

Page 1

S
G
O
O
N
TABLE OF
CONTENTS
I. Installing the Game ..................................... 5
1. System requirements......................................... 5
2. Installing Total Annihilation............................... 5
Standard Installation......................................... 5
Installation without Autoplay ............................ 6
Multiplayer Spawn Installation .......................... 6
Installing Direct X.............................................. 6
DirectX T roubleshooting .................................... 7
Uninstalling Total Annihilation........................... 7
3. Improving Game Performance ........................... 7
Adjusting Y our System....................................... 8
Adjusting Game Options ................................... 8
Installation T roubleshooter ................................ 9
II. Starting a New Game............................... 10
1. T he Galactic War ............................................. 10
2. Game Overview .............................................. 11
3. New Game Options ........................................ 11
4. Starting a New Single Player Game ................. 12
New Campaign ............................................... 13
Skirmish.......................................................... 13
Game Options................................................. 14
5. Starting a New Multiplayer Game ................... 25
Choosing the Right Connection Method.......... 25
Serial Games................................................... 25
Modem Games ............................................... 25
Network (LAN) Games .................................... 26
Playing on the Internet.................................... 26
Selecting a Multiplayer Game.......................... 27
Creating a New Multiplayer Game .................. 28
The Battle Room ............................................. 28
Customizing Multiplayer Games...................... 29
TAL ANNIALATI
T
TALLIN
I. IN
3
Page 2

I
INSTALLING TOTAL ANNIALATION
III. Playing the Game .................................... 31
1. Game Components ......................................... 31
Metal.............................................................. 31
Energy ............................................................ 31
Structures ....................................................... 32
Units............................................................... 32
2. Game Interface ............................................... 33
Choosing the mouse interface......................... 33
Main Battle Screen.......................................... 33
Battle Map...................................................... 34
Mini-map........................................................ 34
Resource status bar......................................... 35
Unit status bar ................................................ 35
3. The Build and Orders Menus ........................... 36
The Build Menu............................................... 36
Building Structures.......................................... 37
.
Building Units ................................................. 37
The Orders Menu ............................................ 37
Firing Orders................................................... 38
Movement Orders ........................................... 38
Immediate Orders ........................................... 38
Commander’s Handbook.............................. 40
IV. Structures and Units................................ 42
Common Units and Structures......................... 42
ARM Units ...................................................... 48
CORE Units..................................................... 57
IV. Customer Services
Technical Support Information .............. 67
Technical Support (U.S. & Canada) .................. 70
Technical Support (Europe).............................. 71
Ordering Our Products .................................... 72
4
Page 3

S
G
O
O
I. INSTALLING
THE GAME
SYSTEM REQUIREMENTS
Minimum
Single Play
Pentium 100 (133 Recommended) with 16 MB RAM (24
Mb recommended), Microsoft or fully compatible
mouse, 4X CD ROM drive, Windows 95, 35 MB hard
drive space, 100% SoundBlaster compatible sound card,
VGA 256 color or better video.
Multiplayer
Up to 4 Players: Pentium 133, 24 MB RAM
Up to 8 Players: Pentium 133, 32 MB RAM
Up to 10 Players: Pentium 166, 48 MB RAM
NOTE
It’s good practice to
have some free
space on your hard
drive at all timespreferably at least
10% of your hard
drive capacity.
N
TAL ANNIALATI
T
TALLIN
I. IN
INSTALLING
TOTAL ANNIHILATION
Standard Installation
1.Place the Total Annihilation CD 1 in your
CD-ROM drive.
2.Wait for the installation menu to appear. When it
does, click the Regular Install button, then follow the
on-screen instructions.
5
Page 4

I
INSTALLING TOTAL ANNIALATION
NOTE
Make sure to check
out the README file
for the latest information about the
game. You’ll see its
icon in the Total
Annihilation folder/
shortcut menu.
.
NOTE
Almost all video and
sound cards on the
market support
DirectX. However, if
you have an older
video or sound card,
this may not be the
case. Contact your
video/audio card
manufacturer to
obtain updated drivers compatible with
DirectX.
3.Insert Total Annihilation CD 1 to start a single player
game.
Installation without AutoPlay
If you do not see the installation screen appear automatically after inserting CD 1 into your CD ROM drive,
follow these steps:
1. After inserting Total Annihilation CD 1 into your CD
ROM drive, double-click the My Computer icon on
your desktop.
2. Double-click the CD ROM icon.
3. Double-click the SETUP.EXE icon. This launches the
installation program.
Multiplayer Spawn Installation
This installation program installs Total Annihilation for
multiplayer games only. It enables you to play Total Annihilation against human opponents without having the
game CD (Total Annihilation CD 1) in your CD ROM
drive if you’re not hosting the game. You will need: One
disc 1 for ≤3, two disc 1’s for ≤6 and three disk 1’s for
≤10.
Installing DirectX 5
Total Annihilation has been designed to take advantage
of Microsoft’s DirectX 5 video and audio drivers. You
need to install DirectX 5 for optimum game performance.
To install DirectX 5 and/or to check whether you
have DirectX 5 already on your system, click on the Install DirectX button in the installation menu. The DirectX
5 installation program will check your system for earlier
DirectX versions and report what it finds.
• If no DirectX components are found, the installation
program will automatically install DirectX 5 on your
system.
6
Page 5

S
G
O
O
• If earlier versions of DirectX are found, you’ll see
them listed with the version numbers. Click on the
Re-Install DirectX button to update your DirectX drivers to version 5.
DirectX T roubleshooting
N
If you run into any video/audio problems following the
installation of DirectX 5, but have earlier versions of
DirectX installed which work fine, you may restore your
original DirectX drivers by following these steps:
1. Double-click on the My Computer icon on your
desktop.
2. Double-click the Add/Remove Programs icon. You’ll
see a list of programs that are present on your system, including DirectX.
3. Click on the DirectX entry, and then on the Add/Remove button in the lower right hand corner. You’ll see
a list of DirectX components on your system.
4. Click on the Restore Drivers button. This will restore
your previous DirectX drivers.
NOTE
The Uninstall program does not remove DirectX 5 from
your system. To remove DirectX or
restore your previous version of
DirectX, refer to the
DirectX T roubleshooting section in
this manual.
TAL ANNIALATI
T
TALLIN
I. IN
Uninstalling T otal Annihilation
If you ever want to remove Total Annihilation from your
system, use the Uninstall program included with the
game. You’ll see the Uninstall icon (a bone) below the
game icon in the Windows 95 shortcut menu.
Do not uninstall the game simply by dragging the
Total Annihilation folder to the Recycling Bin. This will
leave some of the game’s components still installed on
your system.
Improving Game Performance
Large numbers of units and structures can considerably
slow down the game. You can try to improve performance by common-sense adjustments to your system,
or by adjusting the game options.
7
Page 6

II
.
STARTING A NEW GAME
Adjusting Y our System
1. Close all other applications.
2. Check your system for programs running in the background (for example, virus detection programs). These
can not only slow the game down, but also result in
lockups.
3. Change the resolution to 640 x 480. The higher the
resolution, the slower the game.
4. Run Scandisk and Disk Defragmenter (provided
within Windows 95).
5. Check the Startup menu for applications loading automatically whenever you boot up your system.
Adjusting Game Options
You can improve game performance by adjusting the
following options:
1. Turning off CD music in the Game Options screen.
2. Turning off or reducing unit sounds and chat through
the Sound and Interface buttons in the Game Options
screen.
3. Turning off shading, anti-aliasing, and shadows
through the Visuals button in the Game Options
screen. This will result in less impressive graphics.
4. Slowing down the game speed with the slider available through the Interface button in the Game Options screen.
In addition, in Skirmish and Multiplayer games, you
can do the following to improve performance:
1. Reduce the number of computer opponents (Skirmish
mode).
2. Select a smaller map (both Skirmish and Multiplayer).
3. Choose Permanent LoS (Line of Sight; both Skirmish
and Multiplayer).
4. Restrict the number of units that can be built
(Multiplayer only).
5. Disable Cheat Codes (Multiplayer only).
8
Page 7

S
G
G
INSTALLATION
TROUBLESHOOTER
Game doesn’t install
Check whether you have enough space on your hard
drive, and whether the CD ROM drive is working properly.
AME
Game won’t run
Check whether you have any free space left on your
hard drive, and whether the CD ROM is working properly. Check for programs running in the background.
Ensure you have DirectX installed. Try choosing the lowest resolution possible (640 x 480), and set the display
to 256 colors.
A NEW
TARTIN
II.
9
Page 8

II
STARTING A NEW GAME
II. STARTING A
NEW GAME
THE GALACTIC WAR
Long ago, the galaxy was a paradise of peace and tranquility. A galactic governing body known as CORE ruled
this paradise with the quest for scientific advancement
as its governing philosophy.
Paradoxically, the troubles started when science won
the biggest victory of them all-a victory over death itself.
The invention of a process called ‘patterning’ allowed
the transfer of human consciousness, of the human
mind, into machines. This electronic duplication of brain
matrices was made mandatory for all the citizens of the
.
galaxy. Effectively, it meant immortality; but there were
many who were unwilling to toss their bodies aside so
casually, and others that regarded patterning as a
straightforward atrocity.
The rebels fled from the rule of CORE and hid in the
outer edges of the galaxy. With time, they formed an
organization known as ARM. A murderous war began.
ARM developed high-powered combat suits for its soldiers; CORE transferred the minds of its finest soldiers
into deadly machines, duplicating its best fighters thousands of times over. ARM countered this by using cloning. The war raged on, consuming the resources of the
entire galaxy, and leaving most of it a scorched wasteland.
After four thousand years of fighting, both sides
came to stalemate. Their vast military complexes were
smashed; their economies were ruined. The once-mighty
armies of CORE and ARM were reduced to a few scattered survivors. But they continued to battle on ravaged
worlds, their mutual hatred as strong as ever.
For each side, the only acceptable outcome was the
total annihilation of the other.
10
Page 9

S
G
G
GAME OVERVIEW
Total Annihilation is a real-time strategy game. You win
by making the right strategic choices in structure and
unit management, and you play in real time, without
taking turns.
You must not only make all the right moves; you
must make them fast. Even a not so good move made
promptly is better than a brilliant one made too late.
Total Annihilation is a blast, but it is also a complex
game. If you are new to real-time strategy games, make
sure you know the structures and units at your disposal.
It’s a very good idea to have some knowledge of the
units and structures at your enemy’s disposal, too. It’s
worth your while to take the trouble to learn the structure and unit hierarchy. Section IV of this manual provides hierarchy charts for ARM and CORE structures and
units.
Total Annihilation features 3D terrain. Treat it as you
do terrain in the real world, because that’s how it affects your units. If you choose True Line of Sight in the
Game Options, terrain features will affect what your
units can see and what they can’t.
Finally, Total Annihilation is a game in which both
winning and losing are fun. Don’t worry about winning
too much when you’re fresh to the game. Just play, and
have fun!
AME
A NEW
TARTIN
II.
NEW GAME OPTIONS
The Main Menu screen presents you with four options.
11
Page 10
II
STARTING A NEW GAME
* SINGLE starts a new single player
game.
* MULTI starts a new multiplayer
game.
* INTRO replays the opening movie,
showing an intense battle between
ARM and CORE.
* EXIT takes you back to the desktop.
NOTE
There is no clear-cut
advantage to either
ARM or CORE. The
two armies have
corresponding units
in each unit class:
every unit has an
.
enemy equivalent.
However, there are
subtle differences
between the corresponding units on
both sides. Part of
the fun in the game
consists of discovering these differences, and putting
them to good use.
One general comment: on the whole
CORE units are
slightly more heavily
armored, but slower
than their ARM
counterparts.
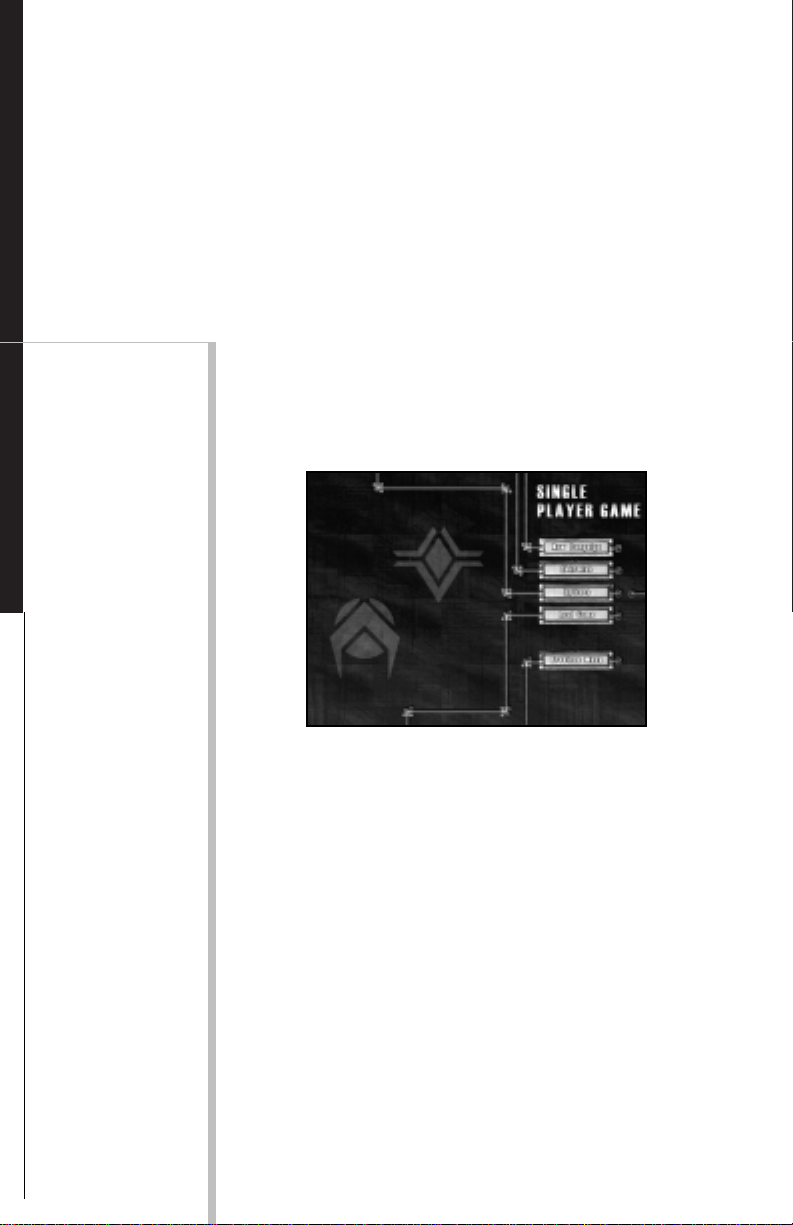
STARTING A NEW SINGLE
PLAYER GAME
Choosing SINGLE from the New Game screen gives
you a new set of options.
• NEW CAMPAIGN will start a new
campaign game.
• SKIRMISH will set up a battle between you and up to three computer
opponents on the multiplayer map
of your choice.
• OPTIONS takes you to the Game
Options screen. This presents you
with a set of choices, discussed in a
separate section.
12
• LOAD GAME loads a previously
saved game.
Page 11

S
G
G
New Campaign
If you are new to real-time strategy gaming, it will be to
your advantage to begin with the ARM campaign and
try the SKIRMISH mode only after you’ve played a few
missions. There is also a tutorial walk through in this
manual. Using the tutorial will give you a clear indication how to gather and manager your metal and energy
resources.
Selecting New Campaign takes you to the Campaign
Screen. Once there, you’ll choose:
• Which side to play, ARM or CORE;
• The difficulty level: Easy, Medium, or
Hard. This varies the starting forces
available to you and your opponent.
Players new to real-time strategy
should choose Easy; players new to
TA should choose Medium; really
tough guys should choose Hard.
AME
A NEW
TARTIN
Skirmish
Play the SKIRMISH mode after you have played enough
missions to feel comfortable with the game. Selecting
SKIRMISH will launch a game in which you play against
up to three computer opponents.
Traditionally, this is good training ground for later
multiplayer games, but you’ll probably fight a better
Campaign game, too. The Skirmish mode gives you instant access to the game’s most sophisticated units,
whereas the Campaign is arranged in a learning curve.
The Skirmish screen also gives you an opportunity to
customize your game. The panel on the left lets you set
starting conditions for yourself and up to three computer opponents. You can adjust the number of players,
type of army under each command, army color, and
starting amounts of metal and energy. Higher amounts
of metal and energy result in sophisticated weapons
appearing within a shorter time frame.
II.
13
Page 12

II
STARTING A NEW GAME
GAME OPTIONS
The Game Options screen accessed through the OPTIONS button presents a wide variety of choices. Many
of these affect game performance.
The Game Options screen can also be accessed dur-
.
ing the game with the F2 key.
• SOUND opens a menu with Sound
Options. Turning Unit Sounds off or
down improves game performance.
• MUSIC opens a menu with Music
Options. Turning CD music off improves game performance.
14
• INTERFACE leads to a menu with
Interface Options. Slowing the game
speed, reducing the number of text
lines, and turning off or reducing
Unit Text all improve performance.
The Interface button within the Interface Options menu lets you
choose between left and right-click
mouse interface. This choice is discussed in Section III-please see Table
of Contents.
• VISUALS opens a menu with
Graphic Options. The Gamma slider
regulates the brightness of the
screen, and the Screen Size sliderthe resolution. Turning Shading,
Anti-Aliasing, and Shadows off improves game performance.
Page 13

S
G
G
ARM MISSION 1:
A HERO RETURNS
THE OBJECTIVE:
The objective of this mission is to secure your Galactic
Gate from a Core threat. To do this you must regain
control of your Galactic Gate.
THE MAP:
You start in the middle bottom of the map. The Galactic
Gate is located in the upper section of the map in a big
caldera. Core units are scattered across the map to
stop you from gaining control of the Gate.
THE STRATEGY:
AME
A NEW
TARTIN
Select all units and use them as one. You can do this by
clicking and dragging the box over all of your units on
the screen or by using the Ctrl-A keys. By using all your
units to attack one unit you mass their firepower and
can take out enemy units faster with less damage incurred to your own units (very important since you have
no capabilities to repair units in this level). Keep an eye
on your radar screen (upper left hand corner) this will
show your units in blue dots, a green exposed area that
you can see as green, uncovered territory as black, explored territory that is out of sight as gray and enemy
units as red dots.
Click on the upper left-hand corner of your game
line-of-site screen. All of your units will start moving up
and to the left. Your units will start moving across the
terrain at different rates. If you are trying to mass your
firepower onto enemy units, it’s important to keep all of
your units together, so keep an eye on them and don’t
let them get too spread out.
II.
15
Page 14

II
STARTING A NEW GAME
Enemy units should be popping up very quickly.
Now click on one of the Core K-bots that have come
into sight. All of your units will start to converge and
attack that unit. That unit shouldn’t last long and will
explode. Now click on the next enemy unit to attack on
the screen, again all your units turn to attack that one
targeted Core aggressor. Continue doing this until
there are no more enemy units to be seen.
Now, look up on the radar-scope (upper left) and
you might see some red dots, those are enemy units.
Move your massed units in their direction and attack. If
you don’t see any units, continue moving up the map to
the left. You should encounter more enemy units, attack
them as you come across them. When you reach the
top of the screen move along to the right. You will skirt
the top of the caldera that contains the Galactic Gate.
Once you reach the upper right-hand corner start moving back down to where you started.
.
You should have taken out all the Core units, for this
mission, it’s time to reclaim your Galactic Gate. Move
all your units up and into the caldera containing the
Galactic Gate. This will end the mission.
16
Page 15

S
G
G
ARM MISSION 2:
CORE K-BOT BASE,
DESTROY IT
AME
THE OBJECTIVE:
Establish a base by building metal extractors, solar collectors, defensive systems and a K-Bot manufacturing
facility and then destroy all Core units or just the Core
K-Bot lab.
THE MAP:
The map is comprised of two land masses separated by
a river with two crossing points. The Core side has the
larger L shaped portion of the map from the mid-left,
around the lower left to the lower right. The Arm units
start in the middle of the upper right-hand section of
the map. The two crossing points are towards the left
and the bottom right of where you start. Just to your
right is a small cliff where some Core units will attack
from in the beginning of the mission. If you travel to
the upper right side of the screen you will see a canyon
opening where patrolling Core units will come out of, be
prepared if you go there. The Core K-Bot facility is located almost directly down from your starting position.
A NEW
TARTIN
II.
THE STRATEGY:
You have started this mission with a new unit, your
Commander! He’s a very powerful asset and you only
have one of them. Protect him at all costs! Don’t
worry, you have plenty of time before you get attacked
and your Commander is in danger, but be aware.
First, you need to build resource generators. Select
your Commander and then pick the Solar Generator
Plant from the Build Menu, on the left-hand side of the
screen. Your cursor will change into a green square
when you move it back onto your line-of-site screen if it
17
Page 16

II
.
STARTING A NEW GAME
is over a suitable spot to build one. Select a spot and
left-click. Your Commander will start building. If you
look to the top of the screen you will see two bars, one
is your Metal and the other is your Energy, they will
start to go down from 1000 as you build the Solar Generator. If you move the cursor over unit being built and
look at the bottom of the screen, you will be able to
track the progress of the construction.
Once you have built the Solar Generator, build a
Metal extractor. You can build Metal Extractors anywhere, but on top of a silver metal deposit is best, there
are three to choose from, pick the one closest to the top
of the screen. Once it’s built, order your Commander to
build another Solar Generator. Next, have him build a
Metal Extractor on the ore patch furthest right. As soon
as this is completed have him build a laser tower next
to the Metal Extractor you just built. Doing this will
help to protect you from patrolling Core AK’s that might
wander into your camp from the Canyon. Continue to
build a Solar Generator . While the Solar Generator is
being built, select another Metal Extractor to be built
from the left-hand menu. Now, move your cursor over
the line-of-site map, hold down the “Shift” key and left
click the green build box over the last metal deposit.
There should now be a green box over the metal deposit. If this is done right, as soon as your Commander
finishes building the Solar Generator, he should start
building a Metal Extractor. Select a K-Bot lab from the
left-hand menu and move the cursor over a patch of
land that you can build it on and again, holding down
the “shift” key left click. Another green box should appear, larger then the first.
Since you have your base being built, it’s time to
start attacking the enemy. Select all of your K-Bots.
You can either, click and drag a box over them or hold
down the “shift” key and select each unit individually
with the left mouse button. As you select them a green
box should appear around the unit. Once all the units
have been selected, a green box should be around all of
your K-Bots, not including your Commander (You don’t
18
Page 17

S
G
G
want to use him in battle yet). With all of your K-Bots
selected press the CTRL-”1" key. When you have the
unit health bars on (toggled by the “~” key) a number
“1” should now appear under all selected units, they
now been grouped together and call all be reselected by
using ALT-”1". Move them to the top of the screen.
When they have reached the top of the screen order
them to move to the right. You will see a green area at
the mouth of a Canyon and encounter enemy units
there. As with the previous mission attack in strength,
mass your firepower against one Core unit at a time.
Stop the units at the mouth of the Canyon, they will
finish up any Core units that try to come through there.
Your commander should be finished building the KBot Lab by now, if not then fill out your registration card
while you wait for him to complete the project. Once
he has finished move him to the center of the base to
build another Solar Generator and select the K-Bot lab.
Once you select the K-Bot lab you notice a new build
menu appears with K-Bots on it. Move your cursor over
the units you can build (ones you can’t are grayed out)
and look at the bottom title bar. As you do so you will
see the cost of metal and energy to manufacture the
unit. Click on the Jethro 4 times. You should see a +4
superimposed over the Jethro icon. This means your KBot lab will build 4 Jethro’s before stopping production.
We don’t want to stop there, click 4 times each on a
Hammer, Rocko and PeeWee. This should start the
building of a small assault force. As units nanolathe
they walk off the platform, move them to a clear patch
of land to wait until all the other units have been produced. If you didn’t have time to fill out the registration
card before, you do now.
Once all the units have been manufactured highlight/select the whole group of 16 K-Bots by either
“Shift”-click or click/drag and do a CTRL-”2" too set
them as ALT-”2" group. Move them down to the right,
you might encounter some Core units on your side of
the water. Frag them as you go. Hold your units on
your side of the River. You should be able to see the
shallow crossing point in the river from there. Once all
AME
A NEW
TARTIN
II.
19
Page 18

II
STARTING A NEW GAME
of your units have gathered at the banks of the river
click on the other side. They should start fording the
river. As your first unit reaches the other side it should
start taking fire from a laser on the top of the ridge in
front of you. Click your units towards that laser tower.
As soon as you can see the ridge crest, click on it. You
can click on the laser tower to attack as soon as you
see it, but it’s on higher ground and your fire will not be
as effective. Run your units to the ridge top and then
attack the laser. It shouldn’t take long.
You will start encountering more enemy units once
you have reached the top of the ridge. Attack them in
force as you’ve been doing. You will start to see structures a Radar Tower, an Energy Storage Unit and a Solar
Generator (all Core). Destroy them, but keep attacking
the Core units attacking you as soon as you see them.
None of those structures can kill you but the K-Bots
can! Once you have destroyed all the buildings and
.
aren’t being attacked by roving Core units move just a
little bit up to the left. You should be able to see the
Core K-Bot lab. Attack and destroy it. That will end the
level.
20
Page 19

G
G
MISSION 3:
SPIDER
AME
TECHNOLOGY
OBJECTIVE:
Save at least one Spider by returning it to your base.
MAP:
The map consists of three land masses separated by a
“Y” in a river. Your commander and units start at the
lower right side of the “Y”. The spiders are located at
the very top center of the map at the summit of a steep
hill.
STRATEGY:
The key to this mission is time. Build up your base with
a some energy generators, a metal extractor and a
couple laser towers for defense (Placed on the outside
of the Dragon Teeth). If you start running low on resources, use your Commander to reclaim trees for energy and rocks for metal. Build a manufacturing plant
of some sort and start cranking out units. Slowly advance up the map to the Spiders. If you stay on your
side of the river it’s easier. Once you’ve cleaned out a
path for the Spiders to get to your base, select them and
walk them on down. You might have to walk them
around the base a little to complete the mission.
THE
III. PLAYIN
21
Page 20

II
STARTING A NEW GAME
MISSION 4:
CORE
CONTAMINATION
SPREADS...
OBJECTIVE:
Eliminate all core units and structures from this map.
MAP:
For this map you start the mission in the lower right
hand corner. The enemy base is located in the center
.
left side of the map. There is a hill in the left center of
the map that is very heavily defended by Core units and
laser towers, beware.
Strategy:
Units in the beginning of this map are few, conserve
them, don't send them off to attack everything. Build
your base as normal, balancing your energy and metal
extraction. Use a couple laser towers to bolster your
defensive parameter. Slowly expand gaining metal resources and space to build while protecting structures
with laser towers. A Radar Tower will give you early
warning if enemy units are approaching, even if you
haven't explored the territory.
As your units start to see action they will become
damaged. You can repair them with your Commander,
or any construction vehicle, by selecting the "Repair"
button from the orders menu or by selecting your Commander, pressing the "R" key and then select the unit
you want to repair. The Commander will move over to
him and start repairing him. If you have a lot of damaged units you can select the unit you want to do the
repairing and then select Patrol ( the "P" key) and click
22
Page 21

S
G
G
a point in the that makes the unit walk around the
damaged units. As the Commander or Construction
Vehicle moves around on patrol and they encounter
damaged units they will stop and repair them, then continue patrolling for more damaged units.
Keep your eye out for enemy units attacking from
the top along the right hand side of the map and from
the lower left.
AME
A NEW
TARTIN
II.
23
Page 22

II
STARTING A NEW GAME
MISSION 5:
THE GATE TO
THALASSEAN
OBJECTIVE:
Capture the Core Galactic Gate.
MAP:
This map is mostly land from the center left all the way
to the right, with water on the left side and a well defended island in the lower Left that has the gate on it.
You start in the top center and there is an extensive
.
Core base facility from the lower center bottom to the
lower right bottom.
STRATEGY:
Build enough structures to support a line of laser towers
from where you start on towards the right. Space them
about 6 inches apart and keep expanding that direction
until you hit the side of the map. As you move along
you will find ore deposits to get metal from. Keep
building energy production facilities as you go along
and the occasional radar tower. Build a K-bot lab and a
Vehicle Plant when you can, along the way. Once
you've built either a K-bot lab or Vehicle plant make a
couple construction vehicles to help you repair, build
and reclaim metal hulks as you go. Start moving down
the right side of the map taking out Core patrols as you
go. Make an at least one advanced plant (vehicle, so
you can build amphibious tanks). As you start producing advanced units add them to your ranks and keep
attacking down the right side. Once you've reached the
bottom start moving to the left. This way you will finish
off all the land units and be able to concentrate on taking the Island and the Gate. Move on the island with
24
Page 23

S
G
G
about 6-10 amphibious tanks and you should be able to
take out everything on the Island. Then bring your
Commander out to the Island and capture the gate.
STARTING A NEW
MULTIPLAYER GAME
To play Total Annihilation against human opponents,
click on the Multi button on the New Game screen.
The Choose Connection screen will appear, giving
you the following connection options.
• IPX Connection for Direct Play. This is the option usu-
ally used for games over a LAN.
• Internet TCP/IP Connection for Direct Play. This is the
option for games over the Internet.
• Modem Connection for Direct Play. Choose this if you
want your computer connected directly to the other
computer via modem.
• Serial Connection for Direct Play. Choose this when
your computer is connected to the other computer
with a null modem cable.
AME
A NEW
TARTIN
II.
CHOOSING THE RIGHT
CONNECTION METHOD
Serial Games
If your computer is connected to another computer with
a serial cable, select the Serial Connection for Direct
Play option this will allow you to play Total Annihilation
via the serial port. Choosing a Serial Connection will
take you to the Serial Connection screen.
Modem Games
If you have a modem connected to your computer,
you can host or join a game over the telephone. Choosing Modem Connection will give you the option of calling to join a game, or hosting a game by answering a
call.
25
Page 24

II
STARTING A NEW GAME
The Modem Connection screen keeps a list of the
names and phone numbers of people you play.
LAN Games
If you have a Local Area Network (LAN) installed,
choose the IPX Connection for Direct Play option. This
takes you to the Choose Game screen.
Internet Games
If you have a LAN that supports TCP/IP, or if you want to
play over the Internet, choose the Internet TCP/IP connection for Direct Play option. Remember that to play
over the Internet, you must first connect to your Internet
service provider .
You will have to input the number your computer
uses as its address when connected to the Internet. If
you are playing over a LAN, leave this field blank.
.
To obtain your computer’s address number: once
you are connected, run a program called winipcfg.exe,
located in your Windows directory. A typical address
consists of four groups of three digits each, separated
by periods (for example, 156.132.084.120).
26
Playing on the Internet
The Select Connection screen offers several ways to
quickly begin Internet play.
• GET MPLAYER installs Mplayer
files from Total Annihilation CD Disc
1. You will then be led with onscreen instructions through the connection phase.
• GET HEAT offers to install HEAT
Katalyst 1.2
• GET KALI You must first connect to
your Internet service provider (ISP
for short). Once you are, this option
will download software that lets you
access the KALI server.
• DWANGO To use this option, you
must also be connected to your ISP.
This option will connect you to the
Page 25

S
G
G
DWANGO server, and give you more
information on DWANGO Internet
gaming.
• Play Free on TEN You need to connect to your ISP first. This option will
connect you to TEN, and lead you
through the connection setup.
• GET WIREPLAY [UK] Installs
Wireplay files from Total Annihilation
CD 1.
SELECTING A MULTIPLAYER
GAME
If you have chosen a LAN or an Internet-base, you are
taken to the Select Game screen. This screen gives you
information about available multiplayer games, and the
option to create a game yourself.
The Select Game screen features the following options:
• NAME opens a field in which you
enter your callsign. This field must
be filled in before you can join or
create a multiplayer game.
AME
A NEW
TARTIN
II.
• PASSWORD opens a field that has
to be filled in only if attempting to
join a password-protected game.
• NEW lets you host your own
multiplayer game, and brings up the
Create New Game Screen.
• UPDATE refreshes the multiplayer
games list.
• WATCH allows you to watch games
in progress. Hosts can turn this option off.
• JOIN lets you join a selected game,
and takes you to the Battle Room.
27
Page 26

II
STARTING A NEW GAME
CREATING A NEW
MULTIPLAYER GAME
After choosing New in the Select Game screen, you will
be asked to provide the game name, your own name,
and a password (if you want to set up a password-protected game). Your choices will subsequently appear on
the Battle Room screen.
The Battle Room
The Battle Room is where you and others choose sides,
teams, and army colors. If you’re hosting the game, this
is where you set the game rules.
.
28
Whether you host or join a game, the Battle Room
asks you for Player Information:
• NAME: Your chosen name.
• SIDE: Choose ARM or CORE .
• COLOR: Army colors .
• ALLY : Alliances can be proposed,
accepted, and rejected by players
both here and later, during play.
• TEAM: For Skirmish mode games
only. Lets you ally with selected
computer players. This alliance cannot be broken later, during the
game.
Page 27

G
G
• PING: Time, in milliseconds, that the
connected computers take to relay
information. In other words, the
delay.
• GO?: Everybody , including you,
clicks on this button when they’re
ready to play. Once everyone has
done so, the host can start the
game.
Customizing Multiplayer Games
• SELECT MAP: Allows the host to
change the map to be played on.
• METAL: Host can set starting metal
between 0 and 10000 in increments
of 100.
• ENERGY: Host can set starting energy between 0 and 10000 in increments of 100
• DEAD COMMANDER: This setting
alters the effect of a dead Commander. Choices are: Game Ends,
Contiues, and Deathmatch (Restarts
Player).
• LOCATION: Starting positions can
be Fixed, or Random.
• LOS: The Line of Sight setting can
be turned to True, Circular, or Permanent. True: terrain features block a
unit’s line of sight, and the fog of
war is active. Circular: units see everything within spotting range, regardless of terrain; active fog of war.
Permanent: units see everything
within spotting range, regardless of
terrain; but there is no fog of war.
• MAP: Displays the mapping setting.
Mapped: map is revealed from the
start. Unmapped: map has to be
explored.
AME
THE
III. PLAYIN
• CHEAT CODES: Toggles the availability of cheat codes.
29
Page 28

II
STARTING A NEW GAME
• WA TCHING: Toggles whether or not
game can be watched by non-participants.
• STATUS: Toggles the game between
Open (others can join in) and Closed
(no players can join).
• MAX UNITS: Sets the total number
of units per player (up to 250).
• BUILD RESTRICTIONS: Brings up a
list of all the units available in Total
Annihilation (includes downloaded
new units). Host can ban the building of any unit in the game.
• START: Starts the game.
Skirmish Games
Single player Skirmish games start with the same op-
.
tions as when hosting a multiplayer game. However
you’re facing multiple computer opponents instead of
real people. This means you can set the difficulty level to
Easy, Medium, or Hard.
For more information on Skirmish games, please
refer to the Starting a New Single Player Game section.
30
Page 29

G
G
III. PLAYING
THE GAME
This section discusses the game components-featured
resources, structures, and units-and how to control
them through the game’s interface.
GAME COMPONENTS
The game features two resources: energy and metal.
These are used to build structures and units.
AME
THE
Metal
You can obtain metal in several ways:
• Mining. You can harvest metal by building a Metal
Extractor over silver pockets of metal found on the
planet’s surface. On CORE planets that are made of
metal, place a Metal extractor anywhere.
• Converting Energy into metal. Build a Metal Maker.
This will delete portions of your energy supply and
convert it into metal.
• Reclaiming. This can only be done with the Commander, Construction Kbots and Construction Vehicles. You’ll see the RECLAIM button on the selected
unit’s Orders menu.
• By gathering the lumps of ore scattered on many
planetary landscapes (they look like clusters of shiny
lumps or rocks). Again, this can only be done through
the RECLAIM function of construction-capable units.
It’s important to maintain stocks of metal. Building
Metal Storage structures can be helpful. Once you’ve
progressed into the game, additional ways of obtaining
metal become available.
III. PLAYIN
Energy
Building anything also requires energy. Like metal, energy can be obtained in several ways:
31
Page 30

III
PLAYING THE GAME
• SOLAR COLLECTORS gather the
sun’s energy.
• TIDAL GENERATORS generate
energy by the ocean tide.
• WIND GENERATORS create energy
by the wind. (If there is no wind on a
barren planet, the blades will not
turn)
• GEOTHERMAL PLANTS. These
can only be built over steaming
vents you’ll find on certain worlds.
• HARVESTING VEGETATION
(patches of moss, shrubs, bushes,
trees) with the exception of grass.
It’s important to store energy in anticipation of
needs. You cannot build anything without sufficient en-
.
ergy even if you have a large storage of metal. Building
Energy Storage structures is helpful. As you progress
into the game, additional ways of producing energy become available.
Structures
There are several types of structures in Total Annihilation. Some give you metal and energy, as explained in
the preceding sections. Many produce units, including
both combat and construction units which in turn can
build higher-level structures. Other structures perform
strictly combat roles: you’ll build them for defensive and
offensive purposes.
Section IV of this manual contains hierarchy charts
for units and structures, as well as a short description of
every Level 1 and Level 2 structure found in the game.
As you progress, additional units and structures may
become available...
32
Units
Total Annihilation features probably the widest selection
of land, sea, and air units featured in any real-time
strategy game. In addition, additional units are available
at www.cavedog.com.
Page 31

G
G
The units in the game break down into combat units
and construction units.
Construction units have several functions:
• Building new structures. Note that several construction units can work on a single structure at the same
time. This significantly shortens construction time. To
assign an additional construction unit to a project,
order it to repair the building under construction.
• Repairing structures and units.
• Reclaiming metal and energy.
Construction units can build higher level structures.
For instance, a Construction Vehicle built in a Vehicle
Plant is able to build an Advanced Vehicle Plant, which
in turn can build an Advanced Construction Vehicle. The
Commander is the only unit that combines combat and
construction capabilities.
THE GAME INTERFACE
Total Annihilation is played almost exclusively with the
mouse. You can configure your mouse to use a left-click
or right click interface, as you prefer.
AME
THE
III. PLAYIN
Choosing the Mouse Interface
You choose your favored mouse interface through the
Options menu, which displays an Interface button.
• The left-click mouse interface uses the left mouse but-
ton for selecting units and giving them orders. The
right mouse button is used to deselect units, and to
find a location within the Mini-Map.
• The right-click mouse interface uses the left mouse
button to select units, but the right mouse button to
give them orders. The left mouse button is also used
to deselect units, and within the Mini-Map.
The Main Battle Screen
Once you have completed game setup and started a
game of Total Annihilation, you are taken to the Main
Battle Screen. Most of it is taken up by the Battle Map,
where the action takes place.
33
Page 32

III
PLAYING THE GAME
To the side of the Battle Map is a panel containing a
mini-map of the battlefield, and the Build/Orders menu.
The top and bottom of the Main Battle Screen feature
status bars showing you the state of your resources
(top), and the state of the selected unit (bottom; you
have to place the mouse cursor over the selected unit to
.
activate this feature).
The Battle Map
The Battle Map shows the battlefield from an overhead
3D perspective. New games typically start with an unexplored map; you have to explore it with your units to
reveal the battlefield and find the enemy. You can only
see what your units and structures can ‘see’ at any
given time. Unexplored areas are black. Areas that were
explored by your units, but are not currently under your
observation will show as gray on the map.
Note that units or structures selected on the Battle
Map show their health bars. A green bar indicates good
health; yellow, some damage; red, serious damage.
Units selected on the Main Map may be given orders using the Mini-Map, and the other way around. For
example, you can click on a unit on the Main Map and
move it to a new location by clicking on it in the MiniMap.
34
The Mini-Map
The upper left corner of the Battle Screen features a
small map of the entire battlefield. This little map is useful for keeping track of the situation, and for quickly
Page 33

G
G
jumping from one area to another. You can also move
units and order them to fire on the Mini-Map, just like
on the main Battle Map.
To quickly jump to a location, click on it within the
Mini-Map. You can also scroll within the Mini-Map by
clicking and holding the appropriate mouse button. This
depends on your choice of the mouse interface.
Units can be given orders within the Mini-Map, just
like on the Main Map. This is particularly convenient
when moving a unit a long distance, or conducting
long-range bombardment.
The Resources Status Bar
At the top of the Main Battle Screen you’ll see a status
bar informing you about the stocks, production, and
usage of your resources. Make a habit of checking the
numbers for production (+) and usage (-).
AME
THE
III. PLAYIN
Note that maximum storage can change, depending
on whether you build storage facilities.
The Unit Status Bar
The Unit Status Bar appears at the bottom of the Main
Battle Screen. To access it, hold the mouse cursor over a
unit. You will be told what type of unit it is, and how
many enemy units it has killed. Units with more than 5
kills become veterans, which very slightly improves their
combat capabilities. Each subsequent 5 kills result in
another small improvement in the unit’s battlefield performance. Use your construction units to repair veteran
units often.
35
Page 34

III
.
PLAYING THE GAME
The horizontal bar is the unit’s health bar. When
green from end to end, the unit is 100% healthy. The
bar starts showing red when the unit is damaged; more
red means more damage.
The figures to the right of the health bar show the
unit’s metal/energy production/consumption. They will
change when you order a construction unit or the Commander to build or repair something. Note that the
Commander produces a small amount of energy.
THE BUILD AND ORDERS
MENUS
There are two buttons under the Mini-Map when a unit
is selected: Build and Orders. Use them to toggle between Build and Orders menus. To issue a command
from either menu, you first have to select the unit or
units you want to give orders. The Orders menu is different for construction units and different for combat
units, reflecting the selected unit’s capabilities.
The Build Menu
The Build menu is the one used for construction units
and your Commander.
When you click the Build button, a set of building
icons will appear. Note that only six icons are shown at
any one time. To view all possible building choices, use
the left/right scroll arrows located under the building
icons.
36
Page 35

G
G
Building Structures
To build a structure, select the construction unit and
click on the appropriate icon in the Build menu. When
you move the mouse cursor over the Battle Map, you’ll
see an outline of the intended structure. A red outline
means you cannot build in the selected location; green
means you can.
After you’ve chosen the building site, click to start
the construction process.
Note that you can order construction of multiple
buildings of the same kind. Shift-click (SHIFT key +
mouse-click) on all the building sites, and the construction unit will build the same structure in sequence in all
chosen locations.
Building Units
To build a unit, click on the appropriate unit-producing
structure, then left-click on the desired unit’s icon in the
Build menu. Multiple clicks will form a production
queue. Note that you can queue up units of different
types.
To cancel building a unit, right-click on the unit’s
icon in the Build menu.
AME
THE
III. PLAYIN
The Orders Menu
When you select a unit, a menu automatically appears
Build and Orders buttons. This menu reflects the capabilities of the selected unit. Combat units will have different Orders menus from construction units.
The choices available in the Orders menu can be
grouped into firing orders, movement orders, and immediate orders.
37
Page 36

III
PLAYING THE GAME
Combine firing and movement orders to make units
behave the way you want them. Note that a construction units automatically repairs any damaged unit it
comes across, and can be given appropriate movement
orders.
Firing Orders
There are three options, from aggressive to passive:
• FIRE AT WILL. The unit will open
fire on any enemy unit/structure
within range.
• RETURN FIRE. The unit will only
open fire after being fired on.
• HOLD FIRE. The unit will not open
fire unless ordered to do so. This is
useful when trying to capture an
enemy structure or unit, or for avoiding friendly fire casualties.
.
Movement Orders
There are three movement options, from passive to active:
• HOLD POSITION. The unit will not
move from its assigned position no
matter what happens.
38
• MANEUVER. A unit will maneuver
in self-defense or in order to attack
a nearby enemy, but only within a
short radius of its assigned position.
• ROAM. Unit has freedom to move
wherever it likes. This means it will
follow enemy units it has engaged in
combat.
Immediate Orders
In addition to general movement and firing orders, a
unit can also be given immediate orders. Note that orders can be queued up: you can order a unit to perform
a sequence of tasks.
Many immediate orders are signaled by a changed
cursor, as indicated:
Page 37

G
G
• RECLAIM. This order can only be
issued to construction units and the
Commander. The unit reclaims metal
or energy from the selected location.
• REPAIR. Applies only to construction units and the Commander. Unit
will repair another selected unit, or
join another construction unit in
building a structure.
• MOVE. Tells the unit to relocate to a
new position; doesn’t change unit’s
general movement orders.
• GUARD. Tells the unit to guard an
another, selected unit. In practice,
attaches one unit to another.
• ATTACK. Tells the unit to attack a
selected enemy unit or structure.
• CAPTURE. Only the Commander
can capture enemy units and structures. The larger and more heavily
armored the target, the longer it
takes to capture.
• STOP. This command cancels all
previous commands issued to the
unit.
• PATROL. Lets you set a patrol route
for the unit.
AME
THE
III. PLAYIN
• LOAD/UNLOAD . This order may
only be issued to transport units.
• D-GUN. Only the Commander has
the Disintegrator Gun. It works just
as advertised, but uses lots of energy.
Note that the cursor changes to reflect a unit’s immediate orders only if you have selected the left-click
mouse interface.
39
Page 38

III
PLAYING THE GAME
COMMANDER’S
HANDBOOK
Keyboard Commands
ESC ....................cancels the current command before
it is executed
CTRL1-CTRL9 .....Assign the currently selected units
to a squad
ALT1-ALT9..........Activate (select) the previously as-
signed squad
B ........................Select the build menu for that unit
O........................Select the Order menu for that unit
.
1-9..................... Select the menu for the current unit
, (Comma)............ Select the previous menu for that
unit
. (period) .............. Select the previous menu for that
unit
40
~ (tilde)................ toggle on/off the damage bars for
the units
PAUSE................ pause the game
F1 ......................Display information on the selected
unit
F2 ......................Bring up the options menu
F3 ......................Go to the unit that last reported
information
F9 ......................Screen capture, will Print screen to
file SHOT ####.pcx
F12 ....................Clear all chat messages
CTRL+ A............Select all of your units
Page 39

G
G
CTRL + C............Center screen and select your Com-
mander
CTRL + D ........... Self-destruct selected units
CTRL + S ............ Select all units currently on the screen
CTRL + Z ............ Select all units of they same type
A........................ Give and Attack order
G........................Give a Guard order
M .......................Give a Move order
AME
THE
P ........................ Give a Patrol order
III. PLAYIN
S ........................ give a Stop order (cancel any previous
orders)
D........................Use the Disintegrator gun
C ........................Give a Capture Order
R ........................Give a Repair order
E ........................ Give a Reclaim order
H........................ Share resources with another player
N........................Scroll to the next unit off screen
T ........................ Track the selected unit
- ......................... Reduce the game speed
+........................ Increase the game speed
SHIFT .................Hold down to queue up multiple com-
mands
ENTER................Activate the message bar
41
Page 40

IV
STRUCTURES AND UNITS
IV.
STRUCTURES
AND UNITS
COMMON UNITS AND
STRUCTURES
Common units and structures are those that can be
built by both ARM and CORE. Note that the cost of the
same item may differ between the two armies.
CONSTRUCTION UNITS
.
Commander
You will start many missions with a
Commander. Armed with the Disintegrator gun and the best nanolathe in
the game, the Commander builds and kills - like no other unit. Use your
Commander cautiously, losing him
often means losing the game.
Construction Kbot
ARM: 120 metal, 2410 energy
CORE: 130 metal, 2540 energy
The Level 1 Construction Kbot can
build Level 1 and 2 structures as well
as an Advanced Kbot Lab. It is a slow
builder, so using two or three on individual construction jobs is highly recommended.
Construction V ehicle
ARM: 185 metal, 2030 energy
CORE: 175 metal, 2145 energy
The Level 1 Construction Vehicle can
build Level 1 and 2 structures, as well
as an Advanced Vehicle Plant. This
vehicle has much better armor than
the Construction Kbot.
42
Page 41

S
C
S
S
Construction Ship
ARM: 255 metal, 2130 energy
CORE: 260 metal, 2375 energy
The Level 1 Construction Ship can
build some Level 1 and 2 structures as
well as an Advanced Shipyard. This
unit plays an important role since it’s
the only naval vessel that can build
torpedo launchers and repair other
ships.
Construction Aircraft
ARM: 105 metal, 4320 energy
CORE: 110 metal, 4580 energy
The Level 1 Construction Aircraft can
build Level 1 and 2 structures as well
as an Advanced Aircraft Plant. Use this
unit to build defensive structures on
unscalable hilltops, and set up supplementary bases or complexes in faraway spots.
AND UNIT
TURE
TRU
Advanced Construction Kbot
ARM: 300 metal, 5784 energy
CORE: 325 metal, 6096 energy
The Advanced Construction Kbot can
build top secret Level 3 structures. It
builds faster than a Construction Kbot;
however, it’s fragile and a slower
mover.
IV.
Advanced Construction Vehicle
ARM: 481 metal, 4263 energy
CORE: 455 metal, 4504 energy
The Advanced Construction Vehicle
can build secret Level 3 structures. It’s
a relatively quick builder, and noticeably better armored than the Advanced Construction Kbot. However, it
cannot get to all the spots a Kbot can.
43
Page 42

IV
STRUCTURES AND UNITS
Advanced Construction Aircraft
ARM: 220 metal, 12096 energy
CORE: 231 metal, 12824 energy
The Advanced Construction Aircraft
can build top secret Level 3. This is the
most expensive construction unit in
the game. Terrain is no obstacle to this
unit, which hovers above ground while
building.
UNIT-PRODUCING
BUILDINGS
Kbot Lab
ARM: 705 metal, 1130 energy
CORE: 680 metal, 1250 energy
The Kbot Lab builds all Level 1 Kbots,
including the Construction Kbot.
.
V ehicle Plant
ARM: 620 metal, 1000 energy
CORE: 600 metal, 1100 energy
The Vehicle Plant builds all Level 1
vehicles, including the Construction
Vehicle.
44
Aircraft Plant
ARM: 850 metal, 1370 energy
CORE: 830 metal, 1340 energy
The Aircraft Plant builds all Level 1
aircraft, including the Construction
Aircraft.
Shipyard
ARM: 615 metal, 775 energy
CORE: 600 metal, 750 energy
The Shipyard builds all Level 1 naval
ships, including the Construction Ship.
Page 43

S
C
S
S
Advanced Kbot Lab
ARM: 2007 metal, 3277 energy
CORE: 1972 metal, 3625 energy
The Advanced Kbot Lab builds all Level
2 Kbots, including the Advanced Construction Kbot.
Advanced V ehicle Plant
ARM: 1984 metal, 3200 energy
CORE: 1947 metal, 3520 energy
The Advanced Vehicle Plant builds all
Level 2 vehicles, including the Advanced Construction Vehicle.
AND UNIT
TURE
Advanced Aircraft Plant
ARM: 2210 metal, 4521 energy
CORE: 2191 metal, 4422 energy
The Advanced Aircraft Plant builds all
Level 2 aircraft, including the Advanced Construction Aircraft.
Advanced Shipyard
ARM: 2524 metal, 2402 energy
CORE: 2460 metal, 2325 energy
The Advanced Shipyard builds all Level
2 naval ships, and the Construction
Ship.
TRU
IV.
COMMON LEVEL 1
STRUCTURES
Radar T ower
ARM: 49 metal, 750 energy
CORE: 50 metal, 800 energy
The Radar Tower gives you information on your enemies’ location within
a small radius. Detected enemy units
and structures show up as a dot (of a
different color than your own) on the
Mini-Map.
45
Page 44

IV
STRUCTURES AND UNITS
Sonar Station
ARM: 20 metal, 403 energy
CORE: 20 metal, 399 energy
The Sonar Station has a large radius
sonar range to detect enemy submarines. Detected craft show up on the
Mini-Map.
Metal Extractor
ARM: 50 metal, 521 energy
CORE: 51 metal, 514 energy
The Metal Extractor is used to exploit
metal deposits. The amount of metal it
extracts depends on the size of the
deposit - larger deposits make it spin
quicker.
Metal Maker
ARM: 0 metal, 687 energy
.
CORE: 0 metal, 700 energy
These structures can be built to fabricate metal using excess energy. 60
energy converts into 1 metal.
Metal Storage
ARM: 305 metal, 535 energy
CORE: 320 metal, 550 energy
This structure increases your maximum
metal storage by 1000 units.
46
Solar Collector
ARM: 145 metal, 760 energy
CORE: 141 metal, 790 energy
A Solar Collector is the most reliable
form of energy production. Each Collector generates 20 energy .
Wind Generator
ARM: 52 metal, 509 energy
CORE: 55 metal, 523 energy
The amount of energy a Wind Generator outputs varies constantly. On planets with no wind these are completely
useless!
Page 45

S
C
S
S
Energy Storage
ARM: 240 metal, 2430 energy
CORE: 250 metal, 2490 energy
This structure increases your maximum
energy capacity by 3000 energy.
Light Laser Tower
ARM: 262 metal, 2546 energy
CORE: 268 metal, 2608 energy
The “L.L.T.” fires a short-range rapidfire laser that is effective against
lightly armored Level 1 units.
COMMON LEVEL 2
STRUCTURES
AND UNIT
TURE
Geothermal Powerplant
ARM: 520 metal, 9568 energy
CORE: 505 metal, 9375 energy
Geothermal Powerplants can only be
built on top of geothermal vents. Their
output is 250 energy.
Tidal Generator
ARM: 82 metal, 768 energy
CORE: 81 metal, 752 energy
Tidal Generators collect an amount of
energy dependent on the strength of
the tides; these are different on every
world.
TRU
IV.
Torpedo Launcher
Cost: 804 metal, 2658 energy
Cost: 831 metal, 3058 energy
These launch torpedoes at enemy
ships and submarines. Their sonar has
longer range than that of subs.
Dragon’ s T eeth
ARM: 10 metal, 250 energy
CORE: 11 metal, 300 energy
These spiked barriers block enemy
units, and are useful in base defense.
47
Page 46

IV
STRUCTURES AND UNITS
Heavy Laser Tower
ARM “Sentinel”: 584 metal, 5398 energy
CORE “Gaat Gun”: 589 metal, 5443 energy
A Heavy Laser Tower fires twin medium-range lasers at enemy units. It is
effective against all unit types except
aircraft. Each shot also requires 75
energy.
Missile T ower
ARM “Defender”: 79 metal, 843 energy
CORE “Pulverizer”: 76 metal, 805 energy
Missile Towers are most effective
against aircraft - they fire mediumrange guided missiles.
Heavy Plasma Cannon
ARM “Guardian” 1946 metal, 7687 energy
CORE “Punisher”1887 metal, 7585 energy
.
The Heavy Plasma Cannon fires powerful long-range plasma projectiles
from two barrels. It’s the most durable
Level 2 defensive structure, effective
against both enemy units and structures. Its long range makes it good for
coastal defense.
48
ARM UNITS
LEVEL 1 KBOTS
“Peewee” Infantry Kbot
Cost: 53 metal, 697 energy
Equipped with good sensors, the Peewee is designed primarily for armed
reconnaissance.
It isn’t well armed or armored, but
boasts a good rate of fire. Have groups
of Peewees scout out the battlefield,
and patrol approaches to your base.
Page 47

S
C
S
S
“Hammer” Artillery Kbot
Cost: 151 metal, 1187 energy
The Hammer’s medium range cannon
fires high-energy plasma rounds; it can
hit targets hidden behind ridges and
other obstacles. The Hammer’s punch
makes it very useful, but its light armor means it needs to be protected by
tougher units.
AND UNIT
“Rocko” Rocket Launcher Kbot
Cost: 117 metal, 964 energy
The Rocko Kbot has the toughest armor among the Level 1 Kbots. Its rockets have a respectable range, and can
also hit aircraft. The Rocko is a versatile weapon, equally good at offense
and defense. Groups of Rockos can be
lethal, even when thrown against relatively sophisticated enemy units.
TURE
TRU
“Jethro” Anti-Air Missile Kbot
Cost: 128 metal, 1219 energy
The Jethro’s guided missiles are most
effective against aircraft; they pack
much less punch against Kbots or vehicles. Only lightly armored, Jethros
are most effective when used to protect other units from aerial attacks.
IV.
LEVEL 2 KBOTS
“Zipper” Fast Scouting Kbot
Cost: 151 metal, 2221 energy
The quickest Kbot in the game, the
Zipper is agile enough to avoid a lot of
the enemy’s gunfire. Its medium laser
is only an average weapon, but used
in groups, Zippers are devastating at
hit-and-run attacks.
49
Page 48

IV
STRUCTURES AND UNITS
“Fido” Four Legged Kbot
Cost: 398 metal, 3556 energy
The four legged Fido is better
equipped to deal with steep terrain
than other Kbots. It’s well armored,
and packs a medium range Gauss
cannon that is very effective against
ground units and structures.
“Zeus” Lightning Kbot
Cost: 267 metal, 2228 energy
This speedy unit is ARM’s most effective close combat Kbot - its powerful
lightning gun is very effective against
CORE’s slower tanks. However, its
weapon’s short range often exposes
this unit to enemy artillery.
“Invader” Crawling Bomb
The blast created by a detonating In-
.
vader destroys or damages everything
within a large radius. Invaders can be
used to soften up enemy defenses
before major base assaults, or for surgical strikes against selected targets.
50
“Eraser” Radar Jammer
Cost: 73 metal, 1326 energy
The Eraser makes your units and structures invisible to enemy radar. When
using an Eraser, assign other units to
guard it as it has no weapons, and is
only lightly armored.
LEVEL 1 VEHICLES
“Jeffy” Fast Attack Vehicle
Cost: 37 metal, 564 energy
The speedy, inexpensive Jeffy is a good
reconnaissance tool. Able to cover
large distances quickly, a Jeffy can
effectively patrol large perimeters.
Armed with only a light laser and
weak armor, it isn’t well suited for
intense combat.
Page 49

S
C
S
S
“Flash” Fast Assault Tank
Cost: 106 metal, 870 energy
The Flash is ARM’s primary recon tank.
Groups of Flash tanks can destroy
undefended enemy buildings, but their
weak armor makes them unsuitable
for confronting enemy tanks. The Flash
is most useful in the early stages of
the game, before the stronger Level 2
tanks appear.
“Samson” Surface-to-Air Missile
Launcher
Cost: 119 metal, 1027 energy
The Samson’s is the best mobile AA
weapon in the ARM arsenal. Capable
of defending against even Level 2
aircraft, the Samson requires protection of its own as its light armor can’t
take much damage. Team up Samsons
with stronger tanks to provide protection for both.
AND UNIT
TURE
TRU
“Stumpy” Medium Assault Tank
Cost: 165 metal, 1246 energy
Armed with a medium plasma cannon
and medium armor, the Stumpy is a
well-balanced Level 1 tank. It serves
as the backbone of ARM’s tank forces
until the appearance of the Bulldog
Heavy Tank.
IV.
LEVEL 2 VEHICLES
“Bulldog” Heavy Assault Tank
Cost: 467 metal, 2994 energy
The Bulldog is the heaviest ARM battle
tank. While slower than a Stumpy, it
has stronger armor and a more powerful plasma cannon. Use Bulldogs primarily in open terrain where they can
close on the enemy easily.
51
Page 50

IV
STRUCTURES AND UNITS
“T riton” Amphibious T ank
Cost: 831 metal, 3058 energy
The lightly armored Triton is ARM’s
only amphibious tank. While underwater, Tritons don’t appear on enemy
radar - their arrival on an enemy
beach will catch your enemy by surprise. If faced with superior resistance,
Triton tanks can always escape back
into the water.
“Jammer” Mobile Radar Jammer
Cost: 97 metal, 1621 energy
As its name indicates, this vehicle
jams enemy radar. The Jammer is fairly
fast, capable of concealing large tank
columns on the move. Like the Eraser
Kbot, the Jammer is unarmed and clad
in light armor - armed units should be
assigned to guard it.
.
“Luger” Mobile Artillery
Cost: 264 metal, 2140 energy
The Luger’s anti-sliver shells are the
most potent ARM weapon - lethal
against units and structures alike. It is
most effective when firing from a distance, since its light armor makes it
very vulnerable to enemy fire.
“Merl” Mobile Rocket Launcher
Cost: 462 metal, 2246 energy
The Merl is capable of firing powerful
long range rockets. Since the rockets
are unguided, they are only effective
against enemy structures and stationary units. Keep AA units near your
Merls, as they are defenseless against
aircraft.
52
Page 51

S
C
S
S
“Spider” All Terrain Attack V ehicle
Cost: 230 metal, 2200 energy
The Spider’s stun gun and terrain capability make it a unique unit in the
game. Its gun paralyzes targets momentarily - rendering them completely
defenseless. In addition, Spiders can
be deployed through any terrain; no
grade is too steep for a Spider.
AND UNIT
“Seer” Mobile Radar
Cost: 85 metal, 941 energy
The Seer is equipped with powerful
radar that’s useful in locating the enemy. Deployed in defense, the Seer can
alert you to approaching enemy
forces. It can also be employed offensively, as a spotter for your artillery.
TURE
TRU
LEVEL 1 SHIPS
“Skeeter” PT Boat
Cost: 100 metal, 985 energy
The Skeeter is the fastest and least
expensive ARM ship. Its guided missiles are effective against aircraft, but
its light laser is no match against enemy ships. Skeeters are the only ARM
Level 1 ship with AA capabilities.
IV.
“Crusader” Destroyer
Cost: 898 metal, 4537 energy
The Crusader’s biggest assets are its
sonar and depth charges. Its anti-submarine (ASW) capabilities make this
ship useful even after Level 2 ships
appear.
“Lurker” Submarine
Cost: 1151 metal, 3724 energy
The Lurker excels at sinking enemy
surface ships. Armed with heavy unguided torpedoes, Lurkers are capable
of sinking any ship in seconds - they
remain useful throughout the game.
53
Page 52

IV
STRUCTURES AND UNITS
“Hulk” Amphibious Transport
Cost: 919 metal, 4639 energy
The unarmed Hulk can carry six
ground units. Hulks are slow and unarmed, making them favorite targets
of enemy submarines; a destroyer escort is always necessary when transporting units with your Hulk.
LEVEL 2 SHIPS
“Piranha” Attack Submarine
Cost: 1448 metal, 5481 energy
Faster than Level 1 subs and armed
with small guided torpedoes, the Piranha is designed to hunt down other
submarines. The Piranha’s smaller torpedo warheads do significantly less
damage to surface ships.
.
“Ranger” Missile Ship
Cost: 2348 metal, 7804 energy
The Ranger is ARM’s best naval AA
unit. In addition to guided AA missiles,
the Ranger can launch heavy rockets
at coastal targets and other ships.
While better than the Skeeter against
aircraft and other ships, the Ranger is
just as defenseless against sub attacks
and needs a sonar-equipped escort.
“Conqueror” Cruiser
Cost: 1719 metal, 8608 energy
The Conqueror is the best ARM ship
for land bombardments. Though it
cannot take as much damage as a
Millenium Battleship, it can enter shallower waters, and its plasma cannon
has greater range. In addition, its sonar and depth charges can protect it
and your other capital ships from enemy subs.
54
Page 53

S
C
S
S
“Millenium” Battleship
Cost: 4404 metal, 20731 energy
The Millenium Battleship is ARM’s
most effective weapon against enemy
surface vessels. While it is clad in very
heavy armor, the Millenium is defenseless against subs and should always
be accompanied by other, sonarequipped ships.
“Colossus” Light Carrier
Cost: 1372 metal, 11257 energy
The Colossus can repair any aircraft on
its decks, and the on-board fission
reactor produces energy. It also has
radar sensors to facilitate air strikes
and naval bombardments. Escort your
carriers at all times as they have no
weapons of their own.
LEVEL 1 AIRCRAFT
AND UNIT
TURE
TRU
“Peeper” Scout
Cost: 40 metal, 1475 energy
The Peeper is a good unit for aerial
reconnaissance. Inexpensive and fast,
this scout ship can often outrun
guided missiles. Its high speed also
enables it to patrol large distances
very quickly.
IV.
“Freedom Fighter” Fighter
Cost: 99 metal, 3234 energy
The most inexpensive fighter available
to the ARM forces, the Freedom
Fighter is best suited for intercepting
enemy bombers. You can also employ
this versatile fighter to support your
Kbots and vehicles against CORE’s
level 1 ground units.
55
Page 54

IV
STRUCTURES AND UNITS
“Thunder” Bomber
Cost: 130 metal, 5496 energy
The Thunder is a slow and lightly armored bomber. It can’t survive strong
AA fire; limiting it to one pass over a
target is a good policy. The Thunder’s
lack of air-to-air weaponry makes it
very vulnerable to enemy Level 2
fighters.
“Atlas” T ransport
Cost: 107 metal, 2479 energy
The Atlas is useful in delivering units
to inaccessible regions of the map islands and high hilltops for example.
Relatively slow and unarmed, this
transport plane is very vulnerable, so
provide an escort of a pair of fighters.
If shot down, the Atlas and its cargo
are destroyed.
.
LEVEL 2 AIRCRAFT
“Brawler” Gunship
Cost: 314 metal, 6249 energy
Able to hover over its target, the
Brawler can be used to attack air,
ground, as well as naval units. Its dual
EMGs - though not very powerful have a very high rate of fire. In addition, The Brawler is clad in heavy armor that protects it well against enemy AA weapons.
“Hawk” Stealth Fighter
Cost: 254 metal, 6893 energy
The Hawk’s stealth technology makes
it invisible to enemy radar. Equipped
with dual guided missile launchers, it
is a great bomber killer. The Hawk can
hold its own against CORE Level 2
fighters, too.
56
Page 55

S
C
S
S
“Phoenix” Strategic Bomber
Cost: 209 metal, 7624 energy
The Phoenix is ARM’s most powerful
bomber. Armed with heavy armor and
defensive lasers, it is able to defend
itself against enemy fighters and survive tough AA defenses. It’s a good
idea to repair these expensive bombers after every sortie.
“Lancet” Torpedo Bomber
Cost: 378 metal, 6438 energy
The Lancet’s torpedoes are good
against naval targets. It doesn’t have
sonar, but with another unit spotting
for it, the Lancet can even destroy
submarines.
CORE UNITS
AND UNIT
TURE
TRU
LEVEL 1 KBOTS
IV.
“A.K.” Infantry Kbot
Cost: 56 metal, 696 energy
CORE’s primary infantry Kbot, the A.K.
is a more powerful unit than its ARM
counterpart, the Peewee. It is only
equipped with light armor, but because of its quickness and low price
tag, the A.K. remains useful even after
Level 2 Kbots appear.
“Crasher” AA Kbot
Cost: 129 metal, 1224 energy
The Crasher is armed with light guided
missiles. While good against enemy
aircraft, its missiles inflict only minor
damage to ground units. Five or six
patrolling Crashers can protect an
entire base from Level 1 aircraft.
57
Page 56

IV
STRUCTURES AND UNITS
“Storm” Rocket Launcher Kbot
Cost: 118 metal, 985 energy
The Storm’s armor can take twice the
damage of any other CORE Level 1
Kbot. While its rockets are only moderately effective, its durability makes it a
good offensive unit. Lead attacks with
Storms to draw fire away from your
artillery.
“Thud” Artillery Kbot
Cost: 147 metal, 1161 energy
The Thud’s long range plasma cannon
is the most powerful weapon among
CORE’s Level 1 Kbots. Try to keep them
away from enemy fire, however - their
armor is very weak.
LEVEL 2 KBOTS
.
“Pyro” Flame Thrower Kbot
Cost: 260 metal, 2200 energy
The Pyro’s flamethrower, while lethal,
is only effective at close range. Use
Pyros to ambush slower tanks and
Construction Kbots.
“Roach” Cr awling Bomb
Cost: 65 metal, 5471 energy
The Roach is a walking anti-matter
bomb capable of blowing up many
enemy targets at once. Great at softening up base defenses, Roaches
should be kept clear of your other
units!
“The Can” Heavy Kbot
Cost: 420 metal, 3500 energy
Although quite slow, the Can is the
most heavily armored Kbot available
to CORE. It is also well armed with a
heavy laser. Use the Can to provide
your other, speedier units with support.
58
Page 57

S
C
S
S
“Spectre” Radar Jammer
Cost: 70 metal, 1453 energy
The Spectre is CORE’s only countermeasures Kbot - its jamming radius
roughly approximates a Radar Tower’s.
Speedy but unarmed, this fairly inexpensive unit should be guarded by
other units.
AND UNIT
LEVEL 1 VEHICLES
“Weasel” Scout vehicle
Cost: 38 metal, 575 energy
The Weasel is the quickest and most
inexpensive CORE vehicle; useful for
exploring early in the game. Weakly
armed or armored, the Weasel doesn’t
fare very well in combat.
“Instigator” Light Recon Tank
Cost: 110 metal, 887 energy
The small Instigator is very quick and
maneuverable. Its quick-firing laser is
good against both units and structures, particularly at leveling undefended metal extractors and solar collectors. Keep in mind that its light
armor makes the Instigator unsuitable
for intense combat.
TURE
TRU
IV.
“Slasher” Mobile Missile Launcher
Cost: 116 metal, 947 energy
The Slasher provides more AA firepower than a Crasher Kbot. One or
two Slashers are capable of defending
a large base from aerial assaults.
Slashers are also good at defending
your moving units from enemy gunships.
59
Page 58

IV
STRUCTURES AND UNITS
“Raider” Medium Assault T ank
Cost: 169 metal, 1241 energy
The Raider is the only Level 1 Tank
suitable for close combat. Its medium
armor and plasma cannon are sufficient when attacking Level 1 and 2
base defenses. The Raider is inexpensive and reliable, making it useful even
when more sophisticated tanks become available.
LEVEL 2 VEHICLES
Mobile Artillery
Cost: 251 metal, 1535 energy
The Mobile Artillery lobs high explosive shells at distant enemy targets. It
isn’t very accurate, and the blast affects a large area. Use mobile radar,
.
“Reaper” Heavy Assault T ank
Cost: 473 metal, 3048 energy
preferably mounted on aircraft, to spot
for Mobile Artillery; if you use land
units, chances are they’ll be destroyed.
The Reaper is a very valuable unit. This
versatile tank is well armored, heavily
armed and isn’t as slow as the
Goliath. Reapers make short work of
structures but require AA protection
from enemy aircraft.
60
“Crock” Amphibious T ank
Cost: 295 metal, 2310 energy
The Crock tank is fully submersible,
and able to cross large bodies of water. Their moderate armor makes them
incapable of withstanding much punishment but unlike other tanks, Crocks
can submerge to escape enemy fire.
Page 59

S
C
S
S
“Diplomat” Mobile Heavy Rocket
Launcher
Cost: 427 metal, 2470 energy
The Diplomat is the ultimate building
killer. It can fire its powerful unguided
rockets from long range, and can
quickly eliminate any stationary target. Slow and weakly armored, these
units should be kept behind a protective screen of tanks and Kbots.
AND UNIT
“Informer” Mobile Radar
Cost: 86 metal, 1209 energy
The Level 2 Informer’s radar range is
smaller than a Radar Tower’s. It’s a
small and fast unit, great at reconnaissance and at spotting for your long
range guns.
TURE
TRU
“Deleter” Radar Jammer
Cost: 100 metal, 1757 energy
The jamming radius of the Deleter is
relatively small; one won’t protect
your entire base. Send Deleters out to
conceal important installations. If you
attach a Deleter to an assault team,
the enemy will have no warning of
your approach.
IV.
“Goliath” Super Heavy Tank
Cost: 697 metal, 3906 energy
No tank on the battlefield is as strong
as a Goliath. In teams, the Goliath is
capable of overrunning top secret,
sophisticated defensive structures - its
armor can withstand a lot of pounding. The most expensive tank in the
game, the Goliath is still a bargain
when compared to some Level 2 ships
and aircraft.
61
Page 60

IV
STRUCTURES AND UNITS
LEVEL 1 SHIPS
“Searcher” Scout Ship
Cost: 95 metal, 917 energy
While quick and maneuverable, the
Searcher is inadequate for fighting sea
battles because of its light armor. The
Searcher has better spotting range
than other ships, making it an ideal
scout. You can also use it to protect
your more expensive ships - it is the
only Level 1 ship with AA missiles.
“Enforcer” Destroyer
Cost: 887 metal, 4505 energy
The Enforcer is the only Level 1 surface ship with anti-submarine weaponry. Its medium plasma cannon and
armor are strong by Level 1 standards.
With the appearance of Level 2 Cruis-
.
“Snake” Submarine
Cost: 1199 metal, 3902 energy
ers, your Enforcers should be re-assigned to escort your more expensive
capital ships.
The Snake is CORE’s ship-killing submarine. Armed with heavy unguided
torpedoes, a Snake can sink even a
battleship in seconds. Remember that
Snakes have very thin armor - it will
buckle quickly under depth charge
attacks.
62
“Envoy” Transport Ship
Cost: 887 metal, 4786 energy
The slow, lumbering Envoy can transport six ground units inside. Use them
when islands need to be exploited for
their resources or strategic location.
Guard this unarmed transport; if it
goes down, the units on board are
also lost.
Page 61

S
C
S
S
LEVEL 2 SHIPS
“Shark” Sub Killer
Cost: 1356 metal, 5245 energy
The Shark is specially designed to hunt
other submarines - its smaller torpedo
home in on their target with the help
of the Shark’s enhanced sonar. Use
Sharks to intercept ARM Lurkers before they can get near your expensive
capital ships.
Missile Frigate
Cost: 2283 metal, 7628 energy
The Missile Frigate’s powerful guided
missiles are the best naval defense
against enemy aircraft. Two or three
Hydras are a good investment, as they
can quickly eliminate fragile Torpedo
Bombers. You’ll need to protect the
Missile Frigate with ASW ships, as they
have no anti-sub weapons of their
own.
“Executioner” Cruiser
Cost: 1724 metal, 8551 energy
The Executioner is CORE’s prime fighting ship. Designed for heavy combat,
this cruiser has heavy armor and a
long range plasma cannon that can hit
sea and ground targets. Additionally
armed with depth charges, the Executioner can also tackle enemy submarines.
AND UNIT
TURE
TRU
IV.
“Warlord” Battleship
Cost: 4181 metal, 19741 energy
With the most powerful naval plasma
cannon and the heaviest armor in the
game, the Warlord specializes in destroying surface ships and coastal
structures. The Warlord, however, lacks
anti-aircraft or anti-sub weaponry.
63
Page 62

IV
STRUCTURES AND UNITS
“Hive” Light Carrier
Cost: 1379 metal, 11715 energy
The unarmed Hive provides transport
and repair bays for two aircraft. The
Hive is unique to CORE’s fleet in that
it has a fission reactor, which produces
useable energy. It is also equipped
with radar, letting you coordinate air
strikes and coastal bombardments.
LEVEL 1 AIRCRAFT
“Fink” Scout
Cost: 36 metal, 1369 energy
The small Fink has longer spotting
range than other CORE aircraft, making it ideal for exploring the map in
the early stages of a game. Assigned
to patrol duty, the Fink can alert you
.
“Avenger” Fighter
Cost: 101 metal, 3181 energy
to enemy activity even if the enemy
fields radar jammers.
The Avenger is a basic fighter, designed to intercept ARM aircraft.
Weakly armed and armored, the
Avenger is most useful when escorting
Level 1 bombers to their targets.
64
“Shadow” Bomber
Cost: 131 metal, 5691 energy
The Shadow bomber is best used very
early in the game when AA defenses
are nonexistent or weak. Too slow to
dodge AA fire, the Shadow also has no
air-to-air weaponry, making it very
vulnerable to enemy fighters.
Page 63

S
C
S
S
“V alkyrie” Air T r ansport
Cost: 115 metal, 2695 energy
The Valkyrie can transport one ground
unit anywhere regardless of terrain.
Remember that it is slow and unarmed; when transporting units it is
always a good idea to provide
Valkyries with an escort. If shot down,
both the plane and its cargo are destroyed.
LEVEL 2 AIRCRAFT
AND UNIT
“Rapier” Gunship
Cost: 294 metal, 5778 energy
Overall, the Rapier is the most versatile of all CORE aircraft. Sporting
heavy armor and guided rockets, the
Rapier is effective against both air and
ground targets.
TURE
TRU
“Vamp” Stealth Fighter
Cost: 257 metal, 6973 energy
Though scantily armored, the Vamp
Stealth Fighter is armed with twin airto-air missile launchers and is invisible
to enemy radar. Effective as they are
against enemy aircraft, Vamps are very
vulnerable to AA fire.
IV.
“Hurricane” Strategic Bomber
Cost: 220 metal, 8050 energy
The Hurricane is a powerful bomber
that can level buildings and wipe out
units with equal ease. It is armed with
a secondary light laser that helps fight
off enemy fighters. Remember to repair your Hurricanes between sorties,
as they are a big investment.
65
Page 64

IV
STRUCTURES AND UNITS
“Titan” T orpedo Bomber
Cost: 364 metal, 6588 energy
Designed for sub hunting, the Titan is
armed with powerful unguided torpedoes. To hit enemy subs, a naval unit
with sonar must spot for the Titan. It’s
prudent to keep these fragile bombers
away from the enemy’s anti-aircraft
weaponry.
Cavedog Entertainment
13110 NE 177th Place
Suite # B101, Box 180
Woodinville, WA 98072-996
Attn: Customer Service
Please be sure to include the exact name of the product you
have and the platform (such as Total Annihilation for Windows ’95),
your complete name, mailing address, including your zip or postal
code if applicable, and your phone number in case we need to call
you. The replacement product will be sent via First Class Mail only. If
.
you are calling outside of the US or Canada, you’ll need to speak to
one of our agents at 425-398-3063 to determine your shipping and
handling charges. This is not a Technical Support line.
Defective Disk
Very often, customers just need some technical support in order to
get their products up and running. You will need to speak with a live
technical specialist in order to determine if your product is defective.
For phone assistance, call Cavedog Entertainment’s Tech Support at
425-398-3063. We have an Interactive Voice Response and Faxback
system that is available twenty-four hours a day, seven days a week.
If you should need live support, we are available Monday through
Friday, 7:30 AM until 7:30 PM (PST).
Please note that live Tech Support may be closed on major holidays. We ask that you do the following when calling: be at your
computer; have your system information ready for our technicians
including system make and model; RAM; video and sound card data
and drivers; and any screen or error messages you’ve encountered
and where (if not currently displayed on your screen). It will expedite
your handling significantly.
In the event our technicians determine that you will need to
forward materials directly to us, please include a brief letter explaining what is enclosed and why. Make sure you include the Return
Merchandise Authorization Number supplied you by the technician
Warranty
66
Page 65

Technical Support (U.S. & Canada)
Assistance Via World Wide Web
Get current technical information at the Infogrames, Inc., web-site at:
h t t p : / / w w w. i n f o g r a m e s . c o m, 24/7 and access our FAQ documents,
(Frequently Asked Questions), our Hints/Cheat Codes if they’re available, and an E-Mail
area where you can get help and ask questions.
Help Via Telephone
Call Infogrames, Inc.’s Tech Support at 425-398-3063. We have an Interactive Voice Response and Faxback system that’s available 24/7. We will have automated support, our
FAQ documents such as gameplay tips, information on Control Keys, possible cheat code
combination keys, instructions for finding secret screens and/or additional game levels if
they exist. Live support is available M-F, 8:00 AM until 6:00 PM (PT). We may be closed
on major holidays. You can send faxes to: (425) 806-0480, or write to the address below.
If you encounter what may be determined to be a defective product issue such as your
game freezing at the beginning or during gameplay, no display, etc., the automated system
will tell you our product return and replacement options.
Product Return Procedures
If you encounter a defective product issue, you ust call Tech Support at 425-398-3063. If
we agree, we will issue you a Return Merchandise Authorization Number. Make sure you
include this RMA# , along with your full name, address and your phone number within
your return in case we need to call you. Any materials not containing this RMA# will be
returned to you. Your mail should be sent to:
Infogrames, Inc.
Attn: TS/CS Dept.
13110 NE 177th Place
Suite # B101, Box 180
Woodinville, WA 98072-9965
Warranty Policy In The United States & Canada If our technicians
determine that the product storage medium is found to be defective within ninety (90)
days of original purchase, (unless otherwise provided by applicable law), Infogrames, Inc.
will replace the item free of charge, to the original purchaser, if the item is accompanied by
the original dated receipt and packaging. If you do not have the original receipt, or if the
warranty period has expired, Infogrames, Inc. will replace the product storage medium for
a nominal fee.
Other Infogrames Products To order other fine products from Infogrames, call
1-800-245-7744 or visit our web site, h t t p : / / w w w. u s . i n f o g r a m e s . c o m.
Page 66

END-USER LICENSE A GREEMENT
PLEASE READ CAREFULLY. BY USING THIS SOFTWARE, YOU ARE AGREEING TO BE
BOUND BY THE TERMS OF THIS END-USER LICENSE AGREEMENT (“LICENSE”). IF
YOU DO NOT AGREE TO THESE TERMS, DO NOT USE THE SOFTWARE AND PROMPTLY
RETURN THE DISC OR CARTRIDGE IN ITS ORIGINAL PACKAGING TO THE PLACE OF
PURCHASE.
1. Grant of License. The software accompanying this license and related documentation (the “Software”) is licensed to you, not sold, by Infogrames North America, Inc.
(“INA”), and its use is subject to this license. INA grants to you a limited, personal, nonexclusive right to use the Software in the manner described in the user documentation. If
the Software is configured for loading onto a hard drive, you may load the Software only
onto the hard drive of a single machine and run the Software from only that hard drive.
You may permanently transfer all rights INA grants to you in this license, provided you
retain no copies, you transfer all of the Software (including all component parts, the
media and printed materials, and any upgrades), and the recipient reads and accepts
this license. INA reserves all rights not expressly granted to you by this Agreement.
2. Restrictions. INA or its suppliers own the title, copyright, and other intellectual property rights in the Software. The Software contains copyrighted material, trade secrets
and other proprietary material. You may not delete the copyright notices or any other
proprietary legends on the original copy of the Software. You may not decompile, modify,
reverse engineer, disassemble or otherwise reproduce the Software. You may not copy,
rent, lease, sublicense or distribute the Software. You may not electronically transmit the
Software from one computer, console or other platform to another or over a network.
Any attempt to transfer any of the rights, duties or obligations hereunder is void.
3. Termination. This License is effective until terminated. You may terminate this Li-
cense at any time by destroying the Software. This License will terminate immediately
without notice from INA if you fail to comply with any provision of this license. Upon termination, you must destroy the Software.
4. Disclaimer of Warranty on Software. You are aware and agree that use of the
Software and the media on which it is recorded is at your sole risk. The Software and
the media are provided “AS IS.” Unless otherwise provided by applicable law, INA warrants to the original purchaser of this product that the Software storage medium will be
free from defects of materials and workmanship for ninety (90) days from the date of
purchase. This warranty is void if the defect has arisen through accident, abuse, neglect
or misapplication. INA EXPRESSLY DISCLAIMS ALL OTHER WARRANTIES,
EXPRESS OR IMPLIED, INCLUDING, BUT NOT LIMITED TO, THE IMPLIED
WARRANTIES OF MERCHANTABILITY AND FITNESS FOR A PARTICULAR
PURPOSE. INA DOES NOT WARRANT THAT THE FUNCTIONS CONTAINED IN
THE SOFTWARE WILL MEET YOUR REQUIREMENTS. NO ORAL OR WRITTEN
INFORMATION OR ADVICE GIVEN BY INFOGRAMES OR ANY IINFOGRAMESAUTHORIZED REPRESENTATIVE SHALL CREATE A WARRANTY OR IN ANY
WAY INCREASE THE SCOPE OF THIS WARRANTY. SOME JURISDICTIONS DO
NOT ALLOW THE EXCLUSION OF IMPLIED WARRANTIES, SO THE ABOVE EXCLUSIONS MAY NOT APPLY TO YOU.
Page 67

5. Limitation of Liability. UNDER NO CIRCUMSTANCES, INCLUDING NEGLIGENCE, SHALL INA BE LIABLE FOR ANY INCIDENTAL, SPECIAL OR CONSEQUENTIAL DAMAGES IN CONNECTION WITH THE SOFTWARE, INCLUDING
THOSE THAT RESULT FROM THE USE OF OR INABILITY TO USE THE SOFTWARE, EVEN IF INA HAS BEEN ADVISED OF THE POSSIBILITY OF THOSE
DAMAGES. IN NO EVENT SHALL INA’S TOTAL LIABILITY TO YOU FOR ALL
DAMAGES, LOSSES AND CAUSES OF ACTION (WHETHER IN CONTRACT, OR
OTHERWISE) EXCEED THE AMOUNT PAID BY YOU FOR THE SOFTWARE.
SOME JURISDICTIONS DO NOT ALLOW THE LIMITATION OR EXCLUSION
OF LIABILITY FOR INCIDENTAL OR CONSEQUENTIAL DAMAGES, SO
THE ABOVE LIMITATION OR EXCLUSION MAY NOT APPLY TO YOU.
6. Miscellaneous. This license shall be governed by and construed in accordance with
the laws of the State of California, USA, exclusive of its choice of law and/or conflicts of
law jurisprudence; and, in respect of any dispute which may arise hereunder, you consent
to the jurisdiction of the federal and state courts of Santa Clara County, California. If any
pro-vision of this license is unenforceable, the rest of it shall remain in effect. This license
(including any addendum or amendment to this license which is included with the Software) constitutes the entire agreement between you and INA with respect to the use of
the Software and the support services (if any) and they supersede all prior or contemporaneous oral or written communications and representations with respect to the Software or
any other subject matter covered by this license.
 Loading...