

Page 1
2000 Aerial Center
Suite 110
Morrisville, NC 27560
www.redstorm.com
FOR HINTS AND TIPS,
CALL 1-900-288-2583
(CLUE)
$.95/min. Must be 18+ Touchtone Only
SPECIAL OPERATIONS MANUAL
SPECIAL OPERATIONS MANUAL
Page 2
1-0
WWW.REDSTORM.COMROGUE SPEAR
SPECIAL
OPERATIONS
MANUAL
© 1999 Red Storm Entertainment, Inc. All rights reserved. Red Storm Entertainment is a trademark of Jack Ryan Enterprises, Ltd. and Larry Bond. Rogue Spear is a trademark of Red Storm
Entertainment. Rainbow Six is a trademark of Rubicon, Inc. All other brand names are trademarks or registered trademarks.
Page 3

CONTENTS
CONTENTS
INTRODUCTIONS
OVERVIEW OF THE GAME 1-4
GETTING STARTED
MINIMUM SPECIFICATIONS 2-1
INSTALL/UNINSTALL 2-2
WALKTHROUGH OF MISSION 1 2-4
PLANNING PHASE 2-4
ACTION PHASE 2-9
GAME MENUS
SINGLE PLAYER 3-1
NEW 3-2
DIFFICULTY LEVEL 3-2
RESUME 3-2
DELETE 3-2
PRACTICE MISSION 3-2
BRANCH CAMPAIGN 3-2
LONE WOLF 3-3
TERRORIST HUNT 3-3
VIEW MISSION RESULTS 3-3
MULTIPLAYER 3-3
TRAINING 3-3
FIRE AND MOVEMENT 3-4
ROOM CLEARING 3-5
HOSTAGE RESCUE 3-5
OPEN TRAINING 3-6
TERRORIST HUNT 3-6
OPTIONS
GAME 3-7
SOUND 3-8
GRAPHICS 3-9
ADVANCED 3-10
MULTIPLAYER GAME 3-11
MULTIPLAYER SERVER 3-11
JOYSTICK 3-12
REMAP KEYS 3-12
REPLAYS 3-13
CREDITS 3-13
QUIT 3-13
PLANNING PHASE
BRIEFING 4-2
OBJECTIVES 4-2
LIST OF ADVISORS 4-3
INTEL 4-3
CATEGORY LIST 4-4
SUBJECT LIST 4-4
ROSTER 4-5
PLANNING PHASE (CONTINUED)
READINESS 4-5
READY 4-5
FATIGUED 4-5
WOUNDED 4-6
INCAPACITATED 4-6
KIA 4-6
BIO 4-6
STATS 4-6
SPECIALTY SKILLS 4-7
ASSAULT 4-7
DEMOLITIONS 4-7
ELECTRONICS 4-7
GRENADES 4-7
SNIPER 4-7
STEALTH 4-7
PROFILE TRAITS 4-8
AGGRESSION 4-8
LEADERSHIP 4-8
SELF-CONTROL 4-8
STAMINA 4-8
KIT SELECTION 4-9
SAMPLE KITS 4-13
RECON KIT 4-13
ASSAULT KIT 4-13
SNIPER KIT 4-14
BREACHING KIT 4-14
TEAM 4-15
PLANNING 4-16
MAP ORDERS 4-16
RECON 4-16
ROSTER 4-17
ORDERS 4-18
PLOTTING MOVEMENT 4-18
WAYPOINT CONTROLS 4-18
MAP CONTROLS 4-19
GO CODES 4-20
RULES OF ENGAGEMENT 4-21
ASSAULT 4-21
INFILTRATE 4-21
RECON 4-21
ESCORT 4-21
BLITZ 4-21
NORMAL 4-21
CAUTIOUS 4-21
SPECIAL ACTIONS 4-22
FLASHBANG ROOM 4-22
FRAG ROOM 4-22
BREACH DOOR 4-22
1-1
WWW.REDSTORM.COMRAINBOW SIX
1-2
WWW.REDSTORM.COMROGUE SPEAR
Page 4

CONTENTS
INTRODUCTION
PLANNING PHASE (CONTINUED)
SNIPE 4-22
COVER 4-23
DEFEND 4-23
ADDITIONAL 4-23
SAVE/LOAD PLAN 4-23
WATCH MODE 4-24
EXECUTE 4-24
ACTION PHASE
INTERFACE 5-1
CINEMA WINDOW 5-1
TARGETING RETICULE 5-2
ACTION BAR 5-4
SPECIAL ACTIONS 5-7
CONTROL 5-8
FIRE AND MOVEMENT 5-8
VERTICAL MOVEMENT 5-8
USING WEAPONS AND EQUIPMENT 5-9
DOORS AND OTHER OBJECTS 5-10
DYNAMIC TEAM CONTROL 5-10
WATCH MODE 5-11
ENDING THE MISSION 5-11
MULTIPLAYER MODE
CREATING A GAME 6-1
SETTING UP A GAME 6-3
PLAYER OPTIONS 6-4
SESSION OPTIONS 6-5
ADVERSARIAL GAMES 6-5
COOPERATIVE GAMES 6-7
COMMUNICATING 6-7
PLAY AFTER DEATH 6-7
MSN GAMING ZONE 6-8
MPLAYER 6-10
WEAPONS AND EQUIPMENT
PRIMARY WEAPONS 7-1
SECONDARY WEAPONS 7-7
EQUIPMENT 7-9
UNIFORMS 7-11
DEFAULT KEYBOARD COMMANDS 8-1
TECHNICAL SUPPORT 9-1
With the end of the Cold War and the stabilizing effects of the Super Powers,
terrorism has become one of the greatest threats to security in nations all
around the world. While terrorism has existed in some form for centuries, it
has become more effective with the development of the mass media and more
powerful with the proliferation of weapons of mass destruction.
Terrorism involves illegal violent actions taken by a group of individuals in
order to further their ideology or beliefs. The word illegal is important. Since
many terrorist organizations consider themselves armies, they do not have the
same legal status as a military of a recognized nation. In the past, terrorism
has relied on high profile acts committed to attract attention to them and their
cause. With 24-hour world-wide television news networks, a single terrorist can
shock the entire world by blowing up a daycare center or gunning down innocent
bystanders.
Fear is the main weapon of the terrorist. The fear that what was seen on television can happen anywhere. While bloody and violent, most terrorist actions
were on a small scale, usually involving casualties of less than a few hundred.
Now terrorists can threaten entire cities or nations with weapons of mass
destruction. Casualties in these cases would number in the millions.
In the recent past, governments have declared war on terrorist organizations
and their leaders. However, cruise missile attacks and other conventional military means have proved largely unsuccessful. Instead, a top secret organization by the name of RAINBOW was created to deal with unconventional threats
with unconventional means.
OVERVIEW
In Rogue Spear, you must lead RAINBOW, a covert international counter-terrorist team set up to combat terrorism around the world. As part of the operations
assigned to you, you must select team members, outfit them with weapons and
equipment, plan the actions your team will take and then execute the mission
to achieve the objectives. The game consists of 18 missions which are linked
together to form a campaign.
The Rogue Spear campaign takes place after the campaigns in RAINBOW SIX and the
Eagle Watch Mission Pack. If you have played these previously, you will already
be familiar with the game interface. However, review this manual as many changes
and additions have been made. There are new weapons, new operatives, new actions
and orders and much more.
Now don’t just sit there. Get going! You have the world to save.
CREDITS 10-1
SPECIAL THANKS 10-3
1-3
WWW.REDSTORM.COMRAINBOW SIX
1-4
WWW.REDSTORM.COMRAINBOW SIX
Page 5
2-0
WWW.REDSTORM.COMROGUE SPEAR
GETTING
STARTED
Page 6

GETTING STARTED: INSTALLING GAME
2-2
WWW.REDSTORM.COMROGUE SPEAR
GETTING STARTED: MINIMUM SPECS
2-1
WWW.REDSTORM.COMROGUE SPEAR
TO PLAY ROGUE SPEAR, YOUR COMPUTER MUST MEET THE FOLLOWING CRITERIA:
COMPUTER:
Pentium 233 Mhz with MMX and 3D Hardware acceleration OR Pentium II 266 Mhz (software rendering)
MEMORY: 32 MB RAM Required (64 MB RAM Recommended)
OPERATING SYSTEM: Windows 95 or Windows 98
VIDEO: Software Rendering only: 2D 16-Bit SVGA 4MB Video
Card
3D HARDWARE SUPPORT: Direct 3D compatible video card required. Supported
chipsets include 3Dfx Voodoo, Nvidia Riva, Matrox
G200, for a full list of supported cards visit
www.redstorm.com.
CD-ROM: 4x or Better
SOUND: DirectX compatible sound card required
HARD DRIVE: 200 MB uncompressed space
DIRECTX: DirectX 6.1 (included on CD) must be installed
INTERNET/NETWORK PLAY: Properly Configured TCP/IP connection at 28.8 Kbps
or faster
INSTALLING THE GAME
1. Start the Windows 95/98 operating
system.
2. Insert the Rogue Spear CD into your
CD-ROM drive. The Autorun menu should
appear.
Note: If the Autorun menu does
not automatically appear, double-click the My Computer icon
located on your Desktop. Then
double-click the icon corresponding to your computer’s CDROM drive. The Autorun menu
should now appear.
3. Click the Install Rogue Spear button.
The installation routine will now
walk you through each step of the
setup and installation process.
Once you have created a directory for
Rogue Spear, the program will automatically be installed on your hard
drive. In addition, the program will
check to see whether or not a current
version of DirectX has already been
installed on your hard drive. If there
is an older version of DirectX on your
computer or DirectX does not exist,
the program will automatically ask
you if you want to install version
6.1, the latest version of DirectX.
To play Rogue Spear you must have version 6.1 or higher.
4. After you have completed the
installation process, you can select
Rogue Spear from the Start menu or
double-click on the Rogue Spear.exe
file from the installed directory to
run the game.
Note: You may also uninstall the
game from the Start Menu.
CONFIGURE ROGUE SPEAR
During the installation process,
Rogue Spear will automatically scan
your system for any available sound
and 3-D graphic accelerator cards.
However, we recognize that many
gamers may have multiple video and
audio cards installed on their computers. The Configure Rogue Spear
feature lets you manually select
which cards you would like to use when
playing Rogue Spear.
Page 7

WALKTHROUGH OF THE FIRST MISSION
2-4
WWW.REDSTORM.COMROGUE SPEAR
GETTING STARTED: UNINSTALLING GAME
2-3
WWW.REDSTORM.COMRAINBOW SIX
UNINSTALLING ROGUE
SPEAR
TO UNINSTALL ROGUE SPEAR:
1. Start the Windows 95/98 operating
system.
2. Insert the Rogue Spear CD into your
CD-ROM drive.
3. Click the Uninstall Rogue Spear
button.
You will be asked to confirm that you
wish to uninstall Rogue Spear.
If you are sure you want to uninstall
Rogue Spear, click Yes.
If you are not sure, click No.
Note: If you uninstall Rogue
Spear, any previously saved scenarios will remain on your hard
drive in the Rogue Spear Save
game subdirectory. You may delete
these saved games using Windows
Explorer.
BEGINNING A NEW CAMPAIGN
Rogue Spear contains eighteen different single player missions which
together form a campaign. Let’s get
one started. From the Main Menu
screen, click on Single Player. This
takes you to a new screen. Since there
is no campaign in progress, the New
Campaign window is open. Type in a
name for your campaign. Change the
difficulty level to Recruit and click
on Enter. This will take you to the
“Planning Phase” for the first mission. It consists of several different screens which let you plan your
current mission prior to executing
it.
PLANNING PHASE
The first part of the “Planning Phase”
is the Briefing Screen. Here you can
learn about the current mission. In
the upper right are the stats for the
first mission: codenamed Pandora
Trigger. In the center at the top is
the Objectives Box. It lists what must
be accomplished in order for your mission to be a success. For this first
mission, you must rescue all the
hostages. Along the left side of the
screen is the Briefing Box. Control is
the first briefing you receive. It
basically brings you up to speed on
the situation. Click on John Clark to
go to the next briefing. Mr. Clark is
the commander of RAINBOW and will
offer some advice for the mission. At
the bottom of the list are the Mission
Orders. Once you have read all the
briefings, go to the bottom of the
screen and click on the right green
arrow. This will take you to the next
screen.
You are now on the Intel Screen. Here
you can find additional information
pertaining to the mission. Since this
is your first mission, there is not
much to view. In the top left is the
Category Box. The intel subjects are
divided into four categories. People
provides information on the personalities involved in the missions. If you
look down at the Subject List, there
is only one name: John Clark. Read
quickly about your commander and then
in the Category Box, click on
Organizations. Now the Subject List
contains two names; Islamic Vanguard
and RAINBOW. Read about each. The
other two categories are empty to
begin with.
Rogue Spear is complex simulation of real-world hostage rescue operations. As
such, we highly recommend that you read each section to acquaint yourself with
some of the concepts, terminology and game functionality explained throughout
the manual.
We also realize that some players would rather start playing the game right
away and learn the basics first, then go ahead and find out more about the game
interface mechanics of play and other details. If you are one of those who want
to play immediately, read this brief walkthrough of the first mission, which
will teach you the basics as you play.
On the other hand, if you want to learn all about the game before playing, skip
this section for now and go to the section on Game Menus. After reading the
Game Menus, Planning Phase and Action Phase sections, come back here to begin
the tutorial.
Page 8
WALKTHROUGH OF THE FIRST MISSION
2-6
WWW.REDSTORM.COMROGUE SPEAR
WALKTHROUGH OF THE FIRST MISSION
2-5
WWW.REDSTORM.COMRAINBOW SIX
However, after some missions, a news
story about it appears under Newswire
and all other subjects fall under
Miscellaneous. Now click on the right
green arrow again to go to the next
screen. A window will pop up asking if
you want to use the HQ’s plan for the
mission. For all missions, headquarters will provide the planning if you
desire. However, since we are going to
plan this mission ourselves, click on
No.
Pick your operatives for the mission.
The Roster Screen is where you choose
which operatives to take on the mission. It is important to take the
right operatives for each mission.
Each operative has his or her own
strengths and weaknesses. The right
two thirds of the screen contains
information on the currently selected
operative. To look at the dossier for
another operative, click on one of the
names in the list on the left. To add
an operative to your mission team,
highlight their name, then click on
the Add Bar above the list of names.
The portrait of the operative will
then appear in one of the boxes in the
top left. For each mission, you are
limited to a maximum of eight operatives. However, you can take as few as
you want. For this mission we will
take eight. Select the following
operatives and add them to the mission
team: Arnavisca, Bogart, Burke,
Chavez, Filatov, Haider, Hanley, and
Weber. To find the last operative, you
must scroll down to the Sniper section
of the list. When all eight slots are
filled, click on the right green arrow
to continue.
Equip your team.
It is now time to equip your team on
the Kit Screen. The eight operatives
are listed along the left side of the
screen. The rest of the screen consists of equipment boxes. Each operative comes with a default set of
equipment. However, we are going to
customize things a bit. You should
begin with Arnavisca who is already
selected.
First you will assign uniforms to all
the operatives. Click on the graphic
of the operative in the middle of the
screen to bring up the Uniform Menu.
Click on Street Medium. Notice how the
graphic changes to the new uniform.
Click on the check mark to select the
uniform. Now click on the blue button,
containing three lines and the
arrows, above the graphic. This
assigns the uniform to all of the
operatives.
Next, assign primary weapons to the
operatives. Now, click on the picture
of the submachine gun. This brings up
the Primary Weapons Menu. Select the
HK MP5/10SD. This is a submachine gun
with a built in silencer. Assign this
to all operatives by clicking on the
assign to all the button above the
graphic of the weapon.
The third step is to assign secondary
weapons. Clicking on the picture of
the Pistol brings up the Secondary
Weapons Menu. Select the HK .45
Mark23. Assign this to all operatives.
Now you need to choose items to fill
the bottom two boxes, Slots 1 and 2.
Click on the Slot 1 Box to bring up a
menu of items. While still on
Arnavisca, select a Breaching Charge
for Slot 1. Click on Slot 2 and select
Flashbangs.
Switch to Chavez by clicking on his
name in the list to the left. Assign
him some Frag Grenades in Slot 1 and
Flashbangs in Slot 2.
Give all the remaining operatives
Flashbangs in both Slots 1 and 2.
Weber needs a sniper rifle. Assign him
the PSG-1 sniper rifle. Change
Weber’s uniform to Black Light.
Click right green arrow to go to tem
screen.
The Team Screen is where you divide
your operatives into fire teams. The
operatives are listed on the left and
four colored team boxes are located to
the right. To add an operative to a
team, highlight their name and then
click on the Add button on the appropriate team. Assign Arnavisca, Bogart
and Burke to the Blue Team. Assign
Chavez, Filitov and Haider to Red.
Assign Hanley and Weber to Green. To
choose a team leader, highlight an
operative, then click on the Promote
button to move their name towards the
top of the team list. Team leaders
should be Bogart, Chavez and Weber.
Now click on the right green arrow to
continue.
The Planning Screen is where you will
spend most of your time during the
“Planning Phase”. Here you give each
member of your team orders so he or
she knows exactly what to do, how to
do it and when to do it during the
mission. You begin with the Blue Team
selected and the encircled blue triangle on the top left is lit up. Click
on the “Recon” tab below it. The Recon
Menu let’s you examine the known positions of Hostages, Terrorists and
Landmarks on the map to the right.
“Legend” lists what each symbol on the
map represents. Cycle through the
Hostages by clicking on the arrow to
the right of the name. Do the same
with the other categories, then click
on the Orders tab.
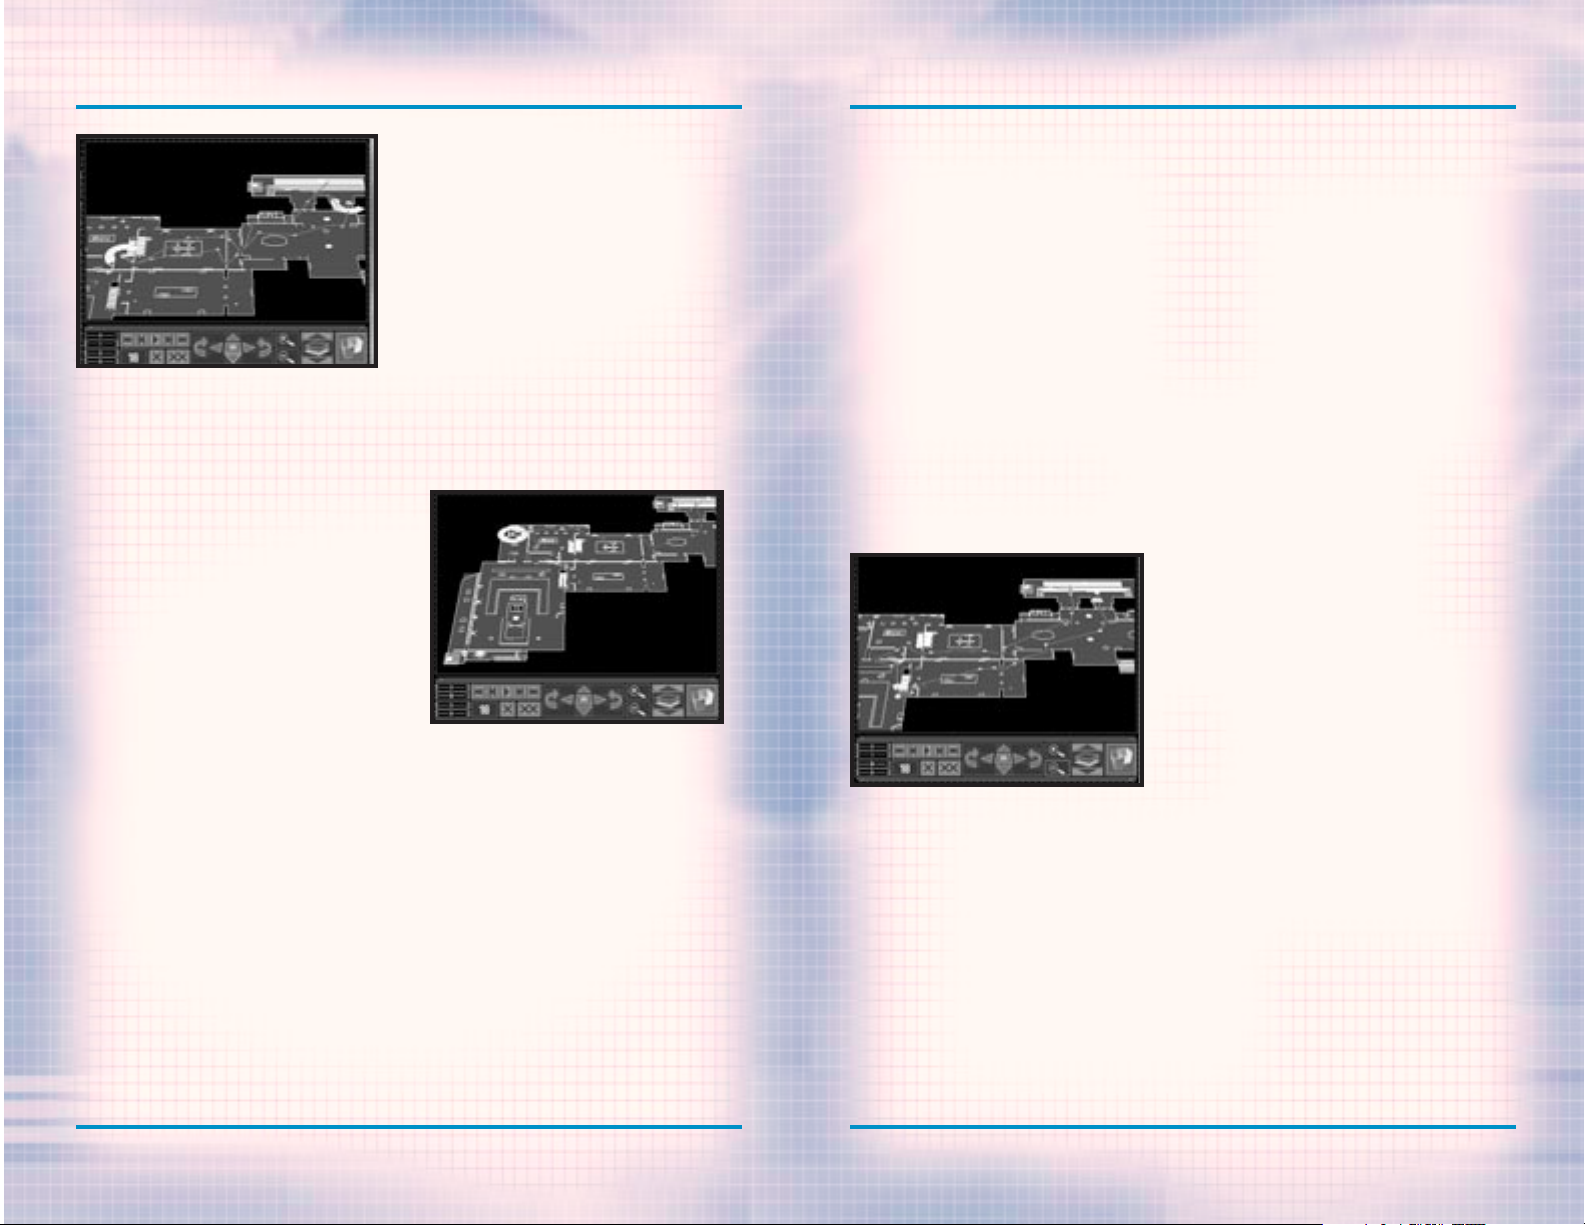
Plot each team’s waypoints on the
map and give orders where needed.
Page 9
WALKTHROUGH OF THE FIRST MISSION
2-8
WWW.REDSTORM.COMROGUE SPEAR
WALKTHROUGH OF THE FIRST MISSION
2-7
WWW.REDSTORM.COMRAINBOW SIX
Blue Team’s Plan
All of your teams must start out at an
Insertion Zone. These are represented
on the map by a light blue rectangle.
Move the map so you can see the one
near the top. To move the map, click
on the Map Control arrows below the
map. You can also zoom in and out with
the magnifying buttons. The next button to the right changes levels so you
can see the second story. The far
right button shows a 3-D view of the
map. To place the first waypoint for
Blue Team, click on the Insertion
Zone. Place the next waypoint near the
second door from the right. The green
lines represent doors. While at this
waypoint, go over to the Orders Menu
and click on Breach Door under
Actions. This orders the team to
breach the door.
Note: You cannot give Special
Action orders unless you’re in a
position to perform the action.
In this case, if you do not place your
waypoint close enough to the door, the
option to breach it will not be available. Place the next waypoint up and
to the right so they are just above
the rightmost door. Click on Alpha
under the Go Codes and then Cover
under Actions. The Go Code order tells
the team to wait at the waypoint until
it receives the assigned Go Code.
Without Go Codes, the team would trav-
el from waypoint to waypoint without
stopping. Go Codes let you coordinate
the actions of multiple teams. Cover
tells them to defend their position in
a 180 degree arc. To set the arc,
right click on the map and a targeting icon will appear. Place it so the
team is facing the opened door. Now,
plot waypoints to lead the team into
the museum, heading to the left until
they are just to the left of the double staircase. Here, assign them Go
code Bravo and order them to Cover
facing the top left. Finally plot waypoints back through the main doors and
to the Extraction Zone represented by
the white rectangle.
Red Team’s Plan
With Blue Team ready, click on the red
triangle to begin giving orders to Red
Team. Start them off at the Insertion
Zone in the bottom left. Place the
next waypoint near the door and click
on Frag Room under Actions. This
orders the team to throw in a Frag
Grenade as soon as they open the door.
Continue up the stairs and down the
corridor leading right and up. Just
outside the second door you come to,
near the small flight of stairs leading to the right, use the Frag Room
order again, then head all the way to
the right, then up and then back to
the left, visiting all the rooms on
the second floor.
Head down the single flight of stairs
near the center of the map, then
towards the room in the top left.
Place a waypoint outside the door, and
a little below it. Order the team to
Flashbang Room, then enter it. Walk
near the other door in the room, then
click on the Charlie Go Code and
Defend under Actions. Defend
instructs the team to be prepared for
terrorists in all directions or 360
degrees. Also click on Escort under
Mode and Blitz under Speed. Escort
orders the team to take any hostages
with them while Blitz has them running
instead of walking. Plot the next waypoints to lead them out the main
doors, to the left side of the stairs
outside and then on to the Extraction
Zone.
Green Team’s Plan
Green Team is your sniper team. Click
on the green triangle and then place
their first waypoint in the top
Insertion Zone. Plot the next above
the door the Blue team will breach.
Here, click on the Alpha Go Code and
Snipe under Actions. Snipe orders the
team to set up the sniper to cover a
very narrow arc. Right click somewhere inside the museum so the sniper
has a line of sight to the point
through the opened door. Next, send
them inside and down near the staircase Red Team will come down. Place
the waypoint just to the left and
below the staircase and click on Go
Code Bravo. Also order them to Snipe
at the doorway above and to the left
of the stairway. The following waypoints should lead out the main doors
and to the Extraction Zone. You are
now finished with this screen, so
click on the right green arrow to continue.
The Execute Screen is where you can
choose which team you want to control
at the start of Action Phase of the
mission. You can also choose to just
watch the mission by clicking on the
button in the lower left of the
screen. In this mode, you can view the
mission from the perspectives of each
of the three teams, but do not control any of them. Deselect Watch
Mode. By default, you will be placed
in control of the Blue team. When you
are ready, click on the right green
arrow again. A window will pop up asking if you wish to continue to the
“Action Phase”. Click on Yes.
Page 10
WALKTHROUGH OF THE FIRST MISSION
2-10
WWW.REDSTORM.COMROGUE SPEAR
WALKTHROUGH OF THE FIRST MISSION
2-9
WWW.REDSTORM.COMRAINBOW SIX
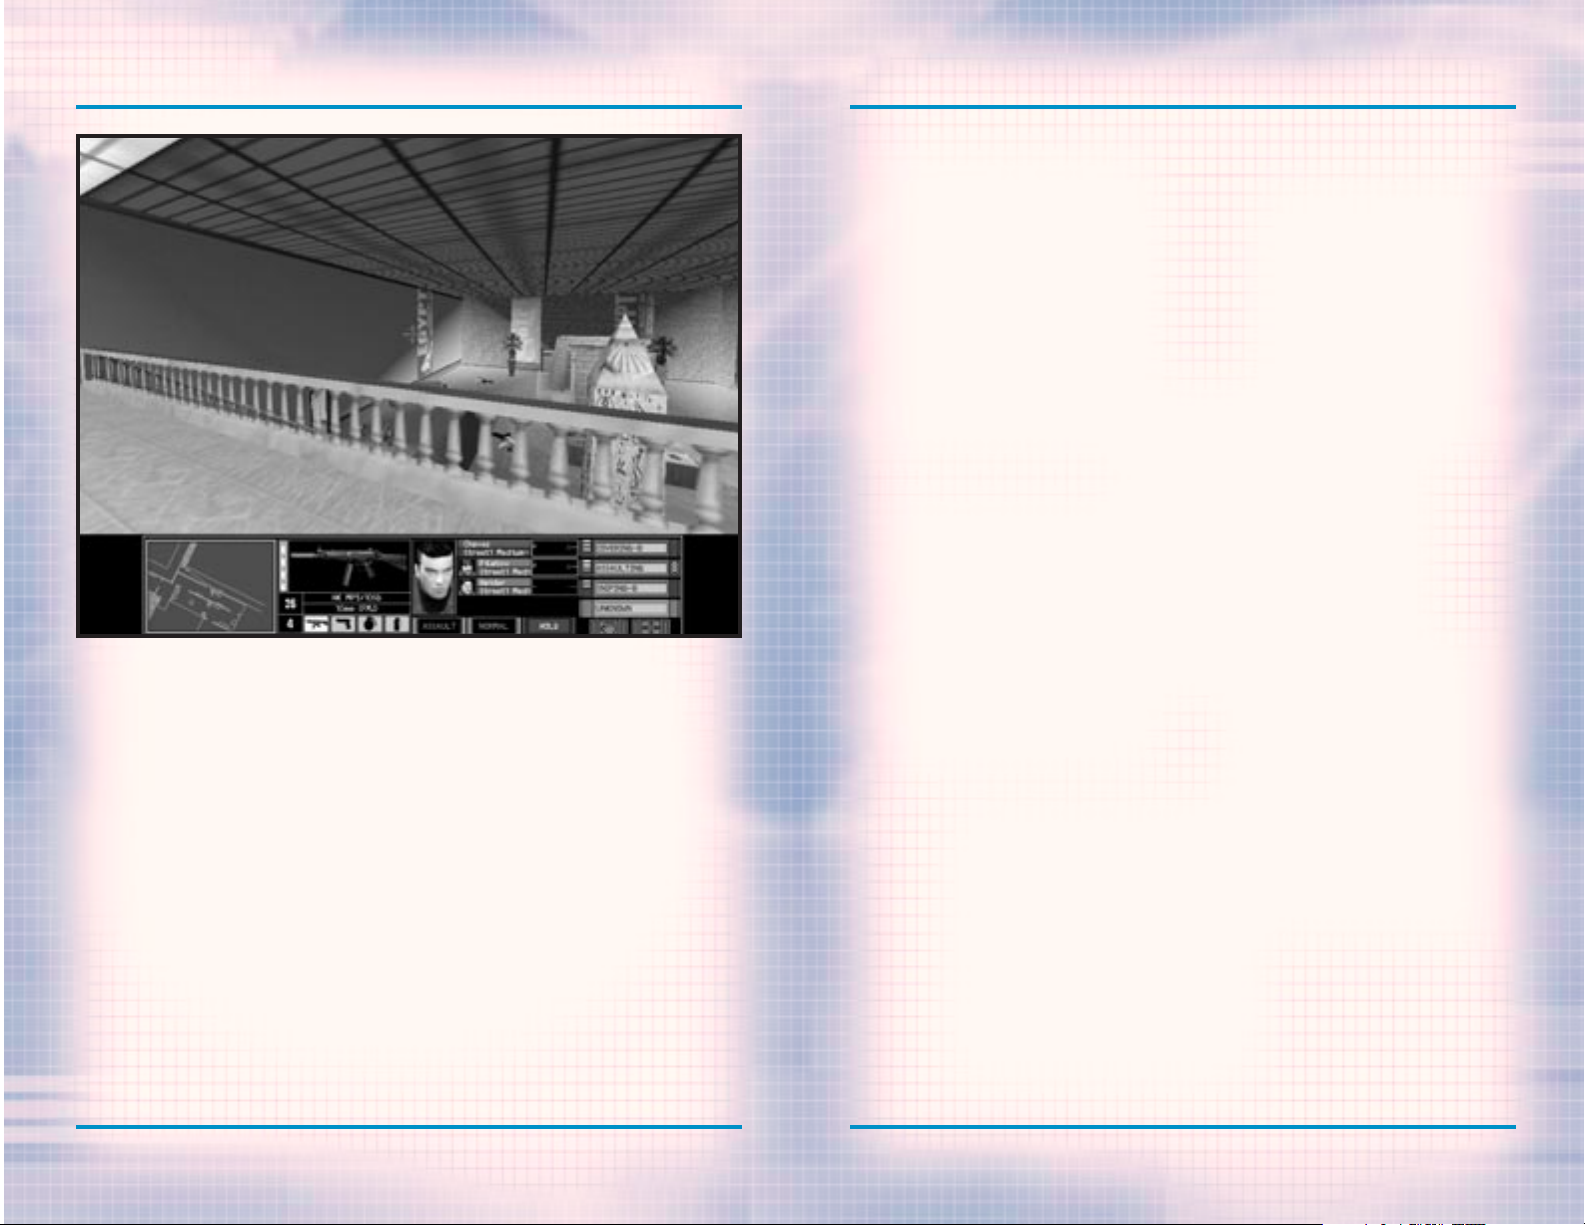
ACTION PHASE
The “Action Phase” is where you execute the plan you created in the
Planning Phase. Unless you are in
Watch Mode, you control the team
leader of the currently selected
team. After the Action Phase loads, a
window will appear asking if you are
ready to begin. Click on OK. The
screen is divided into two main parts.
The Cinema Window is the 3-D view of
the mission area. Below it is the
Action Bar. Centered in the Cinema
Window is the targeting reticule.
This is what you use to aim your
weapon. As you move and rotate, the
reticule will grow in size to show the
decrease in accuracy while moving. On
the left side of the Action Bar is the
Map Window. This will be disabled in
resolutions lower than 640 X 480.
It is centered on the current team.
The top of the map is always the
direction the team leader is facing.
As you begin moving, follow the lines
connecting your waypoints. Next to
the Map is the Weapons Display. This
shows the current weapon, the number
of rounds remaining in the magazine,
the number of extra magazines the
operative is carrying and little
icons of the other items carried. You
can change items, magazines, or the
rate of fire by selecting the appropriate keys. The next box is the Team
Display. It lists the operatives in
the current team and their Mode and
Speed. The last box is the All Teams
Display. It shows the status of all
the teams in the mission. In addition,
three yellow chevrons indicate the
team you are currently in charge of.
When you come across a terrorist,
place the targeting reticule over his
chest and press the fire button or
key. If the weapons rate of fire is
set to single shot, each press will
fire a single round.
However in three-round burst or full
automatic, holding down the button or
key will fire either three rounds or
empty the magazine respectively. Be
careful.
You can switch between teams during
the mission and take control of each
in turn. Keep an eye on the All Teams
Display. When their status lists an
action followed by a letter, it means
the team is waiting for the listed Go
Code. For this mission, give code
Alpha as soon as Red Team is beginning to clear the area overlooking the
main entrance. Code Bravo is to be
given after Red Team has secured the
hostages, immediately followed by
code Charlie. Right from the beginning of the mission, you should press
the Activate Sniper Control key to
order the Sniper to fire at will.
Try playing this mission as each of
the different teams as well as in
Watch Mode. Each team has different
responsibilities and going through
each will give you a good feel for the
game.
END OF THE MISSION
The mission will end when one of the
following conditions occurs: the
hostages have been safely rescued, a
hostage is killed, or all of your
operatives are out of action. At the
end of the mission, you will go to the
Results Screen where you can see the
statistics for your mission. If you
would like to see a replay of your
mission, click on the third button
from the right on the bottom of the
screen. It will replay the mission and
you can observe, similar to Watch
Mode.
Page 11
3-0
WWW.REDSTORM.COMROGUE SPEAR
GAME
MENUS
Page 12

GAME MENUS: SINGLE PLAYER
3-2
WWW.REDSTORM.COMROGUE SPEAR
GAME MENUS: SINGLE PLAYER
3-1
WWW.REDSTORM.COMRAINBOW SIX
The Main Menu is fairly intuitive. Just left mouse click on a
selection to go to the corresponding area.
When you first start Rogue Spear, the
“Main Menu” offers seven different
choices.
SINGLE PLAYER
Takes you to the Single Player Menu
MULTIPLAYER
Takes you to the Multiplayer Menu
TRAINING
Takes you to the Tutorial Menu
OPTIONS
Takes you to the Options Screen
REPLAYS
Takes you to the Mission Replay Menu
CREDITS
Takes you to the screen listing all
the people who worked on this game.
QUIT
Exits the game.
The Single Player menu is where
you begin a campaign and return
to resume a campaign in progress.
From here you can also replay
missions in one of three different modes.
SINGLE PLAYER
The “Single Player” menu is where you
begin all of the campaign missions and
other types of games for individual
play. There are eight selections from
which to choose: New, Resume, Delete,
Practice Mission, Branch Campaign,
Lone Wolf, Terrorist Hunt, and View
Missions Results. Each of these is
described in the subheads below.
Rogue Spear contains a number of different menus, which are organized to simplify the process of setting up and starting a game. This section covers all
the choices available to you prior to selecting a mission.
NEW
When you play Rogue Spear for the
first time, you will automatically be
taken to New Campaign. A dialogue box
will appear. Enter a name for the campaign. Next you must select a difficulty level.
DIFFICULTY LEVEL
You can choose from Recruit, Veteran
or Elite. Each level of difficulty
requires varying levels of skill for
success.
Recruit: In order to move on to the
next level, you must accomplish the
objectives of the mission. There are
fewer terrorists than in the other
levels and they are slower to react.
Veteran: As in Recruit, you must
achieve the objectives to complete a
mission successfully. However, there
are usually more terrorists and they
react quicker than in the Recruit
level.
Elite: This is a very tough level.
There are often more terrorists and
they will shoot much more quickly.
Auto Target is disabled and Heart Beat
Sensors (explained in weapons and
equipment section) cannot tell the
difference between a hostage and a
terrorist. This level is as real as
they come and requires the most careful planning and execution in order to
succeed.
Once you have made your selections,
click OK to begin the first mission. You
will be taken to the “Planning Phase”.
RESUME
After at least one campaign has been
started, the Resume option will be
available from the “Single Player”
menu. Click on one of the campaigns
listed in the Campaign Window and
select Resume. You will be taken to
the planning phase of the next uncompleted mission in the current campaign.
DELETE
This option deletes the selected campaign. A dialogue box will appear asking you to verify your decision before
the campaign is actually deleted. You
cannot delete individual missions in
a campaign. If you are unhappy with
the results of a mission and want to
try it over to improve your performance for campaign purposes, use the
Branch Campaign option instead. All
deleted campaigns are gone for good.
If the only campaign is deleted, you
must start over from the beginning
with mission 1.
PRACTICE MISSION
Once a mission has already been completed, you can return and try it
again without affecting the campaign
in progress. First select the campaign in the Campaign Window, then
select the mission from the Mission
Window. With the mission highlighted,
select Practice Mission. You will be
taken to the planning phase for that
mission. None of the results of the
practiced mission will affect the
campaign. Even if some of your operatives are killed or wounded, these do
not carry over to the campaign. If you
want to improve the performance of a
mission for campaign purposes, choose
the Branch Campaign option instead.
BRANCH CAMPAIGN
If you are not happy with the results
of a mission and would like to play it
over for the purpose of improving your
campaign, then use the Branch
Campaign option. Once the correct
campaign has been selected, choose
the mission prior to the one you want
to replay and then select Branch
Campaign. A dialogue box will appear
and ask you to provide a name for the
new campaign. You cannot, however,
change the difficulty level. It
remains the same as that chosen for
the original campaign.
Page 13
GAME MENUS: TRAINING
3-4
WWW.REDSTORM.COMROGUE SPEAR
GAME MENUS: MULTIPLAYER/TRAINING
3-3
WWW.REDSTORM.COMRAINBOW SIX
LONE WOLF
After a mission has been successfully
completed, the Lone Wolf option for
that mission will be available. Using
the same map level, you enter it with
a single operative. Thirty terrorists
are randomly placed about the level.
You must get from the insertion zone
to the extraction zone without being
killed. The objectives of the original mission are no longer in effect.
It is just you and the bad guys. Once
you select this option, you will be
taken to the planning phase where you
can choose and outfit your operative.
TERRORIST HUNT
Similar to Lone Wolf, this option is
only available after a mission has
been completed successfully. However,
in this case, you can take an entire
team with you. The objective for this
option is to hunt down all thirty terrorists and clear the level. After
selecting this option, you are taken
to the planning phase.
VIEW MISSION RESULTS
This option allows you to review the
End State of any completed mission
within a campaign. This command is
most useful when you have several campaigns and are looking for a good spot
to Branch the Campaign. The information displayed is the same as that
presented at the Results screen for
the mission.
TRAINING
This is where you can create or join
multiplayer games of Rogue Spear.
These menus are covered later in this
manual in the Multiplayer section.
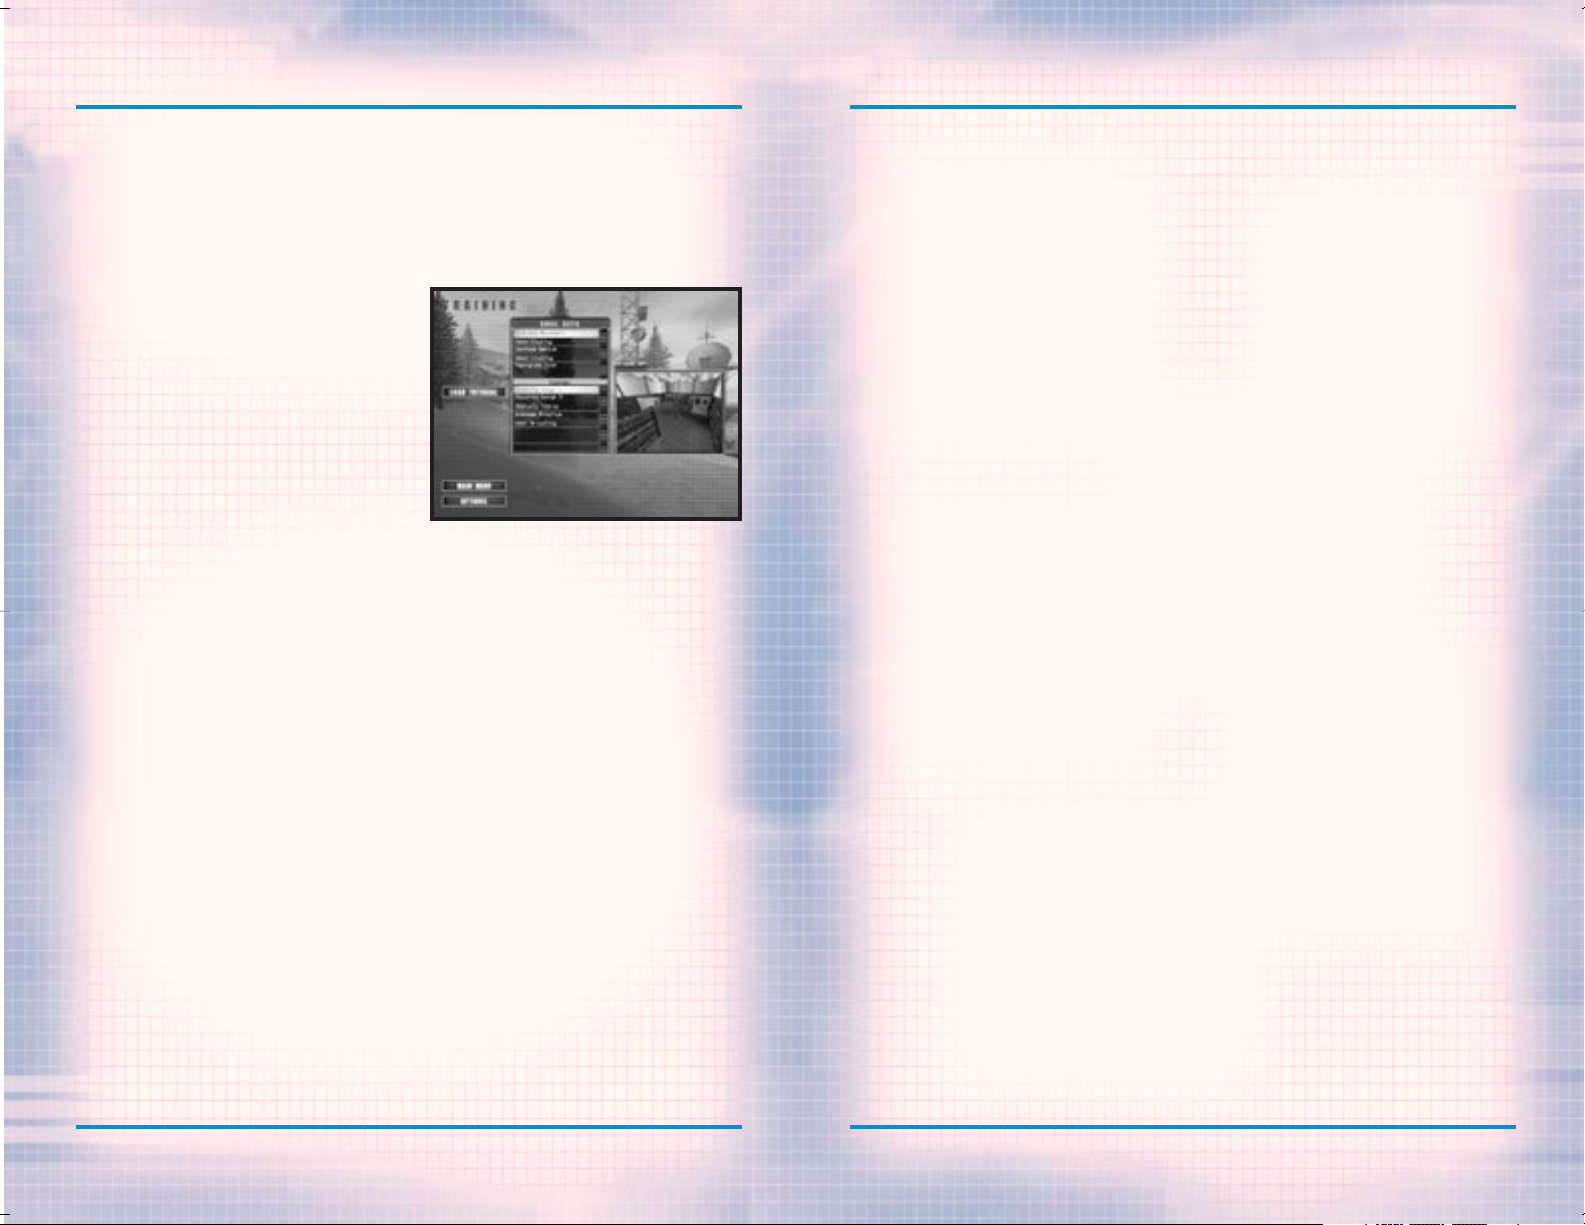
The Training Menu is divided into
Skill Sets and Courses. The first
three Skill Sets form a tutorial
teaching you all the skills you
need to go onto the operational
missions.
Several training missions have been
created to help you become familiar
with the game and the types of actions
you will be performing within the missions. It is a good idea to spend some
time going through each of the training missions. They are organized
according to Skill Sets. Each Skill
Set concentrates on a group of skills
necessary for the actual missions. To
begin a training mission, select a
Skill Set and then one of the courses listed in the window below. It is
usually a good idea to go through each
of the training missions in order
since most build on the previous missions.
Even after you have started a campaign, continue to return to the
training missions to keep your skills
at a high level. Hostage rescue teams
in the real world spend thousands of
hours training and practicing on firing ranges, obstacle courses and in
simulated rescue situations. The
training missions are organized to
allow you to work on a specific type
of action without having to do a lot
of set-up and enter an actual mission.
For example, if you are having trouble during a mission saving a hostage
or entering a room containing terrorists, try one of the appropriate
training courses until you feel comfortable with your ability to execute
the action successfully.
While the training missions are a
great way to hone your personal combat skills for missions, many are
great for testing out team tactics.
Each training mission begins with a
planning phase where you can select
different operatives and kits, then
assign them to teams and lay out a
plan. In some of the more advanced
training missions, you can practice
using Go Codes to coordinate the
actions of all your teams. Also try
assigning teams special actions such
as Frag Room, Flashbang Room, or
Breach Door. Then during the training
mission, observe how they perform the
action.
Often during an operational mission,
there will be one or more difficult
spots to get through. Instead of going
through the entire mission again and
again until you get it right, go back
to the training missions and find one
similar to the trouble spot. Practice
getting through it either by yourself
or with the help of other teams.
Remember, the more you sweat in training, the less you bleed in combat. You
can exit the Training Sessions at any
time by pressing the Escape Key. Click
on Abort Mission from the window which
appears and you will be returned to
the Main Menu. There is not a Results
Screen for Training Sessions since no
statistics are collected during
training.
There are five different Skill Sets
from which to choose.
FIRE AND MOVEMENT
The five courses in this Skill Set let
you practice moving your operatives
as well as using their weapons and
equipment. Two of the courses are
shooting ranges were you can hone your
firearms skills. Each course has five
different sections. The first is a
gravel walkway on the far left. Here
you can practice firing while on the
move. Walk along the gravel way and
fire at the target as you go. To the
right of this section are four more:
short, medium, long and extra long
ranges. The latter is great for sniper
practice.
The obstacle course solely tests your
ability to move an operative around
the level. To complete this course,
you must walk across narrow planks,
side-step, climb, etc. While it may
not seem too difficult, practice
going through the course with your
weapon always aimed downrange. In
real missions, you always want to keep
your weapon pointed towards the
enemy. Also try using obstacles for
cover by crouching behind them or
peeking around them. Switch between
first and third person views to find
the best for different actions and
situations.
The grenade practice range provides
an area where you can work on your use
of both flashbangs as well as frag
grenades. Behind the tire barrier is
a mock building. Start off with flashbangs and try throwing them over the
barrier first. You throw grenades and
Page 14

GAME MENUS: TRAINING
3-6
WWW.REDSTORM.COMROGUE SPEAR
GAME MENUS: TRAINING
3-5
WWW.REDSTORM.COMRAINBOW SIX
flashbangs by holding, then releasing
the fire button or key. The longer you
hold it down, the farther you throw.
By looking up or down, you change the
angle at which you throw the grenade.
Practice throwing grenades through
the door, and then through the window.
Remember to be careful with the frag
grenades. Even in training, they are
real and deadly. If they don’t clear
the tire barrier, they will bounce
back and land near you; killing or
seriously wounding your operative.
In addition to the grenade range,
there are also several mock buildings
for practicing the use of flashbangs.
Try opening a door while standing to
one side. Then quickly peek in and
throw a flashbang. As soon as you
release the flashbang, switch to your
primary weapon and enter the room once
it has detonated. It is also a good
idea to throw a flashbang and watch it
detonate. Observe the effects it has
on your operative. Your firing accuracy is reduced temporarily and your
vision is somewhat obscured. You may
also be temporarily paralyzed. It is
important to practice throwing flashbangs, then looking away, so you are
not effected as much as the terrorists.
The final course in this Skill Set is
the Door Breaching Course. Take a
demolitions specialist armed with
shotguns and breaching charges for
this training mission. It uses the
same course as the grenade practice.
Instead of using the grenade range,
concentrate on breaching the doors of
the mock buildings. There are two main
ways to breach a door. Start off by
using a breaching charge. Walk up to
a door, select the breaching charge,
then hold down the fire button or key
while the operative places the
charge. Next, back away from the door
and press the fire button or key again
to detonate the charge. Not only is
the door blown to pieces, terrorists
in the room would be stunned with
effects similar to a flashbang.
Breaching charges can even kill if a
person is too close to the other side
of the door. Therefore, be careful
when using them on rooms containing
hostages.
ROOM CLEARING
This is the first Skill Set, which
offers opposition. The three courses
consist of the same pair of connecting rooms with different configurations of simulated terrorists inside.
There are several ways to practice
using the courses. Try using frag
grenades to clear a room. Then try
using flashbangs to stun the terrorists before rushing in. You can also
test multiple team tactics by using
two teams to breach and enter the two
doors simultaneously. Use caution on
each of these courses because the terrorists fire back at your operatives.
HOSTAGE RESCUE
The next Skill Set continues on with
the training by adding hostages to the
missions. Not only do you have to
clear out the terrorists, you must
also keep the hostages safe at the
same time. It is a good idea to take
a heartbeat sensor along to locate
where the hostages are being held so
you can use extra caution when entering those rooms.
The six courses take place in one of
two kill houses. The first is a small
office building with six small rooms
connected by a single hallway. The
second kill house is a two story
building with several rooms on each
floor. There are three configurations
of terrorists and hostages for each of
the kill houses. The hostage rescue
training missions are much tougher
than previous ones. In most cases,
there are doors across from each other
in the hallways, which can make
advancing on one difficult without
exposing yourself to another.
Practice using flashbangs as well as
multiple team tactics. Once you can
get through all six of these courses,
you are first class certified in
Hostage Rescue and Close Quarters
Combat. You are ready to go operational.
OPEN TRAINING
After going through the training missions, the Open Training Skill Set
lets you go back to practice at the
shooting and demolitions ranges as
well as three kill houses. It is
always a good idea to continue training in-between operational missions
to keep your skills honed to razor
sharpness.
TERRORIST HUNT
The final Skill Set allows you to go
through two new kill houses and eliminate all the terrorists you can find.
The first kill house contains a pair
of two story buildings while the second is a mock up of a city street. The
latter is filled with hiding places
and underground passages where terrorists can be waiting to ambush you.
Each time you try these two training
missions, the terrorists are randomly
placed throughout the levels.
Page 15
GAME MENUS: OPTIONS
3-8
WWW.REDSTORM.COMROGUE SPEAR
GAME MENUS: OPTIONS
3-7
WWW.REDSTORM.COMRAINBOW SIX
OPTIONS MENU
The Options Menu is where you can
configure and customize the game
for your computer and playing
style.
The “Options Menu” allows you to configure and customize Rogue Spear to
your personal taste. Within the submenus, you can adjust game functions,
sound, graphics, multiplayer games,
joystick setting and remap the keys.
GAME OPTIONS
These options affect the way the game
plays. To toggle an option, click on
the box next to the title and a checkmark will appear to show the option is
activated. An empty box means the
option is not activated.
Auto-Targeting On is activated by
default. During the Action Phase, the
targeting reticule will automatically
center itself over the chest of the
nearest enemy and then move to his
head. This makes targeting a terrorist easier and eliminates the time
necessary to line up a perfect shot.
Once you become more proficient with
the controls, deactivate this option
for more of a challenge.
With Blood activated, terrorists and
other characters will bleed when shot
and there can be blood spray. The
effect is realistic and not overly
gory like you might expect in other
games. When Blood is deactivated,
characters just fall down without any
visible wounds; just like in the old
Western movies.
With Mouse Look activated, your mouse
moves the targeting reticule around
in the Action Phase. Moving the mouse
up and down makes your operative look
up and down while left and right movement rotates your operative.
Note: Changing the Mouse Look
settings will cause some of your
key mappings to change.
If you turn this option off, number
pad keys will be activated as your
“Look” and “Turn” keys. Invert Mouse
swaps the up and down motion of the
mouse to make it similar to a flight
simulator. Moving the mouse up makes
your operative look down and vice
versa. Mouse Sensitivity is set using
a bar with arrows at each end. To
increase the sensitivity, click on
the right arrow and the little notches in the bar will begin to light up.
The more sensitive the mouse, the less
you have to move it during the Action
Phase to control your character.
When Record Mission is activated,
your missions will be automatically
recorded for replay after the mission. For more information on this,
see the Replay Mission section later
in this manual. Turning this off may
help increase speed on slower
machines.
Unlimited Practice turns off Victory
Conditions for Practice Mission. To
use the Practice Missions option,
you’ll need to have successfully completed the mission first. This allows
you to run through a level while never
winning or losing, regardless of what
happens during the mission.
Always Run automatically makes your
operative run whenever you give move
commands. When you press the run button, your operative will slow down to
a walk.
The MODs Path option allows you to use
different MODs created by other players. Type in the path to where the
MODs are located in your computer in
the box provided. MODs are levels,
missions or variations created by
players. Red Storm Entertainment does
not support MODs so use them at your
own risk. Our Technical Support
Representatives cannot help customers
with problems arising from the use of
MODs. Please uninstall any MODs
before calling Technical Support. If
you’re having game play problems
after installing MODs, try uninstalling to see if problems are fixed.
SOUND OPTIONS
These options allow you to adjust the
volume of different types of sounds in
the game. By clicking on the box next
to the titles, you can turn that sound
on or off. Volume is adjusted by
clicking on the arrows on either side
of the bar. There are six types of
sounds you can adjust:
Master: This adjusts the volumes of
all the individual following types of
sounds collectively.
Ambient: This adjusts the volume of
background or environmental sounds
such as crickets chirping or machinery running.
Gunshot: This adjusts the volume of
all gunshots and explosions in the
game.
Footstep: This adjusts the volume of
sounds made by operatives and other
characters walking.
Radio Chatter: This adjusts the volume of messages from your other operatives during a mission.
Action Music: This adjusts the volume
of the music played during the missions. It does not affect the volume
of CD music.
Maximal Sound: This bumps up the maximum number of 3D sounds that are
played at any one time. Not all sound
cards support a large number of 3D
sounds being played at one time. If
you are unsure whether or not your
sound card can support many 3D sounds
playing at once, then leave this
option off.
Page 16

GAME MENUS: OPTIONS
3-10
WWW.REDSTORM.COMROGUE SPEAR
GAME MENUS: OPTIONS
3-9
WWW.REDSTORM.COMRAINBOW SIX
CD Sound Volume is adjusted through
Windows settings. This can be
accessed by clicking on the Volume
Control in the Taskbar. If you do not
have this icon in your Taskbar, you
can add it by clicking on Start, then
Control Panel, then Multimedia. Under
the Audio tab, in Playback, you can
put a check in the box to add the
Volume Control to the Taskbar.
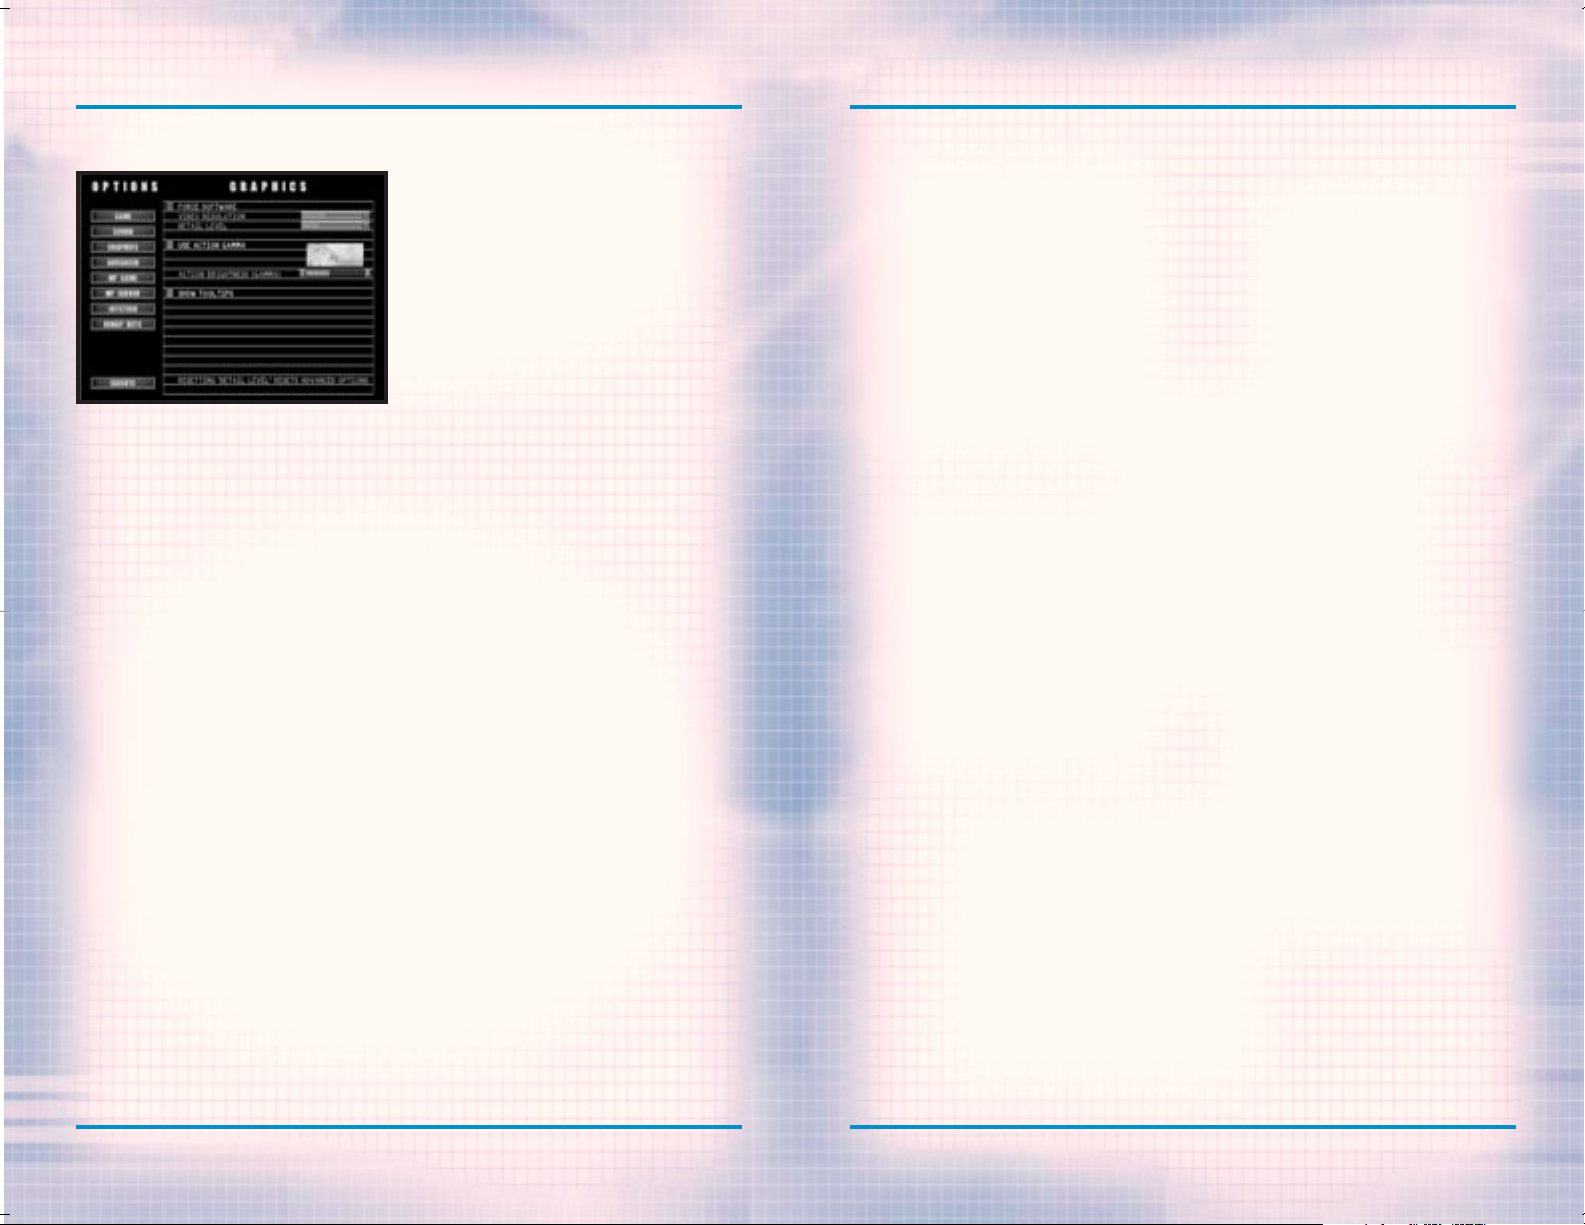
GRAPHICS OPTIONS
These options not only affect how the
game looks on your monitor, but also
how fast the game plays on slower computers. If you have a hardware 3D
accelerator, Rogue Spear will automatically take advantage of it. If
you’re having difficulties getting
into the Action Phase and/or graphical glitches, turn the Force Software
option on. Video Resolution allows
you to set the resolution of the
action screen by selecting an option
from a pull down menu. Not all resolutions will work on all computers and
the higher the resolution, the slower
the game may play on slow computers.
Detail level will automatically set
several advanced options to specific
default levels. These options will
affect the performance of Rogue Spear
on your machine. If you have a slower machine, try setting the detail
level to low. This will degrade visual quality while increasing performance. If you have a powerful machine,
you may want to set the detail level
to high, which will increase visual
quality, but may slow down the performance of Rogue Spear on your system. This setting defaults to medium.
For more information on what graphics
options are set, and how they will
affect the game, see the section on
Advanced Options detailed on the next
page.
Use Action gamma will allow you to use
gamma correction to brighten up the
apparent light level of the action
phase. This option does not affect
how well AI’s in the game can see,
only how bright it appears on your
monitor. The small bars to the right
of this option will scroll up to
increase the apparent brightness in
the game if you click on the arrow to
the right of them. If you click on
the arrow to the left of them, the
bars will scroll down, making the levels apparently darker. Some machines
may experience a performance increase
by turning off this option.
Show Tooltips causes floating
tooltips to appear when you hover the
cursor over a selectable part of the
screen. These tooltips will give you
a brief reminder of what the button
they are hovering over will do. Some
slower machines may experience a performance increase by turning off this
option.
ADVANCED OPTIONS
These are the graphics options that
are modified by the detail setting in
the Graphics Options.
Every time you change the detail
level, all of the options on this
screen will be reset to defaults,
regardless of changes you may
have made to the screen.
The first three affect the environmental effects visible in the game.
If you turn off Show Sky, then the
skybox is no longer drawn in the game,
and you will see a default background
color. Turning off Show Fog causes
the game to not draw in fog on levels. Show Weather FX will turn on or
off the rain and snow visible effects
for the level. It will not affect the
sounds associated with these effects.
Also, in a multiplayer game, a server
can override the disabling of these
options.
LOD Skip: This is an option that
affects the Level of Detail (LOD) for
character models. When you activate
this option, the highest LOD will not
display for a model. This cuts down
on the amount of information which
must be displayed, and can result in
a performance increase.
MIP Skip: This option affects the LOD
for textures. Many textures have several different levels of detail. By
activating this option, Rogue Spear
will not use all of the levels of
detail for some textures, and so will
not be swapping them in and out as
often. Activating this option may
increase performance.
Dynamic Lighting: Clicking in this
box determines if the lighting of a
character changes according to
events, such as passing under lights,
or muzzle flashes from weapons. With
this turned off, some machines may
experience a performance increase.
Character Shadows: This option toggles the shadows of characters on and
off. With this option off, you will
no longer see shadows extending from
the character’s feet. Some machines
may experience a performance increase
with this option turned off.
Projected Textures: By clicking this
box on or off, you control whether
dynamically displayed textures, such
as scorch marks, are placed in the
game world while playing Rogue Spear.
Turning this option off will cause
Rogue Spear to stop displaying these
textures, and may result in a performance increase on some systems.
Bullet Holes: This bar determines how
many bullet holes will be displayed at
any time. If you exceed this number,
bullet holes will be removed from the
game world in the order that they were
created (oldest will be removed
first). It functions just like previous slider bars.
Texture Filtering: This determines
what type of filtering the game will
use to smooth out pixels in textures.
Not all filtering types are supported
by all video cards, so check with your
card manufacturer to determine what
filtering style is best for your card.
Page 17

GAME MENUS: OPTIONS
3-12
WWW.REDSTORM.COMROGUE SPEAR
GAME MENUS: OPTIONS
3-11
WWW.REDSTORM.COMRAINBOW SIX
MULTIPLAYER GAME OPTIONS
Name: This text box lets you enter the
name you want to use for multiplayer
games.
Clan: Enter the name of your clan in
this text box.
Gender: You can choose the gender of
your multiplayer character by checking either the Male or Female box.
Voice Pitch: The arrows on either side
of the bar allow you to adjust the
pitch of your characters voice either
up or down. The voice is used when
sending Bound Messages.
Arm Patch: Click on the check box to
use arm patches. Then go to the right
and click on the arrows to choose from
available arm patches.
Behind Firewall: Click on this box if
you are playing a game on the Internet
and your computer accesses the
Internet through a firewall.
Firewalls are sets of related programs, located on a network gateway
server, to protect the resources of a
private network from users from other
networks. Most business LANs use a
firewall. If you are not sure, check
with your systems administrator.
Internet or LAN: Click on the type of
connection you will use. If you want
to play with other computers on a
Local Area Network such as within an
office, select LAN. If you are connecting to other computers outside of
a LAN, select Internet. It is recommended you use Internet for games on
MPlayer or The Zone.
MULTIPLAYER SERVER OPTIONS
These options are only used if your
computer will be hosting a multiplayer game.
Server Name: This text box allows you
to enter a name for your server. This
name will appear on the other players
list of servers to join.
Message of the Day: You can enter a
brief message welcoming other players
to your game and informing them of any
special conditions.
Max # of Players: You can set the maximum number of players in your game
from 2 to 16.
Blue Team Size: Enter the maximum number of players who can be on Blue
team.
Gold Team Size: Enter the maximum number of players who can be on Gold
team.
Loud Footsteps: By checking this box,
the volume of the sound of characters
walking in the game is increased to
make detection easier.
Join Port: This is the address of the
port used to join a game. It is best
left to the default setting.
Info Port: This is the address of the
port used to transfer information
during a game. It is best left to the
default setting.
Announce Port: This is the address of
the port used to announce a server to
other players. It is best left to the
default setting.
Announce Server: When this option is
activated, your new game will beannounced to all other players on your
LAN or at your IP address with the
same Announce Port setting.
Password: If you want to use a password to limit the number of players’
who can join your game, type it in the
text box. Then click on the Use
Password box.
Allow Arm Patches: When this is
selected, each character will display
their playerís chosen arm patch.
Force Fog: This allows you to force
other players to show fog during a
mission and overrides their graphics
setting.
Force Rain: This allows you to force
other players to show rain falling
during a mission and overrides their
graphics setting.
Force Snow: This allows you to force
other players to show snow falling
during a mission and overrides their
graphics setting.
Show Enemy Names: When this is activated, the names of enemy players will
appear on the map next to their character’s location icon.
JOYSTICK OPTIONS
If you are using a joystick, game pad
or other type of controller, this menu
lets you choose the controller and set
its Joystick Sensitivity and its
Force Feedback. The Joystick
Sensitivity slider changes how quickly the controller reacts to movement.
Increasing the sensitivity here
results in faster response to controller stick movement, while
decreasing the slider results in more
sluggish response. The Force Feedback
option only applies if you have a
force feedback controller. These controllers move, shake and rattle in
response to actions during a game. For
example, you will feel a slight kick
when you fire a weapon and a jolt if
your operative is hit. You can also
assign buttons for movement and looking around. All other actions are
assigned for your controller from the
“Remap Keys” menu. If a Joystick is
set to control certain actions, the
corresponding keyboard keys will not
work. To turn off the Joystick, go to
Remap Keys, hit Default Keys and then
reconfigure as you prefer.
REMAP KEYS
The keyboard controls have been
designed for ease of use during play.
All the main action and movement commands are controlled by keys placed
closely together. However, if you are
used to another style, feel free to
set them to your liking. If you are
using a controller of some type, you
can also assign buttons from this
menu. There are eight submenus dividing up the types of actions in the
game. To remap a key, locate the
appropriate action and click once on
the title. The title will highlight to
show it has been selected. Next, press
the new key or button to assign it to
that action. Once you have completed
your remapping, click on Accept. If
you want to nullify your changes and
go back to the way it was before,
click on Cancel. If you have previously made changes and want to return
the key mappings to their default from
when the game was first installed,
click on Default.
Page 18

NOTES
WWW.REDSTORM.COMROGUE SPEAR
GAME MENUS: REPLAYS
3-13
WWW.REDSTORM.COMRAINBOW SIX
REPLAYS
The Replay Menu allows you to
watch previously recorded missions and to organize your
replays.
One of the great features of Rogue
Spear is the ability to review your
mission afterwards and study what
went well and what didn’t. If the
Record Mission option is activated,
then each mission will be automatically recorded. From the “Replay”
menu, you can View a replay by selecting one from the Replay List and then
clicking on View Replay. When a replay
is highlighted on the list, the data
box on the right lists the name of the
mission as well as the date and time
it was recorded. A comment also
appears in the box. To change the comment, click on Edit Comment and then
type a new comment in the text box
provided. If you no longer want a
replay saved on your computer, highlight the replay and then click on
Delete to remove the replay.
While viewing a replay, you can only
observe what happened during the mission. Though you can change the Camera
View and switch between teams, you
cannot issue any other commands or
affect the mission in any way. The
Replay feature is a good way to go
over a mission and see what worked
well and what didn’t. If your mission
was a failure, watch it over again to
see what went wrong. Often while you
are controlling one team, another can
be getting into trouble. Pressing
Escape any time during a “Replay”
brings up a menu allowing you to exit
the replay or access other options.
During “Replay”, the following keys
have the following effects; F5 Pause, F6 - Slow Speed, F7 - Normal
Speed, F8 - Fast Forward. On low end
systems F8 will have little effect.
CREDITS
This selection lists all the people
that made Rogue Spear possible.
Please take a look at all those
involved in this project.
QUIT
Clicking on this selection shuts down
Rogue Spear and exits to your operating system.
Page 19

4-0
WWW.REDSTORM.COMROGUE SPEAR
PLANNING
PHASE
Page 20

PLANNING PHASE
PLANNING PHASE: BRIEFING
Whenever you begin a mission, training
or operational, you first go through
the “Planning Phase.” Rogue Spear
places a large emphasis on planning.
Hostage Rescue Teams rarely, if ever,
go into a situation unprepared. Too
many lives are on the line to start an
action without having planned out as
much of it as possible.
During the course of the operational
campaign, you may discover you spend
much more time in the Planning Phase
than you do during the Action Phase.
While you can spend an hour or more
planning a mission, actually executing the mission will often take only
a matter of minutes. The Planning
Phase consists of six main steps:
1) Receiving the mission briefing and
your orders
2) Reviewing all available intelligence sources
3) Selecting up to eight operatives to
participate in the mission
4) Selecting the weapons and equipment those operatives will use during
the mission
5) Dividing the operatives into fire
teams
6) Preparing a detailed fire and movement plan so each team knows exactly
where to go, what to do, and how to
do it.
Once all of the planning is complete,
you can continue to the Action Phase
where you execute your plan. If the
mission fails, then come back to the
Planning Phase, modify the plan to
correct the problems, then try again.
The Planning Phase takes place on a
screen, which resembles a Personal
Data Assistant. As the leader of RAINBOW, you use this PDA to set up a mission. The main screen area is where
you will perform most of your actions.
At the bottom of the screen are six
buttons and a large indicator area
with two arrows. The first three buttons, on the left side, are options
specific to each screen in the planning interface. The last three buttons, on the right side, always remain
the same. They allow you to Load/Save
plans, call up the Help Menu, and the
Selection Menu, which will allow you
to move to other screens or exit to the
Main Menu. The lights across the bottom of the screen let you know which
stage of planning you are on and how
many more you need to complete. Each
completed stage is represented by a
green light while the uncompleted ones
by a red light. The two arrows are also
an indicator as to whether you have
completed everything on the current
screen before advancing to the next.
The back arrow takes you back one
screen. If you are on the Briefing
screen, this will take you back to the
Single Player menu. The forward arrow
will remain red until you have completed all the tasks on the current
screen. When it turns green, you can
advance to the next screen. Let’s take
a look at each of the different
screens in the Planning Phase.
<<< Note: There is a Help Button
located at the bottom of the PDA
Screen. If you leave the arrow cursor over a button, text will appear
in the Help Bar explaining that
button. To bring up a Help Window,
press F1.
BRIEFING
The Briefing screen is where you
find out what the mission is all
about as well as the objectives
you must accomplish for the mission to be considered a success.
Study your objectives carefully.
Your entire plan must revolve
around them.
The first screen you are taken to when
beginning or resuming a campaign is
the Briefing screen. Here, you
receive your orders and learn what the
mission is all about. The screen is
broken up into three main sections. At
the top center of the screen are the
mission objectives. To the left is the
“List of Advisors.” Along the bottom
is the text transcript for each briefing. The remainder of the screen contains photographs of the mission area
to help you get acquainted with the
terrain and conditions.
OBJECTIVES
Objectives are probably the most
important pieces of information you
can obtain from the Briefing screen.
The Objectives succinctly state what
you must accomplish to consider the
mission a success. Often it will be to
rescue all hostages or to prevent a
bomb from detonating. At times, there
will be more than one objective. The
Objectives are what you must build
your plan around because they are the
purpose of the mission.
4-1
WWW.REDSTORM.COMRAINBOW SIX
4-2
WWW.REDSTORM.COMROGUE SPEAR
Page 21

PLANNING PHASE: BRIEFING
INTEL
PLANNING PHASE: BRIEFING
SUBJECT LIST
Once a category is highlighted, a number of subjects will become available
in the Subject List. By clicking on a
subject, the name is highlighted and
the corresponding information appears
in the text box. It is usually a good
idea to read through all the latest
intelligence before starting on a
mission. It can offer clues as to what
you are up against.
LIST OF ADVISORS
You will always have at least three
advisors from which to choose. The
first is always Control. This brief
will inform you of the general situation and what you must do during the
mission. In addition to the recorded
audio briefing, you can also read the
transcript in the text box at the bottom of the page. John Clark is the
next briefer. Code named RAINBOW SIX,
Clark will always offer a few suggestions for the mission. At times, other
people will offer specialized information to assist you during the mission. Finally, the Mission Orders
list your objectives as well as any
other tasks or conditions that apply.
Access to the Intel database is
on a “need to know” basis,
regardless of your level of
clearance. Consequently, many
subjects won’t appear on the
Intel screen until you have
received an assignment for which
knowledge of them is essential.
The Intel screen is where you can tap
into background information for the
operational missions during the campaign. It is also where the storyline
of the campaign plays out. The Intel
screen is broken down into three main
areas: the “Categories List,” the
“Subject List” and the “Text Box.”
The mission objectives are also listed and a photograph of the current
subject is included.
CATEGORY LIST
The information found in the Intel
screen is divided into four categories. People lists the various personalities you encounter during the
campaign. Organizations covers companies, groups, etc. After you successfully complete some missions, you can
read about it in the Newswire. Of
course, since RAINBOW is a covert
organization, you will never see it
mentioned in the articles. Instead,
local law enforcement will get all the
credit. Finally, any information
which does not fit into the other
categories can be found in Miscellaneous.
When you are finished going over the
intelligence information, click on
the right arrow to go to the next
screen. Before the next screen
appears, a dialogue box will pop up
and ask if you want to use the default
plan for the mission. Make your selection, then the Roster screen will
appear.
4-3
WWW.REDSTORM.COMRAINBOW SIX
4-4
WWW.REDSTORM.COMROGUE SPEAR
Page 22

PLANNING PHASE: ROSTER
PLANNING PHASE: ROSTER
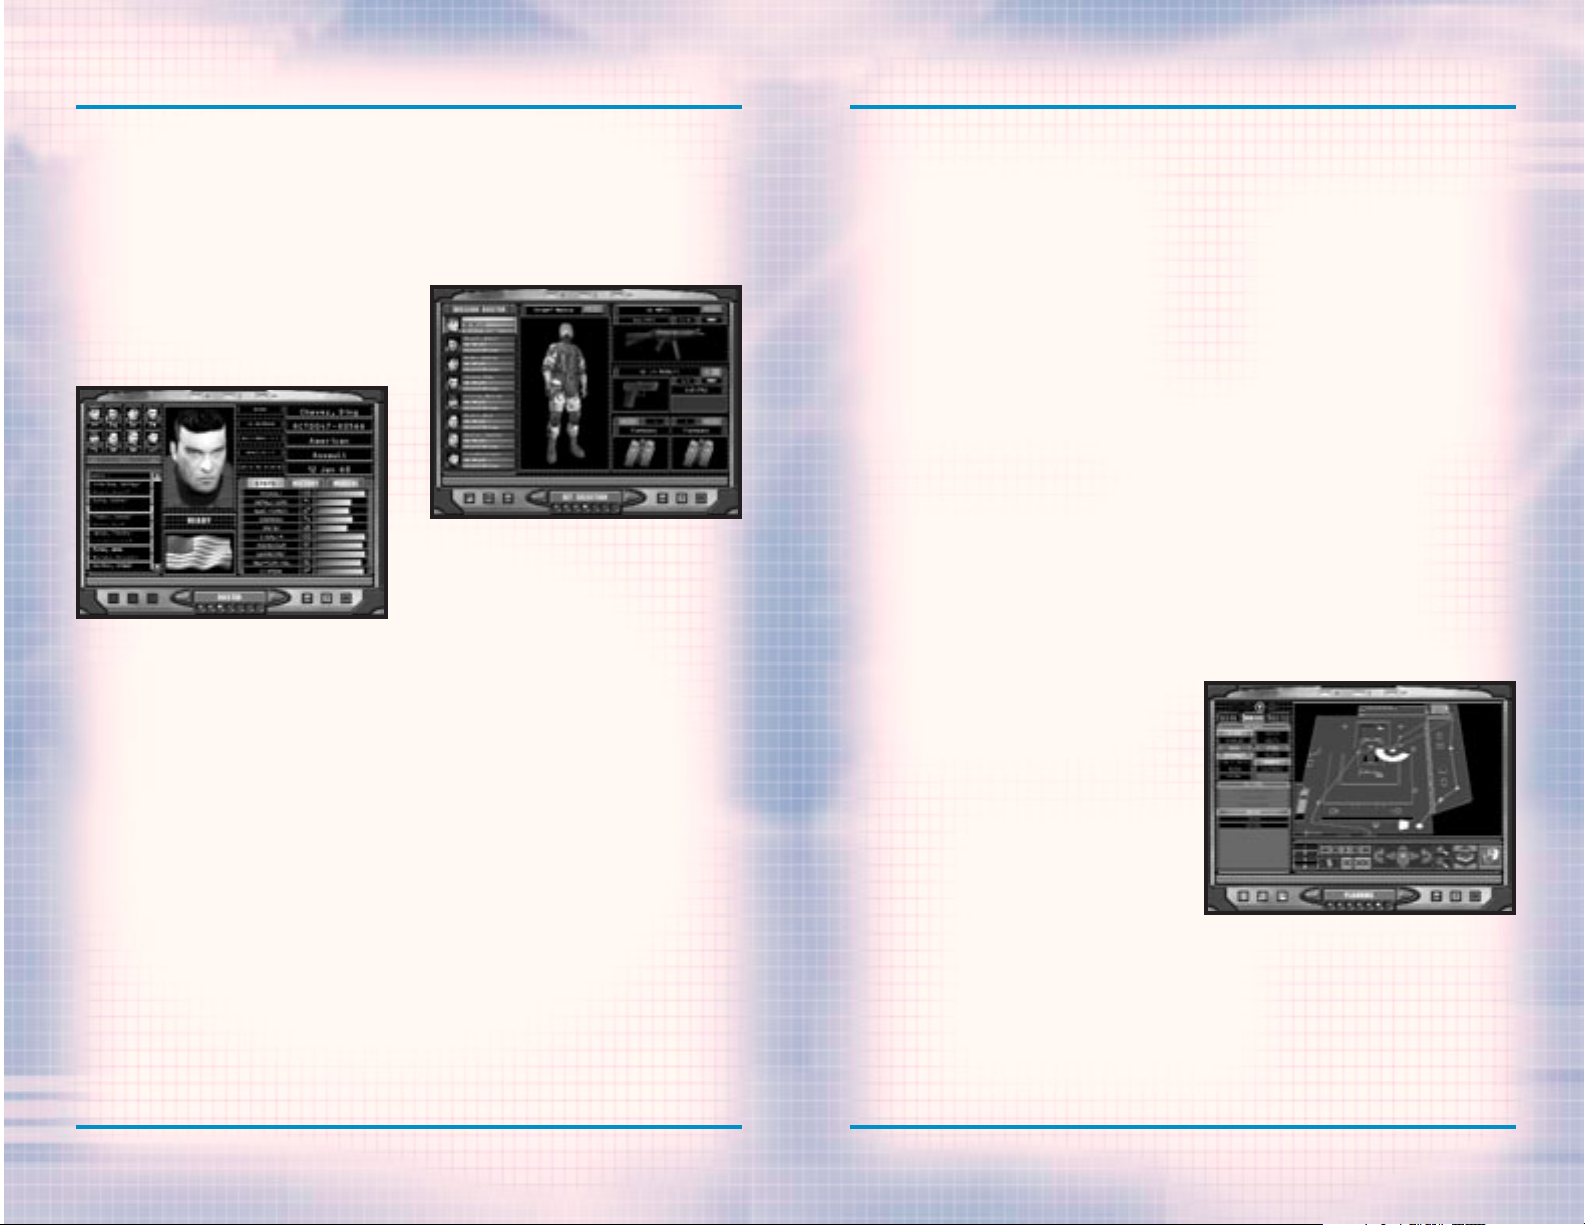
ROSTER
The Roster screen is where you can
review dossiers on each of the RAINBOW team members and then select up to
eight for the current mission. The
operative list is located in the bottom left of the screen. Click on any
of the names to bring up the dossier
for that operative. This information
appears to the right. If you like what
you see and want to select this operative for the mission, click on the
Add bar above the list and the operatives picture will appear in one of
the eight boxes showing assigned
operatives.
Each operative has his or her
strengths and weaknesses. In addition, each has a specialty. There are
five different specialties in Rogue
Spear: Assault, Demolitions,
Electronics, Recon and Sniper. The
operatives are organized according to
specialty on the list. Those with the
Assault specialty will often form the
core of your team for a mission. They
are often proficient in the use of
firearms and trained in the general
skills of hostage rescue. Demolitions
specialists are best for breaching
doors, using grenades and disarming
or placing bombs and explosives.
Electronics specialists are great for
getting through security systems or
accessing computer terminals. Recon
specialists excel at quietly moving
around the mission area and scouting
out where the enemy is located.
Finally, Snipers are good with longrange weapons.
Whenever an operative’s name is highlighted, their dossier appears to the
right. It contains a picture of the
operative, his or her readiness, a
bio, stats, personal history and
medical information.
READINESS
In between the operative’s picture
and their national flag is the readiness indicator. There are five different states of readiness for each
operative.
Ready: This means the operative is
capable of being used on this mission
and suffers no adverse modifiers to
their skills.
Fatigued: If the operative just
completed a mission, he or she may be
fatigued. This reflects the lack of
down time between missions.
Operatives have all of their stats
decreased by ten percent during a mission. During the action phase the
operative will have his or her
firearms accuracy decreased and will
be slower to react to the enemy.
Wounded: This means the operative
received a wound during a previous
mission and has not yet recovered from
it. While you can take a wounded operative on a mission, their stats will
be reduced due to the effects of the
wounds. Wounded operatives are less
accurate with their firearms and
react slower to terrorists.
Incapacitated: If an operative is
still in the hospital recovering from
his or her wounds, they are not available for the current mission. After
some time, their readiness will
improve to Wounded or even Ready. All
operatives heal at the same rate, so
the only factor in healing is the time
between missions.
KIA: This means the operative was
killed during a previous mission and
is no longer available for the remainder of the campaign.
BIO
The bio lists the operative’s name,
identification number, nationality,
specialty and date of birth.
STATS
Below the bio are three different
files you can examine: stats, history
and medical. The medical file lists
the operative’s personal characteristics and how long it will take to
recover from wounds. History provides
the background and training of the
operative. Stats lists the operative’s capabilities and skills in ten
specific areas. Six of these are considered specialty skills and the
other four are profile traits. Each of
these ten areas are rated on a scale
of 1 to 100, with anything over 90
considered expert.
4-5
WWW.REDSTORM.COMRAINBOW SIX
4-6
WWW.REDSTORM.COMROGUE SPEAR
Page 23

PLANNING PHASE: ROSTER
PLANNING PHASE: ROSTER
SPECIALTY SKILLS
Specialty skills reflect learned and
trained abilities. They define how
well the operative can use equipment.
These skills affect all operatives
alike, whether you or the computer is
controlling them. Therefore, always
choose team leaders with the skills
you will need to complete the mission.
Assault: This skill is used to determine the operative’s ability to use
firearms as well as the size of the
targeting reticule. The higher the
assault skill, the smaller the reticule and the faster he can target an
enemy. It also effects how fast Auto
Target will track to an enemy. For
more information on the targeting
reticule, see the “Targeting
Reticule” section in the Action
Phase. The assault skill is used whenever an operative fires any gun without the sniper view activated. Your
team leaders should always have high
assault skills since they are in the
lead and will usually see the enemy
first and have the first shot.
Demolitions: This skill determines
the speed with which an operative can
work with demolitions. The higher the
skill level, the shorter the time it
takes. The demolitions skill is used
when placing breaching charges or
explosives as well as when disarming
a bomb. You should usually assign an
operative with a high demolitions
skill level to the team that will be
breaching or handling bombs. Keep
this operative either in the middle or
rear of the team so the other assault
operatives can offer protection. See
“Team” Section to determine how to
place operatives within teams.
include placing bugs, picking locks,
using computers or bypassing security
systems. There are a few missions
which require these types of actions.
Always assign this task to the operative with the best electronics skill
level since speed is almost always of
essence. You want to provide cover
for these operatives as well.
Grenades: This skill is used to determine the accuracy of thrown weapons
such as flashbangs and frag grenades.
It also affects the amount of time it
takes the operative to prepare a
grenade prior to throwing it.
Sniper: This skill determines the
accuracy of the operative while using
a sniper rifle. It is also used in conjunction with the assault skill level
when firing an assault rifle using the
sniper view. The higher the skill, the
more quickly he can target a hostile.
It represents the operatives ability
to hit targets at long range. This
skill is similar to Assault, except
that this skill is only used when your
weapon is zoomed in.
Stealth: This skill determines how
much noise an operative makes while
walking. While other factors also
figure into the equation, the stealth
skill is important. If you need an
operative to be able to sneak up on
the enemy, make sure they have a high
stealth skill level.
PROFILE TRAITS
Profile Traits represent the character of the operative. Unlike skills
which are learned, traits are both
learned and inherent. They tend to
reflect the physical and psychological make-up of each operative.
Aggression: This trait determines the
basic nature of the operative and only
comes into play when he or she is controlled by the computer and “snaps”
(See self control). The more aggressive the operative, the more likely he
or she will use extreme force when
under pressure, possibly hurting a
hostage with stray fire. On the other
hand, a passive operative may seek
cover or panic.
Leadership: Leadership is the trait
you look for in determining a team
leader. A team leader’s leadership
level affects the self control level
of the others in the same team; for
good or bad. Always put good leaders
in charge of each of your teams.
Self Control: This trait determines
how well the operative handles the
pressure and stress of combat. The
higher the level, the less likely the
operative will “snap” or panic. If an
operative does snap, his or her
aggression level will dictate how
they react.
Stamina: Some people are tougher than
others. Stamina determines how many
wounds an operative can receive
before becoming incapacitated. The
greater the stamina level, the more
damage they can take and keep going.
Electronics: This skill determines
the speed with which an operative can
manipulate electronics. This can
4-7
WWW.REDSTORM.COMRAINBOW SIX
4-8
WWW.REDSTORM.COMROGUE SPEAR
Page 24

PLANNING PHASE: KIT SELECTION
PLANNING PHASE: KIT SELECTION
KIT SELECTION
The Kit Selection screen is where
you arm and equip your operatives. Always go through each
operative’s kit to make sure it
contains the correct items for
the mission.
Once you have decided which operatives to use for the current mission,
it is time to assign them weapons and
equipment. This, along with the uniform, comprises the operatives “kit.”
While each specialty has its own
default kit, you can and should customize each operative’s kit for the
tasks he or she must perform during
the current mission. For example, if
an operative must breach a door during a mission, make sure he or she has
a breaching charge or other way of
accomplishing the job.
In Rogue Spear, each team member has
four inventory slots: primary
weapons, secondary weapon and special
slots one and two. The primary weapon
can be a submachine gun, assault
rifle, sniper rifle or a shotgun.
Secondary weapons are always pistols.
The two slots can be filled with
grenades, breaching charges, heartbeat sensors, binoculars, special
kits or extra magazine for the
firearms. For more information on
each weapon and equipment item available, see the Weapons and Equipment
section later in this manual.
The Kit screen consists of a list of
the operatives on the left. In the
middle is a picture of a uniform and
the weapons and equipment slots are
located on the right. To customize an
operatives kit, first select the
operative by clicking on his or her
name to highlight it. Then click on
the box of the item you wish to
change. A window will appear listing
all the choices to replace that item.
To select the new item, click on it.
To close the window and keep the new
item, click on the button with the
check mark. To close the window and
cancel the change, click on the button with the “X”. To assign the item
to all operatives, click on the button with the two arrows pointing to
the left.
Assign to all operatives
Select item by clicking on images.
Primary & Secondary Weapons
In the case of the primary and secondary weapons, you can also choose
the type of ammunition. Pistols, submachine guns, assault rifles and
sniper rifles can fire either Full
Metal Jacket (FMJ) or Jacketed Hollow
Point (JHP). FMJ is better at penetrating body armor and for use at long
range. JHP is most effective at close
range against targets without body
armor. Shotguns have three choices:
.00 Buckshot, Slugs or Rubber Batons.
The SPAS 12 cannot use Slugs. Buckshot
is best for targets without body armor
and for breaching doors. However, it
usually takes a couple of shots to
drop a terrorist. Slugs will drop a
terrorist with a single shot.
However, they do not have the spread
of buckshot. Rubber Batons are primarily used for training. They are
best used when you have to capture
someone or when you are concerned
about possibly hitting a hostage near
a terrorist. In most cases, you should
stick with FMJ and Buckshot. However,
change the ammo if the situation calls
for it.
The buttons at the bottom left of the
screen provide some additional
options. Here you can assign the current kit to all the operatives or
Save/Load a kit. Once you have gone
through a few missions, you will have
found several kits which fit your
style of play. Save them to one of the
slots so you can quickly assign them
to operatives in future missions.
To Save your current user kit, click
on the Save button in the lower left
corner. A window will appear with ten
boxes numbered 0 to 9. Click on one of
these boxes to save the current user
kit to that slot. This kit can then be
accessed during any of the missions in
the campaign.
4-9
WWW.REDSTORM.COMRAINBOW SIX
4-10
WWW.REDSTORM.COMROGUE SPEAR
Page 25
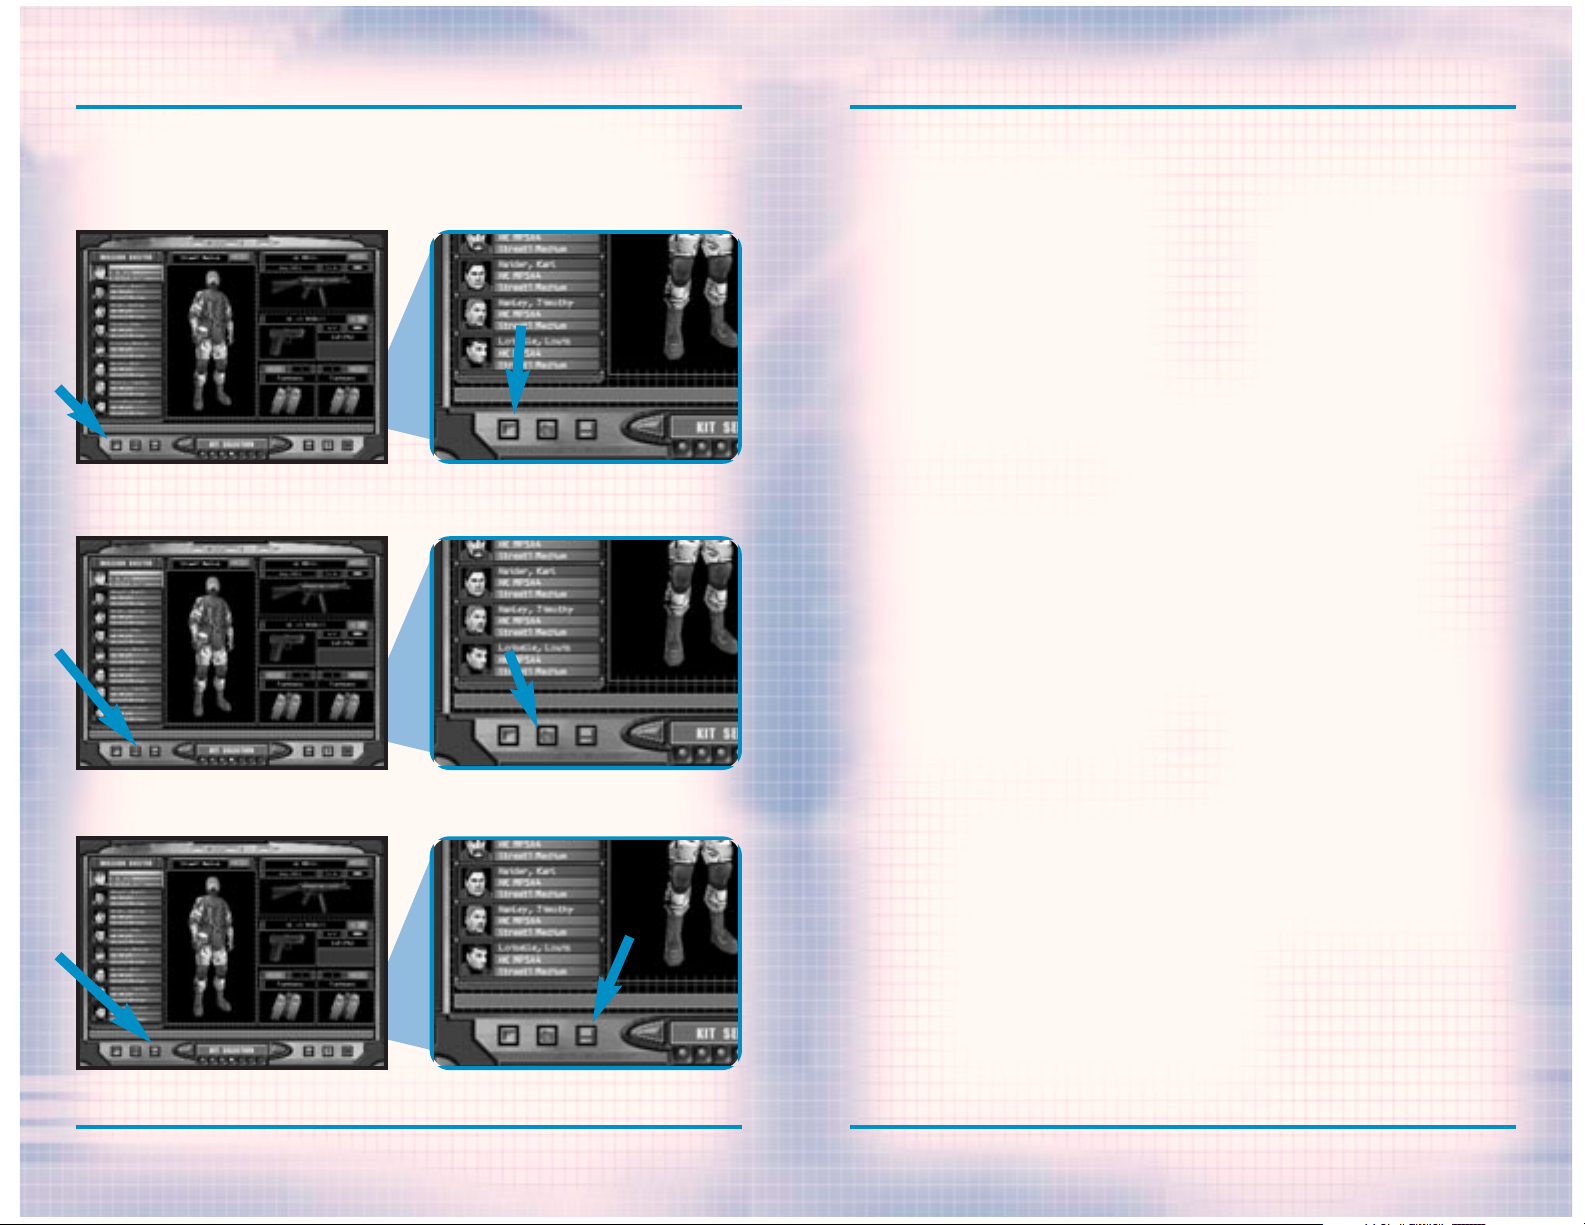
PLANNING PHASE: KIT SELECTION
To Load a user kit previously saved, click on the Load button to open a window. Then click one of the ten boxes to choose the desired kit.
Assign kit to All
NOTES
Load User Kit
Save User Kit
4-11
WWW.REDSTORM.COMRAINBOW SIX
4-12
WWW.REDSTORM.COMRAINBOW SIX
Page 26

PLANNING PHASE: KIT SELECTION
SAMPLE KITS
Following are five sample kits based on the tasks to be performed by the
operatives. These are not necessarily the default kits used in the game.
PLANNING PHASE: KIT SELECTION
THE RECON KIT
The basic recon kit sacrifices everything in favor of stealth and surveillance. Operatives with this kit
should be used to locate the enemy or
hostages for other fire teams. Their
weapons are mainly for self-defense.
However, this kit can also be used by
operatives with the task of quietly
clearing the way for others. For example, quietly eliminating the terrorist guards outside a building so the
breaching and assault teams can set up
and enter without giving those inside
advance warning.
Location/Type Equipment Uniform
Light (pattern depending on terrain
and area of operations) Primary
Weapon MP5SD5 Secondary Weapon 92FS
9mm-SD Slot One Heartbeat Sensor
Slot Two Binoculars (outdoors)
THE ASSAULT KIT
This is the basic type of kit you will
use for most missions. The composition of this kit assumes you will be
making an attack on an enemy, which
has set up defenses or barricades and
is expecting some type of assault. As
a result, mobility and speed are just
as important as firepower. While protection is heavier than the Recon kit,
it comes second to the ability to move
quickly. For indoor missions, a submachine gun is used while an assault
rifle is better for outdoor missions
where range is often longer and the
length of the firearm is not as critical.
Location/Type Equipment Uniform
Medium (pattern depending on terrain
and area of operations) Primary
Weapon MP5A4 (inside), G3A3 (outside)
Secondary Weapon .45 Mark 23 Slot One
Flashbangs Slot Two Frag Grenades
THE SNIPER KIT
Snipers operate a little differently
than other operatives. Therefore, a
sniper kit combines stealth with the
ability to strike hard at long range.
The sniper must be able to get into
position without being detected.
Therefore the kit is somewhat similar
to the recon kit with light armor. A
silenced pistol provides the sniper
protection while moving to a sniper
perch.
Location/Type Equipment Uniform Light
(pattern depending on terrain and
area of operations) Primary Weapon
PSG-1 Secondary Weapon .40 USP-SD
Slot One Extra Primary Magazines Slot
Two Empty
THE BREACHING KIT
This is the basic kit for breachers;
the operatives responsible for blowing open doors. Since they are out in
front of the other teams and likely to
take fire from terrorists, they wear
heavy uniforms capable of stopping
rounds up to rifle caliber. A shotgun
is necessary for blasting through
doors with a large caliber pistol for
use against terrorists. In addition,
one or two breaching charges are carried depending on the number of doors
to be blasted. Grenades or flashbangs
can be carried to help prepare a room
for entry by assault operatives.
Location/Type Equipment Uniform Heavy
(pattern depending on terrain and
area of operations) Primary Weapon
SPAS-12 Secondary Weapon .50 Desert
Eagle Slot One Breaching Charge Slot
Two Frag Grenades
4-13
WWW.REDSTORM.COMRAINBOW SIX
4-14
WWW.REDSTORM.COMROGUE SPEAR
Page 27

PLANNING PHASE: TEAM
PLANNING PHASE: TEAM
TEAM
The commander of each fire team
should have strong leadership
skills as well as good assault
skills since he or she will be in
the front of the team.
The Team Assignment screen is where
you divide your operatives into fire
teams. You can have up to four different teams and each team can contain
up to four operatives from the total
pool of eight. You can form two fourman teams, four- two man teams or anything in between. It is always a good
idea to have at least two operatives
in a team since sending a lone operative in without backup can be dangerous.
Note: You do not have to use
eight operatives.
To assign an operative to a team,
first click on their name in the list
on the left to highlight it. Then
click on the Add button above the
appropriate team window. The order of
the operatives in each team window,
from top to bottom, represents their
position in the team. The top name is
the team leader. Each subsequent
operative comes next in the team formation during the Action Phase. So the
last name in the team window will be
the operative bringing up the rear.
If you want to change the team leader,
highlight the operative’s name on the
list to the left, then click on the
Promote button above the team window.
To move operatives to a different
team, highlight the operative and
click Add on the team you want them to
join. Once all operatives have been
assigned to fire teams, it is time to
go the Planning screen.
PLANNING
The Planning screen is the heart
of the Planning Phase. It is here
you give orders to all of your
teams and instruct them what to
do during the mission.
The old adage “To fail to plan is to
plan to fail” is extremely appropriate to Rogue Spear. The Planning
screen is where you give orders to
each of your fire teams as to what
they must do and how they will do it
during the mission. Since you can only
be in control of one team at a time,
you should make the plan as complete
and comprehensive as possible. In
other words, each and every team
should be able to complete their
assigned tasks without being under
your direct control. However, you can
also make a plan as simple as you
want.
The Planning screen is divided into
three main areas: the Map Orders Menu,
the Map, and the Map Controls.
RECON
“Recon” is the first tab. Prior to any
deliberate assault, real world
hostage rescue teams will have gathered as much data as possible on the
locations of terrorists and hostages
within the operational area. This
information is collected by observer
posts, the placement of spike mikes,
fiber optic cameras, and even by using
millimeter wave radar that render
exterior walls essentially invisible
to the scanning source. Since the
focus of Rogue Spear is on the assault
itself, not intelligence gathering,
these types of operations have been
simulated for you.
Click on the “Recon” tab to bring up
the recon menu. This lists four different types of information you can
learn about the map. There are four
radio buttons along the lower left
side. Click on one of them to select
a topic. Once a topic is chosen, then
use the arrows to scroll through the
related items on the map.
4-15
MAP ORDERS
The menu on the left side of the
screen is the Map Orders menu. At the
top of the menu are three tabs which
change what is displayed on the menu.
WWW.REDSTORM.COMRAINBOW SIX
The first topic is Hostages.
Scrolling through this topic shows
you the locations of all the hostages.
The hostage symbol on the map is a
white broken square around a colored
dot. A green dot represents a primary
hostage. A blue dot represents a host-
4-16
WWW.REDSTORM.COMROGUE SPEAR
Page 28
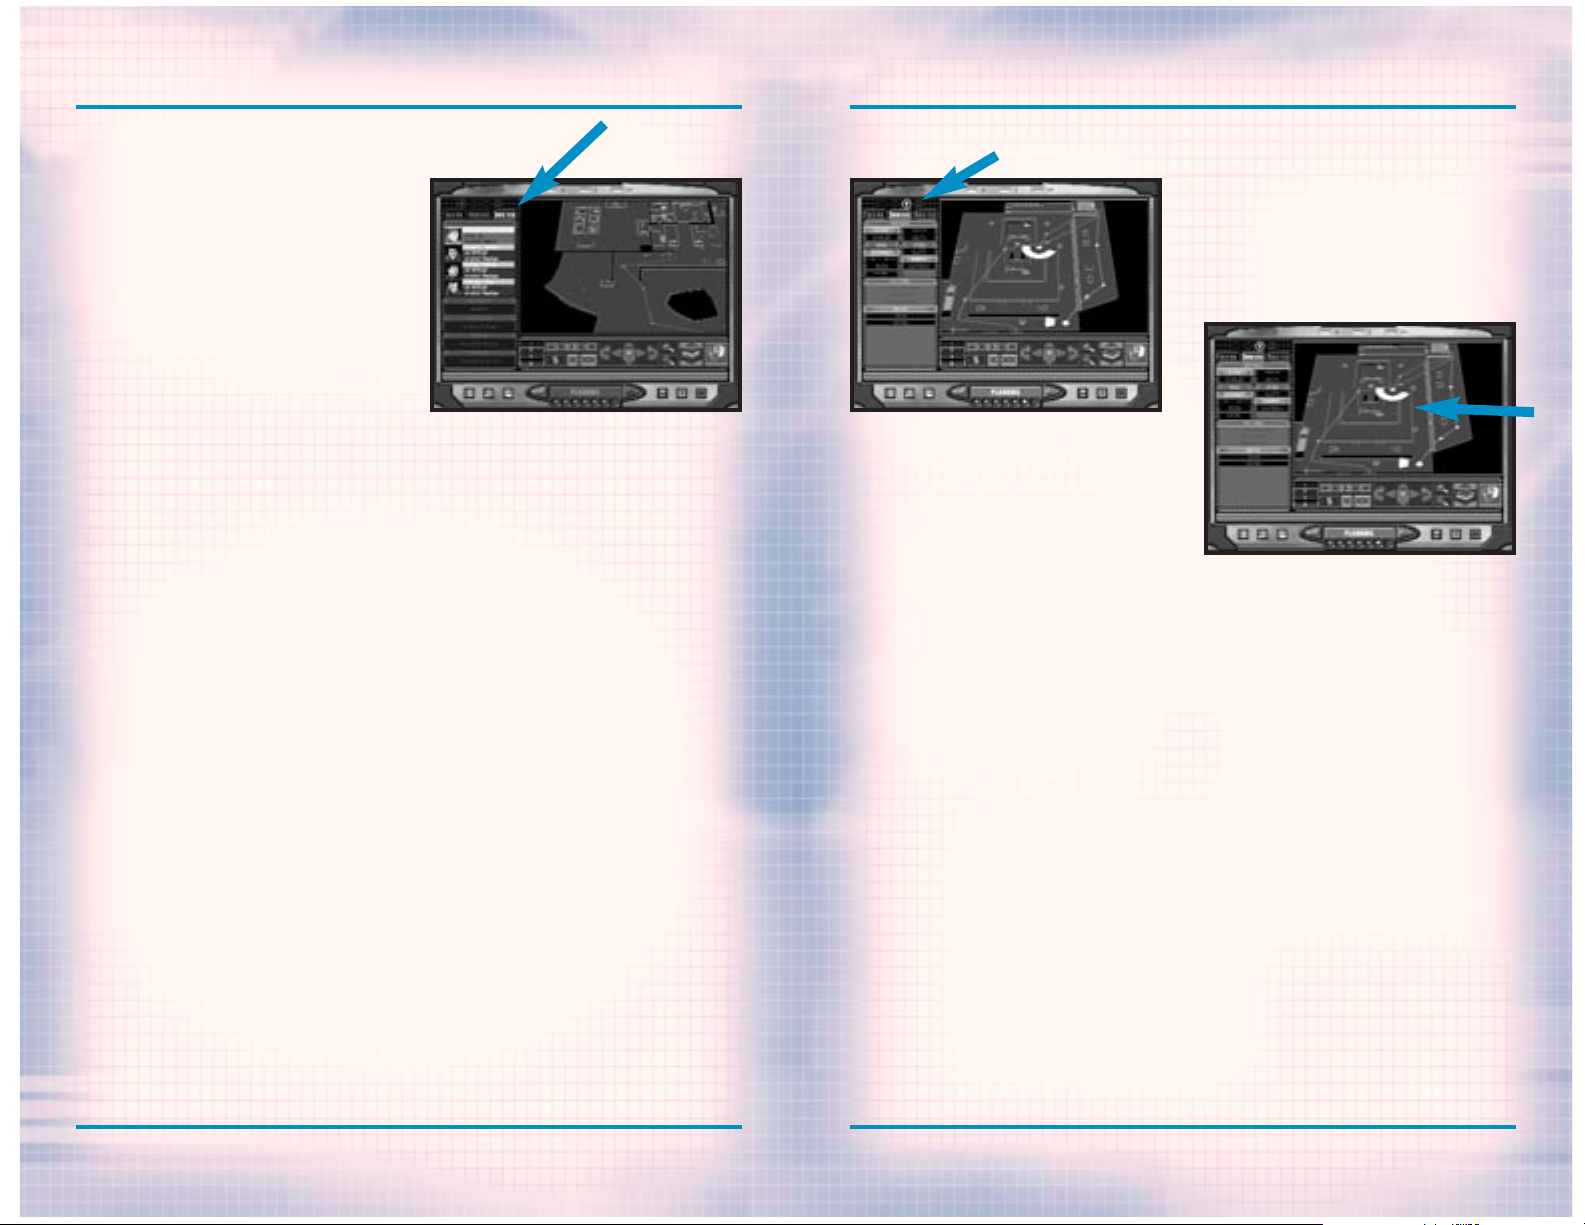
PLANNING PHASE
PLANNING PHASE
age is nearby, but not necessarily at
the exact location on the map.
The second topic is Terrorists. Never
rely solely on this information.
There are often many more terrorists
than those shown on the map.
Terrorists are represented by crosses. Red crosses show the exact location of terrorists while yellow
crosses show a terrorist may be in the
area.
The next topic is Landmarks.
Scrolling through this shows you
important features on the map. The
light blue rectangle on the map is the
insertion zone. There can be more than
one. All of your operatives must begin
in one of the insertion zones. The
white rectangles are the extraction
zones. In order to complete hostage
rescue missions, you must escort the
hostages or all of your team to the
extraction zone. Landmarks also show
the location of objective items such
as bombs with a yellow square on the
map.
The final topic on the recon menu is
Legend. This merely shows what all the
symbols on the map represent such as
ladders or stairways. If you are not
sure what something is, go to the
Legend to find out.
ROSTER
The “Roster” tab brings up a list of
the currently selected fire team. It
shows each of the team members as well
as the weapons and equipment they are
carrying. To change teams, click on
the appropriately colored triangle
above the map orders menu.
ORDERS
When actually giving orders to your
teams, you will use the “Orders” tab.
It will be discussed a bit later.
PLOTTING MOVEMENT
To begin giving your teams orders,
first select a colored triangle in the
upper left corner to choose a team.
Movement is plotted on the map by
using waypoints to create a path for
the team to follow. Start off by placing the first waypoint in an insertion
zone with a left mouse click. Then
click on the map at another location
where you want the team to go. When
the second waypoint is set, a line
will automatically be drawn connecting them. For each waypoint, you can
assign actions associated with that
point such as changing the “Rules of
Engagement” Mode and Speed, Go Codes
or Special Actions. These are chosen
on the Orders menu and will be discussed in greater detail later.
area such as a hallway or corridor, it
can be hard to differentiate between
the paths. Therefore, turn off the
paths for those teams you are not currently plotting.
WAYPOINT CONTROLS
To the right of these lines are the
waypoint controls. The number is the
designation for the current waypoint.
The arrow buttons above it allow you
to do the following in order: return
to the first waypoint, go back one
waypoint, play through the waypoints,
advance one waypoint, and go to the
final waypoint. The play button is a
good way to review the movement for a
team because it begins with the current waypoint and advances slowly one
waypoint at a time to the end. The
button with the “X” deletes the last
waypoint placed while the button with
the “XX” deletes all waypoints
assigned for the team.
4-17
Below the map are the Map Controls. On
the left side are four colored lines
with arrows. When these are highlighted, the paths for the correspondingly colored team will be visible on the map. Clicking on these
lines turns the path off. When you
have several teams traversing a small
WWW.REDSTORM.COMRAINBOW SIX
4-18
WWW.REDSTORM.COMROGUE SPEAR
Page 29

PLANNING PHASE
PLANNING PHASE
MAP CONTROLS
The next control box allows you to
move the map forward, back, left,
right and rotate it clockwise or counterclockwise. You can also zoom in and
out.
When you place a waypoint on a ladder
or stairway, the map automatically
changes to the next level to show the
path going either up or down.
GO CODES
Go Codes are a means of controlling
the timing and execution of multiple
fire teams. By default, each waypoint
is not assigned a Go Code. In the
absence of Go Codes, a team will
advance from one waypoint to the next
all the way to the final one without
pause. By assigning a Go Code to a
waypoint, you order the team to pause
there until you give it the order to
continue. The four Go Codes can be
assigned to the current waypoint by
clicking on one of them in the Orders
menu. You can choose from Alpha,
Bravo, Charlie or Delta.
Think of Go Codes as stoplights. They
all begin red and stop teams when they
get to them. During the Action Phase,
you can issue Go Codes to momentarily
“turn the light green” and let the
team advance towards the next waypoint. However, the issued Go Code
only lets those teams currently waiting for it to advance. If another team
is not yet waiting at a waypoint with
the same Go Code, you must give it
again when they arrive for them to
continue on. This allows you to use
the same Go Code more than once during a mission.
simultaneously. After going through
the building and rescuing the
hostages, order all teams to wait for
Go Code Delta before leaving. By the
time all the teams are waiting for
this final Go Code, the path to the
extraction zone is clear and all teams
will leave at the same time. The different ways of using Go Codes is limited only by your imagination.
Whatever you do, try to keep it simple enough for you to remember what
each code does during the mission. In
complex plans, you may want to write
down the Go Codes and when to issue
them during the Action Phase.
The next box to the right allows you
to change levels. Some maps contain
several stories. This control lets
you examine and plot movement on all
of them.
By clicking on the box on the far
right, you can bring up a three dimensional view of the map. You cannot
plot waypoints in this view, but it
helps you translate the two-dimensional blue print maps into what the
area looks like in the real world.
There are three buttons located along
the bottom left of the screen. The
leftmost swaps the map between the left
and right sides of the screen. The middle button toggles the Map Orders menu
on and off. The right button toggles
the Map Controls on and off.
4-19
WWW.REDSTORM.COMRAINBOW SIX
How you use Go Codes is up to you. One
option is to use a different Go Code
for each team. On the other hand, each
Go Code could mean different things.
Here is an example of using Go Codes.
All four of your teams have been given
orders to enter a building from four
different doors. Since you want all to
enter at the same time, assign Go Code
Alpha for each team at the waypoint
next to their door. Without these, the
teams would just barge in as soon as
they got to their door instead of
waiting for the rest. Once all teams
are in position, the Go Code would be
issued and all teams would enter
4-20
WWW.REDSTORM.COMROGUE SPEAR
Page 30

PLANNING PHASE
RULES OF ENGAGEMENT
As mentioned earlier, you can tell
your teams how to act as they advance
through the waypoints. This is done
from the Orders menu and consists of
Mode and Speed. The Mode instructs the
team what to do and the Speed how fast
to do it. There are four Modes.
Assault: This is the default mode
teams will use during a mission. The
team will engage any terrorists they
come across during their movement.
They will also spread out after entering small rooms and automatically
clear them if feasible.
Infiltrate: This mode orders the team
to only engage terrorists in their way
from one waypoint to the next. The
team will use silenced weapons if
available. The goal of the team in
this mode is to get to the next waypoint as quickly and quietly as possible.
Recon: Teams in this mode will only
return fire when they have been first
engaged by terrorists. As with
Infiltrate, the team will use
silenced weapons if available. Any
computer controlled operatives
equipped with Heartbeat Sensors will
bring them out and use them in this
mode. Be careful not to have all the
operatives in a team equipped with
these sensors while in this mode or no
one will have their weapons ready.
Operatives in this mode will move in
a crouched position.
Escort: This mode is similar to
Assault except teams must be in this
mode in order to get hostages to follow them. Otherwise the hostages will
just stay put. The hostages will continue to follow the team as long as
their mode remains Escort. Before
leading hostages out to the extrac-
tion zone, be sure the path is clear
of terrorists or they may shoot the
hostages before you can get them to
safety.
In addition, to the four modes, you
can also set the speed at which they
move. Speed takes into account not
only how fast the team moves, but also
the amount of risk they take in
regards to combat. There are three
Speeds.
Blitz: Teams in this speed run between
waypoints and maintain a tight formation. They will also fire much quicker than in other modes which can lead
to wild shots. This mode can be dangerous to hostages or other teams in
the area. Therefore be careful where
you use it.
Normal: This is the default speed.
Teams in this speed walk from waypoint
to waypoint and maintain a more open
formation. They also use a little more
care when using firearms.
Cautious: Teams in this speed walk as
they advance and make frequent pauses
to look around and make sure everything is clear. They also maintain an
open formation. Operatives will pause
and take careful aim before firing.
While this may seem the safest speed,
the pause may give terrorist the
chance to fire first at either the
team or the hostages.
SPECIAL ACTIONS
Depending on the location or condition
of a waypoint, you can order a team to
perform special actions while there.
There are six main special actions
listed in the bottom half of the
Orders menu. These actions only become
available whey you can complete that
action. The first three require the
waypoint to be situated near a door or
doorway. The next three require a Go
Code assigned to the waypoint. There
can also be additional special actions
dependent on the mission.
Flashbang Room: This special action
orders the team to toss a flashbang
into a room after the door is opened
but before the team actually enters.
This action can also be given at
entranceways without doors. The
flashbang does not usually cause damage to the hostages or terrorists in
the room. Instead, they blind and
momentarily stun or distract whoever
is in the room and give your team a
few crucial seconds to enter the room
and take down the terrorists. Unless
you need to be quiet, it is a good
idea to flashbang just about every
room containing a terrorist, especially those containing hostages.
Whenever using flashbangs, be careful
not to look at it when it detonates or
your operative will be stunned. His or
her vision (your view) will be
impaired and your firearms accuracy
will be temporarily reduced. This can
only be issued when near a door.
Frag Room: This special action is similar to the above except the team
throws a fragmentation grenade into
the room. This can kill or wound the
occupants of the room, so do not use
this if a hostage is present. A frag
grenade is also not a sure kill. If
the terrorists in the room see the
grenade come in, they may duck behind
something for cover or even run out of
the room. This also applies to flashbangs. Therefore, keep your firearms
ready and still use caution while
entering the room. Even if the frag
grenade does not hurt the terrorists,
it will often still stun them. This
can only be issued when near a door.
Breach Door: This special action
orders a team to place a breaching
charge on a door and then detonate it
to break in. If a Go Code is also
assigned to the waypoint, the team
will place the breaching charge as
soon as they arrive, but not detonate
it until the Go Code is issued.
Breaching charges act like a flashbang, stunning those in the room. It
can also kill or wound persons standing next to the door when it detonates. Therefore, if you use it to
enter a room containing hostages,
make sure they are not near the door.
If a team must get through a locked
door and they do not have a breaching
charge or have not been ordered to use
one, they will use a shotgun to shoot
the lock until it opens. If none of
the operatives are carrying a shotgun
or a breaching charge, they will use
alternate methods depending on your
Rate of Engagement. This can only be
issued when near a door.
Snipe: While this special action is
generally for use by snipers, it can
in fact be given to a team without any
of these specialists. Snipe can only
be assigned at a waypoint with a Go
Code. It basically orders the team to
halt and begin sniping. Once you click
on the Snipe button in the Orders
menu, you must then right-click on a
position on the map. This will
instruct the sniper to take aim
towards that point. During this
action one of the team members will
always defend the sniper(s).
4-21
WWW.REDSTORM.COMRAINBOW SIX
4-22
WWW.REDSTORM.COMROGUE SPEAR
Page 31

PLANNING PHASE
PLANNING PHASE
A sniper team should usually consist
of a sniper and another operative for
security. However, snipers can operate individually or even in larger
teams. If a team without a sniper
rifle is given the Snipe action, then
the operative with the highest sniper
skill level will use his or her primary weapon instead.
Cover: This special action directs
the team to cover a 180 degree arc.
After clicking on the Cover button,
right click on the map to designate
the point of focus for the team. If
the team consists of a single operative, he or she will sweep across the
arc looking for terrorists. With more
operatives, they will divide the arc
so each sweeps a smaller part. The
team crouches while covering.
Defend: Similar to the cover special
action, defend orders the team to
cover all approaches to the team’s
location or 360 degrees. The team members will crouch and try to find some
type of cover for protection.
Additional Special Actions: Depending
on the mission, there may be other
special actions. These can include
disarming a bomb or planting a bug.
These will become available when the
team’s waypoint is adjacent to the
objective such as a bomb or a phone or
a computer.
SAVE/LOAD PLAN
When you are satisfied with your plan,
be sure to save it using the Save/Load
Plan button in the lower right. This
allows you to come back to this plan
later. If your mission fails, you
probably will have to make a few minor
changes to the plan. To save a plan,
click on the Save/Load Plan button.
Rename the file listed at the top of
the window and then click on Save. To
load a plan, highlight one of the
plans by clicking on it in the list,
then click on Load.
WATCH MODE
Rogue Spear also includes an option
where you can observe the entire mission instead of actively taking part.
This is the ultimate test of your
planning abilities. To choose Watch
Mode for the mission, click on the
button in the lower left of the
Execute screen.
EXECUTE
The Execute Screen is a summary
overview of your plan. It also
allows you to select which team
you command when the mission
begins.
Now go to the Execute screen. It contains a brief summary of your mission
plans by listing the four teams and
the operatives in each. By clicking on
one of the teams, you highlight the
team and select it as the team you
begin in control of at the start of
the mission. No matter what team you
choose here, you can also switch
between teams in the mission.
When you are ready to begin the mission and go to the Action Phase, click
on the right arrow at the bottom. A
dialogue box will pop up to verify you
actually want to go to the Action
Phase. Make your decision and get
ready to go.
4-23
WWW.REDSTORM.COMRAINBOW SIX
4-24
WWW.REDSTORM.COMROGUE SPEAR
Page 32

5-0
WWW.REDSTORM.COMROGUE SPEAR
ACTION
PHASE
Page 33

ACTION PHASE: INTERFACE
5-2
WWW.REDSTORM.COMROGUE SPEAR
ACTION PHASE: INTERFACE
5-1
WWW.REDSTORM.COMRAINBOW SIX
Once you actually enter the mission, all action takes place on
this screen.
The Action Phase is where you actually execute the plan created during
the Planning Phase. It begins with
the teams positioned at their insertion zone and ends when all the objectives have been completed, the mission is a failure or you abort the
mission. This phase of Rogue Spear is
real-time and you issue commands
using either a keyboard, keyboard and
mouse, or game controller.
Unless you are playing in Watch Mode,
you begin the Action Phase in control
of one of the team leaders. During the
mission you can jump from team to
team; however, you are always in control of the team’s leader. The only
way you can take control of non-team
leaders is if the team leader is
killed or incapacitated and they
assume command of the team based on
seniority.
The screen in the Action Phase is
divided into two parts: the Cinema
Window and the Action Bar.
CINEMA WINDOW
This window displays the view from
the perspective of the operative you
are currently controlling. To change
views, select the “Change Field of
View” key. As you shift between
teams, the view will change to whatever the new operative can see. You
can play Rogue Spear in either first,
third person, or cinematic view. In
first person view, you are looking
through the eyes of the operative.
This is the default view and the one
you will most often use during missions. Third person view puts you
behind the operative so he or she is
centered on your cinema window. This
view is good for moving across difficult terrain where you need to be
careful where you place your feet. It
also provides a wider angle of view.
The third perspective is a cinematic
view only usable during Replays or as
an observer in Multiplayer games.
This perspective makes it difficult
for controlling an operative because
it removes the reticule. However it
is great when using Watch Mode.
TARGETING RETICULE
In the center of the cinema window is
a small, red icon, which represents
your targeting reticule. Unlike other
games, the targeting reticule in
Rogue Spear does more than just show
you where your gun is pointing. It
also shows the accuracy level.
Submachine Gun and Pistol
Reticule
Shotgun Reticule
Sniper Reticule
Assault Rifle Reticule
The center of the icon represents the
aiming point of your selected weapon.
While this is what you use to aim your
weapon by placing it over the target,
it does not actually show you where
the bullets will hit. As you move your
operative, notice how the four little
lines, called your Accuracy
Indicators, move away from the center, then back towards it. The
Accuracy Indicator represents the
spread area. When you fire a weapons,
the bullets will hit somewhere within
the spread area. The size of the
spread area is determined by a number
of factors. Let’s take a look at them.
The fundamental size of the spread
area is determined by the skill of the
operative and the base accuracy of
the weapon. This is used as a baseline for all further modifications.
The higher the firearms skill level
of the operative, the smaller the
spread area. The reticule cannot
become smaller than the baseline
size. But it can become much larger
based on a number of factors. These
factors can be broken down into two
types: constant and pulsed.
Constant reticule modifiers affect
the base or current size of the spread
area by a constant percentage as long
as the state or action causing the
modifier is in effect. There are four
constant modifiers.
MOVEMENT:
The faster an operative moves, the
larger the reticule modifier. As long
as the operative moves forward in a
straight line, the spread area does
not grow very much. However, as soon
as the operative begins to rotate or
turn, the spread area increases dramatically. Once the movement stops,
the spread area will return to its
normal size. The higher the operative’s skill level, the quicker the
return to normal.
STANCE CHANGE:
Changing from standing to crouching
or vice versa momentarily increases
the size of the spread area.
FATIGUE LEVEL:
High fatigue levels globally increase
the normal size of the spread area for
the remainder of the mission. This
also affects how quickly it returns
to its normal size when the operative
stops to take careful aim.
Page 34

ACTION PHASE: INTERFACE
5-4
WWW.REDSTORM.COMROGUE SPEAR
ACTION PHASE: INTERFACE
5-3
WWW.REDSTORM.COMRAINBOW SIX
TARGETING RETICULE (CONTINUED)
HEALTH LEVEL:
Wounds affect the normal size of the
spread area. The more wounded the
operative, the larger the spread
area. This effect lasts for the
remainder of the mission.
Pulsed reticule modifiers have a onetime, pulsed effect on the current
size of the spread area.
FIRING:
Firing a round causes the spread area
to increase slightly in size. This
reflects the inherent difficulty in
firing multiple rounds accurately. To
see this effect, fire a primary
weapon on full automatic and watch as
the spread area increases with each
successive round fired.
TAKING HITS:
Being physically hit by anything,
whether it be a round, shrapnel or a
physical blow, momentarily increases
the size of the spread area proportionally to the size of the hit. This
is in addition to the modifier for
wounds. Even if a round or shrapnel
does not cause a wound because it is
stopped by body armor, the hit modifier will still apply.
FLASHBANGS:
Observing a flashbang detonate will
cause a large increase in the size of
the spread area. After a few seconds,
it will return to normal.
MAP WINDOW
The Map can be expanded from the
mini-map on the Action Bar to
full screen.
This map view is centered on the currently selected team and is similar
to the map in the Planning Phase. The
top of the map is the direction your
operative is facing. Use this map to
navigate through the mission using
the lines connecting the waypoints.
This can save you a lot of time and
keep you from getting lost in large
buildings with lots of rooms. The map
can be zoomed in and out as well as
expanded to full screen. You can also
display a separate map for each team
by using the four map mode of the
action bar.
One of the helpful features of the map
is its ability to show the known location of people. Your operatives are
represented by circles the same color
as the team they are on. The small
line extending from the circle shows
the direction each operative is facing. Once a person is detected by any
of your operatives, either visually
or with a heartbeat sensor, that person is displayed on the map. Hostages
or unknown people appear as white
circles while terrorists are magenta.
Dead or incapacitated persons are
represented by a darker shade of the
appropriate color.
ACTION BAR
The Action Bar is located below the cinema window. It provides all the information you need on your current operative as well as the rest of your teams
during the mission. On the left side of the bar is a mini-map.
Note: map is disabled in resolutions below 640 x 480.
Page 35

ACTION PHASE: INTERFACE
5-6
WWW.REDSTORM.COMROGUE SPEAR
ACTION PHASE: INTERFACE
5-5
WWW.REDSTORM.COMRAINBOW SIX
WEAPONS DISPLAY
Next to the map is the weapons display. An illustration of the active
firearm or equipment appears at the
top. Below it is the name of the
weapon and the type of ammunition it
is using. On the left side of the
illustration is a graphic showing the
rate of fire selection for firearms.
This shows how many rounds will fire
when the fire button is pressed.
Depending on the firearm, you can
select single shot, three round burst,
full automatic or safety, which prevents the weapon from firing.
On the bottom left of the weapons display are two number boxes. The top box
lists the number of rounds remaining
in the current magazine. The bottom
box lists the number of extra magazines the operative is carrying.
Remember, this does not include the
magazine in the gun. It is always a
good idea to keep your loaded magazine two-thirds full before heading
into an area where you can encounter
terrorists. You don’t want to run out
in the middle of a firefight. When you
replace a partially full magazine,
you do not lose it. Instead, when you
run out of full magazines, you can
then load the partially full magazines back into your firearm.
The four silhouettes at the bottom of
the weapons display show what the
operative is carrying. From left to
right they represent the primary and
secondary weapons and slots one and
two.
ACTIVE TEAM DISPLAY
The next window over is the active
team display. This contains a large
portrait of the operative you are
controlling as well as smaller portraits of the other operatives in the
team. Next to the portraits are the
names and specialty of each operative
as well as a heartbeat enunciator.
The latter shows the health of the
operative.
HEALTHY:
indicated by a green colored slot and
a functioning heartbeat. The heartbeat changes according to the level
of exertion of the operative.
WOUNDED:
indicated by a yellow slot and a functioning heartbeat.
INCAPACITATED:
indicated by an orange slot and a
barely functioning heartbeat.
DEAD:
indicated by a red slot and a flatlined heartbeat.
At the bottom of the display are three
boxes which list the team’s current
mode, speed, and whether it is on
hold.
ALL TEAMS DISPLAY
Located on the right end of the Action
Bar, this display lists all of the
teams in the mission. The text box
lists what the team is currently
doing or if they are waiting for a Go
Code. To the left of the text box are
little slots. Each represents one of
the operatives in the team and the
color is their health using the same
code listed above. Three yellow
chevrons appear to the right of the
team you are currently in control of.
Below the teams list are two indicators which can light up. The one with
the hand lights up when the All Hold
command is given. This orders all
teams to halt what they are doing and
stay put. The other one, with the targeting reticule, is the Sniper control. When it is illuminated, all
snipers are activated and will fire
at any targets that come into their
sights. By default, this is set to
off. This allows you to get all of
your other teams into position before
the snipers start picking off terrorists.
ORDERS MODE
The Orders Mode allows you to
order your team to perform special actions and use the mouse to
change Modes, Speed and issue Go
Codes.
By pressing the Orders Mode key, the
Action Bar changes and your control
over the current operative ceases
while you gain control over a cursor.
From the new menus which appear, you
can issue Go Codes or toggle All Hold
and Sniper activation functions. You
can also change the current team’s
Mode and Speed using the mouse rather
than the keys. What really makes this
nice is the ability to order special
actions during the mission.
Page 36

ACTION PHASE: CONTROL
5-8
WWW.REDSTORM.COMROGUE SPEAR
ACTION PHASE: INTERFACE
5-7
WWW.REDSTORM.COMRAINBOW SIX
ORDERS MODE
Since a mission does not always go as
planned, the Orders Mode allows you
give instructions to operatives who
are not team leaders during the
Action Phase. For example, if you
come across a room you want to flashbang and you are not carrying any,
just position your operative near the
door and go to the Orders Mode. There,
click on the Flashbang Room button
and one of the operatives in your
team, carrying a flashbang, will move
forward and throw one in. You can also
order operatives on your team to
throw a frag grenade into a room or
breach a door.
In addition to these actions, teams
can be ordered to Snipe, Cover or
Defend. However, unlike in the planning phase, this order does not have
to be given at a waypoint with the Go
Code. Instead, click on the appropriate selection in the Orders Mode and
the team will hold and begin positioning themselves for the order.
They will stay there until you click
on the Hold order to release them. Use
this when you have to take control of
another team. Use the team leader to
choose the direction the team will
face for the Cover order. For the
Snipe order, zoom the team leader’s
view into Sniper mode and then aim the
targeting reticule at the area you
want the team to snipe at. The Defend
order is non-directional. You do not
have to choose a facing.
Other special actions can be chosen
depending on the mission. If one of
the objectives is to disarm a bomb,
when the team is near a bomb, you can
order a team to Disarm Bomb in the
Orders Mode.
What makes this feature so great is
that you do not have to rely on the
team leader to take care of all the
surprises that arise during a mission.
FIRE AND MOVEMENT
The success or failure of Close
Quarter Battle tactics relies on
properly executed fire and movement.
During the mission, each team maneuvers about on foot. Your operatives
are also restricted to the types of
movement most commonly used by SWAT
and HRT teams. There is no jumping or
running at full speed because the
main concern for operatives at all
times is maintaining control over
their weapon.
There are two basic stances your
operatives can use: crouched or
upright. In the upright stance, your
operative can move faster and maneuver easier. However, he or she also
presents a larger target for the
enemy to detect and then fire at. In
crouched stance, the operative is
harder to detect or shoot at because
of the lower profile. In several missions there are objects which provide
cover to operatives crouched behind
them. While you can run while
crouched, you cannot fire while doing
so. To run, hold down the right mouse
button or other assigned key while
giving movement commands. You can
also move slowly by holding down the
shuffle key.
Corners and doorways can be some of
the most dangerous places during a
mission. Therefore you should use
caution when passing around or
through them. To quickly see what is
around a corner, you can peek. This
limits your exposure to detection as
well as enemy fire. You must still be
careful when peeking. Terrorists
will still see you if they are looking in that direction. When moving
around a corner, face the wall and
sidestep out from behind it. As soon
as any terrorists come into view, you
can get the first shot because you are
already facing them unless, of
course, they are already facing you.
VERTICAL MOVEMENT
Operatives can climb up and down
stairs to change levels just by walking onto them. However, to climb ladders or other objects where hands
must be used, walk up to the object
and press the “manipulate environment” or action key. To let go while
climbing, press the key again. You
cannot use inventory objects or
manipulate other objects while in the
act of climbing.
CONTROLLING YOUR OPERATIVE
While you must keep an eye on what the rest of your teams are doing during the
mission, your main responsibility is to personally lead your team to accomplish
its assigned role. In fact, if you have done a good job planning the mission,
the rest of the teams should be able to accomplish their roles with very little help from you.
Page 37

ACTION PHASE: CONTROL
5-10
WWW.REDSTORM.COMROGUE SPEAR
ACTION PHASE: CONTROL
5-9
WWW.REDSTORM.COMRAINBOW SIX
USING WEAPONS AND EQUIPMENT
The main item you will use during missions is your primary weapon. It is
very simple to use. Just aim the targeting reticule at the enemy and
press the fire button or key. How the
reticule works was discussed earlier
in this section. To change to a different inventory item, press the corresponding key. When using grenades,
the longer you hold down the fire button, the farther you will throw it.
Since you usually do not want to have
a line of sight to a detonating
grenade, flashbang or frag, throw a
grenade while peeking around a corner
or try to bounce the grenade off of a
wall so it lands around the corner.
There are also several other items
you can use during the Action Phase.
Heartbeat Sensor: The heartbeat sensor is a great little device for
detecting terrorists and hostages
without having to put your operatives
into danger. In some missions (usually when terrorists are barricaded
somewhere holding hostages), heartbeats sensors will have been placed
around the building to provide you
with this information automatically.
However, in the rest, you must carry
the heartbeat sensors in yourself. It
is often a good idea to have one operative in each team carry a sensor
unless they will not need it such as
sniper teams. Teams in recon mode
will use the heartbeat sensors as
they advance from waypoint to waypoint. If your operative is carrying
one, you must select it as the current item in order to use it. The sensor detects persons in all directions
for a short distance. However, its
range is increased along a narrow
beam in the direction you are facing.
To get the most out of the sensor,
enlarge the Mini-Map to full screen
and rotate your operative in place to
scan at long range in all directions.
If you can locate a terrorist first,
you can get the drop on him and hit
him before he knows you are even
around.
Demolitions Kit: This kit can be used
by operatives to decrease the amount
of time required to complete tasks
such as disarming a bomb. To use,
press the “manipulate environment”
key or button while next to and facing the object.
Electronics Kit: This kit can be used
by operatives to decrease the amount
of time required to complete tasks
such as deactivating security systems
and planting surveillance devices. To
use, press the “manipulate environment” key or button while next to and
facing the object.
Lockpick Kit: This kit can be used by
operatives to decrease the amount of
time required to pick a lock on a
door. To use, press the ìmanipulate
environmentî key or button while next
to and facing the door.
Binoculars: These can be used to get
a closer look at distant objects and
terrorists. To use, make the binoculars the current item. The “sniper
view” key or button zooms the view in
to 4x and 8x. In addition, the binoculars contain a built-in range finder, which gives you the distance to
the object centered in the view.
These are good to assign to team leaders for scouting out areas before
heading in to assault.
DOORS AND OTHER OBJECTS
During missions, you will have to go
through doors and activate switches
or levers. To open or operate these
objects, walk up next to them and
press the “manipulate environment”
key or button. In the case of a locked
door, your operative must first pick
the lock by holding down the “manipulate environment” key, then press it
again to open it. On the other hand,
you can also breach the door using
breaching charges or a shotgun. These
are discussed in greater detail in
the Training Missions section.
In some missions, you must perform
special actions such as planting surveillance equipment or explosives or
disarming a bomb. While you can give
special action orders to a team during the Planning Phase or with the
Orders Mode, you can also perform
these actions yourself. Just walk up
to the objective and press the
“manipulate environment” key or button.
DYNAMIC TEAM CONTROL
During a mission, things can go wrong
and your plan may fall apart.
Therefore you may have to do more than
just control your operative. This can
involve switching between teams, giving Go Codes, changing modes, etc.
As the team leader, wherever your
operative goes, the rest of the fire
team follows behind. In some circumstances, you may want to leave them
behind and do a quick solo recon.
Press the Hold key and the rest of the
team will stay where they are and
assume a defensive posture. To
release them from the Hold, press the
key again. If they are within visual
range of you, they will join up.
Otherwise, you will have to move back
towards them until they can see you.
The Hold command can also be used to
keep your team from advancing while
you switch to another team. There is
a different command called All Hold.
This orders all teams to hold. Use
this when things start to go wrong to
essentially halt the advance until
you can see what action must be taken.
During the mission, you can use Go
Codes to coordinate the actions of
all your teams. Go Codes must be
ordered during the Planning Phase.
However, you issue the codes during
the mission. The All Teams Display in
the Action Bar will let you know if a
team is waiting for a Go Code. Wait
until all the teams are ready before
giving the Go Code by pressing the
corresponding key.
Some missions may require you to
switch between teams to perform difficult or tricky actions. Or you may
want to take control of another team
while yours is just waiting or providing cover. Switch between teams
using the Next Team and Previous Team
keys. Before leaving a team, make
sure they are either holding or have
orders what to do while you are controlling other teams. You may find it
useful to return to the Orders Mode in
section five of the Action Phase
Interface.
Page 38

NOTES
5-12
WWW.REDSTORM.COMROGUE SPEAR
ACTION PHASE: WATCH MODE
5-11
WWW.REDSTORM.COMRAINBOW SIX
WATCH MODE
At any time, you can switch to Watch
Mode by pressing the “Watch” toggle
key. While in Watch Mode, you can
still switch between teams and change
the camera between first and third
person views. However, you cannot
give any commands or orders except Go
Codes. This is a good way to see how
good your plan was.
ENDING THE MISSION
The Results Screen is where you
can review the statistics for the
mission after it comes to an end.
If you wish to abort the mission at
any time, hit the ESC key. This will
bring up a menu window where you can
quit or perform several other actions
such as go to the Main Menu or the
Options Menu. The Options Menu lets
you remap the keys without having to
exit the Action Phase.
When the objectives have been accomplished, the mission will end as a
success. You will be taken to a
results screen showing statistics for
the mission. If you want to go on to
the next mission in the campaign,
click on the right arrow at the bottom. However, if you are not satisfied because a vital operative was
killed or you lost too many operatives, do not accept the mission.
Instead, click on the left arrow and
choose to replay it.
The mission will also end if all of
your operatives are killed or it is
impossible to achieve your objectives. This could be because a
hostage is killed or a bomb detonated. When this happens, you must
replay the mission. If you choose
Retry Action, you will begin the
Action Phase again. Retry Plan takes
you back to the Planning Phase so you
can make adjustments and modifications to your plan.
At the bottom right of the Results
screen are two buttons that allow you
to save the Replay or to delete it.
When you choose to save, a text box
will appear and request you enter a
name for the Replay file. From the
Main Menu, you can go to the Replay
screen and view your mission at your
leisure. In the real world, Hostage
Rescue Teams spend a lot of time going
over previous missions step by step.
Since no mission is ever perfect,
there is always something to learn
from your mistakes. You can also find
out what worked well and use it for
future missions.
Page 39

ROGUE SPEAR: SOMETHING
1-1
WWW.REDSTORM.COMRAINBOW SIX
VEHICLE INFORMATION DISPLAY
Located in the center of the Mission Setup Interface, the Vehicle Information
Display provides valuable data on each of your combat units, including a
detailed description and 3-D model for every vehicle type.
Note that the Vehicle Information Display is tied directly to the Platoon
Information Panel located on the right of the Mission Setup Interface. As a
result, you may only bring up information on those units available to you for
each mission.
ROGUE SPEAR: SOMETHING
1-1
WWW.REDSTORM.COMROGUE SPEAR
VEHICLE INFORMATION
DISPLAY
Located in the center of the Mission
Setup Interface, the Vehicle
Information Display provides valuable
data on each of your combat units,
including a detailed description and
3-D model for every vehicle type.
Note that the Vehicle Information
Display is tied directly to the
Platoon Information Panel located
on the right of the Mission Setup
Interface. As a result, you may
only bring up information on those
units available to you for each
mission.
PLATOON COMMANDER
INFORMATION DISPLAY
The Platoon Commander Information Display contains background information
on every available unit commander,
including detailed data on their overall capabilities.
Note that the Platoon Commander
Information Display is tied
directly to the Commander
Selector located on the right of
the Mission Setup Interface. As a
result, you may only bring up
information on those commanders
available to you for each mission.
During the Mission Setup Phase, you will also be able to study each individual
unit type available to you then determine how your force will complete the mission at hand. You will also be able to choose a unit commander for each individual combat platoon based on specialties and statistics.
THE MISSION
SETUP INTERFACE
The Mission Setup Interface is segmented into several sections, including an Operations Briefing Display, a
Vehicle Information Display, a Platoon
Comman-der Information Display, a
Platoon Con-trol Panel and an Options
Menu.
PLATOON COMMANDER INFORMATION DISPLAY
The Platoon Commander Information Dis-play contains background information on
every available unit commander, including detailed data on their overall capabilities.
Note that the Platoon Commander Information Display is tied directly
to the Commander Selector located on the right of the Mission Setup
Interface. As a result, you may only bring up information on those
commanders available to you for each mission.
Page 40

7-0
WWW.REDSTORM.COMROGUE SPEAR
WEAPONS &
EQUIPMENT
Page 41

WEAPONS AND EQUIPMENT
7-2
WWW.REDSTORM.COMROGUE SPEAR
WEAPONS AND EQUIPMENT
7-1
WWW.REDSTORM.COMRAINBOW SIX
RAINBOW has a broad assortment of weapons and equipment for use during missions.
It is important to choose the right selections for each operative’s kit so they
have the right tools to complete their assigned tasks during the mission.
HK MP5A4
The preferred submachine gun of
counter-terrorist operatives around
the world, Heckler & Koch’s MP5 is
known for its reliability and accuracy, even when firing on full automatic. RAINBOW uses the 9mm MP5A4 fitted
with single, triple, and full-auto
trigger group.
HK MP5K-PDW
Heckler & Koch’s 9mm MP5K-PDW is a
compact version of the classic MP5.
Its folding stock and light weight
make it an ideal choice when a full
rifle or submachine gun is unmanageable and a handgun is a poor compromise. It is equipped with the single
and full auto trigger group.
HK MP5SD5
Terrorists throughout the world fear
Heckler & Koch’s MP5SD. Its integral
silencer is so effective that the
report of the bullet is miniscule
compared to the click of the bolt
operating. RAINBOW uses the 9mm
MP5SD5 whenever both accuracy and
stealth are essential.
HK MP5/10A2
The HK MP5/10A2 is a product-improved
variant of the venerable HK MP5 chambered for a 10mm round. The increased
stopping power of the heavier round
is offset by increased recoil. It is
equipped with a single and full auto
trigger group.
PRIMARY WEAPONS
HK MP5/10SD
An HK MP5/10A2 equipped with a sound
suppressor gives a nice mix between
power and silence. Because the suppression is not integral (like the
MP5SD), the suppression is not quite
as complete.
HK UMP45
The HK UMP45 is the newest submachine
gun from veteran gun manufacturer HK.
The stopping power of its .45 caliber
round comes at the price of an
increased recoil and lower rate of
fire.
HK UMP45SD
An HK UMP45 equipped with a sound suppressor. Of course, the suppression
is not as complete as the integral
suppressor of the MP5SD. A good
choice when a balance between power
and silence is required.
M4 CARBINE
A compact version of the M-16, the M4
Carbine is commonly used when the
firepower of an assault rifle is
needed, but the weight and size is
not. It is commonly used by US and
Israeli special forces. It comes
standard with a single and full auto
trigger group.
Page 42

ENFIELD L85A1
The Enfield L85A1 (also known as the
Enfield Individual Weapon or SA80) is
the standard infantry weapon of the
British Army. Its bullpup design
trades accuracy for maneuverability.
STEYER AUG
The standard weapon of the Austrian
Army, the Steyr AUG is a futuristic
looking assault rifle with a compact
bullpup design. It is well suited for
missions requiring the maneuverability of a submachine gun combined with
the punch of an assault rifle.
HK G3A3
The G3A3 is Heckler & Koch’s standard
assault rifle. It fires the powerful
7.62mm NATO round. This is the most
accurate assault rifle in RAINBOW’s
arsenal.
G36K
The Heckler & Koch G36K is their latest assault rifle entry. Its compact
design makes it useful in close quarters, while its 5.56mm round will
penetrate most body armor.
WEAPONS AND EQUIPMENT
7-4
WWW.REDSTORM.COMROGUE SPEAR
WEAPONS AND EQUIPMENT
7-3
WWW.REDSTORM.COMRAINBOW SIX
BARRETT MODEL 82A1
The Barrett ‘Light Fifty’ M82A1 was
the first .50 caliber sniper rifle to
achieve widespread use. Its massive
length (1.55m) and weight (13.4 kg)
make it the most accurate sniper
rifle in RAINBOW’s arsenal. Extreme
care should be used in employing this
weapon, as its high powered .50
Browning round can tear through multiple targets just as easily as it can
through an engine block.
PSG-1
Arguably the most accurate off-theshelf sniper rifle available. A
favorite of police forces around the
world, the PSG-1 comes standard with
a 6x sight and fires the NATO 7.62
round.
M16-A2
When extra range or firepower is
needed, RAINBOW turns to Colt’s
M16A2. Tried and true, it’s 5.56 caliber easily pierces Level II body
armor and has the longest range of any
of RAINBOW’s standard weapons. It
comes standard with a single and
three round trigger group.
M-14
The direct descendant of the classic
M1 Garand, the M14 fires a 7.62 round
with extreme accuracy. It has been is
use by the US Army since 1957.
Page 43

WEAPONS AND EQUIPMENT
7-6
WWW.REDSTORM.COMROGUE SPEAR
WEAPONS AND EQUIPMENT
7-5
WWW.REDSTORM.COMRAINBOW SIX
WALTHER WA2000
The shortest sniper rifle used by the
RAINBOW team, the Walther WA2000’s
bullpup design and light weight make
it a favorite of snipers with needing
to move stealthily into difficult
positions. Its powerful .300
Winchester round has more punch than
the more common 7.62 NATO round.
BENELLI M1
Whether used for door breaching or
highly lethal close quarters combat,
a good tactical shotgun is an essential part of all anti-terrorist
teams. RAINBOW uses the Benelli M1
Tactical 12-Gauge, largely because
its superb recoil characteristics
enable a skilled operator to fire
five rounds accurately in less than
one second.
SPAS-12
The SPAS-12 is a fully automatic combat shotgun capable of emptying its
clip in 2.25s. This makes it ideal for
quickly clearing a room of all hostiles.
Page 44

WEAPONS AND EQUIPMENT
7-8
WWW.REDSTORM.COMROGUE SPEAR
WEAPONS AND EQUIPMENT
7-7
WWW.REDSTORM.COMRAINBOW SIX
.50 DESERT EAGLE
The IMI .50 Desert Eagle is a very
powerful handgun. It is capable of
punching through body armor, but has
a limited seven round magazine.
.357 DESERT EAGLE
The smaller cousin of the Desert
Eagle .50, this the IMI Desert
Eagle’s .357 Magnum round packs a
punch capable of punching through
body armor at close range. It carries
a limited eight-round magazine.
BERETTA 92FS 9MM
The Beretta Model 92FS is RAINBOW’s
9mm pistol of choice. Its primary
advantage is low recoil and a large
magazine compared to the bulkier .45.
BERETTA 92FS 9MM-SD
The specially designed sound and
flash suppressor on this Beretta
Model 92FS minimizes weight and
length to maintain accuracy while
boasting an impressive 32dB of sound
reduction. It is the favorite pistol
of for RAINBOW’s recon specialists.
HK .40 USP
Heckler & Koch’s .40 caliber USP is a
favorite among those desiring a balance between size and firepower.
HK .40 USP-SD
This Knight Armament Corp. silencer
provides excellent sound suppression
to the HK .40 USP.
HK .45 MARK 23
The extreme ruggedness, reliability,
and match-grade accuracy of Heckler &
Koch’s .45 Caliber Mark23 ACP has
made it the handgun of choice for all
U.S. Special Forces.
HK .45 MARK 23-SD
The specially designed sound and
flash suppressor on this HK MK23 virtually eliminates muzzle flash and
provides more than 35dB of sound
reduction. An essential part of any
RAINBOW mission requiring both firepower and discretion.
SECONDARY WEAPONS
Page 45

WEAPONS AND EQUIPMENT
7-10
WWW.REDSTORM.COMROGUE SPEAR
WEAPONS AND EQUIPMENT
7-9
WWW.REDSTORM.COMRAINBOW SIX
FLASHBANG
Capable of stunning observers with a
combination bright flash and loud
report, flashbangs are commonly
tossed into rooms to ‘prepare’ rooms
prior to entry. The valuable seconds
gained while potential hostiles
recover from the stun effects can
mean the difference between life and
death to a tactical team. Also known
as distraction devices or stun
grenades.
BREACHING CHARGE
Breaching charges are used to explosively remove doors for rapid entry.
Flashbangs do not need to be used in
conjunction with a breaching charge
as they stun, wound, or even kill anyone nearby.
PRIMARY MAGS
Extra magazines for your primary
weapon.
SECONDARY MAGS
Extra magazines for your secondary
weapon.
HEARTBEAT SENSOR
The Heartbeat Sensor is capable of
tracking a human heartbeat even
through thick layers of concrete. It
works by detecting the characteristic
ultra-low-frequency electric field
given off by a beating heart. When
in use, the heartbeat sensor scans in
a small circle around the user as well
as a larger cone straight ahead.
BINOCULARS
These compact, lightweight binoculars
are specially constructed to withstand the rigors of CT operations. A
built in range finder and choice of 4x
and 8x zoom factors make these the
item of choice for RAINBOW recon missions.
DEMOLITIONS KIT
This kit speeds both the placing and
disarming of explosives. It contains
basic electrical diagnostic equipment
along with the essential mechanical
tools needed to perform the job.
Extra primer, detcord, and a variety
of adhesives complete the kit.
ELECTRONICS KIT
This kit speeds up placing bugs,
rewiring security cameras, and related electrical tasks. It contains a
high precision multimeter, miniature
power supplies, a breadboard, and
digital analyzer. A full complement
of jumpers, clips, and miscellaneous
electrical parts rounds out the kit.
LOCKPICK KIT
This kit speeds the picking of locks.
Its primary component is a highly
sophisticated auto-pick capable of
opening most mechanical locks in a
few seconds. Electrical keycard or
swipe locks are handled using a classified system containing presets for
all major keycard variations.
FRAG GRENADE
The M61 fragmentation grenade is the
standard issue offensive grenade used
by infantry throughout the world.
While its blast radius is small, an
overhand throw is still necessary to
safely clear the blast radius in the
open.
EQUIPMENT
Page 46
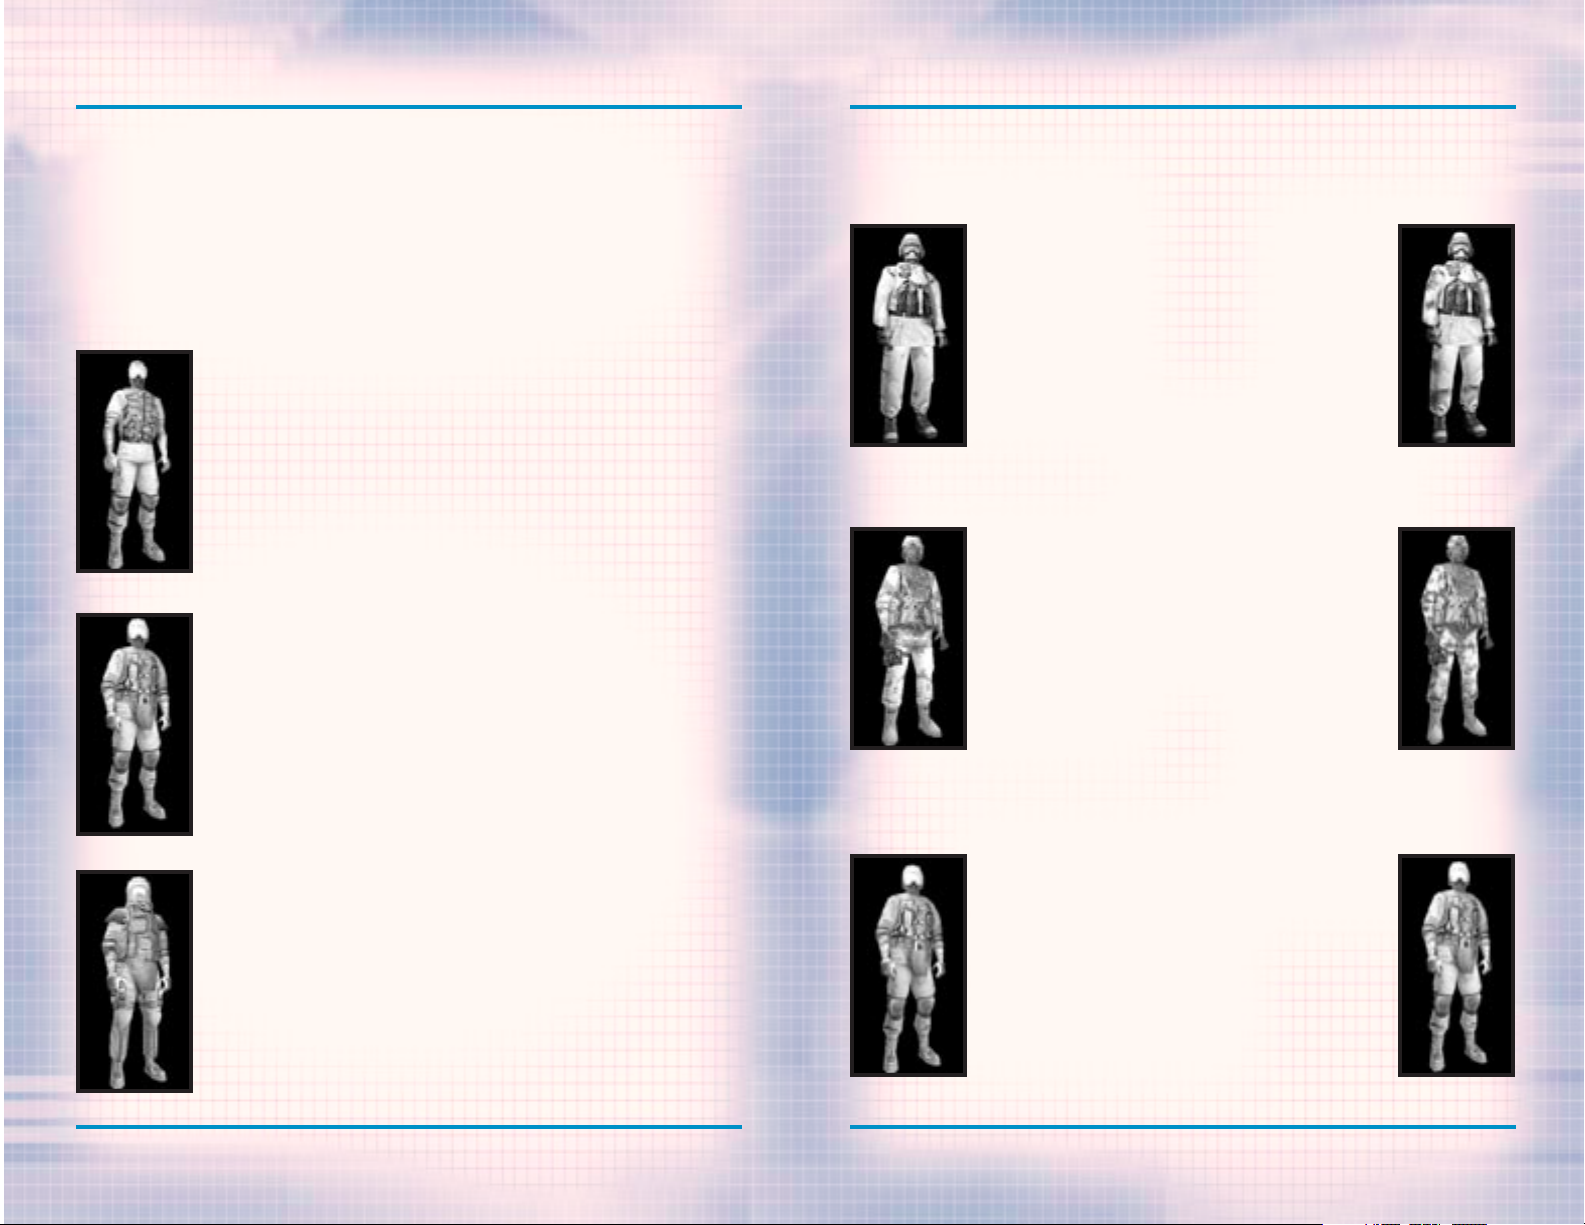
WEAPONS AND EQUIPMENT
7-12
WWW.REDSTORM.COMROGUE SPEAR
WEAPONS AND EQUIPMENT
7-11
WWW.REDSTORM.COMRAINBOW SIX
RAINBOW uses seven different uniform patterns. Each is specially designed for
a specific environment or lighting condition.
ARCTIC 1
This all-white uniform is great for missions
in the snow.
ARCTIC 2
An alternative arctic uniform, this one has
dark splotches on white and is best used when
operating in snow and brush where an allwhite uniform would stand out.
DESERT 1
This desert camo uniform is used for desert
operations and is issued to RAINBOW operatives for desert type operations.
DESERT 2
BLACK
This black uniform is perfect for nighttime
missions.
BLUE
This blue uniform is good for nighttime missions as an option to black.
LIGHT
This class is perfect for nighttime missions and recon specialists. It consists of a lightweight Level IIa tactical vest
capable of stopping low-powered pistol rounds and is rounded
out with the standard soft-soled rubber boots, Nomex balaclava, and Nomex/Kevlar gloves.
MEDIUM
This class consists of a Level II waist-length tactical vest
and a Kevlar Helmet, soft-soled rubber boots, Nomex balaclava, and Nomex/Kevlar gloves. The vest is capable of stopping
most pistol fire, and some submachine gun fire as well.
HEAVY
This class consists of Level III body armor extending to the
groin and is capable of stopping all but the most high-powered of rifle rounds. This is the preferred uniform of demolitions experts, as the faceplate on the Kevlar helmet offers
excellent protection from flying debris. The Desert, Camo and
Woods heavy uniforms do not include the helmet with faceplate
and the body armor extends only to the waist since these uniforms are mainly used on outdoor missions.
UNIFORMS
Choosing the correct uniform is just as important as choosing your weapons.
Each mission takes place in different terrain and lighting conditions. In addition, some operative will need more protection than others. For example, recon
operatives will favor a light uniform while those breaching will need a heavy
uniform. There are several uniforms from which to choose in Rainbow Six. They
come in several different styles and each style is available in three classes.
Page 47

WEAPONS AND EQUIPMENT
7-13
WWW.REDSTORM.COMRAINBOW SIX
CAMO
This uniform is used for jungle operations.
Usually used in Central and South America and
Africa.
EURO
An excellent uniform choice for those operating in mixed forest environments, it uses
a European woods camouflage pattern.
GREEN
This uniform provides a good blend of protection and ease of movement. It is used primarily in general outdoor environments.
GRAY
This gray uniform is the standard used for
urban operations.
STREET
This street camo uniform is RAINBOW’s alternative choice for urban assault operations.
WOOD
This uniform is used for operations in
forests and rural areas. Usually used in
European and North American operations. The
woodland uniforms are a personal favorite of
Santiago Arnavisca.
Page 48

8-1
WWW.REDSTORM.COMROGUE SPEAR
DEFAULT KEYBOARD COMMANDS
Here is the default layout for keyboard commands in the game:
ACTIONS
Left Mouse Fire (Use Item)
1 Switch to Primary
Weapon
2 Switch to Secondary
Weapon
3 Switch to Kit Slot 1
4 Switch to Kit Slot 2
N Select Next Weapon
Z Change Magazine
B Change Rate of Fire
Space Manipulate Environment
MOVEMENT
W Move Forward
S Move Backward
A Sidestep Left
D Sidestep Right
Q Peek Left
E Peek Right
C Crouch
Tab Shuffle
Right Mouse Run
TEAM/AI
PgUp Change to Previous Team
PgDn Change to Next team
7 Status Report
R Toggle Team Hold in Place
H Toggle All Teams Hold
Y Toggle Sniper Control
J Go-Code Alpha
K Go-Code Bravo
L Go-Code Charlie
M Go-Code Delta
U Toggle Orders Mode
G Toggle Map Mode
F Change ROE Mode
V Change ROE Speed
/ Toggle Watch Mode
COMM
‘ Global Chat
Enter Team Chat
Right-Alt Send Bound Message
VIEW
Left Shift Toggle Sniper Mode
5 Toggle Night Vision
T Toggle Full-Screen
Map Mode
F1 Toggle Camera View
= Increase Cinema Size
- Decrease Cinema Size
[ Zoom Map Out
] Zoom Map in
\ Watch Next Team Member
in Action Phase Map
Keypad 5 Center View
OPTIONS
F4 Toggle Auto-Aim
F3 Toggle Reticule
6 Show Status Display
Print Screen Grab Screen Shot
F12 Activate Server Control
Page 49

TECHNICAL SUPPORT
TECHNICAL SUPPORT
Before contacting Red Storm
Entertainment’s Technical Support
Department we recommend that you consult the readme.txt file contained on
the CD, since it contains the answers
to some of the most frequently asked
questions and may therefore provide
an easy solution to some of your problems. You can also check out our FAQ
on our website, www.redstorm.com. It
contains updated information since
the game’s release.
Also, please make sure that your computer meets the minimum system
requirements, as our support representatives cannot help customers
whose computers do not meet these
criteria. Whenever you contact the
Technical Support Department, please
include the following information:
• Complete Product Title
(including version number)
• Exact error message reported (if
any) and a brief description of the
problem you’re encountering
• Processor speed and manufacturer
• Amount of RAM
• CD-ROM or DVD-ROM drive
• Sound Card
• Video and/or 3D accelerator card
• Operating system
• Specific type of modem you are using
(for problems involving multiplayer
gaming)
CONTACT US OVER THE
INTERNET:
Our website contains the most up-todate Technical Support information
available including patches that can
be downloaded free-of-charge. We
update the Support pages on a daily
basis so please check here first for
solutions to your problems.
http://www.redstorm.com/support
CONTACT US BY E-MAIL:
If you don’t have access to the World
Wide Web, you can contact our Support
Department by e-mailing them directly
at Support@redstorm.com. Please
ensure that you include all of the
bulleted information above for your
computer when sending email to this
email address. It may take anywhere
from 24-72 hours for us to respond to
your e-mail depending upon the volume
of messages we receive and the nature
of your problem.
CONTACT US BY PHONE:
You can also contact us by phone by
calling (919) 460-9778. Note that
this number is for technical assistance only. No hints and tips will be
given out over the Technical Support
line. When calling our Technical
Support line, please make sure you
are in front of your computer and have
all the necessary information as
listed above at hand.
RED STORM ENTERTAINMENT’S
TIPS LINE
All the hints, tricks and cheats
you’ll ever need! If you’re under 18
years of age, please have your parents’ permission before calling. Note
that only touch-tone phones may
access this service.
(900) 288-2583 (CLUE).
$.95 PER MINUTE
CONTACT US BY
STANDARD MAIL:
If all else fails, you can write us
at:
RED STORM ENTERTAINMENT
2000 AERIAL CENTER
SUITE 110
MORRISVILLE, NC 27560
ATTN: CUSTOMER SUPPORT
Please do not send any game returns
directly to Red Storm as it is our
policy that game returns must be
dealt with by the retailer or online
site where you purchased the product.
Be advised that our Support representatives are available to help you
Monday - Friday from 9 a.m. - 6 p.m.
(Eastern Standard Time).
9-1
WWW.REDSTORM.COMRAINBOW SIX
9-2
WWW.REDSTORM.COMROGUE SPEAR
Page 50

ROGUE SPEAR: SOMETHING
VEHICLE INFORMATION DISPLAY
Located in the center of the Mission Setup Interface, the Vehicle Information
Display provides valuable data on each of your combat units, including a
detailed description and 3-D model for every vehicle type.
Note that the Vehicle Information Display is tied directly to the Platoon
Information Panel located on the right of the Mission Setup Interface. As a
result, you may only bring up information on those units available to you for
each mission.
ROGUE SPEAR: SOMETHING
THE MISSION
SETUP INTERFACE
The Mission Setup Interface is segmented into several sections, including an Operations Briefing Display, a
Vehicle Information Display, a Platoon
Comman-der Information Display, a
Platoon Con-trol Panel and an Options
Menu.
PLATOON COMMANDER INFORMATION DISPLAY
The Platoon Commander Information Dis-play contains background information on
every available unit commander, including detailed data on their overall capabilities.
Note that the Platoon Commander Information Display is tied directly
to the Commander Selector located on the right of the Mission Setup
Interface. As a result, you may only bring up information on those
commanders available to you for each mission.
1-1
WWW.REDSTORM.COMRAINBOW SIX
VEHICLE INFORMATION
DISPLAY
Located in the center of the Mission
Setup Interface, the Vehicle
Information Display provides valuable
data on each of your combat units,
including a detailed description and
3-D model for every vehicle type.
Note that the Vehicle Information
Display is tied directly to the
Platoon Information Panel located
on the right of the Mission Setup
Interface. As a result, you may
only bring up information on those
units available to you for each
mission.
During the Mission Setup Phase, you will also be able to study each individual
unit type available to you then determine how your force will complete the mission at hand. You will also be able to choose a unit commander for each individual combat platoon based on specialties and statistics.
PLATOON COMMANDER
INFORMATION DISPLAY
The Platoon Commander Information Display contains background information
on every available unit commander,
including detailed data on their overall capabilities.
Note that the Platoon Commander
Information Display is tied
directly to the Commander
Selector located on the right of
the Mission Setup Interface. As a
result, you may only bring up
information on those commanders
available to you for each mission.
1-1
WWW.REDSTORM.COMROGUE SPEAR
 Loading...