

Page 1
Page 2

INTRODUCTION . . . . . . . . . . . . . . . . . . . . . . . . . . . . . . . . . . . . . . . . . . 3
O
VERVIEW . . . . . . . . . . . . . . . . . . . . . . . . . . . . . . . . . . . . . . . . . . . . 3
Q
UICK STAR T . . . . . . . . . . . . . . . . . . . . . . . . . . . . . . . . . . . . . . . . . . 4
S
TAR TI NG A CAMPAIGN . . . . . . . . . . . . . . . . . . . . . . . . . . . . . . . . 4
J
OINING A MULTIPLAYER GAME . . . . . . . . . . . . . . . . . . . . . . . . . . 4
C
REATING A MULTIPLAYER GAME . . . . . . . . . . . . . . . . . . . . . . . . . 5
M
INIMUM SPECIFICATIONS . . . . . . . . . . . . . . . . . . . . . . . . . . . . . . . . 5
I
NSTALLATION. . . . . . . . . . . . . . . . . . . . . . . . . . . . . . . . . . . . . . . . . . 6
U
NINSTALLING. . . . . . . . . . . . . . . . . . . . . . . . . . . . . . . . . . . . . . . . . 6
PRE-GAME SCREENS . . . . . . . . . . . . . . . . . . . . . . . . . . . . . . . . . . . . . . 7
M
AIN MENU . . . . . . . . . . . . . . . . . . . . . . . . . . . . . . . . . . . . . . . . . . 7
C
AMPAIGN. . . . . . . . . . . . . . . . . . . . . . . . . . . . . . . . . . . . . . . . . . . . 7
C
USTOM MISSION . . . . . . . . . . . . . . . . . . . . . . . . . . . . . . . . . . . . . . 8
T
RAINING . . . . . . . . . . . . . . . . . . . . . . . . . . . . . . . . . . . . . . . . . . . . 8
O
PTIONS . . . . . . . . . . . . . . . . . . . . . . . . . . . . . . . . . . . . . . . . . . . . . 8
G
AME . . . . . . . . . . . . . . . . . . . . . . . . . . . . . . . . . . . . . . . . . . . . . 8
S
OUND . . . . . . . . . . . . . . . . . . . . . . . . . . . . . . . . . . . . . . . . . . . . 9
G
RAPHICS . . . . . . . . . . . . . . . . . . . . . . . . . . . . . . . . . . . . . . . . . 10
HUD . . . . . . . . . . . . . . . . . . . . . . . . . . . . . . . . . . . . . . . . . . . . 10
M
ULTIPLAYER . . . . . . . . . . . . . . . . . . . . . . . . . . . . . . . . . . . . . . . 11
C
ONTROLS . . . . . . . . . . . . . . . . . . . . . . . . . . . . . . . . . . . . . . . . . 11
P
LANNING COMPUTER . . . . . . . . . . . . . . . . . . . . . . . . . . . . . . . . . . 12
N
AVIGATION BAR . . . . . . . . . . . . . . . . . . . . . . . . . . . . . . . . . . . . 12
B
RIEFING ROOM . . . . . . . . . . . . . . . . . . . . . . . . . . . . . . . . . . . . . 12
G
EAR ROOM. . . . . . . . . . . . . . . . . . . . . . . . . . . . . . . . . . . . . . . . 13
P
LANNING ROOM. . . . . . . . . . . . . . . . . . . . . . . . . . . . . . . . . . . . 16
E
XECUTE MISSION ROOM . . . . . . . . . . . . . . . . . . . . . . . . . . . . . 19
IN-GAME INTERFACE:HUD . . . . . . . . . . . . . . . . . . . . . . . . . . . . . . . 20
Y
OUR OPERATIVE. . . . . . . . . . . . . . . . . . . . . . . . . . . . . . . . . . . . . . 20
Y
OUR WEAPON STATU S . . . . . . . . . . . . . . . . . . . . . . . . . . . . . . . . . 20
R
ETICULE. . . . . . . . . . . . . . . . . . . . . . . . . . . . . . . . . . . . . . . . . . . . 20
A
CTION ICON . . . . . . . . . . . . . . . . . . . . . . . . . . . . . . . . . . . . . . . . . 20
W
AYP OI N TS A N D PLANNING . . . . . . . . . . . . . . . . . . . . . . . . . . . . . . 21
O
THER OPERATIVES IN YOUR TEAM . . . . . . . . . . . . . . . . . . . . . . . . . 21
O
THER TEAMS . . . . . . . . . . . . . . . . . . . . . . . . . . . . . . . . . . . . . . . . 21
M
AP . . . . . . . . . . . . . . . . . . . . . . . . . . . . . . . . . . . . . . . . . . . . . . . 21
I
N-GAME MENU . . . . . . . . . . . . . . . . . . . . . . . . . . . . . . . . . . . . . . 21
HOW TO PLAY. . . . . . . . . . . . . . . . . . . . . . . . . . . . . . . . . . . . . . . . . . 22
W
HOAMI?. . . . . . . . . . . . . . . . . . . . . . . . . . . . . . . . . . . . . . . . . . 22
M
Y ROLE AND RESPONSIBILITIES. . . . . . . . . . . . . . . . . . . . . . . . . 22
S
WITCHING BETWEEN TEAMMATES AND TEAM HOLD . . . . . . . . . . 22
W
HAT IS MY MISSION? . . . . . . . . . . . . . . . . . . . . . . . . . . . . . . . . . 23
W
HAT DO I DO? . . . . . . . . . . . . . . . . . . . . . . . . . . . . . . . . . . . . 23
D
EFAULT MISSION OBJ ECTIVE . . . . . . . . . . . . . . . . . . . . . . . . . . . 23
W
HO ELSE IS IN THE WORLD? . . . . . . . . . . . . . . . . . . . . . . . . . . . . 23
O
THER RAINBOW TEAMS . . . . . . . . . . . . . . . . . . . . . . . . . . . . . . 23
> 1 <
TABLE OF CONTENTS
Page 3

> 2 <
TERRORISTS . . . . . . . . . . . . . . . . . . . . . . . . . . . . . . . . . . . . . . . . 24
H
OSTAGES . . . . . . . . . . . . . . . . . . . . . . . . . . . . . . . . . . . . . . . . . 24
L
OOKING AND MOVIN G AROUN D. . . . . . . . . . . . . . . . . . . . . . . . . . 25
P
EEKING AND CHANGING STANCE. . . . . . . . . . . . . . . . . . . . . . . . . . 25
N
IGHT VISION . . . . . . . . . . . . . . . . . . . . . . . . . . . . . . . . . . . . . . . . 26
I
NTERACTING WITH THE ENVIRONMENT. . . . . . . . . . . . . . . . . . . . . . 26
H
OW DO I . . . . . . . . . . . . . . . . . . . . . . . . . . . . . . . . . . . . . . . . 26
H
OW TO ORDER MY TEAM . . . . . . . . . . . . . . . . . . . . . . . . . . . . 26
T
EAM QUICK ORDER INTERFACE (QOI) . . . . . . . . . . . . . . . . . . . 26
I
SSUING A TEAM ORDER ON ZULU GO CODE. . . . . . . . . . . . . . . . 27
S
ITUATIONS AND DEFAULT ACTIONS . . . . . . . . . . . . . . . . . . . . . . 27
U
SING DOORS/WINDOWS . . . . . . . . . . . . . . . . . . . . . . . . . . . . 28
U
SING LADDERS . . . . . . . . . . . . . . . . . . . . . . . . . . . . . . . . . . . . 29
S
WITCHING BETWEEN WEAPONS AND EQUIPMENT . . . . . . . . . . . . . 29
E
NGAGING TANGOS AND RULES OF ENGAGEMENT (ROE) . . . . . . . . 29
S
HOOTING. . . . . . . . . . . . . . . . . . . . . . . . . . . . . . . . . . . . . . . . . . . 30
R
ETICULE. . . . . . . . . . . . . . . . . . . . . . . . . . . . . . . . . . . . . . . . . . 30
F
IRING . . . . . . . . . . . . . . . . . . . . . . . . . . . . . . . . . . . . . . . . . . . 30
R
ATE OF FIRE (ROF). . . . . . . . . . . . . . . . . . . . . . . . . . . . . . . . . . 30
R
ELOADING. . . . . . . . . . . . . . . . . . . . . . . . . . . . . . . . . . . . . . . . . 31
Z
OOMING. . . . . . . . . . . . . . . . . . . . . . . . . . . . . . . . . . . . . . . . . . 31
W
EAPON ATTACHMENTS. . . . . . . . . . . . . . . . . . . . . . . . . . . . . . . 31
A
UTO-AIM. . . . . . . . . . . . . . . . . . . . . . . . . . . . . . . . . . . . . . . . . 32
B
ULLET PENETRATION OF DOORS . . . . . . . . . . . . . . . . . . . . . . . . 32
U
SING OTHER ITEMS . . . . . . . . . . . . . . . . . . . . . . . . . . . . . . . . . . . 33
P
ASSIVE ITEMS . . . . . . . . . . . . . . . . . . . . . . . . . . . . . . . . . . . . . . 33
H
EARTBEAT SENSOR . . . . . . . . . . . . . . . . . . . . . . . . . . . . . . . . . . 33
D
EPLOYING EXPLOSIVE CHARGES AND MINES . . . . . . . . . . . . . . . 33
T
HROWING GRENADES . . . . . . . . . . . . . . . . . . . . . . . . . . . . . . . . . . 34
FINISHING A MISSION:DEBRIEFING SCREEN . . . . . . . . . . . . . . . . . . . . 35
MULTIPLAYER . . . . . . . . . . . . . . . . . . . . . . . . . . . . . . . . . . . . . . . . . . 35
D
IFFERENCES BETWEEN SINGLE AND MULTIPLAYER PLAY. . . . . . . . . . 35
M
ULTIPLAYER SCREEN . . . . . . . . . . . . . . . . . . . . . . . . . . . . . . . . . . 36
M
AIN BUTTONS. . . . . . . . . . . . . . . . . . . . . . . . . . . . . . . . . . . . . 36
S
ERVER LISTS . . . . . . . . . . . . . . . . . . . . . . . . . . . . . . . . . . . . . . . 36
F
ILTER/INFORMATION AREAS. . . . . . . . . . . . . . . . . . . . . . . . . . . . 37
C
REATE SERVER SCREEN . . . . . . . . . . . . . . . . . . . . . . . . . . . . . . . . . 39
M
AIN BUTTONS. . . . . . . . . . . . . . . . . . . . . . . . . . . . . . . . . . . . . 39
O
PTIONS . . . . . . . . . . . . . . . . . . . . . . . . . . . . . . . . . . . . . . . . . . 39
R
ESTRICTION KIT . . . . . . . . . . . . . . . . . . . . . . . . . . . . . . . . . . . . 41
I
N-GAME MENU . . . . . . . . . . . . . . . . . . . . . . . . . . . . . . . . . . . . . . 42
T
EAMMATE RADAR . . . . . . . . . . . . . . . . . . . . . . . . . . . . . . . . . . . . . 42
C
OMMUNICATIONS AND THE CONSOLE . . . . . . . . . . . . . . . . . . . . . . 42
U
SING MULTIPLAYER ONLY ITEMS . . . . . . . . . . . . . . . . . . . . . . . . . . 43
D
YING AND ACTIVATING DEATH CAMERAS . . . . . . . . . . . . . . . . . . . 43
T
HE CONSOLE . . . . . . . . . . . . . . . . . . . . . . . . . . . . . . . . . . . . . . . . 43
B
ASIC COMMANDS . . . . . . . . . . . . . . . . . . . . . . . . . . . . . . . . . . 43
A
DMINISTRATOR ONLY COMMANDS . . . . . . . . . . . . . . . . . . . . . . 45
CREDITS . . . . . . . . . . . . . . . . . . . . . . . . . . . . . . . . . . . . . . . . . . . . . . 46
WARRANTY . . . . . . . . . . . . . . . . . . . . . . . . . . . . . . . . . . . . . . . . . . . 48
TECHNICAL SUPPORT . . . . . . . . . . . . . . . . . . . . . . . . . . . . . . . . . . . . 49
Introduction
The year is 2005. In the minds of millions, the conflicts of the 20th century have
been forgotten. Relegated to history books or dusty archives. They are subjects
for movies. Stories told by aging grandfathers that seem less and less relevant
in the brave new world of global terrorism and vicious international conflict.
But not everything that is buried is dead. Old hatreds still linger. Old mysteries
remain unsolved. And old enemies may yet rise again, re-energized and
prepared to pick up the tools of modern terror to carry on their ancient battles.
Only one bulwark stands between the world and terrors both new and
revisited: RAINBOW, an international task force dedicated to combating
terrorism in all its forms. A top-secret organization consisting of the best
counter-terrorism operatives the United Nations has to offer. Rainbow is the
most potent weapon in the world's arsenal. Backed by the most sophisticated
technology available, and trained to the limits of human capability,they are our
best hope in the war against terror.
They may also be our last.
Overview
In Raven Shield, you lead an elite, international anti-terrorist unit code named
“Rainbow”. You assume the role of mission commander, before and after each
mission and plan out every detail of their missions from the operatives and
their gear to their exact paths and actions. During missions you lead from the
front by controlling any of the eight Rainbow operatives as they engage
terrorists and save the world.
Raven Shield contains fifteen missions linked together to form a single
campaign. During missions the action gets intense and with “one shot, one kill
lethality” the world of Raven Shield is extremely unforgiving. As your skills
sharpen, the missions get gradually harder to keep up the pressure.
Remember, when Rainbow gets called in, it’s because it’s an extremely
important mission and all other options have been exhausted…hit’em hard and
hit’em fast!
> 3 <
Page 4

Quick Start
Starting a Campaign
1. Insert the Raven Shield CD into your computer and start the game
2. When the Main Menu appears,click on Campaign
3. At the Campaign screen,click on New Campaign
4. Type in a name for your new campaign
5. Select a difficulty level
6. Click on Start
7. When you’re finished listening to the briefing, click on the Load Plan button
in the bottom right of the screen
8. Select the Default plan and click on the Load button
9. Click on the Go to Execute Mission Room button near the Load Plan button
10. Click on Start Mission and enjoy!
Joining a Multiplayer Game
1. Insert the Raven Shield CD into your computer and start the game
2. When the Main Menu appears, click on Multiplayer
3. If you choose to connect onto the Internet proceed to Step 4. If you choose
to connect using LAN proceed to Step 9
4. Click on the World Wide Web:Create New Account OR if you already have an
account skip to Step 7.
5. Enter the required information and click on the Submit button
6. Click on Yes to install Ubi.Com Manager software
7. Exit your Internet browser to return to the game
8. Enter your Login Name and Password and click the check box
9. Select a server from the server list and click the Join button
10. Once in the game click Play or join a team (Green or Red)
11. If the Multiplayer Menu is not displayed,press the Tab key to display it
12. Click on the Gear Menu button
13. Select the weapons and equipment you want to use by clicking on the
image to bring up a list of choices to the right. Once you’re happy with your
selections click on the Close button.
14. Finally, click on the Ready button in the lower right of the screen to tell the
server you’re ready to play
15. The round launches when the Time Remaining reaches zero or all players
click on Ready…Have fun!
> 4 <
Creating a Multiplayer Game
1. Insert the Raven Shield CD into your computer and start the game
2. When the Main Menu appears, click on Multiplayer
3. Click on the Create button to go to the Create Server screen
4. Select a Game Mode and then enter a name for your server
5. Select a Map and a Game Type
6. Click on the Add to Map List button in between the Map and Map List
7. Click on the Launch button to create the server
8. If you choose to create an Internet server that is not a dedicated server
proceed to Step 9. Otherwise proceed to Step 14
9. Click on the World Wide Web: Create New Account OR if you already have an
account skip to Step 7.
10. Enter the required information and click on the Submit button
11. Click on Yes to install Ubi.Com Manager software
12. Exit your Internet browser to return to the game
13. Enter your Login Name and Password and click the check box
14. Once in the game click Play or join a team (Green or Red)
15. If the Multiplayer Menu is not displayed, press the Tab key to display it
16. Click on the Gear Menu button.
17. Select the weapons and equipment you want to use by clicking on the
image to bring up a list of choices to the right. Once you’re happy with your
selections click on the Close button.
18. Finally, click on the Ready button in the lower right of the screen to tell the
server you’re ready to play
The round launches when the Time Remaining reaches zero or all players click
on Ready… enjoy!
Minimum Specifications
In order to play Raven Shield on your computer, your system must meet the
following criteria:
• Processor: 800 MHz Pentium III, AMD Athlon,or equivalent
• RAM: 128 MB;XP users: 256 MB required
• Supported OS: Win 98/ME/2000/XP Only
• Direct X version: 8.1 or higher
• Video Card:32MB VRAM DirectX 8.1 compatible graphics card with hardware T&L
• Hard Drive: 2 GB minimum hard drive space
• CD-ROM: 16x or faster
• Sound Card: DX 9 compatible sound device
• Peripherals:Windows-compatible mouse required
• Multiplay:Internet connection for play on Ubi.com
> 5 <
Page 5
Pre-Game Screens
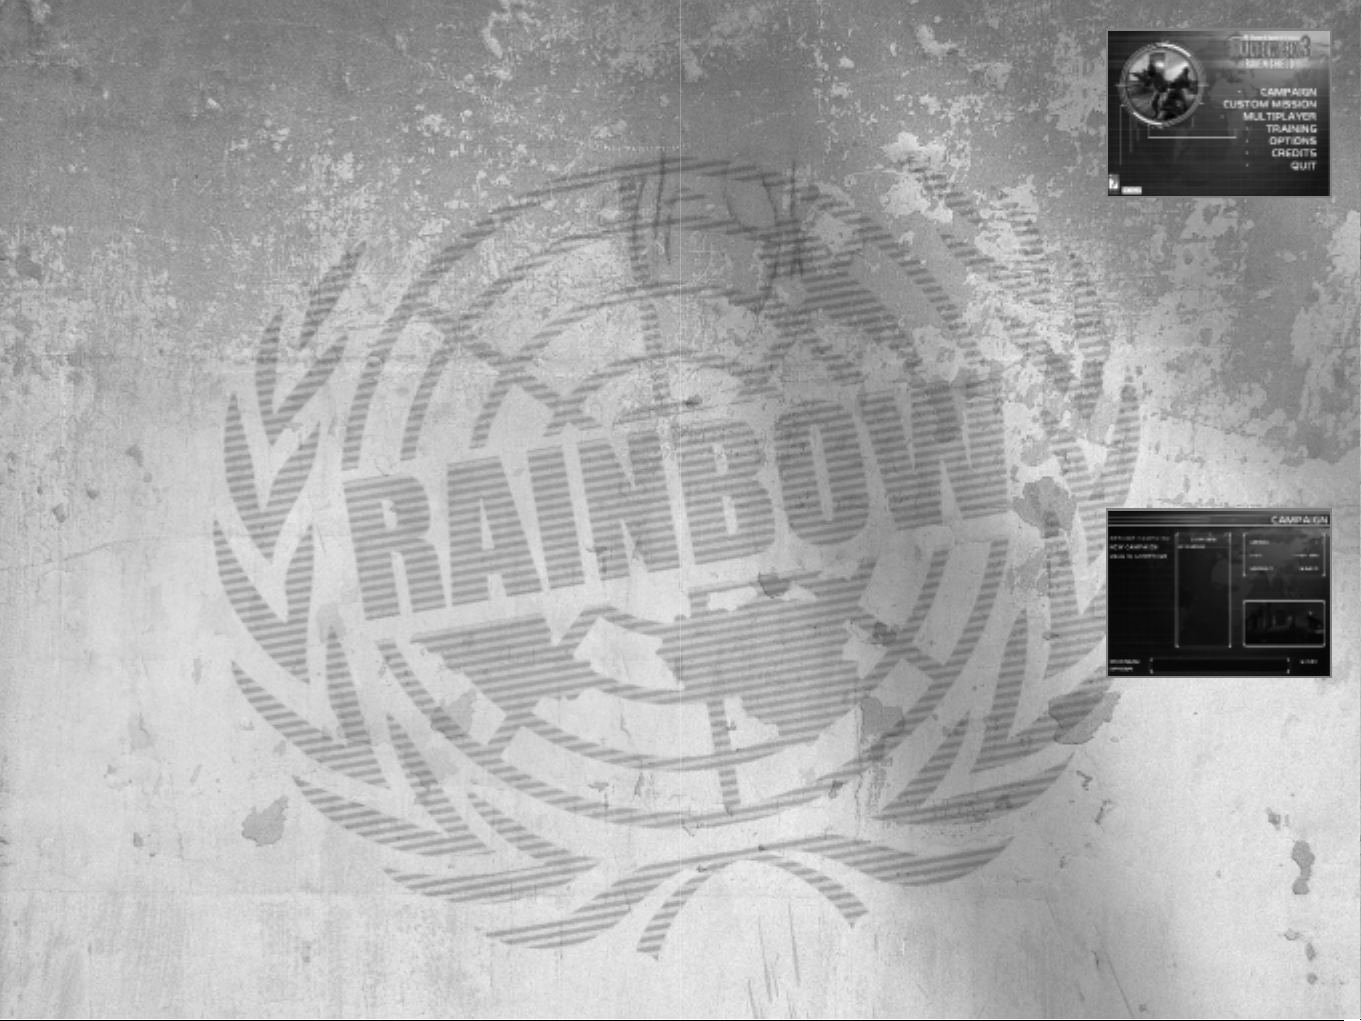
Main Menu
This is the first screen that appears when you
start Raven Shield and has the following options:
•
Campaign – Takes you to the Campaign
screen where you Resume and Create new single player campaigns
•
Custom Mission – Takes you to the Custom Mission screen where you play
individual missions using various mission objectives
•
Multiplayer – Takes you to the Multiplayer screen where you Join and Create
multiplayer games (see Multiplayer section)
•
Training – Takes you directly into the training mission where you learn how
to play the game
•
Options – Takes you to the Options screen where you set Raven Shield’s
customizable options
•
Credits – Displays the game credits
•
Quit – Exits Raven Shield
Campaign
This screen allows you to manipulate campaigns
and has a number of options:
•
Resume Campaign – Allows you to resume a
previously saved game:
1. Select Resume Campaign
2. Select Campaign in center window
3. Click Start in bottom right – Takes you to
the Planning Computer
•
New Campaign – Allows you to start a new campaign:
1. Select New Campaign
2. Type a Campaign Name in the center window
3. Select a difficulty mode
Recruit – Easy:Terrorists take more time before shooting
Veteran - Moderate
Elite - Hard: Terrorists take less time before shooting
4. Click Start in bottom right – Takes you to the Planning Computer
•
Delete Campaign – Allows you to delete a saved campaign:
1. Select Delete Campaign
> 7 <
Installation
To install Raven Shield,follow these simple steps:
1. Start your computer
2. Insert the Raven Shield Installation CD into your CD-ROM drive.The Autorun
Menu should appear.
Note: If the Autorun Menu does not automatically appear, double-click on the
My Computer icon located on your desktop, then double-click on the icon that
corresponds to your computer’s CD-ROM drive. The Autorun Menu should now
appear.
3. Click on the Install button. The installation wizard now walks you through
each step of the setup and installation process for the game.
Once you have created a directory for Raven Shield, the game is installed on
your hard drive. The game automatically asks you if you want to install DirectX
v8.1. You can not play Raven Shield without v8.1 or higher on your computer. If
you already have a version of DirectX that is v8.1 or higher, simply check the No
button, and it does not install DirectX. If you are not sure, click Yes, and the
DirectX installer performs its own verification.
4. After installing the game, select “Red Storm Entertainment: Raven Shield:
Play Raven Shield” from your computer’s Start menu or double-click the
“Play Raven Shield”shortcut on your desktop. Doing either starts the game.
Note: The Raven Shield Play CD must be in your CD-ROM drive to start the
game.
Uninstalling
To uninstall Raven Shield,follow these simple steps:
1. Start your computer
2. Insert either Raven Shield CD into your CD-ROM drive. The Autorun Menu
should appear.
3. When it appears, click on the Uninstall Raven Shield button. The uninstall
wizard automatically asks if you really want to uninstall the game.If you are
sure you want to remove Raven Shield from your hard drive, click the Yes
button. If you don’t want to uninstall the game, click No, which cancels the
process.
If you uninstall Raven Shield,all previously saved Campaigns and games remain
on your hard drive,unless you answer Yes to “Delete all configuration and saved
games files?” question.
Note: You can also uninstall Raven Shield by using the Add/Remove Programs
control panel in Windows.
> 6 <
Page 6
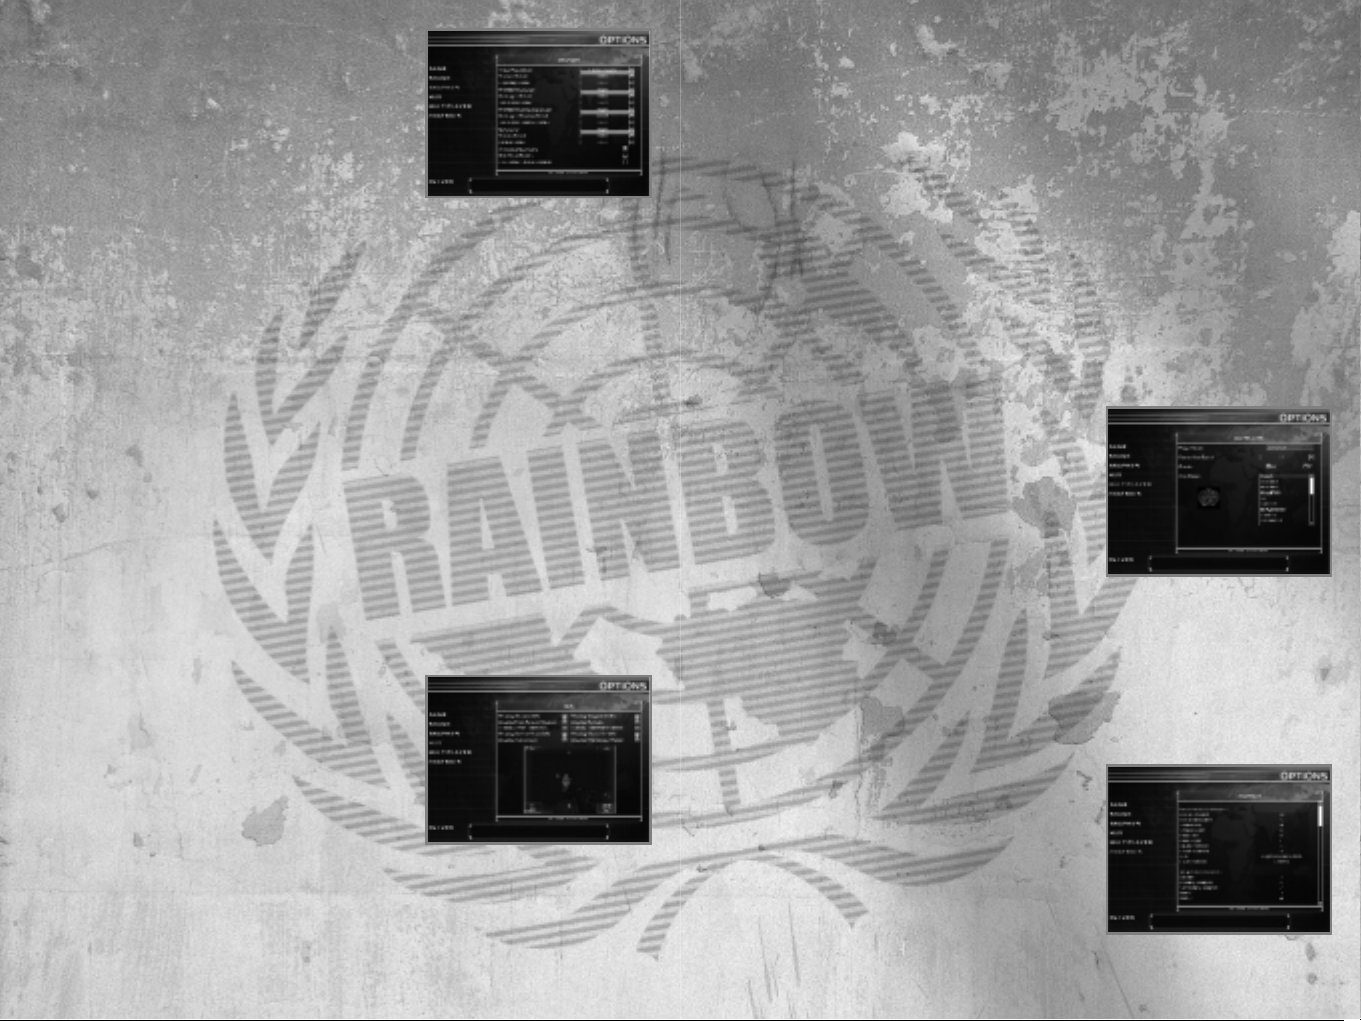
Game
Always Run – When activated your operative
always runs and holding the Run key makes
him/her walk
Invert Mouse – Inverts the up/down axis on your
mouse
Mouse Sensitivity – Alters the sensitivity of your
mouse and the speed at which it turns your
character
Auto-Aim: None, Low, Medium, High – Allows your crosshairs to automatically
lock onto tangos when they come into view (see Firing: Auto-Aim section);
Note: Auto Aim is not available in multiplayer adversarial games
Prompt for Load a Plan – The option displays the Load a Plan window when you
first go to the Gear,Planning, or Execute Room for each mission.It allows you to
load one of the default or one of your saved plans
Restore to Default Button – Restores all the options on this page to their
default state
Sound
Ambient Sounds – Sets the volume of all sound
effects
Voices – Sets the volume of all voices
Music - Sets the volume of all music
Sound Quality – Sets the quality of the sound
played in the game. Lower quality sounds may
result in higher game performance. 3D audio is only available with high quality
sounds.
Audio Virtualization – Sets the audio output mode for a two channel
monitoring configuration (two speakers,Headphones). No Virtualization means
stereo playback with no additional CPU usage. Low and high HRTF refers to
"Head Related Transfer Functions", which emulates 3D sound immersion. The
lower setting may result in higher game performance.
3D Audio Hardware Acceleration – Enables sound card hardware support. The
option must be enabled to activate EAX™.
EAX™ – If your sound card is compatible with Creative Labs EAX™ Processing,
enabling this option greatly improves your sound experience
Restore to Default Button – Restores all the options on this page to their
default state
> 9 <
2. Select Campaign in center window
3. Click the Delete button in bottom right
Other Options (these are available on almost every screen in the game)
•
Main Menu – Takes you to the Main Menu screen
•
Options – Takes you to the Options screen. After altering the customizable
game options you automatically return to your previous screen.
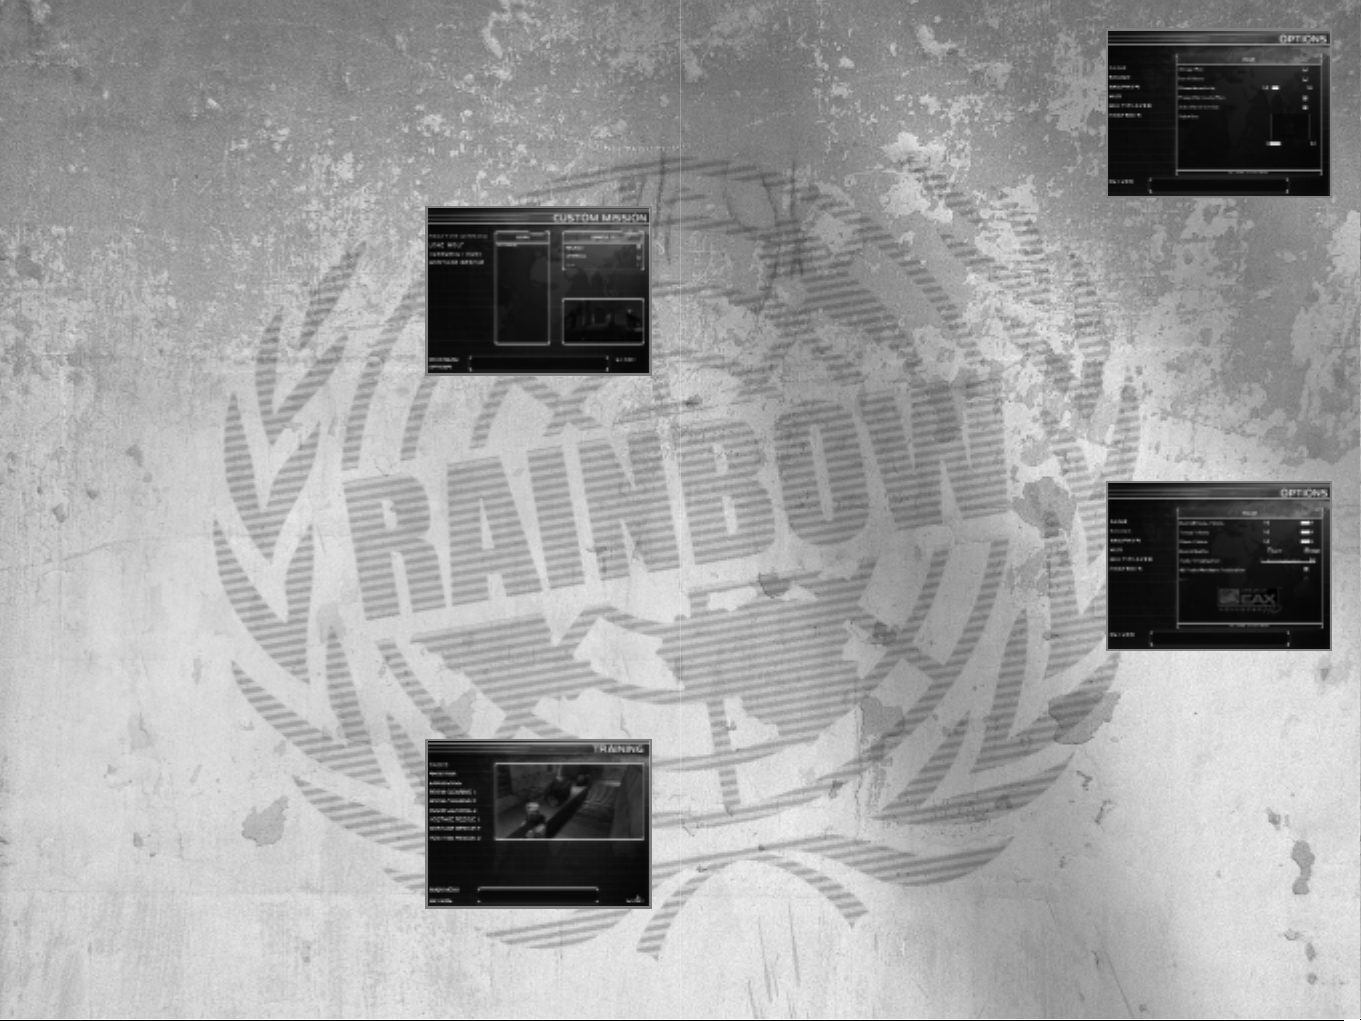
Custom Mission
This screen allows you to play individual missions
using a variety of mission objectives. To start a
custom mission use the following steps:
1. Select a custom mission mode
Practice Mission – You can practice the
mission exactly as it plays during the
campaign
Lone Wolf – You are by yourself with the sole objective of reaching the
extraction zone alive
Terrorist Hunt – Your objective is to neutralize all terrorists on the map
Hostage Rescue – Your objective is to rescue the hostages by escorting
them to the extraction zone
2. Select Map in center window (To unlock a map you must complete it in
Campaign mode first)
3. Select a difficulty mode
Recruit - Easy
Veteran - Moderate
Elite - Hard
4. Set number of terrorists in center right (not available in Practice Mission Mode)
5. Click Start in bottom right – Takes you to the Planning Computer
Training
The Training screen allows you to select training
scenarios and learn how to play the game. To
begin a scenario, simply select it and then click
on the Start button in the bottom right of the
screen.
Options
The Options screen lets you customize the game and consists of six different
pages: Game,Sound, Graphic,HUD, Multiplayer,and Controls.
> 8 <
Page 7
Display Weapon Info – Displays weapon icon, name, attachment name, rate of
fire, rounds in weapon, and remaining magazines
Display First Person Weapon – Displays the first person weapon
Display Reticule – Displays the targeting reticule
Display Waypoint Info – Displays the current waypoint graphic and waypoint
actions
Display Action Icon – Displays an icon, which shows you how you can interact
with environment
Display Teammate Names – Displays the name of a teammate when you point
at them
Display Multiplayer Radar – Displays the teammate radar in multiplayer games
Restore to Default Button – Restores all the options on this page to their
default state
Multiplayer
Player Name – This is your operative’s name
Gender – This is your operative’s gender, which
determines your voice in the game
Connection Speed – This is your Internet
connection type
Arm Patch – This is the arm patch displayed on
your character. You can make your own arm patches by creating images using
the same format as the .tga files in the arm patch directory. Custom arm
patches are automatically downloaded and displayed by other players on the
server.
Restore to Default Button – Restores all the options on this page to their
default state
Controls
This screen allows you to remap your keyboard
and mouse controls to your own taste.To remap
an action, simply click on the currently assigned
key and then press the new control.
Restore to Default Button – Restores all the
options on this page to their default state
Graphics
Setting any of the options below to Medium and
Low may result in higher game performance.
Video Resolution – Sets the video resolution
Texture Detail – Sets the environmental texture
detail level
Lightmap Detail – Sets the environmental
lightmap detail level
Rainbow Detail – Sets the Rainbow character detail level
Hostage Detail – Sets the Hostage character detail level
Terrorist Detail – Sets the Terrorist character detail level
Rainbow Shadow Detail – Sets the Rainbow character shadow detail level
Hostage Shadow Detail – Sets the Hostage character shadow detail level
Terrorist Shadow Detail – Sets the Terrorist character shadow detail level
Terrain Detail – Sets the detail level for grass and things on the ground
Decal Detail – Sets the bullet impact and explosion decal detail level
Animated Geometry – Allows animated geometry such as trees moving with
the wind
Gore Level – Sets the blood and gore level in the game
Hide Dead Bodies – Forces dead bodies to disappear from the map
Restore to Default Button – Restores all the options on this page to their
default state
HUD
The in-game user interface or HUD contains a
great deal of information. You can customize
what information it displays by using the
following options.
Display Character Info - Displays your operative’s
health, stance, name, and current rules of
engagement
Display Current Team Info – Displays your computer controlled teammates
health and current action
Display Other Team Info – Displays information about the health and current
actions of other,computer controlled teams
> 10 < > 11 <
Page 8

• Kevin Sweeney – Kevin Sweeney tells you about why you’re going in on this
mission and what’s behind the terrorists’actions
•
News Wire – The News Wire tells you how the public was informed about
your last mission and is in the form of a news paper article or press release
•
Mission Orders – Mission Orders displays detailed information about your
mission including things to be aware of any special notes on terrorists (also
known as Tangos) and hostages
Gear Room
In the Gear Room you select and equip your
teams. There are three different areas within the
Gear Room, each with their own purpose:
Operative Area,Gear Area, and Information Area.
Operative Area
The Operative Area consists of a list of all of the
currently active Rainbow operatives at the top
and your three teams below.
• Operatives Roster – The Operative Roster contains all the
Rainbow operatives in the game sorted by their specialties:
Assault, Recon, Sniper,Demolitions, and Electronics.
Assault – Specialize in combat using all weapons other
than sniper rifles
Recon – Specialize in stealthy movement and remaining
undetected
Sniper – Specialize in combat using sniper rifles
Demolitions – Specialize in placing and deactivating explosives
Electronics – Specialize in placing and manipulating electronic devices
When you click on an operative you select him/her and get detailed
information in the Information Area on the right of the screen.
•
Your Teams – To add an operative to a team, select the operative and then
click on the + button to the left of one of the team names. If no + button
appears it is either because that team is full (maximum of four operatives
per team) or you’ve already assigned the maximum number of operatives to
your teams (maximum of eight operatives per mission).
By selecting an operative in a team you can perform three different options:
• Move them to another team by clicking the + next to the name of that
team
• Promote/Demote them within the team by click the arrow up and arrow
down buttons to the right or their team name
• Remove them from the team by clicking the – button to the left of their
team name
> 13 <
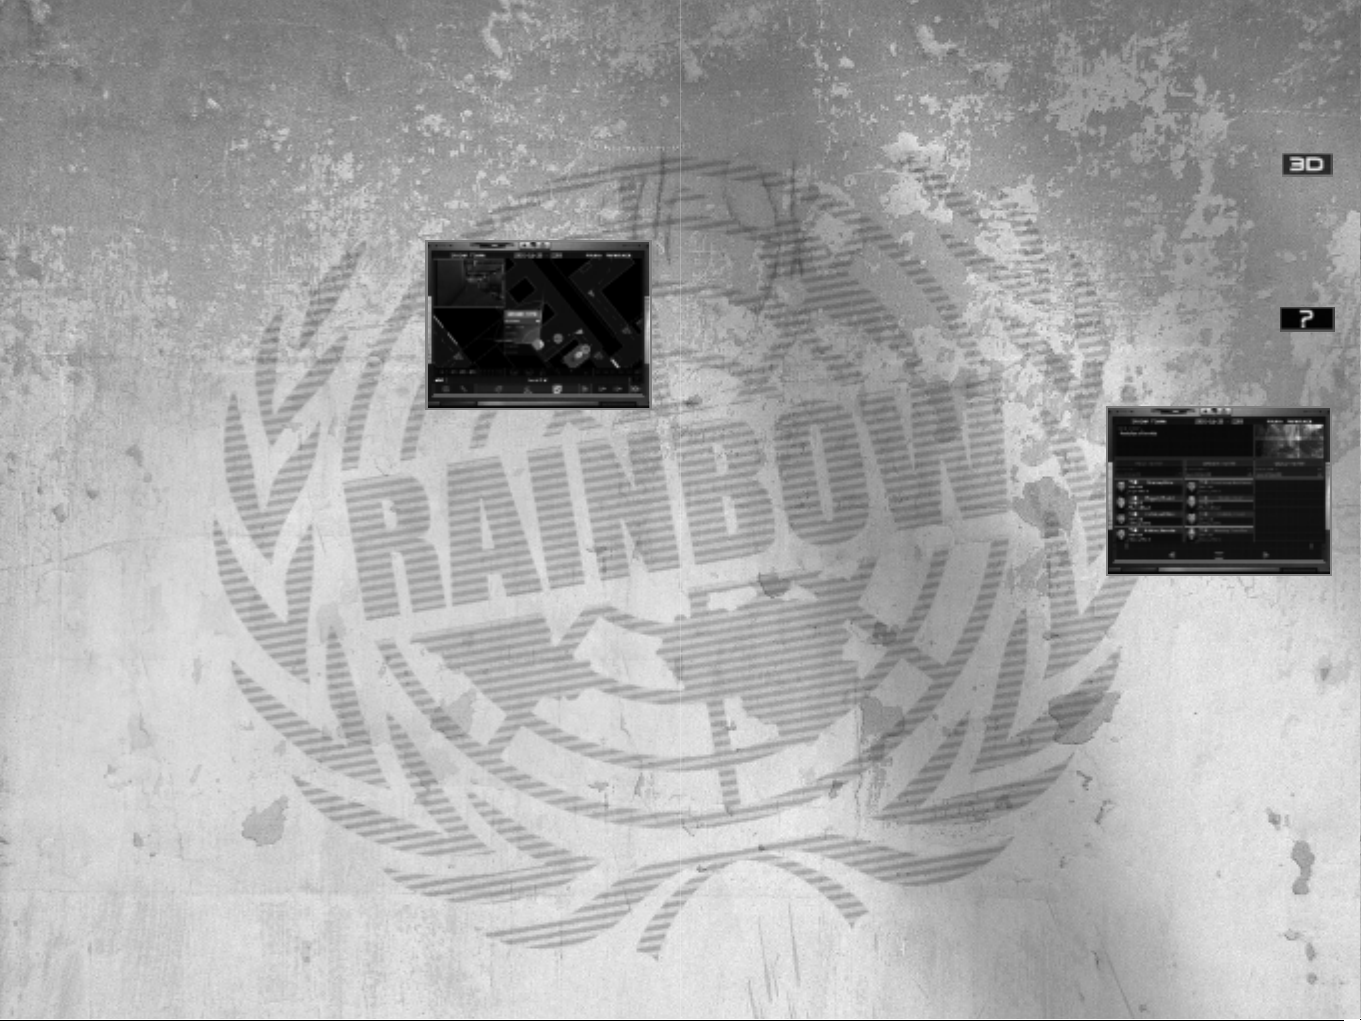
Planning Computer
The Planning Computer allows you to create/or modify your preparations for
the current mission,and to give you all the background information you need to
go in and get the job done. It consists of a Navigation Bar at the bottom and
four different screens on top.
Navigation Bar
The navigation bar allows you to change the current screen in the Planning
Computer. It also allows you to do other things like saving and loading mission
plans, accessing the Options screen, and exiting the Mission Planing Computer
to the Main Menu screen.
•
Main Menu – Exits the Planning Computer and takes you to the Main Menu
screen
•
Options – Takes you to the Options screen and then returns you to the
Planning Computer when you’re done
•
Briefing Room – Changes the information in the top of the Planning
Computer to the Briefing Room
•
Gear Room - Changes the information in the top of the Planning Computer
to the Gear Room
•
Planning Room - Changes the information in the top of the Planning
Computer to the Planning Room
•
Execute Mission Room - Changes the information in the top of the Planning
Computer to the Execute Room where you can launch your mission
•
Save Plan – Opens a window that allows you to save all the information in
the Planning Computer, your planning, under a name you specify
•
Load Plan – Opens a window that allows you to load a previously saved
mission plan. Note: When you load a plan you override all information
currently in the Planning Computer
•
Quick Play – Loads the Action planning, which contains four operatives and
one waypoint,and begins the mission immediately
Briefing Room
The Briefing Room tells you about your upcoming
mission and it’s objectives.
•
Control – When the screen first appears
Control tells you about the overall situation
and your mission orders
•
John Clark – John Clark tells you more about
the tactical situation, how this mission
connects with previous missions, and who
you’re up against
> 12 <
Page 9

Information Area
This area displays both information and lists of items. When you
select an operative it displays their history, skills, health status,
and campaign statistics. Operative skills are as follows:
•
Assault – Affects how fast your reticule adjusts from
maximum inaccuracy to maximum accuracy with all weapons
other than sniper rifles
•
Demolitions – Affects how fast you can plant and disarm
explosives
•
Electronics – Affects how fast you can plant and disable electronic devices
•
Sniper – Affects how fast your reticule adjusts from maximum inaccuracy to
maximum accuracy with sniper rifles
•
Stealth – Affects how much noise you create when moving
•
Self Control – Affects how willing AI controlled characters are to shoot when
there is a good chance of missing the target.The higher the value the longer
they wait,and more accurate they become before pulling the trigger.
•
Leadership – Affects the length of time between you issuing orders and
teammates responding to your orders
•
Observation - Affects how observant characters when computer controlled
and how likely they are to see and hear other characters in the game
As play through the campaign your operatives get better and their skills
increase. Even operatives you don’t take on a mission train and get slightly
better with time. The number next to each skill is the operative’s current skill
level, while the number in parenthesis is the total amount this skill has
increased throughout the campaign.
When you select gear, this area displays a list of all the gear available in that
category and information about currently selected piece of gear. There are two
tabs in the lower window for weapons. The first shows a text description of the
weapon, while the second shows statistics for the weapon.The lower the rating
the worse a weapon is in a given category.
•
Range – Maximum range of the weapon
•
Damage – Amount of damage the weapon inflicts at point blank range
•
Accuracy – Base accuracy of the weapon
•
Stability – How stable the weapon is when firing (i.e. the more stable it is,
the less it jumps when you shoot)
•
Recovery – How fast the reticule recovers toward the center of the screen
> 15 <
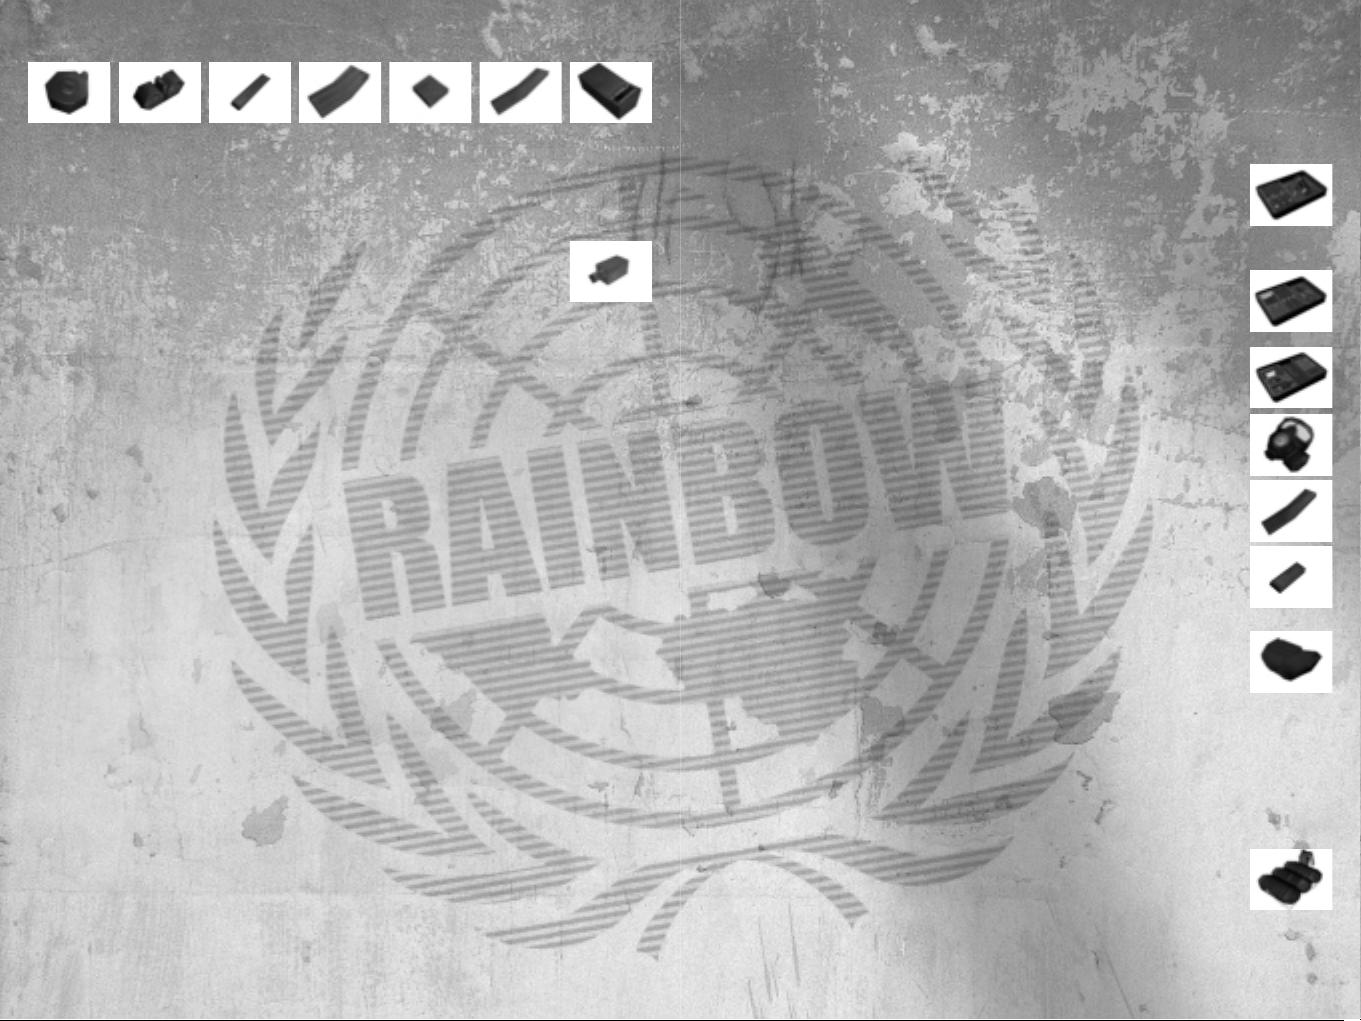
Gear Area
The Gear Area allows you to change the gear of an operative to
suit their skills and your tastes. It consists of a number of
images that represent the operative’s gear in the middle of the
screen. By clicking on the images, a list of all the available gear
appears in the Information Area to the left.
•
Primary Weapon
Weapon
– This is the operative’s main weapon (see Primary
Weapons section)
Ammo – Ammunition type for the weapon: FMJ is the standard
ammunition, JHP does more damage to unarmored targets, but less to
targets wearing body armor. 00 Buck shoots nine bullets at once from a
shotgun, while Slug shoots a single large projectile.
Attachment – Attachment for the weapon, which could include Sound
Suppressor (Silencer), High Capacity Magazine, Mini-Scope, and Thermal
Scope Attachment (see Weapon Attachments section)
Assign to Team – Located along the right side of each image, this button
assigns the weapon, ammo,and attachment to all members of this team
•
Secondary Weapon
Weapon
– This is the operative’s secondary weapon (see Secondary
Weapons section)
Ammo – Ammunition type for the weapon
Attachment – Attachment for the weapon
Assign to Team – Located along the right side of each image, this button
assigns the weapon, ammo,and attachment to all members of this team
•
Item 1 and 2
Item
– These could be anything from a heart beat sensor to frag grenades
(see Using Other Items section)
Assign to Team – Located along the right side of each image, this button
assigns the item to all members of this team
•
Assign Gear to All Teams
Assign Gear to All Teams
– Located along the bottom of the gear area, this button
assigns all of the equipment displayed above to all operatives on all teams
•
Uniform/Armor
Uniform/Armor
– This is the operators camouflage and armor level. The
heavier the armor the more damage the operative can sustain, but the
slower they perform actions like picking a lock.
Assign to Team – This small button in the upper right assigns the
uniform/armor to all members in this team
> 14 <
Page 10

Path Buttons
• Go to First Waypoint (Home key) – Centers map on and selects the first
waypoint for the selected team
•
Go to Previous Waypoint (Page Down key) – Centers map on and selects the
previous waypoint for the selected team
•
Play/Pause – Moves map view through waypoint list for selected team at
the movement mode of the waypoint path
•
Go to Next Waypoint (Page Up key) – Centers map on and selects the next
waypoint for the selected team
•
Go to Last Waypoint (End key) – Centers map on and selects the last
waypoint for the selected team
•
Lock/Unlock Camera on Action – If you don’t want the camera to
automatically move when you use Path buttons use this control to lock and
unlock the camera to the currently selected waypoint
Creating/
Modifying Waypoint Plans
When you create a waypoint path for a team, the
first waypoint must be in an insertion zone.
These appear as dark red boxes in the map. To
drop a waypoint, simply click on the map. To
place another waypoint, move your mouse cursor
and click again.
Path Window
Now that you have two waypoints you have a
waypoint path. Computer controlled teams
follow their waypoint paths during missions.
These paths also serve as a guide for you to
follow during a mission to make sure you don’t
get lost and wander around too much (see InGame Interface: HUD: Waypoints and Planning
section).
In the center of each waypoint path is a small icon that tells you the Rules of
Engagement or RoE (see Rules of Engagement section) for the path between
the two points. All AI controlled operatives follow RoE to engage targets.
•
Assault (a gun icon) – Fire at will
•
Infiltrate (a silenced pistol icon) – Fire only with silenced weapons. When
fired upon fire back with all weapons.
•
Recon (a binocular icon) – Fire only if fired upon
> 17 <
Planning Room
The Planning Room is where you actually put
down waypoints and create a plan. When you
don’t directly control a team, they follow their
waypoints and mission plan. The Planning Room
consists of two areas: Map Window and Map
Toolbar
Map Window
The Map Window displays a large image of your mission area. You can translate
or scroll the map by moving your mouse cursor off the right, left, top, and
bottom of the Planning Room. You can also use the Scroll Map Up (W), Scroll
Map Down (S), Scroll Map Left (A), and Scroll Map Right (D) keys on the
keyboard.
Map Toolbar
The map toolbar contains a number of options that let you manipulate the
map, which are grouped into four areas: Edit/Display Team Buttons, Delete
Buttons, Map Buttons, and Path Buttons. There are also two keyboard only
controls that allow you to Change Map Angle Towards Overhead (T key) and
Map Angle Toward Ground Level (G key).
Current/Display Team Buttons
• Edit Team: Red (1 key), Green (2 key), Gold (3 key) – Selects
the current team. Only one of team can be selected at a time.
• Display Team Waypoints: Red (4 key), Green (5 key), Gold (6 key) – Toggles
the display of each teams waypoints on the map
Delete Buttons
• Delete Selected Waypoint
• Delete All Waypoints for Selected Team
• Delete All Waypoints for All Teams
Map Buttons
• Rotate Map Counterclockwise (Q key)
•
Rotate Map Clockwise (E key)
•
Zoom In (R key)
•
Zoom Out (F key)
•
Go Up One Level (C key) – Changes the map to show the floor above the
current floor
•
Go Down One Level (X key) – Changes the map to show the floor below the
current floor
> 16 <
Page 11
• Breach – This option is only available near a door and tells a computer
controlled team to destroy the door(s) and make rapid entry
You can also right click to place a waypoint onto the map. If you do this the
WaypointWindow automatically appears.
3D View
To the lower left of the screen is a 3D button that pops-up a 3D window
looking into the game world from the selected waypoint. You can look around
in this view by moving your cursor into the window, clicking and holding, and
then moving your mouse around.
Map Legend
The “?” button in the lower right of the screen brings up the map
legend, which defines all the icons and images in the map.
Execute Mission Room
The Execute Mission Room is the last room you
must enter in order to start a mission. You can
skip any other room, but this one is mandatory. If
you don’t have a team and/or waypoint plan
already, a window appears and prompts you to
load a saved mission plan.The screen displays the
mission objectives, mission location, team
compositions, and waypoints and go codes assigned to each team. You can
select which team you want to lead by clicking on the team.
At the bottom of the screen are three buttons:
•
Go Back to Planning – This button exits the screen and takes you to your
previous Planning Computer screen
•
Play Mission in Observer Mode – This button begins the mission with all
teams controlled by the computer allowing you to watch the action without
participating
•
Play Mission – This begins the mission with you leading whichever team you
chose
> 19 <
The path itself tells you the Movement Mode.
•
Blitz (a solid line) – Move at run speed
•
Normal (a dashed line) – Move at normal speed
•
Recon (a dotted line) – Use a crouched posture and move at normal speed
By right clicking on the RoE icon on a waypoint path the Path Window to
appear. It lets you change the RoE and Movement Mode for that piece of the
path. All waypoint paths added immediately after this piece of the path,
automatically use the same RoE and Movement Mode.
Waypoint Window
By right clicking on a waypoint icon, the
Waypoint Window appears. This menu allows
you to change the type and action of this
waypoint.Waypoint types are as follows:
• Normal – This is the standard waypoint type,
and simply marks a point on the path
•
Objective – Assigns a number, between 1 and 10, to this waypoint forcing a
computer controlled team to send you a voice message when they reach
this point
•
Alpha – Assigns a wait for Alpha Go Code action
•
Bravo – Assigns a wait for Bravo Go Code action
•
Charlie – Assigns a wait for Charlie Go Code action
•
Delete – Delete this waypoint
Waypoint actions are as follows:
• None – This is the standard waypoint action, nothing special happens
•
Frag – This action pops-up a circle on the map where you can specify exactly
where you want a computer controlled team to throw a frag grenade
•
Flash – This action pops-up a circle on the map where you can specify
exactly where you want a computer controlled team to throw a flashbang
grenade
•
Gas – This action pops-up a circle on the map where you can specify exactly
where you want a computer controlled team to throw a tear gas grenade
•
Smoke – This action pops-up a circle on the map where you can specify
exactly where you want a computer controlled team to throw a smoke
grenade
•
Snipe – This option is only available if this is a wait for Go Code waypoint. It
allows you to specify the direction you want a computer controlled team to
snipe, while waiting.
> 18 <
Page 12

Waypoints and Planning
Your current waypoint appears in your screen as a floating circle with its range
in meters. If your waypoint is not in view an arrow appears along the edge of
the screen indicating the direction you need to turn to find it. If you planned a
special action for a waypoint, such as Wait for Alpha Go Code or Throw a Frag
Grenade, it appears in the center of the screen when you reach the waypoint.
Below your health and name are the current Rules of Engagement (RoE). RoE
determine how your AI teammates engage the enemy and change
automatically based on your planning as teams reach waypoints (see Engaging
Tangos and Rules of Engagement section).
Other Operatives in Your Team
In the upper right of the screen is your team’s status. Each team member has a
health icon that functions identically to your own. Below, is your team’s current
action, such as Following and Engaging.
Other Teams
In the lower right of the screen is information about other teams that you’re
not currently controlling. This information includes team names, health icons,
and their current actions. Glance at this information occasionally to make sure
none of your teams is waiting for you to issue a go code before they continue
moving.
Map
By pressing the Toggle Map key (G),a full screen map appears in your screen and
rotates to match your characters facing. This map depicts your current position,
all of your unachieved waypoints, and any tangos that you’ve spotted. To zoom
the map in is press the Zoom In Map key ([). To zoom the map out press the
Zoom Out Map key (]).
In-Game Menu
You can pause the game and bring up the InGame Menu by pressing the In-Game Menu key
(Esc). This menu displays statistics on all your
operatives including health status, kills, hit
percentage, rounds fired, and rounds that hit
target. It also displays your mission objectives
and their status.
> 21 <
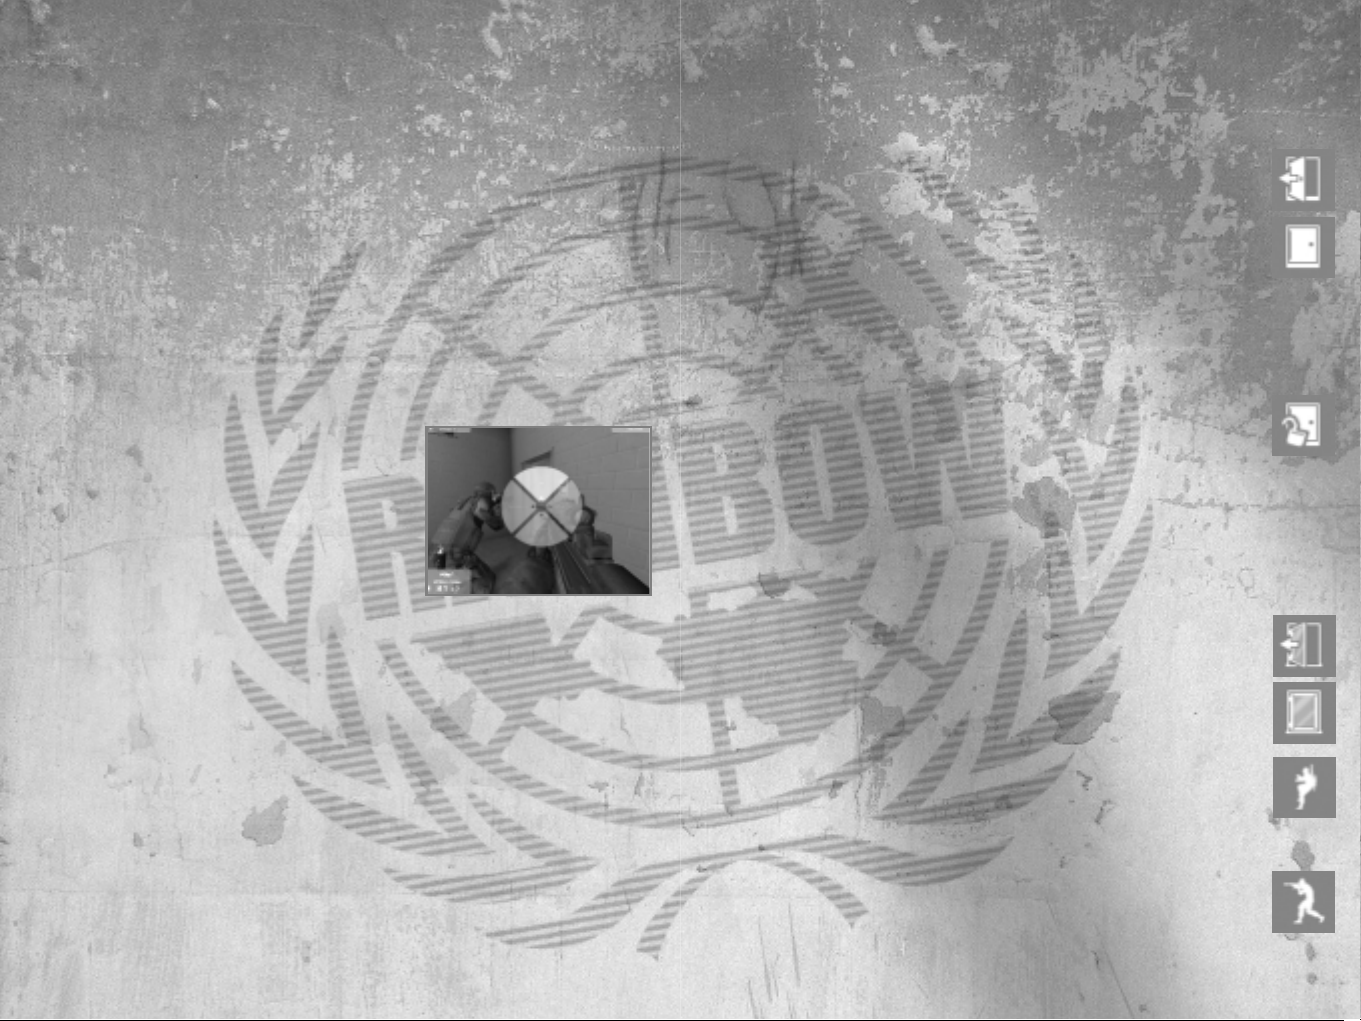
In-Game Interface: HUD
The Heads Up Display or HUD, provides you with
the information you need during a mission. This
includes data such as your health status and the
amount of ammunition remaining for your
weapons. Because you can filter things out of
your HUD (see Options: HUD section above) you
can press and hold the Show Complete HUD key
(F1) to see everything in your HUD at one time.
Your Operative
In the upper left of the screen are your operative’s stance (standing, crouching,
or prone), health, and name. If the health icon is full you’re healthy. If it’s half
full you’re wounded and can no longer run. If it’s empty, it’s time to switch to
another operative.
Your Weapon Status
The status of your weapon appears in the lower left of the screen. In the top of
the box is an icon of your current weapon,along with its name and attachment.
Below this starting from the left are your Rate of Fire (see Shooting: Rate of Fire
section), rounds in the weapon, and magazines remaining. As you shoot, the
number of rounds in the weapon decreases. As you reload and discard empty
magazines the number of magazines remaining decreases.
Reticule
In the center of the screen is your reticule, which consists of two pieces: the
center dot and the four moving crosshairs. The reticule represents the current
accuracy of your weapon (see Shooting: Reticule section). Bullets you fire hit
somewhere within the crosshairs.The longer you wait before taking a shot, the
closer the crosshairs get and the more accurate your shot will be.
Action Icon
Below the reticule at the bottom center of the screen is the Action icon. When
you point the center reticule dot at something in the environment that you can
interact with, this icon appears. The icon symbolizes what you and your team
can do at this location (see Interacting with the Environment section).
> 20 <
Page 13

What is My Mission?
What do I do?
Your mission is protect the innocent and stop the guilty. Rainbow only gets
called after all other options have been exhausted on situations of
international importance. That means when you go in hit hard and fast, but be
careful what you shoot at. Shooting hostages and/or surrendered terrorists is
not acceptable. In fact, shooting hostages causes you to fail a mission
automatically.
Default Mission Objective
All missions have a default objective, whether it is stated or not. This objective
is to neutralize all terrorists. If you accomplish this objective you automatically
complete all remaining objectives. The only exception to this is on Recon
missions where you must remain undetected. Should you shoot a terrorist in
this type of mission you automatically fail the mission.
Who Else is in the World?
You and your team aren’t the only ones in the world. There are three different
types of people you will encounter: Other Rainbow Teams, Terrorists, and
Hostages.
Other Rainbow Teams
Switching Between Teams
When you plan a mission you have the option to field up to three teams. These
can contain up to eight operatives total. You can switch between teams by
using the Previous Team (Page Up) and Next Team (Page Down) keys. When
you’re not controlling a team directly, the team members follow their planned
waypoint and actions. If they don’t have any waypoints they simply hold their
position waiting for you to take control of them.
Go Codes
Occasionally, teams you don’t control directly require orders from you. These
situations include teams waiting for Go Codes and Sniper Controls. As
mentioned in the Planning section above, Go Codes are a great way to
coordinate activities between teams. When teams reach waypoints with
attached Go Codes they wait until you issue the appropriate Go Code. To issue
Go Codes, simply press the appropriate key: Alpha Go Code (J), Bravo Go Code
(K), Charlie Go Code (L), and Zulu Go Code (,). To know whether a team is
currently “waiting for a go code” see the In-Game Interface: Other Teams
section.
> 23 <
At the bottom of the menu are buttons that allow you to do the following:
•
Quit Raven Shield – Exits the game
•
Quit to the Main Menu – Returns you to the Main Menu screen
•
Go to the Options Menu – Allows you to change the current options and
then return to the game
•
Abort Mission and Retry Action – Restarts the mission from the beginning
of the action phase
•
Abort Mission and Retry Planning - Restarts the current mission from the
beginning of the planning phase”
How to Play
Who am I?
My Role and Responsibilities
You are an elite Rainbow counter terrorism operative, trained to the limits of
human capabilities. In Raven Shield you play two unique roles: Mission Leader
and Individual Team Leader. As Mission Leader you are responsible for selecting
your teams, equipping them, and preparing a plans of attack. Once you begin a
mission you are responsible for issuing Go Codes and Freeing your snipers to
fire when they have targets (see Controlling Other Rainbow Teams section).
You also assume the role of one of the Individual Team Leaders with up to three
computer-controlled teammates following you.You lead from the front and are
usually the first to encounter the enemy. It’s up to you to decide how best to
engage them, minimize your own casualties, and complete your mission.
Switching between Teammates and Team Hold
Behind you are up to three computer-controlled teammates. Each has their own
responsibilities and sweep pre-designated areas for targets. When you
approach a door, your team automatically deploys around you to best cover
your entry into the room.
Since each member of a team has their own capabilities and equipment, there
are times you may want to control them directly to best accomplish a particular
task. You can switch between your teammates by using the Previous Team
Member (Home) and Next Team Member (End) keys or by pressing and holding
the Operative Menu key (7).
You can also tell you team to hold position by using the Toggle Team Hold key
(R). This allows you to leave you team behind, while you perform some
especially risky or sneaky maneuver. To have them reform on you again simply
press the Toggle Team Hold key again.
> 22 <
Page 14

and beg not to be hurt. Hostages are physically and emotionally overwhelmed
and otherwise not prepared for the situation they’re in.The only way to interact
with hostages is to rescue them (see Interacting with the Environment section).
Looking and Moving Around
To look around the world move you mouse. This controls where you character
looks.To move,use the Move Forward (W), Move Backward (S),Sidestep Left (A),
and Sidestep Right (D) keys. You can move faster by pressing and holding the
Run key (Right Mouse Button) at the same time as the Move and/or Sidestep
keys. Using the Run key, however, greatly increases the amount of noise you
make and also makes shooting accurately much more difficult.
Peeking and Changing Stance
Peeking is extremely useful for looking around objects without completely
exposing yourself to enemy fire. You can peek using the Peek Left (Q) and Peek
Right (E) keys. You can also fluidly peek by pressing and holding the Fluid
Posture key (Left Control) and moving your mouse. This allows you to peek as
little or as much as needed.
When you’re trying to avoid being shot or detected it also helps to minimize
your stance. The three stances you can assume are standing, crouching, and
prone.To lower your stance, press the Stance Down key (X). To raise your stance,
press the Stance Up key (C). You can also fluidly adjust your stance between
standing and crouching by holding the Fluid Posture key and moving your
mouse.
While holding the Fluid Posture key your mouse changes your posture and
peeking only, and cannot be used to look around or aim. When you release the
key your posture and peeking status remain in their current positions and
mouse once again allows you to look around. When you want to stop peeking
and snap your stance to standing or crouching simply press the Fluid Posture
key twice.
Night Vision
Rainbow is an elite unit and has access to all the latest technology. To help
Rainbow operate at night and in darkened conditions, team members use night
vision goggles. To turn your night vision on and off press the Toggle Night
Vision key (5).
> 25 <
Sniper Controls
When a team reaches a Snipe Until Go Code waypoint (see Planning section
above) they stop and inform you if they have targets or not. If they have no
targets you receive a message saying,“Green team, sights are cold.”If they have
targets you receive a message saying, “Green team, sights are hot.”If you want
the team to fire on the target(s) you can free them by using the Toggle Sniper
Control key (T). From this point on they’ll shoot any terrorist they see. If you
want them to hold their fire simply press the Toggle Sniper Control key again.
All Teams Hold
You can also tell all teams, including your present team to hold their position by
pressing the Toggle All Teams Hold key (H). To have all teams resume the
mission and follow their preplanned waypoints, simply press the Toggle All
Teams Hold key again.
Call for Status Report
You can ask your teams for a status report by pressing the Call for Status Report
key (8). Your computer controlled team leaders respond with what they are
currently doing and the number of team members out of action.
Terrorists
Terrorists,also known as “Tangos”, are the enemy.
These guys must be stopped at all costs. They
have their own objectives, which usually involve
hurting innocent people for political or
ideological reasons and/or destruction or theft of
property that doesn’t belong to them. Basically,
there are only two ways to deal with Tangos:Stop
them by force if they’re armed (shoot them) or
take them into custody if they aren’t armed or have surrendered (see
Interacting with the Environment section).
Hostages
Hostages are the innocent people terrorists
usually threaten to hurt. Hostages are panicky,
unpredictable elements in an already wildly out
of control situation.When they see you they tend
to react in very unpredictable ways. Some run to
you or freeze in place,while others hit the ground
> 24 <
Page 15
If you want to coordinate this order with another team, switch to another team
and issue another quick order on Zulu. Then switch to a third team, press the
Zulu Go Code key (,),and watch the fun.
Situations and Default Actions
Doors (Open/Close)
• Open (Default) – You or your team move to the door, assume room
entry formation,and open the door
•
Open and Grenade – Same as Open, but the team throws in a
grenade once the door is open
•
Open and Clear – Same as Open, but the team rushes through door
to engage all tangos
•
Open, Grenade, and Clear – Same as Open and Grenade, but the team
rushes through the door to engage all tangos
Locked Doors
When you order your team to interact with a locked door they treat it
exactly like an unlocked door. This means that you can issue the same
orders as Doors and the team automatically unlocks the door before
proceeding with their orders.
When you unlock a door it does not open it automatically. It simply changes it
from locked to unlocked. To perform this action, you must press and hold the
Action key until it is complete.
• Unlock (Default) – You unlock it
Windows/Shutters (Open/Close)
• Open (Default) – You or your team move to the window and open it
•
Open and Grenade – Same as Open, but the team throws a grenade
through once the window is open
Ladders (Climb Up/Down)
• Climb (Default) – You or your team move to the ladder, assume
ladder covering formation,and climb the ladder
Ground Not Near You
• Move to – Your team moves to the designated location
•
Move to and Grenade – Same as Move to, but the team throws in a
grenade once they are within range of the location
Interacting with the Environment
How Do I
Interacting with your environment is extremely important in Raven Shield. It
allows you to do everything from opening doors to securing surrendered
terrorists. To interact with your environment move near to and look at an
area/object you can interact with. When a bright, high intensity Action Icon (see
In-Game Interface: Action Icon above) appears in the bottom center of the screen
press the Action key (Space Bar) to perform the action the icon represents.
How to Order My Team
Ordering your team to interact with the environment is just as simple as doing
it yourself. Look at an object or area where you want them to do something
from a distance. When a dull, low intensity Action Icon appears in the bottom
center of the screen, press the Action key to order your team to perform the
default action (see Situations and Default Actions section).
Team Quick Order Interface
(QOI)
The default action is not the only action you can
order your team to perform. Instead of pressing
and releasing the Action key, press and hold it.
The team Quick Order Interface (QOI) appears in
the center of your screen and contains all the
orders you can issue to your team at that
location.To issue an order,move your mouse until
you highlight the desired order and left click on it.
Orders that utilize grenades require one additional step to issue them. After
clicking on an order the menu changes to all the grenades your team currently
has on them. Click on a grenade to finish issuing the order.
You’ll know you’ve issued an order when the QOI disappears while you’re still
holding the Action key, and you hear your character vocally issue the order. To
exit the QOI without issuing an order, release the Action key before you click on
an order.
Issuing a Team Order on Zulu Go Code
By using the QOI you can even coordinate activities between multiple teams. To
do this, you need to issue quick orders that wait for the Zulu Go Code before the
teams execute them. To issue a “quick order on Zulu”, access the QOI normally,
but instead of left clicking on the order,right click on it. Now the team will wait
for you to issue the Zulu Go Code before executing the quick order.
> 26 < > 27 <
Page 16

same time as the Fluid Open or Fluid Close keys you can quickly open and close
doors/windows.
And finally, there is a much more destructive way to permanently open
doors…explosives. A Breaching Charge, Remote Charge, Claymore Mine, or Frag
Grenade destroys most doors instantly (see Deploying Explosive Charges and
Mines, and Throwing Grenades sections below).
Using Ladders
When you interact with a ladder all you initially do is put away your weapon
and grab onto the ladder.To go up or down the ladder you need to use the Move
Forward and Move Backwards keys. You can also go up and down ladders
quickly by holding the Run key while simultaneously using the Move keys. But
remember, climbing faster makes more noise and is more likely to cause
enemies to notice you.
Switching between Weapons and Equipment
Each Rainbow has four pieces of equipment they can utilize: Primary Weapon,
Secondary Weapon, Item 1, and Item 2. Computer controlled Rainbow team
members automatically switch between their available gear as needed. You can
switch your current operative’s gear by using the Primary Weapon (1),Secondary
Weapon (2),Item 1 (3), and Item 2 (4) keys.
If you’re not sure what gear your current operative has, press and hold the
Inventory Menu key (6). This brings up a menu of your operative’s gear in the
middle of your screen similar to the QOI (see Team Quick Order Interface above).
Use the mouse to highlight the desired piece of equipment and left click on it to
equip it.
Engaging Tangos and Rules of Engagement
(RoE)
As the player, it’s completely up to you when you engage tangos and when you
don’t. Remember that on Recon missions engaging tangos is an automatic
mission failure.
Your team, however, engages tangos based on the current Rules of Engagement
(RoE):
•
Assault – Engage all tangos
•
Infiltrate – Engage all tangos with silenced weapons only; If fired upon,
engage all tangos regardless of silenced weapons
•
Recon – Only engage tangos if fired upon
> 29 <
Ground Near You
• Reform on me (Default) – Your team returns to you and follows
Usable Device Area (Activate/Deactivate)
This one actually requires a little more explanation. Some missions
require you to do things like plant surveillance devices or disarm
bombs. This action allows you to perform all these types of actions. To
perform these actions, you must press and hold the Action key until
they are complete.
•
Activate (Default) – You or your team activate or plant a device
Securing Terrorists
To perform this action, you must press and hold the Action key until it
is complete.
•
Secure (Default) – You or your team move to the surrendered terrorist and
handcuff him
Escorting Hostages (Follow Me/Stay Here)
• Follow Me (Default) – You or your team move to the hostage and
tell him/her to follow
Player Death
• Switch to Next Rainbow (Default) – You switch to control the next
Rainbow in your team after your current Rainbow dies
Using Doors/Windows
The process of using doors requires a little more discussion, as there are a
number of ways to approach it. Reminder, unlocking a door does NOT open it. It
simply the door’s state from locked to unlocked.
There is, however,another way to unlock doors…you can shoot out the locks! By
shooting at the locking mechanism, you cause it to sustain damage and
eventually it breaks and becomes unlocked. Further shooting at the door
actually opens it if it opens away from you.
Besides simply opening and closing a door/window all the way, you can also
open/close them slowly. By pressing the Fluid Open (Mouse Wheel Up) and
Fluid Close (Mouse Wheel Down) keys you can slowly open and close doors and
windows. If you press the Fast Fluid key (Mouse Wheel Button Down) at the
> 28 <
Page 17

If the rate of fire is Five, which represents full automatic, you can hold the fire
key as long as you like and the weapon continues to fire until you release or it’s
magazine goes empty. You can still press and release the fire key to fire one or
two rounds at a time.
Reloading
When your weapon’s magazine goes empty or “dry”, you need to reload it. Use
the Reload key (Z) to reload a weapon. Reloading when the weapon is
completely empty is the most time consuming reloading method, because you
must swap magazines and load a round into the firing chamber by pulling the
charging handle.
You may also want to reload when your weapon is simply low on ammunition
or before you enter combat. This method of reload, a tactical reload, is much
quicker than waiting until a weapon goes dry,because you simply need to swap
magazines. Don’t worry, if the magazine isn’t empty. Your character
automatically saves it for later use.
Zooming
All weapons have a default, concentration based, zoom of 1.5x. To zoom your
weapon use the Zoom key (Left Shift). To zoom out with your weapon simply
press the Zoom key again. Sniper rifles have a special scope that allows them to
zoom to 5x and 10x magnification.
Weapon Attachments
You can customize your weapons by using one of four weapon attachments.
Each of the weapon attachments in Raven Shield affects your weapon in a
unique way.
Mini-Scope
A Mini-Scope simply changes your default zoom from 1.5x to 3.5x.
However, the scope itself takes up considerable screen space on top
of the weapon.
Sound Suppressor (Silencer)
Sound suppressors are used in conjunction with special subsonic
ammunition and greatly reduce the sound emitted by a weapon.
The subsonic ammunition has less power than standard rounds and
therefore has less range and is less lethal. The weight of the suppressor also
slows the reticule recovery time, making it less responsive than a nonsuppressed weapon.
> 31 <
To change the RoE press the Change Rules of Engagement key (F). As you press
the key the RoE indicator in the upper left of the screen cycle between the three
options.
Shooting
Reticule
Now that you know how to equip your weapons you need to know how to use
them. The best place to start is with the reticule. The center of your reticule
represents the center of your screen and is where your bullets hit when you’re
100% accurate. This however rarely happens, as there are a lot of things that
influence you accuracy with a weapon.
The other pieces of the reticule are four lines that move away from and toward
the center of your screen to represent your current accuracy. When you fire a
weapon the bullets hit somewhere within these four lines. As you move and
look around the reticule lines move away from the center of your screen. This is
called “reticule bloom”. When you stop the lines move back toward the center
of the screen until they reach the weapons best accuracy.The rate at which your
reticule expands and contracts is unique to each weapon. It’s always best to
wait until the reticule shrinks completely before firing, but sometimes you just
don’t have that luxury…tangos shoot too.
Reducing your stance down, standing to crouching and crouching to prone,
increases your weapons base accuracy. This however decreases your mobility,so
be aware.
Firing
To fire a weapon press the Primary Fire key (Left Mouse button). The first thing
you should notice is that your screen jumps when you fire. This reflects the
recoil of the weapon. Each weapon’s recoil is unique. To compensate for this
jump and stay on target you can pull your mouse down,but this may cause your
reticule to bloom if you pull too fast.
Rate of Fire (RoF)
Not all weapons fire a single round when you press the Primary Fire key. Each
weapon in Raven Shield has one or more Rates of Fire (RoF). You can cycle
between your weapon’s RoF setting by pressing the Change Rate of Fire key (B).
If the RoF is set to One there is no difference between pressing and holding the
fire key; you always fire a single bullet or round. If the RoF is Three you can hold
the fire key to fire a burst of three rounds or press and release it to fire one or
two rounds.
> 30 <
Page 18
Using Other Items
Passive Items
A number of items that you can take on missions do not require you to hold
them in order for them to work. These items are called passive items and are
listed below:
Defuse Kit
This item allows you to activate and deactivate bombs and
explosive devices much faster. It does not help you deploy Claymore
Mines, Breaching Charges, and Remote Charges faster.
Electronic Kit
This item allows you to place and manipulate electronic devices
such as bugs and security systems much more quickly.
Lockpick Kit
This item allows you to unlock doors much more quickly.
Gas Mask
This item negates the effects of gas grenades.
Primary Magazines
This item provides additional magazines for your primary weapon.
Secondary Magazines
This item provides additional magazines for your secondary
weapon.
Heartbeat Sensor
The heartbeat sensor must be equipped to operate and displays the
electrical signals emitted by beating hearts as pulsating white
circles. These circles pulsate at the same rate as the person’s heart. Since the
sensor cannot tell whether the person is a Rainbow team member, Terrorist, or
Hostage, you’ll have to figure that out by yourself. Here’s a hint, when people
get scared, run,and get wounded their heart rates increase.
Deploying Explosive Charges and Mines
Breaching Charge
Breaching charges are small explosive devices designed to instantly
open/destroy any door. To deploy a breaching charge,equip it,
move close to a door and press and hold the Primary Fire key. Once deployed, a
detonator appears in your hand. Move a meter or so away from the door and
then press the Primary Fire key to detonate the charge.
> 33 <
High Capacity Magazines
High Capacity Magazines greatly increases the ammunition capacity of a
weapon resulting in less frequent reloading. However the increased weight of
the extra ammunition slows the reticule recovery time, making it less
responsive than the same weapon with a standard magazine.
Thermal Scope Attachment (Sniper Rifles only)
The Thermal Scope Attachment appears on the left side of sniper
scopes and allows you to see thermal signatures up to 3 meters
through walls and other obstacles. To activate it you must be zoomed to 5x or
10x magnification. Press the Secondary Fire/Toggle Weapon Attachment key
(Left Alt). While in thermal vision mode you can look through almost anything,
but can only shoot through doors. To deactivate it simply hit the Secondary
Fire/Toggle Weapon Attachment key again.
Auto-Aim
Auto-Aim helps you target quickly by snapping your crosshairs to tangos as
they appear. You can toggle through the auto-aim settings by pressing the Cycle
Auto-Aim key (F2): None, Low, Medium,and High. At Low setting Auto-Aim only
locks to tangos near the center of the screen. At High setting Auto-Aim locks
on-to most tangos in the screen.
Auto-Aim is a great tool when you first begin to play, but as your skills increase,
you may want to turn it off and take your chances aiming on your own. AutoAim only works against medium to short-range targets. If you want to aim at
anything farther and you’ll have to hit it on your own.
Bullet Penetration of Doors
As stated in the Thermal Scope Attachment section, bullets only penetrate
doors. They do so based on the door material and the bullet’s energy when it
reaches the door. Bullets are less lethal when they emerge from a door, but for
large caliber weapons like the M82A1 .50cal sniper rifle, it really doesn’t make
much of a difference.
> 32 <
Page 19

Tear Gas
Tear Gas grenades detonate after a short delay and leave a toxic
cloud of smoke,which causes coughing and blurred vision.These are
also good grenades to toss into rooms with terrorists and hostages.
Finishing a Mission:
Debriefing Screen
A mission ends either when you complete all of
the mission objectives or when you fail one or
more of them. In both circumstances you go to
the Debriefing screen, which displays the mission
objectives and their status, your operatives and
their status/statistics, total team status, and your
campaign statistics.
If you complete all of the mission objectives you have the following options at
he bottom of the screen:
•
Go to the Main Menu – Returns you to the Main Menu
•
Go to the Options Menu – Allows you to change your options and then
return to the Debriefing screen
•
Retry Action – Restarts the current mission
•
Go to Back to Planning – Restarts the current mission in the Briefing Room
so you can rework your plan
•
Accept Mission Outcome – Accepts the mission outcome. If you’re playing a
campaign it takes you to the Planning Computer for the next mission. If
you’re not in a campaign,it takes you to the Custom Mission screen.
If you fail one or more of the objectives you get the same options as you do
when you succeed, except for the Accept Mission Outcome option.
Multiplayer
Differences between Single
and Multiplayer Play
The main difference between multiplayer and single player play is that in
multiplayer there are one or more other human players playing with or against
you. Computer controlled characters are challenging opponents, but other
players are another thing entirely. Once you’ve mastered the single player
> 35 <
Remote Charge
Remote charges are small explosive devices designed to destroy
everything in a small area. Think of them as extremely powerful
frag grenades that can be remotely detonated. To deploy a remote charge,
equip it, look at the ground near you, and press and hold the Primary Fire key.
Once deployed, a detonator appears in your hand. Move away from the area
and then press the Primary Fire key to detonate the charge.
Claymore Mine
Claymore mines work almost identically to remote charges except
that they focus the destructive effect in the direction you face when
deploying them. Deploy and detonate a claymore the same way as a remote
charge, but make sure you’re behind it when it goes off.
Throwing Grenades
Grenades give you a lot of flexibility during a mission. To throw a grenade,
equip it and point in the direction that you want to throw. Press the Primary
Fire key to throw it overhand or the Secondary Fire/Toggle Weapon Attachment
key to throw it underhand.
You can also press and hold the Primary Fire or Secondary Fire keys to pull the pin,
but not throw it. However, at this point you are committed, as you cannot put the
pin back into the grenade.When you release the key, you toss the grenade.
With practice you’ll be tossing frags through windows in no time!
Frag
Frags are destructive grenades that detonate after a short delay,
destroying everything and everyone nearby.
Flashbang
Flashbangs are distraction grenades that confuse and blind anyone
nearby, while doing inflicting no damage. Toss these into rooms
with hostages and terrorists to give you an edge over the enemy before
entering.
Smoke
Smoke grenades detonate shortly after being released and emit a
large cloud of concealing smoke. Use these grenades to cross open
areas and to conceal your movements. But beware, thermal vision sees directly
through smoke making you vulnerable to snipers who are thus equipped.
> 34 <
Page 20

Internet Servers
Internet servers exist on the Internet. To see these servers you must Log In to
Ubi.Com using your account. Once you are logged in, the available servers list
fills up and displays the Internet servers currently available. The server list
displays information regarding each server and uses the following format:
• Favorite – Server is in your favorites list (see below)
•
Locked – Server is password protected
•
Dedicated – Server is a dedicated server (see Create Server Screen section)
•
Name – Name of the server
•
Ping – Ping or response rate of the server
•
Game Type – Current game type of the server
•
Game Mode – Game mode of the server: Adversarial or Cooperative
•
Map – Current map on the server
•
Current/Max Players – Current and maximum number of players allowed on
the server
If you click on a server, you select it. If you right click on a server, you select it
and bring up the Server Window.This window contains three options:
•
Add to Favorites – Adds server to your favorites list
•
Remove from Favorites – Removes server from your favorites list
•
Refresh – Refreshes this server only
LAN Servers
LAN servers are servers that only exist on your Local Area Network (LAN).You do
not need an account on Ubi.Com to play on these servers and the server list
displays the same information as it does for Internet servers.
Filter/Information Areas
This area has three tabs, which allow you to filter the servers shown in the
server list and to find out more information on the selected server: Game Type
Filter,Tech Filter,and Server Info
Game Type Filter
The game type filter removes all servers
you’re not interested in playing from
the server list and is divided by Game
Mode: Adversarial and Cooperative.
Adversarial – Go head-to-head against other players
•
Survival – Free-for-all, shoot everyone game, where all you need to do to
win is survive
> 37 <
game, sharpen you skills against living, breathing opponents for a whole new
level of gaming.
Unlike single player games, to play a multiplayer game you must first join or
create a server.Servers exist either on Local Area Networks (LAN), if you’re lucky
enough to be on one, or on the Internet. To play Raven Shield over the Internet
you must create a free Ubi.Com account (see Multiplayer Screen).
Multiplayer Screen
The Multiplayer screen is quite intimidating the
first time you see it, but it’s actually quite simple
to use. This screen is broken into three areas:
Main Buttons, Server Lists, and Filter/Information
Areas.
Main Buttons
The main buttons run across the top of the screen and consist of the following
options:
•
Log In/Log Out – This option allows you to Log In to and Log Out of to
Ubi.Com.When you log in, a window appears in the center of the screen and
has the following options:
Login Name – Your Ubi.Com account name
Password – Your Ubi.Com account password
Remember Password – Saves your password
Auto Login (only available is Remember Password is enabled) –
Automatically logs you in to Ubi.Com when you enter the Multiplayer
screen
World Wide Web: Create Account – Takes you to the UbiSoft web page
where you can create a free Ubi.Com account
•
Join – Joins the selected server in the server list
•
Join IP – Brings up a window that allows you to enter the IP location of a
server you wish to join
•
Refresh – Refreshes the server list
•
Create – Takes you to the Create Server screen (see Create Server Screen
section)
Server Lists
There are two different types of servers in Raven Shield: Internet and LAN.
> 36 <
Page 21

• Players,Kills, Time Played,Ping – Shows all players and their statistics
• Map List/Game Mode – Shows the entire map list and the game types
associated with each map
• Server Options – Shows all of the server options
Create Server Screen
This screen allows you to create a new server and
consists of three areas: Main Buttons, Options
Tab, and kit Restriction Tab.
Main Buttons
Cancel – Exits the screen and returns you to the
Multiplayer screen
Launch – Launches, starting the server
Options
General Options (not all options are available for all Game Modes)
Game Mode: Cooperative, Adversarial
– Select the game mode
Server Name – Enter a server name
Password: Enter a password if desired. Use the check box next to password text
area to lock the server and use the specified password
Administrator Password: Enter a password if desired. Use the check box next to
password text area to activate administrator mode on this server;if not checked
only the host on non-dedicated servers can use administrator commands
Rounds per Match/Mission – The number of rounds in a match/mission.When a
match/mission ends the map and game type rotate to the next one in the map
list.
Time Per Round – Round time limit
Time Between Rounds – Time limit between rounds
Number of Players – Maximum number of players
Bomb Timer – Time limit between bomb activation and detonation
Number of Terrorists – Maximum number of computer controlled terrorists on
the map
Difficulty Level – The difficulty of computer-controlled tangos during
cooperative play
Server Location – This is where others look to join your server: LAN or Internet
> 39 <
• Team Survival – Players separate into two teams, where the last team
standing wins
•
Bomb – Green team must prevent bombs from being detonated, while Red
team must detonate bombs
•
Hostage – Green team must recover the computer controlled hostages and
escort them to the extraction zone, while Red team must prevent them
from doing so
•
Pilot – Green team must escort a downed Blackhawk helicopter pilot,played
by one of the players on the Green team and armed only with a secondary
weapon, to the extraction zone. Red team must prevent him from reaching
the extraction zone
Cooperative – In this game type, you cooperate with other players to defeat
computer-controlled enemies.
•
Mission – Play single player missions with a friend against computercontrolled enemies
•
Terrorist Hunt – Neutralize all the computer controlled tangos
•
Hostage Rescue – Rescue the hostages and escort them to the extraction
zone
Tech Filter
This filter allows you to see only servers
that meet specified criteria in the server
list above:
• Unlocked Only – Shows only servers that aren’t password protected
•
Favorites Only – Shows only your favorite servers
•
Dedicated Servers Only – Shows only dedicated servers
•
Servers Not Empty – Shows only servers that have one or more players on
them
•
Servers Not Full – Shows only servers that are not completely full
•
Responding – Shows only servers that respond when “pinged”
•
Same Version – Shows only servers that are running the same version of the
game as you
•
Faster Than – Shows only servers that respond faster than the specified rate
(the lower the ping the better)
Server Info
This tab shows you more detailed
information regarding the selected server.
> 38 <
Page 22

Edit Welcome Message
This button allows you to edit the server welcome message.
Restriction Kit
The restriction kit allows you to “outlaw” or
restrict certain pieces of equipment from the
game. The left side of the screen is the Item Class
Area and the right side is the Individual Item
Area.
Item Class Area
Primary Weapons – These options display a list of
all the individual weapons in the Individual Item Area
• Sub-Machineguns
• Shotguns
• Assault Rifles
• Light Machineguns
• Sniper Rifles
Secondary Weapons – These options display a list of all the individual weapons
in the Individual Item Area
• Pistols
• Machine Pistols
Other Items – These options display a list of all their individual items in the
Individual Item Area
• Primary Weapon Attachments
• Secondary Weapon Attachments
• Other Items (i.e. grenades,etc…)
Individual Item Area
In this area you can restrict weapons/items individually or as a group using the
following options:
• Select All
• Unselect All
• Individual Items
> 41 <
Dedicated Server – When launched the server runs by itself, without forcing you
to join the game
Friendly Fire – Allows teammates to hurt each other
Teammate Killer Penalty – If you take out a teammate, they can choose to
penalize you and make you a spectator next round
Allow Radar – Allows players to use teammate radar to help coordinate team
play
Allow Teammate Names – Allows players to see teammate names when they
point at them
A.I. Backup – Gives you computer-controlled teammates who follow you
Force First Person Weapon – Forces all players to use first person weapons
Auto Balance Teams – Automatically assigns players to teams to balance them
Rotate Map On Success – Ignores Rounds Per Map and only rotates a map when
you successfully complete it
Map Area
Map Window
– Contains a list of all of the available maps
Add/Remove Map to/from Map List – Adds/Removes the selected map and the
selected game type to/from the map list window
Map List Window – Shows the maps assigned to the server with their game
types
Game Type – Depending on the selected game mode, this displays the available
game types
•
Adversarial: Survival,Team Survival, Bomb,Hostage, Pilot
•
Cooperative:Mission, Terrorist Hunt, Hostage Rescue
Death Camera Area
No Death Camera
– Does not allow a death camera4
First Person – Allows first person death camera
Third Person – Allows third person death camera
Free Third Person – Allows free third person death camera
Ghost Camera – Allows ghost death camera where you can move freely on the
screen
Team Only – Allows you to only see through/from your teammates and
automatically disables the Ghost Camera
> 40 <
Page 23

recorded voice messages to your team using the Pre-Recorded voice Message
key (V).
Finally, you can use the Drawing Tool key (F4) to display a drawing map.To draw,
simply left click and drag your mouse. You can right click to place a stamp on
the map. Your drawings and stamps remain on the map for approximately 15
seconds and are automatically transmitted to your teammates along with a
message telling them you’ve updated the map.
Using Multiplayer Only Items
There are three items that you can only use in multiplayer games:
•
False Heartbeat Puck – Deploys like a grenade and emits a
heartbeat that appears in heart beat sensors
•
Heartbeat Sensor Jammer – Masks all heartbeat signals within a
10m radius of the bearer from heartbeat sensors when held
•
Stand Alone Heartbeat Sensor Jammer – Deploys like a remote
charge and masks all heartbeats within a 15 meter area
Dying and Activating Death Cameras
When you die during a multiplayer game you can switch between the death
cameras allowed by the server by pressing the Primary (left mouse button) and
Secondary Fire (Left Alt) keys. When using the Ghost Camera you can fly around
the world and watch the action using the Move Forward (W), Backward (S), Left
(A), and Right (D) keys. When using other cameras you can switch between
players by using the Next (Home) and Previous Team Member (End) keys.
The Console
The Console key (`) brings up the game console, which shows you a list of the
previous game messages. It also allows you to enter a number of simple
commands.You can also enter console commands in the chat window, using the
Global Chat key (Y) or Team Chat key (U), by putting a “/” in front of the
command to let the game know what comes next is not a chat message.
Basic Commands
These console commands are available to all players on a server.
•
hideweapon - Hides the first person weapons
•
showweapon - Shows the first person weapons
•
name <new_name>” - Changes your multiplayer name to <New Name>
> 43 <
In-Game Menu
By pressing the Multiplayer Menu key (Tab), the
multiplayer in-game menu appears. In the title
bar is the time remaining until the next round
begins. Below this is server information including
Server Mode (Adversarial, Cooperative), Server
Name, Server IP and port, Map Name,Game Type,
Rounds (rounds remaining/rounds per match),
and Time per Round (remaining time in the round/total time of a round).
In the center of the screen is the team/player area with team and player
statistics including the following: Ready Status, Health Status, Player Name,
Number of Rounds Won/Rounds Played, Kills, Deaths, Hit Percentage, Shots
Fired, Shots Hit,Who Killed this Player,and Ping.
At the bottom of the screen are six buttons:
• Select Team – Allows you to select your team for team games
•
Server Options – Displays the server options, which are editable by the
server only
•
Restriction Kit – Displays the restriction kit, which is editable by the server
only
•
Gear Menu – Opens the gear menu, which allows you to change your
operative’s gear
•
Ready Button – Tells the server you’re ready to start the round
Teammate Radar
Teammate radar displays the relative location of
your teammates during team games.Teammates
on your level appear as a dot.Those above you
appear as an arrow pointing up,those below you
as an arrow pointing down, and
dead/incapacitated teammates appear as an “X”.
Communications and the Console
Communications are very important in multiplayer
games. So important that Raven Shield has four
different ways to communicate with other players.
Use the Global Chat key (Y) to send chat messages
to everyone in the game or the Team Chat key (U)
to send messages only to your team. Send pre-
> 42 <
Page 24

Administrator Only Commands
To have access to these commands you must either be the server or enter the
correct administrator password using the adminlogin command.
•
newpassword <new_admin_password> - Changes the admin password
from <old_ password> to <new_password> and sends the following
message to all players: “<admin_name> has changed the administrator
password”
•
kick <player_name> - Kicks the player off server and displays the following
message to all players: "<player_name> was kicked off the server by
<admin_name>"
•
kickid <player_id#> - Same as kick command but uses the players id#,
which can be obtained using the playerlist command, the instead of name
•
restartmatch <explanation_text> - Ends the current round, resets all
statistics to zero, and displays the following message to all players:
"<admin_name> restarts the match: <explanation_text>"
•
restartround <explanation_text> - Restarts the current game-round, resets
all statistics to what they were at the beginning of the round, and displays
the following message to all players: "<admin_name> restarts the round:
<explanation_text>"
•
map <map_id#> <explanation_text> - Ends the current round immediately,
changes the server to the designated map, and displays the following
message to all players: "<admin_name> ends the round and changes the
map to <map_name>: <explanation_text>"
•
writeserver <filename> - Saves the current server setup under the specified
filename in the Save directory
•
loadserver <filename> - Load a server setup from the specified filename in
the Save directory
> 45 <
• say <message> - Sends <Message> to everyone in the game
•
teamsay <message> - Sends <Message> to everyone in your team
•
quit - Exits the game
•
writeprofile <filename> - Saves the option settings under the specified
filename in the Save directory
•
loadprofile <filename> - Loads the option settings from the specified
filename in the Save directory
•
votekick <player_name> - Begins a one minute voting process to kick a
player off the server. Players can vote once during the voting period by
pressing the Toggle Vote Window key (F3). Each time a player votes a
message appears in the chat display area:“<player_name> votes <response>
to kick out <player_name>”. If over 50% of the players vote yes the player is
automatically kicked out and all players receive the following message:
"Vote passed! <player_name> kicked off server". Once 50% of the players
vote no the vote cannot pass and all players receive the following message:
"Vote failed! <player_name> can stay and play". Each player can only call a
votekick once every five minutes.
•
votekickid <player_id> - Same as votekick command but uses the players
id#, which can be obtained using the playerlist command, the instead of
name
•
vote <1,2> - Once someone starts a vote you can vote by either using the F3
voting window or by entering this command:
•
1 = Yes
• 2 = No
• playerlist - Lists all players and their ID#s in the console
•
maplist - Lists all maps and their ID#s in the console
•
suicide – Kills your character instantly
•
adminlogin <admin_password> - Allow you to enter that administrator
password to gain access to administrator only commands
> 44 <
Page 25

> 47 <
Credits
CREATIVE TEAM
> 46 <
Producer
Chadi Lebbos
Associate Producer
Patrick Naud
Senior Producer
Mathieu Ferland
Lead Game Designer/Manual Writer
Michael McCoy
Game Designers
Daniel Bérubé
Maxime Béland
Lead Programmer
Éric Bégin
Programmers
Alexandre Dionne
Aristomenis Kolokathis
Guillaume Borgia
Jean-François Dubé
Joel Tremblay
John Bennett
Patrick Garon
Rima Brek
Serge Doré
Yannick Joly
Collaborating Programmers
Chaouky Graham
Hugo Allaire
Julien Bouvrais
Intern Programmers
Cyrille Lauzon
Lysanne Martin
Sébastien Lussier
Lead Artist / Art Director
Carol Bertrand
Artists
Adrian Cheung
Annie Richer
Audran Guerard
Catherine Nolin
Christian Sirois
Danny Deslongchamps
Dany Marcoux
David Blazetich
David Massicotte
Guillaume Blais
Gwenael Heliou
Hugo Desmeules
Jean-Philippe Rajotte
John Bigorgne
Karine Fortin
Natasha Bouchard
Patrick Daigle
Sebastien Laporte
Simon Marinof
Wafaa BenHammou
Character Artist /
Character Concept Artist
Arman Akopian
Lead Animator
Josef Sy
Animators
Alexandre Vinet
Joseph Nasrallah
Mathieu Huet
Thomas J Anderson
Lead Level Designer
Carl Lavoie
Level Designers
Benoit Richer
Éric Poulin
François Laperrière
Jason Arsenault
Jonathan Dumont
Martin Dufour
Philippe Lussier
Rémi Lacoste
Yann Sylvestre
Audio Designer
Nicholas Duveau
Quality Assurance
QA Lead Testers
Emmanuel-Yvan Ofoé
François McCann
Marc Brouillette
QA Testers
Alexandre Martel
Allen Tremblay
Antoine Thisdale
Charles Drolet-Demers
Christian Fortier
Christian Norton
Daniel Sarrazin
Dominic Colabelli
Eric Laperrière
Eric St-Jean
Frédéric Dufort
Frédéric Laporte
Hanz Tabora
Jean-François Dupuis
Jimi Langlois
Luc Plante
Marc Brouillette
Marc-André Dessureault
Marc-André Fillion
Martin Langlois
Martin Tavernier
Mathieu Fortin
Mathieu Lachance
Nicholas Routhier
Patrick Sauvageau
Philippe Dion
Raymond Brunette
Robin Lee Gordon
Sebastien Martel
Stéphane Pinard
Sylvain Bordeleau
Yan Charron
Yannick Francoeur
QA Config Testers
David Lévesque
Jason Alleyne
Data Manager
Bruno Bellavance
Francis Tremblay
Lead Localization/Integration
Alexandre St-Louis
Technical Advisor
Mike Grasso
Planning Coordinator
Audrey Goyette
Marketing Research Coordinator
Jean-François Poirier
Storyboard
Wayne Murray
Making Of Director/Editing
Miguel Angel Martin
Making Of Assistant
Annemarie Gabrielle
The complete credits list is available
in the credits section in the game
Uses Bink Video.Copyright ©
1997-2001 by RAD Game Tools,Inc.
Page 26

Technical Support
On-line Support Options
Ubi Soft offers on-line support options for software products. One of these is
our website at: http://www.ubisoft.co.uk/support/.
If you have a specific problem that is not addressed on our site, you can send
your question to us via e-mail at:
techsuppor
t@ubisoft.co.uk.
Please be as specific as you can be about the problem you are experiencing.
Other Support Options
You can also contact Ubi Soft Technical Support by phone and fax. When you
call, please be as specific as you can be about the problem you are experiencing.
Ubi Soft Technical Support:
0870 739 7670
Hours: Monday To Friday 8.00am – 11.00pm GMT
Ubi Soft Hintline:
0906 906 0200
Mailing Address:
Ubi Soft Entertainment Ltd.
Chantrey Court,
Minorca Road,
Weybridge,
SURREY.KT13 8DU
> 49 <> 48 <
Warranty
Ubi Soft guarantees to the original buyer of the product that the compact disc
(CD) supplied with this product shall not show any fault during a normal-use
period of ninety (90) days from the invoiced date of purchase.
Please return any defective product to; Ubi Soft Entertainment Ltd., Chantrey
Court, Minorca Road, Weybridge, Surrey, KT13 8DU together with this manual
and your registration card if you have not already sent it to us. Please state your
full name and address (including postcode), as well as the date and location of
purchase. You may also exchange the product at the place of purchase.
If a disc is returned without proof of purchase or after the warranty period has
expired, Ubi Soft will choose either to repair or to replace it at customer
expense. This warranty is invalid if the disc has been damaged through
negligence, accident or misuse,or if it has been modified after acquisition.
This software program, manual and packaging are protected by copyright and
all rights are reserved by Ubi Soft. Documentation should not be copied,
reproduced, translated or transferred,in whole or in part and in whatever form,
without prior written agreement of Ubi Soft.
This software program, this CD and its documentation are sold as they stand.
Outside the guarantee period of 90 days concerning any manufacturing defect
of the CD, Ubi Soft will not extend any other guarantee concerning this
program, this CD nor its documentation, be it written or verbal, direct or
implied, including but without limitation of the above, guarantee and
conditions of marketing and use for specific purposes even though the
company may have been informed of such use. Similarly, you shall be entirely
responsible for any risks relative to utilisation, results and performance of this
software program, of this CD and the documentation.
Ubi Soft shall in no event be liable to you or a third party for indirect or
consecutive damages, nor specific damages relative to ownership, the use or
the wrongful use of this product and, within the limits provided by law,
damages in case of bodily injury, even if Ubi Soft has been informed of such
possible damages or losses. The buyer wholly accepts that, in case of legal claim
(contract, prejudice, or other) the liability of Ubi Soft shall not exceed the price
value originally paid for the purchase of the product.
Page 27

Notes
> 51 <
Notes
> 50 <
Page 28

Notes
> 52 <
Page 29

Design : ƒ © 2003 Red Storm Entertainment. All Rights Reserved. Red Storm and Red Storm Entertainment are trademarks of Red Storm Entertainment in the US and/or other countries. Rainbow Six Raven Shield is a trademark of Red Storm Entertainment in the US and/or other countries. Red Storm Entertainment, Inc. is a Ubi Soft Entertainment company.
 Loading...