

Page 1
Page 2
TABLE OF CONTENTS
First Things First . . . . . . . . . . . . . . . . . . . . . . . . . . . . . .1
The ReadMe File . . . . . . . . . . . . . . . . . . . . . . . . . . . .1
System Requirements . . . . . . . . . . . . . . . . . . . . . . .1
Setup and Installation . . . . . . . . . . . . . . . . . . . . . . . . . .2
Controls . . . . . . . . . . . . . . . . . . . . . . . . . . . . . . . . . . . . .3
Welcome to Shadow Ops™: Red Mercury . . . . . . . . . . . . . .4
Start Menu . . . . . . . . . . . . . . . . . . . . . . . . . . . . . . . . . . .4
Saving Games . . . . . . . . . . . . . . . . . . . . . . . . . . . . . . . . .5
Main Menu . . . . . . . . . . . . . . . . . . . . . . . . . . . . . . . . . . . .5
Options Menu . . . . . . . . . . . . . . . . . . . . . . . . . . . . . . . . .6
Playing the Game . . . . . . . . . . . . . . . . . . . . . . . . . . . . . .8
Multiplayer . . . . . . . . . . . . . . . . . . . . . . . . . . . . . . . . . .10
Shadow Ops Tactics . . . . . . . . . . . . . . . . . . . . . . . . . . . .13
Credits . . . . . . . . . . . . . . . . . . . . . . . . . . . . . . . . . . . . .14
Atari Web Sites . . . . . . . . . . . . . . . . . . . . . . . . . . . . . . .19
Technical Support . . . . . . . . . . . . . . . . . . . . . . . . . . . . .19
End-User License Agreement . . . . . . . . . . . . . . . . . . . . .27
FIRST THINGS FIRST
The ReadMe File
The Shadow Ops™: Red Mercury DVD-ROM game has a ReadMe file where you can view
both the License Agreement and updated information about the game. We strongly
encourage you to read this file in order to benefit from changes made after this
manual went to print.
To view this file, double-click on it in the Shadow Ops™: Red Mercury directory
found on your hard drive (usually C:\Program Files\Atari\Shadow Ops Red Mercury).
You can also view the ReadMe file by first clicking on the Start button on your
Windows®taskbar, then on Programs, then on Atari, then on Shadow Ops Red
Mercury, and then on the ReadMe file.
System Requirements
Operating System: Windows®98SE/Me/2000/XP
Processor: Pentium®III or AMD Athlon™ 1 GHz (Pentium®III or AMD
Athlon™ 1.5 GHz recommended)
Memory: 256 MB RAM (512 MB recommended)
Hard Disk Space: 4 GB Free
DVD-ROM Drive: 1X Speed (4X or faster recommended)
Video: 64 MB Windows®98SE/Me/2000/XP-compatible, hardware
T&L-compatible video card (128 MB recommended)*
Sound: Windows®98SE/Me/2000/XP-compatible sound card (Sound
Blaster®Audigy®2 series card recommended)*
DirectX®: DirectX®version 9.0 (included) or higher
Modem: 56 Kbps modem or faster for Internet (TCP/IP) and LAN
(TCP/IP) play
*Indicates device should be compatible with DirectX®version 9.0 or higher.
1
Page 3
SETUP AND INSTALLATION
1. Start Windows®98SE/Me/2000/XP.
2. Insert the Shadow Ops™: Red Mercury DVD-ROM into your DVD-ROM drive.
3. If AutoPlay is enabled, a title screen should appear. If AutoPlay is not enabled,
or the installation does not start automatically, click on the Start button on
your Windows®taskbar, then on Run. Type D:\Setup and click on OK. Note: If your
DVD-ROM drive is assigned to a letter other than D, substitute that letter.
4. Follow the remainder of the on-screen instructions to finish installing the
Shadow Ops™: Red Mercury game.
5. Once installation is complete, click on the Start button on the Windows®taskbar
and choose Programs/Atari/Shadow Ops Red Mercury/Shadow Ops Red Mercury to
start the game.
Note: You must have the Shadow Ops™: Red Mercury game disc in your DVD-ROM
drive to play.
Installation of DirectX
The Shadow Ops™: Red Mercury game requires DirectX®9.0 or higher in order to
run. If you do not have DirectX®9.0 or higher installed on your computer, click
“Yes” when asked if you would like to install it.
®
CONTROLS
ACTION CONTROL ALTERNATE CONTROL
Fire Left mouse button
Move forward Up arrow W
Move backward Down arrow S
Center view End Home
Strafe / lean left Left arrow A
Strafe / lean right Right arrow D
Objectives / score Tab F3
Previous weapon Left bracket ([) Mousewheel down
Next weapon Right bracket (]) Mousewheel up
Scope zoom in Mousewheel up
Scope zoom out Mousewheel down
Aim / scope Right mouse button
Reload R
Equip pistol 1
Equip primary weapon 2
Equip secondary weapon 3
Equip rocket launcher 4
Action Enter F
Crouch C
Jump Backspace Space
Grenade roll B
Grenade throw G
Melee attack Middle mouse button CTRL
Multiplayer chat T
Multiplayer team chat Y
Talk V
View MP map / game info M
Screenshot F9
This is the default configuration. You can switch configurations in the Options
Menu under Controls. See “Options Menu” on page 6 for details.
32
Page 4
WELCOME TO
Imagine a nuclear weapon that fits in a backpack, with the power to annihilate
millions. Imagine such power falling into the wrong hands.
You are Frank Hayden, an elite Delta Force operative recruited by the CIA. Your
mission: Track down and defuse a weapon of unspeakable destruction known only
as Red Mercury. The terrorist faction that possesses this devastating device will
stop at nothing to realize their twisted goals of chaos and fear. Your pursuit of
these madmen will lead you through some of the deadliest, war-torn locations
on earth.
Your obsessive quest to track down this potential nightmare is far from a solo
mission. The Russians claim they are after Red Mercury to prevent a nuclear war.
Can they be trusted? What about the CIA and its intel?
Figure it out fast. The fate of millions is in your hands.
™
START MENU
New Game
1. From the Start Menu, click on New Game. Click on Name to enter a name for your
profile. Press the Enter key when you are finished.
2. Select a difficulty level from the following options: Infantry (easy difficulty),
Ranger (normal), Green Beret (hard) or Delta Force (hardest). Click on Continue
to create the profile.
3. After creating the profile, you are taken to the Options Menu. Once you have
changed the settings, click on Continue. You will be taken to the Main Menu
4. From the Main Menu, click on Campaign.
5. Click on “Rough Beginnings.”
Load Game
1. From the Start Menu, click on Load Game. Left-click on the profile name you
want to use. Right-click on a profile to delete it.
2. Click on Campaign in the Main Menu.
3. In the Campaign menu, click on the name of the level you want to load.
Multiplayer
See “Multiplayer” on page 10.
SAVING GAMES
After you successfully complete a level, the game automatically saves your
progress. You will be able to load the next level and start playing it from the Load
Profile menu.
If you die before reaching the end of a level, you can restart the level as many
times as you want.
Warning
Delta Force: You have only one life for the entire game in the Delta Force
difficulty setting. If you die while playing in the Delta Force difficulty setting, you
will have to start over from the beginning. You must complete the entire game
using only one life. However, it is possible to exit the game at any point and
resume playing later from the beginning of the level at which you quit. But if you
die after resuming the game, all saved progress will be lost and you must restart
from the beginning.
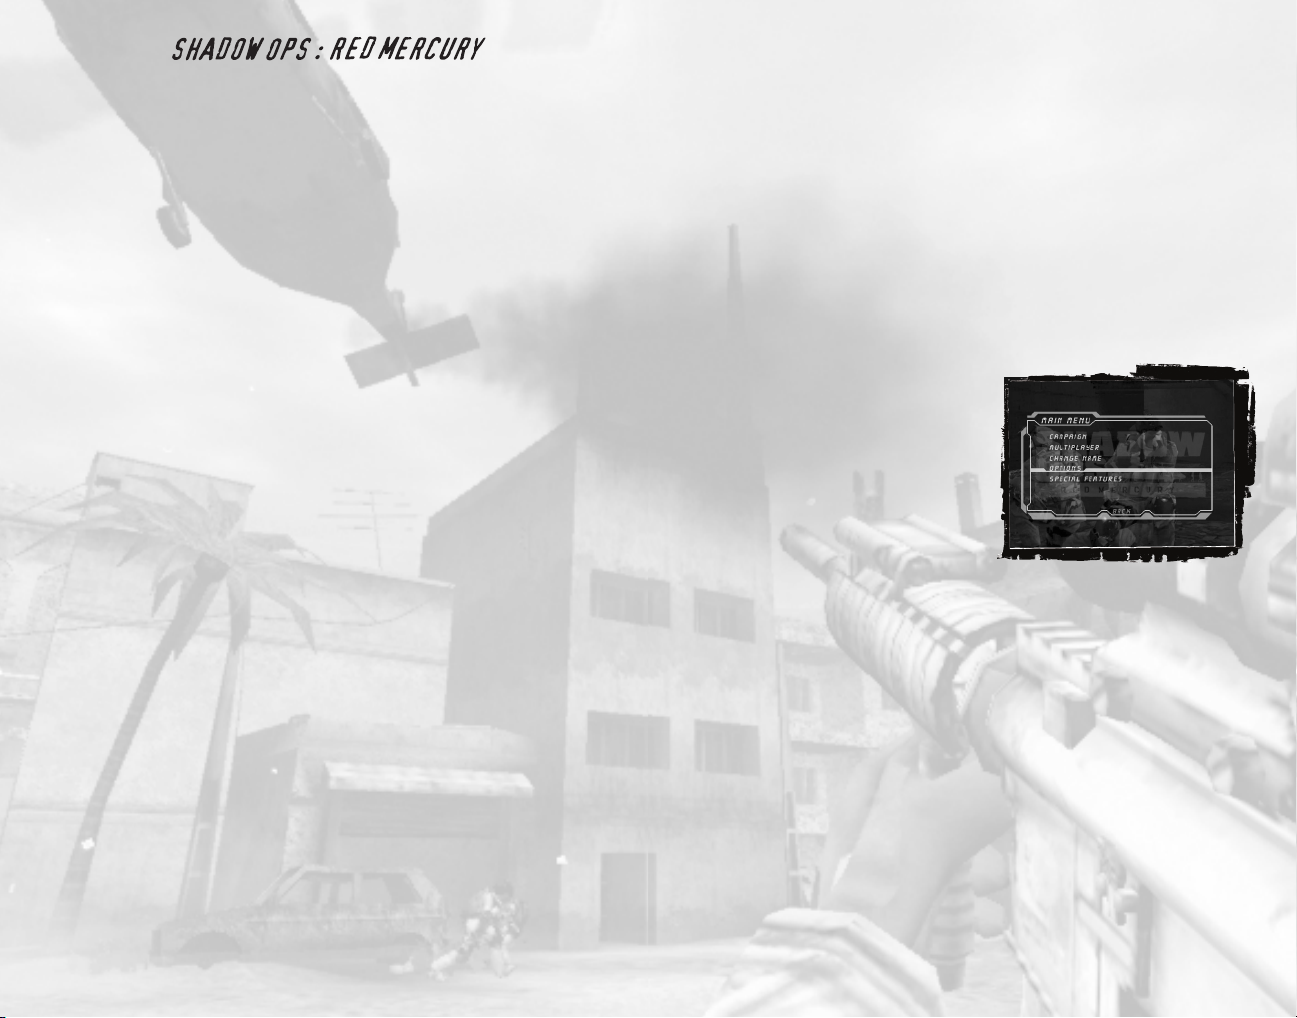
MAIN MENU
Campaign
To play through a previously completed
level, click on the name of the level.
Multiplayer
See “Multiplayer” on page 10.
Change Name
Enter a new name for your profile.
Options
Adjust the game settings to suit your preferences. See “Options Menu” on page 6
for details.
Special Features
Click on an available special feature to view it. You can unlock some special features as you progress through the game in the various modes.
54
Page 5
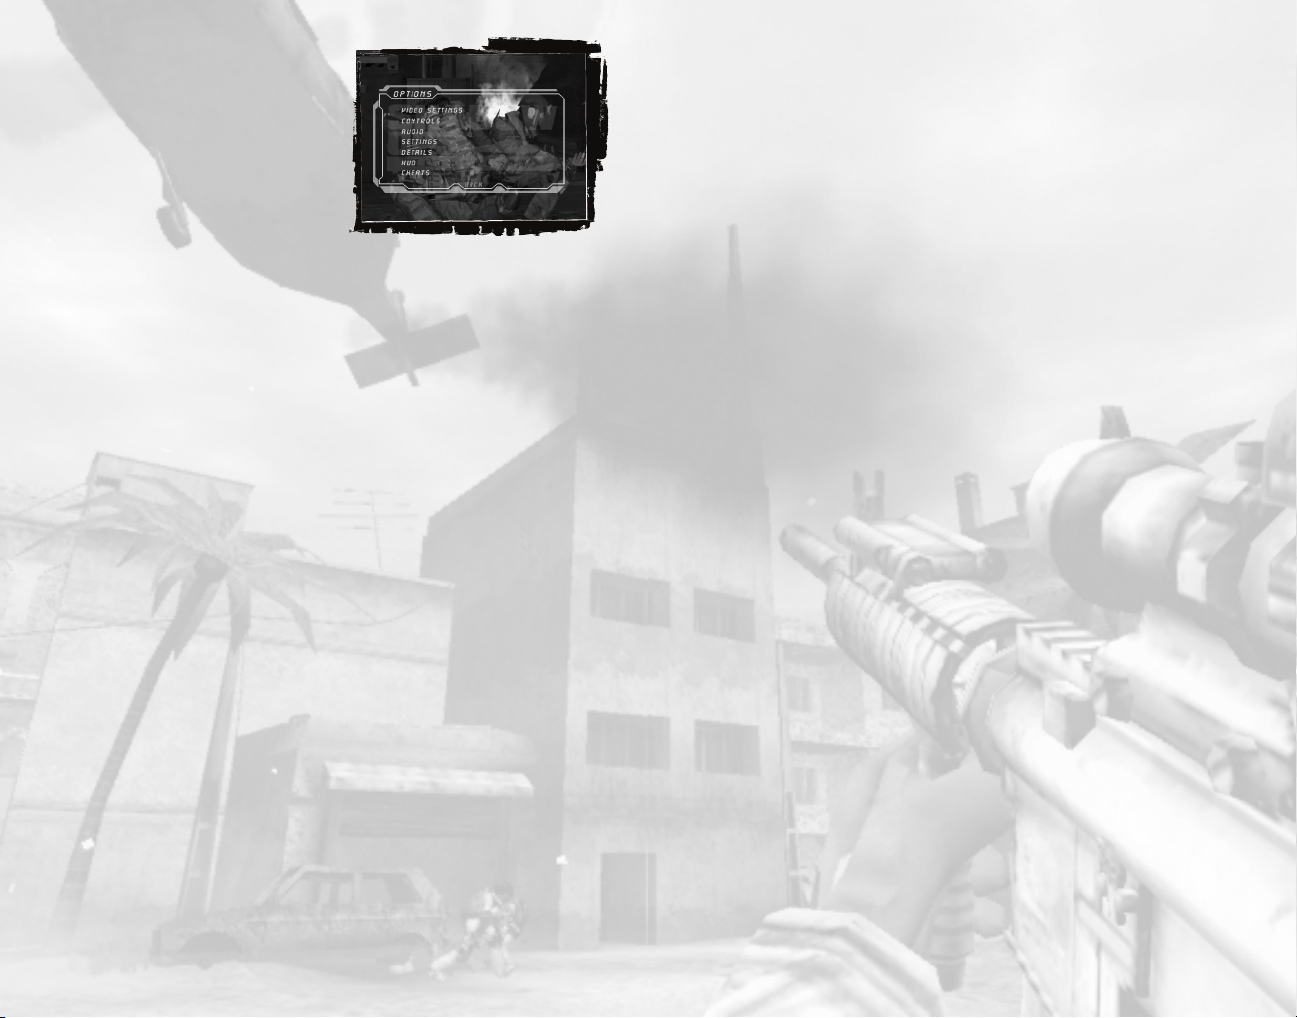
OPTIONS MENU
Click on “Options” in the Main Menu to
configure video, audio and control settings.
Video Settings
Resolution: Click to select the video
resolution at which you wish to play.
Gamma: Click on the left or right arrows to
decrease or increase the gamma to suit
your monitor.
Full Screen: Turn this ON to run the game full-screen.
Default: Return all video settings to their original state.
Apply: Activate your video settings changes.
Controls
Assign keys to different game functions like movement and weapons. Click on the
function you want to change, and then press the key you want to assign to that
function. You can cancel by pressing the Esc key, or undo the key assignment by
pressing the Delete key.
Audio
Effects: Click on the left or right arrows to decrease or increase the sound
effects volume.
Music: Click on the left or right arrows to decrease or increase the music volume.
Dialog: Click on the left or right arrows to decrease or increase the dialog volume.
Subtitles: Toggle the subtitles for in-game dialog ON / OFF.
High Quality Sound: Turn this option ON to get the maximum audio experience from
the game.
Audio Mode: Choose Safe Mode / 3D / 3D+EAX. EAX®3.0 ADVANCED HD™ is used to
model reverberation effects on the 3D sounds. This allows the game to accurately
model different acoustic environments and take advantage of the hardware DSP on
the Sound Blaster®Audigy®2 series of sound cards.
Settings
Invert Mouse: Enable to invert the Y-axis (up / down) of your mouse.
Mouse Speed: Click on the left or right arrows to decrease or increase the speed
at which the game responds to the mouse input.
Crouch Toggle: When turned ON, pressing the crouch key (the C key by default)
causes you to crouch down and stay in that position until the crouch key is
pressed again.
Aim / Scope: Turn this setting OFF to remove the scope graphics from the screen
in aiming mode.
Default: Return settings to their original state.
Details
Texture: Click to adjust the level of detail displayed on objects and scenery in
the game. Turning the texture level down may increase game speed on some
older computers.
Character: Click to adjust the level of detail displayed on characters in the
game. Turning the character level down may increase game speed on some
older computers.
Default: Return all details settings to their original state.
Apply: Activate your details settings changes.
HUD
The Heads-Up Display (HUD) shows information about your health and available
ammo. (See “Heads-Up Display” on page 8.)
Height: Click on the left or right arrows to decrease or increase the height of
the HUD from the side of the screen.
Width: Click on the left or right arrows to decrease or increase the width of the
HUD from the bottom of the screen.
Opacity: Click on the left or right arrows to decrease or increase the opacity of
the HUD.
Crosshair: Click to change the style of crosshair displayed on the HUD.
Default: Return all HUD settings to their original state.
Cheats
Enter cheat codes here.
76
Page 6

PLAYING THE GAME
Heads-Up Display
Distance to the
Next Objective
Damage Indicator Aiming Reticle
Health Meter Weapon and Ammo
Information
Aiming Reticle
The reticle turns red when an enemy is within range and targeted.
Damage Indicator
When you’re taking enemy fire, a red flash indicates the direction from which the
damage is coming.
Health Meter
You die if your health is reduced to zero. To restore your health, look for the
health packs scattered throughout the levels.
Weapon and Ammo Information
The number to the left of the weapon icon indicates the ammo left in the current
clip. The number to the right indicates the ammo reserve. The number of available
grenades is indicated by the dots below the weapon icon.
Distance to the Next Objective
Distance to the Next Objective does not appear in Green Beret or Delta Force
difficulty levels.
Teammates and Friends
Depending on the mission, you may find
yourself fighting alongside others. In most
cases, you are the mission leader and will
receive important information from your
teammates.
When aiming at friendly forces, the person’s
name and a sign indicating “Hold your fire”
will replace the reticle of your weapon.
Although you cannot kill teammates, they
will not appreciate being shot. You must do
what you can to protect them so they can complete their mission assignments.
Ammo
Each weapon class has a specific type of ammunition. You will find ammo during
missions. Walk over it to pick it up. Press the R key to reload your gun. Use the
mousewheel or right bracket key (]) or left bracket key ([) to scroll through your
weapons.
Note: If you run out of ammo, you can use your gun as a melee weapon. (See “Melee
Attack” below.)
Mission Objectives
Before each mission, you can review the next objective by pressing the Tab key or
F3 key. Click on an objective to get more information. You must complete all of the
objectives and reach the end of a level in order to access the next level.
WEAPON MODES
Aim / Lean Mode
Use aim / lean mode to get a clear shot of an enemy target. Aim / lean mode lets
you use the sight or scope of your current weapon to steady your aim and hit the
target.
• Press the right mouse button to enter aim / lean mode.
• Use the mousewheel to zoom in and out with the sniper rifles.
• Use the mouse to move your aim.
• Press the A key to lean left. Press the D key to lean right.
• Press the left mouse button to fire.
• Press the G key to throw a grenade.
• Press the 8 key to roll a grenade.
• Press the C key to crouch.
Melee Attack
A melee attack involves using your weapon
as a blunt instrument to knock out an
attacker. This is handy when an enemy is
close by or charging, and you’re out of
ammo or reloading. To use melee attack,
click the middle mouse button or press the
Ctrl key.
Gun Emplacements
Gun emplacements are found behind enemy lines. These heavy-caliber guns can
quickly clear an area. To man a gun emplacement, move into position behind the
weapon and press the Action key (Enter key or F key by default).
98
Page 7

Planting Explosives
Certain missions require placement of
explosive charges in specific locations,
including doors and tanks. You won’t see the
charges in your weapon inventory. Here is
how to plant a charge:
1. Get close to the charge placement marker
on the object you must destroy.
2. Aim at the object. Press and hold the
Enter key or F key to plant the charge.
A series of lights will then turn green. When all of the lights on the charge turn
green, take cover. You can be injured or killed by the explosion.
3. If you release the Enter key or F key before all of the charge lights turn
green, you must start over.
MULTIPLAYER
When starting a multiplayer game you must
first choose whether to play on your local
area network (LAN) or the Internet. Once
you’ve chosen where to play you can either
join a game in progress or host a game on
your computer for other players to join.
Joining a Game
When joining a game you can sort by game
type and get more information about the
game before joining (number of players,
time, rules, friendly fire, etc.). During the game, press the M key to view the game
rules and the map of the current game.
Hosting a game
Select Host to create a game on your LAN or the Internet for other players to
join. You can then set the parameters of the game:
Server Name: The name that will be shown for your server.
Password: If you set a password, players joining your server will need to
enter the same password to join. This is useful for ensuring only your friends
can join a game.
Admin Password: (Advanced) If you set this, you can log into the game and perform
basic administration (progressing to the next map in the map rotation, kicking
players, etc.).
Run Dedicated Server: If the Dedicated Server option is ON, the host
computer will function only as the server. While hosting the game, no one may play
on the dedicated server computer. A dedicated server can have up to 32 players
in a game.
After you are done setting the server options, you continue to the Map
Rotation menu.
Map Rotation: Here you can set up which maps you want to play and the map
options. The map rotation should be set up with maps that have the same maximum
number of players, or players will be dropped when the game moves from a map
that can handle 32 players to a map that can handle fewer players. At least two
players must join the game for the map rotation to start.
Click on Add Map to add a new map and set up its options. Left click on an existing
map to change its options. Right click on a map to remove it. Maps can be reordered in the list by left clicking and dragging them.
Dedicated Server
If the Dedicated Server option is set to ON, the host computer will function only
as the server. While hosting the game, no one may play on the dedicated server
computer. A dedicated server can have up to 32 players in a game. The host may
choose to play on one map or create a rotation of several maps.
Click on Add Map in the Dedicated Server menu to add a map to the rotation. The
map rotation must be set up with maps that have the same maximum number of
players, or players will be dropped when the game moves from a map that can handle 32 players to a map that can handle fewer players. At least two players must
join the game for the map rotation to start.
You can edit the map rotation list by left-clicking and dragging a map name and
dragging it to the desired position. Left-click once on a map name to move to the
map options screen (time, players, etc.).
Connecting Through a Firewall
If you are trying to host a game on a computer that is behind a firewall, you may
need to set up port forwarding on your firewall. Some firewalls automatically
prompt you when an attempt is made to send data from a program that the firewall
doesn’t recognize. If the connection fails, you might need to manually configure
your firewall to open and forward the following ports:
• The default game port is 7777.
• The query port is 7778.
If you are unfamiliar with changing your firewall settings, consult your
firewall’s documentation.
1110
Page 8

Multiplayer Rules
Deathmatch
• The rule is every man for himself, whether Special Forces or Terrorist.
• The character class you choose determines your available weapon loadout.
• Changing classes can give you an edge in certain situations. Figure out which
class works best for you.
• The host defines the maximum number of players, duration of the game, the kill
limit and the initial map selection.
• The first player to reach the kill limit wins. If no one reaches the limit before
time expires, the player with the most kills is the winner.
• Respawns are infinite.
• At the end of the game, a table appears with the scores.
• If a player commits suicide (with a grenade for instance), that player has one
kill subtracted from his total kills.
Team Deathmatch
• Two teams fight against each other: Special Forces vs. Terrorists. Team scores
are totaled to determine the winning team.
• The character class you choose determines your available weapon loadout.
• The host defines the maximum number of players, duration of the game, kill limit,
initial map selection and turns Friendly Fire ON / OFF.
• The first team to reach the kill limit wins. If neither team reaches the limit
before time expires, the team with the most kills is the winner.
• Provide cover for teammates. Heavy Weapons characters can provide cover fire
for Rifleman characters.
Capture the Flag
• Two teams fight against each other: Special Forces vs. Terrorists. Each team
must capture the opponent’s flag and return it to their team’s base.
• The character class you choose determines your available weapon loadout.
• The host defines the maximum number of players, duration of the game, captures
limit, initial map selection and turns Friendly Fire ON / OFF.
• You get a point only if you have your team’s flag present when you return with
the enemy flag.
• The flag icons in the top-left corner of the HUD indicate the flag status. If the
flag is at the base, the icon is solid. The icon pulses if you are carrying the
flag. The icon turns hollow when another player is carrying the flag.
• If you kill the opposite team’s flag carrier, the flag will return instantly to your
base when you touch it. If no player touches the flag, it will return to its base
after a period of time. If you pick up the opponent’s flag after your teammate
dies, you can still carry it.
• The first team to reach the capture limit wins. If neither team reaches the limit
before time expires, the team with the most captures is the winner.
• Teamwork is critical to victory. Snipers can provide cover fire for players
making an assault on the flag.
V.I.P. Escort
• Two teams fight against each other: Special Forces vs. Terrorists. The
Terrorists must kill the V.I.P. The Special Forces must escort the V.I.P. to a given
location.
• The character class you choose determines your available weapon loadout.
• The game randomly selects which player on the Special Forces is the V.I.P.
• The V.I.P is armed only with a pistol and has more health than other players. You
can tell you are the V.I.P. if a star appears in the upper-left corner in your HUD.
• The host defines the maximum number of players, duration of the game, initial
map selection and turns Friendly Fire ON / OFF.
• The Special Forces win if the V.I.P. safely arrives at the location.
• The Terrorists win if the V.I.P. dies or if the time limit expires.
• Players cannot respawn. If a player dies, he must wait for the next round.
TACTICS
The following tips might help you survive:
• When beginning a mission, always look around for cover spots. Clear immediate
threats and move to cover to better assess the situation.
• When behind cover, use the lean function to peek at enemies without completely
exposing yourself.
• In addition to leaning left / right, you can also lean up (when crouched) and
down (when standing up).
• Conserve ammo whenever possible. If you run out, you may have to rely on an
inferior weapon, such as a pistol, or resort to melee attacks. Some enemies
drop ammo and health packs — after you’ve neutralized an enemy, be sure to
check the area surrounding him.
• Game difficulty levels affect how much damage you can take, how much damage
your shots cause, and how often your teammates help. If you find the game too
easy, switch to a higher difficulty level.
THX Certification is your assurance of consistent and optimal sound and picture
performance. This game title was developed in a studio that meets THX’s stringent
reference standards for acoustical and visual performance, letting you enjoy the
best in sound and picture playback.
THX is a trademark of THX Ltd. which may be registered in some jurisdictions. All
rights reserved.
1312
Page 9

CREDITS
ATARI
Peter Wyse
Executive Producer
Aron Drayer
Senior Producer
David T. Brown
Rafael Curulla
Producers
Kyle Peschel
Associate Producer
Mike Webster
Director of Brand Marketing
Andrew Shiozaki
Senior Brand Manager
Matt Frary
Senior PR Manager
Mark Soderwall
Art Director
Greg Marquez
Technical Director
Shawn Monroe
Senior Artist
Steve Martin
Director of Creative Services
Elizabeth Mackney
Director of Editorial &
Documentation Services
David Gaines
Art Director
Rod Tilley
Graphic Designer
Chris Dawley
Documentation Specialists
Norm Schrager
Copywriter
Michael “Gilly” Gilmartin
Director of Publishing Support
Ken Ford
I.T. Manager/Western Region
Michael Vetsch
Manager of Technical Support
Ezequiel “Chuck” Nunez
Project Manager/Q.A. Supervisor
Dave “Colonel” Strang
Arthur “Paper Cup” Long
Jason “No Nickname” Cordero
Q.A. Supervisors
Juan “TaskMaster” Sanchez
Test Commander
Neil “Shoot Me” Digiacomo
1st Lieutenant
Emily “MegaDoomer” D'Aurora
Mark “DaGunShow” Alibayan
Eduardo “Big Guns” Baraf
Kendrick “KC” Chan
Ray “Krieg” Cicero
Marshall “Lone Gunman” Clevesy
Raul “Darkman X” Cruz
Cesar “DVS Clevvy” Estrada
Kevin “K HO” Hogan
Rick “Ohayou” Imperial
Brad “Dose” Johnson
Jason “Meth” Johnson
Marco “Mr.” Mah
Sam “hi2u” Mansour
Ken “Collateral Damage” Moodie
Stefan “Pvt. Stash” Nelson
Mike “Wheelman” O'Shea
Kenny “Kiddo” Schang
Dan “infekt” Schneider
Piers “Demo-lition” Sutton
Ken “Movado”Tran
Alex “T-bug”Trinidad
Ed “Striker”Toribio
Henry “Rally” Yei
Privates
Daniyel “Disconnect” Garcia
Cher “Bunnie” Rocha
Carl “NinjaJeebus” Vogel
Reserves
Jimmy Chiu
Al Flores
Angel Marquez
Libert Viray
Shawn Wyatt
KIA
Ken Moodie
Betatest Administrator
Dave Strang
Manager, Engineering Services &
Compatibility Lab
Mark Florentino
Compatibility Test Lead
Randy Buchholz
Jason Cordero
Chris McQuinn
Cuong Vu
Compatibility Analysts
Ken Edwards
Engineering Services Specialist
Eugene Lai
Engineering Services Technician
Matt Frary
Senior PR Manager
James Gaines
Creative Services
Jon Nelson
Director, Global Web Services
Scott Lynch
Producer, Online
Richard Leighton
Senior Web Designer, Online
Todd Curtis
Vice President, Operations
Eddie Pritchard
Director of Manufacturing
Lisa Leon
Lead Senior Buyer
Gardnor Wong
Senior Buyer
Tara Moretti
Buyer
Janet Sieler
Materials Planner
Nichole Mackey
Process Planner
Special Thanks
Lorraine Garcia
Patty Swanson
Kristene Lowell
Sona Rae Wyse
Syaa Drayer
Jay Majumdar & SuperComputer, Inc.
Laddie Ervin
Todd Hartwig
Mark T. Morrison
Dorian Richard
Paula Richardson
Susan Tumang
Brandon Smith
Sgt Gilmartin, Michael H USMC
Sandi Smith
Mr. Soop, for his love and support
ZOMBIE STUDIOS
John E. Williamson
Lead Designer
Mark Long
Producer
Daniel Sipes
Associate Producer
Shawn Mulanix
Art Director
Bill Wright
Technical Director
Joe Zajonc
Audio Director
Bill Black
Doug Stone
Casting Directors
Ron Haskins
Ron Chang
Military Advisors
Richard Starr
Lead Level Designer
Russell Nelson
Lead Programmer
Eric Eye
Lead Texture Artist
Matt Rapelje
Lead 3D Artist
Neil Alphonso
Lead Gameplay Scripter
John Young
Sound Designer
Jay Parker
Rob Faison
Wes Cumberland
Mark Teo
Kristofel Munson
Marcin Wieczorek
Mike Bell
John Lykins
Paul Furio
Patrick Hackett
William Perone
Patrick Sebring
Programming
Derek Chatwood
Mike Rice
Erik Bretz
Nate Hall
Trent Martinez
Eric Rueter
Richard Dormer
Level Design
Michael Gehri
Cinematics Artist
Paul Steed
Daniel Sipes
Julian DePuma
Shane Moura
Kevin Dalziel
Steve Klett
Levi Hopkins
Character Art & Animation
DKE
Motion Capture
1514
Page 10

Laureen Lafave
Texture Artist
Anthony Lampa
Matt Newman
Bryan Koszoru
Eli Hanselmann
Ben Shively
Seung Hyun Lim
Ken Taya
Nick Kondo
John “Hojo” Gayness
David Cleeton
3D Artists
Camisha Jackson
Chris Ewers
Storyboard Artists
Adin Clark
John Epp
Josie Nutter
Brett Holton
Masaru Hirose
Gameplay Scripting
Dak Babone
Katalina Gatonova
Riff Hutton
Endre Hules
Alex Veadov
Hawthorne James
Dean Elliot
MAF
S.A.F.
Charles Fathy
Rafael Curulla
Rudy
Elo
Dido
Vahe Bejan
Armen Khanyan
Bill Black Helo
Mark Long
Joe Zajonc
Shawn Mulanix
Voice Actors
Special Thanks
USS Constellation
Matson Navigation
Rich Kinney
Kake Kazdal
Janice Butler
Aramis VanSandt
Tim Sweeny
Steven Olge
Erik de Neve
Joe Graf
Albert Reed
Steve Sinclair
Josh Adams
Andrews Schiedeker
Warren Marshall
Daniel Vogel
James Golding
Jack Porter
Sean Cavanaugh
Maya Rish
ATTITUDE STUDIO
Antoine Charreyron
Director
Rémi Brun
Motion Capture Director
Pierre Avon
Setup & Animation Supervisor
Pascal Lemaire
Layout Supervisor
Stéphane Marty
Visual Effects Supervisor
Laurent Martin
Research and Development Director
Laurent Guilleminot
I.T. Director
Noémie Bercot
Production Coordinator
François Lourdin
V.P. Production
Alexis Delahaye
David Encinas
Yvan Gomez
Emmanuel Gorinstein
Farid Kermici
Storyboarders
Sabrina Curkgian
Casting
Patrice Guillain-Paoli
Yves Le Caignec
Anne Le Chartier
Sofiane Meyraud
Anthony Royer
Actors
Nessim Debbiche
First Assistant Director
Aurélien Agathon
First Shooting Supervisor Assistant
Arnaud Debels
Second Shooting Supervisor Assistant
Anne-Laure Battail
Shooting Supervisor
Sylvie Mouchenik
Costume Designer
Karim Hamache
Christian Dupeux
Set Constructors
Nicolas Vitte
Floor Plan Operator
Patrick Guyot
Floor Manager
Jérôme Brack
Emmanuelle De Amezaga
Assets Checking
Anne-Laure Battail
Christophe Cerruti
Christophe Cheul
Christophe Corréani
Abdenour Daoudi
Olivier Forgeot
Julien Hassenforder
Xavier Jacolot
Julien Robert
Frank Vayssettes
Motion Capture
Eric Bacquet
Patrick Giusiani
Alexandre Henri
Vincent Lemaire
Sy-Pheng Lim
Patrick Porcher
Matthieu Razungles
Neïla Terrien
Emmanuel Vergne
Setup & Keyframe Animation
Julien Mazon
Yacine Taoufik
David Vandergucht
Henri Zaitoun
Framing and Editing
Christian Lemercier
Chahn Ly
Christophe Sauveur
Alex Vitet
Lighting and SFX
Guillaume Aliquot
Laurent Helmlinger
Eric Krebs
Iranji Pirouzi
Philippe Raoux
Conformation
Marie-Cécile Auzeill
Adrien Crochet
Philippe Delorme
Hervé Faynel
Julien Frantz
Benjamin Godon
Sébastien Masino
Alexandre Verlhac
Research and Development
Special Thanks
Sylvia Abenzoar
Elisabeh Baur
Jérôme Brack
Annika Boman
Franck Clément La Rosière
Gil Cornut
Jean-Paul Da Silva
Céline Devie
Jérôme Desvignes
Carole Djaouti
Agnès Duval
Giselda Figueroa
Jérôme Grillon
Samantha Guanine
Boris Hertzog
Marie Hudelot
André Leyronnas
William Le Henanff
Mun Lo
Marc Miance
Sandrine Nguyen
Olivier Renouard
Pascal Raimbault
Frédéric Simonot
Frédéric Vandenberghe
Sound Design and Mixing by
Soundelux Design Music Group
and Signet Sound Studios
Peter Zinda
Sound Designer
Becky Allen
Executive Producer
Amanda Wyatt
Producer
Scott Martin Gershin
Creative Director
Dori Amarillo
Recording, Mixing and Co-producer
Paul Taylor
Orchestrating and Copying
Bill Black Audio Video
www.billblackaudio.com
Bill Black and Doug Stone
Voice Over Casting
Bill Black
Voice Over Directing
SCREENPLAY BY
Ric Roman Waugh and Tag Mendillo
1716
Page 11

STORY BY
Mark Long
Ric Roman Waugh
Tag Mendillo
Antoine Charreyron
Rafael Curulla
John E. Williamson
ORIGINAL MUSIC COMPOSED AND
PRODUCED BY Inon Zur
www.inonzur.com
MUSIC RECORDED BY
The Northwest Symphonia
VERY SPECIAL THANKS TO
Keith Boskey at ICM
Mark Rein & Tim Sweeney at Epic Games
Augustin Navarrete at Gentle Giant
Bob Rice at Four Bars Intertainment
Joseph O.Vogel, Robert A. Hewitt, Dr. Mark
Tuffy and Andrew Poulain at
THX Ltd.
Keith Boskey
Shadow Ops™: Red Mercury is based on the
®
Technology created by and licensed
Unreal
from Epic Games.
ATARI WEB SITES
To get the most out of your new game, visit us at:
atari.com/us
If you would like to chat with other gamers, as well as developers, visit our
Community Forum area at:
ataricommunity.com
Kids, check with your parent or guardian before visiting any web site.
Chat Messages: Atari does not monitor, control, endorse, or accept responsibility for the content of
chat messages. You are strongly encouraged not to give out identity or other personal information
through chat message transmissions. Kids, check with your parent or guardian if you are concerned
about any chat you receive.
Use of Atari web sites is subject to terms and conditions, which you can access at:
atari.com/us/tos
TECHNICAL SUPPORT (U.S. & CANADA)
Help Via the Internet
Up-to-the-minute technical information about Atari products is generally available
24 hours a day, 7 days a week via the Internet at:
www.atarisupport.com
Through this site you’ll have access to our FAQ (Frequently Asked Questions)
documents, our FTP (File Transfer Protocol) area where you can download patches
if needed, our Hints/Cheat Codes if they’re available, and an E-Mail area where
you can get help and ask questions if you do not find your answers within the FAQ.
Note: In the event we must send you a Hint Sheet, FAQ document, patch or update
disc via E-mail, we may require verifiable consent from a parent or guardian in
order to protect children’s privacy and safety online. Consent Forms are available
at the web site listed above.
Help Via Telephone in the United States & Canada
For phone assistance, call Atari Technical Support at (425) 951-7106. Our
Interactive Voice Response system is generally available 24/7, providing
automated support solutions immediately.
Great News! We’ve improved our Automated Systems so that you can get
product-specific Troubleshooting help more quickly. All you need to do is enter
the product’s Part # when prompted to do so. This will take you directly to all of
our known issues and solutions for this title. The product’s Part # is located in
several places (on the CD label, package and/or plastic disc case) and is usually
identified by a number such as 04-12345. When prompted by the Automated System,
enter the last five digits of your product’s Part #. (For example, Part # 04-12345
would require that you enter the “12345” portion of the number for that product.)
Note: Some products simply feature a five-digit Part # without an “04-” prefix.
1918
Page 12

Live support is generally available Monday through Friday, 8:00 AM until 6:00 PM
(Pacific Time). Note: We may be closed on major holidays.
Before making your call, we ask that you be at your computer, have the following
information available, and be ready to take notes:
• System Make and Model
• Processor Type
• Operating System, including version number if possible (such as Windows
Windows®Me)
®
98;
• RAM (Memory)
• Video and sound card data and drivers
• Any screen or error messages you’ve encountered (and where)
Product Return Procedures in the United States & Canada
In the event our technicians at (425) 951-7106 determine that you need to forward
materials directly to us, please include a brief letter explaining what is enclosed
and why. Make sure you include the Return Merchandise Authorization Number
(RMA#) supplied to you by the technician, and your telephone number in case we
need to call you. You will receive the mailing address when the technician gives
you the RMA#. Any materials not containing this RMA# will be returned to you
unprocessed.
Warranty Policy in the United States & Canada
If our technicians determine that the product storage medium is found to be
defective within ninety (90) days of original purchase, (unless otherwise provided
by applicable law), Atari will replace the item free of charge, to the original
purchaser, if the item is accompanied by the original dated receipt and packaging.
NOTES
20
Sound Blaster®Audigy®2 ZS blurs the new line between gaming
and reality:
• Experience believable audio landscapes in real-time with EAX®ADVANCED HD
• Accelerated hardware effects create amazing audio with perfect performance
• Hear your enemies, from every direction possible with 7.1 surround sound
• Bring any game to life with the quality sound of 24-Bit ADVANCED HD
• Clarity that lets you hear your enemy before they hear you with 108dB SNR
• THX®Certified “Movie Theater” sound for all your games
©2004 Creative Technology Ltd. The Creative logo is a registered trademark of Creative Technology Ltd. In the United
States and/or other countries. All other brands are trademarks or registered trademarks of their respective holders.
™
™
Page 13

NOTES
23
Page 14

NOTESNOTES
2524
Page 15

NOTES
END-USER LICENSE AGREEMENT
IMPORTANT — READ CAREFULLY: Please be sure to carefully read and understand all of the rights and restrictions described in this End-User License Agreement (“EULA”).
AGREEMENT
This document is an agreement between you and Atari, Inc. and its affiliated companies (“Company”). The enclosed
software game disc(s), cartridge or Game Pak (“Software”) and any accompanying printed materials are licensed to you
only on the condition that you accept all of the terms contained in this EULA.
By opening this package and installing or otherwise using the Software you agree to be bound by the terms of this
EULA. If you do not agree to the terms of this EULA you may not install or use the Software and within 15 days of purchase you must call the Tech Support telephone number listed in the manual accompanying the Software (the
“Manual”). Select the Automated Phone System’s Main Menu option for Consumer Services and follow the prompts.
You will be given a Return Merchandise Authorization number (RMA #) by the technician. You then have 15 days from
the date of this contact to return the Software in its protective covering, the Manual and the original sales invoice to
the address supplied to you.
If this is a PC product, when you install the Software you will be asked to review and either accept or not accept the
terms of the EULA by clicking the “I Accept” button. By clicking the “I Accept” button you acknowledge that you have
read the EULA, understand it and agree to be bound by its terms and conditions.
COPYRIGHT
The Software is protected by copyright laws and international copyright treaties, as well as other intellectual property
laws and treaties. All title and copyrights in and to the Software (including but not limited to any images, photographs,
animations, video, music, text and “applets” incorporated into the Software) and any printed materials accompanying
the Software are owned by the Company or its Licensors.
GRANT OF LICENSE
The Software is licensed and not sold to you and its use is subject to this EULA. The Company grants you a limited,
personal, non-exclusive license to use the Software in the manner described in the user documentation. The Company
reserves all rights not expressly granted to you in this EULA.
PERMITTED USES
1. If the Software is configured for loading on a hard drive, you may install and use the Software on a single computer.
2. You may make and maintain one copy of the Software for backup and archival purposes, provided that the original
and copy of the Software are kept in your possession.
3. You may permanently transfer all your rights under this EULA, provided you retain no copies, you transfer all of the
Software (including all component parts, the media and printed materials and any upgrades) and the recipient reads
and accepts this EULA.
RESTRICTIONS
1. You may not delete or obscure any copyright, trademark or other proprietary notice on the Software or
accompanying printed materials.
2. You may not decompile, modify, reverse engineer, disassemble or otherwise reproduce the Software.
3. You may not copy, rent, lease, sublicense, distribute, publicly display the Software, create derivative works based
on the Software (except to the extent expressly permitted in the Editor and End-User Variation section of this
Agreement or other documentation accompanying the Software) or otherwise commercially exploit the Software.
4. You may not electronically transmit the Software from one computer, console or other platform to another or over a
network.
5. You may not use any backup or archival copy of the Software for any purpose other than to replace the original copy
in the event it’s destroyed or becomes defective.
26
27
Page 16

EDITOR AND END-USER VARIATIONS
If the Software includes a feature that allows you to modify the Software or to construct new variations (an “Editor”),
you may use such Editor to create modifications or enhancements to the Software, including the construction of new
levels (collectively the “Variations”), subject to the following restrictions. Your Variations: (i) must only work with the
full, registered copy of the Software; (ii) must not contain modifications to any executable file; (iii) must not contain
any libelous, defamatory or other illegal material, material that is scandalous or invades the rights of privacy or publicity of any third party; (iv) must not contain any trademarks, copyright-protected work or other property of third parties; and (v) may not be commercially exploited by you, including but not limited to making such Variations available
for sale or as part of a pay-per-play or timesharing service.
TERMINATION
This EULA is effective until terminated. You may terminate this EULA at any time by destroying the Software. This EULA
will terminate automatically without notice from the Company if you fail to comply with any provisions of this EULA. All
provisions of this EULA as to warranties, limitation of liability, remedies and damages will survive termination.
LIMITED WARRANTY AND DISCLAIMER OF WARRANTIES
You are aware and agree that use of the Software and the media on which is recorded is at your sole risk. The Software
and media are supplied “AS IS.” Unless otherwise provided by applicable law, the Company warrants to the original
purchaser of this product that the Software storage medium will be free from defects in materials and workmanship
under normal use for ninety (90) days from the date of purchase. The warranty is void if the defect has arisen through
accident, abuse, neglect or misapplication. If the Software fails to conform to this warranty, you may at your sole and
exclusive remedy, obtain a replacement free of charge if you return the defective Software. Follow the Product Return
Procedures described in the Manual. The Company does not warrant that the Software or its operations or functions
will meet your requirements, or that the use of the Software will be without interruption or error.
TO THE FULLEST EXTENT PERMISSIBLE UNDER APPLICABLE LAW, EXCEPT FOR THE EXPRESS
WARRANTY SET FORTH ABOVE, THE COMPANY DISCLAIMS ALL WARRANTIES, EXPRESS OR
IMPLIED, INCLUDING AND WITHOUT LIMITATION, THE IMPLIED WARRANTIES OF MERCHANTABILITY
AND FITNESS FOR A PARTICULAR PURPOSE AND NON-INFRINGEMENT. EXCEPT FOR THE EXPRESS
WARRANTY SET FORTH ABOVE, THE COMPANY DOES NOT WARRANT, GUARANTEE OR MAKE ANY
REPRESENTATION REGARDING THE USE OR THE RESULTS OF THE USE OF THE SOFTWARE IN TERMS
OF ITS CORRECTNESS, ACCURACY, RELIABILITY, CURRENTNESS OR OTHERWISE. SOME JURISDICTIONS DO NOT ALLOW THE EXCLUSION OF OR LIMITATIONS ON IMPLIED WARRANTIES, SO THE
ABOVE EXCLUSIONS AND LIMITATIONS MAY NOT APPLY TO YOU.
ATION OF LIABILITY
LIMIT
IN NO EVENT WILL THE COMPANY OR ITS EMPLOYEES OR LICENSORS BE LIABLE FOR ANY
INCIDENTAL, INDIRECT, SPECIAL, CONSEQUENTIAL OR PUNITIVE DAMAGES, OR ANY DAMAGES
WHATSOEVER (INCLUDING, WITHOUT LIMITATION, DAMAGES FOR INJURY TO PERSON OR
PROPERTY, FOR LOSS OF PROFITS, BUSINESS INTERRUPTION, LOSS OF BUSINESS INFORMATION,
LOSS OF PRIVACY, FAILURE TO MEET ANY DUTY AND NEGLIGENCE) ARISING OUT OF OR IN ANY WAY
RELATED TO THE USE OR INABILITY TO USE THE SOFTWARE, EVEN IF THE COMPANY OR AN AUTHORIZED REPRESENTATIVE OF THE COMPANY HAS BEEN ADVISED OF THE POSSIBILITY OF SUCH
DAMAGES. SOME JURISDICTIONS DO NOT ALLOW THE EXCLUSION OF LIABILITY FOR INCIDENTAL
OR CONSEQUENTIAL DAMAGES, SO THE ABOVE EXCLUSION MAY NOT APPLY TO YOU.
IN NO EVENT WILL THE LIABILITY OF THE COMPANY FOR DAMAGES WITH RESPECT TO THE SOFTWARE EXCEED THE AMOUNTS ACTUALLY PAID BY YOU FOR THE SOFTWARE.
CHOICE OF LA
This EULA is governed by the laws of the United States of America and the State of New York, exclusive of its conflicts
of law provisions. The exclusive venue for litigation regarding or arising from this EULA is New York County, New
York and you agree to submit to the Jurisdiction of the courts of New York County, New York for any such litigation.
MISCELLANEOUS
If any provision or portion of this EULA is found to be unlawful, void, or for any reason unenforceable, it will be severed from and in no way affect the validity or enforceability of the remaining provisions of the EULA.
This EULA constitutes the entire agreement between you and the Company regarding the Software and its use.
W AND VENUE
SHADOW OPS™: RED MERCURY © 2004 Atari, Inc. All Rights Reserved. Developed by Zombie Studios, Inc. All
trademarks are the property of their respective owners.
THX is a trademark of THX Ltd. which may be registered in some jurisdictions. All rights reserved.
All rights reserved.Windows and DirectX are either registered trademarks or trademarks of Microsoft Corporation in
the United States and/or other countries.
Pentium is a trademark or registered trademark of Intel Corporation or its subsidiaries in the United States and other
countries.
Uses Bink Video Technology. Copyright © 1997-2004 by RAD Game Tools, Inc.
Atari does not control, and disclaims any responsibility or liability for, the functioning and performance of third-party
web sites and any content on or available through third-party web sites.
08124
28
 Loading...