

Page 1

Protected by copyright. Unauthorized or unlawful copying or downloading expressly prohibited.
Page 2
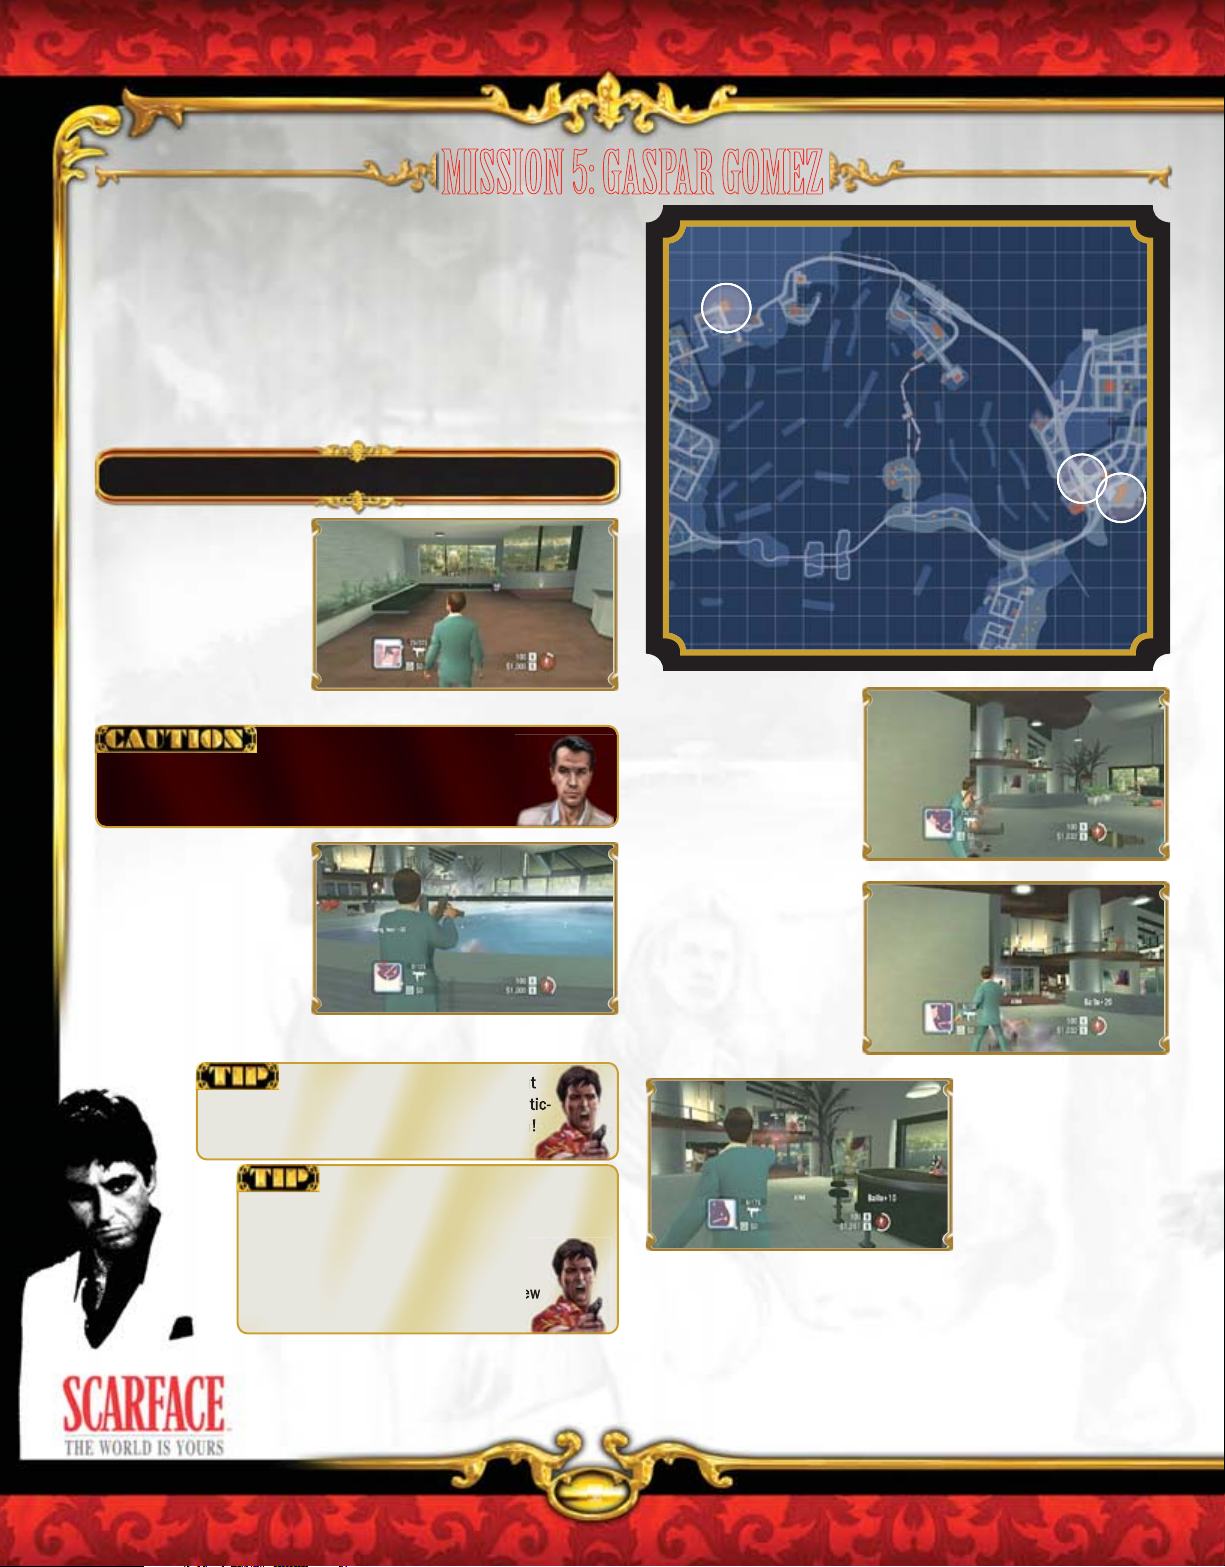
MISSION 5: GASPAR GOMEZ
You call Felix to fi nd out more about
Gaspar Gomez and decide to pay
Gaspar a visit in person. Matters take a turn for the worse as you
rip through the hotel suite, attempting to execute Gomez. You’ll need
every bullet when tackling the assembled henchmen…and helicopter!
Moving methodically down to a parking lot, you’ll steal an armored van
containing Gomez’s ill-gotten gains and bank it yourself—if you can
survive the drive!
PART 1: NORMAND LANDING
La Normand Location: U-10
Stride into the hotel reception
area and tell the attendant
your intentions. Before he
can call hotel security, you’re
in the elevator, heading up
to Gomez’s penthouse suite.
A guy on an upper balcony
might help you fi nd him.
Bring out your SMG.
This attack is a murderous rampage with
little time to rest. You must rely on sharp, manual targeting and Blind
Rage episodes to keep you alive. Also, The King’s lyrics “fools rush
in” apply to this fi refi ght. Stay back and kill from a distance.
Bring out your SMG and
run around and up the
ramp, turning right as you
do. About 10 enemies are
standing behind an indoor
pool. Begin to manually
target each one, dropping
around fi ve from this partial
cover. Optionally crouch to
dodge a few more shots.
“F—k Gaspar Gomez….”
EFGHIJKLMNOPQRSTU
1
2
3
4
5
6
7
8
9
10
11
12
13
14
15
You’ll be shot at by gang
members from an upper
balcony, so move to the top
of the ramp, turn right, and
fi nish off four or fi ve thugs
on the same level as you.
Stay close to the wall, so
the balcony punks can’t
shoot you.
Drop the nearer one fi rst,
including those coming
around the left corner
near your position. With
accurate manual shooting
and taunting, you’ll have
built your Rage meter by
this time.
down three foes immediately, because no one notic-
es you until you start fi ring or brandish a weapon!
PRIMA Offi cial Game Guide
This initial attack is crucial. Try to cut
Two tactics make this assault a little
easier. First, check your mini-map for red dots: these
are enemy locations. Second, auto-target everyone
to quickly ascertain where they are, and if
they’re enemies or innocents. These techniques are especially useful when only a few
enemies remain.
58
Protected by copyright. Unauthorized or unlawful copying or downloading expressly prohibited.
Remain on the fl oor
near the pool and fi nish
off this initial wave of
attackers. Use autotargeting to locate three
or four foes on the upper
balcony 180 degrees
ahead and left of you, and
slaughter them all.
Page 3
Then look over the low
wall to the curved lower
area, and bring out the
guns on a couple more
thugs. Don’t enrage
yourself just yet. During
a lull in the carnage,
claim the health by the
bar, and pick up as much
ammunition as you can.
You should have cleared
all the enemies from the
living rooms on the lower
deck, so move around to the
right, and head toward the
thug-fi lled rear living area.
This is an excellent spot to
launch into a Blind Rage.
Be quick and mow down
fi ve or six thugs, then climb
the stairs and drop another
three or so before the
rage stops, then turn right,
and fi nish the thugs in the
sitting area across from
you. Check the kitchen and
the large table for ammo
and any remaining enemies.
Smash a window to reach a health pack
outside on the balcony. You could then move around the outside
balcony itself, but this isn’t recommended as you’ll reach a wellguarded area with nearby enemies who can really damage you.
Head across to the
sitting area after scouring
the kitchen and interior
balcony for ammo. Stand
by the right wall, and blast
two shotgun-toting bad
guys from a distance. Then
step and turn right, and
shoot a coked-up maniac in
the bedroom. If you step into the open you’ll be ambushed, so stay at
a distance!
The shotgun-wielding maniacs drop their weapons,
and now is a great time to add them to your collection. However,
you don’t want to lose the SMG, so select the pipe or pistol when
you’re swapping weapons.
Basics — Walkthrough — Appendicies
Mission 5: Gaspar Gomez
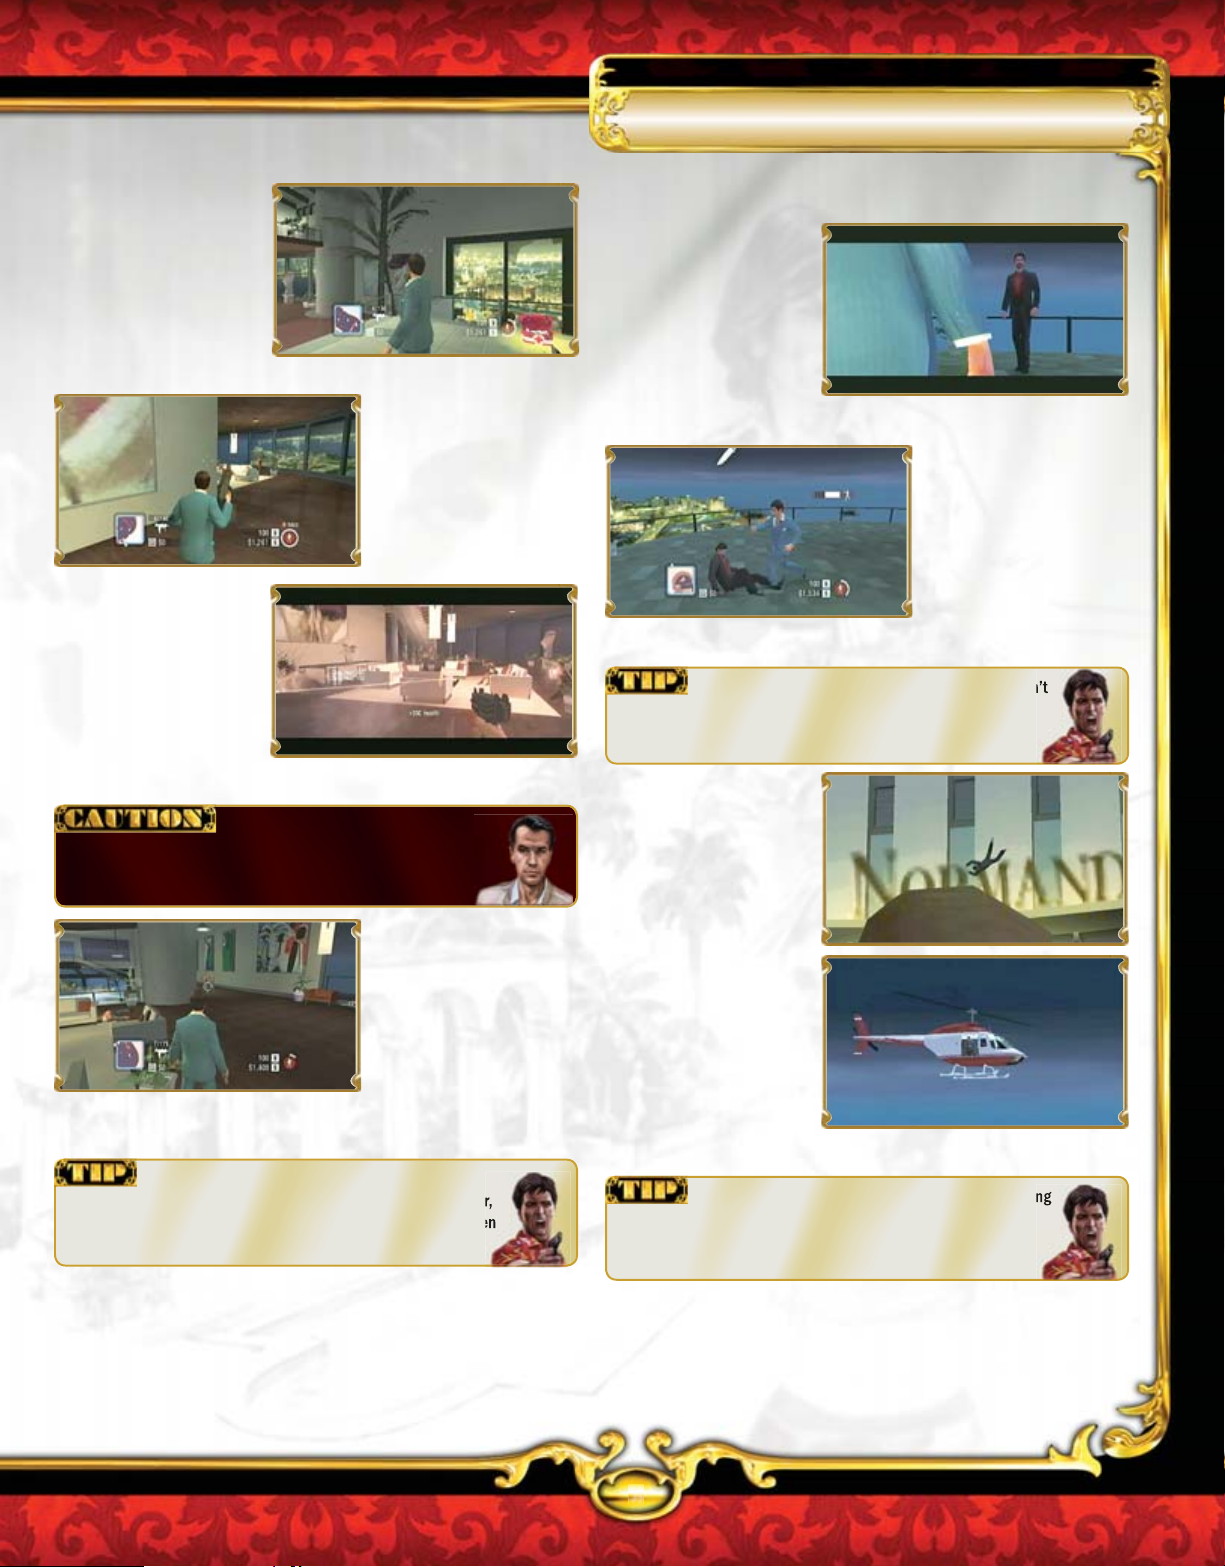
PART 2: FROM PENTHOUSE TO PARKING LOT
Stride along the gallery
where the shotgun wielders
died, and head up the
steps to the top balcony.
Gaspar isn’t here, but his
lieutenant, Ricardo, is. After
you exchange some words
with him, you remark, “The
next thing outta your mouth
is gonna be your teeth, puta!”
Begin combat with
Ricardo. If you’re using
melee attacks, simply tap
the right trigger quickly
after locking on; countering
and shoving aren’t
necessary. However, the
counter move is easy and
then you don’t need to run
around after Ricardo.
You’re probably wounded after your fi refi ght, so don’t
forget the health up here. Run to it before the fi ght starts if you
need it.
Ricardo takes a long
walk off a short balcony,
landing with a messy
thud on the ground below.
Gaspar’s remaining thugs
head straight into the
building, intent on hunting
you down.
A helicopter appears,
and you have three
options: You can blast
it in a Blind Rage, which
destroys it as long as you
fi re at different sections of
the chopper. Or, you can
fi re at it from the balcony,
shrugging off the incoming
bullets. Or, you can ignore it.
Ignore the chopper and you can fi nish it after dealing
with the foes inside. Also, shoot the chopper until it begins to
smoke; after that it explodes on its own. Defeating the chopper
increases your Balls.
59
Protected by copyright. Unauthorized or unlawful copying or downloading expressly prohibited.
primagames.com
Page 4

Ignoring the chopper
allows you to race inside
and deal with those thugs
on foot. You can shoot
them from the balcony,
but if you’ve been building
your Rage meter, use Blind
Rage now. Head down to
the lower living room, and
begin the carnage!
Tackle enemies in this
living room and the sitting
area on the other side of
the wall. Break a window
if you need to reach this
second area quickly. Don’t
forget the health by the
pool bar.
Head down the ramp
you started at, back to
the elevator. Defeat any
stragglers and build up
your Rage meter. Enter the
elevator, and ride it down to
the lobby.
You may be wounded,
so take either staircase
down to the reception area
and check the front desk
for a couple more thugs.
Find health behind the front
desk, too. Ignore the rest
of this area.
Instead, head along
the corridor to the left of
reception, to the entrance
marked “Parkade.” Head
down the steps to the parking
garage, which holds six foes.
This area can be diffi cult to
maneuver, so launch into a
fi nal Blind Rage!
Make quick work of the
gangsters here. Without
Blind Rage, stay at the
top of the stairs, wait for
each enemy to head up,
and blast one at a time.
Rushing them gets you
blasted from all sides.
After defeating the initial
wave of gangsters, back up to
the elevator and the balcony
continuation. Grab the health
here, then head left, around
to the ledge where you
fought the previous
eight guys.
Be careful during
this next section.
Continue to fi ll
your Rage
meter
and head
down to
a second
elevator bank near the bar, and bring down a foe
here. Then swing right and back up, peppering an
elevator as three thugs attempt to ambush you.
Exit the elevator and
head left, to the thug behind
the low wall. Step around
and blast him, then shoot
the eight or so punks
running at you from the
opposite end of the corridor.
Stay back, blast them, taunt,
and fi ll up that Rage meter!
PART 3: KEEP ON (ARMORED) TRUCKING
Dash to the armored van
and get inside. Ignore or run
over the few foes. Drive out
of the parking lot, avoiding
the middle, as there’s a hut
there. Ram one of the enemy
vans blocking you. You’re
heading to the bank!
JCS Bank Location: G-3/4
Taunt enemies during your armored van drive to fi ll your Rage
meter a little.
Ram the vans, skid
right, and head around (or
over!) the fountain area,
and make the fi rst possible
left. You’re heading for the
freeway. Make the next left,
and two blocks later, you’ll
see the waypoint.
PRIMA Offi cial Game Guide
60
Protected by copyright. Unauthorized or unlawful copying or downloading expressly prohibited.
Page 5

Freeway Entrance Location: T-10
Do not drive to the
waypoint. Instead, swing
right onto the freeway
entrance. Gaspar’s gang
chases you relentlessly.
You can’t return fi re,
so concentrate on
accelerating!
Stay in the central part
of the freeway, between the
two directions of traffi c, and
accelerate northeast. Stay
on this freeway, and ignore
any battering attempts.
Keep your speed up, and
don’t ram any innocents, as
this slows you down.
Staying in the center of the freeway (and the double
yellow lines as you reach the bridge) means you won’t hit oncom-
ing traffi c, and you have more room to maneuver left or right if
you’re struck by a foe.
Basics — Walkthrough — Appendicies
Mission 5: Gaspar Gomez
If you listen to Susan
when she buzzes Jerry,
you overhear that he’s not
expecting you. No problem.
The way is unblocked, so
head left, through the teller
entrance, and up the stairs.
Although you can chat
with the bank executives
in the adjacent offi ces,
you should really head
to the waypoint: Jerry’s
offi ce. Jerry considers
it dangerous to be your
banker, and he needs a cut
to cover his tracks.
Head downstairs to
Susan, and attempt to
launder your dirty cash.
Make sure the bank gets
the minimum percentage
cut possible (1.0 percent)!
You’re buffeted as you
reach the suspension
bridge. Just stay straight
and the enemy vans soon
explode. After the bridge,
the helicopter attempts to
block your path! You can
ram it, causing a massive
explosion!
Your van is strong,
but not invincible. Still, it
should be sturdy enough to
make it to the bank, which
is coming up soon on
your right. Gaspar phones
you, asking what the hell
is going on. You retort
with a quip. Pull up to the
waypoint. You’ve obtained Gaspar’s mobile phone, too!
PART 4: DIRTY LAUNDRY
After hanging up on Gaspar,
run up the steps into the
bank foyer, and run to
the teller with the arrow
pointing at her. This is
Susan. You ask to speak to
Jerry, the bank manager.
Laundered cash doesn’t disappear when you die. Banks are also
where you save your game.
After your deposit, you
receive “The Vanguard
Registry” for the bank’s more
infl uential clients. There’s
excellent news: the bengal
tiger will soon become
available! You can now
access the “Exotics Catalog”
in your Options menu.
61
Protected by copyright. Unauthorized or unlawful copying or downloading expressly prohibited.
primagames.com
Page 6

MISSION 6: FRONTAL ASSAULT
There’s no need to take the risks
if you aren’t going to spend your
wealth. The exotics catalog is
the key to fi lling your mansion
with antiques, garish trinkets,
servants, bodyguards, and
vehicles. After speaking with Felix and hiring your fi rst associate, head
over to Pedro’s Pawn Shop, and begin piecing your empire back together.
PART 1: AN OSTENTATIOUS OUTING
“Some sort of satellite voice
tracking shit; I think the
Russians made it.”
HIJK
2
3
Tony’s Location (Marina): I/J-4
You leaf through the exotics
catalog, planning your
purchases and your next
move. After you talk with Felix,
it’s time to start spending
some of Gaspar’s money!
Pedro’s Pawn Shop looks
ripe for buying and using as
a base of operations, but
fi rst indulge yourself. Follow
the onscreen prompts and
purchase a henchman
driver ($11,000), then
summon him using the
“Driver” option.
He arrives in your QM
convertible after a second
or two. Run over and get
into the vehicle. You can
now freely roam Miami
and begin the non-missionspecifi c parts of your
adventure.
4
5
6
The Empire portion of your options allows you to select
from Business, Turf, or Heat. Follow the instructions and select Pedro’s
Pawn Shop. From now on, you can attempt the following:
Take Over Four Miami Turfs
Felix Leads
Purchasing Fronts
Dealing with Cop Heat
Dealing with Gang Heat
Drug Dealers
Supplier Missions
The remainder of the walkthrough shows you the best order in
which to attempt these undertakings.
Femmes Fatales
Weapons
Dirty Cash Accumulation
Exotics Purchases
Gambling
Increasing Reputation
Pedro’s Pawn Shop Location: E-11
Step on the gas and
travel to Pedro’s using the
shortcuts you’ve already
found. His shop is very
close to Sheffi eld’s law
offi ces, so backtrack there,
and attempt your fi rst
purchase.
PRIMA Offi cial Game Guide
62
Protected by copyright. Unauthorized or unlawful copying or downloading expressly prohibited.
Page 7

Basics — Walkthrough — Appendicies
PEDRO’S PAWN SHOP
Mission 7: Little Havana Fronts—Pedro’s Pawn Shop
MISSION 7: LITTLE HAVANA FRONTS—
PEDRO’S PAWN SHOP
You need additional sources
of income to further your
machinations, and the pawn shop’s low-grade junk sells well. Meet
with the manager. He’s happy to sell the place for the right price, but
only after you remove some hot merchandise and deliver it to three
drop-off points across town.
“I want what’s coming to me.”
PART 1: A MAN WITH A PLAN IN A VAN
Pedro’s Pawn Shop Location: E-11
Run around the front of the pawn
shop after stopping to check out
the weapon dealer’s wares. The
only open door is to the right of
the sign on the main street. Head
into the store and speak with the
manager.
Inside the store, you can kill time playing slots
and video poker. When you’re done, speak to the manager.
The manager listens to
your offer, but he’s got the
cops bearing down on him
and a load of hot items to
dispose of. Your task is
to help him. You have fi ve
minutes.
Exit the store via the
front door and turn left.
Get into the van parked on
the sidewalk and turn left
again. Use the map to plot
your course.
First Package Drop-off Point: E-10
DEFGHIJKLM
4
5
6
7
8
9
10
11
12
13
The fi rst package
drop-off point is an area
of waste ground behind
Diaz Motors. It will take
you about 40 seconds to
reach. You automatically
drop the package. Head
back to Pedro’s.
The mini-map is extremely helpful for locating the
drop-off points, and onscreen arrows guide you to the appropriate
turns at each junction.
The cops are on Pedro’s case, and they’ll be on your
tail too if you don’t follow this advice to the letter. Do not:
Run over pedestrians
Destroy scenery, cut corners, or smash obstacles
Crash into other traffi c
Get out and wave a weapon around like a lunatic
63
Protected by copyright. Unauthorized or unlawful copying or downloading expressly prohibited.
primagames.com
Page 8

Coping with the Cops
If you ignored the advice above,
you’ll be swarmed with cops
once your visibility rating maxes
out, and when this happens,
you can’t drop off or pick up
packages.
Stay close to the drop-off (or
pick-up) location, and quickly
maximize your speed on a
straight road, leaving the cop
in the dust. Head away from
his radar (which appears on
the map) to free yourself, then
continue the mission.
Unfortunately, the time limit
means you’re unlikely to complete this mission if you’re
spotted more than once. Be careful out there.
PART 2: THE CRATE ESCAPE
Race back to Pedro’s
and pick up the fi nal
package in the dirt
courtyard behind the store.
If the timer reaches zero before you pick
up the fi nal crate, you f—k up. However, you should have around
one minute left on the clock if you’ve been driving to a professional standard!
PART 3: HARDCORE PAWN STAR
As soon you grab the fi nal
crate, the cops show up
early! There’s nothing you can
do except plan your escape.
Plan your route wisely.
When you’re back at Pedro’s
(having used the directional
arrows at each junction to
arrive here), drive around
the back to pick up the
second crate of goods.
Second Package Drop-off Point: E-6
Take the alleyway just
left of the junction as you
cross the bridge. Drop off
package two behind Fidel’s
Records. You should have
approximately 2:30
left on the clock.
northern sections of Little Havana can signifi cantly
reduce your driving time. Cut across the park that
runs behind Cabana Cigar, avoiding the ditch
and taking the alley down the side of the
Christy Design building. Use this in both direc-
tions during the second crate drop.
A shortcut between the southern and
Third Package Drop-off Point: M-11
Be sure you’re traveling
in the correct direction.
Swing the van around as
you’re heading toward the
trailer park. Make a right,
and follow the road.
This van is tough, but it isn’t invincible. If
you really hammer it into vehicles and walls, it can be immobilized
or destroyed, and you’ll fail. Don’t get reckless!
If you’re speedy,
you’ll outrun the cops in
seconds, so use the map
to maneuver your ride
with skill. Head across
the bridges and over the
freeway, then stop at the
car wash.
When the cops start following you, weave in and out of the oncoming traffi c on Beach Drive to lose them.
PRIMA Offi cial Game Guide
64
Protected by copyright. Unauthorized or unlawful copying or downloading expressly prohibited.
Page 9

Don’t drive too erratically. The drop-off
MISSION 8: LITTLE HAVANA FRONTS—
CABANA CIGAR
point is near the water, and there’s no fence to stop you from skidding in and failing the mission!
Once Pedro’s store is
clean, drive back, either
in the van or in a stolen
vehicle. Chat to the
manager when you get
there: “Holy f—king shit,
thanks, Tony! I’m lookin’
forward to workin’ wit’
chu, man!”
Basics — Walkthrough — Appendicies
Mission 8: Little Havana Fronts—Cabana Cigar
The World Is Yours: Freelance Plans
When you speak to the
manager at Pedro’s, you learn
the cost of purchasing the
place: $50,000. When you
have enough money, speak to
him again and buy it.
Recommended Plans
Earn money using any of the following schemes (attempt some
before your next mission):
Complete “Felix Leads”: these give you money, reputation points, turf percentages, and
they unlock supplier missions.
Complete small supplier missions and deal drugs to earn more money.
Clear neighborhood gang nests to earn turf percentages.
Purchase exotics to earn reputation.
Earn more than 150,000 reputation points, then head to your mansion and level up to
Reputation Level 2.
MISSION 8: LITTLE HAVANA FRONTS—
CABANA CIGAR
The manager of Cabana Cigar
is being blackmailed by his old
accountant, who has run off with
all of the important papers and
is being protected by goons. Without the papers, the store will change
hands and you won’t be able to purchase it. Find the accountant,
secure the paperwork, and if she has to sink to the bottom of a Miami
canal under a hail of gunfi re, so be it.
CDEFGHIJKLMNOPQRSTUVW
3
4
5
6
7
8
DOCK
“You know what capitalism
is? Gettin’ f—ked.”
PART 1: SMOKING THE ACCOUNTANT
Cabana Cigar Location: E-8
LEGEND
PAPERS
9
FRONT
10
11
65
Protected by copyright. Unauthorized or unlawful copying or downloading expressly prohibited.
primagames.com
 Loading...