

Page 1
Page 2

Page 3
GETTING STARTED
The ReadMe File
The Once Upon a Knight CD-ROM game has a ReadMe file where you can view both the
License Agreement and updated information about the game.We strongly encourage
you to read this file in order to benefit from changes made after this manual went to
print.
To view this file, double-click on it in the Once Upon a Knight directory found on your
hard drive (usually C:\Program Files\Atari\Once Upon a Knight). You can also view the
ReadMe file by first clicking on the Start button on your Windows®taskbar,then on
Programs, then on Atari, then on Once Upon a Knight, and then on the ReadMe file.
System Requirements
Operating System: Windows®98/Me/2000/XP (Windows®XP recommended)
Processor: 733 MHz (1.2 GHz recommended)
Memory: 128 MB RAM (256 MB recommended)
Hard Disk Space: 800 MB Free (1.2 GB recommended)
CD-ROM Drive: 4X Speed (8X speed recommended)
Video: 16 MB Windows®98/Me/2000/XP-compatible 3D video card
with T&L support* (ATI Radeon Series, Matrox Parhelia series
or GeForce 3 TI,4, TI, FX series, SIS Xabre 2 recommended)
Sound: 16-bit Windows®98/Me/2000/XP-compatible sound card*
DirectX®: DirectX®version 9.0 (included) or higher
Multiplayer: Internet connection required
* Indicates device should be compatible with DirectX®version 9.0 or higher.
Setup and Installation
1. Start Windows®98/Me/2000/XP.
2. Insert Once Upon a Knight Disc 1 into your CD-ROM drive.
3. If AutoPlay is enabled, a title screen should appear. If AutoPlay is not enabled, or the
installation does not start automatically,click on the Start button on your Windows
®
taskbar,then on Run. Type D:\Setup and click on OK.Note: If your CD-ROM drive
is assigned to a letter other than D,substitute that letter.
4. Follow the remainder of the on-screen instructions to finish installing the Once Upon
a Knight CD-ROM game.
5. Once installation is complete, click on the Start button on the Windows®taskbar and
choose Programs/Atari/Once Upon a Knight/Once Upon a Knight to start the game.
Note: You must have Once Upon a Knight Disc 1 in your CD-ROM drive to play.
Installation of DirectX
®
The Once Upon a Knight CD-ROM requires DirectX®9.0 or higher in order to run. If
you do not have DirectX®9.0 or higher installed on your computer,click “Yes” to
accept the DirectX®9.0 License Agreement.This will then launch the DirectX®9.0
Install.
3
TABLE OF CONTENTS
Getting Started . . . . . . . . . . . . . . . . . . . . . . . . . . . . . . . . . .3
The Story . . . . . . . . . . . . . . . . . . . . . . . . . . . . . . . . . . . . . .4
Saving and Loading . . . . . . . . . . . . . . . . . . . . . . . . . . . . . .5
Game Menus . . . . . . . . . . . . . . . . . . . . . . . . . . . . . . . . . . .5
Main Game Screen . . . . . . . . . . . . . . . . . . . . . . . . . . . . . .10
Movement and Actions . . . . . . . . . . . . . . . . . . . . . . . . . . .14
Combat . . . . . . . . . . . . . . . . . . . . . . . . . . . . . . . . . . . . . . .18
Magic . . . . . . . . . . . . . . . . . . . . . . . . . . . . . . . . . . . . . . . .21
RPG Mode . . . . . . . . . . . . . . . . . . . . . . . . . . . . . . . . . . . .25
RTS Mode . . . . . . . . . . . . . . . . . . . . . . . . . . . . . . . . . . . .30
Skirmish . . . . . . . . . . . . . . . . . . . . . . . . . . . . . . . . . . . . . .45
Multiplayer . . . . . . . . . . . . . . . . . . . . . . . . . . . . . . . . . . . .45
Editor . . . . . . . . . . . . . . . . . . . . . . . . . . . . . . . . . . . . . . . .46
Appendix . . . . . . . . . . . . . . . . . . . . . . . . . . . . . . . . . . . . .47
Keyboard Commands . . . . . . . . . . . . . . . . . . . . . . . .47
RTS Character Overview . . . . . . . . . . . . . . . . . . . . .51
Credits . . . . . . . . . . . . . . . . . . . . . . . . . . . . . . . . . . . . . . .52
Atari Web Sites . . . . . . . . . . . . . . . . . . . . . . . . . . . . . . . . .54
Technical Support . . . . . . . . . . . . . . . . . . . . . . . . . . . . . . .54
End-User License Agreement . . . . . . . . . . . . . . . . . . . . . .56
2
Page 4

RPG
This role-playing extravaganza is full of surprises and extras,featuring powerful heroes
who can all improve their weaponry,combat characteristics, powers and skills throughout the game.You are called upon to undertake a twisting and turning adventure, to
follow paths into the unknown, and to confront difficult tasks and take on treacherous
quests. During your travels, you will meet many people who will offer help or services.
Some will mean well while others will have their own ulterior motives.
You must fight your way to a magical gate where you will face the kingdom’s ultimate
enemy,Syff, the Queen of the Depraved.
SAVING AND LOADING
You can save a game in any single-player mode at any time by pressing the Esc key and
selecting Save from the Pause Menu, or by pressing Alt-F2.Enter a name for your
game in the Save window or use the time-stamped name the game automatically creates
for you. Select a saved game and then click on Delete to delete it.Click on Cancel or
press the Esc key to return to the previous menu or screen.
You can Quick Save your progress at any time by pressing Alt-F1. This automatically
creates a time-stamped file with the prefix Quick Save. Note: Each time you Quick
Save, you write over the previous Quick Save information.
The game has an Autosave feature that saves your progress automatically every 1 to 20
minutes.You can set the Autosave frequency in the Options menu.
To Load a game, select Load from most any game menu. If you select Load from the
Main Menu, the game displays a list of all saved games, sorted by game type.Click on
the RPG, Campaign and Skirmish tabs at the top of the window to display the saved
games for each type. Select a saved game and then click on Load to continue. Select a
saved game and then click on Delete to delete it. Click on Cancel or press the Esc key
to return to the previous menu or screen.
Keyboard Commands – Save/Load
ACTION KEY
Pause Menu Esc
Save current game Left-Alt + F2
Load game Left-Alt + F3
Quick-Save current game Left-Alt + F1
GAME MENUS
Configuration
The first time you launch the game,a Configuration screen will appear, where you can
text and adjust your initial graphics settings.The graphics settings are identical to those
found in the Options Menu (see “Options Menu” on page 7), however the
Configuration screens contains four extra buttons.
5
THE STORY
Once Upon a Time…
In a distant land, long ago, there lived a prince.He was righteous and just, noble and honorable,courageous and wise. As
you might expect, dark and treacherous powers were not fond
of this prince and joined to not only spread evil throughout the
land, but to banish the prince from the principality and the
thoughts of the people. One day, one of the despicable lords
cast a spell that sent the prince to another dimension. What it
failed to do, however, was to purge his image from the hearts
and minds of his subjects.
Some years later,the good-hearted magician, Gallus, opened a portal between dimensions
and returned the prince to his lands.Now, the prince must drive the evil lords from power
and bring peace and order to the kingdom. A bitter fight against evil is imminent…
RTS
So begins the epic adventure within RTS Mode, where you’ll build towns, command
armies, use mothers-in-law as weapons, milk cows and more.Campaign Mode is the
best way to learn the game: it will lead you step-by-step through the mechanics of playing, starting with simple movement and continuing on through the leading of armies.
Be sure to check the Tooltips in the game for complete details on all of the units, spells,
buildings and such.
Your characters will accompany you throughout the campaign (providing they are not
killed by wild animals or enemies). Each character that you control (including the
cows!) gains experience and abilities.The magical items,
weapons and armor you find will make each character even
more impressive and harder to defeat.
Kidnapped
Let’s go back to the moment that the prince was banished and
the evil lord Valtamand took control. Knowing that only bad
things lay ahead for the kingdom and its people, Gallus began to
search all of the weird, wonderful, magical places and torturous
voids, to bring the prince back to where he truly belonged. His efforts did not go unnoticed. The dark forces responsible for the prince’s disappearance learned what magician
priest was up to and quickly put an end to his dealings by making him disappear as
speedily as they had the prince.
Witnesses to this deed protested loudly, calling for all true heroes and valiant warriors
to find and rescue the magician. After all, he was a man known as a friend to the royal
family,and guardian of the faith, for hundreds of years.
Only eight potential rescuers were found. All were entrusted with the task of finding
and setting Gallus free.This is where the RPG begins.
4
Page 5
Multiplayer – Play a network or Internet game against human opponents.See
“Multiplayer” on page 45 for more information.
Options – Adjust game settings. See “Options Menu”below for more information.
Editor – Create your own battlefields and adventures.See “Editor” on page 46 for
more information.
Back – Return to the Sign-In screen.
Exit – Quit the game and return to the Windows®desktop.
Options Menu
The Options Menu is available from the Main Menu or the Pause Menu. From it, you
can adjust the following options:
Interface
Mouse Sensitivity – Adjust mouse sensitivity
from more to less.
Mouse Speed – Adjust mouse speed from slower
to faster.
Keyboard Speed – Adjust keyboard speed from
slower to faster.
Type – Click on the drop-down menu to choose a
style for game’s interface.
Reverse Mouse – Toggle reverse mouse mode ON/OFF.
Show Other Tooltips – Toggle extended game tooltips ON/OFF.
Auto Zoom – Toggle ON/OFF to enable automatic angle-adjustment while zooming.
Reduce Mouse Lag – Toggle ON/OFF to activate mouse cursors threshold.
Show Talk Tooltips – Toggle dialog subtitles ON/OFF.
Show The Unit List – Toggle the column of character portraits on the left of the
screen ON/OFF. You can click on these portraits for easier and quicker to access your
units.
Autosave – Set the frequency at which the game will automatically save your progress
(from 1 to 20 minutes). You can load the Autosave game from the Load menu — its
name has the prefix “Autosave” and the time.
Back – Return to the previous menu without saving changes.
OK – Save changes and return to the previous menu.
Default – Return all interface options to their default settings.
7
• Test – Click on this to text your video card at your currently selected resolution set-
ting. If your system fails the test,try switching to a lower resolution and testing again.
• Benchmark – Click on this to run a scripted game event that tests your system and
returns suggestions for optimal graphics performance at the selected resolution.
• Test Results – After you benchmark your system at a particular resolution, you can
click on the Test Results button to see suggested graphics settings. Click on the arrow
buttons to switch between test results for other benchmarked resolutions.
• Voice Transmission – This allows you to configure and test your system for voice
transmission (used in multiplayer games).
• Advanced – Click on this to view and print technical information about your graphics
system. This information can sometimes be helpful when troubleshooting technical
problems.
Sign-In Screen
Before you start playing, you must sign in.Your Player Name is the name that multiplayer opponents see and is the name under which all of your saved games are stored.
Select a name from the list of available players and
then click on Enter the Game or press the
Return key. To create a new player, type a name
into the New Player field and then click on Enter
the Game or press the Return key.
To delete a player name from the list, select the
name and then click on Delete. A confirmation
screen will appear informing you that the operation
will delete settings and saved games associated
with that player name.
Click on Exit to quit the game.To bypass the scrolling credits, press the Esc key.
Main Menu
After you sign in you are taken to the Main Menu, where you can choose from the
following options:
Campaigns – Play an RTS Mode campaign
game. See “RTS Mode” on page 30 for more
information.
RPG – Play the RPG Mode as one of eight
characters.See “RPG Mode” on page 25 for
more information
Skirmish – Play an RTS Mode skirmish game.
See “Skirmish” on page 45 for more information.
Load – Load a previously saved game. See “Saving and Loading” on page 5 for more
information.
6
Page 6
Animated T ress – Turn animations of plants and trees ON/OFF.
Clouds Shadows – Turn cloud shadows on the terrain ON/OFF.
Light in Tunnels – Slide to adjust the amount of light displayed in tunnels and
dungeons.
Gamma Correction – Slide to adjust gamma correction.
Back – Return to the previous menu without saving changes.
OK – Save changes and return to the previous menu.
Default – Return all video options to their default settings.
Keyboard
This contains all of the game’s keyboard commands that you can assign,as well as their
current key assignments (see “Keyboard Commands”on page 47 for a complete list).
You can change a key assignment by double-clicking on the function you want to
change and then pressing the new key.
Pause Menu
Press the Esc key at any time while playing to pause the game and display the Pause
Menu, which contains the following options:
Save – Save your current progress.You can also
save by pressing Alt-F2 while playing. See “Saving
and Loading” on page 5 for more information.
Load – Load a previously saved game. See “Saving
and Loading” on page 5.
Restart – Restart your current mission or campaign from the beginning.
Options – Display the Options Menu.
End – End your current game and return to the Main Menu. Game progress will be
lost unless you have saved.
Back – Return to the current game.
9
Sound Menu
Volume – Adjust the overall game volume.
Music – Adjust the in-game music volume.
Sound FX – Adjust the sound effects volume.
Units Speeches – Adjust the volume of unit voices. When the slider is pushed all the
way to the left you will no longer hear comments from any of the units.We recommend
you keep unit voices ON,so your units can warn you when the enemy is near.
Dialogs – Adjust the volume of cutscene dialog.
Environment – Adjust the volume of background sound effects (such as birds, wind
and water).
Soundtrack – Select a music soundtrack from the drop-down menu. (Default setting
lets game choose most appropriate music.)
Swap Channels – Toggle ON/OFF to swap left and right audio channels..
Use Voice Transmission – Toggle ON/OFF to enable voice chat during multiplayer
games.
Back – Return to the previous menu without saving changes.
OK – Save changes and return to the previous menu.
Default – Return all sound options to their default settings.
Video Menu
Resolution – Select the game’s resolution.Higher settings look better but may reduce
performance.
Texture Quality – Select High or Low. The High setting looks better but may reduce
performance.
Graphic Details – Select High, Medium or Low. Higher settings will look better but
may reduce performance.
Shadows – Select Off, Simple or Detailed. The Detailed setting will look better but may
reduce performance.
Effects – Adjust Effects, such as spells to Low, Medium or High. Higher settings look
better but may reduce performance.
Rain/Snow – Turn weather effects ON/OFF.
Water Foam – Turn water foam ON/OFF.
Reflective Water – Turn water reflections ON/OFF.
8
Page 7
Mini-Map – See “Mini-Map” below.
Action Icons – The action icons in this area will vary depending on the type of unit or
structure you have selected. Hold the mouse cursor over an item to display a Tooltip
that describes that icon.
Build Buttons – Displays character and structure icons when you click on one of the
four buttons: Basic Characters, Advanced Characters, Structures and Other Structures.
See “Construction” on page 30 for more information.
Milk Reserves – Displays your current milk reserves.
Keyboard Commands – Main Interface
ACTION KEY
Pause Menu Esc
Tooltip mode ON/OFF F1
Open objectives box F2
Locked camera mode ON/OFF F3
Pause Pause
Panel ON/OFF Left Alt + P
Tunnels ON/OFF Tab
Mini-Map zoom in = [equal]
Mini-Map zoom out – [minus]
Mini-Map terrain mode \ [backslash]
Increase game speed Number Pad + (plus)
Decrease game speed Number Pad – (minus)
Default game speed Number Pad * (asterisk)
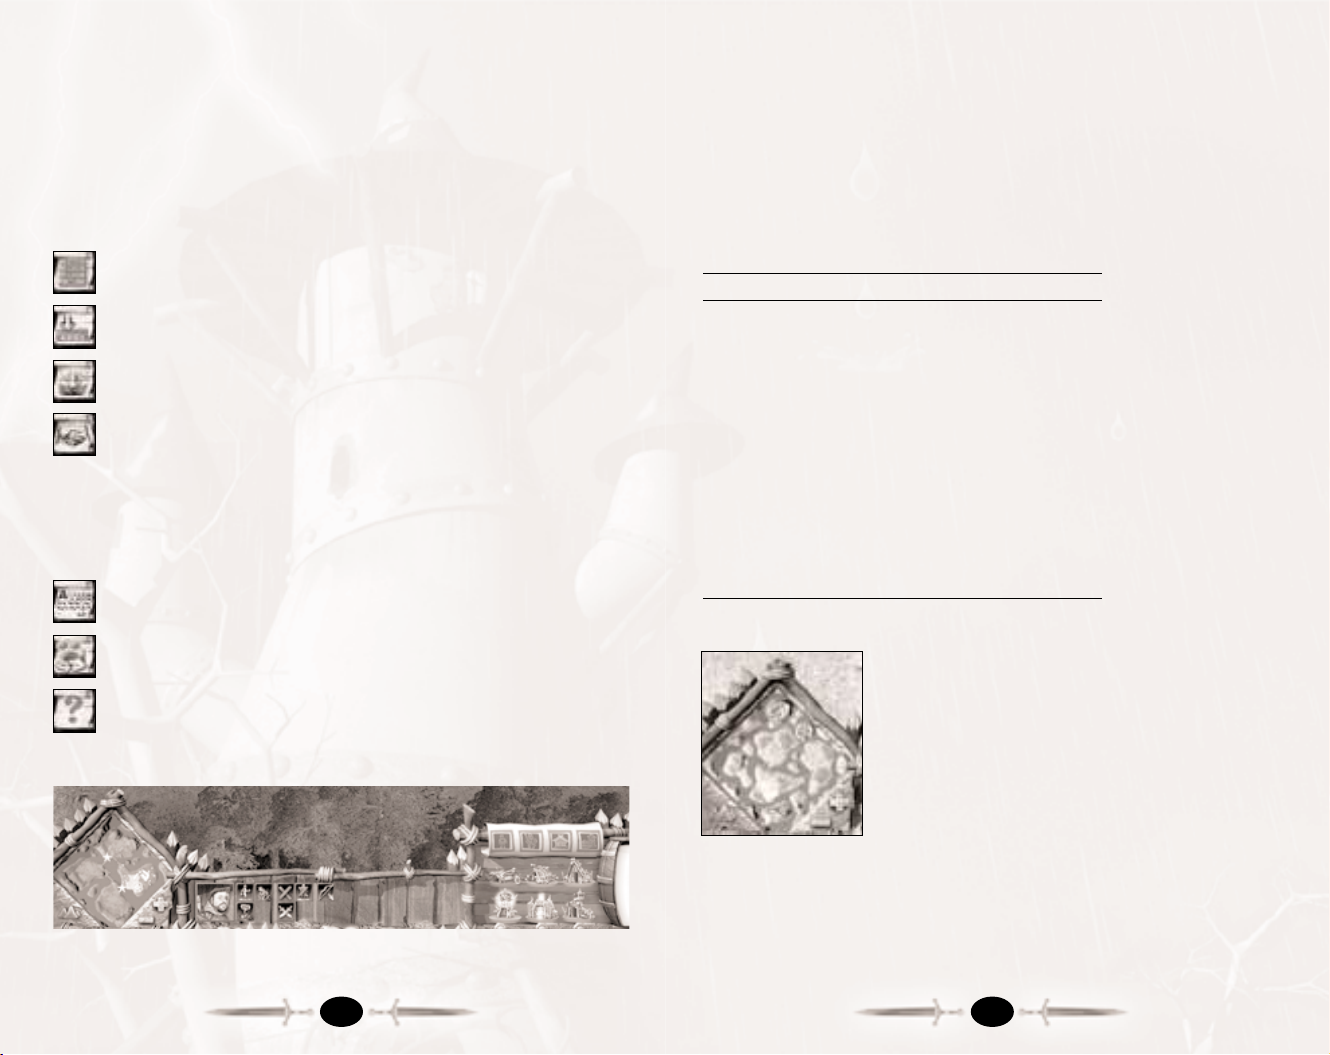
Mini-Map
The Mini-Map at the lower-left corner of the screen lets you
quickly view any part of the battlefield and provides valuable
information about current activity in the game.
Right-click on the Mini-Map to center the battlefield in that
location. Left-click on the Mini-Map to order selected
unit(s) to go to that location.
Symbols on the map indicate items, areas and other information. Use the [+] and [–] icons to zoom in and out.
The green cone shows the area of the battlefield that is cur-
rently on-screen. The larger part of the cone points in the direction you are facing.
Blue circles on the Mini-Map represent your characters.Pulsing green circles indicate a
mission goal. The sawblade symbols indicate healing stations. Stars indicate items that
you can pick up.Two pulses of a purple circle indicate that a unit or structure has just
been produced in that location.
11
MAIN GAME SCREEN
The following section provides an overview of interface elements common to both the
RPG (roleplaying) and RTS (real-time strategy) modes. For commands specific to each
mode, see “RTS Mode” on page 30 and “RPG Mode” on page 25.
Menu Bar
The main interface in both RTS and RPG modes consists of a large battlefield where all
of the action takes place, a Menu Bar across the top, and a Control Panel along the
bottom containing icons for performing actions.
Pause Menu – Displays Pause Menu — see page 9.
Show/Hide Control Panel – Hides Control Panel at bottom of screen to give
you a larger view of the battlefield. Click again to display Control Panel again.
Show/Hide Dungeons – Displays underground view of your current location.
Click again to show above-ground view.
Open Alliance Dialog – You can offer other players (human or AI) an alliance
by clicking on the clasped hands icon in the Alliance Dialog window. That player
may then accept or reject your offer.Click on the crossed swords icon to make your
units aggressive toward another player.Click on the shield icon to make your units
defensive toward another player.In defensive mode, your units will only attack if they
are attacked first. If the opposing force is attacking your buildings and not your units,
you must open the Alliance Dialog and select aggressive (crossed swords) in order to
make your units automatically attack them.
Show Goals List – Displays current goals.
Locked Camera Mode – Locks camera to an isometric angle position that you
cannot rotate.This position is often preferred by beginning users.
Show/Hide Extended Tooltips – Turns Tooltips ON/OFF. We recommend that
you leave Tooltips ON until you are familiar with the game.
Control Panel
10
Page 8

Keyboard Commands – Camera
ACTION KEY
Camera left Left arrow
Camera right Right arrow
Camera up Up Arrow
Camera down Down Arrow
Zoom camera in Page Down
Zoom camera out Page Up
Angle camera up Home
Angle camera down End
Rotate camera left Delete
Rotate camera right Insert
Turn view to north Numpad . (period)
Locked camera mode ON/OFF F3
Follow object ON/OFF Left-Alt + F
Show last event location Spacebar
Show selected unit Numpad 0
Show next unit Left-Alt + Numpad 0
Create terrain marker 1 Right-Ctrl + 1
Create terrain marker 2 Right-Ctrl + 2
Create terrain marker 3 Right-Ctrl + 3
Create terrain marker 4 Right -Ctrl + 4
Create terrain marker 5 Right-Ctrl + 5
Create terrain marker 6 Right-Ctrl + 6
Create terrain marker 7 Right-Ctrl + 7
Create terrain marker 8 Right-Ctrl + 8
Create terrain marker 9 Right-Ctrl + 9
Create terrain marker 10 Right-Ctrl + 0
Select terrain marker 1 Right-Shift + 1
Select terrain marker 2 Right-Shift + 2
Select terrain marker 3 Right-Shift + 3
Select terrain marker 4 Right-Shift + 4
Select terrain marker 5 Right-Shift + 5
Select terrain marker 6 Right-Shift + 6
Select terrain marker 7 Right-Shift + 7
Select terrain marker 8 Right-Shift + 8
Select terrain marker 9 Right-Shift + 9
Select terrain marker 10 Right-Shift + 0
13
Keyboard Commands – Mini-Map
ACTION KEY
Mini-Map zoom in = [equal]
Mini-Map zoom out – [minus]
Mini-Map terrain mode \ [backslash]
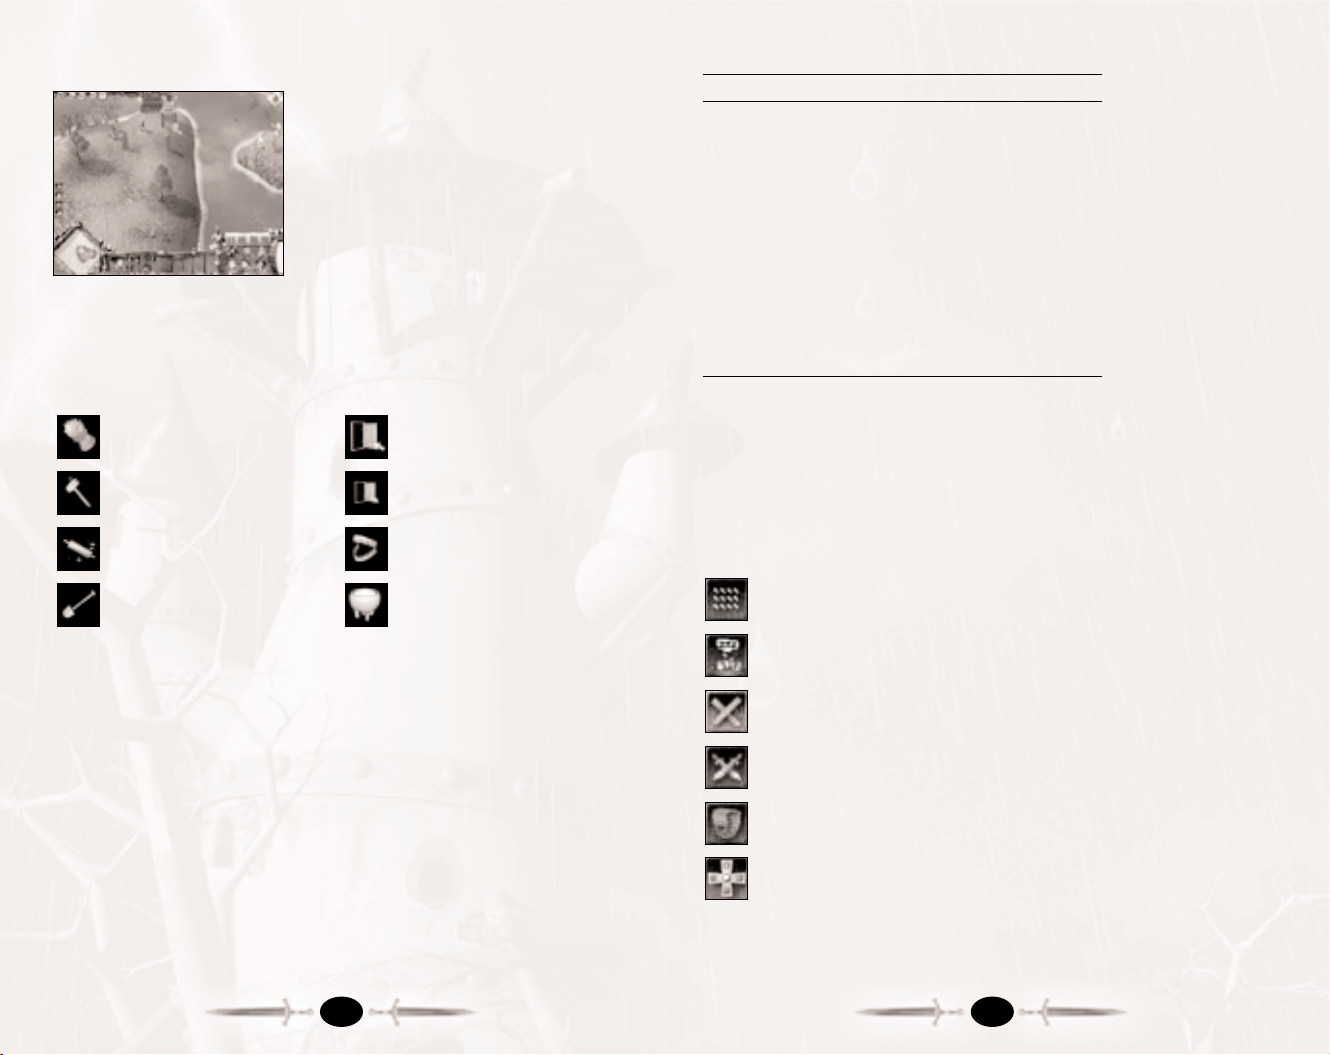
Battlefield and Camera
If you have played an RTS game before, you
should quickly feel comfortable with the Once
Upon a Knight controls.Like most games of its
kind, it allows you to move your mouse to direct
your pointer around the screen, and to click your
mouse to perform a variety of tasks, including
selecting and ordering units, building structures,
attacking, repairing and more.
As a rule, left-clicking selects units, confirms
orders and changes modes.Right-clicking cancels
actions and selections.
The game takes place on a battlefield. Move the mouse cursor to the edge of the screen
or use the arrows on the keyboard to scroll the map.(You can turn off mouse scrolling
in the Options Menu.)
You can instantly jump to any part of the map by right-clicking on the Mini-Map (see
“Mini-Map” on page 11). Right-clicking on a character portrait centers the battlefield
on that character.
By clicking and holding the right mouse button and then moving the mouse, you can
rotate the camera, change the camera angle, and zoom the camera in and out. You can
also zoom in and out using the mouse wheel. You can also perform all of these camera
functions using the keyboard.
Terrain Markers
You can create up to 10 terrain markers that let you quickly jump to any spot on the
battlefield — for example, your town center or a key strategic bridge. To do this, simply
press Right-Ctrl + [number 1–0]. When you press Right-Shift + [corresponding
number] the battlefield will instantly center on that location.
12
Page 9
Keyboard Commands – Character Movement
ACTION KEY
Attack A
Hold position H
Stop S
Unit sleep mode ON/OFF G
Unit camouflage mode ON/OFF C
Exit tower E
Move cow to cowshed W
Move cow to grass T
Record command R
Quick record Caps Lock
Repeat commands Z
Execute command list X
Actions
The actions your characters can perform vary, depending on the character type.When
you have a unit or units selected, icons in the lower center of your screen indicate the
actions you can perform. Click on an icon to perform that action.
Sometimes, not all characters in a selected group can perform a particular action, such
as casting a spell. When you click on a character-specific action, only the character that
can perform the action will attempt to do so. Below are some of the most commonly
seen action icons:
Formation – Toggle between Square formation,Line formation and
No formation.
Sleep – Sleeping allows injured characters to heal
more quickly.
Abort Current Action – Selected characters stop their current
action and await further orders.
Attack Object – Click on an object or unit to make characters attack it.
You can use this to destroy an enemy structure, for example.
Inventory – Open your character’s Inventory (RPG only).
Character Stats – Display character stats — when this is flashing,
open it in order to level up (RPG only).
15
MOVEMENT AND ACTIONS
To select a character, left-click on that character in
the battlefield, or left-click on his or her portrait at
the left side of the screen. To move the character,
point the cursor to the location on the battlefield
where you’d like the unit to go and then left-click.
You can also left-click on the Mini-Map to move
to that location.
To deselect the character, right-click anywhere on
the battlefield. To center the battlefield on a character,right-click the character’s portrait at the left
side of the screen.
If the character cannot move to a location because of impassable terrain, the cursor will
change to an X. If the character can interact with a location — for example attack or
talk to a character — then the cursor will change to indicate this.Below are the most
common cursor icons and the actions they indicate:
Attack object/character Enter tower
Construct building Exit tower
Capture building Graze here
Construct roads Send cow to Cowshed
Macros
You can create simple macro scripts to make your characters patrol a specific area,
for example.To create a quick macro, select a character and then press and hold the
Caps Lock key and click on a series of points on the battlefield.Your character will
immediately go from one location to the next.
To create a macro that you can make your character perform once with a single
keystroke, press the R key. Give your character normal commands and then press the
R key again to stop recording.When you press the X key,your character will repeat
these steps.
To create a patrol macro, press the R key to start recording, give your character
commands, and then press the Z key to stop recording. This time when you press the
X key, your character will follow all of the macro commands and then start over from
the beginning in a continuous loop.
Note: If you give a character new commands after recording a macro for that character,
it will clear any recorded macro!
14
Page 10

You will also find magical healing places scattered about in both game modes.Any character can stand in one of these shimmering blue areas and regenerate up to twenty
times faster than in other areas.
Another healing option in RPG mode is the drinking of health potions.You can sometimes find these on fallen victims or in treasure chests,and you can buy them from
merchants.To drink a potion, just click on the potion icon, or open your Inventory,
select the potion, and then click on Use.
A slow but sure way to heal, in RTS mode,is to let your characters sleep.While
dreaming of rescuing damsels in distress, your heroes will regain strength five times
faster than they would while awake. Note: Characters will refuse to sleep if they are
near impending danger,such as wild animals and enemies.
In the RPG mode, only the Barbarian has the ability to regain his HP while sleeping,
and even then it is a skill he must learn. The rate at which he recovers his HP during
sleep depends on how many experience points he has invested into the Regeneration
skill.
Magic characters in RPG mode can also heal using the Self-Heal spell if they both
know the spell and can spare the mana.
Keyboard Commands – Healing
ACTION KEY
Consume Healing Potion/Mushroom P
(RPG Only)
Cast Self-heal spell (RPG only) Left-Alt + V
17
Keyboard Commands – Actions
ACTION KEY
Show Skills K
Show Inventory I
Rotate building/formation Numpad Enter
Rotate building/formation reversed Left Alt + Numpad Enter
Set formation F
Attack A
Hold position H
Stop S
Unit sleep mode ON/OFF G
Unit camouflage mode ON/OFF C
Sell unit O
Set trap Y
Set damage trap Left-Ctrl + Y
Consume Healing Potion/Mushroom
(RPG Only) P
Use Mana Regeneration potion M
Next weapon ] [right bracket]
Automatic weapon selection ON/OFF Left-Ctrl + A
Healing
Characters get injured and die, no matter which game mode you are playing. To help
your heroes, armies and townsfolk stay in good shape and avoid premature death, you
must occasionally heal them. There are several ways to do this:
The quickest way to bring a character back from death’s door is with magic.Within the
forest, and along some paths, you will find patches of luminous blue mushrooms.
Should you instruct your character to eat one of these “magic mushrooms,” he will
regain his health immediately.
In RTS mode, a character eats a mushroom and feels its benefits as soon as he steps on
it. In the RPG mode,mushrooms are picked up and stored in a character’s inventory. If
you want a character to eat a mushroom, click on the mushroom or potion icon or
press the P key.
16
Page 11

Grouping
To select more than one character at a time, press the Shift key and left-click on the
characters you want to select. You can quickly select a group of characters by clicking
on the battlefield, dragging the cursor around the characters and then releasing the
mouse button. This is called drag-selecting.
You can select all on-screen units by pressing the ; [semicolon] key. Press the
’ [apostrophe] key to select all on-screen military units.Press the ] [right bracket] key
to select all on-screen wounded units.
Double-click on a specific character type on the battlefield to select all units of that type
currently on-screen. You can also select all units of a specific type by double-clicking on
a portrait of that unit type at the left side of the screen.
To deselect a character, either click on it or drag-select it while pressing the Alt key .
To assign all selected units to a numbered group that you can reselect quickly, press the
Ctrl key and a number while the units are selected. Then, simply press that number or
click the group icon to select those units.The following group icons indicate what types
of characters a group contains:
Mixed characters
Ranged combat group
(Spearmen and/or Archers)
Group with Prince Magic character group
Close combat group
(Knights and/or Woodbutchers) Animal group
19
COMBAT
Combat is really basic in Once Upon a Knight. Simply put, you select a character, move
your mouse cursor over an enemy and click. Your character will attack, either rushing in
and swinging away at close range, or standing back and lobbing arrows, spears or magical blasts. Of course, your battle tactics will have to be a lot more sophisticated than
that if you want to succeed, but that will come with practice.
There are two fighting modes: melee and ranged.Warriors, Knights and Woodbutchers
are melee combatants who fight up close and personal. Melee weapons have a onesquare range in any direction, including diagonally. Long-range combatants include
Archers,Spearmen, Witches, Priestesses, and Wizards. Attack range varies according to
type of weapon and the character wielding the weapon. Hold the cursor over a weapon
and a Tooltip will pop up that displays the weapon’s stats, including its range.
To attack a structure, as well as an enemy, click on the Attack icon or press the A key.
Your selected characters will attack the next unit or building you click on.To make your
characters hold their position and defend against attackers, click on the Hold icon or
press the H key. Click on the Camouflage icon or press the C key to make any selected
units capable of camouflaging attempt to hide from enemy units
Putting units in groups and coordinating your attacks based on character type is critical
to winning difficult battles. See “Grouping” below for information about how to deal
with groups.
Keyboard Commands – Combat
ACTION KEY
Attack A
Hold position H
Stop S
Unit sleep mode ON/OFF G
Unit camouflage mode ON/OFF C
Berserk attack B
Set trap Y
Set damage trap Left-Ctrl + Y
Consume Healing Potion/Mushroom
(RPG Only) P
Use Mana Regeneration potion M
Cycle through weapons used / [forward slash]
Next weapon ] [right bracket]
Automatic weapon selection ON/OFF Left Ctrl + A
Rotate formation Number Pad Enter
Rotate formation reversed Left-Alt + Number Pad Enter
18
Page 12

MAGIC
Magical spells provide you with a powerful battlefield advantage when used correctly.
In addition to conjuring powerful storms that can destroy buildings, magic users can
charm enemies to switch allegiances,summon ghosts and wild animals, teleport far
distances, make mirror images of themselves and even turn people into cows.
A character’s magical power defines his or her magic prowess. The more power a character has, the stronger his or her spells, and the more spells he or she can cast before
running out of magical energy (mana).
In RPG mode, characters must find or buy spells and can focus on either increasing
their magical power or mana pool, or making one spell especially powerful as they level
up. In RTS mode, characters level up automatically, allowing you no control over individual abilities. In order to acquire a spell for an RTS magic user, you must research
that spell in the type of building from which he or she emerges.
To cast a spell, click on its icon in the Control Panel or press its assigned keyboard
command. To cast the spell, click on an enemy or the battlefield. Non-targeted spells,
like Mirror Image, are cast immediately. For targeted spells, the mouse cursor will
change to indicate the spell you are going to cast.
In RTS mode, magic users will automatically cast the spells they know by default. You
can adjust exactly which spells are autocast by toggling them ON/OFF using keyboard
commands (see “Keyboard Commands – Spells”on page 24).
Conversions
In some quests and missions, you will need a specific character in order to complete a
task. If you do not have this type of character in your squad, you can convert another
character by making him stand on a “conversion station.” Conversion stations are indicated by statues of the animal into which they will convert your character. For example,
a cow conversion station features statues of cows.You can potentially convert a character into a cow,wolf, bear, woodbutcher or giant.
Note: It is recommended that you use characters with low experience levels for conversion since several things happen when you convert:
• All equipment is lost
• All level and experience points are lost
• If a character’s HP are at 50 percent or lower, the character cannot be converted
and dies
21
Keyboard Commands – Grouping
ACTION KEY
Create group 1 Left-Ctrl + 1
Create group 2 Left-Ctrl + 2
Create group 3 Left-Ctrl + 3
Create group 4 Left-Ctrl + 4
Create group 5 Left-Ctrl + 5
Create group 6 Left-Ctrl + 6
Create group 7 Left-Ctrl + 7
Create group 8 Left-Ctrl + 8
Create group 9 Left-Ctrl + 9
Select group 1 1
Select group 2 2
Select group 3 3
Select group 4 4
Select group 5 5
Select group 6 6
Select group 7 7
Select group 8 8
Select group 9 9
Select all visible units ; [semicolon]
Select all visible military units ' [apostrophe]
Select all visible wounded untis / [forward slash]
Rotate formation Number Pad Enter
Rotate formation reversed Left-Alt + Number Pad Enter
20
Page 13

23
Spell Descriptions
Below are brief descriptions of some of the spells in the game. Be sure to check the
Tooltips for more details on how a particular spell works.
Power Blast
Hurts all enemies within a specified
radius.The radius and the amount of
damage dealt depend on the caster’s
experience level.
Fire Rain
Creates a devastating rain of fire,
destroying everything in its area. Its
duration depends on the experience
points invested into the spell.
Firewall
Creates a long line of fire that injures
anyone who dares to go through it. The
more skilled the caster,the longer the
Firewall lasts.
Raven Scout
Summons a raven scout that can fly over
any portion of the battlefield and reveal
whatever is below. Its duration depends
on the caster’s experience.
Magic Shield
Creates a powerful magical shield that
protects the caster from damage.
22
Conversion (RPG Only)
Can transform a human into a cow.
Some enemies are immune to this
powerful spell.
Paralyze (RPG Only)
Paralyzes a single target.The duration
depends on the points invested into
this ability.
Petrify Foes (RPG Only)
Petrifies all foes in an area.The range
and time of the spell depends on the
caster’s skill.
Absorb Life (RPG Only)
Steals vital energy from a victim and
transfers it to the caster’s body.
Self-heal (RPG Only)
Heals the caster’s wounds at the cost
of some mana. The level of healing
depends on the number of points
invested in the spell.
Summon Ghost (RPG Only)
Summons a ghost that attacks all
enemies who approach. Damage
caused by the ghost’s attacks depends
on the caster’s experience.
Magic Mirror (RPG Only)
Creates a controllable twin of the caster.
The twin disappears after a period,
depending on the skill level of the caster.
This is a basic spell of the Amazon
Sorceress.
Summon Magical Animal
(RPG Only)
This spell summons a controllable
magical animal that fights enemies
until it dies or dissipates. Its power and
duration depend on caster’s level in
the spell.
Magical Trap (RPG Only)
Sets a magical trap that deals damage
when an enemy walks over it. Damage
depends on the caster’s skill level.
Storm
Summons a ravaging storm over a
specified area. Its duration and power
depend on the caster’s level.
Teleportation
This magical way of traveling (handy for
fleeing enemies) lets you instantly jump
from one spot on the battlefield to another.
The distance depends on the caster’s
skill level.
Dispel Storm
Dispels a storm cast by another magic
user.
Craze (RPG Only)
Causes enemies to attack their own companions (if any) while ignoring the caster.
Possess Mind (RPG Only)
Allows the caster to control the subject’s
mind for a limited time.
Page 14

RPG MODE
Unlike RTS mode, where you can create and control armies of characters, RPG mode
centers on just one special hero.This hero starts as a relatively weak creature, but
through quests, battles and the finding of treasure, he or she becomes stronger.
Eventually,you’ll have a regular champion on your hands — someone capable of
single-handedly defeating swarms of enemies.
To start an RPG mode game, click on RPG on
the Main Menu. Select the type of character you
want to create from the pull-down menu at the
top-center of the screen (see “RPG Heroes” on
page 28 for descriptions of each type). Select a
color from the pull-down menu above the hero
portrait box, and then give your hero a name.
To load a character, select that character’s name
from the hero list and click on OK.
Your hero’s abilities will differ depending on his or her character type. For example,
Archers are the only characters with the Marksmanship,Stealth and Trap abilities.Hold
the mouse cursor over an ability to display a pop-up description of it.
You begin with a pool of five points that you can use to boost any of your character’s
abilities.(As you level up, you will receive more points, which you can spend in the same
way.) Once you are happy with your hero, click on OK.
At the RPG Menu, select a hero and a difficulty level and then click on Start Game to
begin. Once your hero has completed a chapter, you can play that chapter again with
that hero.
Character Development
Chapter 1 will introduce you to the basics of the RPG game.As you make your way
through the land and talk to NPCs (non-player characters), you will be given quests.
These quests show up in your Goal List and as pulsating circles on the Mini-Map.To
display your goals,click on the Goal List icon at the top of the screen or press F2.
Whenever your hero kills an enemy, deftly uses a skill or solves a quest, he or she will
gain experience points.When your character has earned enough experience points, he
or she will “level up.” This is indicated by the flashing Skills icon in the Control Panel.
Click on the Skills icon to display the Skills
window.This window includes information about
all of your character’s abilities. Hold the mouse
cursor over any ability to display a Tooltip with
details about that ability.The line marked
Experience includes your hero’s current
experience, followed by the experience level at
which he or she will go up in level next.
25
Keyboard Commands – Spells
ACTION KEY
Cast Magic Shield Left-Alt + S
Cast Capture Left-Alt + A
Cast Storm Left-Alt + O
Cast Summon Raven Scout Left-Alt + I
Cast Conversion Left-Alt + N
Cast Fire Rain Left-Alt + L
Cast Dispel Storm Left-Alt + R
Cast Teleportation Left-Alt + T
Cast Specter Left-Alt + H
Cast Wild Animal Left-Alt + W
Cast Set Magical Trap (RPG only) Left-Alt + M
Cast Absorb Life (RPG only) Left-Alt + Y
Cast Petrify Foes (RPG only) Left-Alt + E
Cast Paralyze (RPG only) Left-Alt + G
Caste Craze (RPG only) Left-Alt + B
Cast Possess Mind (RPG only) Left-Alt + C
Cast Summon Magical Animal (RPG only) Left-Alt + D
Cast Summon Ghost (RPG only) Left-Alt + J
Cast Magic Mirror (RPG only) Left-Alt + Z
Cast Conversion (RPG only) Left-Alt + K
Cast Power Blast (RPG only) Left-Alt + Q
Cast Self-heal (RPG only) Left-Alt + V
Cast Firewall (RPG only) Left-Alt + N
Autocast Magic Shield ON/OFF Right-Ctrl + S
Autocast Capture ON/OFF Right-Ctrl + A
Autocast Raven Scout ON/OFF Right-Ctrl + I
Autocast conversion ON/OFF Right-Ctrl + N
Autocast Dispel Storm ON/OFF Right-Ctrl + R
Autocast Teleportation ON/OFF Right-Ctrl + T
Autocast Spectre ON/OFF Right-Ctrl + H
Repeat last magic command [ [left bracket]
Use Mana Regeneration potion (RPG Only) M
24
Page 15

Items and Inventory
Slain enemies sometimes drop gold or other
items.Your hero can collect dropped items by
stepping on them. Additionally, you can find gold
and other treasures in chests or barrels,which
your character must destroy to open. You can
identify such a container when you hover over it,
at which point the cursor will change into an
attack cursor. Simply click on a chest and your
character will bust it open. All of the items your
character picks up go into his or her inventory.
The size of an inventory is limited by the amount of weight a character can carry. A
knight or a barbarian can carry more than a priestess or an Amazon sorceress, but
armor,swords and helmets (which magic users cannot wear) are heavier than amulets,
belts or scrolls, so it tends to even out. Inventory capacity increases as a character
levels up.
Open your hero’s inventory by pressing the I key or by clicking on the Inventory icon
on the Control Panel.Your character’s stored items appear on the right side of the window.Use the scroll arrows to see additional items. The left side of the window displays
your character portrait and four boxes that indicate equipped items: a weapon, a ring, a
belt and an amulet. A character can only equip one of these types of items at a time, so,
even though your Sorceress might have three nice magical rings,she can wear only one.
Hold the mouse cursor over a piece of equipment to see its statistics.
To equip an item, click on it and drag it from your stored items to the appropriate
equipped items box or select it and then click on the Use button. Currently equipped
items will automatically be swapped into your inventory.If an item has a red background, your hero cannot use it. It would be best to sell this item to a merchant or give
it to a hireling.
When dealing with a merchant, your inventory appears alongside items the merchant
currently has for sale.The price the merchant is willing to pay or receive is indicated on
the left side of each item.
Note: Sometimes your character will pick up an “unknown”potion. Merchants are
never willing to pay much for these unidentified items,and it can often be risky to just
quaff it and hope for the best. We recommend that you search out a clairvoyant, who —
for a price, of course — will identify these items.
27
If you have points to spend on abilities, they are indicated on the Points Left line. Click
on the [+] symbol next to an ability score to spend points and improve that ability.
Check the pop-up Tooltip to see what you’re getting for your hard-earned points. Click
on the [–] symbol next to an ability score to subtract points that you have recently
added to that ability.Click on Close to return to the battlefield. Note: Once you close
the Skill window after spending points, you cannot subtract points — they are considered spent.
NPCs
There are various inhabitants of the Once Upon a Knight world beyond the characters
you control. Some of these NPCs (non-player characters) are friendly — they’ll help
you solve quests, and give hints and even special rewards for solving difficult tasks.
These NPCs are indicated by an explanation point [!] above their heads.Clicking on one
of these characters will launch a dialog and will usually add a goal to your Goals List.
Sometimes, an NPC will have no symbol above his or her head, yet you cannot attack
them or otherwise interact. This often means that they are part of a future quest.
Remember where they are and come back at a later time.
You will also meet merchants during your adventures.These NPCs are primarily
interested in making money,and are indicated by a money bag above their heads. The
merchants want to buy all of your interesting items as cheaply as possible… and then
jack up the prices and sell the items for a tidy profit.
Sometimes a character, called a hireling, will offer to join you in your adventure — for a
price.You can tell a hireling by the crossed swords above his or her head. Click on that
character and a box will pop up asking you to hire them. If you agree, the character will
join you for a period of time (indicated by the hourglass next to their character portrait).
Hired characters have their own inventory, which you can manipulate. If they die, they
will drop their equipment. If they leave when their contract is up, however, they’ll take
all of their equipment with them. You may want to clean out their pockets before they
hit the road. (You can make them drop items, including gold, by opening their inventory
and using the Drop command — see “Items and Inventory” on page 27.)
Last, but not least, comes the final group of NPCs — the horrible enemies. Depending
on the difficulty level at which you are playing, some enemy reactions can be quite
intelligent. For example, enemies can make use of their sight and hearing, and you
should adapt your strategies to accommodate this. Sometimes, enemies will use group
strategies — for example, they may send one character ahead while the rest hide behind
a corner.They are well aware of weapons properties,and will try to use melee and
ranged weapons to their best advantage.
26
Page 16

Spearman
The spearman is a very rough-and-ready bloke who became
part of the Priest Preservation and Liberation Taskforce shortly
after meeting the mother-in-law. It was the only logical thing to
do.According to his philosophy,“Tis better to meet and fight a
thousand enemies than to cross the mother-in-law’s path once
on a bad day.”
Sorcerer
Older than the forest, but younger than the priest, the wizard
became part of the Gallus Liberation team because he had
forgotten the punch line to a spell joke. Completely frustrated,
he began speaking loudly to himself and was overheard by the
wrong ears as he walked through the forest muttering, “Must
find the old git who taught me this style of magic — Gallus,
must find Gallus.”
Archer
This well-traveled, highly skilled,cultured fighting man has
spent too much time in Sherwood Forest wearing green tights…
which may explain his manner of speaking. He claims to have
learned his marksmanship in person from Robin of Loxley.He
became an RPG hero while drinking a nice cup of tea: While
choking on the leaves,his coughing and spluttering was mistaken for a positive answer.
Priestess
The Priestess began her career as apprentice to the Priest. Following
her training, she took over the admin department for the United
Temples of Power. After working many years in institutional business, she decided to go back to the roots of her job and speak
directly to the gods,rather than receive divine news secondhand
from some eccentric old man. With the gods’ help, she became
adept at using spells and magical scrolls for holy combat. When she
heard that her old Master and mentor had been kidnapped, she was the first true volunteer for the liberation squad.
29
RPG Heroes
Knight
This character, a hero born from an aristocratic family, saw it as
his duty to stand by the royal family in their absence. He manages to make most people quite sick with his stories of heroic
deeds and of dragons conquered, but is nevertheless a fierce
warrior and a brave knight.
Barbarian
From a long line of skilled woodcutters and builders,this powerful axe-swinging chap is a recently unemployed tree-cutter.
After completing his job of clearing the rain forests in North
Africa, he stood on the final stump and shouted “Hurra!”The
locals misunderstood his cheer and, after the tree-cutter’s
departure, dubbed the place “Sahara.” He eventually wandered
into Prince John’s future kingdom, which already had an abundance of woodbutchers.Grim job prospects forced him into the forest, where he ate
bears and fruit for two years and aggressively defended his territory against intruders.
The other forest dwellers named him the “barbarian.” At the meeting concerning
Gallus’ disappearance, as volunteers were being solicited, the barbarian rose his hand,
calling out in his nearly incomprehensible dialog in the hopes of gett\ing a free horn of
mead. Alas, his words,heard by all present as,“Aye, I shall undertake this dangerous
mission,” were actually “Aye, another horn of mead would be a fine thing.” And so a
new hero was born…
Amazon Sorceress
This attractive, swimsuit-clad, carefully tattooed character is especially designed to please the large group of young males who simply
expect a beautiful, buxom heroine in a modern game.To avoid frustrating this very important target group with a looks-only heroine,
the Amazon Sorceress takes advantage of powerful spells, scrolls
and magic items, and comes with a provocative and somewhat sug-
gestive voice. Using her magical staff, she can fire a lightning blast
that can efficiently roast, fry or boil the enemy from a distance,without causing friendly
casualties.As an added bonus, her base spell is Magic Mirror, which she uses to create a
temporary clone of herself, complete with lightning staff and long legs.
28
Page 17

Knight Priest Witch
Mother-in-Law Priestess Wizard
To create a character, click on an available character icon. The milk required to create
that character will be drained from your reserve vats,and the character will run out of
the building shortly.The number next to the character icon indicates the number of
remaining characters of that kind you can build before you run out of housing space.
Note: By setting a building’s destination point, you can specify where characters run after they are created. Click on the building and then press the P key
or click on the Destination Point icon.Your cursor will change into a flag.
Plant the flag in the spot on the battlefield where you want your characters to go after
they are created.
Creating Structures
If you have met the prerequisites for constructing a building (including milk quantity),
that building’s icon will appear on the Building panel with a green base (except for the
bridge, which appears in blue). Structures that are not available will appear shaded
brown. There are two Structures buttons, each with six structure choices:
Cowshed Hut Barracks
Wizard’s tower Temple Court
Road Bridge Drawbridge
Stockade Tower Gate
31
RTS MODE
Economy
The economy of the Once Upon a Knight world is based on milk, the only resource that
gives the woodbutchers (your builders) the strength they need to construct buildings.
Milk pays for things, like buildings, building upgrades, knights, archers and, naturally,
more cows.
The Once Upon a Knight cows are tireless nibblers — each can produce 10 liters of milk
from one square of grass. Eventually, all that grazing reduces a meadow to bare earth
(but it eventually grows back). When a grass square is empty, the cow automatically goes
in search of a fresh square of nourishing green grass.
It pays to manually keep your cows moving around a pasture. If you do, you can double
milk production, since you are getting the cows to areas of fresh grass quicker than they
would on their own. For best results, allow a cow three to four bites on one grass
square and then click on a neighboring square.You can also speed up milk production
by hiring a cowherd (see “Character Reference” on page 37).
Construction
Buildings provide you with the means to create units, produce more milk and research
new discoveries. Each building can only support a certain number of units, and some
buildings have prerequisites. For example, you must build huts next to roads, but you
must build a cowshed before you can build a hut. Woodbutchers take care of the building construction in the game.
To build a structure or a character, click on one of the four Build buttons at the bottom
right side of the screen. A red X will appear through a button if none of the characters
or structures is available for that section. If you hover your cursor over a character or a
building icon, a Tooltip will pop up explaining why you cannot currently create it.You
may not have enough milk or a building may first require the creation of a different
building. Buildings can also become full,in which case you’ll need to create another
building before you can build the unit.
Creating Characters
You can create any character associated with a building that you own, providing you
have enough milk and enough space. Characters that you can currently build appear in
full color. Characters that you cannot currently build are shaded brown. There are two
Characters buttons, each with six character choices:
Cows Woodbutcher Warriors
Cowherds Archers Spearmen
30
Page 18

Building Reference
Cowshed
One cowshed can accommodate up to three cows or
cowherds in any combination. Each cowshed can store
100 liters of milk. If you don’t have enough milk to
build high-priced items, you need to build more cowsheds to increase your storage capacity.
Prerequisites: Build on meadow
Cost: 80 liters
HP: 1000
Hut
One hut is home to up to six archers,woodbutchers
or mothers-in-law,in any combination.
Prerequisites: Existing cowshed; build next to road
Cost: 80 liters
HP: 1200
Upgrades Available:
• Great Bow
• Great Bow 2
• Fire Bow 1
• Fire Bow 2
• Battle Axe
• Double-Headed axe
• Double-Headed Battle axe
• Battle Axe of Ice
33
To create a building, click on an available Structure icon and the required milk will be
drained from your vats. Direct the woodbutchers to build your structure where you
want by moving the cursor to a particular point on the landscape, and then left-clicking
(right-clicking will cancel). You can change the orientation of a building with the Enter
key on the number pad — pressing the key once will rotate the building a quarterturn. Nearby woodbutchers will automatically begin construction. If you want other
woodbutchers to help,you must select them and then click on the construction site
(your mouse cursor will change to a sledgehammer). Moving a mother-in-law close to
the site will make the woodbutchers work faster.
Woodbutchers are not required to build roads. Simply click on the Road icon within
the Buildings tab,and then click on the landscape to direct where the road section
should be built.
To construct a bridge, click on the Bridge icon within the Buildings tab. Then, click on
a water square next to the shore to place one end of the bridge where you’d like. After
clicking on a valid spot, a construction site appears. Click again next to this site to
extend the bridge out over the water and to the other shore.
Like characters,every building has a number of HP (health points), indicating the
amount of damage it can take before it is destroyed. Nearby woodbutchers will
automatically try to repair a damaged building.
Upgrading Structures
Each character in Once Upon a Knight has an individual weapon.The Spearman uses a
spear,the Woodbutcher an axe, and the Archer a bow.The Knight, the Warrior and the
Prince all use swords. (The Prince can also use an axe.)
You can upgrade some structures to provide the associated units with better weapons,
armor and spells. Select the building you want to upgrade and then press the U key or
click on the Anvil icon at the bottom of the screen.This will bring up the research dialog that lists the available upgrade choices for that structure.Hold your mouse cursor
over an upgrade to see details. Click on an upgrade and then click Buy to order that
upgrade for the building. All characters that come out of that building will be equipped
with the appropriate new upgrade. See “Building Reference” on page 33 for more details
about structure upgrades.
Characters can also find weapons upgrades on the battlefield. If you see an upgrade,
hold your mouse cursor over it and a description will pop up.Then, select a character
that can use it and direct that character to walk over it.
32
Page 19

Temple
A Temple can house up to three witches or priests, in
any combination. Because the temple is made of stone,
it takes a long time for a woodbutcher to build one —
try sending the mother-in-law with a squad of woodbutchers.
Prerequisites: Hut; build next to road
Cost: 300 liters
HP: 1400
Upgrades Available:
There are 4 levels of upgrade for each item — Levels 2
through 5.
• Magic missile
• Magic blast
• Raven Scout
• Teleportation
• Spectre
• Magical Wolf
Wizard’s Tower
This is the home of up to two priestesses or wizards,
in any combination. Send a squad of woodbutchers,
under the driving force of a mother-in-law, to complete this structure quickly.
Prerequisites: Temple; build next to road
Cost: 400 liters
HP: 1600
Upgrades Available:
There are four levels of upgrade for each item —
Levels 2 through 5.
• Lightning
• Fireball
• Magical Shield
• Possession
• Storm
• Conversion
• Fire Rain
35
Barracks
One Barracks can house up to four spearmen or
warriors, in any combination. It’s difficult for one
woodbutcher to raise this building, so try sending
several, as well as a mother-in-law to badger them.
Prerequisites: Hut; build next to road
Cost: 200 liters
HP: 1400
Upgrades Available:
• Trident
• Pike
• Pike of Lightning
• Pike of Fire
• Short Sword +
• Knight’s Sword
• Knight’s Sword +
• Long Sword
• Round Shield 3
• Small Steel Shield
• Medium Shield 1
• Medium Shield 5
Court
A court is the home of a single Knight. It is a very
expensive, but very strong, abode, similar to its inhabitant. Several woodbutchers make fast work of completing this building.
Prerequisites: Barracks; build next to road
Cost: 400 liters
HP: 1600
Upgrades Available:
• Knight’s Armor
• Knight’s Heavy Armor
• Lord’s Armor
• Warlord’s Armor
• Helmet
• Knight’s Helmet
• Helmet (more powerful)
• Heavy Helmet
34
Page 20

Characters
All characters in the game have specific attributes and abilities.These abilities determine
their prowess in battle, as well as their speed, range, health and more. As a character
gains experience and increases in level, his or her abilities increase.
HP (health points): A character’s current state of health
HP Regeneration: The speed at which an injured character regains health
Magic: A character's magic power, which determines the number of spells that
character can cast
Magical Regeneration: The speed at which character regains magic power
Movement Speed: A character’s speed
Strength: A character’s ability to sustain wounds
Grazing Speed: The speed at which a cow eats grass
Capacity: The amount of milk a cow gives in one milking
Take-Over Resistance: The level of resistance an animal has to taming attempts
Experience
As the game progresses, every character and animal gains experience by doing what it
does best. Swordsmen, for example, earn experience by fighting — the tougher the
defeated foe, the more experience points earned. Even cows gain experience, earning
one point for every ten liters of milk delivered to the cowshed. Experience levels are
displayed as blue spheres above the character’s head.When a character levels up,stars
circle around his or her head.
Higher levels affect various character parameters.An archer’s range will improve. A
cowherd will get better at taming wild animals.A cow will produce more milk.
Character Reference
Cow
These docile cud-munchers are the lifeblood of the game.
Without cows,there’d be no milk, and without milk there
would be, well, nothing.
Cows have various colors and markings, making it easier to
identify them. As a cow grazes, it gains experience and increases
in efficiency.So, an old,experienced cow is more valuable than
a new,young one. An attacked cow will run away to its shed in
panic and remain there.After the enemy has been repelled, you
will need to send your cowering cows back to the pasture.
Home: Cowshed
Cost: 80 liters
HP: 240
37
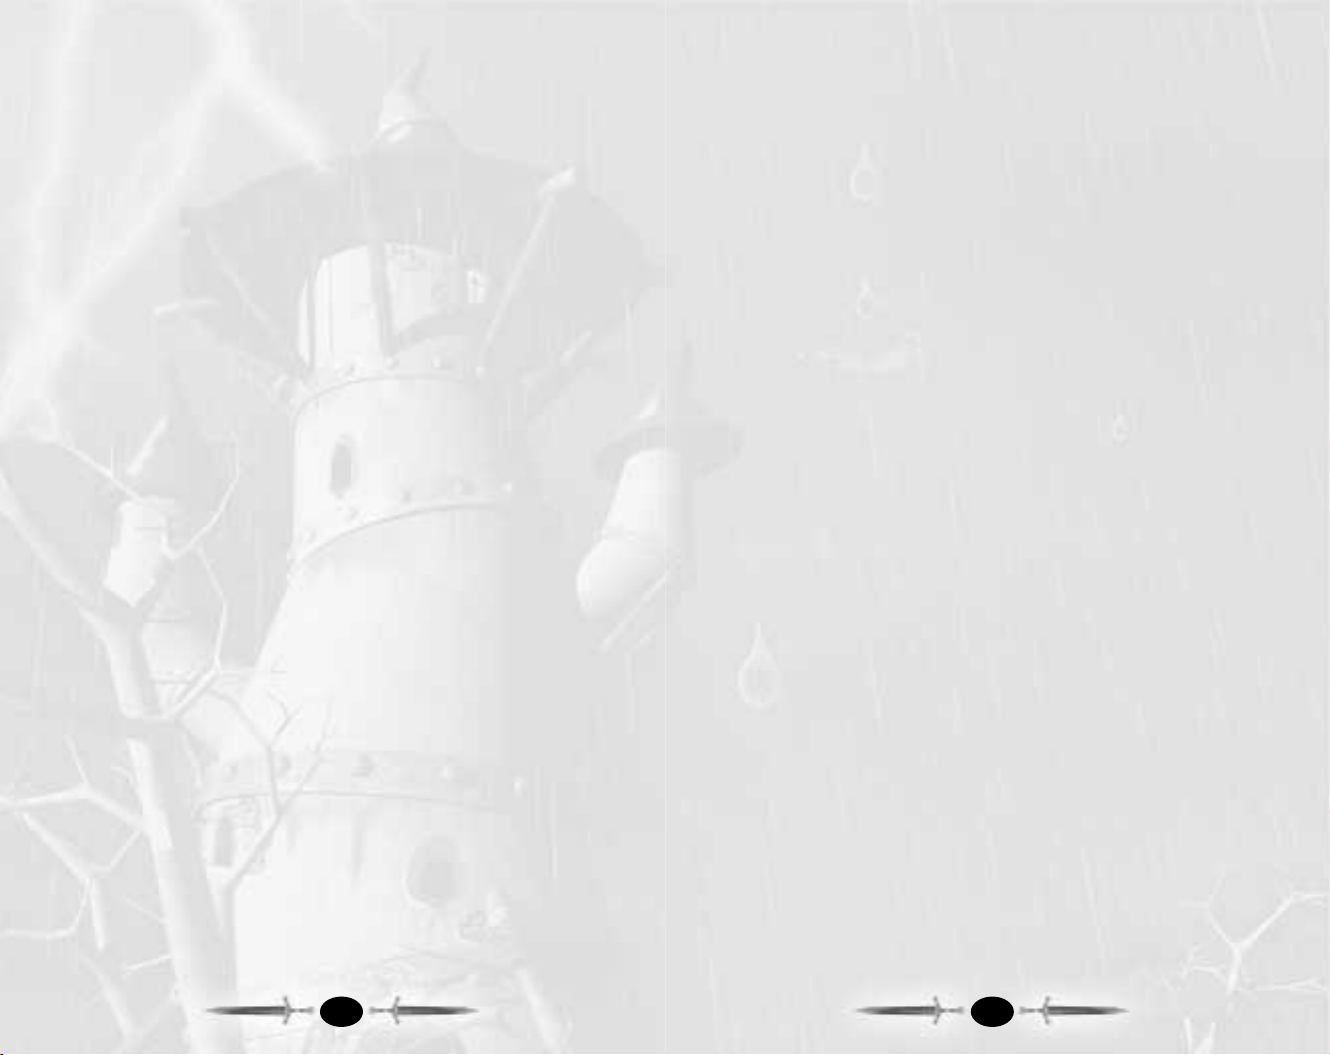
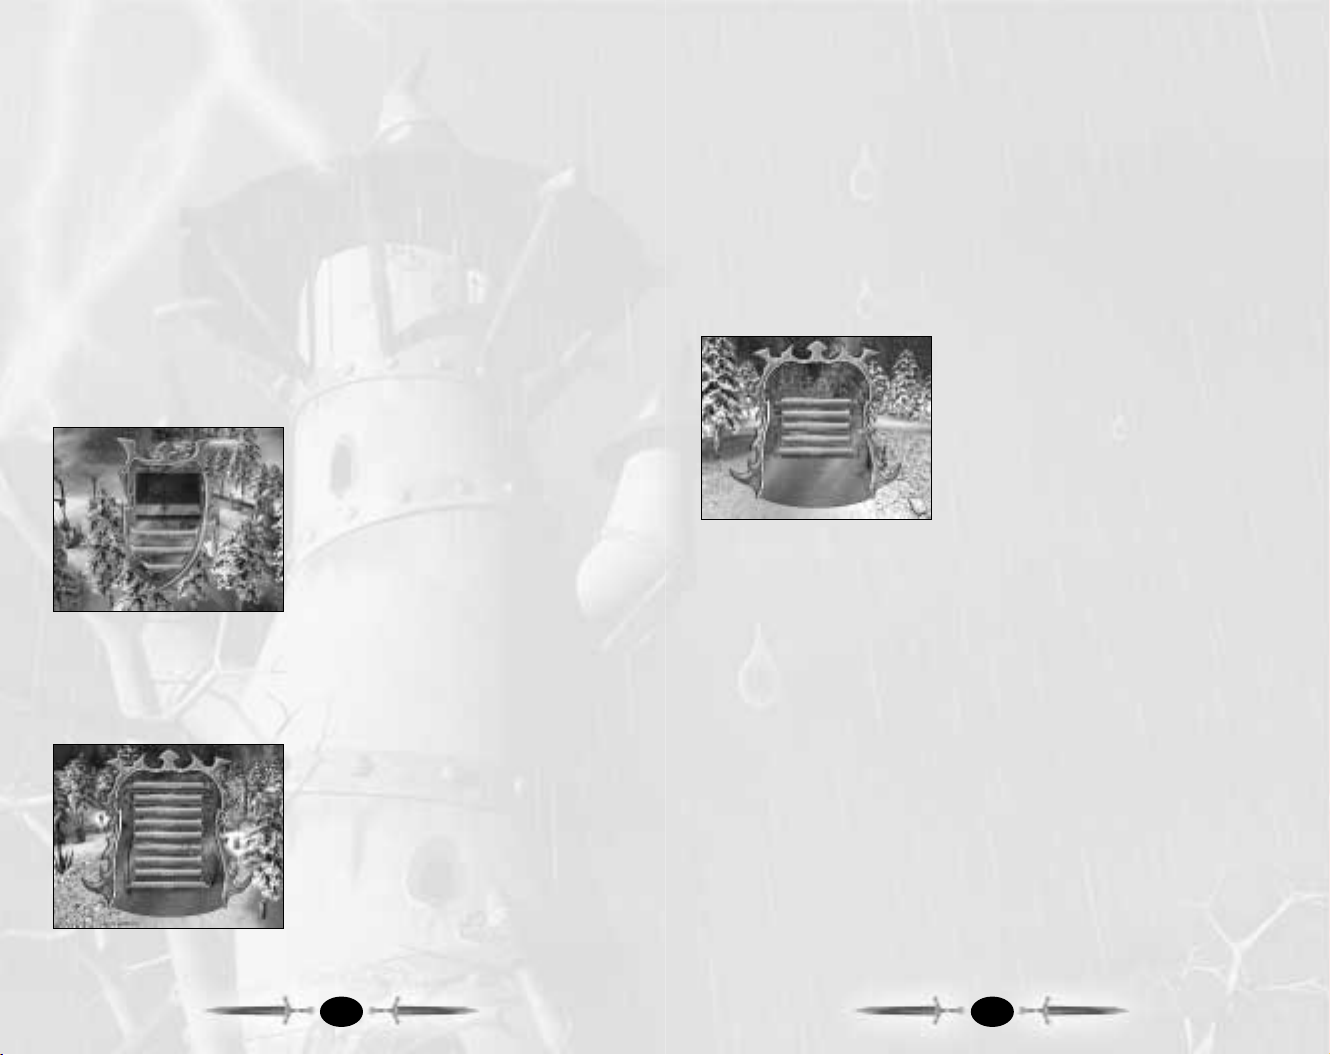
Gate
A gate is built as part of a Stockade. It allows friends
to pass through easily and forces enemies to halt.
Gates require one character to operate.When a
character is on a gate’s accompanying watchtower,
the gate automatically opens for friendly units and
closes for enemy units.
Cost: 30 liters
HP: 1200
Tower
You can place a single unit in this defensive structure.
Select the unit and then click on the tower — the unit
will climb the tower and fire arrows, spears or magic
blasts at approaching enemies.Every ranged enemy
attack aimed at a Tower hurts the character in it. Every
sword- or axe-blow damages the Tower, but not the
character in it.
Cost: 30 liters
HP: 800
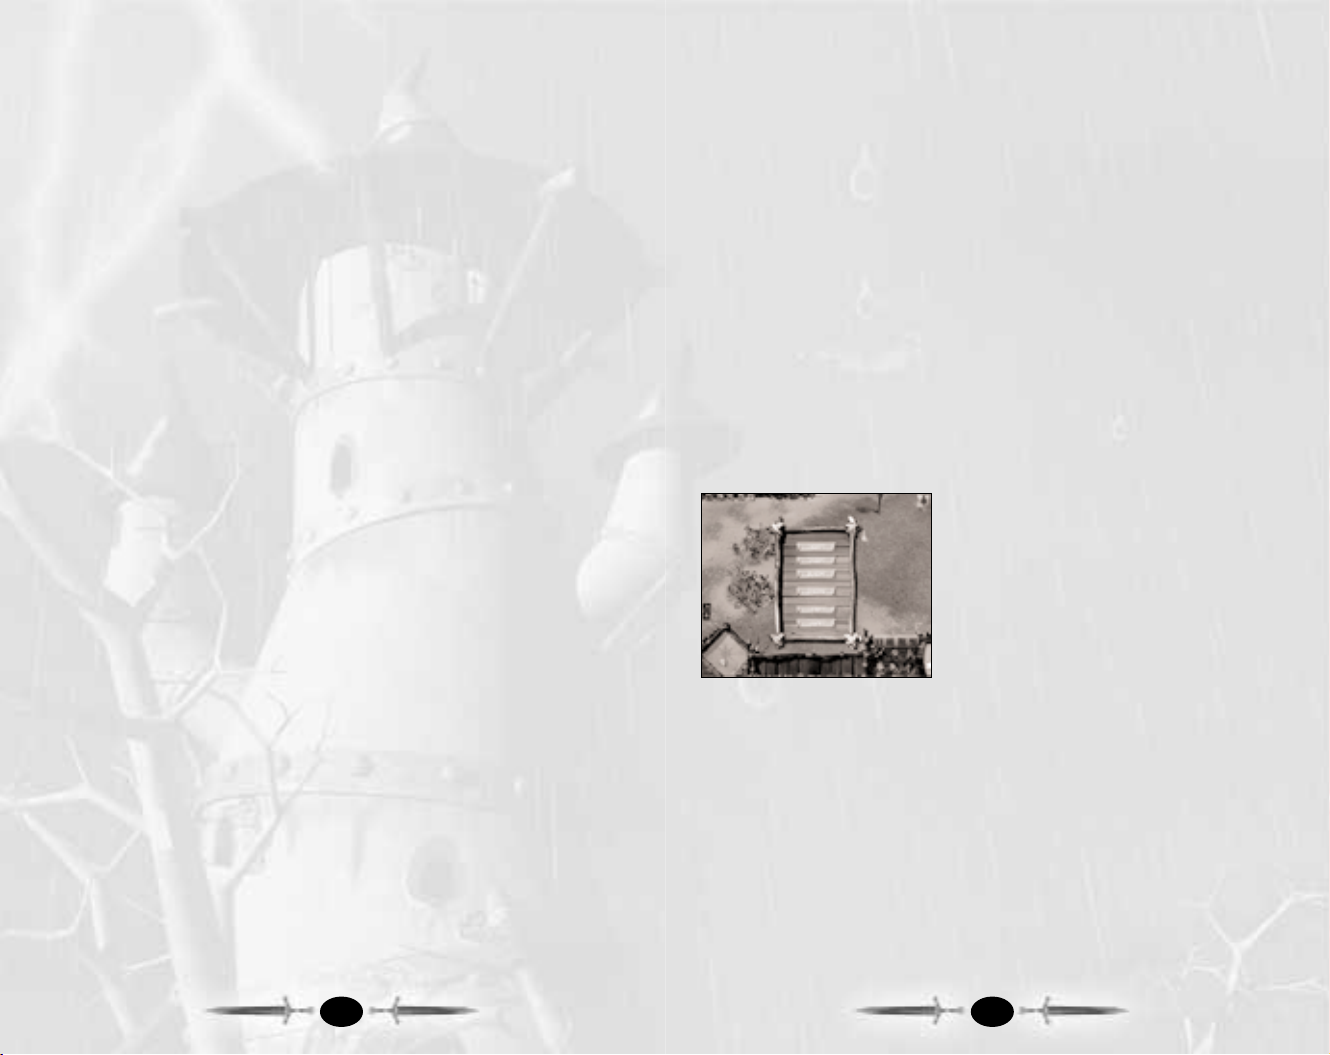
Drawbridge
You can build a drawbridge on a river bank or on a
lakeshore.A drawbridge requires one unit to operate
it. When a character is inside, the drawbridge
automatically opens for friendly units and closes
for enemies.
Cost: 40 liters
HP: 3000
36
Page 21

Warrior
Warriors are the fearless frontmen of any good army, protecting archers and spearmen, charging fortified structures and
generally taking, and dishing out, a lot of abuse. Warriors wield
swords and wear leather armor,so they are sturdier and more
dangerous than woodbutchers.They are also far less expensive
than most other fighting units.
Home: Barracks
Cost: 120 liters
HP: 600
Strength: 45 + 10
Range: 1
Spearman
A spearman, being as frail as an archer, is not suited to close
combat. However, his spears go as far as, and do much more
damage than, an archer’s arrows. Like an archer, a spearman
has a much better chance of survival when he is placed in a
tower.Unlike an archer, a spearman can also use a shield to
protect himself.
Home: Barracks
Cost: 150 liters
HP: 280
Strength: 22 + 5
Range: 8
Knight
The knight is one of the most powerful characters in the game,
but he is also one of the most expensive, requiring his own
court as a place to hang his helmet. Equipped with good armor
and a sword, the knight can outfight several swordsmen, and
can wade through archers and spearmen all day long.
Home: Court
Cost: 400 liters
HP: 1500
Strength: 60 + 20
Range: 1
39
Cowherd
This charming young lad is one of the most useful people in
the village. He lives with, and cares for, the cows. Cows who
graze near a cowherd double their grazing speed.
A cowherd can capture enemy cows and bring them to the
village.A cowherd can also capture and tame wild bears and
wolves — but this is dangerous and does not always work.
Home: Cowshed
Cost: 80 liters
HP: 80
Archer
The archer’s strong bow lets him shoot animals and enemies
from a considerable distance. He is especially effective when he
stands atop a tower,where his only direct dangers are bowmen, sorcerers and witches on broomsticks. The archer is the
fastest of all of the characters in the Once Upon a Knight
world… and he has the best eyesight, allowing him to spot
enemies from a long distance.
An archer’s special ability is spying — in this mode, he is silent
and nearly invisible to enemies.He wears an amulet of the
Forest God and is very resistant to magic missiles. Apart from all
these wonderful attributes,the archer has one drawback — he is
a puny man. This means he has no chance in a direct fight with
even a woodbutcher — two axe-blows and he’s finished.
Home: Hut
Cost: 80 liters
HP: 200
Strength: 15 + 5
Range: 8
Woodbutcher
The woodbutcher is one of most important characters in the
game.With his giant axe, he can build or repair any structures,
destroy enemy buildings and cut trees. But he is not just a man
of peace — he can swing a mean axe in combat, too! So, if you
intend to turn an enemy village into dust, you must have a few
woodbutchers in your army.
Home: Hut
Cost: 80 liters
HP: 400
38
Page 22

Witch
The witch is the only character able to fly, using a state-of-theart SWEEP 64 model broomstick. This gives her an undeniable advantage over other characters.Additionally,she can
strike enemies with lightning and create powerful lightning
storms.The witch is also very useful in fending off magical
enemy attacks — her Dispel spell neutralizes enemy thunderstorms and fire rains. Because she is airborne, she can’t be
touched by swordsmen, knights or woodbutchers, and can be
eliminated by long-range combatants, such as archers or spearmen. All characters around a witch gain a 100 percent health
regeneration bonus.
Home: Temple
Cost: 400 liters
HP: 80
Strength: 40 + 10
Range: 8
Magic: 100
Wizard
This old man has a powerful and comprehensive knowledge of
magic. He can teleport, summon wolves and ghosts, strike enemies with fireballs or convert them into cows, and create a
destructive fire rain.
Home: Wizard’s tower
Cost: 400 liters
HP: 200
Strength: 100 + 200
Range: 16
Magic: 200
41
Mother-In-Law
The mother-in-law is a powerful saboteur and diplomat who
wields a rolling pin to punctuate certain points in her arguments. She can use her intelligence and guile to convince the
dwellers of any enemy building to swap sides.The building
then becomes yours, and the mother-in-law stays inside it for
the duration of the game.A mother-in-law also has another
useful ability: all woodbutchers working in close proximity to
her perform at twice the speed.
Home: Hut
Cost: 80 liters
HP: 100
Priest
A priest is an old temple caretaker who has made sacrifices to
the gods all of his life.This mystical man with magical abilities
can teleport himself to any place on the map, use a magic
crown to see across long distances, create magical ghosts to
terrorize enemies and summon magic wolves to attack them.
He uses no weapons but can throw a mean fireball. All magical
characters in a priest’s vicinity gain a 100% magic power
regeneration boost.
Home: Temple
Cost: 200 liters
HP: 200
Strength: 10 + 10
Range: 8
Magic: 100
Priestess
This charming woman cannot fight using weapons or bows,but
her powerful magical abilities more than make up for it. She
can strike enemies with lightning and surround herself with a
magic shield. The priestess’ most powerful spell is a magical
thunderstorm, which can damage buildings and even destroy
small villages.Another priestess power is the ability to infatuate
enemy soldiers and convince them to fight on her side.
Home: Wizard’s tower
Cost: 400 liters
HP: 200
Strength: 20 + 30
Range: 8
Magic: 200
40
Page 23

Skeleton
There are a variety of skeleton types in the game and each has
its own characteristics and behaviors.Skeletons are conjured
up from the underworld in large groups and represent all that
is evil. Their sole objective is to destroy you! Beware!
HP: unknown
Strength: unknown
Range: unknown
Minotaur
These evil creatures were not created by a mythological white
bull and a beautiful queen, but through an unfortunate accident in a sorcerer’s lab involving a sacrificial roast beef sandwich and a bodyguard. You will meet this aggressive monstrosity several times throughout the game and you’d best beware.
The minotaur is a very strong and talented killer, using mostly
swords and axes as his preferred weapons.
HP: unknown
Strength: unknown
Range: unknown
Werebear
It is better not to disturb this half-bear/half-human monstrosity,as he is far more dangerous than nearly any other animal
you’ll find in the forest.A one-on-one fight with a Werebear
usually ends brutally and sadly in favor of the beast. Werebears
live in dense forests but, when hungry, may approach villages.
One last caution: werebears move much faster forward than
your average bear!
HP: unknown
Strength: unknown
Range: unknown
Werewolf
This half-wolf/half-human mutant apparently doesn’t need a
full moon to boost his lunatic powers.Your heroes will meet
him fairly often in the game and the outcome will usually be
against them. Be careful when a hungry werewolf creeps from
the forest toward your village. Use your fastest archers because
this animal (or whatever it is) moves much faster than a normal wolf.
HP: unknown
Strength: unknown
Range: unknown
43
Enemies
Wolf
Wolves are some of your most common opponents, and you
will encounter them often while exploring. Individually, wolves
are not too strong, but they can cause a lot of damage when
attacking in packs.If your cowherd cries “Wolf!” be sure to
send some support as cows can’t defend themselves and,
although an experienced cowherd can tame a wolf, chances
are good that your herd will suffer.
HP: 40
Strength: 50+ 15
Range: 1
Bear
The bear is a wild animal that is best left undisturbed. Far
more dangerous than a wolf, a one-on-one with a bear usually
ends in victory for the bear.Bears live in dense forests but,
when hungry,may approach villages.The best way to fight off
a bear is with a long-range attack using archers.After shooting,
the archer can run away before the slow-moving bear closes in.
A bear can be tamed by a cowherd, becoming a valuable ally.
HP: 100
Strength: 80+ 20
Range: 1
Valtamond
Valtamond is an evil magician who has spent his life studying
the dark arts. He can summon monsters to harass your heroes
during their trips. He uses various magical weapons but his
specific combat tactics are still a secret.
HP: 1000
Strength: 10 + 30
Range: 8
Magic: 400
42
Page 24

SKIRMISH
Skirmish Mode lets you train your RTS abilities against computer-controlled opponents
before taking them on the world stage against human competitors in multiplayer mode.
Select Skirmish from the Main Menu and then set the following game options:
Level Name: Choose among more than 20 in-game maps or add maps created in
the Editor.
Game Type: Choose from the following game variations.
• Destroy Structures – You win when all enemy buildings are destroyed.
• Battle – You win when all enemies are destroyed.
Starting Units (Destroy Structures mode only):
• Map Default – The number of units chosen by the mapmaker
• 1 Woodcutter – When you really want to start from scratch
Allied Victory: Choose YES in order to recruit allies and fight together. When one
warrior wins, so does the other.
Random Equipment (Destroy Structures mode only): Turn this setting ON to make
random items pop up on the battlefield during the game.The game will inform all
players when a random item appears.
Milk at Start (Battle mode only): Since there are no cows in this mode, you must
choose the amount of milk each player has to spend in the game (2,000, 5,000,10,000
or 15,000 liters). When you run out of milk in a Battle mode game, you cannot buy any
additional units or buildings.
MULTIPLAYER
Multiplayer Mode allows you to test your RTS
against human opponents or to play alongside
them in an RPG adventure. Select Multiplayer
from the Main Menu to start or join a game.
First, choose a provider — EarthNet or
DirectPlay9 TCP/IP Service Provider — and click
on Intialize to continue.
Available sessions will show up in the Available
Sessions box at the bottom of the screen. If you
would like to join a game, click on its name and select Join to continue. To create a new
session, type a name in the New Session Name field.You can password-protect your
session to allow only friends in, for example,by typing a password in the Password field.
If you leave the Password field blank, the session will not be password-protected.
45
Pilous Mephitis (tm)
This monster, created by dark powers,is found most often in
the vicinity of graveyards, barrows and swamps. It is extremely
dangerous and very fast. If a small party of heroes meets it,
they have a rather small chance of survival. During the game,
you will meet a variety of mutations of this creature.They all
behave similarly,but take care... if you have already defeated
one, do not think the next one is an easy task. You could be
wrong.
HP: 600
Strength: 30
Range: 1
Giant
These tall, strong loners mostly keep to themselves in mountain caves. Occasionally, however, hunger overtakes them and
they approach villages in search of beef.A squad of heavily
armored knights provides the best defense against a marauding
giant. Armed with a powerful club, a giant can crush most
characters with a few savage blows.
HP: 3000
Strength: 30 + 30
Range: 1
Amazon Sorceress
An Amazon Sorceress is a young, lightly dressed woman with
one powerful magical attribute: using her magical staff she can
create a burning lightning spell to roast, fry or boil her enemies very efficiently from a safe distance. Her other powers
include the ability to make mirror images of herself, which
serve to confuse (and damage) her unfortunate foes.
HP: unknown
Strength: unknown
Range: unknown
And Many Others…
44
Page 25

APPENDIX
KEYBOARD COMMANDS
ACTION KEY
Camera left Left arrow
Camera right Right arrow
Camera up Up arrow
Camera down Down arrow
Camera zoom in PgDn
Camera zoom out PgUp
Camera angle up Home
Camera angle down End
Camera rotate left Del
Camera rotate right Insert
Open game menu Esc
Save current game Left-Alt + F2
Load game Left-Alt + F3
Quick Save current game Left-Alt + F1
Open Alliance dialog F5
Open “Give Money to Ally”dialog F6
Open Objectives dialog F2
Show Skills K
Show Inventory I
Show last event location Spacebar
Follow object mode ON/OFF Left Alt + F
Show selected unit Numpad 0
Show next unit Left Alt + Numpad 0
Rotate view to north Numpad . [period]
Tooltip mode ON/OFF F1
Locked camera mode ON/OFF F3
Pause Pause
Increase game speed Numpad + [plus]
Decrease game speed Numpad – [minus]
Default game speed Numpad * [asterisk]
Record command R
Quick record Caps Lock
Repeat commands Z
Execute command list X
Create group 1 Left-Ctrl + 1
Create group 2 Left-Ctrl + 2
Create group 3 Left-Ctrl + 3
47
Click on Create New Session to start a competitive RTS game. Click on Create New
RPG Session to start a cooperative RPG game.
Multiplayer RTS games play just like Skirmish games,with the same game options (see
previous page). As game host, you select the game options.When enough players have
joined your game, select Start Game to begin playing.
Multiplayer RPG games require that all players create a new RPG character. The setup
interface is similar to the regular RPG mode (see “RPG Mode” on page 25). When
enough players have joined your game, click on Start to begin the game.
EarthNET (tm)
The EarthNet server provides a location where you can meet other Once Upon a Knight
players from around the world. The first time you connect to the EarthNet server, you
must create an account that includes a nickname and a password. You can find out
more information about playing on EarthNet in the Once Upon a Knight ReadMe file (see
“The ReadMe File” on page 3).
Keyboard Commands – Multiplayer
ACTION KEY
Open Alliance dialog F5
Open “Give Money to Ally”dialog F6
Send current point to allies’ map Left-Ctrl + S
EDITOR
The Once Upon a Knight Editor lets you create your
own maps, RPG adventures and RTS campaigns.
For detailed directions on using the editor and
incorporating your own maps and adventures into
the game, see the Editor Manual.
You can view the Editor Manual file by first
clicking on the Start button on your Windows
®
taskbar,then on Programs, then on Atari, then
on Once Upon a Knight, and then on the
EditorManual.html file.
46
Page 26

Mini-map zoom out – [minus]
Mini-map terrain mode \ [backslash]
Rotate building/formation Numpad Enter
Rotate building/formation reversed Left-Alt + Numpad Enter
Create terrain marker 1 Right-Ctrl + 1
Create terrain marker 2 Right-Ctrl + 2
Create terrain marker 3 Right-Ctrl + 3
Create terrain marker 4 Right-Ctrl + 4
Create terrain marker 5 Right-Ctrl + 5
Create terrain marker 6 Right-Ctrl + 6
Create terrain marker 7 Right-Ctrl + 7
Create terrain marker 8 Right-Ctrl + 8
Create terrain marker 9 Right-Ctrl + 9
Create terrain marker 10 Right-Ctrl + 0
Select terrain marker 1 Right-Shift + 1
Select terrain marker 2 Right-Shift + 2
Select terrain marker 3 Right-Shift + 3
Select terrain marker 4 Right-Shift + 4
Select terrain marker 5 Right-Shift + 5
Select terrain marker 6 Right-Shift + 6
Select terrain marker 7 Right-Shift + 7
Select terrain marker 8 Right-Shift + 8
Select terrain marker 9 Right-Shift + 9
Select terrain marker 10 Right-Shift + 0
Send current point to allies’ map Left-Ctrl + S
Set formation F
Attack A
Hold position H
Stop S
Unit sleep mode ON/OFF G
Unit camouflage mode ON/OFF C
Sell unit O
Cast Magic Shield Left-Alt + S
Cast Capture Left-Alt + A
Cast Storm Left-Alt + O
Cast Summon Raven Scout Left-Alt + I
Cast Conversion Left-Alt + N
Cast Fire Rain Left-Alt + L
Cast Dispel Storm Left-Alt + R
49
Create group 4 Left-Ctrl + 4
Create group 5 Left-Ctrl + 5
Create group 6 Left-Ctrl + 6
Create group 7 Left-Ctrl + 7
Create group 8 Left-Ctrl + 8
Create group 9 Left-Ctrl + 9
Select group 1 1
Select group 2 2
Select group 3 3
Select group 4 4
Select group 5 5
Select group 6 6
Select group 7 7
Select group 8 8
Select group 9 9
Add selected units to group 1 Left-Shift + 1
Add selected units to group 2 Left-Shift + 2
Add selected units to group 3 Left-Shift + 3
Add selected units to group 4 Left-Shift + 4
Add selected units to group 5 Left-Shift + 5
Add selected units to group 6 Left-Shift + 6
Add selected units to group 7 Left-Shift + 7
Add selected units to group 8 Left-Shift + 8
Add selected units to group 9 Left-Shift + 9
Remove selected units from group 1 Left-Alt + 1
Remove selected units from group 2 Left-Alt + 2
Remove selected units from group 3 Left-Alt + 3
Remove selected units from group 4 Left-Alt + 4
Remove selected units from group 5 Left-Alt + 5
Remove selected units from group 6 Left-Alt + 6
Remove selected units from group 7 Left-Alt + 7
Remove selected units from group 8 Left-Alt + 8
Remove selected units from group 9 Left-Alt + 9
Select all visible units ; [semicolon]
Select all visible military units ' [apostrophe]
Select all visible wounded untis / [forward slash]
Panel ON/OFF Left Alt + P
Tunnels ON/OFF Ta b
Mini-map zoom in = [equal]
48
KEYBOARD COMMANDS
ACTION KEY
KEYBOARD COMMANDS
ACTION KEY
Page 27

RTS CHARACTER OVERVIEW
NAME COST HP
Amazon Sorceress – 400
Archer 80 200
Bandit – 1500
Banshee – 600
Bear – 240
Cow 80 240
Cowherd 80 80
Floyd – 650
Giant – 3000
Knight 400 1500
Minotaur – 700
Mother in Law 100 80
Necromancer – 1000
Janoslaw – 2000
Prince John – 650
Princess Lisa – 400
Priest 200 200
Priestess 400 200
Skeleton – 600
Spearman 150 280
Unicorn – 800
Warrior 120 600
Werebear – 1400
Werewolf – 1000
Witch 300 80
Wizard 400 200
Wolf – 40
Woodbutcher 50 400
51
Cast Teleportation Left-Alt + T
Cast Specter Left-Alt + H
Cast Wild Animal Left-Alt + W
Cast Set Magical Trap (RPG only) Left-Alt + M
Cast Absorb Life (RPG only) Left-Alt + Y
Cast Petrify Foes (RPG only) Left-Alt + E
Cast Paralyze (RPG only) Left-Alt + G
Caste Craze (RPG only) Left-Alt + B
Cast Possess Mind (RPG only) Left-Alt + C
Cast Summon Magical Animal (RPG only) Left-Alt + D
Cast Summon Ghost (RPG only) Left-Alt + J
Cast Magic Mirror (RPG only) Left-Alt + Z
Cast Conversion (RPG only) Left-Alt + K
Cast Power Blast (RPG only) Left-Alt + Q
Cast Self-heal (RPG only) Left-Alt + V
Cast Firewall (RPG only) Left-Alt + N
Autocast Magic Shield ON/OFF Right-Ctrl + S
Autocast Capture ON/OFF Right-Ctrl + A
Autocast Raven Scout ON/OFF Right-Ctrl + I
Autocast Conversion ON/OFF Right-Ctrl + N
Autocast Dispel Storm ON/OFF Right-Ctrl + R
Autocast Teleportation ON/OFF Right-Ctrl + T
Autocast Spectre ON/OFF Right -Ctrl + H
Repeat last magic command [ [left bracket]
Move to cowshed W
Move to grass T
Give selected units to other player Left-Alt + U
Beserk attack B
Set trap Y
Set damage trap Left-Ctrl + Y
Consume Healing Potion/Mushroom (RPG Only) P
Use Mana Regeneration potion M
Next weapon ] [right bracket]
Automatic weapon selection ON/OFF Left-Ctrl + A
Exit tower E
Set building assembly point P
Set gate mode G
Sell building O
Show research dialog U
50
KEYBOARD COMMANDS
ACTION KEY
Page 28

Very Special Thanks:
To the thousands of Beta
testers,
who really helped us
improve this title.
Atari
Bill Levay
Producer
Peter Matiss
Director of Marketing
Jeff Foley
Senior Brand Manager
Bob Welch
Executive Producer
Paul Hellier
Director of Technology
Steve Martin
Director of Creative Services
Elizabeth Mackney
Director of Editorial &
Documentation Services
Charles Rizzo
Art Director
Morgan Tomaiolo
Graphic Designer
Kurt Carlson
Documentation Specialist
Norm Schrager
Copywriter
Michael Gilmartin
Director of Publishing Support
Michael Craighead
Director of Quality Assurance,
North America
Ken Ford
I.T. Manager/Western Region
Michael V etsc h
Manager of Technical Support
Kurt Boutin
Senior Q.A. Testing Manager
Randy Lee
Bill Carroll
Q.A. Testing Managers
Daniel Frisoli
Lead Tester
Stephan Wenninger
James W ang
Michael Callahan
Gregory Amato
Michael Krapovicky
Dani McDowell
Jay Brown
Matt Pantaleoni
Mike Romatelli
Joe Howard
Robb Gagne
Tam Vo
Chris Parsons
Scott Rollins
Mike Murphy
Becky Madore
Jeff Tolleson
Clif McClure
Shawn He
Roy Husson
Erik Jeffery
Brian Swedis
Milton Laureano
Chad Rabinovitz
Testers
Dave Strang
Compatibility Lab Supervisor
Randy Buchholz
Jason Cordero
Mark Florentino
Chris McQuinn
Cuong Vu
Compatibility Analysts
53
CREDITS
Reality Pump Studios
Miroslaw Dymek
Project Leader
Alexandra Constandache
Producer
Prof. Dr. Dirk P. Hassinger
Executive Producer
Manfred Morin
President
Miroslaw Dymek
Alexandra Constandache
Dirk P. Hassinger
Game Idea
Daniel Duplaga
Postproduction Director
Janusz Grzyb
Technical Director
Jacek Sikora
Lead Programmer
Maciej Kordas
Konrad Kwiatkowski
Pawel Gieruszczak
Grzegorz Zietek
Programmers
Alexandra Constandache
Jerzy Kowalik
Graphic Design
Wojciech Drazek
Rafal Januszkiewicz
Slawomir Jedrzejewski
Jean-Michel Maheu
Piotr Rulka
Piotr Sulek
Violetta Tranter
Grzegorz Wisniewski
In-game Graphics
Uwe Schaefer
Alexandra Constandache
Terrain Graphics
Alexandra Constandache
Graphic Quality Assurance
Kajetan Czarnecki
Andrzej Rams
Krzysztof Rybczynski
Violetta Tranter
Grzegorz Wisniewski
Videos
Miroslaw Dymek
Pawel Furman
Adam Salawa
Map Design
Tim Wilson
Dirk U.Jantz
Sergiusz Juraszek
Patricia Bellantuono
Dialogs
Tim Wilson
Direction
Linus Payne
John Cruz
Phillip Griffiths
Martin Griffiths
Jennifer Hartmann
Andrew Cujak
Tim Wilson
Antoinette Payne
Ellenore Gahr
Eric Arnold
Paul Payne
Dirk Muehlbach
Julie Smith
Paul de la ware
Richard Tily
George Thomson
Michael Amesbury
Actors
Martin Kietzer
Daniel R. Lanz
Sound Editing
TMS Multimedia,
Mannheim, Germany
Voice Recordings
Tadeusz Zuber
Remigiusz Miernikiewicz
Uwe Ludwig
Gerd Hoffmann
Sound F/X
Gerd Hofmann
Joachim Schaefer
RPG Soundtrack & Main
Theme
Liza Harrison
Vocals
Maciej Pawlowski
RTS Soundtrack
Miroslaw Burzynski
Roman Eich
Network Administration & Tech
Support
Tadeusz Zuber
Lead Tester
Dawid Jakubowski
Krzysztof Janeczek
Sebastian Kus
Tymoteusz Trzaska
Roman "NAMOR" Eich
Uwe "Tron" Ludwig
Dirk “Raidor” Hassinger
“Schlaxi”
“Phalynx”
Beta Test Supervisors
Special Thanks:
Iris Mocsnek
Teresa Dymek
Ewelina Michalik
Agnieszka Zietek
Agnieszka Zuber
Carmen Constandache
Ion Constandache
… And Our Families
And all those who
participated in the realization
of this project.
52
Page 29

Great News! We’ve improved our Automated Systems so that you can get product-specific
Troubleshooting help more quickly. All you need to do is enter the product’s Part #
when prompted to do so.This will take you directly to all of our known issues and
solutions for this title.The product’s Part # is located in several places (on the CD
label, package and/or plastic disc case) and is usually identified by a number such as
04-12345. When prompted by the Automated System, enter the last five digits of your
product’s Part #. (For example, Part # 04-12345 would require that you enter the
“12345” portion of the number for that product.) Note: Some products simply feature a
five-digit Part # without an “04-”prefix.
Live support is generally available Monday through Friday, 8:00 AM until 6:00 PM
(Pacific Time).Note: We may be closed on major holidays.
Before making your call, we ask that you be at your computer, have the following information available, and be ready to take notes:
• System Make and Model
• Processor Type
• Operating System, including version number if possible
(such as Windows®98; Windows®Me)
• RAM (Memory)
• Video and sound card data and drivers
• Any screen or error messages you’ve encountered (and where)
Product Retur
n Procedures in the United States & Canada
In the event our technicians at (425) 951-7108 determine that you need to forward
materials directly to us, please include a brief letter explaining what is enclosed and why.
Make sure you include the Return Merchandise Authorization Number (RMA#) supplied to you by the technician, and your telephone number in case we need to call you.
You will receive the mailing address when the technician gives you the RMA#. Any
materials not containing this RMA# will be returned to you unprocessed.
Warranty Policy in the United States & Canada
If our technicians determine that the product storage medium is found to be defective
within ninety (90) days of original purchase, (unless otherwise provided by applicable
law), Atari will replace the item free of charge, to the original purchaser, if the item is
accompanied by the original dated receipt and packaging.
55
ATARI WEB SITES
To get the most out of your new game, visit us at:
http://www .us.atari.com
To send e-cards to your friends, download wallpapers, or get access to other free stuff,
visit our Freebies section at:
www.us.atari.com/freebies
If you would like to chat with other gamers,as well as developers, visit our Community
Forum area at:
www.ataricommunity.com
Kids, check with your parent or guardian before visiting any web site.
Chat Messages: Atari does not monitor, control, endorse, or accept responsibility for the con-
tent of chat messages.You are strongly encouraged not to give out identity or other personal
information through chat message transmissions. Kids, check with your parent or guardian if
you are concerned about any chat you receive.
Use of Atari web sites is subject to terms and conditions, which you can access at:
www.us.atari.com/terms_of_service.asp
TECHNICAL SUPPORT (U.S. & CANADA)
Help Via the Internet
Up-to-the-minute technical information about Atari products is generally available 24
hours a day,7 days a week via the Internet at:
http://www.atarisupport.com
Through this site you’ll have access to our FAQ (Frequently Asked Questions)
documents, our FTP (File Transfer Protocol) area where you can download patches if
needed, our Hints/Cheat Codes if they’re available, and an E-Mail area where you can
get help and ask questions if you do not find your answers within the FAQ.
Note: In the event we must send you a Hint Sheet, FAQ document, patch or update
disc via E-mail, we may require verifiable consent from a parent or guardian in order to
protect children’s privacy and safety online. Consent Forms are available at the web site
listed above.
Help Via Telephone in the United States & Canada
For phone assistance,call Atari Technical Support at (425) 951-7108. Our Interactive
Voice Response system is generally available 24/7, providing automated support
solutions immediately.
54
Page 30

EDITOR AND END-USER VARIATIONS
If the Software includes a feature that allows you to modify the Software or to construct new variations (an “Editor”),
you may use such Editor to create modifications or enhancements to the Software, including the construction of new
levels (collectively the “Variations”), subject to the following restrictions. Your Variations: (i) must only work with the
full, registered copy of the Software; (ii) must not contain modifications to any executable file; (iii) must not contain
any libelous, defamatory or other illegal material, material that is scandalous or invades the rights of privacy or publicity of any third party; (iv) must not contain any trademarks, copyright-protected work or other property of third parties; and (v) may not be commercially exploited by you, including but not limited to making such Variations available
for sale or as part of a pay-per-play or timesharing service.
TERMINATION
This EULA is effective until terminated. You may terminate this EULA at any time by destroying the Software. This EULA
will terminate automatically without notice from the Company if you fail to comply with any provisions of this EULA. All
provisions of this EULA as to warranties, limitation of liability, remedies and damages will survive termination.
LIMITED WARRANTY AND DISCLAIMER OF WARRANTIES
You are aware and agree that use of the Software and the media on which is recorded is at your sole risk. The Software
and media are supplied “AS IS.” Unless otherwise provided by applicable law, the Company warrants to the original
purchaser of this product that the Software storage medium will be free from defects in materials and workmanship
under normal use for ninety (90) days from the date of purchase. The warranty is void if the defect has arisen through
accident, abuse, neglect or misapplication. If the Software fails to conform to this warranty, you may at your sole and
exclusive remedy, obtain a replacement free of charge if you return the defective Software. Follow the Product Return
Procedures described in the Manual. The Company does not warrant that the Software or its operations or functions
will meet your requirements, or that the use of the Software will be without interruption or error.
TO THE FULLEST EXTENT PERMISSIBLE UNDER APPLICABLE LAW, EXCEPT FOR THE EXPRESS WARRANTY SET
FORTH ABOVE, THE COMPANY DISCLAIMS ALL WARRANTIES, EXPRESS OR IMPLIED, INCLUDING AND WITHOUT LIMITATION, THE IMPLIED WARRANTIES OF MERCHANTABILITY AND FITNESS FOR A PARTICULAR PURPOSE AND NON-INFRINGEMENT. EXCEPT FOR THE EXPRESS WARRANTY SET FORTH ABOVE, THE COMPANY
DOES NOT WARRANT , GUARANTEE OR MAKE ANY REPRESENTATION REGARDING THE USE OR THE RESULTS OF
THE USE OF THE SOFTWARE IN TERMS OF ITS CORRECTNESS, ACCURACY, RELIABILITY, CURRENTNESS OR
OTHERWISE. SOME JURISDICTIONS DO NOT ALLOW THE EXCLUSION OF OR LIMITATIONS ON IMPLIED WARRANTIES, SO THE ABOVE EXCLUSIONS AND LIMITATIONS MAY NOT APPLY TO YOU.
LIMITATION OF LIABILITY
IN NO EVENT WILL THE COMPANY OR ITS EMPLOYEES OR LICENSORS BE LIABLE FOR ANY INCIDENTAL, INDIRECT, SPECIAL, CONSEQUENTIAL OR PUNITIVE DAMAGES, OR ANY DAMAGES WHATSOEVER (INCLUDING,
WITHOUT LIMITATION, DAMAGES FOR INJURY TO PERSON OR PROPERTY, FOR LOSS OF PROFITS, BUSINESS
INTERRUPTION, LOSS OF BUSINESS INFORMATION, LOSS OF PRIVACY, FAILURE TO MEET ANY DUTY AND NEGLIGENCE) ARISING OUT OF OR IN ANY WAY RELATED TO THE USE OR INABILITY TO USE THE SOFTWARE, EVEN
IF THE COMPANY OR AN AUTHORIZED REPRESENTATIVE OF THE COMPANY HAS BEEN ADVISED OF THE POSSIBILITY OF SUCH DAMAGES. SOME JURISDICTIONS DO NOT ALLOW THE EXCLUSION OF LIABILITY FOR INCIDENTAL OR CONSEQUENTIAL DAMAGES, SO THE ABOVE EXCLUSION MAY NOT APPLY TO YOU.
IN NO EVENT WILL THE LIABILITY OF THE COMPANY FOR DAMAGES WITH RESPECT TO THE SOFTWARE EXCEED
THE AMOUNTS ACTUALLY PAID BY YOU FOR THE SOFTWARE.
CHOICE OF LAW AND VENUE
This EULA is governed by the laws of the United States of America and the State of New York, exclusive of its conflicts
of law provisions. The exclusive venue for litigation regarding or arising from this EULA is New York County, New
York and you agree to submit to the Jurisdiction of the courts of New York County, New York for any such litigation.
MISCELLANEOUS
If any provision or portion of this EULA is found to be unlawful, void, or for any reason unenforceable, it will be
severed from and in no way affect the validity or enforceability of the remaining provisions of the EULA.
This EULA constitutes the entire agreement between you and the Company regarding the Software and its use.
END-USER LICENSE AGREEMENT
IMPORTANT — READ CAREFULLY: Please be sure to carefully read and understand all of the rights and restrictions
described in this End-User License Agreement (“EULA”).
AGREEMENT
This document is an agreement between you and Atari, Inc. and its affiliated companies (“Company”). The enclosed
software game disc(s), cartridge or Game Pak (“Software”) and any accompanying printed materials are licensed to you
only on the condition that you accept all of the terms contained in this EULA.
By opening this package and installing or otherwise using the Software you agree to be bound by the terms of this
EULA. If you do not agree to the terms of this EULA you may not install or use the Software and within 15 days of purchase you must call the Tech Support telephone number listed in the manual accompanying the Software (the
“Manual”). Select the Automated Phone System’s Main Menu option for Consumer Services and follow the prompts.
You will be given a Return Merchandise Authorization number (RMA #) by the technician. You then have 15 days from
the date of this contact to return the Software in its protective covering, the Manual and the original sales invoice to
the address supplied to you.
If this is a PC product, when you install the Software you will be asked to review and either accept or not accept the
terms of the EULA by clicking the “I Accept” button. By clicking the “I Accept” button you acknowledge that you have
read the EULA, understand it and agree to be bound by its terms and conditions.
COPYRIGHT
The Software is protected by copyright laws and international copyright treaties, as well as other intellectual property
laws and treaties. All title and copyrights in and to the Software (including but not limited to any images, photographs,
animations, video, music, text and “applets” incorporated into the Software) and any printed materials accompanying
the Software are owned by the Company or its Licensors.
GRANT OF LICENSE
The Software is licensed and not sold to you and its use is subject to this EULA. The Company grants you a limited,
personal, non-exclusive license to use the Software in the manner described in the user documentation. The Company
reserves all rights not expressly granted to you in this EULA.
PERMITTED USES
1. If the Software is configured for loading on a hard drive, you may install and use the Software on a single computer.
2. You may make and maintain one copy of the Software for backup and archival purposes, provided that the original
and copy of the Software are kept in your possession.
3. You may permanently transfer all your rights under this EULA, provided you retain no copies, you transfer all of the
Software (including all component parts, the media and printed materials and any upgrades) and the recipient reads
and accepts this EULA.
RESTRICTIONS
1. You may not delete or obscure any copyright, trademark or other proprietary notice on the Software or accompanying printed materials.
2. You may not decompile, modify, reverse engineer, disassemble or otherwise reproduce the Software.
3. You may not copy, rent, lease, sublicense, distribute, publicly display the Software, create derivative works based
on the Software (except to the extent expressly permitted in the Editor and End-User Variation section of this
Agreement or other documentation accompanying the Software) or otherwise commercially exploit the Software.
4. You may not electronically transmit the Software from one computer, console or other platform to another or over a
network.
5. You may not use any backup or archival copy of the Software for any purpose other than to replace the original copy
in the event it’s destroyed or becomes defective.
56
57
Page 31

NOTES
59
© 2003 Atari Interactive, Inc. All Rights Reserved. © 2003 My Shopping World, d/b/a “Merscom.” A game by Reality
Pump Studios, Krakow, Poland, produced by Zuxxez Entertainment AG, Worms, Germany. © 1999-2003 by Zuxxez
Entertainment AG, Worms, Germany. All Rights Reserved.
Windows and DirectX are either registered trademarks or trademarks of Microsoft Corporation in the United States
and/or other countries. All trademarks are the property of their respective owners.
08273
58
Page 32

NOTES
61
NOTES
60
Page 33

NOTES
63
NOTES
62
Page 34

NOTES
64
Page 35

 Loading...