

Page 1
EPILEPSY WARNING
A very small percentage of individuals may experience
epileptic seizures when exposed to certain light patterns
or flashing lights. Exposure to certain light patterns
of backgrounds on television screens while playing computer games
may induce an epileptic seizure in these individuals.
Certain conditions may induce undetected epileptic symptoms
in persons who have no history of prior seizures of epilepsy.
If you or anyone in your family has an epileptic condition,
consult your doctor prior to playing.
If you experience any of the following symptoms while
playing a computer game: dizziness, altered vision, eye
or muscle twitches, loss of awareness, disorientation,
any involuntary movement, or convulsions
– IMMEDIATELY discontinue use and consult your doctor.
PACK CONTENTS
• 2 CD ROM Disks
• This Manual
• Edge of Chaos Control Guide
• Registration Card
CAUTION
Mishandling can damage the CD-ROMs that hold
INDEPENDENCE WAR 2: Edge of Chaos.
Please remember to fill in the questions on your registration card and return it.
The information will help us in developing future games you want to see.
Thank you.
QUERIES
If you should find either the program or the documentation
unsatisfactory in some way, please write and let us know.
EDGE OF CHAOS On The Internet
To keep informed with all things related to the INDEPENDENCE WAR
universe visit Infogrames’ website at www.edgeofchaos.net.
Here you will find a wealth of information for pilots, heroes and rogues
of all abilities. For more information on the Independence War Universe, visit
Particle Systems website at www.independencewar.com.
Welcome to the Edge of Chaos
In the twenty-fourth century, the citizens of the Core Systems lead a life of
opulence and luxury. However, far from Earth and its notions of justice, powerful
corporations rule the Badlands Cluster with an iron fist. The brave few who were
prepared to make a stand have paid the ultimate price for their courage…
On the cold frontier of Known Space, the murder of one man will set in motion events that could
lead to freedom for the Badlands – or to the utter annihilation of humanity.
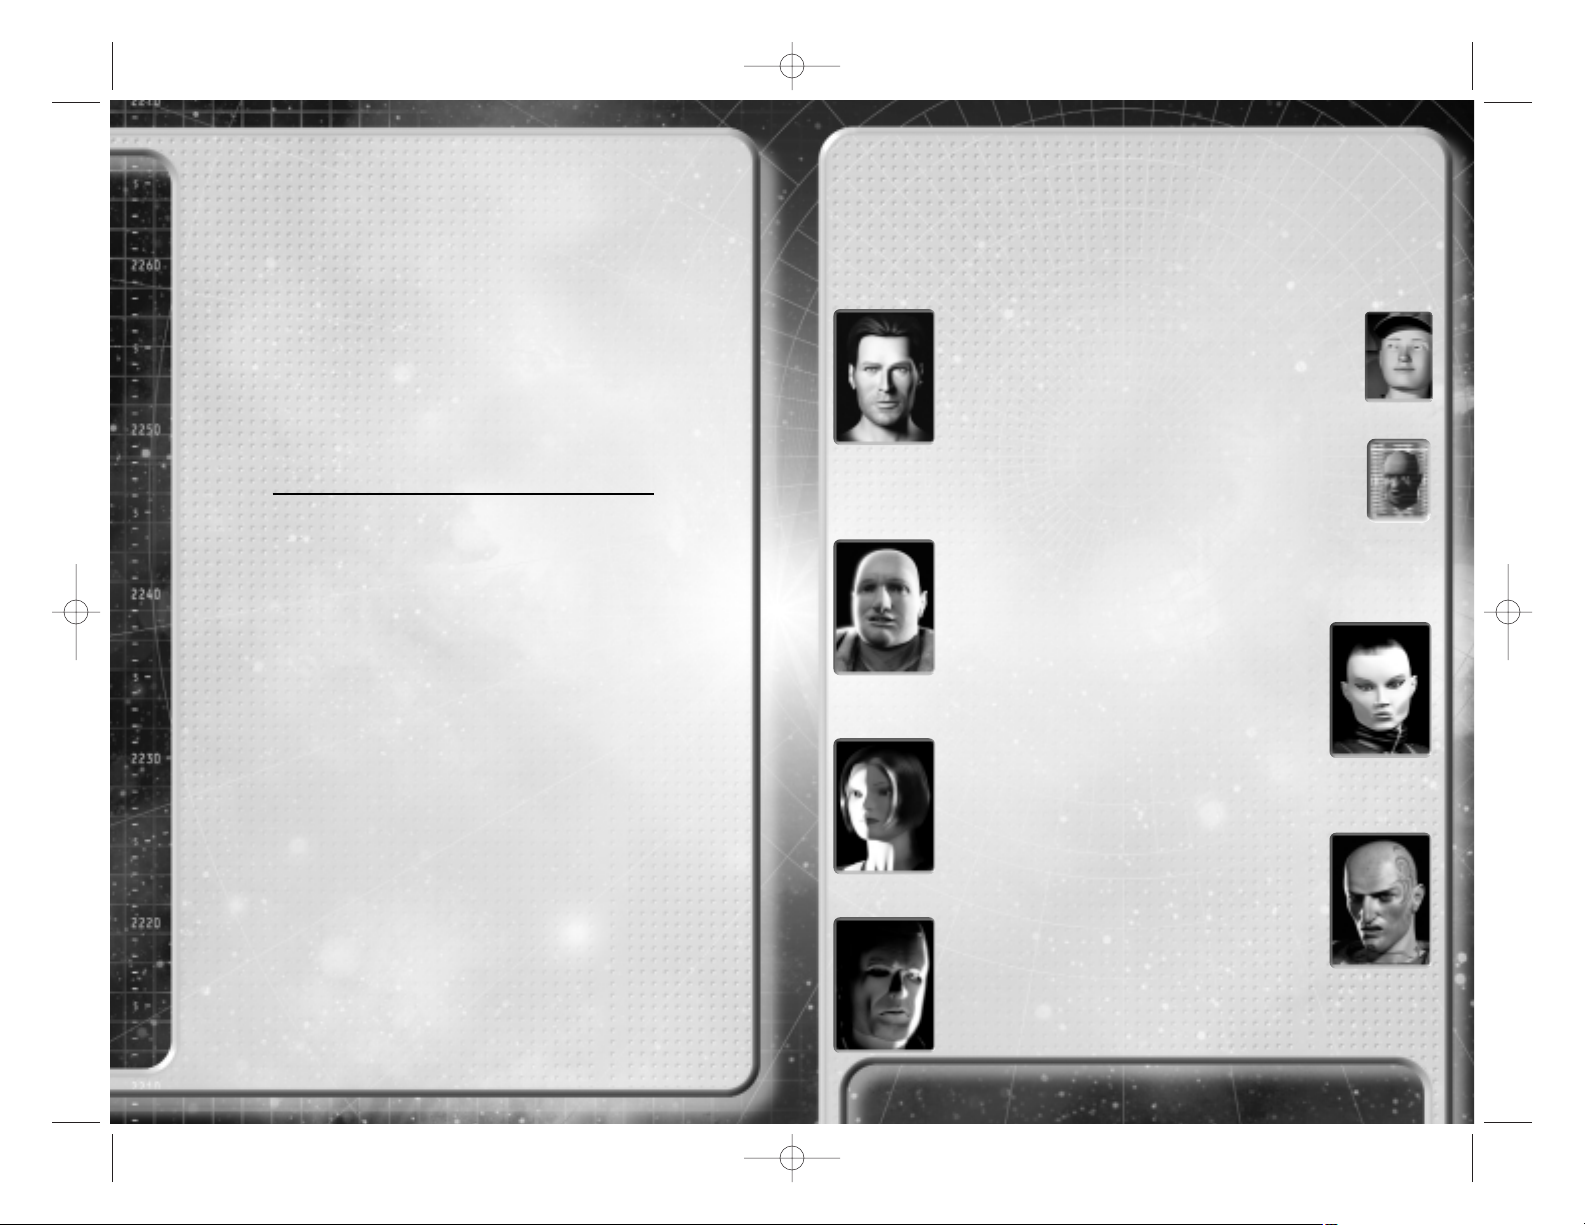
Cal Johnston
You are Cal Johnston, tough, smart and a born leader.
You were only 12 years old when you witnessed Caleb
Maas brutally murder your father, Felix. Now, 15 years
later, you may finally be able to exact your revenge.
Jefferson Clay
Clay is a one-of-a-kind computer simulation of an ancient
war hero. When he died more than a century ago,
his personality and knowledge were preserved.
Clay serves as your mentor and guardian.
Jafs
A gifted smuggler and forger, Jafs is Cal’s best friend and
confidant. He is also a skilled cargo pilot and an adept negotiator.
Azraelle Takagi
Cool and enigmatic, little is certain about Azraelle.
However, she is an exceptional combat
pilot and was once a pirate of some considerable
renown. Az has never really revealed her
true reasons for joining Cal.
Lori Trieste
Young and idealistic, Lori is Az’s close friend and ally.
What she lacks in combat experience she makes up for
with dogged persistence.
Lemuel Smith
Despite his towering stature and partially
cybernetic body, Smith is genial and popular.
A self-taught engineer, he has remarkable skill
in any field involving machinery.
Caleb Maas
Sadistic and cruel, Caleb is the recent heir to
the Maas Industries fortune. His keen instinct
serves him well in both starship combat
and the boardroom.
3
Manual E_of_K GB 1st 7/30/01 12:21 Page 2
Page 2
4
5
Contents
Welcome to the Edge of Chaos
. . . . .
3
Cal Johnston . . . . . . . . . . . . . 3
Jefferson Clay . . . . . . . . . . . . 3
Jafs . . . . . . . . . . . . . . . . . . . 3
Azraelle ‘Az’ Takagi . . . . . . . . . 3
Lori Trieste . . . . . . . . . . . . . . 3
Lemuel Smith. . . . . . . . . . . . . 3
Caleb Maas . . . . . . . . . . . . . . 3
Hardware Requirements . . . . . . 6
Minimum specification: . . . . . . 6
Recommended specification: . . 6
Installing EDGE OF CHAOS. . . . . 6
The Readme File . . . . . . . . . . 6
Infogrames Customer
Service Numbers . . . . . . . . . . 7
Quick Start Guide . . . . . . . . . . . . 8
Story Mode . . . . . . . . . . . . . . . 8
Instant Action. . . . . . . . . . . . . . 8
Multi-player . . . . . . . . . . . . . . . 8
Become a Combat Pilot
in 60 Seconds . . . . . . . . . . . . . 8
Moving Around . . . . . . . . . . . . . 8
Defending Yourself . . . . . . . . . . 8
More Information . . . . . . . . . . . 8
Main Menu . . . . . . . . . . . . . . . . 10
START NEW GAME . . . . . . . . 10
LOAD GAME. . . . . . . . . . . . . 10
INSTANT ACTION . . . . . . . . . 10
MULTIPLAYER. . . . . . . . . . . . 10
OPTIONS. . . . . . . . . . . . . . . 10
MOVIES. . . . . . . . . . . . . . . . 10
CREDITS . . . . . . . . . . . . . . . 10
QUIT . . . . . . . . . . . . . . . . . . 10
Multiplayer . . . . . . . . . . . . . . . . 10
GAME TYPES . . . . . . . . . . . . 10
LAN GAME. . . . . . . . . . . . . . 11
INTERNET GAME . . . . . . . . . 11
OPTIONS. . . . . . . . . . . . . . . 12
Options . . . . . . . . . . . . . . . . . . 12
GRAPHICS . . . . . . . . . . . . . . 12
SOUND . . . . . . . . . . . . . . . . 12
CONTROLS . . . . . . . . . . . . . 12
Escape Menus . . . . . . . . . . . . . 13
How to Pilot The New
1502-X Command Section. . . . . 15
Flying Your Ship . . . . . . . . . . . 16
Linear Displacement Drive (LDS)17
The Heads-Up Display . . . . . . . 17
RETICLE . . . . . . . . . . . . . . . 17
CONTACT LIST . . . . . . . . . . 18
ORB . . . . . . . . . . . . . . . . . . 19
MFD . . . . . . . . . . . . . . . . . 20
SYSTEM STATUS . . . . . . . . . 20
GRID. . . . . . . . . . . . . . . . . . 21
CONTRAILS . . . . . . . . . . . . . 21
BRACKETS . . . . . . . . . . . . . 21
CLOCK . . . . . . . . . . . . . . . . 21
Using the Command Menu . . . . 21
MAIN MENU . . . . . . . . . . . . . 22
NAV SUBMENU . . . . . . . . . . 22
AUTOPILOT SUBMENU . . . . . 22
WEP SUBMENU . . . . . . . . . . 22
CMD SUBMENU . . . . . . . . . . 23
DOC SUBMENU . . . . . . . . . . 23
COMMS SUBMENU . . . . . . . . 23
Navigation . . . . . . . . . . . . . . . 23
AUTOPILOTS . . . . . . . . . . . . 23
THE STARMAP . . . . . . . . . . . 24
THE CAPSULE DRIVE
AND LAGRANGE POINTS . . . . 25
Using Weapons Systems . . . . . 26
Weapon selection . . . . . . . . . 26
Targetting . . . . . . . . . . . . . . 27
Rules and Regulations . . . . . . . . 30
Discipline. . . . . . . . . . . . . . . 30
Shares and bonuses,
in order of payment . . . . . . . 30
Command structure . . . . . . . 30
Final word . . . . . . . . . . . . . . 30
Lefty’s Advanced
Flight Techniques . . . . . . . . . . . 31
Advanced Piloting . . . . . . . . . . 31
The flight computer . . . . . . . 31
Lateral thrusters. . . . . . . . . . 32
Free flight . . . . . . . . . . . . . . 32
Heat and Power . . . . . . . . . . . 33
Heat and overheating . . . . . . 33
Power and brownouts . . . . . . 34
The Engineering Screen. . . . . . 34
Designation . . . . . . . . . . . . . 34
Alert lights. . . . . . . . . . . . . . 34
System information. . . . . . . . 35
TRI . . . . . . . . . . . . . . . . . . . 35
Power output . . . . . . . . . . . . 35
Status display . . . . . . . . . . . 36
Lefty’s Advanced
Combat Tactics . . . . . . . . . . . . . 36
Group tactics . . . . . . . . . . . . . 36
Wingmen . . . . . . . . . . . . . . . 36
Turret Fighters . . . . . . . . . . . 37
Tactical camera . . . . . . . . . . 37
Getting the Edge . . . . . . . . . . 38
Sub-targeting . . . . . . . . . . . . 38
Sneaking around . . . . . . . . . 38
Remote piloting . . . . . . . . . . 38
Weapon tips. . . . . . . . . . . . . . 39
LDSi missiles and LDSi fields . 39
Particle beam cannon . . . . . . 39
REM missiles . . . . . . . . . . . . 39
Disruptor missiles. . . . . . . . . 39
Shields and Self Defence. . . . 40
LDA shields . . . . . . . . . . . . . 40
Ramming speed!. . . . . . . . . . 40
Power management . . . . . . . . 40
Home Sweet Home . . . . . . . 41
The Base Computer Interface. . 42
HANGAR . . . . . . . . . . . . . . . 42
TRADE . . . . . . . . . . . . . . . . 42
INVENTORY . . . . . . . . . . . . . 42
RECYCLING . . . . . . . . . . . . . 42
MANUFACTURING . . . . . . . . . 42
COMMUNICATIONS . . . . . . . . 42
ENCYCLOPEDIA . . . . . . . . . . 42
The Hangar and
Maintaining Your Ships . . . . . . 43
LOADOUT . . . . . . . . . . . . . . 43
CUSTOMIZE . . . . . . . . . . . . . 43
ADD CARGO . . . . . . . . . . . . 43
MANIFEST . . . . . . . . . . . . . . 43
Customizing Your Loadout . . . . 43
Menus. . . . . . . . . . . . . . . . . 43
Hardpoints. . . . . . . . . . . . . . 44
Heat and power requirements 44
Internal cargo space . . . . . . . 45
Further information . . . . . . . . 45
Trading For Fun And Profit . . . . 45
Trades list . . . . . . . . . . . . . . 45
Doing the deal . . . . . . . . . . . 46
Getting tips . . . . . . . . . . . . . 46
Manufacturing goods . . . . . . . 46
Manufacturing . . . . . . . . . . . 47
Piracy . . . . . . . . . . . . . . . . . . . 47
The Law . . . . . . . . . . . . . . . 47
Cargo and pods . . . . . . . . . . 47
Persuasion . . . . . . . . . . . . . 48
Hauling it home . . . . . . . . . . 48
CREDITS . . . . . . . . . . . . . . . . . 50
Manual E_of_K GB 1st 7/30/01 12:21 Page 4
Page 3

6
Installation Guide
EDGE OF CHAOS is designed for computers using the Microsoft
Windows®95b, Windows 98, Windows 2000 and Windows ME operating
systems. The game also requires Microsoft DirectX™8.0, and you will be
able to install this on your computer as part of the installation process.
Hardware Requirements
Minimum System Requirements
:
• AMD® K6-2 350 MHz or Intel® Pentium® II 300 MHz or better.
• 64 MB RAM.
• 16 MB DirectX-compatible 3D Video Card.
• 600 MB hard drive space for installation.
• 128 MB hard drive space after installation.
• Microsoft DirectX-compatible sound card.
• 4x CD-ROM drive.
Recommended specification:
• AMD Athlon or Intel Pentium III or better.
• 128 MB RAM.
• Microsoft DirectX-compatible sound card.
• 16x CD-ROM.
• 600 MB hard drive space for installation.
• 128 MB hard drive space after installation.
• 3-axis 4 button joystick with a 4-way hat switch.
• 28.8 Kbps modem for internet multiplay.
In addition your machine should have the following:
• Microsoft DirectX 8.0 (installed by the game).
Installing EDGE OF CHAOS
After starting your computer place the CD marked “EDGE OF CHAOS Install
Disk” into your CD-ROM drive. Follow the on screen instructions to install
the game.
If you do not have Autoplay enabled, open My Computer and double-click
on the icon for your CD-ROM drive, then double-click on SETUP.EXE to start
the install program.
If you do not have Autostart enabled, open “My Computer” and double click
on the CD-ROM drive icon. Double click the SETUP.EXE program.
After the game has installed you can play from the Windows Start button by
selecting Program Files -> EDGE OF CHAOS.
7
Customer and Technical Support (U.S. & Canada)
Assistance Via World Wide Web
Get up-to-the-minute technical information at the Infogrames,Inc. web-site, at:
http://www.us.infogrames.com, twenty-four hours a day, seven days a week. Through
this site you’ll have access to our FAQ documents (Frequently Asked Questions), which
contain our latest troubleshooting information. You’ll have access to a Message Board
and links to our E-Mail area where you can leave us your tech support problems and
questions if you do not find your answers within the FAQ.
Help Via Telephone/Fax Or Mail In The United States & Canada
For phone assistance, call Infogrames, Inc. Support at 425-951-7106. We have an
Interactive Voice Response and Faxback system that is available twenty-four hours a
day, seven days a week. If you should need live support, we are available Monday
through Friday, 8:00 AM until 6:00 PM (PST). Please note that live Tech Support may
be closed on major holidays. We ask that you do the following when calling: be at your
system; have your system information ready for our technicians. It will expedite your
handling significantly. You may also fax in your Technical Support questions or problems to: (425) 806-0480, or write in to the address below. INFOGRAMES HINT LINE - 1900-454-HINT: $.99/minute. If you’re under 18, get a parent’s permission before calling.
Product Return Procedures In The United States & Canada
In the event our technicians at 425-951-7106 determine that you will need to forward
materials directly to us, please include a brief letter explaining what is enclosed and why.
Make sure you include the Return Merchandise Authorization Number (RMA#) supplied
to you by the technician and your telephone number in case we need to call you. Any
materials not containing this RMA# will be returned to you unprocessed. Your mail
should be sent to the following address:
Infogrames, Inc.
13110 NE 177th Place
Suite # B101, Box180
Woodinville, WA 98072-9965
Attn: Technical Support
RMA#: (include your RMA# here)
Warranty Policy In The United States & Canada
If our technicians determine that the product storage medium is found to be defective
within ninety (90) days of original purchase, (unless otherwise provided by applicable
law), Infogrames, Inc. will replace the item free of charge, to the original purchaser, if
the item is accompanied by the original dated receipt and packaging. If you do not have
the original receipt, or if the warranty period has expired, Infogrames Entertainment S.A.
will replace the product storage medium for a nominal fee.
Other
Please do not make unauthorized copies. The program you’ve purchased was produced
through the efforts of many people who earn their livelihood from its lawful use. Don’t
make copies for others who have not paid for the right to use it. To report copyright violations to the Software Publishers Association, call 1-800-388-PIR8 or write:
Software Publishers Association
1101 Connecticut Ave., Suite 901
NW Washington, DC 20036
This program is protected by United States federal and international copyright laws.
Manual E_of_K GB 1st 7/30/01 12:21 Page 6
Page 4

8
Quick Start Guide
You don’t need to read the whole of this flight manual before pitting your
wits against the cutthroats of the Hoffer’s Wake system, but you are likely
to live longer if you do. At least read this guide before powering up your
starship and heading out into the lawless Badlands Cluster.
There are three ways to play EDGE OF CHAOS:
• Story Mode
To play the story mode, and have the full EDGE OF CHAOS experience,
click Start New Game from the Main Menu. In the prelude to the story,
Jefferson Clay will teach you how to fly and fight. We recommend that you
play at least part of the story before trying Instant Action or Multiplayer.
Clay has been around for a long time and knows all there is to know about
surviving space combat, so be sure to learn all you can. You are going to
be putting those new skills to good use later on.
• Instant Action
Perfect for a quick fix of space combat. The enemies come thick and fast.
And they get harder and better equipped the longer you survive.
• Multiplayer
Take on your friends and make new enemies over a LAN or on the Internet.
We recommend that you get a little practice in Instant Action or Story Mode
before taking on skilled human pilots...
Become a Combat Pilot in 60 Seconds
We recommend using a joystick to play, and this manual assumes that
you are using a joystick with hat switch and throttle. If you don’t have a joystick, don’t despair - all joystick functions are available via the keyboard.
Refer to the separate control guide for more details.
Moving Around
Controlling your ship is quite simple. Moving the joystick back and forth will
point the nose up and down. Moving left and right turns to the left or right.
To speed up and slow down, adjust the throttle using the Throttle Wheel or
the + and - keys on the keyboard.
Defending Yourself
The green circle in the center of the screen is the targeting reticle – your
weapons will fire at objects in the center of this circle. To target an enemy,
position your reticle over their ship and press Joystick Button 2 or the T key.
Cycle through your primary weapons (guns) with joystick button 4 or the Enter key, and
secondary weapons (missiles) with button 3 or the Backspace key.
Finally, take aim and pull the trigger to fire at your target.
More Information
For more in-depth information refer to the main flight manual on page 15.
Good luck, Captain!
“Astronomy compels the soul
to look upwards
and leads us from
this world to another.”
Plato (428 BC – 348 BC),
The Republic
“Astronomy compels the soul
to look upwards
and leads us from
this world to another.”
Plato (428 BC – 348 BC),
The Republic
Manual E_of_K GB 1st 7/30/01 12:21 Page 8
Page 5

10
Main Menu
After starting EDGE OF CHAOS you will
see the screen shown here.
This is the main menu.
START NEW GAME
Begin a new game in Story Mode. The plot
picks up straight after the death of Cal’s
father at the end of the intro movie.
LOAD GAME
Continue a game you have previously saved in Story Mode.
INSTANT ACTION
Select this for a quick space battle. Pick a ship from the list and enter the fray.
A succession of enemy ships will appear through the jump point for you to engage
and destroy. The longer you survive the tougher the waves of ships become.
If you score highly, you may be able to earn new ships to fly.
MULTIPLAYER
Play against your friends over a LAN or via the Internet.
Refer to the Multiplayer section below for details.
OPTIONS
Configure EDGE OF CHAOS to your personal taste. Refer to the options
screen section on page 12 for details.
MOVIES
View any of the movies you have seen so far in Story Mode. The further
into the story you get, the more there will be to see. Press Space to stop
watching a movie.
CREDITS
View the list of people responsible for making EDGE OF CHAOS. Press
Space to return to the Main Menu.
QUIT
Exit the game and return to Windows.
Multiplayer
The Multiplayer Screen allows you to set up your player options, search for
LAN and Internet games, or host a Multiplayer game on your own computer.
GAME TYPE
• Deathmatch
Play a standard frag fest. The winner is player with the most kills at the
end of the game, or the first to reach a specified number of kills.
Make good use of the weapon power-ups to gain an advantage!
11
• Team Deathmatch
Join Team Alpha or Team Beta and take on the enemy with the help of your
human wingmen. Ganging up on enemy ships will win the day.
• Capture the Flag
A real test of strategy. Your team must steal the other team’s flag and return it
to your base to score points.
• Bomb Tag
The player who grabs the bomb first scores points by killing all the others, but
be careful not to let someone steal it from you. Watch out! The bomb is full of
unstable antimatter, and you don’t want to be near it when it goes off…
In Multiplayer your enemies are always highlighted in red on the heads-up
display, and any friends in blue. In Deathmatch all the other players are red,
because they all want to take you out… Any light blue objects are power-ups,
which are almost always going to help you out.
LAN GAME
To play a multiplayer game over a LAN, all the computers must be able to
communicate using the TCP/IP network protocol. If you are not sure whether
you have this protocol or how to install it, consult your system administrator
or Windows documentation.
When you enter the LAN GAME screen, the system will search for and display
a list of all the games currently being played on your network. When the search
is complete, the Searching… message changes to Refresh.
Click this button to update the list of games.
If you move the mouse pointer over an entry in this list, additional information
about the server is displayed at the bottom of the screen. This includes the
map, game type, and maximum number of players.
To join a game, click on its entry in the list.
INTERNET GAME
Make sure your Internet connection is active before trying to play an Internet
game. For more information, consult your Windows documentation.
When you enter the INTERNET GAME screen, the system will connect to the
GameSpy master server and download a list of games currently being played
on the Internet. This process may take several seconds.
When the search is complete, the Searching… message changes to Refresh.
Click this button to begin a new search for games.
The entries in the list are sorted by ping time, which is a measure of the
connection speed between your computer and the game server on the
Internet. You will generally have a smoother and faster game on a server with
a lower ping time.
Manual E_of_K GB 1st 7/30/01 12:21 Page 10
Page 6
12
If you move the mouse pointer over an entry in this list, additional information about the
server is displayed at the bottom of the screen. This includes the map, game type, and
maximum number of players.
To join a game, click on its entry in the list.
Advanced users: You can also find and connect to Internet games
using GameSpy Arcade, included on the EDGE OF CHAOS Install
Disk. For more information, check out our readme file and
http://www.gamespyarcade.com/.
OPTIONS
Enter the name by which you wish to be known by other players, and select
the ship you wish to fly. The different ships all have their own strengths and
weaknesses, so choose wisely.
HOST SESSION
Here you can host a Multiplayer game of EDGE OF CHAOS on your
computer. Select the type of game you want to play, set frag and/or time
limits, and click START to enter the fray.
The ADVANCED menu allows you to play against AI bots and adjust other
server options to your taste.
Options
The options screen is accessed from the Main Menu and allows you to
configure EDGE OF CHAOS to your personal taste. From the options menu
you can access the following screens to tailor specific areas of the game
to your computer.
GRAPHICS
To change the display resolution, click the Resolution button and select your
3D Accelerator (if you have more than one in your computer) to display a list
of resolutions. Highlight the desired resolution and click Apply to change.
The other options on the graphics screen allow you find a balance between
performance and visual quality to suit you and your computer.
Some of these options are intended for advanced users only.
SOUND
Adjust the volume levels for music, speech and sound effects.
CONTROLS
Select your desired control style from the list. The default style is recommended for all
EDGE OF CHAOS pilots.
Other options allow you to modify aspects the control style, and adjust the
strength of Force Feedback effects if you are using a Force Feedback joystick.
Escape Menus
Whenever you are playing the game, you can press Escape to pause and bring
up a menu. This menu contains the following options:
• Resume game
Return to the game and continue playing
• Load game
Quit your current game and load a new game
• Options
Open the options screen
• Quit
Quit your current game and return to the Main Menu
If you are in the base interface, you will have the following extra option:
• Save game
Save your progress and then continue playing
Note that the game saves automatically when you launch from the
base, using the slot labelled AUTOSAVE.
13
Manual E_of_K GB 1st 7/30/01 12:21 Page 12
Page 7

Manual E_of_K GB 1st 7/30/01 12:21 Page 14
Page 8

15
NSO Laplace 1502-X Command Section:
Provisional Prototype Flight Manual
NSO Laplace “Armadillo-Works” R&D Facility,
Bessus, Hoffer’s Wake
5th February 2325
HIGHLY CONFIDENTIAL
– EYES ONLY –
❚“This flight manual sometimes reads more like a sales brochure.
I guess they wrote this back when they were still trying to sell
this Command Section to the Navy.
I’ve added some notes to fill in the gaps. So pay attention, kid.
Clay”
Manual E_of_K GB 2nd 7/30/01 12:26 Page 15
Page 9

1617
How to Pilot the New 1502-X
Command Section
NSO Laplace is proud to present the new 1502-X
Command Section.
This advanced prototype allows you to fully command any
compatible starship from the comfort of an armored yet
high-visibility bubble cockpit, giving maximum combat and
operational effectiveness for minimum investment in personnel.
❚“In fact, most of the test pilots couldn’t handle the extra workload.
But I reckon you’re better than that”.
Previous designs required a skilled bridge crew to operate
a vessel. However, using Laplace’s patented avionics and
command and control technology, a whole starship can now
be controlled by a single person.
The first thing any starship commander needs to do is learn
to fly their ship. Don’t be daunted - it’s a lot easier than it
looks. With our new command section, every vessel from
the smallest tug to the deadliest warship is flown in exactly
the same way.
And remember, the 1502-X is a capable ship in its own right. It
can ferry three people around a star system in comfort, giving
convenience for owner and crew.
Flying Your Ship
Most of the time, you will be in conventional flight, with your
ship’s course and speed controlled by your drive and thrusters.
The drive assembly at the rear of the ship vents superheated
plasma from the main reactor ring to move the ship forwards.
An array of smaller maneuvring thrusters all over the outer hull
are used to point the ship in the desired direction.
You control the maneuvring thrusters with your joystick in
a similar fashion to aircraft controls.
Moving the joystick back and forth will point the nose up
and down (pitch). Moving left and right turns to the left or
right (yaw). You can rotate the ship around its long axis (roll)
by using the twist action on a 3-axis joystick, or by holding
down Joystick Button 2 and moving the stick left and right.
To control the drive, choose your desired forward speed with
the Throttle Wheel on your joystick or the “+” and “-” keys on
the keyboard. This is called your set speed.
Your flight computer will fire the drive automatically to reach
your set speed in the direction you are pointing.
❚“Remember kid, when you fly this thing I’m gonna be in the cockpit with you.
You might be a hot-shot, but you still have a lot to learn.”
Linear Displacement System (LDS)
Your drive and thrusters are powerful, but using them to traverse
the large distances between planets would be uneconomic.
The Linear Displacement System, or LDS, propels your ship
forward with a series of microscopic inertia-less spatial distortions.
A ship in LDS can approach the speed of light, which makes
interplanetary travel feasible. Under normal circumstances
your Autopilot will engage the LDS drive for you. It is possible
to engage manual LDS using the L key but this is only recommended for advanced pilots and those who need to get out of
the way of someone in a really big hurry. Once in manual LDS,
control your direction in the normal way, and change speed
using the throttle controls.
❚“Be careful with that Manual LDS override! If you hit any planets travelling
at half the speed of light, you’ll leave a heck of a hole.”
The Heads-Up Display
Your Command Section cockpit does not contain any traditional
instrumentation – all the flight and combat information you need
is presented by the Heads-Up Display, or HUD.
The HUD is projected onto the inside of your specially designed
helmet visor, so it’s always in your field of view.
The main purpose of the HUD is to display information about
your ship, your current target, and other ships or stations that
your sensors have detected. The HUD consists of a number of
different displays, which we will discuss in detail.
• RETICLE
The green circle in the center of the
HUD is the reticle. It displays critical
information about your ship and your
current target. It is the single most
important display on the HUD.
The left side of the reticle is the speed
display. In conventional flight you can
see your speed in meters per second
to the left of the center. The orange
arc displays your speed graphically, with the small orange
triangle marking your set speed.
Above the conventional speed display is the LDS speed display.
When the LDS drive is engaged, the green arc indicates your
speed, and the small green triangle your set speed.
The LDS speed scale is geometric, so for each increase of
the throttle, the speed is multiplied by 10.
Manual E_of_K GB 2nd 7/30/01 12:26 Page 16
Page 10

1819
One of the contacts on the list will be highlighted as your
current target. To pick a new target, move the highlight up and
down the contact list with the “,” and “.” Keys, or joystick.
All contacts are colour-coded, and this colour is used in each area
on the HUD where information about that contact is displayed.
The following colours are used:
Yellow: Neutral contacts, and contacts not yet identified
by your sensors.
Red: Hostile vessels and stations.
Blue: Friendly or allied vessels and stations.
Light Blue: Mission-critical vessels, usually which
need to be protected.
Green: Waypoints.
Each line of the contact list displays the following
information about the contact:
Faction: The group that owns the vessel.
This could be the police, one of the megacorporations,
or even indicate that the vessel is an illegal.
Type: What kind of vessel the contact really is.
If the contact is unidentified, its type will be UNKWN.
Range: The distance to the contact, displayed in meters if it
is nearer than 10km, or kilometers if it is further away.
Name: The name of the contact.
• ORB
The 3D sphere in the top-right of the HUD is the ORB,
which shows the location of contacts in space
around you. The ORB sphere is a 3D representation
of a 1km radius around your ship. You are always at
the center. Each contact is shown as a point and a
stalk attached to the ORB. Contacts closer than 1km
are shown as stalks pointing inward, and contacts
further away are shown as stalks pointing outward.
❚“It takes a while to get used to reading the ORB – it’s easier to pick out
individual targets with the contact list and reticle, but the ORB lets you
know where the bad guys are concentrated in a battle.”
All contacts are color coded as for the contact list,
and the current target is indicated with a flashing blip.
To the right of the reticle, you can see information about your
current target, including its name, hull strength, range and
speed. If the target is outside the reticle, an arrow within the
reticle points out the way you should turn to bring the target
back into your sights.
The green arc to the lower right of the reticle displays your hull
strength, and changes color through yellow to red as you are
damaged. If it falls too low it might be time to retreat and
repair yourself.
Urgent warnings and other status information will flash up in
the area below the reticle.
❚“Don’t ignore these warnings, except maybe the ones about speed limits.
Hey – forget I said that.”
Pop-up icons around the reticle provide information about your
current status. Clockwise from 9 o’clock, these icons are as
follows:
The icons are covered in more detail later.
• CONTACT LIST
The box in the lower-right corner of the HUD
displays all the contacts your sensors have
detected in the area of space around you.
A contact might be a ship, space station, or
other object. Your contact list also displays
waypoints, which mark specific locations in
space to allow you and other pilots to reach them.
Flight Assist Off
Laterals
Docked
LDS ramp-up
Running
Inhibited
Incoming
Missile
Powe r
Autopilot: Approach
Formate
Pursuit
Dock
Capsule drive
charging
Jump In Progress
Brightness
Heat
Manual E_of_K GB 2nd 7/30/01 12:26 Page 18
Page 11

20
• MFD
The large display in the upper-left of the HUD is the
MFD, or Multi-Function Display.
This presents several useful pages of information
depending on the circumstances.
In-flight comms: Whenever another person
(in another vessel or on-board your own) wishes to talk to
you, their portrait or a camera view of their ship is displayed
in the MFD, and subtitles are displayed at the top of the HUD.
If you are asked a question, you will be presented with a list
of responses. Pick the response you want using Up and Down
on the Joystick Hat or keyboard Arrow Keys, and press Fire or
Enter to broadcast it.
Targeting: Most of the time, the MFD will display your current
target. For waypoints, stations and other geography you
will only see the name and type of the target.
If you have targeted a ship, more information will be displayed,
including the target’s hull strength, and for advanced pilots, the
current subsystem you have targeted.
Scanning: When you target a cargo pod, your sensors can
read the UCP (Universal Cargo Profile) code stencilled onto
the pod and display the contents.
• SYSTEM STATUS
The row of indicator lights in the top-center of the HUD, between
the MFD and ORB, displays the status of each of the individual
systems on your ship. A system is represented by two lights,
one above the other.
The upper light shows the system’s damage level. An undamaged
system has a green light, with the color changing through
yellow to red as the system becomes more damaged.
If a system is not in perfect condition, the light will blink as
a warning.
The lower blue light shows the system’s power level. If the
system loses power, the light will blink and become dim.
❚“When these things light up like a Christmas tree, you know you’re
in trouble…”
If a system is either underpowered or damaged, it will function
less well, and may go offline completely until it is repaired.
Repairs are carried out automatically by your auto-repair system,
if one is installed.
The systems are ordered left to right, with critical systems on
the left and minor systems on the right.
21
• GRID
When flying in space, a grid of translucent lines is projected
onto the HUD. The end of each line is fixed in space, so the
lines provide a frame of reference as you move past them. This
shows you that you are in motion, how fast you are travelling
(represented by the length of the lines) and in which direction.
The grid is colored orange in conventional flight, and changes
to green when the LDS drive is engaged.
• CONTRAILS
If your sensors detect a vessel that is in motion near your ship,
the HUD will display a contrail for that contact. The contrail
shows the vessel’s path, and allows you to see where it has
been, as well as predicting where it might go.
• BRACKETS
All contacts detected by the sensors, whether in motion or not,
are surrounded by brackets on the HUD to show their size and
position. Waypoint brackets are shown as a small diamond.
• CLOCK
This clock display shows how much time has elapsed since
your ship last left port.
Using the Command Menu
One of the most important features of the HUD, and an essential
part of the interface between you and your ship, is the command
menu. This allows easy access to all the functions on your ship
using a common interface, and is perhaps the most innovative
avionics feature in the 1502-X.
❚“Hmm… This interface is a lot more elegant than those in my day.”
The menu is operated with the Joystick Hat or the Cursor
Keys. To display the menu, push the Hat in any direction or
press one of the Cursor Keys. Once the menu is displayed,
select an option by moving in the appropriate direction.
You can close the menu by pressing Joystick Button 2 or
the Backspace key.
Some menu selections open further submenus containing more
commands, and others perform actions, labelled with an icon.
After performing an action, such as engaging the autopilot,
the menu will close automatically.
Other menu selections open one of the full-screen HUD displays.
These displays can be closed in the same way as the menu,
using Joystick Button 2 or the Backspace key.
Manual E_of_K GB 2nd 7/30/01 12:26 Page 20
Page 12

22
The command menu is split into four sections, as follows:
• MAIN MENU
NAV: Open the navigation submenu
WEP: Open the weaponry and
combat submenu
CMD: Open the Captain’s
commands submenu
ENG: Open the engineering screen.
❚“Hey, that sounds a lot like the bridge workstations on my old corvette.
Maybe less has changed than I thought.”
• NAV SUBMENU
STARMAP: Open the starmap screen.
UNDOCK: Detach your ship from stations
and other vessels.
AUTOPILOT: Open the autopilot submenu.
MENU: Return to the main menu
• AUTOPILOT SUBMENU
PREV: Select previous autopilot
NEXT: Select next autopilot
APPROACH/FORMATE/DOCK/PURSUIT:
Engage the selected autopilot.
DISENGAGE: Stop the current autopilot and
return to manual control
NAV: Return to the NAV submenu
Autopilots are covered in more detail in the Navigation section
on page 23.
• WEP SUBMENU
ZOOM IN/OUT: Zoom the HUD view in to
allow you to inspect and target distant
contacts. Only available if an imaging
module is installed and functioning.
TOGGLE AIM ASSIST: Engage or disengage
aim assist, which uses the gimbal mountings on your guns
to track your target automatically.
Only available if a CPU is installed and functioning.
MENU: Return to the main menu
23
• CMD SUBMENU
DOC: Open the documents submenu.
REM LINK/REM UNLINK: Remote-link to your
current target, or cancel a remote link.
COMMS: Open the communications submenu.
MENU: Return to the main menu
Remote piloting is covered in more detail in the Advanced
Combat Tactics section on page [36].
• DOC SUBMENU
LOG: Open the mission log screen
OBJECTIVES: Open the mission
objectives screen
STATISTICS: Open the combat
statistics screen
CMD: Return to the command submenu
• COMMS SUBMENU
WINGMEN: Open the wingmen orders menu
CMD: Return to the command submenu
Giving commands to turret fighters and wingmen is covered in more detail in the Advanced
Combat Tactics section on page 36.
You also may be able to communicate with other team
members using the COMMS submenu.
Navigation
• AUTOPILOTS
Your shipboard navigation computer can assist with many
basic piloting tasks. Three autopilot modes are provided as
standard, which can be accessed from the command menu
or the keyboard.
Approach: Fly to a location or object and stop.
(Keyboard shortcut F6)
Formate: Fly to another ship and maintain formation with it,
following wherever it leads.
(Keyboard shortcut F7)
Dock: Attach your ship to another ship or station.
(Keyboard shortcut F8)
❚
“There’s also a special combat autopilot called Pursuit. It isn’t fitted as
standard, but you might be able to persuade somebody to give you the software.
Manual E_of_K GB 2nd 7/30/01 12:26 Page 22
Page 13

24
In general, autopilots are most useful for travelling long distances,
both in-system and between systems.
They also perform precision tasks like docking.
To use an autopilot, select a target from your contact list and
then engage the autopilot using the command menu or the
appropriate keyboard shortcut. Once the autopilot is engaged,
you can change your target to another contact without affecting the autopilot’s destination.
If you have engaged an autopilot and wish to return to manual
control, disengage the autopilot using the command menu or
by pressing F5 on the keyboard.
❚“You can never use your autopilots too much.
Why make life hard for yourself?”
• THE STARMAP
The Starmap is an essential navigation tool, used to find your
way around the stations, planets star systems of the Badlands
Cluster. To activate the starmap, use the command menu
or press SHIFT-M. To close the map, press Joystick Button 2
or SHIFT-M again.
The starmap displays the following different kinds of
navigational waypoint:
Waypoints are arranged according to their orbits, with the
system’s primary star at the centre of this map. Zooming in
on the primary star allows you to cycle through all the planets
orbiting it. Zooming in on one of these planets allows you to
cycle through its moons and orbital stations, and so on.
25
To move around the map, use the command menu controls,
i.e. the joystick hat or cursor keys. Press Left and Right to
cycle through all the waypoints at the current level, or zoom in
and out with Up and Down.
To select the current waypoint as your navigation target, press
Fire or Enter. The waypoint is then added to your contact list
and becomes your current target. When a target is selected,
the map closes automatically. You can then use your autopilot
to approach the waypoint.
When the map is first opened, it centres on the nearest
navigation waypoint to your ship. If you zoom all the way out
of the system, the map will change to displaying the entire
Badlands Cluster and the star systems within it. Select a star
system to view using Left and Right, and zoom in on it with Up.
If you have set a destination and engaged the autopilot, your
route is marked with a red line on the starmap.
❚“We can’t leave Hoffer’s Wake until we get our hands on a Capsule Drive.
Hardware like that is real hard to come by, so someone’s going to have to
owe us one hell of a favour.”
• THE CAPSULE DRIVE AND LAGRANGE POINTS
The gulf between the stars is vast. Even using the LDS drive
it would take years to travel between systems. The Capsule
Effect generates a tiny bubble of independent space-time
around a ship. This capsule universe is then detached from
normal space and reattached at the destination point, allowing
ships to travel immense distances without traversing the
intervening space.
The Capsule Effect requires vast amounts of energy, and is
impossibly expensive in dense gravity fields. For this reason,
ships can enter and leave Capsule Space only at Lagrange
Points, where the local gravity fields of orbiting bodies cancel
each other out.
If you are close to a Lagrange Point, the HUD displays a 3D
representation at the point’s location. Ships enter Capsule Space
from the blue side of the point and leave it from the red side.
❚“Whatever you do, keep clear of the red zone – if a big freighter comes
through the point, it isn’t going to be able to stop for you.”
To make use of Capsule Space your ship must be fitted with
a Capsule Drive. Once you have acquired the hardware, you
simply select your destination on the starmap, and let the
autopilot take you there.
Space Station
Lagrange Point
Asteroïd
Asteroïd Base
Star
Gas Giant
(large planet)
Moon
Planet
Manual E_of_K GB 2nd 7/30/01 12:26 Page 24
Page 14

26
Not all destinations can be reached from each Lagrange Point,
so the autopilot may have to perform several Capsule Jumps
before arriving at the destination. If you have a Capsule Drive,
the autopilot will also make use of it to cut down on in-system
travel time by using local Capsule Jumps to cover the distance.
Experienced captains may wish to select destinations manually
and execute their own Capsule Jumps. To do this, fly to the
Lagrange Point you wish to depart from and open the starmap.
Zoom in on the Lagrange Point and select your destination, then
press Fire. When you fly through the point from blue to red, your
Capsule Drive will engage and jump you to your destination.
Using Weapons Systems
Please be advised that NSO Laplace does not advocate the use
of weapons in anything but self-defense, and use contrary to
this proviso may break the terms of your service agreement
and/or limited warranty. Consult your ownership contract and
master’s license for more details.
❚“Ignore them - now we’re getting to the fun stuff!”
• Weapon selection
Spacecraft weapons are broken down into two broad categories:
Primary weapons: Usually energy or ammo-fed guns, primary
weapons have large or unlimited ammo supplies.
Secondary weapons: Usually guided missiles, unguided
rockets, or other special-purpose weapons. Generally in
shorter supply than primary weapon ammo, but with more
destructive potential per shot.
The currently selected weapon is displayed on the left of the
HUD below the MFD. Select from your primary weapons with
Joystick Button 4 or the Enter key, and secondary weapons
with Joystick Button 3 or the Backspace key. To fire a weapon,
press Fire or Space.
The current weapon display indicates the charge level of
energy-based weapons, or the remaining ammo for missile
launchers and ammo-fed guns. If you have several identical
weapons, they may be linked and fired simultaneously, in
which case the ammo count of each weapon will be displayed.
❚“Keep an eye on your ammo counts – it isn’t nice to be caught short at the
wrong end of someone else’s particle cannon.”
27
• Targeting
Your weapons are always locked on to your current target.
For primary weapons, your HUD displays a lead sight that
indicates where you should fire to hit the target, compensating
automatically for the movement and range of the target.
The lead sight is a cross, composed of four arrows. If the
arrows point outward, you are out of range for the current
weapon. If the arrows point inward, you are in range. If the
sight is rotating, the target is outside the fire arc of your
current weapon. When the arrows point inward and stop
rotating, the target is in range and guns are locked on – open fire!
For more information on weapons and tactics see the
Advanced Combat Tactics section of this manual on page 36.
Manual E_of_K GB 2nd 7/30/01 12:26 Page 26
Page 15

2928
“Lucrecia, your
grandma, gave this
manual to everyone
who signed on with
her.
She may have been
an outlaw, but she
ran a tight ship.
You could go far
by following her
advice.”
Pirate’s Charter
and Crew Manual
“Fighting, freedom and a fair share”
Lucrecia Johnston, Xing Liu, and Lefty O’Hare
Pirate’s Charter
and Crew Manual
“Fighting, freedom and a fair share”
Lucrecia Johnston, Xing Liu, and Lefty O’Hare
Manual E_of_K GB 3rd 7/30/01 12:24 Page 28
Page 16

3130
>::Rules and Regulations ::
Now I know you didn’t sign up to be a pirate in order to keep your nose
clean, but as long as you’re in my crew, you’ll dance to my tune. And if
you don’t like it, you’ll leave.
Discipline
We run a tight operation and I expect reasonable
discipline. Any crewmembers starting fights, drinking on duty and the
like will be warned. If they repeat the offence they will lose shares.
Anyone who wilfully endangers the safety of the base and crew, anyone
who betrays our location or my trust, will be spaced. No exceptions.
Off-duty crew can do what they want, provided it doesn’t break the
above rules or get in the way of operations.
Shares and bonuses, in order of payment
> Life support and maintenance fund: Six shares
> Lucrecia Johnston: Four shares of all operations
> Lieutenants: Three shares
> Engineering team leaders: Two shares
> Flight wing leaders: Two shares plus kill bonus
> Pilots: One share plus kill bonus
> Base crew: One half share
At my discretion, rich hauls and feats of notable daring or bravery may
net bonus shares for those responsible.
Command structure
I’ll keep this simple – pilots report to wing leaders, base crew to
engineering team leaders. Leaders report to Lefty and Xing Liu, and
they report to me. You don’t need to salute your superiors, but you’d
better jump if they say so.
Final word
That’s it for the rules and regulations, apart from one more thing: read
the rest of this manual and pay attention. I don’t want
anyone showboating or taking stupid risks, but I do want you flying to
the limits of your ability. So learn, and then put what you’ve learned into
practice. It’ll serve you well in the long run.
Good luck and good hunting,
Lucrecia Johnston
Before you can fight like a pro, you need to fly like a pro. Don’t think you can ignore
this and survive. One of the pilots I knew who ignored ship management and piloting
technique to concentrate on his gunnery learned the hard way. He didn’t keep an
eye on his life support systems, couldn’t repair them when he
needed to, and died a cold lonely death on the way back from an op.
Advanced Piloting
The Flight Computer
When you move the joystick, your ship’s flight computer is translating your
movements into instructions for the thrusters mounted on your ship. For example
if you pull the joystick towards you, the belly thrusters fire to pitch your ship
upwards. When you release the stick, thrusters on the opposite side fire to bring
you to a halt.
“She was a tough
cookie, and reading
this brings it all
back. She’s right,
too – learn all her
extra tricks and
tactics, and you’ll
be set for anything
they throw at you.”
>::Lefty’s Advanced Flight
Techniques ::
Manual E_of_K GB 3rd 7/30/01 12:24 Page 30
Page 17

3332
The same principle applies to your main engines. When you move the
throttle, you’re choosing a set speed, not controlling the engines directly. So if you are stationary and set the throttle to 500 m/s forward, you
will hear your engines burn while you accelerate 500 m/s
2
. Once you
get there, they’ll stop burning and you’ll coast along, carried by your
own inertia.
If you were then to pitch your nose up ninety degrees, the computer
will fire the belly thrusters and main engine to cancel your original
velocity and again leave you travelling at 500 m/s in the direction your
ship is pointing.
This is called assisted flight, since the computer is helping you out and
making your life easier.
Lateral thrusters
Even if flight assist is switched on, you can directly activate your lateral
thrusters and main engine using the thrust override controls. This gives
you an edge over pilots relying solely on the computer, and some extra
maneuvrability.
To override your main engines or retros, use the keyboard W and S
keys.
“Be careful. It’s easy to keep your finger on the override and
end up travelling at several kilometers per second. But it’ll
always take as long to stop as it did to get up to speed. This is
bad if you’re flying towards something big and solid, like a
space station.”
To fire your lateral thrusters manually, you can hold down ALT and
move the joystick. Your ship then moves in the direction you choose,
so pushing left slides left, pushing up moves the ship straight up, and
so on.
The left and right lateral thrusters can also be fired using the keyboard
A and D keys. This is often more useful, as you can sideslip to dodge
an enemy’s shots, and at the same time rotate with the joystick to keep
your nose (and guns) pointing at him.
“We called this circle strafing, and it can often tip the balance
of one-on-one dogfights.”
Free flight
When you control your laterals directly like this, you’ll still have the
benefit of flight assist. Sometimes it’s useful to be able to turn this off
too. Luckily, you can. Either hold CTRL to turn off flight assist for as
long as the key is down, or toggle assist on and off for long periods of time by
pressing N.
When assist is off, the throttle setting is ignored, and you will drift in whatever direction you were last travelling unless you use your laterals or thrust override controls.
You can make use of this drift to strafe large ships – set yourself up on a course
along their length, then turn off flight assist and you can rotate to bring your guns
to bear. You’ll still be moving, but not towards the ship, so you their turrets will have
a tough time tracking you, and you’ll not crash into them.
“Turning off flight assist might seem like a bad idea,
but sometimes it can give you a real edge in a fight.”
Heat and Power
Heat and overheating
A combat starship is basically a big hot fusion pile with a cabin and guns on it. This
generates a lot of heat, which has to be radiated into space by your heat sink. If
you are damaged, or you over-use your energy weapons, it’s possible to generate
more heat than the sink can get rid of. Your hull temperature will then start to rise,
and this can eventually cause critical damage.
To help prevent this, the HUD displays your temperature on a dial to the lower right
of the reticle. Pips count around the dial as the temperature increases.
If your hull temperature gets too high, the computer will have to shut down systems
to prevent serious damage. Although rare, it has been known for ships to be
destroyed by over-zealous pilots who ignored the heat warnings.
If you find yourself in this situation, you can try the following ways of reducing
temperature:
>
Avoid using weapons, especially energy
weapons
>
Avoid using your thrusters and main engines
>
Reduce your reactor power in the engineering screen
“Not flying into stars can help with that too…”
Power and brownouts
All systems on your ship draw energy from the ship’s power plant. Most of the time
you’ll have plenty of surplus power, but if you load out too many systems, or your
reactor is damaged, then you might suffer a brownout. This is when one or more
systems are forced go offline due to a power shortage.
Manual E_of_K GB 3rd 7/30/01 12:24 Page 32
Page 18

3534
The HUD displays the power plant’s output level next to the
temperature icon. The icon will hide itself if the power level is not
changing, and there aren’t any power problems.
You can also see the power levels of your individual systems on the
HUD system status display, or in the engineering screen.
The Engineering Screen
The engineering screen allows you to inspect, and in
some cases control, the systems on your ship. Don’t
forget that you can’t modify your loadout from this
screen – you need to go back to base and fit the
equipment there.
Use the command menu controls (Joystick Hat or
Cursor Keys) to move the highlight around the
engineering screen. The options available depend on
the control you currently have selected. We’ll look at
all the options, from top to bottom.
Designation
At the very top of the screen is the name and class of the ship you
are flying.
“Just in case you forget. Heh heh.”
Below this is your current IFF (Identification Friend or Foe) code.
This is a unique signal that must be legally broadcast by every ship,
allowing other ships to identify it. In some circumstances
you might be able to change your IFF
transponder and (for example) run under
enemy colors.
This is very useful for piracy and stealth
missions, since enemy ships won’t know
you’re trouble until they can actually see you.
Alert lights
Below the IFF code are three alert icons to let
you know if you have problems with either
power, heat or hull damage. These are the
same as the HUD heat, power and emissions
icons.
System information
Below the three warning lights is the system information bar. Highlight this bar and
move left and right to cycle through all the systems on your ship. Each system will
display a series of status bars, which display damage status and power consumption. Some systems may provide additional information, for example, ammo counts
for weapons.
Certain systems may be activated and deactivated. For example, you might want to
turn your active sensors off to keep other ships from spotting you. Press Fire or
Enter to toggle a system on and off.
TRI
The Tactical Resource Interface lets you adjust the way power is distributed
between engines, weapons and shields, boosting one group of systems at the
expense of the others.
To adjust the TRI, select one of the power bars and move left or right to change its
level. The other bars will also you allot power, and the point in the TRI will move to
graphically display the current balance.
To return the power balance to normal, so that all systems have an equal share,
highlight the RESET TRI control below the power bars and press Fire or Enter.
Power output
Below the TRI is the power gauge. This displays the amount of power that your
ships power plant is currently generating. Highlight the bar and move left or right to
adjust the amount of power output. The plant may take a few seconds to respond
to your changes.
Reducing the output reduces the amount of heat generated and can make it
harder for other ships to detect you. Most of the time though, you’ll want to
operate on full power.
Each bar is labelled with an icon:
Propulsion and
Drive Systems
Weapons
Systems
Shield
Systems
ICON
SYSTEM
Manual E_of_K GB 3rd 7/30/01 12:24 Page 34
Page 19

3736
Status display
Finally, at the bottom of the screen there are overall status displays.
From left to right the status displays show:
>
System operation lights
>
Overall hull integrity
>
Emission levels
>
Hull temperature
OK, now you’ve read all my wise words about flight, you get to learn
about the fighting part. There’s a lot to take on board here, and you’ll
likely survive without it for a while. There are as many favorite
tactics as pilots, so the best approach is to try a few of these tricks in
each new encounter to find what works for you.
Group tactics
Wingmen
It’s a rare thing that you’ll be fighting alone – our pilots usually fly in
wings of two or three ships. Lucrecia likes to keep things this way
since it raises our odds of success. If you’re experienced enough to be
a wing leader, you’ll be able to give orders to the other ships on the
operation: your wingmen.
Wingmen orders can be issued with the command menu (from the
CMD/COMMS/WINGMEN submenu) or using the number keys on the
keyboard.
You can issue the following orders:
If your wingmen succeed in their objective, they’ll return to formation with you until
you give them another order.
Turret Fighters
You might have heard of T-fighters, but I doubt it. They’re reported to be a
prototype development of the C-fighter technology from the Independence War, but
add some interesting wrinkles: when docked to a larger vessel they can act as
rotating turrets, or be undocked and support the ship as independent fighters.
T-fighters under your command are given orders in the same way as wingmen,
using the COMMS submenu of the command menu, or number keys.
You’ll probably never get to use these, but what the heck…
“We heard about the T-Fighters when we stole your command section from
Laplace, but we never found out where they were keeping the prototypes.
Damn shame too – Lefty and Xing Liu were really keen on the idea.”
Tactical camera
Most of the time, you’ll use your eyes and the view out of the cockpit window to fly.
In a complex furball, it can be easy to lose sight of your target, and this is where
the tactical camera comes in. Your HUD will display an external view of your ship in
the lower part of the screen, with the camera always locked to your target in the
center. Some pilots find this makes controlling the ship harder, but it’s great for
keeping an eye on your target.
Select the tactical camera with F2, and press F1 to return to the cockpit.
>::Lefty’s Advanced Combat
Tactics ::
Key Wingman Command
1 Report in
2 Defend me
3 Attack my target
4 Defend my target
5 Dock to my target
6 Halt
“If you order your wingmen to
do something dumb, such as
defend an enemy or attack an
ally, they’ll usually complain…”
Key Turret Fighter Command
7 Cease fire
8 Attack my target
9 Fire at will
0 Attach/detach
Manual E_of_K GB 3rd 7/30/01 12:24 Page 36
Page 20

3938
Getting the Edge
Sub-targeting
If you get close to an enemy ship, you can target its individual systems
and take them out. A system targeted in this way is called a sub-target.
This is great for piracy, since you can destroy a freighter’s thrusters or
LDS drive to prevent it escaping.
“You can also sub-target cargo pods docked on to freighters,
so you can see if they’re worth pirating.”
To select a sub-target, place your reticle over your current target and
press Joystick Button 2 or the Y key.
The current sub-target is shown in the MFD.
Sneaking around
There are times when you will wish to conceal the presence of your
ship from your enemies. Perhaps you want to sneak into a system and
attack a key target, or maybe the cops are taking just a little too much
interest in your whereabouts… In these situations you’ll want to take
steps to make yourself less detectable.
The HUD displays an emission level dial to the lower right of the reticle.
This shows how easy it is for other ships’ sensors to detect you. The
higher the reading on the dial, the less stealthy you are.
Your emissions are mainly determined by:
>
Class of your ship. Larger ships are often less stealthy
>
How much heat you are generating
>
Your thrusters usage – all that plasma is easy to see
>
Whether your active sensors are enabled
Try the following to reduce your emissions:
>
Reduce the power plant output in the engineering screen
>
Don’t use thruster overrides, and keep the throttle
setting low
>
Turn off your active sensors in the engineering screen
>
Don’t go shooting your weapons all over
“Back in the war I knew a Commonwealth captain who thought
stealth tactics were cowardly. He died unnecessarily.”
Remote piloting
All commercial and military ships have an emergency control back-up
system, which allows them to be controlled remotely. REM-link
protocols are standard across a wide range of vessels, but there are also clever
security systems to prevent (say) heartless pirates from making off with freighters
remotely…
“Actually, we did do this once, but that’s a story for another time.”
To remote pilot another ship, select it as your current target. Attempt the REM-link
using the CMD submenu of the command menu, or by pressing SHIFT-R.
If the remote link is successful your HUD will display a camera view from the other
ship, and your control inputs will be routed through the link, allowing you to control
the target ship. Cancel the link in the same way you established it.
A word of warning: while you are REM-linked, your own ship is dead in
space, and may get into trouble.
Weapon tips
LDSi missiles and LDSi fields
Normally, an LDS drive can be used just about
anywhere. Unless you disable it with an LDSi (LDS-Inhibit) field, that is…
LDSi field generators are commonly mounted inside space stations to keep local
traffic from hitting the station at LDS speeds.
You can generate your own LDSi field by firing an LDSi missile or mine. The missile
will track a target in LDS and generate a large LDSi field when it detonates. We
often use these devices to stop freighters from getting away. Don’t forget that the
effect of an LDSi missile dissipates over time, so you need to press your advantage
and disable the target quickly before it can get away.
Particle beam cannon
Most of the energy guns you will use are based on particle beam cannon (PBC)
technology. Here comes the science bit: PBCs divert plasma from your ship’s power
plant and use it to emit focused blasts of charged particles at your target.
The focussing effect dissipates with range, so PBCs are most effective close-in.
Ideally you want to keep one or two kilometres between you and your target. And
remember that the most vulnerable part of any ship is its unshielded drive section.
REM missiles
Remote missiles differ from ordinary missiles in that they are guided by REM-link instead of an internal guidance system. When you launch a remote missile, you REMlink to it automatically as soon as it arms. Fly the missile into your target, or press
the Fire button to detonate.
The space that would have been used for the guidance system is used for a larger
payload, so remotes are often more deadly than standard missiles. You need a
steady hand though, so they aren’t for everyone.
Disruptor missiles
A special guided weapon that disables the systems on enemy ships, leaving them
vulnerable and tumbling. This is particularly useful if you can use the window of vulnerability to cripple or destroy the ship.
“Pretty sensible,
really.”
Manual E_of_K GB 3rd 7/30/01 12:24 Page 38
Page 21

4140
Shields and Self Defense
LDA shields
Combat ships are usually protected by one or more Linear
Displacement Array (LDA) shield systems. LDAs are an offshoot of LDS
technology that uses local spatial distortions to disrupt a small area of
space in front of the shield projector. This disperses the energy of an
incoming weapon, preventing it from damaging the hull. Or that’s what
the technical manual says. All you need to know is that if you see a
purple flash when you shoot a ship, you didn’t do it any damage.
“Shield coverage varies from ship to ship. However, the drives
are always vulnerable, so cover your ass while shooting
theirs.”
Another important point to remember about shields is that each LDA
decides which is the most likely enemy to fire at you and tracks that
vessel with the shield projector. You can use this to your advantage by
getting your wingmen to attack your target. The target’s LDA will not be
able to deflect the weapons from both attackers if they attack from a
different angle.
Ramming speed!
Shields also provide moderate protection when ships collide.
Specialized aggressor shields have been developed to exploit this and
are used specifically for the purpose of ramming. You still take
damage, but not half as much as the other guy.
To use an aggressor shield, select it as a secondary weapon and ‘fire’
it just as you are about to collide with your target. Don’t get the timing
wrong.
“He wasn’t kidding - the aggressor shield is only activated for
a few short seconds. If you get it wrong you’ll be lucky to
survive.”
Power management
Remember that you can adjust your power allocation with the TRI?
If you do, you’ll know that it takes a few seconds to open the
engineering screen and set up the TRI how you want it. This might not
be ideal in combat…
Luckily, there are shortcuts that can perform rough adjustments
quickly. They don’t allow the same degree of finesse as the
engineering screen, but that isn’t really the point.
>
SHIFT-Left: Full power to weapons
>
SHIFT-Right: Full power to shields
>
SHIFT-Down: Full power to engines
>
SHIFT-Up: Balance power
These shortcut keys can be lifesavers when in battle, but remember to reset the TRI
afterwards or you might find yourself defenceless.
Now that Lefty has told you all you need to know about space combat, I’ll tell you
about your new home. Our base is a derelict terraforming satellite, called a bio
bomber, concealed in a cloud of debris and charged particles called the Effrit.
The Effrit has strange effects on LDS drives and communication signals, so people
tend to avoid it as a navigation hazard. This is just fine by us, since we can hide out
near the rich pickings of the corporate bases around Griffon and Touchdown,
without being harassed.
“This is the safe place Felix was talking about. I can’t take you there
directly – I don’t know the exact location. But Lucrecia left a route we can
follow, when we get closer.”
Flight crew who are off-duty on the base should follow Lucrecia’s regulations and
stay out of the way of my engineering teams – they’ve got work to do.
Xing Liu
>::Home Sweet Home ::
Manual E_of_K GB 3rd 7/30/01 12:24 Page 40
Page 22

4342
The Base Computer Interface
Just because we’re pirates doesn’t mean that we don’t like convenience.
Some of the base systems are automated, so you don’t have to do
everything the hard way. You can control the systems and make
requests of the crew using the base computer system.
When you are on the base, activate a terminal in the
command office to be presented with the following options:
HANGAR
Give the ground crews instructions as to how you want your ship
loaded out, or signal them to ready it for launch.
TRADE
Arrange to barter commodities with our fences and market contacts.
INVENTORY
Check out the spoils – this includes all our weapons, cargo other
assorted items we’ve ‘liberated’.
RECYCLING
Convert surplus cargo into raw materials that can be used to
manufacture new goods.
MANUFACTURING
We’ve modified the automated terraforming drone factory to produce
some more useful equipment. You can use this screen to order the
factory to make new items from raw materials. Keep an eye out for any
blueprints that we could use to manufacture new items.
COMMUNICATIONS
Check your email and see if there are any operations going on, or just
catch up on the gossip.
ENCYCLOPEDIA
Your electronic guide to the galaxy at large. The encyclopedia was
comprehensive enough when we stole it, and various crewmembers
have annotated it with extra information.
“You should have seen the place back in Lucrecia’s time!
Almost a hundred of us lived there. Let’s hope it’s all still
working - that was all a long time ago.”
Check the following sections for more information about
specific sections of the base computer interface.
The Hangar and Maintaining Your Ships
Different types of mission require different ships, also a different style of
equipment loadout. For example, a combat mission will normally require you to be
as heavily armed as possible, whereas a reconnaissance mission might be easier in
a fast lightly armed ship with an emphasis on stealth systems.
LOADOUT
The hangar menu displays your selected ship and the current loadout style you are
using. The following loadouts are available:
>
STANDARD: An all-purpose selection of systems and weaponry.
>
ASSAULT: Big guns and lots of missiles. Not a lot of subtlety, but it gets the
job done on particularly dangerous operations.
>
STEALTH: Light weapons and systems which reduce emissions and sensor
visibility. Not be the most efficient or powerful loadout, but your ship will be
much less likely to be spotted by police ships or unfriendly traffic.
>
ECM: This loadout is designed for neutralising ships without destroying them
– ideal for piracy so you’ll use this a lot. The weapon mix emphasises
electronic countermeasures like disruptors and LDSi missiles.
When you choose a loadout, your ship will be assigned the appropriate mix of
weapons and systems based on the loadout style and what is available in the
inventory. Choosing a new loadout will overwrite your previous selection, even if it
was manually customised, so take care.
When you launch, any ammo-fed guns and missile launchers will be automatically
reloaded, provided the ammunition is available.
CUSTOMIZE
Select the CUSTOMIZE button to tweak the current loadout for a specific mission or
your personal combat style.
ADD CARGO
If for some reason you need to deliver a cargo in person, select ADD CARGO, pick
an item from the inventory, and one pod of that cargo will be docked to your ship
when you launch.
MANIFEST
Use this to view all the details of the current loadout. You can also check to see if
the loadout is not spaceworthy for any reason.
Customizing Your Loadout
If you don’t feel the different loadout styles give enough control over your systems
and armaments, try using the customization interface to tweak them.
Menus
The customization process uses a series of nested menus. Each menu allows you to
alter the loadout of a specific part of the ship – a piece of equipment, a weapon
mount, or even an attached turret fighter, if we ever get hold of one.
Manual E_of_K GB 3rd 7/30/01 12:24 Page 42
Page 23

4544
Click the left mouse-button on a menu selection to enter a submenu or
attach that piece of equipment. Click the right button to leave the current
menu and return to the previous one.
The top-level menu displays a list of all the mount points on the ship,
and their current contents. Click a mount point to be presented with a
list of options. An option can be either a system to attach to that
mount point, or a menu containing a list of types of system which may
be attached. Navigate through the menus to the piece of hardware you
want, and when you attach it to the ship, the manifest window on the
right of the screen will update to show your changes.
Hardpoints
A hardpoint is a location on a ship that is hardened against stress and
therefore able to mount a weapon. Each ship has various types of
hardpoint:
>
Light hardpoint: For weak weapons.
>
Medium hardpoint: Can hold a wider range of weapons,
including missile launchers
>
Heavy hardpoint: Can hold the most powerful weapons
>
Countermeasure mount: Some ships have a special
countermeasure launcher. A missile launcher fitted to this mount
may only be loaded with flares and other decoys.
Countermeasures loaded here will be fired automatically if
missiles target your ship.
>
Pylon hardpoint: Most ships have at least one pylon. This
pylon can be used either to dock a turret fighter, or as a normal
weapon mount.
>
Pylon cannon mount: If a cannon is attached to a pylon
hardpoint, the resulting configuration is stable enough to mount
an extra missile launcher onto the gun itself.
“With all these hardpoints and options, it’s easy to see why a
lot of pilots let the automatic loadout do the work.”
Heat and power requirements
Most systems will generate heat and require power. The ship’s heat
sink and power plant can only handle a certain load (which you may be
able to increase by fitting a better plant or heat sink) so it is important
to watch the spare power and heat dissipation capacity while modifying
the loadout.
This information is updated whenever you make a change to the loadout, and it will
warn you if your modification has made the loadout dangerous.
If your ship can’t satisfy the power requirements, a power brownout will occur. One
or more systems will run at less than full efficiency or even shut down altogether.
More importantly, if the ship can’t dissipate the heat it generates, a heat build-up
could damage and possibly destroy the vessel.
Internal cargo space
Some systems, weapons and upgrades are big enough to require significant amounts
of space inside the hull. Larger ships tend to have more space for these systems
than smaller ships. The amount of internal cargo space available is updated
whenever you make a change to the loadout. If there is little or no free space remaining it may not be possible to fit certain large systems.
Further information
More information about specific ship systems, weapons and upgrades can be found
in the base encyclopedia.
Trading For Fun And Profit
We may be pirates, and we may want weaponry and upgrades for our ships, but it’s
rare to find and successfully raid a weapons convoy. Apart from anything else,
they’re usually heavily defended. We need to be able to trade the goods we do steal
for the weapons we want.
Luckily, if we don’t want something there’s usually someone in the Badlands who
does, and we have fences and other contacts who can arrange deals for us. If you
need to arrange a specific trade, access the trading system from the base
computer by selecting Trade.
Trades list
The trade screen displays a list of all the trading opportunities available to us. A
trade is always a barter arrangement – we’re illegal so the money markets are
closed to us. Instead, we give them something and we get something in return.
As a rule, we don’t trade away anything we could use on a ship – you never know
when things are going to come in handy…
For simplicity, all the trades are in amounts of one or more full pods of the cargos in
question.
Each trade displays the following information:
>
The faction offering the trade
>
What they offer
>
What they want. Note that this can be
something in a general category of cargo,
as well as a specific item
Manual E_of_K GB 3rd 7/30/01 12:24 Page 44
Page 24

4746
Doing the deal
To make a trade, highlight it and click TRADE. If you can satisfy the
trade’s requirements, one of our cargo pilots ships the goods out, and
returns with the desired item.
Getting tips
Below the trades list is a comments area. Our cargo pilots have a feel
for the value of goods, and can tell you if the trade you are about to
make is good value or not.
Manufacturing goods
While we can get a lot of what we need by trading, we still need to be
careful. It takes a lot of missiles to keep your ships loaded out, and
shipping those around in quantity might arouse suspicion.
Luckily, our base was once a bio bomber, and we’ve modified the
terraforming drone nano-tech factory to produce more useful items. We
have the blueprints for missiles and gatling cannon rounds, and we may
be able to find others.
With the right blueprints, we can manufacture more or less anything
that will fit through the doors, up to and including fighters and other
small ships. All we need are raw materials, and the same
nano-machines that assemble the new goods can break down
unwanted cargo into just that.
Raw materials are measured in manufacturing units.
Recycling
The recycling screen shows a comprehensive list of items that you
have in your inventory. It also shows the quantity of each item and its
value in manufacturing units.
To recycle an item, highlight it using the mouse, and then click
RECYCLE ONE or RECYCLE ALL, depending on your raw material
needs.
Manufacturing
The manufacturing screen shows a list of all the items we have blueprints for. Each
item has a cost in manufacturing units, so you need to have enough raw materials
before manufacturing the item. The manufacturing units available are shown at the
bottom of the screen.
To build an item, select it from the list and click MANUFACTURE. The cost will be
deducted and the new item will be added to your inventory.
“I don’t know if there’ll be any blueprints left now, but if we ever get the
base fully functional, we can even sell the goods we manufacture.”
Well, I couldn’t let Lefty and Xing Liu have all the fun – here are some useful tips I’ve
picked up along the way.
Lucrecia Johnston
The Law
Piracy is a capital crime. But then you knew that before you signed on, didn’t you?
The local police are a trigger-happy bunch, who take a dim view of our operations –
usually they will kill a suspect rather than go through the inconvenience of a trial.
Keep your distance from the cops if you can.
Cargo and pods
Nearly all the corporations and organisations in the Badlands Cluster operate large
transport vessels that ferry cargo between orbital space stations. This cargo often
contains juicy valuables that we want to get our hands on.
>::Piracy ::
Manual E_of_K GB 3rd 7/30/01 12:24 Page 46
Page 25

4948
Cargo is carried in standard 50 meter cargo pods, which are attached
to the sides of the transports for long journeys. The pods also have
small thrusters for moving the cargo around dockyards and storage
facilities without needing tugs. This makes life easy for us pirates,
since it isn’t necessary to send boarding parties onto freighters if we
can convince them to release the pods…
Persuasion
Most transport pilots are underpaid, and are not willing to risk their
lives for cargo they don’t even own. Force them to surrender with a few
blasts of your cannon, and they will eject their pods. Try and take out
the escort first, or you’ll be attacked while you’re busy with the
transport.
Once a transport has surrendered, let it go. I take a dim view of
needless bloodshed, and if the transport’s reactor explodes, you could
lose the cargo as well.
Hauling it home
You’ll need the help of a cargo pilot if you want to make off with more
than one pod at a time. On my operations we take care of all that, and
after you clear the area of hostiles a Search and Recovery Vehicle
(SnRV) will come in to pick up the pods.
“I think there might still be one of those in the base’s main bay.
But we’ll need to find a capable pilot.”
Inspect the pods using your MFD. SnRVs have a twelve-pod cargo
capacity, and you can specify exactly which pods to take by tagging
them. To do this, sub-target the pod by placing your reticle over it and
hitting Joystick Button 2 or the Y key. Tag a pod again to untag it.
Tagged pods are displayed in Light Blue on your contact list.
If you don’t specify which pods you want, the SnRV pilot will pick them.
“Check out your loot before you take it home. You’d be amazed
at the amount of raw sewage a decent sized space station
produces, and you don’t want that by mistake.”
Manual E_of_K GB 3rd 7/30/01 12:24 Page 48
Page 26

5150
CREDITS
EXECUTIVE PRODUCER
& DIRECTOR
Michael Powell.
ORIGINAL GAME DESIGN
Glyn Williams.
PROJECT LEAD
Rich Aidley.
PRODUCERS
Kim Blake,
Roger Godfrey.
LEAD PROGRAMMER
Will Vale.
PROGRAMMING
Carl Birkinshaw,
Chris Box,
Brett Laming,
Derek Marriott,
Tim Page.
ADDITIONAL PROGRAMMING
Derek Johnson.
LEAD DESIGNER
Nigel Kershaw.
DESIGN &
CONTENT SCRIPTING
Martyn Bramall,
James Moore,
Stephen Robertson.
ADDITIONAL
CONTENT SCRIPTING
Jack Aidley,
Alex Brown.
CONCEPT DESIGNS
Michael Todd,
Richard Wright,
Stephen Tappin.
LEAD REALTIME ARTIST
Matt Clark.
REALTIME ARTWORK
Jason Bowers,
Trevor Hairsine.
LEAD CGI ARTIST
Andy Turner.
CGI ARTWORK
Matt Clark,
Paul Clayton,
Rich Bentley,
Richard Wright,
Stephen Tappin,
Tim Brown,
Trevor Hairsine.
INTERACTIVE SCREENPLAY
Daniel Greenberg.
MUSIC
Chris Mann.
SOUND DESIGN
Andy Turner.
RECORDING
Outsource Media:
Mark Estdale,
Mike Timm.
VOICE TALENT
Cal: Doug Cockle,
Clay: Declan Wilson,
Smith: Stanley Townsend,
Jafs: Simon Smithies,
Az: Risa Hall,
Lori: Toni Barry,
Maas: Richard Sinnott.
Additional Voices
Laurence Bouvard,
Jo Cammack,
Martin Crocker,
Damian Gaskin,
Gilly Goodman,
Lewis Hancock,
Glen Kinch,
Lindsay Mac,
Fiz Marcus,
John Moriatis,
Joanna Swain,
John Tearney,
Zac Wilson.
MANUAL
Roger Godfrey,
Will Vale.
IT SUPPORT AND TESTING
Vincent Formosa.
INFOGRAMES SHEFFIELD
TEST PILOTS
QA Manager
Lewis Glover.
Supervisor
Robert D. Lunt.
Localization Test Supervisor
Danielle Perez.
Pre-Mastering
Chris Greatbatch.
Lead Testers
Sam 'Big Willy Shatner'
Attenborough,
Nick ‘Tel Star Destroyer’ Herring.
Testers
Ian 'Dark Helmet' Whitaker,
Ian 'Solo' Hammond,
Darren 'Flash' Sellars,
Steve ‘Budda 2001’ Blower,
Richard 'Lagrange' Arrowsmith,
Mark 'Bucko' Bridges,
Mick 'Ice Pirate' Sanderson,
Jack Bishop,
Mark Newton,
Matthew Eanor.
QA SAN JOSE
Director of Studio Operations
Michael Gilmartin
Lead Tester
Chris McQuinn
Testers
Jason Pope,
Scott Springer,
Chris Sur,
Don Gorday,
Jason Kausch,
Brian Turner
SPECIAL
PARTICLE SYSTEMS THANKS
Abbie,
Ruth Aidley,
Ash Colclough,
Sian Estdale,
Susan Grundy,
Katell Jentreau,
Anna Marriott,
Claire Powell,
Maria Scanlon,
Tim Randall,
Christine Robertson,
Matthew Robertson,
Katherine Rogers,
Kim Ryalls,
Vicky Trivett,
Micky Vale,
Kerry Warhurst,
Hannah Morton,
Paul Beaumont,
Donna McParland.
INFOGRAMES
PRODUCTION EXECUTIVE
VP label
Olivier Goulay.
Production Director
Eric Labelle.
UK Production Manager
Ivan Davies.
Producer
Simon Livesey.
Vice-President Marketing Europe
Larry Sparks.
Vice-President Production
and Publishing Europe
James North-Hearn.
Marketing director Label
Monique Crusot.
Vice-President
Certification and Quality
Jean-Marcel Nicolai.
SERVICES
Marketing manager Europe
Cindy Church.
Product manager Europe
Antoine Molant.
Marketing coordinator
Florence Rigaut.
Product manager assistant
Mathieu Piau.
Online Manager Europe
Renaud Marin.
Webmaster Europe
Marcin Kaczmarczyk.
Localisation Coordinator
Sarah Bennett.
Localisation manager (Europe)
Sylvianne Pivot.
Localisation manager (France)
Valerie Maillot.
Localisation Manager (Germany)
Heike Walther.
French localisation
KBP Productions.
German localisation
4-Real Intermedia GmbH.
Italian localisation
Project Synthesis.
Spanish localisation
Betafix.
Public relation manager
Matt Broughton.
Public relation executive
Lynn Daniel.
Production artists
Patrick Chouzenoux,
Michel Mégoz.
QUALITATIVE TEST
Co-Ordinator
Emmanuel Desmaris.
Assistant
Yan Schied.
Assistant
Jean-Yves Lapasset.
Qualitative Testers
Régis Philibert,
Stéphane Recoupe,
Lionel Billaud,
Aurélie Crawford,
Olivier Cannard,
David Ouk,
Christophe Chabal,
Stéphane Randanne,
Stéphane Rizzo,
Carl Buchholz.
COMPATIBILITY TEST
Co-Ordinator
Emeric Polin.
Compatibility Testers
Gregory Martinez,
Luc Henrion,
Guillaume Curt,
Rodric Rambosson,
Lionel Maseguer,
Guillaume Lestrat.
MARKETING FORCE
Arnaud Blacher,
Matthew Woodley,
Amanda Farr,
Penrose Tackie (UK),
Franck Holz,
Achim Schmauss (Germany),
Lisette Sprengers,
Bart Hufen (Benelux),
Pascale Vermeerbergen,
Beatriz Doval (Spain),
Pedro Reuter,
Duarte Nuno Vicente (Portugal),
Paolo Iacono,
Corine Beroud (Italy),
Dimitri Koulouris,
Daniel Petsaridis (Greece),
Noam Weisberg,
Gila Czitron (Israel),
Frederic Martin,
Glauco Bueno
(Brazil and South America),
Nathalie Cagossi,
Laure di Iorio (Japan),
Thomas Gutknecht,
Tino Pivetta (Switzerland),
Edward Fong,
Louise Malouf (Australia),
Martin Sirc,
Franz Mittermayer
(Scandinavia),
Aberle Rainer,
Gerald Kossaer,
Nikolaus Gregorcic (Austria).
PRESS RELATIONS
Aida Guerra (Spain),
Simon Callaghan (UK),
Alan King (UK),
Cecile Fouques Duparc (France),
Jerome Barbe (France),
Bart Hufen (Benelux),
Duarte Nuno Vivente (Portugal),
Guido Alt (Germany),
Michael Bratsch (Germany),
Frans Mittermayer
(Scandinavia),
Petra Steenhouwer
(Scandinavia),
Tino Pivetta (Switzerland),
Gila Czitron (Israel),
Glauco Bueno
(Brazil and South America),
Kym Warner (Australia),
Daniel Petsaridis (Greece),
Federica Bianco (Italy),
Gerald Kossaer (Austria).
SPECIAL THANKS TO
Emmanuelle Tahmazian,
Rose May Mathon,
Sylvie Combet,
Catherine Louvier,
Marie-Emilie Requien,
Neil Baltzer,
Eric Baesa,
Philippe Louvet,
Tony Duret,
Audrey Chapot,
Linda Bourdin,
Pierre Vu,
Helene Persod,
Rebecka Pernered,
Sophie Wibaux,
Nelly Jacquin,
Patricia Nowak,
Anne-Sylvie Genevrier,
Jake Tombs,
Viviane Arthur,
Caroline Fauchille,
Carly Singleton,
Franck Parker,
Lau Glendining,
Gemma Cox,
Ollie Green,
Cedric Astier,
Philippe Persebois.
Manual E_of_K GB 3rd 7/30/01 12:24 Page 50
Page 27

52
52
INFOGRAMES
US
EXECUTIVE PRODUCER
Christophe Gomez
Producer
Dave Brown
Marketing
Tom Richardson
Donna Cornwell
Marketing Services
Cecelia Hernandez
David Ellison
W.D. Robinson
Lead QA Analyst
Chris McQuinn
Assistant Lead QA Analyst
Jason Pope
QA Analysts
Donald Gorday III
Tom Andrade
Brian Turner
Dave “Red” Strang
Chris Plep
Ted Tomasko
Greg Hertager
Marquel Basurto
David Farrior
Gabe Sprague
Josh Prigg
David Cantwell
Compatibility Lab Supervisor
Dave Strang
Lead Compatibility Analyst
Geoffrey Douglas Smith
Compatibility Analysts
Randy Jones
Randy Buccholz
Greg Akatiff
Jason Duke
Ted Tomasko
Mike Le Doux
Special Thanks to:
David Abrams
Dorian Richard
Jean-Philippe, Jason, Erick, Cos,
Greg M., Gregg N., Patty
Francine, Matt, and Nicole.
INFOGRAMES
US
EXECUTIVE PRODUCER
Christophe Gomez
Producer
Dave Brown
Marketing
Tom Richardson
Donna Cornwell
Marketing Services
Cecelia Hernandez
David Ellison
W.D. Robinson
Lead QA Analyst
Chris McQuinn
Assistant Lead QA Analyst
Jason Pope
QA Analysts
Donald Gorday III
Tom Andrade
Brian Turner
Dave “Red” Strang
Chris Plep
Ted Tomasko
Greg Hertager
Marquel Basurto
David Farrior
Gabe Sprague
Josh Prigg
David Cantwell
Compatibility Lab Supervisor
Dave Strang
Lead Compatibility Analyst
Geoffrey Douglas Smith
Compatibility Analysts
Randy Jones
Randy Buccholz
Greg Akatiff
Jason Duke
Ted Tomasko
Mike Le Doux
Special Thanks to:
David Abrams
Dorian Richard
Jean-Philippe, Jason, Erick, Cos,
Greg M., Gregg N., Patty
Francine, Matt, and Nicole
Manual E_of_K GB 3rd 7/30/01 12:24 Page 52
 Loading...