


LUCASARTS AND THE LUCASARTS LOGO ARE TRADEMARKS OF LUCASFILM LTD.
© 2003 LUCASFILM ENTERTAINMENT COMPANY LTD. OR LUCASFILM LTD. & TM AS INDICATED. ALL RIGHTS RESERVED.
32607.260.AU

ACADEMY CURRICULUM
INSTALLING THE GAME .............................. |
3 |
STARTING THE GAME ................................. |
3 |
SINGLE-PLAYER MENU ............................... |
4 |
SETUP ..................................................... |
5 |
CONTROLS ............................................... |
8 |
CHARACTER CREATION ............................. |
12 |
CREATING A LIGHTSABER .......................... |
13 |
IN-GAME MENU ...................................... |
14 |
THE DATAPAD ......................................... |
14 |
ONSCREEN INTERFACE (HUD) .................... |
15 |
INTELLIGENT TARGETING RETICLE ................ |
16 |
WORLD AND CHARACTER INTERACTION ...... |
17 |
THE LIGHTSABER ...................................... |
17 |
LIGHTSABER TECHNIQUES .......................... |
17 |
LIGHTSABER COMBAT MOVES .................... |
18 |
ACROBATIC MOVES ................................. |
21 |
LIGHTSABER COMBAT STYLES .................... |
23 |
USING THE FORCE ................................... |
25 |
FORCE POWERS ...................................... |
25 |
WEAPONS ............................................. |
30 |
MULTIPLAYER MENU ................................ |
33 |
NEW MULTIPLAYER GAME TYPES ................ |
34 |
CLASSIC MULTIPLAYER GAME TYPES ........... |
36 |
GAMEPLAY TIPS ...................................... |
42 |
CREDITS ................................................ |
44 |
CUSTOMER SUPPORT ................................ |
45 |
SOFTWARE LICENCE AGREEMENT ............... |
46 |
1 |
STAR WARS JEDI KNIGHT: JEDI ACADEMY |
:0124 |
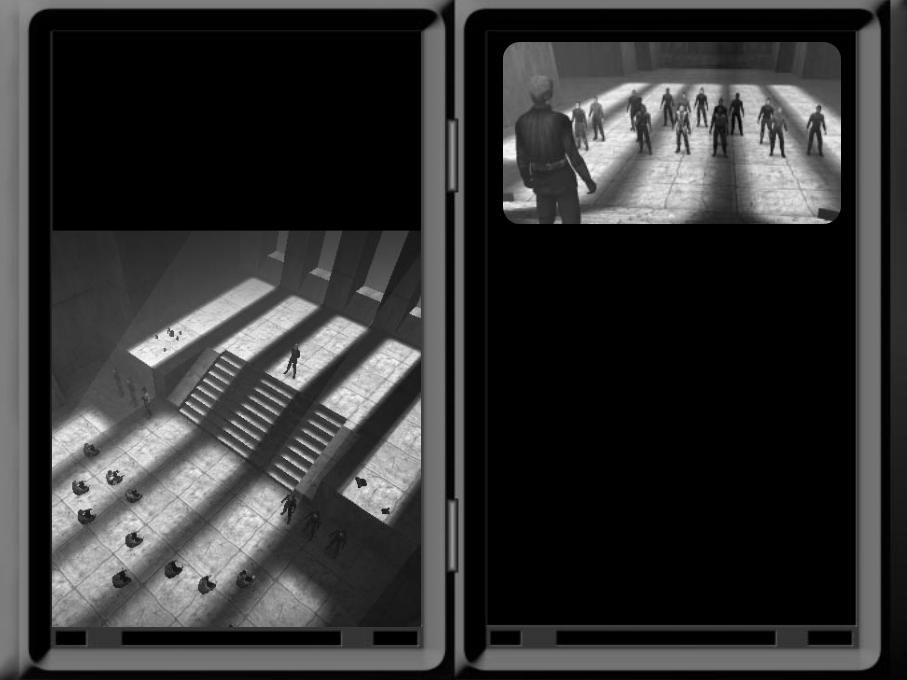
welcome to the jedi academy
Welcome, apprentice. I am Luke Skywalker, and it is my pleasure to inform you that you have been chosen to undergo training in the ways of the Jedi at the academy on Yavin 4. You are about to embark on a long and sometimes perilous journey, one in which you will learn more about yourself than you can possibly imagine. Here, we will train you in the ways of the Force. You will learn to defend yourself with a lightsaber. You will also study diplomacy, history, and more.
Should you complete the training, you will represent the Jedi Order as a guardian of peace and justice throughout the galaxy. The path before you is arduous, and not all will be able to complete the trials that lie ahead. Know also that the path to the dark side is ever present, and the temptations are many. Be mindful of your task at hand, and let the light guide you in all your decisions. Those who are successful will enter a brand new world within themselves. May the Force be with you.
padawan Orientation
INSTALLING THE GAME
To install Star Wars ™ Jedi Knight™: Jedi Academy™, insert the game CD into your CD-ROM drive. If you have Autorun enabled, the game’s Launcher will appear. Click the Install button to load the game onto your computer.
If your computer does not have Autorun enabled, open My Computer from your Windows desktop and double-click on the CD-ROM drive showing the Star Wars Jedi Knight: Jedi Academy icon. Double-click on the Jedi Academy Program icon to start installing the program. Once started, a series of onscreen instructions will guide you through the rest of the installation procedure. If you experience problems with the installation, click Help on the game’s Launcher screen, and then click View Readme. NOTE: We recommend turning off background applications and virus scanners before beginning installation.
STARTING THE GAME
Once the game is installed, you can begin playing Star Wars Jedi Knight: Jedi Academy. If you installed an icon onto your desktop, double-click the icon to access the game Launcher. From this menu you can start either the single-player or multiplayer game, or access Help files and troubleshoot your system. To view the Readme file, click Help on the Launcher screen, and then click View Readme.
NOTE: LucasArts’ customer support is only offered in the U.S. and Canada.
If no icon is present, open the Start menu from your Windows desktop, select Programs, LucasArts, and then the Star Wars Jedi Knight Jedi Academy folder. Next, select one of the available options. NOTE: The single-player and multiplayer versions of
Star Wars Jedi Knight: Jedi Academy are separate programs.
Your configuration and game settings for one version of the game will not transfer over to the other.
2 |
STAR WARS JEDI KNIGHT: JEDI ACADEMY |
:0124 |
3 |
STAR WARS JEDI KNIGHT: JEDI ACADEMY |
:0124 |

THE PATHS ARE MANY
SINGLE-PLAYER MENU
Click Single Player Game to launch the game and access the following options:
NEW GAME
Click to start a new game, and then choose a difficulty level: Padawan (easy), Jedi (normal), Jedi Knight (hard), and Jedi Master (hardest).
LOAD GAME
Load a previously saved game from an available list. You can also delete saved-game files from this screen.
SETUP
Select to view and/or customise the default settings for Video, Sound and more. See Setup on the following page for more information.
CONTROLS
Select to view and/or customise the default control settings. See Controls, page 8, for more information.
EXIT
Quit Star Wars Jedi Knight: Jedi Academy and return to your desktop environment.
NOTE: For information on multiplayer, see Multiplayer Menu on page 33.
STUDY THE SUM KNOWLEDGE OF
ALL WHO HAVE
COME BEFORE YOU.
choose wisely
SETUP
The Setup screen allows you to view and/or adjust the following graphical and sound settings:
VIDEO
Select this tab to adjust the game’s video settings for optimal performance on your machine. Users with high-end machines should be able to turn on most of these features. If you experience slow frame rates, you can come back and turn off options.
»VIDEO QUALITY: Choose from Normal, Fast, Fastest, Custom or High Quality. Each choice alters the remaining video settings to pre-set levels to adjust your system’s performance.
»VIDEO MODE: Adjust the video resolution of the game. Higher resolutions mean crisper graphics, but the frame rate may drop. Experiment to determine the best resolution for your video card.
»COLOUR DEPTH: Choose between Default, 16-Bit or 32-Bit colour. Default will set the game to the colour depth that your desktop is set to. Setting colour depth to 16-Bit may help increase performance.
»FULL SCREEN: If this option is turned off, you can run the game in a desktop window, provided your video card supports this feature.
»GEOMETRIC DETAIL: Select how much polygonal detail is represented in the game world. Selecting a lower setting will increase performance.
»TEXTURE DETAIL: Choose between Low, Medium, High or Very High. Higher detail requires more system resources.
»TEXTURE QUALITY: Default, 16-Bit and 32-Bit textures are available. NOTE: 32-Bit textures are the most system-intensive and
are not supported on all video cards.
»TEXTURE FILTER: Toggle between Bilinear and Trilinear graphics filtering. Trilinear filtering uses more system resources and is not supported on all video cards.
»DETAILED SHADERS: Turn off shaders if you are experiencing in-game slowdown.
»VIDEO SYNC: Synchronises the game’s frame rate with the refresh rate of your monitor.
4 |
STAR WARS JEDI KNIGHT: JEDI ACADEMY |
:0124 |
5 |
STAR WARS JEDI KNIGHT: JEDI ACADEMY |
:0124 |

MORE VIDEO
»BRIGHTNESS: Adjust the brightness of the game by moving this slider left or right. The number 6 should be barely visible, for optimum brightness.
»SHADOWS: Adjust the quality of shadows in the game from None, Simple or Volumetric. Volumetric utilises more system resources.
»DYNAMIC LIGHTS: Dynamic lighting is the use of flashing or changing lights in the game. This option drains system resources. Turn off to improve performance.
»DYNAMIC GLOW: Toggle to turn dynamic glow on or off for lightsabers and other glowing objects. This option drains system resources. Turn off to improve performance.
»LIGHT FLARES: Toggle to show halos around light sources.
»WALL MARKS: Toggle to see wall damage from weapon fire and lightsaber usage. Turning Wall Marks off will increase performance.
»ANISOTROPIC FILTER: If on, elements of the scene will appear smoother when viewed at near-edge angles. Your video card must support this feature before it can be turned on.
»DRIVER INFO: Click to view the driver information for the currently selected video card. This option helps you check if your video drivers are up-to-date.
NOTE: If you are experiencing problems with the game, consult this screen and your video card manufacturer to make sure you have the most up-to-date video drivers.
SOUND
»EFFECTS VOLUME: Use this slider to adjust the volume of weapon explosions and other ambient in-game sound effects as well as movie volume.
»MUSIC VOLUME: Change the volume of the music that plays during the game.
»VOICE VOLUME: The volume of character voices can be modified with this slider.
»SOUND QUALITY: Choose between Low and High sound settings. If you are experiencing slowdown in the game, try Low sound quality.
»EAX: Turns environmental audio on/off. Not all sound cards support EAX. Consult your sound card manual or your sound card manufacturer’s Web site to determine whether or not your sound card features EAX support.
NOTE: This game supports Creative's EAX 4.0 ADVANCED HD Environmental Audio technology to accurately simulate sonic effects such as Multi-Environment™ Environmental Panning™, occlusion, obstruction, and advanced reverberation in real time.
OPTIONS
»DRAW CROSSHAIR: Turns the targeting crosshair on/off.
»IDENTIFY TARGET: Turns crosshair target identification on/off.
»SLOW MOTION DEATH: Determines the frequency of slow motion death animations in the game.
»1ST PERSON GUNS: Toggles to first-person view when lightsaber is put away.
»FOOTSTEPS: Set the assets used for footsteps.
»MODEL DISMEMBERMENT: Toggles dismemberment from lightsaber attacks on/off.
»VIEW SWAYING: Turns camera movement caused by player movement on/off.
»TEXT: Select the language for all of the game’s text.
»VOICE: Choose the language for the characters’ speech.
»SUBTITLES: Choose from two settings: In Cinematic only shows subtitles during a cinematic cutscene. None will not display any subtitles.
MODS
If you have created or downloaded from the Internet a user-created modification or new level (collectively referred to herein as “MOD”), use this option to load it. IMPORTANT NOTICE: Your creation and/or distribution of any MOD is subject to the software license to which you agree by using the software, including, without limitation, all terms and conditions pertaining to the creation and distribution of MODs as stated in the software license. You are allowed to create MODs, subject to the restrictions in the software license, for personal recreational use, or for free distribution only. You are not permitted to sell or commercially distribute any MOD. USER-CREATED MODS ARE NOT SUPPORTED BY ANY ENTITY WHATSOEVER (INCLUDING LUCASARTS, RAVEN SOFTWARE, INC. AND/OR ACTIVISION PUBLISHING, INC.). A copy of the software license can be found at the end of this manual or by clicking the Options button on the Launcher menu.
DEFAULTS
Restores all settings, including controls, back to their factory defaults.
REPORT TO THE TRAINING ARENA AFTER ORIENTATION.
KYLE KATARN WILL FAMILIARISE YOU WITH THE GROUNDS
WHERE YOU WILL DO MOST OF YOUR HANDS-ON TRAINING.
6 |
STAR WARS JEDI KNIGHT: JEDI ACADEMY |
:0124 |
7 |
STAR WARS JEDI KNIGHT: JEDI ACADEMY |
:0124 |
controls
The Controls screen allows you to view and/or adjust the following options.
NOTE: The control settings listed here and throughout the rest of the manual are the default settings.
JEDI MOVES
|
|
FORWARD |
|
|
W or |
|
|||||||||
|
|
|
|
|
|
|
|
|
|
|
|
|
|
|
|
|
|
BACKPEDAL |
|
|
|
|
|
S or |
|
||||||
|
|
|
|
|
|
|
|
|
|
|
|
|
|
|
|
|
|
|
|
|
|
|
|
|
|
|
|
|
|
|
|
|
TURN LEFT |
|
|
|
|
|
|
|
|
|
|
|
|
|
|
|
|
|
|
|
|
|
|
|
|
|
|||||
|
TURN RIGHT |
|
|
|
|
|
|
|
|
|
|||||
|
RUN/WALK |
|
|
|
|
|
SHIFT |
|
|
|
|
|
|
||
|
|
|
|
|
|
|
|
|
|
|
|
||||
STEP LEFT |
|
|
|
|
, |
or |
|
A |
|
|
|
|
|||
|
|
|
|
|
|
|
|
|
|
|
|
|
|
|
|
STEP RIGHT |
|
|
|
|
. or |
|
D |
|
|
|
|
||||
SIDESTEP/TURN |
|
|
|
V |
|
|
|
|
|||||||
|
|
|
|
|
|
|
|
|
|
|
|
|
|
|
|
UP/JUMP |
|
|
SPACEBAR |
|
|
||||||||||
|
|
|
|
|
|
|
|
|
|
|
|
|
|
|
|
DOWN/CROUCH |
|
|
C |
|
|||||||||||
|
|
|
|
|
|
|
|
|
|
|
|
|
|
|
|
LEAN |
|
|
Hold USE + Step |
Left |
|||||||||||
|
|
|
|
|
|
|
|
or Step Right |
|||||||
|
|
|
|
|
|
|
|
|
|
|
|
|
|
|
|
|
|
|
|
|
|
|
|
|
|
|
|
|
|
|
|
JEDI INTERACTION |
|||||||||||||||||||||
|
|
|
|
|
|
|
|
|
|
|
|
|
|
|
|
|
|
|
|
|
|
|
|
|
|
|
|
ATTACK |
|
|
|
|
CTRL or Left Mouse Button [MOUSE 1] |
|
|
|
|||||||||||||||||
|
|
|
|
|
|
|
|
|
|
|
|
|
|
|
|
|
|
|
|
|
|
|
|
|
|
|
|
ALTERNATE |
|
|
ATTACK |
|
ALT or Right Mouse Button [MOUSE |
2] |
|
|
|
|
|
||||||||||||||
|
LIGHTSABER |
|
|
STYLE |
|
L [select the key to use to switch |
|
between |
|
|
|
Lightsaber |
|
|
||||||||||||
|
|
|
|
|
|
|
Combat Styles when multiple |
|
styles |
are |
|
|
available] |
|
|
|||||||||||
|
USE |
|
|
|
|
|
ENTER |
|
or R |
|
|
|
|
|
|
|
|
|
|
|
|
|||||
|
LOOK UP |
|
|
|
|
|
PAGE |
|
UP |
|
|
|
|
|
|
|
|
|
|
|
|
|
|
|
|
|
|
|
|
|
|
|
|
|
|
|
|
|
|
|
|
|
|
|
|
|
|
|
|
|
|
|
|
|
|
|
|
|
|
|
[or move mouse |
forward |
if |
Mouse |
Look |
is |
|
enabled] |
|
|
||||||||||
|
LOOK DOWN |
|
|
|
PAGE DOWN |
|
|
Look |
|
is enabled] |
|
|||||||||||||||
|
|
|
|
|
|
|
|
|
|
|
|
|
|
|
|
|
|
|
|
|
|
|||||
|
|
|
|
|
|
[or move mouse backward if Mouse |
|
|
||||||||||||||||||
|
MOUSE LOOK |
|
|
/ [also can be toggled on/off as Free Look |
|
on |
|
|||||||||||||||||||
|
|
|
|
|
|
Mouse/Joystick menu] |
|
|||||||||||||||||||
|
|
|
|
|
|
|
|
|
|
|
|
|
|
|
|
|
|
|
|
|
|
|
|
|
|
|
|
CENTREVIEW |
|
END |
|
||||||||||||||||||||||
|
|
|
|
|
|
|
|
|
|
|
|
|
|
|
|
|
|
|
|
|
|
|
|
|
|
|
|
|
|
|
|
|
|
|
|
|
|
|
|
|
|
|
|
|
|
|
|
|
|
|
|
|
|
WEAPONS
Star Wars Jedi Knight: Jedi Academy includes an array of weapons players will acquire during gameplay. After leaving the academy for your first mission you are given two weapons, and you gain more weapons as you progress. Weapons can be picked up off the ground by running or walking over them. If you can’t get close enough to an object, press the Use key to grab it. Ammo packs for weapons are picked up in a similar fashion. For more information, see Weapons starting on page 30.
|
|
|
|
|
|
|
|
|
|
|
|
|
|
|
|
|
|
|
|
MELEE/LIGHTSABER |
1 |
|
|
|
|
||||||||||
|
|
|
|
|
|
|
|
|
|
|
|
|
|
|
|
|
|
|
|
BLASTER |
|
PISTOL |
2 |
|
|
|
|
||||||||
|
|
|
|
|
|
|
|
|
|
|
|
|
|
|
|
|
|
|
|
BLASTER |
|
RIFLE |
|
|
|
|
|
|
|
|
3 |
|
|
|
|
|
|
|
|
|
|
|
|
|
|
|
|
|
|
|
|
|
|
|
|
DISRUPTOR |
|
|
RIFLE |
|
|
|
|
|
|
|
4 |
|
|
|
|
|
|
BOWCASTER |
|
|
|
|
|
|
|
|
|
|
|
|
|
|
|
|
|
|
|
|
|
|
|
|
|
|
|
|
|
|
|
||
|
|
|
|
|
|
|
|
|
|
|
5 |
|
|
|
|
||
|
|
HEAVY REPEATER |
|
|
|
|
|
|
|
|
|
|
|
|
|||
|
|
|
|
|
|
|
|
|
|
|
|
|
|
||||
|
|
|
|
|
|
|
|
|
6 |
|
|
|
|
||||
|
|
|
|
|
|
|
|
|
|
|
|
|
|
|
|||
|
|
DEMP 2 |
|
|
|
|
|
|
|
7 |
|
|
|
|
|||
|
|
|
|
|
|
|
|
|
|
|
|
|
|||||
|
|
|
|
|
|
|
|
|
|
|
|
|
|||||
|
|
|
|
|
|
|
|
|
|
|
|
|
|
|
|||
|
|
FLECHETTE |
|
|
|
|
|
|
|
8 |
|
|
|
|
|||
|
|
CONCUSSION |
RIFLE |
|
|
|
|
|
|
9 |
|
|
|
|
|||
|
|
MERR-SONN |
|
|
|
|
|
|
|
|
|
|
|
|
|||
|
|
|
|
|
|
|
|
|
0 |
|
|
|
|
||||
|
|
THROWABLE |
WEAPONS |
|
|
|
|
|
|
|
|
|
|
||||
|
|
|
|
|
|
|
|
|
|
|
|
||||||
|
- |
(Thermal |
Detonators/Tripmines/Detpacks) |
|
|
|
|
|
|||||||||
|
|
|
|
|
|
|
|
|
|
|
|
|
|
|
|
|
|
|
|
NEXT WEAPON |
] (or scroll down using the mouse |
wheel) |
|||||||||||||
|
|
|
|
|
|
|
|
|
|
|
|
|
|
|
|
|
|
|
|
PREVIOUS WEAPON |
[ (or scroll up using the mouse wheel) |
||||||||||||||
|
|
|
|
|
|
|
|
|
|
|
|
|
|
|
|
|
|
YOUR EYES CAN DECEIVE YOU.
DON’T TRUST THEM.
STRETCH OUT WITH YOUR FEELINGS.
BUT BEWARE OF THE DARK SIDE.
8 |
STAR WARS JEDI KNIGHT: JEDI ACADEMY |
:0124 |
9 |
STAR WARS JEDI KNIGHT: JEDI ACADEMY |
:0124 |
FORCE POWERS
Only a limited number of Force powers are available at the beginning of the game. As you acquire them, you will be able to scroll through the available list by pressing the E and Q keys, and then pressing the F key to use the chosen power. You can also bind, or assign, Force powers to a Function key for immediate use.
|
|
JUMP |
|
|
|
|
SPACEBAR [Hold Down] |
PROTECT |
Unbound |
|
|||||||
|
|
|
|
|
|
|
|
|
|
|
|
|
|
|
|
|
|
|
|
PUSH |
|
|
|
|
F1 |
DRAIN |
|
Unbound |
|
||||||
|
|
PULL |
|
|
|
|
F2 |
|
|
|
|
GRIP |
|
|
|
Unbound |
|
|
|
SPEED |
|
|
|
F3 |
|
|
|
|
LIGHTNING |
|
|
|
Unbound |
|
|
|
|
SENSE |
|
|
|
F4 |
|
|
|
|
DARK RAGE |
|
|
|
Unbound |
|
|
|
|
|
|
|
|
|
|
|
|
|
|
|
|||||
|
|
ABSORB |
|
|
|
Unbound |
|
|
|
USE FORCE |
POWER |
|
F |
|
|
||
|
|
HEAL |
|
|
|
|
|
|
|
|
|
|
E |
|
|
||
|
|
|
|
Unbound |
FORCE NEXT |
|
|
|
|||||||||
|
|
MIND |
TRICK |
|
Unbound |
FORCE PREVIOUS |
Q |
|
|
||||||||
|
|
|
|
|
|
|
|
|
|
|
|
|
|
|
|
|
|
|
|
|
|
|
|
|
|
|
|
|
|
|
|
|
|
|
|
QUICK KEYS
These keys quickly help you call up important features of the game, including your Datapad and the options to access your save and load menus.
DATAPAD |
TAB or M |
SAVE MENU |
F11 |
LOAD MENU |
F10 |
QUICK SAVE |
F12 |
QUICK LOAD |
F9 |
NOTE: If you die during gameplay, you are given the following options: Load Checkpoint, Load Saved Game, Instant Load or select a New Mission.
MOUSE/JOYSTICK
Set up, adjust, enable and disable miscellaneous mouse and joystick options.
FREE LOOK |
When toggled on, the mouse controls the view of |
(Multiplayer Only) |
the player. |
INVERT MOUSE |
Switch the Y-axis of the mouse. |
SMOOTH MOUSE |
Should usually be set to on, but if you experience |
|
difficulties with your mouse, try turning it off. |
SENSITIVITY |
Move this slider to adjust the mouse sensitivity. Lower |
|
settings result in slower mouse speeds. |
ENABLE JOYSTICK |
Turn joystick support on/off. |
X-AXIS AS BUTTONS |
Turns on/off X-axis movement on the mouse or joystick. |
Y-AXIS AS BUTTONS |
Turns on/off Y-axis movement on the mouse or joystick. |
THRESHOLD |
This slider changes the joystick sensitivity. |
FORCE FEEDBACK |
Turns force feedback on/off for supported input devices. |
|
OTHER |
ALWAYS RUN |
Toggles player’s movement speed between run and walk. |
AUTO SWITCH |
Choose whether to switch weapons when a new one |
|
is picked up. The three settings are as follows: |
|
» Higher Weapon When Safe: Only switch to |
|
newly acquired weapons. |
|
» Always Higher Weapon: Always switch to a |
|
better weapon. |
|
» Don’t Switch: Prevents automatically switching |
|
weapons. |
3RD PERSON |
P (Switch between firstand third-person camera views |
|
while wielding in-view, non-lightsaber weapons.) |
10 |
STAR WARS JEDI KNIGHT: JEDI ACADEMY |
:0124 |
11 |
STAR WARS JEDI KNIGHT: JEDI ACADEMY |
:0124 |
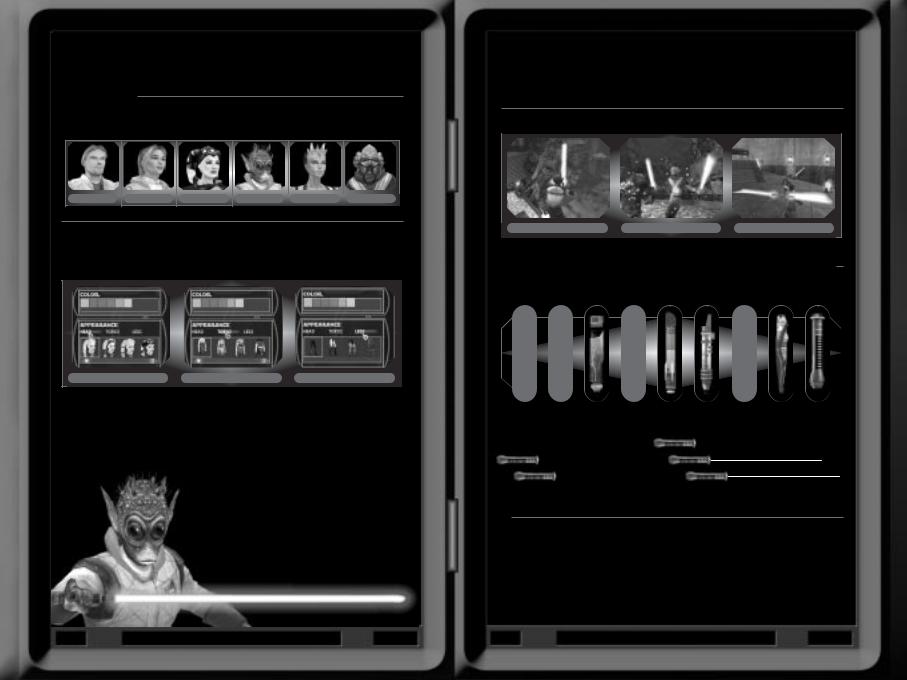
CHARACTER CREATION
Before training can begin, all students must first customise their appearance using the following options:
SPECIES/GENDER Choose between Human Male, Human Female, Twi’lek Female, Rodian Male, Zabrak Female or Kel Dor Male.
HUMAN MALE |
HUMAN FEMALE |
TWI’LEK FEMALE |
RODIAN MALE |
ZABRAK FEMALE |
KEL DOR MALE |
COLOUR |
Select an outfit or skin-tone colour from nine choices. |
|
|
|
|
HEAD/TORSO/LEGS |
Select an appearance for each from a variety of styles, |
|
|
colours and choices. |
|
HEAD |
TORSO |
LEGS |
After choosing an appearance, click Next to go to the lightsaber creation screen.
A JEDI CAN FEEL THE FORCE
FLOWING THROUGH HIM.
CREATING A LIGHTSABER
The lightsaber is the preferred weapon of the Jedi. Before entering the academy, all students are required to customise their lightsaber from the available list of options. For more information on specific types, see Lightsaber Techniques on page 17.
SABER TYPE |
Choose between Standard, Dual and Double-Bladed lightsabers. |
||
STANDARD LIGHTSABER |
DUAL LIGHTSABER |
DOUBLE-BLADED LIGHTSABER |
|
NOTE: Only the Standard Saber is available when starting a new game.
SABER HILTS |
Nine lightsaber hilts are available at the start of the game. Students |
||
|
should choose whichever hilt fits their personality best. |
||
|
|
|
|
|
|
|
|
|
|
|
|
BLADE COLOUR |
Choose from five lightsaber colours: blue, green, orange, purple |
||||||||||
|
|
|
or yellow. |
||||||||
|
|
|
|
|
|
|
|
|
|
|
|
|
|
|
|
|
|
|
|
|
|
|
|
|
|
|
|
|
|
|
|
|
|
|
|
|
|
|
|
|
|
|
|
|
|
|
|
|
|
|
|
|
|
|
|
|
|
|
|
|
|
|
|
|
|
|
|
|
|
|
|
COMBAT STYLE Choose from Fast, Medium or Strong style, when available.
NOTE: Only Medium Combat Style is available when starting a new game.
After deciding on an appearance and creating a lightsaber, it is time to enter the academy. Select Begin Game to start.
TURN YOUR LIGHTSABER OFF
WHEN NOT IN USE.
12 |
STAR WARS JEDI KNIGHT: JEDI ACADEMY |
:0124 |
13 |
STAR WARS JEDI KNIGHT: JEDI ACADEMY |
:0124 |
In-Game MENU
During training, press the ESC key to access the in-game menu. From here students can save their current game, load a previously saved game and adjust gameplay options. To quit playing, select Exit Game. To return to the game, select Resume Game. This menu functions the same way as the game’s Main Menu.
NOTE: Students may also use the Quick Save feature from within the game to quickly save their progress.
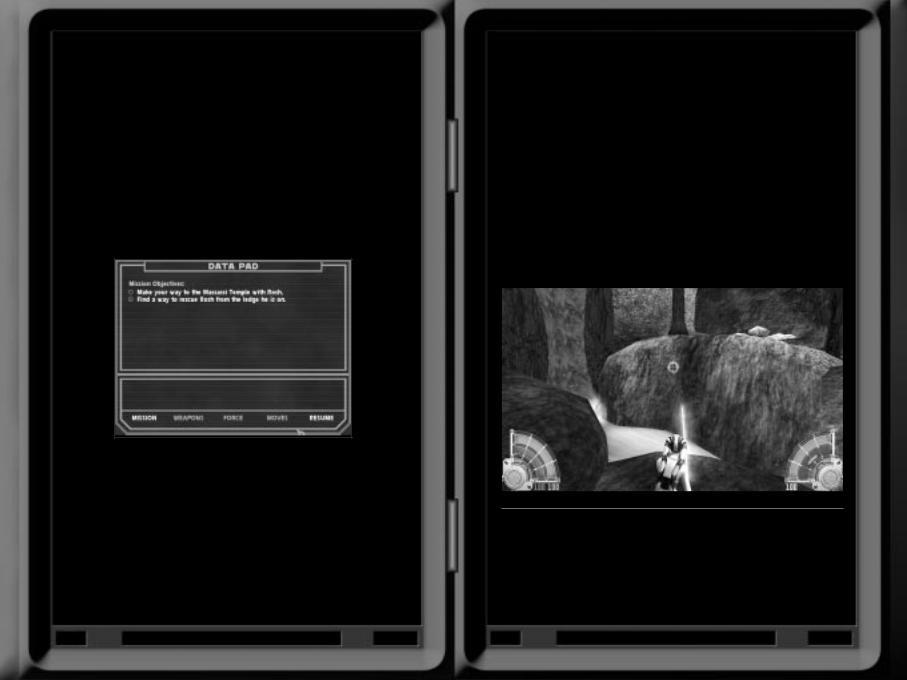
the DATAPAD
All students are given access to a Datapad (TAB key), which serves as a personal digital assistant, allowing them to review mission objectives as well as their current arsenal of Force powers, weapons and combat moves.
NOTE: Once completed, the circle next to the objective will be filled in.
Once the Datapad is open, the mission objectives are displayed in the text window. Students can also access the following options from the bottom of the Datapad screen by clicking on them:
MISSION |
After clicking on another tab, click this tab to return to the mission |
|
objective information. |
WEAPONS |
See a description of all currently available weapons. |
FORCE |
Current Force powers are displayed here, including information on |
|
each power’s rank. See Force Powers, page 25, for more information. |
MOVES |
How to execute acrobatic moves, flips, wall runs and other special |
|
maneuvers are described in detail here. |
NOTE: Students can click or on the Weapons and Force tabs to move between specific items. Click the Resume button to return to the game.
ONSCREEN
INTERFACE [HUD]
One of the most valuable tools a student has is the onscreen interface, or HUD. Some students may recognise this display from previous journeys. Those who aren’t as familiar with the interface should take a moment to review this lesson.
LEFT STATUS |
This display shows a student’s shield and health status. The |
DISPLAY |
number and bar appearing in red represent health. Full |
|
healthequals 100 units. The number and bar appearing in |
|
green represents the student’s personal shield strength. |
|
Shields absorb all energy-based attack damage, but do not |
|
function against damage caused by falling or being crushed. |
14 |
STAR WARS JEDI KNIGHT: JEDI ACADEMY |
:0124 |
15 |
STAR WARS JEDI KNIGHT: JEDI ACADEMY |
:0124 |
 Loading...