

Page 1

Information in this document, including URL and other Internet Web site references,
is subject to change without notice. Unless otherwise noted, the example companies,
organizations, products, people and events depicted herein are fictitious and no
association with any real company, organization, product, person or event is intended
or should be inferred. Complying with all applicable copyright laws is the responsibility of the user. Without limiting the rights under copyright, no part of this document
may be reproduced, stored in or introduced into a retrieval system, or transmitted in
any form or by any means (electronic, mechanical, photocopying, recording, or
otherwise), or for any purpose, without the express written permission of Microsoft
Corporation.
Microsoft may have patents, patent applications, trademarks, copyrights, or other
intellectual property rights covering subject matter in this document. Except as
expressly provided in any written license agreement from Microsoft, the furnishing of
this document does not give you any license to these patents, trademarks, copyrights,
or other intellectual property.
© 2000 Digital Anvil, Inc. All rights reserved.
Portions © 2000 Microsoft Corporation. All rights reserved.
DIGITAL ANVIL and CONQUEST are either registered trademarks or trademarks of
Digital Anvil, Inc. [Digital Anvil Holdings, Inc.] in the United States and/or other
countries/regions.
Microsoft, MS-DOS, Windows, Windows NT, the Windows logo, DirectX, and MSN
are either registered trademarks or trademarks of Microsoft Corporation in the
United States and/or other countries/regions.
The names of actual companies and products mentioned herein may be the
trademarks of their respective owners.
1000 Part No. X05-94983
Page 2

AN INTRODUCTION TO YOUR FIELD MANUAL
Greetings.
The Field Manual you hold in your hand is the latest word on every
ship, building, and technology—friendly or otherwise—that a new
commander might run into on the edge of the galaxy. The Terran Navy
wants to remind you to think before you speak about the things here
discussed, and especially before you hand over your copy to someone
else. Much of this information is still unknown to the general public,
meaning you shouldn’t give it to the Terran populace. And it’s far too
detailed to give to an alien—while many of these details may seem
innocuous to you, the decision over which details on our equipment
to reveal to our allies rests on much higher shoulders.
In the manual, you’ll learn how to control your vessels, make alliances,
and if necessary (and it is often necessary) go to war. We’ve worked
extremely hard to provide you with reports on the alien races we’ve
encountered, along with detailed descriptions of their materiel. For
your enlightenment, we’ve also included a glimpse at how our alien
allies see us—it is an eye-opener.
That is all. Use the manual. Don’t sell it or give it away to the enemy.
Loose lips sink ships, Gentlemen. Think of your Field Manual as one
great big flapping lip.
__________________________
Signature
Admiral Len Wolfman
Witnessed by:
__________________________
Signature
Foreword
1
Page 3

CHAPTER 1—QUICK START 3
Main Menu .................................................................................................. 4
Single Player and Multiplayer .................................................................. 4
The Lay of the Land.................................................................................. 5
Game Parameters ..................................................................................... 8
User Interface .......................................................................................... 10
Game Menu and Options Screen ........................................................ 20
CHAPTER 2—STAKING YOUR CLAIM
IN THE GALAXY 22
Building Headquarters ........................................................................... 23
Building Fabricators ................................................................................ 23
Constructing Platforms ......................................................................... 24
Mining Resources .................................................................................... 24
Building and Commanding Ships.......................................................... 25
Exploring and Establishing Supply Lines ............................................. 27
Resupplying and Repairing Units ......................................................... 28
Commanding Fleets ................................................................................ 30
Using Diplomacy ..................................................................................... 31
CHAPTER 3—RESOURCES AND
THE ENVIRONMENT 33
Resources ................................................................................................. 34
Command Points .................................................................................... 34
Finding Resources ................................................................................... 35
CHAPTER 4—TERRANS 39
History ...................................................................................................... 40
Technology ............................................................................................... 41
CHAPTER 5—MANTIS 55
History ...................................................................................................... 56
Technology ............................................................................................... 57
CHAPTER 6—CELAREONS 71
History ...................................................................................................... 72
Contents
Technology ............................................................................................... 73
APPENDIX A—UNIVERSAL UPGRADES 86
APPENDIX B—HOTKEYS 87
INDEX 93
2
Page 4

CHAPTER 1—QUICK START
To install
1 Insert the Microsoft® Conquest: Frontier Wars™
compact disc into the CD-ROM drive.
2 Click Install, and then follow the instructions on
the screen.
To st ar t
1 Insert the Microsoft Conquest: Frontier Wars
compact disc into the CD-ROM drive.
2 Click Start on the taskbar, point to Programs,
Microsoft Games, and Conquest: Frontier
Wars, and then click Conquest: Frontier Wars.
For additional information about installing or starting
Conquest: Frontier Wars, see the Readme file on the
compact disc.
3
Quick Start
Page 5

Main Menu
Opening Movie Plays the opening movie to Conquest: Frontier
Wars.
Single Player Begins a single-player game—either the Terran
campaign or a Mantis or Celareon training mission, a quick battle, or a
game that you previously saved.
Multiplayer Begins a multiplayer game.
Options Displays the Options screen, where you can adjust volume,
cursor sensitivity, fog of discovery, and so forth.
About Provides brief information about your version of Conquest:
Frontier Wars, including your product identification number. Also
credits the team behind the Frontier Wars.
Quit Exits Conquest: Frontier Wars.
Single Player and Multiplayer
Single Player
For a single-player game, you have the following choices.
Campaign As a green commander of the Terran Naval Forces, wade
through the missions of intergalactic war in the Terran campaign.
Watch your admirals become heroes, and take charge of their destiny.
If you want to familiarize yourself with the other races, Mantis and
Celareon training is also available here.
Chapter 1
Quick Battle Go head-to-head with the computer with game and
map parameters that you determine. You can play as any race: Terran,
Mantis, or Celareon. You can also form fleets and command the
admirals who lead them.
Load Campaign Saved Game Load and play games you’ve
previously saved.
Load Quick Battle Game Load and play quick battles you’ve
previously saved.
4
Page 6

Multiplayer
Practice your bloodthirsty cunning, honey-tongued diplomacy, and
admiral command against the living and breathing over the Internet or
LAN.
To create or join a multiplayer game
1 On the main screen, click Multiplayer.
2 Select the type of network connection you want for your
multiplayer game, and then click Next.
MSN™ Gaming Zone Connects through the Zone on the
Internet, where you can start or join a game. If you select this
connection type, your browser will automatically open and point
you to the Zone. Follow the instructions that appear on the
screen.
TCP/IP (Local Area Network) Lets you create your own
game or join one on a LAN via a TCP/IP connection.
TCP/IP (Internet) Lets you create or join a game on the
Internet via a TCP/IP connection.
3 To join an existing game, select a game in the list and then click
Next (LAN), or select Join, type the IP address that is hosting the
game you want to play, and then click OK (Internet).
–or–
To create a new game, select Create New Game (LAN) or
select the Create option (Internet), and then click Next.
4 If you are creating a game, you can set the parameters of the game
in the Multiplayer Lobby, select Lock Settings, and then wait for
other players to join.
–or–
If you are joining a game, select Accept when you are satisfied
with the game settings.
Quick Start
The Lay of the Land
Your goal as a commander in the Frontier Wars will be to explore and
secure sector after sector of the galaxy. Understanding a few basic
concepts right away will allow you to jump immediately into the
5
Page 7

Terran campaign or to determine favorable game parameters if you
will be playing a multiplayer game or a quick battle.
Sectors, Systems, and Supply Lines
Divided areas of the galaxy are known as sectors—vast in size and
light-years from one another. Sectors themselves are composed of
multiple systems. Luckily, wormholes connect many systems to one
another and can be used as a means of navigating between systems.
And recent developments now allow us to use these wormholes
more safely by protecting them with Jump Gates, but this provides an
all-new challenge. Commanders must now be able to think strategically—and keep their forces supplied—across multiple systems.
When messing around in your home system, unit supply is simple, but
once you begin to expand your territory success relies on intact
supply lines to ensure that individual ships and fleets have enough
supplies on board to perform optimally. System supply refers to
whether or not your current system has an uninterrupted supply line
to a Headquarters, and this is provided via Jump Gate–protected
wormholes. If a Jump Gate on your supply line is destroyed, your
supplies are compromised and your fleets are at risk. Get stuck in an
ill-supplied remote system, and you could find yourself in an ambush
with little means of repelling it.
For information about unit supply, see “Resupplying and Repairing
Units,” in Chapter 2. For information about system supply, see “Exploring and Establishing Supply Lines,” in Chapter 2.
Chapter 1
Races
Until recently, the idea of having a section on races in a war manual
would have been absurd—but no longer. We’re not alone: There are
three major players on the board, and we the Terrans are the newbies.
For the history and details about the units and technology of each
race, see Chapters 4 through 6. For an at-hand summary of each race’s
technology path, see the Conquest: Frontier Wars Quick Rescue Card.
6
Page 8

Terrans
Unless you’ve stolen this manual, most likely
Terran means you. The Terrans are a diplomatic race with the intention of exploring the
heavens for new life, new worlds, and new
technologies. The most balanced of the three
races, the Terrans have very capable small,
medium, and large ship-to-ship combatants; long-range strike capability;
and high-tech special weapons. Ore is the key resource of such an
armada, so a top-notch harvesting operation is mandatory.
Mantis
The Mantis are an insect-evolved race that
we can best describe as predatory. They’re
volatile and expansionist, with a low tolerance for coexistence with other species. The
Frontier Wars began, oddly enough, as a civil
war on the Mantis homeworld and spilled
over when we got involved. Mantis ships are
based on the importance of numbers and rely on swarming tactics and
evolution. They lean heavily on light-hulled carriers—so heavily that
even scout ships house fighter wings. They search the galaxy for a new
homeworld, so the sector you save may be yours.
Celareons
The most mysterious of the three races, the
Celareons seem to be an old enemy of the
Mantis. Thus, they’re an ally of the Terrans,
but there’s no telling if we could count ’em
as friends. They appear to be so highly
evolved that they may in fact possess no
corporeal form, just energy inside armor.
Celareon ships are highly advanced, built
chiefly for exploration, with defense as the leading design concern.
These ships are fast and stealthy, and even their tricks have tricks up
their sleeves.
Quick Start
7
Page 9

Resources and the Environment
As you lead your fleet across the far-flung reaches, you better make
sure you have plenty of resources. The good news is, our harvesting
technology is pretty advanced, with Refineries, Harvesters, the Marine
Training Facility, and numerous upgrades.
Resources come in three major types: ore, gas, and crew. The environment is full of planets, nebulae, and asteroid fields that contain these
resources. And don’t forget that recycling is also important in deep
space, so sweep debris fields, too.
Although not a natural resource, command points must also be monitored to keep your operation running. Command points are awarded
when you build certain types of platforms, such as Headquarters, and
they are required when you build units as a means of commanding
those units.
For details about resources and the environment, see Chapter 3. For
information about harvesting these resources, see “Mining Resources,”
in Chapter 2.
Game Parameters
Because quick battles and multiplayer games are defined by you and
(in multiplayer) by your opponents before the game starts, there are
options to keep in mind.
Chapter 1
Random Map Generation
The random map generator is a way to play on maps that vary in size
and scope. The generator will make intelligent placement of terrain
elements, planets, and wormholes. There are several parameters you
can set for your map.
Battle Map Indicates a Random battle map.
Game Speed Determines how fast your game progresses. With the
default setting, real time equals game time. You can make game time
faster or slower than real time by adjusting the slider.
Starting Resources Determines the amount of resources all
players start with.
8
Page 10

Game Type Shows the game type—destroying all platforms and
construction ships is the default objective.
Number of Systems Determines how many systems the sector
will have.
Map Size Determines how large the systems in the sector will be.
Terrain Determines the density of the terrain throughout the
sector.
Visibility Determines what you see—or don’t see—at the begin-
ning of a game. Normal means you will have to explore all territory to
see it, Explored means the fog of discovery is lifted but not the fog of
war, and All Visible means the fog of both war and discovery is lifted so
players can see all.
Starting Base Determines the number and types of platforms and
ships you will have at the beginning of a game.
Game Settings
While choosing your map parameters, you will also have the opportunity to decide on some general game settings.
Spectators Allows a player who is defeated to remain an observer
of the game as the remaining players battle it out. Spectators cannot
communicate with anyone in the game via chat.
Lock Alliances Prevents players from changing alliances in the
Diplomacy screen during the game.
Lock Settings (Multiplayer hosts only) Indicates to players the
game is ready and prevents players from changing game settings after
the game has begun.
Accept (Multiplayer only) Indicates that you accept the settings and
are ready to play.
Races
The race you choose to play greatly affects your strategy and the
course of your game. For general information about choosing a race
for a quick battle or multiplayer game, see “The Lay of the Land,”
earlier in this chapter.
Quick Start
9
Page 11

User Interface
The Conquest: Frontier Wars game screen has all the controls you
need to command your race to victory. The main screen is where you
watch the action, navigate, and command first-hand. The resource bar
along the top of the game screen and the toolbar along the bottom
allow you to keep a close eye on the details of your game and specify
what you want your units to do.
Resource Bar
The resource bar provides detail about the resources the player
currently has and contains some buttons that do not directly affect
ships and units. From left to right, the components of the resource bar
are as follows.
Chapter 1
System Supply
Command Points
Ore
System Supply Indicates whether or not the system you are
currently in is in supply. A green icon means the system is in supply; a
red icon means it is not.
Command Points Displays how many command points you are
currently using and how many you have available to use. When more
command points are needed, this indicator will flash red.
Ore Displays how much ore you currently have available to use and
the maximum you can store.
Gas Displays how much gas you currently have available to use and
the maximum you can store.
Crew Displays how much crew you currently have available to use
and the maximum you can store.
Diplomacy Opens the Diplomacy screen, where you can change
alliances with and give resources to other players.
Gas
Crew
Game Menu
Chat
Diplomacy
Mission Objectives
10
Page 12

Chat Displays the Chat screen, which allows communication with all
other active players. This does not pause the game.
Game Menu Displays the game menu, where you can save, load,
and resign from games as well as access the Options screen.
Mission Objectives Displays the mission objectives when playing
the Terran campaign or the Mantis or Celareon training mission.
The Toolbar
The most important controls in the Conquest: Frontier Wars game
screen are found on the large toolbar that spans the bottom of the
screen.
◆ To minimize/maximize the toolbar, click the Minimize/Maximize
Toolbar button in the lower-right corner of the toolbar, or press
the END key.
Orders Buttons Hot Buttons
Context Window
Stance Buttons System Map
Sector Map
The Context Window
The large box at the left of the toolbar—the context window—will
change to reflect information about the unit you currently have
selected in the main screen. To the right of this window are selectionspecific orders buttons, which affect the units or groups (ship orders)
or platforms (platform orders) you currently have selected. For
example, shown in the preceding illustration is a military ship context
window for a Corvette and, to its right, the ship’s orders buttons. If
nothing is selected, the context window will be empty.
Quick Start
11
Page 13

Military Ship Context Window
The military ship context
window displays the unit’s
name, current/maximum
possible hull points, current/
maximum possible supplies,
number of kills, and current
upgrade level in regard to
hull, shield, engine, sensors,
weapon, supply, and (for
ships that have them) its
special weapons.
Orders Buttons
The military ship orders buttons, to the right of the context
window, are as follows.
Stop Cancels the last order.
Patrol Orders the selected unit to patrol an area you
specify. Select the unit, click the Patrol button, and then click
the location you want the unit to patrol.
Escort/Defend Orders the selected unit to escort the
unit you specify. Select the unit, click the Escort/Defend
button, and then click the unit to escort
Chapter 1
Special Allows you to use a unit’s special weapon when
that weapon has been researched and the unit is selected
alone. You can also use an available special weapon for a
group of selected ships if that group is all of the same type
(for example, only Battleships are selected). The Cloaking
ability, however, can be activated for all Infiltrators and
Missile Cruisers selected as part of a group. Select the unit,
and then click its special weapon button.
Ship Stance Buttons
A military ship’s stance reflects its attitude toward arriving
nonfriendly units. To set the stance of a ship, select it, and then click
the stance button you want to apply to that ship.
12
Page 14

Attack Orders the ship to attack any enemy in its sensor
range.
Stand Ground Orders the ship to remain in place and
defend its exact location.
Defend Orders the ship to stay and defend its immediate
area.
Idle Orders the ship to “sleep,” ignoring all activity and
posing no threat to enemy ships.
Fabricator Context Window
The Fabricator context
window appears when
you select a Fabricator. It
displays the Fabricator’s
current/maximum
possible hull points. It
has multiple tabs that
together contain all of
the platforms that can be
built in the game as they
are researched: the Main Platform tab, the Research tab, and the
Defense tab. The Stats tab shows the level of current upgrades for
the construction ship.
A platform button that has a green border around it means that
you already have a least one platform of that type built. If a button
is grayed out, you have not yet met the technology prerequisite
for building that platform.
Orders Buttons
The Fabricator orders buttons, to the right of the context window,
are as follows.
Stop Cancels the last order.
Salvage Salvages a platform and recycles its ore and gas.
Select a Fabricator, click the Salvage button, and then click
the platform you want to salvage when the cursor becomes
a dollar sign. Ships cannot be salvaged (although the Mantis
are known to have this technology).
Quick Start
13
Page 15
Repair Repairs a platform to its full hull strength. Select a
Fabricator, click the Repair button, and then click the platform
you want to repair when the cursor becomes a wrench. Ships
are repaired at the Repair Platform.
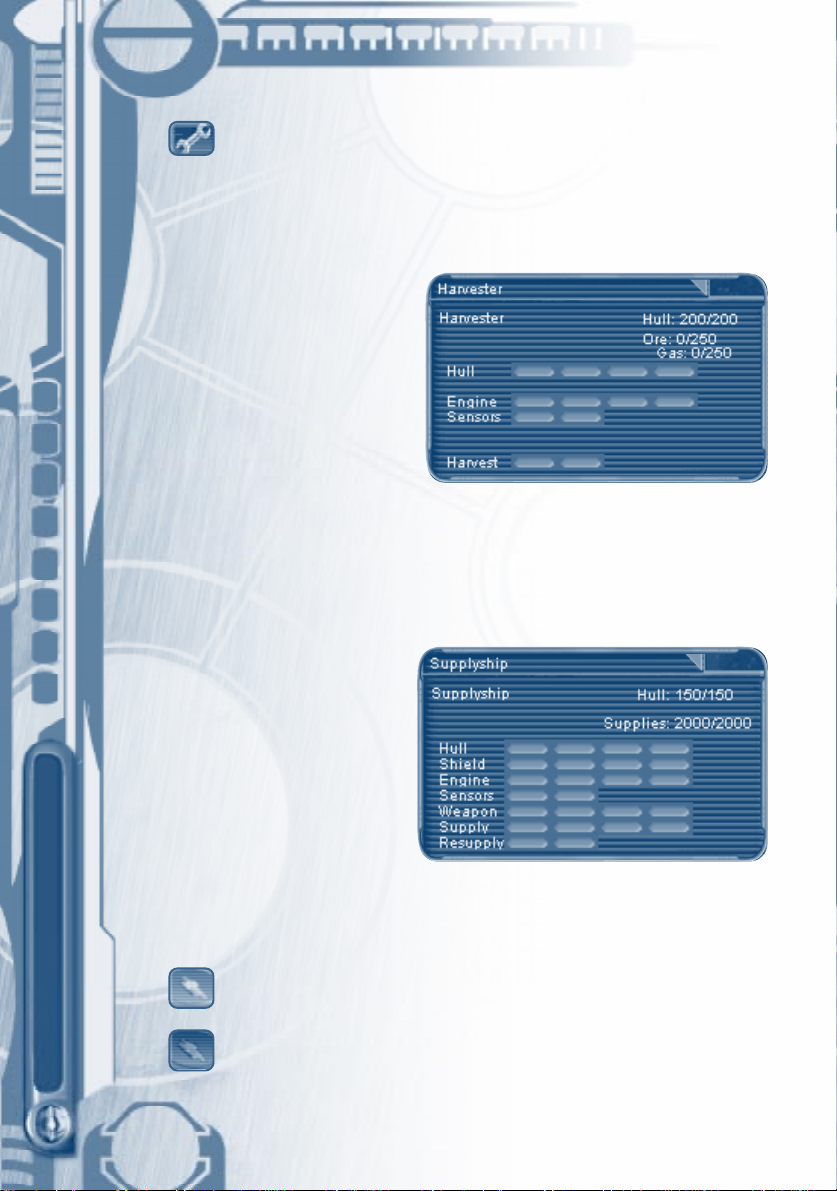
Harvester Context Window
The Harvester context
window shows the selected
Harvester’s current/maximum possible hull points
and how much ore and gas
the Harvester is carrying/the
maximum possible it can
carry. It also displays the
current Harvester upgrade
levels.
Orders Buttons
The Harvester’s orders buttons—Stop and Patrol—work like those
for military ships.
Supplyship Context Window
The Supplyship context
window shows the
selected Supplyship’s
current/maximum possible
hull points as well as its
current/maximum possible
supplies and current
upgrade level.
Chapter 1
Orders Buttons
The Supplyship’s orders buttons Stop and Patrol work like those for
military ships. In addition, it has orders buttons specific to its supply
function.
Auto-Supply On Orders a Supplyship to resupply any ship
within its supply radius in need of supplies.
Auto-Supply Off Orders a Supplyship to not resupply ships.
14
Page 16

Full Auto-Supply Orders a Supplyship to resupply itself at
the nearest Headquarters, Supply Platform, or Repair Platform
whenever necessary and then return to its preassigned
location.
Group Ship Context Window
The group ship context
window shows an iconic
representation of each ship
selected in a group. The red
bar above each ship
indicates its hull level. If a
ship’s hull is more than 50%
intact, the ship icon is
green; if less than 50%, the
icon is yellow; and if near 0,
the icon is red. The blue bar below each military ship indicates its
supply state. To see a particular ship’s stats, click its icon here in the
group ship context window to display its individual context window.
Orders Buttons
When a group is selected and at least one military ship is in that
group, the military ship’s orders buttons will override the orders
buttons of other ship types in the group selection.
Admiral Context Window
In quick battles and multiplayer games, the admiral context window
appears whenever a fleet admiral or a fleet is selected. It always
includes three tabs along the top of the window: Fleet Commands,
Group, and Admiral Statistics.
Quick Start
15
Page 17

Fleet Commands Tab
The Fleet Commands tab, in the top row of buttons, contains all the
commands a quick battle or multiplayer admiral can give to a fleet.
Group Tab
Fleet Commands Tab
Admiral Statistics Tab
Fleet
Commands
Special
Weapons
Chapter 1
Terran
Mantis
Celareon
Form Fleet To form a fleet, select the fleet admiral and all
the units you want in a fleet, and then click the Form Fleet
button. A ship may only be in one fleet at a time. To select this
fleet, click the ship that the admiral is on, press the fleet’s
corresponding function key (F1–F6), or click the Fleets hot
button to cycle through all your fleets.
Disband Fleet To disband a fleet, select it, and then click
the Disband Fleet button. The fleet is immediately disbanded and the fleet admiral returns to his individual ship.
Repair Fleet To repair an entire fleet, select it, and then
click the Repair Fleet button. The fleet immediately goes to
the nearest Repair Platform, and all damaged units are
repaired.
Resupply Fleet To resupply an entire fleet, select it, and
then click the Resupply Fleet button. The fleet immediately
goes to the nearest Headquarters or Supply Platform, and all
units are resupplied.
Transfer Admiral To transfer an admiral to another ship
without disbanding the fleet, select the fleet, click the Trans-
fer Admiral button, and then click the ship you want him to
board when the cursor becomes a flag.
16
Page 18

Troopship Assault To assault an enemy with a Troopship in a fleet, select the fleet, click the Troopship
Assault button, and then right-click the target when
the cursor becomes an orange, partial crosshairs icon.
The buttons below the preceding command buttons correspond to
the special weapons and/or abilities available to the fleet. If a ship
has a special weapon and is a member of the fleet, then its corresponding special weapon button will be highlighted. Clicking a
special weapon button is the equivalent of clicking that individual
ship’s special weapon button. If multiple ships have the same special
weapon, the admiral decides which is the best ship to execute the
special weapon command and will allocate that ship to perform the
action. The exception to this rule is the Cloaking special ability,
which cloaks all Infiltrators and Missile Cruisers at once.
The bottom row of buttons will display the Terran, Mantis, or
Celareon special weapons in a fleet. A player can have ships of all
three races in a fleet, thus he can still get to all their special
weapons with these buttons.
Group Tab
When the Group tab is selected, the admiral context window
becomes a group ships context window for the selected fleet (see
“Group Ship Context Window,” earlier in this section).
Admiral Statistics Tab
When the Admiral Statistics tab is selected, the admiral context
window shows the statistics of the admiral, similar to the Stats tab
for any military ship context window.
Platform Context Window
The platform context
window shows the name
of the selected platform,
its current/maximum
possible hull points,
buttons that allow either
the building of units or the
researching of technology,
Quick Start
17
Page 19

and a queue (of up to 15 items) to show what is being built or
researched and in what order. To remove an item from this queue,
click it.
Items that cannot be built or researched yet will appear grayed out.
Status text on the main screen will indicate the prerequisite that
needs to be met in order to build or research that item.
Orders Buttons
Stop Cancels the last order.
Rally Point Sets up a point at which all ships built at the
selected platform will meet. Select the platform, click the
Rally Point button, and then click the desired location on
the screen. To see where any given platform’s rally point is,
select the platform and note the location of the blinking
yellow locator on both the main screen and the system map.
Hot Buttons
The buttons to the right of the context window and orders buttons
are your hot buttons—a quick means of cycling through specific
platforms and ships so you can keep them active.
Research Platforms Cycles through all platforms that
offer upgrades. Each platform is selected and shown in the
context window. To center that platform on your main
screen, click the triangle to the right of that platform’s name
in the context window.
Chapter 1
Shipyards Cycles through all shipyards and Headquarters.
Each platform is selected and shown in the context window.
To center that platform in your main screen, click the up
arrow to the right of that platform’s name in the context
window.
Idle Nonmilitary Ships Cycles through all idle Fabricators, Harvesters, and Supplyships. Each ship is selected, shown
in the context window, and centered on your main screen.
Fleets (Quick battles and multiplayer games only) Cycles
through all fleets. Each fleet is selected, shown in the context
window, and centered on your main screen.
18
Page 20

Maps
System Map
The two maps on the right side of your toolbar are the system
map and the sector map. Use them to quickly survey your fleets
and the terrain and to facilitate orders. For color detail on the
maps, see the Quick Rescue Card.
Sector Map
The System Map
The system map shows the system you’re currently looking at in
the main screen. Undiscovered areas are shown as black. As you
send ships out to explore the system, the fog of war is lifted and
the planets and terrain appear on the map. All buildings and units in
the system are distinguished on the map by each player’s unique
color.
Once you’ve selected a unit on the main screen, you can select its
target destination on the system map just as you would in the
main screen—by right-clicking where you want it to go. To set
waypoints, hold down the SHIFT key and right-click waypoints to
create a complete path for your unit to travel.
The Sector Map
The sector map shows the entire sector in which you’re playing. It
shows all systems you’ve traveled to and allows you to quickly
send ships to those sectors.
Quick Start
19
Page 21

Systems you own and that are in supply appear blue, while neutral
systems appear gray or black. A white circle will appear around the
system you’re currently viewing in the main screen. If you are
involved in a battle, the system where it is occurring will have a
flashing red ring around it.
You can also tell at a glance whether your systems have intact
supply lines (where all wormholes between systems have a Jump
Gate). If not, the out-of-supply system and its connector line will
appear yellow.
Lines that simply end in space indicate that you’ve discovered a
wormhole but haven’t explored the system on the other side. When
you enter the new system, it will appear on the sector map.
Clicking a system on the sector map displays that system in your
main screen and the system map. You can also select units you want
to transport to another system and then right-click that system in
the sector map to send them there automatically.
Game Menu and Options Screen
Saving, Loading, and Exiting
You can access the game menu and Options screen by pressing F9
at any time during gameplay.
Chapter 1
◆ To save a game, click Save, type a name for the game (or click
the name of an existing saved game to replace it), and then click
Save.
◆ To load a saved game, click the name of the game you want to
load, and then click Load.
◆ To exit a game without saving it, click Resign, and then click
Continue in the Score screen to return to the main menu.
◆ To change player, graphics, and sounds settings, click Options to
display the Options screen.
20
Page 22

Options Screen
◆ To change individual player game settings, click the Player tab.
Here you can adjust your cursor sensitivity, game speed, and scroll
rate. You can also disable status text and information boxes that
appear when you roll over UI elements in the game screen, as well
as disable the rotation of your sector map when you rotate your
game view. Finally, you can even change the game’s left-click/rightclick model if you prefer.
◆ To change graphics settings, click the Graphics tab.
Here you can select your 3D device and game resolution. Increasing your gamma correction will brighten your game screen, and
turning off other graphics options may increase your game’s
performance.
◆ To change sounds settings, click the Sounds tab.
Here you can turn on or off various game sounds, as well as adjust
their volume.
21
Quick Start
Page 23

CHAPTER 2—STAKING
YOUR CLAIM IN THE GALAXY
You’re at a disadvantage if you’re
trying to fight a war far from your
homeworld, so it’s vital to put down
stakes the moment you arrive. It
would be nice to have resources and
defenses you can rely on before the
battles come. Here are the basics to
staking your claim.
Chapter 2
22
Page 24

Building Headquarters
You need a home base, and the only place for it is on a planet.
Headquarters are a means of resupplying wanting ships with
ammo. They also provide command points and allow you to build
Fabricators and Supplyships.
Often you’ll begin with a Headquarters, but if you need a new one
you’ll build it with a Fabricator
on any planet.
◆ To build a Headquarters,
select a Fabricator, click the
Main Platform tab in the
Fabricator context window,
click the Headquarters
button, and then click
available slots (shown in
green) on a planet.
Building Fabricators
The Fabricator is the ship you need to build before you can build
anything else—as new platforms become available, your Fabricator
context window will highlight their corresponding buttons.
◆ To build a Fabricator,
click a Headquarters,
and then click the
Fabricator button
in the Headquarters
context window.
For more information,
see “Fabricator Context
Window,” in Chapter 1.
Staking Your Claim
23
Page 25

Constructing Platforms
You have two kinds of units: platforms and ships. Platforms are
nonmobile units that affect your fleet by performing some useful
function, such as mining resources on a planet (Refinery), providing
command points (LR Sensor Tower), resupplying ships (Supply Platform), or defending territory (Laser Turret). Most platforms must be
built on a planet, but some must be placed in space—namely, defense
turrets such as the Ion Cannon.
Platforms that recruit crew (Marine Training Facility and Naval Academy) must be built on an earth or swamp planet, which generates
crew. Fabricators can build any platform.
◆ To build the Refinery
platform, select a
Fabricator, click the
Main Platform tab,
click the Refinery
button, and then click
available slots (shown
in green) on a planet.
For more information,
see “Platform Context
Window,” in Chapter 1.
Chapter 2
Mining Resources
Once you have a Refinery, it
will drill into a planet and
start harvesting the resources on that planet. With
that operation under way,
you’ll want to harvest
resources off-planet as well,
because valuable ore and gas
can be found in phenomena
such as nebulae and asteroid
fields. You can also recycle
24
Page 26

ore from the debris fields left by destroyed units. Build a Harvester at
the Refinery to harvest these off-planet resources.
◆ To mine off-planet resources, click a Harvester, and then right-
click the Harvester’s target when the cursor becomes a pick-andshovel icon.
Look for bright spots scattered through nebulae, shiny nuggets in
asteroid fields, and floating metal in space.
For more information, see “Harvester Context Window,” in Chapter
1. For details about finding resources, see Chapter 3.
Building and Commanding Ships
Building
As nifty as Fabricators and Harvesters are, a fleet of them won’t do
you much good. You need some real fighting ships, and to build ships
you need shipyards. The first shipyard to become available will be the
Light Shipyard, which builds smaller ships, followed by the Heavy
Shipyard, which builds larger ships. Once your harvesting operation
has begun, build a Light Shipyard, and start building your fighters.
25
Staking Your Claim
Page 27

◆ To build a Corvette, click a Light Shipyard, and then click the
Corvette button.
To build more than one, click the button for each Corvette you
want.
Selecting
Selecting a ship is as easy as clicking it, but you likely will want to
move them in groups, too.
◆ To select multiple ships, drag the cursor around them, or hold
down SHIFT while clicking each ship you want in the group.
◆ To select all ships of the same type shown in the main screen,
double-click one of them.
◆ To assign a group of ships to a control group, select the group, and
then hold down CTRL while pressing a number key 0–9.
When you want to select that control group, press the number
key you assigned them to.
Commanding
Navigating and attacking are both carried out by right-clicking the
destination and target, respectively.
◆ To move a ship or group, select it, and then right-click its destina-
tion.
◆ To set a specific path for a ship using waypoints, select it, and then
hold down SHIFT while right-clicking each waypoint you want the
ship to visit, with the final waypoint being its final destination.
◆ To attack an enemy, select the ship or group you want to attack
with, and then right-click the target when the cursor becomes a
red crosshair icon.
Chapter 2
◆ To attack an ally without officially changing your alliance, select the
ship or group you want to attack with, hold down the CTRL key,
and then right-click the target.
The toolbar at the bottom of the game screen offers many more
options for commanding your military ships. For more information,
see “Military Ship Context Window,” in Chapter 1.
26
Page 28

Exploring and
Establishing Supply Lines
Once you’re well apportioned—preferably with a Headquarters, a
Fabricator, a productive Refinery, and a passel of fighting ships—it’s
time to explore outside your home system. You move to different
systems throughout the sector via wormholes.
◆ To navigate to another system, select a ship or group, and then
right-click a wormhole.
Before right-clicking the wormhole, you can check the ship’s
destination system by noting
the white-highlighted path on
the sector map in the toolbar.
To change your own view to
that system, click the wormhole
on the main screen, or click the
system on the sector map.
Once you’ve begun exploring a new
system, you must establish an intact
supply line to it that is connected
to a sector with a Headquarters.
This is done by building a Jump
Gate around the wormhole.
◆ To build a Jump Gate, select a Fabricator, click the Defense tab in
the Fabricator context window, click the Jump Gate button, and
then click the wormhole.
The Jump Gate will allow only friendly traffic through the wormhole, and your supply line will remain intact.
Check your system map often to make sure your territory is always in
supply—yellow sectors and connector lines indicate that your overall
sector supply is in jeopardy. Rigorously defend your Jump Gates,
noting that they can be destroyed from either side of the wormhole,
and do not neglect to rebuild them if they are destroyed.
Staking Your Claim
27
Page 29

Resupplying and Repairing Units
Without necessary supplies and repairs, platforms and ships cannot
function, and your race will slowly—or perhaps quickly—die.
Resupplying
A unit’s supply status can be checked one of several ways:
• When a turret platform or individual military ship is selected, its
current/maximum possible supplies are shown in its context
window.
• When a military ship is selected as part of a group, the blue
supply bar below its corresponding icon in the group ship
context window indicates its current supply status.
• When you roll your cursor over a turret platform or individual
military ship in the main screen, its blue supply bar is shown. To
make a quick general appraisal of unit supply on a group of
turret platforms and ships in the main screen, drag your cursor
around the group—but don’t release the mouse button; the
supply bars for all units will appear.
Turret platforms and ships can be resupplied with a Headquarters,
Supply Platform, Repair Platform, or Supplyship. The resupply radii of
these units are shown when you roll your cursor over them. Note
that the resupply radius of Supply Platforms, Repair Platforms, and
Supplyships is much greater than that of Headquarters.
Chapter 2
If you do not build a turret platform within the resupply radius of a
Headquarters, Supply Platform, or Repair Platform, then you will
have to monitor its supplies carefully and manually resupply it when
necessary with a Supplyship.
◆ To resupply a turret platform, select a Supplyship, and then right-
click a location on the main screen that will place the platform
within the ship’s resupply radius.
28
Page 30

◆ To resupply a ship, select it, and then right-click a location on the
main screen that will place it within the resupply radius of a
Headquarters, Supply Platform, Repair Platform, or Supplyship.
For additional information about Supplyship orders, see “Supplyship
Context Window,” in Chapter 1.
Repairing
You must also repair units as they are damaged or they will eventually
be destroyed. A unit’s health is indicated by its hull level. Checking a
unit’s hull level is similar to checking its supply status.
• When any platform or individual ship is selected, its current/
maximum possible hull points are shown in its context window.
• When a ship is selected as part of a group, the red hull bar above
its corresponding icon in the group ship context window indicates
its current hull level. If a ship’s hull is more than 50% intact, the
ship icon is green; if less than 50%, the icon is yellow; and if near 0,
the icon is red.
• When you roll your cursor over any platform or individual ship in
the main screen, its hull bar is shown. If a ship’s hull is more than
50% intact, the bar is green; if less than 50%, the bar is yellow; and
if near 0, the bar is red. To make a quick general appraisal of unit
health on a group of platforms and ships in the main screen, drag
your cursor around the group—but don’t release the mouse
button; the hull bars for all units will appear.
To repair a unit, you must have a Repair Platform and, to repair a
platform, a Fabricator. Keep in mind that when you repair a unit,
resources will be deducted from your holdings, based on how much
repair work has to be done.
◆ To repair a platform, select a Fabricator, click the Repair button,
and then click the platform when the cursor becomes a wrench
icon.
◆ To repair a ship, select it, and then right-click a Repair Platform.
Staking Your Claim
29
Page 31

Chapter 2
Commanding Fleets
In quick battles and multiplayer games, it helps to delegate your
command to intelligent officers who don’t have to be constantly
monitored. Fleet admirals are officers who control a group of ships
of your choosing. From their admiral vessel, they keep your fleets in
line, choose the best targets, and intelligently size up a command’s
likelihood of success. Each of your six admirals, however, will make
different decisions based on his or her personality, experience, and
strengths and weaknesses. This individuality is also reflected in the
valuable bonuses each admiral provides to the entire fleet as a
whole.
To establish a fleet
1 To create a fleet admiral, click the Naval Academy, and then click
the button of the fleet admiral you want.
2 After the admiral reports to duty, select the admiral and the ships
you want in that admiral’s fleet, and then click the Form Fleet
button in the admiral context window.
The admiral will board the largest ship in the group. The function
key that appears above each member of the fleet is the fleet’s
selection key.
3 To select the entire fleet, press the fleet’s corresponding function
key (F1–F6), click the ship the admiral is on, or click the Fleets
hot button until the fleet is selected.
30
Page 32

For all the controls available for commanding fleets, see “Admiral
Context Window,” in Chapter 1. Even if a fleet is carrying out a fleet
command, you can give specific orders to an individual fleet ship, but
to remove a ship from a fleet you must either disband the fleet or recreate the fleet without that ship.
Always keep an eye on the hull level of the ship the admiral is aboard.
If an admiral’s ship is grievously damaged, transfer him or her to
another ship by using the Transfer Admiral button in the admiral
context window. If the admiral’s ship is destroyed, he or she will bail
and then board another ship in the fleet, as long as one is available.
Using Diplomacy
Diplomacy is a function that allows you to make and change alliances
and share resources with your allies during a quick battle or a
multiplayer game.
◆ To access the Diplomacy screen, click the Diplomacy button in
the resource bar, or press ALT+D.
31
Staking Your Claim
Page 33

Changing Alliances
Alliances are a way to determine how readily your ships and fleets
attack opponents. Enemies will attack one another automatically; allies
will not. If you consider someone an ally and they fail to return that
respect, your ships will not attack, but theirs will attack yours. The
Stance column lets you know where you stand.
Each player (except yourself) has two hand indicators in the Allied
column. The hand on the left indicates your stance toward the player
in that row, and the second that player’s stance toward you. A white
hand indicates ally and a gray hand enemy.
◆ To change your stance toward a player, click that player’s box in
the Allied column.
Gifting Resources
When an ally is in need, you can gift resources to that ally in the
Diplomacy screen.
◆ To give resources to an ally, click the box in the appropriate
resource column in that ally’s row (click repeatedly until the
amount gifted is satisfactory), and then click OK to send the gift
and return to the game.
Chapter 2
32
Page 34

CHAPTER 3—RESOURCES
AND THE ENVIRONMENT
As in any war, resources are absolutely
vital to keep your fleet up and running.
These resources are found throughout
the environment of the sector. The
environment hosts terrain that also can
enhance your fleet in one way or another,
but there is a downside—best summarized by a reportedly Celareon adage,
“Environment is a nice way of saying
space that can hurt you.”
Staking Your Claim
33
Page 35

Resources
The three resources that matter—ore, gas, and crew—allow you
to pay your way to winning the Frontier Wars. Everything you build
and research costs resources, so setting up your harvesting
operation at the start of the game and then monitoring your
resource bar at the top of the screen are mandatory.
Ore
Ore is smelted to make the metals you need to build ships, platforms, and weaponry. It is found on earth planets and moons and in
asteroid and debris fields. The hardware-happy Terrans have the
greatest need for ore.
Gas
Gas is harvested from earth planets, gas giants, and nebulae and is
used to produce fuel for your propulsion systems. Among the three
races, the technology-driven Celareons are the most reliant on gas.
Crew
Crew—the men and women who will do or die at your command—exist only on earth and swamp planets and are “harvested”
by building a Marine Training Facility or Naval Academy to recruit
them. Both platforms will automatically recruit crew from planets.
You need crew to run your ships. The carrier-reliant Mantis, who
burn through drones like jet fuel, have the greatest need for crew.
Chapter 3
Command Points
As you expand your base with Headquarters and LR Sensor
Towers, you will accumulate command points, which mark the
ability to command a ship. Some ships and platforms require more
command points to construct them than others. You will have to be
aware at all times of how many command points you can afford to
spend.
34
Page 36

Finding Resources
Planets
Planets are a frequently occurring phenomenon formed by the
collision of materials as they follow the rotation of stars and the
galaxy itself. Different planets provide different amounts and types
of resources. Before or after building on a planet, you can check the
types and amount of resources it holds by moving your cursor over
it. The planet’s popup shows how much of each resource is currently on the planet, how much was originally available, and the rate
at which each resource is being harvested if a Refinery is on the
planet.
Earth Planets
We call these lovely
M-Class planets earth
because of their Terranfriendly environments
and also because we’re
unusually Terracentric.
Earth planets yield all
three kinds of resources.
Moons
Dead, dead, dead in terms of anything
useful except keeping the tides in line
on nearby planets and coughing up
impressive amounts of ore.
Resources and Environment
35
Page 37

Gas Giants
If you can’t figure out that what you
find on a gas planet is chiefly gas, then
maybe you’re out of your league.
Swamp Planets
Similar to earth planets but wetter and
more dense in atmosphere, swamp
planets provide exceptional crew.
Asteroids and Nebulae
Chapter 3
Asteroids and nebulae yield useful ore and gas, respectively (you won’t
find crew hanging around on an asteroid, and even if crewmen were
floating in a nebula you probably couldn’t use them). But be careful
around these fields, as they also have many dangers.
36
Page 38

Asteroid Fields
Navigating through rocks the size of
your ship is tricky business. Navigation systems and pilots are smart
enough not to collide with them,
but an asteroid field will slow down
your ships considerably.
Nebulae
Nebulae can have various effects, so
be careful.
Helios Nebula
These soft-yellow, cloudlike nebulae are so helium-rich that ship
attacks within the nebulae cause much greater damage than normal.
Lithium Nebula
This misty-green nebula is ugly, but all it does is slow you down while
offering gas for your Harvester.
Hyades Nebula
This red, sulfurous, hellish cloud yields much harvestable gas but will
slowly destroy your ships if you leave them inside it too long.
Celsius Nebula
These frozen, waterlogged nebulae are to ships what being dropped in
a river is to pistols. You’ll suddenly find your supplies locked up and
nonresponsive, leaving you unable to lay mines or launch fighter wings,
much less use special weapons.
Cygnus Nebula
An oozing, off-orange slushy in space, enhanced with gas, this nebula
actually speeds you up rather than slowing you down.
Ion Nebula
Perhaps the prettiest, this bluish, lightning-laced nebula will play havoc
with your shields, rendering ships woefully underdefended.
Resources and Environment
37
Page 39

Debris Fields
We believe in recycling in the Terran
Navy, especially since any ship blown up
in space, friend or foe, will leave copious
amounts of useful material to harvest.
Your Harvesters are smart enough to
leave the soft tissue floating in the
heavens and only bring home what you
can smelt. Careful, though—moving
through debris fields means slowing
down enough so that ships can navigate
properly.
Antimatter
The rainbow-colored antimatter
ribbon and its cousin, in the form of
yellow clouds, are anomalies lovely to
look at but utterly impassable to ships.
Black Holes
Chapter 3
The black hole is like a wormhole gone bad. If you should ever come
across one, watch out—its incredible gravitational field will begin to
suck ships in, and the ability to escape is directly proportional to the
size and strength of the ship in jeopardy. Since black holes are formed
by the energy of an imploded
star, if your ship doesn’t
escape it will be tugged and
crushed as it’s sucked into
the depths of the phenomenon. If it survives—and
many ships won’t—there’s
no telling where the lost ship
will wind up.
38
Page 40

CHAPTER 4—TERRANS
What makes the Terrans special is their glorious need to strive, that cosmic-dwarf complex
that makes them overachieve rather than
perish on a harsh planet. With nothing but
their colossal brains they have conquered a
disastrously hostile environment, so much so
that they now take that victory for granted.
Especially remarkable is the wondrous variety
among the Terrans, the infinite dreams and
imaginations among those teeming billions of
brains housed in vulnerable flesh. They are
walking contradiction: dreamers and cynics,
poets and tax collectors, warriors and peacekeepers. They may not look it, but they are a
formidable enemy for the rest of the galaxy.
— Translated from Celareon Magistrate
Elan’s “Thoughts on the Terran”
Resources and Environment
39
Page 41

History
It is ironic that the prevailing sentient organism from Terra, a planet
no less than three-quarters covered in water, would be a warmblooded land mammal. The dominant creatures we call Terrans are
soft-bodied, finely furred, live-young–bearing creatures who, like
their planet, consist mostly of water. Their chief manner of locomotion is a precarious, inefficient bob from one of two lower appendages to the other. They possess no protective shell and go into a
mild coma approximately every twenty-four hours.
This lack of any natural defense against a hostile and largely
uninhabitable (for them) environment has only aided their adaptation of intelligence. Hence, their fragility has become their strength:
Not only do these weak, flightless, bipedal creatures boast a life
span of a shocking 100 to 120 years, but constantly improving
technology has made those lives all the more sturdy. A dense, nearimpenetrable, top-mounted cranium houses the only truly impressive organ the Terrans possess: their large and heavily folded brain,
rivaled only by the all-mind energy-being Celareons.
It took thousands of years for the Terrans to finally bring the small
portion of Earth on which they could survive under the rule of one
government. The main impediment, of course, was once more the
adaptive intelligence and imagination of the species, which habituates men to imagining the more and better, regardless of the
circumstances.
Chapter 4
Since the earliest Terrans developed their first machine—the
lever—the keys to human technology are two prevailing and
counterbalancing precepts: imagination and functionality. “Does it
work? Can it work better?” A man sees that he cannot survive
bitter cold, and yet he suffers winters. Whereas other species
would adapt hard shells or thick fur coats, man has adapted
intelligence to lead him to take a fur coat from a bear. The drive to
make things that work and work better has led him to remain both
a constant dreamer and a thorough moderate, so that even today
his ships are functional, utilitarian, and even-keeled. If they are
beautiful, it is because beauty was a feature someone thought
would be useful.
40
Page 42

Technology
The most balanced of the three races, the Terrans have very capable
small, medium, and large ship-to-ship combatants, long-range strike
capability, and high-tech special weapons.
Platforms
Headquarters
Your home away from home and your single most important—and
most expensive—platform, the Headquarters is the base of all supply:
both system and unit. You must be able to trace a viable supply line
(via Jump Gates) from a system with an HQ to other systems for
them to be in supply. Units low on ammunition can fly within the
resupply radius of an HQ to resupply, and defense platforms built
within that resupply radius will also be taken care of.
HQs provide Fabricators
and, after a Supply Platform
is built, Supplyships. Com-
mand points awarded.
41
Terrans
Page 43

Refinery
Build a Refinery on a
planet, moon, or gas giant
from which you want to
harvest ore and gas
automatically. To mine
resources off-planet, you’ll
need to build a Harvester
here. A Refinery offers
harvesting, supply, and
resupply upgrades. It is
also the starting point for
all ship creation. Requires: Headquarters.
Marine Training
Facility
As a new home for all your
green troops, the Marine
Training Facility will automatically recruit crew from earth
and swamp planets. It offers
Troopship upgrades and is
the starting point for all
personnel and fleet upgrades.
Requires: Headquarters.
Chapter 4
LR Sensor Tower
A valuable asset, the LR Sensor Tower
scans a very large radius, clearing the
fog of war from your maps. It also
offers upgrades that increase the
sensor range of your other units.
Requires: Headquarters. Command
points awarded.
42
Page 44

Laser Turret
The Laser Turret does
damage about equivalent to
the Corvette’s laser, but this
platform is very useful for
defending any given area—
you can place it anywhere in
space. Make sure, however,
you build it within the
resupply radius of an HQ or Supply Platform. Requires: Headquarters.
Light Shipyard
The Light Shipyard is
the first gunshipbuilding platform that
will become available
to you. Here you can
build all your smaller
ships: Corvettes,
Missile Cruisers,
Troopships, and
Infiltrators.
Requires: Refinery.
Jump Gate
Wormholes by nature allow easy
access between systems, so it’s
important to build Jump Gates
around wormholes along your
supply line. A Jump Gate effectively
locks out unfriendly traffic, allowing
you to shore up your held positions—that is, until someone
destroys it, which is possible from
either side of the wormhole.
Requires: Refinery.
Terrans
43
Page 45

Naval Academy
The source of leaders you’ll
need as you expand your fleet
is found at the Naval Academy.
It not only automatically
recruits new crew from
planets at a higher rate than
the Marine Training Facility
but, in quick battles and
multiplayer games, can train
and provide up to six unique
Terran admirals, each of
whom will command and upgrade their entire fleet. Requires: Marine
Training Facility.
Supply Platform
The Supply Platform
serves as a secondary
base for resupplying units
at your forward bases—
with a much larger
resupply radius than that
of an HQ. It is also
mandatory for building
Repair Platforms. Requires:
Refinery.
Chapter 4
Repair Platform
The Repair Platform, as its
name suggests, repairs ships
as well as resupplies both
ships and defense platforms.
Requires: Supply Platform.
44
Page 46

Squadron Hangar
The Squadron Hangar is the home of
fighter-based units and platforms, providing
significant upgrades for your fighters.
Requires: Naval Academy.
Ballistics Lab
The Ballistics Lab is where the
guys in white coats come up with
new destructive implements—
here you can research Cloaking
for Infiltrators and Missile
Cruisers, as well as upgrade
weapons and missiles. Requires:
Light Shipyard.
Space Station
The Space Station, a fighter
defense platform, houses a single
wing of short-range fighters. The
station can be placed anywhere in
space. Requires: Squadron Hangar.
Terrans
45
Page 47

Advanced Hull
Factory
At the Advanced Hull
Factory, you can research
stronger hulls for your
ships—useful considering
the pounding Terran ships
take from Mantis fighters.
Requires: Ballistics Lab.
Heavy Shipyard
The Heavy Shipyard is where you build the heavy hitters of the fleet,
the medium to large ships: Battleships, Fleet Carriers, Lancer Cruisers,
and Dreadnoughts. Take advantage of it, because you aren’t going to
win this war with Corvettes. Requires: Advanced Hull Factory.
Chapter 4
Propulsion Lab
The Propulsion Lab
gives you access to
better engines for your
ships. Requires: Advanced
Hull Factory.
46
Page 48

AWS Research Lab
These guys make the white coats at
the Ballistics Lab look like pikers—
the AWS Research Lab provides
strange and exotic technology,
including items on loan from our
rebel allies inside the Mantis Empire.
The special weapons you can find
here are the Tempest Charge, Probe,
Vampire Arc, and Aegis Shield (all
described in “Upgrades and Special
Weapons” later in this chapter).
Requires: Heavy Shipyard.
Displacement Lab
The Displacement Lab
provides upgrades for your
ship shields—especially
useful for lighter-hulled
ships. Requires: Advanced
Hull Factory.
Ion Cannon
A heavy turret gun, the free-floating
Ion Cannon delivers a massive
wallop wherever you deem. Requires:
AWS Research Lab.
Terrans
47
Page 49

Ships
Fabricator
The Fabricator is your most important
nonmilitary ship. Fabricators build
platforms—any available platform—on
any planet, moon, or gas giant, as well as
Jump Gates and defense platforms in
space such as the Laser Turret. They can
also repair and salvage platforms. Re-
quires: Headquarters.
Supplyship
As its name suggests, the
Supplyship resupplies
ships and platforms that
are within its resupply
radius. Requires: Head-
quarters; Supply Platform.
Chapter 4
Harvester
The Harvester is
essentially a cargo
ship that gathers
gas from nebulae
and ore from
asteroid and debris
fields—in other
words, any resources not on a
planetary surface.
Requires: Refinery.
48
Page 50

Admiral
In quick battles and multiplayer games, the
admiral is the ship that leads its assigned fleet,
generating bonuses for all ships in that fleet.
You essentially command your admirals. In the
missions, your admirals serve as the heroes of
the Frontier Wars. Requires: Naval Academy.
Admiral Halsey
Halsey’s job is to lead Earth’s military forces into the new frontier.
Halsey has a true appreciation for the benefits of peacetime, but if
there will be victory against aggressors from beyond the stars, Halsey
will be at the heart of that victory. Bonuses: Battleships; Fleet Carriers;
Dreadnoughts; supplies; shields.
Admiral Hawkes
This curious Briton was the first to lead an expeditionary force into
uncharted space—it was Hawkes’ science vessel, Andromeda, that
waded into the middle of a Mantis civil war and began our involvement with the Frontier Wars. Through capture, torture, rescue, and
maneuver, Hawkes remains unflappable. Bonuses: Missile Cruisers; ship
speed; vs. Mantis ships.
Admiral Takei
Takei is a tactical genius from a long line of precisely that, all the way
back to his admiral ancestor in Earth’s so-called “Second World War.”
If it weren’t for Halsey’s own great leadership qualities, Takei would
almost surely be running the Terran Navy. Bonuses: Fleet Carriers;
sensors; fighter upgrades.
Admiral Steele
As the first Texan to make admiral in the new Terran Navy, Steele’s
goal is to show the enemy the true meaning of “getting the boot.”
Steele was raised in a strict military family where his mama’s motto
was, “Treat people with decency, until such time when they need a
good ole kick in the ass.” Charming. Bonuses: Battleships; damage; vs.
Celareon ships.
Terrans
49
Page 51

Admiral Smirnoff
This prestigious Russian was one of the trickiest and most challenging
instructors the academy ever saw, and in wartime Smirnoff brings
those skills to bear. But there is something questionable about him.
He’s a very capable commander, but you should watch him. Bonuses:
Dreadnoughts; vs. platforms; vs. Terran ships.
Admiral Benson
The youngest admiral in the Terran Navy, Benson first saw active duty
at the beginning of the Frontier Wars. Before that, she was the
highest-rated cadet ever to graduate from the Terran Naval Academy.
She’s hoping her whole career won’t be spent fighting this war. She has
bigger plans for Terra. Bonuses: Lancer Cruisers; evasive tactics; range.
Corvette
A fearless workhorse, the Corvette is
small, fast, and good for scouting new
systems. Lightly armored, it possesses a
flak cannon that is ideal for defending
against carrier fighters. Although a
small, hard target for bigger ships, it
should not be relied on to win battles.
Requires: Light Shipyard.
Chapter 4
Missile Cruiser
With its upgradeable
missiles researched at
the Ballistics Lab, the
medium-armored,
lightly hulled Missile
Cruiser is excellent for
attacks against heavily
armored, larger ships
and platforms. Its other
special upgrade (also at
the Ballistics Lab) is its cloaking ability, used at the expense of supplies.
Requires: Light Shipyard; Ballistics Lab.
50
Page 52

Troopship
Ramming into enemy
platforms and offloading
marauding Marines, the
Troopship is invaluable for
invasions—it can take over
any enemy construction ship,
harvesting ship, or platform
that is equivalent to its base
or upgrade level. A Troopship that has not been upgraded, for example, can take over an
unarmored or light-armored unit; a Troopship at a level 1 or 2 upgrade
can take over a medium- or heavy-armored unit, respectively; and a
level 4 Troopship can take over a Headquarters, Mantis Cocoon, or
Celareon Acropolis. A Troopship cannot take over a gunship, other
Troopship, its alien equivalent (the Mantis Leech and the Celareon
Legionnaire), or enemy Jump Gate. These expensive ships are lightly
armored, though, so be careful. Requires: Light Shipyard; Marine Training
Facility.
Infiltrator
Even smaller than the Corvette, the
Infiltrator has one purpose: deep scouting
in hairy territory. With no weapons at all,
the Infiltrator must rely on its impressive
speed, long-range cloak-piercing sensors,
and its own cloaking (researched at the
Ballistics Lab) and ping abilities to get the information you want
and make it back alive. When you turn on the Infiltrator’s ping
(by clicking the Ping button in its context window), all enemy
ships in the system will be momentarily exposed in the system
map, but at the cost of supplies and a brief exposure of your
own Infiltrator to other players. Requires: Light Shipyard; LR
Sensor Tower.
Terrans
51
Page 53

Battleship
The mainstay of
the Terran fleet,
the medium-sized,
heavily armored
Battleship carries
two laser bolt–
firing, doublebarreled turret
guns that do
excellent damage
to larger ships. Even better is its special weapon—on loan from our
rebel Mantis allies—the Tempest Charge. Requires: Heavy Shipyard.
Fleet Carrier
Launching two wings of fighters,
the medium-sized, lightly armored
Fleet Carrier is excellent for longrange attacks, but its thinnish hull
means long range is your best bet.
Its special weapon is the Probe,
which when launched lifts the fog
of war wherever it goes for the
short time it remains active.
Requires: Heavy Shipyard;
Squadron Hangar.
Chapter 4
52
Page 54

Lancer Cruiser
The medium-sized Lancer
Cruiser takes a very steady
commander: Although its
lightning-like arcs are spectacular, they’ll damage any
nearby ship, friend or foe, as
they dance from one ship to
the next. The Lancer’s special
weapon is the Vampire Arc,
which actually depletes the
supplies of enemy ships. Requires: Heavy Shipyard; Naval Academy;
Displacement Lab; Propulsion Lab.
Dreadnought
The biggest and most powerful ship in the Terran fleet, the Dreadnought is a massive, heavily armored monster that does tremendous
damage with its three triple-barrel laser cannons. The Dreadnought’s
special weapon is the Aegis Shield, which pumps up the Dreadnought
shield to temporary near-invulnerability. Requires: Heavy Shipyard;
Propulsion Lab; AWS Research Lab.
Terrans
53
Page 55

Upgrades and Special Weapons
General Upgrades
Terran ships and weapons share numerous universal upgrades with
the Mantis and Celareons. For a description of these upgrades, see
Appendix A.
Special Upgrades and Weapons
Special upgrades and weapons specific to the Terrans are as follows.
Chapter 4
Ore 1–2 Improves ore
harvesting. Affects:
Refineries. Requires:
Refinery.
Gas 1–2 Improves gas
harvesting. Affects:
Refineries. Requires:
Refinery.
Missile Pack 1–2
Provides more missiles.
Affects: Missile Cruisers.
Requires: Ballistics Lab.
Fighter Wing 1–3
Provides additional wings
of fighters. Affects:
fighters. Requires: Squadron Hangar.
Cloaking Makes ships
invisible to the enemy,
unless that enemy is an
Infiltrator, Seeker, or
Oracle. Affects: Infiltra-
tors; Missile Cruisers.
Requires: Ballistics Lab.
Tempest Charge
Causes area-effective
damage, particularly
against small ships. Affects:
Battleships. Requires:
AWS Research Lab.
Probe Lifts fog of war
and detects cloaked units
wherever it goes for a
short time. Affects: Fleet
Carriers. Requires: AW S
Research Lab; Squadron
Hangar.
Vampire Arc Depletes the supplies of
enemy units. Affects:
Lancer Cruisers. Requires:
AWS Research Lab;
Naval Academy; Displacement Lab; Propulsion Lab.
Aegis Shield Boosts
ship shields to temporary near-invulnerability.
Affects: Dreadnoughts.
Requires: AWS Research
Lab; Propulsion Lab.
54
Page 56

CHAPTER 5—MANTIS
Tellingly, a favorite song among the Mantis spells
out the ultimate dream of the race as it pertains
to the Frontier Wars. Among other galactic
exploits, recently added stanzas foretell of the
capture of the planet Terra. The hives fly together, birthing the millions of Mantis who spill
across the Terran plain. These brand-new children then seize the nine billion inhabitants of
Terra and mechanically grind them into a milky
pink paste, which they then feed to the rest of
the Mantis Navy, who dance across the planet,
drunk on the Terrans’ liquefied carcasses.
Something to keep in mind.
55
Terrans
Page 57

Chapter 5
History
We may never find a planet of more unforgivable beauty than Chut,
the homeworld of the race known as the Mantis. Terrans visiting Chut
would be awestruck by the stunning fields of wheat and grass as far as
the eye can see—for seven years at a time, at least. Following that
verdant long season is an equally long season of almost unbelievable
cold, ice covering the planet in layers miles thick, atmosphere so cold
that air-breathers’ lungs would turn stone hard in seconds. This
strange phenomenon of seven-year seasons is due to the calamitously
wild swing of the planet Chut in its rotation around its sun.
Swarming across these plains in days of old came the Mantis, the
gigantic, somewhat narrowly hive-minded insects bearing the powerful
exoskeletons necessary to withstand Chut’s unique environment. Like
the miniature insects from which they are descended, the Mantis feed
well on grain for seven entire years, after which they must hibernate in
caves of ice and rock. During this hibernation, once nutrients run out,
the Mantis feed upon those who die during the long sleep: Drilling
machines reduce the corpses of the Mantis to a liquid mash that
allows the rest of the race to survive. In this way they make it through
the long, cold winter.
The insectoid Mantis are completely oriented toward the group to
which they belong. Mantis politics are extremely complex, but over
the years we have developed a basic understanding of how the system
works. Modern Mantis are divided into sects arranged by maternal
heredity. The sects themselves do not have inherent duties; rather, as
powers shift in Mantis politics, the various sects are placed in charge
of various more and less important duties. These duties cover just
about everything a race might need to survive, from food supply
maintenance to ship-building—and even, surprisingly, to humor (Mantis
humor has to be heard to be believed, although it will never be
understood). The three most important sects are the royal Azkar; the
military Malkor, who are in charge of ship-building; and the mystic
Kz’ra, whose influence at court with Queen Azkar is not completely
understood.
The hive-minded race has produced a very interesting kind of technology that is difficult for an individualist society such as the Terrans to
deal with: Everything they build is based upon the precept “numbers
upon numbers.”
56
Page 58

Technology
Several of the Mantis ships are carriers. If they could, they would build
carriers that carry carriers. They don’t care about the individual. Hull
defense is almost completely unimportant: Numbers are what count.
And as Abraham Lincoln of the
Terrans observed, numbers win
wars.
Platforms
Cocoon
The main Mantis platform, the
Cocoon is the Mantis equivalent of
the Terran Headquarters. The
Cocoon is the base of all supply:
both system and unit. A viable
supply line must be traceable (via
Jump Gates) from a system with a
Cocoon to other systems for
them to be in supply. Units low on
ammunition can fly within the resupply radius of the Cocoon to
resupply, and defense platforms built within that resupply radius will
also be resupplied.
Cocoons provide Weavers (the Mantis version of Terran Fabricators)
and, after a Collector and Plantation are built, Zoraps as supplyships.
Command points awarded.
Jump Gate
Wormholes by nature allow easy
access between systems, so it’s
important to build Jump Gates around
wormholes along a supply line. A Jump
Gate effectively locks out unfriendly
traffic, allowing the establishment of
held positions—that is, until someone
destroys it, which is possible from
either side of the wormhole. Requires:
Collector.
Mantis
57
Page 59

Greater Collector
(Evolution)
This evolution of the Collector
harvests and recruits faster; it
also stores a larger amount of
crew. Requires: Collector;
Mutation Colony.
Collector
The Mantis resource refinery, the
Collector automatically harvests ore
and gas from planets, moons, and gas
giants and crew from planets. To
retrieve resources off-planet, Siphons
are built at the Collector and then
sent out to harvest. The Collector
also offers harvesting, supply, and
resupply upgrades and is the starting
point for all ship creation. It can
evolve into the Greater Collector.
Requires: Cocoon.
Chapter 5
Warlord Training Grounds
The Warlord Training Grounds
automatically recruits crew from
planets and trains and provides up to
six Mantis warlords—equivalent to
Terran admirals—for quick battles
and multiplayer games. Requires:
Collector.
58
Page 60

Thripid
Essentially a light shipyard, the
Thripid builds the first of the
Mantis ships: Scout Carriers,
Frigates, Khamirs, Hive Carriers,
and Seekers. It can evolve into
the Niad. Requires: Collector.
Niad (Evolution)
An evolution of the Thripid, the
Niad is where the heavier Mantis
ships are built: Leeches,
Spinelayers, Scarabs, and Tiamats.
Requires: Thripid; Warlord
Training Grounds.
Eye Stalk
The Eye Stalk provides ships with the
vision of the Queen herself, with
upgrades for the sensor range of all
units as well as a large scan radius to
clear the fog of war around it. The
Eye Stalk can evolve into the Mutation Colony. Requires: Cocoon.
Command points awarded.
Mantis
59
Page 61

Mutation Colony
(Evolution)
Fitted with even more effective longrange sensors, this evolution of the
Eye Stalk allows research of several
special Mantis abilities: Mimic,
Repellent Cloud, Gravity Well, and
Repulsor Wave (all described in
“Upgrades and Special Abilities,”
later in this chapter). Requires: Eye
Stalk; Niad. Command points awarded.
Plantation
The Mantis Plantation
resupplies units at a much
greater resupply range than
the Cocoon—valuable in
the far-flung Frontier Wars.
The Plantation can evolve
into the Greater Plantation.
Requires: Thripid.
Chapter 5
Greater Plantation
(Evolution)
The Greater Plantation, an evolution of the Plantation, will repair
ships as well as resupply ships and
defense platforms. Requires:
Plantation.
60
Page 62

Blast Furnace
The Blast Furnace has the ability
to improve all weapons for the
betterment of insectkind, and it
can evolve into the Explosives
Range. Requires: Thripid.
Dissection Chamber
The Mantis leave nothing to the
scavengers. The Dissection Chamber salvages ships for full resource
value. Requires: Plantation.
Explosives Range
(Evolution)
An evolution of the Blast Furnace,
the Explosives Range not only
provides an upgrade for all
weapons but also upgrades for
the Explosive Ram, a special ability
of the Khamir. Requires: Blast
Furnace; Thripid.
Mantis
61
Page 63

Carrion Roost
The Carrion Roost provides
upgrades for Mantis fighters,
which in the carrier-reliant
Mantis fleets are many and
diverse. Requires: Warlord
Training Grounds.
Plasma Spitter
A defensive turret that can be placed in
space but not on planets, the Plasma
Spitter fires nasty, medium-sized plasma
bolts. It can evolve into either the Plasma
Hive or the Voraak Cannon. Requires:
Warlord Training Grounds.
Voraak Cannon
(Evolution)
An evolution of the Plasma Spitter, the
Voraak Cannon fires even nastier,
larger plasma bolts than its forebear.
Requires: Plasma Spitter; Mutation
Colony.
Chapter 5
Plasma Hive (Evolution)
Another evolution of the Plasma
Spitter, this free-floating defensive
turret still fires plasma bolts, but it also
houses one fighter wing. Requires:
Plasma Spitter; Carrion Roost.
62
Page 64

Fusion Mill (Evolution)
An evolution of the Bio Forge, the
Fusion Mill provides upgrades for
ship engines and can evolve into the
Hybrid Center. Requires: Bio Forge.
Bio Forge
The Bio Forge provides
upgrades for ship shields and
can evolve into either a Fusion
Mill or Carapace Plant. Re-
quires: Niad.
Carapace Plant
(Evolution)
Another evolution of the Bio
Forge, the Carapace Plant
offers upgrades for ship hulls.
Like the Fusion Mill, the
Carapace Plant can evolve into
the Hybrid Center. Requires: Bio
Forge.
Mantis
63
Page 65

Hybrid Center
(Evolution)
An evolution of either the
Carapace Plant or Fusion Mill,
the Hybrid Center gives a
Mantis triple threat, with
upgrades for shields, engines,
and hulls. Requires: Fusion Mill
or Carapace Plant.
Ships
Weaver
The equivalent of the Terran
Fabricator, the Weaver can build,
salvage, and repair any available
platform. Requires: Cocoon.
Chapter 5
Zorap
The Mantis supplyship, the
Zorap provides supplies to
all ships and platforms
within its resupply radius.
Requires: Cocoon; Collector;
Plantation.
64
Page 66

Siphon
Built at the Mantis
Collector, the Siphon
gathers gas from
nebulae and ore from
asteroid and debris
fields. Requires:
Collector.
Warlord
A warlord ship is the flagship of a
Mantis fleet, commanded by a
warlord and providing bonuses to all
ships within its assigned fleet. Up to
six Mantis warlords are available in
quick battles and multiplayer games.
Requires: Warlord Training Grounds.
Warlord Mordella
Known to Mantis as “terror from the stars,” Mordella has superior
light carrier tactics, which make enemies run in fear. Mordella was
appointed protector of the Voraak homeworld and royal guard to the
new Queen Ver Lak. Bonuses: Scout Carriers; fighter upgrades; ship
speed.
Warlord Azkar
Under Queen Azkar’s leadership, the Mantis Empire reached many
galaxies. But the Queen was also a feared warrior before her demise,
and so skilled was she in ship command that a clone possessing her
abilities and mind still flies as a warlord. This clone is the warlord
equivalent of the dead queen (and she makes Ker Tak not a little
nervous). Azkar is intent on seeing “her” daughter succeed in overthrowing the disloyal Ver Lak. Bonuses: Scout Carriers; Hive Carriers;
Tiamats; fighter upgrades; sensors.
Mantis
65
Page 67

Warlord Ver Lak
Evil daughter of Queen Azkar and current ruler of the Mantis Empire—and born one second after her sister Ker Tak—Ver Lak was
destined to serve rather than rule. So she conducted a coup, driving
Ker Tak off the home planet with the help of Warlord Malkor. When
Queen Azkar learned of Ver Lak’s treachery, she ordered her own
daughter’s execution. By then, however, Ver Lak had swayed the Royal
Guard, and it was the old queen whose green blood spilled. Now
Queen Ver Lak is busy fending off her sister’s loyalists and the new
enemy, the Terrans. Bonuses: Tiamats; fighter upgrades; supplies; vs.
Celareon ships.
Warlord Ker Tak
First born to Queen Azkar and the rightful heir to the throne, Ker Tak
was driven from her homeworld before she could take her mother’s
ruling seat. Now Ker Tak has traded courtly manners for warlord
command and, with Warlord Malkor, leads a fleet of rebel Mantis
intent on restoring her to power. If such a noble goal calls for alliance
with creatures so nauseating as the Terrans, so be it. Bonuses: Hive
Carriers; fighter upgrades; vs. Mantis ships.
Warlord Thripid
Thripid, the weapons-smith for all advanced Mantis technologies,
created the Thripid light shipyard. His ability to manipulate new
technologies and incorporate them with old ships is legendary.
Recently promoted to warlord due to the Frontier Wars, Thripid
would rather be tinkering with the latest ion engine drives than
battling among the stars. Bonuses: Frigates; range; shields.
Chapter 5
Warlord Malkor
Known to some as General Malkor, this warlord is the leader of the
Red Army, the largest segment of the Mantis forces. Malkor is a vicious
and cruel warrior nearly unequaled in military ability. When he
decided to ally with the lovely Ver Lak, it spelled doom for Queen
Azkar and royal daughter Ker Tak. With the queen out of the way, the
only things standing in the way of his plans for galaxy conquest are Ker
Tak’s forces and the mysterious Terrans. Bonuses: Scarabs; damage; vs.
Terran ships.
66
Page 68

Frigate
The lightly armored
Frigate fires doublestream, medium-sized
plasma bolts. The special
ability of the Frigate is the
Mimic. Requires: Thripid;
Blast Furnace.
Scout Carrier
A lightly armored carrier
housing one wing of Mantis
fighters, the Scout Carrier is
good for both scouting and
distance attacks. Requires:
Thripid.
Khamir
The lightly armored Khamir fires a
dangerous, if small, plasma bolt and can
use its upgradeable special ability, the
Explosive Ram, which allows the
Khamir to ram enemy ships. Requires:
Thripid; Blast Furnace.
Mantis
67
Page 69

Hive Carrier
An impressive, medium-armored
carrier housing two fighter wings,
the Hive Carrier is excellent for
long-distance attacks. The special
ability of the Hive Carrier is its
highly damaging Repellent Cloud.
Requires: Thripid; Carrion Roost.
Seeker
The small and fast Seeker is
excellent for scouting, with its
long-range, cloak-piercing sensors; however, it lacks weaponry.
The Seeker does have ping ability.
Click the Ping button in the
Seeker’s context window to
expose all enemy ships momentarily in the system map, but note that
this ability costs supplies and your own Seeker is briefly exposed to
other players. Requires: Thripid; Eye Stalk.
Chapter 5
Spinelayer
The lightly armored Spinelayer
lays mines for enemy ships—
but those mines cost resources. Requires: Niad;
Explosives Range.
68
Page 70

Leech
The Mantis equivalent of the
Terran Troopship, the Leech
is extremely valuable in
wresting power from enemy
hands. It can take over a
construction ship, a harvesting ship, or any platform
equivalent to its base or
upgrade level—thus, a Leech that has not been upgraded can take
over an unarmored, light-armored, or medium-armored unit; a level 1
Leech can take over a heavy-armored unit; and a level 2 Leech can
take over a Cocoon, Terran Headquarters, or Celareon Acropolis.
Note, though, that a Leech cannot take over a gunship, another Leech,
its enemy equivalent (the Terran Troopship and Celareon Legionnaire),
or an enemy Jump Gate. Requires: Niad; Hybrid Center.
Scarab
The monstrous,
heavily armored
Scarab is a
cruiser with
two turrets
hurling large
plasma bolts at the enemy. Its special ability is
the Gravity Well. Requires: Niad; Carapace Plant.
Tiamat
The most visually imposing—and
dangerous—carrier in the fleet,
the Tiamat is medium-armored
and carries three bomber wings.
The Tiamat moves slowly but
possesses the greatest attack
distance of all Mantis ships. Its
special ability is the Repulsor Wave.
Requires: Niad; Carrion Roost; Bio
Forge; Dissection Chamber.
69
Mantis
Page 71

Upgrades and Special Abilities
General Upgrades
Mantis ships and weapons share numerous universal upgrades
with the Terrans and Celareons. For a description of these
upgrades, see Appendix A.
Special Upgrades and Abilities
Special upgrades and abilities specific to the Mantis are as
follows.
Explosive Ram 1–2 Increase the Explosive Ram’s
damage to enemy ships. Affects: Khamirs. Requires:
Explosives Range.
Fighter Wing 1–5 Provides additional wings of
fighters. Affects: fighters. Requires: Carrion Roost.
Mimic Enables a Frigate to disguise itself as any ship
it targets. Affects: Frigates. Requires: Mutation Colony;
Blast Furnace.
Repellent Cloud Releases a gaseous, area-effective
cloud that slows down and vigorously damages enemy
ships. Affects: Hive Carriers. Requires: Mutation Colony;
Carrion Roost.
Chapter 5
Gravity Well Fires a missile that freezes and damages ships in the area. Affects: Scarabs. Requires: Mutation
Colony; Carapace Plant.
Repulsor Wave Pushes away all enemy ships past
their firing range with a single energy wave. Affects:
Tiamats. Requires: Mutation Colony; Carrion Roost; Bio
Forge; Dissection Chamber.
70
Page 72

CHAPTER 6—CELAREONS
Think of them this way: Our mind,
our intelligence, is essentially energy—electromagnetic impulses
bouncing around inside a relatively
small and unwieldy, although impressively designed, conductor—our
brain. The Celareons have been set
free from the need for the meat.
—Terran Ambassador Brunvand
Mantis
71
Page 73

Chapter 6
History
From the beginning we had no idea what the Celareons looked like
inside those metal exoskeletons of theirs, which enveloped the
individual beings like thick leaden barrels. Some of the humans suggested that the Celareons might be extremely weak physically, requiring the exoskeletons as much to appear imposing as to keep them
ambulatory. They were obviously a very intelligent race, which evolutionarily tended to suggest a biological creature physically ill-equipped
to deal with the dangers of its environment. But if the exoskeletons
worn by the first Celareon ambassadors were required for the
creatures’ survival, then it must be a materially weak race indeed—
after all, humans were not exactly well-equipped to deal with their
environment either, but they didn’t have to wear a big gray can
whenever they went outside.
The Celareons are beings of pure energy. Obviously, they did not
evolve that way—or else why would they need ships? And why the
exoskeletons? Initially, these were questions that the surviving ambassadors were unwilling to answer, but we now know the Celareon
secret: They require exoskeletons because they are born inside
magnetic birthing fields and then immediately transferred into the
shell that will act as their body for the rest of their lives—although of
course they can change their shell at any time circumstances warrant.
So how could these evolutionary freaks have evolved at all? The best
we can work out is that, at one time, the Celareons were biological
organisms just beginning to emerge from the oceans of Solari. According to Celareon myth, an ancient, now half-forgotten race saw the
intellectual potential of the Celareons and decided to send the new
race’s evolution on a quantum jump. They developed and gave to the
Celareons the first containment fields that would be needed to hold
their young and left a pair of ancients in place to oversee the first
several generations of what would be their new creation. Once set on
their new path in this artificial way, the Celareons developed into the
ultra-intelligent creatures that we know today.
72
Page 74

Technology
Celareon platforms and ships are built chiefly for exploration, with
defense as the leading design concern. Their ships are fast and stealthy
and not altogether powerful, since war for the Celareons is an absurd
disease of unsociability and rudeness.
Platforms
Acropolis
The Celareon headquarters, the Acropolis is the
base of all supply: both
system and unit. A viable
supply line must be
traceable (via Jump Gates)
from a system with an
Acropolis to other systems for them to be in supply. Units low on
ammunition can fly within the resupply radius of the Acropolis to
resupply, and defense platforms built within that resupply radius will
also be resupplied.
The Acropolis builds Forgers (the Celareon answer to Terran Fabricators) and, after a Eutromil is built, supplyships known as Stratums.
Command points awarded.
Oxidator
The Celareon resource refinery, the Oxidator must be placed on a
planet, moon, or gas giant, from which it harvests ore and gas. It can
then build Galiot
harvesters to
retrieve resources
from off-planet. The
Oxidator also
offers harvesting,
supply, and resupply
upgrades, and it is
the starting point
for all ship creation.
Requires: Acropolis.
Celareons
73
Page 75

Jump Gate
Wormholes by nature allow easy
access between systems, so it’s
important to build Jump Gates around
wormholes along a supply line. A
Jump Gate effectively locks out
unfriendly traffic, allowing the establishment of held positions—that is,
until someone destroys it, which is
possible from either side of the
wormhole. Requires: Acropolis.
Sentinel Tower
Extremely useful, the
Sentinel Tower has a large
sensor range to clear the fog
of war. It can also upgrade
the sensor range of other
units. Requires: Acropolis.
Command points awarded.
Chapter 6
Pavilion
The Celareon light
shipyard, the Pavilion
builds the smaller
Celareon ships and its
takeover ship: Taoses,
Oracles, Auroras,
Legionnaires, and
Polarises. Requires:
Oxidator; Sentinel
To w e r.
74
Page 76

ESP Coil
Don’t let the enemy get the jump on
you: Place the ESP Coil turret anywhere
in space and watch it shoot a lightning
arc at multiple targets. Requires: Sentinel
To w e r.
Helion Veil
The Helion Veil provides upgrades
for ship shields. Requires: Sentinel
To w e r .
Bunker
The Bunker automatically
recruits crew from planets and
provides the route to your
magistrates and special weapons.
Requires: Oxidator.
Greater Pavilion
Larger ships are built at
the Greater Pavilion, the
Celareon heavy shipyard.
The medium to large
ships available here are
the Atlas, Trireme, and
Monolith. Requires:
Pavilion.
Celareons
75
Page 77

Eutromil
The Celareon supply and
repair platform, the
Eutromil resupplies ships
and defense platforms
within its effective radius,
which is larger than that of
the Acropolis. It also
repairs ships. Requires:
Pavilion.
Proteus
Good for basic spot defense,
the Proteus, as an inexpensive
defensive missile turret, can be
placed anywhere in space.
Requires: Pavilion.
Chapter 6
Citadel
The Citadel is the Celareon
academy where you train and
commission up to six magistrates for quick battles and
multiplayer games. The Citadel
automatically recruits crew
from planets at a higher rate
than the Bunker. Requires:
Bunker.
76
Page 78

Munitions Annex
The Munitions Annex provides
upgrades for weapons and the
Proteus. Requires: Greater Pavilion.
Xeno Chamber
The technology-savvy
Celareons research
their special weapons
at the Xeno Chamber:
Synthesis, Mass
Disrupter, Shroud,
Destabilizer, and Auger
Ray. Requires: Citadel;
Greater Pavilion.
Anvil
The Anvil provides upgrades for ship
hulls. Requires: Greater Pavilion.
Celareons
77
Page 79

Turbine Dock
The Turbine Dock
provides upgrades for
ship engines. Requires:
Greater Pavilion.
Hydrofoil
A little heftier than
the Proteus, the
Hydrofoil is a flakdefense turret.
Requires: Greater
Pavilion; Proteus.
Chapter 6
Starburst
Yet another turret, the
Starburst laser turret
simultaneously fires four
beams. Requires: Munitions Annex; Turbine
Dock.
78
Page 80

Portal
The Portal establishes a one-way wormhole at and to whatever location desired—at a cost. Your Forger is sacrificed
upon its completion; you only have a brief
time to use it, as indicated by its life bar;
and it will suck in everything within a
certain radius. Requires: Xeno Chamber.
Ships
Talorean
Matrix
The Matrix, an energy
ring connecting
platforms around a
planet, increases
those platforms’
shield strength as a
whole. Requires: Xeno
Chamber; Munitions
Annex.
Forger
The equivalent of the
Terran Fabricator, the
Forger can build, salvage,
and repair any available
platform. Requires:
Acropolis.
Celareons
79
Page 81

Stratum
The Celareon
supplyship, the
Stratum provides
supplies to all ships
and platforms.
Requires: Acropolis;
Eutromil.
Galiot
Built at the Celareon
Oxidator, the Galiot gathers
gas from nebulae and ore
from asteroid and debris
fields. Requires: Oxidator.
Chapter 6
Magistrate
A magistrate ship is the
flagship leading its assigned
fleet, generating bonuses for all
members in the fleet in quick
battles and multiplayer games.
Requires: Citadel.
80
Page 82

Magistrate Blanus
The brains (and we use the term lightly, since Celareons are energy
beings, thus all brains) behind Celareon technologies, Blanus knows his
way around a starship. Blanus learned how to harness the volatile
Hyades nebulae to his fleet’s advantage. Enemies would be wise to see
that they have excellent shielding before going up against Blanus.
Bonuses: Triremes; damage; targeting.
Magistrate Elan
Elan is the leader of the Celareon race and ambassador to the Terrans.
In a show of good faith, Elan agreed to the Terran–Celareon peace
accord. With the strength of unity between Terrans and Celareons,
Elan hopes to finally put an end to the Frontier Wars. Bonuses: Mono-
liths; Triremes; Polarises; supplies.
Magistrate Vivac
A fearless commander of the Celareon forces, Vivac’s ingenuity and
guile in military tactics is second to none. Vivac has been known to
agree to ally with Terran forces in order to stop the massive Mantis
army. Bonuses: Monoliths; shields; vs. Mantis ships.
Magistrate Joule
The brilliant mind of Joule was awakened for the Frontier Wars. He
knows how to get the most from his forces by way of pinpoint
accuracy and supply management. Bonuses: Polarises; supplies; targeting;
vs. Terran ships.
Magistrate Procyo
Long dormant in the collective consciousness, Procyo was originally
awakened to take up the fight against the Mantis. Procyo’s genius with
warp drives and fuel usage have gotten him and the Celareon military
out of many jams. Bonuses: Taoses; ship speed; range.
Magistrate Natus
Natus is an intelligent but occasionally less-than-honest magistrate
among the Celareons. He commands great respect and a certain
amount of fear, because his actions are not entirely predictable.
Bonuses: Auroras; sensors; vs. Celareon ships.
Celareons
81
Page 83

Taos
This lightly armored scout ship
seeks information. Its single
thin laser won’t win any battles,
but it will get the Taos back
alive. Its special ability is
Synthesis, the ability to merge
with another friendly ship and
lend its hull points to the other vessel, restoring both hull and supplies
up to the Taos’ current level. Requires: Pavilion.
Polaris
A quick fighter armed with a
two–laser beam attack, the
Polaris special weapon is the
excellent-for-big-targets Mass
Disrupter. Requires: Pavilion;
Citadel.
Aurora
Chapter 6
Also known as the “stealth cruiser,” the Aurora fires one medium
laser and has the ability to cloak. Its special ability is the Shroud, which
allows it to cloak
other friendly
units as well as
itself. Requires:
Pavilion; Helion
Veil; Greater
Pavilion.
82
Page 84

Legionnaire
The Celareon equivalent of
the Terran Troopship, the
Legionnaire is extremely
valuable in wresting power
from your enemy’s hands.
Although it possesses no
armor, the Legionnaire can
take over a construction
ship, a harvesting ship, or any
platform equivalent to its
base or upgrade level—thus, a Legionnaire with no upgrade can take
over an unarmored unit. A level 1 Legionnaire can take over a lightarmored unit, a level 2 a medium-armored unit, and up to level 4,
which can take over an Acropolis, Terran Headquarters, or Mantis
Cocoon. Note, though, that the Legionnaire cannot take over a
gunboat, another Legionnaire, its enemy equivalent (the Terran Troopship and Mantis Leech), or an enemy Jump Gate. Requires: Pavilion;
Bunker.
Oracle
Small, fast, and excellent for scouting, the
Oracle has the ability to cloak and see
deep into fogged territory with its longrange cloak-piercing sensors—all of
which is good, because the Oracle
possesses no weapons. It does, however,
have ping ability. Click the Ping button
in the Oracle’s context window to
expose all enemy ships momentarily in the system map, but note that
this ability costs supplies and your own Oracle is briefly exposed to
other players. Requires: Pavilion; Sentinel Tower.
Celareons
83
Page 85

Atlas
The lightly armored Atlas lays
mines in the path of enemy ships,
causing significant supply damage
when deployed—but remember
that mines will cost you resources. Requires: Greater Pavilion.
Monolith
Trireme
This medium-armored,
medium-sized battleship
fires large plasma bolts. Its
special weapon is the
Destabilizer. Requires:
Greater Pavilion; Munitions
Annex; Turbine Dock.
Chapter 6
The heaviest Celareon ship, the Monolith is one of the few Celareon
ships that doesn’t seem better suited to scientific investigation. This
heavily armored
warship boasts two
powerful laser turrets,
and its special weapon
is the Auger Ray.
Requires: Greater
Pavilion; Munitions
Annex; Turbine Dock;
Xeno Chamber.
84
Page 86

Upgrades and Special Weapons
General Upgrades
Celareon ships and weapons share numerous universal upgrades with
the Terrans and Mantis. For a description of these upgrades, see
Appendix A.
Special Weapons
Upgrades and special weapons specific to the Celareons are as
follows.
Ore 1–3 Improves ore
harvesting. Affects:
Oxidators. Requires:
Oxidator.
Gas 1–3 Improves gas
harvesting. Affects:
Oxidators. Requires:
Oxidator.
Proteus 1–2 Provides
extra missiles. Affects:
Proteuses. Requires:
Munitions Annex.
Synthesis Allows a
Taos to merge with a
friendly ship and restore
the hull and supplies of
that ship up to the Taos’
levels. Affects: Taoses.
Requires: Xeno Chamber.
Mass Disrupter
Damages larger ships
with an energy wave.
Affects: Polarises. Requires:
Xeno Chamber; Citadel.
Shroud Allows the
Aurora to cloak a
friendly ship as well as
itself. Affects: Auroras.
Requires: Xeno Chamber; Helion Veil; Greater
Pavilion.
Destabilizer Casts a
field to paralyze all
enemy ships within a
considerable range.
Affects: Triremes. Re-
quires: Xeno Chamber;
Munitions Annex; Turbine
Dock.
Auger Ray Causes
massive damage in just
seconds while freezing
its target during the
attack. Affects: Monoliths.
Requires: Xeno Chamber; Munitions Annex;
Turbine Dock.
Celareons
85
Page 87

APPENDIX A—UNIVERSAL
UPGRADES
Universal upgrades are weapon and ship upgrades that apply to all
three races. For the specific requirements for these universal upgrades
based on race, see the information box that appears in the main
screen as you move your cursor over the upgrade buttons. For
upgrades and special weaponry particular to each race, see Chapters 4
through 6.
Engine Upgrades
Increase the speed of
ships. Levels: Terran, 4;
Mantis, 3; Celareon, 5.
Harvester, Siphon,
and Galiot Upgrades
Increase the maximum
supply limit for harvester
ships. Levels: Terran, 2;
Mantis, 3; Celareon, 2.
Hull Upgrades Increase ships’ hull points.
Levels: Terran, 4; Mantis, 3;
Celareon, 5.
Resupply Upgrades
Increase the resupply
radius of supply platforms and supplyships.
Levels: Terran, 2; Mantis, 3;
Celareon, 2.
Sensor Upgrades
Increase the sensor
range. Levels: Terran, 2;
Mantis, 3; Celareon, 5.
Shield Upgrades
Strengthen the shields of
ships. Levels: Terran, 4;
Mantis, 3; Celareon, 5.
Supply Upgrades
Increase the amount of
supplies ships can carry.
Levels: Terran, 4; Mantis, 3;
Celareon, 5.
Troopship, Leech, and
Legionnaire Upgrades Increase the
ability of takeover ships
to take over armored
units. Levels: Terran, 3;
Mantis, 2; Celareon, 4.
Weapons Upgrades
Increase the damage
weapons inflict. Levels:
Terran, 4; Mantis, 2;
Celareon, 5.
Universal Upgrades
86
Page 88

APPENDIX B—HOTKEYS
Primary command hotkeys are located on the back cover of this field
manual. This appendix lists the hotkeys for game screens, the interface,
and technology.
Game and Interface
To Press
Zoom in/out PLUS SIGN/
MINUS SIGN
Toggle zoom HOME
Scroll main view Arrow keys
Rotate view RIGHT BRACKET/
right/left LEFT BRACKET
Rotate to BACKSLASH (\)
default view
Technology—Terrans
Then
To Select press
Build Headquarters Fabricator Q
Build Refinery Fabricator X
Build Marine Training Fabricator M
Facility
Build Supply Platform Fabricator S
Build Repair Platform Fabricator E
Build Light Shipyard Fabricator L
Build Jump Gate Fabricator J
Build Naval Academy Fabricator C
Build LR Sensor Tower Fabricator T
Build Ballistics Lab Fabricator Y
Build Squadron Hangar Fabricator G
Build Advanced Hull Fabricator U
Factory
Build Heavy Shipyard Fabricator H
Build Propulsion Lab Fabricator K
Build Displacement Lab Fabricator D
To Press
Pause game P
Quick save (single player) F7
Quick load (single player) F8
Access game menu F9 or ESC
Access Diplomacy screen ALT+D
Access Mission Objectives ALT+M
screen
Then
To Select press
Build AWS Fabricator W
Research Lab
Build Laser Turret Fabricator Z
Build Space Station Fabricator X
Build Ion Cannon Fabricator I
Build Fabricator Headquarters Q
Build Supplyship Headquarters S
Build Harvester Refinery H
Upgrade Harvesters Refinery U
Upgrade Supply Refinery S
Upgrade Resupply Refinery T
Upgrade Gas Refinery G
Upgrade Ore Refinery O
Upgrade Troopships Marine Training T
Facility
Build Corvette Light Shipyard C
Hotkeys
87
Page 89

To Select press
Then
Build Missile Light Shipyard M
Cruiser
Build Troopship Light Shipyard T
Build Infiltrator Light Shipyard S
Build Battleship Heavy Shipyard T
Build Fleet Carrier Heavy Shipyard C
Build Lancer Heavy Shipyard L
Cruiser
Build Dreadnought Heavy Shipyard D
Build Admiral Naval Academy H
Halsey
Build Admiral Naval Academy K
Hawkes
Build Admiral Naval Academy T
Ta k e i
Build Admiral Naval Academy L
Steele
Build Admiral Naval Academy S
Smirnoff
Build Admiral Naval Academy C
Benson
To Select press
Then
Upgrade Sensors LR Sensor Tower S
Upgrade Weapons Ballistics Lab W
Upgrade Missile Ballistics Lab M
Packs
Research Cloaking Ballistics Lab C
Research Fighter Squadron W
Wings Hangar
Upgrade Hulls Advanced Hull H
Factory
Upgrade Engines Propulsion Lab E
Upgrade Shields Displacement S
Lab
Research Tempest AWS Research T
Charge Lab
Research Probe AWS Research C
Lab
Research Vampire AWS Research L
Arc Lab
Research Aegis AWS Research D
Shield Lab
Hotkeys
Technology—Mantis
To Select press
Build Cocoon Weaver Q
Build Collector Weaver C
Build Jump Gate Weaver J
Build Warlord Weaver W
Training Grounds
Build Thripid Weaver T
Build Plantation Weaver O
Build Dissection Weaver D
Chamber
Build Blast Furnace Weaver X
Build Eye Stalk Weaver E
88
Then
To Select press
Then
Build Bio Forge Weaver G
Build Carrion Roost Weaver R
Build Plasma Spitter Weaver S
Build Weaver Cocoon Q
Build Zorap Cocoon Z
Build Siphon Collector H
Upgrade Siphons Collector or U
Greater Col.
Upgrade Supply Collector or S
Greater Col.
Upgrade Resupply Collector or O
Greater Col.
Page 90

Then
To Select press
Evolve into Collector G
Greater Collector
Build Warlord Warlord Training M
Mordella Grounds
Build Warlord Warlord Training Z
Azkar Grounds
Build Warlord Warlord Training W
Ver Lak Grounds
Build Warlord Warlord Training K
Ker Tak Grounds
Build Warlord Warlord Training T
Thripid Grounds
Build Warlord Warlord Training X
Malkor Grounds
Upgrade Leeches Warlord Training L
Grounds
Build Scout Thripid or Niad C
Carrier
Build Frigate Thripid or Niad M
Build Khamir Thripid or Niad K
Build Hive Thripid or Niad H
Carrier
Build Seeker Thripid or Niad S
Evolve into Niad Thripid T
Build Leech Niad L
Build Spinelayer Niad I
Build Scarab Niad G
Build Tiamat Niad T
Upgrade Repair Plantation D
Upgrade Weapons Blast Furnace or W
Explosives Range
Evolve into Blast Furnace E
Explosives Range
To Select press
Then
Research Explosives E
Explosive Ram Range
Upgrade Sensors Eye Stalk S
Evolve into Eye Stalk M
Mutation Colony
Research Mimic Mutation M
Colony
Research Mutation C
Repellent Cloud Colony
Research Mutation G
Gravity Well Colony
Research Mutation T
Repulsor Wave Colony
Upgrade Shields Bio Forge, S
Fusion Mill,
Carapace Plant,
or Hybrid Center
Evolve into Bio Forge G
Fusion Mill
Evolve into Bio Forge C
Carapace Plant
Upgrade Engines Fusion Mill or E
Hybrid Center
Evolve into Fusion Mill or C
Hybrid Center Carapace Center
Upgrade Hulls Carapace Plant H
or Hybrid Center
Upgrade Fighters Carrion Roost W
Evolve into Plasma Spitter V
Voraak Cannon
Evolve into Plasma Spitter H
Plasma Hive
Hotkeys
89
Page 91

Technology—Celareons
Hotkeys
Then
To Select press
Build Acropolis Forger Q
Build Oxidator Forger O
Build Jump Gate Forger J
Build Pavilion Forger Y
Build Greater Pavilion Forger G
Build Bunker Forger I
Build Citadel Forger C
Build Eutromil Forger E
Build Sentinel Tower Forger S
Build Helion Veil Forger H
Build Xeno Chamber Forger X
Build Munitions Annex Forger M
Build Anvil Forger Z
Build Turbine Dock Forger D
Build ESP Coil Forger L
Build Proteus Forger U
Build Hydrofoil Forger K
Build Starburst Forger V
Build Portal Forger W
Build Talorean Matrix Forger T
Build Forger Acropolis Q
Build Stratum Acropolis S
Build Galiot Oxidator H
Upgrade Resupply Oxidator E
Upgrade Supply Oxidator S
Upgrade Galiots Oxidator U
Upgrade Gas Oxidator G
Upgrade Ore Oxidator O
Build Taos Pavilion T
Build Polaris Pavilion M
Build Aurora Pavilion C
Build Legionnaire Pavilion L
Then
To Select press
Build Oracle Pavilion O
Build Atlas Greater S
Pavilion
Build Trireme Greater T
Pavilion
Build Monolith Greater M
Pavilion
Upgrade Legionnaires Bunker L
Upgrade Sensors Sentinel S
To w e r
Build Magistrate Blanus Citadel U
Build Magistrate Elan Citadel E
Build Magistrate Vivac Citadel V
Build Magistrate Joule Citadel J
Build Magistrate Procyo Citadel Y
Build Magistrate Natus Citadel T
Upgrade Shields Helion Veil S
Research Synthesis Xeno S
Chamber
Research Mass Xeno M
Disrupter Chamber
Research Destabilizer Xeno D
Chamber
Research Shroud Xeno C
Chamber
Research Auger Ray Xeno T
Chamber
Research Weapons Munitions W
Annex
Research Proteus Munitions M
Annex
Upgrade Hulls Anvil H
Upgrade Engines Turbine E
Dock
90
Page 92

Digital Anvil
Producers—Erin & Chris Roberts
Line Producer—David Downing
Associate Producer—Eric Peterson
Lead Programmer—Jason Yenawine
Art Director—Sergio Rosas
Test Manager—Evan Brandt
Programmers—Robert Marr,
Thomas Mauer, Sean Barton, Aaron
Hunter
Mission Programmers—Justin
Przedwojewski, John Thomas, Jeff
Posey
Artists—Drew Mobley, Kyle Anderson, Mike Washburn, Kenneth Perez,
David Russ, Rhett Bennett, Mike Dean,
John Blood, Whitney Ayres
Design
Senior Designer—Jamie Wiggs
Designer—Arvee Garde
Mission Design—Jamie Wiggs, Eric
Peterson
Story & Scripts
Jamie Wiggs, Jason Henderson, Chris
Roberts
Cinematics
Lead—Dean McCall
Cinematic Artists—Mark
Goldsworthy, John Sommer, Steven
Stahlberg, Sarma Vanguri, John Ford,
Rhett Bennett
Cinematics Coordinator—Tara
Thomas
Editors—Curtis Neal, Lara Martine
Foss
Audio
Digital Anvil Director of Audio—
Martin Galway
Conquest Audio Director—Eric
Peterson
Sound Designers—Amy Hughes, T. J.
O’Leary
Additional Dialogue Editor—Lara
Martine Foss
Music
Original Score composed, arranged &
produced by James Hannigan
Test Lead
Scott Pace
Testers—James Mitchell, Andrew
Franklin, Jamie Gibbs, Jeff Davis
Digital Anvil Programming
Interns
Indravijay Gohil, Michael Dula
Soundelux Showorks
Creative Director & Sound
Design Supervisor—Scott Martin
Gershin
Sound Designers—Peter Zinda,
Bryan Bowen, Bryan Celano, Dutch
Hill, Alan Rankin, Geoff Rubay
Soundelux Project Coordinator—
Becky Allen
Sound Design Asset Manager—
Glynna Grimala
Casting Director—Carole Ruggier
Voice Over Production Coordinator—Amanda Wyatt
Production Assistant—James Tabb
Credits
91
Page 93

Special Thanks
Jared Carr, Gary Gattis, Dan Orzulak, John Moore, Gary Boswood, Jake
Rodgers, Pauline Saab, Alex Toader, Brad Doan, Mike Cahill, Buck Wall, and Rob
Smith
A HUGE special thanks to all our wives, children, girlfriends, and pets, who
endured the long hours and absence of team members with unimaginable
grace and dignity.
Microsoft
Program Manager/Producer—
Danan Davis
Test Leads—Ken Smith, Jamie Evans
Testers—Daland Davis, Chuck Cooper,
Sean Willmore, Morgan Akers, Jason
Hendricks, Eric Meldrum, Marty Wright
Hardware Configuration Testers—
Harold Ryan, Paul H. Gradwohl, Dan
Hitchcock
Multiplayer Test Lead—Scott Gerlach
Multiplayer Testers—Brian Kirkness,
Shawn Johnson, Bret Fenton, Michelle
Grisim, Joe Kelsay
Network Administrator—Shane
Nelson
Core Playtesters—Dennis Stone, Jr.,
Mike Christensen
Recon Playtester Lead—Douglas
Hall
Recon Playtesters—Adam Maloy,
Bruce Carr, Erik Davis, Jacob Fulwiler,
Mark Shoemaker, Michael Engle, Seth
Elder, Bob Church, Brad Catlin
Usability Lead—Kevin Keeker
Usability Engineer—Michael Medlock
Playtest Lead—Bill Fulton
Playtest Specialists—Ramon Romero,
Credits
Jerome Hagen
Editors—Dana Fos, Amy Robison
Print Production—Chris Lassen, Chris
Burns, Jeannie Davison
Manual/QRC/CD Art—Mark Forrer
Beta Lead—Steve Kastner
Beta Coordinator—Matt Alderman
Software Design Engineer Lead—
Michael Lyons
Localization Project Manager—
Victoria Olson
Localization—Peter Fitzpatrick, Hugh
O’Malley, Robert Lin, Atsushi Miyake,
Hiroshi Ogura, Kazuyuki Kumai
Marketing—Peter Parsons, Rick Mehler
Product Planner—Jon Kimmich
Setup Programmers—Randy
Shedden, Chris Haddan, Melody Litovkin
VP Games Publishing—Ed Fries
General Manager—Stuart Moulder
Development Manager—Craig Henry
Test Manager—Matt Gradwohl
User Education Manager—Jo Tyo
Group Assistant—Kori Brown
Lead Product Planner—Edward
Ventura
Art Director—Douglas Herring
Program Manager Lead—Jonathan
Sposato
Localization Manager—Yasmine
Nelson
Associate Product Unit Manager—
Eric Straub
Creative Director—Jordan Weisman
Legal—Jeff Koontz, Sue Stickney
Special Thanks—Matt Kowalczyk, Mark
Thomas, Humberto Castaneda, Shannon
Loftis
92
Page 94

AA
A
AA
Acropolis (Celareon) 73
Admiral (Terran) 49
admiral context window
15
admirals
commanding fleets
16, 30
creating 30
statistics 17
transferring 16
Advanced Hull Factory
(Terran) 46
Aegis Shield (Terran) 54
alliances 32
antimatter 38
Anvil (Celareon) 77
asteroids 36
Atlas (Celareon) 84
Attack stance 13
attacking enemies 26
Auger Ray (Celareon)
85
Aurora (Celareon) 82
auto-supplying 14
AWS Research Lab
(Terran) 47
BB
B
BB
Ballistics Lab (Terran)
45
Bio Forge (Mantis) 63
black holes 38
Blast Furnace (Mantis)
61
building
construction ships 22
Fabricators 22
Headquarters 22
Jump Gates 27
INDEX
building (continued)
platforms 24
ships 25
Bunker (Celareon) 75
CC
C
CC
campaign, starting
Terran 4
Carapace Plant (Mantis)
63
Carrion Roost (Mantis)
62
Celareons
history 72
overview 7
technology 73
chat 11
Citadel (Celareon) 76
Cloaking
Celareon 82, 83
Terran 45, 54
Cocoon (Mantis) 57
Collector (Mantis) 58
command points
current status 10
described 34
commanding
fleets 16, 30
ships 26
construction ships
building 23
context window 13
finding 18
orders buttons 14
context windows
admiral 15
construction ship 13
control groups 15
Fabricator 13
group ships 15
harvester ship 14
military ship 12
context windows
(continued)
overview 12
platform 17
supplyship 14
control groups
assigning 26
orders buttons 15
Corvette (Terran) 50
crew
current status 10
described 34
DD
D
DD
debris fields 38
Defend stance 13
defending units 12
Destabilizer (Celareon)
85
diplomacy 31
disbanding a fleet 16
Displacement Lab
(Terran) 47
Dissection Chamber
(Mantis) 61
Dreadnought (Terran)
53
EE
E
EE
earth planets 35
escorting units 12
ESP Coil (Celareon) 75
Eutromil (Celareon) 76
exploring territory 27
Explosive Ram (Mantis)
70
Explosives Range
(Mantis) 61
Eye Stalk (Mantis) 59
Index
93
Page 95

Index
FF
F
FF
Fabricator (Terran) 48
Fabricators
building 23
context window 13
orders buttons 13
finding
fleets 18
idle nonmilitary ships
18
research platforms 18
resources 35
shipyards 18
Fleet Carrier (Terran)
52
fleet commands 16
fleets
commanding 30
disbanding 16
establishing 30
finding 18
forming 16
repairing 16
resupplying 16
selecting 16
special weapons 17
Troopship assault 17
Forger (Celareon) 79
forming a fleet 16
Frigate (Mantis) 67
Fusion Mill (Mantis) 63
GG
G
GG
Galiot (Celareon) 80
game options 8, 21
game settings 8, 21
games
loading 4, 20
multiplayer 5
saving 20
single player 4
gas
current status 10
described 34
gas giants 36
graphics 21
Gravity Well (Mantis) 70
Greater Collector
(Mantis) 58
Greater Pavilion
(Celareon) 75
Greater Plantation
(Mantis) 60
group ships
context window 15
fleets 17
orders buttons 15
special weapons 12
guarding units 12
HH
H
HH
Harvester (Terran) 48
harvester ships
context window 14
orders buttons 14
Headquarters (Terran)
41
Headquarters, building a
23
Heavy Shipyard (Terran)
46
Helion Veil (Celareon)
75
Hive Carrier (Mantis)
68
hot buttons 18
hull level, checking 29
Hybrid Center (Mantis)
64
Hydrofoil (Celareon) 78
II
I
II
idle nonmilitary ships,
finding 18
Infiltrator (Terran) 51
installing Conquest:
Frontier Wars 3
Ion Cannon (Terran) 47
JJ
J
JJ
Jump Gate
Celareon 74
Mantis 57
Terran 43
KK
K
KK
Khamir (Mantis) 67
LL
L
LL
Lancer Cruiser (Terran)
53
Laser Turret (Terran) 43
Leech (Mantis) 69
Legionnaire (Celareon)
83
Light Shipyard (Terran)
43
loading games 4
locking alliances 9
locking game settings 9
LR Sensor Tower
(Terran) 42
MM
M
MM
Magistrate (Celareon)
80
main menu 4
main screen 10
Mantis
history 56
overview 7
technology 57
map settings 8, 9
maps, system and sector
19
Marine Training Facility
(Terran) 42
Mass Disrupter
(Celareon) 85
military ships
context window 12
guarding 12
94
Page 96

military ships
(continued)
orders buttons 12
patrolling 12
rally points 18
special weapons,
preparing 12
stances 12
statistics 12
Mimic (Mantis) 70
mining resources 24
Missile Cruiser (Terran)
50
Missile Pack (Terran) 54
Monolith (Celareon) 84
moons 35
moving ships 26
multiplayer games 5, 8
Munitions Annex
(Celareon) 77
Mutation Colony
(Mantis) 60
NN
N
NN
Naval Academy (Terran)
44
nebulae 36
Niad (Mantis) 59
nonmilitary ships, finding
idle 18
OO
O
OO
Oracle (Celareon) 83
options, game 8, 21
orders buttons
construction ships 14
control group 15
group ship 15
harvester ships 14
military ships 12
platforms 18
supplyships 15
ore
current status 10
described 34
Oxidator (Celareon) 73
PP
P
PP
patrolling territory 12
Pavilion (Celareon) 74
ping
Infiltrator (Terran) 51
Oracle (Celareon) 83
Seeker (Mantis) 68
planets 35
Plantation (Mantis) 60
Plasma Hive (Mantis) 62
Plasma Spitter (Mantis)
62
platforms
building 23
context window 17
orders buttons 18
rally points 18
repairing 14, 29
resupplying 28
salvaging 13
Polaris (Celareon) 82
Portal (Celareon) 79
Probe (Terran) 54
Propulsion Lab (Terran)
46
Proteus (Celareon) 76
QQ
Q
QQ
quick battles
game settings 8
loading 4
starting 4
RR
R
RR
races
choosing 9
overview 6
rally points, setting 18
random map generation
8
Refinery (Terran) 42
Repair Platform (Terran)
44
repairing
a fleet 16
platforms 14
units 29
Repellent Cloud (Mantis)
70
Repulsor Wave (Mantis)
70
research platforms,
finding 18
resource bar 10
resources
finding 35
gifting 32
overview 8
resupplying
a fleet 16
units 28
SS
S
SS
salvaging platforms 13
saving games 20
Scarab (Mantis) 69
Scout Carrier (Mantis)
67
sector map 19
sectors, overview 6
Seeker (Mantis) 68
selecting a fleet 16
selecting ships 26
Sentinel Tower
(Celareon) 74
setting rally points 18
settings, game 8, 21
ships
building 25
commanding 26
repairing 28
resupplying 27
selecting 26
shipyards, finding 18
Shroud (Celareon) 85
single-player games 4
Index
95
Page 97

Index
Siphon (Mantis) 65
sounds 21
Space Station (Terran)
45
special weapons
fleets 17
other races 17
preparing to use 12
spectators 9
Spinelayer (Mantis) 68
Squadron Hangar
(Terran) 45
stance buttons 13
Stand Ground stance 13
Starburst (Celareon) 78
starting Conquest:
Frontier Wars 3
statistics
admirals 17
military ships 12
Stratum (Celareon) 80
supply lines
current status 10
establishing 27
overview 6
Supply Platform (Terran)
44
supply status, checking
28
Supplyship (Terran) 48
supplyships
auto-supplying 14
context window 14
orders buttons 14
swamp planets 36
Synthesis (Celareon) 85
system map 19
system supply
current status 10
establishing 27
overview 6
systems
overview 6
setting number of 9
TT
T
TT
takeover ships
in fleet 17
Leech (Mantis) 69
Legionnaire
(Celareon) 83
Troopship (Terran)
51
Talorean Matrix
(Celareon) 79
Taos (Celareon) 82
Tempest Charge (Terran)
54
terrain, setting density 9
Terrans
history 40
overview 7
technology 41
Thripid (Mantis) 59
Tiamat (Mantis) 69
toolbar 11
transferring an admiral
16
Trireme (Celareon) 84
Troopship (Terran) 51
Turbine Dock
(Celareon) 78
VV
V
VV
Vampire Arc (Terran) 54
visibility, setting 9
Voraak Cannon (Mantis)
62
WW
W
WW
Warlord (Mantis) 65
Warlord Training
Grounds (Mantis)
58
waypoints 26
Weaver (Mantis) 64
wormholes 27
XX
X
XX
Xeno Chamber
(Celareon) 77
ZZ
Z
ZZ
Zorap (Mantis) 64
96
Page 98

Microsoft Product Support Services
The services and prices listed here are available in
the United States and Canada only. Support outside
the United States and Canada may vary. Microsoft’s
support services are subject to Microsoft’s thencurrent prices, terms, and conditions, which are
subject to change without notice.
Self-Help
Help yourself with Microsoft Personal Online
Support—designed specifically for home users and
individuals! Go online and get the most up-to-date
answers swiftly and easily. You can use simple self-help
tools or search a wide variety of technical information. If you still need help, Personal Online Support
provides an easy way to submit support incidents
directly to Microsoft via the Web. Connect to
Personal Online Support at http://
support.microsoft.com/.
Assisted Support
No-Charge Assisted Personal Support: If you
acquired this product as a stand-alone retail product,
you are eligible for unlimited no-charge assisted
Personal Support for this product during regular
business hours. You can receive no-charge Personal
Support via the Web or the telephone. When
submitting incidents, be prepared to provide your
Product ID (PID) number. For Applications, the PID is
a 20-digit number that you can find by clicking About
on the main screen.
Paid Assisted Personal Support: If you need help
after hours, or if you have used up or are not eligible
for no-charge Personal Support, you can use Pay-PerIncident Support via the Web on Personal Online
Support or the telephone. Support fees are billed to
your VISA, MasterCard, or American Express card. In
the U.S.: $35 U.S. per incident. In Canada: $45 CDN +
tax per incident. Both are available 24 hours a day, 7
days a week, including holidays.
Note: If your Microsoft product was preinstalled or
distributed with your personal computer or
dedicated system (Windows CE–based device), or
provided by an Internet Service Provider (ISP), and
your PID contains the letters “OEM” after the first
five digits, you are welcome to use the many online
no-charge self-help or paid assisted support offerings
provided by Microsoft. No-charge assisted support
for OEM licenses is not provided by Microsoft. Please
contact the personal computer manufacturer, device/
system manufacturer, or ISP directly for more
information regarding their no-charge and paid
offerings for support of your product. Please check
the documentation that came with your personal
computer or check our list of manufacturer phone
numbers at http://support.microsoft.com/support/
webresponse/pid/oem.asp.
Retail versions of Microsoft software are those standalone packaged products purchased at retail stores,
mail-order resellers, and online resellers. Microsoft
products preinstalled or distributed with your
personal computer or dedicated system (Windows
CE-based device), provided by an ISP, or purchased
through a volume licensing program such as Select,
Open, or License Packs receive all Microsoft support
privileges, excluding no-charge assisted support.
Getting Assisted Support
When you contact Product Support Services, you
should be at your computer and have the following
information at hand:
• The version of your Microsoft product.
• The type of hardware, including network
hardware, if applicable.
• The operating system (e.g., DOS, Windows 98,
Windows NT, and so on).
• The exact wording of any informational or error
messages that appeared on your screen.
• A description of what happened and what you
were doing when the problem occurred.
• A description of how you tried to solve the
problem.
Via the Web
Web-based support on Microsoft’s Personal Online
Support is available 24 hours a day, 7 days a week. Via
the Web, you can submit a no-charge or paid incident
to a Microsoft Support Professional any time day or
night. You will receive notification from Microsoft
that your solution is available and your answers are
ready during regular business hours. Connect to
Personal Online Support at http://
www.microsoft.com/support.
Via the Phone No-Charge
• In the U.S.: Games & Multimedia: (425) 637-9308.
Regular business hours for no-charge assisted
Personal Support are 5 AM to 9 PM Pacific time
Monday through Friday and 9 AM to 3 PM Pacific
time Saturdays, excluding holidays. This number is
based in Redmond, Washington, so your phone
company may charge you for your call. Contact
your long-distance provider for rate information.
• In Canada: Games & Multimedia: (905) 568-3503.
Regular business hours for no-charge assisted
Personal Support are 8 AM to 11 PM, Monday
through Friday, Eastern time, 10 AM to 11 PM
Saturdays, excluding holidays. This number is based
in Mississauga, Ontario, so your phone company
may charge you for your call. Contact your longdistance provider for rate information.
Via the Phone Paid
• In the U.S.: (800) 936-5700. Available 24 hours a
day, 7 days a week, including holidays.
• In Canada: (800) 668-7975. 8 AM to 8 PM Eastern
time Monday through Friday only.
 Loading...