

Page 1

CONTENTS
Introduction . . . . . . . . . . . . . . . . . . . . . . . . . . . . . . . . . . . . . 4
Installation . . . . . . . . . . . . . . . . . . . . . . . . . . . . . . . . . . . . . . 5
Enter CD Key . . . . . . . . . . . . . . . . . . . . . . . . . . . . . . . . . 5
Latest Information . . . . . . . . . . . . . . . . . . . . . . . . . . . . . . 6
The Single Player Game . . . . . . . . . . . . . . . . . . . . . . . . . . . . 6
Main Menu . . . . . . . . . . . . . . . . . . . . . . . . . . . . . . . . . . . . . 6
Playing the Game . . . . . . . . . . . . . . . . . . . . . . . . . . . . . . . . . 7
In-Game Display . . . . . . . . . . . . . . . . . . . . . . . . . . . . . . . 7
Movement Controls . . . . . . . . . . . . . . . . . . . . . . . . . . . . . . . 9
Crouching and Going Prone . . . . . . . . . . . . . . . . . . . . . .11
Leaning . . . . . . . . . . . . . . . . . . . . . . . . . . . . . . . . . . . . . .11
Sprinting . . . . . . . . . . . . . . . . . . . . . . . . . . . . . . . . . . . . .11
View Controls . . . . . . . . . . . . . . . . . . . . . . . . . . . . . . . . . . . .12
Weapons Controls . . . . . . . . . . . . . . . . . . . . . . . . . . . . . . . .13
Melee Attack . . . . . . . . . . . . . . . . . . . . . . . . . . . . . . . . . .14
Reloading Weapons . . . . . . . . . . . . . . . . . . . . . . . . . . . . .14
Aiming Down the Sight (ADS) . . . . . . . . . . . . . . . . . . . .14
Swapping Weapons and Picking Up Items . . . . . . . . . . . .15
“Cooking Off” Grenades . . . . . . . . . . . . . . . . . . . . . . . . .15
Binoculars and Artillery Strikes . . . . . . . . . . . . . . . . . . . .16
Other Controls . . . . . . . . . . . . . . . . . . . . . . . . . . . . . . . . . . .16
Show Objectives/Score . . . . . . . . . . . . . . . . . . . . . . . . . . .17
Quick Save/Quick Load . . . . . . . . . . . . . . . . . . . . . . . . . .17
Weapons of Call of Duty:™United Offensive™ . . . . . . . . . . . . .17
United States . . . . . . . . . . . . . . . . . . . . . . . . . . . . . . . . . .17
Browning .30 Caliber M1919A6
Deployable Light Machine Gun . . . . . . . . . . . . . . . . .17
2.36-in Rocket Launcher, M1A1 “Bazooka” . . . . . . . .18
Russia . . . . . . . . . . . . . . . . . . . . . . . . . . . . . . . . . . . . . . . .18
Tokarev SVT-40 . . . . . . . . . . . . . . . . . . . . . . . . . . . . .18
Degtyarev-Pekhotny 28 . . . . . . . . . . . . . . . . . . . . . . . .18
Tokarev TT-33 . . . . . . . . . . . . . . . . . . . . . . . . . . . . . .19
1
Page 2

United Kingdom . . . . . . . . . . . . . . . . . . . . . . . . . . . . . . .19
Silenced Sten Mk IIs . . . . . . . . . . . . . . . . . . . . . . . . . .19
Webley Mk 4 . . . . . . . . . . . . . . . . . . . . . . . . . . . . . . .20
Germany . . . . . . . . . . . . . . . . . . . . . . . . . . . . . . . . . . . . .20
Gewehr 43 . . . . . . . . . . . . . . . . . . . . . . . . . . . . . . . . .20
Machinegewehr 34 General-Purpose Machine Gun . .21
Raketenpanzerbüchse “Panzerschrek” . . . . . . . . . . . . .21
Flammenwerfer 35 “Flamethrower” . . . . . . . . . . . . . .22
New Weapons . . . . . . . . . . . . . . . . . . . . . . . . . . . . . . . . .22
Deployable Light Machine Guns . . . . . . . . . . . . . . . .22
Flamethrowers . . . . . . . . . . . . . . . . . . . . . . . . . . . . . . .22
Satchel Charges . . . . . . . . . . . . . . . . . . . . . . . . . . . . . .23
Smoke Grenades . . . . . . . . . . . . . . . . . . . . . . . . . . . . .23
Stationary Weapons . . . . . . . . . . . . . . . . . . . . . . . . . . .23
Vehicles . . . . . . . . . . . . . . . . . . . . . . . . . . . . . . . . . . . . . . . . .24
Russia . . . . . . . . . . . . . . . . . . . . . . . . . . . . . . . . . . . . . . . .24
SU-152 Heavy Tank . . . . . . . . . . . . . . . . . . . . . . . . . .24
T-34/85 Medium Tank . . . . . . . . . . . . . . . . . . . . . . . .24
Gaz 67b Light Truck . . . . . . . . . . . . . . . . . . . . . . . . . .24
United Kingdom/United States . . . . . . . . . . . . . . . . . . . .25
Sherman M4A1 Medium Tank . . . . . . . . . . . . . . . . . .25
Willys Jeep . . . . . . . . . . . . . . . . . . . . . . . . . . . . . . . . .25
Germany . . . . . . . . . . . . . . . . . . . . . . . . . . . . . . . . . . . . .25
“Elefant” Heavy Tank . . . . . . . . . . . . . . . . . . . . . . . . .25
Panzer IV Medium Tank . . . . . . . . . . . . . . . . . . . . . . .26
Horch 1a Light Truck . . . . . . . . . . . . . . . . . . . . . . . . .26
Other Information . . . . . . . . . . . . . . . . . . . . . . . . . . . . . . . .26
Health Kits . . . . . . . . . . . . . . . . . . . . . . . . . . . . . . . . . . .26
Multiplayer . . . . . . . . . . . . . . . . . . . . . . . . . . . . . . . . . . . . . .27
Multiplayer Options . . . . . . . . . . . . . . . . . . . . . . . . . . . .28
Finding and Connecting to Multiplayer Servers . . . . . . . .29
Connecting to Your ISP . . . . . . . . . . . . . . . . . . . . . . .29
Setting Your Data Rate . . . . . . . . . . . . . . . . . . . . . . . .29
Server Listing . . . . . . . . . . . . . . . . . . . . . . . . . . . . . . .29
2
Page 3

Server Filters . . . . . . . . . . . . . . . . . . . . . . . . . . . . . . . .30
Connecting to a Specific Server . . . . . . . . . . . . . . . . . .31
Adding to Favorites . . . . . . . . . . . . . . . . . . . . . . . . . . .32
Server Info . . . . . . . . . . . . . . . . . . . . . . . . . . . . . . . . .32
Creating a Server . . . . . . . . . . . . . . . . . . . . . . . . . . . . .32
General . . . . . . . . . . . . . . . . . . . . . . . . . . . . . . . . . . . .32
Advanced . . . . . . . . . . . . . . . . . . . . . . . . . . . . . . . . . .33
Settings . . . . . . . . . . . . . . . . . . . . . . . . . . . . . . . . . . . .34
Vehicles . . . . . . . . . . . . . . . . . . . . . . . . . . . . . . . . . . . .35
Weapons . . . . . . . . . . . . . . . . . . . . . . . . . . . . . . . . . . .36
Multiplayer Vehicle Controls . . . . . . . . . . . . . . . . . . . . . .36
Vehicle Weapons . . . . . . . . . . . . . . . . . . . . . . . . . . . . .36
Vehicle Views . . . . . . . . . . . . . . . . . . . . . . . . . . . . . . .37
Vehicle Positions . . . . . . . . . . . . . . . . . . . . . . . . . . . . .37
Multiplayer Battlefield Promotions . . . . . . . . . . . . . . . . .38
Multiplayer Maps . . . . . . . . . . . . . . . . . . . . . . . . . . . . . . .39
Multiplayer Game Types . . . . . . . . . . . . . . . . . . . . . . . . .40
Domination . . . . . . . . . . . . . . . . . . . . . . . . . . . . . . . .40
Capture the Flag . . . . . . . . . . . . . . . . . . . . . . . . . . . . .40
Base Assault . . . . . . . . . . . . . . . . . . . . . . . . . . . . . . . . .40
Important Tips . . . . . . . . . . . . . . . . . . . . . . . . . . . . . . . . . . .41
Credits . . . . . . . . . . . . . . . . . . . . . . . . . . . . . . . . . . . . . . . . .42
Customer Support . . . . . . . . . . . . . . . . . . . . . . . . . . . . . . . .47
Software License Agreement . . . . . . . . . . . . . . . . . . . . . . . . .49
3
Page 4

INTRODUCTION
On air, land or sea, one thing has remained constant throughout
history—in war, no one fights alone. From the skies over
Western Europe to the rolling plains of Russia, the Allies stood
together against their common enemy and prevailed. In Call of
Duty:™United Offensive™you will be immersed in some of the
most decisive battles of World War II.
Become Corporal Scott Riley as you and your brothers in the
besieged 101st airborne hold out in Bastogne during the Battle
of the Bulge. Relive the career of S.O.E. operative James Doyle
from your last bombing run as a gunner with the R.A.F. to the
invasion of Sicily in 1943. Assume the role of Conscript Private
Yuri Petrenko as you and your comrades take part in the events
of the summer of 1943, from the Battle of Kursk to the final
battle for the city of Kharkov.
Whether in a small unit sabotaging an enemy train in occupied
Europe, or part of an entire tank division advancing across the
Russian steppes, one truth rings through: success in battle
cannot be realized by any one man. Adversity cannot be
overcome without unity, and victory can only be achieved
through a United Offensive.
4
Page 5

INSTALLATION
A previous full installation of Call of Duty™is required to play
Call of Duty:™United Offensive.
Insert disc one of Call of Duty:™United Offensive™into your
CD-ROM drive. After a few seconds, the splash screen will appear.
Click Install to begin the installation process and then follow the
on-screen instructions.
If the splash screen does not appear, you may have Autorun disabled.
Double-click on the My Computer icon on your desktop. Open the
CD-ROM drive with the Call of Duty:™United Offensive™CD inserted.
Double-click on Setup.exe to launch the Start screen. If you need
more information, consult the help files.
Enter CD Key
The Installer will prompt you to enter a CD key. You must have a
valid CD key to continue the installation process and play Call of
Duty:™United Offensive.™Your unique CD key is affixed to the jewel
case your game CDs are contained in.
Note: Call of Duty:™United Offensive™has its own CD key, separate
from Call of Duty.™Your Call of Duty™key will not allow you to play
Call of Duty:™United Offensive.
When prompted, enter the CD key as it appears on the jewel case.
It’s important that you observe the following guidelines to ensure the
privacy of your CD key:
• Keep your CD key in a safe, private place in case you need to
reinstall your game at a later point.
• Players with invalid CD keys will not be permitted to join
Multiplayer games, so be sure to enter it correctly, as it appears on
the jewel case.
• No one from Activision or Gray Matter will ever ask you for your
CD key (in game, on message boards or in chat rooms). Never give
it out to anyone! If you lose your CD key, you will not be issued
another one.
™
™
5
Page 6

Latest Information
You’ll find the latest information about the game in the Readme
file on the game disc. Select Readme from the Start screen to
view this information. If you’re having problems installing or
playing the game, you’ll also find help in the Help files section
of the Start screen.
THE SINGLE PLAYER GAME
In the Single Player campaigns, you play as an Allied soldier
deep in the thick of some of the fiercest combat of the Second
World War. The success of your squad, the completion of your
mission and even your very survival depends on how well you
move, how well you shoot and, perhaps most importantly, how
well you keep your wits about you.
To begin a Single Player game, select Play Call of Duty:
United Offensive™Single Player from the Call of Duty:
United Offensive™folder contained in the Programs section
of the Windows®Start Menu.
™
™
MAIN MENU
After you view the introductory movies, the Main menu
appears. From this menu you can launch new games, resume
games in progress, switch to the Multiplayer portion of
Call of Duty:™United
Offensive™or access the
configuration options.
Resume Game – Resume
Game loads the last game
you saved so you can
continue your progress
through the campaigns.
6
Page 7

New Game – Launch a ne w Call of Duty:™United Offensive™game
from the beginning of the first campaign. After selecting
New Game, choose your difficulty level from one of the four
options available.
Load Game – Load any games you’ve saved. When you reach the
Load/Save menu, select the game name in the box on the left side
of your screen and then click Load.
Multiplayer – Launch the Multiplayer component of Call of
Duty:™United Offensive,™where you can join or create Multiplayer
servers via LAN or Internet.
Options – Configure your controls and adjust audio/video
quality and performance settings. Click on the sub-sections on
the right side of the screen for additional options. Click on those
settings to change them. A list of default controls can be found
on the following pages.
Quit – Exit the game and return to the desktop.
PLAYING THE GAME
Each mission loading screen provides crucial information about
the setting, objectives, opportunities and potential obstacles you’ll
encounter in the mission. This information comes as personal
journal entries or communiqués from your superiors. Study them
closely before entering the mission. The information they contain
could save your life.
In-Game Display
Compass – The compass helps you navigate your surroundings
and get your bearings. In addition to showing you which
direction you’re facing, it shows you the location of Allies in your
vicinity (green arrows) and the location of your current objective
(a golden star).
7
Page 8

Stance Indicator – The
triangle-shaped icon shows
your current stance. The icon
changes from standing to
crouching to prone,
depending on the stance you
choose. It also changes to a
fast runner icon to indicate
you’re sprinting. As your
sprint energy depletes, the
icon drains from white to black. After you finish sprinting, the
icon fills up again as your energy recharges.
Status Text – Throughout the game, updates appear here
including changes in mission objectives, picking up health and
other alerts.
Ammunition Counter – The box in the lower right-hand
section of the screen is your ammunition counter. The first
number indicates how many rounds are in your current
weapon’s clip. The second number indicates your total number
of rounds.
Health Bar – This bar indicates your current health status. A
full green bar indicates full health. The bar reduces in size and
changes color along the spectrum from green to red as you
lose health.
Crosshair – Use your crosshair to aim your weapon. When you
run or walk, your crosshair widens, indicating the lack of
accuracy that comes from attempting to aim while moving. The
wider the crosshair, the less accurate your shots. When you stop
moving, you automatically steady your weapon and your
crosshair narrows. It’s often wisest to fire when completely
stopped to ensure accurate shots (and enable you to conserve
ammo). Crouching or lying prone also keeps your crosshair
focused, so use these positions whenever possible. Your crosshair
8
Page 9

changes when you encounter interactive objects. If you move your
crosshair over an ally who’s close to you, you’ll see your crosshair
change to the image of a person. Press the Attack key (default: left
mouse button) to ask individuals to move out of your line of sight.
Pickup/Interact Indicator – This indicator appears when there’s
an item you can pick up, be it a health kit, secret documents or a
new weapon. To pick up the desired item, press your Use key
(default: F ). In the case of a new weapon (or ammunition for your
current arsenal), press and hold the Use (default: F ) key. This icon
also appears when you can interact with an object.
MOVEMENT CONTROLS
The default movement keys are as follows:
COMMAND DEFA ULT KEY DESCRIPTION
Forward W Walk for ward.
Backpedal S Walk backward.
Move Left A Sidestep left.
Move Right D Sidestep right.
Lean Left Q Lean left around corners to minimize
exposure.
Lean Right E Lean right around corners to
minimize exposure.
Stand/Jump Spacebar Stand upright from either the
crouching or prone position or jump
when in the upright position.
Go to Crouch C Crouch from either the standing
or prone position.
Go to Prone Ctrl Lie prone from either the standing or
crouched position.
9
Page 10

Jump/ Unbound Jump (when already standing) or
Stance Up move up to stand from either prone
or crouch.
Stance Down Unbound Move down one stance position
(from standing to crouching or from
crouching to prone).
Stance Up Unbound Move up one stance position (from
crouching to standing or from
prone to crouching).
Toggle Crouch Unbound Press once to move into crouch
position. Press again to return to
your previous stance.
Toggle Prone Unbound Press once to move into prone
position. Press again to return to
your previous stance.
Hold Down Unbound Hold to crouch. When released, you
Crouch return to your previous stance.
Hold Down Unbound Hold to lie prone. When released,
Prone you return to your previous stance.
Turn Left Unbound Rotate to the left while staying in
one position.
Turn Right Unbound Rotate to the right while staying in
one position.
Strafe Unbound Sidestep (control direction with
the mouse).
Sprint Alt Run fast for a short period of time.
In addition to running forward, backward, left and right, you’ll
need to master the other movement skills described on the
following pages.
10
Page 11

Crouching and Going Prone
As soon as you enter your first battle, you’ll find that a soldier
who stands around often winds up dead. A shrewd player makes
use of both the crouch and prone stance positions when in the
thick of battle to keep cover, avoid enemy fire and move without
exposing himself to danger. Keep in mind that while crouched or
prone, you’ll be harder to hit, but won’t move as fast as when
standing up. Additionally, when prone, you’ll crawl on your belly
at a very slow pace and won’t be able to fire while moving.
Important Tip: Always use available cover! Crouching or lying
behind trees and brush can keep the enemy from spotting you.
Getting behind bulletproof objects can save you from gunfire.
Leaning
The ability to lean around corners and obstacles is essential to
your survival. Leaning minimizes your exposure in potentially
dangerous situations and allows you to look into rooms, around
corners and otherwise peek from behind cover to survey the
situation, check for hidden enemies and even fire at them. You
can still be seen and even shot while leaning, so exercise caution.
You activate the lean controls for as long as you hold down the
key. Releasing either lean key (default: Q and E) returns you to a
centered view position.
Sprinting
The ability to sprint for short distances is a new feature in Call of
Duty:™United Offensive.™Like leaning and crouching, sprint is
most useful for minimizing your exposure to enemy fire. Use
sprint to move rapidly from cover point to cover point. While
sprinting, you will be unable to fire your weapon.
Important: Sprint only works when you’re standing up—it will
not engage from the prone or crouching positions.
11
Page 12

VIEW CONTROLS
The default view keys are as follows:
COMMAND DEFA ULT KEY DESCRIPTION
Look Up Unbound Shifts your view up to see above you.
Look Down Unbound Shifts your view down to see
below you.
Mouse Look Unbound Toggles between mouse-controlled
view and keyboard-controlled view.
Center View Unbound Returns your view to front
and center.
Free Look Yes Enable mouse-controlled “free”
viewing—move your mouse to
view 360.°
Invert Mouse No Invert the Y-axis of the mouse if
you prefer.
Smooth Mouse No Makes mouse movement less jittery.
MouseSensitivi t y Slider Controls the responsiveness of
the mouse.
By default, looking around in the game is controlled by the mouse.
Moving your mouse from side to side rotates your view left or right.
Moving your mouse forward (away from you) causes you to look up,
while moving your mouse backward (toward you) causes you to
look down.
12
Page 13

WEAPONS CONTROLS
The default weapons-related keys are as follows:
COMMAND DEFAULT KEY DESCRIPTION
Attack Left Mouse Fire weapon.
Button
Toggle Aim Right Mouse Switch between “Aim Down
Down the Sight Button the Sight” and “From the Hip”
firing modes.
Aim Down Unbound This command, when held
the Sight down, allows you to aim down
the sight of your gun. Release it
to return to “From the Hip”
firing mode.
Melee Attack Shift Strike the enemy with the butt
of your gun.
Reload Weapon R Reload weapon.
Change Rate M Switch between fully automatic
of Fire and semiautomatic firing modes.
(Note: Not all weapons have
multiple firing modes)
Select First Weapon 1 Switch your active weapon to the
first weapon slot.
Select Second 2 Switch your active weapon to
Weapon the second weapon slot.
Select Pistol 3 Switch your active weapon to
your pistol.
Select Grenade 4 Switch your active weapon to
grenades.
Select Smoke 5 Switch your active weapon to
Grenade smoke grenades.
(Multiplayer Only)
13
Page 14

Select Satchel 6 Switch your active weapon to
Charge satchel charges.
(Multiplayer Only)
Select Binoculars 7 Switch your active weapon to
binoculars. (Multiplayer Only)
Next Weapon Mouse Switch to the next weapon in
Wheel Down your inventory.
Previous Mouse Switch to the previous weapon
Weapon Wheel Up in your inventory.
Melee Attack
Sometimes the proximity of your enemies makes it difficult to
aim your weapon and defend yourself properly. Fortunately, you
have a Melee Attack (default: shift) available that allows you to
smack an enemy at close range with the butt end of your rifle
or pistol.
Reloading Weapons
When your weapon’s clip runs out of ammunition, you will
automatically reload. Monitor your ammunition carefully!
Reloading (default: R) in the middle of a firefight takes time and
leaves you unable to defend yourself. If you’re running low on
ammunition, pick up the extra ammunition from a fallen
comrade’s weapon of the same type. If all else fails, grab a weapon
from a fallen enemy.
Aiming Down the Sight (ADS)
With every gun, you can enable the “aim down the sight”
function, bringing the weapon up from your hip to your face so
you can look down the sight (or look into the scope, in the case
of scoped rifles). Aiming down the sight gives you a slight zoom
effect, enabling you to be more accurate. However, when aiming
down the sight, you move more slowly than normal.
14
Page 15

The default toggle key for Aim Down the Sight is the right
mouse button. You can also bind a key to “hold down” between
ADS and normal modes.
Swapping Weapons and Picking Up Items
When you see a weapon on the ground, you can swap it with one
of your two main weapons (slot 1 or slot 2). To swap weapons,
move your crosshair over the weapon and hold down the Use key
(default: F). You’ll automatically drop your current weapon and
pick up the new weapon.
Picking up items is as simple as pointing your crosshair at the
item and pressing the Use key (default: F), or, in the case of
health and ammunition, walking over the item.
“Cooking Off” Grenades
You now have the ability to pull the pin and hold a grenade for as
long as you want in order to “cook off” the charge. This is useful
if you want to have more precision in your grenade throws. In the
Single Player missions, it also reduces the ability for an enemy to
pick up the grenade and throw it back to you.
To cook off grenades, press and hold the Fire button (default: left
mouse button), then press and hold the Aim Down the Sight
button (default: right mouse button) for as long as you want to
hold the grenade in your hand. Your crosshair pulses for each
second you hold it. When you want to throw the grenade, release
both the fire and ADS mode buttons. The grenade will fly for as
long as it has left on its fuse and explode.
Important Note: In Multiplayer, you can also cook off satchel
charges in the same way you do grenades.
15
Page 16

Binoculars and Artillery Strikes
When you’ve achieved the highest rank in a Multiplayer game,
you acquire a set of binoculars (default: 7). Binoculars allow you
to view aspects of the battlefield from an extremely long range.
They also allow you to call in an artillery strike. To call in an
artillery strike, use the binoculars by going into Aim Down the
Sight mode, then press the Fire button (default: left mouse
button) while aiming at your target. You’ll know the artillery
strike has been called in when your ammo counter goes from
1 to 0.
OTHER CONTROLS
COMMAND DEFAULT KEY DESCRIPTION
Show Objectives/ Tab Bring up a list of your
Score mission objectives.
Use F Use, pick up, drop off and
otherwise interact with items
and devices.
Screenshot F12 Take an in-game screenshot.
Quick Save F5 Quickly save your game in the
middle of a mission.
Quick Load F9 Load your Quick Save game.
Enable Console No Set this to Yes if you want to
enable the in-game console
(accessible by pressing the
tilde ~ key). Please be advised
that the console is not
supported. Please do not call
Activision Customer Support
with any questions regarding
this feature.
16
Page 17

Show Objectives/Score
Throughout your campaign, mission objectives change. Press the
Show Objectives/Score key (default: tab) to show your mission
objectives and give you a status on each one.
• Incomplete or in-progress mission objectives appear in green text.
• Failed mission objectives appear in red text.
• Completed mission objectives appear in black text.
Quick Save/Quick Load
As you progress through the campaigns, it’s wise to save your
progress. The Quick Save (default: F5) and Quick Load (default:
F9) hotkeys allow you to avoid the save/load menus and stay in
the action.
WEAPONS OF CALL OF DUTY:
UNITED OFFENSIVE
This section lists all weapons that have been added to the United
Offensive™expansion pack. Original Call of Duty™weapon
descriptions can be found in the original Call of Duty™manual.
™
™
United States
Browning .30 Caliber M1919A6 Deployable Light
Machine Gun
The air-cooled M1919A6 was introduced as a lighter alternative
to the monstrous, 93-pound water-cooled M1917. Weighing
about 43 pounds with tripod, the M1919A6 was easier to
transport with infantry units, as well as easier to mount on tanks.
It was one of the most reliable weapons of the Second World War.
Range: Long
Rate of Fire: Very Fast
Damage: High
Mobility: Fast
17
Page 18

2.36-in Rocket Launcher, M1A1 “Bazooka”
One of the simplest, yet most effective, weapons in the United
States arsenal, the bazooka was little more than a steel tube fitted
with wooden stocks for aiming and securing. Although GIs used
bazookas to flush out pillboxes, blow lanes through minefields
and even disable artillery, the bazooka’s claim to fame was as an
anti-tank weapon. Its superiority in this regard prompted the
Germans to copy its design after capturing examples of the M1 in
Tunisia in 1943.
Range: Short
Rate of Fire: Slow
Damage: Very High
Mobility: Slow
Russia
Tokarev SVT-40
The Samozaryadnaya Vintovka Tokareva-40 (“Tokarev selfloading rifle”), manufactured between 1941 and 1945, was a
major upgrade from the standard Mosin-Nagant bolt-action rifles
of the Red Army. Though most Russian troops were ill trained to
use the reloading rifle effectively, German troops considered it a
trophy weapon, prized for its accuracy and superior firepower.
Range: Long
Rate of Fire: Medium
Damage: High
Mobility: Fast
Degtyarev-Pekhotny 28
The 7.62 mm Ruchnoy Pulemyot Degtyaryova pakhotnyi
(“Degtyarev hand-held infantry machine gun”) was a paragon of
simplicity and easy maintenance. Apart from a bipod that was
prone to break if handled roughly, the DP-28 provided the Red
Army with reliable and effective fire from its introduction in
1928 to the end of the war.
18
Page 19

Range: Long
Rate of Fire: Ver y Fast
Damage: High
Mobility: Fast
Tokarev TT-33
The Tokarev TT-33 became the standard pistol of the Red Army
in 1933. It was an evolution of the American Colt-Browning
automatic pistol, similar in design to the M1911. Russian
engineers improved several aspects of the design, making it more
reliable, easier to produce and capable of withstanding a
tremendous amount of abuse.
Range: Short
Rate of Fire: Medium
Damage: Moderate
Mobility: Very Fast
United Kingdom
Silenced Sten Mk IIs
The Sten derives it name from its two designers, Major R.V.
Shepherd and H.J. Turpin, and the place it was made, the Enfield
Lock Small Arms Factory. In 1940, Britain found itself with a
shortage of weapons, and Shepherd and Turpin’s design proved
simple, easy to manufacture and reliable in the field. More than a
hundred thousand Sten Mk Is were produced, providing British
troops with a lightweight, compact, easy-to-maintain machine
gun. A limited number of Mk IIs models fitted with silencers
were produced for SAS Commandos and raiding forces.
Range: Short
Rate of Fire: Ver y Fast
Damage: Moderate
Mobility: Very Fast
19
Page 20

Webley Mk 4
Used extensively through the armies of the British Commonwealth
from 1939 to 1945, the Webley Mk 4 revolver was a simple, nofrills combat revolver. Firing a smaller 0.38-inch round than the
World War I–era Webley 0.455-inch pistol, the Mk 4 was lighter
and easier to fire and required less training and practice to use.
The Mk 4 is so popular it remains in service in various parts of
the world to this day.
Range: Short
Rate of Fire: Slow
Damage: High
Mobility: Very Fast
Germany
Gewehr 43
Early in the war, the Germans produced a reloading rifle called the
Gewehr 41(W). It was unwieldy, difficult to reload and unreliable
in the field, and when German troops found themselves face-toface with the superior Tokarev SVT-40, its limitations cost many
lives. Seizing several SVT-40s, German engineers noticed the
Tokarev’s gas-operated reloading system was superior to theirs, so
they integrated it into their existing rifle design. The Gewehr 43
was the result. German troops appreciated its easy reloading, high
accuracy and excellent reliability.
Range Long
Rate of Fire: Medium
Damage: High
Mobility: Fast
20
Page 21

Machinegewehr 34 General-Purpose Machine Gun
Though the Treaty of Versailles specifically prohibited Germany
from producing any kind of sustained-fire weapon, they
circumvented this by funding its development in Switzerland.
This development produced an aircraft machine gun, the
Rheinmetall MG 15, from which the MG 34 was born.
Considered one of the finest machine gun designs in history, the
MG 34 saw service on all fronts of the War.
Range: Long
Rate of Fire: Ver y Fast
Damage: High
Mobility: Fast
Raketenpanzerbüchse “Panzerschrek”
When the Germans captured some American bazookas in Tunisia
in 1943, their engineers immediately recognized their ingenious
design and copied it. Soon after, Germany had a reloadable antitank weapon in the field, the Raketenpanzerbüsche 43,
nicknamed “Panzerschrek” (tank terror). It launched a larger 3.46inch shell over an effective range of more than 160 yards, and, in
the competent hands of a two-man crew, became the stuff of
nightmares for Allied tank crews, who took to reinforcing their
tanks with sandbags and extra lengths of track to combat the
Panzerschrek’s unparalleled armor-piercing capabilities.
Range: Short
Rate of Fire: Slow
Damage: Very High
Mobility: Slow
21
Page 22
Flammenwerfer 35 “Flamethrower”
One of the most terrifying weapons of the War, the German
Flammenwerfer 35 used compressed nitrogen to propel flaming
liquid fuel as far as 33 yards. Though the teams that wielded them
were extremely vulnerable in the field, the Flammenwerfer was
devastatingly effective at flushing out infantry from any manner
of bunker or entrenchment.
Range: Very Short
Rate of Fire: High
Damage: Very High
Mobility: Medium
New Weapons
Deployable Light Machine Guns
Players can now pick up and use deployable light machine guns in
Multiplayer and select Single Player levels. These weapons can
only be used when their bipod has been deployed. These machine
guns can be set up on almost any surface—window sills, flat
ground, barrels and boxes, to name a few. When you see the
special, triangle-shaped deploy icon, use the Aim Down the Sight
(default: right mouse button) function to set up the gun for use.
Flamethrowers
A fearsome anti-personnel weapon, the flamethrower can launch a
deadly inferno over a wide area, instantly engulfing enemies in
flames. Though total ammunition is limited and mobility is slow,
the flamethrower is excellent for clearing trenches, bunkers and
anywhere you think the enemy may be holed up.
22
Page 23

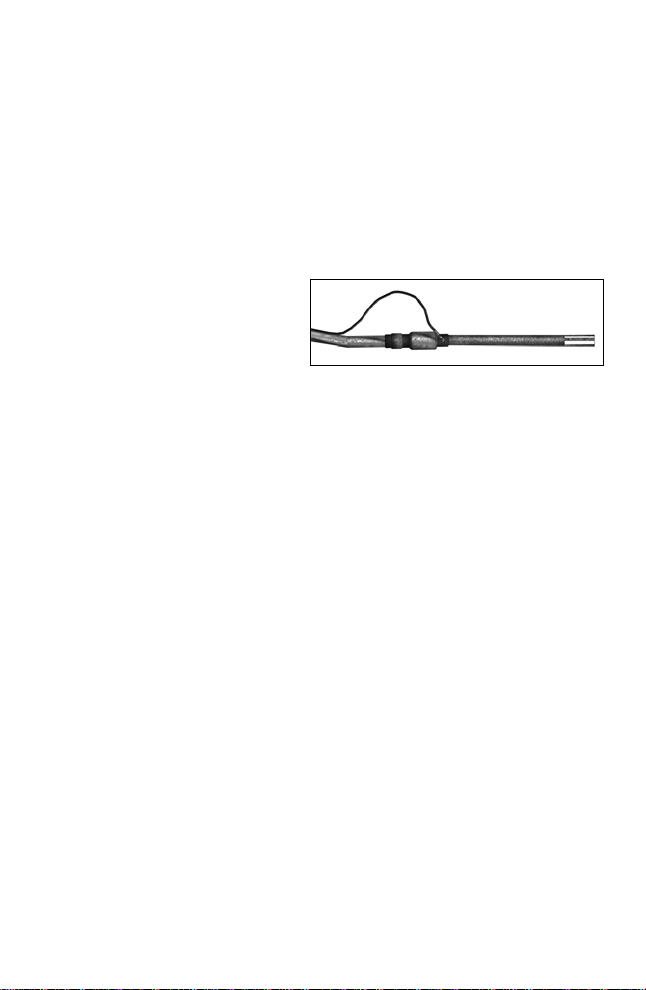
Satchel Charges
In Multiplayer, you can now pick up and use
satchel charges. These bundles of dynamite
must be “pulled” like a grenade and thrown.
They are significantly more powerful than
grenades, however, and can damage or even
destroy a tank. Though they can be effective
anti-personnel weapons, their primary purpose
is to give infantry the ability to disable or
destroy tanks.
Smoke Grenades
In Multiplayer, every player now spawns into the game with a
smoke grenade. These grenades do no damage, but they release a
thick, gray smoke that’s impossible to see through. Smoke
grenades are useful for obscuring the view of the enemy, which
can help shield an advance.
Stationary Weapons
To use a stationary weapon (such as an MG42 machine gun),
move up to the weapon until you see the hand icon. Press the
Use key (default: F ) to mount the weapon and fire the weapon with
the attack command. Press the Use key (default: F ) again to
dismount from the weapon.
23
Page 24

VEHICLES
Russia
SU-152 Heavy Tank
Crew Positions: 1 (driver/gunner)
Weapons: Main gun 152mm cannon, 7.62mm bow mg
Damage: Heavy
Armor: Heavy
Speed: Slow
Turning: Slow
T-34/85 Medium Tank
Crew Positions: 2 (driver/gunner, commander)
Weapons: Main gun 85mm cannon, turret mounted
7.62mm coaxial mg, additional 7.62mm mg
mounted on commander’s cupola.
Damage: Medium
Armor: Medium
Speed: Medium
Turning: Medium
Gaz 67b Light Truck
Crew Positions: 3 (driver, machine gunner, passenger)
Weapons: Pintle-mounted 7.62mm mg
Damage: Light
Armor: Light
Speed: Fast
Turning: Fast
24
Page 25

United Kingdom/United States
Sherman M4A1 Medium Tank
Crew Positions: 2 (driver/gunner, commander)
Weapons: Main gun 76mm cannon, .30 cal coaxial mg,
additional .50 cal mg mounted on
commander's cupola
Damage: Medium
Armor: Medium
Speed: Medium
Turning: Medium
Willys Jeep
Crew Positions: 3 (driver, machine gunner, passenger)
Weapons: Pintle-mounted .50 cal mg
Damage: Light
Armor: Light
Speed: Fast
Turning: Fast
Germany
“Elefant” Heavy Tank
Crew Positions: 1 (driver/gunner)
Weapons: Main gun 88mm cannon, 7.92mm bow mg
Damage: Heavy
Armor: Heavy
Speed: Slow
Turning: Slow
25
Page 26

Panzer IV Medium Tank
Crew Positions: 2 (driver/gunner, commander)
Weapons: Main gun 75mm cannon, 7.92mm coaxial mg,
additional 7.92mm mg mounted on
commander’s cupola.
Damage: Medium
Armor: Medium
Speed: Medium
Turning: Medium
Horch 1a Light Truck
Crew Positions: 3 (driver, machine gunner, passenger)
Weapons: Pintle-mounted 7.92mm mg
Damage: Light
Armor: Light
Speed: Fast
Turning: Fast
OTHER INFORMATION
Health Kits
Throughout your journey, you’ll encounter three kinds of health
kits—tins, boxes and bags—that replenish small, medium and
large amounts of health, respectively. Press the Use key
(default: F) or walk over the health kits to pick them up.
Note: There are no additional health kits when playing the Single
Player game on the Veteran difficulty setting.
26
Page 27

MULTIPLAYER
To play online, select the
Multiplayer option from the
Single Player main menu or
choose the Join Game option
from the Multiplayer main
menu. You’ll be presented
with these choices:
Join a Game – Go to the
Multiplayer Server Browser
screen to search for available
Internet or LAN-based Multiplayer games.
Start a New Server – Set up and host your own
Multiplayer game.
Multiplayer Options – Adjust settings specific to Multiplayer,
including data rate, chat hotkeys and player name.
Options – Configure your controls and adjust audio/video
quality and performance settings. Click on the sub-sections on
the right side of the screen for additional options. Click on
those settings to change them. A list of default controls can be
found on the following pages.
Mods – View the list of mods (modified versions of Call of
Duty:™United Offensive™) you’ve installed.
Single Player – Launch Single Player Call of Duty:™United
Offensive™to play campaign missions.
Quit – Exit the game and return to the desktop.
27
Page 28

Multiplayer Options
COMMAND DEFAULT DESCRIPTION
Vote Yes F1 Vote yes on the vote currently
in progress.
Vote No F2 Vote no on the vote currently
in progress.
Chat T Chat with other players.
Team Chat Y Send a chat message to your
team members only.
Quick Chat V Quick Chat to quickly “shout”
commands, warnings, etc.
Map G Brings up an overhead
map view.
Allow No Set to Yes to automatically
Downloading download new maps or mods
when connected to server with
new content.
Draw HUD Yes Toggle the health, compass and
ammo indicators On or Off.
Draw Crosshair Yes Toggles the crosshair On
or Off.
Connection Type ISDN Select the correct Internet
connection speed.
Player Name Unknown Enter the name you want to
Soldier use for Multiplayer games.
Show Scores Tab View the scoreboard and
display teams.
PunkBuster No Toggles PunkBuster On and Off.
28
Page 29

Finding and Connecting to Multiplayer Servers
Connecting to Your ISP
For Internet play, connect to your Internet Service Provider (ISP)
before starting Multiplayer. If you have cable modem or DSL
access, you may have a persistent connection and won’t need to
do anything special. See your Windows®and ISP manuals for
information on how to connect to your ISP.
Setting Your Data Rate
It’s extremely important that you set your Connection Type to
match the speed of your Internet connection. There are five
options for the Connection Type setting to send data at the
optimal rate for your bandwidth: 28.8Kbps modem, 33.6Kbps
modem, 56Kbps modem, ISDN line (default) and one for LAN,
cable modem or DSL connections.
Important Note: Options 28.8Kbps and 33.6Kbps are
not supported.
An improper data rate could result in impaired performance
(i.e., high “ping” times and “lag”) in Internet and LAN-based
Multiplayer games, so be sure to set this value correctly.
Server Listing
After selecting Join a Game,
you’ll see the Server Listing
screen. To see Internet
servers, click on the Source
button and change the
source from Local to Internet
(or from Internet to Local to
play a LAN game). The
server list shows the name of
the server, the map the server is playing, the number of current
and maximum players on the server, the gameplay type and your
ping (connection delay) to that server. Ping indicates the time it
29
Page 30

takes for your computer to transmit to the server (the lower the
ping, the better). By default, servers are sorted by ping. You’ll
generally experience fewer gameplay slowdowns on a server with
a lower ping than one with a higher ping. The server list also
shows the hardware and operating system of each server with a
two-letter icon. (WD stands for Windows Dedicated Server, WL
stands for Windows Listen Server and LD stands for Linux
Dedicated Server.) Servers running with PunkBuster enabled
will show a PunkBuster icon next to the game type listing.
Finally, the column with the hammer icon shows whether or not
a server has been modded. An X in the hammer column next to
a server name indicates that the server is running a mod or
unofficial map.
Click Refresh List to update the list of available servers.
Server Filters
To refine your server browsing results, the server list allows you
to filter out specific servers based on common settings:
SERVER SETTING DEFAULTS TO DESCRIPTION
View Empty Yes Set to No to filter out
empty servers.
View Full Yes Set to No to filter out
full servers.
With Password Yes Set to No to filter out
password-protected servers.
Without Password Yes Set to No to filter out servers
that require no password.
(Useful for quickly finding
password-protected servers.)
Pure Servers Only Yes Set to No to view
non-pure servers.
30
Page 31

SERVER SETTING DEFAULTS TO DESCRIPTION
Dedicated Only No Set to Yes to only view
dedicated servers.
Mods All Set to Yes to vie w only
modded servers. Set to No to
view only non-modded
servers. Set to All to view
both types.
Friendly Fire All Set to Off to show servers
with Friendly Fire turned off.
Set to On, Reflect or Shared
to show servers with those
settings. Set to All to show
servers regardless of Friendly
Fire setting.
Killcam All Set to On to show only
servers with the Killcam on.
Set to Off to show servers
with it disabled. Select All to
show servers regardless of
Killcam setting.
PunkBuster All Set to Yes to show only
servers with PunkBuster
enabled. Set to No to show
only servers with PunkBuster
disabled. Set to All to show
servers regardless of
Punkbuster setting.
Connecting to a Specific Server
When you find a server you like, double-click on the name to
connect, or click once to highlight the server and then click
Join S e rve r.
31
Page 32

Adding To Favorites
If you like a particular server, you can add it to your favorites list
by clicking Add To Favorites. View your favorites list by clicking
the Source button to change the source to Favorites.
Server Info
The Server Info button shows you detailed information about
the highlighted server, including IP address and a wide range of
server settings.
Important Note: Some servers may require a password to
connect. Click the Password button on the bottom of the
screen and then enter the password.
Creating a Server
To use your computer as a server, click on Start New Server
from the Multiplayer main menu. You’ll be able to select the
map you want the server to run and other server options.
General
Game Type Choose from Base Assault, Domination,
Capture The Flag, Deathmatch, Team
Deathmatch, Retrieval, Behind Enemy Lines,
Headquarters and Search & Destroy.
Server Name This is the name of the server as it appears in
the Join Server browser.
Dedicated • No – Start a local server and a local client.
• LAN – Start a Local Area Network
dedicated server [no local client].
• Internet – Start a server that can be seen on
the Internet through the master server.
Pure Restrict players with modified game files from
joining the server.
32
Page 33

Maximum Set the maximum number of players on the
Players server at one time.
Minimum Ping Set the minimum ping allowed per player.
Setting this to 0 means no limit on ping time.
Maximum Ping Set the maximum ping allowed per player.
Setting this to 0 means no limit on ping time.
Maximum Rate Set the maximum amount of bandwidth
allowed per player. Setting this to 0 means no
limit on bandwidth.
Password Enter a password to restrict players from
joining unless they know the password.
Passwords are case sensitive.
PunkBuster Enable or disable PunkBuster.
Advanced
Battle Rank Allow player to advance in rank.
(See page 38 for more info).
Kill Cam Enable/Disable kill cam.
Drop Health Allow player to drop a health pack
when killed.
Shellshock Enable/disable shellshock.
Allow Voting Allow players to use the in-game voting system
to change server options such as map and game
type.
Allow Vote Allow players to vote on whether a map
Map Restart can be restarted.
Allow Vote Allow players to vote on switching to
Next Map the next map on the list.
33
Page 34

Allow Vote Map Allow players to vote on new map selection.
Allow Vote Allow players to vote on switching
Game Type to another game type.
Allow Vote Kick Allow players to vote on kicking a player from
the server.
Allow Vote Ban Allow players to vote on banning a player from
the server.
Depending on the game type selected on the Server Settings
screen, the Settings tab brings up a different set of options.
Settings
Score Limit Set the number of kills needed to win.
(player points)
Score Limit Set the number of team points needed to win.
(team points)
Time Limit Set the time limit for the map in minutes.
(minutes)
Round Limit Set the round limit for the map. (rounds)
Round Length Set the time limit for each round in minutes.
(minutes)
Respawn Set the amount of time before everyone
Wave Time who is dead respawns. (seconds)
Start Round Set the waiting period at the beginning of
Delay the round before the round starts. (seconds)
End Round Set the amount of time before resetting all
Delay the scores and restarting the round. (seconds)
Clear Score Clear the players or teams score at the
Each Round start of the round.
34
Page 35

Grace Period Set the amount of time allowed at the
beginning of each round for players to switch
teams and still be allowed to play for that
round. (seconds)
Carrier Add an icon over the head of the player
Indicator carrying the objective.
Friendly Enable this option to add an icon over
Indicators the head of teammates.
Friendly Fire Allow teammates to hurt and even kill each
other. There are 4 settings: On, Off, Shared
or Reflect.
• Shared – Will share damage in cases of
friendly fire between the victim and the
attacker.
• Reflect – When a player shoots a teammate,
the damage the teammate would have taken
is reflected back onto the player who shot
the teammate.
Auto-Balance Automatically balance number of players
Teams on teams.
Force Force players to respawn after dying.
Respawning
Allow Enemy Allow dead players to spectate players
Spectating on the opposing team.
Allow Free Allow spectators to freely roam the map.
Spectating
Show Flag Show flag carriers on compass.
Carriers
Vehicles
Allow or disallow the use of specific vehicles on the server.
35
Page 36

Weapons
Allow or disallow the use of specific weapons on the server.
Note: By playing online, you must leave the Activision-controlled
environment in Call of Duty:™United Offensive.™The game’s
content has been rated for Teen audiences, but the content of the
game may change during online play due to, among other things,
interactive exchanges. Activision and Gray Matter take no
responsibility for content external to the game itself.
Call of Duty:™United Offensive™includes PunkBuster™Anti-Cheat
software technology. PunkBuster™Anti-Cheat software
technology and services combat online cheating in Call of Duty:
United Offensive™Internet play.
The use of PunkBuster™Anti-Cheat software is optional and is
provided without direct cost to our users. For more information
about PunkBuster™or for PunkBuster™support, please visit
www.evenbalance.com.
™
Multiplayer Vehicle Controls
Driving vehicles in Multiplayer is as simple as getting in the
vehicle and using the same commands as moving on foot. To get
in a vehicle, walk toward it until you see a hand icon, then press
your Use key (default: F). The Forward (default: W) command
allows you to drive forward. The Backpedal (default: S)
command applies brakes while driving and, when you reach a
stop, reverses your movement. The Move Left (default: A) and
Move Right (default: D) commands turn the body of the vehicle
left and right, respectively. To control the tank turret, use your
mouse to aim up and down and swivel the turret left and right.
Press the Jump command (default: spacebar) to align the body of
the tank with your barrel position.
Vehicle Weapons
In the tank driving position, you control both the main tank
cannon as well as a mounted submachine gun. To fire the cannon,
36
Page 37

press Fire (default: left mouse button), and to fire your machine
guns, use the Melee Attack (default: shift).
In the jeep driving position, The Fire button (default: left
mouse button) honks your horn. Use it to warn other players of
your approach.
Vehicle Views
When you enter a tank, your default view is a top-down, thirdperson perspective. To zoom in on the tank cannon for more
precision firing, use the Aim Down the Sight (default: right
mouse button) function.
Jeeps default your view to a first-person, in-the-driver’s-seat
perspective. To change to third person perspective, use the Aim
Down the Sight (default: right mouse button) function.
Vehicle Positions
Medium tanks and jeeps have multiple positions a player can
occupy. The first person to enter a medium tank or jeep
automatically becomes the driver. The next to jump in occupies
the machine gunner position (up top in tanks, on the back in
jeeps). Jeeps have a third spot, the passenger seat, where a player
can sit and use their own hand-held weapons.
Tip: A player can mount a deployable machine gun in the
passenger seat position, which makes a 3-person jeep a force to
be reckoned with.
Once in a jeep or medium tank, use the Next Weapon (default:
mouse wheel down) or Previous Weapon (default: mouse wheel
up) commands to change positions. For instance, to move from
the driver’s seat to the machine gunner position, enter the
vehicle and then move your mouse wheel down. There’s a short
delay after each position change to avoid players hopping
between positions too frequently.
37
Page 38

Note: Heavy tanks, such as the Elefant, have a single driver
position and no ancillary gunner position.
Multiplayer Battlefield Promotions
Multiplayer team-based game modes feature a battlefield
promotion system that rewards players for team-based
participation and achievement. As players move up in rank, they’re
able to carry more equipment (i.e., more grenades, ammo). Higher
rank players also get access to special equipment and weapons,
which is detailed below:
New ranks are awarded when players achieve a certain number of
points. Points are awarded for achieving objectives, leading or
assisting the capture of a flag, defending a flag and killing enemies.
The five ranks and their benefits are as follows:
RANK SPECIAL ABILITIES
1. Private None
2. Rifleman Additional grenades and pistol ammo.
3. Squad Leader Scouting Binoculars – Squad Leaders can use
binoculars, which are useful for scouting over
long distances, spotting approaching attacks
and monitoring combat from afar.
4. Section Satchel Charges – Section Sergeants spawn
Sergeant in the game with satchel charges already in their
weapons inventory.
Note: Lower rank players can still use satchel
charges, but they must pick them up off
the ground.
38
Page 39

5. Platoon Artillery Strike – Platoon Sergeants can now
Sergeant use the binoculars they acquired at Rank 3 to
call in a deadly artillery strike anywhere on
the map. To use this ability, equip the
binoculars in Aim Down the Sight mode.
Your ammo counter should show a “1,”
indicating your artillery are standing by ready
to strike. Aim the viewfinder at the ground
and press the Fire button (default: left mouse
button). In a few seconds, artillery shells will
rain down on the area you pinpointed,
significantly damaging or destroying anything
(friend or foe) in the area.
Note: Each rank enjoys the benefits of the previous rank. New
weapons and abilities become available after you respawn, with
the exception of artillery, which becomes available shortly after
you gain the Platoon Sergeant rank.
Multiplayer Maps
Players can now view an overhead map of the current
Multiplayer level by activating the View Map command
(default: G). These maps are marked with Target Reference
Points (TRPs), which can make team communication quicker
and more efficient. Using the in-game text chat, players can
point out a TRP (based on the map) to call attention to a threat
or an objective or stake out a rally point. This makes it easier to
reference map locations, rather than relying on descriptions of
terrain that may be vague or confusing. (Example: Instead of
typing “there’s a sniper in the bombed-out building on the east
side” you can simply type “sniper trp 9” and your team can
reference the location by referring to its map.)
39
Page 40

Multiplayer Game Types
This section lists all new Multiplayer game modes that have
been added to the United Offensive™expansion pack. To read
detailed descriptions of the Headquarters, Behind Enemy Lines,
Retrieval, Search & Destroy, Deathmatch and Team
Deathmatch modes, consult the original Call of Duty™manual.
Domination
Two teams clash with one another in an attempt to capture 5 to
7 separate zones on a map. Zones are represented by flags, and
players must stand next to a flag for a period of time to raise their
side’s flag and lay claim to the zone. The first team to capture all
zones (and thereby dominate the battlefield) wins the round.
Points are awarded for raising flags and killing enemy players.
Capture the Flag
In this team-oriented mode, each team must locate the enemy
base, steal the enemy flag and bring it back to their own base to
capture it. Points are awarded for stealing, capturing, defending
and returning the flag, as well as for killing other players. Teams
score points for successful captures, and the first team to score the
point limit, or score more captures during the alloted time, wins.
To successfully capture an enemy flag, your team flag needs to be
present at your base.
Base Assault
In this team-oriented mode, each team must locate and destroy
three enemy bases on the map. To destroy a base, teams must
assault the base installations with heavy weapons (e.g., tank
shells, bazookas, satchel charges, artillery strikes) and destroy the
base’s perimeter defenses. Once the defenses are down, infantry
must infiltrate the base and plant charges. Once the charges
detonate, the base is destroyed and the enemy loses use of it as a
spawn point. Each team must defend their bases against assaults,
while striking out against enemy bases. Defending infantrymen
can defuse charges planted in their base.
40
Page 41

IMPORTANT TIPS
These tips take into account the new features of the Call of
Duty:™United Offensive™Expansion Pack:
Sprinting—Master the ability to sprint from cover point to
cover point. Multiplayer games are an excellent place to practice
crouching behind cover, standing up, sprinting to another cover
point, then quickly crouching or lying prone. Enemies may fire
at you, but your speed makes it difficult for them to target and
hit you. This ability is indispensable in all parts of Call of Duty:
United Offensive.
Multiplay er Vehicles—All vehicles other than the heavy tanks
allow more than one player to ride at a time. Medium tanks
have the driver/main gunner position as well as a machine
gunner position. Heavy tanks have only the driver/main gunner
position, but these tanks have superior firepower. Jeeps have a
driver, a passenger (who can fire his or her own weapon) and a
.50 cal gunner position, making them a triple threat! As much as
possible, jump in a tank or Jeep with a teammate and man the
extra weapons. Together, you will be more effective than on
your own.
™
™
41
Page 42

CREDITS
GRAY MATTER
STUDIOS
Art
Brian Anderson
Sloan Anderson
Isabelle Decenciere
Dominique Drozdz
Jason Hoover
Dan Moditch
Colin Whitney
Thomas Szakolczay
Design
Joe Chiang
Mike Denny
Jeremy Luyties
Nikolai Mohilchock
Paul Sandler
Thad Sasser
Nathan Silvers
Jesse Snyder
Sean Soucy
Kevin Worrel
Programming
Jed Adams
Alexander Conserva
Ryan Feltrin
Sound Design
Steve Goldberg
Administrative Assistant
Erika Narimatsu
Art Director
Corky Lehmkuhl
Creative Lead
Richard Farrelly
Lead Designer
Dan Koppel
Senior Producer
Robb Alvey
Technical Director
Jean-Marc Morel
ACTIVISION
Production
Producer
Doug Pearson
Executive Producer
Marc Struhl
Associate Producer
Daniel Hagerty
Production
Coordinator
Matthew Burns
Nathaniel McClure
Production Testers
Robert Kirschenbaum
Ismael Garcia
VP, North
American Studios
Mark Lamia
President, Activision
Publishing
Kathy Vrabeck
ADDITIONAL
CONTENT
PROVIDED BY
INFINITY WARD
Level Designers
Chad Grenier
Todd Alderman
Keith "Ned Man"
Bell
Mohammed Alavi
Animators
Chance Glasco
Paul Messerly
Producer
Ken Turner
Associate Producer
Eric Johnsen
PI STUDIOS
Robert Erwin
John Faulkenbury
Rob Heironimus
Dirk Jones
Dan Kramer
Cameron Lamprecht
Peter Mack
David Mertz
Daniel Young
Stanjel –
Community Map
Roger Abrahamsson
SCRIPT AND
VOICE
Scriptwriter
Michael Schiffer
Additional W riting
Richard Farrelly
Casting and
Voice Direction
Margaret Tang,
Womb Music
Voice Talent
Sergeant Moody
Gregg Berger
Captain Foley,
Additional VO
Steve Blum
Major Ingram,
Additional VO
Robin Atkin Downes
Sergeant Antonov,
Sergeant Jones,
Additional VO
S. Scott Bullock
B-17 Pilot, US
Narrator, Additional VO
Neil Ross
42
Page 43

Private Whitney,
Private Semashko,
Additional VO
Scott Menville
Corporal Kukilov,
German Officer,
German Soldier
Jim Ward
Private Koppel,
Van Dyke,
German Soldier
Dee Baker
Lieutenant Lehmkuhl,
Sergeant Ramirez,
Additional VO
Jamie Alcroft
Tank Commander,
Navigator ,
Additional VO
Nick Jameson
Private Anderson,
Sasha, Additional VO
Cam Clarke
Private Goldberg,
Additional VO
Andre Sogliuzzo
Russian Narrator,
Additional VO
Grant Albrecht
British Narrator,
Additional VO
Greg Ellis
Private Korolov,
Additional VO
Jay Gordon
Machine Gunner,
Additional VO
Matt Morton
Co-Pilot,
Additional VO
Bill Harper
Private Ender
Quinton Flynn
Recording, Engineering,
Editing, VO Effects
Design
Rik W. Schaffer,
Womb Music
Voices Recorded at
Salami Studios
MUSIC AND
SOUND EFFECTS
Original Musical Score
Michael Giacchino
Additional Music
Justin Skomarovsky
GLOBAL BRAND
MANAGEMENT
Associate
Brand Manager
Richard Brest
Director, Global
Brand Management
David Pokress
VP, Global
Brand Management
Dusty Welch
Senior Publicist
Mike Mantarro
Publicist
Maclean Marshall
Director, Corp
Communications
Michelle Nino
SVP, North American
Sales
Tricia Bertero
VP, North American
Sales
Maria Stipp
Trade Marketing
Manager
Julie DeWolf
Amy Longhi
BUSINESS &
LEGAL AFFAIRS
Director, Business
& Legal Affairs
Greg Deutsch
Senior VP
& General Counsel
George Rose
CREATIVE
SERVICES
VP, Creative Services
& Operations
Denise Walsh
Marketing
Creative Director
Matthew Stainner
Creative
Services Manager
Jill Barry
Creative Services
Assistant Manager
Shelby Yates
Package Design
Hamagami/Carroll
And Associates
Manual Design
Ignited Minds LLC
INTERNATIONAL
Senior Vice President
European Publishing
Scott Dodkins
UK General Manager
Roger Walkden
Director of Marketing
UK/ROE
Alison Turner
Head of European
Corporate
Communications
Tim Ponting
43
Page 44

Head of
Publishing Services
Nathalie Ranson
Localization Manager –
PC Group
Tamsin Lucas
Creative
Services Manager
Jackie Sutton
Localization
Project Manager
Simon Dawes
Creative Services
Coordinator
Philip Bagnall
Brand Manager
Daleep Chhabria
European
Operations Manager
Heather Clarke
Production Planners
Victoria Fisher
Lynne Moss
German Localization
Effective Media
GmbH
French Localization
Around The Word
Italian & Spanish
Localization
Synthesis
International
Japanese Localization
Kids Station, Inc
Chinese Localization
Unalis Corporation
Korean Localization
MEGA Enterprise Co.
ACTIVISION
GERMANY
Marketing Manager
Stefan Luludes
PR Manager
Bernd Reinartz
PR Assistant
Julia Volkmann
Brand Manager
Stefan Seidel
IT & Web Manager
Thorsten
Huebschmann
ACTIVISION
FRANCE
Marketing Director
Bernard Sizey
Marketing
Group Manager
Guillaume Lairan
Brand Manager
Gautier Ormancey
PR Manager
Diane de Domecy
CENTRAL
TECHNOLOGY
Senior Manager
Edward Clune
Installer Programming
Andrew Petterson
INFORMATION
TECHNOLOGY
Vice President, IT
Niel Armstrong
Help Desk Manager
David Smith
IT Technician
Erwin Barcega
IT Technician
Ricardo Romero
IT Technician
Jason McAuliffe
Principal
Systems Engineer
Bryan Fung
QUALITY
ASSURANCE/
CUSTOMER
SUPPORT
Project Lead
Erik Melen
Senior
Project Lead
Glenn Vistante
QA Manager
Marilena Rixford
Matt McClure
Floor Lead
Donald E Marshall
Testers
Avery Bennet
Albert Yao
Chris O’Neill
Jason Ralya
Jim Norris
Peter McKernan
Scott Soltero
Daniel Yoon
Adam Luskin
Matthew Murray
Serg Souleiman
Jason Guyan
Julio Rodriguez
Travis Cummings
Evan Vincent
Network Sr. Lead
Chris Keim
Senior Project Lead,
Compatibility Group
Neil Barizo
44
Page 45

Senior Compatibility/
Network Tester
Francis Jimenez
Compatibility Testers
Pratheep Eamranond
Robert Telmar
Manager, Code
Release Group
Tim Vanlaw
Lead, Code
Release Group
Jef Sedivy
CRG Testers
James Call
Anastasia Popova
Diego Lozano
Matt Mahler
Localizations
Project Lead
David Hansen
Night Crew
Senior Lead
Anthony Korotko
Night Crew Manager
Adam Hartsfield
Localizations Testers
Jason Smith
Jason Gilmore
Aaron Sedillo
Edmund Park
Kendrick Hsu
Dan Rohan
David Haddock
Akshay Dhalwala
Hoan Bui
Sr. Manager,
Customer Support
Bob McPherson
Sr. Lead,
Phone Support
Gary Bolduc
Lead,
E-mail Support
Michael Hill
GRAY MATTER
SPECIAL THANKS
John Bojorquez
Brandon Grada
Bradly Shaw
PI SOFTWARE
SPECIAL THANKS
Christian Cummings
ACTIVISION
SPECIAL THANKS
Brad Carraway
Ken Murphy
Caryn Law
Steve Holmes
Matthew Beal
Jason Kim
Stacy Sooter
Steffanie Bullis
Alexander Rohra
John Fritts
Clarence Washington
Dion Brain
Nancy Wolfe
Michael Carter
Suzy Luko
Cecilia Barajas
Danielle Kim
Michael Larson
Jay Komas
Betty Kim
Lori Plager
Letty Cadena
Justin Berenbaum
Jim Black
Mitch Soule
Rex Sikora
Cathy Kinzer
Eddie Banks
QA/CS Special Thanks
Jim Summers
Jason Wong
Joe Favazza
Jason Levine
Nadine Theuzillot
Jason Potter
John Rosser
Chad Siedhoff
Indra Yee
Todd Komes
Joule Middleton
Willie Bolton
Jennifer Vitiello
Mike Rixford
Jessica McClure
Joanne Shinozaki
JB Bernstein
Cinematics provided by
The Ant Farm
Rob Troy
Lisa Riznikove
PunkBuster Technology
by
Even Balance, Inc.
Tony Ray
Cinematic Audio
Processing by
Sonic Pool
Patrick Bird
VERY
SPECIAL THANKS
Infinity W ar d
Todd Alderman
Brad Allen
Keith “Ned
Man” Bell
Michael Boon
Kevin Chen
Clifton Cline
Grant Collier
Ursula Escher
Robert Field
Steve Fukuda
Oliver George
45
Page 46

Francesco Gigliotti
Chance Glasco
Carl Glave
Preston Glenn
Chad Grenier
Jack Grillo
Earl Hammon, Jr.
Chris Hassell
Jeff Heath
Chris Hermans
Paul Jury
Bryan Kuhn
Scott Matloff
Fairfax Sheild McCandlish IV
Gavin McCandlish
Paul Messerly
David Oberlin
Zied Rieke
Chuck Russom
Nate Silvers
Justin Thomas
Janice Turner
Ken Turner
Jason West
Vince Zampella
Activision Production Team
for Call of Duty
™
Thaine Lyman
Ken Murphy
Dan Hagerty
Eric Grossman
Pat Bowman
Robert Kirschenbaum
Laird Malamed
Mark Lamia
LICENSES
This product contains software
technology licensed from
id Software (“id Technology”)
id Technology © 1999-2000
id Software, Inc.
Uses Bink Video
Copyright ©
1997-2004 by
RAD Game Tools, Inc.
Uses Miles
Sound System
Copyright ©
1997-2004 by
RAD Game Tools, Inc.
46
Page 47

CUSTOMER SUPPORT
You should read through the manual and the readme file on
the CD before contacting Activision Customer Support.
Additionally, if you have Internet access, search our
troubleshooting database at: http://www.activision.com/support
Please ensure that your computer system meets the minimum
system requirements that are listed on the bottom of the box.
Our Customer Support representatives will not be able to help
customers whose computers do not meet the requirements.
So that we can better help you, please have the following
information ready:
• Complete product title (include version number)
• Exact error message reported (if any) and a brief description
of the problem
• Your computer’s processor type and speed
(e.g. Pentium 4 2.4, Athlon XP 3000+)
• Amount of RAM
• Make and model of your video and sound cards (e.g. Radeon
9800 Pro, Creative Sound Blaster Audigy 2)
• Make and model of your CD-ROM or DVD-ROM drive
(e.g. Samsung SC-140)
• Operating system
NOTE: Please do not contact Customer Support for
hints/codes/cheats; only technical issues.
Internet/E-mail: http://www.activision.com/support
Our support section of the Web has the most up-to-date
information available, including patches that can be downloaded
free of charge. We update the support pages daily so please
check here first for solutions. By going to the Find Answers
section and selecting the platform/game you are inquiring about
you can view the top solutions for the game to date. If you don’t
47
Page 48

find your question/solution there, try inputting a keyword into
the search.
If you cannot find an answer to your issue, you can e-mail us
using the support form. A response may take anywhere from
24–72 hours depending on the volume of messages we receive
and the nature of your problem. During the first few weeks of a
game release and during holiday seasons the response time may
take a little longer.
NOTE: Internet/e-mail support is handled in English only.
NOTE: The Multiplayer components of Activision games are
handled only through Internet/e-mail.
Phone: (310) 255-2050
You can call our 24-hour voice-mail system for answers to our
most frequently asked questions at the above number. Contact a
Customer Support Representative at the same number between
the hours of 9:00 am and 5:00 pm (Pacific Time), Monday
through Friday, except holidays. When calling please make sure
you are in front of your computer with the power on and have
all the necessary information as listed above at hand.
Please do not send any game returns directly to Activision
without first contacting Customer Support. It is our policy
that game returns/refunds must be dealt with by the retailer or
online site where you purchased the product. Please see the
Limited Warranty contained within our Software License
Agreement for warranty replacements.
Register your product online so we can enter you
in our monthly drawing for a fabulous Activision prize.
48
Page 49

SOFTWARE LICENSE AGREEMENT
IMPORTANT – READ CAREFULLY: YOUR USE OF THIS SOFTWARE (THE “PROGRAM”) IS SUBJECT TO THE SOFTWARE LICENSE
TERMS SET FORTH BELOW. THE “PROGRAM” INCLUDES ALL SOFTWARE INCLUDED WITH THIS AGREEMENT, THE ASSOCIATED
MEDIA, ANY PRINTED MATERIALS, AND ANY ON-LINE OR ELECTRONIC DOCUMENTATION, AND ANY AND ALL COPIES OF SUCH
SOFTWARE AND MATERIALS. BY OPENING THIS PACKAGE, INSTALLING, AND/OR USING THE PROGRAM AND ANY SOFTWARE
PROGRAMS INCLUDED WITHIN THE PROGRAM, YOU ACCEPT THE TERMS OF THIS LICENSE WITH ACTIVISION, INC. (“ACTIVISION”).
LIMITED USE LICENSE: Subject to the conditions described below, Activision grants you the non-exclusive, non-transferable, limited
right and license to install and use one copy of the Program solely and exclusively for your personal use. All rights not specifically
granted under this Agreement are reserved by Activision and, as applicable, Activision’s licensors. The Program is licensed, not sold, for
your use. Your license confers no title or ownership in the Program and should not be construed as a sale of any rights in the Program.
All rights not specifically granted under this Agreement are reserved by Activision and, as applicable, its licensors.
LICENSE CONDITIONS
You agree not to:
• Exploit the Program or any of its parts commercially, including but not limited to use at a cyber cafe, computer gaming center or any
other location-based site. Activision may offer a separate Site License Agreement to permit you to make the Program available for
commercial use; see the contact information below.
• Sell, rent, lease, license, distribute or otherwise transfer this Program, or any copies of this Program, without the express prior written
consent of Activision.
• Use the Program, or permit use of the Program, in a network, multi-user arrangement or remote access arrangement, including any
on-line use, except as otherwise specifically provided by the Program.
• Use the Program, or permit use of the Program, on more than one computer, computer terminal, or workstation at the
same time.
• Make copies of the Program or any part thereof, except for back up or archival purposes, or make copies of the materials
accompanying the Program.
• Copy the Program onto a hard drive or other storage device; you must run the Program from the included CD-ROM (although
the Program itself may automatically copy a portion of the Program onto your hard drive during installation in order to run
more efficiently).
• Reverse engineer, derive source code, modify, disable, decompile or disassemble the Program, in whole or in part.
• Remove, disable or circumvent any proprietary notices or labels contained on or within the Program.
• Export or re-export the Program or any copy or adaptation thereof in violation of any applicable laws or regulations.
OWNERSHIP: All title, ownership rights and intellectual property rights in and to the Program and any and all copies thereof are owned
by Activision or its licensors. The Program is protected by the copyright laws of the United States, international copyright treaties and
conventions and other laws. The Program contains certain licensed materials and Activision’s licensors may protect their rights in the
event of any violation of this Agreement. You agree not to remove, disable or circumvent any proprietary notices or labels contained on
or within the Program.
THE PROGRAM UTILITIES: The Program contains certain design, programming and processing utilities, tools, assets and other
resources (“the Program Utilities”) for use with the Program that allow you to create customized new game levels and other related
game materials for personal use in connection with the Program (“New Game Materials”). The use of the Program Utilities is subject to
the following additional license restrictions:
• You agree that, as a condition to your using the Program Utilities, you will not use or allow third parties to use the Program Utilities
and the New Game Materials created by you for any commercial purposes, including but not limited to selling, renting, leasing,
licensing, distributing, or otherwise transferring the ownership of such New Game Materials, whether on a stand alone basis or
packaged in combination with the New Game Materials created by others, through any and all distribution channels, including, without
limitation, retail sales and on-line electronic distribution. You agree not to solicit, initiate or encourage any proposal or offer from any
person or entity to create any New Game Materials for commercial distribution. You agree to promptly inform Activision in writing of
any instances of your receipt of any such proposal or offer.
• If you decide to make available the use of the New Game Materials created by you to other gamers, you agree to do so solely
without charge.
• New Game Materials shall not contain modifications to any COM, EXE or DLL files or to any other executable Product files.
• New Game Materials may be created only if such New Game Materials can be used exclusively in combination with the retail version of
the Program. New Game Materials may not be designed to be used as a stand-alone product.
• New Game Materials must not contain any illegal, obscene or defamatory materials, materials that infringe rights of privacy and
publicity of third parties or (without appropriate irrevocable licenses granted specifically for that purpose) any trademarks, copyrightprotected works or other properties of third parties.
• All New Game Materials must contain prominent identification at least in any on-line description and with reasonable duration on the
opening screen: (a) the name and E-mail address of the New Game Materials’ creator(s) and (b) the words “THIS MATERIAL IS NOT
MADE OR SUPPORTED BY ACTIVISION.”
• All New Game Materials created by you shall be exclusively owned by Activision and/or its licensors as a derivative work (as such
term is described under U.S. copyright law) of the Program and Activision and its licensors may use any New Game Materials made
publicly available by you for any purpose whatsoever, including but not limited to, for purposes of advertising and promoting
the Program.
49
Page 50

LIMITED WARRANTY: Activision warrants to the original consumer purchaser of the Program that the recording medium on which
the Program is recorded will be free from defects in material and workmanship for 90 days from the date of purchase. If the
recording medium is found defective within 90 days of original purchase, Activision agrees to replace, free of charge, any product
discovered to be defective within such period upon its receipt of the Product, postage paid, with proof of the date of purchase, as
long as the Program is still being manufactured by Activision. In the event that the Program is no longer available, Activision
retains the right to substitute a similar program of equal or greater value. This warranty is limited to the recording medium
containing the Program as originally provided by Activision and is not applicable to normal wear and tear. This warranty shall not
be applicable and shall be void if the defect has arisen through abuse, mistreatment, or neglect. Any implied warranties prescribed
by statute are expressly limited to the 90-day period described above.
EXCEPT AS SET FORTH ABOVE, THIS WARRANTY IS IN LIEU OF ALL OTHER WARRANTIES, WHETHER ORAL OR WRITTEN,
EXPRESS OR IMPLIED, INCLUDING ANY WARRANTY OF MERCHANTABILITY, FITNESS FOR A PARTICULAR PURPOSE OR
NON-INFRINGEMENT, AND NO OTHER REPRESENTATIONS OR CLAIMS OF ANY KIND SHALL BE BINDING ON OR
OBLIGATE ACTIVISION.
When returning the Program for warranty replacement please send the original product disks only in protective packaging and
include: (1) a photocopy of your dated sales receipt; (2) your name and return address typed or clearly printed; (3) a brief note
describing the defect, the problem(s) you are encountered and the system on which you are running the Program; (4) if you are
returning the Program after the 90-day warranty period, but within one year after the date of purchase, please include check or
money order for $10 U.S. (A$19 for Australia, or £10.00 for Europe) currency per CD or floppy disk replacement. Note: Certified
mail recommended.
In the U.S. send to:
Warranty Replacements
Activision, Inc.
P.O. Box 67713
Los Angeles, California 90067
LIMITATION ON DAMAGES: IN NO EVENT WILL ACTIVISION BE LIABLE FOR SPECIAL, INCIDENTAL OR CONSEQUENTIAL
DAMAGES RESULTING FROM POSSESSION, USE OR MALFUNCTION OF THE PROGRAM, INCLUDING DAMAGES TO PROPERTY,
LOSS OF GOODWILL, COMPUTER FAILURE OR MALFUNCTION AND, TO THE EXTENT PERMITTED BY LAW, DAMAGES FOR
PERSONAL INJURIES, EVEN IF ACTIVISION HAS BEEN ADVISED OF THE POSSIBILITY OF SUCH DAMAGES. ACTIVISION’S
LIABILITY SHALL NOT EXCEED THE ACTUAL PRICE PAID FOR THE LICENSE TO USE THIS PROGRAM. SOME STATES/
COUNTRIES DO NOT ALLOW LIMITATIONS ON HOW LONG AN IMPLIED WARRANTY LASTS AND/OR THE EXCLUSION OR
LIMITATION OF INCIDENTAL OR CONSEQUENTIAL DAMAGES, SO THE ABOVE LIMITATIONS AND/OR EXCLUSION OR
LIMITATION OF LIABILITY MAY NOT APPLY TO YOU. THIS WARRANTY GIVES YOU SPECIFIC LEGAL RIGHTS, AND YOU MAY
HAVE OTHER RIGHTS WHICH VARY FROM JURISDICTION TO JURISDICTION.
TERMINATION: Without prejudice to any other rights of Activision, this Agreement will terminate automatically if you fail to comply
with its terms and conditions. In such event, you must destroy all copies of the Program and all of its component parts.
U.S. GOVERNMENT RESTRICTED RIGHTS: the Program and documentation have been developed entirely at private expense and
are provided as “Commercial Computer Software” or “restricted computer software.” Use, duplication or disclosure by the U.S.
Government or a U.S. Government subcontractor is subject to the restrictions set forth in subparagraph (c)(1)(ii) of the Rights in
Technical Data and Computer Software clauses in DFARS 252.227-7013 or as set forth in subparagraph (c)(1) and (2) of the
Commercial Computer Software Restricted Rights clauses at FAR 52.227-19, as applicable. The Contractor/Manufacturer is
Activision, Inc., 3100 Ocean Park Boulevard, Santa Monica, California 90405.
INJUNCTION: Because Activision would be irreparably damaged if the terms of this Agreement were not specifically enforced, you
agree that Activision shall be entitled, without bond, other security or proof of damages, to appropriate equitable remedies with
respect to breaches of this Agreement, in addition to such other remedies as Activision may otherwise have under applicable laws.
INDEMNITY: You agree to indemnify, defend and hold Activision, its partners, licensors, affiliates, contractors, officers, directors,
employees and agents harmless from all damages, losses and expenses arising directly or indirectly from your acts and omissions
to act in using the Product pursuant to the terms of this Agreement.
MISCELLANEOUS: This Agreement represents the complete agreement concerning this license between the parties and
supersedes all prior agreements and representations between them. It may be amended only by a writing executed by both parties.
If any provision of this Agreement is held to be unenforceable for any reason, such provision shall be reformed only to the extent
necessary to make it enforceable and the remaining provisions of this Agreement shall not be affected. This Agreement shall be
construed under California law as such law is applied to agreements between California residents entered into and to be performed
within California, except as governed by federal law and you consent to the exclusive jurisdiction of the state and federal courts in
Los Angeles, California.
If you have any questions concerning this license, you may contact Activision at 3100 Ocean Park Boulevard, Santa Monica,
California 90405, USA, (310) 255-2000, Attn. Business and Legal Affairs, legal@activision.com.
In Europe send to:
WARRANTY REPLACEMENTS
ACTIVISION (UK) Ltd., Parliament House,
St Laurence Way, Slough, Berkshire,
SL1 2BW, United Kingdom.
Disc Replacement: +44 (0) 870 241 2148
In Australia send to:
Warranty Replacements
Activision
Level 5, 51 Rawson Street
EPPING NSW 2121
AUSTRALIA
50
Page 51

Page 52
activision.com
Lead one of eleven
old-world armies in epic,
cinematic battles.
Forge an empire on
the revolutionary
3D campaign map.
Command unique
units like
Carthaginian elephants.
www.totalwar.com
Violence
Total War Software © 2002–2004 The Creative Assembly Limited. Total War, Rome: Total War and the Total War logo are trademarks or
registered trademarks of The Creative Assembly Limited in the United Kingdom and/or other countries. Published by Activision Publishing,
Inc. Activision is a registered trademark of Activision, Inc. All rights reserved. PC CD-ROM logo TM and © IEMA 2003. The NVIDIA logo and
the “The Way It’s Meant to be Played” logo are registered trademarks or trademarks of NVIDIA Corporation. GameSpy and the “Powered
by GameSpy” design are trademarks of GameSpy Industries, Inc. All rights reserved. The ratings icon is a registered trademark of the
Entertainment Software Association. All other trademarks and trade names are the properties of their respective owners.
®
Page 53

53
Page 54

54
Page 55

NOTES
55
Page 56

NOTES
56
 Loading...