

Page 1

Page 2

Table of Contents
SYSTEM REQUIREMENTS
INSTALLING THE GAME
Install .........................................................................................3
Minimum ..........................................................................3
Full .....................................................................................3
DirectX ...........................................................................4
Uninstall .........................................................................4
Readme ....................................................................4
THE LAUNCHER ................................................4
MENUS AND INTERFACE SYSTEM
Interface Navigation ..................................5
Main Menu .....................................................6
Single Player ............................................7
Multiplayer .............................................8
Options ................................................15
Profile ..................................................20
Heads-up Display ...................................21
Cross-hair System ..............................24
WEAPONS, TOOLS, AND EQUIPMENT
Gaining Weapons, Tools, and Equipment....27
Human ....................................27
Predator ..........................27
Alien .........................................27
Human .............................................27
Weapons and Tools .................................27
Equipment ...................................................30
Pickups ..........................................................30
Predator ...........................................................31
Weapons and Tools .........................................31
Equipment .................................33
Abilities ...........................................34
Alien Weapons and Abilities ...............34
Facehugger ......................................34
Chestburster ............................35
Mature Aliens ...................................35
Runner Special Abilities .....................35
Predalien Special Abilities ..............35
Praetorian Special Abilities ...................35
GAMEPLAY TIPS
Alien ....................................................36
Marine ...................................................36
Predator ...................................................36
Environmental Hazards ...................36
Multiplayer Tactics ...............................37
DEFAULT KEY CONFIGURA TION CHARTS ......39
CREDITS
Fox Interactive ......................................44
Monolith Productions .................................45
Music ..............................................................46
Voice and Motion Capture ......................................46
2
Table of Contents
Page 3

System Requirements
MINIMUM SYSTEM REQUIREMENTS
Windows® 98/Me/2000
DirectX™ 8 or higher
Pentium® III 450MHz
128 MB RAM (Win98) / 128 MB (Me/Win2K)
16MB 3D hardware accelerator card with Direct3D™ support
4x CD-ROM
Mouse
Keyboard
56K modem or Local Area Network (LAN) for multiplayer
750MB free hard drive space
DirectX compatible 16-bit sound card
Recommended:
Pentium® III 600MHz
256MB RAM (Win98) / 256MB (Me/Win2K)
32MB 3D hardware accelerator card with Direct3D™ support
Installing the Game
To begin, insert the Aliens Versus Predator 2 CD, Disc 1, into your CD-ROM drive. If
AutoRun is enabled on your computer , the Launcher should appear within a few seconds.
NOTE: If nothing happens then AutoRun has been disabled. If this is the case you can start the
Launcher by clicking on the START button on the Windows taskbar, then click RUN.... In the
Run dialog box, type D:\AVP2 (where D: is the letter assigned to your CD-ROM drive) and then
click the OK button.
Click INSTALL on the Launcher . Follow the on-screen prompts to navigate through the
setup screens as follows:
In the Select Destination Directory screen, click Next to install to the default
folder, or click Browse to install to a different folder on your hard drive.
In the Install T ype screen, you may choose from two possible installation methods:
The Typical Installation (recommended) requires 1.3 gigabytes of free hard disk space
and will copy both the game and all game data. For maximum performance, use this
option.
The Compact installation option requires 750 megabytes of disk space and will
copy only the game files to your hard drive and leaves all levels and other data on
the CD. This option is recommended if you need to conserve hard drive space.
Aliens vs Predator 2
3
Page 4
The default installation directory is C:\Program Files\Fox\Aliens vs. Predator 2.
In the Select Program Folder screen, simply click Next to add Fox Interactive/Aliens
Versus Predator 2 to the default folder in your Start menu, or you can specify a different
folder .
Once Setup is complete, click Next to exit the installer.
Install GameSpy Arcade: Once you have installed the game, you will be asked
whether or not you want to install GameSpy Arcade.
Install DirectX 8.0: If you do not already have Microsoft’s DirectX version 8.0 or
higher installed on your computer, you must upgrade your version of DirectX. We
have included DirectX 8.0a for you.
Read Me: Provides useful information on installing and starting the game, as well as last
minute information that didn’t make it into this manual. You may also read this file later
by selecting its shortcut from the Aliens vs. Predator 2 folder on the START menu.
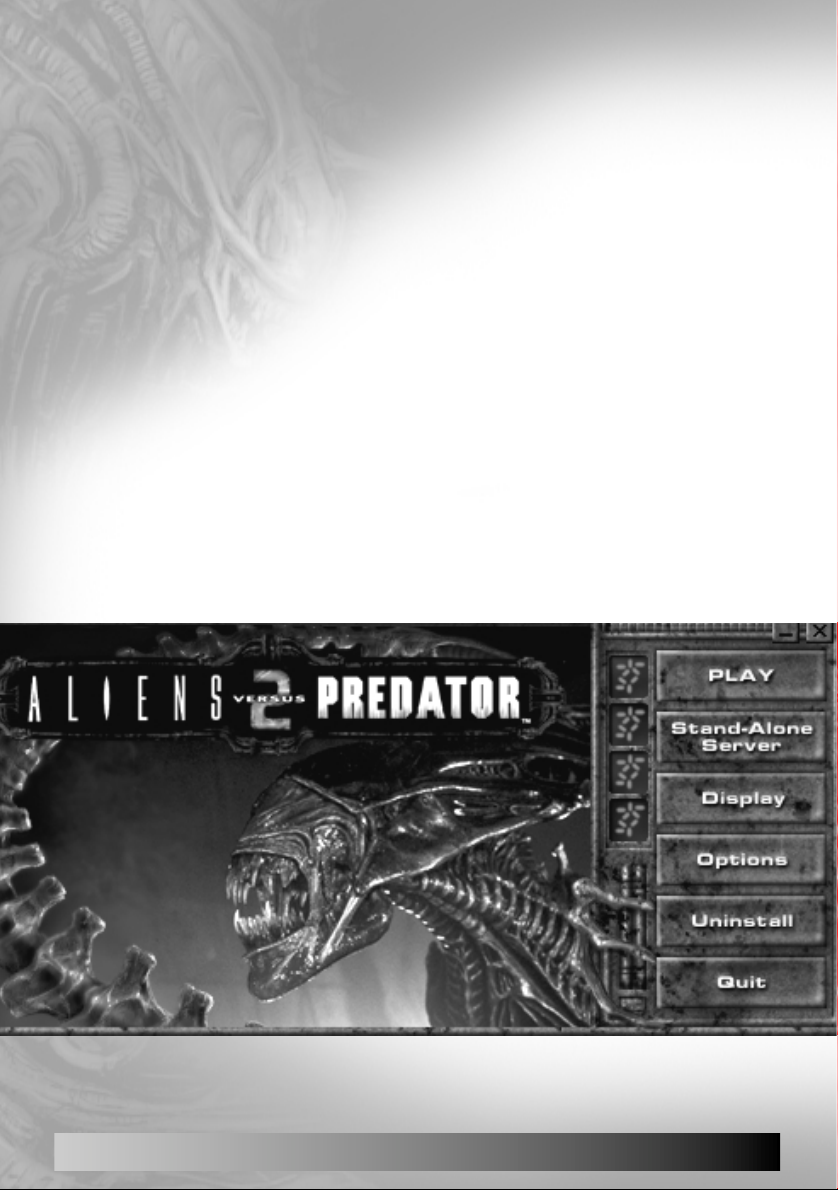
The Launcher
REACHING THE LAUNCHER
You can reach the Launcher by opening one of the Aliens Versus Predator 2 shortcuts
created during install or by inserting the Aliens V ersus Predator 2, Disc 1, into your CDROM drive when AutoRun is enabled.
LAUNCHER OPTIONS
The following options are available from the game’s Launcher:
4
The Launcher
Page 5

Play: Select this button if you wish to enter the Main Menu for Aliens Versus Predator 2.
Stand-alone Server: Select this button if you wish to launch a Stand-alone server
using your last Hosted Multiplayer settings. If you have never hosted a Multiplayer
Game, we provide a default setting for you.
Note: you may also launch a Stand-alone Server from the game’s Host Game screen.
Display: Select this button if you wish to change the game’s screen resolution, color
depth, or driver settings before launching the game. When you first select the display
option, the game will scan your system to determine the settings that your hardware
supports.
To change your settings, highlight the desired setting with your mouse. Once you
have highlighted all changes you desire, hit enter or click on the OK button. You
may also move from panel to panel using your TAB key and move up and down
each list using your UP/DOWN keys.
Options: Select this button if you wish to alter your advanced sound and graphics settings from outside of the game or to change your command-line parameters. These
options are for Advanced Users only and are primarily used for troubleshooting, they
can normally be ignored.
Uninstall: Once you have installed AVP2 to your system, this button will become
active. Selecting this button will uninstall AVP2 from your system.
Menu and Interface System
INTERFACE NAVIGATION
The AVP2 menus are constructed for easy mouse navigation and for simple keyboard
navigation.
Interface items: In the AVP2 menus, you find five basic types of interface items: Link
Text, Tab Text, List Text, Toggle Text, and Arrow Bar Text. Your choice will be accepted
upon exiting the relevant menu screen.
Mouse Navigation: To navigate with the mouse, point at any text. If the text becomes
highlighted, you can interact with the text.
Keyboard Navigation: Use your UP and DOWN keys to move from one active item
to the next.
•For Link Text and for Tab T ext items - use the ENTER key to activate the item once
you have selected it.
• For List Boxes - such as your list of Saved Games - use the RIGHT and LEFT
arrows to cycle up and down the list.
Menu and Interface System
5
Page 6
• For Arrow Text items - such
as your Volume Settings use the RIGHT and LEFT
arrows to increase or
decrease the slider value.
• For Option Text items -
such as the Game Type
selection for Multiplayer use the RIGHT and LEFT
arrows to cycle through the
available options.
Tab Key Shortcuts: The
active items on each screen
are divided into groups - i.e.
on the Main screen, Single
Player, Continue Game,
Multi-player, Options, and Profiles form one group while the Quit text forms another.
The TAB key acts as a shortcut to select the first item in the next group.
MAIN MENU
The following options are available from the game’s Main Menu:
Single Player: Access this menu if you wish to play through the single player mis-
sions in Aliens Versus Predator 2.
Continue Game: This option is only available once you have begun playing the sin-
gle player missions. It will allow you to pick up where you left off in Single Player
mode by automatically reloading your last saved game.
Multiplayer Internet: Access this menu to play a Multiplayer match against other
players on the Internet. Note: to play over the Internet, you must have a valid CD key.
Multiplayer LAN: Access this menu to play a Multiplayer match against other players on a Local Area Network (LAN) or on the Internet.
Options: Here you can change Display and Sound Settings, Game difficulty, and
Controls.
Profile: A profile tracks the preference and game progress of a user. This includes
key configuration, saved games, and progress through the single player levels.
Access the Profile Menu to create a new profile, rename an existing profile, load
another profile or delete a profile.
Quit: Allows you to leave the game and return to Windows.
6
Main Menu
Page 7

SINGLE PLAYER MENUS
Load Game: This menu allows you to load previously saved games including your
QuickSave game and your QuickSave Archive Game. Aliens Versus Predator 2 always
stores your last two QuickSaves.
Marine: This menu displays all of the Marine missions that you can currently play.
Select Mission: At first, you can only choose one mission. Each time you com-
plete a mission, a new one will become available until you have completed the
Marine story. Completed missions remain in this menu for you to play again later.
However, when you replay missions, you play with default weapons, tools, and
equipment. To begin, just click on the name of the mission you want to play, then
select a difficulty level, and then click on Launch.
Difficulty Levels: You can select from one of four difficulty levels for each mission. Once you begin a mission, you cannot change the difficulty level without
returning to the Single Player Marine screen and restarting it.
• Easy - enemies are weaker and do less damage.
• Normal - the default setting.
•Hard - enemies are stronger and do more damage. T raining Messages are turned off.
• Hardcore - enemies are the same as hard; saving games is not allowed, Mission
Objectives are not displayed and Training Messages are disabled.
(Note: this mode is not for the impatient or the faint of heart. You will probably not survive
the first time that you play through a mission; or the second; or the third; you get the idea.
Launch: This button launches the currently selected mission.
)
Aliens: This menu displays all of the Alien missions. Otherwise, the Alien menu functions just as the Marine menu do.
Predator: This menu displays all of the Predator missions. Otherwise, the Predator
menu functions just as the Marine menu do.
Custom Level: Although the tools necessary to create your own level are not available in the retail version of the game, they will be available for download via the Web
in the future, please refer to this site first. The Custom Level option lets you load levels that you have created or downloaded. Only worlds stored in the A VP2/AVP2/Worlds
directory will be available. Note that you will have to create this directory manually.
Tools will be available at http://avp2.sierra-online.co.uk
Single Player Menus
7
Page 8

MULTIPLAYER MENUS
The Multiplayer Menus let you play against other players on a Local Area Network (LAN)
or on the Internet. The first time you enter the Multiplayer Internet menu, you will be asked
to enter your CD Key, which can be found on the cover of your game CD case. The current
CD Key will always be displayed on this screen and can be updated by selecting Update
CD Key from the same menu. Both the Multiplayer Internet and Multiplayer LAN menus
function in the same way, with the exception of the CD Key options, which is only found in
the Multiplayer Internet menu. A CD Key is not necessary when hosting or joining a LAN
game.
Host Internet/LAN Games: Allows you to Host your own Multiplayer game. On the
Host screen, you can select from five different Host tabs: Game, Setup, Maps, Advanced,
and Player.
Launch: Once you are satisfied with your settings, use this to start your game. You can
access the Launch button from any tab in the host screen.
Game Tab: This tab allows you to name your game, review your choices, and make
general decisions about type, password, and server settings.
Name: Type the name of your session here.
T ype:You can select Deathmatch, Team Deathmatch, Hunt, Survivor , Overrun or Evac
modes.
Password: Set your password. This entry is ignored unless you click the Lock Game
Check Box.
Lock Game Check Box: Click this box to enable your password. Other players must
know this password to join your game.
Dedicated: If you want to launch a Stand-alone Server, set Dedicated to “Yes”.
Dedicated servers provide the best game performance, but you must then join the
game from a second computer.
Configurations: Click here to save and load your favorite game configurations.
Game Settings: This box displays the settings that you selected on the Setup Tab.
Advanced Settings: This box displays the settings selected on the Advanced Tab
(see below).
Setup Tab: This tab allows you to customize the game mode to match your favorite
style of play. Since the rules in each game mode can vary drastically, the Setup tab varies
from mode to mode. Also, for each mode, the Setup Tab remembers the changes that you
make - such as your favorite maps - so you don’t have to worry that your favorite
Deathmatch maps will load when you switch to playing Evac or some other mode.
Setup Deathmatch and Setup Team Deathmatch:
Max Players: The total number of players you will allow to enter your game
8
Multiplayer Menus
Page 9
Max Marines: The total number of players of Marines that you will allow to enter
your game.
Max Aliens: The total number of players of Aliens that you will allow to enter your
game.
Max Predators: The total number of players of Predators that you will allow to
enter your game.
Max Corporates: The total number of players of Corporates that you will allow to
enter your game.
Frag Limit: The level ends when any player’ s frag count reaches the Frag Limit. Set
this to zero for no limit.
Score Limit: The level ends when any player’s score reaches the Score Limit. Set
this to zero for no limit.
T ime Limit: The level ends when the T ime Limit expires. Set this to zero for no limit.
Alien Lifecycle: Use this to turn Alien Lifecycle On. When Lifecycle is on, Aliens
spawn into the game as facehuggers and must implant hosts to become Alien
drones or Predaliens.
Game Description: This text box describes the rules of the game. See Multiplayer
Tactics on page 37 for a detailed description of these game types.
Setup Hunt:
Max Players: The total number of players you will allow to enter your game.
Multiplayer Menus
9
Page 10

Frag Limit: The level ends when any player’s frag count reaches the Frag Limit. Set
this to zero for no limit.
Time Limit: The level ends when the Time Limit expires. Set this to zero for no limit.
Hunter Race: Select the Hunter race. Only Hunters can score.
Prey Race: Select the Prey Race. If one of the Prey kills a Hunter, that Prey mutates
into the Hunter Race when they respawn and vice versa.
Hunters vs. Prey: Use this to set the ratio of Hunters to Prey. If the teams become
uneven, an appropriate player is chosen to mutate from one race to the other.
Game Description: This text box describes the rules of the game.
Setup Survivor:
Max Players: The total number of players you will allow to enter your game.
Round Limit: This defines how many rounds take place in a match. After these rounds
are completed, the player with the highest score wins.
Score Limit: When any player’ s score reaches the Score Limit, a new map loads. Set
this to zero for no limit.
Round Time: This sets how long each round lasts. Set this to zero for no limit.
Survivor Race: All players begin as Survivors. Survivors become Mutants in one of
three ways. One, a Survivor commits suicide. T wo, a Mutant kills a Survivor. Three, the
Survivor is the first player to die in a round (this is called “Cutthroat Mode”). While
Survivors are active in the game, they gain one (1) point per second. (Survivors don’t
score while invulnerable.)
Mutate Race: Mutants try to kill all of the Survivors. Each kill earns the Mutant ten (10)
points.
Game Description: This text box describes the rules of the game.
Setup Overrun:
Max Players: The total number of players you will allow to enter your game.
Round Limit: This defines the number of rounds in a match. After this number of
rounds, the team with the highest score wins.
Round Time: This sets how long each round lasts. Set this to zero for no limit.
Defender Race: The Defenders win the round if any of them are alive when the
Round Time expires. If the Defenders win, they get one point per surviving Defender.
Defender Lives: This sets the number of lives allowed per Defender. Once a player
uses up lives, he is dead for the remainder of the round. (Starting the game uses one
life.)
Attacker Race: The Attackers win the round if they kill all of the Defenders before the
Round Time expires. If the Attackers win, they get one point per dead Defender.
Attacker Lives: This sets the number of lives allowed per Attacker . Once a player uses
his lives, he is dead for the remainder of the round. (Starting the game uses one life.)
Game Description: This text box describes the rules of the game.
10
Multiplayer Menus
Page 11

Setup Evac:
Max Players: The total number of players you will allow to enter your game.
Round Limit: This defines the number of rounds in a match. After this number of
rounds, the team with the highest score wins.
Evac T ime: This sets how long the Evac Race has to evacuate. Set this to zero for no
limit. To evacuate, one of the team members must reach the evacuation point and
stay there for ten (10) seconds.
Evac Race: Select the Evac Race. The Evac Race wins the round if any of them reaches the evac point and remains there for ten (10) seconds before the Round Time
expires. If they succeed, they gain one point.
Evac Lives: This sets the number of lives allowed per Evac member. Once a player
uses his lives, he is dead for the remainder of the round. (Starting the game uses one
life.)
Attacker Race: Select the Attacker Race. The Attacker Race win the round if the Evac
Race fails to evacuate. If the Attackers win, they get one point.
Attacker Lives: This sets the number of lives allowed per Attacker. Once a player
uses his lives, he is dead for the remainder of the round. (Starting the game uses one
life.)
Game Description: This text box describes the rules of the game.
Maps T ab:Use this tab to determine levels that you wish to use and the order in which
they will be used. The available maps are listed on the left, and your selected maps are
listed on the right. Maps cycle in the order that they are displayed from top to bottom. In
addition, if you choose to use custom multiplayer maps, they will be available here.
Add: Simply click on the map you want to add and then click on the Add option. A
new map appears at the bottom of the selected maps list.
Remove: If you need to remove a specific level from the selected maps list, just click
on the map, and then click on Remove.
Add All: Use the Add All option to add all of the available levels to the bottom of
selected maps list. Y ou will notice that these appear in the same order as the available
map list.
Remove All: If you wish to remove all of the levels from the selected maps list, click
on Remove All.
Advanced Tab: Use this tab to alter the advanced rules or to change the default scor-
ing. Rules are found on the Advanced Tab. Scoring settings are found on the Scoring Tab
Advanced Sub-menu: Items listed here change the basic rules of AVP2.
Player Damage Rate: Modifies the normal damage inflicted by weapons. This
value is a percent, with 100 as the default (i.e. 100% of normal)
Multiplayer Menus
.
11
Page 12

Location-based damage: Specifies whether location-specific damage modifiers
will be used (i.e. head shots inflict greater damage than limb shots).
Friendly Fire Damage: When turned On, you will be able to injure your teammates
with your own weapon fire and vice versa.
Predator Mask Loss: When turned On, headshots can knock off a Predator’s mask.
Class Weapon Sets: When this is On, Marines and Predators begin with their spe-
cial Default Weapons. When this is off, Marines begin with a pistol, a knife, and a
pulse rifle, and Predators begin with Wristblades and a Plasmacaster.
Host Port ID: Specify a specific port to host a server.
Server Bandwidth: This adjusts the maximum bandwidth that the server is allowed
to use to send information. Choose among the default settings or select Custom to
set your own.
Custom Bandwidth: When the Server Bandwidth option is set to Custom you can
use this to manually fine-tune the Server Band width setting. Please note that this
option only be available when the Server Bandwidth option is set to Custom.
Scoring Sub-menu: Use this to set the score awarded to a player for killing each
type of character.
Player Tab: Use this tab to pick your favorite Alien, Predator, Marine and Corporate
characters.
Player Name: Set your player name. By default, this matches your Profile Name.
Race Arrow T ext, Character Arrow Text: Use the Race and Character Arrow T ext
to tell the game which character of each race you prefer to play. The race arrows
switch races while the character arrows switch between characters of the same race.
Preferred Team and Character: The displayed character represents your current
preference when joining a Multiplayer Game. As long as the server allows you to
play as that race, you will start the game as the displayed character. In Team
Deathmatch modes, this will also select your team.
Class Description: This describes the abilities of the current character.
Note on classes: The server can select whether games are played with character
classes. When this setting is On, Marines and Predators start with the default
weapons listed in the Class Description. When this setting is Off, Marines begin with
a pistol and a knife. Predators begin with Wristblades and a Plasmacaster.
Find Internet / LAN Games: These two screens are virtually identical. Both allow you to
join a Multiplayer game already in progress. The screen includes three tabs that display the
available servers, offer information on specific selected servers, and allow you to change
your player settings. The Find Game screen also provides the following active buttons:
Join: Once you have clicked on the server you want to join, click on Join to connect.
12
Multiplayer Menus
Page 13

Server List Tab: This tab displays all of the servers available and information about
them. The tab includes the following controls:
Refresh Server List: Clicking this icon will command the game to update the list of
available servers and all related information.
Server Name Header: Lists the name of each server in a column. Select this text to
sort the list alphabetically based on Server Name. When you click on a server name
under this header the IP address will be displayed to the right of the Status Text.
Ping Header: Lists the ping of each server in a column. Select this text to sort the list
in ascending or descending order based on ping rate.
# Header: Lists the number (#) of players on each server in a column. Select this text
to sort the list in ascending or descending order based on number.
T ype: Lists the type of game on each server in a column. Select this text to sort the
list alphabetically based on Type (DM/Team DM/Hunt/Survivor/Overrun/Evac).
Map: Lists the current map on each server in a column. Select this text to sort the list
alphabetically based on Map Name.
Join Specific IP: Use this to connect to a game at a specific IP. The IP address will
then be displayed to the right of the Status Text.
Status: The Status Text - found next to the Join Specific IP button text and above the
Filters - displays the status of the server search.
Filters: The Filters line at the bottom of the screen provides four text toggles that can
be used to filter for games that match specific criteria.
Version: #/Any: This will restrict the list to the version you have or to any versions.
Ping: This will restrict the list to the games of less than one hundred ping (<100), less
than two hundred ping (<200), or less than four hundred ping (<400). Select Any to
avoid filtering for ping.
Players: This will restrict the list based on how many people are currently playing.
Any: Game contains any number of players.
1+: Game contains more than one player.
<Max: Game is not full.
Some: Game contains more than one player and game is not full.
Game Type: This will restrict the mode of game (Any/DM/Team DM/Hunt/Survivor/
Overrun/Evac).
Server Type: This restricts the type of server displayed in the lists (Dedicated or
Client Hosted).
Server Info T ab:This tab is only selectable after you select a server from the server list.
The tab displays information about the selected game.
General Server Info: This displays the Server Name, IP, Version, Game Type, Current
Level, Number of Players, and Player Names.
Game Settings: This displays the setup information for the game.
Multiplayer Menus
13
Page 14
Advanced Settings: This displays any
changes made to the default rules.
Player Tab: The player tab in the
Join Game screen is identical to
the Player Tab found in the
Host Game screen.
Changes made to one
will appear on the
other and vice versa.
14
Multiplayer Menus
Page 15

OPTIONS MENUS
The options menus gives you access to the Controls screen, the Game screen, the Sound
screen, and the Display screen.
Controls: Lets you customize the keyboard movement and other configurable items to
your tastes. The screen contains four tabs: Assignment, Mouse, Keyboard, and Joystick.
Below is a list of the controls and what they mean:
Restore defaults: Reverts all controls for all species back to the original configuration.
Assignment Tab: This tab provides various controls that you can use to customize
which key corresponds to a given control. To accommodate the three species, the
Keyboard Tab is further divided into Shared, Marine, Predator, and Alien tabs. Controls
on the Shared Tab apply to all three species. To change a control, select the control and
then press ENTER or left mouse. You will see an “=” appear and the control setting will
vanish. Now, press the new key that you wish to assign to the function.
•Warning T ones: If you hear a warning tone, you know that you have assigned a
key that was already in use. The old assignment has been erased automatically.
Shared Tab: The Shared Tab covers basic movement, jumping, and attacking along
with a few other commands. See Default Key Configuration Chart (on page 39) for
more information.
Alien Tab: The Alien Tab covers Crouching, Wall-walking, Pounce Jumping, and the
Wall-walk and Crouch Toggle keys.
Marine T ab:The Marine T ab covers Marine weapons and tools, the Activate/Use key,
and Crouching.
Predator T ab:The Predator T ab covers Predator weapons and tools, the Activate/use
key, Crouching and Leaping keys.
Mouse Tab: This option provides various controls that you can use to customize how
your mouse interacts with the game.
Always Mouse Look: The user is always able to look around with the mouse (instead
of pushing a button to look around with the mouse).
Invert y axis: Toggles vertical mouse movement.
Mouse sensitivity: Controls the speed at which your view swings around in
response to mouse movement.
Mouse smoothing: Scales mouse input rate for smoother or more responsive
movement.
Keyboard Tab: This tab provides various controls that you can use to customize how
your keyboard interacts with the game.
Normal T urn Speed:If you turn with the keyboard, this determines how fast you will
turn when you are walking.
Fast Turn Speed: If you turn with the keyboard, this determines how fast you will
turn when you are running.
Options Menu
15
Page 16

Up/Down look speed: If you look up and down with the keyboard, this determines
how fast you will look up and down.
Auto-Center: When playing with the keyboard using mouse-look, Auto-Center automatically moves the view back to the “center” (i.e., the horizon).
Joystick Tab: Use this to configure your joystick for AVP2. The tab contains a Use
Joystick control and four tabs to set up the joystick.
Use Joystick: Enables joystick controls.
Configure Joystick Tabs: This option provides various controls that you can use to
customize how your joystick interacts with the game.
Invert Axis: This swaps the directions on this axis. For example, if you press left, the
game treats the input as if you had pressed right.
Dead Zone: The dead zone setting determines how much of the joystick’s range is
treated as if the joystick were centered.
Analog: Turn this on to use an analog joystick.
Sensitivity (analog only): Sets how readily the game will read joystick movement.
Center Correction (analog only): This may improve centering in some cases.
Fixed by position (analog only, up/down axis only): When this option is turned
on, the up/down angle of the player’s view directly corresponds to the joystick’s position. When it is turned off, pushing the joystick up rotates the view up and pushing it
down rotates the view down.
Game Options: Customize your game settings by using the General and Multiplayer tabs.
General Tab: Allows you to set specific game options to your liking.
Pickup Icon Duration: When you pickup a new weapon or pickup ammo, a small
pickup icon appears on the screen. The icon fades away over time. This control modifies the default fade rate.
Autoswitch Weapons: If this is set to “Yes” and you pick up a more powerful
weapon than your current weapon, your character will automatically switch to the
newly acquired weapon. The “power” of a weapon corelates to the number keys
assigned to the weapon. Larger numbers indicate more powerful weapons.
Default Run: When turned on, the player is always running.
Head Bob: T oggles the simulated up and down head movement when walking or run-
ning.
Head Canting: Toggles the simulated side-to-side head movement when walking or
running.
Weapon Sway: Toggles the simulated weapon movement when walking or running.
Objective Notification: Toggles the Objective Notifier on or off. Objectives tell you
what you must do to complete the single player missions.
16
Options Menu
Page 17

Training Messages: By default, Training Messages will appear during Easy and
Normal modes to explain the features and abilities for each of the species. NOTE:
Training messages will not appear in Hard or Hardcore mode.
Subtitles: When set to Yes, subtitles will appear at the bottom of the screen whenever relevant in-game dialogue is heard.
Orientation Overlay: By default, when playing as the Alien, blue orientation arrows
will appear on the screen to indicate the direction of gravity. See the Alien section of the
HEADS-UP DISPLAY (HUD) section below (page 24).
Multiplayer Tab:
Message Display Area: In Multiplayer Games, other players can send messages to
you. This control modifies how much space these messages can occupy on the screen.
Message Display Time: In Multiplayer Games, other players can send messages to
you. This control modifies how long these messages stay on screen.
Connection Speed: This toggle text tells the game how fast your connection runs so
that the game can optimize its performance to meet your needs.
Ignore Taunts: Use this to turn off other player’s taunt sounds.
Graphics: Click on this option to access the game’s graphics options. The following items
will become available:
Resolution: Use this option to select the desired video resolution and texture depth.
Higher resolution and texture depth can have an impact on game performance. Check to
see whether your card supports 32-bit textures.
Performance: Use this option to select one of four preset performance settings. If you
value play-speed over image quality, select the Low or Extra-Low options. If you have a
256MB of RAM and speedy processor, you can turn up the settings to suit your taste.
Note: Further performance gains can be made by lowering settings in the Audio Options.
C
ustom Performance: This takes you to the custom performance screen. Here, you will
be able to adjust specific settings to change the look and performance of your game.
General Tab: General graphic options that impact performance can be accessed here.
Texture depth: Toggle between 16 and 32-bit textures. 32-bit textures are much
smoother and more detailed than 16-bit textures but increase load times, require
more video and system RAM and may slow down the framerate on some video
cards. If you have an older video card, particularly one with only 16MB of RAM, it is
recommended that you keep this setting on “16-bit.”
Options Menu
17
Page 18

Lightmap resolution: Toggle between 16 and 32-bit world shadows. As with textures, 32-bit shadows are smoother in appearance but require more RAM, loading
and processing time.
Shadows: Toggle character shadows on/off. Turning them off gives a slight performance boost on slower systems.
Detail textures: T oggle detail textures on/off. Detail textures provide the tiny details
you see on the world when you look at objects at close range. Turning them off will
yield a slight increase in framerate. Some older cards may not support detail textures. If everything in the game looks flat white, try turning detail textures off.
Environment Chrome: Toggle environment mapping on/off. Environment maps
provide the shiny surface effects you see on some metallic surfaces in the game.
Turning this off will improve performance, particularly on older video cards.
Model Chrome: Toggle model chrome on/off. Model chrome is the shiny surface
effects you see on some glass and metal models, such as some of the Predator’s
weapons. Turning this off will improve performance, particularly on older video
cards.
Trilinear filtering: Toggle trilinear filtering on/off. Trilinear filtering makes textures
look smoother when viewed at an angle. It is not supported by all video cards, and
may also decrease performance.
Triple buffering: Toggle triple buffering on/off. Triple buffering can provide
smoother framerates by having the video card store an extra rendered frame before
sending it to the monitor. 16MB card users may want to keep this setting off if they
are running the game in a high resolution.
Draw Sky: Toggles sky rendering on/off. When off, the sky will be drawn as a flat
color but rendering performance will be slightly higher.
Effects Tab: You can change weapon and debris effects here.
Draw Guns: Toggles player -view models such as your hands and gun on/off. When
turned off you won’t be able to see your hands, however the framerate will improve
slightly.
Shell casings: Toggle shell casing models on/off. Turning them off will improve performance on slower systems.
Muzzle flash lighting: Toggle muzzle flash dynamic lighting on/off. Turning this off
may improve performance in intense gunfights.
Weapon impacts: Toggle weapon impact detail between Low, Medium and High.
Higher settings create more effects (sparks, smoke, debris) where weapons hit solid
18
Options Menu
Page 19

surfaces. Turning this setting down may improve performance on slower systems
when weapons are being fired.
Debris: Toggle debris detail between Low,
Medium and High. Higher settings create more
pieces when objects break. Turning this setting
down may improve performance on slower systems when objects break.
Textures Tab: Change texture settings
here. This section will probably do the
most to increase your performance.
Overall: Toggles overall game texture
detail between Extra-Low, Low,
Medium, High and Extra-high. Higher
settings provide more surface detail,
lower settings decrease load times
and may improve performance, particularly on systems with low RAM.
World/Sky/Characters/Weapons/
Props/Effects: You can individually
change texture detail settings for specific types of objects using the arrow
sliders. Experiment with different settings to
find your own preferred balance between
visual detail and game performance.
Performance: You can change the global performance settings using the Performance setting.
This allows you to easily see the differences
between each performance level setting.
Sound: Here you may adjust sound and music volumes.
Sound FX Volume: Raise or lower the volume of all
the game sound effects and speech within the game.
Max Sounds: Set the maximum number of
sounds that can play at a time. Lowering this
may improve performance.
Sound FX Quality: Sets the quality of the sound heard in the game.
Lowering this may improve performance.
Music Volume: Raise or lower the volume of the game’s music.
Options Menu
19
Page 20

PROFILE MENUS
The profile menu allows you to manage player profiles. A profile tracks your key configuration, saved games, user name, and mission progress. When you start the game, you
automatically begin with the <Player_0> profile. You can change the name of this at any
time and your progress to that point will not be lost.
Current profile: Displays the current profile’s name.
Available profiles: Displays a list of the available profiles.
Load: Loads the profile highlighted on the available profile list.
Create: Creates a new profile and assigns it as the current profile.
Rename: Lets you rename the current profile.
Delete: Deletes the current profile.
NOTE: deleting your profile will not permanently erase your saved games. These are stored in a
folder that matches the Profile name. However, once the Profile is deleted, you cannot load your
old saved games unless you create a Profile that matches the folder’s name.
20
Profile Menu
Page 21

PAUSE MENU
Hitting the ESC key during gameplay will pause your game and give you access to the following options.
Resume Game: This will return you to the game in progress.
Load Game: This is the same Load Game option that is found on the Main Menu. Use
this to load previously saved games including your QuickSave game.
Save Game: Use this to save your current progress in the game.
Options: These are the same Options that are found on the Main Menu.
Abort Game: Select this to exit the current game and return to the Main Menu. Be sure
you save your game before selecting this option.
Quit: This will exit the game and return you to Windows.
HEADS-UP DISPLAY (HUD)
The Aliens Versus Predator 2 HUD is organized so you can quickly and easily check your
status in the middle of the wildest firefights. The HUD varies depending on your race.
Marine: The Marine HUD is the most traditional of the three HUD setups.
Health Counter/Meter (top left): The white numbers next to the EKG readout, which
monitors your heartrate, indicates how much health you have. Full health equals one
hundred (100); death occurs at zero (0). The blue bar beside the EKG meter gives you a
visual representation of your current health; also, as you become injured, your heartrate
will increase.
Armor Counter (top left): Beneath the EKG meter is a blue chest plate that represents
Body Armor. Body Armor will completely absorb most types of damage. Once it is
depleted, your health will deteriorate rapidly. Body Armor ranges from zero (0) to one
hundred (100).
Flare Counter (top right): In the top right corner, you can see your flare counter . If you
run out of flares, the flare counter will disappear. You can only carry twenty (20) flares,
so ration them carefully.
Weapon Select Icons (right side): Using the Next Weapon or Previous Weapon controls, activates the Weapon Select Icons.
Active Weapon Choice: The Active Weapon Choice shows an iconic depiction of a
weapon. If you fire, this weapon will become your active weapon. Each icon also displays the weapon’s ammo types in the form of small blue bars. Weapons with one
type
Heads-up Display
21
Page 22

of ammo have one bar; two
types results in two bars
and so forth. When your
weapon is filled with ammo
the bar is completely blue.
When the weapon has no
ammo, the bar is completely red. The number on the
left side refers to the hot
number key used to select
the weapon instantly.
Available Weapon
Number: While the Active
Weapon Choice is visible,
your other weapons appear
in the form of numbers corresponding to the weapon’s hot number key. These numbers normally sit on blue
boxes. If the box is red instead of blue, you know that the weapon is out of ammo. If
the box doesn’t appear, you don’t have that weapon.
Battery Meter (left side): Your Shoulder Lamp and your Image Intensifier rely on a
kinetic battery for operation. The battery has a limited charge, but it recharges quickly. A
vertical meter on the left of the screen represents the battery’ s charge. This meter is only
visible when the battery is in use or is charging.
Motion Tracker (bottom left): The Motion Tracker appears in the lower left corner of
the screen. Be warned: the tracker can only detect moving targets. These appear as
white blips on the tracker. If you are ordered to track another Marine’s life signs, your
tracker will be reconfigured for you. Once reconfigured, you will see a new red blip that
indicates the direction of the targeted Marine.
Objective Indicator (bottom center): An “objective” icon will appear near the bottom center of the screen whenever your objectives have been updated.
Note: Objectives are not available in Hardcore mode.
Predator: The Predator HUD follows some of the Marine HUD conventions, but also differs in many ways. First of all, Predators have no armor . The Predator Health Meter appears
22
Heads-up Display
Page 23

on the left and an Energy Meter appears on the right. Predators use Energy to heal, to power
the Plasmacaster and Pistol, and to power their cloaking technology. The second main difference is that the Weapon Select Icons appear across the top of the screen.
Health Counter (top left): A series of six (6) Predator symbols run down the left side of
the HUD beneath Predator mask icon. These symbols indicate how much health you have.
Full health equals fifty-four (54); death occurs at zero (0).
Note: If you aren’t familiar with Predator numbers, Predators use a base-9 system but if
you just eyeball the number of symbols, you’ll get a pretty good idea of how much health
you have left.
Energy Counter (top right): Under the Energy Sift icon on the right sits another column
of Predator symbols. These symbols represent the Predator’ s energy store. You must have
energy to be able to do things like cloak, to use the healing Medicomp, and to fire the
Plasmacaster or the Pistol. To restore your energy store, activate the Energy Sift.
Weapon Select Icons (top center): Using the Next Weapon or Previous Weapon controls, activates the Weapon Select Icons.
Active Weapon Choice: The Active Weapon Choice shows a pictorial depiction of a
weapon. If you press the Fire key, this weapon becomes your active weapon. In addition to telling you which weapon you are about to choose, each icon displays the
weapon’ s primary ammo type and a small bar representing the ammo remaining in the
weapon. Energy weapons appear with a small energy sift icon.
Available Weapon Number: While the Active Weapon Choice is visible, your other
weapons appear as shadowed pictorial depictions. If you have no ammo for a weapon,
a red bar symbols indicate the lack of ammo. “For those familiar with Predator count-
ing, you will notice that each weapon is displayed with its hotkey number - in Predator
of course.”
Ammo Icons (lower left): The Speargun and the Netgun have limited ammo. When one
of these weapons is selected, its ammo level is displayed on the lower left of the HUD
using a small icon followed by Predator numbers.
Spears are used with the Speargun.
Nets are used with the Netgun.
T rophy Counter (lower left, very bottom):The skull on the lower left is the T rophy
Counter. Each time you behead a human, Predator, or Alien, your Trophy Counter increments by one. (Again, as with the Energy and Health Counters, the Trophy Counter uses
Predator numerals.) Collecting trophies is a matter of Predator pride.
Objective Indicator (bottom right): An objective icon will appear near the bottom, right
side of the screen whenever your objectives have been updated.
Note: Objectives are not available in Hardcore mode.
Heads-up Display
23
Page 24

Alien: The Alien HUD is simple and unique.
Health Sense (bottom center): A long bar across the bottom of the Alien screen rep-
resents the Alien’s health. As the Alien suffers damage, this bar contracts towards the
screen’s center. If the bar vanishes, the Alien dies.
Gravity Sense (around the outer edge of the screen): If you are wall-walking and
you play with the Orientation Overlay set to be showing, blue arrows will move around
the edge of the screen to indicate the direction of gravity (see below).
You are upside down; if you let go, you will fall.
You are on a steep angle; if you let go, you will fall.
You are right side up; if you let go, you will not move.
Objective Indicator (top center): An objective icon in the form of a long bar will
appear across the top of the screen whenever your objectives have been updated.
Note: Objectives are not available in Hardcore mode.
CROSSHAIR SYSTEM
Aliens Versus Predator 2 features a dynamic crosshair system to alert you to special
objects or characters.
Marine Crosshairs: The Marine crosshairs tell you what can be activated and where you
can use your Welding Torch and Hacking Tool. You can turn off this crosshair in the
Options/Game menu.
TARGETING CROSSHAIR:This is your generic targeting cursor . When using
some weapons, such as the Smartgun, this crosshair will change.
ACTIV A TE CROSSHAIR: When your crosshair moves over an item or person
that you may activate in some way, this crosshair will appear. Selecting the
Use button will then activate the item. For example, you may open a door or
trigger a conversation with a bystander.
24
Cross-Hair System
Page 25

HACKING CROSSHAIR: When your crosshair moves over an item that you
can hack, this crosshair will appear . Select the Hacking Device and press the
Fire button to activate the item.
WELDING TORCH CROSSHAIR: When your crosshair moves over an item
that you can use the Welding Torch on, this crosshair will appear. Select the
Welding Torch tool and press the Fire button to activate the item.
Predator Crosshairs: The Predator crosshairs tell you what can be activated and where you
can use your wrist-computer. You can turn off this crosshair in the Options/Game menu.
TARGETING CROSSHAIR: This is your generic targeting cursor.
ACTIV ATE CROSSHAIR: When your crosshair moves over an item or per-
son that you may activate in some way, this crosshair will appear. Selecting
the Use button will then activate the item. For example, you may open a door
or trigger an interaction with a bystander.
CHARGE EMITTER CROSSHAIR: When your crosshair moves over an
item that you can disable with your Charge Emitter in your wrist-computer,
this crosshair will appear. Select the Charge Emitter tool and press the Fire
button to activate the item.
Alien Crosshairs: The Alien crosshairs tell you what can be interacted with. You can turn
off this crosshair in the Options/Game menu.
TARGETING CROSSHAIR: This is your generic targeting cursor.
HEADBITE INDICATOR: When your
crosshair moves over a head that you can
bite, your teeth will descend onto the screen.
Press the Fire button to bite the head.
TEAR INDICATOR: When your crosshair moves over an item that you can tear with
your claws, your claws will appear on the sides of the screen. Press the Fire button to
tear the item.
CrossHair System
25
Page 26

26
Aliens vs Predator 2
Page 27

Weapons and Tools
GAINING WEAPONS AND EQUIPMENT
You will have access to a wide variety of weapons and gadgets as you play through the
game.
Marines: As a Marine, you pick up most of your weapons. When you do, a small icon
appears at the top of the screen. As you play through the game, you get to keep your
inventory, so don’t waste your resources.
Predators: As a Predator, you pick up some of your weapons, but by default, you also
have a large number of tools. When you do pick up new items, a small icon appears at the
top of the screen. As you play through the game, you keep your inventory. Be careful not
to waste your resources.
Aliens: As an Alien, you are a natural weapon, dependent only on prey for nourishment.
This prey comes in various forms. You can gain additional health by health by Head Biting
or Clawing your victims.
HUMAN WEAPONS AND TOOLS
The following weapons and tools are available to Marines and Corporate players. You can
only hold one of these at a time. You can select a weapon using hot keys or the
Next/Previous Weapon keys. To select a tool, you must use the hot key associated with the
tool.
COMBAT KNIFE
Although deadly in the hands of an expert, the trusty commando knife leaves a lot to be desired when face-to-face with
an Alien and its acid blood.
M-4A4 PISTOL
The M-4A4, an updated version of the trusty M-4A3 pistol, offers Marines
a choice of lethal stopping power or armor-piercing destruction.
•Alt-Fire: change ammo type.
•Ammo types: anti-personnel or armor piercing. 12 rounds per magazine.
Anti-personnel: Fires a light, extremely high velocity, prefragmented bullet that splits
apart on impact and causes an almost explosive energy dump into soft targets.
Fires a heavy, high velocity bullet that consists of a non-ferrous jacket, lead shield
layer, and tungsten alloy core. Upon impact the jacket and lead layers peel away and
allow the needle sharp tungsten core to penetrate all soft and most common hard
armor layers.
Weapons and Tools
27
Page 28

SHOTGUN
Simple. Deadly. Although the Corps frowns upon personal weaponry, many Marines ignore Corps doctrine and opt
for the shotgun’s reliability and ease of use.
•Alt-fire: change ammo type.
•Ammo types: shell or slug. 6 round maximum load.
Shells: fire a small conical burst of pellets; terrific against most targets, but have limited use against armored opponents.
Slugs: fire a single heavy slug. Ideal for taking down armored targets.
M-41A PULSE RIFLE
The primary weapon of the Corps, the M-41A offers automatic
fire paired with explosive destruction.
• Primary-fire: automatic M309 10mm x 24 rounds. 99 rounds
per clip.
•Alt-fire: M40 grenades. 8 grenades per clip.
10mm rounds: terrific against most targets, but have limited use against armored
opponents.
Impact grenades: fire in a straight line at high speed; detonate on impact.
M-56 SMARTGUN
The Smartgun provides motion-tracking or direct fire
modes. Fires M250 10mm x 28 caseless rounds. A red
cursor indicates the weapon has locked onto a target.
When used with Image Intensifier, the Smartgun
switches to direct fire mode automatically.
•Limitations: Direct fire mode only when in Image Intensifier mode. Can only walk in
Multiplayer while carrying this weapon.
•Alt-fire: toggle between motion-tracking and direct fire modes.
M-240 FLAMETHROWER
This lightweight mobile flamethrower delivers a stream of
heavy, pressurized napalm that burns humans, Predators, and
Aliens.
•Alt-fire: None.
28
Weapons and Tools
Page 29

M-6B ROCKET LAUNCHER
Derived from the Marine’s anti-aircraft defense system, the M-6B packages three self-propelled rockets
into a single firing tube to reduce reload times.
Comes with either direct fire or tracking rockets.
•Limitations: Can only walk in Multiplayer while carrying this weapon.
•Alt-fire: change ammo types. 3 rockets per tube.
Direct fire rockets: Travel in a straight line and detonate on impact.
Tracking rockets: aim at a target to lock the rocket onto the target. A red-cursor indi-
cates lock acquired. Rocket will home onto target.
M-92 GRENADE LAUNCHER
A favorite weapon of combat engineers, the grenade
launcher offers an array of tactical explosives ideal for
creating defensive perimeters.
•Alt-fire: change ammo types.
Prox grenades: stick to most surfaces. Once active, the prox mine will detonate upon
detecting motion.
Timed grenades: bounce off most surfaces. Detonate on impact with target or after
timer expires.
EMP grenades: detonate on impact. Derived from artifacts found on L V-1201, the EMP
grenades disable electrical systems and stun with their concussive force.
Smart mines: stick to most surfaces. Once placed, the smart mine will activate upon
detecting a target. Using tiny robotic legs, the mine will then move immediately
towards the target along any intervening surfaces.
M-90 MINIGUN
Designed for combat against light armored vehicles,
the Minigun combines high-caliber ammunition with
a rapid-fire air-cooled rotating multi-barrel housing.
•Limitations: walk only in Multiplayer.
•Alt-fire: pre-spins the barrels for faster response.
WY-102 SNIPER RIFLE
A favorite weapon of mercenaries, the WY-02 sniper
rifle offers the latest in Weyland-Yutani technology to
provide accurate long-range fire in all conditions.
• Alt-fire: activates the rifle zoom, hold down to
increase zoom magnification.
Weapons and Tools
29
Page 30

HACKING DEVICE
The Hacking Device allows Marines to override most electronic security systems.
WELDING TORCH (TOOL)
A Welding Torch comes in handy to open rusted or locked bolts or doors.
HUMAN EQUIPMENT:
Below is a summary of some of the equipment you’ll encounter. Equipment can be used
regardless of your selected weapon or tool.
FLARE
The ubiquitous flare relies on a phosphorous flame to burn under all conditions. Can
be used with any weapon. Activate with the Flare key.
•Limitations: 20 flares maximum.
SHOULDER LAMP
The shoulder lamp casts a beam of light wherever you look. The shoulder lamp drains
power from the Marine’ s kinetic battery system. Once the battery is drained, the lamp
turns off. The battery recharges automatically over time. Can be used with any
weapon. Use the Shoulder Lamp key to toggle on and to toggle off.
•Limitations: drains battery slowly.
IMAGE INTENSIFIER
The Image Intensifier boosts the light levels in the world. In darkness, this illuminates
the world, but in well-lit areas, this can wash out the screen and make it difficult to see.
The Intensifier rapidly drains the Marine’s kinetic battery system. Once the battery is
drained, the Intensifier turns off. The battery recharges automatically over time. This
can be used with any weapon. Use the Next Vision Mode or Previous Vision Mode key
to toggle on and to toggle off.
•Limitations: drains battery quickly.
HUMAN PICKUPS:
Pickup items are special power-ups that you may collect during a mission. These include
pickups for each weapon, tool, ammo, and gear. Humans have a maximum of 100 Health
and 100 Armor , and can carry 20 Flares. Humans also can carry a limited amount of ammo
for each weapon. If you are at your maximum, you will automatically ignore the pickup. If
the pickup would raise your Health, Armor, flares or ammo beyond your limits, then you
will automatically take what you can and leave the rest (the pickup will remain until it is
completely depleted).
Note: in class-based Multiplayer games, each class has limited weapons options. They cannot pickup weapons or ammo that are not supported by their class.
30
Weapons and Tools
Page 31

In addition, these include:
ARMOR
Provides 100 armor.
MEDIKIT
Provides 100 health.
FLARE POUCH
Contains 10 flares.
AMMO BOX
Contains an assortment of pickups.
PREDATOR WEAPONS AND TOOLS:
The following weapons and tools are available to Predators. Y ou can only hold one of these
at a time. You can select a weapon using number keys or the Next/Previous Weapon keys.
To select a tool, you must use the hot key associated with the tool. Predators have no
armor, and like humans, they can carry only a limited amount of ammo for each weapon.
If you are at your limit, you will automatically ignore the pickup. If the pickup would raise
your ammo beyond your limits, then you will automatically take what you can and leave
the rest (the pickup will remain until it is completely depleted).
Note: in class-based Multiplayer games, each class has limited weapons options. They cannot pickup weapons or ammo that are not supported by their class.
WRISTBLADES
With surreal cutting power, the Predator Wristblades are perfect for killing
prey at close range and for skinning them afterwards.
• Alt-fire: gather your energy to deliver a more powerful blow (useful for
gathering Trophies).
The spear, or Combistick blends the cutting power of the Wristblades with
extended reach and power.
•Primary fire: horizontal slice.
•Alt-fire: vertical slice.
PLASMA PISTOL
An advanced version of the standard Predator Pistol, this energy weapon
uses an encapsulated plasma charge to provide direct or lobbing fire. The
pistol draws from the general Predator energy pool.
•Limitations: firing uncloaks the Predator.
•Primary fire: direct fire, large blast.
•Alt-fire: lobbing multi-fire with small stunning blasts.
Weapons and Tools
31
Page 32

SPEARGUN
Perfect for sniping, the Speargun is ideal for beheading your enemies. As a
bonus, you can collect spears from your enemies’ heads. In close combat or in
chaotic situations, the Speargun’s multifire works well to dispatch nearby opponents. 9 spears per clip.
•Primary-fire: single shot.
•Alt-fire: tri-shot.
PLASMACASTER
Tied directly to the Predator’s vision modes, the Plasmacaster provides a multitude of combat options. In the appropriate vision mode, the Plasmacaster will
lock onto the nearest vision-specific target. The weapon can also be charged
before firing to increase its damage. T o charge the weapon, either hold down the
Primary Fire key before releasing it or hold down the Alt-Fire key. Alt-Fire charges
the weapon without actually firing it. The charge remains stored until it is used.
• Limitations: the tracking laser can be seen by your enemies even when you are
cloaked; firing uncloaks the Predator.
•Primary fire: fire the weapon or hold down to charge the weapon before firing.
•Alt-fire: charge the weapon.
DISC
Slicing enemies in two, the Disc provides unparalleled power to the skillful
Predator. In the appropriate vision mode, the Disc locks onto the nearest target;
otherwise, it travels in a straight line. The Recall key recalls the Disc in mid-flight
or from its resting position. If you use the Recall key and you cannot see the disc,
the disc teleports back to you - at a higher energy cost.
• Limitations: the tracking laser can be seen even when you are cloaked; firing
uncloaks the Predator.
•Primary fire: throw the disc.
NETGUN
32
Great for collecting specimens, the Netgun knocks down and envelops its targets. Watch out though; sharp weapons - claws or knives - will cut through the
net quite quickly. 9 nets per packet.
•Alt-fire: None.
Weapons and Tools
Page 33

REMOTE BOMB
Remote Bombs provide a useful means of entrapping your prey. However,
you have a limited supply of these. These bombs stick into most surfaces,
but can also bounce occasionally. If they strike a living target, they explode.
They will also detonate if you select another weapon.
•Primary fire: Place bomb.
•Alt-fire: Detonate bomb.
MEDICOMP (TOOL)
The Medicomp restores your health and drains your energy.
• Limitations: Using this item uncloaks the Predator and he can only move
at walking pace. The Predator also lets out a large roar that can alert others
to his presence.
ENERGY SIFT (TOOL)
The Energy Sift restores your energy, but draws enemies to you with its light
and commotion.
• Limitations: Using this item uncloaks the Predator and he can only move
at walking pace.
CHARGE EMITTER (TOOL)
The Charge Emitter uses a concentrated electrical charge to short-circuit primitive
human locks and control devices.
PREDATOR EQUIPMENT:
Below is a summary of some of the equipment you’ll encounter. Equipment can be used
regardless of your selected weapon or tool.
MASK
Vision Modes:
The Predator Mask provides the Predator with three special hunting modes.
Thermal mode - targets humans. Electromagnetic mode - targets Aliens.
PredTech mode - targets Predators and illuminates dark areas. The drawback to using Vision Modes is that while tracking one species becomes easier, the
other two species become much harder to see.
Long Range Zoom:
The Predator Mask also provides the Predator with the ability to zoom in on his victims from far off distances.
Weapons and Tools
33
Page 34

CLOAKING FIELD GENERATOR
The Cloaking Field Generator allows Predators to cloak, bending light around
them to hide from prying eyes. Unfortunately, this technology doesn’t extend to
the Alien senses. Aliens sense Predators regardless of cloaking.
PREDATOR ABILITES:
PREDATOR CROUCH LEAP
The Predator can perform a very powerful jump by first Crouching and then pressing
the Jump key. This powerful move allows Predators to leap through the trees. A
Predator must rest a few seconds between each Crouch Leap.
ALIEN WEAPONS AND ABILITIES:
Aliens are unique and organic. They acquire no weapons; they are weapons. Each type of
Alien posseses certain limitation and advantages.
VISIONS MODES: All Aliens have the two Vision Modes.
HUNT MODE: This is the Alien’ s Primary V ision Mode. This mode allows an Alien to
spot potential prey by the pheromones they emit. The pheromones appear as a colored aura surrounding them. The color of the aura varies with each species: human
auras are blue, Predator auras are green and Alien auras are red. These auras are even
visible in complete darkness.
NAVIGATE MODE: Aliens possess a Secondary Vision Mode that effectively allows
them to see in the dark. An Alien can shift into this mode at any time. This has a detrimental side effect in that prey is relatively indistinguishable from the environment.
WALL-WALKING (EXCEPT FOR CHESTBURSTERS AND PRAETORIANS)
Most forms of Alien can cling to surfaces, effectively walking on the walls. To wallwalk, use the wall-walk toggle or the wall-walk key.
CROUCH JUMP
By crouching before jumping, Aliens can jump higher than normal. To do this, press
the Crouch key and then simultaneously press the Jump key. After Crouch Jumping,
the Alien must recover for a moment before Crouch Jumping again.
POUNCE (EXCEPT CHESTBURSTER AND PRAETORIAN)
Pounce is both a means of navigation and an attack. Use Pounce to rapidly spring
from place to place, or Pounce on your enemies. You will not receive any health if you
kill enemies with this attack. Look where you want to get to or look at your target. Press
the Pounce key. An Alien must wait a few seconds between pounces.
34
Weapons and Tools
Page 35

Facehugger
FACEHUG
A facehugger only has two instincts: to stay alive and to find a viable host for implantation. To implant a target - to Facehug - aim at the target, and press your Pounce key
or your Fire key. If you hit the target above the waist, you’ll facehug the target.
Chestburster
BITE
While the Chestburster’s sharp teeth are enough to tear out of a host’s body, they are
no match for a Pulse Rifle or a Plasmacaster. Avoid combat until you’ve matured.
Mature Aliens - Runner, Drone, Praetorian, Predalien
CLAW
The primary weapon of the mature Alien is the Claw attack. Clawing dead humans and
Predators increases the Alien’s health.
•Primary fire.
HEADBITE (EXCEPT PREDALIEN)
The Headbite provides health to the Alien.
• Primary Fire while aiming at the target’s head. The Alien’s teeth become visible on
screen to show that you can perform this attack. You cannot Headbite synthetics or
other Aliens.
TAIL
The tail delivers a venomous barb that temporarily stuns its victims. To increase the
venom, charge the tail by holding down the alt-fire.
•Alt-Fire for normal tail. Hold Alt-Fire to charge the tail.
Runner Special Abilities
SPEED
The Runner is the fastest of the adult Aliens, but also the weakest.
Drone Special abilities
BLEND OF SPEED AND STRENGTH
The Drone is an excellent warrior with a balance of speed and strength.
Predalien Special Abilities
SUPER STRENGTH
The blending of Alien and Predator DNA creates the strongest of the adult Aliens. The
Predalien possesses the greatest Pounce range, but is not known for its speed.
Praetorian Special Abilities
ARMORED PLATING
Praetorians are resistant to small caliber arms fire. Only armor piercing ammunition
and Minigun rounds are completely effective against the Praetorian
Weapons and Tools
35
Page 36

Gameplay Tips
MARINE
• Use your Motion Tracker to identify targets.
• Back away from the Aliens. Acid blood is very toxic to humans.
• Use your Shoulder Lamp and Flares to illuminate your path. Don’t rely on your Image
Intensifier, which can run out of power at the worst possible times.
• When fighting Praetorians, get hold of the Minigun. If you can’t find a Minigun, use your
Pistol alt-ammo or Shotgun alt-ammo.
• Conserve your Pulse Rifle grenades. These are hard to find and extremely useful.
• If you are netted by a Predator, use the Knife to cut yourself free.
PREDA TOR
• Use your Cloaking to stalk your enemy. When you strike, destroy them before they can
respond.
• You can use your Wristblades, Spear, and Speargun and stay Cloaked. If you fire any
other weapon, you will lose your Cloaking.
Your Disc and Plasmacaster both track humans in Thermal Vision, track Aliens in
•
Electromagnetic Vision, and track Predators in PredTech Vision.
• Charge the Plasmacaster for its most explosive power by holding down your Alt-Fire key.
• Use the Plasma Pistol carefully. The Alt-Fire stun blast can drain your energy instantly
and leave you vulnerable to your enemies.
• Aliens can see you. Your cloaking will not help you fight them.
• Water will negate your cloaking.
• The Smartgun and Tracking Rockets can locate you if you are moving. If you see humans
facing you and carrying these weapons, don’t move. Wait until the human turns to move
so that they cannot track you.
ALIEN
• Against groups of humans, use the Pounce to eliminate your enemies quickly.
• Against solitary humans, use the Tail stun to immobilize your prey, and then Headbite
your prey for extra health.
• Beware of flamethrowers.
ENVIRONMENTAL HAZARDS
• Steam and electrical sparks damage Aliens, Predators and humans.
• LV-1201 has large greenish, yellow lakes. These are highly toxic to all life. Swimming in
them will kill you quickly.
36
Gameplay Tips
Page 37

MULTIPLAYER TACTICS
Aliens Versus Predator 2 provides six modes of play.
•Standard Deathmatch:
• AVP2 is a very fast game. If you see your enemy first, you have the upper hand.
Either kill him, or withdraw.
•Keep moving, especially side-to-side.
• Take advantage of the different species. Predators, for example, often get lazy and
use only one Vision Mode. If you are an Alien, and you see a Predator hunting a
human, you know that he’s probably not paying attention to you.
•Team Deathmatch:
•Stay together. This applies to all three species.
•Use all the classes - this is particularly true for Aliens.
• Aliens - let the Praetorian and Predalien (the largest Aliens) distract your foes while
your faster allies finish them off.
• Marines - use your Smartguns and Tracking Rockets to find hiding Predators. Use
Prox Grenades and Spider Mines to protect your rear.
•Hunt:
•The goal of hunt is to rack up the most kills as the Hunter.
• While you are hunting, try to strike quickly and then get away from your prey. No
one else can score, so you can take your time and maximize your kills.
• While you are being hunted, try not to kill other Prey characters. This hurts your
score and makes it easier for the Hunter to kill you.
•Survivor:
•The goal of Survivor is to be the last Survivor player killed. For each second that you
are alive as a Survivor, you gain one point. One player starts as a Mutant. When a
Mutant kills a Survivor, the Mutant gets ten points and the Survivor respawns as a
Mutant.
•Because Survivors are scored for time and Mutants are scored for kills, Mutant play-
ers want to end the round as quickly as possible. Dying is not a big penalty once you
are a Mutant.
•Overrun:
•In Overrun, players are on two teams - Attackers and Defenders. Each round lasts for
a fixed period of time. The Attackers want to kill all the Defenders before the round
ends. If they do, they win. Otherwise, they lose.
•In Overrun, most humans and Predators have only one life per round. If you die, you
must wait for the next round. If you can eliminate one or two opposing players without losing any from your own team, you can usually mop up the other enemies quite
quickly.
Multiplayer Tactics
37
Page 38

•Learn the maps. Good Overrun players try to ambush their enemies at the key choke-
holds.
•Evac:
•In Evac, players are on two teams - Attackers and Defenders. Each round lasts for a
fixed period of time. The Attackers want to prevent the Defenders from evacuating
before the round ends. To evacuate, Defenders must reach the Evac Point and stay
there for ten seconds. Attackers can also win by killing all of the Defenders.
• In Evac, most humans and Predators have only one life per round. If you die, you
must wait for the next round. If you can eliminate one or two opposing players without losing any from your own team, you can usually mop up the other enemies quite
quickly.
38
Multiplayer Tactics
Page 39

Default Key Configuration Chart
This section describes the default key mappings for A VP2. With the exception of the game
controls, all key assignments listed here can be changed in the Options menu.
Game Controls (These cannot
Key Function Description
<Esc> Menu Exits to the menu
<F1> Multiplayer info Change races in MP; see who is playing
<F2> Multiplayer Camera Fly Mode
<F6> QuickSave Saves your current game to the QuickSave slot
<F8> Screenshot Captures the image currently on your screen to a
<F9> Quickload Loads the game currently saved in the QuickSave
be changed!):
as each race
file in the main AVP2 folder on your hard drive
Slot.
Default Key Configuration Charts
39
Page 40

SHARED
Key Function Description
W Forward Move Forward
S Backward Move Backward
Left Arrow Turn Left Turn to the left
Right Arrow Turn Right Turn to the Right
A Strafe Left Step to the Left
D Strafe right Step to the Right
K Strafe Strafe
Caps Lock Run Move faster
M Run/Walk Toggle Selects Run or Walk as your default mode of
movement
Space Jump Jump up
Mouse 0 Primary Fire Fire your primary weapon
Mouse 1 Alt-Fire Fire your alt weapon
V Next Vision Mode Cycle to next vision mode
Home Look Up Look up
End Look Down Look down
Delete Center View Center view
Insert Mouse Look When pressed, the mouse can be used
for aiming/looking around
Tab Objectives/Scores View your current objectives (SP) or score (MP)
Enter Send Message Send message (MP)
\ Send Team Message Send message to team only (MP)
Backspace Taunt Taunt the enemy (MP); distract the enemy (SP)
. Crosshair Toggle Hide crosshairs
40
Default Key Configuration Charts
Page 41

MARINE
Key Function Description
Left Shift Crouch Crouch down
/ Crouch Toggle Crouch all the time
E Use Operate
Q, Mouse wheel down Next Weapon Next Weapon
Z, Mouse wheel up Previous Weapon Previous Weapon
R Reload Reload
G Shoulder Lamp Shoulder Lamp
F Flare Flare
H Hacking Device Hacking Device
T Welding Torch Welding Torch
1 Knife/Exosuit Left Knife
2 Pistol/Exosuit Right Pistol
3 Shotgun Shotgun
4 Pulse Rifle Pulse Rifle
5 Grenade Launcher Grenade Launcher
6 Flamethrower Flamethrower
7 Smartgun Smartgun
8 Rocket Launcher Rocket Launcher
9 Minigun Minigun
0 Sniper Rifle Sniper Rifle
X Last weapon Last weapon
Default Key Configuration Charts
41
Page 42

PREDA TOR
Key Function Description
Left Shift Crouch Crouch down
/ Crouch Toggle Crouch all the time
E Use Use
Q Next Weapon Next Weapon
Z Previous Weapon Previous Weapon
R Reload Reload
Mouse wheel up/Page up Zoom In Zoom In
Mouse wheel dn/Page down Zoom Out Zoom Out
H Charge Emitter Charge Emitter
C Cloak Cloak
F Disc Retrieve Disc Retrieve
1 Wristblades Wristblades
2 Spear Spear
3 Pistol Pistol
4 Speargun Speargun
5 Plasmacaster Plasmacaster
6 Disc Disc
7 Netgun Netgun
8 Remote Bomb Rocket Launcher
X Last Weapon Last Weapon
T Energy Sift Device Energy Sift Devic
G Medicomp Device Medicomp Device
B Previous Vision Mode Previous Vision Mode
Leap = Crouch + Jump
42
Default Key Configuration Charts
Page 43

ALIEN
Key Function Description
E Pounce Pounce jump and attack
Left Shift Wall-walk Wall-walk
G Wall-walk Toggle Wall-walk all the time
Left Ctrl Crouch Crouch down
/ Crouch Toggle Crouch all the time
Default Key Configuration Charts
43
Page 44

Credits
Fox Interactive:
David Stalker, Producer
Paul Pawlicki, Associate Producer
Michael Heilemann, Director of
Technology
Fox Quality Assurance Department:
Don Sexton, Quality Assurance Manager
Igor Krinitskiy, Assistant Quality Assurance
Manager
Project Lead:
Glenn Dphrepaulezz
T esters:
Ken Anderson
Geoff Bent
Terrance Brant
Joe Castellano
Francis Choi
Matt Dell
David Farkas
Anant Jiemjitpolchai
Javier Lagos
Joseph Lamas
Cris Lee
Kerry Marshall
Aaron Minjares
Billy Pamier
Jen Redding
Gabe Slater
Jeff Spierer
David Taylor
Luke Thai
Jason Weitzner
Chris Wilson
Hal Zabie
Special Thanks:
Eric Asevo
Steven Bersch
Aaron Blean
Kristian Davila
Lindsey Fischer
Tom Gastall
Ivo Gerscovich
Luke Letizia
Blake McCallister
Dan MacKechnie
Kimberlee MacMullan
John Melchior
Chris Miller
Megan O’Brien
Michael Pole
Harish Rao
Victor Rodriguez
Jamie Samson
Kirk Scott
Dave Shaw
Gary Sheinwald
Kristin Sutter
Rozita Tolouey
Tim Tran
Jack Van Leer
Mark Vu
Karly Young
Justin Cooney, ATI
Ritche Corpus, Logitech
Brad Craig, AMD
Mike Drummelsmith, Matrox
Brian Harvey, NVIDIA
Joe Kreiner, ST
Nicolas Thibieroz, PowerVR
Elias Slater, AMD
Thanks to all the filmmakers and storytellers who created, and contributed to, the
legend.
44
Credits
Page 45

Monolith Productions Core Development Team:
James Ackley, Lead Sound Designer
Rhett Baldwin, Level Designer
Brice Broaddus, 3D Artist
Mark Brown, Level Designer
Ben Chamberlain, Lead Quality Assurance
Nathan Cheever, Level Designer
Ben Coleman, Senior Level Designer
Courtney Evans, Level Designer
Andy Grant, 3D Artist
Nathan Grigg, Music Designer
Ben Harrison, World Artist
Nathan Hendrickson, Lead Level Designer
Chris Hewett, Director of Development
Peter Higley, Game Programmer
Craig Hubbard, Creative Director
Andy Kaplan, Game Programmer
Kevin Kilstrom, Lead 2D/3D Artist
Eric Kohler, Art Director
Andy Mattingly, Lead Programmer
Dan Miller, Level Designer
Brian Pamintuan, Sound Designer
Brad Pendleton, Game Programmer
Mark Spadoni, Game Programmer
Dan Thibadeau, Senior Level Designer
Cassano Thruston, Sound Designer
Bill Vandervoort, Senior Level Designer
Brian Waite, 3D Animator
William Westwater, Game Design /
Producer
Simon Wong, Motion Capture Artist
Monolith Productions Additional Development:
Bryan Bouwman, Lithtech Programmer
Kevin Deadrick, Level Designer
Bill Dewey, Sierra Programmer
Mike Dussault, Engine Programmer
Jim Edwards, Game Programmer
Israel Evans, Special FX Artist
Crista Forest, Level Designer
Jay Fuller, Level Designer
Kevin Francis, Engine Programmer
Terry Franguiadakis, Lithtech Programmer
Jim Geldmacher, Interface Programmer
Bob Givnin, Quality Assurance
Miguel Gomez, Lithtech Programmer
Jonathan Gramlich, Quality Assurance
Geoff Kaimmer, World Artist
Seiko Kobayashi, 3D Artist
Kevin Lambert, Launcher Programmer
Brian Long, Game Programmer
John O’Rorke, Lithtech Programmer
Curtis Salsman, 2D/3D Artist
Matt Scott, Lithtech Programmer
Jonathan Stein, Product Manager
Kevin Stephens, Director of Engineering
Ewen Vowels, Lithtech Programmer
Special Thanks to the following
Monolith Personnel:
Andrea Barringer
Wayne Burns
Patti Kail
Gary Kussman
Spencer Maiers
Kristin McLellan
Jim Totaro
Jim Wallingford
Sandra Watanabe
Kiyotaka Yaguchi
Additional Special Thanks:
Kyle “Pezman” Peschel
Ben “Sadogoat” Bradbury
Christoffer “Eldritch” Lundberg
Lonnie “Glock” Wilson
Credits
45
Page 46

Sierra / Vivendi
Marketing & PR:
Koren Buckner
Sarita Churchill
Simon Etchells
Lori Inman
Anna Valleser
Janelle Watts
Localisation:
Barry Kehoe, Project Manager
Anthony Fitzgerald, Lead Engineer
Mick Lavin, Engineer
Bill Sweeney, Graphics
Francis Courchinoux, QA
Bartolomeo DiBenedetto, QA
Compatibility Lab:
Sue Ung
Sean Meichle
Joe Easter
Quality Assurance:
Brad Nelson - Executive Senior Director
Consumer Services
Gary Stevens - Quality Assurance Director
Ken Eaton - QA Supervisor
John Largis - QA Lead
Jim Gentle - QA Tester
Erinn Hamilton - QA Tester
Patrick Orr - QA Tester
Brian Burnett - QA Tester
Mark Storie - QA Tester
Creative Services:
Kathy Carter
Jessica Drossin
Elizabeth Miller
Michelle Garnier-Winkler
Voice and Motion Capture Artists:
John Armstrong - Duke, Blackwell, Dimitri
and Various
Jock Blaney - McCain and Various
Andromeda Dunker - Dunya and Various
Kit Harris - Various
Turner Heidi - Various
Todd Licea - Harrison and Various
Gary Schwartz - Eisenberg and Various
David Scully - Jones, Ivan and Various
Jeff Steitzer - Rykov and Various
Jen Taylor - Tomiko and Various
Andrew Hefferman - Motion Capture
Performer
Jamil Giovanni Mullen - Motion Capture
Performer
Additional Music Composition:
Rich Ragsdale
Uses Miles Sound System
Copyright ©1991-2001 by RAD Game Tools, Inc.
Uses Bink Video Technology
Copyright ©1994-2001 by RAD Game Tools, Inc.
MPEG Layer-3 playback supplied with the Miles
Sound System from RAD Game Tools, Inc.
MPEG-3 audio compression technology
licensed by Fraunhofer IIS and THOMPSON
Multimedia.
Sampled Instruments by Sonic Implants:
www.sonicimplants.com
©2001 Twentieth Century Fox Film Corporation. All
Rights Reserved.
LithTech™ Game Engine ©1998-1999 Monolith
Productions, Inc. All rights reserved.
Fox, Fox Interactive, Aliens vs. Predator 2 and their
associated logos are registered trademarks or trademarks of Twentieth Century Fox Film Corporation.
LithTech is a trademark of Lithtech, Inc. Windows is a
registered trademark or trademark of Microsoft
Corporation in the United States and/or other countries.
The ratings icon is a trademark of the Interactive
Digital Software Association.
We would also like to thank all of the
wives, husbands, children and significant
others who have supported us through the
development process. Without their support, this game would not have been possible.
46
Aliens vs Predator 2
Page 47

THIRD PARTY SOFTWARE:
Uses Miles Sound System
Copyright © 1991-2001 by RAD Game Tools, Inc.
MPEG Layer-3 playback supplied with the Miles Sound System from RAD Game Tools, Inc.
MPEG-3 audio compression technology licensed by Fraunhofer IIS and THOMPSON
Multimedia.
Sampled Instruments by Sonic Implants: www.sonicimplants.com
Uses Binks Video Technology
Copyright © 1994-2001 by RAD Game Tools, Inc.
© 2001 Twentieth Century Fox Film Corporation. All Rights Reserved.
LithTech™ Game Engine © 1998-1999 Monolith Productions, Inc.
All rights reserved.
Fox, Fox Interactive, Aliens vs. Predator 2 and their associated logos are registered trademarks or trademarks of Twentieth Century Fox Film Corporation.
LithTech is a trademark of Lithtech, Inc.
Windows is a registered trademark or trademark of Microsoft Corporation in the United
States and/or other countries.
The ratings icon is a trademark of the Interactive Digital Software Association.
Check out other Monolith Titles at http://www.lith.com/
 Loading...