Franke Foodservice AQRM271 Installation Manual
Installation and operating instructions |
Istruzioni per il montaggio e l’uso |
Notice de montage et de mise en service |
Montageen bedrijfsinstructies |
Instrucciones de montaje y uso |
|
|
|
EA-Nr.: |
76 12982 000485 |
FAR-Best.-Nr.: |
2152 00 23 |
EA-Nr.: |
76 12982 000492 |
FAR-Best.-Nr.: |
2154 00 23 |
Franke Aquarotter AG, Germany
18-05.098d-Exp.fm/07.04.04

................................................................. 3
Please refer to the graphics in the German Installation and Operating Instructions.
................................................................. 10
Les graphiques sont disponibles dans la notice de montage et de mise en service allemande.
................................................................. 17
Por favor, consulte los gráficos en las instrucciones alemanas de montaje y uso.
................................................................. 24
Per le grafiche fare riferimento alle Istruzioni per il montaggio e l’uso in tedesco.
................................................................. 31
De tekeningen kunt u in de Duitse montageen bedrijfsinstructies vinden.
Inhaltsverzeichnis.fm
2

English
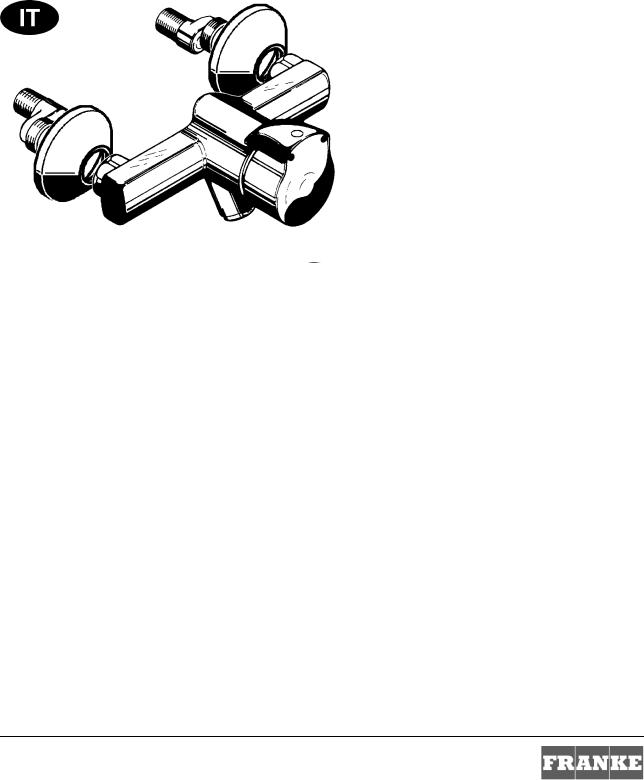
76 12982 000485 ........AQUAMIX single-lever mixer for wall mounting with angled outlet
76 12982 000492 ........AQUAMIX single-lever mixer for wall mounting with swivel outlet
Please refer to the graphics in the German Installation and Operating Instructions.
Contents
1. Warranty . . . . . . . . . . . . . . . . . . . . . . . . . . . . . . . . . . . . . . . . . . . . . . . . 3 2. Abbreviations and terminology . . . . . . . . . . . . . . . . . . . . . . . . . . . . . . 4 3. Important notes . . . . . . . . . . . . . . . . . . . . . . . . . . . . . . . . . . . . . . . . . . 4 4. Technical specifications . . . . . . . . . . . . . . . . . . . . . . . . . . . . . . . . . . . . 4 5. Scope of Delivery . . . . . . . . . . . . . . . . . . . . . . . . . . . . . . . . . . . . . . . . . 5 6. Dimensions . . . . . . . . . . . . . . . . . . . . . . . . . . . . . . . . . . . . . . . . . . . . . . 5 7. Installation example . . . . . . . . . . . . . . . . . . . . . . . . . . . . . . . . . . . . . . . 5 8. Assembly Instructions . . . . . . . . . . . . . . . . . . . . . . . . . . . . . . . . . . . . . 5 9. Function. . . . . . . . . . . . . . . . . . . . . . . . . . . . . . . . . . . . . . . . . . . . . . . . . 5 10. Adjusting flow duration . . . . . . . . . . . . . . . . . . . . . . . . . . . . . . . . . . . . 5 11. Adjusting the temperature . . . . . . . . . . . . . . . . . . . . . . . . . . . . . . . . . . 6 12. Replacing the functional part. . . . . . . . . . . . . . . . . . . . . . . . . . . . . . . . 6 13. Swivel limit (model with a swivel outlet). . . . . . . . . . . . . . . . . . . . . . . 6 14. Maintenance . . . . . . . . . . . . . . . . . . . . . . . . . . . . . . . . . . . . . . . . . . . . . 7 15. Fault correction . . . . . . . . . . . . . . . . . . . . . . . . . . . . . . . . . . . . . . . . . . . 8 16. Replacement parts . . . . . . . . . . . . . . . . . . . . . . . . . . . . . . . . . . . . . . . . 9
1.Warranty
Liability is accepted according to the general terms of agreement and supply. Only use original replacement parts!
18-05.098d-GB.fm
3

2.Abbreviations and terminology
TWW |
Warm drinking-water |
TW |
Drinking-water |
SW |
Width A/F |
DN |
Nominal diameter in mm |
FAR Order No. |
Franke-AQUAROTTER Order No. |
EA No. |
European article number |
Conversion |
1 mm = 0.03937 inches |
|
1 inch = 25.4 mm |
All length specifications in the graphics are in mm.
3.Important notes
•Installation, commissioning and maintenance are to be performed only by a qualified technician according to the instructions provided.
•Legal requirements and the technical connection regulations of the local water supply companies must be complied with.
•Before assembling and installing the equipment, flush the supply pipes in accordance with DIN 1988!
•Only operate this valve in conjunction with the correct grit filters.
•If the temperature of the hot water supply is above 45 °C, the temperature limiter must be set to prevent scalding (see Chapter 11.).
•Use suitable cleaning agents that are not harmful to the fittings in a proper manner and rinse with water after use. High-pressure cleaners must not be used for cleaning.
•All rights reserved to make technical alterations.
4.Technical specifications
Minimum flow pressure |
1.0 bar |
Calculation flow rate |
TW 0.07 l/s (4.2 l/min), TWW 0.07 l/s (4.2 l/min) |
Volume flow 2152 00 23 |
0.10 l/s (6 l/min) at 3 bar flow pressure |
Volume flow 2154 00 23 |
0.13 l/s (7.8 l/min) at 3 bar flow pressure |
Flow time at 38 °C |
1 – 30 s adjustable |
18-05.098d-GB.fm
4
5.Scope of Delivery
Quantity Description
2Offset-type screw connector, with mesh washers and screw rosette
1 |
AQUAMIX self-closing single-lever mixer |
|
|
1 |
Installation and operating instructions |
18-05.098d-GB.fm
6.Dimensions
7.Installation example
8.Assembly Instructions
8.1Flush the pipes in compliance with DIN 1988.
8.2Install the offset-type screw connector.
8.3Install the screw rosettes.
8.4Install the fitting.
!Caution!!
Do not forget the mesh washer.
9.Function
9.1Open both water flow volume regulators (a) SW 3.
9.2Actuate the push-cap handle to start the flow of water.
Water flow stops automatically, depending on the flow duration that has been set.
9.3Turn the push-cap handle to select the desired temperature.
10. Adjusting flow duration
10.1Use a screwdriver to carefully prise up the plug.
10.2Remove the plug.
10.3Use an Allan key (SW 2.5) to loosen the set screw.
10.4Remove the push-cap handle.
10.5Use a screwdriver to adjust the flow time.
a: Blade width 3 mm
+ longer flow time (max. 50 s)
5
– shorter flow time (min. 1 s)
10.6To measure the flow time, trigger water flow from the fitting by pressing the handle jack.
10.7After setting the required flow time, replace the push-cap handle.
Important!!
When refitting the push-cap handle, ensure that the attachment rib locks in the appropriate groove.
11. Adjusting the temperature
11.1Remove the push-cap handle (see Chapter 10.).
11.2Use a screwdriver to carefully prise off the stop ring and then use your hand to pull it off from the teeth.
11.3Mount the push-cap handle and trigger the fitting.
11.4Turn the push-cap handle until the desired maximum hot-water temperature is reached.
11.5Push the stop ring back on the teeth so that the nose of the stop ring is positioned up against the right-hand stop of the housing.
11.6Reassemble in the reverse order.
Important!!
While fitting the push-cap handle, make sure that the driving lug locks properly into the corresponding groove.
12. Replacing the functional part
12.1Close both water flow volume regulators (see Chapter 14.1).
12.2Drain the fitting (see Chapter 14.2).
12.3Remove the push-cap handle (see Chapter 10.).
12.4Pull off the circlip.
12.5Remove the circlip, the handle jack and the pressure spring.
12.6Use a socket spanner to remove the functional part.
12.7Reassemble in the reverse order.
Important!!
When refitting the push-cap handle, ensure that the attachment rib locks in the appropriate groove.
13. Swivel limit (model with a swivel outlet)
Depending on the position in which the stop ring is fitted (see diagram), the swivel arm can be either fixed in a rigid position or it can be moved within a swivel range of 150°. If the stop ring is removed, the swivel arm could theoretically be rotated through 360°.
18-05.098d-GB.fm
6

14. Maintenance
Cleaning or replacing if necessary
14.1Close both water flow volume regulators (a) SW 3.
14.2Drain the fitting.
14.3Use an SW 22 open-end spanner to unscrew and remove the aerator.
14.4Clean the aerator or replace it if necessary.
Replacing the return-flow inhibitor
14.5Close both water flow volume regulators (see Chapter 14.1).
14.6Drain the fitting (see Chapter 14.2).
14.7Remove the union nuts.
14.8Pull off the fitting.
14.9Use an SW 12 Allan key to unscrew the seating completely.
14.10Remove the defective return-flow inhibitor and replace it with a new one.
14.11Reassemble in the reverse order.
Important!!
Make absolutely sure to install the return-flow inhibitor pointing in the right direction.
Replacing the mesh washers
14.12Close both water flow volume regulators (see Chapter 14.1).
14.13Drain the fitting (see Chapter 14.2).
14.14Remove the union nuts.
14.15Pull off the fitting.
14.16Replace the mesh washers (b).
18-05.098d-GB.fm
7

15. Fault correction
Fault |
Cause |
Remedy |
|
|
|
Water does not flow |
– Water flow regulator closed |
Restore |
|
– Functional part faulty |
Replace it |
|
|
|
Water flows |
– Functional part faulty |
Replace it |
continuously |
– Valve seat dirty |
Clean it |
|
|
|
Water flow too weak |
– Aerator calcified |
Clean it |
|
– Supply pressure too low |
Check it |
|
– Grit filter/return-flow inhibitor is |
Clean it |
|
contaminated |
|
|
– Water flow volume regulator not fully |
Open it |
|
opened |
|
|
|
|
Flow time too short or |
– Incorrect setting |
Adjust it |
too long |
– Mesh washer contaminated |
Clean it |
|
– Aerator calcified |
Clean it |
|
– Functional part defective |
Replace it |
|
|
|
Water is too hot |
– Temperature limit is incorrectly set or |
Adjust it |
|
not set at all |
|
|
– Cold water is turned off |
Open it |
|
– Return flow inhibitor in the cold |
Replace it |
|
water connection is faulty |
|
|
|
|
Water is too cold |
– Return flow inhibitor in the cold |
Replace it |
|
water connection is faulty |
|
|
– Hot water is turned off |
Open it |
|
|
|
If you are unable to correct a fault or if the fault is not described in the fault correction section, please inform our service department!!
18-05.098d-GB.fm
8

16. Replacement parts
Designation |
Order No. |
1 Push-cap handle . . . . . . . . . . . . . . . . 82-100-20.021 2 Functional part . . . . . . . . . . . . . . . . . . 82-100-20.390 3 Stop ring . . . . . . . . . . . . . . . . . . . . . . 82-039-05.134 4 Aerator (PU 10 pcs.) . . . . . . . . . . . . . 81-013-03.057
5 Swivel outlet, only for 2154 00 23
115 mm projection . . . . . . . . . . . 90-1017 23 075 mm projection . . . . . . . . . . . 90-1016 23 175 mm projection . . . . . . . . . . . 90-1018 23
6 Installation kit comprising: Mesh washers Return-flow inhibitors Rubber parts
Seal . . . . . . . . . . . . . . . . . . . . . . . 81-500-02.001
Replacement kit comprising: Rubber parts
Spring
Circlip Sealing plug
Set screw . . . . . . . . . . . . . . . . . . . 82-500-01.011
Designation |
Order No. |
Theft-proof aerator
with flow controller 6l/min . . . . .81-013-03.058
Special spanner for
theft-proof aerator . . . . . . . . . . . .90-1002 03
18-05.098d-GB.fm
9
Français
76 12982 000485 ........AQUAMIX - Mitigeur monocommande comme batterie murale avec bec oblique
76 12982 000492 ........AQUAMIX - Mitigeur monocommande comme batterie murale avec bec orientable
Les graphiques sont disponibles dans la notice de montage et de mise en service allemande.
Table des matières
1. Garantie. . . . . . . . . . . . . . . . . . . . . . . . . . . . . . . . . . . . . . . . . . . . . . . . . 10 2. Abréviations et unités . . . . . . . . . . . . . . . . . . . . . . . . . . . . . . . . . . . . . 11 3. Remarques importantes. . . . . . . . . . . . . . . . . . . . . . . . . . . . . . . . . . . . 11 4. Données techniques. . . . . . . . . . . . . . . . . . . . . . . . . . . . . . . . . . . . . . . 11 5. Volume de livraison . . . . . . . . . . . . . . . . . . . . . . . . . . . . . . . . . . . . . . . 12 6. Dimensions . . . . . . . . . . . . . . . . . . . . . . . . . . . . . . . . . . . . . . . . . . . . . . 12 7. Exemple d’installation . . . . . . . . . . . . . . . . . . . . . . . . . . . . . . . . . . . . . 12 8. Montage . . . . . . . . . . . . . . . . . . . . . . . . . . . . . . . . . . . . . . . . . . . . . . . . 12 9. Fonctionnement . . . . . . . . . . . . . . . . . . . . . . . . . . . . . . . . . . . . . . . . . . 12 10. Réglage de la durée d’écoulement . . . . . . . . . . . . . . . . . . . . . . . . . . . 12 11. Réglage de la limitation de température . . . . . . . . . . . . . . . . . . . . . . . 13 12. Remplacement de l’élément fonctionnel . . . . . . . . . . . . . . . . . . . . . . 13 13. Limitation de butée (seulement pour les modèles avec bec orientable) 14 14. Maintenance . . . . . . . . . . . . . . . . . . . . . . . . . . . . . . . . . . . . . . . . . . . . . 14 15. Elimination des pannes . . . . . . . . . . . . . . . . . . . . . . . . . . . . . . . . . . . . 15 16. Pièces de rechange. . . . . . . . . . . . . . . . . . . . . . . . . . . . . . . . . . . . . . . . 16
1.Garantie
La responsabilité est conforme à celle décrite dans les conditions générales et de livraison.
Utiliser exclusivement des pièces de rechange d’origine AQUA !
18-05.098d-F.fm
10
2.Abréviations et unités
TWW |
Eau potable chaude |
TW |
Eau potable |
SW |
Ouverture de clé |
DN |
Diamètre nominal en mm |
N° de comm. FAR |
Numéro de commande Franke-AQUAROTTER |
N° AE |
Référence européenne |
Conversion |
1 mm = 0,03937 pouce |
|
1 pouce = 25,4 mm |
18-05.098d-F.fm
Les longueurs sont toujours indiquées en mm dans les graphiques.
3.Remarques importantes
•Le montage, la mise en service et la maintenance doivent uniquement être effectués par un spécialiste, conformément aux instructions de ce manuel.
•Respecter les prescriptions en vigueur de même que les conditions techniques de raccordement définies par l’entreprise locale d’alimentation en eau.
•Avant le montage, les conduites doivent être rincées, conformément à la norme DIN 1988.
•Ne faire fonctionner la robinetterie qu’avec les filtres collecteurs d’impuretés.
•Si la température de l’eau chaude est supérieure à 45 °C, régler la limitation de température our éviter les échaudures (voir chapitre 11.).
•Utiliser des produits de nettoyage non corrosifs pour la robinetterie et conformément à leur usage ; rincer ensuite la robinetterie à l’eau pour éliminer toute trace de produit. Ne pas utiliser d’appareils de nettoyage à haute pression pour effectuer le nettoyage.
•Sous réserve de modifications.
4.Données techniques
Pression de service minimale |
1,0 bar |
Débit théorique |
TW 0,07 l/sec (4,2 l/min), TWW 0,07 l/sec (4,2 l/min) |
Débit volumétrique 2152 00 23 |
0,10 l/s (6 l/min) à 3 bars de pression dynamique |
Débit volumétrique 2154 00 23 |
0,13 l/s (7,8 l/min) à 3 bars de pression dynamique |
Durée d’écoulement à 38 °C |
1 – 30 s, réglable |
11

5.Volume de livraison
Quantité Désignation
2Vis de raccordement coudée avec garnitures à filtre et rosette à vis
1AQUAMIX Mitigeur monocommande à fermeture automatique
1 |
Notice de montage et de mise en service |
6.Dimensions
7.Exemple d’installation
8.Montage
8.1Rincer les canalisations conformément à DIN 1988.
8.2Monter les vissages de raccordement.
8.3Monter les rosettes à vis.
8.4Monter la robinetterie.
!Attention !
Ne pas oublier les garnitures à filtre.
9.Fonctionnement
9.1Ouvrir les deux régulations de débit (a) SW 3.
9.2Déclencher l’écoulement d’eau en actionnant le capuchon à pression de la poignée.
L’écoulement d’eau s’arrête automatiquement en fonction de la durée d’écoulement réglée.
9.3Sélectionner la température en tournant le capuchon à pression de la poignée.
10. Réglage de la durée d’écoulement
10.1Soulever avec précaution le bouchon à l’aide d’un tournevis.
10.2Retirer le bouchon.
10.3Dévisser la tige filetée à l’aide d’une clé mâle coudée pour vis à six pans creux (OC 2,5).
10.4Retirer le capuchon à pression de la poignée.
18-05.098d-F.fm
12
 Loading...