

Page 1
SEGHETTO RICARICABILE PER POTATURA FAAS 12 B1
SEGHETTO RICARICABILE PER
POTATURA
Traduzione delle istruzioni d’uso originali
AKKU-ASTSÄGE
Originalbetriebsanleitung
IAN 285192
CORDLESS BRANCH SAW
Translation of the original instructions
Page 2
Prima di leggere aprire le due pagine con le immagini e prendere confidenza con le diverse funzioni
dell'apparecchio.
Before reading, unfold both pages containing illustrations and familiarise yourself with all functions of the
device.
Klappen Sie vor dem Lesen die beiden Seiten mit den Abbildungen aus und machen Sie sich anschließend
mit allen Funktionen des Gerätes vertraut.
IT / MT Traduzione delle istruzioni d’uso originali Pagina 1
GB / MT Translation of the original instructions Page 11
DE / AT / CH Originalbetriebsanleitung Seite 21
Page 3

A B
C D
Page 4

E
F
G
Page 5

Indice
Introduzione .....................................................2
Uso conforme ............................................................... 2
Dotazione .................................................................. 2
Volume della fornitura ........................................................ 2
Dati tecnici ................................................................. 2
Indicazioni generali relative alla sicurezza per elettroutensili .............3
1. Sicurezza sul posto di lavoro ................................................. 3
2. Sicurezza elettrica ......................................................... 3
3. Sicurezza delle persone ..................................................... 4
4. Uso e manipolazione dell'elettro-utensile ........................................ 4
5. Assistenza ............................................................... 5
Indicazioni relative alla sicurezza specifiche per i seghetti alternativi .................... 5
Uso e manipolazione dell’utensile a batteria ....................................... 5
Indicazioni relative alla sicurezza per caricabatterie ................................. 5
Istruzioni operative per il taglio .....................................6
Accessori / apparecchi addizionali originali ....................................... 6
Informazioni sulle lame ....................................................... 6
Prima della messa in funzione .......................................6
Carica del pacco batteria ..................................................... 6
Inserimento / rimozione del pacco batteria dall'apparecchio .......................... 6
Controllo della carica della batteria ............................................. 6
Inserimento / rimozione della staffa di sostegno .................................... 7
Montaggio / sostituzione della lama ............................................. 7
Messa in funzione .................................................7
Accensione/spegnimento ...................................................... 7
Metodi di taglio ............................................................. 7
Manutenzione e pulizia ............................................8
Garanzia della Kompernass Handels GmbH ...........................8
Assistenza .......................................................9
Importatore. . . . . . . . . . . . . . . . . . . . . . . . . . . . . . . . . . . . . . . . . . . . . . . . . . . . . 10
Smaltimento ....................................................10
Traduzione della dichiarazione di conformità originale .................10
FAAS 12 B1
IT│MT
│
1 ■
Page 6
SEGHETTO RICARICABILE PER
POTATURA FAAS 12 B1
Introduzione
Ci congratuliamo per l'acquisto del vostro nuovo
apparecchio. È stato scelto un prodotto di alta
qualità. Il manuale di istruzioni è parte integrante
del presente prodotto. Esso contiene importanti
indicazioni per la sicurezza, l'uso e lo smaltimento.
Prima di utilizzare il prodotto, familiarizzare con
tutte le indicazioni relative ai comandi e alla sicurezza. Utilizzare il prodotto solo come descritto e
per i campi d'impiego indicati. In caso di cessione
del prodotto a terze persone, consegnare anche
tutta la relativa documentazione.
Uso conforme
L'apparecchio, definito seghetto alternativo, è concepito con una battuta fissa (piastra di base) per il
taglio di legno, plastica e materiali di costruzione.
L'apparecchio è idoneo per interventi di saldatura
grossolani, tagli diritti e curvi e taglia a filo le
superfici. Il montaggio della staffa di sostegno
consente all'apparecchio di segare perfettamente
i rami. Osservare le informazioni sulle lame e le
istruzioni operative per il taglio. Qualunque altro
impiego o modifica della macchina è da considerarsi non conforme alla destinazione d'uso prevista
e può comportare gravi rischi di infortunio. Il
produttore non si assume alcuna responsabilità per
i danni derivanti da uso non conforme. L'apparecchio non è destinato all'uso commerciale.
Dotazione
Blocco di accensione
Impugnatura
Pacco batteria
Sblocco (pacco batteria)
Interruttore ON/OFF
Lama di taglio
Piastra di base
Mandrino ad attacco rapido
Guanto
Sblocco (staffa di sostegno)
Staffa di sostegno
Caricabatteria rapido
LED di controllo (verde)
LED di controllo (rosso)
Indicatore dello stato della batteria
Volume della fornitura
1 seghetto ricaricabile per potatura FAAS 12 B1
1 caricabatterie rapido FAAS 12 B1-2
1 pacco batteria FAAS 12 B1-1
1 staffa di sostegno
1 lama per legno 152 mm
1 valigetta
1 manuale di istruzioni per l'uso
Dati tecnici
Gattuccio a batteria: FAAS 12 B1
Tensione nominale: 12 V
Numero di giri
nominale in folle: n0 0–2700 min
Lunghezza corsa: 20 mm
Max. Potenza di taglio: legno 80 mm
Pacco batteria: FAAS 12 B1-1
Tipo: IONI DI LITIO
Tensione nominale: 12 V
Capacità: 1500 mAh
Caricabatterie rapido: FAAS 12 B1-2
INGRESSO / Input:
Corrente nominale: 230 - 240 V ~, 50 Hz
Potenza assorbita nominale: 30 W
USCITA / Output:
Tensione nominale: 12,6 V
Corrente nominale: 1800 mA
Tempo di carica: circa 60 min
Classe di protezione: II /
(corrente
continua)
-1
(corrente continua)
(corrente alternata)
(corrente continua)
(isolamento doppio)
■ 2 │ IT
│
MT
FAAS 12 B1
Page 7
Valori di emissione acustica:
Valore di misurazione dei rumori determinato
secondo ENISO 4871. Valori tipici del livello di
rumore ponderato A dell'elettroutensile nel luogo
dell'utilizzo:
Livello di pressione acustica: L
Fattore di convergenza: K
= 82 dB (A)
pA
= 3 dB
pA
Livello di potenza acustica: LWA = 93 dB (A)
Fattore di convergenza: K
= 3 dB
WA
Indossare paraorecchi acustici!
Valori totali di vibrazione (somma dei vettori di tre
direzioni) rilevati ai sensi della norma EN60745:
Taglio di pannelli di truciolato: a
h,B
Fattore di convergenza K = 1,5 m/s
Taglio di travi di legno: a
h,WB
Fattore di convergenza K = 1,5 m/s
= 6,37 m/s
2
= 9,26 m/s
2
2
NOTA
► Il livello di vibrazioni indicato nelle presenti
istruzioni è stato misurato secondo un procedimento di misurazione conforme alla norma
e può essere usato per un confronto tra vari
apparecchi. Il coefficiente di emissione delle
vibrazioni può anche essere usato per una
stima introduttiva dell'esposizione.
ATTENZIONE!
► Il livello di vibrazioni cambia in base all'uso
dell'elettroutensile e in alcuni casi può essere
superiore al valore indicato nelle presenti
istruzioni. La sollecitazione da vibrazioni
potrebbe risultare sottostimata se l'elettroutensile viene utilizzato regolarmente in tal
modo. Cercare di ridurre il più possibile la
sollecitazione da vibrazioni. Provvedimenti
adeguati per la riduzione della sollecitazione
da vibrazioni sono l'uso di guanti nell'utilizzo
dell'elettroutensile e la limitazione della durata d'impiego. Occorre tenere in considerazione tutte le componenti del ciclo di esercizio
(per esempio i tempi nei quali l'elettroutensile
è spento e i tempi in cui è acceso ma funziona senza subire carichi).
Indicazioni generali
relative alla sicurezza
per elettroutensili
ATTENZIONE!
► Leggere tutte le indicazioni relative alla sicu-
rezza e le istruzioni. L'errata applicazione
delle indicazioni relative alla sicurezza e
delle istruzioni può causare scosse elettriche,
incendi e / o gravi lesioni.
Conservare le indicazioni relative alla
2
sicurezza e le istruzioni per il futuro.
Il termine "elettroutensile" utilizzato nelle indicazioni
relative alla sicurezza si riferisce a elettroutensili
collegabili alla rete elettrica (con cavo di rete) e a
elettroutensili a batteria (senza cavo di rete).
1. Sicurezza sul posto di lavoro
a) Mantenere l'area di lavoro pulita e ben
illuminata. Il disordine e la scarsa illuminazione
dell'area di lavoro potrebbero dare luogo a
infortuni.
b) Non lavorare con elettroutensili in ambienti
a rischio di esplosione, in cui siano presenti
liquidi, gas o polveri infiammabili. Gli elettro-
utensili generano scintille che possono incendiare
la polvere o i vapori.
c) Tenere lontani i bambini e altre persone
durante l'uso dell'elettroutensile. In caso di
distrazione, si potrebbe perdere il controllo
dell'apparecchio.
2. Sicurezza elettrica
a) La spina dell'elettroutensile deve essere
idonea all'inserimento nella presa. La spina
non deve essere assolutamente modificata.
Non utilizzare connettori adattatori con
elettroutensili collegati a terra. Le spine non
modificate e le prese idonee riducono il rischio
di scosse elettriche.
FAAS 12 B1
IT│MT
│
3 ■
Page 8

b) Evitare il contatto corporeo con superfici col-
legate a terra, come tubi, termosifoni, stufe e
frigoriferi. Quando il corpo è a diretto contatto
con la terra sussiste un maggiore pericolo di
scosse elettriche.
c) Tenere gli elettroutensili lontano dalla piog-
gia o dall'umidità. La penetrazione di acqua
in un apparecchio elettrico aumenta il rischio di
scosse elettriche.
d) Non utilizzare il cavo elettrico per scopi non
conformi, come ad es. per trasportare l'elettroutensile, per appenderlo o per scollegare la
spina dalla presa. Tenere il cavo lontano dal
calore, dall'olio, da angoli acuminati o da
parti dell'apparecchio in movimento. Cavi
danneggiati o aggrovigliati aumentano il
rischio di scosse elettriche.
e) Se si lavora all'aperto con un elettroutensile,
utilizzare solo una prolunga omologata anche per uso esterno. L'utilizzo di una prolunga
idonea all'uso esterno riduce il rischio di scosse
elettriche.
f) Se è inevitabile l'uso dell'elettroutensile in
un ambiente umido, utilizzare un circuito di
sicurezza per correnti di guasto. L'uso di un
circuito di sicurezza per correnti di guasto evita
il rischio di scosse elettriche.
3. Sicurezza delle persone
a) Prestare sempre attenzione controllando le
operazioni in corso e procedere con cura
quando si lavora con un elettroutensile. Non
utilizzare l'elettroutensile se si è malati o stanchi o se sono state assunte sostanze come
droghe, alcol o farmaci. Un solo momento di
disattenzione nell'uso dell'elettroutensile può
dare luogo a gravi lesioni.
b) Indossare dispositivi di protezione individuale
e sempre occhiali di protezione. L'uso di un
dispositivo di protezione individuale come mascherina antipolvere, scarpe antiscivolo, casco
protettivo o paraorecchi acustici, a seconda
dell'uso e dell'impiego dell'elettroutensile, riduce
il rischio di lesioni.
c) Evitare l'accensione involontaria. Accertarsi
che l'elettroutensile sia spento prima di
collegarlo all'alimentazione e/o alla batteria,
sollevarlo o movimentarlo.
Se si tiene il dito sull'interruttore mentre si sposta
l'elettroutensile o si collega l'apparecchio alla
rete elettrica con l'interruttore su ON, si possono verificare infortuni.
d) Rimuovere gli utensili di regolazione o le
chiavi per dadi prima di accendere l'elettroutensile. Un utensile o una chiave lasciati in
una parte rotante dell'apparecchio possono
provocare lesioni.
e) Evitare posture innaturali. Provvedere a
una posizione sicura e mantenere sempre
l'equilibrio. In tal modo si può controllare
meglio l'elettroutensile, soprattutto in situazioni
impreviste.
f) Indossare un abbigliamento idoneo. Non
indossare abiti ampi o gioielli. Tenere lontani
i capelli, gli abiti e i guanti dalle parti in
movimento. Gli abiti ampi e pendenti, i gioielli
o i capelli lunghi possono impigliarsi nelle parti
mobili.
g) Se è possibile montare aspiratori per polvere
e trucioli, accertarsi che siano collegati e
vengano utilizzati correttamente. L'uso di un
aspiratore per polvere può ridurre i pericoli
associati alla polvere.
4. Uso e manipolazione dell'elettroutensile
a) Non sovraccaricare l'apparecchio. Utilizzare
l'elettroutensile idoneo al proprio lavoro. Con
l'elettroutensile adatto si lavora meglio e con
maggiore sicurezza nell'intervallo di potenza
indicato.
b) Non utilizzare elettroutensili con interruttore
difettoso.Un elettroutensile che non può più
essere acceso o spento è pericoloso e deve
essere riparato.
c) Staccare la spina dalla presa di corrente
e/o rimuovere la batteria prima di eseguire
impostazioni dell'apparecchio, sostituire gli
accessori o riporre l'apparecchio. Questa
misura precauzionale impedisce l'avvio involontario dell'elettroutensile.
d) Conservare gli elettroutensili non utilizzati
fuori della portata dei bambini. Non consentire
l'uso dell'apparecchio a persone inesperte o
che non hanno letto le presenti istruzioni.
■ 4 │ IT
│
MT
FAAS 12 B1
Page 9
Gli elettroutensili sono pericolosi se utilizzati da
persone inesperte.
e) Trattare gli elettroutensili con cura. Controllare
che le parti mobili dell'apparecchio funzionino perfettamente e non si inceppino e che
non vi siano elementi rotti o danneggiati al
punto da compromettere la funzione dell'elettroutensile. Fare riparare le parti danneggiate prima di utilizzare l'apparecchio. Molti
infortuni derivano da una cattiva manutenzione
degli elettroutensili.
f) Mantenere gli utensili da taglio ben affilati e
puliti. Gli utensili da taglio trattati con cura e
con angoli di taglio affilati si inceppano meno
spesso e sono più facili da controllare.
g) Utilizzare elettroutensili, accessori, utensili,
ecc. conformi a queste istruzioni. Tenere conto
delle condizioni di lavoro e dell'attività da
eseguire. L'uso di elettroutensili per applicazioni
diverse da quelle previste può dare luogo a
situazioni di pericolo.
5. Assistenza
a) Fare riparare l'elettroutensile solo da per-
sonale qualificato specializzato e solo con
ricambi originali. In tal modo si garantisce la
sicurezza dell'elettroutensile.
Indicazioni relative alla sicurezza
specifiche per i seghetti alternativi
■ Afferrare sempre l'elettroutensile dal manico
isolato quando si eseguono lavori nei quali
l'elettroutensile potrebbe urtare cavi elettrici
nascosti o il proprio cavo di alimentazione.
Il contatto con una linea che conduce tensione
potrebbe mettere sotto tensione anche le parti
dell'apparecchio di metallo e provocare così
una scossa elettrica.
■ Indossare una mascherina antipolvere.
Uso e manipolazione dell’utensile a
batteria
a) Caricare le batterie solo con i caricabatterie
che vengono consigliati dal costruttore. Se un
caricabatterie adatto a un determinato tipo di
batteria viene utilizzato con batterie diverse, vi
è pericolo di incendio.
b) Utilizzare solo le batterie appositamente
previste per gli elettroutensili. L’utilizzo di
altre batterie può causare lesioni e pericoli di
incendio.
c) Tenere la batteria non utilizzata lontano
da graffette, monete, chiavi, chiodi, viti o
altra minuteria in metallo, poiché tali oggetti
potrebbero provocare un cortocircuito fra
i contatti. Un cortocircuito fra i contatti della
batteria può dare luogo a ustioni o incendio.
d) In caso di utilizzo scorretto, potrebbe
fuoriuscire del liquido dalla batteria. Evitare
il contatto con questo liquido. In caso di
contatto accidentale, sciacquare con acqua.
Se il liquido entra a contatto con gli occhi,
consultare un medico. Il liquido che fuoriesce
dalla batteria potrebbe provocare irritazioni
cutanee o ustioni.
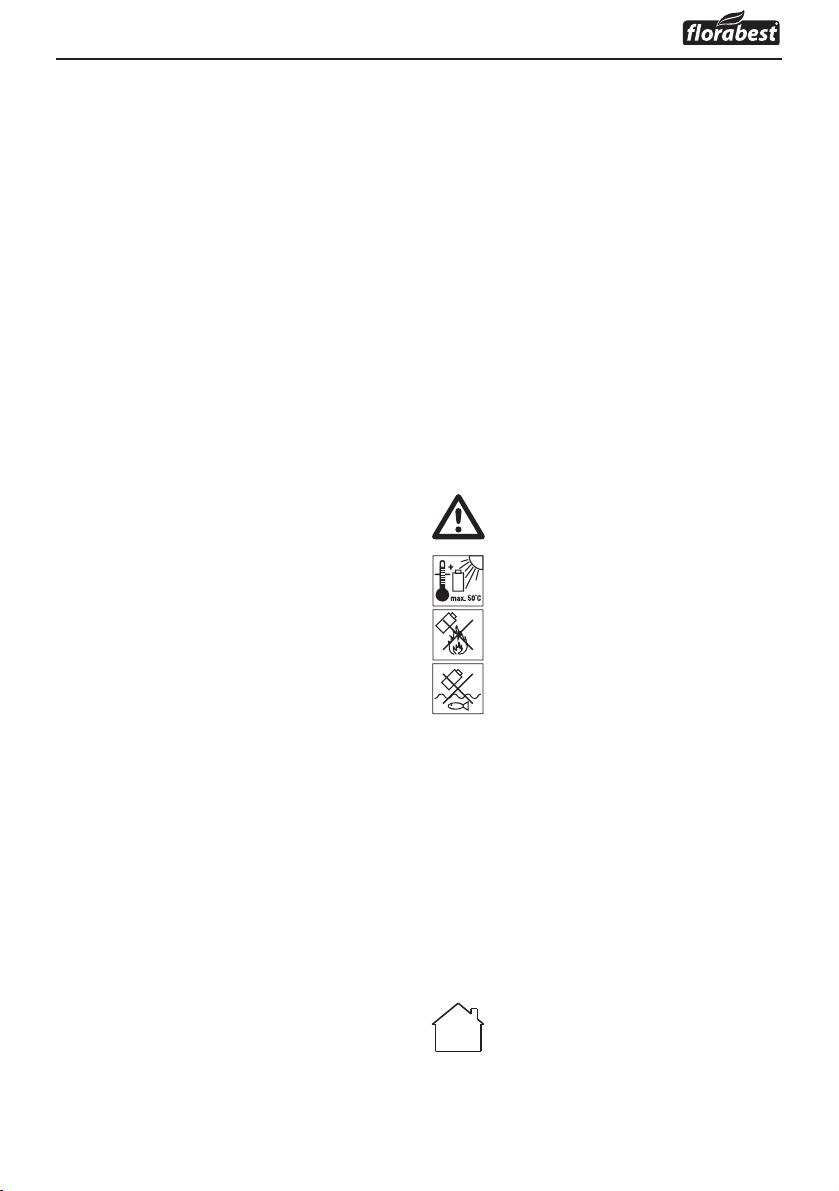
ATTENZIONE! PERICOLO DI ESPLO-
SIONE! Non caricare mai batterie
non ricaricabili.
Proteggere la batteria dal calore, per
es. es. anche da irradiazione solare
permanente, fuoco, acqua e umidità.
Sussiste pericolo di esplosione.
Indicazioni relative alla sicurezza per
caricabatterie
■ Questo apparecchio può essere utilizzato dai
bambini di almeno 8anni di età e da persone
con capacità fisiche, sensoriali o mentali ridotte
o insufficiente esperienza o conoscenza, solo
se sorvegliati o istruiti sull'uso sicuro dell'apparecchio e qualora ne abbiano compreso i pericoli associati. I bambini non devono giocare
con l'apparecchio. La pulizia e la manutenzione
a cura dell'utente non devono essere eseguite
da bambini, a meno che non siano sorvegliati.
Il caricabatterie è indicato solo per l'uso
in ambienti interni.
FAAS 12 B1
IT│MT
│
5 ■
Page 10
■ In caso di danni al cavo di collegamento
dell'apparecchio, farlo sostituire dal produttore,
dal servizio di assistenza clienti o da personale
altrettanto qualificato per evitare pericoli.
Istruzioni operative per il taglio
■ Verificare la presenza di corpi esterni sul materiale
da lavorare quali chiodi, viti ecc. e rimuoverli.
■ Se la lama si blocca spegnere immediatamente
l'apparecchio. Allargare la fessura già tagliata
con un attrezzo idoneo ed estrarre il seghetto
alternativo.
■ Tagliare il materiale con un avanzamento
uniforme.
Accessori / apparecchi addizionali
originali
■ Utilizzare solo accessori e apparecchi addi-
zionali indicati nel manuale di istruzioni.
L'uso di apparecchi o accessori diversi da quelli
indicati nel manuale di istruzioni può comportare il pericolo di lesioni.
Informazioni sulle lame
È possibile utilizzare qualsiasi altra lama, purché
sia provvista del supporto adeguato, gambo
universale da ½“ (12,7 mm). Per ogni impiego del
seghetto alternativo, sono reperibili in commercio
lame ottimizzate di diverse lunghezze.
NOTA
► TPI = teeth per inch = numero di denti ogni
2,54 cm
Prima della messa in funzione
Carica del pacco batteria
ATTENZIONE!
► Staccare sempre la spina dalla presa prima
di rimuovere o inserire il pacco batteria
dal o nel caricabatterie rapido .
■ Non caricare il pacco batteria
ratura ambiente è al di sotto di 10 °C o al di
sopra di 40 °C.
♦ Inserire il pacco batteria
rapido
♦ Inserire la spina nella presa Il LED di controllo
rosso si accende.
♦ Il LED di controllo verde segnala che il pro-
cedimento di carica è concluso e che il pacco
batteria è pronto per l'uso.
♦ Introdurre il pacco batteria
♦ Tra un processo di carica e l'altro spegnere il
caricabatterie rapido
scollegando la spina dalla presa di corrente.
.
per almeno 15 minuti
se la tempe-
nel caricabatteria
nell'apparecchio.
Inserimento / rimozione del pacco
batteria dall'apparecchio
Inserire il pacco batteria:
♦ Fare in modo che il pacco batteria
in posizione nell'impugnatura
Rimozione del pacco batteria:
♦ Premere il tasto per lo sbloccaggio e prele-
vare il pacco batteria
.
.
Controllo della carica della batteria
♦ Per verificare le condizioni della batteria pre-
mere l’interruttore di Blocco di accensione
ON/OFF
Lo stato o la carica residua vengono visualizzati
sull'indicatore di stato della batteria
♦ ROSSO / ARANCIONE / VERDE = potenza /
carica massima
ROSSO / ARANCIONE = potenza /
carica media
ROSSO = carica debole – caricare la batteria
.
si innesti
:
et
■ 6 │ IT
│
MT
FAAS 12 B1
Page 11
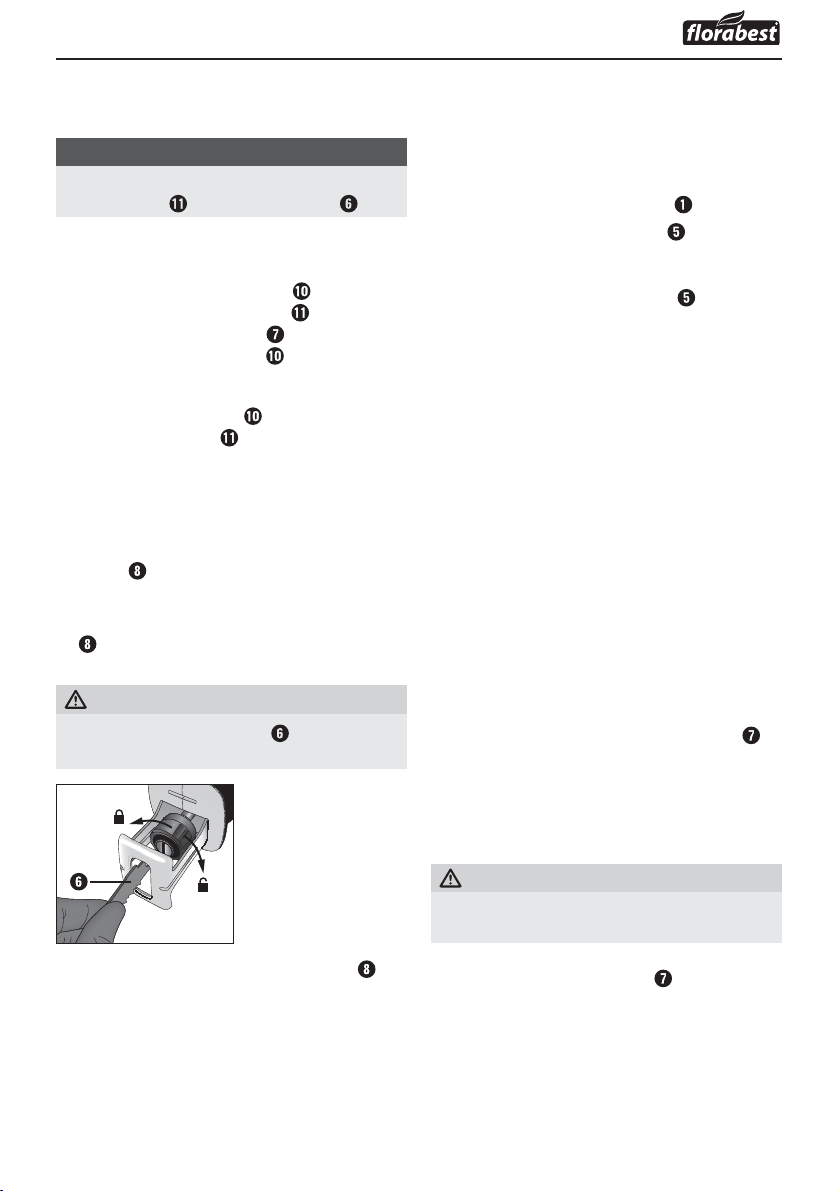
Inserimento / rimozione della staffa
di sostegno
NOTA
► Non è possibile inserire / rimuovere la staffa
di sostegno
Inserimento della staffa di sostegno
(vedere fig. B–D):
♦ Premere il tasto di sbloccaggio
♦ Introdurre la staffa di sostegno tramite le
guide della piastra di base nell'apparecchio.
♦ Bloccare il tasto di sblocco .
Rimozione della staffa di sostegno:
♦ Premere lo sbloccaggio
la staffa di sostegno dalla guida.
se la lama è montata .
.
ed estrarre in avanti
Montaggio / sostituzione della lama
Indossare i guanti protettivi durante l'utilizzo / la
sostituzione della lama.
♦ Ruotare completamente il mandrino ad attacco
rapido
lo ruotato.
♦ Infilare la lama nel mandrino ad attacco rapido
la battuta.
► I denti della lama di taglio
in direzione della freccia e mantener-
spingendola fino a quando non raggiunge
ATTENZIONE!
devono essere
rivolti verso il basso!
Messa in funzione
Accensione/spegnimento
Accensione:
♦ Premere il blocco di accensione
♦ Premere l'interruttore ON/OFF .
Spegnimento:
♦ Rilasciare l'interruttore ON/OFF
Metodi di taglio
A) Intervento senza staffa di sostegno
(vedere fig. E):
■ In caso di rami con diametri più grandi o di taglio
di legno, plastica e materiali di costruzione, lavorare SENZA la staffa di sostegno. Il componente
di taglio deve essere posizionato sulla piastra
di base. In caso di pezzi circolari muovere il
seghetto con movimenti avanti e indietro.
A1) Taglio a filo:
■ Con lame flessibili, a condizione che abbia-
no la lunghezza corrispondente, è possibile
tagliare pezzi sporgenti come ad es. es. tubi
direttamente alla parete.
1. Posizionare la lama direttamente sulla parete.
2. Piegarla con una pressione laterale sul seghetto
alternativo, in modo che la piastra di base
aderisca lateralmente sulla parete.
3. Accendere l'apparecchio e tagliare il pezzo
esercitando una pressione costante.
.
.
♦ Rilasciare il mandrino ad attacco rapido ,
che deve ritornare nella posizione di partenza.
La lama è ora bloccata.
FAAS 12 B1
A2) Taglio a immersione (vedere fig. F):
ATTENZIONE! PERICOLO DI RINCULO!
► I tagli a immersione possono essere eseguiti
solo con materiali morbidi (legno o simili).
1. Posizionare il seghetto alternativo con il bordo
inferiore della piastra di base
Accendere l'apparecchio.
2. Inclinare il seghetto in avanti e immergerlo con
la lama nel pezzo.
3. Posizionare il seghetto in verticale e continuare
a tagliare lungo la linea di taglio.
sul pezzo.
IT│MT
│
7 ■
Page 12

B) Interventi con staffa di sostegno
(vedere fig. G):
♦ Muovere il seghetto con una leggera pressione
verso il basso.
Manutenzione e pulizia
ATTENZIONE! PERICOLO DI LESIONI!
Prima di qualsiasi lavoro sull'apparecchio, rimuovere la batteria.
■ Prima di eseguire qualsiasi lavoro sull'elettro-
utensile, estrarre sempre la lama.
■ Tenere l'apparecchio e la fessura di ventila-
zione sempre puliti. In caso di fessure otturate,
sussiste il pericolo di surriscaldamento e /o di
danno dell'apparecchio.
■ Pulire l'apparecchio al termine del lavoro.
■ Impedire la penetrazione di liquidi all'interno
dell'apparecchio. Per la pulizia dell'alloggiamento utilizzare un panno. Non utilizzare
mai benzina, solventi o detergenti in grado di
attaccare la plastica.
■ Pulire all'occorrenza il supporto della lama con
un pennello o con aria compressa.
■ Se si intende conservare la batteria agli ioni di
litio per un periodo prolungato, occorre controllare periodicamente la sua carica. La carica
ottimale è compresa tra il 50% e l'80%.
Si consiglia di conservare la batteria in un
luogo fresco e asciutto.
Garanzia della
Kompernass Handels GmbH
Egregio Cliente,
Questo apparecchio ha una garanzia di 3 anni
dalla data di acquisto. Qualora questo prodotto
presentasse vizi, Le spettano diritti legali nei confronti
del venditore del prodotto. La garanzia qui di seguito
descritta non costituisce alcun limite a tali diritti
legali.
Condizioni di garanzia
Il periodo di garanzia decorre dalla data dell’acquisto. Si prega di conservare lo scontrino di cassa
originale. Tale documento è necessario come
prova di acquisto.
Qualora entro tre anni a partire dalla data
dell’acquisto di questo prodotto si presentasse un
vizio del materiale o di fabbricazione, provvederemo, a nostra discrezione, a riparare o a sostituire
gratuitamente il prodotto. Questa prestazione di
garanzia ha come presupposto che l’apparecchio
difettoso e la prova di acquisto (scontrino di cassa)
vengano presentati entro il termine di tre anni e
che si descriva per iscritto in cosa consiste il vizio e
quando si è presentato.
Se il vizio rientra nell’ambito della nostra garanzia,
il Suo prodotto verrà riparato o sostituito da uno
nuovo. Con la riparazione o la sostituzione del prodotto non decorre un nuovo periodo di garanzia.
■ 8 │ IT
│
MT
Periodo di garanzia e diritti legali di
rivendicazione di vizi
Il periodo di garanzia non viene prolungato da
interventi in garanzia. Ciò vale anche per le parti
sostituite e riparate. Danni e vizi eventualmente già
presenti al momento dell’acquisto devono venire
segnalati immediatamente dopo che l’apparecchio
è stato disimballato. Le riparazioni eseguite dopo
la scadenza del periodo di garanzia sono a
pagamento.
FAAS 12 B1
Page 13

Ambito della garanzia
L’apparecchio è stato prodotto con cura secondo
severe direttive qualitative e debitamente collaudato
prima della consegna.
La garanzia viene prestata in caso di vizi del
materiale o di fabbricazione. Questa garanzia non
si estende a componenti del prodotto che sono
esposti al normale logorio e possono pertanto essere
considerati come componenti soggetti a usura o a
danni che si verificano su componenti delicati, per
es. interruttori, batterie, stampi da forno o parti
realizzate in vetro.
Questa garanzia decade se il prodotto è stato
danneggiato oppure utilizzato o sottoposto a
interventi di manutenzione in modo non conforme.
Per un utilizzo adeguato del prodotto si devono
rigorosamente rispettare tutte le istruzioni esposte
nel manuale di istruzioni per l’uso. Si devono assolutamente evitare modalità di utilizzo e azioni che
il manuale di istruzioni per l’uso sconsiglia o da cui
esso mette in guardia.
Il prodotto è destinato esclusivamente all’uso domestico e non a quello commerciale. La garanzia
decade in caso di impiego improprio o manomissione, uso della forza e interventi non eseguiti
dalla nostra filiale di assistenza autorizzata.
■ Una volta che il prodotto è stato registrato come
difettoso, lo può poi spedire a nostro carico,
provvedendo ad allegare la prova di acquisto
(scontrino di cassa), una descrizione del vizio
e l’indicazione della data in cui si è presentato,
all’indirizzo del servizio di assistenza clienti che
Le è stato comunicato.
Al sito www.lidl-service.com si possono
scaricare questo e molti altri manuali di
istruzioni per l’uso, filmati sui prodotti e
software.
Assistenza
ATTENZIONE!
► Far riparare gli apparecchi dal centro di
assistenza o da un elettricista specializzato
e solo con pezzi di ricambio originali.
In tal modo si garantisce la sicurezza dell'apparecchio.
► Fare eseguire sempre la sostituzione della
spina o del cavo dal produttore dell'apparecchio o dal relativo centro di assistenza.
In tal modo si garantisce la sicurezza dell'apparecchio.
Trattamento dei casi di garanzia
Per garantire una rapida evasione della Sua richiesta,
La preghiamo di seguire le seguenti istruzioni:
■ Tenga a portata di mano per qualsiasi richiesta
lo scontrino di cassa e il codice dell’articolo
(per es. IAN 12345) come prova di acquisto.
■ Il codice dell’articolo è indicato sulla targhetta
di modello, su un’incisione, sul frontespizio del
manuale di istruzioni per l’uso (in basso a sinistro)
o come adesivo sul lato posteriore o inferiore.
■ Qualora si presentassero malfunzionamenti o
altri tipi di vizi, contatti innanzitutto il reparto
assistenza clienti qui di seguito indicato telefo-
nicamente o via e-mail.
FAAS 12 B1
NOTA
► I pezzi di ricambio non indicati (come ad es.
batteria, interruttore o staffa di sostegno)
possono essere ordinati tramite il nostro call
center.
Assistenza Italia
Tel.: 02 36003201
E-Mail: kompernass@lidl.it
Assistenza Malta
Tel.: 80062230
E-Mail: kompernass@lidl.com.mt
IAN 285192
IT│MT
│
9 ■
Page 14

Importatore
Badi che il seguente indirizzo non è quello del
servizio di assistenza clienti. Contatti innanzitutto
il servizio di assistenza clienti indicato.
KOMPERNASS HANDELS GMBH
BURGSTRASSE 21
DE - 44867 BOCHUM
GERMANIA
www.kompernass.com
Smaltimento
L'imballaggio è composto da materiali
ecocompatibili che possono essere
smaltiti tramite gli appositi centri di
raccolta e riciclaggio.
Non smaltire gli elettrodomestici
assieme ai normali rifiuti domestici.
In base alla direttiva europea 2012/19/EU, gli
apparecchi elettrici usati devono essere raccolti separatamente e inviati a un centro per il riciclaggio
ecologico.
Non smaltire le batterie assieme ai
normali rifiuti domestici!
Le batterie difettose o esauste devono essere
riciclate in base alla direttiva 2006/66/EC.
Riconsegnare il pacco batteria e/o l'apparecchio
presso gli appositi centri di raccolta.
Per le possibilità di smaltimento relative agli
elettroutensili/pacchi batterie usati, informarsi
presso il municipio o l'amministrazione comunale
di residenza.
Traduzione della dichiarazione
di conformità originale
La Società KOMPERNASS HANDELS GMBH,
responsabile della documentazione: Sig. Semi
Uguzlu, BURGSTR. 21, DE - 44867 BOCHUM,
GERMANIA, dichiara con la presente che questo
prodotto è conforme alle norme, ai documenti
normativi e alle direttive CE seguenti:
Direttiva macchine
(2006/42/EC)
Compatibilità elettromagnetica
(2014 / 30 / EU)
Direttiva RoHS
(2011 / 65 / EU)*
*Il produttore è il responsabile esclusivo del
rilascio di questa dichiarazione di conformità.
L’oggetto della dichiarazione sopra descritto soddisfa le prescrizioni della Direttiva 2011/65/EU
del Parlamento Europeo e del Consiglio Europeo
dell’8 giugno 2011 sulla restrizione dell’uso di
determinate sostanze pericolose nelle apparecchiature elettriche ed elettroniche.
Norme armonizzate utilizzate:
EN 60745-1:2009/A11:2010
EN 60745-2-11:2010
EN 62233:2008
EN 60335-1:2012/A11:2014
EN 60335-2-29:2004/A2:2010
EN 55014-1:2006/A2:2011
EN 55014-2:2015
EN 61000-3-2:2014
EN 61000-3-3:2013
Tipo / denominazione dell'apparecchio:
Seghetto ricaricabile per potatura FAAS 12 B1
Anno di produzione: 03 - 2017
Numero di serie: IAN 285192
Bochum, 20/03/2017
■ 10 │ IT
│
MT
Semi Uguzlu
- Direttore qualità Con riserva di modifiche tecniche volte al miglioramento del prodotto.
FAAS 12 B1
Page 15

Contents
Introduction .....................................................12
Intended use ............................................................... 12
Features .................................................................. 12
Package contents ...........................................................12
Technical data ............................................................. 12
General Power Tool Safety Warnings ...............................13
1. Work area safety .........................................................13
2. Electrical safety ..........................................................13
3. Personal safety ...........................................................14
4. Power tool use and care ...................................................14
5. Service .................................................................15
Appliance-specific safety instructions ............................................15
Use and handling of the cordless electrical power tool ..............................15
Safety guidelines for battery chargers ...........................................15
Practical advice on sawing ........................................16
Original accessories/auxiliary equipment ........................................16
Information on saw blades .................................................... 16
Before use ......................................................16
Charging the battery pack ....................................................16
Attaching/disconnecting the battery pack to/from the appliance ......................16
Checking the battery charge level ..............................................16
Attaching/removing the grip bracket ............................................17
Fitting/changing the saw blade ................................................17
Operation ......................................................17
Switching on and off ........................................................17
Sawing methods ............................................................ 17
Maintenance and cleaning .........................................18
Kompernass Handels GmbH warranty ..............................18
Service .........................................................19
Importer .......................................................19
Disposal ........................................................20
Translation of the original Conformity Declaration .....................20
FAAS 12 B1
GB│MT
│
11 ■
Page 16

CORDLESS BRANCH SAW
FAAS 12 B1
Introduction
Congratulations on the purchase of your new appliance. You have selected a high-quality product. The
operating instructions are part of this product. They
contain important information on safety, usage and
disposal. Before using the product, please familiarise yourself with all operating and safety instructions. Use the product only as described and for the
specified areas of application. Please also pass on
these operating instructions to any future owner.
Intended use
This appliance – standard designation: reciprocating saw – is intended for the sawing of wood,
plastics and building materials up to a fixed stop
(base plate). The appliance is suitable for rough
sawing work, straight and curved cuts; it cuts surfaces off flush. With the grip bracket mounted, the
appliance is suitable for sawing branches. Follow
the information concerning saw blades and practical advice on sawing. Any other uses of or modification to the appliance is deemed to be improper
and carries the risk of serious personal injury. The
manufacturer accepts no responsibility for damage(s) attributable to misuse. The appliance is not
intended for commercial use.
Features
Safety lock-out
Handle
Battery pack
Release (battery pack)
ON/OFF switch
Saw blade
Base plate
Quick-release chuck
Hand guard
Release (grip bracket)
Grip bracket
High-speed battery charger
Control LED (green)
Control LED (red)
Battery charge level display
Package contents
1 cordless branch saw FAAS 12 B1
1 high-speed battery charger FAAS 12 B1-2
1 battery pack FAAS 12 B1-1
1 grip bracket
1 saw blade for wood 152 mm
1 carrying case
1 set of operating instructions
Technical data
Cordless branch saw: FAAS 12 B1
Rated voltage: 12 V
Rated idle speed: n0 0–2700 rpm
Stroke length: 20 mm
Max. cutting performance: Wood 80 mm
Battery pack: FAAS 12 B1-1
Type: LITHIUM ION
Rated voltage: 12 V
Capacity: 1500 mAh
High-speed
battery charger: FAAS 12 B1-2
INPUT:
Rated current: 230–240 V ~, 50Hz
(alternating current)
Rated power consumption: 30 W
OUTPUT:
Rated voltage: 12.6 V
Rated current: 1800 mA
Charging time: approx. 60 min.
Protection class: II /
Noise emission values:
Measured values for noise determined in accordance
with EN ISO 4871. The A-rated noise level of the
power tool at the working location is typically as
follows:
Sound pressure level: L
Uncertainty: K
Sound power level: L
Uncertainty: K
pA
pA
WA
WA
Wear hearing protection!
(DC)
(DC)
(DC)
(double insulation)
= 82 dB(A)
= 3 dB
= 93 dB(A)
= 3 dB
■ 12 │ GB
│
MT
FAAS 12 B1
Page 17

Total vibration values (vector total of three directions) determined in accordance with EN 60745:
Cutting boards: a
Cutting wooden beams: a
= 6.37 m/s
h,B
Uncertainty K = 1.5 m/s
= 9.26 m/s
h,WB
Uncertainty K = 1.5 m/s
2
2
NOTE
► The vibration level specified in these instruc-
tions has been measured in accordance with
a standardised measuring procedure and can
be used to make equipment comparisons. The
specified vibration emission value can also
be used to make an initial exposure estimate.
WARNING!
► The vibration level varies in accordance with
the use of the power tool and may be higher
than the value specified in these instructions
in some cases. Regular use of the electric
tool in such a way may cause the user to
underestimate the vibration. Try to keep the
vibration loads as low as possible. Measures
to reduce the vibration load are, e.g. wearing
gloves and limiting the working time. Wherein
all states of operation must be included (e.g.
times when the power tool is switched off and
times where the power tool is switched on but
running without load).
General Power
Tool Safety
2
2
Save all warnings and instructions for future
reference.
The term "power tool" in the warnings refers to your
mains-operated (corded) power tool or batteryoperated (cordless) power tool.
1. Work area safety
a) Keep work area clean and well lit.
b) Do not operate power tools in explosive atmo-
c) Keep children and bystanders away while
Warnings
WARNING!
► Read all safety warnings and all instructions.
Failure to follow the warnings and instructions may result in electric shock, fire and/or
serious injury.
Cluttered or dark areas invite accidents.
spheres, such as in the presence of flammable
liquids, gases or dust. Power tools create sparks
which may ignite the dust or fumes.
operating a power tool. Distractions can cause
you to lose control.
FAAS 12 B1
2. Electrical safety
a) Power tool plugs must match the outlet.
Never modify the plug in any way.
Do not use any adapter plugs with earthed
(grounded) power tools. Unmodified plugs
and matching outlets will reduce risk of electric
shock.
b) Avoid body contact with earthed or grounded
surfaces, such as pipes, radiators, ranges and
refrigerators. There is an increased risk of elec-
tric shock if your body is earthed or grounded.
c) Do not expose power tools to rain or wet
conditions. Water entering a power tool will
increase the risk of electric shock.
GB│MT
│
13 ■
Page 18

d) Do not abuse the cord. Never use the cord
for carrying, pulling or unplugging the power
tool. Keep cord away from heat, oil, sharp
edges or moving parts. Damaged or entangled
cords increase the risk of electric shock.
e) When operating a power tool outdoors, use
an extension cord suitable for outdoor use.
Use of a cord suitable for outdoor use reduces
the risk of electric shock.
f) If operating a power tool in a damp location
is unavoidable, use a residual current device
(RCD) protected supply. Use of an RCD reduces
the risk of electric shock.
3. Personal safety
a) Stay alert, watch what you are doing and
use common sense when operating a power
tool. Do not use a power tool while you are
tired or under the influence of drugs, alcohol
or medication. A moment of inattention while
operating power tools may result in serious
personal injury.
b) Use personal protective equipment. Always
wear eye protection. Protective equipment
such as dust mask, non-skid safety shoes, hard
hat, or hearing protection used for appropriate
conditions will reduce personal injuries.
c) P
revent unintentional starting. Ensure the
switch is in the off-position before connecting
to power source and/or battery pack, picking
up or carrying the tool. Carrying power tools
with your finger on the switch or energising power tools that have the switch on invites accidents.
d) Remove any adjusting key or wrench before
turning the power tool on. A wrench or a key
left attached to a rotating part of the power tool
may result in personal injury.
e) Do not overreach. Keep proper footing and
balance at all times. This enables better control
of the power tool in unexpected situations.
ress properly. Do not wear loose clothing or
f) D
jewellery. Keep your hair, clothing and gloves
away from moving parts. Loose clothes, jewel-
lery or long hair can be caught in moving parts.
g) If devices are provided for the connection of
dust extraction and collection facilities, ensure
these are connected and properly used. Use of
dust collection can reduce dust-related hazards.
4. Power tool use and care
a) Do not force the power tool. Use the correct
power tool for your application. The correct
power tool will do the job better and safer at
the rate for which it was designed.
b) Do not use the power tool if the switch does
not turn it on and off. Any power tool that cannot be controlled with the switch is dangerous
and must be repaired.
c) Disconnect the plug from the power source
and/or the battery pack from the power tool
before making any adjustments, changing
accessories, or storing power tools. Such
preventive safety measures reduce the risk of
starting the power tool accidentally.
d) Store idle power tools out of the reach of
children and do not allow persons unfamiliar
with the power tool or these instructions to
operate the power tool. Power tools are dan-
gerous in the hands of untrained users.
e) Maintain power tools. Check for misalignment
or binding of moving parts, breakage of parts
and any other condition that may affect the
power tool’s operation. If damaged, have the
power tool repaired before use. Many acci-
dents are caused by poorly maintained power
tools.
f) Keep cutting tools sharp and clean. Properly
maintained cutting tools with sharp cutting
edges are less likely to bind and are easier to
control.
g) Use the power tool, accessories and tool bits
etc. in accordance with these instructions, taking into account the working conditions and
the work to be performed. Use of the power
tool for operations different from those intended
could result in a hazardous situation.
■ 14 │ GB
│
MT
FAAS 12 B1
Page 19

5. Service
a) Have your power tool serviced by a qualified
repair person using only identical replacement
parts. This will ensure that the safety of the
power tool is maintained.
Appliance-specific safety instructions
■ Hold power tool by insulated gripping surfac-
es, when performing an operation where the
fastener may contact hidden wiring or its own
cord. Fasteners contacting a “live” wire may
make exposed metal parts of the power tool
“live” and could give the operator an electric
shock.
■ Wear a dust mask!
Use and handling of the cordless
electrical power tool
a) Charge a rechargeable battery unit using
only the charger recommended by the manufacturer. Chargers are often designed for a
particular type of rechargeable battery unit.
There is the danger of fire if other types of rechargeable battery units are used.
b) Only the rechargeable battery units supplied
are to be used with an electrical power tool.
The use of other rechargeable battery units may
lead to the danger of injury or fire.
c) When they are not being used, store re-
chargeable battery units away from paper
clips, coins, keys, nails, screws or other small
metal objects that could cause the contacts
to be bridged. Short-circuiting the contacts of
a rechargeable battery unit may result in heat
damage or fire.
d) Fluids may leak out of rechargeable batteries
if they are misused. If this happens, avoid
contact with the fluid. If contact occurs, flush
the affected area with water. Seek additional
medical help if any of the fluid gets into your
eyes. Escaping battery fluid may cause skin
irritation or burns.
CAUTION! RISK OF EXPLOSION!
Never charge non-rechargeable
batteries!
Protect the rechargeable battery
from heat, for example from continuous exposure to sunlight, fire, water
and moisture. There is a risk of explo-
sion.
Safety guidelines for battery chargers
■ This appliance may be used by children aged
8 years and above and by persons with limited
physical, sensory or mental capabilities or lack
of experience and knowledge, provided that
they are under supervision or have been told
how to use the appliance safely and are aware
of the potential risks. Do not allow children to
play with the appliance. Cleaning and user
maintenance tasks may not be carried out by
children unless they are supervised.
This charger is suitable for indoor use
only.
■ To avoid potential risks, damaged mains cables
should be replaced by the manufacturer or the
manufacturer’s customer service department or
a similarly qualified person.
FAAS 12 B1
GB│MT
│
15 ■
Page 20

Practical advice on sawing
■ Check the material to be worked to make sure
that all foreign objects have been removed,
e.g. nails, screws, etc.
■ Switch the appliance off immediately if the saw
blade jams. Open up the sawn gap using a
suitable tool and pull out the reciprocating saw.
■ Saw the material at a constant speed.
Original accessories/auxiliary
equipment
■ Use only the additional equipment and ac-
cessories specified in the operating instructions.
Using attachments or accessory tools other than
those recommended in the operating instructions
can lead to a risk of injury.
Information on saw blades
You can use any saw blade that has a suitable
mount – ½" (12.7 mm) universal shaft. Saw blades
are available from retail stores in various lengths
and optimised for a variety of purposes.
NOTE
► TPI = teeth per inch = the number of teeth per
2.54 cm
Before use
Charging the battery pack
CAUTION!
► Always unplug the appliance before you
remove the battery pack
the battery pack to the high-speed battery
charger .
■ Never charge the battery pack
ambient temperature is below 10°C or above
40°C.
♦ Connect the battery pack to the high-speed
battery charger
♦ Insert the power plug into the socket. The control
LED lights up red.
♦ The green control LED indicates that the
charging process is complete and the battery
pack is ready for use.
♦ Push the battery pack
ance.
♦ You should always switch the high-speed charg-
er
off for at least 15 minutes between successive charging processes. Also disconnect the
power plug from the mains power socket.
.
Attaching/disconnecting the battery
pack to/from the appliance
Attaching the battery pack:
♦ Click the battery pack
Removing the battery pack:
♦ Press the release button
battery pack
.
Checking the battery charge level
♦ Press the safety lock-out
OFF switch
battery. The status/remaining charge will be
shown on the battery charge level display
as follows:
♦ RED / ORANGE / GREEN = maximum
charge/performance
RED/ORANGE = medium charge/performance
RED = low charge – charge the battery
to check the charge level of the
from or connect
when the
back into the appli-
into the handle .
and remove the
and the ON/
■ 16 │ GB
│
MT
FAAS 12 B1
Page 21

Attaching/removing the grip bracket
NOTE
► The grip bracket
removed while the saw blade is attached.
Attaching the grip bracket (see fig. B–D):
♦ Press the release button
♦ Push the grip bracket over the guides on the
base plate and onto the appliance.
♦ Lock the release button .
Removing the grip bracket:
♦ Press the release
forwards out of the guides.
cannot be attached/
.
and pull the grip bracket
Fitting/changing the saw blade
Wear protective gloves when fitting/changing a
saw blade.
♦ Turn the quick-release chuck
go in the direction of the arrow and hold it in
this position.
♦ Push the required saw blade into the quick-
release chuck
CAUTION!
► The teeth of the saw blade
downwards!
as far as the stop.
as far as it will
must point
Operation
Switching on and off
Switching on:
♦ Press the safety lock-out
♦ Press the ON/OFF switch .
Switching off:
♦ Release the ON/OFF switch
Sawing methods
A) Working without the grip bracket (see fig. E):
■ For branches of a larger diameter or wood,
plastic or building material, work without the
grip bracket. The workpiece must be right up
against the base plate. Use a rocking cutting
motion for round workpieces.
A1) Sawing flush:
■ Flexible saw blades allow you to saw off pro-
truding workpieces such as pipes located close
to the wall, provided the saw blade is long
enough.
1. Place the saw blade directly against the wall.
2. Bend it by applying lateral pressure to the reciprocating saw so that the base plate
into contact with the wall.
3. Switch the appliance on as described and saw
off the workpiece by applying constant pressure.
A2) Plunge cutting (see fig. F):
.
.
comes
♦ Let go of the quick-release chuck ; it must
return to its initial position.
The saw blade is now locked.
FAAS 12 B1
CAUTION! RISK OF KICKBACK!
► Plunge cuts may only be made in soft materials
(wood or similar).
1. Place the reciprocating saw with the lower edge
of the base plate
the appliance on.
2. Tilt the reciprocating saw forwards and plunge
the saw blade into the workpiece.
3. Position the reciprocating saw vertically and
continue sawing along the cutting line.
B) Working with the grip bracket (see fig. G):
♦ Push down lightly and move the saw downwards.
on the workpiece. Switch
GB│MT
│
17 ■
Page 22

Maintenance and cleaning
WARNING! RISK OF INJURY! Always
switch the appliance off and remove
the battery before carrying out any
work on the appliance.
■ Always remove the saw blade before carrying
out any work on the power tool.
■ Keep the appliance and ventilation slits clean at
all times. If the ventilation slits are blocked, there
is a risk of overheating and/or the appliance
being damaged.
■ Always clean the appliance after completion
of work.
■ Do not allow any liquids to get into the appli-
ance. Use a cloth to clean the housing. Never
use petrol, solvents or cleansers which can
damage plastic.
■ Clean the saw blade mount, if necessary with a
brush or by blowing it out with compressed air.
■ If a lithium-ion battery is to be stored for an
extended period, the charge level should be
checked regularly. The optimum charge level is
between 50% and 80%. The optimum storage
climate is cool and dry.
Kompernass Handels GmbH
warranty
Dear Customer,
This appliance has a 3-year warranty valid from
the date of purchase. If this product has any faults,
you, the buyer, have certain statutory rights. Your
statutory rights are not restricted in any way by the
warranty described below.
Warranty conditions
The validity period of the warranty starts from the
date of purchase. Please keep your original receipt
in a safe place. This document will be required as
proof of purchase.
If any material or production fault occurs within
three years of the date of purchase of the product,
we will either repair or replace the product for you
at our discretion. This warranty service is dependent
on you presenting the defective appliance and
the proof of purchase (receipt) and a short written
description of the fault and its time of occurrence.
If the defect is covered by the warranty, your product
will either be repaired or replaced by us. The repair
or replacement of a product does not signify the
beginning of a new warranty period.
■ 18 │ GB
│
MT
Warranty period and statutory claims for
defects
The warranty period is not prolonged by repairs
effected under the warranty. This also applies to
replaced and repaired components. Any damage
and defects present at the time of purchase must
be reported immediately after unpacking. Repairs
carried out after expiry of the warranty period shall
be subject to a fee.
FAAS 12 B1
Page 23

Scope of the warranty
This appliance has been manufactured in accordance
with strict quality guidelines and inspected meticulously prior to delivery.
The warranty covers material faults or production
faults. The warranty does not extend to product parts
subject to normal wear and tear or fragile parts such
as switches, batteries, baking moulds or parts made
of glass.
The warranty does not apply if the product has been
damaged, improperly used or improperly maintained.
The directions in the operating instructions for the
product regarding proper use of the product are
to be strictly followed. Uses and actions that are
discouraged in the operating instructions or which
are warned against must be avoided.
This product is intended solely for private use and
not for commercial purposes. The warranty shall be
deemed void in cases of misuse or improper handling,
use of force and modifications/repairs which have
not been carried out by one of our authorised
Service centres.
Warranty claim procedure
To ensure quick processing of your case, please
observe the following instructions:
■ Please have the till receipt and the item number
(e.g. IAN 12345) available as proof of purchase.
■ You will find the item number on the type plate,
an engraving on the front page of the instructions
(bottom left), or as a sticker on the rear or
bottom of the appliance.
■ If functional or other defects occur, please
contact the service department listed either by
telephone or by e-mail.
■ You can return a defective product to us free of
charge to the service address that will be provided
to you. Ensure that you enclose the proof of
purchase (till receipt) and information about
what the defect is and when it occurred.
Service
WARNING!
► Have the power tool repaired by the Service
centre or a qualified electrician and only
using genuine replacement parts. This will
ensure that the safety of the appliance is
maintained.
► Always ensure that the power plug or the
mains cable is replaced only by the manufacturer of the appliance or by an approved
customer service provider. This will ensure
that the safety of the appliance is maintained.
NOTE
► Replacement parts not listed (such as
batteries, switches and grip bracket) can be
ordered via our service hotline.
Service Great Britain
Tel.: 0871 5000 720 (£ 0.10/Min.)
E-Mail: kompernass@lidl.co.uk
Service Malta
Tel.: 80062230
E-Mail: kompernass@lidl.com.mt
IAN 285192
Importer
Please note that the following address is not the
service address. Please use the service address
provided in the operating instructions.
KOMPERNASS HANDELS GMBH
BURGSTRASSE 21
DE - 44867 BOCHUM
GERMANY
www.kompernass.com
You can download these instructions
along with many other manuals,
product videos and software on
www.lidl-service.com.
FAAS 12 B1
GB│MT
│
19 ■
Page 24

Disposal
The packaging is made from environmen-
tally friendly material and can be disposed of at your local recycling plant.
Do not dispose of power tools in
your normal household waste!
European Directive 2012/19/EU requires that
worn-out power tools be collected separately and
recycled in an environmentally compatible manner.
Do not dispose of batteries in your
normal domestic waste!
Defective or worn-out rechargeable batteries must
be recycled according to Directive 2006/66/EC.
Take the battery pack and/or appliance to a
nearby collection facility.
Please consult your local authorities regarding
suitable disposal of worn out power tools/battery
packs.
Translation of the original
Conformity Declaration
We, KOMPERNASS HANDELS GMBH, documents officer: Mr. Semi Uguzlu, BURGSTR. 21,
DE - 44867 BOCHUM, GERMANY, hereby declare
that this product complies with the following standards, normative documents and EC directives:
Machinery Directive
(2006/42/EC)
EMC (Electromagnetic Compatibility)
(2014/30/EU)
RoHS Directive
(2011/65/EU)*
*
The manufacturer bears the full responsibility for
compliance with this conformity declaration. The
object of the declaration described above complies
with the requirements of the Directive 2011/65/EU
of the European Parliament and Council of 8 June
2011 on the limitations of use of certain dangerous
substances in electrical and electronic appliances.
Applied harmonised standards:
EN 60745-1:2009/A11:2010
EN 60745-2-11:2010
EN 62233:2008
EN 60335-1:2012/A11:2014
EN 60335-2-29:2004/A2:2010
EN 55014-1:2006/A2:2011
EN 55014-2:2015
EN 61000-3-2:2014
EN 61000-3-3:2013
Type/appliance designation:
Cordless branch saw FAAS 12 B1
Year of manufacture: 3 - 2017
Serial number: IAN 285192
Bochum, 20/03/2017
■ 20 │ GB
│
MT
Semi Uguzlu
- Quality Manager The right to effect technical changes in the context
of further development is reserved.
FAAS 12 B1
Page 25

Inhaltsverzeichnis
Einleitung .......................................................22
Bestimmungsgemäßer Gebrauch ...............................................22
Ausstattung ................................................................ 22
Lieferumfang ............................................................... 22
Technische Daten ...........................................................22
Allgemeine Sicherheitshinweise für Elektrowerkzeuge .................23
1. Arbeitsplatz-Sicherheit ..................................................... 23
2. Elektrische Sicherheit ......................................................23
3. Sicherheit von Personen .................................................... 24
4. Verwendung und Behandlung des Elektrowerkzeugs ............................. 24
5. Service .................................................................25
Gerätespezifische Sicherheitshinweise für Säbelsägen .............................. 25
Verwendung und Behandlung des Akkuwerkzeugs .................................25
Sicherheitshinweise für Ladegeräte .............................................25
Arbeitshinweise zum Sägen .......................................26
Originalzubehör / -zusatzgeräte ............................................... 26
Informationen zu Sägeblättern ................................................. 26
Vor der Inbetriebnahme ..........................................26
Akku-Pack laden ............................................................ 26
Akku-Pack ins Gerät einsetzen / entnehmen ...................................... 26
Akkuzustand prüfen ......................................................... 26
Haltebügel einsetzen /entnehmen ..............................................27
Sägeblatt montieren / wechseln ............................................... 27
Inbetriebnahme .................................................27
Ein- / ausschalten ...........................................................27
Sägemethoden .............................................................27
Wartung und Reinigung ...........................................28
Garantie der Kompernaß Handels GmbH ............................28
Service .........................................................29
Importeur ......................................................30
Entsorgung .....................................................30
Original-Konformitätserklärung ....................................30
FAAS 12 B1
DE│AT│CH
│
21 ■
Page 26

AKKU-ASTSÄGE FAAS 12 B1
Einleitung
Wir beglückwünschen Sie zum Kauf Ihres neuen
Gerätes. Sie haben sich damit für ein hochwertiges
Produkt entschieden. Die Bedienungsanleitung ist Teil
dieses Produkts. Sie enthält wichtige Hinweise für
Sicherheit, Gebrauch und Entsorgung. Machen Sie
sich vor der Benutzung des Produkts mit allen Bedienund Sicherheitshinweisen vertraut. Benutzen Sie das
Produkt nur wie beschrieben und für die angegebenen Einsatzbereiche. Händigen Sie alle Unterlagen
bei Weitergabe des Produkts an Dritte mit aus.
Bestimmungsgemäßer Gebrauch
Das Gerät - normativ eine Säbelsäge - ist mit
festem Anschlag (Fußplatte) zum Sägen von Holz,
Kunststoff und Baustoffen bestimmt. Das Gerät eignet sich für grobe Sägearbeiten, gerade, kurvige
Schnitte und trennt Flächen bündig ab. Mit montiertem Haltebügel ist das Gerät zum Sägen von
Ästen geeignet. Beachten Sie die Informationen
zu Sägeblättern und Arbeitshinweise zum Sägen.
Jede andere Verwendung oder Veränderung der
Maschine gilt als nicht bestimmungsgemäß und
birgt erhebliche Unfallgefahren. Für aus bestimmungswidriger Verwendung entstandene Schäden
übernimmt der Hersteller keine Haftung. Das Gerät
ist nicht für den gewerblichen Einsatz bestimmt.
Ausstattung
Einschaltsperre
Handgriff
Akkupack
Entriegelung (Akkupack)
EIN- / AUS-Schalter
Sägeblatt
Fußplatte
Schnellspannfutter
Handschutz
Entriegelung (Haltebügel)
Haltebügel
Akku-Schnellladegerät
Kontroll-LED (grün)
Kontroll-LED (rot)
Akkuzustandsanzeige
Lieferumfang
1 Akku-Astsäge FAAS 12 B1
1 Akku-Schnellladegerät FAAS 12 B1-2
1 Akku-Pack FAAS 12 B1-1
1 Haltebügel
1 Sägeblatt Holz 152 mm
1 Tragekoffer
1 Bedienungsanleitung
Technische Daten
Akku-Astsäge: FAAS 12 B1
Bemessungsspannung: 12 V
Bemessungs-
Leerlaufdrehzahl: n0 0–2700 min
Hublänge: 20 mm
Max. Schnittleistung: Holz 80 mm
Akku-Pack: FAAS 12 B1-1
Typ: LITHIUM-IONEN
Bemessungsspannung: 12 V
Kapazität: 1500 mAh
AkkuSchnellladegerät: FAAS 12 B1-2
EINGANG / Input:
Bemessungsstrom: 230 - 240 V ~, 50 Hz
Bemessungsaufnahme: 30 W
AUSGANG / Output:
Bemessungsspannung: 12,6 V
Bemessungsstrom: 1800 mA
Ladedauer: ca. 60 min
Schutzklasse: II /
Geräuschemissionswerte:
Messwert für Geräusch ermittelt entsprechend EN
ISO 4871. Der A-bewertete Geräuschpegel des
Elektrowerkzeugs am Ort des Benutzers beträgt
typischerweise:
Schalldruckpegel: L
Unsicherheit: KpA = 3 dB
Schallleistungspegel: LWA = 93 dB (A)
Unsicherheit: K
Gehörschutz tragen!
(Gleichstrom)
(Gleichstrom)
(Wechselstrom)
(Gleichstrom)
(Doppelisolierung)
= 82 dB (A)
pA
= 3 dB
WA
-1
■ 22 │ DE
│AT│
CH
FAAS 12 B1
Page 27

Schwingungsgesamtwerte (Vektorsumme dreier
Richtungen) ermittelt entsprechend EN 60745:
Sägen von
Spanplatte: a
= 6,37 m/s2
h,B
Unsicherheit K = 1,5 m/s
2
Sägen von
Holzbalken: a
= 9,26 m/s2
h,WB
Unsicherheit K = 1,5 m/s
2
HINWEIS
► Der in diesen Anweisungen angegebene
Schwingungspegel ist entsprechend einem
genormten Messverfahren gemessen worden
und kann für den Gerätevergleich verwendet
werden. Der angegebene Schwingungsemissionswert kann auch zu einer einleitenden
Einschätzung der Aussetzung verwendet
werden.
WARNUNG!
► Der Schwingungspegel wird sich entspre-
chend dem Einsatz des Elektrowerkzeugs
verändern und kann in manchen Fällen über
dem in diesen Anweisungen angegebenen
Wert liegen. Die Schwingungsbelastung
könnte unterschätzt werden, wenn das
Elektrowerkzeug regelmäßig in solcher Weise
verwendet wird. Versuchen Sie, die Belastung
durch Vibrationen so gering wie möglich zu
halten. Beispielhafte Maßnahmen zur Verringerung der Vibrationsbelastung sind das Tragen von Handschuhen beim Gebrauch des
Werkzeugs und die Begrenzung der Arbeitszeit. Dabei sind alle Anteile des Betriebszyklus zu berücksichtigen (beispielweise Zeiten,
in denen das Elektrowerkzeug abgeschaltet
ist, und solche, in denen es zwar eingeschaltet ist, aber ohne Belastung läuft).
Allgemeine
Sicherheitshinweise
für Elektrowerkzeuge
WARNUNG!
► Lesen Sie alle Sicherheitshinweise und Anwei-
sungen. Versäumnisse bei der Einhaltung der
Sicherheitshinweise und Anweisungen können
elektrischen Schlag, Brand und/oder schwere
Verletzungen verursachen.
Bewahren Sie alle Sicherheitshinweise und
Anweisungen für die Zukunft auf.
Der in den Sicherheitshinweisen verwendete Begriff
„Elektrowerkzeug“ bezieht sich auf netzbetriebene
Elektrowerkzeuge (mit Netzkabel) und auf akkubetriebene Elektrowerkzeuge (ohne Netzkabel).
1. Arbeitsplatz-Sicherheit
a) Halten Sie Ihren Arbeitsbereich sauber und
gut beleuchtet. Unordnung und unbeleuchtete
Arbeitsbereiche können zu Unfällen führen.
b) Arbeiten Sie mit dem Elektrowerkzeug nicht
in explosionsgefährdeter Umgebung, in der
sich brennbare Flüssigkeiten, Gase oder
Stäube befinden. Elektrowerkzeuge erzeugen
Funken, die den Staub oder die Dämpfe entzünden können.
c) Halten Sie Kinder und andere Personen wäh-
rend der Benutzung des Elektrowerkzeugs
fern. Bei Ablenkung können Sie die Kontrolle
über das Gerät verlieren.
2. Elektrische Sicherheit
a) Der Anschlussstecker des Elektrowerkzeuges
muss in die Steckdose passen. Der Stecker
darf in keiner Weise verändert werden.
Verwenden Sie keine Adapterstecker gemeinsam mit schutzgeerdeten Elektrowerkzeugen.
Unveränderte Stecker und passende Steckdosen verringern das Risiko eines elektrischen
Schlages.
FAAS 12 B1
DE│AT│CH
│
23 ■
Page 28

b) Vermeiden Sie Körperkontakt mit geerdeten
Oberflächen, wie von Rohren, Heizungen,
Herden und Kühlschränken. Es besteht ein
erhöhtes Risiko durch elektrischen Schlag, wenn
Ihr Körper geerdet ist.
c) Halten Sie Elektrowerkzeuge von Regen oder
Nässe fern. Das Eindringen von Wasser in ein
Elektrogerät erhöht das Risiko eines elektrischen
Schlages.
d) Z
weckentfremden Sie das Kabel nicht, um das
Elektrowerkzeug zu tragen, aufzuhängen oder
um den Stecker aus der Steckdose zu ziehen.
Halten Sie das Kabel fern von Hitze, Öl,
scharfen Kanten oder sich bewegenden Geräteteilen. Beschädigte oder verwickelte Kabel
erhöhen das Risiko eines elektrischen Schlages.
e) W
enn Sie mit einem Elektrowerkzeug im
Freien arbeiten, verwenden Sie nur Verlängerungskabel, die auch für den Außenbereich
zugelassen sind. Die Anwendung eines für den
Außenbereich geeigneten Verlängerungskabels
verringert das Risiko eines elektrischen Schlages.
f) Wenn der Betrieb des Elektrowerkzeuges in
feuchter Umgebung nicht vermeidbar ist, verwenden Sie einen Fehlerstromschutzschalter.
Der Einsatz eines Fehlerstromschutzschalters vermindert das Risiko eines elektrischen Schlages.
3. Sicherheit von Personen
a) Seien Sie stets aufmerksam, achten Sie dar-
auf, was Sie tun und gehen Sie mit Vernunft
an die Arbeit mit einem Elektrowerkzeug.
Benutzen Sie kein Elektrowerkzeug, wenn Sie
krank oder müde oder unter dem Einfluss von
Drogen, Alkohol oder Medikamenten stehen.
Ein Moment der Unachtsamkeit beim Gebrauch
des Elektrowerk zeuges kann zu ernsthaften
Verletzungen führen.
b) T
ragen Sie persönliche Schutzausrüstung und
immer eine Schutzbrille. Das Tragen persönlicher
Schutzausrüstung wie Staubmaske, rutschfeste
Sicherheitsschuhe, Schutzhelm oder Gehörschutz,
je nach Art und Einsatz des Elektrowerkzeuges,
verringert das Risiko von Verletzungen.
c) Vermeiden Sie eine unbeabsichtigte
Inbetrieb nahme. Vergewissern Sie sich, dass
das Elektrowerkzeug ausgeschaltet ist, bevor
Sie es an die Stromversorgung und / oder
den Akku anschließen, es aufnehmen oder
tragen. Wenn Sie beim Tragen des Elektrowerk-
zeuges den Finger am Schalter haben oder das
Gerät bereits eingeschaltet an die Stromversorgung anschließen, kann dies zu Unfällen führen.
d) Entfernen Sie Einstellwerkzeuge oder Schrau-
benschlüssel, bevor Sie das Elektrowerkzeug
einschalten. Ein Werkzeug oder Schlüssel, der
sich in einem drehenden Geräteteil befindet,
kann zu Verletzungen führen.
e) Vermeiden Sie eine abnormale Körperhal-
tung. Sorgen Sie für einen sicheren Stand
und halten Sie jederzeit das Gleichgewicht.
Dadurch können Sie das Elektrowerkzeug in
unerwarteten Situationen besser kontrollieren.
f) Tragen Sie geeignete Kleidung. Tragen Sie
keine weite Kleidung oder Schmuck. Halten
Sie Haare, Kleidung und Handschuhe fern
von sich bewegenden Teilen. Lockere Klei-
dung, Schmuck oder lange Haare können von
sich bewegenden Teilen erfasst werden.
g) Wenn Staubabsaug- und -auffangeinrichtun-
gen montiert werden können, vergewissern
Sie sich, dass diese angeschlossen sind und
richtig verwendet werden. Die Verwendung
einer Staubabsaugung kann Gefährdungen
durch Staub verringern.
4. Verwendung und Behandlung des
Elektrowerkzeugs
a) Überlasten Sie das Gerät nicht. Verwenden
Sie für Ihre Arbeit das dafür bestimmte
Elektrowerkzeug. Mit dem passenden Elektro-
werkzeug arbeiten Sie besser und sicherer im
angegebenen Leistungsbereich.
b) Benutzen Sie kein Elektrowerkzeug, dessen
Schalter defekt ist. Ein Elektrowerkzeug, das
sich nicht mehr ein- oder ausschalten lässt, ist
gefährlich und muss repariert werden.
c) Ziehen Sie den Stecker aus der Steckdose
und / oder entfernen Sie den Akku, bevor Sie
Geräteeinstellungen vornehmen, Zubehörteile wechseln oder das Gerät weglegen. Diese
Vorsichtsmaßnahme verhindert den unbeabsichtigten Start des Elektrowerkzeuges.
d) Bewahren Sie unbenutzte Elektrowerkzeuge
außerhalb der Reichweite von Kindern auf.
■ 24 │ DE
│AT│
CH
FAAS 12 B1
Page 29

Lassen Sie Personen das Gerät nicht
benutzen, die mit diesem nicht vertraut sind
oder diese Anweisungen nicht gelesen
haben. Elektrowerkzeuge sind gefährlich, wenn
sie von unerfahrenen Personen benutzt werden.
e) Pflegen Sie Elektrowerkzeuge mit Sorgfalt.
Kontrollieren Sie, ob bewegliche Teile
einwandfrei funktionieren und nicht klemmen,
ob Teile gebrochen oder so beschädigt sind,
dass die Funktion des Elektrowerkzeuges
beeinträchtigt ist. Lassen Sie beschädigte
Teile vor dem Einsatz des Gerätes reparieren.
Viele Unfälle haben ihre Ursache in schlecht
gewarteten Elektrowerkzeugen.
f) Halten Sie Schneidwerkzeuge scharf und
sauber. Sorgfältig gepflegte Schneidwerkzeuge
mit scharfen Schneidkanten verklemmen sich
weniger und sind leichter zu führen.
erwenden Sie Elektrowerkzeug, Zubehör,
g) V
Einsatzwerkzeuge usw. entsprechend diesen
Anweisungen. Berücksichtigen Sie dabei die
Arbeitsbedingungen und die auszuführende
Tätigkeit. Der Gebrauch von Elektrowerkzeugen
für andere als die vorgesehenen Anwendungen
kann zu gefährlichen Situationen führen.
5. Service
a) L
assen Sie Ihr Elektrowerkzeug nur von qualifi-
ziertem Fachpersonal und nur mit Original-Ersatzteilen reparieren. Damit wird sichergestellt, dass
die Sicherheit des Elektrowerkzeugs erhalten bleibt.
Gerätespezifische
Sicherheitshinweise für Säbelsägen
■ Halten Sie das Elektrowerkzeug an den isolierten
Griffflächen, wenn Sie Arbeiten ausführen, bei
denen das Elektrowerkzeug verborgene Stromleitungen oder das eigene Netzkabel treffen kann.
Der Kontakt mit einer spannungsführenden Leitung
kann auch metallene Geräteteile unter Spannung
setzen und zu einem elektrischen Schlag führen.
■ Tragen Sie eine Staubschutzmaske!
Verwendung und Behandlung des
Akkuwerkzeugs
a) Laden Sie die Akkus nur in Ladegeräten auf,
die vom Hersteller empfohlen werden. Für
ein Ladegerät, das für eine bestimmte Art von
Akkus geeignet ist, besteht Brandgefahr, wenn
es mit anderen Akkus verwendet wird.
b) Verwenden Sie nur die dafür vorgesehenen
Akkus in den Elektrowerkzeugen. Der Gebrauch von anderen Akkus kann zu Verletzungen und Brandgefahr führen.
c) Halten Sie den nicht benutzten Akku fern von
Büroklammern, Münzen, Schlüsseln, Nägeln,
Schrauben oder anderen kleinen Metallgegenständen, die eine Überbrückung der
Kontakte verursachen könnten. Ein Kurzschluss
zwischen den Akkukontakten kann Verbrennungen oder Feuer zur Folge haben.
d) Bei falscher Anwendung kann Flüssigkeit aus
dem Akku austreten. Vermeiden Sie den Kontakt damit. Bei zufälligem Kontakt mit Wasser
abspülen. Wenn die Flüssigkeit in die Augen
kommt, nehmen Sie zusätzlich ärztliche Hilfe
in Anspruch. Austretende Akkuflüssigkeit kann
zu Hautreizungen oder Verbrennungen führen.
VORSICHT! EXPLOSIONSGEFAHR!
Laden Sie nicht aufladbare Batterien
niemals auf.
Schützen Sie den Akku vor Hitze, z.
B. auch vor dauernder Sonneneinstrahlung, Feuer, Wasser und
Feuchtigkeit. Es besteht Explosionsge-
fahr.
Sicherheitshinweise für Ladegeräte
■ Dieses Gerät kann von Kindern ab 8 Jahren
und darüber sowie von Personen mit verringerten physischen, sensorischen oder mentalen
Fähigkeiten oder Mangel an Erfahrung und
Wissen benutzt werden, wenn sie beaufsichtigt
oder bezüglich des sicheren Gebrauchs des
Gerätes unterwiesen wurden und die daraus
resultierenden Gefahren verstehen. Kinder
dürfen nicht mit dem Gerät spielen. Reinigung
und Benutzer-Wartung dürfen nicht von Kindern
ohne Beaufsichtigung durchgeführt werden.
Das Ladegerät ist nur für den Betrieb im
Innenbereich geeignet.
FAAS 12 B1
DE│AT│CH
│
25 ■
Page 30

■ Wenn die Netzanschlussleitung dieses Gerätes
beschädigt wird, muss sie durch den Hersteller
oder seinen Kundendienst oder eine ähnlich
qualifizierte Person ersetzt werden, um Gefährdungen zu vermeiden.
Arbeitshinweise zum Sägen
■ Prüfen Sie das zu bearbeitende Material auf
Fremdkörper wie Nägel, Schrauben etc. und
entfernen Sie diese.
■ Schalten Sie das Gerät sofort aus, wenn das
Sägeblatt verklemmt. Spreizen Sie den bereits
gesägten Spalt mit einem geeigneten Werkzeug
und ziehen Sie die Säbelsäge heraus.
■ Sägen Sie das Material mit gleichmäßigem
Vorschub.
Originalzubehör / -zusatzgeräte
■ Benutzen Sie nur Zubehör und Zusatzgeräte,
die in der Gebrauchsanweisung angegeben
sind. Der Gebrauch anderer als in der Bedie-
nungsanleitung empfohlener Einsatzwerkzeuge
oder anderen Zubehörs kann eine Verletzungsgefahr für Sie bedeuten.
Informationen zu Sägeblättern
Sie können jedes Sägeblatt verwenden, vorausgesetzt, es ist mit der passenden Aufnahme - ½“
(12,7 mm) Universalschaft versehen. Es sind für
jeden Einsatzzweck Ihrer Säbelsäge optimierte
Sägeblätter in verschiedenen Längen im Handel
erhältlich.
HINWEIS
► TPI = teeth per inch = die Anzahl der Zähne
je 2,54 cm
Vor der Inbetriebnahme
Akku-Pack laden
VORSICHT!
► Ziehen Sie immer den Netzstecker, bevor
Sie den Akku-Pack
Ladegerät nehmen bzw. einsetzen.
■ Laden Sie den Akku-Pack
Umgebungstemperatur unterhalb 10 °C oder
oberhalb 40 °C liegt.
♦ Stecken Sie den Akku-Pack
Ladegerät
♦ Stecken Sie den Netzstecker in die Steckdose.
Die Kontroll-LED
♦ Die grüne Kontroll-LED signalisiert Ihnen,
dass der Ladevorgang abgeschlossen und der
Akku-Pack einsatzbereit ist.
♦ Schieben Sie den Akku-Pack
ein.
♦ Schalten Sie das Schnell-Ladegerät
aufeinanderfolgenden Ladevorgängen für
mindestens 15 Minuten ab. Ziehen Sie dazu
den Netzstecker.
.
Akku-Pack ins Gerät
einsetzen / entnehmen
Akku-Pack einsetzen:
♦ Lassen Sie den Akku-Pack
einrasten.
Akku-Pack entnehmen:
♦ Drücken Sie die Taste zur Entriegelung und
entnehmen Sie den Akku-Pack
Akkuzustand prüfen
♦ Drücken Sie zum Prüfen des Akkuzustands
die Einschaltsperre und den EIN- / AUSSchalter
wird in der Akkuzustandsanzeige
angezeigt:
♦ ROT / ORANGE / GRÜN = maximale Ladung
/ Leistung
ROT / ORANGE = mittlere Ladung / Leistung
ROT = schwache Ladung – Akku aufladen
. Der Zustand bzw. die Restleistung
aus dem Akku-Schnell-
nie, wenn die
in das Schnell-
leuchtet rot.
in das Gerät
zwischen
in den Handgriff
.
wie folgt
■ 26 │ DE
│AT│
CH
FAAS 12 B1
Page 31

Haltebügel einsetzen /entnehmen
HINWEIS
► Das Einsetzen / Entnehmen des Haltebügels
ist bei montiertem Sägeblatt nicht
möglich.
Haltebügel einsetzen (siehe Abb. B–D):
♦ Drücken Sie die Entriegelungstaste
♦ Schieben Sie den Haltebügel über die Füh-
rungen der Fußplatte in das Gerät.
♦ Arretieren Sie die Entriegelungstaste .
Haltebügel entnehmen:
♦ Drücken Sie die Entriegelung
den Haltebügel nach vorne aus der Führung.
.
und ziehen Sie
Sägeblatt montieren / wechseln
Tragen Sie beim Einsetzen / Wechsel des Sägeblattes Schutzhandschuhe.
♦ Drehen Sie das Schnellspannfutter
dig in Pfeilrichtung und halten Sie es gedreht.
♦ Drücken Sie das benötigte Sägeblatt bis zum
Anschlag in das Schnellspannfutter
ACHTUNG!
► Die Zähne des Sägeblatts
nach unten zeigen!
vollstän-
.
müssen dabei
Inbetriebnahme
Ein- / ausschalten
Einschalten:
♦ Drücken Sie die Einschaltsperre
♦ Drücken Sie den EIN- / AUS-Schalter .
Ausschalten:
♦ Lassen Sie den EIN- / AUS-Schalter
Sägemethoden
A) Arbeiten ohne Haltebügel (siehe Abb. E):
■ Bei größeren Astdurchmessern oder Sägen von
Holz, Kunststoff und Baustoffen arbeiten Sie
OHNE Haltebügel. Das Sägestück muss an der
Fußplatte anliegen. Bewegen Sie die Säge bei
runden Werkstücken im Wiegeschnitt.
A1) Bündig sägen:
■ Mit flexiblen Sägeblättern, entsprechende Län-
ge vorausgesetzt, können Sie hervorstehende
Werkstücke wie z. B. Rohre unmittelbar an der
Wand absägen.
1. Legen Sie das Sägeblatt direkt an der Wand an.
2. Biegen Sie es durch seitlichen Druck auf die
Säbelsäge so, dass die Fußplatte
der Wand anliegt.
3. Schalten Sie das Gerät ein und sägen Sie das
Werkstück mit konstantem Druck ab.
.
los.
seitlich an
♦ Lassen Sie das Schnellspannfutter los, es
muss in seine Ausgangsposition zurückkehren.
Das Sägeblatt ist nun verriegelt.
FAAS 12 B1
A2) Tauchsägen (siehe Abb. F):
VORSICHT! RÜCKSCHLAGGEFAHR!
► Tauchschnitte dürfen nur in weichen Werkstof-
fen (Holz o. ä.) durchgeführt werden.
1. Setzen Sie die Säbelsäge mit der Unterkante der
Fußplatte
Sie das Gerät ein.
2. Kippen Sie die Säbelsäge nach vorn und
tauchen mit dem Sägeblatt in das Werkstück ein.
3. Stellen Sie die Säbelsäge senkrecht und sägen
Sie weiter entlang der Schnittlinie.
B) Arbeiten mit Haltebügel (siehe Abb. G):
♦ Bewegen Sie die Säge mit leichtem Druck nach
unten.
auf das Werkstück auf. Schalten
DE│AT│CH
│
27 ■
Page 32

Wartung und Reinigung
WARNUNG! VERLETZUNGSGEFAHR!
Schalten Sie vor allen Arbeiten am
Gerät das Gerät aus und entnehmen
Sie den Akku.
■ Entfernen Sie vor allen Arbeiten am Elektrowerk-
zeug stets das Sägeblatt.
■ Halten Sie das Gerät und die Lüftungsschlitze
stets sauber. Bei verstopften Lüftungsschlitzen
droht eine Überhitzung und / oder eine Beschädigung des Gerätes.
■ Reinigen Sie das Gerät nach Abschluss der
Arbeit.
■ Es dürfen keine Flüssigkeiten in das Innere
des Gerätes gelangen. Verwenden Sie zum
Reinigen des Gehäuses ein Tuch. Verwenden
Sie niemals Benzin, Lösungsmittel oder Reiniger,
die Kunststoff angreifen.
■ Reinigen Sie die Sägeblattaufnahme ggf. mit ei-
nem Pinsel oder durch Ausblasen mit Druckluft.
■ Soll ein Lithium-Ionen-Akku längere Zeit gela-
gert werden, muss regelmäßig der Ladezustand
kontrolliert werden. Der optimale Ladezustand
liegt zwischen 50 % und 80 %. Das optimale
Lagerungsklima ist kühl und trocken.
Garantie der
Kompernaß Handels GmbH
Sehr geehrte Kundin, sehr geehrter Kunde,
Sie erhalten auf dieses Gerät 3 Jahre Garantie ab
Kaufdatum. Im Falle von Mängeln dieses Produkts
stehen Ihnen gegen den Verkäufer des Produkts
gesetzliche Rechte zu. Diese gesetzlichen Rechte
werden durch unsere im Folgenden dargestellte
Garantie nicht eingeschränkt.
Garantiebedingungen
Die Garantiefrist beginnt mit dem Kaufdatum. Bitte
bewahren Sie den Original-Kassenbon gut auf.
Diese Unterlage wird als Nachweis für den Kauf
benötigt.
Tritt innerhalb von drei Jahren ab dem Kaufdatum
dieses Produkts ein Material- oder Fabrikationsfehler auf, wird das Produkt von uns – nach unserer
Wahl – für Sie kostenlos repariert oder ersetzt.
Diese Garantieleistung setzt voraus, dass innerhalb
der Drei-Jahres-Frist das defekte Gerät und der
Kaufbeleg (Kassenbon) vorgelegt und schriftlich
kurz beschrieben wird, worin der Mangel besteht
und wann er aufgetreten ist.
Wenn der Defekt von unserer Garantie gedeckt ist,
erhalten Sie das reparierte oder ein neues Produkt
zurück. Mit Reparatur oder Austausch des Produkts
beginnt kein neuer Garantiezeitraum.
■ 28 │ DE
│AT│
CH
Garantiezeit und gesetzliche
Mängelansprüche
Die Garantiezeit wird durch die Gewährleistung
nicht verlängert. Dies gilt auch für ersetzte und
reparierte Teile. Eventuell schon beim Kauf vorhandene Schäden und Mängel müssen sofort nach
dem Auspacken gemeldet werden. Nach Ablauf
der Garantiezeit anfallende Reparaturen sind
kostenpflichtig.
FAAS 12 B1
Page 33

Garantieumfang
Das Gerät wurde nach strengen Qualitätsrichtlinien
sorgfältig produziert und vor Auslieferung gewissenhaft geprüft.
Die Garantieleistung gilt für Material- oder Fabrikationsfehler. Diese Garantie erstreckt sich nicht auf
Produktteile, die normaler Abnutzung ausgesetzt
sind und daher als Verschleißteile angesehen werden können oder für Beschädigungen an zerbrechlichen Teilen, z. B. Schalter, Akkus, Backformen
oder Teile die aus Glas gefertigt sind.
Diese Garantie verfällt, wenn das Produkt beschädigt, nicht sachgemäß benutzt oder gewartet wurde. Für eine sachgemäße Benutzung des Produkts
sind alle in der Bedienungsanleitung aufgeführten
Anweisungen genau einzuhalten. Verwendungszwecke und Handlungen, von denen in der Bedienungsanleitung abgeraten oder vor denen gewarnt
wird, sind unbedingt zu vermeiden.
Das Produkt ist nur für den privaten und nicht
für den gewerblichen Gebrauch bestimmt. Bei
missbräuchlicher und unsachgemäßer Behandlung,
Gewaltanwendung und bei Eingriffen, die nicht
von unserer autorisierten Service-Niederlassung
vorgenommen wurden, erlischt die Garantie.
Abwicklung im Garantiefall
Um eine schnelle Bearbeitung ihres Anliegens
zu gewährleisten, folgen Sie bitte den folgenden
Hinweisen:
■ Bitte halten Sie für alle Anfragen den Kassen-
bon und die Artikelnummer (z. B. IAN 12345)
als Nachweis für den Kauf bereit.
■ Die Artikelnummer entnehmen Sie bitte dem
Typenschild, einer Gravur, auf dem Titelblatt
ihrer Anleitung (unten links) oder als Aufkleber
auf der Rück- oder Unterseite.
■ Sollten Funktionsfehler oder sonstige Mängel
auftreten, kontaktieren Sie zunächst die nachfolgend benannte Serviceabteilung telefonisch
oder per E-Mail.
■ Ein als defekt erfasstes Produkt können Sie dann
unter Beifügung des Kaufbelegs (Kassenbon)
und der Angabe, worin der Mangel besteht und
wann er aufgetreten ist, für Sie portofrei an die
Ihnen mitgeteilte Service-Anschrift übersenden.
Auf www.lidl-service.com können Sie
diese und viele weitere Handbücher,
Produktvideos und Software herunterladen.
Service
WARNUNG!
► Lassen Sie Ihre Geräte von der Servicestelle
oder einer Elektrofachkraft und nur mit
Original-Ersatzteilen reparieren. Damit wird
sichergestellt, dass die Sicherheit des Gerätes
erhalten bleibt.
► Lassen Sie den Austausch des Steckers
oder der Netzleitung immer vom Hersteller
des Gerätes oder seinem Kundendienst
ausführen. Damit wird sichergestellt, dass die
Sicherheit des Gerätes erhalten bleibt.
HINWEIS
► Nicht aufgeführte Ersatzteile (wie z. B. Akku,
Schalter oder Haltebügel) können Sie über
unsere Callcenter bestellen.
Service Deutschland
Tel.: 0800 5435 111 (Kostenfrei aus dem
dt. Festnetz/Mobilfunknetz)
E-Mail: kompernass@lidl.de
Service Österreich
Tel.: 0820 201 222 (0,15 EUR/Min.)
E-Mail: kompernass@lidl.at
Service Schweiz
Tel.: 0842 665566 (0,08 CHF/Min.,
Mobilfunk max. 0,40 CHF/Min.)
E-Mail: kompernass@lidl.ch
IAN 285192
FAAS 12 B1
DE│AT│CH
│
29 ■
Page 34

Importeur
Bitte beachten Sie, dass die folgende Anschrift
keine Serviceanschrift ist. Kontaktieren Sie zunächst
die benannte Servicestelle.
KOMPERNASS HANDELS GMBH
BURGSTRASSE 21
DE - 44867 BOCHUM
DEUTSCHLAND
www.kompernass.com
Entsorgung
Die Verpackung besteht aus umwelt-
freundlichen Materialien, die Sie über
die örtlichen Recyclingstellen entsorgen
können.
Werfen Sie Elektrowerkzeuge nicht
in den Hausmüll!
Gemäß Europäischer Richtlinie 2012/19/EU
müssen verbrauchte Elektrowerkzeuge getrennt
gesammelt und einer umweltgerechten Wiederverwertung zugeführt werden.
Werfen Sie Akkus nicht in den
Hausmüll!
Defekte oder verbrauchte Akkus müssen gemäß
Richtlinie 2006/66/EC recycelt werden. Geben
Sie Akku-Pack und / oder das Gerät über die angebotenen Sammeleinrichtungen zurück.
Über Entsorgungsmöglichkeiten für ausgediente
Elektrowerkzeuge / Akku-Packs informieren Sie sich
bitte bei Ihrer Gemeinde- oder Stadtverwaltung.
OriginalKonformitätserklärung
Wir, KOMPERNASS HANDELS GMBH,
Dokumenten- verantwortlicher: Herr Semi Uguzlu,
BURGSTR. 21, DE - 44867 BOCHUM,
DEUTSCHLAND, erklären hiermit, dass dieses
Produkt mit den folgenden Normen, normativen
Dokumenten und EG-Richtlinien übereinstimmt:
Maschinenrichtlinie
(2006 / 42 / EG)
Elektromagnetische Verträglichkeit
(2014 / 30 / EU)
RoHS-Richtlinie
(2011 / 65 / EU)*
*Die alleinige Verantwortung für die Ausstellung
dieser Konformitätserklärung trägt der Hersteller.
Der oben beschriebene Gegenstand der Erklärung
erfüllt die Vorschriften der Richtlinie 2011/65/EU
des Europäischen Parlaments und des Rates vom
8. Juni 2011 zur Beschränkung der Verwendung
bestimmter gefährlicher Stoffe in Elektro- und
Elektronikgeräten.
Angewandte harmonisierte Normen:
EN 60745-1:2009/A11:2010
EN 60745-2-11:2010
EN 62233:2008
EN 60335-1:2012/A11:2014
EN 60335-2-29:2004/A2:2010
EN 55014-1:2006/A2:2011
EN 55014-2:2015
EN 61000-3-2:2014
EN 61000-3-3:2013
Typ / Gerätebezeichnung:
Akku-Astsäge FAAS 12 B1
Herstellungsjahr: 03 - 2017
Seriennummer: IAN 285192
Bochum, 20.03.2017
■ 30 │ DE
│AT│
CH
Semi Uguzlu
- Qualitätsmanager Technische Änderungen im Sinne der Weiterentwicklung sind vorbehalten.
FAAS 12 B1
Page 35

KOMPERNASS HANDELS GMBH
BURGSTRASSE 21
DE - 44867 BOCHUM
DEUTSCHLAND
www.kompernass.com
Versione delle informazioni · Last Information Update
Stand der Informationen:
03 / 2017 · Ident.-No.: FAAS12B1-012017-1
IAN 285192
 Loading...