

Page 1
Instruction Manual
September 2015
Types N551 and N851
Types N551 and N851 Snappy Joe™ Emergency
Shutoff Valves
WARNING
!
Failure to follow these instructions or to
properly install and maintain this equipment
could result in an explosion and/or re
causing property damage and personal injury
or death.
Fisher® equipment must be installed,
operated and maintained in accordance
with federal, state and local codes
and Emerson Process Management
Regulator Technologies, Inc. (Emerson™)
instructions. The installation in most
states must also comply with NFPA No. 58
or ANSI K61.1 standards.
Only personnel trained in the proper
procedures, codes, standards and
regulations of the LPG or anhydrous
ammonia (NH3) industries should install and
service this equipment.
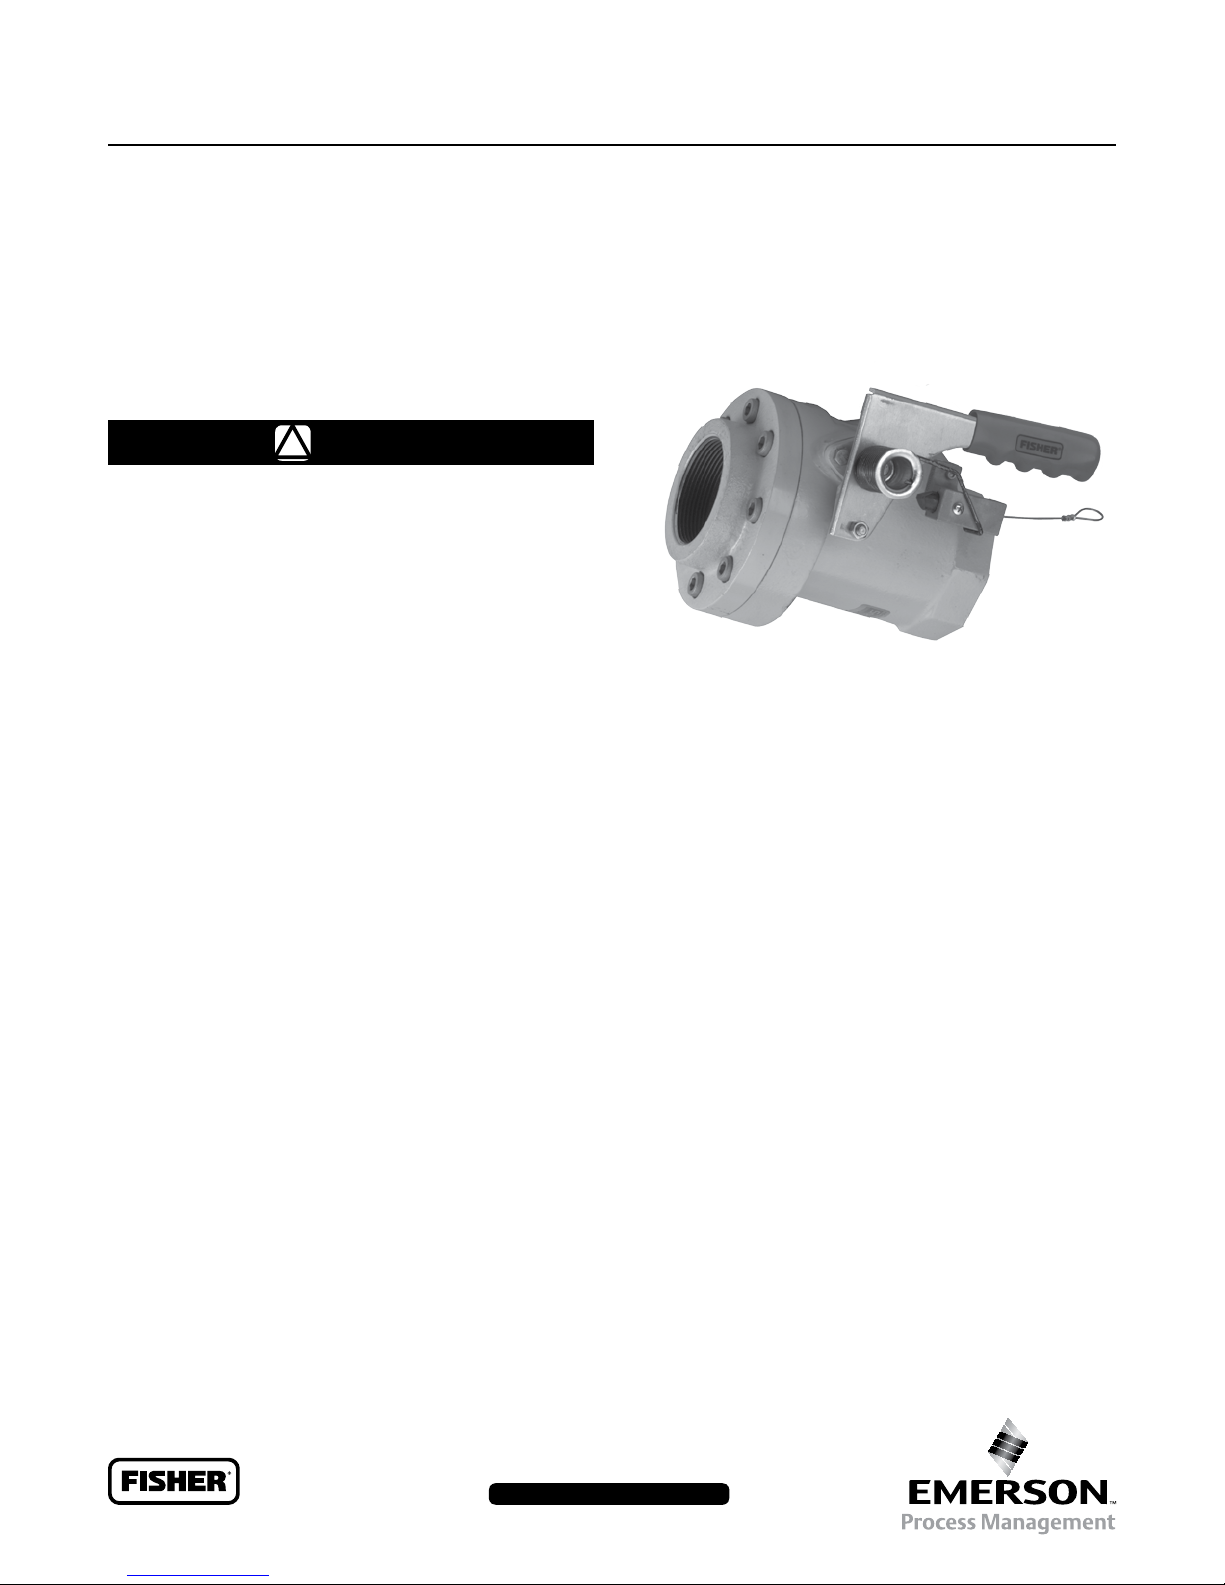
Figure 1. Type N551 in Closed Position
Introduction
Scope of the Manual
This manual provides installation and maintenance
instruction for the Types N551 and N851 Emergency Shutoff
Valves and Accessories.
Description
Type N551 Snappy Joe (Figure 1) emergency shutoff valve is
UL® Listed for service in Propane or Anhydrous Ammonia (NH3).
Type N851 emergency shutoff valve is intended for all other
compressed gas service. Reference to Type N551 also refers to
Type N851 unless otherwise specied.
UL® is a mark owned by Underwriters Laboratories.
www.fisherregulators.com
The valves may be installed on both ends of transfer hoses
where the hose connects the bulk plant piping to the bobtail,
transport or tank car. They provide a quick way of shutting
off gas ow in the event of a hose rupture and meet the
requirements for such service when correctly installed with
a remote release and proper piping support. The Type N551
valve is lever operated, latch-open and quick closing valve. A
fusible element in the latch melts if the temperature reaches
212°F / 100°C, allowing the valve to close.
The following accessories are also covered:
Type P164B – Cable Release Assembly
Type P327D – Remote Pneumatic Release Assembly
D450343T012
Page 2

Types N551 and N851
Specifications
The Specifications table lists specifications for the Types N551 and N851 valve which is designed for butane, propane
or NH
service at ambient temperatures. Contact your local Sales Office if the valve is to be used on any other service,
3
fluid, compressed gas or temperature condition.
TYPE BODY SIZES, NPS*
N551-10, N851-10, N851K-10
N551-16, N851-16, N851K-16
N551-24, N851-24, N851K-24
Maximum Inlet Pressure: 400 psig / 27.6 bar
1. FFKM (Kalrez®) gasket and seals.
2. The pressure limits in this Instruction Manual and any applicable standard or code limitation should not be exceeded.
* Nominal Pipe Size.
Operation
(1)
(1)
(1)
CAUTION
1-1/4 FNPT 150 / 568
2 FNPT 295 / 1117
3 FNPT 850 / 3127
(2)
Temperature Capabilities: -20 to 160°F / -29 to 71°C
Installation
Shutoff Direction
The valves shall be installed in the fixed piping between a
The Type N551 handle and shaft may break if
the valve is forced open against the gas ow
and before pressure is equalized on each
side of the main valve disc.
storage tank and the transfer hose connection at the truck or
tank car loading/unloading area. They can be placed in a line
used either for filling or withdrawing from the storage tank
(or both). The valve shall be installed to shutoff flow from the
tank towards the hose, enabling the valve to control product
To Open a Closed Valve:
loss in case of a hose break.
Close a shutoff valve downstream of the Type N551. Pull
the Type N551 handle counterclockwise. There will be an
opening as inlet pressure helps hold the valve disc closed
against the seat. The initial opening force on the handle
opens a pilot valve in the main valve disc, permitting
pressure to build-up downstream. When differential pressure
across the main disc has been reduced, the Type N551 can
be opened without further difficulty by continuing to lift the
handle to the open position. When the handle is fully open
(handle perpendicular to the pipe) the latch engages to hold
the valve open.
The Type N551 valve is a spring closed (aided
by pressure) and shutoff ow in one direction
only. THE NAMEPLATE FLOW ARROW SHOWS
FLOW DIRECTION FOR VALVE SHUTOFF (see
Figure 6). The arrow shall point to the hose
connection. Improper ow direction will not
shutoff ow through the line.
When installed in horizontal piping, install with the nameplate
up. The valve can be installed in vertical piping with the flow
CAUTION
arrow pointing to the desired flow direction for valve shutoff.
In some cases the normal flow through the valve may be
Because the valve is spring closed (aided by
opposite the shutoff direction (like a back check valve).
pressure), the handle can snap down with
considerable force when closing. Keep hands
and ngers away from the handle as it closes.
To Close an Open Valve:
Pushing the handle down (handle parallel to the pipe) will
close the valve.
From a remote location, pulling on the remote cable or
exhausting pneumatic pressure from the Type P327D will retract
the plunger allowing the Type N551 to close. If emergency
conditions cause the fusible element to reach a temperature
of 212°F / 100°C, the element, which attaches the handle to
the shaft, pulls apart and allows the valve to close.
Bulkhead Protection
The valve should be installed near the hose connection, but
shall be positioned so that any undue strain resulting from a
hose pull cannot shear the valve or its inlet piping from the
storage area piping. The piping shall always be firmly supported
and anchored to be sure of meeting the requirement.
One preferred method of installation is shown in Figure 2
where the pipe connection to the valve and to the hose
coupling is securely anchored in a solid bulkhead.
A bobtail truck can provide enough pull on the hose
connection to cause a break in the system. That break must
not occur between the Type N551 and the storage tank.
PROPANE FLOW AT 2 psi / 0.14 bar
DIFFERENTIAL, GPM / l/min
WARNING
!
®
Kalrez
is a mark owned by E.I. Du Pont de Nemours and Co..
2
Page 3

HOSE CONNECTION
Types N551 and N851
12 / 305
OR MORE
HOSE CONNECTION
T20874
Figure 2. Typical Installation of Type N551 Using Remote Cable Release
Fusible Element Location
A fusible element that will close the Type N551 shall be located
within five feet of the hose connection. If the Type N551 is placed
within five feet of the hose connection, this requirement is met.
If not, an additional fusible element must be provided near the
hose coupling which will activate a remote release.
Remote Release Installation
In all installations a remote release shall be connected to the
latch on all emergency valves at the bulkhead. The remote
release has to extend to a place where it can be easily reached
to close the Type N551 valve(s) in the event that an emergency
makes the valve(s) inaccessible. The remote release shall
shutdown all emergency valves when activated. Remote
release activation may be by cable or pneumatic hook-up.
Cable Hook-Ups
WARNING
!
Remote release cables shall be installed so
that they will close the Type N551 valve(s)
when pulled from the farthest remote location.
Cable shall operate smoothly, over pulleys
and/or through conduit. Do not kink cable or
run cable around sharp corners. If installed
in conduit, keep water out of conduit. Frozen
water, dirt or dried mud in the conduit will
render the remote release inoperable.
Remote releases used on Type N551 valve
shall not:
(a) be made from plastic or ber rope;
(b) have any kind of fusible link which could
melt and prevent the cable from pulling
the Type N551 latch.
NAMEPLATE UP
EMERGENCY SHUTOFF
VALVE TYPE N551
REMOTE CABLE TO
SAFE LOCATION
FIXED PIPING
In. / mm
To provide a remote release, aircraft cable can be connected
to the short looped cable on the valve and run to the remote
release point over pulleys or through conduit. Adjust the cable
so that minimal pull is required to close the emergency valves.
Type P164B Cable Installation
To connect a Type P164B remote release assembly, which is
supplied with 50 ft. / 15 m of cable:
1. Run the inner cable and housing assembly to the
remote release point. Leave enough slack on each end
for a smooth, flowing path, without sharp bends in the
cable, between the Type N551 latch block and remote
release handle.
2. If it is necessary to cut the cable to a shorter length,
pull about one foot of inner cable from the Type N551
latch block cable end (end with the 3/16 x 1/2 in. / 4.8
x 13 mm long cylindrical cast fitting, see Figure 3) from
the housing.
At the remote release end (other end of inner
cablehousing assembly), cut the housing and inner
cable at desired length. Push the excess inner cable
back through the housing so that the bare cable extends
from the remote release end.
3. Close the Type N551 valve. Handle parallel to pipe.
4. If necessary for additional working space, remove the long
end of the external spring from under the latch block. DO
NOT REMOVE SPRING FROM HANDLE.
5. Loosen the slotted screw, Figure 3, on the Type N551
valve’s latch block until the plunger can be pulled from
the latch block.
6. Disconnect the short looped cable and remove it.
7. Insert the Type P164B inner cable end cylindrical cast
fitting through the latch block rear conical hole and connect
the cylindrical cast fitting into the side slot in the plunger.
3
Page 4

Types N551 and N851
REMOTE RELEASE END
CLAMP
CLAMP
3/16 x 1/2 / 4.8 x 13
CYLINDRICAL
CAST FITTING
TYPE N551
LATCH
BLOCK END
CABLE
HOUSING NUT
Figure 3. Type P164B Cable Release Installation Schematic
PLUNGER
SLOTTED PLUNGER SCREW
8. Replace the plunger in the latch block, oriented so the
screw will enter the plunger slot. Tighten the screw.
9. The end of the cable housing and cable housing nut fit
into the conical end of the latch block. Pulling the excess
inner cable through the housing from the remote release
end will hold the housing in the latch block.
10. Mount the remote release cylinder assembly to a
suitable support at the remote release location (7/16 in. /
11 mm diameter mounting hole) but do not tighten the
mounting nut.
11. At the remote release end, strip about 3/4 in. / 19 mm of
vinyl cover from the cable housing end.
12. Insert the inner cable completely through the release
cylinder. Screw the bare cable housing end into the
remote release cylinder by rotating the cylinder. Tighten
the mounting nut.
13. Pull any slack from the inner cable, just tight enough so
that the latch is not activated, and cut the inner cable
off 1 in.
14. Insert the 1 in.
/ 25 mm
past the remote release cylinder end.
/ 25 mm
bare inner cable into the remote
release handle shaft. Push the remote release handle
completely into the remote release cylinder. Tighten
the handle set screw to secure the handle to the
inner cable.
CAUTION
Possible hand and nger pinch point
between closing Type N551 handle and
latch block. Handle closes quickly and with
extreme force. Keep hands and ngers away
from handle as it closes.
1 / 25
HANDLE
SET
SCREW
REMOTE RELEASE CYLINDER
MOUNTING NUT
In. / mm
15. Test the remote release and Type N551 operation
from the most remote location. Rotate handle
counterclockwise to open valve. Valve must stay
open. HANDLE AND VALVE MUST QUICKLY “SNAP”
CLOSED when (a) the remote release cable is pulled and
(b) handle is pushed closed from the open position.
WARNING
!
All open Type N551 emergency valve(s)
attached to the remote release must properly
close when the release cable is pulled.
Pneumatic Hook-Up
Type P327D Pneumatic Release
Block Installation
If several valves are installed at the same location, remote
release may be accomplished with the Type P327D pneumatic
release block which replaces the cable latch block installed on
the Type N551 valve.
To install the Type P327D, see Figure 4:
1. Close the Type N551 valve. Handle is parallel to
the pipe.
2. Remove the long end of the external spring from
under the latch block. DO NOT REMOVE SPRING
FROM HANDLE.
3. Remove latch bolt(s). Older valves will have 2 bolts.
DISCARD CABLE LATCH BLOCK.
4
Page 5

Types N551 and N851
T40337
5/32 / 4 ALLEN HEAD
WRENCH REQUIRED
Figure 4. Type P327D Pneumatic Cylinder Installation
TO HOSE
5/32 / 4 ALLEN HEAD
WRENCH REQUIRED
AIR SOURCE – 1/8 NPT
NAMEPLATE
TO TANK
In. / mm
4. Use a 5/32 in. / 4 mm Allen head wrench to screw
1/4 in. / 6.4 mm long bolt into bottom hole.
5. Tighten until bolt head seats firmly on body.
6. Place latch block on body with lower blind hole over bolt
in body.
7. Install 3/4 in. / 19 mm long bolt through second hole and
firmly tighten with 5/32 in. / 4 mm Allen head wrench.
8. Refasten long end of spring under latch block by
ROTATING 180 DEGREES CLOCKWISE.
9. Attach the remote air source to the cylinder end with
appropriate supply tubing and valving. A regulated
air supply of 30 to 70 psig / 2.1 to 4.8 bar to the
Type P327D pneumatic release cylinder is required for
proper operation.
CAUTION
Possible hand and nger pinch point
between closing Type N551 handle and
latch block. Handle closes quickly and with
extreme force. Keep hands and ngers away
from handle as it closes.
10. Test the remote release and Type N551 operation.
Rotate handle counter clockwise to open valve. Valve
must stay open. HANDLE AND VALVE MUST QUICKLY
“SNAP” CLOSED when (a) air pressure is exhausted
from Type P327D pneumatic remote release and (b) the
handle is pushed closed from the open position.
WARNING
!
All open Type N551 Emergency Valve(s)
attached to the remote pneumatic release
system must properly close when air
pressure is exhausted from the system.
Remote release controls must quickly
exhaust pressure from the supply line to
close emergency valves.
Optional Motion Release Cable
With either the cable or pneumatic remote release hookups, it is possible to connect an additional cable from the
Type N551’s operating handle to the truck along the transfer
hose(s). This cable would close the valve if the hose(s) is
stretched (driver does not disconnect) beyond a preselected
limit. The hook-up does not affect the normal operation of
the valve.
Motion Release Cable Installation
1. Connect a suitable release cable such as stainless steel
aircraft cable to a standard “S” hook. Attach the “S” hook
to the Type N551 handle as shown in Figure 5.
2. The cable should run through the bulkhead just below
and to the side of the pipe. The cable should be in line
with the operating lever, refer to Figure 5.
5
Page 6

Types N551 and N851
HOSE CONNECTION
12 / 305
OR MORE
T20995
BULKHEAD
TO TRUCK
Figure 5. Motion Release Cable Installation (Optional)
3. Leave enough slack in the cable to allow the Type N551
lever to move freely but not close during normal hose
movement or hook-up.
4. Run the cable along the hose. Tape or secure it to
the hose. Fasten the cable securely to the “truck” end
hose connection.
When the hose stretches more than the amount of slack left
in the cable, the tightening cable will pull the lever down and
close the Type N551 valve.
FIXED PIPING
NAMEPLATE UP
EMERGENCY SHUTOFF
VALVE TYPE N551
REMOTE ACTIVATION METHOD,
CABLE OR PNEUMATIC,
ATTACHMENT LOCATION
CABLE
1 / 25
“S” HOOK
slowly, packing replacement (refer to Type N551
Packing Removal/Replacement Instruction Manual,
D450355T012) may be required.
2. Make sure that the lever, latch and release are
working smoothly. The latch parts and lever are easily
accessible for replacement or repair by removing the
securing bolts.
3. Check for packing and joint leakage.
Replacing Internal Parts
IN. / mm
Maintenance
WARNING
!
Only qualied service personnel should
attempt to repair these valves. Before starting
any type of repair, close off the upstream
valves and remove all pressure from both the
inlet and outlet of the Type N551 Emergency
Shutoff Valve.
At least once a month, inspect and check the
following things:
1. See that the remote release is properly connected,
works freely and is not worn. Operate the release to
make certain it closes the valve. If the valve closes
6
Verify that the Emergency Shutoff Valve is Type N551 and
not the previous version Type N550 by confirming that it is
marked with “1” as shown in Figure 7.
Type N551 can be repaired in the field. However, due to the
special fire resistant seals and assembly techniques, repairs
should be done only by trained personnel. If repair should
become necessary, contact your local LPG Equipment
Distributor for information and assistance.
Only parts manufactured by Emerson™ should be used for the
repair of Fisher® Type N551 Valve. Be sure to give the complete
type number of the Type N551 when corresponding with your
local distributor.
Type N551 valve that have been disassembled for repair
must be tested for proper operation before being returned
to service.
Page 7

Types N551 and N851
39
WITH ITEM 46 (NUT)
NOT SHOWN
41
TORQUE:
36
37
63
64
38
21
20
35
34
9
33
32
22
3 TO 4 FT-LBS /
4.1 TO 5.4 N•m
L2
TORQUE:
19
10 TO 15 FT-LBS /
13.6 TO 20.3 N•m
TORQUE:
L1
6 TO 7 FT-LBS /
8.1 TO 9.5 N•m
61
S1
23
62
43
TORQUE:
8 TO 9 FT-LBS /
10.8 TO 12.2 N•m
24
15
16
25
27
28 29
L2
ERAA06717_AC
APPLY LUBRICANT (L) OR SEALANT (S)
L1 = High Temperature Anti-Seize and Extreme Pressure Nickel Lubricant
L2 = Multi-Purpose Polytetrauoroethylene (PTFE) Lubricant
S1 = Medium Strength Threadlocker
1. Lubricants and sealants must be selected such that they meet the temperature requirements.
30 65
L2
L2
(1)
31
18
L2
:
TYPE N551-10 ONLY
47
45
TORQUE:
3 TO 4 FT-LBS /
4.1 TO 5.4 N•m
40
41
L1
8
17
42
L2
TORQUE:
40 TO 55 FT-LBS / 54.2 TO 74.6 N•m FOR TYPE N551-10
50 TO 60 FT-LBS / 67.8 TO 81.3 N•m FOR TYPE N551-16
1
5
4
7
6
L2
2
3 L1
Figure 6. Type N551 Shutoff Valve Assemblies
Figure 7. Type N551 body marked with “1”
7
Page 8

Types N551 and N851
Parts List
Key Description Part Number
Packing Assembly Kit RCN551T0012
Includes packing stack (key 30), O-ring (key 65)
and two washers (key 29).
1 Body, Ductile iron
Type N551-10 (NPS 1-1/4 FNPT) ERSA05033A0
Type N551-16 (NPS 2 FNPT) ERSA05031A0
Type N551-24 (NPS 3 FNPT) ERSA05032A0
2 Flange, Ductile iron
Type N551-10 (NPS 1-1/4 FNPT) ERAA00718A0
Type N551-16 (NPS 2 FNPT) T12783T0YW2
Type N551-24 (NPS 3 FNPT) T20699T0YW2
3 Cap Screw
Type N551-10 (NPS 1-1/4 FNPT) (4 Required) T12864T0012
Type N551-16 (NPS 2 FNPT) (4 Required) 1E760432992
Type N551-24 (NPS 3 FNPT) (8 Required) 1E760432992
4* Seat Ring, Stainless steel
Type N551-10 (NPS 1-1/4 FNPT) T12857T0012
Type N551-16 (NPS 2 FNPT) T12548T0012
Type N551-24 (NPS 3 FNPT) T12887T0012
5* Sealing Ring, Nitrile (NBR)
Type N551-10 (NPS 1-1/4 FNPT) T12858T0012
Type N551-16 (NPS 2 FNPT) T12547T0012
Type N551-24 (NPS 3 FNPT) T12891T0012
6* O-ring, Nitrile (NBR)
Type N551-10 (NPS 1-1/4 FNPT) 10A3800X032
Type N551-16 (NPS 2 FNPT) 1H8762X0022
Type N551-24 (NPS 3 FNPT) T12759T0012
7* Gasket, Graphite
Type N551-10 (NPS 1-1/4 FNPT) T12863T0012
Type N551-16 (NPS 2 FNPT) T12839T0012
Type N551-24 (NPS 3 FNPT) T12890T0012
8 Poppet Sub-Assembly
Type N551-10 (NPS 1-1/4 FNPT) T12964T0012
Type N551-16 (NPS 2 FNPT) T12965T0012
Type N551-24 (NPS 3 FNPT) T12966T0012
9 Pipe Plug T13718T0012
15 Shaft, Stainless steel
Type N551-10 (NPS 1-1/4 FNPT) ERSA05039A0
Type N551-16 (NPS 2 FNPT) ERSA05038A0
Type N551-24 (NPS 3 FNPT) ERSA05040A0
*Recommended spare part.
1. Applicable for Type N551-10 (NPS 1-1/4 FNPT) only.
Key Description Part Number
16 Sleeve, Nylon (PA)
Type N551-10 (NPS 1-1/4 FNPT) T12842T0012
Type N551-16 (NPS 2 FNPT) T12842T0012
Type N551-24 (NPS 3 FNPT) T12893T0012
17 Nameplate - - - - - - - - - - 18 Handle, Aluminum T20677T0012
19 Shoulder bolt, Alloy steel-plate T12853T0012
20 Nut, Carbon steel T1166228982
21 Roller, Nylon (PA) T12847T0012
22 Fuse link, Brass T13500T0012
23 Bolt, Zinc-plated steel 1B290524052
24 Retainer, Zinc-plated steel T12843T0012
25 Spring, 302 Stainless steel
Type N551-10 (NPS 1-1/4 FNPT) T12844T0012
Type N551-16 (NPS 2 FNPT) T12844T0012
Type N551-24 (NPT 3 FNPT) T13005T0012
27 Gland, 303/416 Stainless steel
Type N551-10 (NPS 1-1/4 FNPT) ERSA05036A0
Type N551-16 (NPS 2 FNPT) ERSA05036A0
Type N551-24 (NPS 3 FNPT) ERSA05037A0
28* Spring, 302 Stainless steel T12851T0012
29* Washer, Carbon steel (2 Required) T1207524082
30* Packing Stack T12854T0012
31* Follower, 174 Stainless steel T12841T0012
32 Retainer, Steel ERSA05035A0
33 Bolt, Stainless steel (2 Required) T12499T0012
34 Bushing T12551T0012
35 Washer, Nylon (PA) T12781T0012
36 Latch Block, Aluminum T13800T0012
37 Spring, 302 Stainless steel T13877T0012
38 Plunger, Polyester T12846T0012
39 Cable T12849T0012
40 Screw, Carbon steel 1E175828982
41 Bolt T12980T0012
42 Drive Screw, 18-8 Stainless steel (2 Required) 1A368228982
(1)
Adaptor Plate, Zinc-plated steel T12878T0012
43
(1)
Cap Screw 1D617032992
45
(1)
Nut (Not Shown) T1022724122
46
47 Handgrip T12928T0012
61 Spring, Mandrel T13826T0012
62 Spring, Torsion T20973T0012
63 Bolt, Alloy steel T13803T0012
64 Cap Screw, Carbon steel GE25968X012
65* O-ring, Nitrile (NBR) T1224006562
LPG Equipment
Emerson Process Management
Regulator Technologies, Inc.
USA - Headquarters
McKinney, Texas 75070 USA
Tel: +1 800 558 5853
Outside U.S.: +1 972 548 3574
For further information visit www.fisherregulators.com
The Emerson logo is a trademark and service mark of Emerson Electric Co. All other marks are the property of their prospective owners. Fisher is a mark owned by Fisher Controls International LLC,
a business of Emerson Process Management.
The contents of this publication are presented for informational purposes only, and while every effort has been made to ensure their accuracy, they are not to be construed as warranties or
guarantees, express or implied, regarding the products or services described herein or their use or applicability. We reserve the right to modify or improve the designs or specications of such
products at any time without notice.
Emerson Process Management Regulator Technologies, Inc. does not assume responsibility for the selection, use or maintenance of any product. Responsibility for proper selection, use and
maintenance of any Emerson Process Management Regulator Technologies, Inc. product remains solely with the purchaser.
©Emerson Process Management Regulator Technologies, Inc,. 2014, 2015; All Rights Reserved
 Loading...