


PRO-L-2
Table of contents
 Loading...
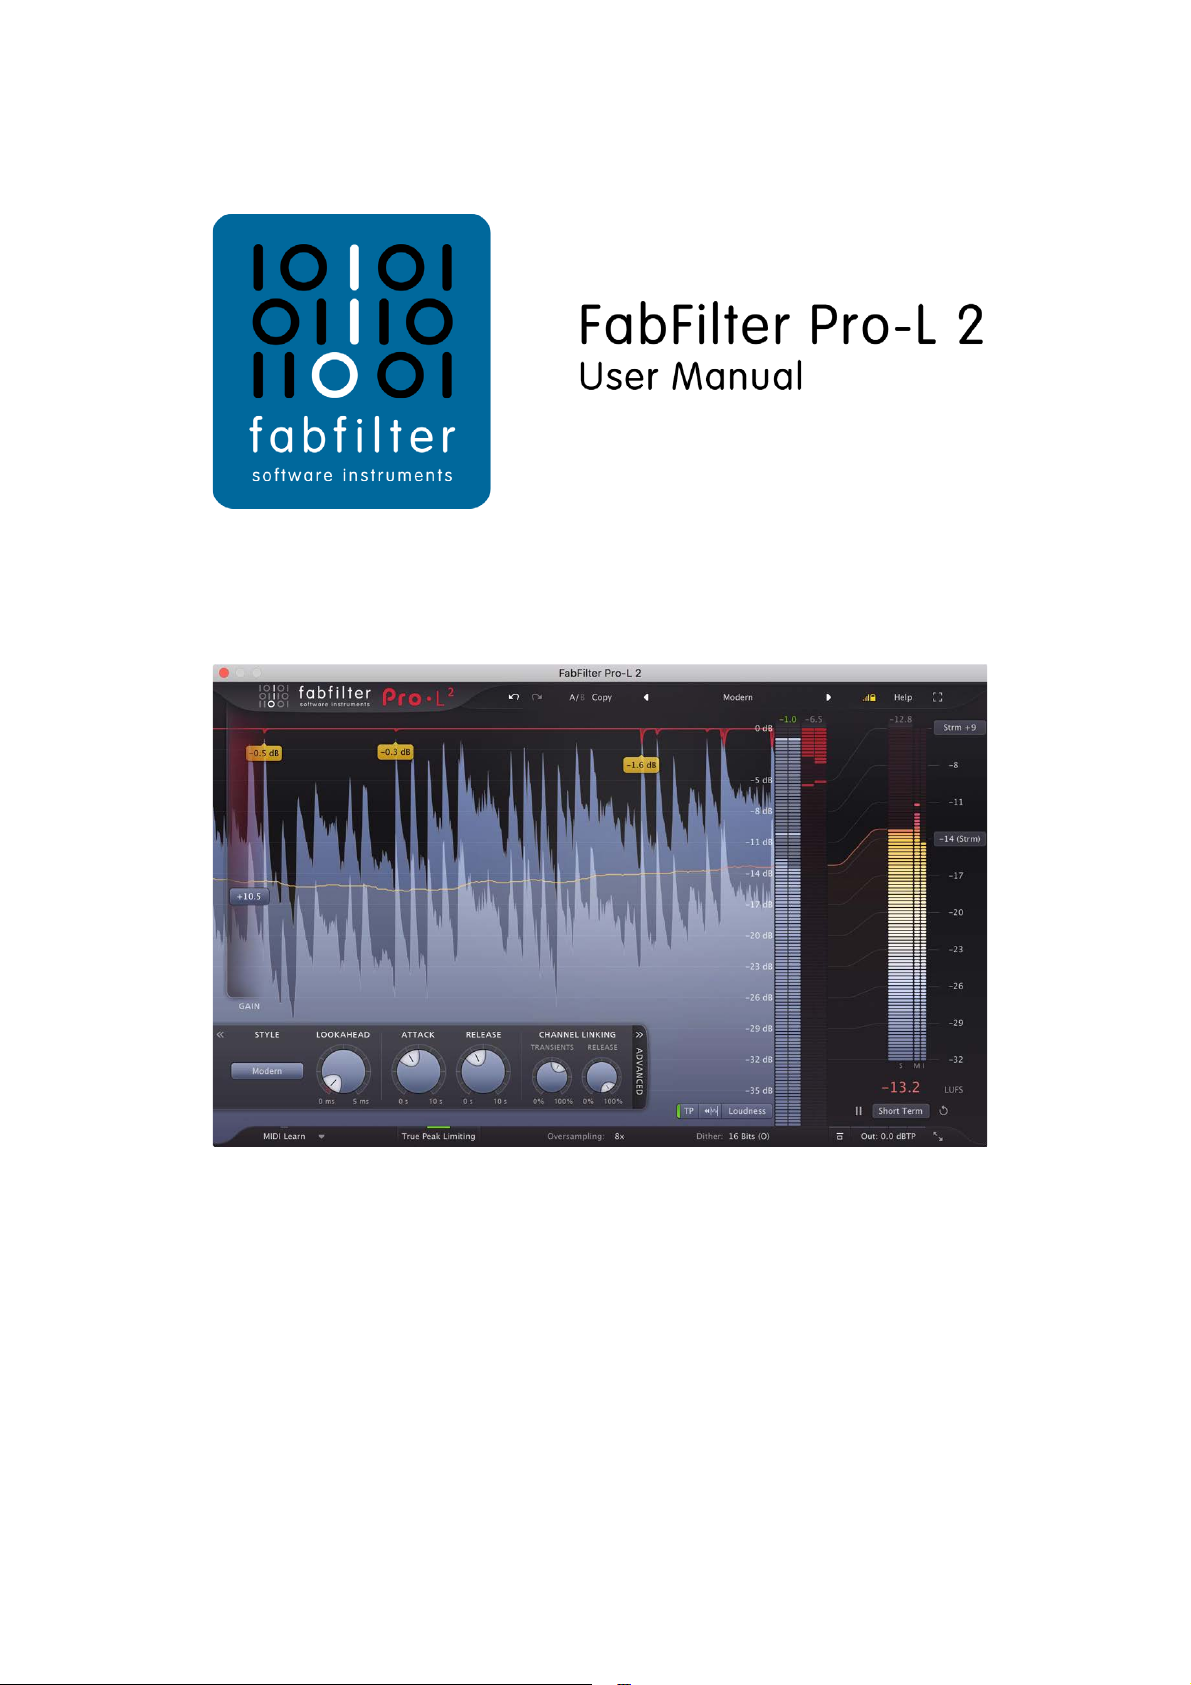
Table of contents
1

. . . . . . . . . . . . . . . . . . . . . . . . . . . . . . . . . . . . . . . . . . . . . . . . . . . . . . . . . . . . . . . . . . . . . . . . . . . . . . . 3
. . . . . . . . . . . . . . . . . . . . . . . . . . . . . . . . . . . . . . . . . . . . . . . . . . . . . . . . . . . . . . . . . . . . . . . . . . . . . . . 5
. . . . . . . . . . . . . . . . . . . . . . . . . . . . . . . . . . . . . . . . . . . . . . . . . . . . . . . . . . . . . . . . . . . . . . . . . . . . . . . 6
. . . . . . . . . . . . . . . . . . . . . . . . . . . . . . . . . . . . . . . . . . . . . . . . . . . . . . . . . . . . . . . . . . . . . . . . . . . . . . . 8
. . . . . . . . . . . . . . . . . . . . . . . . . . . . . . . . . . . . . . . . . . . . . . . . . . . . . . . . . . . . . . . . . . . . . . . . . . . . . . . 9
. . . . . . . . . . . . . . . . . . . . . . . . . . . . . . . . . . . . . . . . . . . . . . . . . . . . . . . . . . . . . . . . . . . . . . . . . . . . . . . 11
. . . . . . . . . . . . . . . . . . . . . . . . . . . . . . . . . . . . . . . . . . . . . . . . . . . . . . . . . . . . . . . . . . . . . . . . . . . . . . . 13
. . . . . . . . . . . . . . . . . . . . . . . . . . . . . . . . . . . . . . . . . . . . . . . . . . . . . . . . . . . . . . . . . . . . . . . . . . . . . . . 15
. . . . . . . . . . . . . . . . . . . . . . . . . . . . . . . . . . . . . . . . . . . . . . . . . . . . . . . . . . . . . . . . . . . . . . . . . . . . . . . 18
. . . . . . . . . . . . . . . . . . . . . . . . . . . . . . . . . . . . . . . . . . . . . . . . . . . . . . . . . . . . . . . . . . . . . . . . . . . . . . . 20
. . . . . . . . . . . . . . . . . . . . . . . . . . . . . . . . . . . . . . . . . . . . . . . . . . . . . . . . . . . . . . . . . . . . . . . . . . . . . . . 21
. . . . . . . . . . . . . . . . . . . . . . . . . . . . . . . . . . . . . . . . . . . . . . . . . . . . . . . . . . . . . . . . . . . . . . . . . . . . . . . 23
. . . . . . . . . . . . . . . . . . . . . . . . . . . . . . . . . . . . . . . . . . . . . . . . . . . . . . . . . . . . . . . . . . . . . . . . . . . . . . . 25
. . . . . . . . . . . . . . . . . . . . . . . . . . . . . . . . . . . . . . . . . . . . . . . . . . . . . . . . . . . . . . . . . . . . . . . . . . . . . . . 27
. . . . . . . . . . . . . . . . . . . . . . . . . . . . . . . . . . . . . . . . . . . . . . . . . . . . . . . . . . . . . . . . . . . . . . . . . . . . . . . 29
. . . . . . . . . . . . . . . . . . . . . . . . . . . . . . . . . . . . . . . . . . . . . . . . . . . . . . . . . . . . . . . . . . . . . . . . . . . . . . . 31
. . . . . . . . . . . . . . . . . . . . . . . . . . . . . . . . . . . . . . . . . . . . . . . . . . . . . . . . . . . . . . . . . . . . . . . . . . . . . . . 32
. . . . . . . . . . . . . . . . . . . . . . . . . . . . . . . . . . . . . . . . . . . . . . . . . . . . . . . . . . . . . . . . . . . . . . . . . . . . . . . 33
. . . . . . . . . . . . . . . . . . . . . . . . . . . . . . . . . . . . . . . . . . . . . . . . . . . . . . . . . . . . . . . . . . . . . . . . . . . . . . . 34
. . . . . . . . . . . . . . . . . . . . . . . . . . . . . . . . . . . . . . . . . . . . . . . . . . . . . . . . . . . . . . . . . . . . . . . . . . . . . . . 35
. . . . . . . . . . . . . . . . . . . . . . . . . . . . . . . . . . . . . . . . . . . . . . . . . . . . . . . . . . . . . . . . . . . . . . . . . . . . . . . 36
. . . . . . . . . . . . . . . . . . . . . . . . . . . . . . . . . . . . . . . . . . . . . . . . . . . . . . . . . . . . . . . . . . . . . . . . . . . . . . . 37
. . . . . . . . . . . . . . . . . . . . . . . . . . . . . . . . . . . . . . . . . . . . . . . . . . . . . . . . . . . . . . . . . . . . . . . . . . . . . . . 38
. . . . . . . . . . . . . . . . . . . . . . . . . . . . . . . . . . . . . . . . . . . . . . . . . . . . . . . . . . . . . . . . . . . . . . . . . . . . . . . 39
. . . . . . . . . . . . . . . . . . . . . . . . . . . . . . . . . . . . . . . . . . . . . . . . . . . . . . . . . . . . . . . . . . . . . . . . . . . . . . . 40
. . . . . . . . . . . . . . . . . . . . . . . . . . . . . . . . . . . . . . . . . . . . . . . . . . . . . . . . . . . . . . . . . . . . . . . . . . . . . . . 41
. . . . . . . . . . . . . . . . . . . . . . . . . . . . . . . . . . . . . . . . . . . . . . . . . . . . . . . . . . . . . . . . . . . . . . . . . . . . . . . 43
. . . . . . . . . . . . . . . . . . . . . . . . . . . . . . . . . . . . . . . . . . . . . . . . . . . . . . . . . . . . . . . . . . . . . . . . . . . . . . . 45
. . . . . . . . . . . . . . . . . . . . . . . . . . . . . . . . . . . . . . . . . . . . . . . . . . . . . . . . . . . . . . . . . . . . . . . . . . . . . . . 46
Table of Contents
About FabFilter Pro-L 2
Overview
Loading presets
Purchasing FabFilter Pro-L 2
Support
2
Introduction
Quick start
Using FabFilter Pro-L 2
Knobs and gain slider
Recommended workflow
Advanced settings
True peak limiting
Metering
Loudness metering
Oversampling
Dithering and noise shaping
Output options
Surround
Full Screen mode and resizing
MIDI learn
Undo, redo, A/B switch
Presets
Saving presets
How presets are stored
Purchasing FabFilter Pro-L 2
Entering your license key
Support
Upgrading to Pro-L 2
Manual installation
VST plug-in versions
External side chaining
License agreement
Acknowledgements
About FabFilter
About FabFilter Pro-L 2
transparency, adjustable look-ahead, attack and release settings, separate channel link settings for transients
3
The limiter is an indispendable tool in modern mastering and mixing, and there are a lot of different flavors
available on the market today. Some limiters try to be as transparent and 'safe' as possible, while others are
designed to just go loud. One limiter may work best on rock music, while another performs best on electronic
dance music.
FabFilter Pro-L 2 is a professional true peak limiter, that combines all these flavors and qualities in one plug-in,
making it suitable for any type of music/audio. It can be as transparent as needed, and can go as loud as you
want it to go. Equipped with excellent (loudness) metering, true peak limiting, surround support, oversampling
and dithering, Pro-L 2 is everything you need in a limiter.
New in version 2
At first glance, FabFilter Pro-L 2 looks quite similar to its predecessor, but you'll soon discover many exciting
new features and improvements that have been added to enhance your sound and workflow. Pro-L 2 features
four brand-new limiting algorithms, surround processing, true peak limiting, full-featured EBU R128 loudness
metering, and much more. Here's a list of the most important new features and improvements:
Four brand-new limiting algorithms: Modern (the new 'best for all' default algorithm), Aggressive (great
for EDM/dance), Bus (nice for drums, individual tracks etc; it's not meant to be transparent, rather the
opposite), and finally Safe (its goal is not loudness, but to be safe and distortion free at all times).
Surround support (up to 7.1.2 Dolby Atmos), including smart surround channel linking.
True peak limiting. When enabled, the final true peak level won't exceed the specified maximum true
peak output level of the plug-in.
Extensive loudness metering (Momentary, Short Term and Integrated), following the ITU-R BS.1770-4
and EBU R128 loudness metering standards (also supporting ATSC A/85 and TR-B32), including true peak
metering, LRA measurement, and customizable loudness meter scale and target levels.
Up to 32x oversampling.
New display modes with peak labels to show moments of high gain reduction.
Optional DC Offset filtering.
Optional external side chain triggering, useful for stem mastering.
Unity Gain option, to easily listen to the effect of the current limiting at unity gain level.
Audition Limiting option, to listen to the applied gain change (i.e. 'delta' signal) only.
AudioSuite 'Analyze' option in the Pro Tools AAX plug-in to analyze audio at current limiter/metering
settings without rendering.
Lots of new factory presets.
Other key features
And of course, all the goodness of the original Pro-L is still there: highest possible sound quality and

and release, dithering with three different noise shape settings, accurate and insightful metering with various
meter scales, GPU-powered graphics acceleration, double-click text entry of parameter values, Pro Tools
4
hardware control surfaces support, MIDI Learn, undo/redo and A/B comparison, extensive help file with
interactive help hints.
Upgrading to Pro-L 2
Upgrading from Pro-L version 1 to the new Pro-L 2 is safe and easy: installing Pro-L 2 will not replace or delete
the previous Pro-L 1 plug-in. Both versions will co-exist and can both be used at the same time. This ensures
that you can open old songs that use Pro-L 1 without problems! Of course, FabFilter Pro-L 2 opens all presets
from Pro-L 1 without problems. See Upgrading to Pro-L 2
for more information.
FabFilter Pro-L 2 is available in VST, VST3, AU (Audio Units), AAX Native and AudioSuite formats (all both 64bit and 32-bit), as well as RTAS (32-bit only), for Mac OS X and Windows.
Windows requirements
32-bit: Windows 10, 8, 7, Vista or XP
64-bit: Windows 10, 8, 7 or Vista (x64)
VST 2/3 host or Pro Tools
Next: Quick start
See Also
Using FabFilter Pro-L 2
Acknowledgements
Mac OS X requirements
OS X 10.6 or higher
AU or VST 2/3 host or Pro Tools
Intel processor

Quick start
5
The installer will copy the FabFilter Pro-L 2 plug-in into the common VST, VST 3, AU (macOS only) and Pro
Tools plug-in folders on your computer. On macOS, the global plug-in folders in /Library/Audio/Plug-Ins are
used.
In most cases, your host will then recognize the plugin automatically. However, if the instructions below do not
work, see Manual
Cubase
Choose an empty insert slot, for example in the Mixer, and select FabFilter Pro-L 2 from the menu that
appears. To use the MIDI features in Pro-L 2, create a new MIDI track and set its output to the Pro-L 2
instance you have just created. (The VST 3 version of Pro-L 2 can be found in the Dynamics section.)
Logic Pro
Choose an empty insert slot on one of your audio tracks, instrument tracks or buses and select FabFilter
Pro-L 2 from the pop-up menu. You will find FabFilter Pro-L 2 in the Audio Units > FabFilter section
(named FF Pro-L 2).
Ableton Live
In Session view, select the track you would like to place FabFilter Pro-L 2 on, for example by clicking the
track name. At the left top of Ableton Live's interface, click on the Plug-in Device Browser icon (third icon
from the top). From the plug-ins list, double-click FabFilter/FabFilter Pro-L 2, or drag it onto the track.
Pro Tools
Choose an empty insert slot on one of your audio tracks, instrument tracks or buses and select FabFilter
Pro-L 2 from the pop-up menu in the Dynamics section.
To begin, just open the plug-in and move the Gain slider. Enjoy!
Next: FabFilter Pro-L 2 overview
See Also
About FabFilter Pro-L 2
installation instead.

Overview
6
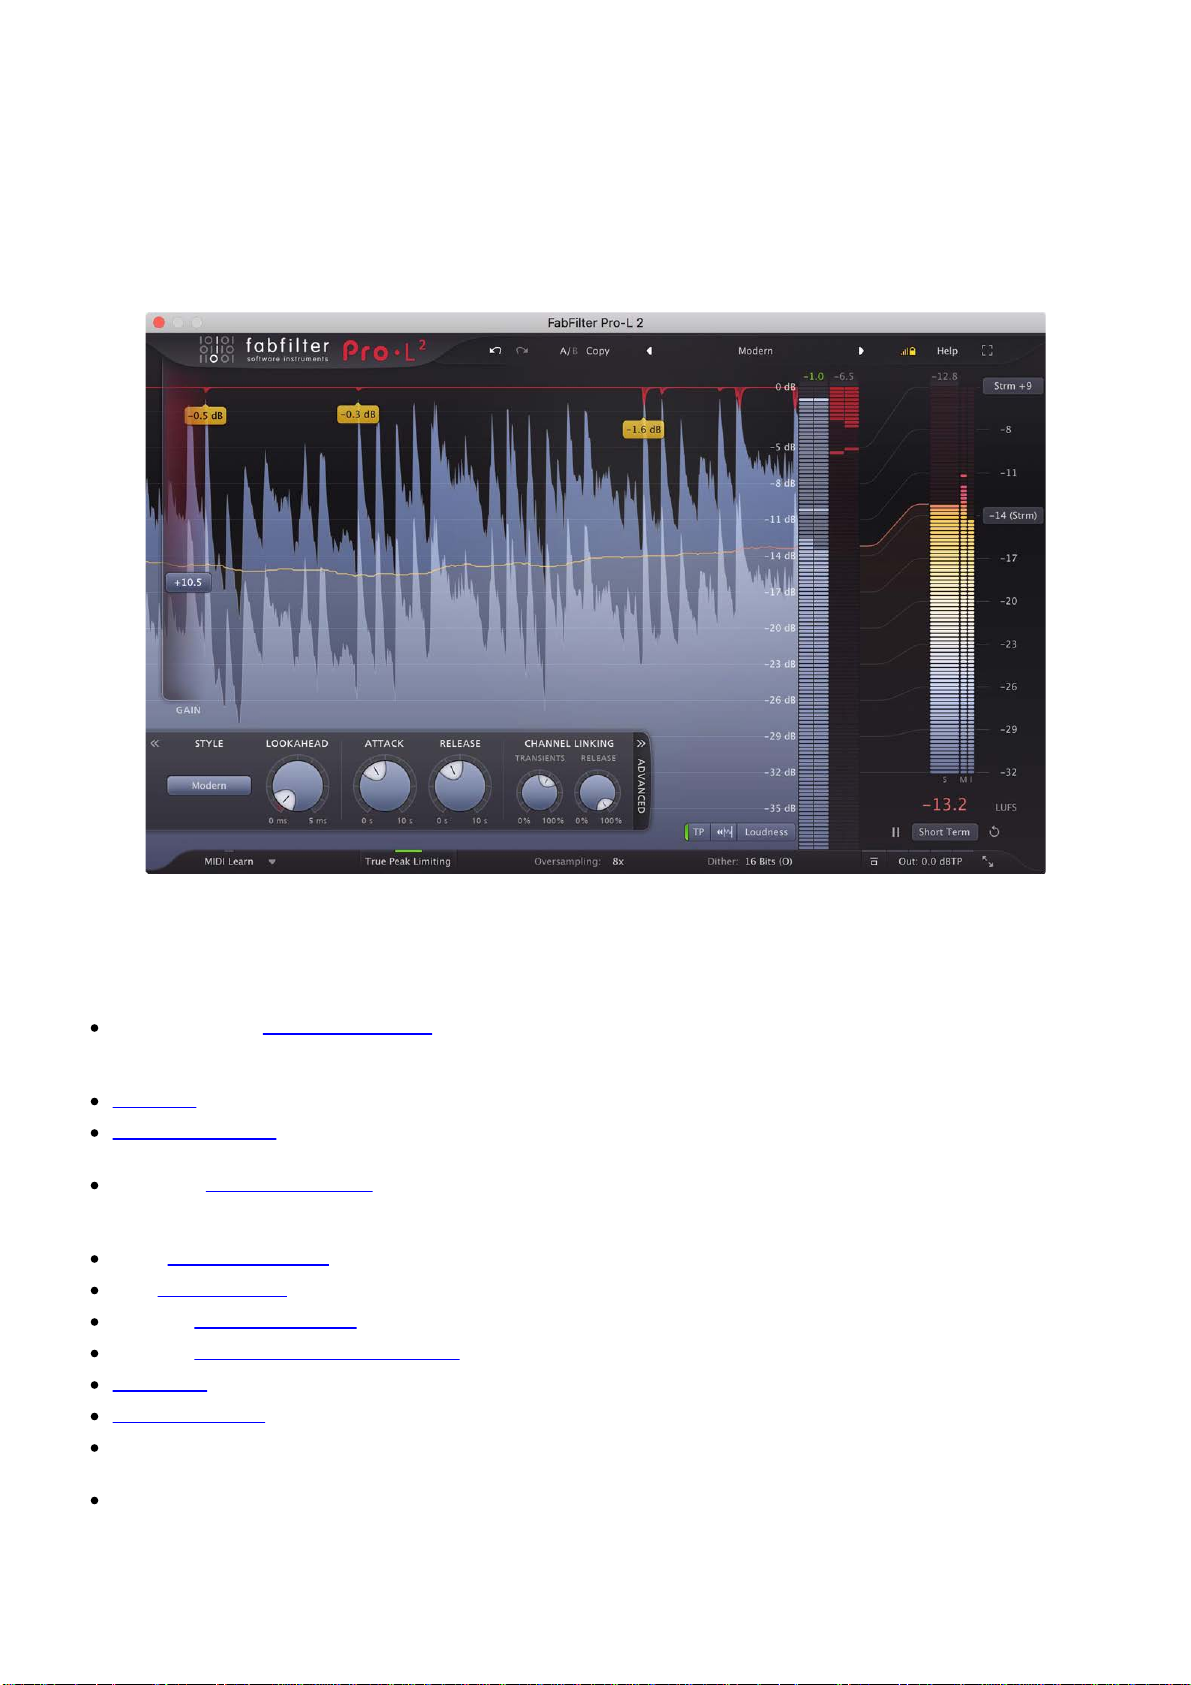
The interface of FabFilter Pro-L 2 is designed to eliminate clutter while providing as much information as possible. It
consists of the following elements:
Real-time level display
The real-time moving level display shows you at a glance what's happening to your audio. It
light blue), output (dark blue) and gain reduction (red) levels, together with the loudness level (thin line). In
addition, peak labels are shown for the most significant gain reduction peaks. See Metering
Gain slider
The Gain slider is the most important control: it adds gain to the incoming signal to make it
the maximum output level specified in the bottom bar. See Knobs and gain slider
Level/loudness metering
The output level meter, gain reduction meter and large loudness metering on the right provide an immediate
overview of the current levels, together with accumulating level readings above the
at the left bottom of the output level meter offer various metering scales (including Loudness, K-12, K-14 and K-20
scales) and an option to enable/disable
Advanced settings
The advanced settings panel lets you customize FabFilter Pro-L 2's behavior by selecting
tweaking their settings. See Advanced settings
True Peak Limiting
With True Peak Limiting enabled, the true peak output is ensured not to exceed the currently set Output Level in
dBTP. See True peak limiting
Oversampling
The Oversampling setting sets the amount of internal oversampling, which reduces aliasing and
sample peaks at the cost of additional CPU usage. See Oversampling
Dithering and noise shaping
The Dither and Noise Shaping settings specify whether and how the output signal is dithered.
preserve (perceived) detail and resolution by reducing quantize distortion.
Input and output options
On the far right of the bottom bar, you can bypass the entire plug-in, adjust the final
Gain, Filter DC Offset, Side Chain Triggering or Audition Limiting. See Input and output options
Resize
The resize button in the lower-right corner lets you choose an interface size and switch to Compact mode. See Full
Screen mode and resizing.
MIDI learn
MIDI Learn lets you easily associate any MIDI controller with any plug-in parameter. See
Presets, undo, A/B, help
With the preset buttons, you can easily browse through the factory presets or save your own
re-use them in other songs. The Undo, Redo, A/B and Copy buttons at the top
.
true peak metering. See Metering
.
and Loudness Metering.
.
and Recommended workflow.
meters. The metering options
See Dithering and noise shaping
output level or enable Unity
of the plug-in interface enable you to
shows input (gray /
and Loudness metering.
louder, while limiting to
different limiting styles and
generation of inter-
Dithering helps to
.
MIDI Learn
settings so you can
.
.

undo your changes and switch between different states of the plug-in. Finally, the Help menu provides access to
help and version information. See Loading presets and Undo, redo, A/B switch.
7
Next: Knobs and gain slider
See Also
Quick start
Knobs and gain slider
8
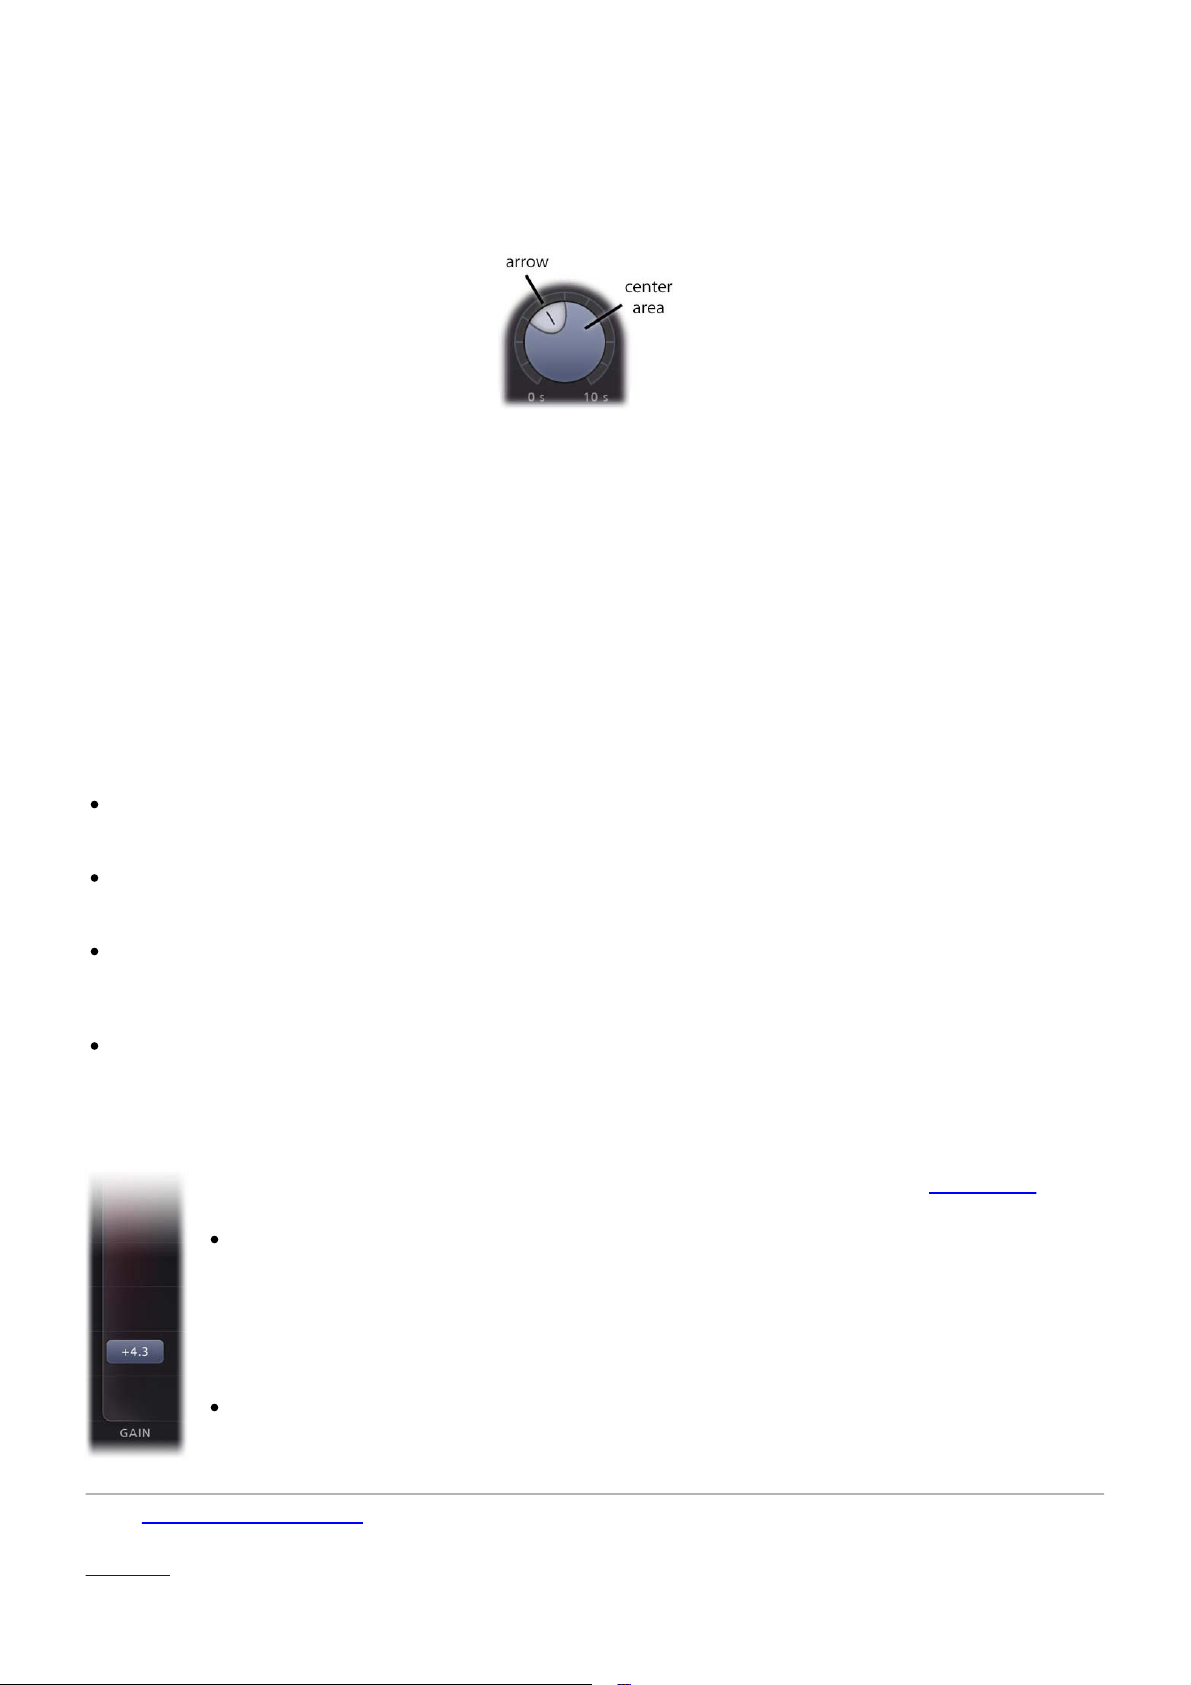
It is easy to control FabFilter Pro-L 2's parameters with the large round knobs. They will light up when you
move the mouse cursor around to indicate that you can adjust them. The moment you move the mouse cursor
over a knob, a parameter value display will pop up, which shows the name and the current value of the
parameter.
All knobs support four ways of control:
1. Vertical mode
Click on the center area of a knob and drag up or down to rotate it. The knob reacts to the speed with
which you are dragging, so if you move the mouse slowly, you make precise adjustments.
2. Rotate mode
Grab the arrow of the knob and drag it around. By moving the mouse cursor further away from the
knob while dragging it, you can make precise adjustments.
3. Mouse wheel mode
Perhaps the easiest way to make adjustments is by using the mouse wheel when you hover over a
knob. This mode works for all the knobs and possible panning rings. (On Windows, you might need to
click in the plug-in interface first to make sure it is the active window.)
4. Text entry mode
Double-click a knob to enter an exact value using the keyboard.
Tips
To reset a knob to its default position, hold down the Ctrl key (Windows) or Command key (macOS) and
click the knob once. Note: In Pro Tools, Pro-L 2 uses the default Pro Tools keyboard shortcut for reset:
Alt+click.
To fine-tune a value when using vertical drag mode or the mouse wheel, hold down the Shift key while
dragging or moving the mouse wheel. Note: In Pro Tools, Pro-L 2 uses the default Pro Tools keyboard
shortcut for fine tune: Ctrl+drag on Windows or Command+drag on macOS.
There are several handy shortcuts in text entry mode. With frequency values, you can type e.g. '1k'
to set the value to 1000 Hz, and also 'A4' for 440 Hz, or even strings like 'C#3+13'. With dB values, you
can type e.g. '2x' to get +6 dB (the value that corresponds to two times louder). With all values, you can
also type a percentage (e.g. '50%' will put a knob exactly in the middle position).
Sometimes, knobs in our plug-in interfaces are linked: these be adjusted simultaneously by holding
down the Alt key (Shift key in Pro Tools) while dragging on one of them. For example, an output level
and input level setting of a plug-in could be adjusted simultaneously (in the opposite direction) this way.
Gain slider
The gain slider adjusts the threshold of limiting and the increase in output gain at the same time.
Simply put, it makes your audio louder, while respecting the current maximum output level
can control the gain slider in the following ways:
Mouse: simply click anywhere on the slider and drag the mouse up and down, or use the
mouse wheel while hovering above the slider. If you click on the slider background and
move the mouse slowly, you make more precise adjustments.
The Gain slider is reverse-linked to the Output Level parameter, so holding down the Alt key
(Shift key in Pro Tools) while increasing the gain, will decrease the output level with the
same amount. This way, you can easily test how the limiting affects the audio without
changing the apparent volume.
Text entry: Double-click on the slider to enter the value exactly using the keyboard.
Next: Recommended workflow
See Also
Overview
. You

Recommended workflow
9
To get the best results with FabFilter Pro-L 2, we recommend the following steps:
Step 1: Choose a good starting point preset
Of course, the simplest way to start working with Pro-L 2, is to just open it with its Default Setting preset and
move the Gain slider up until you reach the desired level. We have chosen the default preset carefully, to work
well on almost any audio.
Instead of just using the default settings however, you can also try one of the excellent factory presets that
come with FabFilter Pro-L 2. They are divided per musical genre and have descriptive names, so you can easily
choose the preset that works best for your purpose and audio material.
To make it easy to try and compare different presets on your audio, while leaving the current amount of
limiting, the specified output level and other output settings unaffected, make sure the Lock Output button is
enabled. It's placed directly right to the preset controls, at the top of the interface. When enabled, the current
values of the Gain, Output Level, DC Offset Filtering, Unity Gain, True Peak Limiting, Oversampling, Dithering
and Noise Shaping parameters will be preserved while loading presets.
After a while, you'll probably have a favorite preset and favorite settings that you use most of the time. In that
case, it's a good idea to override the Default Preset so that the next time you open FabFilter Pro-L 2, you're
ready to go right away. To save all current settings as default, simply choose Options > Save As Default from
the preset menu.
Step 2: Refine settings if needed
If you like to, you can of course adjust or refine the settings that influence the sound and flavour of limiting.
Just open up the Advanced panel to get access to settings like Style, Lookahead, Attack, Release and Channel
Link. To learn how to interpret these settings and adjust them with sense, see Advanced settings
Step 3: Set up True Peak Limiting, Oversampling, Dithering and Output level with care
The final step in setting up the limiter is choosing the correct output settings. Whether you use dithering and
noise shaping depends on your preferences and requirements. See Dithering and noise shaping
information.
"So what's an appropriate Output Level setting? Should I choose -0.1 dB, -0.3 dB or -1.0 dB?"
Actually, there is not a single correct value for the Output
and strength of true peaks (or inter-sample peaks) in the outgoing audio signal. Different metering and
loudness standards allow for different maximum peak (i.e. true peak) levels.
In short, our advice is simple. Turn on True Peak Limiting and True Peak Metering (also known as inter-sample
peak metering), which exposes true peaks in the processed signal. Then set the Output Level to the maximum
allowed value (e.g. -1.0 dBTP for EBU R128).
In any case, make sure that the true peak output level never exceeds 0.0 dBTP. This makes it very likely that a
subsequent D/A conversion (or any other conversion, like to MP3 etc.) will handle your audio without
introducing distortion.
Notes
Not everyone cares about true peaks or inter-sample clipping: see Output options for the full discussion.
Level parameter. It mainly depends on the presence
.
for more

Inter-sample peaks are introduced when the limiter needs to react very quickly to the incoming signal. By
increasing the Lookahead setting, you allow the limiter more time to respond, and therefore reduce
10
distortion and inter-sample peaks.
Another way to reduce inter-sample peaks and true peak overshoot is by using oversampling. In most
cases, choosing 4x oversampling in combination with a minimum lookahead time of 0.1 ms, keeps intersample peaks within the range of 0.1 dB.
The best way to ensure a maximum true peak level, is by enabling True Peak Limiting. This will smooth
out the true peak overshoot after processing, ensuring the output never exceeds the current Output
Level.
Of course, Pro-L 2's True Peak metering fully complies to the EBU R128 / ITU-R 1770 metering standards.
Next: Advanced settings
See Also
Overview
Knobs and gain slider
Advanced settings
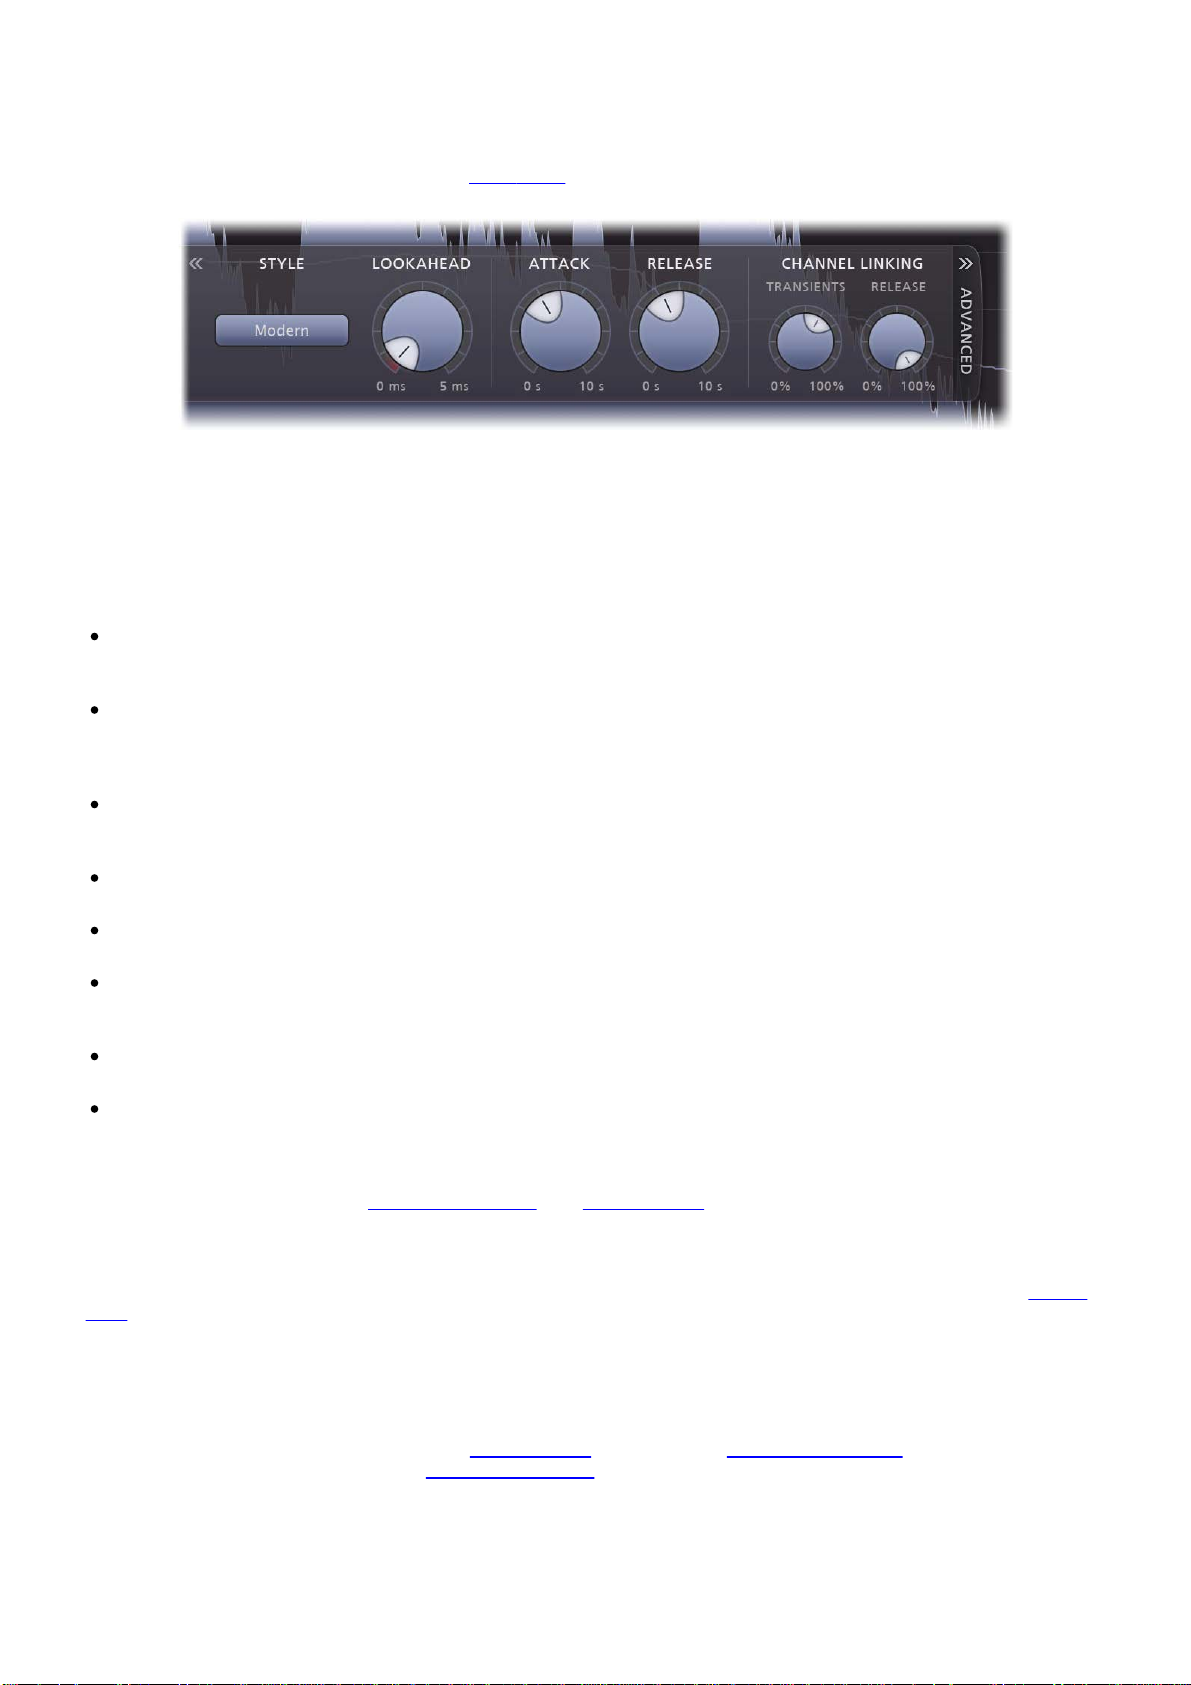
11
Most of the time, choosing the right preset from FabFilter Pro-L 2's preset menu works very well. But in some
cases, you might want to adjust and fine-tune the limiting behavior. To access Pro-L 2's advanced settings,
click the Advanced button right under the Gain
panel slide out. Clicking the button again will hide the panel.
Style
FabFilter Pro-L 2 comes with eight advanced and highly program-dependent limiting algorithms, which all have
their own distinct character. One is not better than the other; they are all great, and they all go very loud if you
want them to. It is best to select the appropriate algorithm depending on what kind of effect you want to
achieve: some are designed to be as transparent as possible, while others may add a nice punch or flavor.
The default Lookahead, Attack and Release values are good starting points but feel free to tweak these to get
the best possible results. Here's a short description of all algorithms:
Transparent: As the name says, this algorithm is designed to stay true to the original sound and feel as
much as possible, avoiding pumping effects and coloring. It works great on most program material, but
especially on rock and pop music.
Punchy: Of all algorithms, this one is the most apparent. When pushed, it becomes quite punchy and will
introduce a bit of pumping, which can add some nice flavor. Since it's fairly 'safe', minimizing distortion
most of the time, it works miracles on single tracks, like vocals, bass or guitar and can give a nice edge
to beat-oriented music.
Dynamic: By enhancing transients before actually applying limiting, this algorithm excels in preserving
the original punch and clarity of your audio. It's great on rock music, but it can work surprisingly well on
other types of audio as well.
Allround: This algorithm is designed to work well on almost any program material, striking a good
balance between loudness and transparency.
Aggressive: As the name implies, this algorithm uses an aggressive yet smart, near-clipping style of
limiting. This works wonders on EDM/trance music but also shines on rock, metal or pop.
Modern: As the new default style in Pro-L version 2, the Modern algorithm sets the new standard for allpurpose, transparent limiting. It can achieve very high loudness and allows for very near-zero lookahead
settings, while still sounding extremely clean and natural.
Bus: Especially nice for (drum) bus processing and individual tracks, this algorithm is not meant to be
transparent, rather the opposite. Think glue, pump or squash!
Safe: No distortion ever, that's what this algorithm is designed to achieve. It's perfect for delicate
acoustic and/or classical music, or individual instrument tracks.
Note that some algorithms (especially the last four new algorithms introduced in Pro-L version 2) need more
latency than others. Do you need to minimize processing latency? Then choose one of the first four algorithms
(e.g. Transparent) and disable True Peak Limiting
slider at the left of the interface, which makes the advanced
and oversampling.
Lookahead
The Lookahead knob sets the look-ahead time for the initial 'transient' stage. This allows the limiter to examine
the incoming audio in advance and predict the amount of gain reduction needed to meet the requested output
level. If the look-ahead time is very short, the limiter doesn't have much time to move to the desired level: this
will generally have the effect of preserving transients better and increasing the apparent loudness, but at the
expense of possible distortion. Longer look-ahead times are safer, but less loud, and transients might appear to
get lost in the mix a little more.
Very short look-ahead times (less than 0.1 ms) will approximate 'hard clipping', introducing distortion and
aliasing. This causes more inter-sample peaks which can cause further distortion later on. To reduce aliasing
and inter-sample peaks, we advise to use oversampling
sample peaks generated, and enable True Peak Limiting
Attack and Release
Apart from the fast 'transient' stage, the limiter has a slower 'release' envelope stage that responds to the
average dynamics of the incoming audio. The Attack and Release knobs control how quickly and heavily the
release stage sets in. Shorter attack times will allow the release stage to set in sooner; longer release times will
. Also, turn on True Peak Metering to visualize the inter-
to attenuate the remaining true peak overshoot.

cause it to have more effect.
In general, short attack times and long release times are safer and cleaner, but they can also cause pumping
12
and reduce clarity. On the other hand, long attack times and short release times can increase apparent
loudness and presence, but at the expense of possible distortion.
Channel linking
When limiting a stereo signal, it is generally desirable to process both channels in the same way to avoid
changing the stereo image inadvertently. However, when a short peak occurs in one channel, removing it is
often almost inaudible. In this case, it is better to remove it only in the channel where it occurs.
You can control this behavior completely with the two channel linking knobs. The Transient knob controls the
amount of channel linking for the 'transient' stage that mainly operates on short peaks. It often works well to
choose less than 100% here. The Release knob controls the channel linking for the 'release' stage, where it is
best to start with 100% which will completely link the channels. However, you can of course experiment with
different settings depending on the level of limiting and the character of the incoming audio signal.
When using Pro-L 2 for surround processing, the Channel Linking section will offer more controls, tailored
especially to deal with surround channels. See Surround
Channel Linking controls are simply disabled.
Tips:
When you first start to work with FabFilter Pro-L 2, try to use the factory presets. These are great
starting points, smartly divided in music categories, and with descriptive names. These might just do the
trick already, without even needing to open the Advanced Panel.
If you have found a preset that you really like, which works well on most music you usually process, you
can easily save it as the default preset! Just choose Options > Save As Default from the plug-ins preset
menu, and the next time, Pro-L 2 will start up with your favorite settings.
Using Pro-L 2 for surround processing? See Surround.
. Of course, in the mono version of the plug-in, the
Next: True peak limiting
See Also
Overview
Recommended workflow
True peak limiting
13
Digital audio processing, and especially ultra-fast limiting or hard clipping in the digital domain, can introduce
inter-sample peaks. In this case, the analog signal that a D/A converter would generate from the sample values
becomes higher than the individual sample values. Depending on how good the D/A converter is, this can cause
audible clipping. The same happens during operations like MP3 conversion.
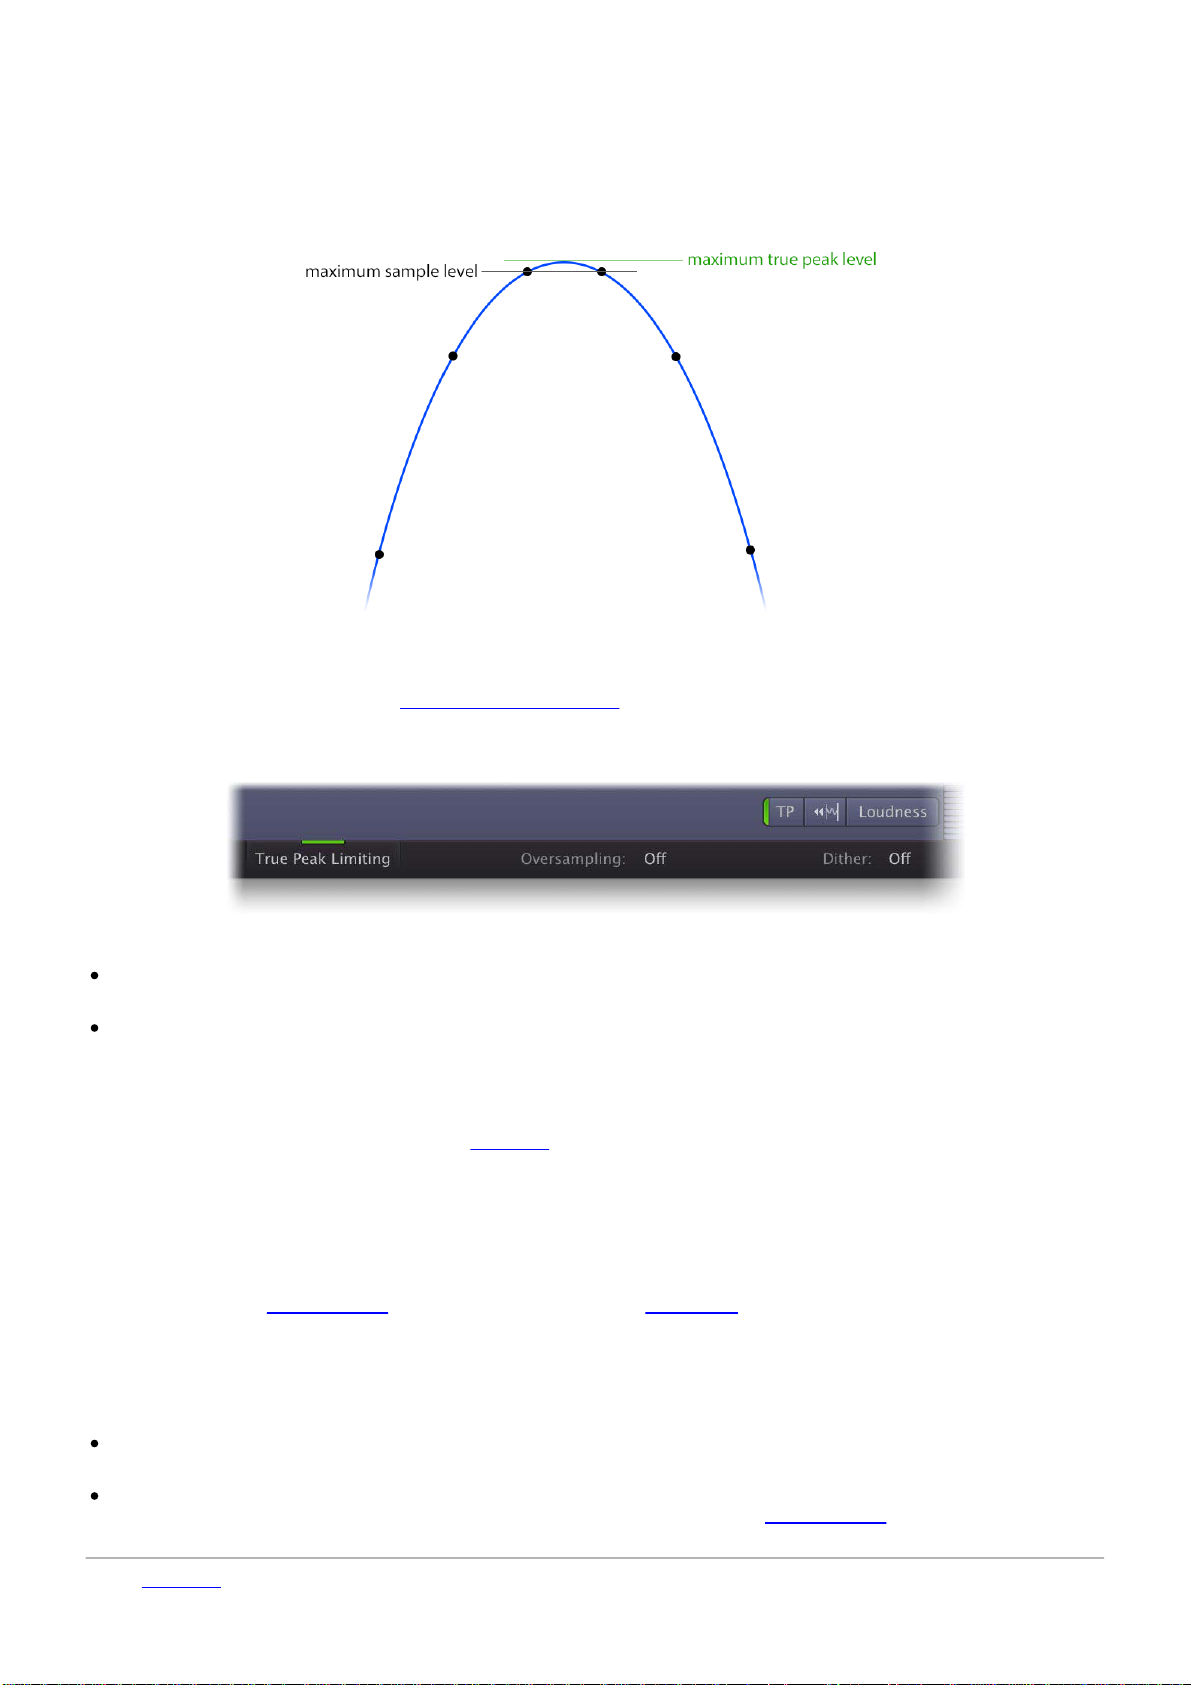
As illustrated by this image, the analog signal (blue) has a peak (green) that is higher than the sample peaks in
the digital signal. Peaks like these are called inter-sample peaks or true peaks. Today, many commonly used
metering/loudness standards, like EBU R128 or ATSC A/85
To guarantee that FabFilter Pro-L 2's output doesn't exceed a certain maximum true peak level, enable the
True Peak Limiting option in the bottom bar.
impose a maximum allowed true peak level.
True Peak Limiting works at two different stages:
The limiting process will detect true peaks that already exist in the input signal, and reduce them
appropriately.
Any true peak overshoot introduced by the ultra-fast limiting process itself, will be smoothly attenuated
afterwards, ensuring the final true peak output doesn't exceed the current maximum true peak Output
Level.
When using True Peak Limiting, it's best to keep True Peak Metering enabled as well, using the TP button next
to the display and meter scale settings. The output level meter will then show the actual true peak levels (with
level reading in green to reflect this). See Metering
Of course, FabFilter Pro-L 2's true peak metering system fully complies with the ITU-R BS.1770 and EBU R128
standards, and is suitable for MFiT (Mastered for iTunes).
Preventing true peak overshoot
Instead of letting the true peak limiting process deal with remaining true peaks in the output, it's even better to
prevent high true peak overshoot in the first place. The best way to minimize inter-sample peaks and
distortion, is to use oversampling
affect loudness and transparency.
In most cases, choosing 4x oversampling in combination with a minimum lookahead time of 0.1 ms, keeps
inter-sample peaks within a range of 0.1 dB.
Tips
When True Peak Limiting is enabled, the Output Level read-out and parameter value display will show its
value as "dBTP" (dB True Peak) instead of "dB" (dBFS or dB Full Scale).
The additional processing needed for true peak limiting will introduce a bit of extra latency (about 5 ms).
If you need to minimize latency, you can disable true peak limiting and oversampling
the limiting styles from Pro-L version 1 (e.g. Transparent).
. In addition, increasing the lookahead can also help quite a lot, but may
.
and choose one of
Next: Metering

See Also
14
Overview
Recommended workflow
Loading...