

Page 1
Read This First
À lire en premier
Bitte zuerst lesen
Leggere attentamente prima di
procedere
Lea primero esto
Page 2

All rights reserved. No part of this publication may be reproduced, stored in a
retrieval system, or transmitted in any form or by any means, electronic,
mechanical, photocopying, recording, or otherwise, without the prior written
permission of SEIKO EPSON CORPORATION. No patent liability is assumed
with respect to the use of the information contained herein. Neither is any liability
assumed for damages resulting from the use of the information contained herein.
Neither SEIKO EPSON CORPORATION nor its affiliates shall be liable to the
purchaser of this product or third parties for damages, losses, costs, or expenses
incurred by purchaser or third parties as a result of: accident, misuse, or abuse of
this product or unauthorized modifications, repairs, or alterations to this product, or
(excluding the U.S.) failure to strictly comply with SEIKO EPSON
CORPORATION’s operating and maintenance instructions.
SEIKO EPSON CORPORATION shall not be liable against any damages or
problems arising from the use of any options or any consumable products other
than those designated as Original EPSON Products or EPSON Approved Products
by SEIKO EPSON CORPORATION.
General Notice:
EPSON is a registered trademark of SEIKO EPSON CORPORATION.
Macintosh, Mac, and iMac are registered trademarks of Apple Computer, Inc.
Windows and Windows NT are trademarks of Microsoft Corporation in the United
States of America.
Intel and Pentium are registered trademarks of Intel Corporation or its subsidiaries
in the United States and other countries.
PowerPC is a trademark of International Business Machines Corporation in the
United States, other countries, or both.
Acrobat Reader Copyright 1987-2002 Adobe Systems Incorporated. All rights
reserved. Adobe, the Adobe logo, Acrobat, and the Acrobat logo are trademarks of
Adobe Systems Incorporated.
Other product names used herein are also for identification purposes only and may
be trademarks of their respective owners. EPSON disclaims any and all rights in
those marks.
Copyright 2003 by SEIKO EPSON CORPORATION
Page 3

Read This First
At First... ........................................................ 2
Unpacking the Projector ................................ 3
Easy Operation Guide ................................... 4
Using the Document CD-ROM ...................... 6
1
Page 4

At First...
Before using this product, please be sure to:
1. Read this booklet.
Please check the projector and its components. Confirm that you
understand how to use the included Document CD-ROM, and how to
use the projector in different operational workflows, to achieve the
desired results.
2. Read the "Safety Instructions/WorldWide Warranty Terms".
It contains important information on using the projector safely, and also
includes the terms and conditions of the worldwide warranty. Be sure to
read this booklet thoroughly before using the projector.
The most commonly used functions of the projector are covered in the Quick
Reference Guide. Always keep this with the projector so that it can be referred
to when needed.
See "Troubleshooting" in the User’s Guide if there are problems such as no
projection, poor image quality, etc.
2
Page 5

Unpacking the Projector
When you unpack the projector, make sure that you have all these components.
If any of the components are missing or incorrect, please contact the place of
purchase.
Projector
(With lens cover)
The illustration shows
a projector fitted with
a standard lens. The
configuration will
vary depending on
which lens is fitted.
Power cable
(3 m (9.8 ft.))
Connect to the
projector and to a
wall outlet.
Audio cable
(3.5 mm dia./1.8 m (6
ft.) stereo mini plug)
Use when playing
sound from a
computer through the
projector's built-in
speaker.
Remote control AA alkali
batteries
(2 pcs.)
Insert into the remote
control.
RCA video
cable
(3 m (9.8 ft.) yellow)
Use when projecting
composite video
images.
USB cable
(1.8 m (6 ft.))
Use when connecting
the projector to a
computer in order to
use the wireless
mouse function and to
transmit data.
RCA audio cable
(3 m (9.8 ft.) red/white)
Use when playing
sound from video
equipment through the
projector's built-in
speaker.
EasyMP Software
(CD-ROM)
Place this in the
computer when
installing the EasyMP
Software.
Wireless LAN
card
Place this card in the
projector’s card slot to
connect the projector to
a computer via a
wireless LAN.
Computer cable
(mini D-Sub 15-pin/
mini D-Sub 15-pin, 1.8
m (6 ft.))
Use when projecting
images from a
computer.
Password Protec t
sticker
When Password Protect
is enabled, attach these
stickers to your
preferred place on the
projector to increase
anti-theft effectiveness.
Documentation
Read This First (this booklet)
Safety Instructions/
World-Wide Warranty Terms
Document CD-ROM
Quick Reference Guide
EasyMP Setup Guide
3
Page 6
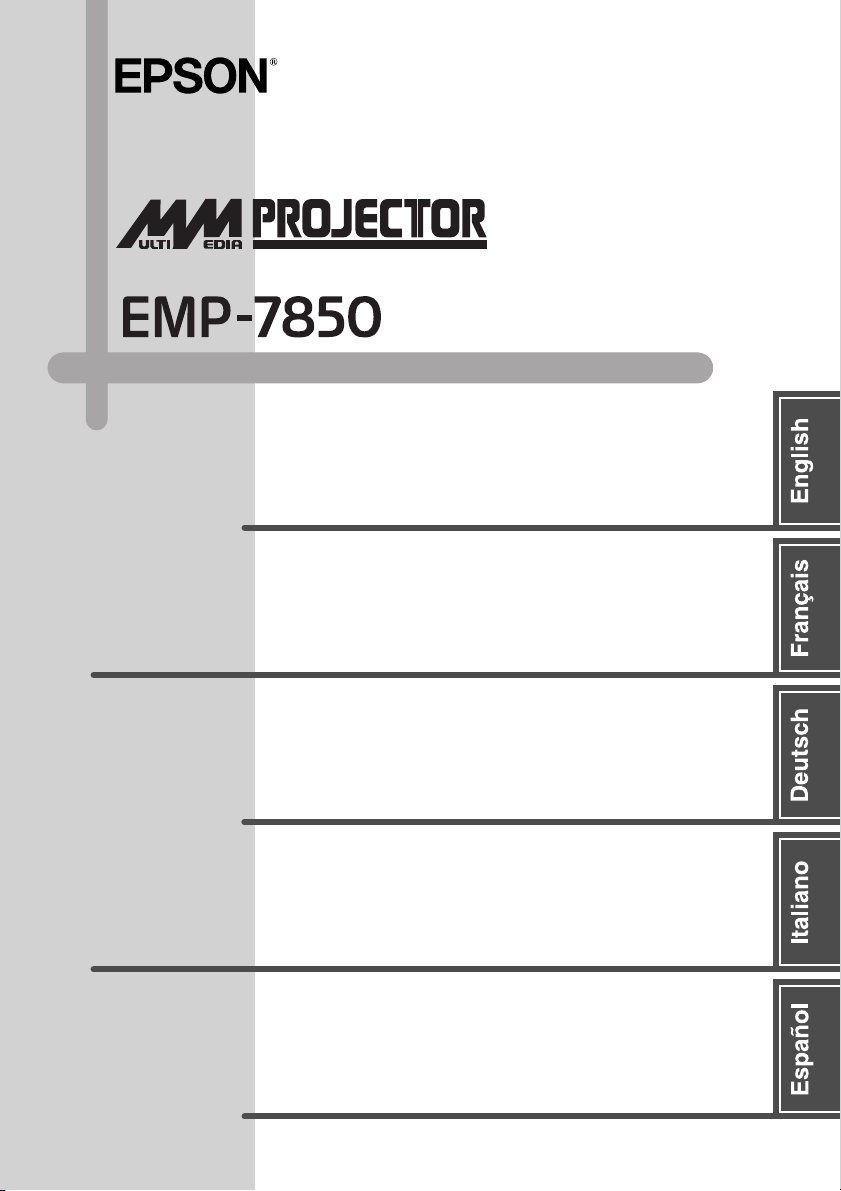
Easy Operation Guide
This booklet describes the projector’s operation and procedures. Consult it for the required
operation procedure.
Projecting Computer and Video Images Using the Accessory Cables
Projector Installation
Installation
Projecting Computer Images via a Network
Installing EMP NS Connection
• Checking the Operating Environment
Operating Environment
• Installation Method
Installing EasyMP Software
Making a Presentation without a Computer
Installing EMP SlideMaker2
• Checking the Operating Environment
Operating Environment
• Installation Method
Installing EasyMP Software
Connecting the Projector Using the
Accessory Cables
• Connecting to a Computer
Connecting to a Computer
• Connecting to a Video Source
Connecting to a Video Source
Preparing the Projector
• Projector Installation
Installation
• Wireless LAN Card Installation
Inserting and Removing Cards
•Power ON
Turning the Projector On
• Sizing and Focusing the Projected Image
Adjusting the Screen Image
Creating a Scenario and Sending it to a
Memory Card
• Checking Memory Card Compatibility
Compatible Memory Cards
• Creating and Sending a Scenario
Preparing a Presentation
Projecting Movie Files, and Projecting Photographs from a Digital
Camera
Projector Installation
Installation
4
Installing a Memory Card where
Photographs are Saved
• Checking Memory Card Compatibility
Compatible Memory Cards
• Memory Card Installation
Inserting and Removing Cards
Page 7

The following icons show the guide you need to refer to.
EMP-7850 User’s Guide EasyMP Setup Guide EasyMP Operation Guide
Power ON
Turning the Projector On
Selection of Input Video Signal
Turning the Projector On
Connecting via a Network
• Connecting to a Computer
Connecting Using Easy Connect
Mode
• Connecting via a Network
Connecting in Access Point Mode or
Wired LAN Connection Mode
Preparing the Projector
• Projector Installation
Installation
• Memory Card Installation
Inserting and Removing Cards
•Power ON
Turning the Projector On
• Sizing and Focusing the Projected Image
Adjusting the Screen Image
Sizing and Focusing the Projected
Image
Adjusting the Screen Image
Post-connection Operation
• Image Projection Operation
Advanced Operations
• Changing Settings from a Computer
Setting, Monitoring and Controlling
from a Computer
• Terminating the Connection
Disconnecting from a Network
Connection
Playing, Operating, and Editing
Scenarios
Projecting Scenarios
Preparing the Projector
•Power ON
Turning On the Projector
• Sizing and Focusing the Projected Image
Adjusting the Screen Image
Photograph Projection and Operation
Playing Graphics and Movie Files
5
Page 8

Using the Document CD-ROM
You need Adobe Acrobat Reader (referred to hereafter as Acrobat Reader) to
view the guide on the Document CD-ROM included with the projector.
If Acrobat Reader is not installed on the computer that you are using, you will
need to install it. Acrobat Reader can be installed from the Document CDROM.
The installation procedure varies depending on whether you are using a
Windows or Macintosh computer. The procedures for both computers are given
below.
For Windows
Turn on the computer. Insert the Document CD-ROM into the CDROM drive.
If you have installed Acrobat Reader, the TOP page of the guide will be
displayed automatically. See "Viewing the Guide".
If you have not yet installed Acrobat Reader, a message will be displayed.
Follow the message instructions to install Acrobat Reader.
1
Once the installation is complete, press the eject button of the
2
CD-ROM drive. When the drive tray has fully opened, close it
again.
This will cause the computer to restart the CD-ROM, and Acrobat
Reader will open.
Tip :
When opening Acrobat Reader for the first time after installation, the "Software
License Agreement" will be displayed. After reading the contents of the "Software
License Agreement", click "Accept"to display the TOP page of the guide. If you
click "Decline", you cannot view the guide.
For Macintosh
Turn on the computer. Insert the Document CD-ROM into the
1
CD-ROM drive.
For users of Mac OS 8.6 and 9.x
2
For users of Mac OS X
If you have installed Acrobat Reader, the TOP page of the guide will be
displayed automatically. See "Viewing the Guide".
6
Double-click "Launcher_for_OS 86_9x".
Double-click "Launcher_for_OSX".
Page 9

If you have not yet installed Acrobat Reader, a message will be displayed.
Follow the message instructions to install Acrobat Reader.
1
For users of Mac OS 8.6 and 9.x
2
Double-click "Launcher_for_OS86_9x". The TOP page of the
guide will be displayed. See "Viewing the Guide".
For users of Mac OS X
Remove the Document CD-ROM from the CD-ROM drive,
1
then restart your computer.
Insert the Document CD-ROM into the CD-ROM drive.
2
Double-click "Launcher_for_OSX". The TOP page of the
3
guide will be displayed. See "Viewing the Guide".
Tip :
• When opening Acrobat Reader for the first time after installation, the "Software
License Agreement" will be displayed. After reading the contents of the "Software
License Agreement", click "Accept"to display the TOP page of the guide. If you
click "Decline", you cannot view the guide.
• Please be sure to read the Readme file if, despite installing Acrobat Reader, you
are unable to open the guide in Acrobat Reader.
Viewing the Guide
When you move the pointer over an item on the TOP page, the
pointer will change to a . Click on an item to view its contents.
Before viewing the contents of the guide, be sure to read the documents called
"Notations Used in This Guide" and "Understanding This Guide".
7
Page 10
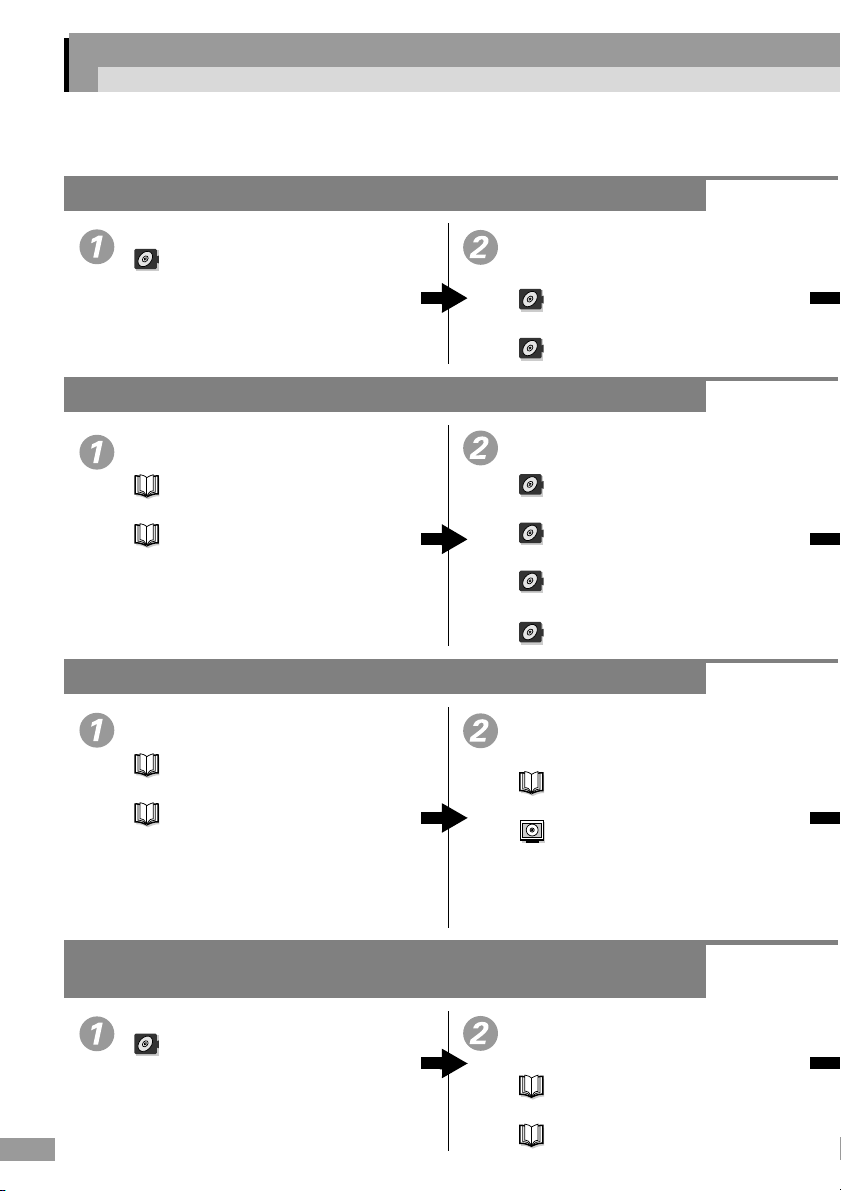
Using the Document CD-ROM
Operating Environment
You can view the contents of the Document CD-ROM using either a Windows
computer or a Macintosh computer.
Windows
Item Requirements
Operating System Microsoft Windows 95 OS R2.0, Windows 98 SE, Windows
Me, Windows NT 4.0 (Service Pack 5), Windows 2000,
Windows XP
CPU Intel Pentium Processor
Memory 64 MB or more of RAM
Hard Drive 24 MB or more of free space
CD-ROM drive 8 × or greater (16 × or greater recommended)
Display 800 × 600 dots or greater
Application Adobe Acrobat Reader 5.05 (included on Document CD-ROM)
Macintosh
Item Requirements
Operating System Mac OS 8.6, 9.0.2, 9.0.3, 9.0.4, 9.1, 9.2.1 or 9.2.2
Mac OS X 10.0.4, 10.1, 10.1.1, 10.1.2, 10.1.3, 10.1.4, 10.1.5,
10.2 or 10.2.1
CPU Power PC G3 or greater (300MHz or higher recommended)
Memory 64 MB or more of RAM
Hard Drive 100 MB or more of free space
CD-ROM drive 8 × or greater (16 × or greater recommended)
Display 800 × 600 dots or greater
Application Adobe Acrobat Reader 5.05 (included on Document CD-ROM)
*
* If using a version of the Mac OS X operating system from 10.0 to 10.0.3, you
may not be able to install Acrobat Reader, or you may not be able to open the
guide file. If using a version between 10.0 and 10.0.3, it is recommended that
you update the operating system to Version 10.0.4 or later.
8
Page 11

À lire en premier
En premier................................................... 10
Déballage du projecteur .............................. 11
Guide d’utilisation facile............................... 12
Utilisation du CD-ROM de documentation
(Document CD-ROM).................................. 14
9
Page 12

En premier...
Avant d'utiliser ce produit, assurez-vous de :
1. Lire ce guide.
Veuillez vérifier le projecteur et ses éléments composants. Veuillez bien
assimiler le contenu du CD-ROM de documentation (Document CDROM) inclus, en comprenant comment exploiter le projecteur de
diverses manières afin d'achever les résultats souhaités.
2. Veuillez lire les "Consignes de sécurité/
Conditions d'application de la garantie
internationale".
Ce document contient des renseignements importants sur une utilisation
sans risque du projecteur, ainsi que les termes et conditions contenus
dans la garantie internationale. Lisez ce guide attentivement avant
d'utiliser le projecteur.
Les fonctions du projecteur les plus fréquemment employées sont présentées
dans le Guide de référence rapide. Gardez ce document toujours à proximité du
projecteur pour vous en servir lorsque nécessaire.
10
Reportez-vous à la section "Dépannage" dans le Guide de l'utilisateur si vous
rencontrez des problèmes comme un non fonctionnement de la projection ou
une mauvaise qualité d'image.
Page 13

Déballage du projecteur
Lors du déballage du projecteur, assurez-vous qu'il contient bien tous ces
éléments.
Si un article manque ou ne correspond pas, veuillez-vous adresser auprès de
l'établissement d'achat.
Projecteur
(avec cache d'objectif)
Cette illustration
représente un projecteur
équipé d'un objectif
standard. L'apparence
du projecteur varie
selon le type d'objectif
installé sur celui-ci.
Cordon secteur
(3 m)
À brancher dans le
projecteur et dans une
prise de courant murale.
Câble audio
(à mini-jacks stéréo
3,5 mm de diamètre,
1.8 m)
Permet d'utiliser le
haut-parleur intégré du
projecteur pour
reproduire le son
provenant d'un
ordinateur.
Télécommande Piles alcalines
de taille AA
À installer dans la
télécommande.
Câble vidéo
RCA
(3 m, jaune)
Permet de projeter des
images vidéo
composites.
Câble USB
(1,8 m)
Permet de raccorder le
projecteur à un
ordinateur pour utiliser
la fonction de souris
sans fil et transmettre
des données.
Câble audio
RCA
(3 m, rouge/blanc)
Permet d'utiliser le
haut-parleur intégré du
projecteur pour
reproduire le son d'un
équipement vidéo.
EasyMP
Software
(CD-ROM)
Introduisez ce CDROM dans l'ordinateur
lors de l'installation du
logiciel EasyMP.
Carte réseau sans
(x2)
fil
Introduisez cette carte dans le
connecteur de carte du
projecteur afin de relier le
projecteur à un ordinateur par
l'intermédiaire d'un réseau
local.
Câble d'interface
ordinateur
(mini-D-Sub 15 broches à
mini-D-Sub 15 broches, 1,8
m)
Permet de projeter des
images à partir d'un
ordinateur.
Autocollant
d'indication de
protection par mot
de passe
Si vous protégez votre
projecteur à l'aide d'un mot de
passe, collez cet autocollant à
l'endroit de votre choix sur le
projecteur pour décourager
d'éventuels voleurs.
Documentation
À lire en premier (ce guide)
Consignes de sécurité/Conditions
d'application de la garantie internationale
Document CD-ROM
Guide de référence rapide
Guide de mise en route EasyMP
11
Page 14
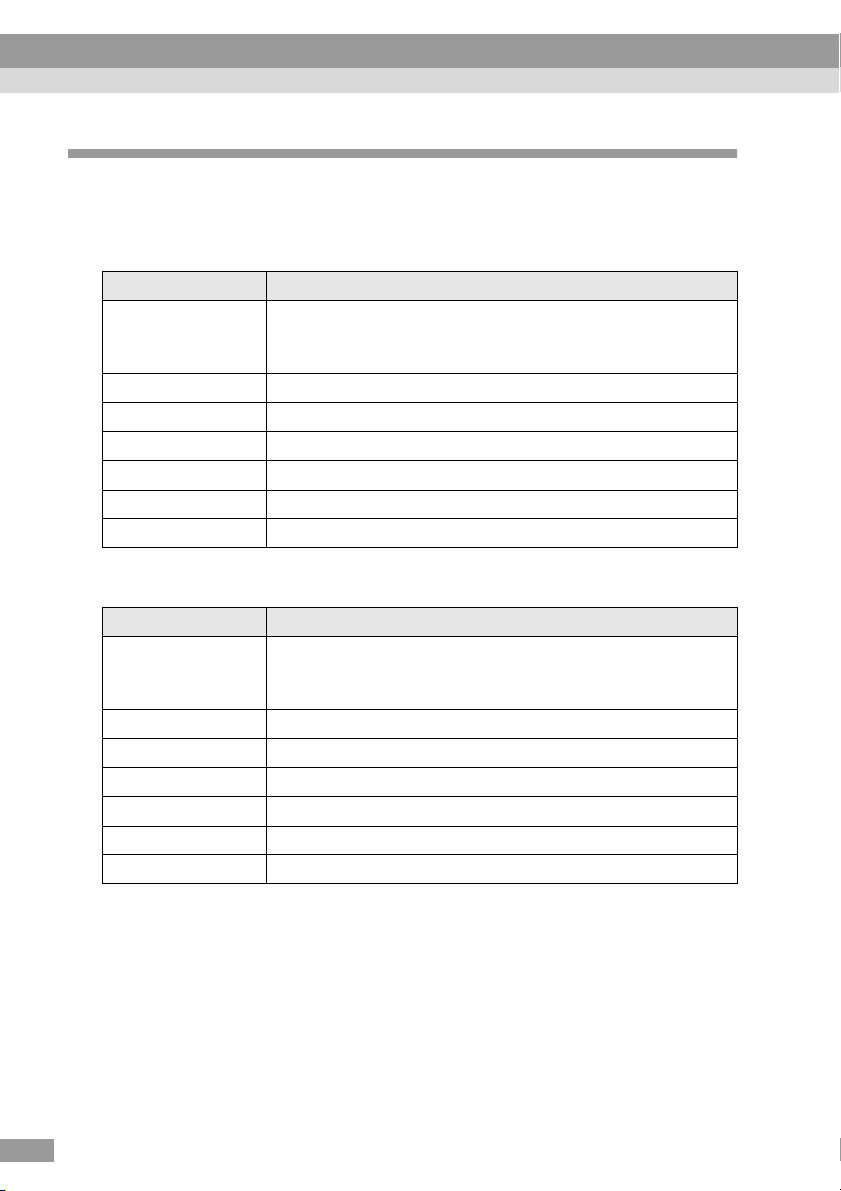
Guide d’utilisation facile
Ce guide décrit le fonctionnement et les procédures du projecteur. Consultez-le pour de
l'information sur les procédures de fonctionnement requises.
Utilisation des accessoires de câbles pour la projection des images
ordinateur et vidéo
Installation du projecteur
Installation
Raccordement du projecteur à l'aide
des câbles
• Raccordement à un ordinateur
• Raccordement à une source vidéo
Projection d’images ordinateur à l’aide d’un réseau
Installation de EMP NS Connection
• Vérification de l'environnement
d'exploitation
Environnement d’exploitation
• Méthode d'installation
Installation du logiciel EasyMP
Préparation du projecteur
• Installation du projecteur
• Installation de la carte réseau sans fil
• Mise sous tension
• Réglage et mise au point de l'image
projetée
Faire une présentation sans ordinateur
Installation de EMP SlideMaker2
• Vérification de l'environnement
d'exploitation
Environnement d’exploitation
• Méthode d'installation
Installation du logiciel EasyMP
Création d'un scénario et envoi à une
carte mémoire
• Vérification de la compatibilité de la carte
• Création et envoi d'un scénario
Raccordement à un ordinateur
Raccordement à une source vidéo
Installation
Insertion et retrait de cartes
Mise sous tension du projecteur
Réglage de l'image projetée
Cartes mémoires compatibles
Préparation d’une présentation
Projection de fichiers film et projection de photos à partir d'un
appareil photo numérique
Installation du projecteur
Installation
12
Installation d'une carte mémoire pour
enregistrer les photographies
• Vérification de la compatibilité de la carte
Cartes mémoires compatibles
• Installation de la carte mémoire
Insertion et retrait de cartes
Page 15

Les icônes suivantes présentent le guide auquel vous devez vous référer.
Guide de l'utilisateur EMP-7850 Guide de mise en route EasyMP
Guide d'utilisation EasyMP
Mise sous tension
Mise sous tension du projecteur
Sélection du signal vidéo d'entrée
Mise sous tension du projecteur
Connexion à l’aide d’un réseau
• Raccordement à un ordinateur
Connexion en Mode de connexion
facile
• Connexion par l'intermédiaire d'un
réseau
Connexion en Mode point d’accès ou
en Mode connexion à un réseau câblé
Préparation du projecteur
• Installation du projecteur
Installation
• Installation de la carte mémoire
Insertion et retrait de cartes
• Mise sous tension
Mise sous tension du projecteur
• Réglage et mise au point de l'image
projetée
Réglage de l'image projetée
Réglage et mise au point de l'image
projetée
Réglage de l'image projetée
Opération d'après connexion
• Opération de projection d'images
Opérations avancées
• Modification du paramétrage depuis un
ordinateur
Réglage, surveillance et contrôle
depuis un ordinateur
• Fin de la connexion
Déconnexion d’une liaison réseau
Lecture, exploitation et édition de
scénarios
Projection de scénarios
Préparation du projecteur
• Mise sous tension
Mise sous tension du projecteur
• Réglage et mise au point de l'image
projetée
Réglage de l'image projetée
Projection et manipulation des
photographies
Lecture de fichiers graphiques et de
fichiers film
13
Page 16

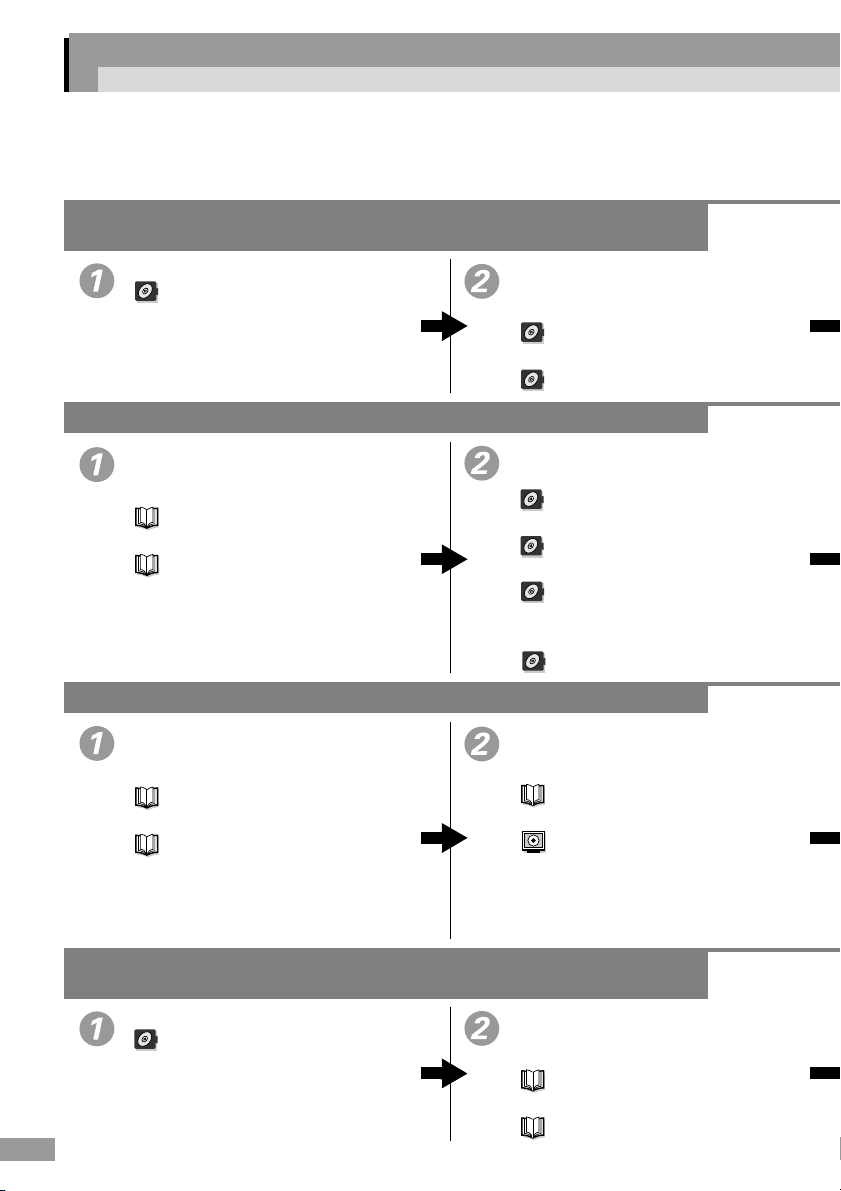
Utilisation du CD-ROM de documentation (Document CD-ROM)
Le logiciel Adobe Acrobat Reader (ci-après nommé Acrobat Reader) vous sera
nécessaire pour consulter le guide sur le CD-ROM de documentation inclus
avec le projecteur.
Si Acrobat Reader n’est pas installé sur l’ordinateur que vous utilisez, il vous
faudra l’y installer. Acrobat Reader peut être installé à partir du CD-ROM de
documentation (Document CD-ROM).
La procédure d'installation varie selon que vous utilisez un ordinateur Windows
ou Macintosh. Les procédures correspondant à ces ordinateurs se trouvent cidessous.
Si vous utilisez Windows
Mettez l'ordinateur sous tension. Insérez le CD-ROM de
documentation dans le lecteur de CD-ROM.
Si Acrobat Reader a été installé, la page de "Page TOP" du guide s'affiche
automatiquement. Référez-vous à "Consultation du guide".
Si Acrobat Reader n'est pas encore installé, un message sera affiché.
Suivez les messages d'instructions pour installer Acrobat
1
Reader.
Une fois l'installation terminée, appuyez sur la touche d'éjection
2
du lecteur de CD-ROM de l'ordinateur. Une fois que le tiroir du
lecteur du CD-ROM s'est complètement ouvert, fermez le à
nouveau.
L'ordinateur recommence alors la lecture du CD-ROM et Acrobat
Reader s'ouvre.
N. B. :
La première fois que vous utilisez Acrobat Reader après l'avoir installé, le "Contrat
de licence du logiciel" apparaît. Après lecture du contenu, cliquez sur "Accepter"
pour consulter la page de "Page TOP" du guide. Si vous cliquez sur "Refuser", vous
ne pourrez pas consulter le guide.
Si vous utilisez un système Macintosh
Mettez l'ordinateur sous tension. Insérez le CD-ROM de
1
documentation (Document CD-ROM) dans le lecteur de CDROM.
14
Page 17

Pour les utilisateurs de Mac OS 8.6 et 9.x
2
Double-cliquer sur "Launcher_for_OS86_9x".
Pour les utilisateurs de Mac OS X
Double-cliquer sur "Launcher_for_OSX".
Si Acrobat Reader a été installé, la page de "Page TOP" du guide s'affiche
automatiquement. Référez-vous à "Consultation du guide".
Si Acrobat Reader n'est pas encore installé, un message sera affiché.
Suivez les messages d'instructions pour installer Acrobat
1
Reader.
Pour les utilisateurs de Mac OS 8.6 et 9.x
2
Double-cliquez sur "Launcher_for_OS86_9x". La page de
"Page TOP" du guide s'affiche. Référez-vous à "Consultation
du guide".
Pour les utilisateurs de Mac OS X
Retirez le CD-ROM du lecteur puis redémarrez votre
1
ordinateur.
Insérez le CD-ROM de documentation (Document CD-
2
ROM) dans le lecteur de CD-ROM.
Double-cliquez sur "Launcher_for_OSX". La page de
3
"Page TOP" du guide s'affiche. Référez-vous à
"Consultation du guide".
N. B. :
• La première fois que vous utilisez Acrobat Reader après l'avoir installé, le
"Contrat de licence du logiciel" apparaît. Après lecture du contenu, cliquez sur
"Accepter" pour consulter la page de "Page TOP" du guide. Si vous cliquez sur
"Refuser", vous ne pourrez pas consulter le guide.
• Consultez le fichier Lisezmoi si vous n'arrivez pas à ouvrir ce guide bien
qu'Acrobat Reader soit installé.
Consultation du guide
Lorsque vous amenez le pointeur de la souris sur une rubrique de
la page de "Page TOP", le pointeur prend la forme . Cliquez sur
une de ces rubriques pour en voir le contenu.
Avant de lire le contenu de ce guide, lisez d'abord les sections intitulées
"Notations utilisées dans ce guide" et "Mieux comprendre ce guide".
15
Page 18

Utilisation du CD-ROM de documentation (Document CD-ROM)
Environnement d'exploitation
Vous pouvez consulter le contenu du CD-ROM de documentation (Document
CD-ROM) sur un ordinateur Windows ou Macintosh.
Windows
Elément Conditions requises
Système
d'exploitation
UC Processeur Intel Pentium
Mémoire 64 Mo de RAM ou supérieur
Disque dur 24 Mo d'espace libre ou supérieur
Lecteur de CD-ROM 8 × ou supérieur (16 × ou supérieur recommandé)
Affichage 800 × 600 ou supérieur
Application Adobe Acrobat Reader 5.05 (inclus sur le CD-ROM de
Macintosh
Elément Conditions requises
Système
d'exploitation
UC Power PC G3 ou supérieur (300MHz ou supérieur
Mémoire 64 Mo de RAM ou supérieur
Disque dur 100 Mo d'espace libre ou supérieur
Lecteur de CD-ROM 8 × ou supérieur (16 × ou supérieur recommandé)
Affichage 800 × 600 ou supérieur
Application Adobe Acrobat Reader 5.05 (inclus sur le CD-ROM de
Microsoft Windows 95 OS R2.0, Windows 98 SE, Windows
Me, Windows NT 4.0 (Service Pack 5), Windows 2000,
Windows XP
documentation (Document CD-ROM))
Mac OS 8.6, 9.0.2, 9.0.3, 9.0.4, 9.1, 9.2.1 ou 9.2.2
Mac OS X 10.0.4, 10.1, 10.1.1, 10.1.2, 10.1.3, 10.1.4, 10.1.5,
10.2 ou 10.2.1
recommandé)
documentation (Document CD-ROM))
*
16
* Si vous utilisez un système d'exploitation Mac OS X de 10.0 à 10.0.3, il se
peut que vous ne puissiez pas installer Acrobat Reader ni ouvrir ce guide. Si
vous utilisez une version entre 10.0 et 10.0.3, il est recommandé de mettre à
jour le système d’exploitation à la version 10.0.4 ou une version supérieure.
Page 19

Bitte zuerst lesen
Zuerst... ....................................................... 18
Auspacken des Projektors........................... 19
Bedienungshandbuch für einfache
Anwendungen ............................................. 20
Verwendung der Document CD-ROM......... 22
17
Page 20

Zuerst...
Bevor Sie dieses Produkt verwenden, sollten Sie auf jeden Fall:
1. Diese Broschüre durchlesen.
Bitte überprüfen Sie den Projektor und seine Komponenten. Sie sollten
verstehen, wie die mitgelieferte Document CD-ROM verwendet und der
Projektor bei den unterschiedlichen Arbeitsabläufen eingesetzt wird, um
die gewünschten Ergebnisse zu erzielen.
2. Die "Sicherheitsanweisungen und
weltweite Garantiebedingungen"
durchlesen.
Sie enthalten wichtige Informationen über den sicheren Einsatz des
Projektors und außerdem die Verkaufs- und Lieferbedingungen der
weltweiten Garantie. Lesen Sie diese Broschüre sorgfältig durch, bevor
Sie den Projektor verwenden.
Die am häufigsten verwendeten Funktionen des Projektors sind in der
Kurzanleitung enthalten. Bewahren Sie diese in der Nähe des Projektors auf,
um bei Bedarf schnell darin nachschlagen zu können.
18
Sehen Sie unter "Fehlersuche" in der Bedienungsanleitung nach, wenn
Probleme wie keine Projektion, schlechte Bildqualität, usw. auftreten.
Page 21

Auspacken des Projektors
Kontrollieren Sie beim Auspacken des Projektors, ob alle Teile vorhanden sind.
Wenden Sie sich bei einem Fehler oder falls Teile fehlen sollten an den
zuständigen Händler.
Projektor
(mit Objektivdeckel)
Die Abbildung zeigt
einen Projektor mit
einem Standardobjektiv. Die Konfiguration hängt vom
verwendeten Objektiv ab.
Netzkabel
(3 m)
Am Projektor und an
einer Netzsteckdose
anschließen.
Audiokabel
(Stereoministecker
Durchmesser 3,5 mm,
1,8 m)
Verwendung für die
Wiedergabe des Tons
von einem Computer
über den Projektorlautsprecher.
Fernbedienung Alkalibatterien
AA
(2 Stück)
In die Fernbedienung
einsetzen.
RCAVideokabel
(3 m gelb)
Verwendung bei der
Projektion CompositeVideosignalen.
USB-Kabel
(1,8 m)
Verwendung für die
kabellose Mausfunktion und zur
Datenübertragung,
wenn der Projektor an
einem Computer angeschlossen ist.
RCA-Audiokabel
(3 m rot/weiß)
Verwendung für die
Wiedergabe des Tons
der Videogeräte über
den Projektorlautsprecher.
EasyMP
Software
(CD-ROM)
Legen Sie die CDROM in den Computer
ein, wenn Sie die
EasyMP-Software
installieren.
Drahtlose LANKarte
Stecken Sie diese Karte
in den Kartensteckplatz
des Projektors, um den
Projektor über ein drahtloses LAN mit dem
Computer zu verbinden.
PC-Videokabel
(Mini-D-Sub 15-polig/
Mini-D-Sub 15-polig,
1,8m)
Für die Bildprojektion
von einem Computer.
Kennwortschutzaufkleber
Bringen Sie diese
Aufkleber bei aktiviertem Kennwortschutz zur
Vorbeugung eines Diebstahls am Projektor an.
Dokumentation
Bitte zuerst lesen (diese Broschüre)
Sicherheitsanweisungen und
weltweite Garantiebedingungen
Document CD-ROM
Kurzanleitung
EasyMP Aufstellungsanleitung
19
Page 22

Bedienungshandbuch für einfache Anwendungen
Diese Broschüre beschreibt den Betrieb und die Bedienung des Projektors. Sehen Sie
darin nach, wenn Sie etwas über die Bedienung wissen möchten.
Projizieren von Computer- und Videobildern mit Hilfe der Zubehörkabel
Installation des Projektors
Installation
Projizieren von Computerbildern über ein Netzwerk
EMP NS Connection installieren
• Überprüfen der Betriebsumgebung
Betriebsumgebung
• Installationsmethode
Installation der EasyMP-Software
Eine Präsentation ohne einen Computer durchführen
Installieren von EMP SlideMaker2
• Überprüfen der Betriebsumgebung
Betriebsumgebung
• Installationsmethode
Installation der EasyMP-Software
Anschließen des Projektors mit Hilfe
der Zubehörkabel
• Anschluss an einen Computer
Anschluss eines Computer
• Anschluss an eine Videoquelle
Anschluss einer Videoquelle
Vorbereiten des Projektors
• Installation des Projektors
Installation
• Installation der drahtlosen LAN-Karte
Einsetzen und Entfernen von
Speicherkarten
•Netz EIN
Einschalten des Projektors
• Größenänderung und Scharfeinstellung
des projizierten Bildes
Einstellen der Bildwiedergabe
Erstellen eines Szenarios und Versenden
an eine Speicherkarte
• Überprüfen der Kompatibilität der
Speicherkarte
Kompatible Speicherkarten
• Erstellen und Senden eines Szenarios
Vorbereitung einer Präsentation
Projizieren von Filmdateien und Projizieren von Fotos von einer
Digitalkamera aus
Installation des Projektors
Installation
20
Installieren einer Speicherkarte, auf
der Fotos gespeichert sind
• Überprüfen der Kompatibilität der
Speicherkarte
Kompatible Speicherkarten
• Installation der Speicherkarte
Einsetzen und Entfernen von
Speicherkarten
Page 23

Die folgenden Symbole zeigen die Handbuch, in der Sie nachsehen können.
EMP-7850 Bedienungsanleitung EasyMP Aufstellungsanleitung
EasyMP Bedienungsanleitung
Netz EIN
Einschalten des Projektors
Auswahl des Eingangsvideosignals
Einschalten des Projektors
Verbindung über ein Netzwerk
• Verbinden mit einem Computer
Verbindung im
Leichtverbindungsmodus herstellen
• Verbinden über ein Netzwerk
Verbinden im Access-Point-Modus
oder Wired-LAN-Modus
Vorbereiten des Projektors
• Installation des Projektors
Installation
• Installation der Speicherkarte
Einsetzen und Entfernen von
Speicherkarten
• Netz EIN
Einschalten des Projektors
• Größenänderung und Scharfeinstellung
des projizierten Bildes
Einstellen der Bildwiedergabe
Größenänderung und
Scharfeinstellung des projizierten
Bildes
Einstellen der Bildwiedergabe
Betrieb nach dem Verbinden
• Bildprojektion
Weitere Bedienung
• Ändern der Einstellungen von einem
Computer aus
Einstellung, Überwachung und
Steuerung von einem Computer aus
• Beenden der Verbindung
Trennung einen Netzwerkverbindung
Abspielen, Bedienen und Bearbeiten
von Szenarios
Szenarios projizieren
Vorbereiten des Projektors
• Netz EIN
Einschalten des Projektors
• Größenänderung und Scharfeinstellung
des projizierten Bildes
Einstellen der Bildwiedergabe
Fotoprojektion und Betrieb
Wiedergabe von Grafik- und Filmdateien
21
Page 24

Verwendung der Document CD-ROM
Für die Wiedergabe des auf der Document CD-ROM (mit dem Projektor
mitgeliefert) befindlichen Handbuchs wird Adobe Acrobat Reader (im
Folgenden als Acrobat Reader bezeichnet) benötigt.
Wenn das Programm Acrobat Reader nicht auf dem verwendeten Computer
installiert ist, muss es installiert werden. Acrobat Reader kann von der
Document CD-ROM installiert werden.
Das Installationsverfahren unterscheidet sich, je nachdem ob Sie einen
Windows- oder Macintosh-Computer verwenden. Die Verfahren für beide
Computertypen werden im Folgenden beschrieben.
Für Windows
Schalten Sie den Computer ein. Legen Sie die Document CD-ROM
in das CD-ROM-Laufwerk ein.
Falls Acrobat Reader bereits installiert ist, wird der Startseite (TOP) des
Handbuchs automatisch angezeigt. Siehe "Anzeigen des Handbuchs".
Falls Acrobat Reader nicht installiert ist, erscheint eine Anzeige.
Folgen Sie den Anweisungen, um Acrobat Reader zu
1
installieren.
2
Tipp :
Wenn Acrobat Reader zum ersten Mal gestartet wird, erscheint der "ElektronikEndbenutzerlizenzvertrag". Lesen Sie den "Elektronik-Endbenutzerlizenzvertrag"
durch und klicken Sie auf "Akzeptieren", um den Startseite (TOP) des Handbuchs
anzuzeigen. Wenn Sie auf "Ablehnen" klicken, kann das Handbuch nicht geöffnet
werden.
Für Macintosh
Schalten Sie den Computer ein. Legen Sie die Document CD-
1
ROM in das CD-ROM-Laufwerk ein.
Für Benutzer von Mac OS 8.6 und 9.x
2
22
Drücken Sie nach abgeschlossener Installation die Auswurftaste
des CD-ROM-Laufwerks. Nachdem das Laufwerk ausgefahren
ist, schließen Sie es wieder.
Damit wird die CD-ROM neu eingelesen und Acrobat Reader wird
gestartet.
Doppelklicken Sie auf "Launcher_for_OS86_9x"
(für Benutzer von Mac OS 8.6 und 9.x).
Page 25

Für Benutzer von Mac OS X
Doppelklicken Sie auf "Launcher_for_OSX" (für Benutzer
von Mac OS X).
Falls Acrobat Reader bereits installiert ist, wird der Startseite (TOP) des
Handbuchs automatisch angezeigt. Siehe "Anzeigen des Handbuchs".
Falls Acrobat Reader nicht installiert ist, erscheint eine Anzeige.
Folgen Sie den Anweisungen, um Acrobat Reader zu
1
installieren.
Für Benutzer von Mac OS 8.6 und 9.x
2
Doppelklicken Sie auf "Launcher_for_OS86_9x". Der
Startseite (TOP) des Handbuchs wird angezeigt. Siehe
"Anzeigen des Handbuchs".
Für Benutzer von Mac OS X
Nehmen Sie die Document CD-ROM aus dem CD-ROM-
1
Laufwerk, starten Sie dann Ihren Computer neu.
Legen Sie die Document CD-ROM in das CD-ROM-
2
Laufwerk ein.
Doppelklicken Sie auf "Launcher_for_OSX". Der Startseite
3
(TOP) des Handbuchs wird angezeigt. Siehe "Anzeigen
des Handbuchs".
Tipp :
• Wenn Acrobat Reader zum ersten Mal gestartet wird, erscheint der "ElektronikEndbenutzerlizenzvertrag". Lesen Sie den "Elektronik-Endbenutzerlizenzvertrag"
durch und klicken Sie auf "Akzeptieren", um den Startseite (TOP) des Handbuchs
anzuzeigen. Wenn Sie auf "Ablehnen" klicken, kann das Handbuch nicht geöffnet
werden.
• Bitte lesen Sie auf jeden Fall die Readme-Datei, wenn Sie trotz Installation von
Acrobat Reader das Handbuch in Acrobat Reader nicht öffnen können.
Anzeigen des Handbuchs
Wenn der Zeiger über einen Gegenstand am Startseite (TOP)
bewegt wird, ändert er sich auf . Klicken Sie auf einen Punkt, um
dessen Inhalt wiederzugeben.
Lesen Sie bitte zuerst den Abschnitt "In diesem Handbuch verwendete
Bezeichnungen" und "Dieses Handbuch verstehen", bevor Sie den Inhalt des
Handbuchs ansehen.
23
Page 26

Verwendung der Document CD-ROM
Betriebsumgebung
Sie können den Inhalt der Document CD-ROM entweder auf einem WindowsComputer oder einem Macintosh-Computer ansehen.
Windows
Gegenstand Anforderungen
Betriebssystem Microsoft Windows 95 OS R2.0, Windows 98 SE, Windows
Me, Windows NT 4.0 (Service Pack 5), Windows 2000,
Windows XP
CPU Intel Pentium Prozessor
Speicher RAM-Speicher 64 MB oder mehr
Festplatte freier Speicherplatz 24 MB oder mehr
CD-ROM-Laufwerk 8 × oder höher (16 × oder höher empfohlen)
Anzeige 800 × 600 Bildpunkte oder höher
Anwendung Adobe Acrobat Reader 5.05 (auf der Document CD-ROM)
Macintosh
Gegenstand Anforderungen
Betriebssystem Mac OS 8.6, 9.0.2, 9.0.3, 9.0.4, 9.1, 9.2.1 oder 9.2.2
Mac OS X 10.0.4, 10.1, 10.1.1, 10.1.2, 10.1.3, 10.1.4, 10.1.5,
10.2 oder 10.2.1
CPU Power PC G3 oder höher (300 MHz oder höher empfohlen)
Speicher RAM-Speicher 64 MB oder mehr
Festplatte freier Speicherplatz 100 MB oder mehr
CD-ROM-Laufwerk 8 × oder höher (16 × oder höher empfohlen)
Anzeige 800 × 600 Bildpunkte oder höher
Anwendung Adobe Acrobat Reader 5.05 (auf der Document CD-ROM)
*
24
* Bei Verwendung einer Version Mac OS X von 10.0 bis 10.0.3 kann es
möglich sein, dass sich Acrobat Reader nicht installieren lässt oder dass das
Handbuch nicht geöffnet werden kann. Für die Versionen 10.0 bis 10.0.3 wird
empfohlen, das Betriebssystem auf die Version 10.0.4 oder höher zu
aktualisieren.
Page 27

Leggere
attentamente prima
di procedere
In primo luogo.............................................. 26
Disimballaggio del proiettore....................... 27
Manuale operativo semplificato................... 28
Utilizzo del Document CD-ROM.................. 30
25
Page 28

In primo luogo...
Prima di utilizzare il presente prodotto, completare quanto segue:
1. Leggere questo libretto.
Controllare il proiettore ed i relativi componenti. Accertarsi di avere
capito come consultare il contenuto del Document CD-ROM incluso e
di avere capito come utilizzare il proiettore nelle varie fasi operative per
ottenere i risultati desiderati.
2. Leggere le "Istruzioni sulla sicurezza/
Clausole della garanzia internazionale".
Questo documento contiene le informazioni sull'utilizzo del proiettore in
modo sicuro e include le clausole e le clausole della garanzia
internazionale. Leggere attentamente questo libretto prima di utilizzare
il proiettore.
Le funzioni del proiettore più frequentemente utilizzate sono descritte in Guida
rapida. Conservarla sempre con il proiettore per le eventuali consultazioni.
26
Per i problemi a livello di proiezione, di qualità dell'immagine, ecc., vedere
"Risoluzione dei problemi" nel Manuale dell'utente.
Page 29

Disimballaggio del proiettore
Dopo avere disimballato il proiettore, accertarsi che siano presenti tutti i
componenti seguenti.
Se dei componenti risultano mancanti o non compatibili, contattare il fornitore
del prodotto.
Proiettore
(con copriobiettivo)
L'illustrazione mostra
un proiettore su cui è
installato u n obiettivo
standard. La
configurazione varia
in base all'obiettivo
installato.
Cavo di
alimentazione
(3m)
Collegare al
proiettore e a una
presa a muro.
Cavo audio
(3,5mm dia./1,8m
mini plug stereo)
Da utilizzare quando
si riproduce audio da
un computer tramite
l'altoparlante
incorporato del
proiettore.
Te le c o ma n d o Batterie AA
alcaline (2)
Da inserire nel
telecomando.
Cavo video RCA
(3m giallo)
Da utilizzare quando si
proiettano immagini
video composito.
Cavo USB
(1,8m)
Da utilizzare quando
si collega il proiettore
a un computer per
utilizzare la funzione
di emulazione del
mouse senza fili e per
trasmettere dati.
Cavo audio RCA
(3m rosso/bianco)
Da utilizzare quando si
riproduce audio da un
apparecchio video
tramite l'altoparlante
incorporato del
proiettore.
EasyMP
Software
(CD-ROM)
Inserire il CD-ROM
nell'apposita unità per
installare il software
EasyMP.
Scheda LAN senza
fili
Per collegare il proiettore
ad un computer mediante
una rete LAN senza fili,
inserire questa scheda nello
slot di scheda del proiettore.
Cavo computer
(mini D-Sub a 15 pin/mini
D-Sub a 15pin, 1,8m)
Da utilizzare per la
proiezione di immagini
provenienti da un computer.
Adesivo protezione
password
Quando la funzione di
protezione password è
abilitata, applicare gli
adesivi sul proiettore
nella posizione desiderata
per incrementare le difese
antifurto.
Documentazione
Leggere attentamente prima di
procedere (il presente libretto)
Istruzioni sulla sicurezza/Clausole
della garanzia internazionale
Document CD-ROM
Guida rapida
Guida alla configurazione di
EasyMP
27
Page 30

Manuale operativo semplificato
Il presente libretto descrive l'impiego e il funzionamento del proiettore. Consultarlo per
determinare la procedura di funzionamento richiesta.
Proiezione di immagini da computer o da dispositivo video
mediante i cavi accessori
Installazione del proiettore
Installazione
Proiezione di immagini computer via rete
Installazione del EMP NS Connection
• Verifica dell'ambiente operativo
Ambiente operativo
• Metodo di installazione
Installazione del software EasyMP
Svolgimento di una presentazione senza un computer
Installazione di EMP SlideMaker2
• Verifica dell'ambiente operativo
Ambiente operativo
• Metodo di installazione
Installazione del software EasyMP
Collegamento del proiettore mediante
i cavi accessori
• Collegamento ad un computer
Collegamento ad un computer
• Collegamento a una sorgente video
Collegamento a una sorgente video
Preparazione del proiettore
• Installazione del proiettore
Installazione
• Installazione della scheda LAN senza fili
Inserimento e rimozione di PC Card
• Accensione
Accensione del proiettore
• Dimensionamento e messa a fuoco
dell'immagine proiettata
Regolazione delle immagini su
schermo
Creazione di uno scenario e invio dello
stesso a una scheda di memoria
• Verifica della compatibilità della scheda
di memoria
Schede di memoria compatibili
• Creazione e invio di uno scenario
Preparazione di una presentazione
Proiezione di filmati e di fotografie da una fotocamera digitale
Installazione del proiettore
Installazione
28
Installazione di una scheda di memoria
contenente le fotografie salvate
• Verifica della compatibilità della scheda
di memoria
• Installazione della scheda di memoria
Schede di memoria compatibili
Inserimento e rimozione di PC Card
Page 31

Le icone seguenti indicano il manuale da consultare.
Manuale dell'utente di EMP-7850 Guida alla configurazione di EasyMP
Manuale di funzionamento di EasyMP
Accensione
Accensione del proiettore
Selezione del segnale di ingresso
video
Accensione del proiettore
Connessione mediante rete
• Collegamento ad un computer
Connessione tramite il Modo di
collegamento facile
• Collegamento mediante rete
Collegament in Modo punto di
accesso o in Modo LAN cablata
Preparazione del proiettore
• Installazione del proiettore
Installazione
• Installazione della scheda di memoria
Inserimento e rimozione di PC
Card
• Accensione
Accensione del proiettore
• Dimensionamento e messa a fuoco
dell'immagine proiettata
Regolazione delle immagini su
schermo
Dimensionamento e messa a fuoco
dell'immagine proiettata
Regolazione dell'immagine su
schermo
Operazioni post-collegamento
• Operazioni legate alla proiezione
dell'immagine
Funzionamento avanzato
• Modifica delle impostazioni da un
computer
Impostazione, monitoraggio e controllo
da un computer
• Chiusura del collegamento
Disconnessione da una connessione
di rete
Lettura, gestione e modifica degli
scenari
Proiezione di scenari
Preparazione del proiettore
• Accensione
Accensione del proiettore
• Dimensionamento e messa a fuoco
dell'immagine proiettata
Regolazione delle immagini su
schermo
Proiezione e gestione di fotografie
Riproduzione di file grafici e filmati
29
Page 32

Utilizzo del Document CD-ROM
Per visualizzare il manuale sul Document CD-ROM fornito con il proiettore, è
necessario disporre di Adobe Acrobat Reader (d'ora in poi chiamato Acrobat
Reader).
Se Acrobat Reader non è installato sul computer utilizzato, è necessario
installarlo. Acrobat Reader può essere installato a partire dal Document CDROM.
La procedura di installazione varia a seconda se si utilizza un computer
Windows o Macintosh. Le procedure per entrambi i sistemi sono descritte nel
seguito.
Per Windows
Accendere il computer. Inserire il Document CD-ROM nell'unità CDROM.
Se Acrobat Reader risulta installato, viene automaticamente visualizzata la
pagina TOP del manuale. Vedere "Visualizzazione del manuale".
Se Acrobat Reader non risulta installato, viene visualizzato un messaggio.
Seguire le istruzioni del messaggio per installare Acrobat
1
Reader.
Una volta completata l'installazione, premere il pulsante di
2
espulsione dell'unità CD-ROM. Terminata l'apertura del piatto
dell'unità, richiuderlo di nuovo.
In questo modo, il computer riavvia il CD-ROM e apre Acrobat
Reader.
Suggerimento :
Alla prima apertura dopo l'installazione, Acrobat Reader visualizza il "Accordo di
licenza del software". Leggere il "Accordo di licenza del software" e fare clic su
"Accetta" per visualizzare la pagina TOP del manuale. Se si sceglie l'opzione
"Rifiuta", non è possibile visualizzare il manuale.
Per Macintosh
Accendere il computer. Inserire il Document CD-ROM nell'unità
1
CD-ROM.
Per gli utenti di Mac OS 8.6 e 9.x
2
Per gli utenti di Mac OS X
30
Doppio clic su "Launcher_for_OS86_9x".
Doppio clic su "Launcher_for_OSX".
Page 33

Se Acrobat Reader risulta installato, viene automaticamente visualizzata la
pagina TOP del manuale. Vedere "Visualizzazione del manuale".
Se Acrobat Reader non risulta installato, viene visualizzato un messaggio.
Seguire le istruzioni del messaggio per installare Acrobat
1
Reader.
Per gli utenti di Mac OS 8.6 e 9.x
2
Fare doppio clic su "Launcher_for_OS86_9x". Viene
visualizzata la pagina TOP del manuale. Vedere
"Visualizzazione del manuale".
Per gli utenti di Mac OS X
Rimuovere il Document CD-ROM dall'unità CD-ROM,
1
quindi riavviare il computer.
Inserire il Document CD-ROM nell'unità CD-ROM.
2
Fare doppio clic su "Launcher_for_OSX". Viene
3
visualizzata la pagina TOP del manuale. Vedere
"Visualizzazione del manuale".
Suggerimento :
• Alla prima apertura dopo l'installazione, Acrobat Reader visualizza il "Accordo di
licenza del software". Leggere il "Accordo di licenza del software" e fare clic su
"Accetta" per visualizzare la pagina TOP del manuale. Se si sceglie l'opzione
"Rifiuta", non è possibile visualizzare il manuale.
• Se dopo l'installazione di Acrobat Reader, non si riesce ancora ad aprire il
manuale in Acrobat Reader, leggere il file Leggimi.
Visualizzazione del manuale
Posizionando il puntatore sopra una voce della pagina TOP, il
puntatore assume l'aspetto di una . Fare clic su una voce per
visualizzarne il contenuto.
Prima di consultare il contenuto del manuale, leggere i documenti "Notazioni
utilizzate nel presente manuale" e "Conoscere questa manuale".
31
Page 34

Utilizzo del Document CD-ROM
Ambiente operativo
Il contenuto di Document CD-ROM può essere visualizzato sia con un
computer Windows che con un computer Macintosh.
Windows
Componente Requisiti
Sistema operativo Microsoft Windows 95 OS R2.0, Windows 98 SE, Windows
Me, Windows NT 4.0 (Service Pack 5), Windows 2000,
Windows XP
CPU Processore Intel Pentium
Memoria Almeno 64 MB di RAM
Disco fisso Almeno 24 MB di spazio disponibile
Unità CD-ROM 8 × o superiore (consigliato 16 × o superiore)
Monitor Risoluzione 800 × 600 o superiore
Applicazione Adobe Acrobat Reader 5.05 (incluso in Document CD-ROM)
Macintosh
Componente Requisiti
Sistema operativo Mac OS 8.6, 9.0.2, 9.0.3, 9.0.4, 9.1, 9.2.1 o 9.2.2
Mac OS X 10.0.4, 10.1, 10.1.1, 10.1.2, 10.1.3, 10.1.4, 10.1.5,
10.2 o 10.2.1
CPU Power PC G3 o superiore (consigliato 300MHz o superiore)
Memoria Almeno 64 MB di RAM
Disco fisso Almeno 100 MB di spazio disponibile
Unità CD-ROM 8 × o superiore (consigliato 16 × o superiore)
Monitor Risoluzione 800 × 600 o superiore
Applicazione Adobe Acrobat Reader 5.05 (incluso in Document CD-ROM)
*
32
* Se si utilizza Mac OS X versione da 10.0 a 10.0.3, è possibile che non si
riesca a installare Acrobat Reader né ad aprire il file del manuale. Se si
utilizza una versione da 10.0 a 10.0.3, si consiglia di aggiornare il sistema
operativo alla versione 10.0.4 o successiva.
Page 35

Lea primero esto
Primero........................................................ 34
Desembalaje del proyector.......................... 35
Guía de manejo fácil ................................... 36
Uso de Document CD-ROM........................ 38
33
Page 36

Primero...
Antes de usar este producto, le rogamos que:
1. Lea este folleto.
Por favor, compruebe el proyector y sus componentes. Verifique que
entiende cómo usar el Document CD-ROM incluido, y que sabe cómo
usar el proyector en los distintos procedimientos de manejo para
alcanzar los resultados deseados.
2. Lea la sección "Guía de instrucciones de
seguridad/Términos de la garantía
mundial".
Contiene información importante sobre el uso seguro del proyector, y
también incluye los términos y las condiciones de la garantía mundial.
Asegúrese de leer bien este folleto antes de usar el proyector.
Las funciones más usadas del proyector aparecen tratadas en la Guía de
referencia rápida. Manténgala siempre a mano cerca del proyector para poder
consultarla cuando sea necesario.
34
Consulte la "Localización de problemas" en la Manual de instrucciones de si
surgen problemas tales como falta de proyección, mala calidad de la imagen,
etc.
Page 37

Desembalaje del proyector
Cuando desembale el proyector, asegúrese de que tiene todos estos
componentes.
Si alguno de los componentes falta o está equivocado, le rogamos que se ponga
en contacto con el establecimiento en el que lo adquirió.
Proyector
(con tapa para la lente)
La figura muestra un
proyector con un lente
estándar instalado. La
configuración puede
variar dependiendo de
que lente tiene
instalado.
Cable de
alimentación
(3 m)
Conéctelo al
proyector y a una
toma de corriente.
Cable de audio
(3,5 mm de diámetro/
1,8 m con minitoma
estéreo)
Úselo cuando
reproduzca sonidos
desde un ordenador a
través del altavoz
incorporado del
proyector.
Mando a
distancia
Cable de video
RCA
(amarillo de 3 m)
Úselo cuando
proyecte imágenes
de vídeo compuesto.
Cable USB
(1,8 m)
Úselo cuando
conecte el proyector
a un ordenador de
manera de usar la
función de ratón
inalámbrico y para
transmitir datos.
Pilas alcalinas
AA
(2 unidades)
Insértelas en el mando a
distancia.
Cable de audio RCA
(rojo/blanco de 3 m)
Úselo cuando reproduzca
sonidos desde el equipo de
vídeo a través del altavoz
incorporado del proyector.
EasyMP
Software
(CD-ROM)
Coloque esto en el
ordenador al
instalar el software
de EasyMP.
Etiqueta de
contraseña protegida
Cuando contraseña protegida
esté activada, coloque estas
etiquetas en el lugar que
prefiera de su proyector para
aumentar la efectividad contra
robos.
Tarjeta de LAN
inalámbrica
Coloque esta tarjeta en la
ranura de tarjeta del
proyector para conectar
el proyector a un
ordenador a través de una
LAN inalámbrica.
Cable de
ordenador
(mini D-Sub de 15
pins/mini D-Sub de 15
pins, 1,8 m)
Úselo cuando
proyecte imágenes
desde un ordenador.
Documentación
Lea primero esto (este folleto)
Guía de instrucciones de seguridad/
Términos de la garantía mundial
Document CD-ROM
Guía de referencia rápida
Guía de Instalación de EasyMP
35
Page 38

Guía de manejo fácil
Este folleto describe el uso y los procedimientos de manejo del proyector. Consúltelo para
averiguar el procedimiento de manejo que necesite.
Proyección de imágenes de vídeo y ordenador mediante los cables accesorios
Instalación del proyector
Instalación
Conexión del proyector mediante los
cables accesorios
• Conexión a un ordenador
Conexión a un ordenador
• Conexión a una fuente de vídeo
Conexión a un fuente de vídeo
Proyección de imágenes de ordenador a través de una red
Instalación de EMP NS Connection
• Comprobación del entorno operativo
Sistema operativo
• Método de instalación
Instalación del software EasyMP
Preparación del proyector
• Instalación del proyector
Instalación
• Instalación de la tarjeta de LAN
inalámbrica
Inserción y extracción de tarjetas
• Encendido
Encender el proyector
• Ajuste del tamaño y enfoque de la
imagen proyectada
Ajuste de la imagen de pantalla
Ejecución de una presentación sin ordenador
Instalación de EMP SlideMaker2
• Comprobación del entorno operativo
Sistema operativo
• Método de instalación
Instalación del software EasyMP
Creación de un escenario y envío del
mismo a una tarjeta de memoria
• Comprobación de compatibilidad de
tarjetas de memoria
Tarjetas de memoria compatibles
• Creación y envío de un escenario
Preparación de una presentación
Proyección de archivos de película y de fotografías desde una cámara
digital
Instalación del proyector
Instalación
36
Instalación de una tarjeta de memoria
para guardar fotografías
• Comprobación de compatibilidad de
tarjetas de memoria
Tarjetas de memoria compatibles
• Instalación de la tarjeta de memoria
Inserción y extracción de tarjetas
Page 39

Los siguientes iconos muestran el manual que necesita consultar.
Manual de instrucciones de EMP-7850 Guía de instalación de EasyMP
Manual de funcionamiento de EasyMP
Encendido
Encender el proyector
Selección de la señal del vídeo de
entrada
Encender el proyector
Conexión a través de un ordenador
• Conexión a un ordenador
Conexión mediante el Modo de
conexión fácil
• Conexión a través de una red
Conexión con Modo punto
de acceso o Modo de conexión LAN
con cable
Preparación del proyector
• Instalación del proyector
Instalación
• Instalación de la tarjeta de memoria
Inserción y extracción de tarjetas
• Encendido
Encender el proyector
• Ajuste del tamaño y enfoque de la imagen
proyectada
Ajuste de la imagen de pantalla
Ajuste del tamaño y enfoque de la
imagen proyectada
Ajuste de la imagen de pantalla
Operación de posconexión
• Operación de proyección de imágenes
Funciones avanzadas
• Cambio de las configuraciones desde
un ordenador
Configuración, Supervisión y
Control desde un ordenador
• Terminación de la conexión
Desconexión de una conexión de red
Escenarios de reproducción,
operación y edición
Proyección de escenarios
Preparación del proyector
• Encendido
Encender el proyector
• Ajuste del tamaño y enfoque de la
imagen proyectada
Ajuste de la imagen de pantalla
Proyección y manejo de fotografías
Visualización de archivos de imagen
y de película
37
Page 40

Uso de Document CD-ROM
Hace falta Adobe Acrobat Reader (a partir de ahora designado como Acrobat
Reader) para ver la guía en el Document CD-ROM que acompaña al proyector.
Si el ordenador que esté utilizando no tiene instalado Acrobat Reader, deberá
instalarlo. Acrobat Reader se puede instalar a partir de Document CD-ROM.
El procedimiento de instalación varía según se esté usando un ordenador
Windows o un ordenador Macintosh. Los procedimientos para ambos tipos de
ordenador se facilitan a continuación.
Para Windows
Encienda el ordenador. Inserte el Document CD-ROM en la unidad
de CD-ROM.
Si ha instalado Acrobat Reader, la página TOP del manual aparecerá
automáticamente. Consulte la sección "Visualización del manual".
Si aún no ha instalado Acrobat Reader, aparecerá un mensaje.
Siga las instrucciones del mensaje para instalar Acrobat
1
Reader.
Una vez terminada la instalación, pulse el botón de expulsión de
2
la unidad de CD-ROM. Cuando la bandeja de la unidad se haya
desplegado completamente, vuélvala a cerrar.
Esto hará que el ordenador reinicie el CD-ROM, y Acrobat Reader se
abrirá.
Pista :
Cuando abra Acrobat Reader por primera vez después de su instalación, aparecerá
el "Acuerdo de licencia de software". Después de leer los contenidos del "Acuerdo
de licencia de software", haga clic en "Aceptar" para visualizar la página TOP del
manual. Si hace clic en "Rechazar", no podrá visualizar el manual.
Para Macintosh
Encienda el ordenador. Inserte el Document CD-ROM en la
1
unidad de CD-ROM.
38
Page 41

Si es usuario de Mac OS 8.6 y 9.x
2
Doble clic en "Launcher_for_OS86_9x".
Si es usuario de Mac OS X
Doble clic en "Launcher_for_OSX".
Si ha instalado Acrobat Reader, la página TOP del manual aparecerá
automáticamente. Consulte la sección "Visualización del manual".
Si aún no ha instalado Acrobat Reader, aparecerá un mensaje.
Siga las instrucciones del mensaje para instalar Acrobat
1
Reader.
Si es usuario de Mac OS 8.6 y 9.x
2
Haga doble clic en "Launcher_for_OS86_9x". Aparecerá en
pantalla la página TOP del manual. Consulte "Visualización
del manual".
Si es usuario de Mac OS X
Saque el Document CD-ROM de la unidad de CD-ROM, y
1
luego reinicie el ordenador.
Inserte el Document CD-ROM en la unidad de CD-ROM.
2
Haga doble clic en "Launcher_for_OSX". Aparecerá en
3
pantalla la página TOP del manual. Consulte
"Visualización del manual".
Pista :
• Cuando abra Acrobat Reader por primera vez después de su instalación,
aparecerá el "Acuerdo de licencia de software". Después de leer los contenidos
del "Acuerdo de licencia de software", haga clic en "Aceptar" para visualizar la
página TOP del manual. Si hace clic en "Rechazar", no podrá visualizar el
manual.
• Si a pesar de haber instalado Acrobat Reader no puede abrir la guía, le rogamos
que lea el archivo Léame.
Visualización del manual
Cuando mueva el cursor hasta colocarlo encima de algún elemento
de la página TOP, el cursor se transformará en . Haga clic en un
elemento para ver sus contenidos.
Antes de visualizar los contenidos del manual, asegúrese de leer los
documentos titulados "Anotaciones usadas en este manual" y "Instrucciones
para el uso del manual".
39
Page 42

Uso de Document CD-ROM
Entorno operativo
Puede visualizar los contenidos de Document CD-ROM en un ordenador
Windows o en un ordenador Macintosh.
Windows
Elemento Requisitos
Sistema operativo Microsoft Windows 95 OS R2.0, Windows 98 SE, Windows
Me, Windows NT 4.0 (Service Pack 5), Windows 2000,
Windows XP
CPU Procesador Intel Pentium
Memoria 64 MB o más de RAM
Disco duro 24 MB o más de espacio libre
Unidad de CD-ROM 8 × o superior (se recomienda 16 × o superior)
Pantalla 800 × 600 píxeles o más
Aplicación Adobe Acrobat Reader 5.05 (incluido en el Document CD-
ROM)
Macintosh
Elemento Requisitos
Sistema operativo Mac OS 8.6, 9.0.2, 9.0.3, 9.0.4, 9.1, 9.2.1 ó 9.2.2
Mac OS X 10.0.4, 10.1, 10.1.1, 10.1.2, 10.1.3, 10.1.4, 10.1.5,
10.2 ó 10.2.1
CPU Power PC G3 o superior (se recomiendan 300 MHz o más)
Memoria 64 MB o más de RAM
Disco duro 100 MB o más de espacio libre
Unidad de CD-ROM 8 × o superior (se recomienda 16 × o superior)
Pantalla 800 × 600 píxeles o más
Aplicación Adobe Acrobat Reader 5.05 (incluido en el Document CD-
ROM)
*
40
* Si está utilizando una versión entre 10.0 y 10.0.3 del sistema operativo Mac
OS X, es posible que no pueda instalar Acrobat Reader o que no pueda abrir
el archivo de la guía. Si utiliza una versión entre 10.0 y 10.0.3, se recomienda
actualizar el sistema operativo a la versión 10.0.4 ó posterior.
Page 43

Page 44

Printed in Japan
03.07-.3A (C01)
404401101
 Loading...