

Page 1

Register your instrument!
www.eppendorf.com/myeppendorf
Eppendorf ThermoMixer® C
Operating manual
Page 2

Copyright ©2014 Eppendorf AG, Germany. All rights reserved, including graphics and
images. No part of this publication may be reproduced without the prior permission of the
copyright owner.
Eppendorf
®
and the Eppendorf logo are registered trademarks of Eppendorf AG,
Germany.
Eppendorf ThermoMixer®, Eppendorf ThermoTop®, and condens.protect® are registered
trademarks of Eppendorf AG, Germany.
Registered trademarks and protected trademarks are not marked in all cases with
®
or ™
in this manual.
Operating manual Eppendorf ThermoMixer® Cseeon p.Fig.Tab.p.
English (EN)Operating manual
5382 900.016-02/092014
Page 3

Eppendorf ThermoMixer
Table of contents
®
English (EN)
Table of contents
1 Operating instructions. . . . . . . . . . . . . . . . . . . . . . . . . . . . . . . . . . . . . . . . . . . . . . . . 7
1.1 Using this manual . . . . . . . . . . . . . . . . . . . . . . . . . . . . . . . . . . . . . . . . . . . . . . 7
1.2 Danger symbols and danger levels . . . . . . . . . . . . . . . . . . . . . . . . . . . . . . . . . 7
1.2.1 Danger symbols . . . . . . . . . . . . . . . . . . . . . . . . . . . . . . . . . . . . . . . . 7
1.2.2 Danger levels . . . . . . . . . . . . . . . . . . . . . . . . . . . . . . . . . . . . . . . . . . 7
1.3 Symbols used . . . . . . . . . . . . . . . . . . . . . . . . . . . . . . . . . . . . . . . . . . . . . . . . . 8
1.4 Abbreviations used . . . . . . . . . . . . . . . . . . . . . . . . . . . . . . . . . . . . . . . . . . . . . 8
1.5 Glossary. . . . . . . . . . . . . . . . . . . . . . . . . . . . . . . . . . . . . . . . . . . . . . . . . . . . . . 8
2 Product description . . . . . . . . . . . . . . . . . . . . . . . . . . . . . . . . . . . . . . . . . . . . . . . . . . 9
2.1 Main illustration . . . . . . . . . . . . . . . . . . . . . . . . . . . . . . . . . . . . . . . . . . . . . . . 9
2.2 Delivery package . . . . . . . . . . . . . . . . . . . . . . . . . . . . . . . . . . . . . . . . . . . . . . . 9
2.3 Features. . . . . . . . . . . . . . . . . . . . . . . . . . . . . . . . . . . . . . . . . . . . . . . . . . . . . 10
3 Safety . . . . . . . . . . . . . . . . . . . . . . . . . . . . . . . . . . . . . . . . . . . . . . . . . . . . . . . . . . . . 11
3.1 Intended use . . . . . . . . . . . . . . . . . . . . . . . . . . . . . . . . . . . . . . . . . . . . . . . . . 11
3.2 User profile . . . . . . . . . . . . . . . . . . . . . . . . . . . . . . . . . . . . . . . . . . . . . . . . . . 11
3.3 Information on product liability . . . . . . . . . . . . . . . . . . . . . . . . . . . . . . . . . . 11
3.4 Warnings for intended use . . . . . . . . . . . . . . . . . . . . . . . . . . . . . . . . . . . . . . 12
3.5 Danger symbols on the device . . . . . . . . . . . . . . . . . . . . . . . . . . . . . . . . . . . 15
4 Installation . . . . . . . . . . . . . . . . . . . . . . . . . . . . . . . . . . . . . . . . . . . . . . . . . . . . . . . . 16
4.1 Selecting the location . . . . . . . . . . . . . . . . . . . . . . . . . . . . . . . . . . . . . . . . . . 16
4.2 Installing the instrument . . . . . . . . . . . . . . . . . . . . . . . . . . . . . . . . . . . . . . . . 16
C
3
5 Operation . . . . . . . . . . . . . . . . . . . . . . . . . . . . . . . . . . . . . . . . . . . . . . . . . . . . . . . . . 17
5.1 Overview of operating controls . . . . . . . . . . . . . . . . . . . . . . . . . . . . . . . . . . . 17
5.2 Setting the language . . . . . . . . . . . . . . . . . . . . . . . . . . . . . . . . . . . . . . . . . . . 19
5.3 Installing the thermoblock . . . . . . . . . . . . . . . . . . . . . . . . . . . . . . . . . . . . . . 19
5.3.1 Attaching the thermoblock . . . . . . . . . . . . . . . . . . . . . . . . . . . . . . 21
5.3.2 Removing the thermoblock . . . . . . . . . . . . . . . . . . . . . . . . . . . . . . 21
5.4 Inserting tubes and plates . . . . . . . . . . . . . . . . . . . . . . . . . . . . . . . . . . . . . . . 22
5.5 Installing the ThermoTop . . . . . . . . . . . . . . . . . . . . . . . . . . . . . . . . . . . . . . . 23
5.6 Temperature control . . . . . . . . . . . . . . . . . . . . . . . . . . . . . . . . . . . . . . . . . . . 24
5.6.1 Temperature control with time setting . . . . . . . . . . . . . . . . . . . . . 24
5.7 Mixing . . . . . . . . . . . . . . . . . . . . . . . . . . . . . . . . . . . . . . . . . . . . . . . . . . . . . . 25
5.7.1 Mixing without temperature control . . . . . . . . . . . . . . . . . . . . . . . 25
5.7.2 Mixing and tempering . . . . . . . . . . . . . . . . . . . . . . . . . . . . . . . . . . 25
5.7.3 Mixing/temperature control with continuous run . . . . . . . . . . . . . 26
5.7.4 Interrupting the mixing process . . . . . . . . . . . . . . . . . . . . . . . . . . 27
5.7.5 Short Mix . . . . . . . . . . . . . . . . . . . . . . . . . . . . . . . . . . . . . . . . . . . . 27
5.7.6 Mixing/tempering with Time Control or Temp Control. . . . . . . . . 27
Page 4

Table o f con tents
Eppendorf ThermoMixer
4
®
C
English (EN)
5.8 Menu . . . . . . . . . . . . . . . . . . . . . . . . . . . . . . . . . . . . . . . . . . . . . . . . . . . . . . . 28
5.8.1 Navigating in the menu . . . . . . . . . . . . . . . . . . . . . . . . . . . . . . . . . 28
5.8.2 Menu structure . . . . . . . . . . . . . . . . . . . . . . . . . . . . . . . . . . . . . . . 28
5.9 Programs . . . . . . . . . . . . . . . . . . . . . . . . . . . . . . . . . . . . . . . . . . . . . . . . . . . . 30
5.9.1 Creating a program . . . . . . . . . . . . . . . . . . . . . . . . . . . . . . . . . . . . 30
5.9.2 Interval Mix: Creating a program level with pause interval . . . . . 32
5.9.3 Restricting ramp rates . . . . . . . . . . . . . . . . . . . . . . . . . . . . . . . . . . 33
5.9.4 Quick save with program keys. . . . . . . . . . . . . . . . . . . . . . . . . . . . 33
5.9.5 Loading a saved program . . . . . . . . . . . . . . . . . . . . . . . . . . . . . . . 34
5.9.6 Editing programs . . . . . . . . . . . . . . . . . . . . . . . . . . . . . . . . . . . . . . 35
5.9.7 Deleting programs . . . . . . . . . . . . . . . . . . . . . . . . . . . . . . . . . . . . . 35
6 Troubleshooting. . . . . . . . . . . . . . . . . . . . . . . . . . . . . . . . . . . . . . . . . . . . . . . . . . . . 36
6.1 General errors . . . . . . . . . . . . . . . . . . . . . . . . . . . . . . . . . . . . . . . . . . . . . . . . 36
6.2 Error messages . . . . . . . . . . . . . . . . . . . . . . . . . . . . . . . . . . . . . . . . . . . . . . . 37
7 Maintenance. . . . . . . . . . . . . . . . . . . . . . . . . . . . . . . . . . . . . . . . . . . . . . . . . . . . . . . 38
7.1 Setting service intervals . . . . . . . . . . . . . . . . . . . . . . . . . . . . . . . . . . . . . . . . 38
7.2 Cleaning . . . . . . . . . . . . . . . . . . . . . . . . . . . . . . . . . . . . . . . . . . . . . . . . . . . . 38
7.2.1 Cleaning the thermoblock . . . . . . . . . . . . . . . . . . . . . . . . . . . . . . . 39
7.3 Disinfection/Decontamination. . . . . . . . . . . . . . . . . . . . . . . . . . . . . . . . . . . . 40
7.4 Decontamination before shipment . . . . . . . . . . . . . . . . . . . . . . . . . . . . . . . . 40
7.5 Verification of temperature control . . . . . . . . . . . . . . . . . . . . . . . . . . . . . . . . 40
8 Transport, storage and disposal . . . . . . . . . . . . . . . . . . . . . . . . . . . . . . . . . . . . . . . 41
8.1 Transport. . . . . . . . . . . . . . . . . . . . . . . . . . . . . . . . . . . . . . . . . . . . . . . . . . . . 41
8.2 Storage . . . . . . . . . . . . . . . . . . . . . . . . . . . . . . . . . . . . . . . . . . . . . . . . . . . . . 41
8.3 Disposal. . . . . . . . . . . . . . . . . . . . . . . . . . . . . . . . . . . . . . . . . . . . . . . . . . . . . 41
9 Technical data . . . . . . . . . . . . . . . . . . . . . . . . . . . . . . . . . . . . . . . . . . . . . . . . . . . . . 42
9.1 Power supply. . . . . . . . . . . . . . . . . . . . . . . . . . . . . . . . . . . . . . . . . . . . . . . . . 42
9.2 Weight/dimensions . . . . . . . . . . . . . . . . . . . . . . . . . . . . . . . . . . . . . . . . . . . . 42
9.3 Ambient conditions . . . . . . . . . . . . . . . . . . . . . . . . . . . . . . . . . . . . . . . . . . . . 42
9.4 Application parameters . . . . . . . . . . . . . . . . . . . . . . . . . . . . . . . . . . . . . . . . . 43
9.4.1 Temperature control . . . . . . . . . . . . . . . . . . . . . . . . . . . . . . . . . . . 43
9.4.2 Mix. . . . . . . . . . . . . . . . . . . . . . . . . . . . . . . . . . . . . . . . . . . . . . . . . 44
9.4.3 Time setting. . . . . . . . . . . . . . . . . . . . . . . . . . . . . . . . . . . . . . . . . . 44
9.5 Interface . . . . . . . . . . . . . . . . . . . . . . . . . . . . . . . . . . . . . . . . . . . . . . . . . . . . 44
10 Ordering information. . . . . . . . . . . . . . . . . . . . . . . . . . . . . . . . . . . . . . . . . . . . . . . . 45
10.1 Device and accessories . . . . . . . . . . . . . . . . . . . . . . . . . . . . . . . . . . . . . . . . . 45
10.2 Tubes and plates . . . . . . . . . . . . . . . . . . . . . . . . . . . . . . . . . . . . . . . . . . . . . . 46
10.3 Temperature Verification System . . . . . . . . . . . . . . . . . . . . . . . . . . . . . . . . . 47
Page 5

Eppendorf ThermoMixer
Table of contents
®
English (EN)
11 Program data form. . . . . . . . . . . . . . . . . . . . . . . . . . . . . . . . . . . . . . . . . . . . . . . . . . 48
Index . . . . . . . . . . . . . . . . . . . . . . . . . . . . . . . . . . . . . . . . . . . . . . . . . . . . . . . . . . . . . 49
Certificates . . . . . . . . . . . . . . . . . . . . . . . . . . . . . . . . . . . . . . . . . . . . . . . . . . . . . . . . 51
C
5
Page 6

Table o f con tents
Eppendorf ThermoMixer
6
English (EN)
®
C
Page 7
Operating instructions
Eppendorf ThermoMixer
English (EN)
®
1 Operating instructions
1.1 Using this manual
Read this operating manual completely before using the device for the first time. Also
observe the instructions for use of the accessories.
This operating manual is part of the product. Thus, it must always be easily accessible.
Enclose this operating manual when transferring the device to third parties.
You will find the current version of the operating manual for all available languages on
our webpage under www.eppendorf.com
1.2 Danger symbols and danger levels
The safety instructions of this operating manual indicate the following danger symbols
and danger levels:
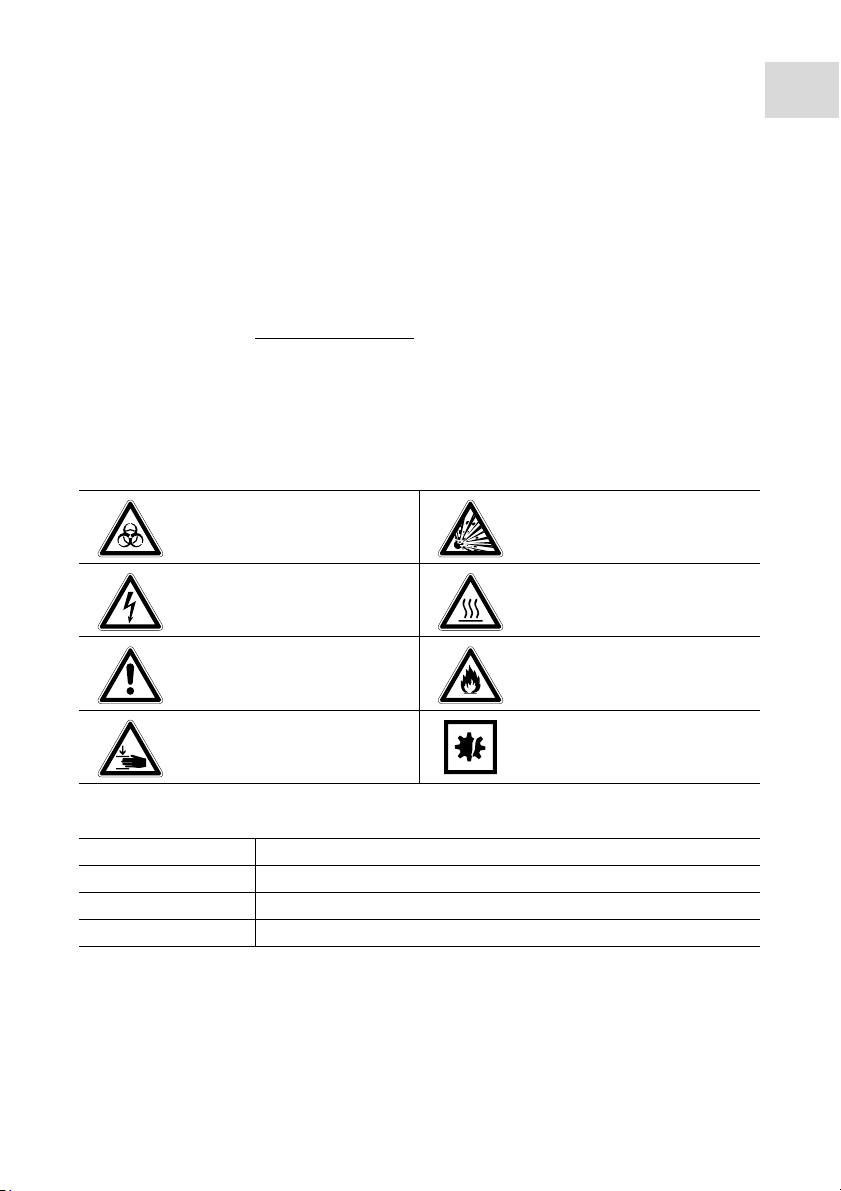
1.2.1 Danger symbols
Biohazard Explosion
Electric shock Hot surface
.
C
7
Hazard point Risk of fire
Crushing Material damage
1.2.2 Danger levels
DANGER Will lead to severe injuries or death.
WAR NIN G May lead to severe injuries or death.
CAUTION May lead to light to moderate injuries.
NOTICE May lead to material damage.
Page 8
Operating instructions
Eppendorf ThermoMixer
8
English (EN)
®
C
1.3 Symbols used
Depiction Meaning
1.
2.
Actions in the specified order
Actions without a specified order
• List
Text Display text or software text
Additional information
1.4 Abbreviations used
PCR
Polymerase chain reaction
rpm
Revolutions per minute – in rpm
1.5 Glossary
Deepwell plate Plate with 48, 96 or 384 wells with a larger volume than
microplates. Suitable for the preparation, mixing,
centrifuging, transporting and storing of solid and liquid
samples.
Lid Lid for the thermoblock. Ensures uniform temperature
control and protects samples from unwanted exposure
to light.
Microplate Plate with 24, 48, 96 or 384 wells for the preparation,
mixing, centrifuging, transporting and storing of solid
and liquid samples.
PCR plate Plate with 96 or 384 wells for PCR applications.
ThermoTop Heated cover for the thermoblock. Prevents the
Well Concave vessel of a microplate, PCR plate or deepwell
formation of condensation on the inner wall or the lid of
the tube thanks to the condens.protect technology.
plate.
Page 9

2 Product description
1 3 542
674
2.1 Main illustration
Abb. 2-1:ThermoMixer C
Fig. 2-1: ThermoMixer C
Product description
Eppendorf ThermoMixer
English (EN)
®
C
9
1 Operating controls
2Display
3 Heating/cooling plate
4 Centering pins
5Power switch
6 Power connection socket
7 USB interface (for Eppendorf Service
only)
2.2 Delivery package
Quantity Order no.
(International)
Order no.
(North America)
Description
ThermoMixer C
1 5382 000.015 5382000023 basic device without thermoblock
1– – Mains/power cord
1 5382 900.016 Operating Manual ThermoMixer C
1 5382 900.024 Short Instructions ThermoMixer C
Check the delivery for completeness.
Check all parts for damage in transit.
To safely transport and store the device, keep the transport box and packing
material.
Page 10

Product description
Eppendorf ThermoMixer
10
®
C
English (EN)
2.3 Features
You can use the ThermoMixer C for performing two basic applications of the sample
preparation in one convenient workstep: the simultaneous mixing and tempering of the
sample material.
The thermoblocks can be exchanged quickly and easily, without the use of tools. The
thermoblocks allow the use of lab tubes in the microliter and milliliter ranges:
• Tubes (e.g., Eppendorf Safe-Lock Tubes with volumes of 0.2 mL to 5.0 mL)
• Conical tubes with volumes of 15 mL and 50 mL
• Microplates and deepwell plates with any kind of bottom shape
• PCR plates (e.g., Eppendorf twin.tec PCR Plate 96, Eppendorf twin.tec PCR Plate 384)
• Tubes with a diameter of 11 mm to 11.9 mm
•Cryotubes
Temperature control
• Peltier cooling allows samples to be cooled to 15 °C below ambient temperature.
• The temperature range can be set from 1 °C to 100 °C.
Mix
• Depending on the utilized thermoblock, you can select mixing frequencies between
300 rpm and 3 000 rpm.
• Anti-spill technology prevents lid wetting and cross contamination.
• The controlled and efficient mixing movement of the
2D
Mix-Control technology
provides for a fast and complete mixing even of minimum volumes.
• Short Mix: Short, uncomplicated mixing of sample material. The mixing process is
performed at the selected speed as long as you press the short key.
• Interval Mix: Continuous switching between mixing phases and pauses. The mixing
frequency and the duration are freely selectable.
• Interrupt time counting: If you want to add reagents or exchange tubes while mixing,
you can interrupt time counting and the mixing process.
Multi-level mixing/temperature control
• In addition to a normal mixing/temperature control run, you can freely define
programs with up to four successive levels ("steps"). The program levels automatically
run one after the other.
• A total of 20 program slots is available.
• Program keys: The 5 most common mixing and temperature control parameters are
already stored as programs and can be selected directly with the program keys. The
programs can be overwritten.
Lid and ThermoTop
• The Lid ensures uniform temperature control and protects samples from unwanted
exposure to light.
• The ThermoTop prevents the formation of condensation on the inner wall or the lid of
the tube thanks to the condens.protect technology.
Page 11

Safety
Eppendorf ThermoMixer
®
English (EN)
3Safety
3.1 Intended use
The ThermoMixer C is intended for use in a molecular biology laboratory.
The ThermoMixer C is designed for the temperature control and mixing of liquids in
closed tubes and closed plates for the preparation and processing of samples.
The ThermoMixer C is exclusively intended for use indoors. All country-specific safety
requirements for operating electrical equipment in the laboratory must be observed.
Only use Eppendorf accessories or accessories recommended by Eppendorf.
3.2 User profile
The device and accessories may only be operated by trained and skilled personnel.
Before using the device, read the operating manual carefully and familiarize yourself with
the device's mode of operation.
3.3 Information on product liability
In the following cases, the designated protection of the device may be compromised.
Liability for any resulting property damage or personal injury is then transferred to the
operator:
• The device is not used in accordance with the operating manual.
• The device is used outside of its intended use.
• The device is used with accessories or consumables which are not recommended by
Eppendorf.
• The device is maintained or repaired by people not authorized by Eppendorf.
• The user makes unauthorized changes to the device.
C
11
Page 12

Safety
Eppendorf ThermoMixer
12
English (EN)
®
C
3.4 Warnings for intended use
Read the operating instructions and observe the following general safety information
before using the ThermoMixer C.
DANGER! Risk of explosion.
Do not operate the device in areas where work is completed with explosive
substances.
Do not use this device to process any explosive or highly reactive substances.
Do not use this device for processing any substances which could generate an
explosive atmosphere.
DANGER! Electric shock as a result of penetration of liquid.
Switch off the device and disconnect the power plug before starting cleaning
or disinfection work.
Do not allow any liquids to penetrate the inside of the housing.
Use closed tubes and closed plates.
Do not spray clean/spray disinfect the housing.
Only plug the device back in if it is completely dry, both inside and outside.
WARNING! Electric shock due to damage to device or mains cable.
Only switch on the device if the device and mains cable are undamaged.
Only use devices that have been properly installed or repaired.
In case of danger, disconnect the device from the mains supply by pulling the
power plug from the device or the mains socket or, by using the isolating
device intended for this purpose (e.g., emergency stop switch in the
laboratory).
WARNING! Lethal voltages inside the device.
Touching parts which are under high voltage may cause an electric shock. An
electric shock injures the heart and causes respiratory paralysis.
Ensure that the housing is closed and undamaged.
Do not remove the housing.
Ensure that no liquid can penetrate into the device.
Only authorized service staff may open the device.
Page 13

Safety
Eppendorf ThermoMixer
English (EN)
WARNING! Risk from incorrect supply voltage
®
Only connect the device to voltage sources which correspond to the electrical
requirements on the name plate.
Only use sockets with a protective earth (PE) conductor and suitable power
cable.
WARNING! Risk of burns from hot surfaces.
The thermoblock and the heating/cooling plate can be very hot after heating and
cause burns.
Allow the thermoblock and heating/cooling plate to cool down completely
before removing the thermoblock.
WARNING! Personal injury or material damage due to chemically or
mechanically damaged thermoblocks.
Do not use thermoblocks that show signs of corrosion or mechanical damage.
Regularly check the condition of the thermoblocks.
WARNING! Damage to health due to infectious liquids and pathogenic
germs.
When handling infectious liquids and pathogenic germs, observe the national
regulations, the biological security level of your laboratory, the material safety
data sheets, and the manufacturer's application notes.
Wear personal protective equipment.
For comprehensive regulations about handling germs or biological material
of risk group II or higher, please refer to the "Laboratory Biosafety Manual"
(source: World Health Organization, Laboratory Biosafety Manual, in its
respectively current valid version).
C
13
WARNING! Risk of fire.
Do not use this device to process any highly flammable liquids.
WARNING! Damage to health due to contaminated device and accessories.
Decontaminate the device and the accessories before storage and shipping.
Page 14

Safety
Eppendorf ThermoMixer
14
English (EN)
WARNING! Risk of injury due to incorrect consumables.
• Poorly fitting tubes or plates can become detached from the thermoblock.
• Glass tubes can smash.
Only use the thermoblocks with the consumables designed for them.
Never use tubes made of glass or other fragile material.
WARNING! Contamination due to opening seals of consumables.
In the following cases, the seals of tubes can spring open. Sample material can
escape.
• high vapor pressure of the content
•improperly sealed cover
• damaged sealing lip
• improperly fastened foil
Always check that consumables have been sealed tightly before use.
WARNING! Injury from sample material being thrown out.
Sample material can be thrown out of open, improperly sealed or unstable tubes
and plates.
Only mix in closed tubes and closed plates.
Observe the nationally prescribed safety environment when working with
hazardous, toxic and pathogenic samples. Pay particular attention to personal
protective equipment (gloves, clothing, goggles etc.), extraction, and the
safety class of the lab.
®
C
CAUTION! Poor safety due to incorrect accessories and spare parts.
The use of accessories and spare parts other than those recommended by
Eppendorf may impair the safety, functioning and precision of the device.
Eppendorf cannot be held liable or accept any liability for damage resulting from
the use of incorrect or non-recommended accessories and spare parts, or from
the improper use of such equipment.
Only use accessories and original spare parts recommended by Eppendorf.
CAUTION! Crush hazard due to moving parts.
Do not replace any consumables during the mixing process.
Do not remove the thermoblock during the mixing process.
Put on the ThermoTop or Lid prior to the mixing process.
Do not remove the ThermoTop or Lid during the mixing process.
Page 15
Safety
Eppendorf ThermoMixer
English (EN)
NOTICE! Caution! Strong vibration.
When mixing at high speeds, items located near the device may be moved by the
vibrations of the work surface and, e.g., fall off the work table.
®
Do not place easily movable items near the device or secure them adequately.
NOTICE! Damage to the display due to mechanical pressure.
Do not apply mechanical pressure to the display.
NOTICE! Damage from overheating.
Do not install the device near to any heat sources (e.g., heating, drying
cabinet).
Do not expose the device to direct sunlight.
Ensure unobstructed air circulation. Keep free a clearance of at least 10 cm
(3.9 in) around all ventilation grilles.
NOTICE! Damage to electronic components due to condensation.
Condensate can form in the device after it has been moved from a cool
environment to a warmer environment.
After installing the device, wait at least for 3 h. Only then connect the device
to the mains.
C
15
NOTICE! Damage from the use of aggressive chemicals.
Do not use any aggressive chemicals on the device or its accessories, such as
strong and weak bases, strong acids, acetone, formaldehyde, halogenated
hydrocarbons or phenol.
If the device has been contaminated by aggressive chemicals, immediately
clean it by means of a mild cleaning agent.
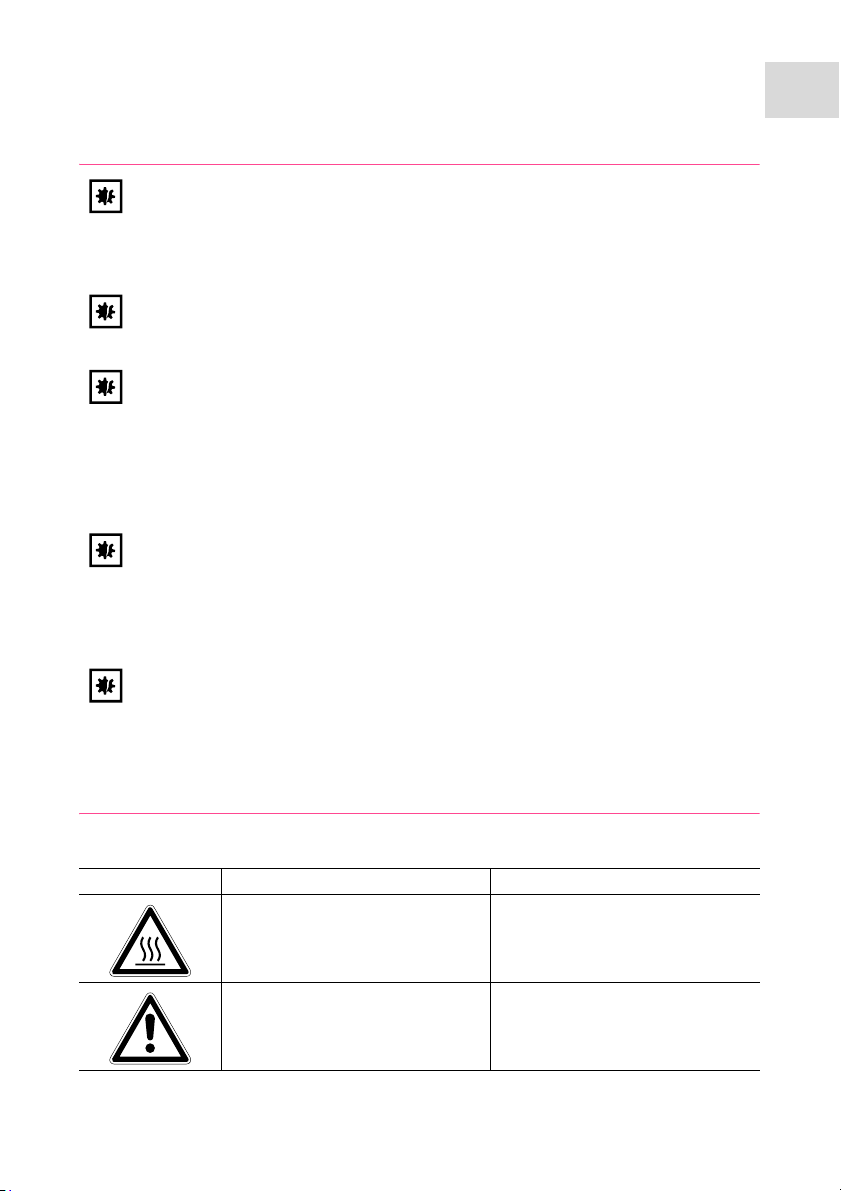
3.5 Danger symbols on the device
Representation Meaning Location
Risk of burns from hot surfaces. Upper device side
On the thermoblock
Observe the operating manual. Rear of the device
Page 16

Installation
Eppendorf ThermoMixer
16
English (EN)
®
C
4 Installation
4.1 Selecting the location
Select the device location according to the following criteria:
• Mains/power connection in accordance with the name plate
• Minimum distance to other devices and walls:10 cm (3.9 in)
• Resonance free table with horizontal even work surface
• The design of table is suitable for operating the device.
• The design of table is suitable for operating the device.
• Surrounding area must be well ventilated.
• The location must be protected against direct sunlight.
The mains/power switch and cutting unit of the mains/power line must be easily
accessible during operation (e.g, residual current circuit breaker).
4.2 Installing the instrument
WARNING! Risk from incorrect supply voltage
Only connect the device to voltage sources which correspond to the electrical
requirements on the name plate.
Only use sockets with a protective earth (PE) conductor and suitable power
cable.
1. Place the ThermoMixer C on a suitable work surface.
Position the device in such a way that the ventilation slots of the device are not
obstructed.
2. Connect the power cable to the power connection socket of the device and the power
supply.
Page 17

5Operation
21
346 5
789
5.1 Overview of operating controls
Abb. 5-1:Operating controlsThermoMixer C
Fig. 5-1: Operating controlsThermoMixer C
Eppendorf ThermoMixer
Operation
English (EN)
®
C
17
1 Program keys with control LEDs
Press the program key: Load program
Keep the program key pressed for 2 s:
Save current parameters
2short key
Short Mix runs while the short key is
being pressed (see p. 27).
3 start/stop key
Press the start/stop key: Start or stop
mixing/temperature control
Press and hold the start/stop key for 2 s:
Pause (interrupt mixing process and
time counting)
4 Arrow keys speed
Setting the mixing frequency
Keep the arrow key pressed: Quick
setting
5Arrow keys temp
Set temperature
Keep the arrow key pressed: Quick
setting
As soon as the target temperature is
modified, the device begins to perform
temperature control.
6Arrow keys time
Setting the mixing time
Keep the arrow key pressed: Quick
setting
7Display
8Menu arrow keys
Navigating the menu: Load or edit
programs, set key lock, set the time
mode, edit the settings.
9 menu/enter key
Open the menu.
Confirm your selection
Page 18

Operation
1 23
4 5 6 7 8 9
10111213
Eppendorf ThermoMixer
18
®
English (EN)
Abb. 5-2:Display ThermoMixer C
Fig. 5-2: Display ThermoMixer C
C
1Program number
2Program name
3 Program levels (step 1 to step 4)
*: current step
4 Device status
Device is performing mixing/
temperature control.
Mixing process interrupted,
temperature control to be continued.
5ThermoTop
ThermoTop has been attached.
To prevent the formation of condensate,
the device heats up the ThermoTop,
before the temperature of the
thermoblock is controlled.
6Interval Mix
Interval Mix has been activated for
the current step.
7Speaker
8Key lock
Key lock activated: parameters cannot
be changed.
No key lock.
9Time mode
Time Control Time counting begins
immediately.
Temp Control Time counting begins
when the set temperature has been
reached.
10 Mixing frequency
11 Actual temperature
When the actual temperature flashes on
the display, the device is not in
temperature control mode operation.
12 Set temperature
When the set temperature has been
reached, only one value is displayed.
13 Mixing time
Speaker switched on.
Speaker switched off.
Page 19

Eppendorf ThermoMixer
Operation
English (EN)
5.2 Setting the language
The device is delivered with English as the default language. To set another language,
proceed as follows:
1. Switch on the device with the power switch at the rear of the device.
2. To open the menu, press the menu/enter key.
3. Select the Settings menu item with the menu arrow keys.
4. To confirm your selection, press the menu/enter key.
5. Select the Language menu item with the menu arrow keys. Confirm
with the menu/enter key.
6. Select the language with the menu arrow keys and press the menu/
enter key.
A tick appears in front of the selected language.
7. To exit the menu, press the left menu arrow key several times.
®
C
19
5.3 Installing the thermoblock
WARNING! Personal injury or material damage due to chemically or
mechanically damaged thermoblocks.
Do not use thermoblocks that show signs of corrosion or mechanical damage.
Regularly check the condition of the thermoblocks.
WARNING! Contamination due to opening seals of consumables.
In the following cases, the seals of tubes can spring open. Sample material can
escape.
• high vapor pressure of the content
•improperly sealed cover
• damaged sealing lip
• improperly fastened foil
Always check that consumables have been sealed tightly before use.
Page 20

Operation
Eppendorf ThermoMixer
20
®
C
English (EN)
When you attach the thermoblock, the device automatically recognizes the mounted
thermoblock. The mixing frequency is automatically limited to the maximum value for the
thermoblock being used.
Only the following thermoblocks can be used with the ThermoMixer C. Exchangeable
thermoblocks for the Thermomixer comfort/Thermomixer R are not compatible.
Thermoblock Tubes/Plates Maximum
Accessories
mixing
frequency
SmartBlock 0.5 mL Tube volume 0.5 mL 2 000 rpm ThermoTop
or Lid**
SmartBlock 1.5 mL Tube volume 1.5 mL 2 000 rpm ThermoTop
or Lid**
SmartBlock 2.0 mL Tube volume 2.0 mL 2 000 rpm ThermoTop
or Lid**
SmartBlock 5.0 mL Tube volume 5.0 mL 1 000 rpm –
SmartBlock 12 mm Tubes with a diameter of 11 mm
2 000 rpm –
to 11.9 mm
SmartBlock cryo Cryotubes 2 000 rpm –
SmartBlock 15 mL Conical tubes volume 15 mL 1 000 rpm –
SmartBlock 50 mL Conical tubes volume 50 mL 1 000 rpm –
SmartBlock plates Microplates with various bottom
contours
Deepwell plates with various
3 000 rpm* ThermoTop
or Lid**
2 000 rpm
bottom contours up to 80 °C
Deepwell plates with various
1000 rpm
bottom contours from 80 °C
SmartBlock PCR 96 96-well PCR plates
0.2 mL PCR tubes
2 000 rpm ThermoTop
or Lid**
SmartBlock PCR 384 384-well PCR plates 3 000 rpm ThermoTop
or Lid**
* The height sensor of the SmartBlock plates automatically differentiates between
deepwell plates and microplates.
** If you are using the Lid, select a mixing frequency of max. 2 000 rpm.
Page 21

Eppendorf ThermoMixer
Operation
English (EN)
5.3.1 Attaching the thermoblock
CLICK
1. First only attach the rear edge of the thermoblock. The writing must face to the front.
2. Push the front edge of the thermoblock down.
• The thermoblock audibly engages.
• The display shows the name of the thermoblock.
5.3.2 Removing the thermoblock
WARNING! Risk of burns from hot surfaces.
The thermoblock and the heating/cooling plate can be very hot after heating and
cause burns.
Allow the thermoblock and heating/cooling plate to cool down completely
before removing the thermoblock.
®
C
21
1. To unlock the thermoblock, press the
lever at the front of the thermoblock
down.
2. Lift the front edge so that the
thermoblock is tilted backwards.
3. Remove the thermoblock upwards.
Page 22

Operation
Eppendorf ThermoMixer
22
English (EN)
®
C
5.4 Inserting tubes and plates
WARNING! Risk of injury due to incorrect consumables.
• Poorly fitting tubes or plates can become detached from the thermoblock.
• Glass tubes can smash.
Only use the thermoblocks with the consumables designed for them.
Never use tubes made of glass or other fragile material.
NOTICE! Damage to plates due to too high temperatures.
Polystyrene microplates melt at temperatures above 70 °C.
Polypropylene deepwell plates deform at temperatures above 80 °C. Deformed
plates can become detached from the thermoblock.
Only heat microplates up to 70 °C.
If you are heating deepwell plates above 80 °C, do not exceed the mixing
frequency of 1000 rpm.
NOTICE! Material change of consumables due to extreme temperatures.
Extreme temperatures (e.g., during refrigeration or autoclaving) affect
consumables material. The mechanical strength, dimensions and shape of the
consumable will change.
Use consumables that are suitable for the selected temperature range or
selected procedure.
The height sensor of the SmartBlock plates automatically differentiates between
deepwell plates and microplates.
When inserting microplates, make sure that the height sensor is not covered.
Take care that the height sensor does not get contaminated.
Place the suitable thermoblock on the device (see Attaching the thermoblock on p. 21).
Inserting the plate
Insert the plate with the back edge first. Then press it down at the front.
Inserting tubes
Insert the tubes completely into the bores of the thermoblock.
Page 23

Eppendorf ThermoMixer
1
Operation
English (EN)
SmartBlock plates, SmartBlock PCR 96 or SmartBlock PCR 384:
To ensure uniform temperature control,
place the lid on the thermoblock.
1 Height sensor
5.5 Installing the ThermoTop
The ThermoTop is compatible with thermoblocks which feature the condens.protect
symbol:
The condens.protect technology available with ThermoTop prevents the formation of
condensation on the inner wall or the lid of the tube.
Prerequisites
• A compatible thermoblock has been attached.
• Tubes or plates have been inserted.
®
C
23
Place the ThermoTop on the device
vertically from above. The centering pins
behind the heating/cooling plate fit into
the recesses of the ThermoTop.
• The ThermoTop is correctly positioned if
the seal is fully flush with the upper part
of the device.
• The blue LED of the ThermoTop lights.
• The symbol appears in the display.
Page 24

Operation
Eppendorf ThermoMixer
24
®
C
English (EN)
Functioning principle of the ThermoTop
• In order to prevent the formation of any condensate in a reliable manner, the
device first heats the ThermoTop until it reaches the set temperature. The
tempering of the thermoblock occurs with a delay.
• The temperature sensor of the thermoblock reacts to the temperature of
samples: after inserting samples into a pre-heated thermoblock, the displayed
actual temperature may fall temporarily.
• While the device is tempering, the blue LED of the ThermoTop is flashing.
5.6 Temperature control
NOTICE! Damage to electronic components due to condensation.
Condensate can form in the device after it has been moved from a cool
environment to a warmer environment.
After installing the device, wait at least for 3 h. Only then connect the device
to the mains.
The ThermoMixer C can be used for temperature control in a range of 15 °C below the
ambient temperature to 100 °C.
• When the actual temperature flashes on the display, the device is not in
temperature control mode operation.
• As soon as the set temperature is changed with the temp arrow keys, the
device begins to perform temperature control.
• When the set temperature has been reached, the display only shows one
value.
5.6.1 Temperature control with time setting
Prerequisites
The time mode is set to Time Control (see p. 27)
1. To switch off the mixing function, use the speed arrow keys to select the 0 rpm setting
(▼ below 300 rpm or ▲ above 3 000 rpm).
2. Using the time arrow keys set the temperature control duration.
3. Using the temp arrow keys set the temperature.
4. To start time counting, press the start/stop key.
• The symbol flashes on the display.
• The temperature control duration is counted down.
• The display shows the remaining temperature control duration and the actual
temperature/set temperature.
• A signal sounds after the temperature control duration has elapsed.
Page 25

Eppendorf ThermoMixer
Operation
English (EN)
5.7 Mixing
You can select the mixing frequency between 300 rpm and 3 000 rpm. The
mixing frequency can be adjusted in steps of 50 rpm.
5.7.1 Mixing without temperature control
1. In order to switch off the temperature control, use the temp arrow keys for selecting
the off setting (▼ below 1 °C or ▲ above 100 °C).
2. Set the mixing time by means of the time arrow keys.
3. Set the mixing frequency by means of the speed arrow keys.
4. In order to start the mixing process, press the start/stop key.
• The symbol flashes on the display.
• The mixing time is counted down.
• The display shows the remaining mixing time, the actual temperature/set
temperature and the mixing frequency.
5. After the set mixing time has elapsed, the device stops automatically.
• A signal tone sounds.
• The display shows the last used parameters.
®
C
25
5.7.2 Mixing and tempering
1. Set the mixing time with the time arrow keys.
2. Set the temperature with the temp arrow keys.
The device immediately starts to perform the temperature control.
3. Set the mixing frequency with the speed arrow keys.
4. In order to start the mixing process, press the start/stop key.
• The symbol flashes on the display.
• The mixing time is counted down.
• The display shows the remaining mixing time, the actual temperature/set
temperature and the mixing frequency.
Page 26

Operation
Eppendorf ThermoMixer
26
®
C
English (EN)
5. After the set mixing time has elapsed, the device stops automatically.
• A signal tone sounds.
• The display shows the last used parameters.
• Temperature control is continued.
5.7.3 Mixing/temperature control with continuous run
Icing of the thermoblock
Ice may form on the thermoblock if samples are tempered at low temperatures
for a long time.
1. In order to mix without any time limits, use the time arrow keys to select the ∞ setting
(▼ below 15 s or ▲ above 99:30 h).
2. Set the temperature with the temp arrow keys.
The device immediately starts to perform the temperature control.
3. Set the mixing frequency with the speed arrow keys.
4. In order to start the mixing process, press the start/stop key.
• The symbol flashes on the display.
• The display alternately shows the mixing time and the ∞ symbol, the actual
temperature/set temperature and the mixing frequency.
• The mixing time is counted up.
5. In order to end the mixing process, press the start/stop key.
• A signal sounds.
• The display shows the last used parameters.
• Temperature control is continued.
A mixing time of more than 99:30 h is possible. After 99:30 h has passed, the
display only will show the ∞ symbol.
Page 27

Operation
Eppendorf ThermoMixer
®
English (EN)
5.7.4 Interrupting the mixing process
If you want to add reagents or exchange tubes while mixing, you can interrupt the mixing
process. The temperature control continues to run during the pause.
1. In order to interrupt the mixing process, keep the start/stop key pressed for 2 s.
• The display shows Pause.
• The mixing process is interrupted.
• Time counting is stopped.
• Temperature control is continued.
2. In order to continue the mixing process, press the start/stop key.
5.7.5 Short Mix
Use the Short Mix function for mixing for a short while without temperature control.
1. Set the mixing frequency by means of the speed arrow keys.
2. Keep the short key pressed.
The mixing process continues as long as the short key will be pressed.
3. In order to end Short Mix, release the short key.
C
27
5.7.6 Mixing/tempering with Time Control or Temp Control
You can specify when time counting should begin:
• Time counting and mixing process begin immediately: Time Control
• Time counting and mixing process begin when the set temperature has been reached:
Temp Control
1. Under Menu, select the Time Mode menu item.
2. Use the menu arrow keys to select Time Control or Temp Control.
A tick indicates the selected setting.
3. To exit the menu, press the left ◄ menu arrow key twice.
Page 28

Operation
Eppendorf ThermoMixer
28
®
C
English (EN)
5.8 Menu
5.8.1 Navigating in the menu
The menu has 3 levels. To change settings, proceed as follows:
1. To open the menu, press the menu/enter key.
2. Select the menu item with the menu arrow keys.
3. To confirm your selection, press the menu/enter key.
4. Change the settings with the menu arrow keys.
5. To confirm the changed setting, press the menu/enter key
A tick appears in front of the setting.
6. To exit the menu level, select the Back menu item and press the menu/enter key.
5.8.2 Menu structure
Menu items and
options
Description Symbol
on the
display
Programs List with 20 program spaces
• Load saved
program
• Select a program key (prog 1 to prog 5)
or
• Select the program from the program list: Menu >
Programs > Load
• Start the program with the start/stop key
• Create program • Save the set parameters (mixing time, temperature and
mixing frequency) on a free program space.
• You can save up to 4 sets of paramet ers as automatically
consecutive program levels ("steps").
• Edit program • Overwrite saved program or save it to a new program
space.
Page 29

Eppendorf ThermoMixer
Operation
English (EN)
®
C
29
Menu items and
Description Symbol
options
• Delete program • Delete the saved program.
• Programs 1 to 5 cannot be deleted. You can edit and
overwrite the programs.
Key lock
• Key lock on • Parameters cannot be changed.
• Key lock off • Parameters can be changed.
Time mode
• Time Control • Time counting and mixing process begin immediately.
• Temp Control • Time counting and mixing process only begin when the
set temperature has been reached.
Settings
Signal tones • The signal tone for error messages is always output at
medium volume level regardless of the speaker settings.
• Volume • Set the volume of the speaker:
20 %, 40 %, 60 %, 80 %, 100 %
• Switching the speaker off:
0 %
• Repetitions • Set repetitions of the signal tone.
1 ×, 5 ×, 10 ×, 30 ×, Unlimited
Language • Set the language: English, German, French, Italian,
Spanish
Contrast • Set the contrast:
0 %, 25 %, 50 %, 75 %, 100 %
Service • Set the service interval:
After 500 operating hours
After 1000 operating hours
After 2000 operating hours
No notification
Go to next higher menu level: Back
Exit menu item without saving: Cancel
Save set value: Save
The program keys as well as the Programs and Time Mode menu items are
locked while time counting is active.
on the
display
Page 30

Operation
Eppendorf ThermoMixer
30
®
C
English (EN)
5.9 Programs
A program consists of up to four program levels ("steps"). The program levels
automatically run one after the other. You can save separate settings for each program
level:
• Mixing time/temperature control duration
• Mixing frequency
•Temperature
• Program levels with pause interval (Interval Mix) .
• Program levels with restricted ramp rates.
The program ends automatically.
The ThermoMixer C has 20 program slots.
At the end of this operating manual there is a printed form of a program table.
The program data can be noted there.
5.9.1 Creating a program
1. In order to open the menu, keep the menu/enter key pressed.
2. Use the menu arrow keys to select the Programs menu item. Confirm with the menu/
enter key.
3. Use the menu arrow keys to select an empty program space. Confirm with the menu/
enter key.
5.9.1.1 Creating a single-level program
1. Set the mixing time, temperature, and mixing frequency with the time, temp and
speed arrow keys.
2. Use the menu arrow keys to select Save. Confirm with the menu/enter key.
Entering the program name
3. Select letters or numbers with the menu arrow keys and confirm with the menu/enter
key.
The program name can have a maximum of 15 characters.
In order to delete individual characters, select ← and press the menu/enter key.
Page 31

Operation
Eppendorf ThermoMixer
®
English (EN)
4. In order to save the program with the program name, use the menu arrow keys to
select Save.
5. Select the program space with the menu arrow keys. Confirm with the menu/enter key.
5.9.1.2 Creating a multi-level program
1. Select an empty program space in the Menu > Programs menu item.
Defining step 1
2. Set the mixing time, temperature, and mixing frequency for the first program step with
the time, temp and speed arrow keys.
Adding step 2
3. Select Options. Confirm with the menu/enter key.
4. Select Add step. Confirm with the menu/enter key.
C
31
The set parameters have been adopted in step 1.
5. Set the parameters for the second program level.
• In order to save the program with 2 program levels, select Save.
• In order to program a third and a fourth program level, respectively select Options >
Add step.
In order to delete a step from a program, select Options > Delete step.
Page 32

Operation
Eppendorf ThermoMixer
32
®
C
English (EN)
5.9.2 Interval Mix: Creating a program level with pause interval
By using the Interval Mix function, you can determine the mixing process to be
interrupted by one or several pauses within one program level . Interval Mix can only be
specified in programs. For program levels with Interval Mix, the symbol will appear in
the display
1. Select an empty program space under Menu > Programs .
2. Set the mixing time, temperature, and mixing frequency with the time, temp and
speed arrow keys.
Select the mixing time so that it covers the entire duration, including mixing processes
and pauses.
3. Select Options. Confirm with the menu/enter key.
4. Select Interval Mix. Confirm with the menu/enter key.
5. Set the mixing time (before the pause) in the Mixing time row using the time arrow
keys.
6. Set the pause duration in the Pause row using the time arrow keys.
7. In order to save the program, select Save . Confirm with the menu/enter key.
The Interval Mix settings are now saved for the program level.
To program a change between several mixing processes and pauses within a
program level, select a correspondingly longer mixing time for the program
level:
Change between mixing process and pause:
• Mixing time set for program level: 6:00 min
•Interval Mix: Mixing time: 1:00 min, Pause: 0:30 min
In the program level the device performs the setting 1 min mixing and 0:30 min
pause 4 times.
Page 33

Eppendorf ThermoMixer
Operation
English (EN)
5.9.3 Restricting ramp rates
You can use the ThermoMixer C to choke the heating rate as well as the cooling rate.
Restricted ramp rates can only be specified for programs.
Tab. 5-1: Heating rates and cooling rates
Heating rate max. 3.0 °C/min max. 2.0 °C/min max. 1.0 °C/min max. 0.1 °C/min
Cooling rate max. 1.0 °C/min max. 0.5 °C/min max. 0.1 °C/min
1. Select an empty program space under Menu > Programs.
2. Set the mixing time, temperature, and mixing frequency with the time, temp and
speed arrow keys.
3. Select Options. Confirm with the menu/enter key.
4. Select Ramp rates. Confirm with the menu/enter key.
5. Use the menu arrow keys to select and change Heating rate or Cooling rate.
6. In order to leave the Ramp rates menu, select the Back menu item. Confirm with the
menu/enter key.
When you start a program that runs with restricted heating or cooling rates, a
message is displayed: The program's ramp rates are restricted.
®
C
33
5.9.4 Quick save with program keys
To quickly save a single-level program, you can use the program keys.
1. Set the mixing time, temperature, and mixing frequency with the time, temp and
speed arrow keys.
2. Keep one of the program keys prog 1 to prog 5 pressed for 2 seconds.
• A signal tone sounds.
• The LED above the program key lights blue.
• The parameters of the program are saved.
• If you want to assign a program name, save the program in the menu: Menu >
Programs.
• If you want to save a program with multiple levels under the program
numbers 1 to 5 , select the program space under Menu > Programs.
Page 34

Operation
Eppendorf ThermoMixer
34
®
C
English (EN)
5.9.5 Loading a saved program
5.9.5.1 Loading program prog 1 to prog 5
On supply, the prog 1 to prog 5 program keys are assigned as follows:
Program name Temperature Mixing time/
temperature
Mixing
frequency
control duration
prog 1 key Cooling 8°C ∞ 0 rpm
prog 2 key Ligation 16°C 16:00 h 0 rpm
prog 3 key Restr. Digest 37°C 1:00 h 1 000 rpm
prog 4 key Prot. K Digest 56°C 10:00 min 1 000 rpm
prog 5 key Denaturation 95°C 30:00 min 0 rpm
1. In order to call up a program on the program spaces 1 to 5, press one of the program
keys prog 1 to prog 5.
• The LED above the program key lights blue.
• The display shows the parameters of the program.
2. In order to start the program, press the start/stop key.
5.9.5.2 Loading a program from the program list
1. In order to load a program from the program list, select the program under Menu >
Programs. Confirm with the menu/enter key.
2. Use the menu arrow keys to select the Load menu item. Confirm with the menu/enter
key.
• The display shows the parameters of the program.
• Programs with several program levels:
The display shows the parameters of the first program level. To display the
parameters of the other program levels, use the ◄ or ► menu arrow keys to select
the corresponding step.
3. In order to start the program, press the start/stop key.
The asterisk marks the active program level Step 1. The display shows the parameters
of Step 2.
Page 35

Operation
Eppendorf ThermoMixer
®
English (EN)
5.9.6 Editing programs
There are two ways to change a saved program:
• Changing the program via the Edit menu item in the program list
• Changing the program during operation
5.9.6.1 Changing the program via the Edit menu item in the program list
1. In order to change the parameters of a program, select the program under Menu >
Programs. Confirm with the menu/enter key.
2. Use the menu arrow keys to select the Edit menu item. Confirm with the menu/enter
key.
The display shows the saved parameters.
You can change all parameters and save them (see Creating a program on p. 30).
5.9.6.2 Changing the program during operation
1. Load the program with the program keys or from the program list.
2. Change the parameters.
For programs with program levels: Use the ◄ or ► menu arrow keys to select a step,
change the parameters of the step.
3. Start the program.
After completion of the program, a message appears stating that the program has been
changed. You can confirm or discard the changes.
C
35
5.9.7 Deleting programs
Programs 1 to 5 cannot be deleted. You can change and overwrite the program name and
all parameters of these programs.
1. In order to delete a program from the program spaces 6 to 20 , select the program
under Menu > Programs. Confirm with the menu/enter key.
2. Use the menu arrow keys to select the Delete menu item. Confirm with the menu/enter
key.
The display shows the message Confirm delete. In order to confirm, press the menu/
enter key.
Page 36

Troubles hooting
Eppendorf ThermoMixer
36
English (EN)
®
C
6 Troubleshooting
If you cannot remedy an error with the recommended measures, please contact your local
Eppendorf partner. The contact address can be found online at: www.eppendorf.com
6.1 General errors
Problem Cause Solution
Display remains
dark.
• No mains connection.
Check the mains connection
and the power supply.
Switch the device on.
Set temperature
is not reached.
ThermoTop LED
does not light.
ThermoTop does
not fit on the
device.
The device does
not mix nor
control the
temperature.
Set temperature is more than
15 °C below ambient temperature.
• No thermoblock has been
attached
• The thermoblock is not
compatible with ThermoTop.
• The interface between the
device and the ThermoTop is
dirty.
• The thermoblock is not
compatible with ThermoTop.
• The lid is attached to the
thermoblock.
Various causes are possible.
Set up the device in a cooler
environment.
Use a compatible thermoblock
with a condens.protect symbol:
Remove any dirt from the front
of the ThermoTop.
Remove any dirt from the top of
the device, especially from the
viewing window beside the
heating/cooling plate.
Use a compatible thermoblock
with a condens.protect symbol:
If using the ThermoTop, do not
use the lid.
Contact your local Eppendorf
partner.
.
Page 37

6.2 Error messages
Problem Cause Solution
Thermoblock not
recognized
Error message
preceded by a
number code.
• Thermoblock is not compatible
with the device.
• The thermoblock is not
attached properly.
• The interface between the
device and the thermoblock is
dirty.
• Various causes are possible. 1. Switch off device and wait
Use a compatible thermoblock.
Remove the thermoblock and
then reattach it.
Remove any dirt from the
underside of the thermoblock.
Remove any dirt from the top of
the device, especially from the
viewing window beside the
heating/cooling plate.
10 seconds.
2. Switch on device.
If the error message appears
again, contact your local
Eppendorf partner.
Eppendorf ThermoMixer
Troubleshooting
English (EN)
®
C
37
Page 38

Maintenance
Eppendorf ThermoMixer
38
English (EN)
®
C
7 Maintenance
7.1 Setting service intervals
The ThermoMixer C offers the option of activating a reminder that the device needs to be
serviced. To set a service interval, proceed as follows:
1. Under Menu > Settings > select the Service menu item. Confirm with the menu/enter
key.
2. Select a service interval with the menu arrow keys (after 500, 1 000 or 2 000 operating
hours).
To switch off the notification, select No notification.
When the specified operating hours have been reached, a message appears. Contact your
local Eppendorf partner. The contact addresses can be found online at
www.eppendorf.com/worldwide.
7.2 Cleaning
Clean the housing of the ThermoMixer C and the thermoblocks regularly.
DANGER! Electric shock as a result of penetration of liquid.
Switch off the device and disconnect the power plug before starting cleaning
or disinfection work.
Do not allow any liquids to penetrate the inside of the housing.
Use closed tubes and closed plates.
Do not spray clean/spray disinfect the housing.
Only plug the device back in if it is completely dry, both inside and outside.
NOTICE! Damage from the use of aggressive chemicals.
Do not use any aggressive chemicals on the device or its accessories, such as
strong and weak bases, strong acids, acetone, formaldehyde, halogenated
hydrocarbons or phenol.
If the device has been contaminated by aggressive chemicals, immediately
clean it by means of a mild cleaning agent.
NOTICE! Corrosion from aggressive cleaning agents and disinfectants.
Do not use corrosive cleaning agents, aggressive solvents or abrasive
polishes.
Do not use lab cleaners with sodium hypochlorite.
Page 39

Eppendorf ThermoMixer
Maintenance
English (EN)
Auxiliary equipment
• Lint-free cloth
• Mild, soap-based lab cleaner
• Dist. water
Cleaning the ThermoMixer C
1. Switch off the ThermoMixer C and disconnect it from the power supply.
2. Allow the device to cool down.
3. Clean all of the outer parts of the ThermoMixer C with a mild soap solution and a
lint-free cloth.
4. Wipe off the soap solution with dist. water.
5. Dry all cleaned parts.
7.2.1 Cleaning the thermoblock
Auxiliary equipment
• Lint-free cloth
• Mild, soap-based lab cleaner
• Dist. water
Clean the thermoblock immediately if sample fluid enters the bore holes or comes into
contact with the surfaces.
1. Clean with a mild soap solution.
2. Wipe off the soap solution with dist. water.
3. Dry the cleaned thermoblock.
®
C
39
Page 40

Maintenance
Eppendorf ThermoMixer
40
English (EN)
®
C
7.3 Disinfection/Decontamination
DANGER! Electric shock as a result of penetration of liquid.
Switch off the device and disconnect the power plug before starting cleaning
or disinfection work.
Do not allow any liquids to penetrate the inside of the housing.
Use closed tubes and closed plates.
Do not spray clean/spray disinfect the housing.
Only plug the device back in if it is completely dry, both inside and outside.
Auxiliary equipment
• Lint-free cloth
• Disinfectant.
1. Switch the ThermoMixer C off and isolate from the power supply.
2. Allow the device to cool down.
3. Clean the device (see Cleaning on p. 38).
4. Select a disinfection method which complies with the legal requirements and
regulations applicable to your range of application.
5. Wipe the surfaces with the lint-free cloth and disinfectant.
7.4 Decontamination before shipment
If you are shipping the device to the authorized Technical Service for repairs or to your
authorized dealer for disposal please note the following:
WARNING! Risk to health from contaminated device
1. Follow the instructions in the decontamination certificate. You find it as a PDF
file on our website (www.eppendorf.com/decontamination
2. Decontaminate all the parts you would like to dispatch.
3. Include the fully completed decontamination certificate in the package.
).
7.5 Verification of temperature control
To verify the temperature accuracy of the thermoblock, use the Eppendorf Temperature
Verification System – Single Channel. In combination with the temperature sensor for the
ThermoMixer C the exact temperature in the thermoblock can be measured.
Details on the verification process with the Eppendorf Temperature Verification System –
Single Channel can be found in the corresponding operating manual.
Page 41

Transport, storage and disposal
Eppendorf ThermoMixer
English (EN)
®
8 Transport, storage and disposal
8.1 Transport
CAUTION! Risk of injury when lifting and carrying heavy loads
The device is heavy. Lifting and carrying the device can lead to back injuries.
Only lift and transport the device with a sufficient number of helpers.
Use a transport aid for transporting the device.
Use the original packaging for transport.
Air temperature Relative humidity Atmospheric pressure
General transport -25 °C – 60 °C 10 % – 75 % 30 kPa – 106 kPa
Air freight -40 °C – 55 °C 10 % – 75 % 30 kPa – 106 kPa
8.2 Storage
Air temperature Relative humidity Atmospheric pressure
In transport packaging -25 °C – 55 °C 10 % – 95 % 70 kPa – 106 kPa
Without transport
packaging
8.3 Disposal
In case the product is to be disposed of, the relevant legal regulations are to be observed.
Information on the disposal of electrical and electronic devices in the European
Community:
Within the European Community, the disposal of electrical devices is regulated by
national regulations based on EU Directive 2002/96/EC pertaining to waste electrical and
electronic equipment (WEEE).
According to these regulations, any devices supplied after August 13, 2005, in the
business-to-business sphere, to which this product is assigned, may no longer be
disposed of in municipal or domestic waste. To document this, they have been marked
with the following identification:
-5 °C – 45 °C 10 % – 95 % 70 kPa – 106 kPa
C
41
Because disposal regulations may differ from one country to another within the EU,
please contact your supplier if necessary.
Page 42

Technical data
Eppendorf ThermoMixer
42
®
C
English (EN)
9 Technical data
9.1 Power supply
Power connection 100 V – 130 V ±10 %, 50 Hz – 60 Hz
220 V – 240 V ±10 %, 50 Hz – 60 Hz
Power consumption Maximum 200 W
Overvoltage category II
Degree of pollution 2
Protection class I
9.2 Weight/dimensions
Dimensions Width: 20.6 cm (8.1 in)
Depth: 30.4 cm (12.0 in)
Height: ThermoMixer C: 13.6 cm (5.4 in)
Weight ThermoMixer C: 6.3 kg (13.9 lb)
9.3 Ambient conditions
Ambience Only for use indoors.
Ambient temperature 5 °C – 40 °C
Relative humidity 10 % – 90 %, non-condensing.
Atmospheric pressure 79.5 kPa – 106 kPa
Page 43

Eppendorf ThermoMixer
Technical data
English (EN)
9.4 Application parameters
9.4.1 Temperature control
Temperature control range Minimum: 15 °C ±2 °C below ambient temperature
Maximum:100 °C
Temperature setting 1 °C – 100 °C, adjustable in steps of
1 °C
Temperature accuracy Set temperature
20 °C – 45 °C
Set temperature
< 20 °C or > 45 °C
SmartBlock 1.5 mL ±0.5 °C ±1.0 °C
You can find information on the temperature accuracy of other SmartBlocks on the
website www.eppendorf.com
.
Temperature homogeneity In the range of 20 °C – 45 °C
max. ±0.5 °C for all positions of the thermoblock
Heating rate* 6.0 °C/min
The change of temperature in filled tubes is slower.
Cooling rate* if the set temperature is
above ambient temperature
if the set temperature is
between ambient
temperature and 15 °C
below ambient temperature
2.5 °C/min 0.5 °C/min – 0.8 °C/min
®
C
43
*Heating rate and cooling rate can be throttled (see Restricting ramp rates on p. 33).
Page 44

Technical data
Eppendorf ThermoMixer
44
®
C
English (EN)
9.4.2 Mix
Thermoblock Mixing frequency
can be set in increments of
50 rpm
SmartBlock 0.5 mL 300 rpm – 2 000 rpm
SmartBlock 1.5 mL 300 rpm – 2 000 rpm
SmartBlock 2.0 mL 300 rpm – 2 000 rpm
SmartBlock 5.0 mL 300 rpm – 1 000 rpm
SmartBlock 12 mm 300 rpm – 2 000 rpm
SmartBlock cryo 300 rpm – 2 000 rpm
SmartBlock 15 mL 300 rpm – 1 000 rpm
SmartBlock 50 mL 300 rpm – 1 000 rpm
SmartBlock plates
with deepwell plates and temperature control up to 80 °C
with deepwell plates and temperature control from 80 °C
300 rpm – 3 000 rpm
300 rpm – 2 000 rpm
300 rpm – 1000 rpm
SmartBlock PCR 96 300 rpm – 2 000 rpm
SmartBlock PCR 384 300 rpm – 3 000 rpm
9.4.3 Time setting
Cycle time 15 s – 99:30 h, unlimited
• In the range of 15 s – 20 min adjustable in steps of 15 s
• In the range of 20 min – 1:00 h adjustable in steps of 1 min
• In the range of 1:00 h – 10:00 h adjustable in steps of 5 min
• In the range of 10:00 h – 99:30 h adjustable in steps of 30 min
9.5 Interface
USB interface For Eppendorf service only.
Page 45

Ordering information
Eppendorf ThermoMixer
English (EN)
10 Ordering information
CAUTION! Poor safety due to incorrect accessories and spare parts.
The use of accessories and spare parts other than those recommended by
Eppendorf may impair the safety, functioning and precision of the device.
Eppendorf cannot be held liable or accept any liability for damage resulting from
the use of incorrect or non-recommended accessories and spare parts, or from
the improper use of such equipment.
Only use accessories and original spare parts recommended by Eppendorf.
10.1 Device and accessories
Order no.
(International)
5382 000.015 – 220 V – 240 V
– 5382000023 100 V – 130 V
5308 000.003 5308000003 with condens.protect technology
5363 000.233 5363000233 for SmartBlocks 0.5 mL, 1.5 mL, 2.0 mL, plates,
5361 000.031 5361000031 Thermoblock for 24 tubes 0.5 mL
5360 000.038 5360000038 Thermoblock for 24 tubes 1.5 mL
5362 000.035 5362000035 Thermoblock for 24 tubes 2.0 mL
5309 000.007 5309000007 Thermoblock for 8 tubes 5.0 mL
5366 000.021 5366000021 Thermoblock for 8 conical tubes 15 mL
5365 000.028 5365000028 Thermoblock for 4 conical tubes 50 mL
5364 000.024 5364000024 diameter 11 mm – 11.9 mm, height 34 mm – 76 mm
Order no.
(North America)
Description
ThermoMixer C
basic device without thermoblock
ThermoTop
Lid
for ThermoMixer F0.5/F1.5/F2.0/FP
PCR 96, PCR 384
SmartBlock 0.5 mL
SmartBlock 1.5 mL
SmartBlock 2.0 mL
SmartBlock 5.0 mL
SmartBlock 15 mL
SmartBlock 50 mL
SmartBlock 12 mm
Thermoblock for 24 tubes
®
C
45
Page 46

Ordering information
Eppendorf ThermoMixer
46
English (EN)
®
C
Order no.
(International)
Order no.
(North America)
Description
SmartBlock cryo
Thermoblock for 24 Cryo tubes
5367 000.025 5367000025 1.5 mL – 2 mL, diameter max. 12,5 mm, all base
shapes
SmartBlock plates
Thermoblock for microplates and deepwell plates
5363 000.039 5363000039 incl. Lid
SmartBlock PCR 96
Thermoblock for PCR plates 96
5306 000.006 5306000006 incl. Lid
SmartBlock PCR 384
Thermoblock for PCR plates 384
5307 000.000 5307000000 incl. Lid
10.2 Tubes and plates
Order no.
(International)
Order no.
(North America)
Description
Eppendorf Safe-Lock Tube 0.5 mL
500 pieces
0030 121.023 022363611 clear
Eppendorf Safe-Lock Tube 1.5 mL
1,000 pieces
0030 120.086 - clear
Eppendorf Safe-Lock Tube 2.0 mL
1,000 pieces
0030 120.094 - clear
PCR Tubes 0,5 mL
500 pieces
0030 124.502 951010057 colorless, thin-walled, with hinged lid
PCR Tubes 0,2 mL
1,000 pieces
0030 124.332 951010006 PCR clean, colorless
0030 124.200 - clear
PCR Tube Strips 0,2 mL, five-tube strip
pack of 125 (= 625 tubes)
0030 124.340 951010014 colorless
Page 47

Ordering information
Eppendorf ThermoMixer
English (EN)
®
C
47
Order no.
(International)
Order no.
(North America)
Description
PCR Tube Strips 0,2 mL
10 × 12 strips
0030 124.359 951010022 colorless
twin.tec PCR Plate 96, skirted
low profile, wells colorless, 25 pieces
0030 128.648 951020401 clear
twin.tec PCR Plate 96, semi-skirted
Wells colorless, 25 pieces
0030 128.575 951020303 standard profile, clear
Eppendorf Deepwell Plate 384/200 µL
40 plates, wells clear, white border color
0030 521.102 951031003 PCR Clean
Eppendorf Deepwell Plate 96/500 µL
40 plates, wells clear, white border color
0030 501.101 951031801 PCR Clean
Eppendorf Deepwell Plate 96/1000 µL
20 plates, wells clear, white border color
0030 501.209 951032603 PCR Clean
Eppendorf Deepwell Plate 96/2000 µL
20 plates, wells clear, white border color
0030 501.306 951033405 PCR Clean
All plates are available with different border colors (red, yellow, green and blue) and
purity qualities, in large packs as well as with barcoding on request. You can find further
information in our catalog or on our website www.eppendorf.com
.
10.3 Temperature Verification System
Order no.
(International)
Order no.
(North America)
Description
Temperature Verification System USB –
Single channel
For Mastercycler nexus, Mastercycler pro und
Mastercycler ep, ThermoMixer, ThermoStat
0056 000.003 0056000003
Temperature sensor
for Temperature Verification System USB –
Single channel
0056 002.006 0056002006 384 Well
Page 48

Program data form
Eppendorf ThermoMixer
48
®
C
English (EN)
11 Program data form
program time temp speed
1
2
3
4
5
6
7
8
9
10
11
12
13
14
15
16
17
18
19
20
Page 49

Eppendorf ThermoMixer
Index
English (EN)
®
C
49
Index
A
Actual temperature................................. 18
Application parameters .......................... 43
C
Cleaning ................................................. 39
condens.protect ...................................... 23
Continuous run ....................................... 26
D
Danger symbol
Device ............................................... 15
Decontamination .................................... 40
Deepwell plate .............................. 8, 19, 22
Display................................................ 9, 18
Disposal .................................................. 41
G
Glossary .................................................... 8
H
Hazards................................................... 12
Heating/cooling plate ............................... 9
I
Installation
Device ............................................... 16
Selecting the location ....................... 16
Intended use
Hazards............................................. 12
Interval Mix
Set..................................................... 32
Symbol.............................................. 18
K
Key lock .................................................. 29
Symbol.............................................. 18
L
Language ................................................29
Set ..................................................... 19
Lid .......................................................8, 22
M
Main illustration ........................................9
Menu .......................................................28
Menu arrow keys...............................17
Navigation .........................................28
Overview ...........................................28
Setting the language .........................19
Microplate .....................................8, 19, 22
Mix
Application parameters..................... 44
Mixing .....................................................25
Mixing frequency ..............................18
Mixing time.......................................18
Setting the mixing frequency......17, 25
Setting the mixing time.....................17
Stop ...................................................17
Symbol ..............................................18
temperature control run....................17
with continuous run ..........................26
without temperature control .............25
O
Operating controls ..............................9, 17
P
Pause.................................................27, 32
PCR ...........................................................8
PCR plate....................................... 8, 19, 22
Power connection socket ..........................9
Power switch.............................................9
Program
Create................................................30
Multi-level .........................................31
Program name.............................18, 30
Program number...............................18
save ................................................... 33
Single-level........................................ 30
Program keys ..........................................17
Page 50

Index
Eppendorf ThermoMixer
50
English (EN)
®
C
R
Ramp rates ............................................. 43
Restrict ............................................. 33
rpm ........................................................... 8
S
Safety precautions .................................. 12
Selecting the location ............................. 16
Set temperature...................................... 18
Short Mix.......................................... 17, 27
Speaker
Set the volume .................................. 29
Switch off.......................................... 29
Symbol.............................................. 18
Step......................................................... 31
Storage ................................................... 41
T
Technical data
Ambient conditions .......................... 42
Application parameters .................... 43
Power supply .................................... 42
Weights/dimensions ......................... 42
Temperature control
Application parameters .................... 43
Setting the temperature control
duration ............................................ 24
Tem peri ng
Set temperature................................ 17
Switching off the temperature control
.......................................................... 25
Symbol.............................................. 18
Thermoblock .......................................... 19
Attach ............................................... 21
Remove............................................. 21
ThermoTop ......................................... 8, 23
Symbol.............................................. 18
Time mode
Temp Control .............................. 18, 27
Time Control ............................... 18, 27
Time setting...................................... 17, 24
Application parameters .................... 44
Tubes.................................................19, 22
U
USB interface ............................................9
V
Verification of temperature control.........40
W
Well ...........................................................8
Page 51

Certificates
Page 52

Page 53

Page 54

Evaluate Your Manual
Give us your feedback.
www.eppendorf.com/manualfeedback
Your local distributor: www.eppendorf.com/contact
Eppendorf AG · 22331 Hamburg · Germany
eppendorf@eppendorf.com · www.eppendorf.com
 Loading...