

Page 1
1
Quick Start Guide
Easy 11-Step Setup
Follow these steps to get your Ultra 2800 ready for operation.
®
A NORDSON COMPANY
Ultra®2800 Dispensing System
• Unpack the unit.
• Now is a good time to activate your Two Year Warranty. Register the
warranty online at www.efd-inc.com/warranty/two-2800.
Unpack the Unit/Warranty
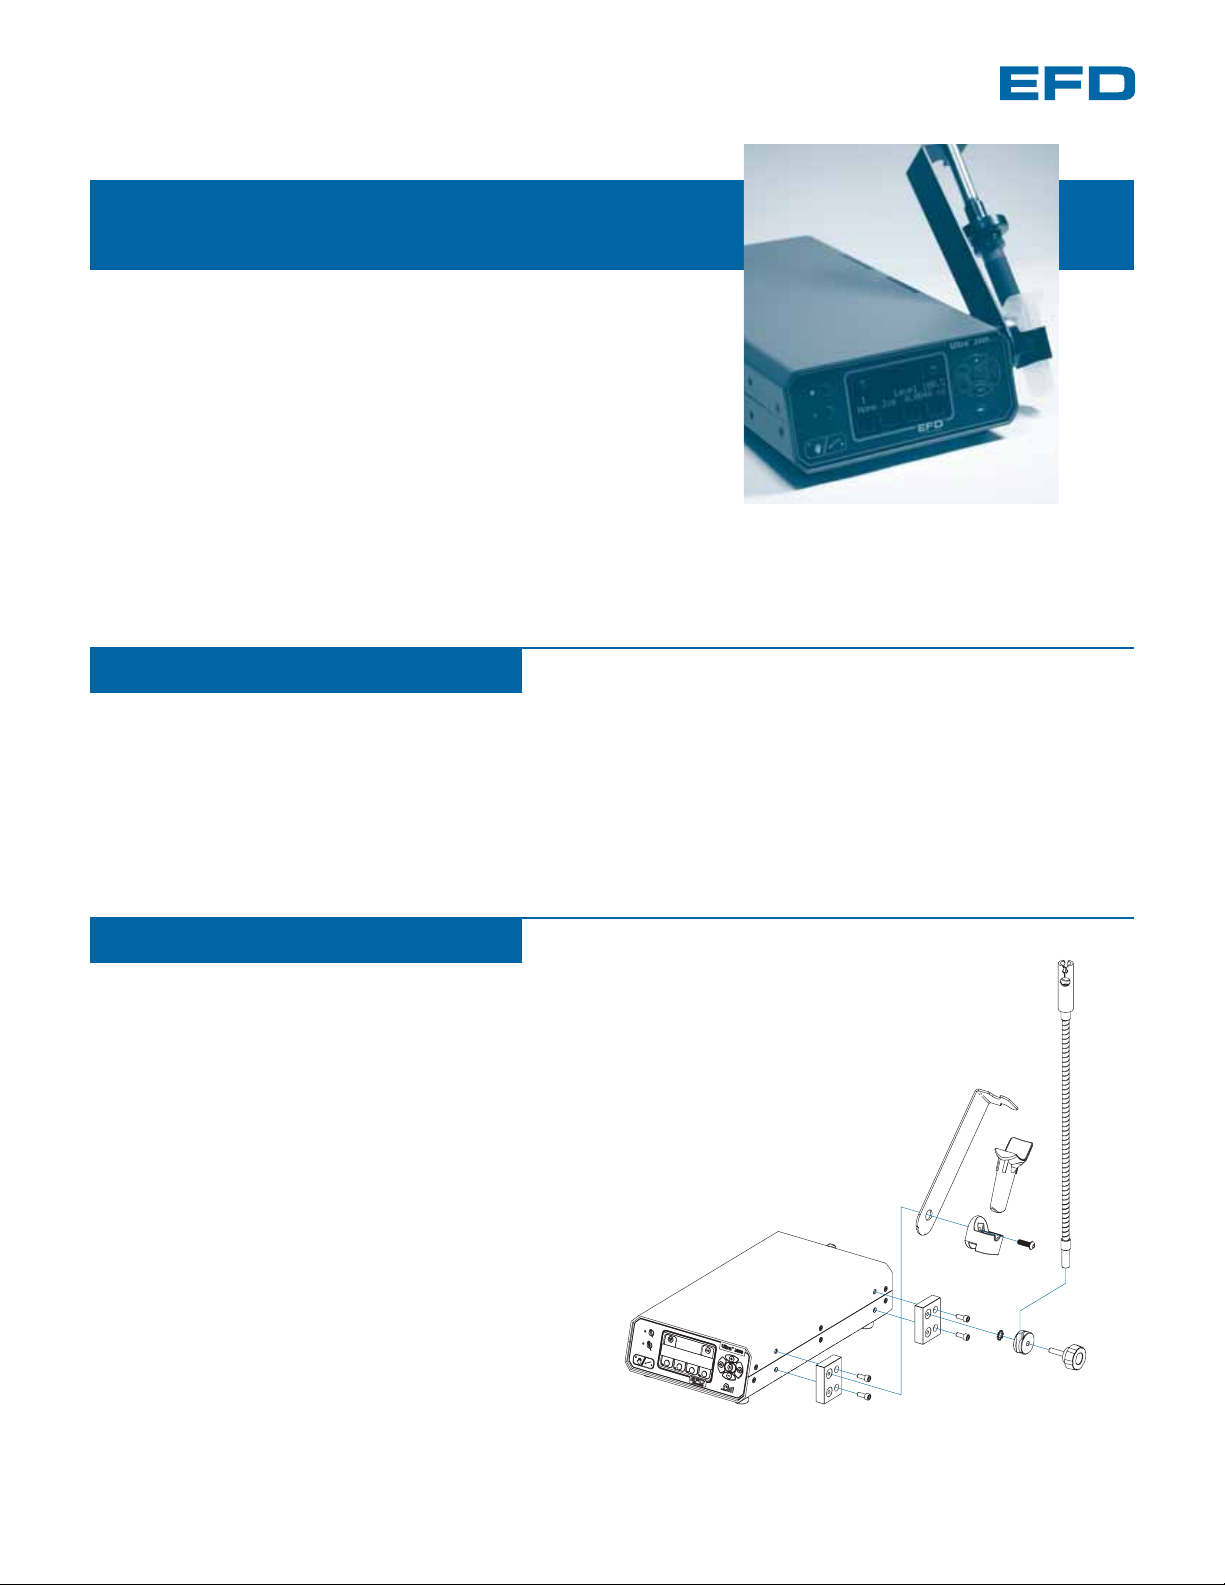
1
Install Barrel Holder & Cable Guide
2
❷
❸
❹
❺
❶
Part A: Install Barrel Holder
• Install mounting blocks using two screws each.
Blocks may be mounted in the forward or rear position on either side. ❶
• Remove barrel holder sleeve from holder. ❷
• Insert the 6 mm screw through the barrel holder and bracket, and then
into the top hole of the front mounting block. Tighten screw to secure. ❸
• Insert barrel holder sleeve.
Part B: Install Cable Guide
• Insert thumbscrew through both
the cable guide mount and star washer,
and then into other mounting block. ❹
• Position flex arm into
channel of cable guide mount. ❺
• Tighten thumbscrew to secure arm to cabinet.
• Snap flexible cable assembly into swivel bracket,
located at top of flex arm. ❻
❻
Electronic pdf files of EFD manuals are also available at www.efd-inc.com/manuals.html
Page 2
6
• Select Program by pressing the Program button. The program
number will flash.
• Use the (+) or (-) buttons to select your program number
(i.e., 1, 2, 3, etc.).
Program button
1
Program Number
• The main menu screen for Home will automatically appear.
If you’re lost at any point, just hit the Foot Pedal once to return
to the Home screen.
Main Menu
4
TIP
Programmed Dispense Mode
5
• For initial setup, make sure you’re in Programmed Dispense mode.
When you’re in Programmed Dispense, the LED light left of the
Manual/Program select button is not lit.
To select Programmed Dispense mode, press the “hand” icon
so the red light is off.
TIP
1
Home Jog
Hand icon Red Light OFF = Program
(Red Light On = Manual)
2
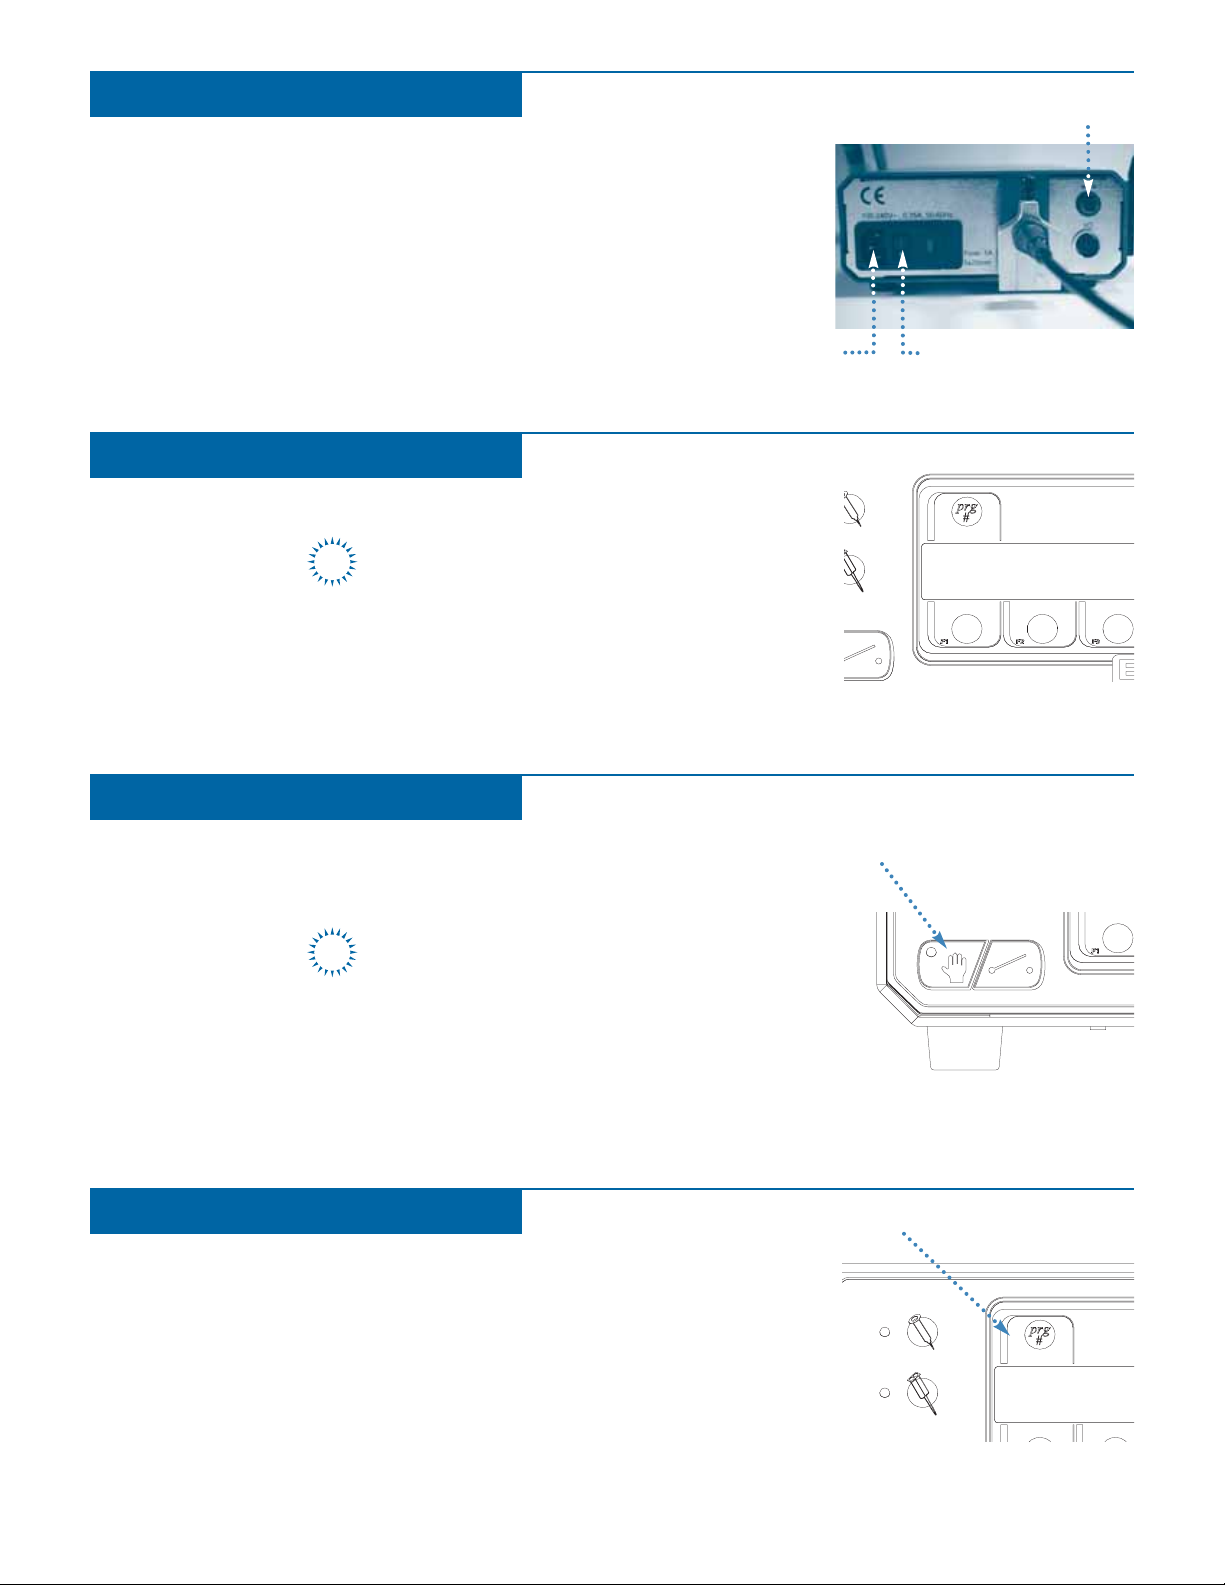
Connect Power & Foot Pedal
3
• Connect the power cord provided to the back of the Ultra 2800 and
plug into your power source.
• Connect the foot pedal provided to the back of the Ultra 2800.
• Turn unit on; On switch is located at the back of the unit. An “EFD
2800” screen will briefly appear before the Main Menu comes up.
On/Off
Foot pedal
Power cord
Page 3

7
• Select Volume by pressing the Forward button.
• Use the (+) or (-) buttons to set your deposit volume.
Note: The maximum number of Forward steps is 65,534.
Deposit volume, measured in cc’s, is linked automatically to
forward steps of the stepper motor. When you increase your cc
setting, it automatically increases the number of forward steps.
TIP
8
Set the Dispense Rate by choosing one of the preset default speeds.
• Press the Single Barrel Select button.
• Press F3 to select Rate.
• Select Medium
• Press the Cycle Start button once to return to the Home screen.
Note: The slower your Dispense Rate, the tighter your tolerance on repeatability.
• Select Pullback by pressing the Back button.
• Use the (+) or (-) buttons to set the number of Pullback steps.
Note: The maximum number of Pullback steps is 20,000.
We recommend a minimum Pullback of 200 steps for low
viscosity fluids. For thicker fluids set your Pullback to 300
steps or higher. During initial setup, adjust your Pullback in
sets of 50 steps at a time.
9
TIP
Forward button
Pullback button
Deposit Volume
Dispense Rate
Pullback
3
Rate Mod
F3/Rate
Page 4

• Unscrew and remove the barrel retainer from the adapter.
• Put a tip cap on the syringe barrel and hold barrel next to the
flexible cable assembly.
• From Manual mode (hand icon light on), advance the
plunger by pressing the Forward button, just until the
plunger reaches past the piston.
• By hand, insert the plunger into the barrel, pressing it
into the piston.
• Press the Pullback button to retract barrel, until there is just
a small gap between barrel and adapter.
• Slide barrel retainer over the barrel and thread one turn onto the
adapter.
• Replace tip cap with dispense tip. Tighten barrel retainer.
• Still in Manual mode, press the foot pedal to purge dispense tip.
Press until fluid almost fills the tip and dispenses. Be sure not to
overfill the tip since this results in excess back pressure, which can
cause oozing.
See the handout provided with your Ultra 2800 dispenser,
“Syringe Barrel Attachment Guide,” for easy, step-by-step
instructions.
TIP
4
10
11
• Press the hand icon so that light is off. You are
now in Programmed Dispense mode.
• Press the foot pedal once to return to the Home
screen.
• Press the foot pedal again to dispense your first
deposit.
During initial setup, it is normal to dispense
a few shots before your deposit is stabilized.
TIP
Plunger
Barrel retainer
Piston
Adapter
Flexible cable assembly with syringe barrel
Syringe barrel
Attach Barrel/Purge Tip
Dispense
©2006 Nordson Corporation 2800-GUIDE-01 v062606
This equipment is regulated by the European Union under WEEE Directive (2002/96/EC).
See www.efd-inc.com for information about how to properly dispose of this equipment.
For EFD sales and service in over 30 countries,
contact EFD or go to www.efd-inc.com/contact
EFD, Inc.
East Providence, RI USA
800-556-3484; +1-401-434-1680 (outside the USA)
info@efd-inc.com www.efd-inc.com
EFD International Inc.
Dunstable, Bedfordshire, UK
0800 585733 or +44 (0) 1582 666334
Ireland 00800 8272 9444
europe@efd-inc.com www.efd-inc.com
EFD, Inc., Asia
China: +86 (21) 5854 2345
china@efd-inc.com www.efd-inc.com/cn
Singapore: +65 6896 9630 sin-mal@efd-inc.com
A NORDSON COMPANY
 Loading...