

For assistance call 800-556-3484 or email tech@efd-inc.com
The 740V-HL hand-operated dispense gun is a rugged
industrial lever-actuated fluid dispensing valve. The valve
incorporates a quick-change fluid body for fast and easy
cleaning. The fluid inlet fitting for 1/4" OD feed tubing and
an assortment of dispensing tips are included.
EFD is a registered trademark of EFD, Inc. ©2005 EFD, Inc. 740V-HL-MAN-01 v072905
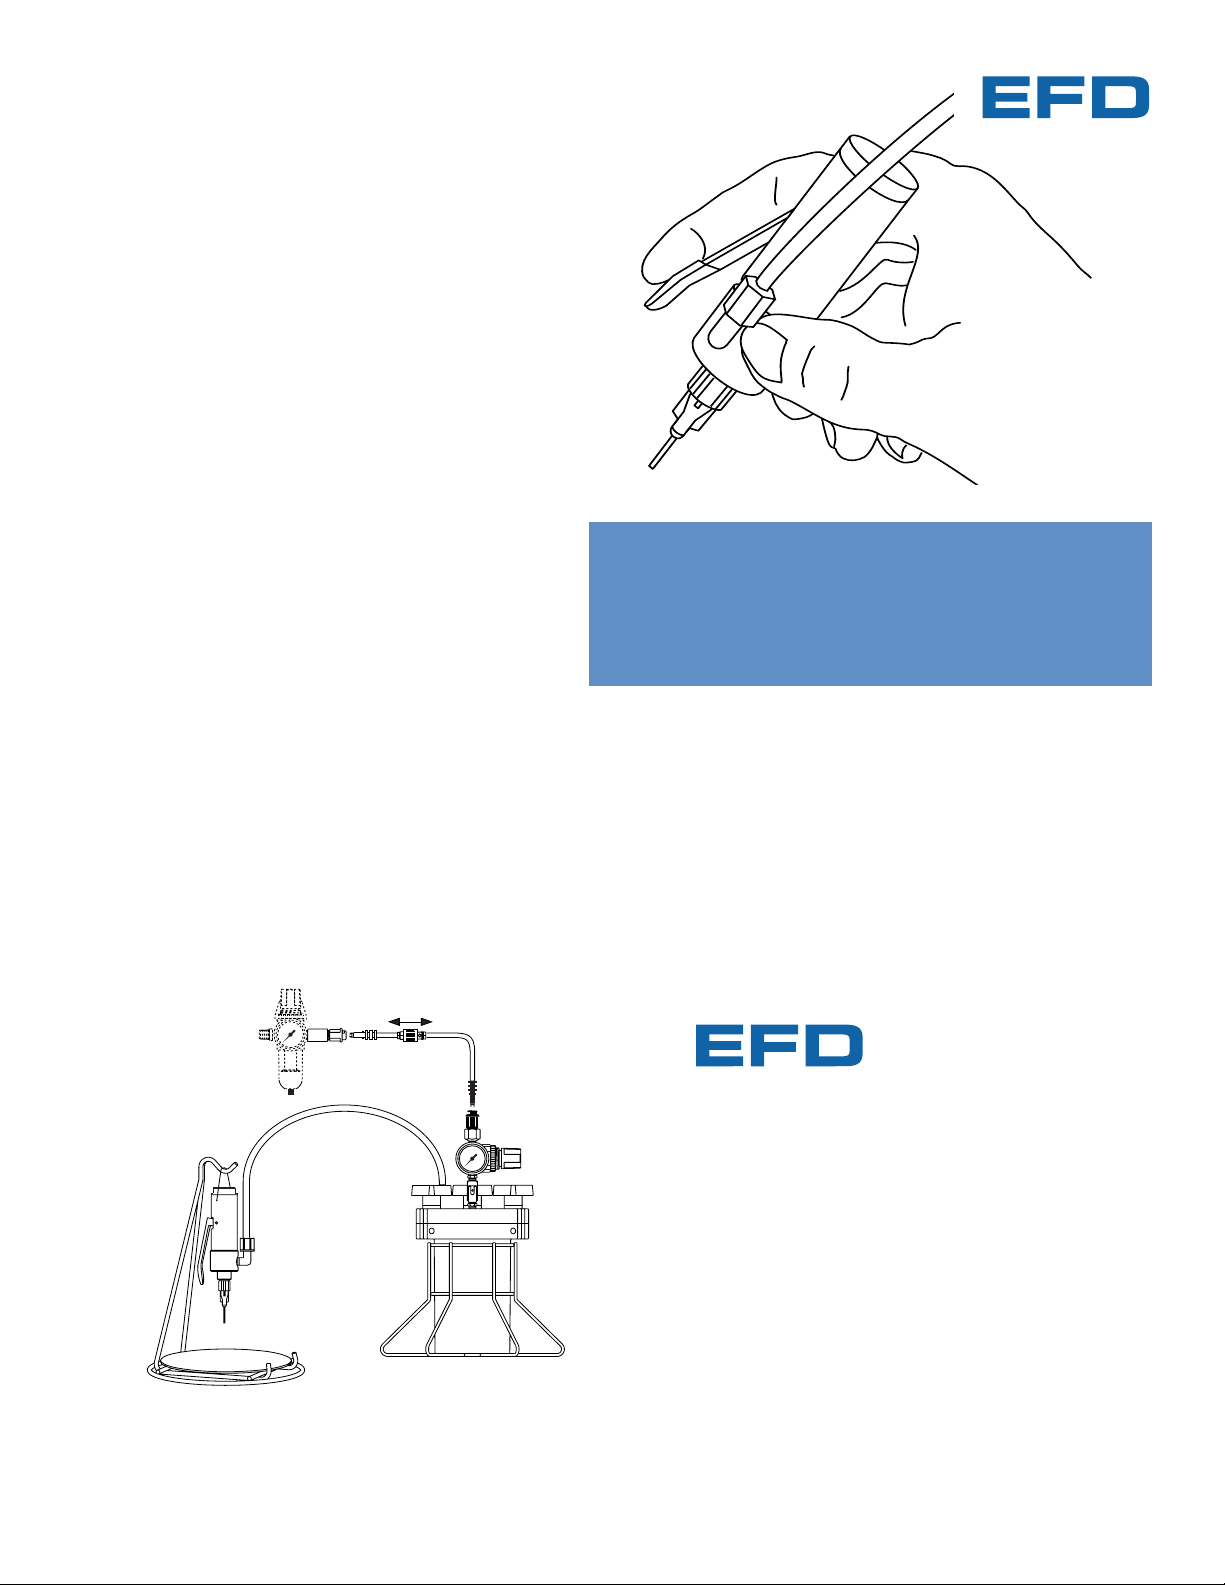
#615DTH
1.0 liter tank accommodates a
one pound bottle.
#61522
Hand-lever
valve stand
#2000F755
Five micron filter regulator for
clean, dry filtered factory air.
Shutoff valve
Typical system setup
®
A NORDSON COMPANY
For application assistance in the USA, call 800-556-3484.
For EFD sales and service in over 30 countries,
contact EFD USA or go to www.efd-inc.com/contact
EFD Inc., a Nordson Company
977 Waterman Avenue
East Providence, RI 02914-1342 USA
Telephone: +1-401-434-1680
Fax: +1-401-431-0237
info@efd-inc.com www.efd-inc.com
Getting started ...
1. Install the feed tube from the fluid reservoir to the inlet
fitting and tighten the compression nut to secure. The fluid
body may be rotated up to 1/2 turn to locate the fluid inlet
fitting in a comfortable position.
2. Apply air pressure to the fluid reservoir. Start with a low
setting of 20 psi (1.4 bar). If using an EFD fluid reservoir,
refer to the User’s Guide for further instructions.
3. Install an appropriate size dispensing tip to the outlet tip
adapter. Use large tips for high viscosity materials and
small tips for low viscosity.
4. Press the hand-lever to begin fluid flow. Release lever to
stop fluid flow.
5. To achieve desired flow, change the size of the dispensing
tip or adjust the reservoir fluid pressure.
User’s Guide
740V-HL Dispense Gun
®
A NORDSON COMPANY
Electronic pdf files of EFD manuals are also available at www.efd-inc.com/manuals.html
Service
Normal cleaning is accomplished by purging with a solvent appropriate
for the material being dispensed. .
To thoroughly clean valve chamber and replace needle packings:
1. Remove the fluid inlet fitting and tip adapter/needle seat assembly
from the fluid chamber.
2. Remove the fluid chamber from the cylinder body by turning
counterclockwise until free. Then remove the O-ring from the fluid
chamber.
3. Remove the needle packings from the fluid chamber, using tool
#7803 supplied with the valve. Insert through outlet end of fluid
chamber and push out the packings.
See Figure 1
.
4. Remove any remaining packings and the packing spring from the
needle.
5. Clean the needle with a cloth dampened with solvent.
6. Lubricate the needle with Nye Lubricants #865 grease and reinstall
the needle packing spring and a new packing kit.
See Figure 2.
7. Install a new O-ring (#7517) on the fluid chamber. Screw the
cylinder onto the fluid chamber. Hand tighten only. The chamber
can be turned back out up to 1/2 turn to orient the fluid inlet
fitting to the desired position.
8. Reinstall the tip adapter/seat assembly.
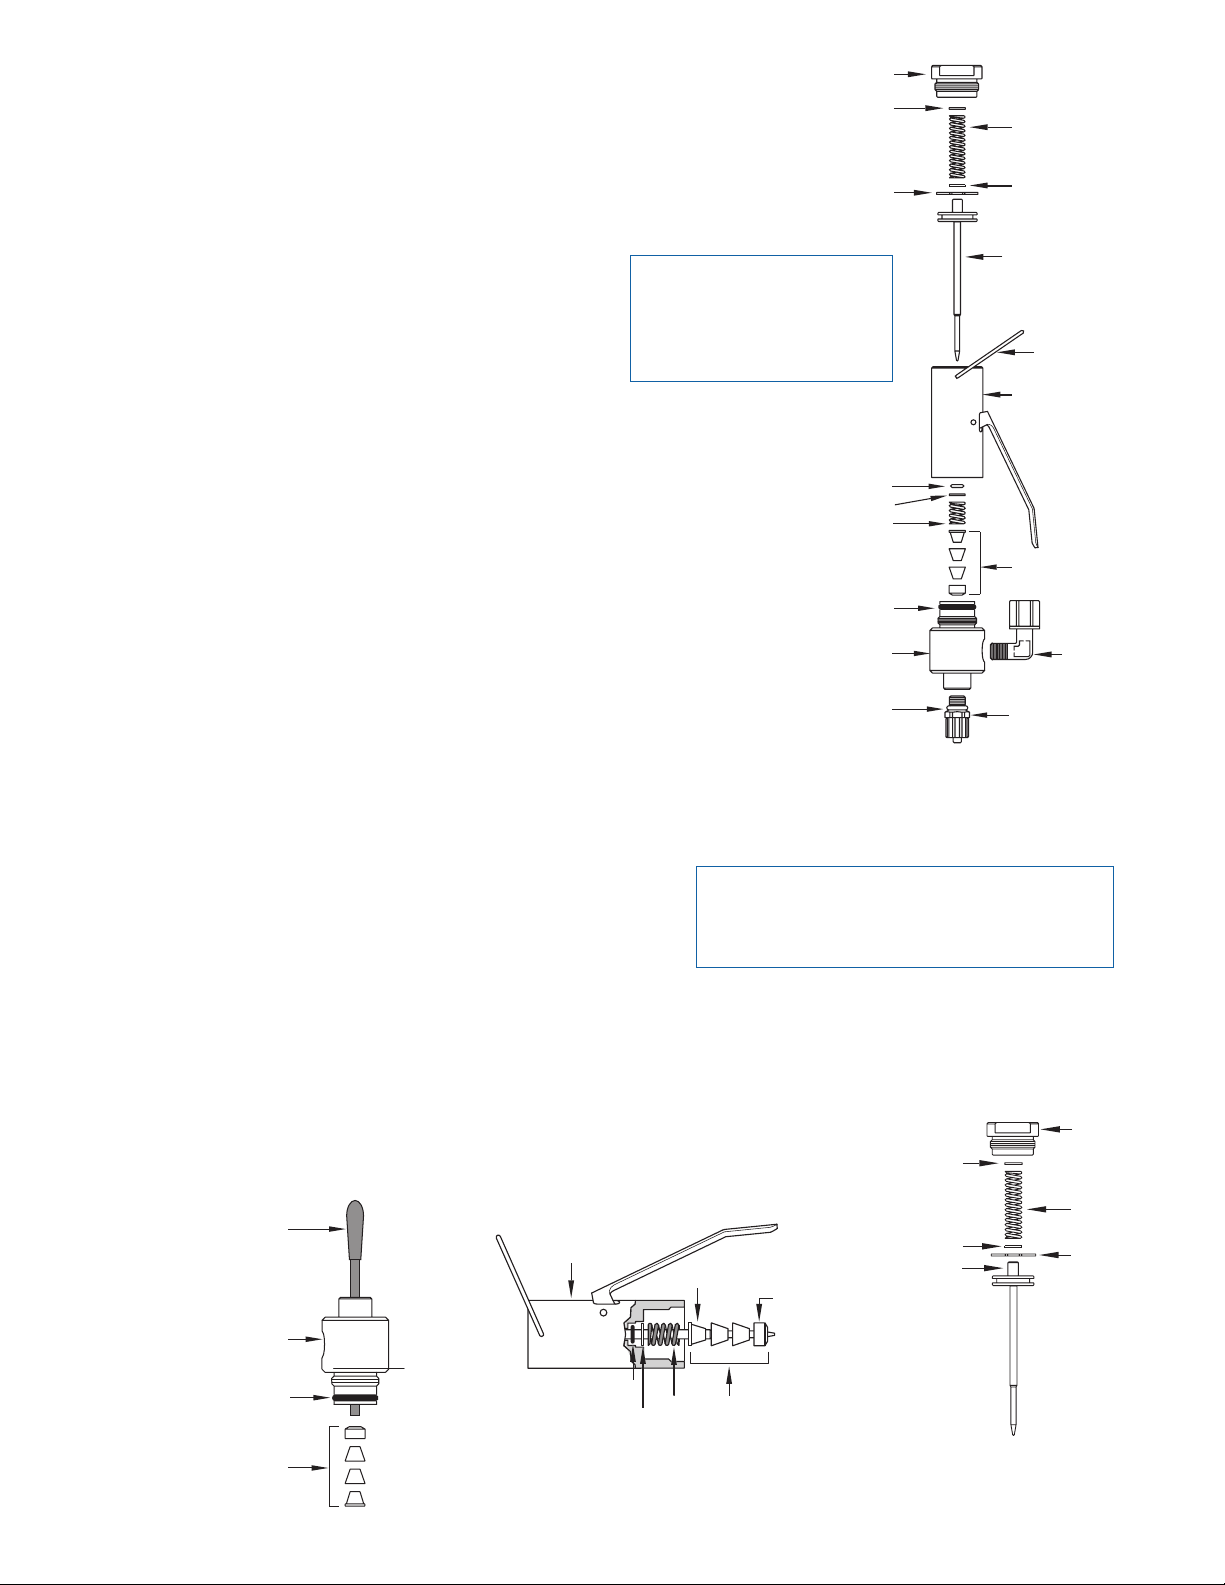
Piston and needle
assembly #7805-SS
Fluid inlet fitting
#7543BP
Cylinder cap
#7529
Nylon thrust
washer #7809
Piston return spring
#7413
Nylon thrust washer
#7809
Snap ring #7526
Bail hanger
#7412
Cylinder and lever
assembly #7410A
O-ring #7517
Needle packing
assembly #7810
O-ring #7806
O-ring #5148RV
Retaining washer #7807
Packing spring #7808
Tip adapter /
seat assembly
#7404
Fluid chamber
#7402
To replace the piston and needle assembly:
1. Remove the cylinder cap by turning counterclockwise until free.
2. Remove the piston return spring, thrust washers and snap ring.
3. Pull the piston and needle assembly out of the air cylinder, using
small pliers on the spring pilot at the top of the piston.
4. Clean the cylinder body wall and lubricate with Nye Lubricants
#865 grease.
5. Lubricate the needle with Nye Lubricants #865 grease, then
reinstall in the cylinder.
6. Reinstall the snap ring.
7. Reinstall thrust washers, spring and cylinder cap.
See Figure 3.
Maintenance Tools:
packing extraction tool (part #7803)
snap ring pliers (customer supplied)
small pliers (customer supplied)
6” adjustable wrench (customer supplied)
Figure 1
Needle packing
assembly
Packing seat
Stainless steel
packing expander
O-ring
Retaining washer
Spring
Cylinder body
Piston and needle
assembly
Cylinder cap
Nylon
thrust washer
Piston return
spring
Nylon
thrust washer
Snap ring
Spring pilot
Packing
extraction tool
#7803
Fluid chamber
O-ring
Figure 3
Figure 2
CAUTION: Check the reservoir pressure gauge prior to performing
any maintenance to assure that pressure is zero (0). To confirm this
on EFD tanks: slide the shutoff valve on the air hose away from the
tank, and open the pressure relief valve on the tank.
For assistance, please call 800-556-3484.
 Loading...