

Page 1

Data Power Solutions Quick Start Guide
Data Power Solutions
Quick Start Guide
Issue: 10640205
Issue Date:
This guide is intended to be used in conjunction with the full Install and Operation manual
IPN 997-00012-41, available from the documentation pages of the web site www.powerware.com/3com
February 2009
Eaton Corporation
Electrical Group
Telecommunications Power Solutions
www.eaton.com/telecompower
DCinfo@eaton.com
Page 2

Data Power Solutions Quick Start Guide
Eaton Corporation disclaims any liabi lity for d irect, indirec t, incidenta l, special or consequent ial damag es ar ising
out of the application or use of any infor mation contained in this document. The foregoing discla imer applies to
damages or personal injury, property da mage, loss of operation, loss of profits, loss of product or los s of time,
whether incurred by the purchaser, the purchaser’s employees or third party.
Information in this document does not constitute a warranty, representation or guarantee concerning the
suitability or perfor mance of Eaton products. No suc h warranty, representation or guarantee is expressed or
implied.
Information contained in this document is subject to change without further notice.
Subject to the right to use its equipment, Eaton Cor poration does not convey any right, title or interes t in its
intellectual property, including, without limitation, its patents, copyrights and know-how.
No part of this document may be reproduced or transmitted in any form, by any means or for any purpose other
than the Purchaser’s personal use, without the express written permission of Eaton Corporation.
®
, Powerwa re®, IntergyTM, CellSureTM, SiteSureTM, PowerManagerIITM and DCToolsTM are trade names,
Eaton
trademarks, and/or servic e marks o f Eaton Corpor ation or its subsidiaries and affi liates . Unles s o ther wis e noted,
brands, product names, trademarks or registered trademarks are the property of their respective holders.
Copyright © 2006-2009 Eaton Corporation. All Rights Reserved.
2
Copyright © 2006-2009 Eaton Corporation. All Rights Reserved.
10640205 February 2009
Page 3

Contents
Data Power Solutions Quick St art Guide
Worldwide Support..................................................................................................................4
For Further Information and Technical Assistance............................................... ..........................4
General Description.................................... ..............................................................................5
APS3 and APS6 Series (48V) DC Power Systems .................................. ...... ... .... ... ... ....... ... ... ... .......5
Access Power Rectifiers.........................................................................................................................5
SM45 Supervisory Module .................................. .................................................................................5
Low Voltage Disconnect (if applicable).............................................................................................6
Pre-Installation..........................................................................................................................6
Warnings ................................. .................................................................................................................6
Inputs ........................................................................................................................................................6
Equipment Classification..................................... ... ... .... ...... ... .... ... ... ...... .... ... ... ....... ... ... ... ..... ...............9
Outputs.....................................................................................................................................................9
Batteries (if applicable)................................... .....................................................................................10
Rectifiers.................................................................................................................................................10
Location and Environment............................................... ..................................................................12
Servicing........................... ......................................................................................................................12
EMC Compliance................................... ... ... ....... ... ... .... ... ...... ... .... ... ...... .... ... ... ...... .... ... ... ... ..................13
Inspecting the Equipment and Reporting Damage .................................... ..................................14
Installation...............................................................................................................................14
Mounting the APS DC Power System ................. ............................................................................14
Connecting the DC Load Cables.......................................................................................................16
Installing the External Batteries (if applicable) ..............................................................................19
Connecting the Battery Cables (if applicable) ........................................................ ........................22
Installing the Battery Temperature Sensor (if batteries are fitted) ................. ...........................24
Connecting the APS DC Power System to the AC Supply............................................... ...........24
Commissioning.......................................................................................................................25
Inserting the Access Power Rectifiers ............ ..................................................................................25
Pre-Power-Up Check ............... ... .... ...... ... ... .... ... ...... .... ... ... ...... .... ... ... ... ....... ... ... ... ....... ... ... ... ...............25
Applying AC Power ............................. ... ... .... ...... ... .... ... ... ...... .... ... ... ....... ... ... ... ... ....... ... ... .... ..............26
Configuring the APS DC Power System for Operation .................................... ...........................26
Applying DC Power to the Load .................................... ..................................................................26
Output Circuit Breaker Field Replacement and Repair........ .............................................27
UL Listed Mark....................................................................................................................... ..............27
Desktop variants APS3-060 & APS3-061 .........................................................................................27
Battery Input Circuit Breakers.................. .........................................................................................27
Contact Information........................... ... ... ....... ... ... ... .... ...... ... ... .... ...... ... .... ... ... ...... .... ... ... .... .................27
Specifications...........................................................................................................................28
Copyright © 2006-2009 Eaton Corporation. All Rights Reserved.
10640205 February 2009
3
Page 4

Data Power Solutions Quick Start Guide
Worldwide Support
For product information and a complete listing of worldwide sales offices, visit Eaton's
website at: www.eaton.com/telecompower or email: DCinfo@eaton.com
Australia
Canada
Central America
China
Europe / Middle East / Africa
Hong Kong / Korea / Taiwan
India
New Zealand / Pacific
Singapore / South East Asia
South America
United States of Americ a
(Toll Free)
Tel. 1300 877 359
Tel. 1-800-461- 91 66
Tel. +52 55 9000 5252
Tel. +86-571-8848-0166
Tel. +44-1243-810-500
Tel. +852-7221-5305
Tel. +91-11-2649-9414 to 18
Tel: 0800 DC Power (327 -69 3 )
Tel. +64-3-343-7448
Tel. +65 6825 1668
Tel. +55-11-3616-8500
Tel: +54 11-4308-0778
Tel. 1-800-843- 94 33
For Further Information and Technical Assistance
If you do not understand certain parts of this manual, or the install and operation manual on the
web site, then please contact your local sales office, who will provide assistance and translation.
如果您对本手册中某些内容或对网站公布的安装和操作手册有不明白之处,请联系当地销售办事处,
他们将为您提供帮助和翻译。
Si certaines sections du présent manuel, ou du manuel d'installation et d'utilisatio n sur le site
Internet, vous posent des difficultés, conta ctez votre revendeur local qui vous fournira l'aide et les
explications nécessaires.
Wenn Sie bestimmte Teile dieses Handbuchs oder des auf der Website bereitgestellten Installationsund Betriebshandbuchs nicht verstehen, wenden Sie sich zwecks Unterstützung und Übersetzung
bitte an Ihr nächstes Vertriebsbüro.
Se alcune parti di questo manuale o del manuale per l'installazione e operativo presente sul sito
Web non sono chiare, contattare l'ufficio ve ndite locale, che fornirà l'assistenza e le traduzioni
necessarie.
Si no comprende ciertas partes de este manual, o del manual de instalación y funci o namiento,
disponible en el sitio web, sírvase contactar con la oficina de ventas local, donde le proporcionarán
4
asistencia y ayuda par a la traducción.
Copyright © 2006-2009 Eaton Corporation. All Rights Reserved.
10640205 February 2009
Page 5

General Description
APS3 and APS6 Series (48V) DC Power Systems
APS dc power systems provide high reliability 48V dc power for wiring closet and other data
and telecommunications equipment. Each power system includes ac/dc rectifier modules, a
supervisory module to provide control and communications functions, circuit breakers to
protect the output cabling, and output terminals to connect the cables to the dc powered
equipment and optional batteries. Four APS3 and two APS6 dc power system models are
available, as shown on the following three pages.
• APS3-058 – rack-mounted version, without battery option
• APS3-059 – rack-mounted version, with battery option
• APS3-060 – desktop version, without batte ry option
• APS3-061 – desktop version, with battery option
• APS6-058 – rack-mounted version, without battery option
• APS6-059 – rack-mounted version, with battery option
Input: APS dc power systems can be powered by a wide range of ac sources such as singlephase, two-phase, three-phase (L-N) and three-phase (L-L ) . Depending on the no m inal
voltage of the ac supply (120V or 240V), the power systems a re equipped with either APU48
or APR48 rectifiers. Fused ac sockets (one per rectifier) are available for connecting the power
system to the ac supply.
Output: Eight floating dc outlets are available for connecting equipment power cables to the
APS dc power system. Each dc outlet is protected by a corresponding 6A or 25A load circuit
breaker. Any combination of 6A or 25A rated load circuit breakers (up to a maximum of
eight) can be fitted, depending on customer requirements.
Battery Option: External VRLA 48V batteries can be connected to APS3-059, APS3-061 and
APS6-059 dc power systems to provide backup power during ac outages. The ba ttery float
voltage is temperature compensated.
Data Power Solutions Quick St art Guide
Access Power Rectifiers
There are three status indicator LEDs on the Access Power Rectifier front panel (Power On,
Urgent Alarm and Non-Ur gen t Alar m).
Two types of fan-cooled, hot-pluggable Access Power Rectifiers are available:
• APU48 – 48 V, 720 W, 120 - 2 40 V ac
• APR48 – 48 V, 1500 W, 208 - 240 V ac
SM45 Supervisory Module
The SM45 supervisory module is an advanced control and monitoring solution for Acce ss
Power Solutions (APS) dc power systems. It provides a full suite of advanced
communications options, including built-in Ethernet interface, Web server and SNMP agent.
Alarm notifications may be by SNMP traps. The SM45 has an onboard audible indicator and
two alarm LEDs.
Copyright © 2006-2009 Eaton Corporation. All Rights Reserved.
10640205 February 2009
5
Page 6

Data Power Solutions Quick Start Guide
Low Voltage Disconnect (if applicable)
APS3-059, APS3-061 and APS6-059 dc power systems are equipped with a Low Voltage
Disconnect (LVD) module. The LVD disconnects the batteries at the LVD disconnect voltage
to prevent damage to the batteries due to excessive deep discharg e. After the batteries are
disconnected, they recover to their open-circuit voltage. The LVD reconnects the batteries
automatically after the ac supply is restored. Af ter the ba tteries are reconnected, the APS dc
power system recharges the batteries and powers the loads.
Both the LVD disconnect and reconnect voltages are configurable. The default LVD
disconnect voltage is set to 44V and the reconnect voltage to 48V. This hysteresis band
ensures that the open-circuit recovery of the discharged batteries does not rise above the LV D
reconnect voltage.
Pre-Installation
Warnings
This section contains important warnings relating to:
• Inputs
• Equipment Classification
• Outputs
• Batteries (if applicable)
• Rectifiers
• Location and Environment
• Servicing
• EMC Compliance
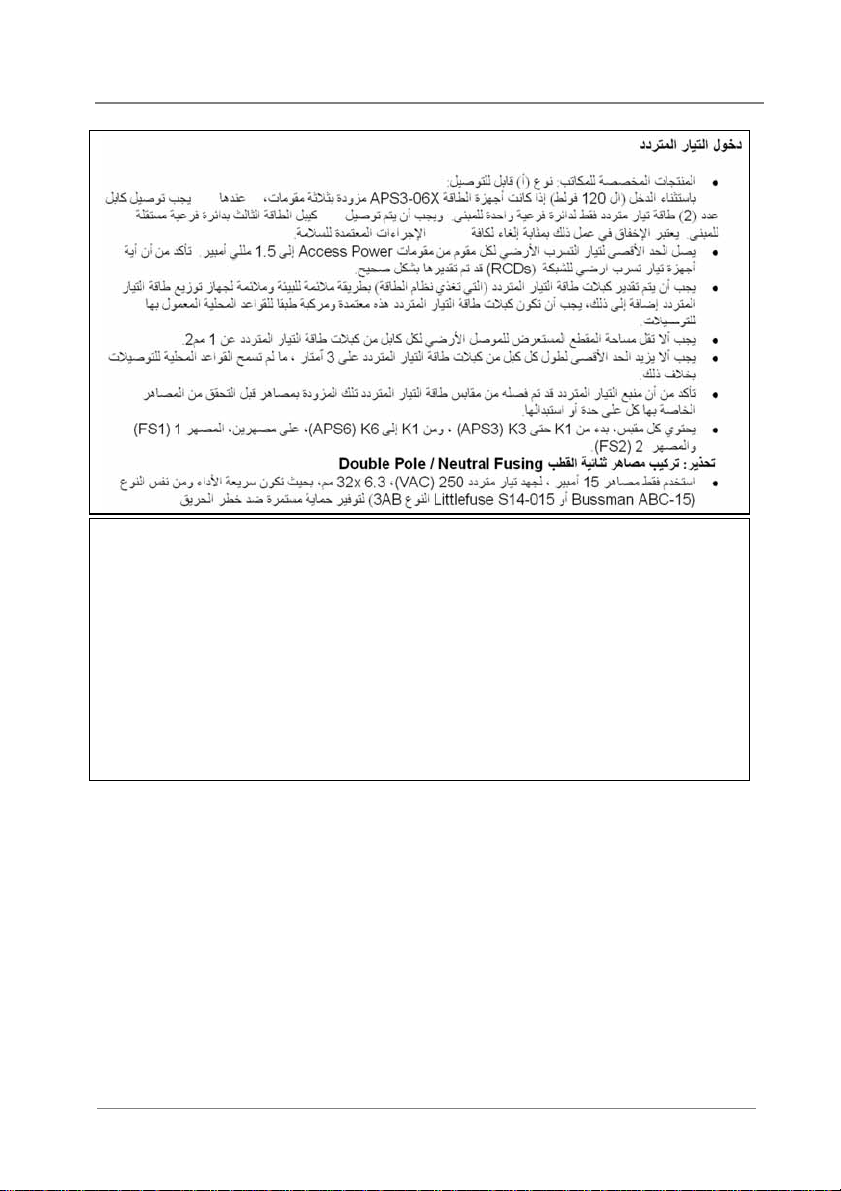
Inputs
• Desktop Versions:
Pluggable Type A: Except for 120V input, if APS3-06X power systems are fitted with three rectifiers, then only
two ac power cords may be connected to one building bran ch circuit. The third ac power cord mus t be
connected to a separate building branch circuit. Failure to do so voids all safety approvals.
• The maximum earth leakage current of each Access Power Rectifier is 1.5 mA. Ensure that any upstream
Residual Current Devices (RCDs) are appropria tely rated.
• The ac power cords (supplying the power system) must be suitably rate d for the e nvironment and ac power
distribution system. I n addition, these ac power cords must be ap proved and installed to comp ly with local
wiring regulations.
• The earth conductor of each ac power cord must have a minimum cross sectional area of 1 m m2 (0.00155 in2).
• The maximum length of each ac power cord should not exceed 3m (10 feet), unless local wiring regulations
permit otherwise.
• Ensure that the ac supply is disconnected from those fused ac power sockets before checking or replacing
their respective fuses.
• Each socket, K1 to K3 (APS3), and K1 to K6 (APS6), contain two fuses, FS1 and FS2.
CAUTION: DOUBLE-POLE / NEUTRAL FUSING
• Use only 15 A, 250 VAC, 6.3 x 32 mm, fast-acting fuses of t he same type (Bussman ABC-15 or L ittelfuse 314-
015 Type 3AB) for continued pr otection ag ainst risk of fire.
6
Copyright © 2006-2009 Eaton Corporation. All Rights Reserved.
10640205 February 2009
Page 7
Data Power Solutions Quick St art Guide
交流输入
• 台式安装版:插入式A类:
如果APS3-06X电源系统配备三个整流器, 除了120V输入外,
那么只有两条交流电源线可以接到一个建筑物配电支路中。
第三条交流电源线必须接到单独的建筑物配电支路中。否则, 将失去所有安全许可资格。
• 每个接入电源整流器的最大泄漏电流是1.5mA。确保任一上游剩余电流设备(RCD)都符合规定要求。
• 为电源系统馈电的交流电源线,其规格必须符合环境和交流电源分配系统的要求。此外,交流电源线的认证和
安装必须符合当地电源线安装规范。
• 每条交流电源线的接地导体横截面必须至小1 mm2。
• 每条交流电源线的最大长度不应超过3米(除非当地电源线安装规范另有规定)。
• 检查或更换每个保险丝之前,应确保交流电源从电源插座断开。
• K1到K3(APS3)和K1到 K6(APS6)每个插座都含有FS1 和 FS2两个保险丝。切记:双极/中性熔断。
• 为了持续性预防火灾,应只使用15 A、250 VAC、6.3 x 32 mm快速动作熔断器(Bussman ABC-15或Littelfuse
314-015 Type 3AB)。
Copyright © 2006-2009 Eaton Corporation. All Rights Reserved.
10640205 February 2009
7
Page 8

Data Power Solutions Quick Start Guide
Entrées Alimentation Secteur
• Versions ordinateur de bureau : Enfichable Type A:
Hormis pour l'entrée 120V, si les systèmes d'alimentation APS3-06X sont équipés de trois redresseurs, deux
cordons d'alimentation seulement peuvent être connectés au circuit de dérivation de l'immeuble. Le troisi ème
cordon d'alimentation secteur doit êt re connecté à un circuit de dérivation séparé. Le non respect de ces
consignes annule l'ensemble des garanties de sécurité.
• Le courant de fuite maximum, à la terre, de chaque redresseur de puissance d'accès est de 1,5 mA. Vérifiez
que les dispositifs à courant résidue l (DCR) en amont sont correctement dimensionnés.
• Les cordons d'alimentation secteur (fournissant le système d'alimentation) doivent être correctement
dimensionnés pour l'environnement et le système de distribution CA. De plus, les cordons d'alimentation
secteur doivent être approuvés et installés conformément aux réglementations de câblage locales.
• Le conducteur de terre de chaque cordon d'alime ntation secteur doit avoir une section minimale d'1 mm2.
• La longueur maximale de chaque cordon d'alimentation secteur ne doit pas dépasser 3 m, sauf disposition
particulière de la réglementation de câblage.
• Assurez-vous que l'alimentation électrique CA est déconnectée des prises électriques secteur protégées par
fusible avant de contrôler ou remplacer les fusibles de celles-ci.
• Chaque prise électrique, de K1 à K3 (APS3) et de K1 à K6 (APS6), est dotée de deux fusibles, FS1 et FS2.
ATTENTION : PROTECTION DOUBLE-POLE / FUSIBLES SUR PHASE ET NEUTRE.
• Pour une protection continue contre les risques d'incendie, n'utilisez que des fusibles à action rapide de 15 A,
250 V CA, 6,3 x 32 mm, de même type (Bussman ABC-15 ou Littelfuse 314-015 Type 3AB).
Wechselspannungs-Eingänge
• Desktop-Versionen: Typ A, steckbar:
Wenn APS3-06X Stromversorgungsanlagen mit drei Gleichrichtern ausgestattet sind, dürfen an einem
Hausstromkreis nur zwei Netzkabel angeschlossen sein (gilt nicht für 120 V Eingangsspannung). Das dritte
Netzkabel muss an einem separaten Hausstromk reis angeschlossen werden. Bei Nichtbeachtung werden
jegliche Sicherheitszulassungen ungültig.
• Der maximale Erdschlussstrom für jeden Access Power-Gleichrichter beträgt 1,5 mA. Vergewissern Sie sich,
dass der Nennauslösestrom für alle vorgeschalteten Fehlerstromschutzschalter (FI-Schalter) korrekt ist.
• Die Nennleistung der Netzkabel (zur Versorgung der Stromversorgungsanlage) muss in Übereinstimmung
mit den Umgebungsbedingungen und der Wechselstromversorgungsanlage ausgelegt sein. Darüber hinaus
müssen diese Netzkabel gemä ß den für Ihr Land gültig en Elektroinstallationsv or sc h rif ten z uge las sen und
installiert sein.
• Der Schutzleiter von jedem Netzkabe l muss einen Mindestquerschnitt von 1 mm2 aufweisen.
• Die Maximallänge von jedem Netzkabel darf höchstens 3 m betragen, sofern andere Längen durch
landesspezifische Elektroinstallationsvorschriften nicht ausdrücklich zugelassen ist.
• Vergewissern Sie sich, dass die Stromversorgung von den abgesicherten Netzsteckd osen getrennt ist, bevor
Sie die zugehörigen Sicherungen überprüfen oder auswechseln.
• Jede Steckdose, K1 bis K3 (APS3) und K1 bis K6 (APS6), umfasst zwei Sicherungen, FS1 und FS2. ACHTUNG:
ZWEIPOLIGE BZW. NEUTRALLEI TER - ABSI C HERUNG
• Verwenden Sie für dauerhaften Schutz gegen Branden twicklung nur flinke Sicherungen mit 15 A, 250 VAC,
6,3 x 32 mm desselben Typs (z. B. Bussman ABC-15 oder Littelfuse 314-015 Typ 3AB).
8
Copyright © 2006-2009 Eaton Corporation. All Rights Reserved.
10640205 February 2009
Page 9

Data Power Solutions Quick St art Guide
Ingressi C.A.
• Versioni desktop: Tipo A inseribile:
ad eccezione dell'ingresso da 120 V, se i sistemi di alim entazione APS3-06X sono dotati di tre raddrizzatori ,
sarà possibile collegare solo due cavi elettrici C. A. a un unico circuit o derivato. Il terzo cavo C. A. deve essere
collegato a un circuito derivato separato. La mancata oss ervanza di questo punto rende nulle tutte le
eventuali approvazioni per la sicure zza.
• La corrente di dispersione a terra massima per ogni Access Power Rectifier è di 1,5 mA. Assicurarsi che
eventuali dispositivi RCD (Residual Current Device, dispositivo di corrente residua) a monte presentino la
tensione appropriata.
• I cavi elettrici C.A. (che alimentano il sistema elettrico) devono presentare la tensione adeguata all'ambiente e
al sistema di distribuzione elettrica C.A. Inoltre, tali cavi elettrici devono essere approvati e installati in modo
tale da essere conformi alle normative locali sui collegamenti elettrici.
• Il conduttor e di messa a te rra di ogni cavo elettrico C.A. deve avere una sezione trasversale minima di 1 mm2.
• La lunghezza massima di ogni cavo elettrico C.A. non deve superare i 3 m, ad eccezione del caso in cui le
normative locali sui collegamenti elettrici prevedano diversamente.
• Assicurarsi che l'alimentazione C.A. sia scollegata dalle prese di alimentazione C.A. dotate di fusibili, prima
di controllarne o sostituirne i relativi fusibili.
• Ogni presa, da K1 a K3 (APS3) e da K1 a K6 (APS6), contiene due fusibili, FS1 e FS2. ATTENZIONE: POLO
DOPPIO/ FUSIBILE NEUTRO
• Utilizzare solo fusibili da 15 A, 250 V C.A., 6,3 x 32 mm, ad azione rapida dello stesso tipo (Bussman ABC-15 o
Littelfuse 314-015 Tipo 3AB) per una protezione continua rispetto al rischio di incendio.
Entradas CA
• Versiones de escritorio: Con enchufe tipo A:
Excepto para la entrada de 120V, si los sistemas de en ergía APS3-06X están inst alados con tre s rectificadores,
solo dos cables de alimentación CA se podrán conectar a un circuito derivado del edificio. El tercer cable CA
deberá conectarse a un circuito derivado diferente del edificio. Si no lo hace, se anularán las aprobaciones de
seguridad.
• La máxima corriente de fuga a tierra de cada uno de los rectificadores Access Power es de 1,5 mA. Asegúrese
de que los equipos de corriente residual (RCD) te ngan una capacidad nominal adecuada.
• Los cables CA (los que suministran el sistema de energía) deberán tener una capacidad nominal adecuada
para el medioambiente y el sistema de distribución de energía CA. Además, dichos cables CA deberán ser
aprobados e instalarse de acuerdo con las disposiciones locales referidas al cableado.
• El conductor a tierra de cada cable CA deberá t ener un área de sección transversal mínima de 1 mm2.
• La longitud máxima de cada cable CA no deberá exceder los 3 m, a menos que lo permitan las disposiciones
locales referidas al cableado.
• Asegúrese de que el suministro CA esté desconectado de las tomas CA con fusibles antes de verificar o
reemplazar los fusibles correspondientes.
• Cada toma, K1 a K3 (APS3), y K1 a K6 (APS6), contienen dos fusibles, FS1 y FS2. PRECAUCIÓN: DOBLE
POLARIDA D / FUSIBLE NEUTRO
• Use solamente fusibles de acción rápida de 15 A, 250 VAC, de 6,3 x 32 mm del mismo tipo (Bussm an ABC-15
o Littelfuse 314-015 Tip o 3AB) para ten er una protección continua contra el riesgo de incendio.
Equipment Classification
APS dc power systems are classified as “Class 1” equipment that must be provided with an earth connected to the
“Protective Earthing Conductor” in the bu ilding wiring. The earth conductor of each ac power cord must be
connected to the “Protective Earthi ng Conductor” in the building wiring. A P S3-06X (desktop versions) are cl assed
as “Pluggab le Equipment Type A” and inte n ded for use as “Desktop units”, All other units, APS3-0 5X and APS605X are “Pluggable Equipment Type B” or for “Permanently connection” in host equipment.
Outputs
The dc outlets of an APS dc power system are floating to meet the isolation requirements for powering Power over
Ethernet IEEE802.3af compatible devices. In non-Power over E thernet applications the positive or ne gative out put
of the dc outlets can be referenced to earth, if required.
Copyright © 2006-2009 Eaton Corporation. All Rights Reserved.
10640205 February 2009
9
Page 10

Data Power Solutions Quick Start Guide
Batteries (if applicable)
• Always install the batteries according to the relevant battery manufacturer’s instructions.
• Batteries are powerful sources of energy and present a potential electrical shock and energy hazard. The
energy hazard is always present, even if the batteries are not connected. Avoid short circuiting terminals of
opposite polarity.
• Batteries are heavy, awkward to handle and can cause personal injury. To prevent back injury, use correct
lifting and bending techniques when moving batteries. If the batteries are too heavy to move, request
assistance.
• Remove or cover rings, wristwatch and other metal jewelry that might be exposed to battery terminals, before
installing batteries.
• Do not wear synthetic clothing when installing batteries.
• Always use insulated tools.
• Only use a clean soft damp cloth for cleaning the batteries. Do not use cleaning detergents or chemicals.
• When unpacking the batteries inspect them carefully for leaks, corrosion and possible damage. Report any
damage or other battery related problems immediately to your battery supplier.
• Do not remove the factory-fitted transit insulation covers from the batteries until access to the battery
terminals is required.
• Do not place tools, loose cables or metal objects (such as interconnecting bars) on top of batteries.
• Do not drop tools, loose cables or metal object s onto intercell connections or terminals of opposite polarity.
• Only terminate cables and interconnecting bars after confirming that the termination will not create a short
circuit.
• Always tighten the battery terminal bolts according to the battery manufacturer’s specification. Failing to do
so can cause erratic battery performance, possible damage to the battery, and/or personal injury.
• Always ensure that any shrouding supplied with the batteries is correctly fitted to cable connectors.
Rectifiers
• To reduce the risk of electric shock and maintain optimum system cooling, always cover empty rectifier
slots with blanking panels (Part Number: IPN 621-05722-63A).
• To avoid electrical shock, do not place hands inside the rectif ier shelf.
• Rectifier cases may exceed 100ºC (212ºF), especially after prolonged operatio n. Use suitable g loves to
remove the hot rectifier.
• Do not attempt to disassemble rectifiers. Return them, (in their original packaging) along with the
completed Equipment Incident Report, to your local Eaton dc product representative for replacement or
repair.
整流器
• 为了降低触电风险并保持系统最佳冷却,始终应把整流器盲板(编号:IPN 621-05722-63A)
安装到未安装整流器的空位上。
• 为了避免触电,不要把手伸到整流器架内。
• 整流器外壳温度可能会超过100ºC,特别是在长期运行之后。拆取发热整流器时, 应戴上合适的手套。
• 不要尝试拆卸整流器。如果需要更换或修理,应把整流器按照原样打包,
连同完整的设备故障报告一起,返回给当地Eaton直流产品办事处。
10
Copyright © 2006-2009 Eaton Corporation. All Rights Reserved.
10640205 February 2009
Page 11

Data Power Solutions Quick St art Guide
Redresseurs
• Pour réduire au minimum le risque de choc électrique et garantir un refroidissement optimal du système,
obstruez les emplacements vides ne contenant pas de redresseur à l'aide de bouchons (Référence : IPN 62105722-63A).
• Pour éviter tout risque de choc électrique, ne pas toucher l'intérieur du panneau contenant le redresseur.
• La température des boîtiers de redresseur peut dépasser les 100°C, en particulier après une utilisation
prolongée. Utilisez des gants adaptés pour retirer le redresseur si celui-ci est chaud.
• N'essayez pas de démonter les redresseurs. Retournez-les (dans leur emballage d'origine), accompagné du
Rapport d'incident rempli, à votre revendeur local de produits électriques Eaton dc (courant continu) pour
réparation ou remplacement.
Gleichrichter
• Um das Risiko von Stromschlägen zu mi nimieren und eine optimale Kühlung der Anlage sicherzustellen,
sollten Sie für ungenutzte Gleichrichterplätze stets Blindabdeckungen verwenden (Bestellnummer:
IPN 621-05722-63A).
• Zum Vermeiden von Stromschläge n niemal s in den Gleichrichterschrank fassen.
• Gleichrichtergehäuse können u. U. über 100° C heiß werden, insbesondere nach längerem Betrieb. Zum
Entfernen des heißen Gleichrichte rs geeignete Handschuhe verwenden.
• Gleichrichter dürfen nicht auseinandergebaut werden. Senden Sie diese zwecks Ersatz oder Reparatur (in
der Original verpackung) mit dem ausgefüllten Fehlerbe richt an Ihren zu ständigen Eat onProduktvertreter.
Raddrizzatori
• Per ridurre il rischio di shock elettrico e conservare una refrigerazione ottimale del sistema, coprire sempre
gli slot vuoti dei raddrizzatori con pannelli otturatori (numero di parte: IPN 621-05722-63A).
• Per evitare shock elet trici, non inserire le mani all'interno del supporto del raddrizzatore.
• Il contenitore del raddrizzatore può superare i 100º C, in particolare dopo un funzionamento prolungato.
Utilizzare gli appositi guanti per rimuovere il raddrizzatore caldo.
• Non cercare di disassemblare i raddrizzatori. Restituirli (nell'imballaggio originale) insieme al report sui
problemi dell'apparecchiatura, al rappresentante Eaton dc locale, per un'eventuale sostituzione o
riparazione.
Rectificadores
• Para reducir el riesgo de descargas eléctricas y para mantener un enfriamiento óptimo del sistema, siempre
cubra las ranu ras de los rectificadores co n paneles obturadores (Número de pieza: IPN 621-05722-63A).
• Para evitar descargas eléctricas, no ponga las manos dentro del estante del rectificador.
• Las carcasas de los rectificadores pued en exceder los 100ºC, en es pecial tras periodos de funcionamiento
prolongados. Utilice guantes para quitar el rectificador recalentado.
• No trate de desarmar los rectificadores. Devuélvalos (en el embalaje original) junto con el Informe de
incidentes del equipo completo, al representante local de productos Eaton dc para su reemplazo o
reparación.
Copyright © 2006-2009 Eaton Corporation. All Rights Reserved.
10640205 February 2009
11
Page 12

Data Power Solutions Quick Start Guide
Location and Environment
• APS dc power systems (rack-mounted and desktop versions) meet the safety and fire enclosure requirements
(as specified in IEC 60950-1, UL 60950-1, EN 60950-1 and AS/NZS 60950.1). Always mount APS3-05X and
APS6-05X dc powers systems in 19-inch wide host equipment racks (enclosed or open type) securely bolted to
the floor and position the desktop versions (APS3-06X) on a surface that supports the weight (12kg/26lb) of
the power system.
• To maintain optimum system cooli ng, keep the front and rear of the APS dc power system clear from wall s or
other equipment. The minimum recommended clearance distance at the front and rear of the APS dc power
system is 50 mm (2”). No top and bottom clearance is required.
• The location must provide adequate airflow around the unit, in an atmosphere free from excessive dust,
corrosive fumes or conductive contaminants.
• Dust build-up within APS dc power systems may cause premature failure. In dusty environments, either
install the power system in a sealed and air-conditioned equipment room, or provide fan assisted filtered air
to create a positive pressure environment inside the equipment room. Both options require regular cleaning of
the air filters.
• Do not allow water or any foreign object to e nter t he APS dc power system. Do not place objects containing
liquid on top of or near the unit.
Servicing
• Data Power Solutions contain hazardous voltages. Do not attempt to disassemble or service the unit if you are
not qualified. Only service personne l of Eaton Corporation's Telecommunications Solutions Division or their
authorized service agents are permitted to service the unit.
• If the power system requires servicing other than external battery or rectifier replacement, isolate the unit first,
as follows:
• Unplug the ac supply cords from the ac power outlets.
• Disconnect the external batteries, by switching off the battery circuit breakers.
维修
• 数据电源解决方案设备包含危险电压。如果您没有获得维修资格, 请不要尝试拆卸或维修设备单元。
只有伊顿公司电讯解决方案部的维修人员或他们授权的维修代理才允许维修设备单元。
• 如果电源系统需要进行的维修不属于外置电池或整流器更换,则应首先隔离设备单元, 步骤如下:
• 从交流电源插座拔下交流电源线。
• 关闭电池电路断路器,断开外置电池。
Entretien
• Les solutions Data Power utilisent des tensions dangereuses. Ne tentez pas de démonter ou d'intervenir sur
l'appareil si vous n'êtes pas qualifié. Seul le personnel du service de réparation de la division Solutions de
Télécommunications d'Eaton Corporation ou leurs agents de maintenance autorisés sont habilités à intervenir
sur l'unité.
• Si vous devez intervenir sur le système d'aliment ation électrique autrement que pour remplacer le redresseur
ou la batterie externe, commencez par isoler l'unité, en procédant de la façon suivante :
• Débranchez les cordons d'aliment ation CA des prises de courant CA.
• Déconnectez les batteries externes en coupant les disjoncteurs d'alimentation des batteries.
12
Copyright © 2006-2009 Eaton Corporation. All Rights Reserved.
10640205 February 2009
Page 13

Data Power Solutions Quick St art Guide
Wartung
• Bei Data Power Solutions-Anlagen liege n ge fährl iche Spannungen an. Sie dürfen das Ge rät ohne
entsprechende technische Ausbildung weder auseinanderbauen noch warten. Das Warten des Geräts darf nur
durch Wartungspersonal der Telecommunications Solutions Division von Eaton oder durch von Eaton
zugelassene Wartungstechniker erfolgen.
• Für andere Wartungsarbeiten als das Austauschen der externe n Batterien oder des Gleichrichters der
Stromversorgungsanlage isolieren Sie das Gerät zunächst wie folgt:
• Ziehen Sie die Netzstecker aus der Netzsteckdose.
• Trennen Sie die externen Batteri en, indem Sie die Batterieschutzschalter ausschalten.
Manutenzione
• In Data Power Solutions sono presenti tensioni pericolose. Non cercare di disassemblare o riparare l'unità, se
non si è qualificati per farlo. Gli interventi di manutenzione sull'unità sono consentiti esclusivamente al
personale di assistenza della divisione Telecommunications Solutions della Eaton Corporation o a eventuali
tecnici da loro autorizzati.
• Se il sistema di alimentazione richiede una manutenzione diversa dalla sostituzione della batteria esterna o del
raddrizzatore, innanzitutto isolate la prima unità, come indicato di seguito:
• Scollegare i cavi di alimentazione C.A. dalle prese C.A.
• Scollegare le batterie esterne, spegnendo gli interruttori della batteria.
Reparaciones
• Las Soluciones de Energía para Datos contienen voltajes peligrosos. No trate de desarmar ni de reparar la
unidad si no está capacitado para hacerlo. Solo el personal de reparaciones de la División de Soluciones para
Telecomunicación de la corporación Eaton o sus agentes de reparación autorizados podrán reparar la unidad.
• Si el sistema de energía necesita ser r eparado, excepto si se trata de reemplazar la batería externa o el
rectificador, primero aísle la unidad, como se indica a continuación:
• Desconecte los cables CA de los enchuf es CA.
• Desconecte las baterías externas, apagando los interrupt ores de circuito de la batería.
EMC Compliance
• APS dc power systems may be used in close proximity to other electronic equipment provided installation is
carried out according to in structions in this manual. H owever, proper installati on and compliance with EMC
standards does not guarantee that the APS dc power system will not respond to electromagnetic disturbances,
or will not cause interference to other equipment in a particular installation.
• APS3 and APS6 power systems comply with part 15 of the FCC (Federal Communications Commis sion) rules.
Operation is subject to the following two conditions:
• This device may not cause harmful interfere nce , and
• This devic e mu st accept any interference received, i n cluding inter f erence that may cause undesired
operation.
• Changes or modifications to APS dc power systems not approved by Eaton Corporation could void FCC
authority to operate that equipment.
• APS3 and APS6 power systems have been tested and found to comply with the limits for a Class B digital
device, pursuant to part 15 of the FCC Rules. These limits are designed to provide reasonable protection
against harmful interference in a re sidential installati on. This equip m ent generates, uses, and can radiate radio
frequency energy and, if not installed and used in accordance with the instructions, may cause harmful
interference to radio communications. However, there is no guarantee that the interference will not occur in a
particular installation. If this equipment does cause harmful interference to radio or television reception,
which can be determined by turning the equipment off and on, the user is encouraged to try to correct the
interference by one or more of the following measures:
• Reorient or relocate the receiving antenna.
• Increase the separation between the equipment and receiver.
• Connect the equipment into an outlet on a circuit different from that to which the receiver is connected.
• Consult the dealer or an experienced radio/TV technician for help.
Copyright © 2006-2009 Eaton Corporation. All Rights Reserved.
10640205 February 2009
13
Page 14

Data Power Solutions Quick Start Guide
Inspecting the Equipment and Reporting Damage
• Unpack the APS dc power system and inspect it carefully for possible damage that may have occurred while
in transit.
• Next, check the equipment against the packing list (supplied with the equipment) and ensure that you have
received th e correct type of Access Power Rectifiers (either APR48 or APU48).
• Report any damage or incorrect shipment immediately, using a completed Equipment Incident Report (at the
back of this guide) to supply all relevant details. Fax the completed form to your local Eaton dc product
representative.
• Keep the original packaging. You will need it if any equipment needs to be returned to your local Eaton dc
product representative.
Installation
Mounting the APS DC Power System
Location and Environment
APS dc power systems (rack-mounted and desktop versions) meet the safety and fire
enclosure requirements (as specified in IEC 60950-1, UL 60950-1, EN 60950-1 and AS/NZS
60950.1).
• Rack-Mounted Versions: APS3-05X and APS6-05X series dc power systems may be
mounted in 19-inch wide host equipment racks (enclosed or open type) securely bolted
to the floor.
• Desktop Versions: APS3-06X series dc power systems may be positioned on any surface
that supports the weight (12kg/26lb) of the power system.
The location must provide adequate airflow around the unit, (as per Clea rance Requirements
below) in an atmosphere free from excessive dust, corrosive fumes, or conductive
contaminants.
Dust build-up within APS dc power systems may cause premature failure. In dusty
environments, either install the power system in a sealed and air-conditioned equipment
room, or provide fan assisted filtered air to create a positive pressure environmen t inside the
equipment room. Both options require regular cleaning of the air filters.
Important Notes for Rack Mounted Systems
• If this dc power system is installed in a closed or multi-unit rack as sembly ensure that the
ambient te mperature is less than 40°C.
• Ensure that the air flow is not restricted.
• Ensure that the system's weight is adequately and evenly supported.
• Take note of the maximum ac current stated on the nameplate. Ensure that the ac supply is
correctly rated.
• Ensure that reliable earthing is maintained. Carefully check earth continuity from the branch
circuit to the dc power system.
14
Copyright © 2006-2009 Eaton Corporation. All Rights Reserved.
10640205 February 2009
Page 15

Data Power Solutions Quick St art Guide
机架安装式电源系统重要注意事项:
• 如果此直流电源安装在封闭机架或多单元机架内,应确保环境温度低于40癈。
• 确保气流畅通。
• 确保系统重量受到足够的且均匀的支撑。
• 应记下铭牌标注的最大交流电流。确保交流输入符合规定要求。
• 确保接地可靠。应仔细检查自分支电路到直流电源系统的接地是否连续。
Remarques importantes pour les systèmes montés dans un rack:
• Si le système d'alimentation dc est placé dans un ensemble fermé ou une baies, assurez-vous
que la température ambiante est inférieure à 40°C.
• Vérifiez que l'air c ircule librement.
• Assurez-vous que le poids du système est bien réparti.
• Vérifiez le courant secteur maximum indiqué sur la plaque signalétique. Contrôlez que
l'al imentation électrique secteur est correctement di mensionnée.
• Vérifiez le bon état et la fiabilité de la mise à la terre. Contrôlez soigneusement la continuité de
la terre depuis le circuit de dérivation jusqu'au système d'alimentation dc.
Wichtige Hinweise für Anlagen mit Schrankmontage:
• Wenn diese Gleichstromversorgungsanlage in einem geschlossenen Gehäuse oder in einem
Mehrgeräte-Schrank installiert wird, darf die Umgebungstemperatur 40° C nicht übersteigen.
• Sorgen Sie für ungehinderte Luftzirkulation.
• Das Gewicht des Geräts muss gleichmäßig gelagert und abgestützt sein.
• Beachten Sie den maximalen Wechselstromwert auf dem Typenschild. Die Nennleistung der
Wechselstromversorgung muss korrekt sein.
• Eine dauerhaft zuverlässige Erdung muss gewährleistet sei n. Überprüfen gewissenhaft Sie
den Erdungsdurchgang zwischen Hausstromkreis und Gleichstromversorgungsanlage.
Note importanti per i sistemi mon tati su rack:
• Se questo sistema di alimentazione dc è installa to in un'unità rack chius a o in un gruppo
multiplo, assicurarsi che la temperatura ambiente sia inferiore a 40°C.
• Assicurarsi che il flusso dell'aria non sia ostruito.
• Assicurarsi che il peso del sistema sia adeguatamente e uniformemente supportato.
• Prendere nota della corrente C. A. massima indicata sull a targhetta. Assicurarsi che
l'alimentazione C. A. si a corretta.
• Assicurarsi la presenza continua di una messa a terra affi dabile. Controllare con attenzione la
continuità di messa a terra dal circuito derivato al sistema di alimentazione dc.
Copyright © 2006-2009 Eaton Corporation. All Rights Reserved.
10640205 February 2009
15
Page 16

Data Power Solutions Quick Start Guide
Notas importantes referidas a los sistemas de montaje en un rack:
• Si este sistema de energía dc está instalado en un montaje cerrado o para varias u n idades,
asegúrese de que la temperatura ambiente sea inferior a los 40°C.
• Asegúrese de que el flujo de aire no esté restringido.
• Asegúrese de que el peso del sistema sea adecuado y de que tenga un soporte parejo.
• Tome nota de la corriente de entrada CA máxima establecida en la placa de características.
Asegúrese de que el suministro CA tenga una capacidad nominal correcta.
• Asegúrese de mantener una conexión a tierra confiable. Compruebe cuidadosamente la
continuid ad a tierra desde el circuito derivado al sistema de energía CC.
Clearance Requirements
• All APS dc power systems (rack-mounted and desktop versions) require the following
minimum clearances:
• Front and Rear Clearance – 50mm (2”) from walls and other equipment, required for
optimum system cooling and access.
• Top and Bottom Clearance – None
Connecting the DC Load Cables
Before you start connecting the dc load and battery cables (if applicable ) to an APS dc power
system, please read the following DC Installation Practices:
• To easily distinguish between positive and negative load cables, we recommend using
cables with different colors (as specified by local wiring regulations). The same applies to
battery cables (if applicable).
• To reduce inductive coupling, separate dc load, battery and communications cabling
from ac supply cables. If the cables have to cross, run them at right angles to the ac
supply cables.
• In order to minimize parasitic cable inductance and reduce electromagnetic interference
(EMI), all dc load cables should be routed in close proximity to one another, and large
current loops should be avoided. The same applies to battery cables (if applicable).
• Eight dc outlets (labeled 1 to 8) are available for connecting your equipment power
cables to the APS dc power system. Each dc outlet is protected by a corresponding 6A or
25A circuit breaker (accessible from the dc distribution at the f ront). The current rating of
the corresponding circuit breaker determines the current rating of a dc outlet. The dc
outlets are floating to meet the isolation requirements for powering Power over Ethernet
IEEE802.3af compatible devices. In non-Power over Ethernet a pplications the positive or
negative output of the dc outlets can be referenced to earth, if required.
DC Load Cable Specifications
No dc load cables are supplied with APS dc power systems. dc load cables are sized
differently, depending on whether you connect to 6 A or 25 A dc outlets. All dc load cables
must meet the following specifications and no other cable sizes must be used.
6A dc Outlets: UL 1015, 18 AWG (1mm ), multi-strand cable
25A dc Outlets: UL 1015, 12 AWG (4mm), multi-strand cable
Cable Length: 3m (10 feet ) maximum
16
Copyright © 2006-2009 Eaton Corporation. All Rights Reserved.
10640205 February 2009
Page 17

Data Power Solutions Quick St art Guide
APS3-05X and APS6-05X (Rack-Mounted Versions)
1 Strip approximately 10m m (⅜”) of the insulation from the cable ends.
2 Terminate the negative load cable(s) at the (-) terminal block(s) of the dc outlet(s).
3 Terminate the positive load cable(s) at the (+) terminal block( s) of the dc outlet(s) .
Ensure that the polarity at the dc outlet(s) matches the power input polarity o f y o ur
equipment. Connecting reverse polarity equipment power cabl es to the dc outlets of an APS
dc power system mi ght cause damage to your equipment. Suc h damage is not covere d b y
our warra n t y.
Ensure that the correct cable sizes have bee used (18AWG for 6A outlets and 12AWG for
25A outlets).
4 To ensure reliable connections at the terminal blocks of the dc outlets, torque the clamp
screws 0.4 – 0.6Nm (3.5 – 5.3 lb-in).
5 Use cable-ties (not supplied) and the provided cable-tie holes on the cable support
bracket to tie down the load cables.
APS3-06X (Desktop Versions)
Before proceeding check you have:
• 4 x load cable clamps
• 8 x 25mm blunt ended screws
• 8 x 5mm and 4 x 10mm cable sleeves (50mm long)
Depending on the cable size s , n ot all sleeves will be required .
• 1mm
• 4mm
2
(18 AWG) cable for connection to 6A outlets.
2
(12 AWG) cable for connection to 25A outlets.
Copyright © 2006-2009 Eaton Corporation. All Rights Reserved.
10640205 February 2009
17
Page 18

Data Power Solutions Quick Start Guide
Step 1- Fit load cable clamps
• Insert the square ends of the load cable
clamps into the holes in the back of the
system.
• Engage two turns of each retaining screw.
This will ensure that the clamp does not
move when the wires and sleeves are
inserted.
Fit all clamps even if you do not use them
all. Tighten unused clamps to prevent access
to the dc outputs.
Step 2 – Strip cable ends
• Strip approximately 10mm (3/8”) from the cable ends. We recommend fitting cable
ferrules over the cable ends.
Step 3 – Fit cable and sleeves
To maintain safety approvals insert only the following numbers of cables per clamp, with
sleeves where applicable. This will ensure that cables are retained correctly in their clamps.
• Feed the cables through the clamps as follows, depending on cable size.
2
1mm
(18 AWG) – 2 cable pairs* per clamp:
2 x 5mm sleeves
10mm sleeve
* If only one cable pair is required
then use a dummy pair with sleeves
to make up the space.
2
4mm
(12 AWG) – 1 or 2 cable pairs per clamp.
Step 4 – Terminate cables
• Terminate the negative load cable(s) at the (-) terminal block(s) of the dc outlet(s).
• Terminate the positive load cable(s) at the (+) terminal block(s) of the dc outlet(s).
• Tighten the terminal screws. Required torque: 0.4 – 0.6 Nm (3.5 – 5.3 lb-in).
Ensure that the polarity at the dc outlet(s) matches the power input polarity of your equipment.
Connecting reverse polarity equipment power cables to the dc outlets of a power system might
cause damage to your equipment. Such damage is not covered by our warranty.
Ensure that the correct cable sizes have been used (1mm2/18 AWG for 6 A outlets and
4mm2/12 AWG fo r 2 5 A outlets).
18
Copyright © 2006-2009 Eaton Corporation. All Rights Reserved.
10640205 February 2009
Page 19

Step 5 – Arrange sleeves and tighten clamp screws
• Arrange the sleeves so that they are all within 10mm (3/8”) of the terminals.
• Tighten all cable clamp screws. Required torque: 1.5 – 2Nm (13.2 – 17.7 lb-in).
Tighten the screws of any unused clamps to prevent access to the dc output terminations.
Installing the External Batteries (if applicable)
This section applies to APS3-059, APS3-061 and APS6-059 dc power systems only.
One 48V battery string can be connected to AP S3-059 and APS3-061, and up to three 48V
battery strings to APS6-059 dc power systems. A 48V battery string consists of either 24 Valve
Regulated Lead Acid (VRLA) 2 V cells or four VRLA 12 V monoblocs.
Because of the wide range of battery types and sizes availab le, we do not supply batteries
with the above mentioned power systems and therefore do not cover battery installa tion in
this guide. Always install batteries according to the relevant ba ttery manufacturer’s
instructions.
Battery Sizing
Battery manufacturers provide various types of information for siz ing batteries such as
constant current discharge and constant power discharge data. Your battery supplier will be
able to assist you with sizing the battery for your application. Before a battery can be sized,
the following information is required.
Required backup time, minimum cell voltage (typically 1.83V/ cell), load power & operating
temperature
In data applications most loads are constant power for a specified backup time. Therefore, f or
sizing a battery for the required backup time, consta nt power discharge data should be used.
Batteries for use in North America must be a UL recognized type, category BAZR2 .
Battery Location
Valve Regulated Lead Acid (VRLA) batteries emit very small amounts of hydrogen gas into
the surrounding atmosphere under normal float charging conditions. For that reason
batteries should never be installed in a sealed enclosure or cabinet. Install the batteries in a
well-ventilated location to prevent accumulation of hydrogen gas to flammable or explosive
levels.
Building air conditioning and ventilation systems already in place for optimum equipment
operation and comfort of personnel usually meet or exceed VRLA battery ventilation
requirements. For specific battery ventilation requ irements, always refer to the battery
manufacturer’s installation instructions. Avoid:
• Installing the batteries next to any heating source or under air ducts.
• Exposing part of a battery string to direct sunlight.
• Any other locations that would cause temperature variations within the batteries.
Data Power Solutions Quick St art Guide
Copyright © 2006-2009 Eaton Corporation. All Rights Reserved.
10640205 February 2009
19
Page 20

Data Power Solutions Quick Start Guide
Battery Fault Protection
• A fault protection device (such as a circuit breaker or fuse) must be fitted i n series with one
of the battery cables of each battery string.
• The fault protection device must be:
• Located as close as practical to the corresponding battery string output terminal, and
• Capable of disconnecting the potential fault current of the battery string.
• The battery circuit breaker(s) of the power system can not be considered as the fault
protection device for the battery string(s) and associated wiring.
• The interrupt rating of the battery circuit breaker(s) fitted within the power systems is 10kA.
Therefore, the maximum potential short-circuit current of a 48V battery string must be
limited to less than 10kA or the total internal impedance of the battery string should be
greater than 5.7mΩ.
If a smaller rated external fault protection device is used, then batteries with
appropriate internal impedance need to be selected.
电池故障保护
• 故障保护装置(例如:断路器或保险丝)必须串接在每组电池的一条电缆上。
• 故障保护设备必须:
• 尽量接近相应的电池组输出终端,并且
• 能够断开电池组的潜在故障电流。
• 不能把电源系统电池电路断路器认为是电池组和相关引线的故障保护装置。
• 不能把电源系统电池断路器认为是电池组和相关引线的故障保护装置。
电源系统内电池断路器的分断能力额定值是10 kA。 因此,48V
电池组的最大潜在短路电流必须限制到小于10kA, 或者,电池组的内阻必须大于5.7毫欧。
20
如果使用较低额定值的外部故障保护装置,则必须选择内阻合适的电池。
Copyright © 2006-2009 Eaton Corporation. All Rights Reserved.
10640205 February 2009
Page 21

Data Power Solutions Quick St art Guide
Protection en cas de défaut de la batterie
• Un dispositif de protection (tel qu'un disjoncteur ou un fusible) doit être monté en série avec
l'un des câbles de batterie de chaque chaîne d'alimentation électrique.
• Ce dispositif de protection doit être:
• Situé le plus près possible de la borne de sortie de la chaîne d'alimentation électrique
correspondante
• Capable de couper le courant de défaut potentiel de la chaîne d'alimentation électrique.
• Le(s) disjoncteur(s) batterie du système d'alimentation ne peut en aucun cas être considéré
comme un dispositif de protection en cas de défaut pour l a ou les chaîne(s) d'alimentation
électrique et les câbles associés.
• Le pouvoir de coupure du ou des disjoncteur(s) monté(s) sur les systèmes d'alimentation est
de 10 kA. Par conséquent, le courant de court-cir cui t potentiel maximum d'une chaîne
d'alimentation électrique de 48V doit être limité à 10 kA maximum ou l'impédance interne
totale de la chaîne d'alimentation doit être supérieure à 5,7 mΩ.
En cas d'utili s a tion d'un dispositif de protectio n de défaut externe nomina l plus
Batterieschutz
• Eine Batterieschutzvorrichtung (z. B. ein Schutzschalter oder eine Siche rung) muss mit je
• Für die Batterieschutzvorrichtung ist Folgendes zu beachten:
• Die Batterieschutzschalter der Stromversorgungsanlage können nicht als Schutzvorrichtung
• Die Unterbrechungsleistung der in den Stromversorgungsanlagen integrierten
faible, il conviendra de choisir des batteries ayant une impédance interne appropriée.
einem Batteriekabel jedes Batteriestrangs in Reihe geschaltet werden.
• möglichst n ah am entsprechenden Ausgangsanschluss de s Batteriestrangs platzieren
• muss den potenziellen Fehlerstrom des Batteriestrangs unterbrechen können
für die Batteriestränge und zugehörigen Leitungen angesehen werden.
Batterieschutzscha lter betr ä gt 10 kA. Folglich muss der maximal mögliche
Kurzschlussstrom eines 48 V-Batteriestrangs auf weniger als 10 kA begrenzt sein bzw. der
interne Gesamtwiderstand des Batteriestrangs muss größer als 5,7 mΩ sein.
Wenn eine externe Schutzvorricht un g mit geri ng erer Nennl ei stu ng verwendet
Protezione da even tu al i guast i del la bat te r ia
• È necessario installar e un dispos itiv o di prot ez io ne da guasti (come un interruttore o un
• Tale dispositivo deve esser e:
• Gli interruttori della batteria del sist ema non possono essere considerati come dis posi tivi di
• Il coefficiente di interruzione dell'interruttore della batteria montata nei sistemi di
wird, müssen Batterien mit einem geeigneten internen Widerstand gewählt werden.
fusibile) in serie con uno dei cavi della batteria di ogni stringa di batterie.
• Posizio nato il più vicino possibile al terminale di uscita della stringa di batterie
• In grado di isolare la corrente per gua sto poten z ia le della stringa di batterie.
protezio ne da eventuali guasti per le stringhe di batterie e i cavi associat i.
alimentazione è di 10kA. Pertanto, la corrente per cortocircuito potenziale massima di una
batteria da 48V deve essere limitata a meno di 10kA oppure l'impedenza interna totale della
batteria deve essere superiore a 5,7mΩ.
Se si utilizza un dispositivo di protezione con una tensione inferiore, è necessario
selezionare batterie con l'impedenza interna appropriata.
Copyright © 2006-2009 Eaton Corporation. All Rights Reserved.
10640205 February 2009
21
Page 22

Data Power Solutions Quick Start Guide
Protección contra fallos de la batería
• Deberá instalarse un dispositivo de protección (tal como un interruptor de circuito o fusible)
en serie con uno de los cables de batería de cada una de las cadenas de batería.
• El dispositivo de protección contra fallos deberá:
• Estar ubicado lo más cerca posible del terminal de salida de la cadena de batería y
• Poder desconectar la corriente del fallo posible de la cadena de batería.
• El interruptor (o interruptores) de batería no podrán considerarse como el dispositivo de
protección contra fallos p ara las cade n as de batería y el cableado as ociado.
• La capacidad nominal de interrupción de lo s interruptores de batería instalados dentro de
los sistemas de energía es de 10kA. Por lo tanto, la corriente de cortocircuito máxima
posible de una cadena de batería de 48V deberá limitarse a menos de 10kA o la impedancia
interna total de la cadena de batería deberá ser de más de 5,7mΩ.
Si se utiliza un dispositivo de protección externo contra fallos con una capacidad
Connecting the Battery Cables (if applicable)
nominal inferior, deberá seleccionar baterías con una impedancia interna adecuada.
This section applies to APS3-059, APS3-061 and APS6-05 9 dc power system s only.
Before You Start
Ensure that all the circuit breakers at the front of the APS dc power system and the external
battery circuit breaker (close to the battery outpu t term inals) are switched OFF.
• Before proceeding check you have:
• Battery cable clamp(s) one for APS3 models, three for APS6-059
• 2 x 25mm blunt ended screws per clamp
• 1 x 16mm sleeve (50mm long) per clamp
• Battery cable (see specification below)
Battery Cable Specifications
No battery cables are supplied with APS3-059, APS3-061 and APS6-059 dc power systems. All
battery cables must meet the following specifications and no other cable sizes must be used.
Cable Style and Size: UL 1283*, 4AWG (25mm), multi-strand cable
Cable Length: 3m (10 feet) maximum
*Required to maintain approval compliance.
Step 1 – Prepare cable clamp
• Cut off the two inside posts of the battery cable clamp to enable the battery cables and
sleeve to fit.
Step 2 – Strip cable and fit sleeve
• Strip approximately 17mm (3/4”) of the insula tion fr om the cable ends. We recommend
fitting cable ferrules over the cable ends.
• Feed both battery cables through the 16mm sleeve.
22
Copyright © 2006-2009 Eaton Corporation. All Rights Reserved.
10640205 February 2009
Page 23

Data Power Solutions Quick St art Guide
Step 3 – Terminate cable
• Terminate the positive battery cable at the Battery (+) termina l block.
• Terminate the negative battery cab le at the Battery (-) terminal block.
• Tighten the terminal screws. Required torque: 2.5 - 3 Nm (22.1 – 26.5 lb-in).
Ensure that the polarity at the battery terminal blocks matches the polarity of the external
battery. Connecting a reverse polarity battery to an APS dc power system will cause damage to
the rectifier modules. Such damage will not be covered by the warranty.
16mm battery cable sleeve.
Battery cable clamp with posts removed.
Step 4 – Arrange sleeve and clamp the battery cables
• Arrange the cable sleeve so that it is within 10mm (3/8”) of the terminals.
• Tighten the cable clamp screws. Required torque: 1.5 – 2Nm (13.2 – 17.7 lb-in).
Step 5 – Repeat for other battery cables (if required)
• Repeat the above procedure to connect up to three battery strings to an APS6-059 power
system
Step 6 – Remove knockout and fit cover
• Remove the battery cable knockout(s) on the dc output cover:
Battery cable knockout.
• Remove any sharp edges, in particular the remaining knock-out webs.
• Fit the dc output cover.
Copyright © 2006-2009 Eaton Corporation. All Rights Reserved.
10640205 February 2009
23
Page 24

Data Power Solutions Quick Start Guide
Installing the Battery Temperature Sensor (if batter ies ar e fitted)
This section applies to APS3-059, APS3-061 and APS6-059 dc power systems only.
Each APS3-059, APS3-061 and APS6-059 dc power system is supplied with a battery
temperature sensor and standard 2m (6.5 feet) long cable (factory-fitted to the sensor). Longer
cables are available from your local Eaton dc product representative or you can make up
your own. We strongly recommend limiting the maximum cable length of the battery
temperature sensor to 20m (65 feet) because of noise considerations.
Connecting the Battery Temperature Sensor Cable
There are two screw-clamp terminal blocks at the rear of APS3-059, APS3-061 and APS6 059
dc power systems for terminating the battery temperature sensor cable, the two termina l
blocks are labeled TEMP SENSOR (+) and TEMP SENSOR (-).
• Terminate the Black / White wire at TEMP SENSOR (+) and the Black wire at TEMP
SENSOR (-).
• To ensure reliable connections at the battery temperatur e sensor terminal blocks, torque
the clamp screws 0.4 – 0.6Nm (3.5 – 5.3 lb-in).
• Use cable-ties (not supplied) and the provided cable-tie holes on the cable support
bracket to tie down the battery temperature sensor cable.
On APS3-061 dc power systems, there is a hole on the battery cable clamp bracket, to tie
Mounting the Battery Temperature Sensor
The battery temperature sensor is designed to measure the average ambient tem perature
around the batteries. It is important to mount the ba ttery temperature sensor at a location that
truly reflects the average ambient temperature of the batteries. Attaching the battery
temperature sensor to the battery stand (above the middle batteries) may provide the most
reliable temperature reading.
If possible, avoid:
• Placing the battery temperature sensor on top of battery cases.
• Attaching the battery temperature sensor to battery cables, terminals or interconnecting
• Exposing the battery temperature sensor to direct sunlig ht and drafts from the air-
• Running the battery temperature sensor cable along power or earth cables.
down the battery temperature sensor cable.
bars.
conditioning system or open windows.
Connecting the APS DC Power System to the AC Supply
APS dc power systems can be connected to single-phase (L-N), two-phase (L-L), three- phase
(L-N) and three-phase (L-L) ac supply systems. Fused ac sockets (one per rectifier) are
available for connecting the APS dc power system to the ac supply. These fused ac sockets are
labeled K1 to K3 on APS3 and K1 to K6 on APS6 dc power systems. AC supply socket K1
powers Rectifier 1, etc. No ac power cords are supplied with APS dc power systems.
AC Supply Requirements
AC Power Cords – The ac power cords (supplying the APS dc power system) must be
suitably rated for the environment and ac distribu tion system. In ad d ition, these a c power
cords must be approved and installed to comply with local wiring regulations. (See
Specifications on page 28 for ac power cord specifications.) The maximum leng th of each ac
24
power cord should not exceed 3m (10 feet), unless local wiring regu lations perm it otherwise.
Copyright © 2006-2009 Eaton Corporation. All Rights Reserved.
10640205 February 2009
Page 25

Desktop Versions – If APS3-06X dc power systems are fitted with three rectifiers, then only
two ac power cords may be connected to one building branch circuit. The third ac power cord
must be connected to a separate building branch circuit. Failure to do so voids all safety
approvals.
Earthing – APS dc power systems are classified as “Class 1” equipment that must be
provided with an earth connected to the “Protective Earthing C onductor” in the building
wiring. The earth conductor of each ac power cord must be connected to the “Protective
Earthing Conductor” in the building wiring.
Earth Leakag e Current – The maximum earth leakage current of each Access Power Rectifier
is 1.5 mA. Ensure that any upstream Residual Current Devices (RCDs) are appropriately
rated.
AC Installation
Install all ac cabling between the ac supply point and the APS dc power system according to
the ac supply requirements above, but do NOT switch on the ac supply at this stage.
Commissioning
Inserting the Access Power Rectifiers
Do NOT switch on the ac supply at this stage.
• Step 1 – Unpack the rectifiers and inspect them carefu lly for possible dam age that may
have occurred in transit. Report any damage immediately, using a completed Equipment
Incident Report (located at the back of this guide) to supply all relevant deta ils. Fax the
completed form to your local Eaton dc product representative. K eep the original
packaging. You will need this if any equipment needs to be returned to your nearest
authorized service agent for replacement or repa ir.
• Step 2 – Align the rectifier with the burst-out guides in the shelf.
• Step 3 – Push in the rectifier, to avoid injury to your hands, keep your fingers clear.
Slowly push in the rectifier, sliding it along the burst-out guides, until it plugs firmly into
the backplane connector. Tighten the rectifier reta ining screw with a Pozidriv®
screwdriver.
Data Power Solutions Quick St art Guide
Pre-Power-Up Check
Use the checklist below to complete initial checks before prog ressing fu rther.
• All ac and dc cabling is installed, all cabling is neat and correctly insulated
• dc battery and load cabling has the correct polarity
• All panels are in place and all empty rectifier slots are covered with blanking panels
• The ac supply to the APS dc power system is switched OFF
• All circuit breakers at the front of the APS dc power system are switched OFF
• Batteries (if fitted) are isolated from the APS dc power system
Copyright © 2006-2009 Eaton Corporation. All Rights Reserved.
10640205 February 2009
25
Page 26

Data Power Solutions Quick Start Guide
Applying AC Power
• Switch on the ac supply.
• Check that each rectifier starts up and that the green
red urgent
Troubleshooting section in Chapter 7 of the main manual).
• Check that the SM45 supervisory module has powered up and that the green
and yellow non-urgent alarm LEDs are off. (If not consult the
On LED on both the SM45 and the display module is on.
• Depending on your configuration settings, the ur gent and/or non-urgent alarm LED(s)
may also be on.
• Check that all installed rectifiers are communicating and that the SM45 supervisory
module has correctly registered all rectifiers, by viewing the individual rectifier currents
in Main Display Mode. If no load is connected each rectifier will show 0A.
Configuring the APS DC Power System for Operation
Each APS dc power system is supplied with a pre-loaded configuration file.
It is important that the settings of this configuration file are checked/verified and changed as
required for site-specific conditions. In particular settings that may affect the performance
and life expectancy of the battery must be checked and set according to the battery
manufacturer’s recommendations. Only those configuration parameters that are most likely
to be changed on-site can be configured from the front panel. For entering and editing of all
other configuration parameters (such as mapping of ala rm s to relay s and setting up
communications) a laptop computer and the latest version of DCTools is required.
The latest version of DCTools can be downloaded from www.powerware.com/downloads.
Applying DC Power to the Load
We recommend using DCTools for configuring your APS dc power sy stem for operation.
• Check the dc output voltage and polarity of the power system and battery string(s).
• Switch on the Battery MCB(s) (if fitted) and check that the Battery Fuse Fail alarm clears.
• When connecting multiple battery strings in parallel to the system dc bus, ensure that the
individual strings are of similar voltage.
• Check the Battery Current reading, if batteries are fitted. (The actual value depends on
the state of charge of the batteries.)
• Switch on the Load MCB(s). Check that the load (the equipment) powers up and that the
Load Fuse Fail alarm clears .
• Check the rectifier currents and verify that the load current is representative of w hat the
load draws and also that the APS dc power system has sufficient capacity.
• Charge the batteries (if fitted) according to the ba ttery ma nufacturer’s recommendations.
Manual Equalize can be started from DCTools or the front panel.
• Manual Equalize increases the system voltage to the pre-configured equalize voltage for
the pre-configured equalize duration. After the pre-configured equalize durat ion has
expired, the APS dc power system voltage reverts back to normal battery float voltage
automatically.
• Fit the dc output cover.
Power On LED is on and both the
Power
26
Copyright © 2006-2009 Eaton Corporation. All Rights Reserved.
10640205 February 2009
Page 27

Data Power Solutions Quick St art Guide
Output Circuit Breaker Field Replacement and Repair
UL Listed Mark
The APS3-058, APS3-059, APS3-060, APS3-061, APS6-058 and APS6-059 series of power
supplies have been approved by Underwriters Laboratories Inc and are permitted to carry
the UL Listed mark.
Under rules and regulations set by UL, all manufactured units have been subjected to their
“Follow Up Service” (FUS) procedure that ensures compliance with the relevant safety
standards, that the correct components have been fitted, and ap propriate tests have been
performed.
To retain the UL mark, only Eaton service engineers, or those persons trained by Eaton, are
Desktop variants APS3-060 & APS3-061
Battery Input Circuit Breakers
permitted to replace an output circuit br eak er or repair a unit.
In the field it is not possible for a service engineer to change output circuit breake rs on
desktop variants APS3-060 or APS6-061.
In the field it is not possible for a service engineer to change battery circuit breakers on
variants APS3-059, APS3-061 or APS6-059.
Contact Information
• For circuit breaker replacement, or repair, please contact your local Eaton dc Products sales
office listed on page 4.
联系信息
• 关于断路器的更换或修理的信息,请联系第 4页列出的当地Eaton销售办事处。
Contacts
• Pour remplacer ou réparer un disjoncteur, contacter votre revendeur local Eaton indiqué en
page 4.
Kontaktinformationen
• Wenden Sie sich bezüglich Austausch oder Reparatur des Schutzschalters an Ihr nächstes
Eaton-Verkaufsbüro (siehe Seite 4).
Informazioni di contatto
• Per la sostituzione degli interruttori o la loro riparazione, contattare l'ufficio vendite Eaton
più vicino in base all'elenco a pagina 4.
Información de contacto
• Para reemplazar o reparar los interruptores de circuito, sírvase contacta r con la oficina de
ventas local de Eaton que aparece listada en la página 4.
Copyright © 2006-2009 Eaton Corporation. All Rights Reserved.
10640205 February 2009
- 4.
27
Page 28

Data Power Solutions Quick Start Guide
Specifications
System Input
Input Voltage APU48: L-N: 95-275V RMS
Rated Input Current
APS3:
@ 120V RMS with APU48 rectifiers:
APS3:
@ 240V RMS with APU48 rectifiers:
APS3:
@ 208-240V RMS with APR48 rectifiers:
IEC AC Cord Sets
Cable Cable rated according to AC voltage (refer
Connector 1 (AC supply)
Connector 2 (Data Power Solution) IEC type C-13
Frequency Ra n ge 45-66Hz
Maximum Earth Leakage Current
System Output
Output Voltage (nominal) 48V
Output Power (maximum)
2.16kW wit h 3 APU48 rectifiers
APS3-058 and APS3-060:
1.70kW wit h 3 APU48 rectifiers
APS3-059 and APS3-061:
4.32kW wit h 6 APU48 rectifiers
APS6-058:
3.40kW wit h 6 APU48 rectifiers
APS6-059:
Environment
Ambient Temperature Range (operating)
Relati ve Humidity (operating and storage)
APR48: L-N: 185-275V RMS
21A (7A per ac power cord)
42A (7A per ac power cord)
APS6:
10.5A (3.5A per ac pow er cord )
21A (3.5A per ac power cord)
APS6:
24A (8A per ac power cord)
48A (8A per ac power cord)
APS6:
to the Rated Input Current values) and
local wiring regulations.
Refer to the Rated Input Current values
according to AC voltage.
1.5mA (per Access Power Rectifier)
4.50kW wit h 3 APR48 rectifiers
3.00kW wit h 3 APR48 rectifiers
9.00kW wit h 6 APR48 rectifiers
7.10kW wit h 6 APR48 rectifiers
-10°C to +40°C [+14°F to 104°F]
<95% (non condensing)
28
Copyright © 2006-2009 Eaton Corporation. All Rights Reserved.
10640205 February 2009
Page 29

Data Power Solutions Quick St art Guide
Dimension s H, W, D
APS3-058 and APS3-059 3U, 19” mounting, 390mm [15.35”]*
APS3-060 and APS3-061 150mm, 465mm, 415mm
[5.9", 18.31", 16.34”]*
APS6-058 and APS6-059 6U, 19” mounting, 390mm [15.35”]*
Access Powe r Rectifier 3U, 66mm [2.6"], 280mm [11"]
* Additional cl ear air space is required at rear for rectif ier exhaust air venting.
Weight
APS3 6kg [13 lb]*
APS6 10kg [22 lb ]*
Access Power Rectifier 1.9kg [4.2 lb]
* Typical configuration, excluding rectifiers
Rectifiers
APR48 APU48
Rated Input Voltage Range 185 - 275 Vrms
Maximum Input Current 10Arms @ 185 Vrms 10 Arms @ 95 Vrms
Rated Output Powe r 1500W 720W
Rated Output Current 31A @ 48V 15A @ 48V
Preset Vol tage 54.5V 54.5V
Full output up to 50°C
[122°F]
150 - 185Vrms
Full output up to 30°C
[86°F]
95 - 275 Vrms
Full output up to
50°C [122°F]
Copyright © 2006-2009 Eaton Corporation. All Rights Reserved.
10640205 February 2009
29
 Loading...