

Page 1
User Guide
Page 2

Declaration
of Conformity
DYMO Corporation
44 Commerce Road
Stamford, CT 06902-4561
Phone: (203) 355-9000
Fax: (203) 355-9090
Equipment Information
Description: Direct Thermal Printer
Model: LabelMANAGER PC (18949)
This equipment has been tested and found to comply with the limits for a Class B digital device,
pursuant to Part 15 of the FCC (Federal Communications Committee) rules. These limits are
designed to provide reasonable protection against harmful interference in a residential installation.
This equipment generates, uses, and can radiate radio frequency energy, and, if not installed and
used in accordance with the instructions, may cause harmful interference to radio communications.
However, there is no guarantee that interference will not occur in a particular installation. If this
equipment does cause harmful interference to radio or television reception, which can be
determined by turning the equipment off and on, the user is encouraged to try correcting the
interference by one or more of the following measures:
•
Reorient the receiving antenna.
•
Increase the separation between the equipment and the receiver.
•
Connect the equipment to an outlet on a circuit different from that to which the receiver is
connected.
•
Use shielded cables to connect this device to computers.
•
Consult the dealer or an experienced radio/TV technician for help.
WARNING Changes or modifications to this unit not expressly approved by the party responsible for
Certification
Copyright
Trademarks
You may find helpful the following booklet, prepared by the FCC: Interference Handbook. This
booklet is available from the U.S. Government Printing Office, Superintendent of Documents,
Washington, DC 20402-9325.
compliance could void the user’s authority to operate the equipment and void the manufacturer’s
warranty.
This device has been tested and complies with the requirements of:
UL 1950
EN60950: Low Voltage Directive Product Safety
FCC Part 15 Class B
EN55022: Radiated and Conducted Emissions B
EN50082-1: Generic Immunity ESD, RF, and Transient Susceptibility
Copyright © 2001 DYMO Corporation. All rights reserved. 12/01
LabelWriter is a registered trademark of DYMO Corporation. DYMO is a registered trademark of
Esselte Corporation. All other trademarks are properties of their respective holders.
Page 3

Chapter 1
Getting Started
Chapter 2
Making Labels
Contents
. . . . . . . . . . . . . . . . . . . . . . . . . . . . . . . . . . . . . . . . . . . . . . . . . . . . . . . . . . . . . . . . . . . . . . . . . . . . 1
Installing LabelMANAGER PC . . . . . . . . . . . . . . . . . . . . . . . . . . . . . . . . . . . . . . . . . . . . . . . . . . . 1
Registering the Software . . . . . . . . . . . . . . . . . . . . . . . . . . . . . . . . . . . . . . . . . . . . . . . . . . . . . . . . . 1
The LabelMANAGER PC Window . . . . . . . . . . . . . . . . . . . . . . . . . . . . . . . . . . . . . . . . . . . . . . . . 2
Ordering Tape Cassettes . . . . . . . . . . . . . . . . . . . . . . . . . . . . . . . . . . . . . . . . . . . . . . . . . . . . . . . . . 4
Getting Help. . . . . . . . . . . . . . . . . . . . . . . . . . . . . . . . . . . . . . . . . . . . . . . . . . . . . . . . . . . . . . . . . . . 4
. . . . . . . . . . . . . . . . . . . . . . . . . . . . . . . . . . . . . . . . . . . . . . . . . . . . . . . . . . . . . . . . . . . . . . . . . . . . . . 5
Designing a Label . . . . . . . . . . . . . . . . . . . . . . . . . . . . . . . . . . . . . . . . . . . . . . . . . . . . . . . . . . . . . . 5
Printing Labels from a List . . . . . . . . . . . . . . . . . . . . . . . . . . . . . . . . . . . . . . . . . . . . . . . . . . . . . . 10
Printing from Other Applications . . . . . . . . . . . . . . . . . . . . . . . . . . . . . . . . . . . . . . . . . . . . . . . . . 13
Print Settings . . . . . . . . . . . . . . . . . . . . . . . . . . . . . . . . . . . . . . . . . . . . . . . . . . . . . . . . . . . . . . . . . 14
Chapter 3
Service and Support
Cleaning the LabelMANAGER PC . . . . . . . . . . . . . . . . . . . . . . . . . . . . . . . . . . . . . . . . . . . . . . . . 17
Troubleshooting the LabelMANAGER PC . . . . . . . . . . . . . . . . . . . . . . . . . . . . . . . . . . . . . . . . . . 18
Technical Support . . . . . . . . . . . . . . . . . . . . . . . . . . . . . . . . . . . . . . . . . . . . . . . . . . . . . . . . . . . . . 19
Contacting DYMO. . . . . . . . . . . . . . . . . . . . . . . . . . . . . . . . . . . . . . . . . . . . . . . . . . . . . . . . . . . . . 19
Appendix A
. . . . . . . . . . . . . . . . . . . . . . . . . . . . . . . . . . . . . . . . . . . . . . . . . . . . . . . . . . . . . . . . . . . . . . 17
Technical Specifications
. . . . . . . . . . . . . . . . . . . . . . . . . . . . . . . . . . . . . . . . . . . . . . . . . . . . . . . . . . . . . . . . . 21
iii
Page 4

iv
Page 5

The DYMO LabelMANAGER PC electronic labelmaker allows you to quickly print high-quality
permanent labels directly from your PC. With your LabelMANAGER PC, you can create labels
that include borders, graphics, formatted text, and date & time stamps. You can even print labels
horizontally or vertically.
The LabelMANAGER PC also supports multi-label printing with the Smart Paste command. This
feature allows you to print labels by copying multiple entries from a word processor, spreadsheet,
or other type of program.
Installing LabelMANAGER PC
In addition to this User Guide, the LabelMANAGER PC is shipped with a Quick Start card. Follow
the instructions in the Quick Start card to install the hardware and software.
Chapter 1
Getting Started
Registering the Software
The first time you start the LabelMANAGER PC application, you will be asked to register the
software. We highly recommend that you register your LabelMANAGER PC so that you can
receive customer support, information on product updates, and special announcements from
DYMO.
If you choose not to register the software at this time, you will be prompted the next several times
you start the program. You can register the software at any time by selecting Register Now from
the Help menu.
To register the software
1
Select Register Now from the Help menu.
The Welcome dialog box appears.
2
Click Register Now .
The Registration Wizard appears.
3
Complete all of the required fields on the registration form and click Next . Required fields are
labeled in bold type.
4
Answer the questions presented on the next two screens and click Next .
The Registration dialog box appears.
5
Choose to register over the Internet or print the registration form for mail or fax registration.
If you choose to register over the Internet, wait a few seconds while your information is
transmitted to DYMO.
To register by mail or fax, click Print to print the completed registration form, and mail or fax
the form to the location printed on the form.
1
Page 6
Getting Started
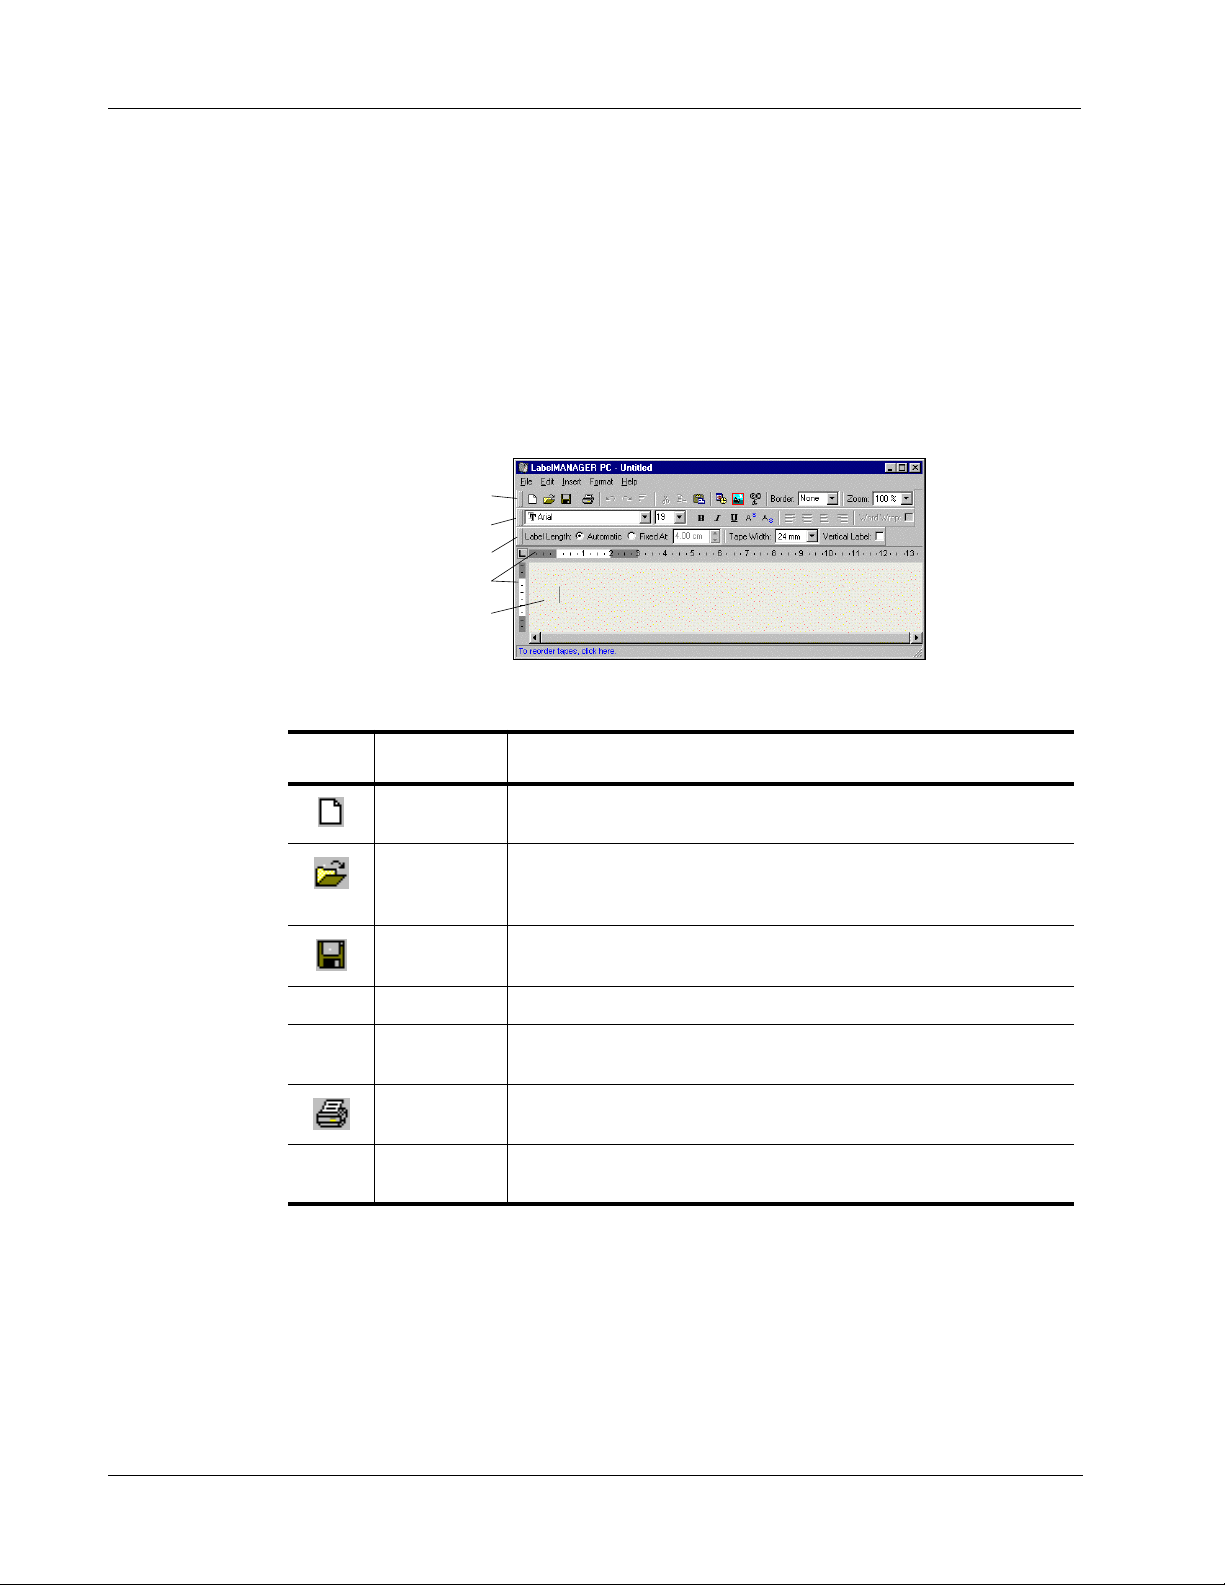
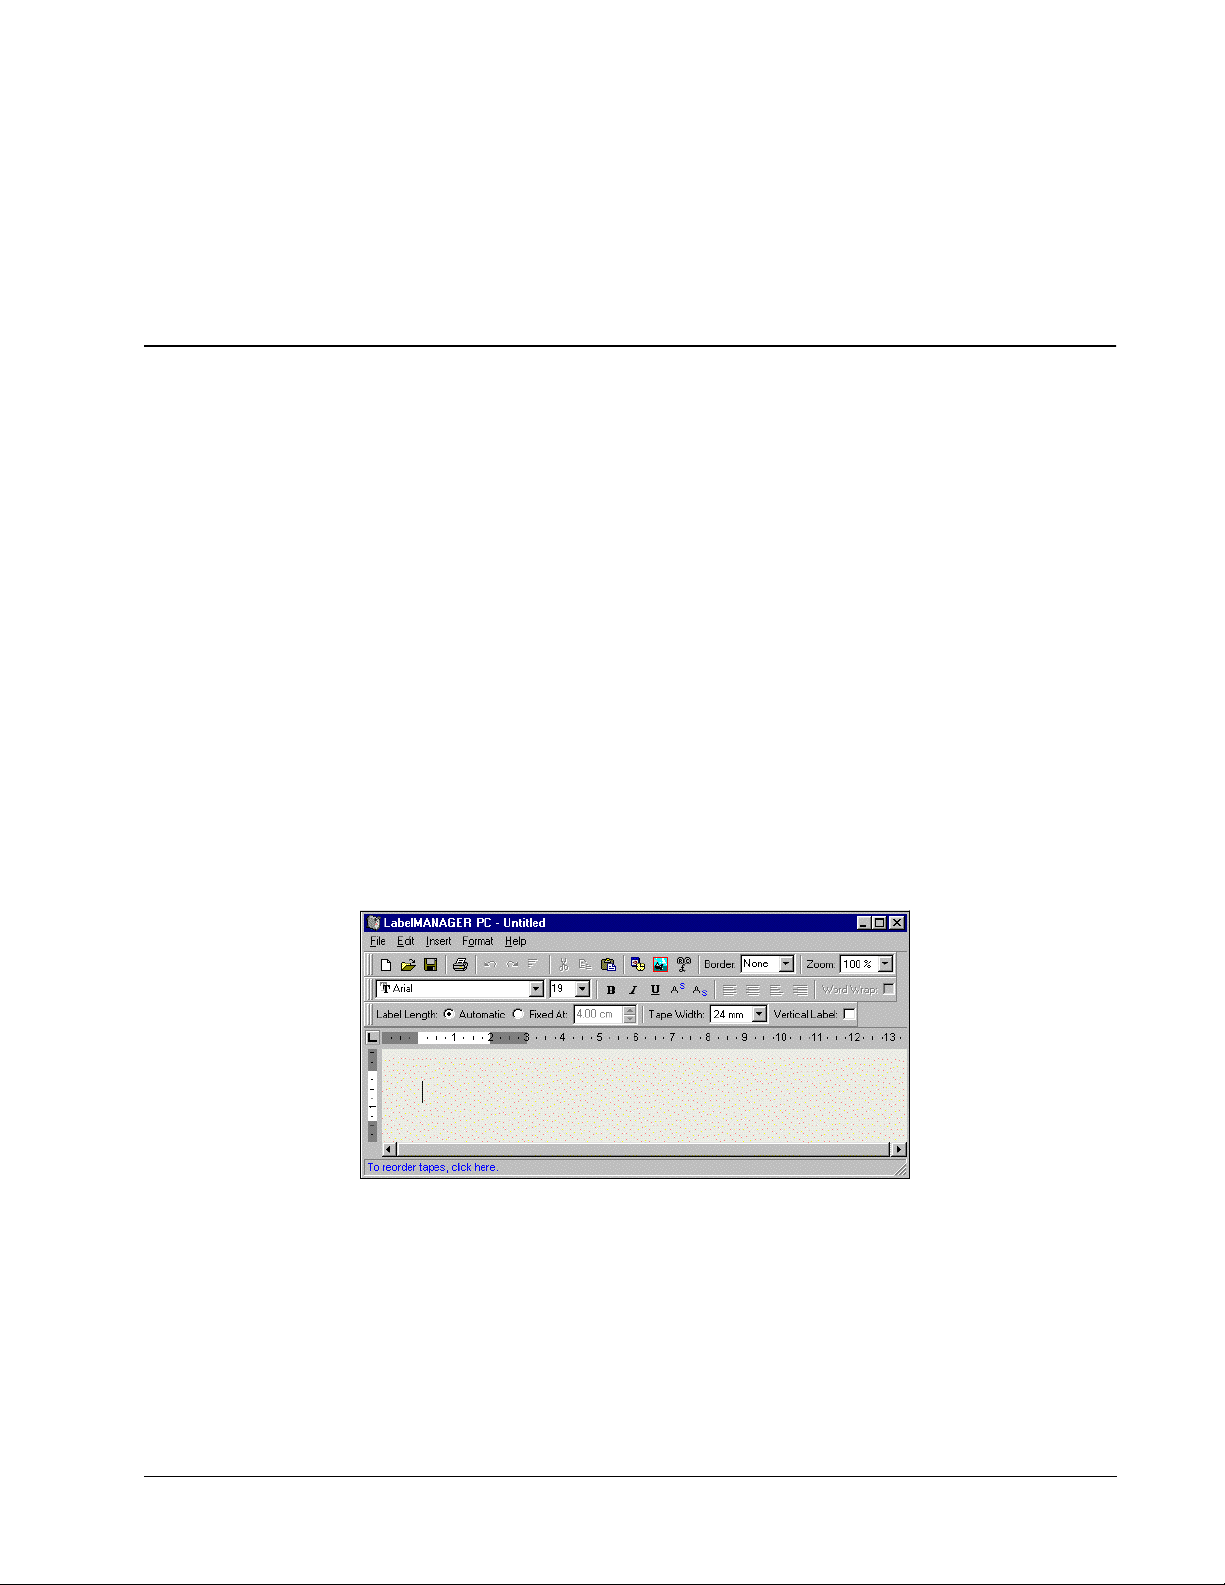
The LabelMANAGER PC Window
The LabelMANAGER PC is easy to learn because the main window consists of menus and toolbars
similar to those of popular word processing programs.
This section summarizes the commands available to you. For more detailed information about a
particular command, refer to the Help.
To start LabelMANAGER PC
➤
Select Start > Programs > LabelMANAGER PC > LabelMANAGER PC .
The LabelMANAGER PC main window is displayed.
Standard Toolbar
Formatting Toolbar
Tape Settings Toolbar
Rulers
Text Area
File Menu
The following commands are available from the File menu.
Toolbar
Icon
Menu
Command
New Clears the label text. If the label has been modified, prompts you to save the
Open Displays the Open File dialog box to select a label file to open. If the
Save Saves the current label to disk.
Save As Allows you to name the label prior to saving.
Printer Setup Displays the Printer Setup dialog box and allows access to the Driver
Print Prints the current label. The menu command displays a dialog box asking
Exit Exits the program. If the current label has not been saved, prompts you to
Description
changes.
current label has been modified and not saved, prompts you to save the
changes.
Properties.
how many copies to print.
save the changes.
2
Page 7
The LabelMANAGER PC Window
Edit Menu
Insert Menu
The following commands are available from the Edit menu.
Toolbar
Icon
Menu
Command
Undo Undoes the last action.
Redo Redoes the last action after an Undo.
Cut Cuts the selection to the clipboard.
Copy Copies the selection to the clipboard.
Paste Pastes the clipboard contents onto the label.
Smart Paste Performs a multi-label paste. See “Printing Labels from a List” on page 10.
Select All Selects the entire contents of the label.
Zoom Zooms in or out on the current label.
Options Displays the Options dialog box.
Description
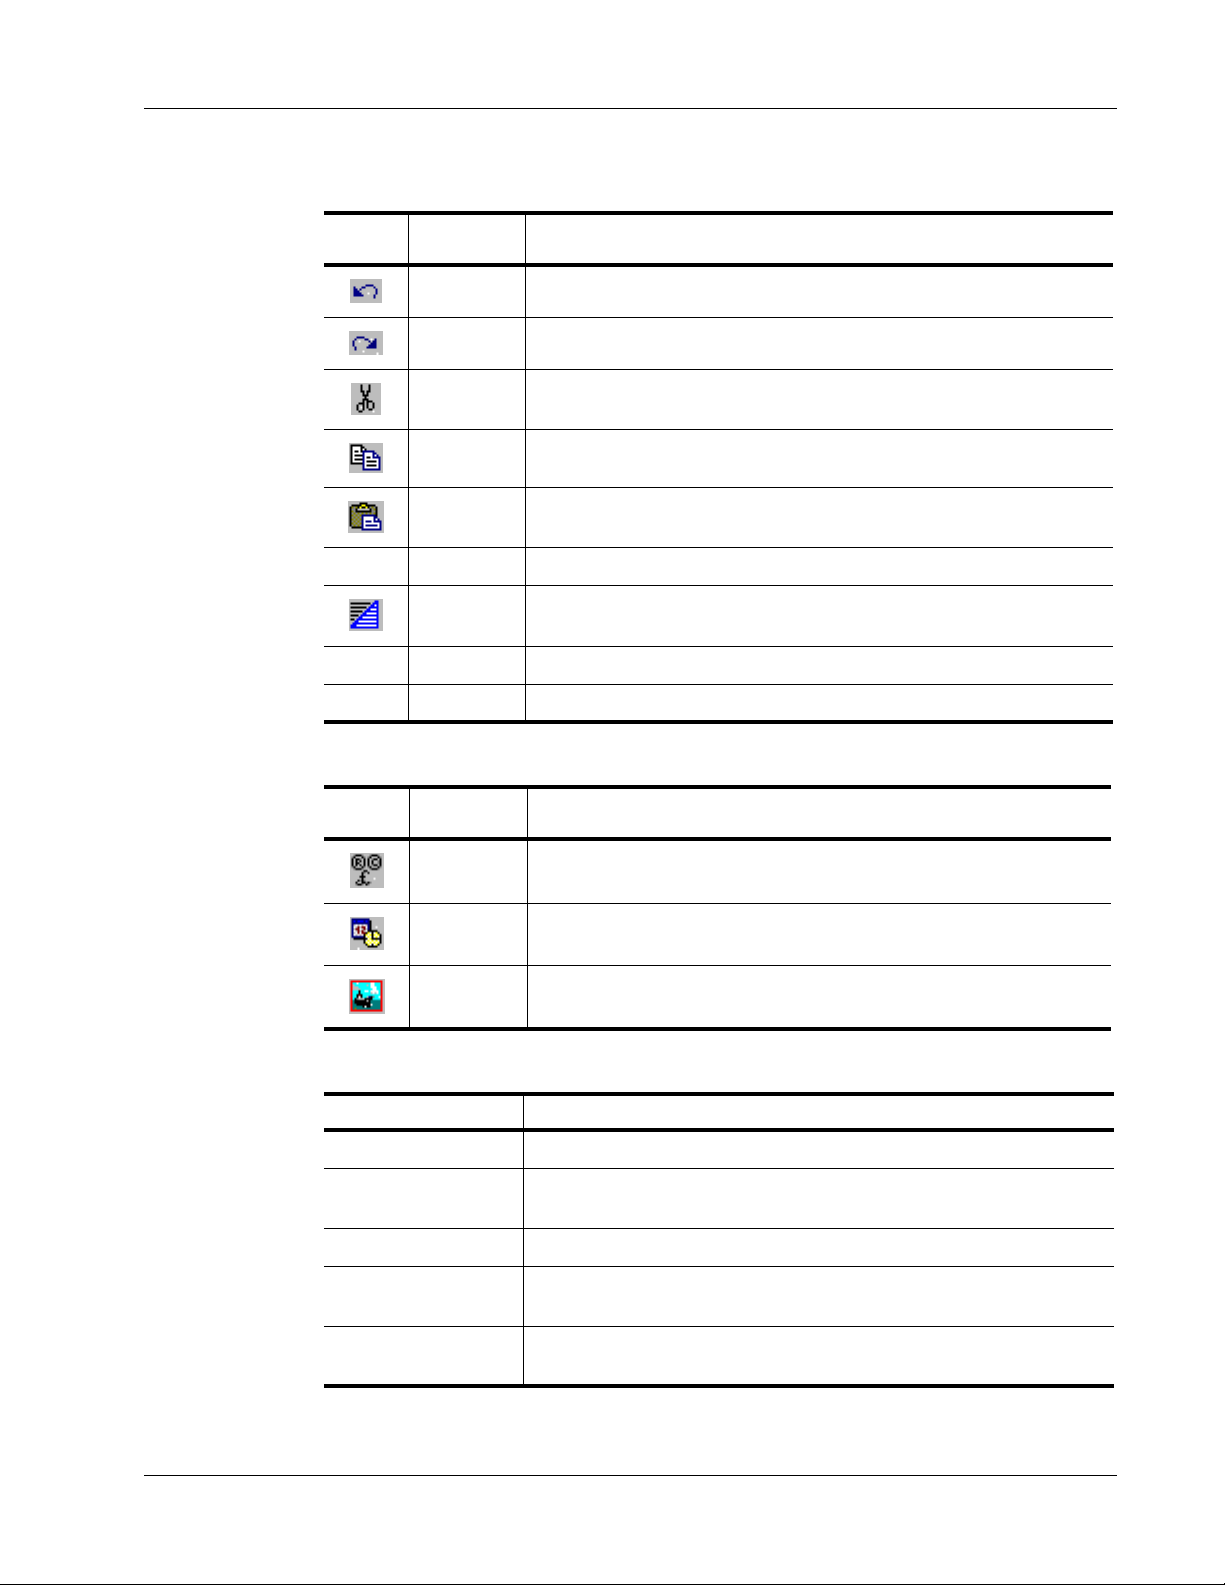
The following commands are available from the Insert menu.
Format Menu
Toolbar
Icon
Menu
Command
Symbol Displays the Insert Symbol dialog box. See “Adding Special Characters” on
Date &Time Displays the Insert Date and Time dialog box. See “Adding a Date and Time
Picture Allows you to insert a picture from the clipboard or from a file. See “Adding
Description
page 7.
Stamp” on page 8.
Graphics” on page 9.
The following commands are available from the Format menu.
Menu Command Description
Font Allows you to apply a font to the selected text.
Borders Allows you to add a border around the contents of the label and may reduce the
size of the text and graphics. See “Adding Borders” on page 7.
Tabs Allows you to set tabs.
Tape Cassette Color Allows you to select the tape cassette color combination currently in the printer
to provide optimal print quality. See “Tape Cassette Color Setting” on page 14.
Toolbars Allows you to show or hide the Standard, Formatting, and Tape Settings
toolbars.
3
Page 8

Getting Started
Help Menu
The following commands are available from the Help menu.
Menu Command Description
Contents Displays the Help Table of Contents.
Help Index Displays the Help Index.
Register Now Displays the Electronic Registration page.
About Displays the current version of the software.
Ordering Tape Cassettes
The LabelMANAGER PC uses DYMO D1 tape cassettes. The tape cassettes are available in
1/4” (6 mm), 3/8” (9 mm), 1/2” (12 mm), 3/4” (18 mm), and 1” (24 mm) widths, and come in a
variety of colors.
For a complete list of D1 tapes and the names of dealers who sell the tapes, visit the DYMO Web
site at www.dymo.com or call DYMO Sales. See “Contacting DYMO” on page 19.
Getting Help
The LabelMANAGER PC software includes extensive Help. At times in this manual, you will be
directed to the Help for more detailed discussion or instructions on various topics.
To access the Help
1
Select Contents or Help Index from the Help menu.
2
Select the topic you want to read about.
The Help can also be accessed by pressing F1 in most windows and dialog boxes to display
context-sensitive help.
4
Page 9
The LabelMANAGER PC can print your labels horizontally or vertically with text in a variety of
fonts, sizes, and styles. You can add borders, graphics, and special characters. You can also add a
date and time stamp to your labels.
This chapter will give you an overview of creating and printing labels with LabelMANAGER PC.
For more information on any of these features, refer to the Help.
Designing a Label
The instructions in the Quick Start card showed you how to print your first label. In this section, we
will show you how to print a label that needs to fit a file folder tab. You can format the label text
and then save the label for future use.
When designing a label, the first items to consider are the width of the label tape onto which you
will print and the length of the area where you will place the label. For this example, we will create
a label that will fit on a file folder tab. The total label length must be no more than 3 1/2” (8.5 cm)
and we will print on label tape with a width of 1/2” (12 mm).
Chapter 2
Making Labels
To create a label
1
Start the LabelMANAGER PC program.
The main window appears.
5
Page 10

Making Labels
6
2
Select 1/2” (12 mm) from the Tape Width pull-down menu.
The text area of the main window changes in size based on the tape width you select.
3
Select Fixed At and enter 3.50 (8.5 cm) in the Label Length Fixed At text box.
Notice the size of the input area change on the ruler.
4
Type 2002 Annual Budget Projections in the main window.
As the line of text becomes too long for a fixed width label at the current font size, the font size
will automatically decrease to fit the text on one line.
5
To center the text, click .
6
Click or select Save from the File menu.
The Save File dialog box appears.
7
Type a name for the label and click Save .
The label is saved to your hard disk with a .dlm extension automatically added to the file name.
Now let’s print the label.
8
Click or select Print from the File menu.
Page 11

Now that you have created and saved your label, let’s introduce additional features you can use to
customize your labels.
Additional Formatting Features
To further customize your labels, you can add borders, symbols, graphics, and even date and time
stamps. You can also choose to print the label vertically.
Adding Borders
You can choose to add one of several pre-defined borders to your label. When you add a border, it
surrounds the text and may cause the text to decrease in size.
To add a border
1
Place the cursor anywhere on the label.
2
Select a border style from the Borders pull-down menu.
Designing a Label
The selected border surrounds the text. If necessary, the font size of the text is decreased to fit
the label.
Adding Special Characters
You can choose to add a special character or symbol to the label.
To add a special character
1 Place the cursor at the point on the label where you want the character to appear.
2 Click on the Standard toolbar or select Symbol from the Insert menu.
7
Page 12

Making Labels
The Symbol dialog box appears.
3 Choose the font that contains the special character you wish to insert from the Font pull-down
menu.
The Symbol, Dingbats, and Wingdings fonts contain many unique characters you can add to
your labels.
4 Select the symbol you wish to insert and click Insert.
5 Click Close to close the Symbol dialog box.
The character you selected appears on the label in a size that matches the text font size.
Adding a Date and Time Stamp
You can choose to add a date and/or time stamp to the label. The date and time is entered as text and
will be the actual system date and time that you added the stamp to the label. For example, if
today’s date is 24 Oct 2001 and you add the date to a label design today, save the label, and then
open it tomorrow, 24 Oct 2001 will still appear on the label.
To add a date and time stamp
1 Place the cursor at the point on the label where you want the date and/or time stamp to appear.
2 Click on the Standard toolbar or select Date & Time from the Insert menu.
8
Page 13

The Date and Time dialog box appears.
3 Select the date and/or time format you wish to insert and click OK.
The date and/or time appears on the label in the format you selected.
Designing a Label
Adding Graphics
You can add a graphic to your label from the clipboard or from a file. If the graphic is in a file, the
format can be BMP, JPG, PCX, PNG, TIF, WMF, or EMF. The graphic will be scaled automatically
to the size of the surrounding text while maintaining the aspect ratio.
To add a graphic from the clipboard
1 Copy the graphic to the clipboard.
2 Place the cursor at the point on the label where you want the graphic to appear.
3 Click on the Standard toolbar or select Paste from the Edit menu.
The graphic appears on the label.
To add a graphic from a file
1 Place the cursor at the point on the label where you want the graphic to appear.
2 Click on the Standard toolbar or select Graphic from the Insert menu.
The Open File dialog box appears.
9
Page 14

Making Labels
3 Select the graphic file you wish to insert and click Open.
The graphic you selected appears on the label.
Printing Vertically
You can print your label vertically, for example, to be placed on the spine of a binder or a video
tape. When you print vertically, the text on your label is reformatted to fit in a single column on the
label. You may wish to center the text on the label as well.
To print vertically
1 Click in the Vertical Label check box on the Formatting toolbar to select Vertical.
A warning dialog box appears informing you that the text will be reformatted.
NOTE If the contents of the label is too long to fit vertically on a fixed width label, the excess
content will be truncated. This action cannot be undone once you click Yes.
2 Click Yes.
The text of your label is now displayed in a single vertical column.
Printing Labels from a List
LabelMANAGER PC includes a Smart Paste command that allows you to print multiple labels
from a list created in a word processing, spreadsheet, or other similar program. This section
explains how text copied from different sources is turned into labels when the Smart Paste
command is used.
Spreadsheet Text
When pasting rows of text from a spreadsheet program using Smart Paste, each row is treated as a
separate label and each cell in the row is treated as a separate line on the label.
10
Page 15
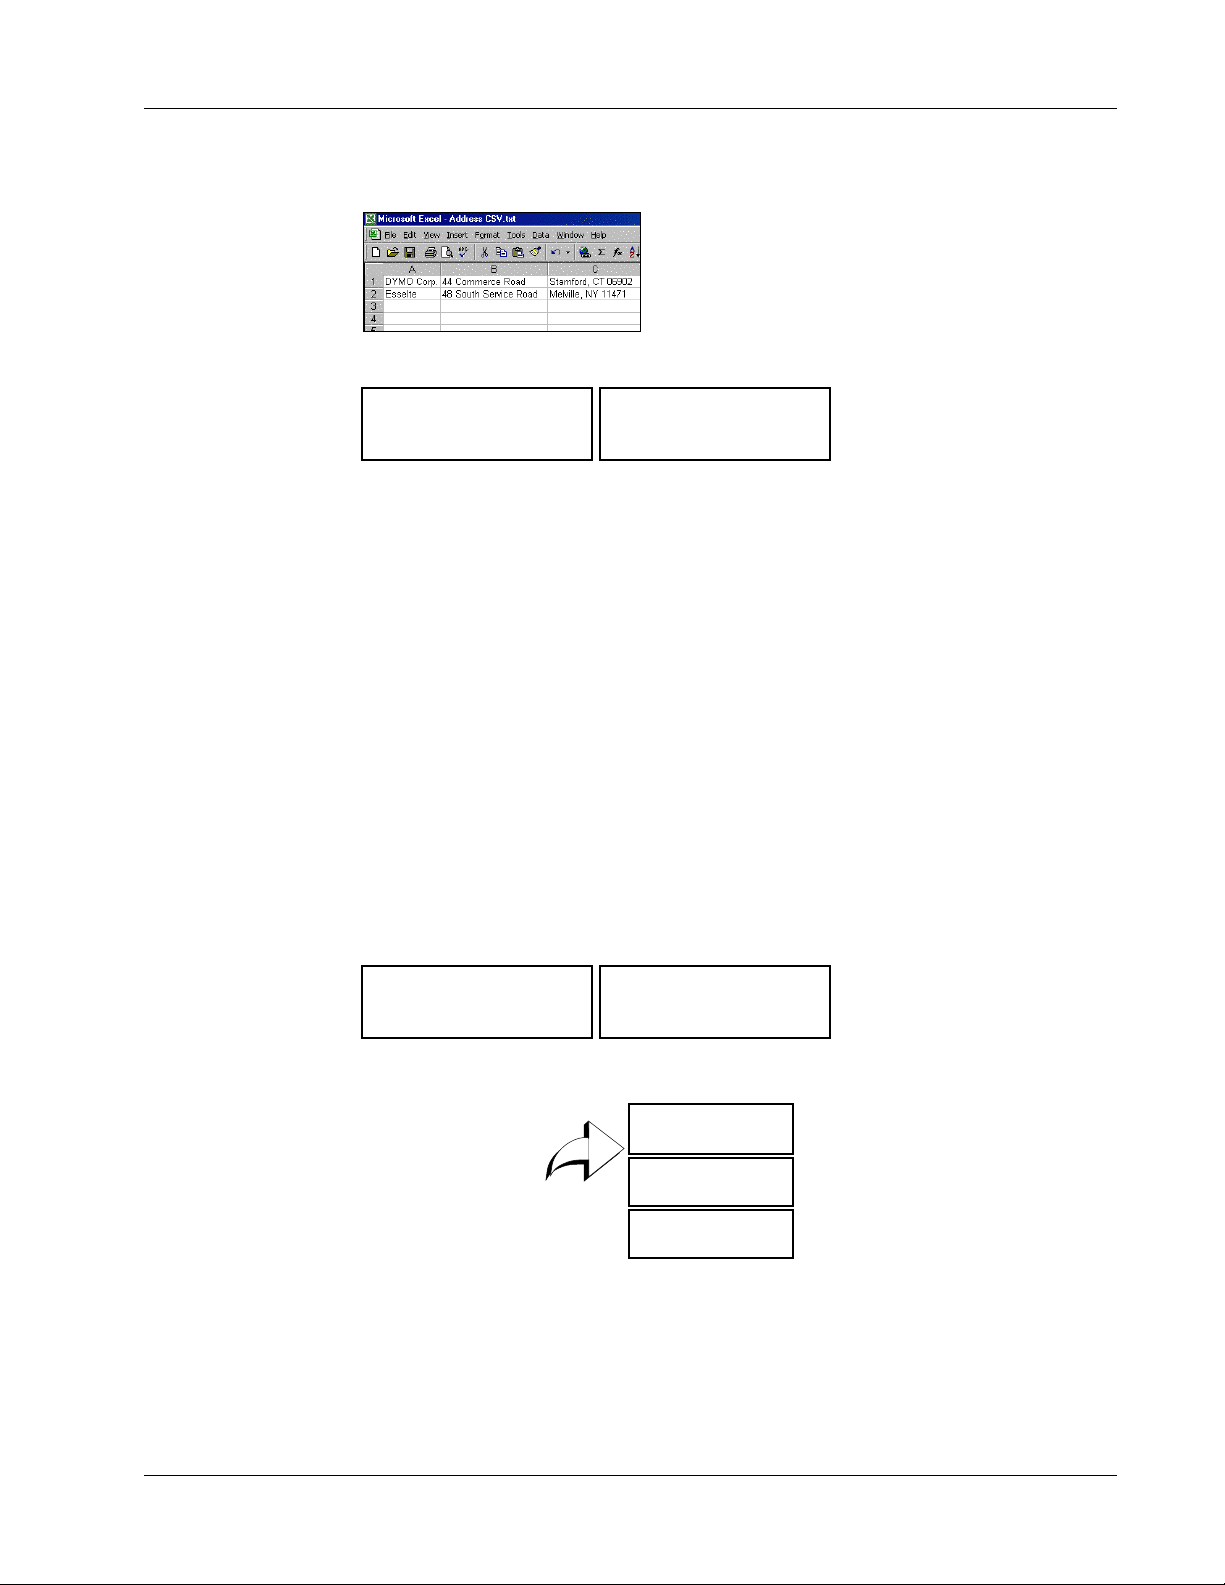
For example, the rows in the following spreadsheet:
will print two three-line labels: one for DYMO and one for Esselte.
Printing Labels from a List
DYMO Corp.
44 Commerce Road
Stamford, CT 06902
Esselte
48 South Service Road
Melville, NY 11471
Text File
Many programs can create a text file, such as a Text Editing program, exporting from a database
application, and so on. When you export text from a database, you usually create a delimited file
with each entry separated by comma or tab characters and a carriage return/line feed at the end of
each entry.
Smart Paste recognizes the delimiter characters and will insert a line break on the label. When a
comma is used as a delimiter, make sure any commas that you want to print on the label are
enclosed in quotation marks. The carriage return/line feed will start a new label.
NOTE The separator character may be different for countries other than the US. When using Smart
Paste, the list separator character is based on the Windows language being used.
For example, the following lines of text (delimited using commas):
DYMO Corp., 44 Commerce Road, “Stamford, CT 06902”
Esselte, 48 South Service Road,“Melville, NY 11471”
will print two three-line labels: one for DYMO and one for Esselte.
DYMO Corp.
44 Commerce Road
Stamford, CT 06902
Esselte
48 South Service Road
Melville, NY 11471
In another example, Smart Paste prints the following three lines of text as three two-line labels:
Pencils
Pencils, 3 for $1.00
Pens, $0.50 each
Erasers, $1.00
3 for $1.00
Pens
$0.50 each
Erasers
$1.00
Multi-Line Text from a Word Processor
When copying text from a word processor, you will typically have multi-line text. In this case, the
text for each label is separated by either a single blank line or a carriage return/line feed.
11
Page 16

Making Labels
If a blank line is contained in the text, Smart Paste reads the text as multiple labels separated by a
single blank line. If no blank line is found, the text is read as multiple, one-line labels.
For example, the following two addresses are separated by a single blank line and Smart Paste will
print two three-line labels.
DYMO Corp.
44 Commerce Road
Stamford, CT 06902
Esselte
48 South Service Road
Melville, NY 11471
However, the following three lines of text contain no blank lines. So, Smart Paste will print three
one-line labels.
Pencils
Pens
Erasers
NOTE Make sure that you copy only the lines of text you wish to print. If you include a blank line at the
end of the lines of text, all the lines will print on one label.
Printing Multiple Labels Using Smart Paste
When you use Smart Paste to print multiple labels, the labels will be formatted using the font, size,
and style currently selected for the label.
To print multiple labels
1 Copy the text you wish to print as labels to the clipboard.
2 From the Tape Settings toolbar, select the tape width from the Tape Width pull-down menu.
3 Select the formatting for the labels from the formatting toolbar.
For example, you can change the font, size, and the horizontal position on the label.
4 Select Smart Paste from the Edit menu.
A dialog box appears telling you how many labels will be printed.
12
5 Click OK.
The labels begin printing.
Page 17

Printing from Other Applications
The LabelMANAGER PC installation wizard installs a standard Windows printer driver on your
computer so the LabelMANAGER PC printer will appear in your list of printers. This printer can
be used to print directly from other applications, such as Microsoft Word or Access, in the same
manner as you would use any other printer.
To successfully print to the LabelMANAGER PC, you need to set the correct page size, orientation,
and margins for the tape cassette currently in the printer. Table 1 gives the paper size and margin
settings for each of the label sizes supported by the LabelMANAGER PC.
Table 1. Label Size and Margin Settings
Printing from Other Applications
Paper Name
Address Label 1”
Large Pendaflex 0.5”
Small Pendaflex 0.5”
1/3 File 0.5”
1/5 File 0.5”
6 mm Label 0.25”
9 mm Label 0.375”
12 mm Label 0.5”
19 mm Label 0.75”
Paper
Height
(24 mm)
(12 mm)
(12 mm)
(12 mm)
(12 mm)
(6 mm)
(9 mm)
(12 mm)
(19 mm)
Paper
Width
3.5”
(89 mm)
3.5”
(89 mm)
3.5”
(89 mm)
3.5”
(89 mm)
2”
(51 mm)
3.5”
(89 mm)
3.5”
(89 mm)
3.5”
(89 mm)
3.5”
(89 mm)
Top
Margin
0.23”
(5.8 mm)
0.09”
(2.3 mm)
0.09”
(2.3 mm)
0.09”
(2.3 mm)
0.09”
(2.3 mm)
0.04”
(1 mm)
0.03”
(1 mm)
0.09”
(2.3 mm)
0.11”
(2.8 mm)
Bottom
Margin
0.24”
(6.1 mm)
0.10”
(2.6 mm)
0.10”
(2.6 mm)
0.10”
(2.6 mm)
0.10”
(2.6 mm)
0.04”
(1 mm)
0.04”
(1 mm)
0.10”
(2.6 mm)
0.11”
(2.8 mm)
Left
Margin
0.4”
(10.2 mm)
0.4”
(10.2 mm)
0.4”
(10.2 mm)
0.4”
(10.2 mm)
0.4”
(10.2 mm)
0.4”
(10.2 mm)
0.4”
(10.2 mm)
0.4”
(10.2 mm)
0.4”
(10.2 mm)
Right
Margin
0.39”
(9.9 mm)
0.39”
(9.9 mm)
0.39”
(9.9 mm)
0.39”
(9.9 mm)
0.39”
(9.9 mm)
0.39”
(9.9 mm)
0.39”
(9.9 mm)
0.39”
(9.9 mm)
0.39”
(9.9 mm)
24 mm Label 1”
(24 mm)
3.5”
(89 mm)
0.23”
(5.8 mm)
0.24”
(6.1 mm)
0.4”
(10.2 mm)
0.39”
(9.9 mm)
This section shows you how to print from within Microsoft Word to the LabelMANAGER PC.
However, printing from applications other than Word follows the same basic steps.
To print from Microsoft Word
1 Type the text to be printed into a Microsoft Word document.
2 Select Print from the File menu.
The Print dialog box appears.
3 Select DYMO LabelMANAGER PC from the list of printers, if not already selected, and
click Close.
4 Select Page Setup or Print Setup from the File menu.
The Page Setup dialog box appears.
13
Page 18

Making Labels
5 On the Margins tab, enter the margin values for the top, bottom, left, and right margins based
on the labels you have loaded in the printer.
Refer to Table 1 for the correct settings.
6 Click the Paper Size tab.
7 Select the label size you have loaded in the printer from the Paper size drop-down list.
The width and height values should now match the values given in Table 1.
8 Select Landscape under Orientation and click OK.
9 Click to print the label.
Print Settings
This section discusses several printer settings that may optimize your printing with
LabelMANAGER PC.
Tape Cassette Color Setting
The LabelMANAGER PC adjusts its print settings based on the color of the label tape. To optimize
the print quality, make sure you set the tape cassette color setting to match the color of the tape in
the printer.
Chain Printing
To set the tape cassette color
1 Select Tape Cassette Color from the Format menu.
A list of possible tape color combinations appears.
2 Select the tape color combination that matches the tape cassette in the printer.
Depending upon the selection you make, the background color in the main window may change so
that you get a better idea of how your printed label will look.
When printing multiple labels, the chain printing feature will automatically print a dashed cut-line
between each label to indicate where each label should be cut. Chain printing is always turned on.
14
DYMO Corp.
44 Commerce Road
Stamford, CT 06902
Esselte
48 South Service Road
Melville, NY 11471
Page 19

Continuous Mode Printing
Continuous mode printing prints multiple labels with no space between the labels. This is
especially helpful for conserving label tape. Continuous mode printing is turned off by default.
NOTE The Continuous mode printing ON selection only applies to printing from other applications.
This selection has no affect when printing from the LabelMANAGER PC software.
To set continuous mode printing
1 Select Page Setup or Print Setup from the File menu.
The Print Setup or Page Setup dialog box appears depending on your operating system.
2 Click Properties.
The Properties dialog box appears.
Print Settings
3 Select Continuous Paper ON from the Media choice pull-down menu and click OK.
The labels will now print continuously with no space between labels.
15
Page 20

Making Labels
16
Page 21

Service and Support
Print Head
and Roller
Cleaning Brush
This chapter describes how to clean the LabelMANAGER PC and offers suggestions for
identifying problems that can occur when you use the printer. If you are unable to solve the
problem, this chapter also describes how to contact DYMO for technical support.
Cleaning the LabelMANAGER PC
The LabelMANAGER PC printer is designed to give you long and trouble-free service, while
requiring very little maintenance. You’ll get the best possible performance from your printer if you
follow the setup instructions that appear in the Quick Start card and clean the print head regularly.
To clean the print head
1 Remove the cleaning brush fastened to the inside of the cassette door.
Chapter 3
2 Gently brush the print head to remove any dust or particles.
NOTE The print head face is delicate, be careful when cleaning it.
17
Page 22

Service and Support
Troubleshooting the LabelMANAGER PC
Your LabelMANAGER PC has been designed to perform to the highest standards. However, if you
experience difficulties when operating the printer, try to determine the problem by checking the
information provided in this section.
The status light is not green
The table below shows the status light conditions and the action that will correct the problem.
Color Meaning Action
Green Normal state No action.
Solid Red USB connection
not detected
Flashing Red Motor is jammed Remove the tape cassette.
Alternating Red
and Green
No Light No power Make sure the power cable is tightly connected to the printer
Communications
Error
Make sure the USB cable is tightly connected to the printer and
the USB port. If using an unpowered USB hub, you may not
have enough power available. Try using a powered USB hub.
Make sure tape and ribbon are taut.
Re-insert the tape cassette.
Unplug the power cable from the printer.
Wait 10 seconds and reconnect the power cable.
and plugged into a powered outlet.
LabelMANAGER PC is not printing
Check the following:
• The AC adaptor is properly connected to the unit, plugged into the wall outlet, and the status
light is green.
• The USB cable is properly connected to the unit and the PC.
• The tape cassette is installed correctly.
LabelMANAGER PC has poor print quality
Check the following:
18
• The tape cassette is installed correctly.
• The print head is clean. See “Cleaning the LabelMANAGER PC” on page 17.
• The tape cassette color setting matches the tape cassette in the printer. See “Tape Cassette
Color Setting” on page 14.
Tape is jammed
If the tape appears jammed, do the following:
1 Carefully lift out the tape cassette and remove the jammed tape.
2 Turn spool clockwise to tighten.
3 Cut off excess label tape.
4 Refit or replace tape cassette.
Page 23

Technical Support
If you experience problems with the set up or use of your LabelMANAGER PC, carefully read this
manual and consult the Help to make sure you have not missed something that is covered in the
documentation.
If you cannot resolve your problem by consulting the documentation, you can obtain additional
information at any time from the Support section on the DYMO Web site or by contacting DYMO
Technical Support. See “Contacting DYMO” for a list of DYMO telephone numbers.
Contacting DYMO
The following table provides a list of telephone numbers to reach DYMO Sales and Support
departments. You can also reach DYMO at www.dymo.com.
Country Telephone Support Fax Support
Australia 1800/ 817 558
België/Belgique 02/ 713 38 08 +31/ 20/ 581 93 80
Brazil +11 6914 3373
Canada (800) 263-6105
Technical Support
Czech Republik 02/619 12 720 +31/ 20/ 581 93 80
Danmark 35 25 65 08 +31/ 20/ 581 93 80
Deutschland 069/ 66 56 85 29 +31/ 20/ 581 93 80
España/Portugal 91/662 31 49 +31/ 20/ 581 93 80
France 01/69 32 49 32 +31/ 20/ 581 93 80
Hong Kong +852 2527 1928
Hungaria 424-6600 +31/ 20/ 581 93 80
Italia 02/ 45 28 13 08 +31/ 20/ 581 93 80
Mexico +01 5368 2066
Nederland 020/581 93 86 020/ 581 93 80
New Zealand 0800 803 966
Norge 22 97 17 10 +31/ 20/ 581 93 80
Österreich 01/ 599 14 20 12 02/627-400-160
Polska 00800/311 12 50 +31/ 20/ 581 93 80
Schweiz/Suisse 01/342 04 66 +31/ 20/ 581 93 80
Slovakia (+420) 2/619 12 720 +31/ 20/ 581 93 80
Suomi 09 229 07 04 +31/ 20/ 581 93 80
Sverige 08/ 632 00 57 +31/ 20/ 581 93 80
Turkey 212/ 286 26 30 PBX +31/ 20/ 581 93 80
United Kingdom (+44) 020/ 7341 55 29 +31/ 20/ 581 93 80
United States (203) 588-2500
19
Page 24

Service and Support
20
Page 25

Appendix A
Technical Specifications
The following are the technical specifications for the LabelMANAGER PC printer.
Print Method
Print Resolution
Print Speed
Maximum Print Height
Maximum Tape Width
Computer Interface
Dimensions
Power Requirements
Ambient Temperature
Humidity
Weight
Print Head Life
Regulatory Approvals
Warranty
Thermal Transfer
180 dots per inch (7.09 dots per mm)
0.4 inch per second (10 mm per second)
0.53 inch (13.54 mm)
0.94 inch (24 mm)
USB 1.1
2.5” x 5.25” x 5.25”
(63.5 mm x 133.4 mm x 133.4 mm)
9 V DC, 1.3 A
0˚ C to 40˚
10% to 90% RH non-condensing
1 pound, 1 ounce (0.5 kg)
Minimum 200 cassettes (7 meters each)
4,590 feet (1.4 km) of label tape
Printer: CE, FCC
Power Adapter: UL, approved by TUV according to GS standard
One Year Limited
21
Page 26

Technical Specifications
22
Page 27

Index
A
adding
borders 7
date and time 8
graphics 9
special characters 7
B
BMP 9
C
cassettes
ordering 4
chain printing 14
cleaning the printer 17
contacting DYMO 19
continuous mode printing 15
creating a label 5
D
delimited files, printing 11
E
EMF 9
G
graphics
from the clipboard 9
I
installing LabelMANAGER PC 1
J
JPG 9
L
label tape
see tape cassettes
M
main window 2
multi-line text 11
P
PCX 9
PNG 9
print settings 14
tape cassette color 14
printer
specifications 21
printing
chain printing 14
continuous mode 15
from a list 10
multiple labels 12
vertically 10
R
registering the software 1
S
Smart Paste 10
spreadsheets, printing from 10
status light 18
T
tape cassettes
color settings 14
ordering 4
widths 4
technical support 19
text files, printing from 11
TIF 9
troubleshooting 18
W
WMF 9
23
Page 28

24
 Loading...