

Page 1

D-Link DPR-1020
USB Multifunction Print Server
Manual
Rev. 01 (November , 2008)
Page 2

Table of Contents
Table of Contents
Package Contents ....................................................................................................1
Contents of Package:..........................................................................................1
System Requirements:........................................................................................2
Introduction...............................................................................................................3
External Features .....................................................................................................6
Port Connectors ..................................................................................................6
Rear Panel Connectors.......................................................................................7
Ethernet Port.......................................................................................................7
DC Power Connector..........................................................................................7
LED Indicators.....................................................................................................8
Setting up the DPR-1020........................................................................................10
Installing the Print Server..................................................................................10
Power ON Self-Test...........................................................................................11
Getting Started........................................................................................................12
Using the PS Software...........................................................................................13
Auto-Run Installation.........................................................................................13
PS Software ......................................................................................................14
Installing PS Software.......................................................................................14
Using PS-Link....................................................................................................17
Installing and Using a MFP/GDI Printer............................................................28
Using PS-Wizard...............................................................................................49
Using the Web Configurator..................................................................................55
Home.................................................................................................................55
SETUP > LAN Setup.........................................................................................59
SETUP > Printer Setup .....................................................................................60
D-Link DPR-1020 User Manual i
Page 3

Table of Contents
ADV ANCED > Advanced LAN...........................................................................68
ADV ANCED > User Access ..............................................................................70
ADV A NCED > E-Mail Notification.....................................................................72
ADV ANCED > SNMP........................................................................................74
MAINTENANCE > Password............................................................................75
MAINTENANCE > Save/Restore Settings........................................................76
MAINTENANCE > Firmware Upgrade..............................................................77
MAINTENANCE > Diagnostics .........................................................................78
STA TUS > Device Info.......................................................................................79
ST ATUS > Network...........................................................................................80
ST ATUS >Print Log...........................................................................................82
HELP.................................................................................................................83
Reboot...............................................................................................................84
Refresh Printer Status.......................................................................................85
TCP/IP Printing for Windows Vista .......................................................................86
TCP/IP Printing for Windows XP...........................................................................96
TCP/IP Printing for Windows 2000......................................................................111
TCP/IP Printing for Windows 98SE/ME ..............................................................126
Unix/Linux Printing...............................................................................................142
Printing Text Files from Unix............................................................................142
Printing from BSD Unix Versions....................................................................143
Printing from SCO Unix System V/386 ...........................................................146
Printing from Solaris........................................................................................148
Printing from Red Hat Linux............................................................................149
Setting up Printing in Mac OS X Tiger (10.4.9)..................................................156
Adding a Printer...............................................................................................157
AppleTalk-enabled or Bonjour-enabled Printers.............................................160
D-Link DPR-1020 User Manual ii
Page 4

Table of Contents
Setting up AppleTalk Printing in Mac OS 9........................................................171
Technical Specifications......................................................................................176
Appendix: DPR-1020 Printer Compatibility List................................................177
D-Link DPR-1020 User Manual iii
Page 5
Package Contents
Package Contents
Contents of Package:
D-Link DPR-1020 USB Multifunction Print Server
Manual and Warranty on CD
Printed Quick Installation Guide
If any of the above items are missing, please contact your reseller.
D-Link DPR-1020 User Manual 1
Page 6

Introduction
System Requirements:
A computer with Ethernet interface.
Windows Vista/XP/2000/NT4/ME/98SE/95
Or
Apple Mac OS 9.x to MAC OS X 10.4.x
Or
Linux, Solaris, SCO Unix, AIX
Internet Explorer 6.0 or above; Netscape Navigator version 6.0 or above, with
JavaScript enabled
Your printer must support the required operating system.
D-Link DPR-1020 User Manual 2
Page 7

Introduction
Introduction
D-Link’s DPR-1020 Print Server allows you to connect a USB Multi-Function Printer
(MFP) to your existing Ethernet network. This product lets multiple users print, scan
and fax using the connected printer. The DPR-1020 also manages the flow of print
files and delivers print jobs quickly and efficiently.
The DPR-1020 comes with easy to use software compatible with most
Windows-based networks. Protocol support for TCP/IP, NetBEUI, and AppleTalk are
provided to ensure seamless connection to major networking operating systems.
The DPR-1020 has a built in web configurator that allows users to easily configure
the Print Server and manage multiple print queues through TCP/IP.
The DPR-1020 improves upon network printing services in the following ways:
The DPR-1020 manages the print file traffic for all of the connected printers. This
provides relief for your file servers and allows them to be used to their full capacity
for file access or other network services. On peer-to-peer networks, workstations
can print directly to the Print Server without increasing the load of another
workstation or server.
The DPR-1020 Print Server is portable and cheap compared to a PC-based print
server. This means you’re able to deploy the DPR-1020 in locations that offer
maximum convenience to users.
Use the included PS-Link software to enable your computer to use your MFP
printer’s print/scan/fax/copy functions. PS-Link helps you to install your printer’s
D-Link DPR-1020 User Manual 3
Page 8

Introduction
manufacturer drivers without creating a physical USB connection from your printer to
your computer. After the software provid ed by your p rinter’s manufacturer is inst all ed,
using the printer’s scan and fax functions will be exactly the same as how it’s
described in your printer’s manual.
Use PS-Wizard to easily add a network printer on Windows for traditional TCP/IP
printing.
The DPR-1020 is compatible with all major network operating systems and
protocols:
TCP/IP
UNIX lpr/lpd (HP-UX, SunOS, Solaris, SCO, UnixWare, IBM AIX) Windows NT/2000,
Windows 95/98SE/ME, Windows XP/Vista, NetWare 5.x NDPS LPR Remote
Printing
NetBEUI
Windows NT/2000/XP, Windows 95/98SE/ME, Windows for Workgroups, Microsoft
LAN Manager, IBM LAN Server
AppleTalk
MacOS EtherTalk
The PS software, PS Link and PS Wizard, allows further configuration of the MFP
server:
¾ PS-Link -Use this to enable your computer to use your printer’s
print/scan/fax/copy functions and GDI printing. PS-Link helps you to install your
printer’s manufacturer drivers without creating a physical USB connection from
your printer to your computer. For more information see the “Using The PS
Software Chapter”.
D-Link DPR-1020 - User Manual 4
Page 9

Introduction
¾ PS-Wizard - This tool allows you to easily add a printer to your computer. For
more information see the “Using The PS Sof t ware Chapter”.
D-Link DPR-1020 - User Manual 5
Page 10

External Features
External Features
Port Connectors
The DPR-1020’s USB printer port is located on the rear panel of the device and is
configurable using the web configurator.
The default IP address of the DPR-1020 is automatically acquired from a DHCP
server on the network. If a DHCP server cannot be found the default IP address for
the DPR-1020 will be 192.168.0.10.
NOTE: Your PC’s IP Address must be in the same subnet as the Print Server’s IP
Address for the two devices to communicate. (For example, if MFP server’s IP
Address is 192.168.0.10, with a subnet mask of 255.255.255.0, then your
computer’s IP Address should be 192.168.0.x, where x is a value between 1-254,
excluding 10.)
D-Link DPR-1020 User Manual 6
Page 11
External Features
)
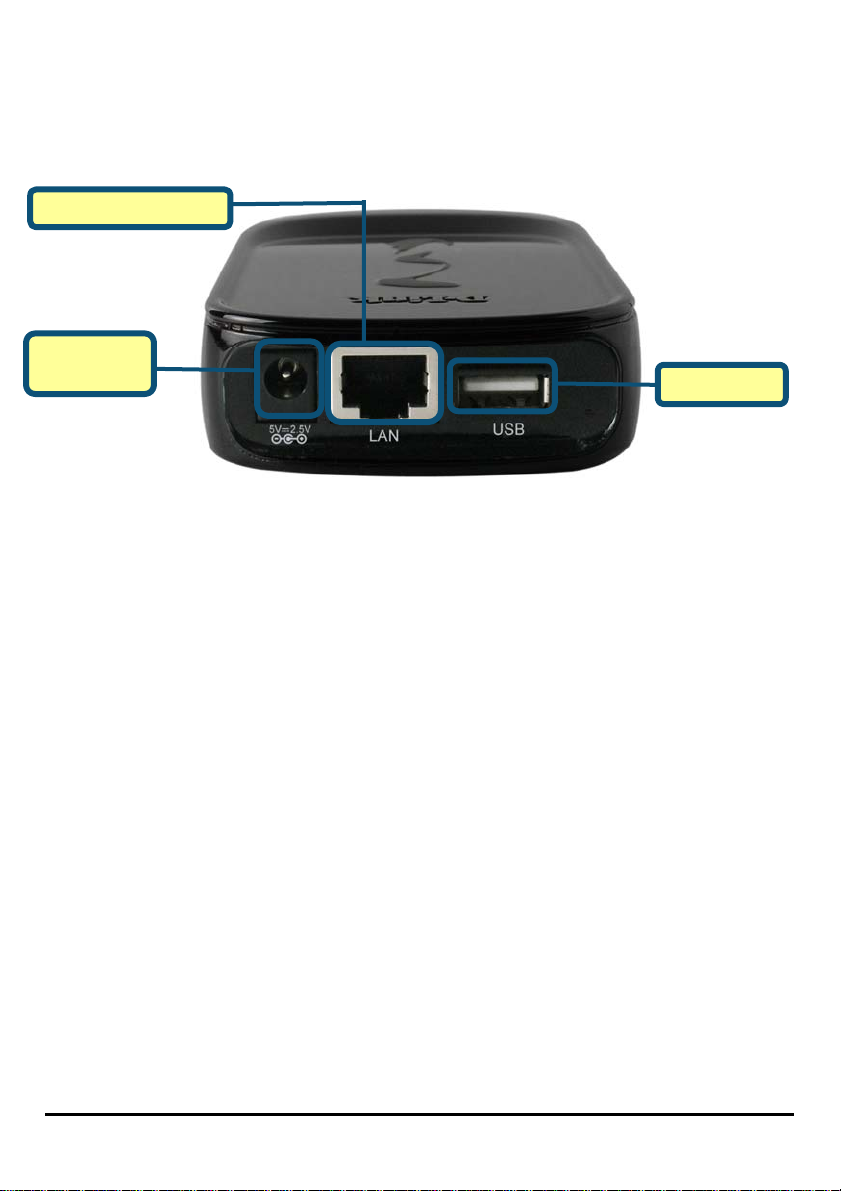
Rear Panel Connectors
Ethernet Port (LAN
DC Power Connector
USB Port
Ethernet Port (LAN)
The Print Server’s rear panel features an Ethernet port for connecting 10/100Mbps
CAT 5 Ethernet cables. This port supports the NWay protocol, allowing the Print
Server to automatically detect or negotiate the transmission speed of the network.
DC Power Connector
The DC power input connector is labeled DC 5V.
D-Link DPR-1020 - User Manual 7
Page 12
External Features
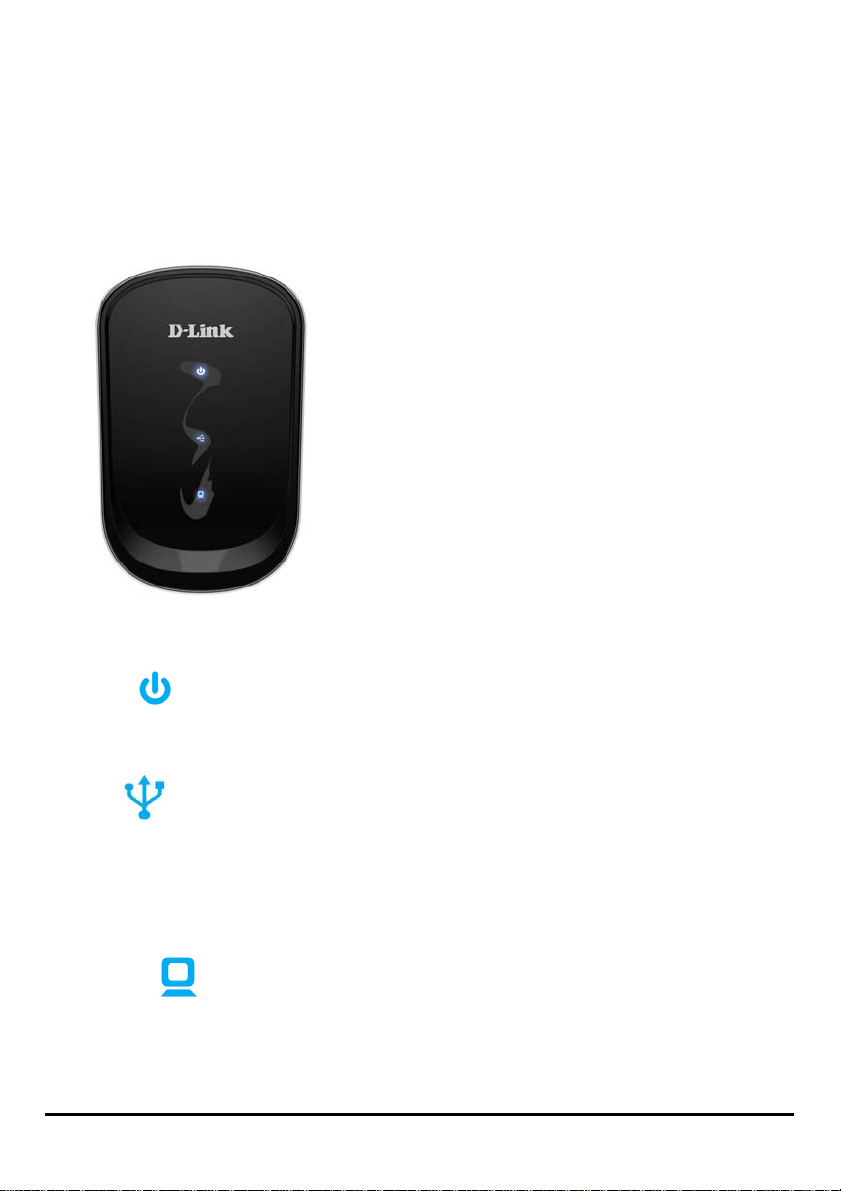
LED Indicators
The top of the Print Server features three LEDs:
Power
A steady blue light confirm s that the Print Server is turned ON.
USB
A steady blue light indicates the printer is online and successfully connected to the
print server. This light will also blink to indicate that data is being transferred
between the print server and printer.
Link/Act
A steady blue light confirm s that the Print Server has a connection to an Ethernet
network. This light will also blink when receiving or transmitting dat a on the network.
D-Link DPR-1020 - User Manual 8
Page 13

External Features
These three LED indicators are also used during the Print Server’s Power-ON Self
Test to indicate any hardware failures.
D-Link DPR-1020 - User Manual 9
Page 14

Setting up the DPR-1020
Setting up the DPR-1020
Installing the Print Server
WARNING:
without first establishing a network connection.
Follow the steps below to avoid any complications during the hardware inst allation:
1. Confirm that the printer you will use to connect to the DPR-1020 is operating
correctly.
2. When you have confirmed that the printer is operating correctly, switch its power
OFF.
3. Confirm that your network is operating normally.
4. Using a CAT 5 Ethernet cable, connect the DPR-1020 Ethernet Port (labelled LAN)
to the network.
There may be configuration problems if the Print Server is turned on
5. While the printer is turned OFF, connect the USB printer cable to the printer and
then to the USB port on the Print Server.
6. Switch on the printer.
7. Insert the power adapter’s output plug into the DC 5V power socket on the rear
panel of the Print Server.
8. Connect the other end of the power adapter into a power outlet. This will supply
power to the Print Server. The blue LED on the Print Server’s front panel should turn
on and the Print Server’s self-test will proceed.
D-Link DPR-1020 User Manual 10
Page 15

Setting up the DPR-1020
Power ON Self-Test
Every DPR-1020 has been factory-tested to operate properly.
When the DPR-1020 is powered ON, it automatically performs a Self-Test on each of
its major components. The final result of the Self-Test is signaled by the state of the
USB LED indicator following the Self-Test. Preliminary to the actual component tests,
the three LED indicators are tested to confirm their operation.
Immediately after power-up, all three of the blue LEDs should illuminate steadily for
several seconds. Then the USB LED should light OFF simultaneously. Irregularity of
any of the three LEDs during these LED tests may mean there is a problem with the
LEDs themselves.
The actual component tests immediately follow the LED tests. A normal (no fault)
result is signaled by simultaneous flashing of the LEDs three times, followed by a
quiescent state with all three LEDs dark.
If the Self-Test routine traps any component error, then following the LED tests the
Self-Test will halt and the LEDs will continuously signal the error according to the
following table. In the event of any such error signal, contact your dealer for
correction of the faulty unit.
USB LED Faulty Component
On DRAM error
1 long 3 short Flash Protected
1 long 5 short Flash Erase/Program error
1 long 6 short LAN Controller error
1 long 14 short LAN MII error
1 long 18 short USB error
D-Link DPR-1020 - User Manual 11
Page 16
Getting Started
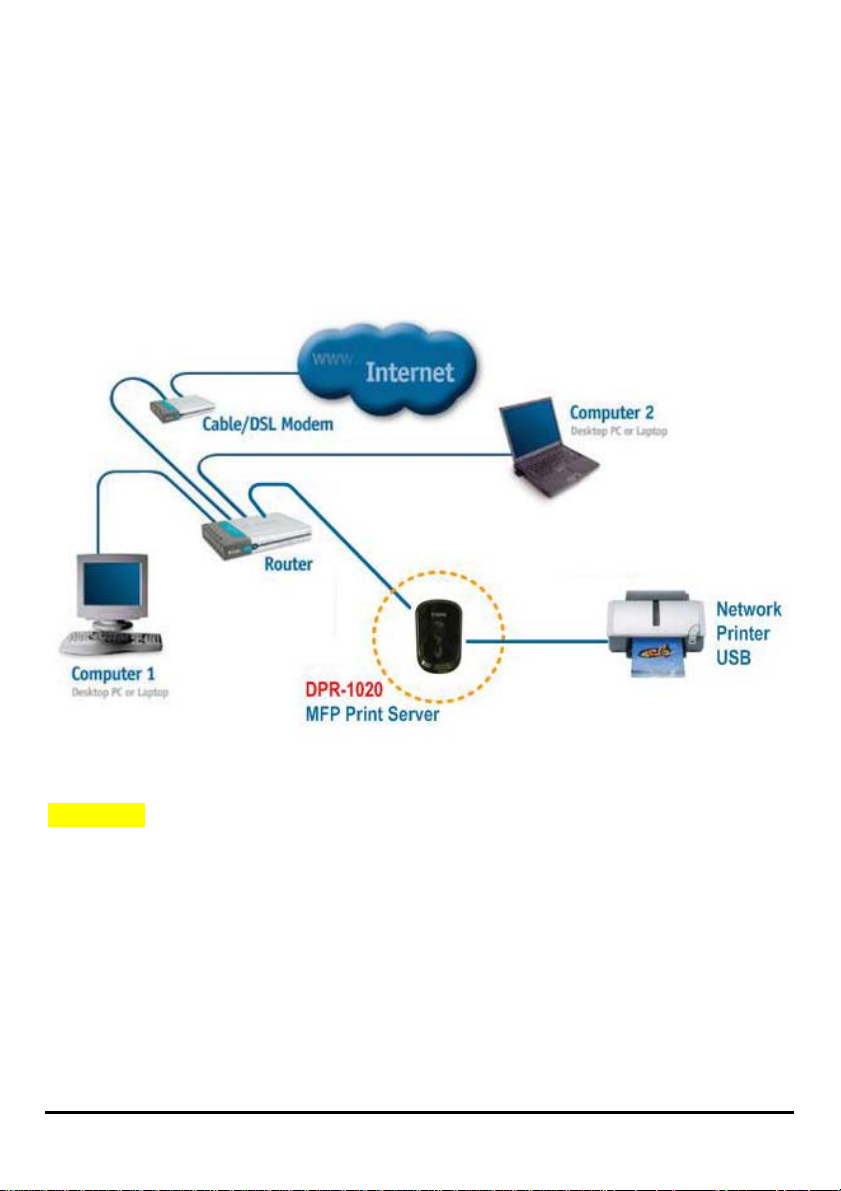
Getting Started
Below is a sample network using the DPR-1020. The DPR-1020 has a built- in web
configurator that allows users to easily configure the Print Server and manage
multiple print queues through TCP/IP.
WARNING: Only a USB printer may be connected to the USB port of the DPR-1 020.
Do not connect any other USB devices to the USB port of the DPR-1020; to do so,
may damage the unit and will void the warranty for this product.
For a list of printers that are compatible with the DPR-1020, please see the Appendix
in this manual. The compatibility list is not comprehensive. Even if it is not included
in the list, your printer may be compatible with the DPR-1020.
D-Link DPR-1020 User Manual 12
Page 17

Using the PS Software
Using the PS Software
This chapter will introduce you to the installation and operation of the PS Software
(PS-Link and PS-Wizard) with which the MFP Server can be configured further.
Auto-Run Installation
Insert the included installation CD into your computer’s CD-ROM drive to initiate the
auto-run program. If auto-run does not start, click My Computer > [CD ROM Drive
Letter].
The content of the installation CD-ROM includes:
• Install PS Software – click this to install the PS Software, which contains
PS-Link and PS-Wizard that can configure more settings for the MFP Server,
such as:
- Change the IP address
- Support the multi-functions (Print/Scan/Copy/Fax) of a MFP printer, GDI
printing, and other software from any MFP/GDI printer.
- Easily add a printer to your computer.
• View Quick Installation Guide – click this to preview the Quick Installation
Guide in PDF format for step-by-step instructions of the MFP Server
Installation.
• View Manual – click this to preview the User Manual in PDF format for
detailed information regarding the MFP Server.
• Install Acrobat Reader – click this to install Acrobat Reader for the viewing and
printing of PDF files found in this Installation CD-ROM.
• Exit – click to close the Auto-Run program.
D-Link DPR-1020 User Manual 13
Page 18
Using the PS Software
PS Software
To avoid any conflict within your network, use the PS Software to change your MFP
Server’s settings, such as the IP address.
The PS Software contains two utilities: PS-Link and PS-Wizard.
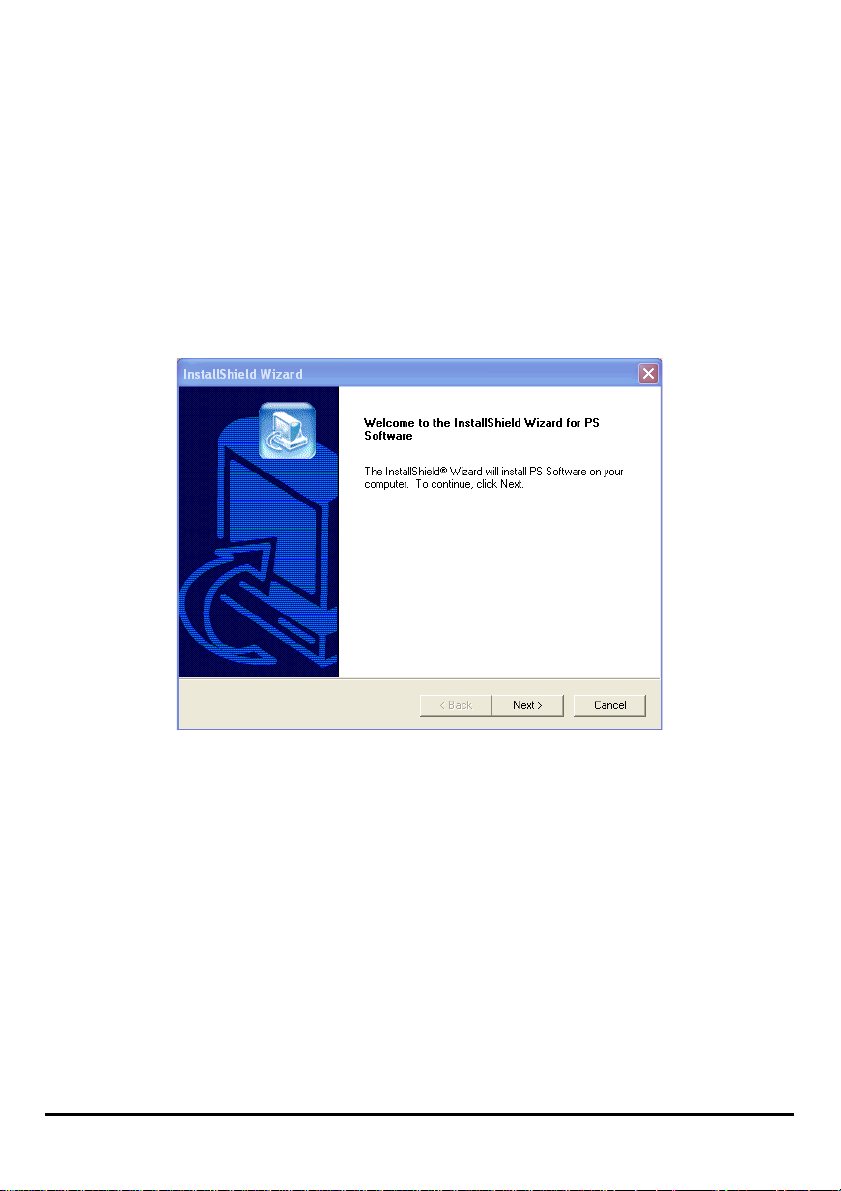
Installing PS Software
1. Click the Next > button in the welcome window of the InstallShield Wizard.
D-Link DPR-1020 - User Manual 14
Page 19
Using the PS Software
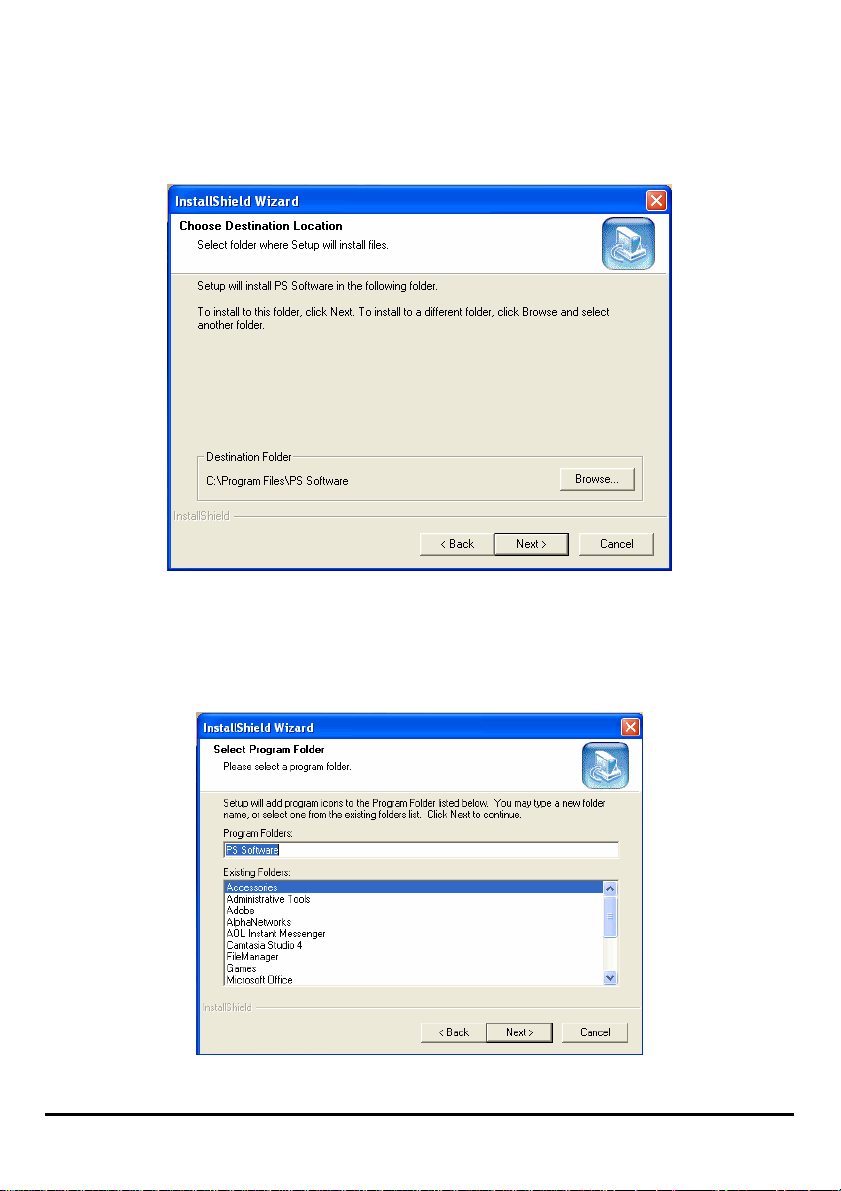
2. Specify the destination location by clicking the Browse… button. Otherwise,
click the Next > button to continue.
3. You may enter a new folder name in the Program Folder field if you want to
change the default name. Otherwise click the Next > button to go to the next
screen.
D-Link DPR-1020 - User Manual 15
Page 20
Using the PS Software
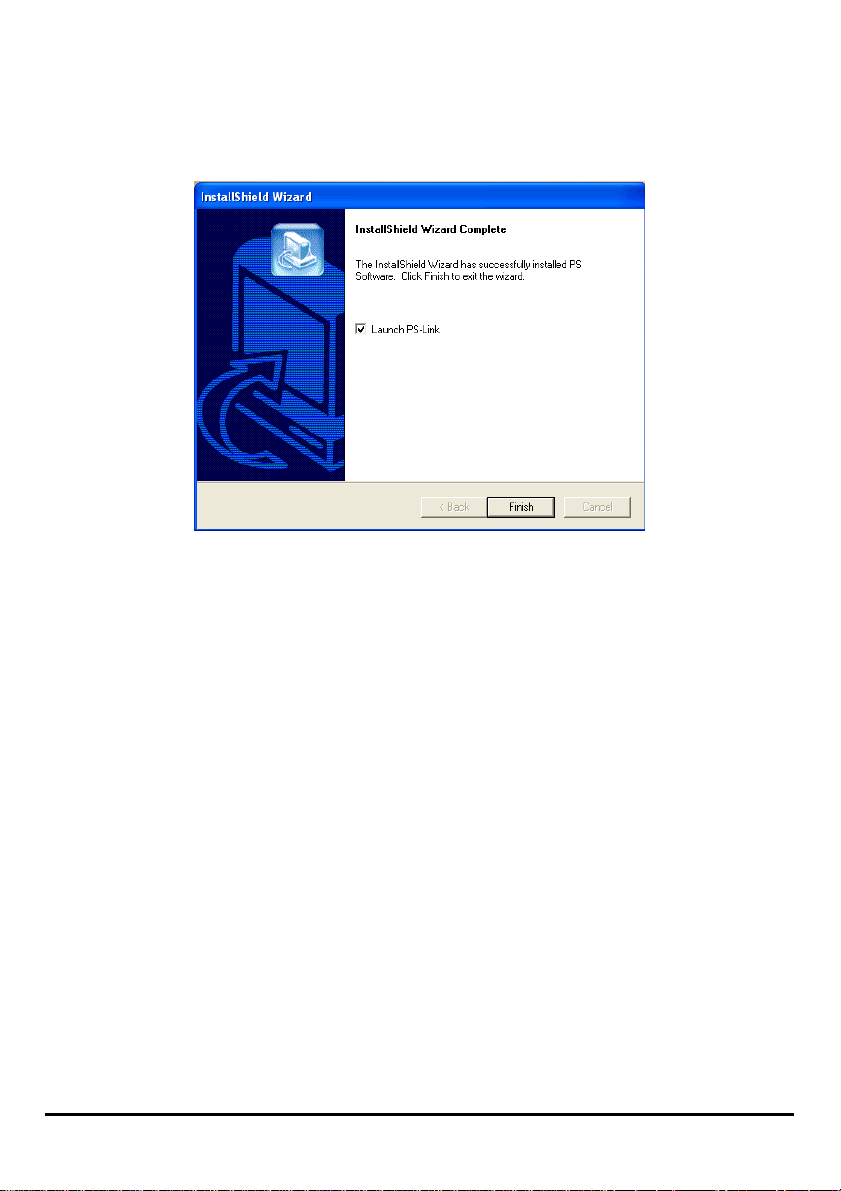
4. The InstallShield Wizard starts to install the software, and the Progress bar
indicates the installation is proceeding until the following window shows up. Cli ck
the Finish button to complete the installation.
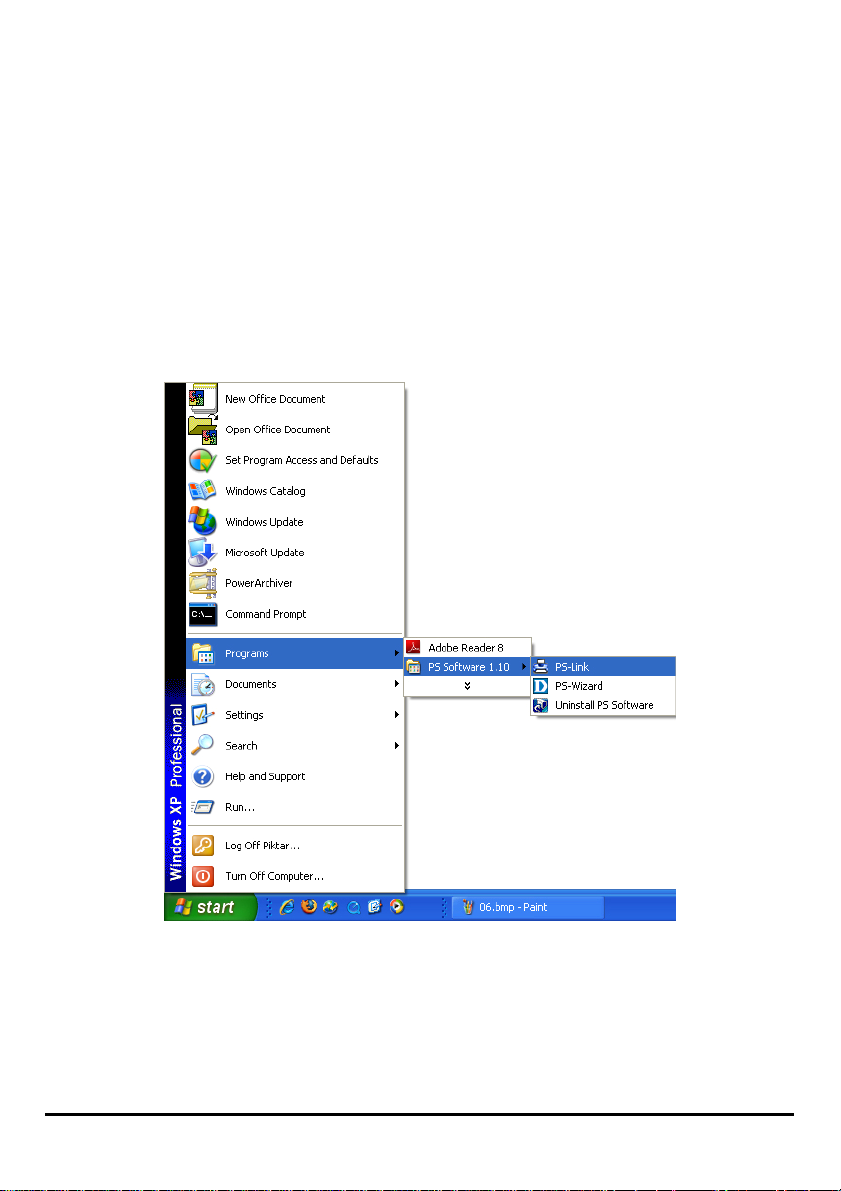
After installing the program, you can access the two utilities by clicking StartÎ
ProgramsÎ PS Software.
The PS Software contains two utilities: PS-Link and PS-Wizard.
D-Link DPR-1020 - User Manual 16
Page 21
Using the PS Software
Using PS-Link
PS-Link (Windows 2000/XP/2003/Vista), is a utilit y that will help you use your printer
manufacturer drivers with the MFP print server. Using the Link command you can
simulate a physical USB connection between your computer and printer, thus
enabling you to complete the installation of the manufacturer drivers without making
a USB connection to your computer .
To start PS-Link, go to StartÎ ProgramsÎ PS Software, and click PS-Link.
PS-Link will then start and automatically search for MFP servers in the same
network segment. If the installation has been successful, you will see that the name
of your MFP server has been discovered and is listed in the Server Name column. If
your MFP server is not listed, please check your network connectivity and click the
Discover button again.
D-Link DPR-1020 - User Manual 17
Page 22

Using the PS Software
Server Name: This list displays the name of the MFP Servers within the network.
Discover: Click this button to search for more MFP Servers.
Status Bar: The status bar at the bottom of the screen displays the current
system status and number of connected MFP servers.
Information: This field displays basic information regarding the selected MFP
Server in the Device List.
There are also three buttons: Setup Wizard, Change IP Address, and Web
Setup. Here is an explanation of each button:
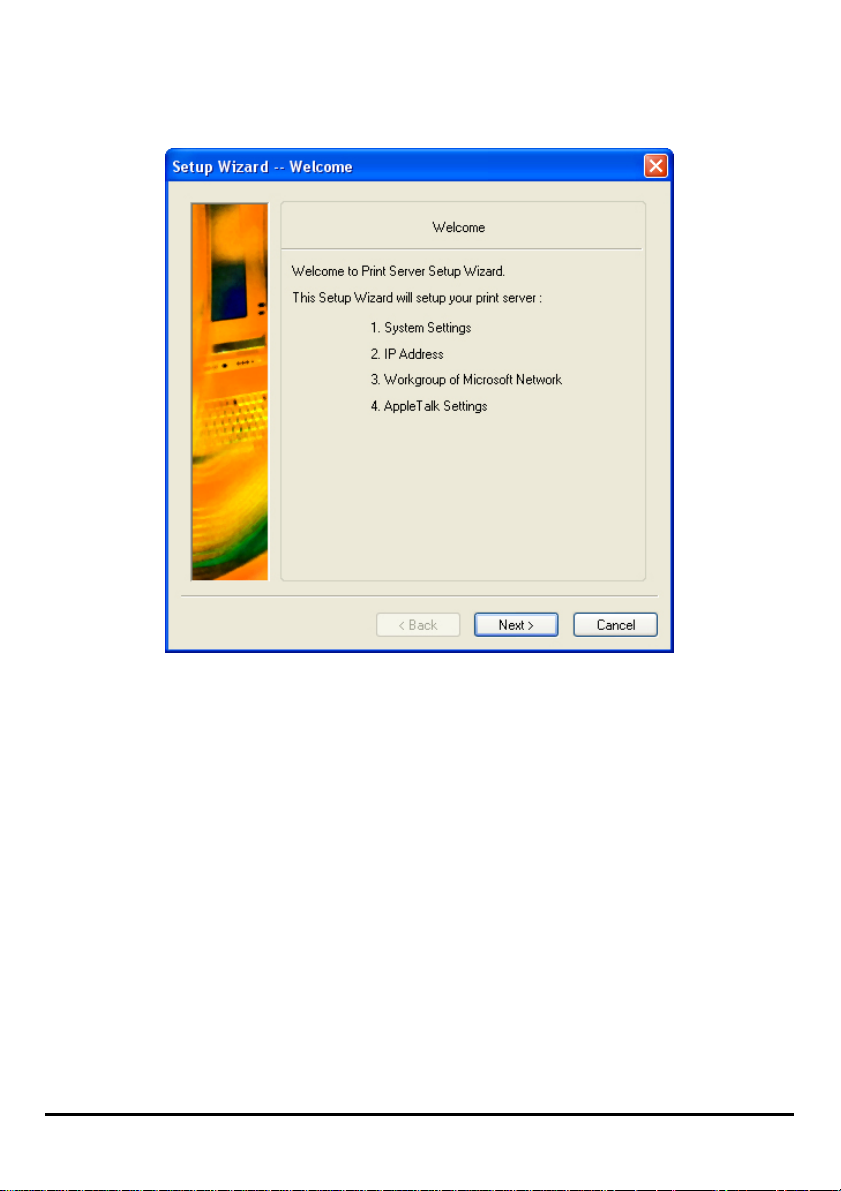
[Setup Wizard] – Setup Wizard will allow you to configure the print server
step-by-step. When this button is clicked, the following screen will display.
D-Link DPR-1020 - User Manual 18
Page 23
Using the PS Software
Click Next > to begin configuring the settings.
D-Link DPR-1020 - User Manual 19
Page 24
Using the PS Software
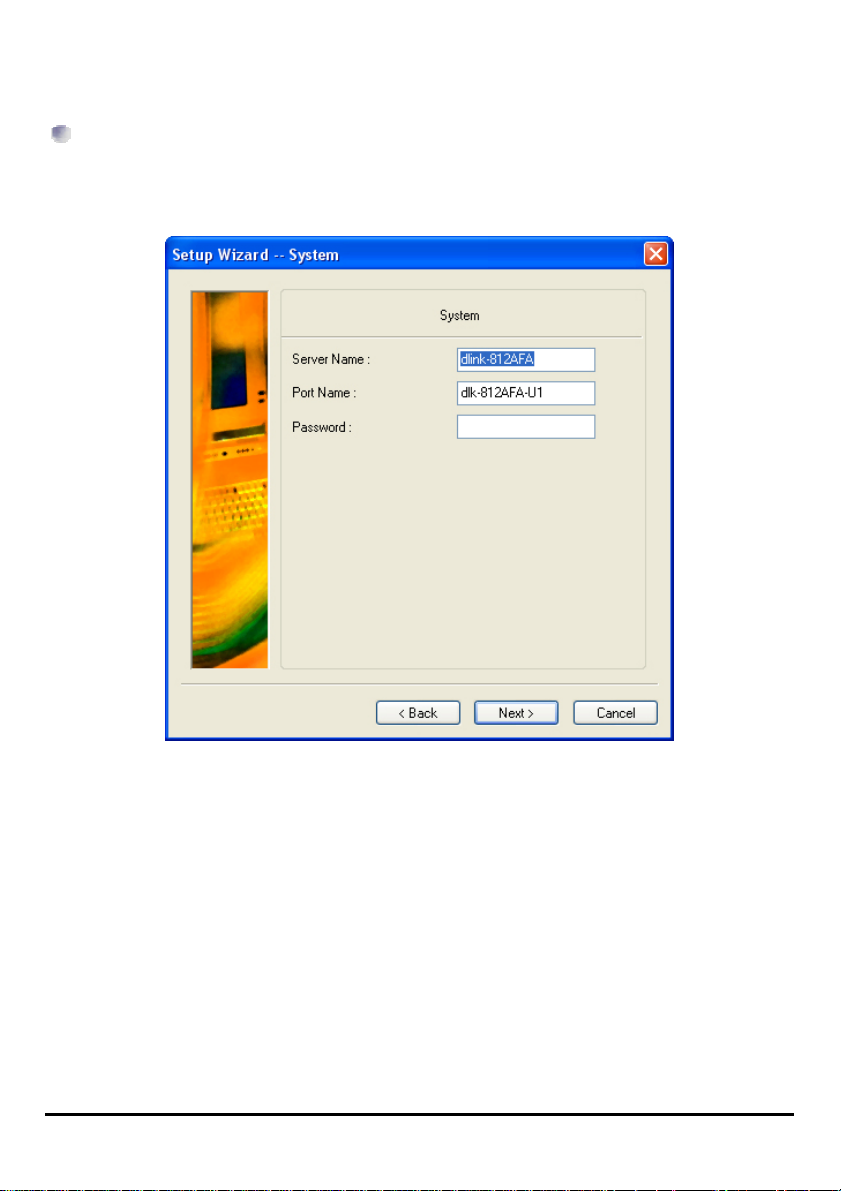
System Settings
Enter the Server Name, Port Name and Password for the print server.
Click Next > to continue to the next page and Cancel to exit.
D-Link DPR-1020 - User Manual 20
Page 25
Using the PS Software
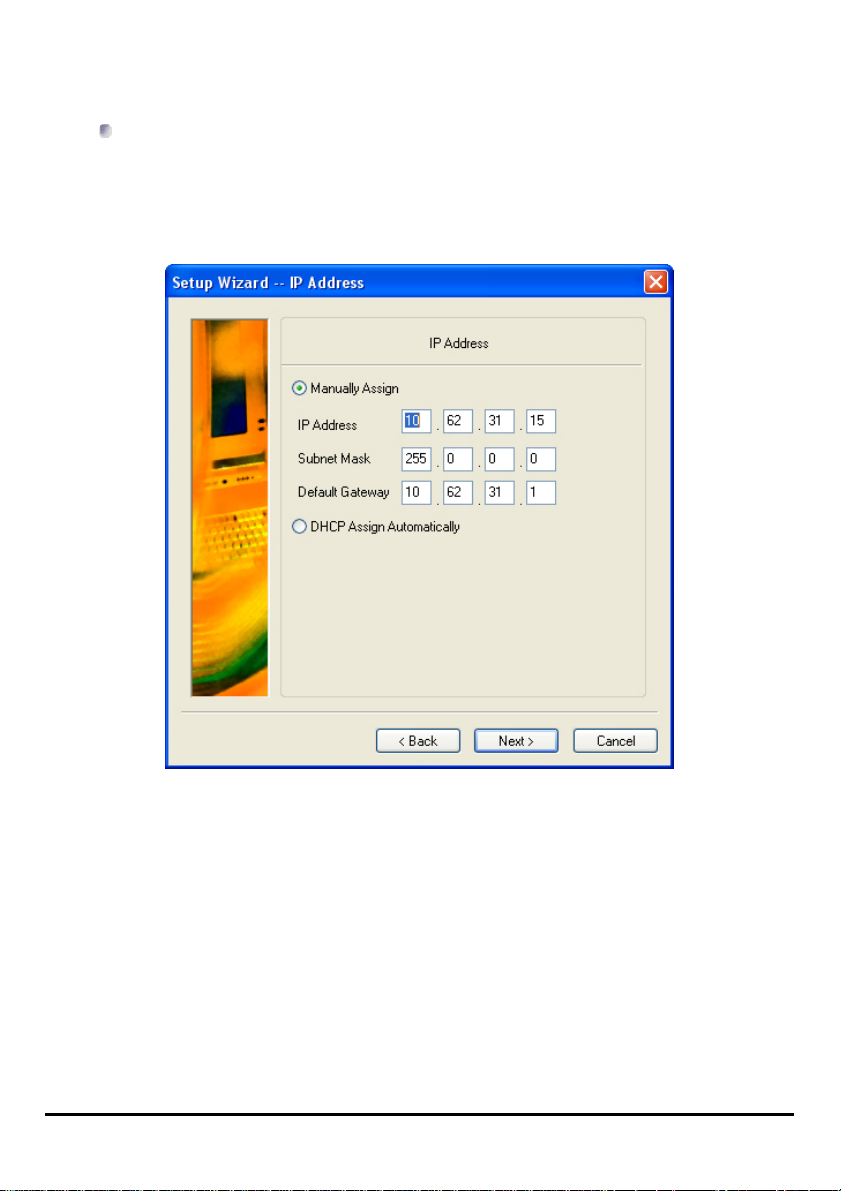
Changing the IP Address:
Select Manually Assign to enter a specific IP address for the print server or DHCP
Assign Automatically to assign the server an IP address automatically.
Click Next > to continue to the next page or Cancel to exit.
D-Link DPR-1020 - User Manual 21
Page 26

Using the PS Software
Microsoft Network Workgroup
Type the name of the Microsoft Workgroup.
Click Next > to continue to the next page or Cancel to exit.
D-Link DPR-1020 - User Manual 22
Page 27
Using the PS Software
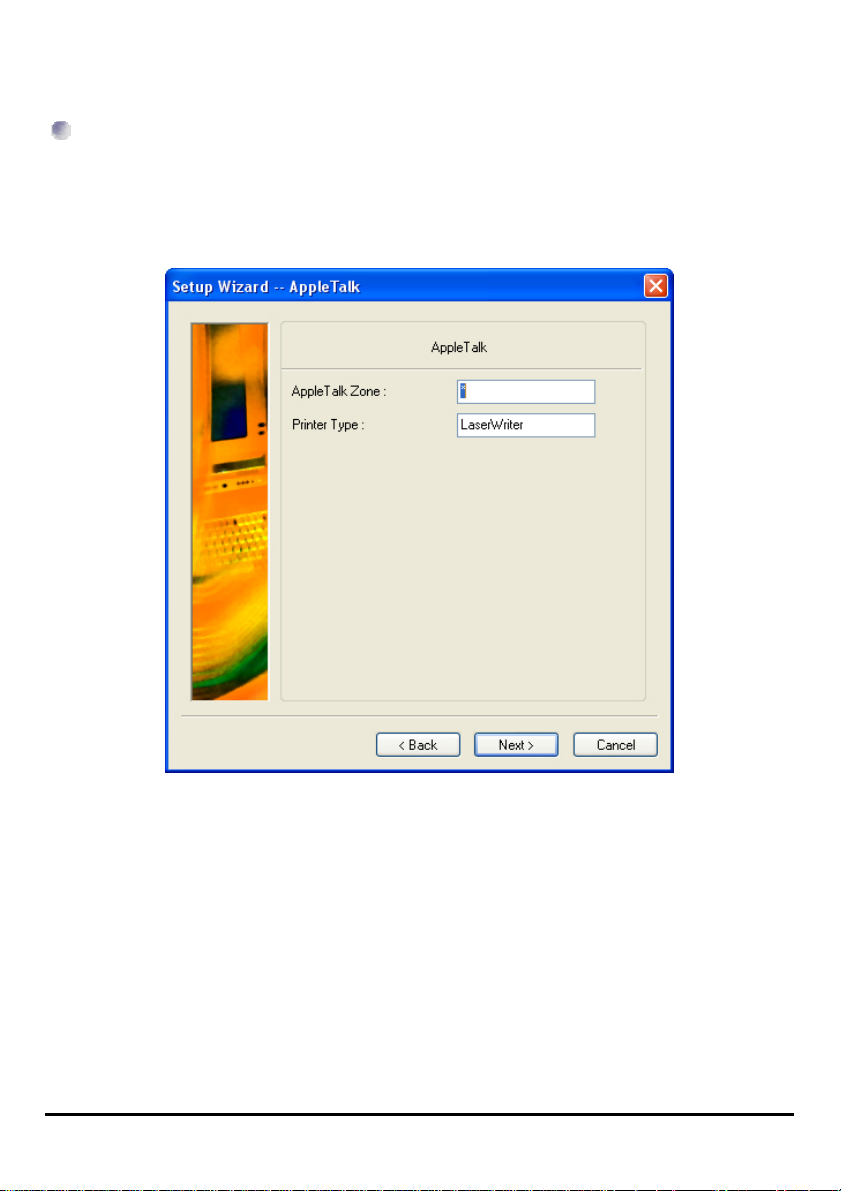
AppleTalk Settings (Optional)
Enter the AppleTalk Zone or just type “*” if your AppleTalk netwo rk is not divided i nto
zones. Type the Printer Type.
Click Next > to continue to the next page or Cancel to exit.
D-Link DPR-1020 - User Manual 23
Page 28
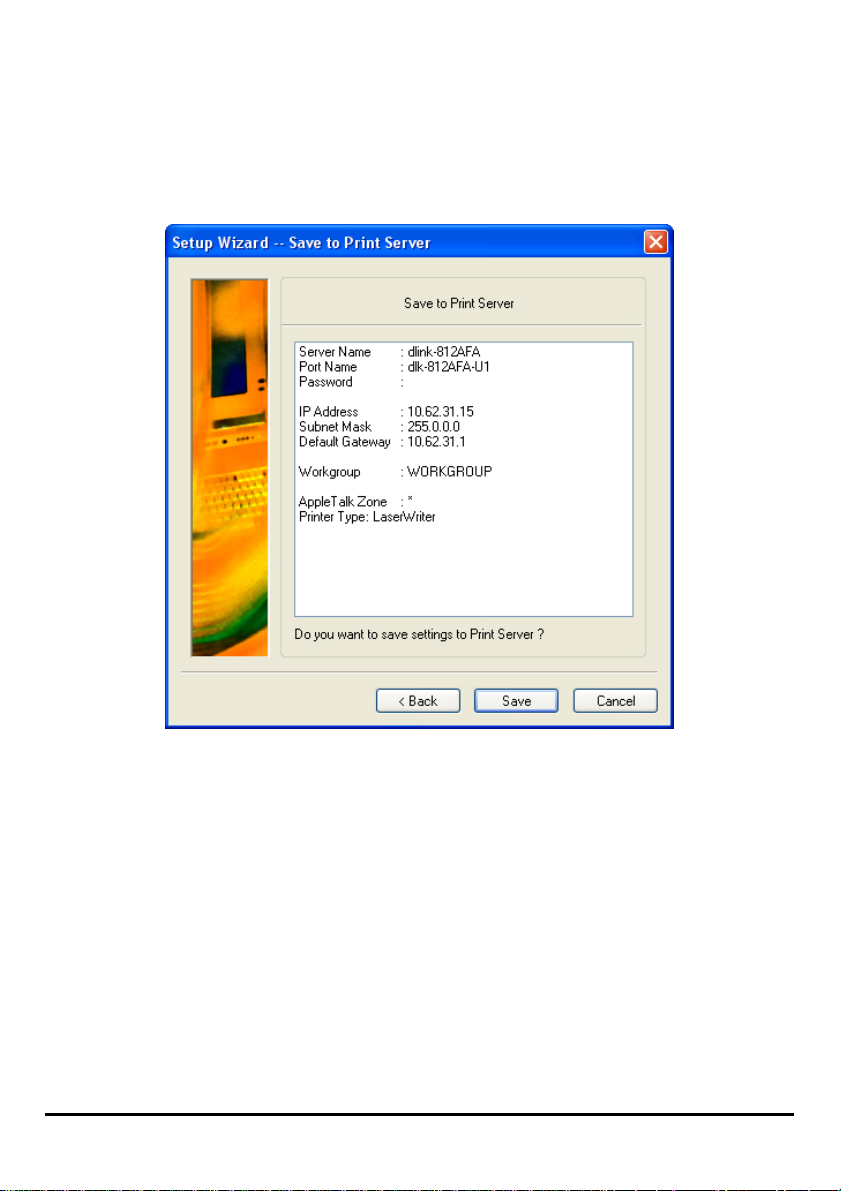
Using the PS Software
After the configuration of these screens is complete, click Save to store the settings
that are displayed or Cancel to abort. You can also click < Back to modify these
settings.
D-Link DPR-1020 - User Manual 24
Page 29
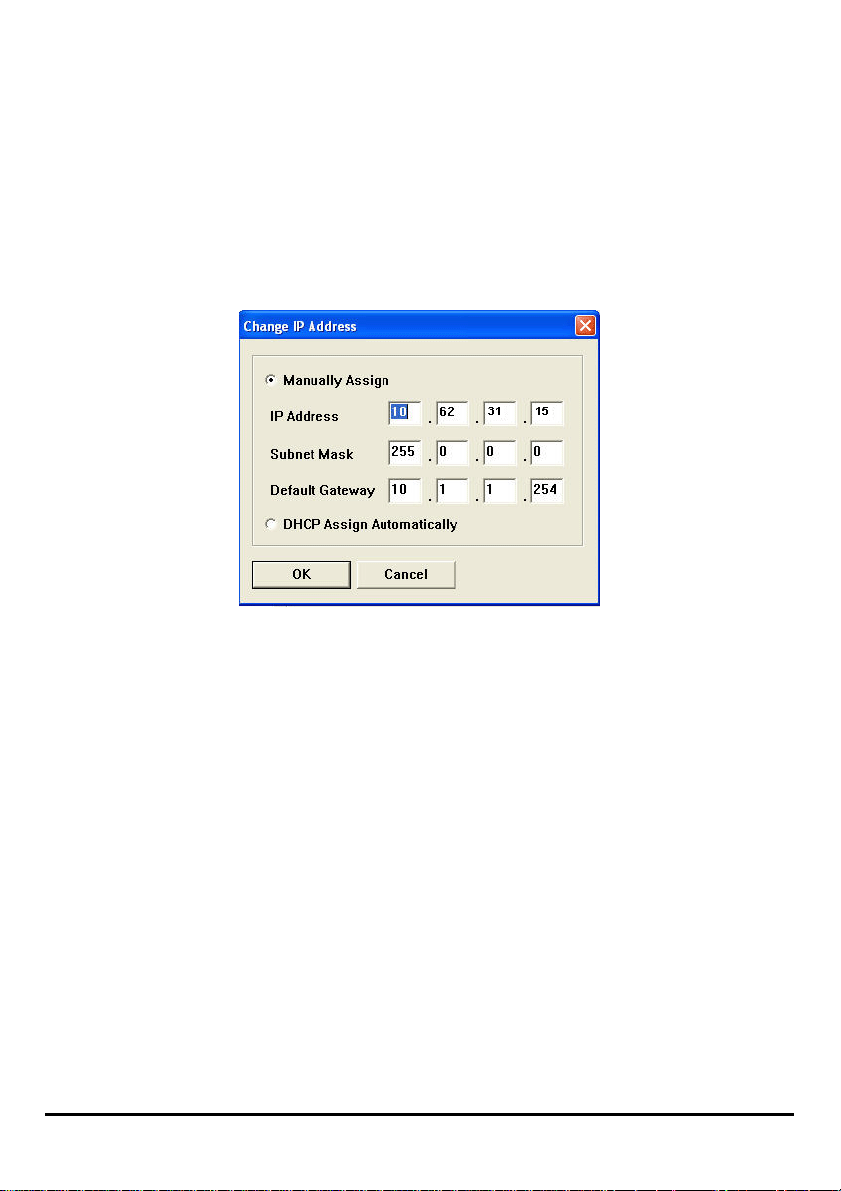
Using the PS Software
[Change IP Address] - Click this button to bring up the following screen. This
screen allows you to change the IP Address of the MFP Server. Select Manually
Assign to enter a specific IP address for the MFP server or DHCP Assign
Automatically to assign the server an IP address automatically. Click OK to
save your changes or Cancel to abort.
D-Link DPR-1020 - User Manual 25
Page 30
Using the PS Software
[Web Setup] – Click this button to launch the web configurator. You can also launch
the web configurator by clicking on the name of the server in the Device List.
Printer Port: This field displays basic information and the current status of the
connected printer. It also allows you to use the four control buttons (Link, UnLink,
Lock, UnLock).
[Link] – The function of this button is to simulate the physical connection between
the printer and computer via a USB cable. This means you can set up a link by
simply clicking this button without physically attaching the printer’s USB cable to
your computer. This is be cause the USB cable will be connected from your prin ter to
the print server and not to your computer.
[UnLink] – This button disconnects the simulated link between the printer and the
computer.
[Lock] – Clicking the Lock button will enable Single User Mode. In this mode only
one user may print.
[UnLock] – Clicking the Unlock button will enable the Shared Mode.
D-Link DPR-1020 - User Manual 26
Page 31

Using the PS Software
About: Click this to display the PS-Link version number. Clic k the OK button to
close this window .
Close: To exit PS-Link, click this button.
D-Link DPR-1020 - User Manual 27
Page 32

Using the PS Software
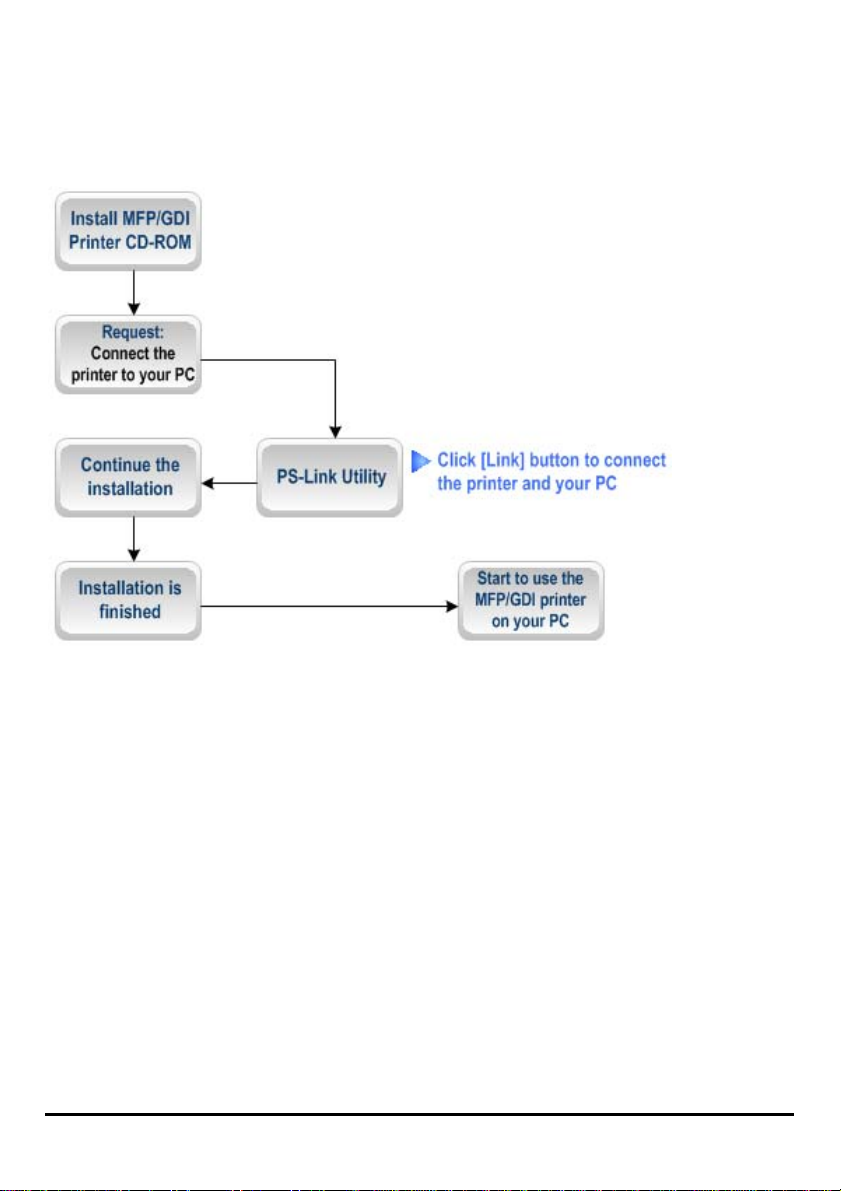
Installing and Using a MFP/GDI Printer
This section will tell you how to use a MFP/GDI printer through the PS-Link utility
after the printer manufacturer’s driver has already been installed.
For PCs with the MFP/GDI printer driver installed:
If your computer already has the MFP/ GDI printer driver installed, you can just click
the [Link] button in PS-Link to complete the connection between the printer and
your computer.
For PCs without the MFP/GDI printer driver installed:
If your computer does not have the MFP/GDI printer driver installed, you may use
the following procedure:
1. Insert the manufacturer’s CD-ROM into your computer’s CD-ROM drive to initiate
the auto-run program.
2. Follow the instructions of the manufacturer’s CD-ROM to install the MFP driver
and other software until you are requested to attach the printer’s USB cable to your
computer.
3. The installation steps will be different depending on the printer and manufacturer
brand. Below you will find diagrams for several printers from different manufactu rers:
D-Link DPR-1020 - User Manual 28
Page 33

Using the PS Software
For HP:
1. When the installation program asks you to connect the USB cable you are allowed
to connect it later by checking a box. Click the Next > button to continue the rest of
the installation.
D-Link DPR-1020 - User Manual 29
Page 34
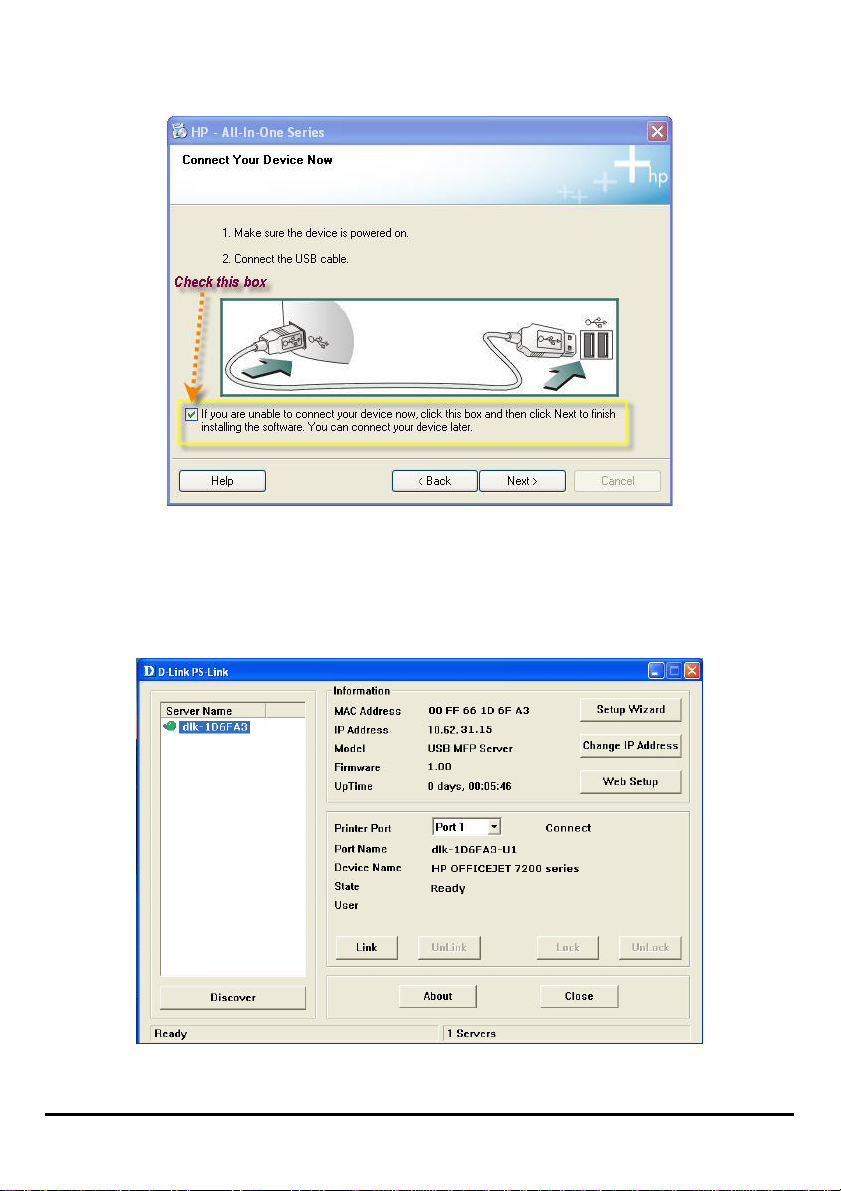
Using the PS Software
2. When the installation of all drivers has been completed, you may use the PS-Link
utility to complete the physical connection between the MFP/GDI printer and your
computer by clicking the [Link] button.
D-Link DPR-1020 - User Manual 30
Page 35

Using the PS Software
If the connection has been made successfully, the following message will display.
Press OK to exit.
3. Now the MFP/GDI printer is ready to use. You may start to use the MFP/GDI
printer through your computer.
D-Link DPR-1020 - User Manual 31
Page 36

Using the PS Software
For EPSON:
D-Link DPR-1020 - User Manual 32
Page 37

Using the PS Software
1. When the installation program asks you to connect the USB cable of the MFP/GDI
printer to your computer , you are not allowed to ignore it; therefore, you need to use
PS-Link to simulate a USB connection between your printer and computer.
2. To do this launch the PS-Link utility and click the [Link] button.
D-Link DPR-1020 - User Manual 33
Page 38

Using the PS Software
When the connection has been completed successfully, a message will display.
Press OK to exit.
3. Now you have to go back to continue the installation of the MFP/GDI printer
CD-ROM on your computer in order to complete the rest of installation steps.
4. When the installation is complete, you may start to use the multi-functio ns
(Print/Scan/Copy/Fax) of the MFP/GDI printer through your computer.
D-Link DPR-1020 - User Manual 34
Page 39

Using the PS Software
For Canon:
1. When the installation program asks you to connect the USB cable of the MFP/GDI
printer to your computer , you are not allowed to ignore it; therefore, you need to use
PS-Link to simulate a USB connection between your printer and computer.
D-Link DPR-1020 - User Manual 35
Page 40

Using the PS Software
2. Launch the PS-Link utility and click the [Link] button.
D-Link DPR-1020 - User Manual 36
Page 41

Using the PS Software
When the connection has been completed successfully, a message will display.
Press OK to exit.
3. Now you have to go back to continue the installation of the MFP/GDI printer
CD-ROM on your computer in order to complete the rest of installation steps.
4. When the installation of the MFP/GDI printer CD is complete, you may start to use
the multi-functions (Print/Scan/Copy/Fax) of the MFP/GDI printer through your
computer.
D-Link DPR-1020 - User Manual 37
Page 42
Using the PS Software
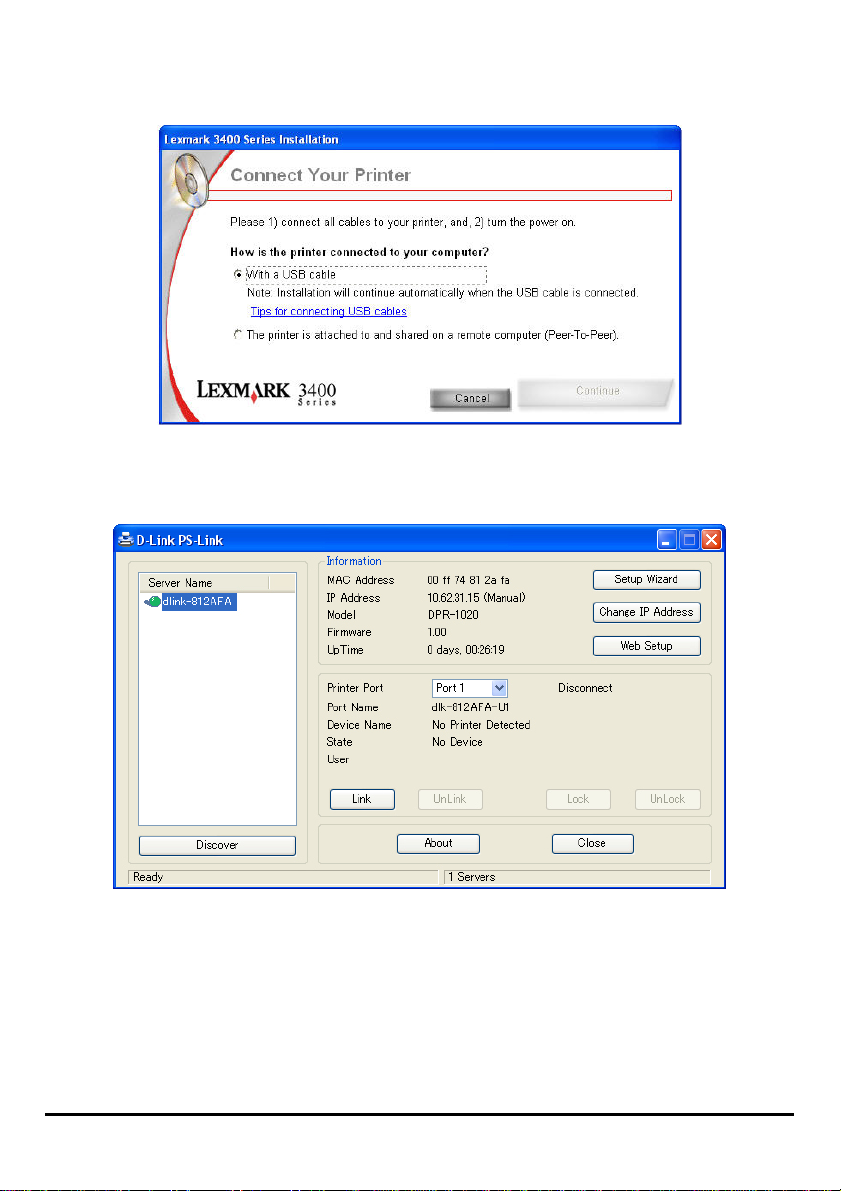
For Lexmark:
1. When the installation program asks you to connect the USB cable of the MFP/GDI
printer to your computer , you are not allowed to ignore it; therefore, you need to use
PS-Link to simulate a USB connection between your printer and computer.
D-Link DPR-1020 - User Manual 38
Page 43
Using the PS Software
2. Launch the PS-Link utility and click the [Link] button.
When the connection is completed successfully, a message will display. Press OK to
exit.
D-Link DPR-1020 - User Manual 39
Page 44

Using the PS Software
3. Now you have to go back to continue the installation of the MFP/GDI printer CD
on your computer in order to complete the rest of installation steps.
4. When the installation of the MFP/GDI printer CD is complete, you may start to use
the multi-functions (Print/Scan/Copy/Fax) of the MFP/GDI printer through your
computer.
D-Link DPR-1020 - User Manual 40
Page 45

Using the PS Software
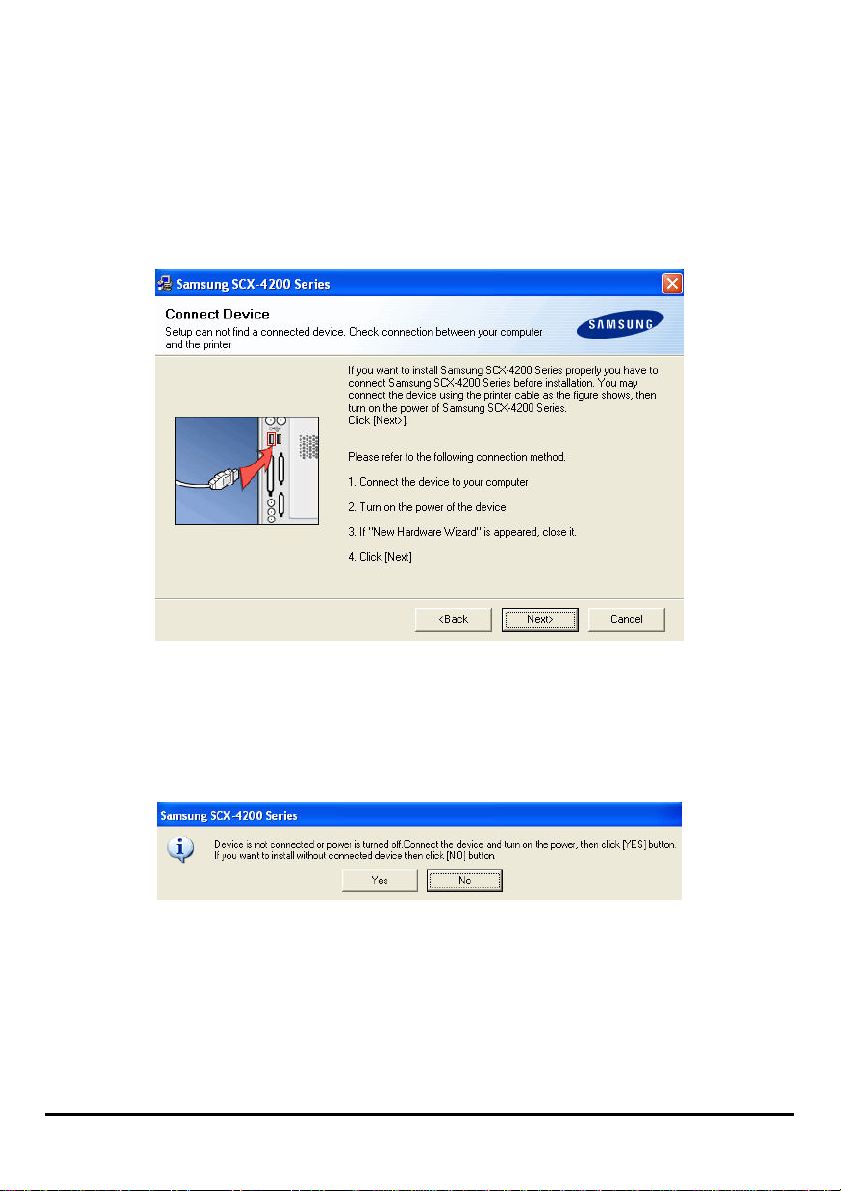
For Samsung:
D-Link DPR-1020 - User Manual 41
Page 46
Using the PS Software
1. When the installation program asks you to connect the printer to your computer,
just ignore it and click the Next> button to continue.
2. The program will prompt you again to connect the two devices, click No and
continue with the rest of the installation.
D-Link DPR-1020 - User Manual 42
Page 47

Using the PS Software
3. Af ter the installation of the MFP/GDI printer CD has finished, you may use
PS-Link to complete the physical connection between the MFP/GDI printer and your
computer.
Click the [Link] button of the PS-Link window as below.
When the connection is successful, a message will display. Press OK to exit.
4. Now the MFP/GDI printer is ready to use through your computer.
D-Link DPR-1020 - User Manual 43
Page 48

Using the PS Software
For Brother:
1. When the installation program asks you to connect the USB cable of the MFP/GDI
printer to your computer , you are not allowed to ignore it; therefore, you need to use
PS-Link to simulate a USB connection between your printer and computer.
D-Link DPR-1020 - User Manual 44
Page 49

Using the PS Software
2. Launch the PS-Link utility and click the [Link] button.
D-Link DPR-1020 - User Manual 45
Page 50

Using the PS Software
When the connection has been completed successfully, a message will display to
inform you. Press OK to exit.
3. Now you have to go back to continue the installation of the MFP/GDI printer CD
on your computer in order to complete the rest of installation steps.
4. When the installation of the MFP/GDI printer CD is complete, you may start to use
the multi-functions (Print/Scan/Copy/Fax) of the MFP/GDI printer through your
computer.
D-Link DPR-1020 - User Manual 46
Page 51

Using the PS Software
For Fuji Xerox:
1. The installation program of the Xerox MFP/GDI printer will not request you to
make a physical connection between the printer and your computer.
2. Af ter the installation has finished, you will have to link the connection between the
MFP/GDI printer and your computer in order to use the printer on your computer. To
do this you need to use PS-Link to link the two devices.
Launch the PS-Link utility and click the [Link] button.
D-Link DPR-1020 - User Manual 47
Page 52

Using the PS Software
When the connection has been completed successfully, a message will display to
inform you. Press OK to exit.
3. Now the MFP/GDI printer is ready to use through your computer.
D-Link DPR-1020 - User Manual 48
Page 53

Using the PS Software
Using PS-Wizard
PS-Wizard (Windows 2000/XP/2003/Vista) is a simple and useful tool for you to
easily add a printer onto your computer without any complex configuration.
The PS-Wizard also allows you to change the IP address settings for the MFP
Server – including such things as IP address, Subnet Mask address and default
Gateway address.
Go to StartÎ ProgramsÎ PS Software, and select PS-Wizard.
D-Link DPR-1020 - User Manual 49
Page 54

Using the PS Software
Print Server: This field allows you to manually discover any connected MFP
Servers and to further configure a selected MFP Server.
LAN: Here you can select to use a Dynamic IP (DHCP) or a static IP address for
the selected MFP server. Click Apply button to implement the new settings.
Port Information: This is the main function of the PS-Wizard and enables you to
easily add a printer onto your computer .
To add a printer, click
, then the following screen will display.
D-Link DPR-1020 - User Manual 50
Page 55

Using the PS Software
The wizard provides three ways for you to select a printer driver:
1. Show currently installed drivers:
Select this option to see if your printer software is already installed. If not, you may
try the next method. Af ter selecting a printer driver, click the Next> button to
continue.
2. Select from manufacturer list:
Select this option, “Select from manufacturer list”, to manually select your printer by
brand and model. Click the Next > button to continue when you have selected the
desired driver.
D-Link DPR-1020 - User Manual 51
Page 56

Using the PS Software
3. Have Disk:
Click the Have Disk button to bring up the following window. Insert the
manufacturer’s installation CD to install the printer driver. After the correct driver is
selected, click the OK button to continue.
After the selection of the printer driver, the wizard will ask you to confirm your
selection again in the following window . You‘re allowed to edit the name of the printer
in the “Network Printer Name” field and enable this printer as the default printer by
checking the box “Use this printer as the default printer for Windows-based
programs”.
D-Link DPR-1020 - User Manual 52
Page 57

Using the PS Software
After you have completed the verification and configuration, click the Next > button
to continue. The printer (in this case the HP Laser Jet 2000) will be automatically
created in the Windows’ Printers and Faxes screen.
D-Link DPR-1020 - User Manual 53
Page 58
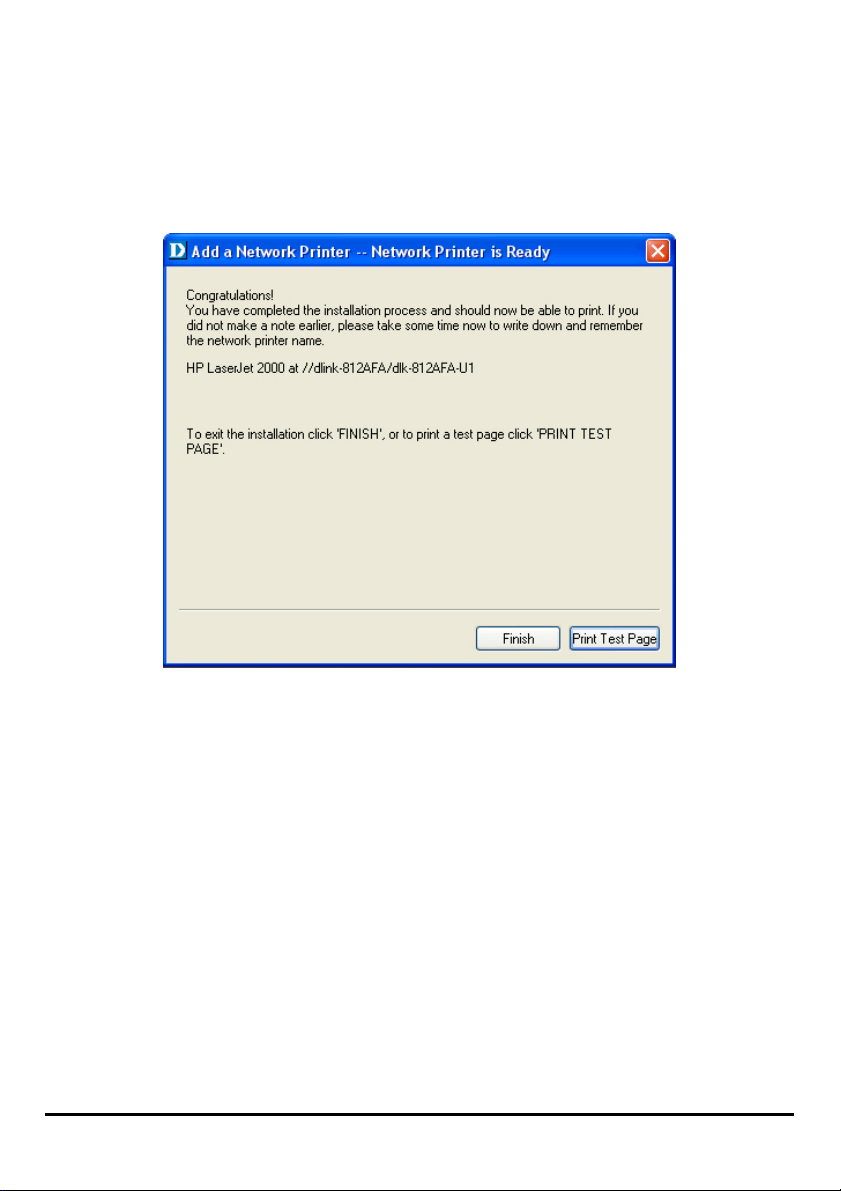
Using the PS Software
When the following screen displays, you can perform a print test by clicking the Print
Te st Pag e button. If everything is operating normally, then click the Finish button to
exit.
D-Link DPR-1020 - User Manual 54
Page 59
Using the Web Configurator
Using the Web Configurator
Home
To begin managing the DPR-1020, launch your browser and go to the following URL
address:
dlink-xxxxxx
xxxxxx being the last six digits of the DPR-1020’s MAC address. The MAC address
can be found on the bottom of the DPR-1020.
You can also access the web configurator by typing the IP addre s s of the device.
The default IP address is 192.168.0.10 but this may have change d if you have a
DHCP server on your network.
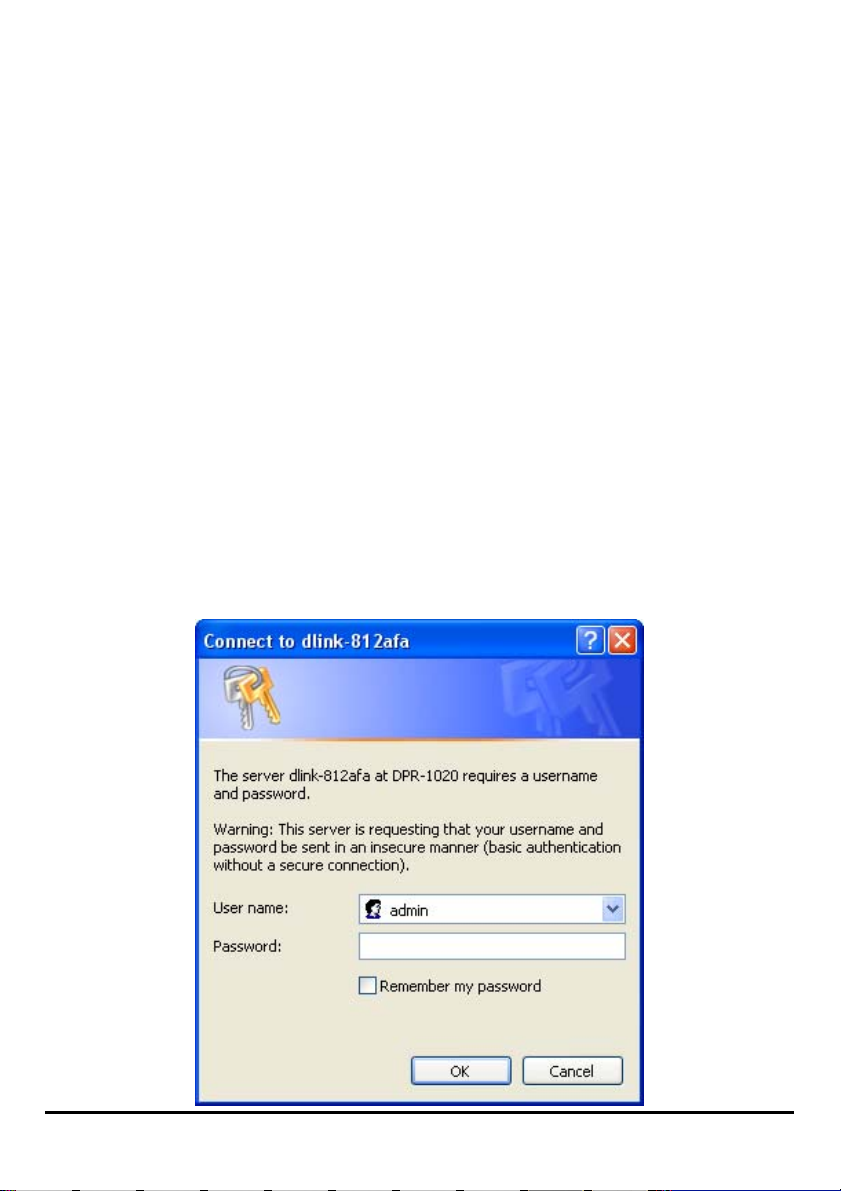
When you enter the correct URL, a password input dialog will pop up. Input “admin”
in the User name field, leave the Password field as blank, and click the OK button
to login.
D-Link DPR-1020 User Manual 55
Page 60

Using the Web Configurator
This is the main screen of the MFP Server’s web configurator. In addition to product
information, there are five links on the top of the main screen: Setup, Advanced,
Maintenance, Status, and Help. Clicking a link from the ba r will display its submenu,
selecting an option from the submenu will display the content in the center column.
D-Link DPR-1020 - User Manual 56
Page 61

Using the Web Configurator
SETUP > Print Server Setup
The Print Server Setup screen allows you to modify the Print Server Name and Port
Name. D-Link does not recommend changing these settings unless asked to do so
by your network administrator.
Print Server Name
In this section, you can configure the basic information of MFP server. The basic
information contains the name of the print server, assigned in the Server Name field,
and a location for the print server, assigned in the Location field (optional).
D-Link DPR-1020 - User Manual 57
Page 62

Using the Web Configurator
Port Settings
In this section you can assign the Port Name for the print server and the description
for the Printer port. It also allows you to select the PJL Printer setting (Yes or No).
NOTE: PJL (Printer Job Language) has certain job requirements that must be
met to work correctly. For more information, please refer to your printer's
manual.
Click the Apply Settings button to save any changes or click Cancel to exit.
D-Link DPR-1020 - User Manual 58
Page 63

Using the Web Configurator
SETUP > LAN Setup
The LAN Setup screen allows you configure the MFP server’s local network settings.
Please note that this section is optional and you should not need to change any of
the settings here to get the MFP server up and running.
TCP/IP
These fields allow you to assign an IP address automatically or ma nually. When
clicking Manually Assign, you should enter the following information in the boxes:
IP Address, Subnet Mask, and Default Gateway.
If you have made changes click Apply Settings to save them or cli ck Cancel to exit.
D-Link DPR-1020 - User Manual 59
Page 64

Using the Web Configurator
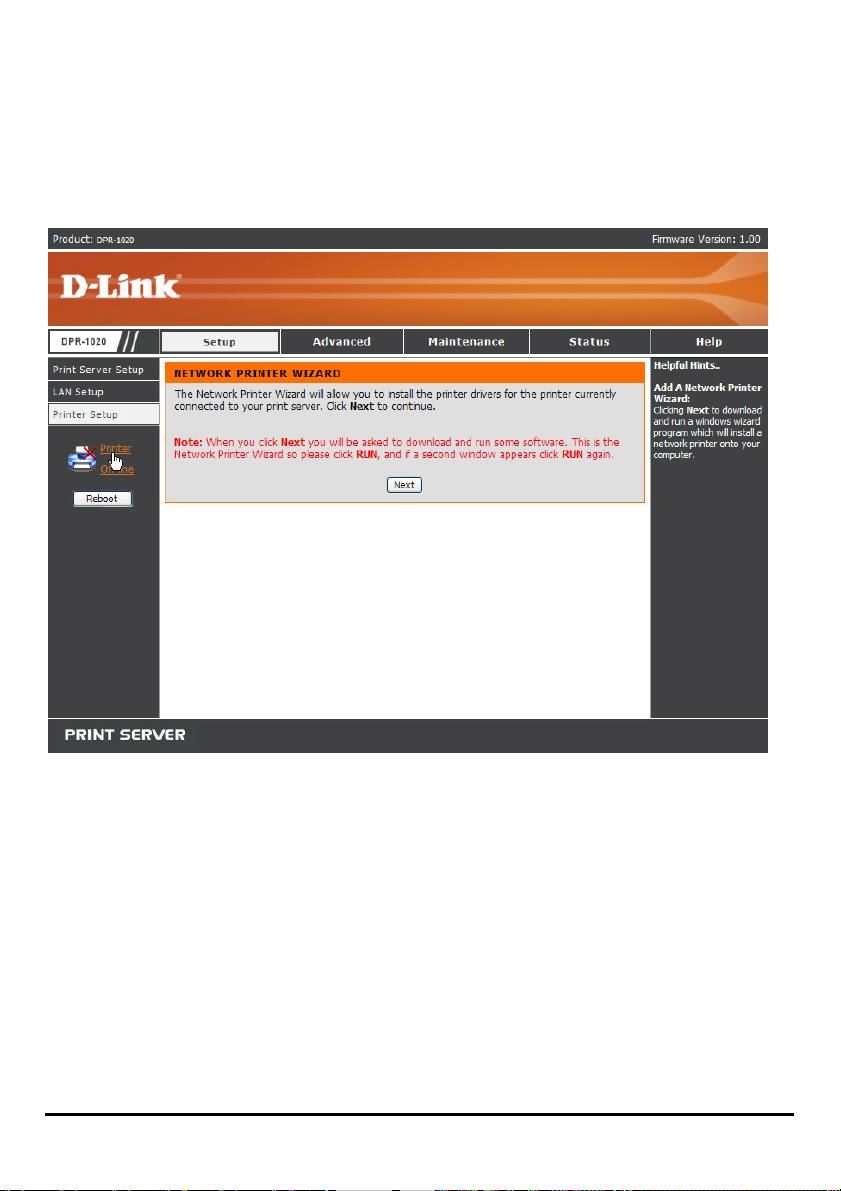
SETUP > Printer Setup
The Printer Setup screen allows you to install the printer drivers for the printer
currently connected to your print server.
D-Link DPR-1020 - User Manual 60
Page 65
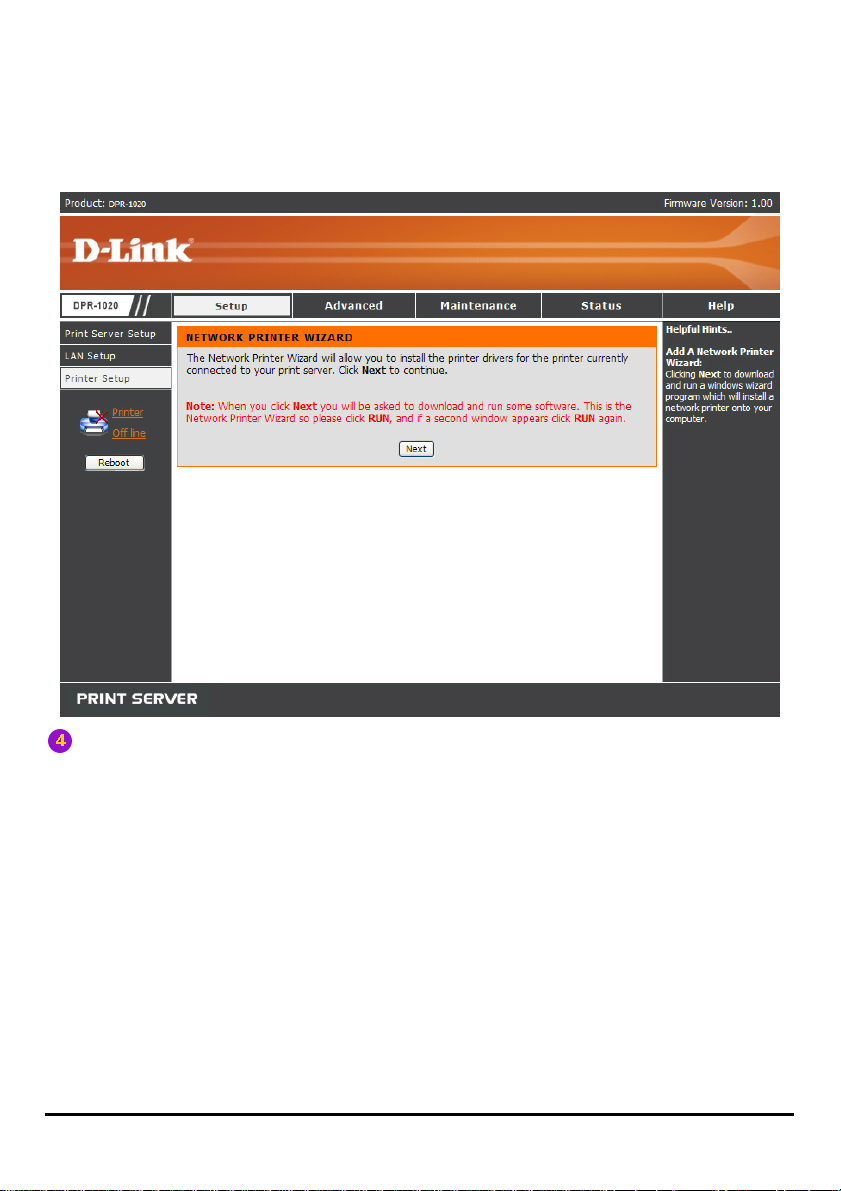
Using the Web Configurator
Network Printer Wizard
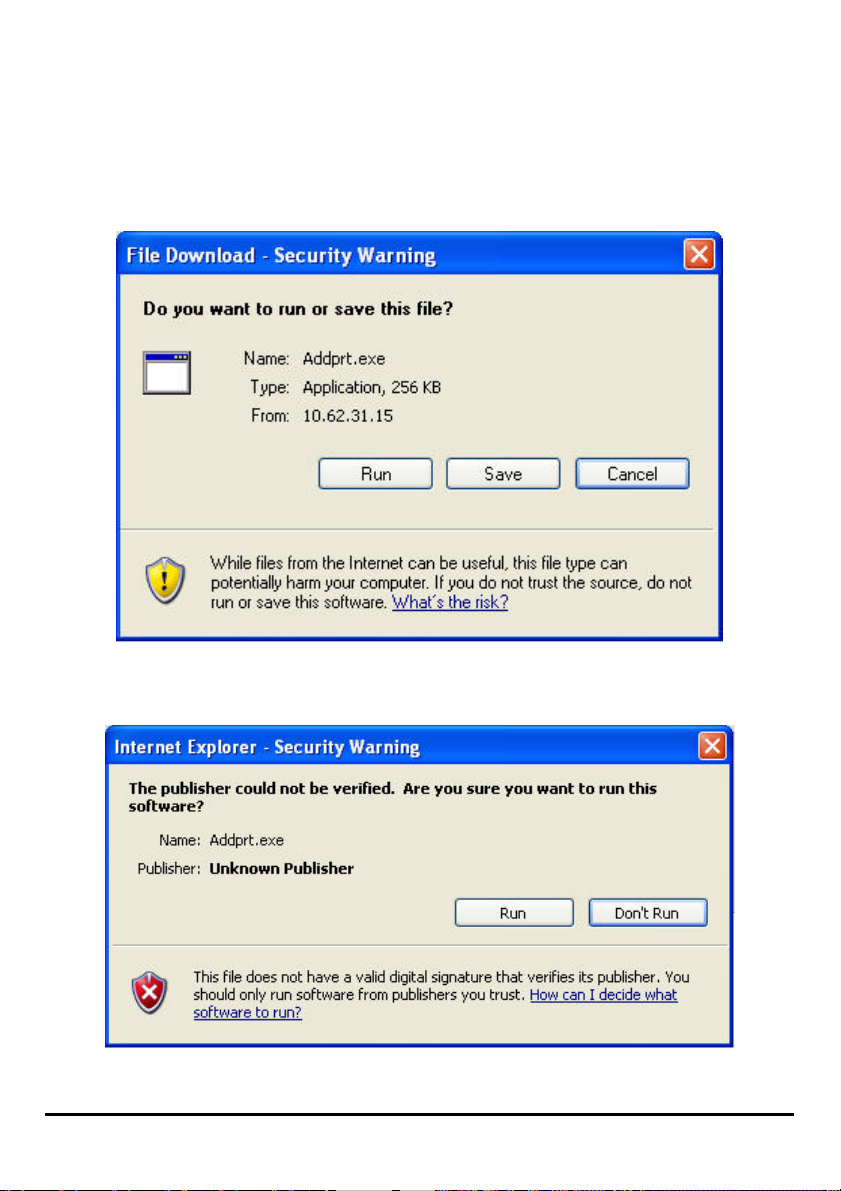
Click Next to download a windows wizard prog ram which will inst all a network p rinter
onto your computer.
Click RUN to download and run the wizard. If a security warning appears click RUN
again.
D-Link DPR-1020 - User Manual 61
Page 66

Using the Web Configurator
Select the printer you wish to add then click Next > to continue.
D-Link DPR-1020 - User Manual 62
Page 67

Using the Web Configurator
The wizard provides three ways for you to select a printer driver:
1. Show currently installed drivers:
Select this option to see if your printer software is already installed. If not, you may
try the next method. Af ter selecting a printer driver, click the Next> button to
continue.
D-Link DPR-1020 - User Manual 63
Page 68

Using the Web Configurator
2. Select from manufacturer list:
Select this option, “Select from manufacturer list”, to manually select your printer by
brand and model. Click the Next > button to continue when you have selected the
desired driver.
D-Link DPR-1020 - User Manual 64
Page 69
Using the Web Configurator
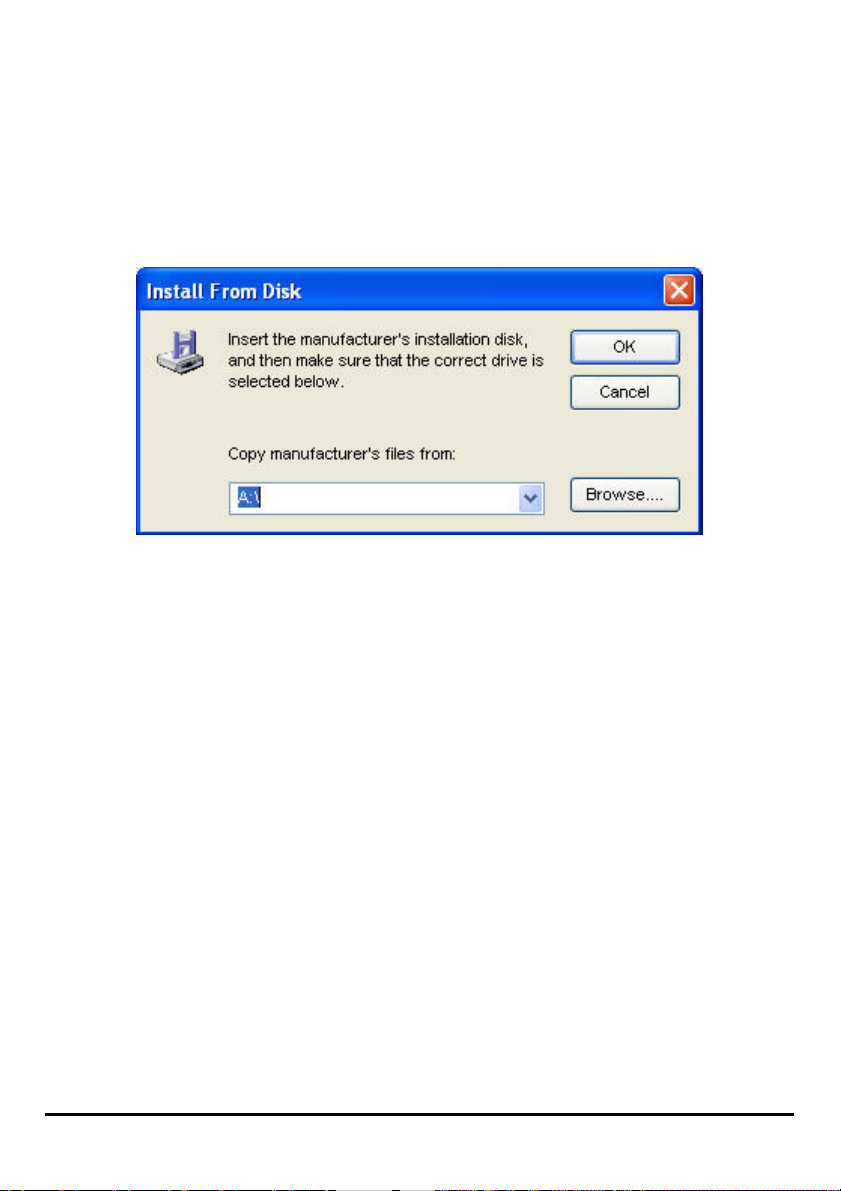
3. Have Disk:
Click the Have Disk button to bring up the following window. Insert the
manufacturer’s installation CD to install the printer driver. After the correct driver is
selected, click the OK button to continue.
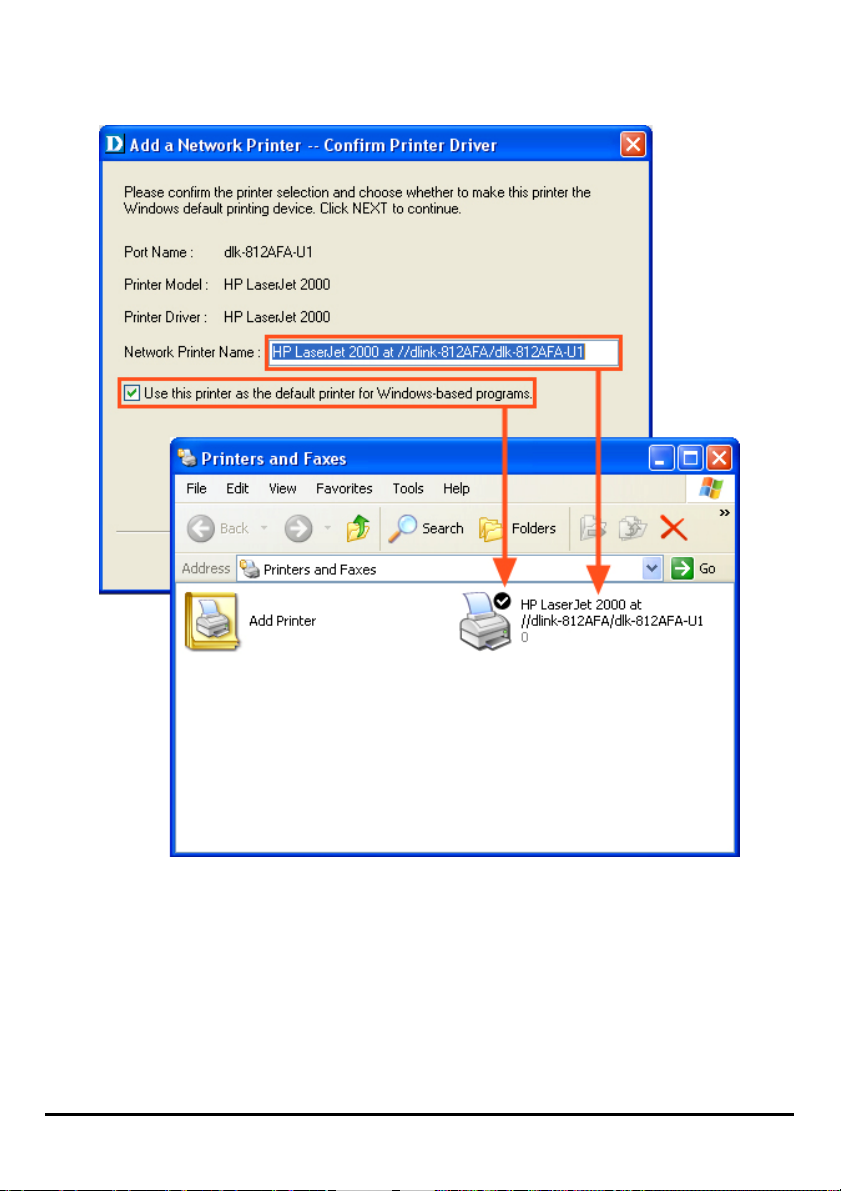
After the selection of the printer driver, the wizard will ask you to confirm your
selection again in the following window . You‘re allowed to edit the name of the printer
in the “Network Printer Name” field and enable this printer as the default printer by
checking the box “Use this printer as the default printer for Windows-based
programs”.
After you have completed the verification and configuration, click the Next > button
to continue. The printer (in this case the HP Laser Jet 2000) will be automatically
created in the Windows’ Printers and Faxes screen.
D-Link DPR-1020 - User Manual 65
Page 70
Using the Web Configurator
D-Link DPR-1020 - User Manual 66
Page 71

Using the Web Configurator
When the following screen displays, you can perform a print test by clicking the Print
Te s t P ag e button. If everything is operating normally, click the OK button then click
the Finish button to exit.
D-Link DPR-1020 - User Manual 67
Page 72

Using the Web Configurator
ADVANCED > Advanced LAN
The Advanced LAN screen allows you to change more advanced network settings
for the MFP server . It’ s recommended n ot to change these settings unless instructed
to do so by your network administrator. The Advanced LAN screen contains three
sections: TCP/IP, Microsoft Network, and AppleTalk.
D-Link DPR-1020 - User Manual 68
Page 73

Using the Web Configurator
TCP/IP
This section contains four configuration options: DNS Server Address, UPnP, Mac
Bonjour/Rendezvous, and Second HTTP Port.
UPnP: This option allows you to enable or disable UPnP.
Mac Bonjour/Rendezvous: This option allows you to enable or disable Mac
Bonjour/Rendezvous.
Second HTTP Port: This option allows you to enable or disable a second
HTTP Port for remote web configuration and IPP printing.
Microsoft Network
Enter the name of the Workgroup that you want the print server associated with.
AppleTalk
AppleTalk Zone: Enter the AppleTalk Zone name into this field .
Chooser Name: This field displays the print server's port name.
Printer Type: Enter the printer's type in this box.
PostScript Level: Select the PostScript Level from the drop-down list box (Level
1 or Level 2).
Font Group: Select the Font Group from the drop-down list box.
Once you have changed the settings in each option, click Apply Settings to store
the settings, or Cancel to exit without saving.
D-Link DPR-1020 - User Manual 69
Page 74

Using the Web Configurator
ADVANCED > User Access
The User Access screen allows you to create and maintain an authorized list of
users that are allowed to access the MFP server.
User Access
By enabling the Enable Authorised User List option (Yes), the users in the User
List below will be permitted to access the print server. Any user who is not added to
this list will not be allowed to access the print server. Once you have changed the
settings, click the Apply Settings button to store the settings or click Cancel to exit.
D-Link DPR-1020 - User Manual 70
Page 75

Using the Web Configurator
Authorised Users
You can add or delete any user to or from the User List. The User List at the bottom
of the screen displays the currently defined users and their related information.
D-Link DPR-1020 - User Manual 71
Page 76

Using the Web Configurator
ADVANCED > E-Mail Notification
The E-Mail Notification screen allows you to assign an E-mail address to the MFP
Server so that you will receive mail when the status of the printer changes. This
screen also allows you to print mail sent to the print server e-mail address.
D-Link DPR-1020 - User Manual 72
Page 77

Using the Web Configurator
Enable E-mail Notification
You can set the print server to send an alert message to your email address when
the printer status changes. To enable this function select Yes next to Enable e-mail
notification. In the field below input the Destination e-mail Address.
E-mail Account Details
You can assign an E-mail address to the print server so that the mail of the account
will be printed out directly through the printer (ASCII text only). To enable this feature,
first enter the E-mail address in the Print Server E-mail Address field.
Then enter the Incoming POP3 server address in the Incoming E-mail (POP3)
Server Address field. Next enter the SMTP server address in the Outgoing E-mail
(SMTP) Server Address field.
If your mail server needs to verify the user, enter the e-mail account user name and
password in the Account (POP3) Name and E-mail Account (POP3) Password
fields.
E-mail Printing
This section is for you to configure E-Mail printing::
E-mail Printing (ASCII Text Only): Allows you to enable or disable E-mail
printing.
Check E-mail Interval: Allows you to set up a time interval in minutes to
check/receive E-mail periodically.
After completing the configuration, click the Apply Settings button to save the new
configuration, or click Cancel to exit without saving.
D-Link DPR-1020 - User Manual 73
Page 78
Using the Web Configurator
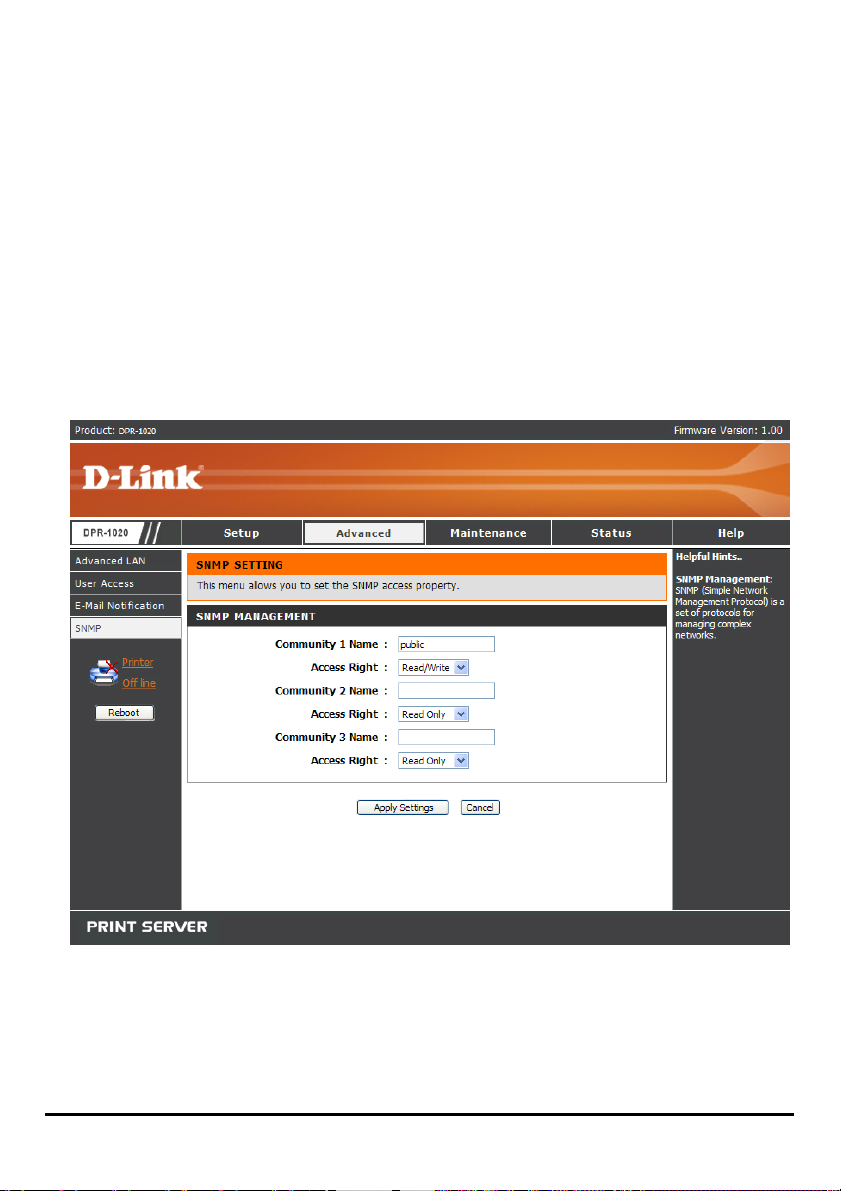
ADVANCED > SNMP
The SNMP screen allows you to use SNMP (Simple Network Management Protocol)
to manage complex networks.
SNMP Management
Community 1/2/3 Name: Enter a name in the Community 1/2/3 Name field, and
configure the Access Right by selecting Read Only or Read/ Write from the
drop-down menu.
D-Link DPR-1020 - User Manual 74
Page 79
Using the Web Configurator
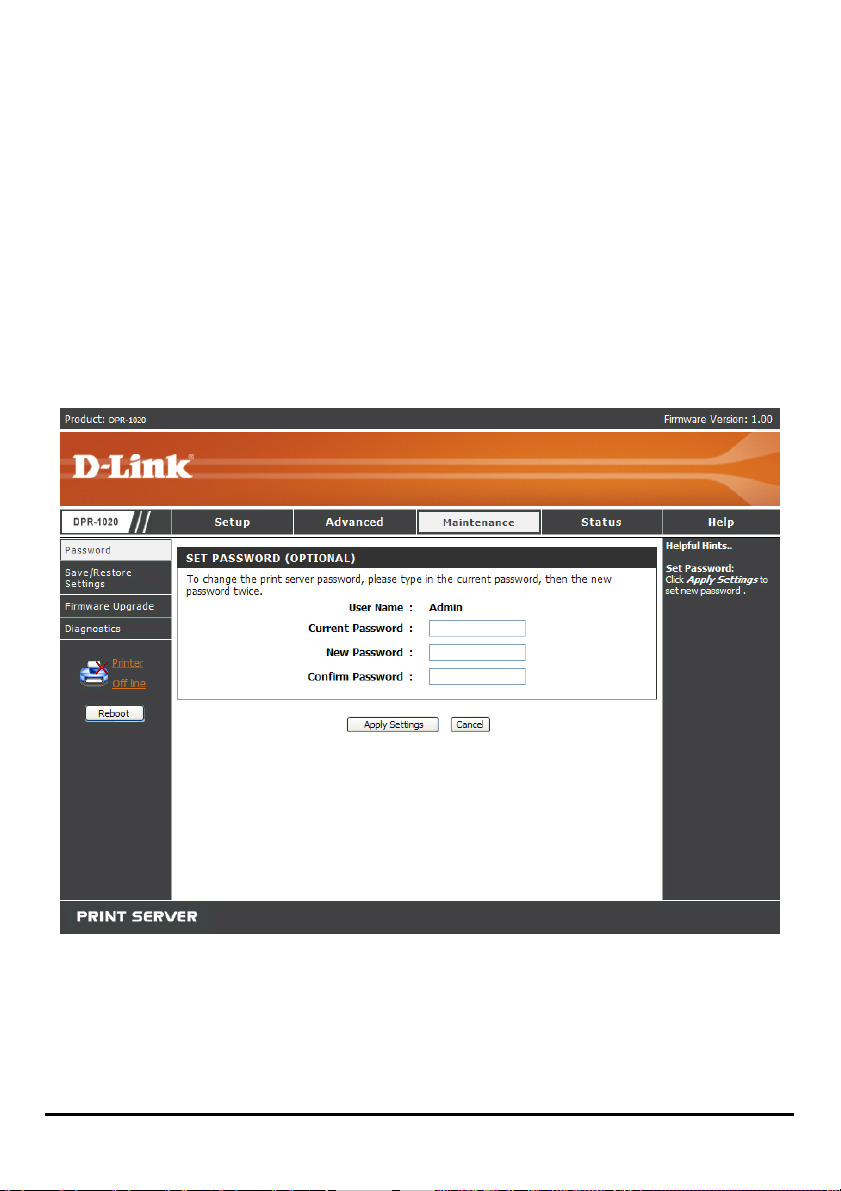
MAINTENANCE > Password
The Password screen allows you to change the password of the MFP server by
entering the current password in the Current Password field and your new
password in the New Password and Confirm Password fields. Click the Apply
Settings button to save the new password, or click Cancel to exit without saving.
NOTE: The default password for the MFP server is blank.
D-Link DPR-1020 - User Manual 75
Page 80

Using the Web Configurator
MAINTENANCE > Save/Restore Settings
The Save/Restore Settings screen allows you to save the current device
configuration in a computer for later backup. It also allows you to reload a previous
configuration.
To save the current device configuration click the [Save] button. T o reload a previous
configuration click [Browse] and select the backup file, then click [Update Settings]
to reload it. You can also return the device to factory default settings by clicking
[Restore Device].
D-Link DPR-1020 - User Manual 76
Page 81

Using the Web Configurator
MAINTENANCE > Firmware Upgrade
The Firmware Upgrade screen displays the current firmware information of the MFP
server. It also allows you to upgra de the firmware of the MFP server when a new
version of firmware is available.
Click Browse to point to the firmware file on your computer, and then click Upgrade.
D-Link DPR-1020 - User Manual 77
Page 82

Using the Web Configurator
MAINTENANCE > Diagnostics
The Diagnostics screen allows you to test the printing for each printer conne cted via
USB to the device. Af ter making the port selection, click the Print Test Page button
to print a test page.
D-Link DPR-1020 - User Manual 78
Page 83

Using the Web Configurator
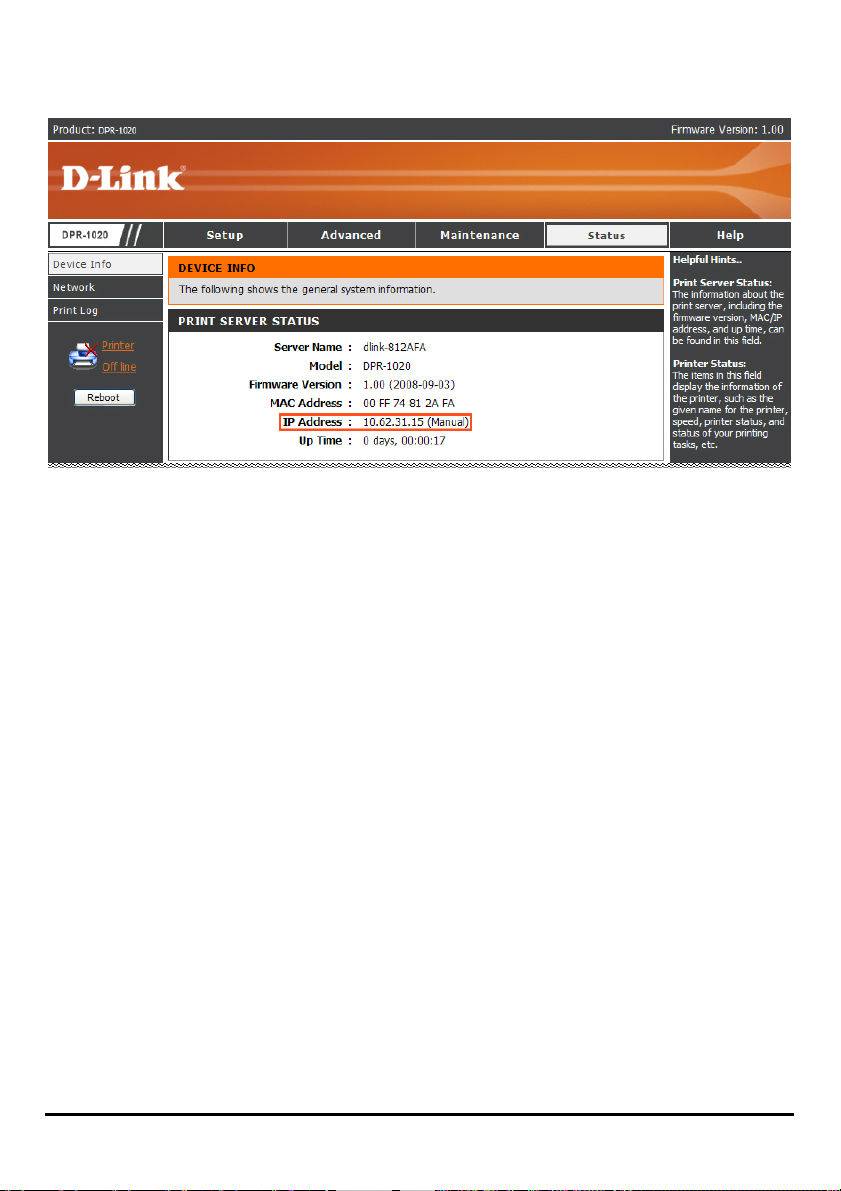
STATUS > Device Info
The Device Info screen displays the status of your MFP Server, printer, and network
for your reference.
D-Link DPR-1020 - User Manual 79
Page 84

Using the Web Configurator
Print Server Status
These fields display the firmware version of the device, MAC/IP address, and up
time.
Printer Status
The items in this section display the information regarding the printer, such as the
printer’s name, speed, printer status, and printing tasks.
LAN Status
You can monitor the network status in this field, including network connection link
status, speed, and packet statistics.
STATUS > Network
The Network screen displays the general network status of your MFP Server,
including:
Auto IP
This field contains the current settings of TCP/IP, including DHCP/BOOTP, UPnP,
and Mac Bonjour/Rendezvous. The items in this section are configured in
Advanced Æ Advanced LAN Æ TCP/IP.
TCP/IP Printing
In this section you can monitor the status of printing tasks through TCP/IP.
Microsoft Network Printing
In this section you can monitor the status of printing tasks through Microsoft
Network.
Mac AppleT alk Printing
In this section you can monitor the status of your printing tasks through Mac
AppleTalk.
D-Link DPR-1020 - User Manual 80
Page 85

Using the Web Configurator
D-Link DPR-1020 - User Manual 81
Page 86
Using the Web Configurator
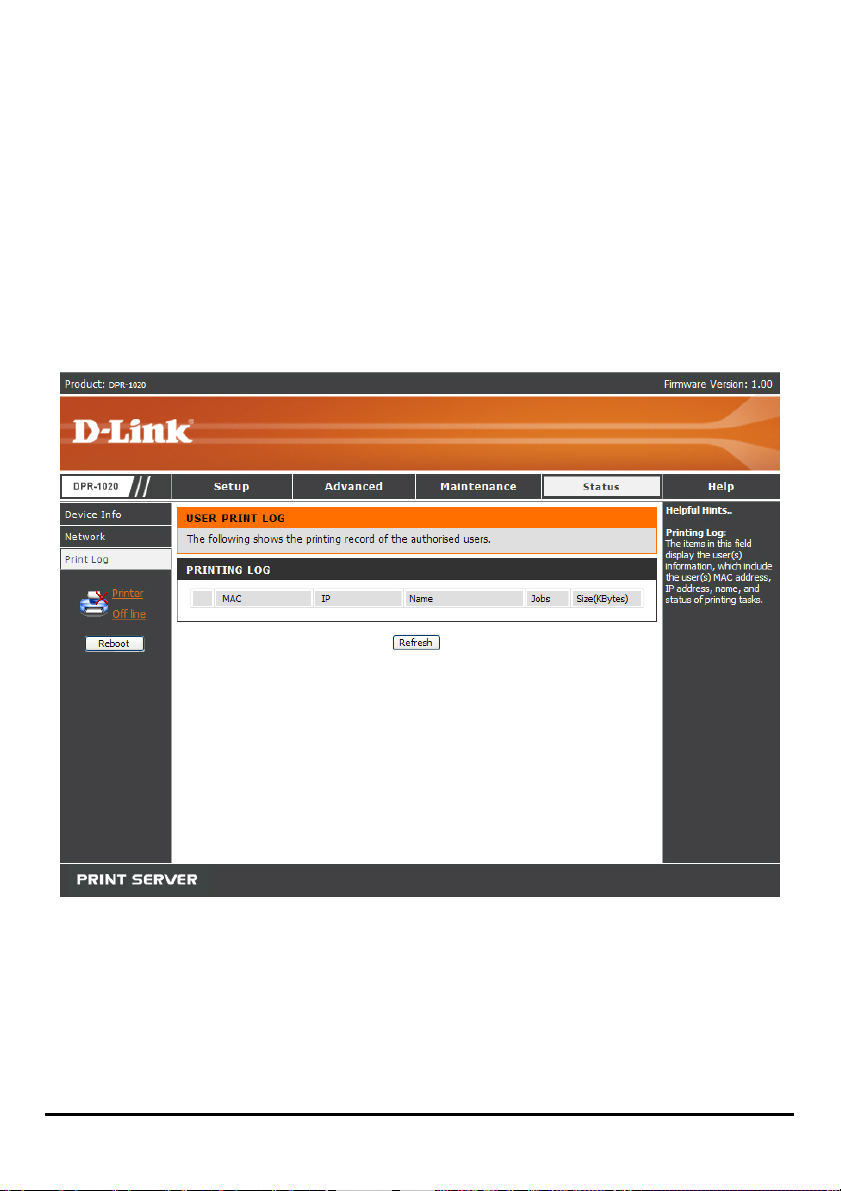
STATUS >Print Log
The Print Log screen displays the printing records of authorized users.
Printing Log
The fields below display the user(s) information, which include the user(s) MAC
address, IP address, name, status of printing t asks and size of printing tasks.
D-Link DPR-1020 - User Manual 82
Page 87
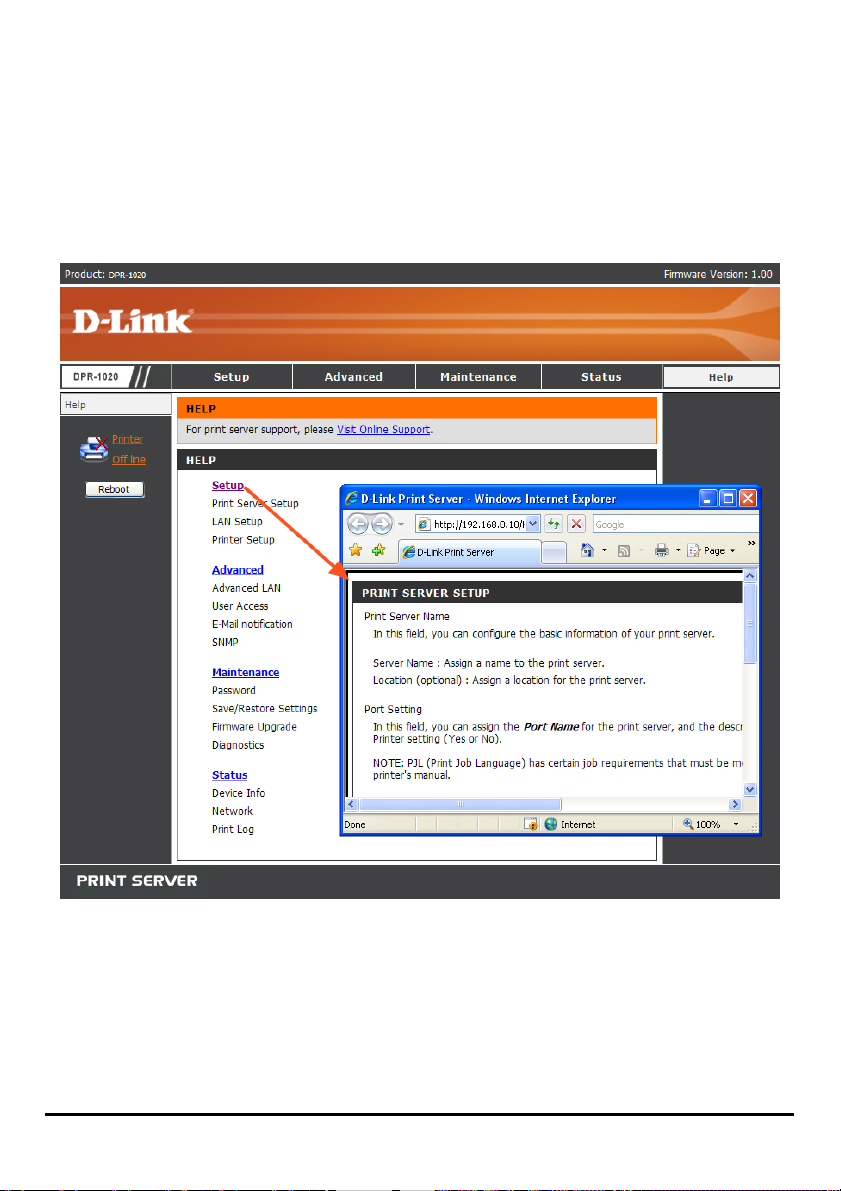
Using the Web Configurator
HELP
The Help screen provides you with additional help regarding the print server.
D-Link DPR-1020 - User Manual 83
Page 88

Using the Web Configurator
Reboot
If you want to reset the print server, you can just click the [Reboot] to restart. It will
take a few seconds to restart.
D-Link DPR-1020 - User Manual 84
Page 89
Using the Web Configurator
Refresh Printer Status
Click the printer in the left column to refresh the status of the printer.
D-Link DPR-1020 - User Manual 85
Page 90

TCP/IP Printing for Windows Vista
TCP/IP Printing for Windows Vista
Go to Start Î Control Panel Î Printers.
D-Link DPR-1020 User Manual 86
Page 91

TCP/IP Printing for Windows Vista
Click Add a printer.
Select the first option, Add a local printer, and then click Next.
D-Link DPR-1020 - User Manual 87
Page 92

TCP/IP Printing for Windows Vista
Select the second option, Create a new port, and highlight Standard TCP/IP Port
from the pull-down menu. Click Next.
D-Link DPR-1020 - User Manual 88
Page 93

TCP/IP Printing for Windows Vista
In the Hostname or IP address field, type the IP address of the MFP server (e.g.
10.62.31.15), this address can be found in the PRINTER SERVER STATUS screen
of the MFP server’s web configurator. The Port Name field will automatically fill in.
Click Next.
D-Link DPR-1020 - User Manual 89
Page 94
TCP/IP Printing for Windows Vista
D-Link DPR-1020 - User Manual 90
Page 95

TCP/IP Printing for Windows Vista
In the next screen highlight the printer you wish to add. If the printer is not on the list,
click [Have Disk] and insert the printer driver disk that came with your printer to
install the printer drivers.
Click Next
D-Link DPR-1020 - User Manual 91
Page 96
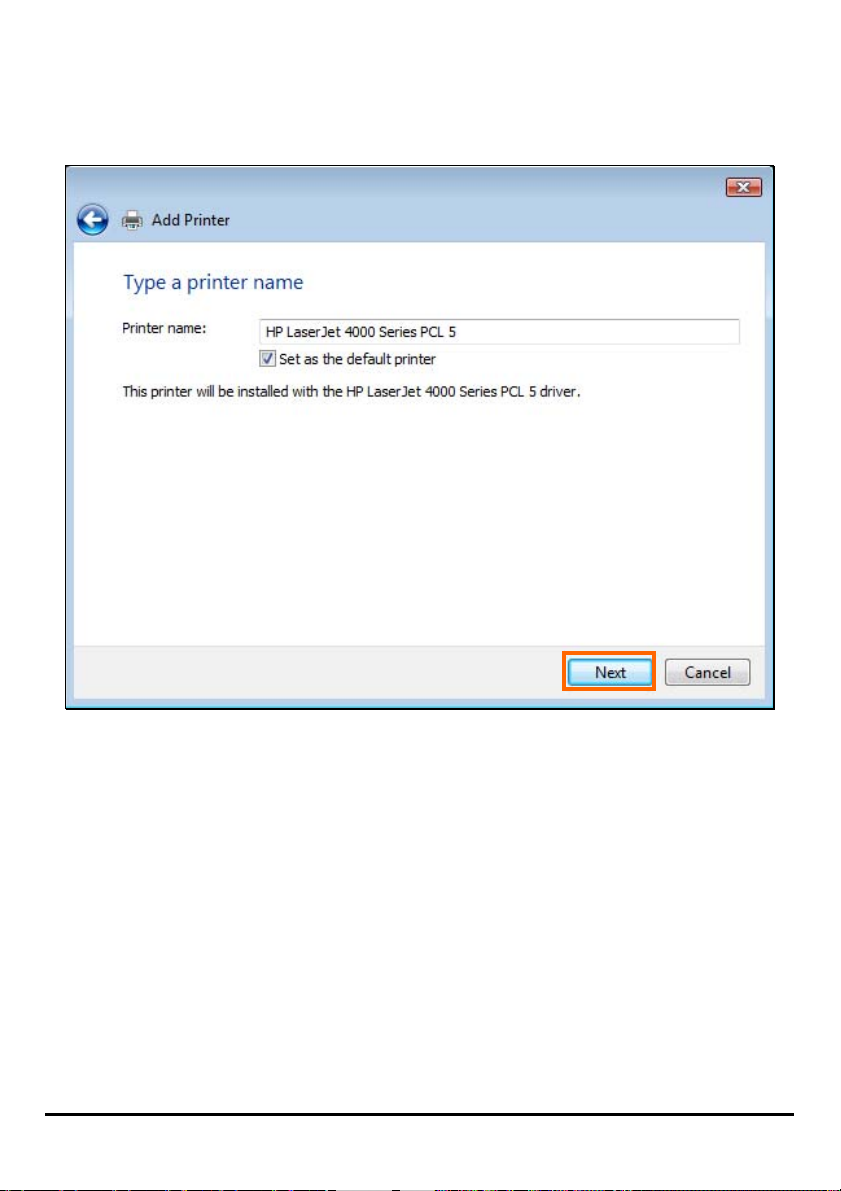
TCP/IP Printing for Windows Vista
Click Next to start installing the printer.
D-Link DPR-1020 - User Manual 92
Page 97

TCP/IP Printing for Windows Vista
After clicking Print a test page, a small dialogue box will display as below. Click
Close.
D-Link DPR-1020 - User Manual 93
Page 98

TCP/IP Printing for Windows Vista
Click Finish.
D-Link DPR-1020 - User Manual 94
Page 99

TCP/IP Printing for Windows Vista
The printer is now ready to use.
D-Link DPR-1020 - User Manual 95
Page 100

TCP/IP Printing for Windows XP
TCP/IP Printing for Windows XP
Go to Start Î Printers and Faxes Î Add a Printer.
When the following screen displays, click Next.
D-Link DPR-1020 User Manual 96
 Loading...