

D-link DIR-450 User Guide
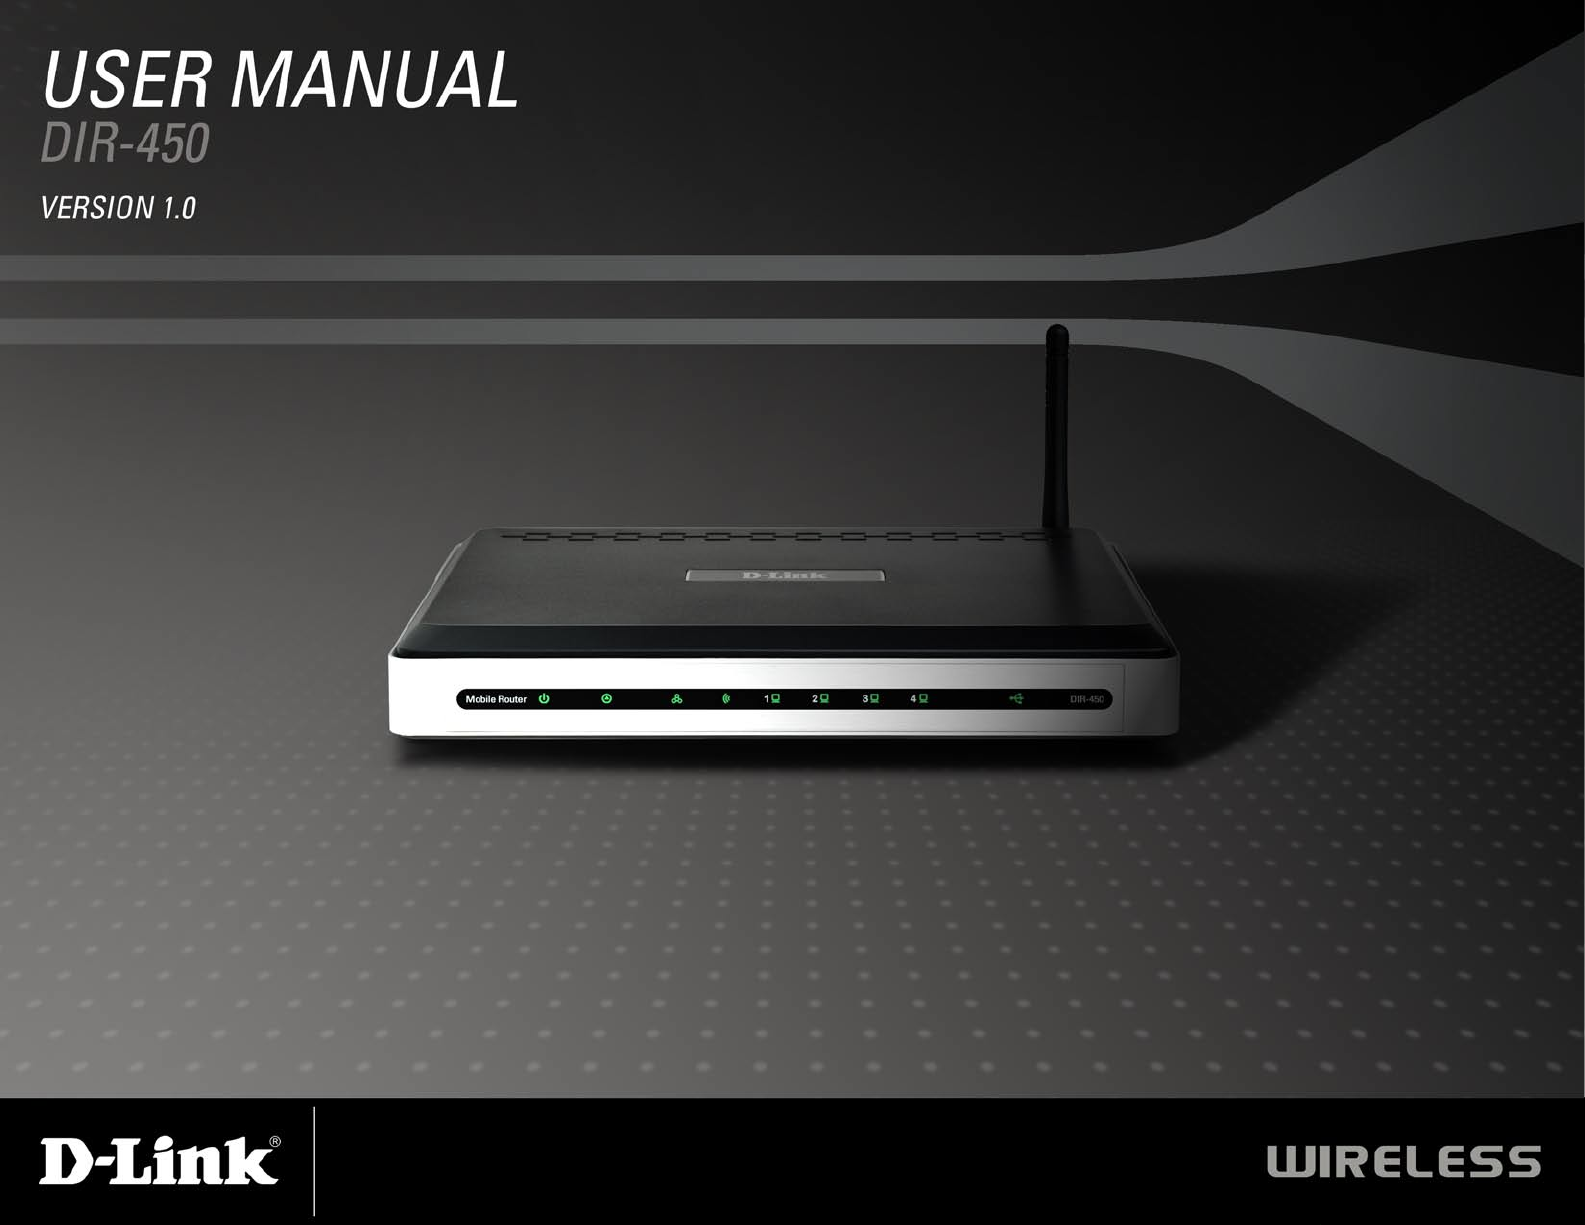

Table of Contents
Table of Contents
Product Overview ........................................................ 4
Package Contents ...................................................4
System Requirements ............................................. 4
Introduction ..............................................................5
Features ..................................................................6
Hardware Overview ................................................. 8
Connections .......................................................8
LEDs .................................................................. 9
Installation ..................................................................10
Connect to your Network ....................................... 10
Wireless Installation Considerations ...................... 12
Conguration ............................................................. 13
Web-based Conguration Utility ............................ 13
Setup Wizard ................................................... 14
EVDO Setup .................................................... 17
Wireless Settings ............................................. 18
Network Settings .............................................. 20
Advanced Wireless Settings ............................ 28
Advanced Network Settings ............................. 29
Administrator Login Name: ........................... 30
Administrator Password: .............................. 30
Remote Management: .................................. 30
Administrator Settings ...................................... 30
Time Settings ...................................................31
System Settings ...............................................32
Firmware Upgrade ........................................... 33
DDNS ............................................................... 34
System Check .................................................. 35
Schedules ........................................................ 36
Log Settings .....................................................37
Device Information ...........................................38
Log ...................................................................39
Stats ................................................................. 40
Wireless Stats ..................................................40
Support ............................................................ 41
DHCP Server Settings ..................................... 21
Virtual Server ................................................... 22
Port Forwarding Rules ..................................... 23
Application Rules ............................................. 24
Network Filter ................................................... 25
Website Filter ...................................................26
Firewall Settings ..............................................27
Wireless Security.......................................................42
What is WEP? .......................................................42
Congure WEP ......................................................43
What is WPA? .......................................................44
Congure WPA-PSK .............................................45
Congure WPA (RADIUS) .....................................46
2D-Link DIR-450 User Manual

Table of Contents
Connect to a Wireless Network ................................ 47
Using Windows® XP ............................................... 47
Congure WEP ...................................................... 48
Congure WPA-PSK .............................................50
Troubleshooting ........................................................ 52
Wireless Basics ......................................................... 54
What is Wireless? ..................................................55
Tips ........................................................................57
Wireless Modes ..................................................... 58
Networking Basics .................................................... 59
Check your IP address ..........................................59
Statically Assign an IP address ............................. 60
Technical Specications........................................... 61
Contacting Technical Support ................................. 63
Warranty .....................................................................64
Registration ................................................................ 70
3D-Link DIR-450 User Manual
Section 1 - Product Overview
• D-Link DIR-450 Mobile Router
• Power Adapter
• Ethernet Cable
• Manual and Warranty on CD
Note: Using a power supply with a different voltage rating than the one included
with the DIR-450 will cause damage and void the warranty for this product.
Product Overview
Package Contents
System Requirements
• A compatible 32-bit PCMCIA (EVDO) card with service*.
®
• Computers with Windows
adapter
• Internet Explorer Version 6.0 or Netscape Navigator
* Subject to services and service terms available from your carrier.
, Macintosh®, or Linux-based operating systems with an installed Ethernet
™
Version 6.0 and above (for conguration)
4D-Link DIR-450 User Manual

Section 1 - Product Overview
Introduction
D-Link announces a fast, secure mobile router which allows you to share a high speed Internet connection virtually
anywhere by connecting an EV-DO notebook adapter. You can get a high speed Internet connection just about anywhere
within your wireless broadband network. This router is extremely useful in situations where a wired broadband connection
is not available. Quickly set up a Wi-Fi hotspot and provide your workgroup with an Internet connection to check email
and browse the web or share le. Maximize your investment in your mobile Internet access subscription by using this
router as a xed broadband Internet solution for the home instead of paying additional fees for cable or DSL.
5D-Link DIR-450 User Manual

Section 1 - Product Overview
Features
Device Interfaces
• LAN Ethernet Support
• 4 Ports 10/100 Mps switch
• Complies with IEEE 802.3u specication
• Supports Auto-Negotiation
• Supports Auto-MDI/MDIX
• Supports IEEE 802.3x Flow Control in Full Duplex mode
• 3G Module Slot
• Connecting an EVDO Notebook Adapter
Function support
• Network Address Translation
• Stateful Packet Inspection
• TCP Connection state & sequence number validation
• Virtual Server
• Virtual Server is used to allow Internet users access to LAN services.
• Port Triggering / Special Applications support
• Special Application is used to run applications that require multiple connections.
•
• Apply to WLAN and/or LAN. Select type of lter - Allow list or Deny list 64 Entries.
• DHCP Server
• Set up as a DHCP Server to distribute IP addresses to the LAN.
• DNS Relay
• WAN DNS Servers if available OR DNS requests directed to the Gateway IP address.
MAC Address Filtering
6D-Link DIR-450 User Manual

Section 1 - Product Overview
• Access Control
• Allow Policy Based on Schedule & IP Address
• Deny specic port ranges (8 Ranges Per Policy)
• Allow all WEB access OR Allow access to a specied list of domian names (64 Domains)
•
Web base setup wizard
• Step by step setting procedure
• L2TP Pass Through
• VPN Pass Through
• IPsec Pass Through
CONFIGURATION & ADMINISTRATION
• Web based interface
• Web Based Conguration Wizard
• Dynamic DNS
• E-mail Reporting
• Statistics
• Firmware upgrade
• Current Time & Daylight savings adjustment
• Conguration Save & Restore
• Remote management
• Device Manager
WIRELESS FEATURES
• SuperG & Turbo (108 Mbps*) modes
• Wireless Security:
• WEP 64/128 bit
• WPA/WPA2
• WPA-PSK/WPA2-PSK
• Channel Select
• SSID Broadcast
• TX Power Adjust
• WMM
• WCN
* Maximum wireless signal rate derived from IEEE Standard 802.11g specications. Actual data throughput will vary. Network conditions and
environmental factors, including volume of network trafc, building materials and construction, and network overhead, lower actual data throughput
rate. Environmental conditions will adversely affect wireless signal range.
7D-Link DIR-450 User Manual

Section 1 - Product Overview
Receptor for the
Power Adapter.
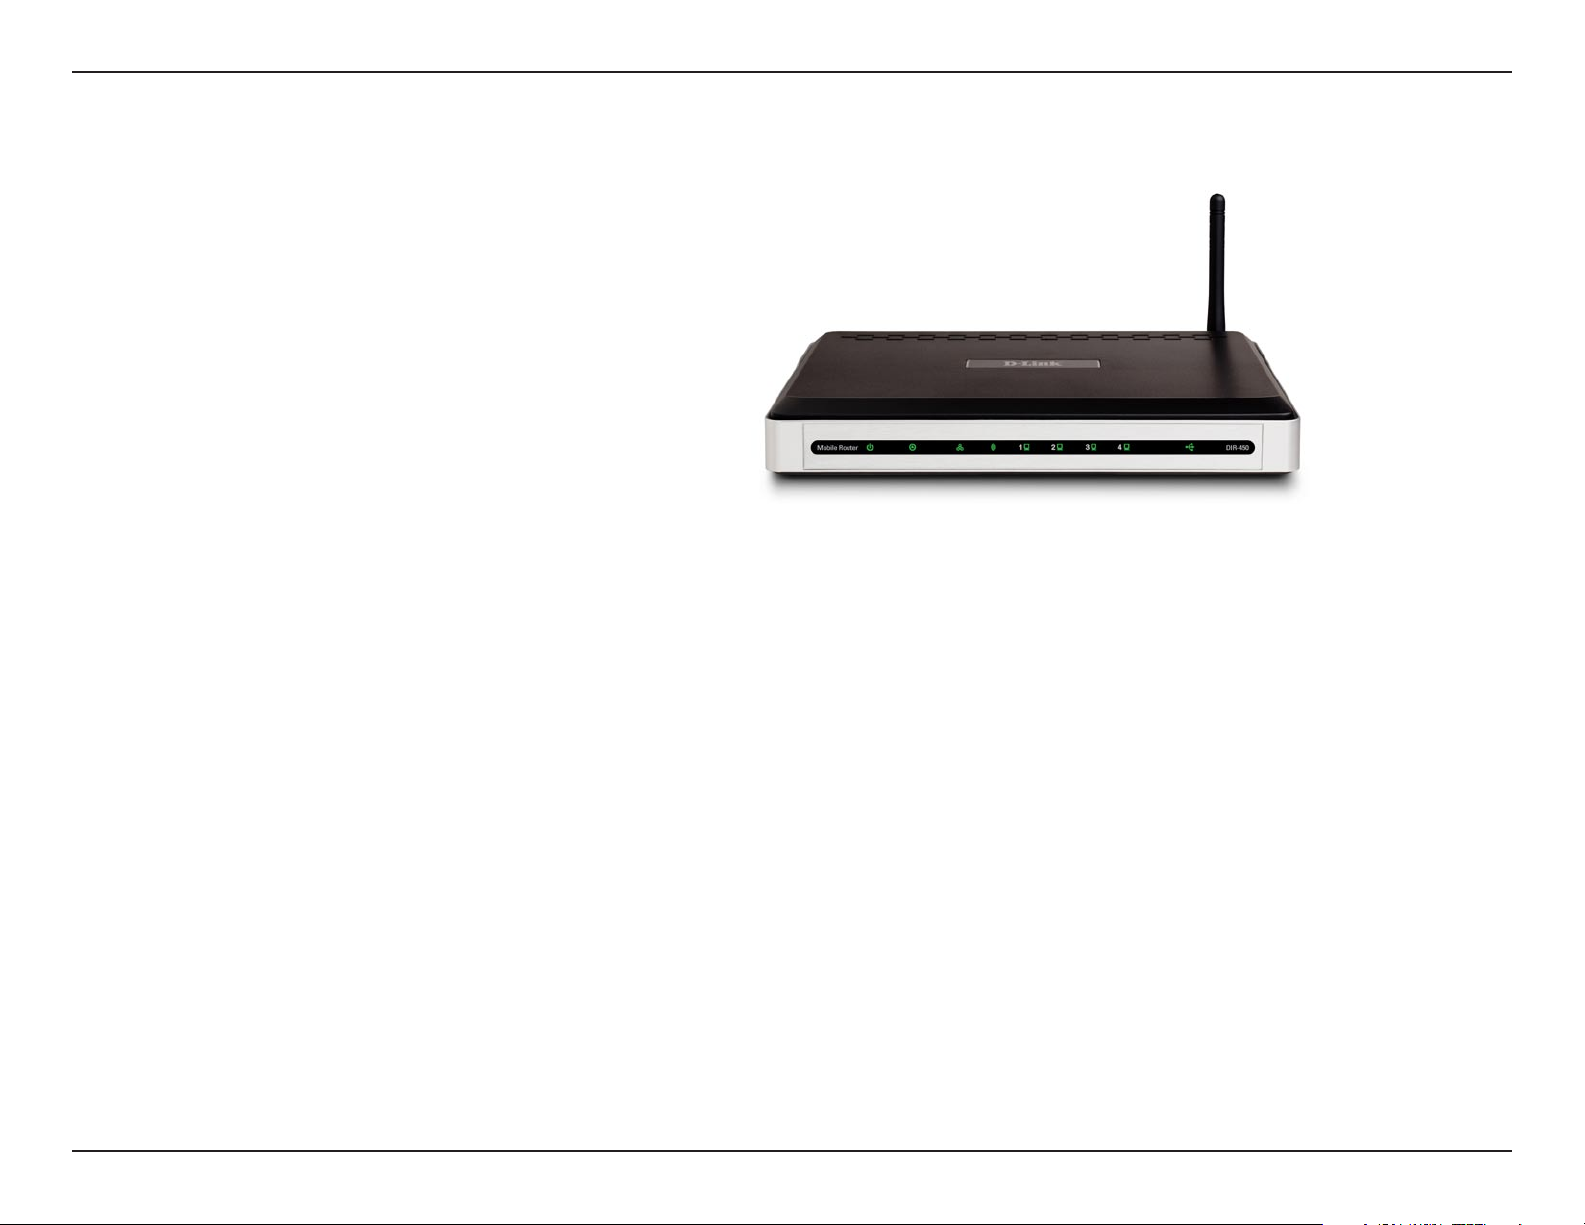
Hardware Overview
Connections
Internet (EVDO) Card Slot
Use this slot if a 32-bit PCMCIA
card is used for your Internet
connection.
Pressing the Reset Button restores
the router to its original factory
default settings.
These ports automatically sense
the cable type when connecting
to Ethernet-enabled computers.
These are Auto MDI/MDIX ports.
8D-Link DIR-450 User Manual
Section 1 - Product Overview
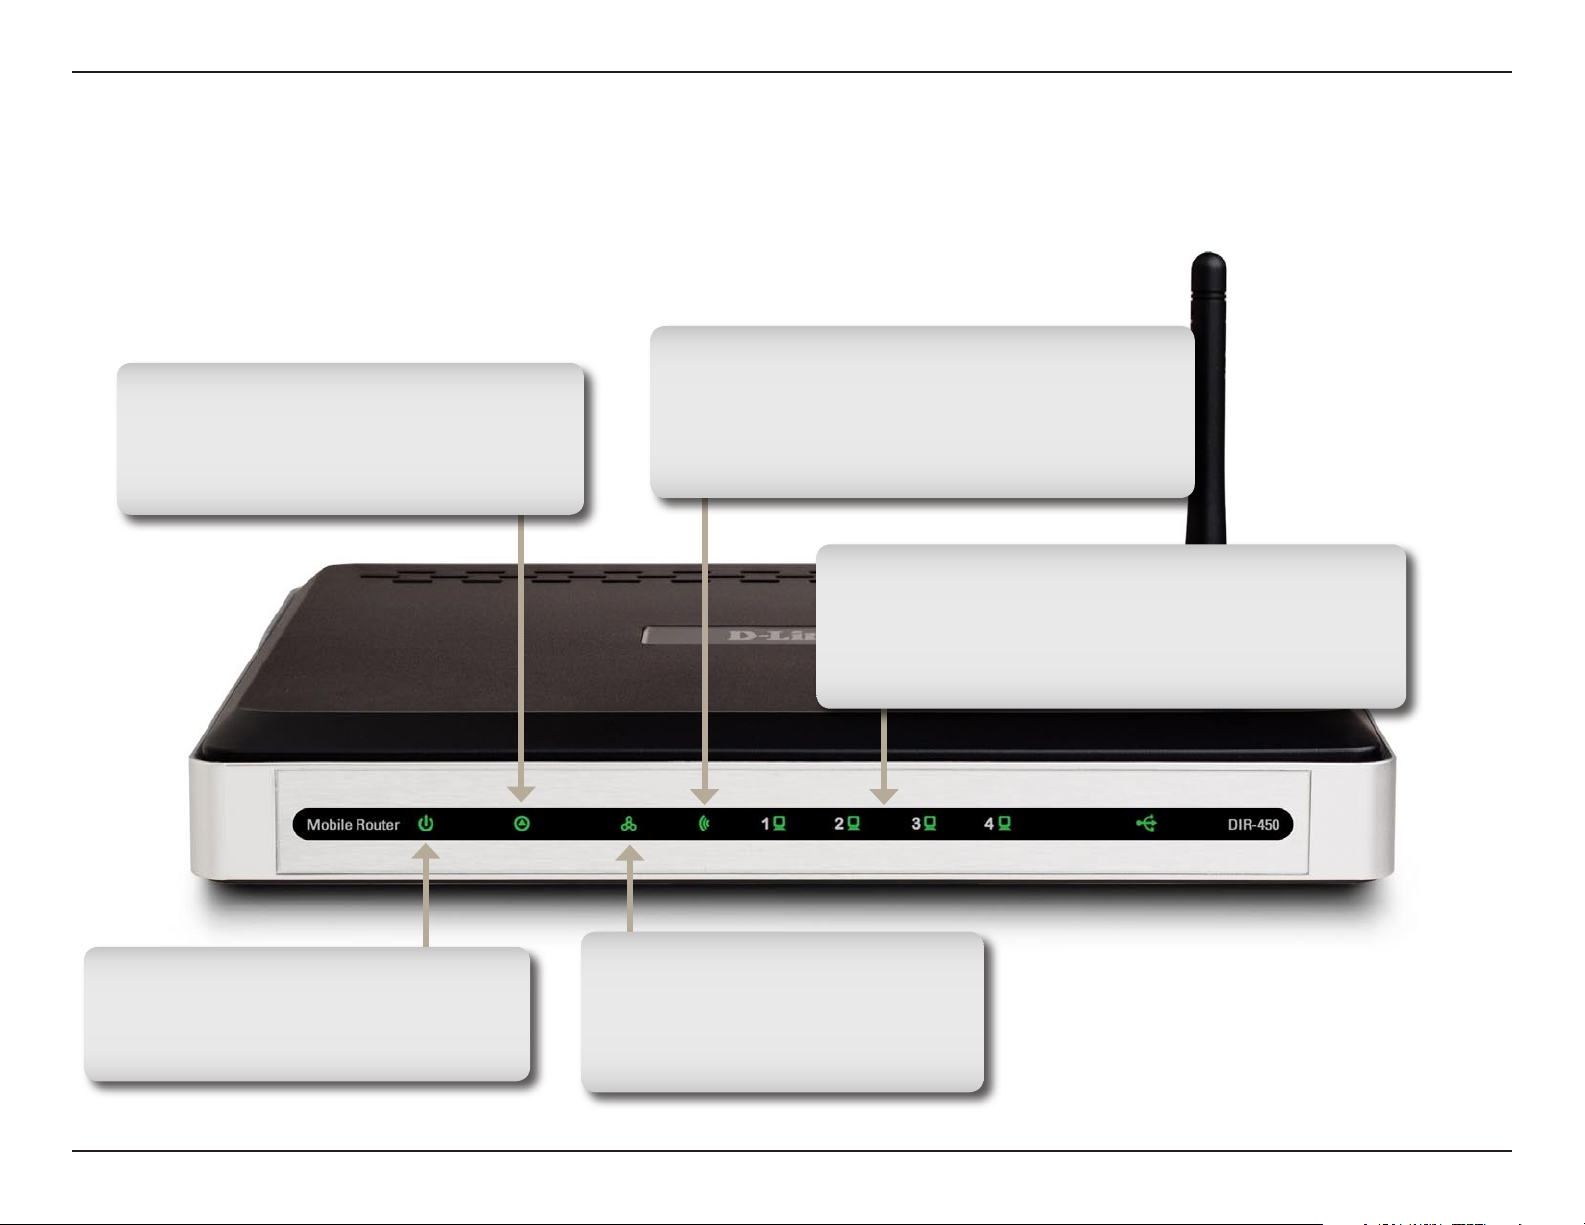
Status LED
A solid blue light indicates that
the DIR-450 is ready.
Hardware Overview
LEDs
WLAN LED
A solid light indicates that the wireless
segment is ready. This LED blinks during
wireless data transmission.
Local Network LEDs
A solid light indicates a connection to an
Ethernet-enabled computer on ports 1-4.
This LED blinks during data transmission.
Power LED
A solid light indicates a proper
connection to the power supply.
Internet (EVDO) LED
A solid blue light indicates
connection on the (EVDO)
port.
9D-Link DIR-450 User Manual

Section 2 - Installation
Installation
This section will walk you through the installation process. Placement of the router is very important. Do not place the
router in an enclosed area such as a closet, cabinet, or in the attic or garage.
Connect to your Network
Note: Ensure that power to your DIR-450 Mobile Router is not connected before performing the installation
steps below.
32-bit PCMCIA (EVDO) Card Connection
1. Attach the antenna.
a. Remove the antenna from its plastic wrapper.
b. Screw the antenna in a clockwise direction to the back panel of the unit.
c. Once secured, position the antenna upward at its connecting joint. This will ensure optimal reception.
2. Insert your wireless 32-bit PCMCIA (EVDO) card into the Internet 32-bit PCMCIA Card Slot.
3. Insert the Ethernet cable into LAN Port 1 on the back panel of the DIR-450 Mobile Router, and an available Ethernet
port on the network adapter in the computer you will use to congure the unit.
Note: The DIR-450 Mobile Router LAN Ports are “Auto-MDI/MDIX.” This provides either patch or crossover
Ethernet cable LAN Port access.
10D-Link DIR-450 User Manual

Section 2 - Installation
4. Connect the power adapter to the receptor on the back panel of your DIR-450 Mobile Router. Then plug the other
end of the power adapter into a wall outlet or power strip.
a. The Power LED will turn ON to indicate power has been applied.
b. Other LEDs will ash ON and OFF as the DIR-450 Mobile Router performs initialization and Internet connection
processes. This will take a few minutes.
c. When complete, the following LEDs will illuminate blue: Power, Status, Internet, WLAN, and LAN Port 1 (or your
specic LAN Port connection).
11D-Link DIR-450 User Manual

Section 2 - Installation
Wireless Installation Considerations
The D-Link mobile router lets you access your network using a wireless connection from virtually anywhere within the
operating range of your wireless network. Keep in mind, however, that the number, thickness and location of walls,
ceilings, or other objects that the wireless signals must pass through, may limit the range. Typical ranges vary depending
on the types of materials and background RF (radio frequency) noise in your home or business. The key to maximizing
wireless range is to follow these basic guidelines:
1. Keep the number of walls and ceilings between the D-Link router and other network devices to a
minimum - each wall or ceiling can reduce your adapter’s range from 3-90 feet (1-30 meters.) Position
your devices so that the number of walls or ceilings is minimized.
2. Be aware of the direct line between network devices. A wall that is 1.5 feet thick (.5 meters), at a
45-degree angle appears to be almost 3 feet (1 meter) thick. At a 2-degree angle it looks over 42 feet
(14 meters) thick! Position devices so that the signal will travel straight through a wall or ceiling (instead
of at an angle) for better reception.
3. Building Materials make a difference. A solid metal door or aluminum studs may have a negative effect on
range. Try to position access points, wireless routers, and computers so that the signal passes through
drywall or open doorways. Materials and objects such as glass, steel, metal, walls with insulation, water
(sh tanks), mirrors, le cabinets, brick, and concrete will degrade your wireless signal.
4. Keep your product away (at least 3-6 feet or 1-2 meters) from electrical devices or appliances that
generate RF noise.
5. If you are using 2.4GHz cordless phones or X-10 (wireless products such as ceiling fans, lights, and
home security systems), your wireless connection may degrade dramatically or drop completely. Make
sure your 2.4GHz phone base is as far away from your wireless devices as possible. The base transmits
a signal even if the phone in not in use.
12D-Link DIR-450 User Manual
Section 3 - Configuration
Configuration
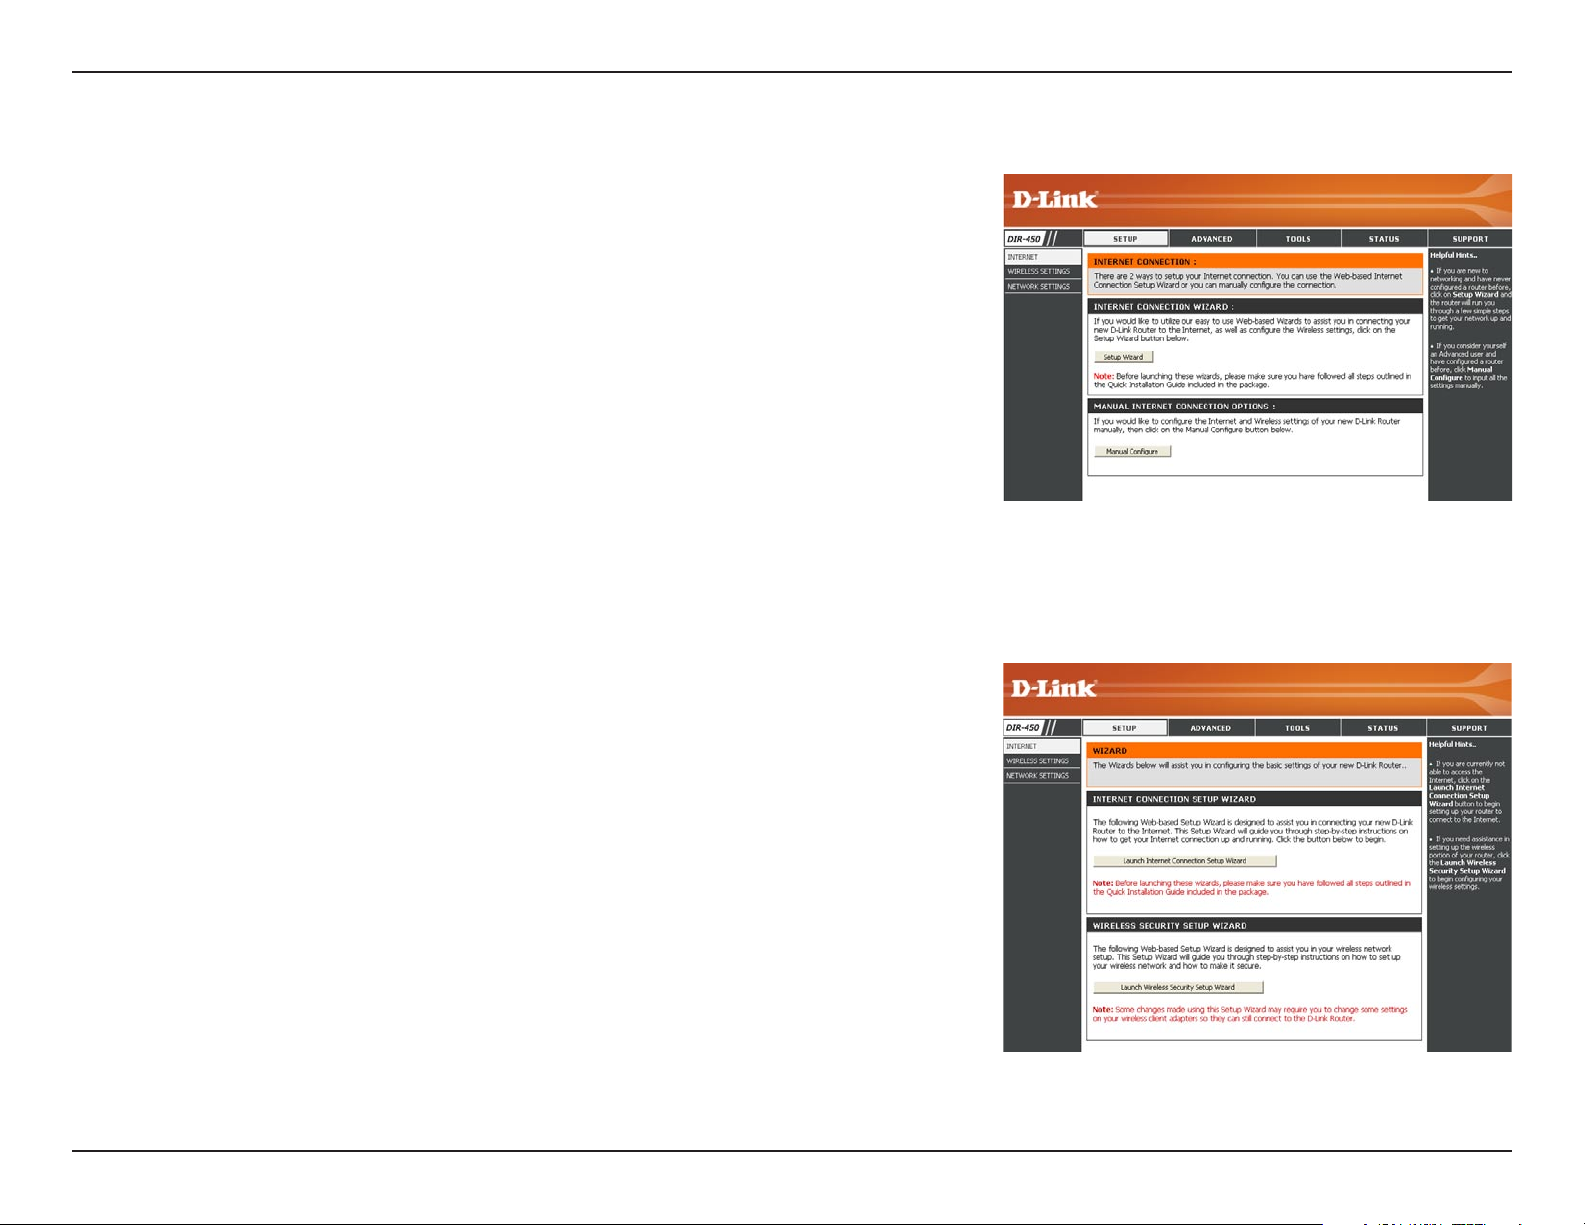
This section will show you how to congure your new D-Link mobile router using the web-based conguration utility.
Web-based Configuration Utility
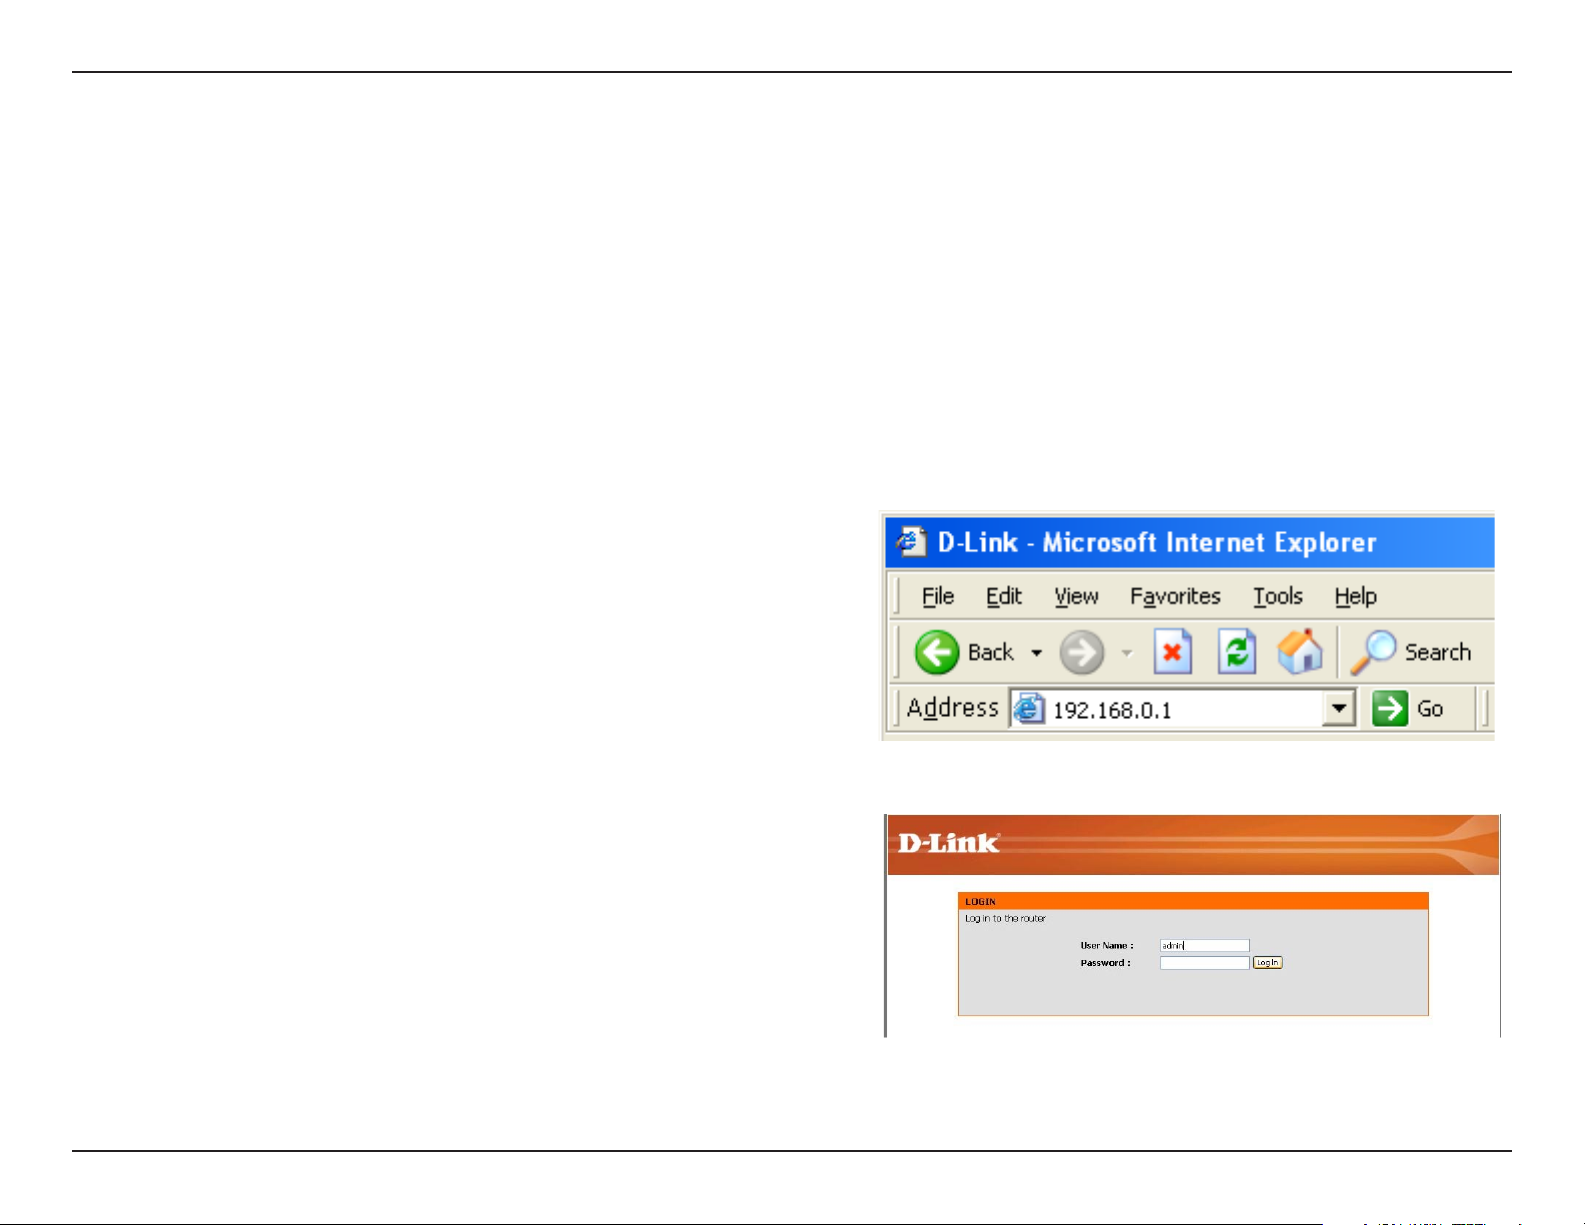
To access the conguration utility, open a web-browser
such as Internet Explorer and enter the IP address of
the router (192.168.0.1).
Enter the user name (admin) and your password. Leave
the password blank by default.
If you get a Page Cannot be Displayed error, please
refer to the Troubleshooting section for assistance.
13D-Link DIR-450 User Manual
Section 3 - Configuration
Setup Wizard
You may run the setup wizard to quickly setup your router. Click
Setup Wizard to launch the wizard.
Click Launch Internet Connection Setup Wizard to begin.
14D-Link DIR-450 User Manual
Section 3 - Configuration
Click Next to continue.
Create a new password and then click Next to continue.
Select your time zone from the drop-down menu and then click Next
to continue.
Select the ISP Card from the drop-down list and then click Username
/ Password Connection (WWAN). Click Next to continue.
15D-Link DIR-450 User Manual
Section 3 - Configuration
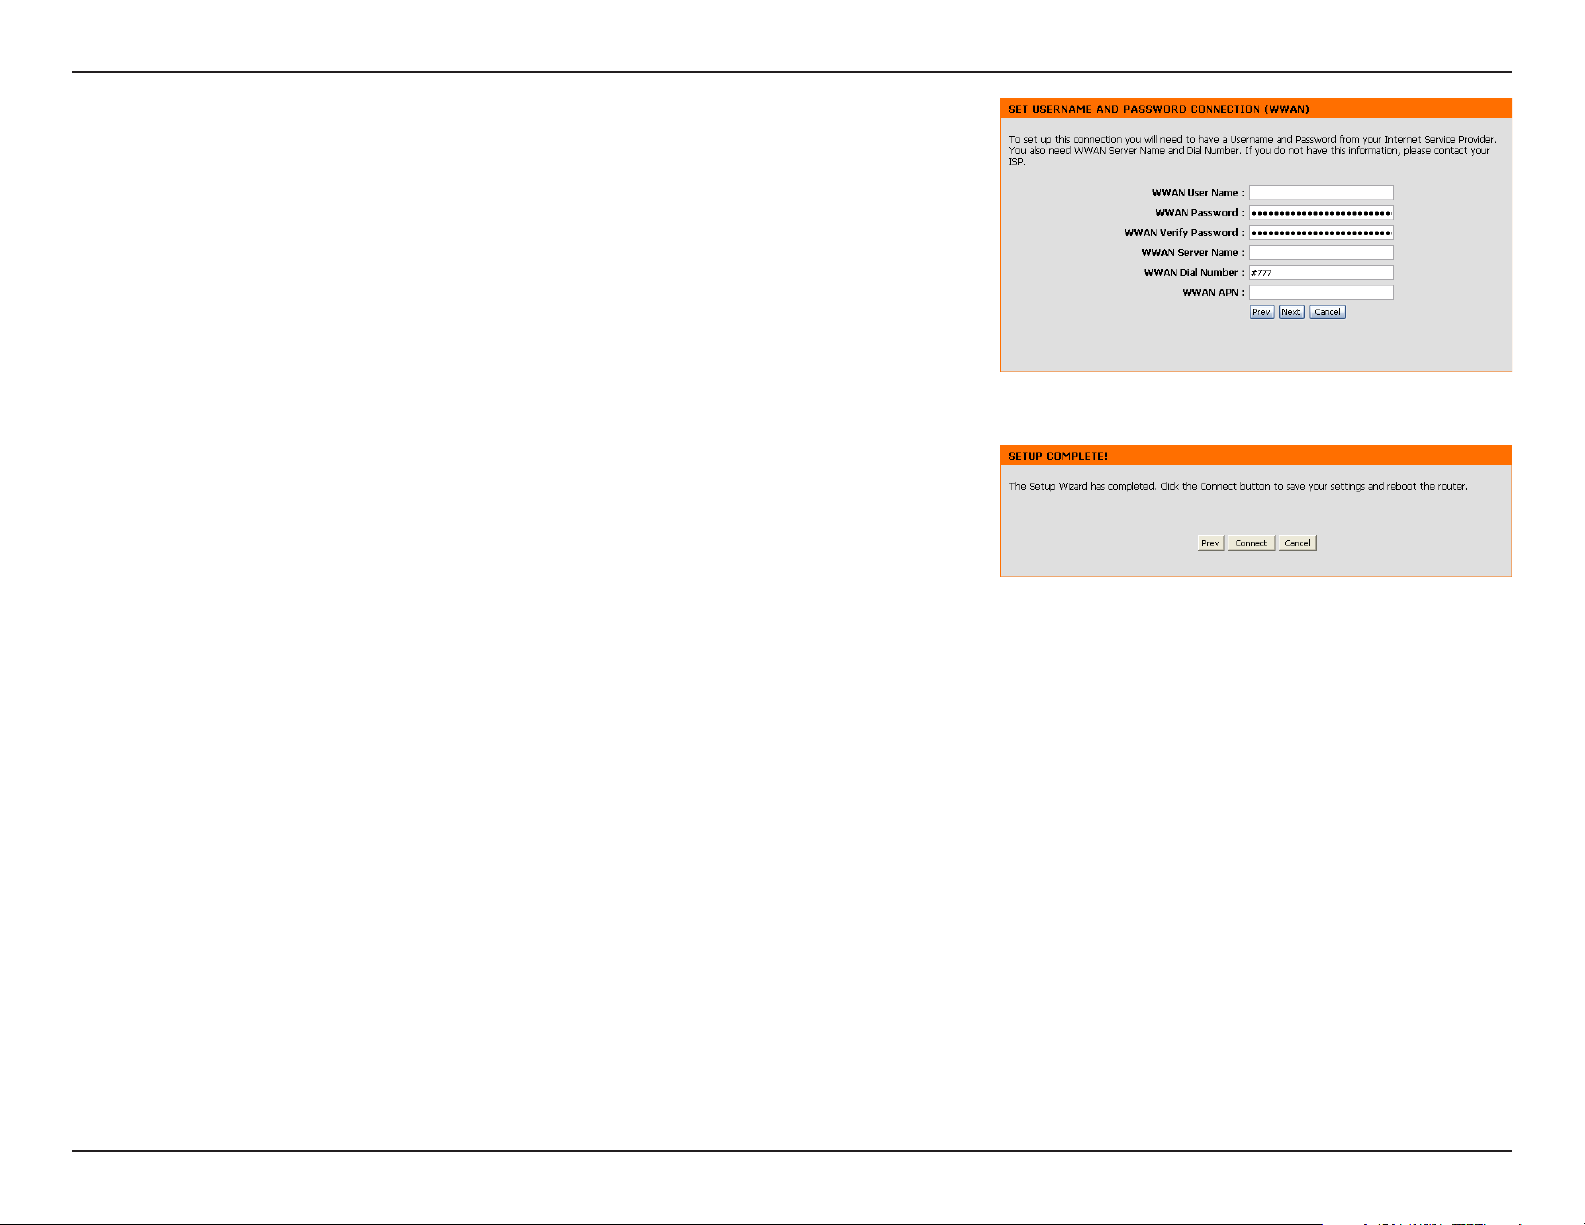
Enter your WWAN user name, password, and server information. If you do
not have this information, please contact your ISP.
Click Connect to save your settings. Once the router is nished rebooting,
click Continue. Please allow 1-2 minutes to connect.
16D-Link DIR-450 User Manual
Section 3 - Configuration
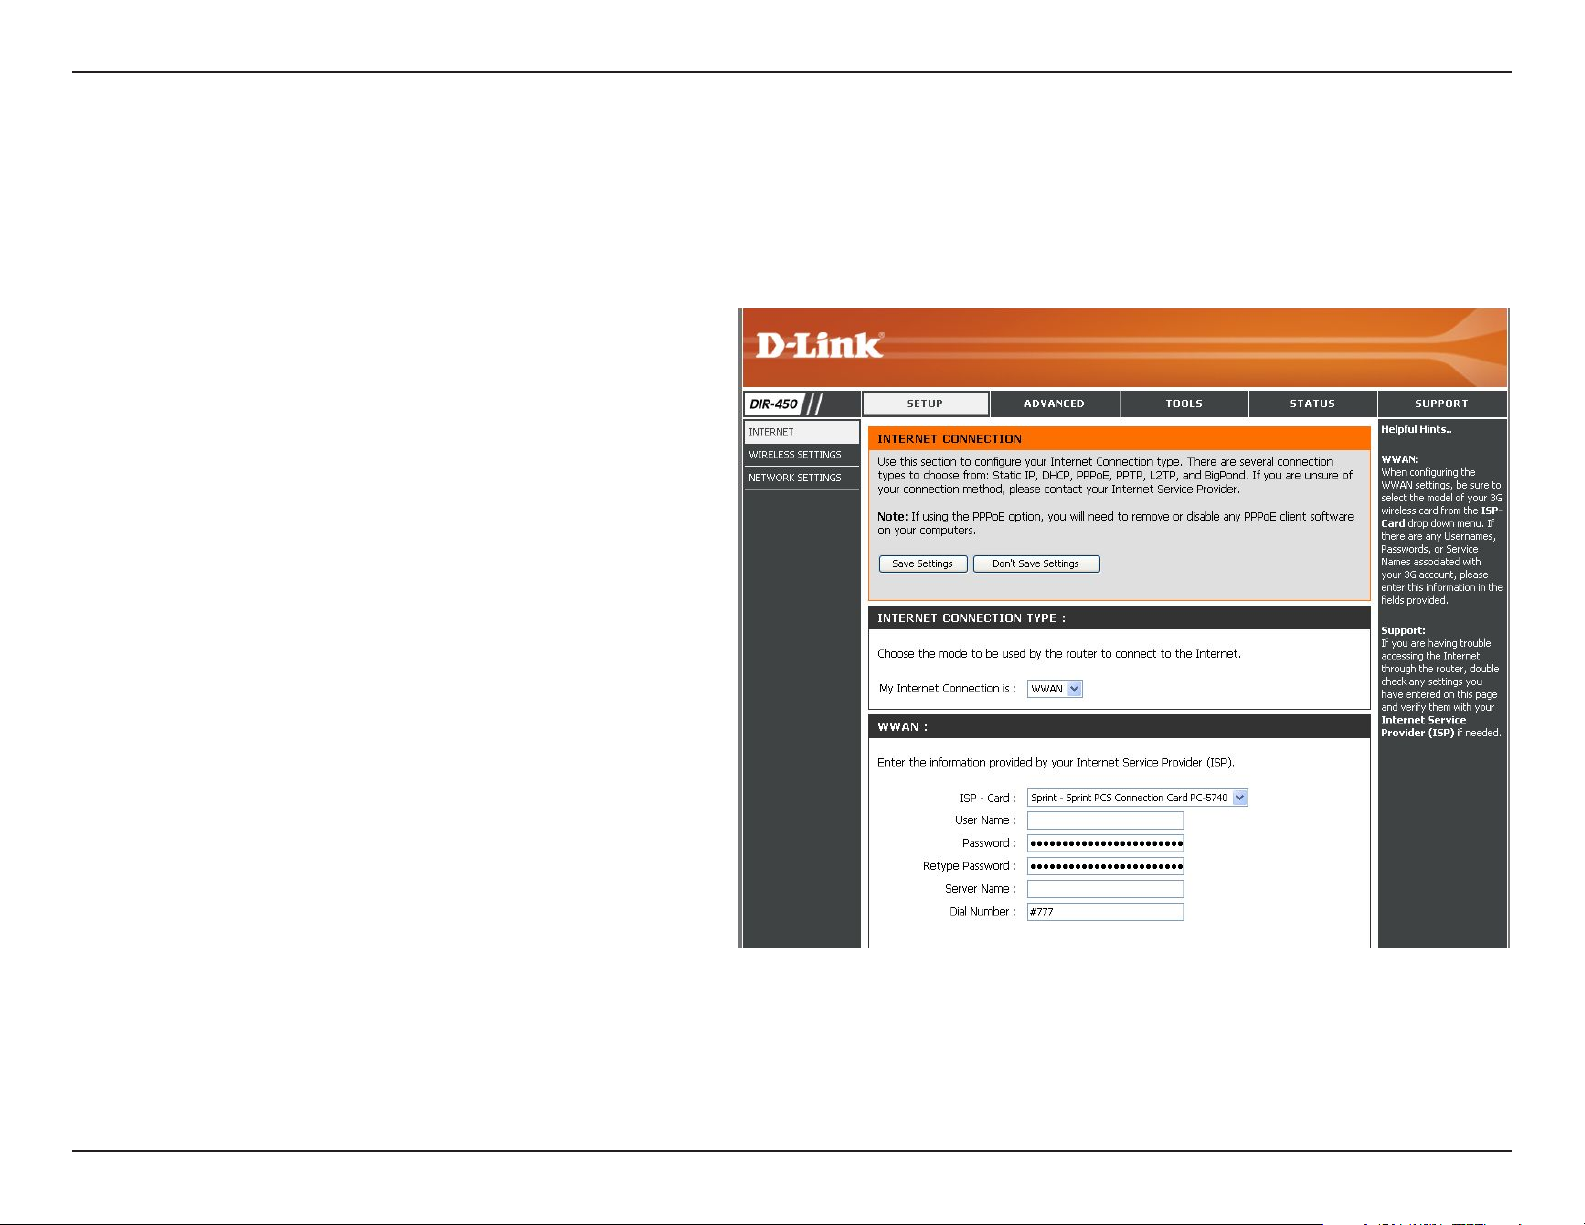
EVDO Setup
The WAN (EVDO) elds may not be necessary for your connection. The information on this page will only be used
when your service provider requires you to enter a User Name and Password to connect to the EVDO network. Please
refer to your EVDO documentation or service provider for additional information.
ISP Card:
User Name:
Password:
Retype Password:
Server Name:
Dial Number:
Select your ISP Card from the drop-down
menu.
Enter your User Name for your EVDO
connection.
Enter your Password for your EVDO
connection.
Ente r y our P a s swor d a gain f o r
conrmation.
Enter the name of your network server
(optional).
The default is #777. This eld should not
be altered except when required by your
service provider.
17D-Link DIR-450 User Manual
Section 3 - Configuration
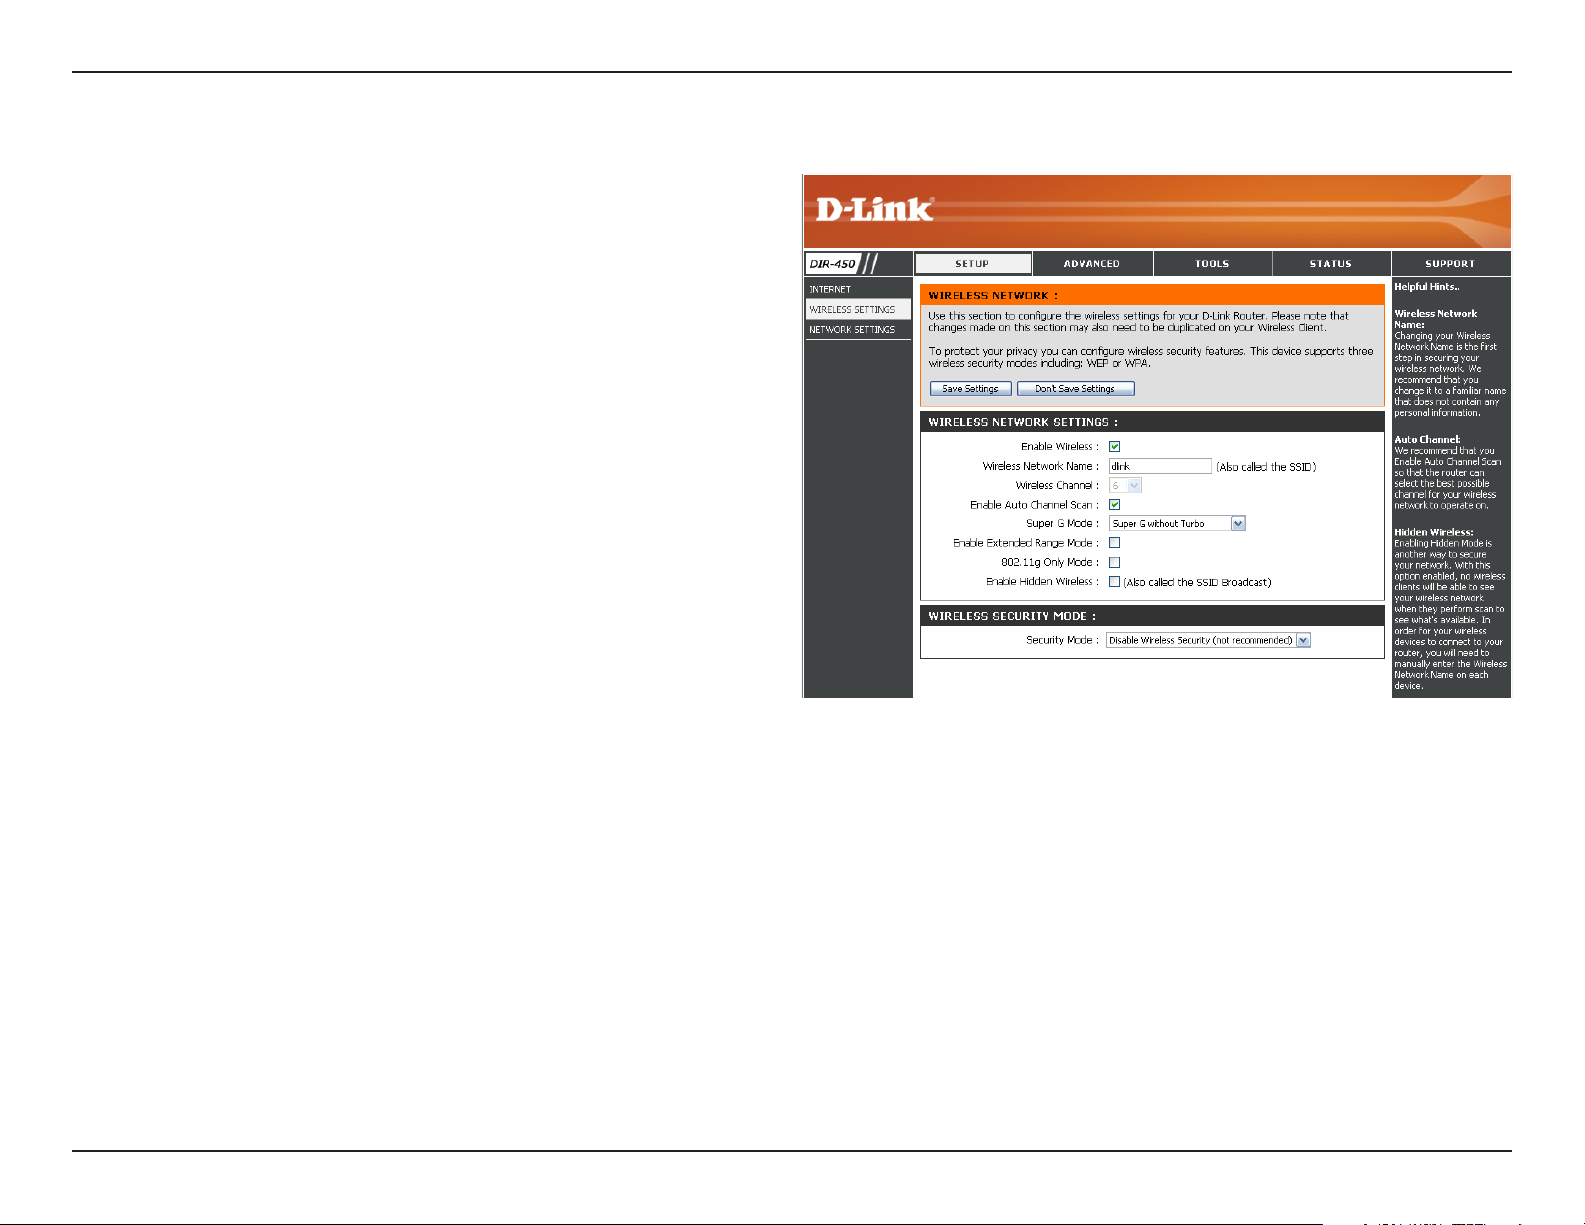
Wireless Settings
Enable Wireless:
Wireless Network
Name:
Wireless Channel:
Super G Mode:
Check the box to enable the wireless function. If you do
not want to use wireless, uncheck the box to disable all
the wireless functions.
Service Set Identier (SSID) is the name of your wireless
network. Create a name using up to 32 characters. The
SSID is case-sensitive.
Indicates the channel setting for the DIR-450. By
default the channel is set to 6. The Channel can be
changed to t the channel setting for an existing wireless
network or to customize the wireless network. The Auto
Channel Scan setting can be selected to allow the
DIR-450 to choose the channel with the least amount
of interference.
Note: Super G with Dynamic Turbo mode only operates
in Channel 6.
Super G is a group of performance enhancement features that increase end user application throughput in an 802.11g
network. Super G is backwards compatible to standard 802.11g devices. For top performance, all wireless devices on the
network should be Super G capable. Select either Disabled, Super G without Turbo, or Super G with Dynamic Turbo.
• Disabled - Standard 802.11g support, no enhanced capabilities.
• Super G without Turbo - Capable of Packet Bursting, FastFrames, Compression, but no Turbo mode.
• Super G with Dynamic Turbo - Capable of Packet Bursting, FastFrames, Compression, and Dynamic Turbo. This
setting is backwards compatible with non-Turbo (legacy) devices. Dynamic Turbo mode is only enabled when all
devices on the wireless network are Super G with Dynamic Turbo enabled.
18D-Link DIR-450 User Manual

Section 3 - Configuration
Extended Range
Mode:
802.11g Only
Mode:
Enable Hidden
Wireless:
Extended Range Mode helps reduce dead spots by improving the reception algorithm, which allows your wireless clients to
associate with the DIR-450 at farther distances. Select either Enabled or Disabled.
Enable this mode if your network is made up of purely 802.11g devices. If you have both 802.11b and 802.11g wireless
clients, uncheck the box.
Check this option if you would not like the SSID of your wireless network to be broadcasted by the DIR-450. If this option is
checked, the SSID of the DIR-450 will not be seen by Site Survey utilities so your wireless clients will have to know the SSID
of your DIR-450 in order to connect to it.
Please refer to Section 4 - Wireless Security for information on setting up security and encryption.
19D-Link DIR-450 User Manual
Section 3 - Configuration
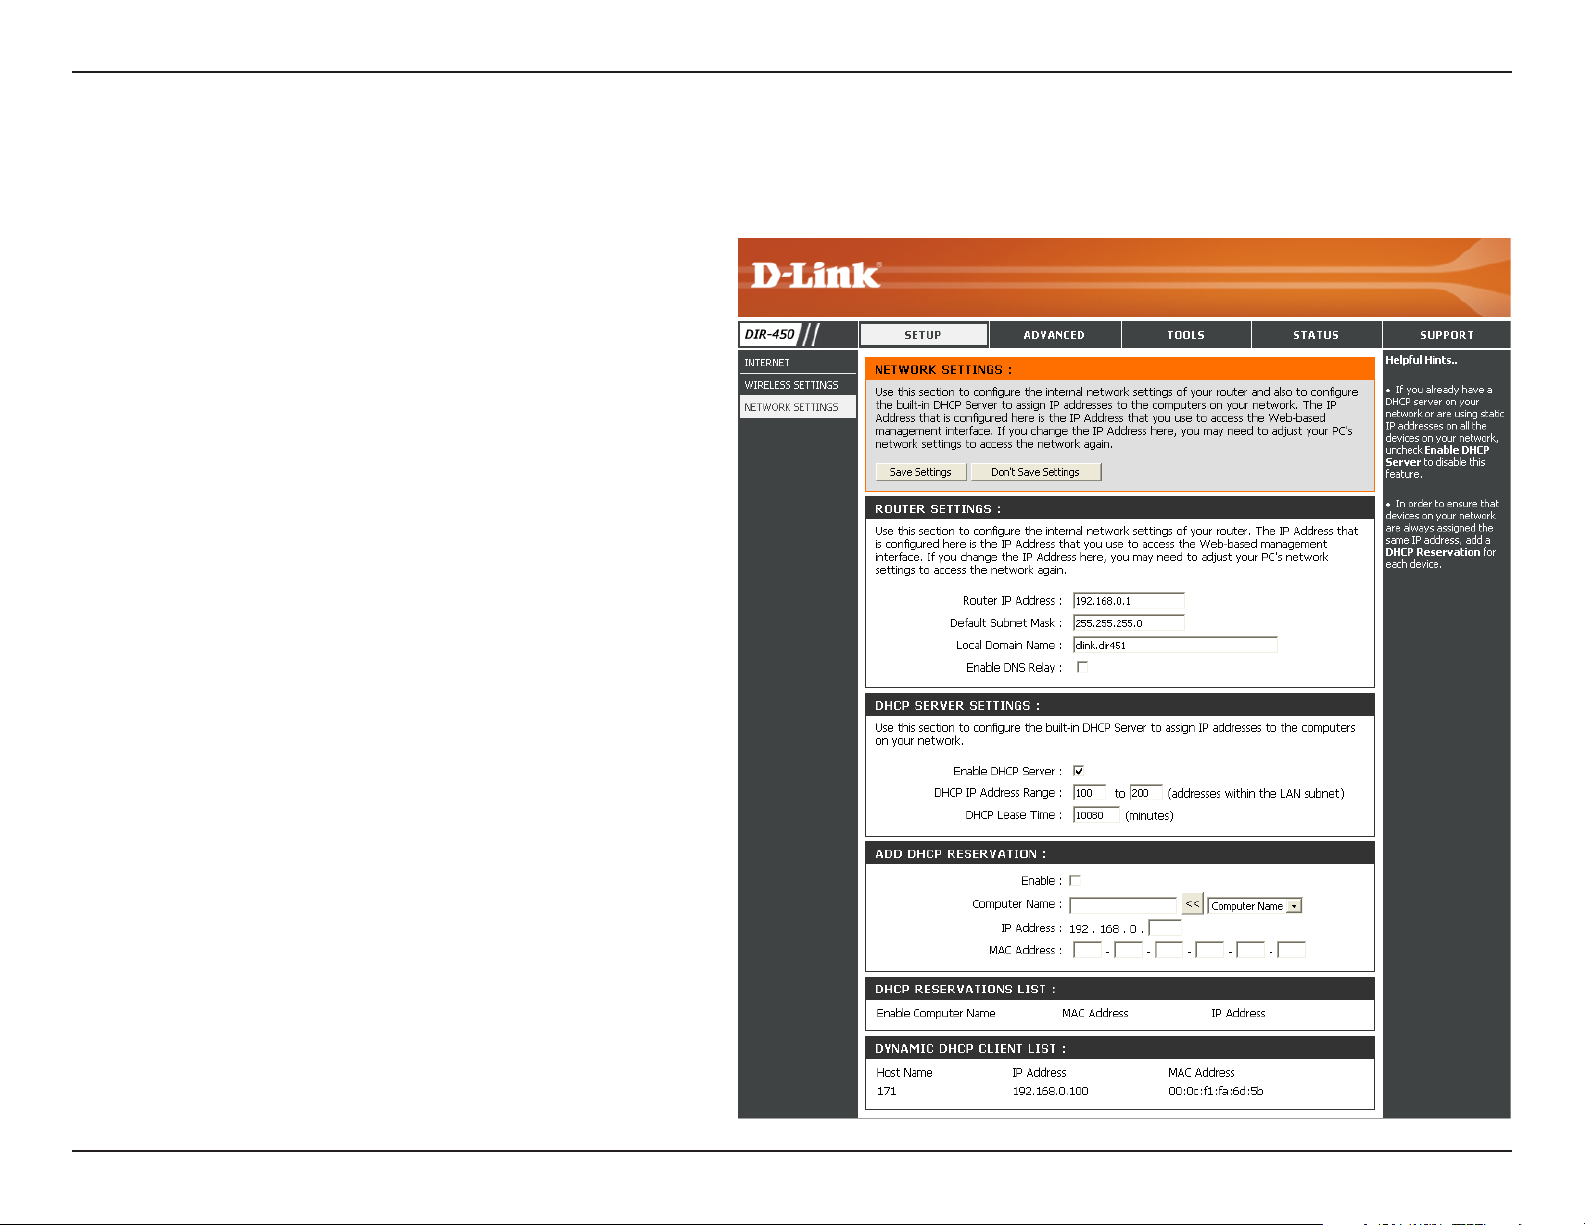
Network Settings
This section will allow you to change the local network settings of the router and to congure the DHCP settings.
Router IP Address:
Default Subnet Mask:
Local Domain Name:
Enable DNS Relay:
Refer to the next page for DHCP information.
Enter the IP address of the router. The default
IP address is 192.168.0.1.
If you change the IP address, once you click
Apply, you will need to enter the new IP
address in your browser to get back into the
conguration utility.
Enter the Subnet Mask. The default subnet
mask is 255.255.255.0.
Enter the Domain name (Optional).
Check the box to transfer the DNS server
information from your ISP to your computers. If
unchecked, your computers will use the router
for a DNS server.
20D-Link DIR-450 User Manual
Section 3 - Configuration
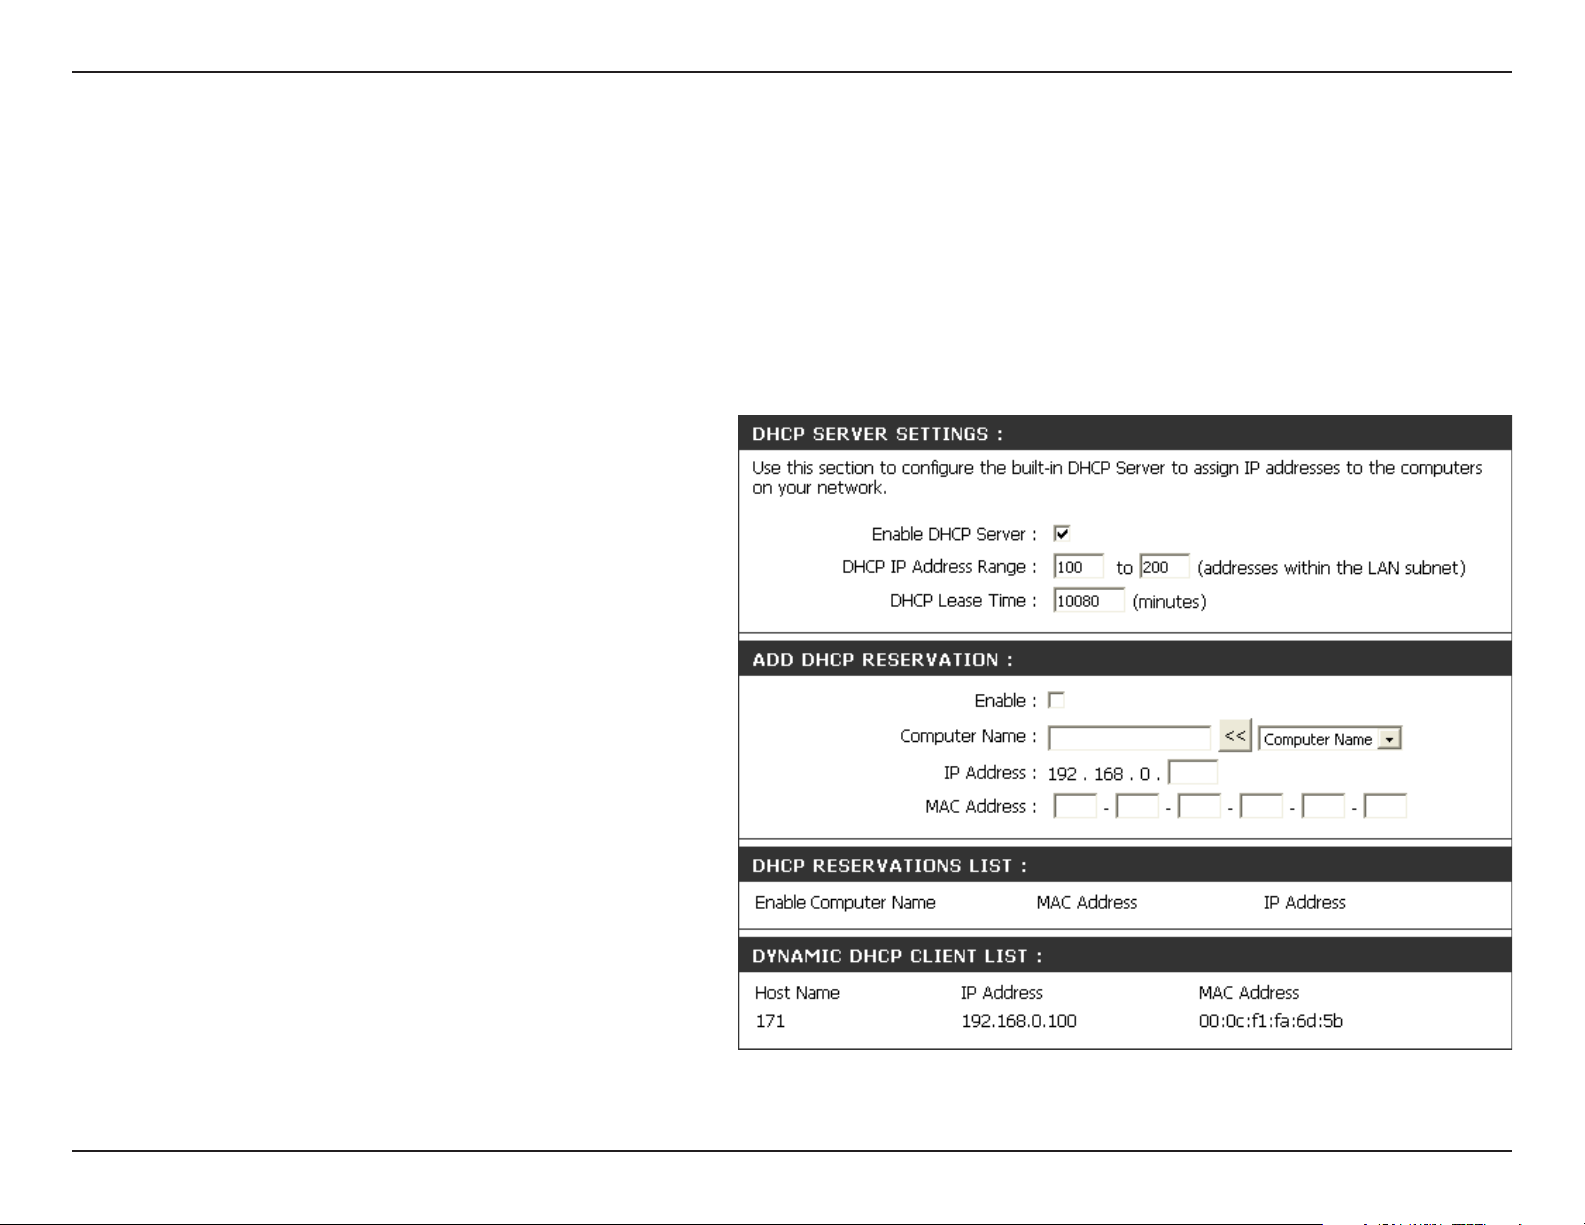
DHCP Server Settings
DHCP stands for Dynamic Host Control Protocol. The DIR-450 has a built-in DHCP server. The DHCP Server will
automatically assign an IP address to the computers on the LAN/private network. Be sure to set your computers to be
DHCP clients by setting their TCP/IP settings to “Obtain an IP Address Automatically.” When you turn your computers
on, they will automatically load the proper TCP/IP settings provided by the DIR-450. The DHCP Server will automatically
allocate an unused IP address from the IP address pool to the requesting computer. You must specify the starting and
ending address of the IP address pool.
Enable DHCP
Server:
DHCP IP Address
Range:
Lease Time:
Check the box to enable the DHCP server on
your router. Uncheck to disable this function.
Enter the starting and ending IP addresses for
the DHCP server’s IP assignment.
The length of time for the IP address lease.
Enter the Lease time in minutes.
21D-Link DIR-450 User Manual
 Loading...