

Page 1
RPx400 USB Drivers and
Software Installation Guide
Page 2

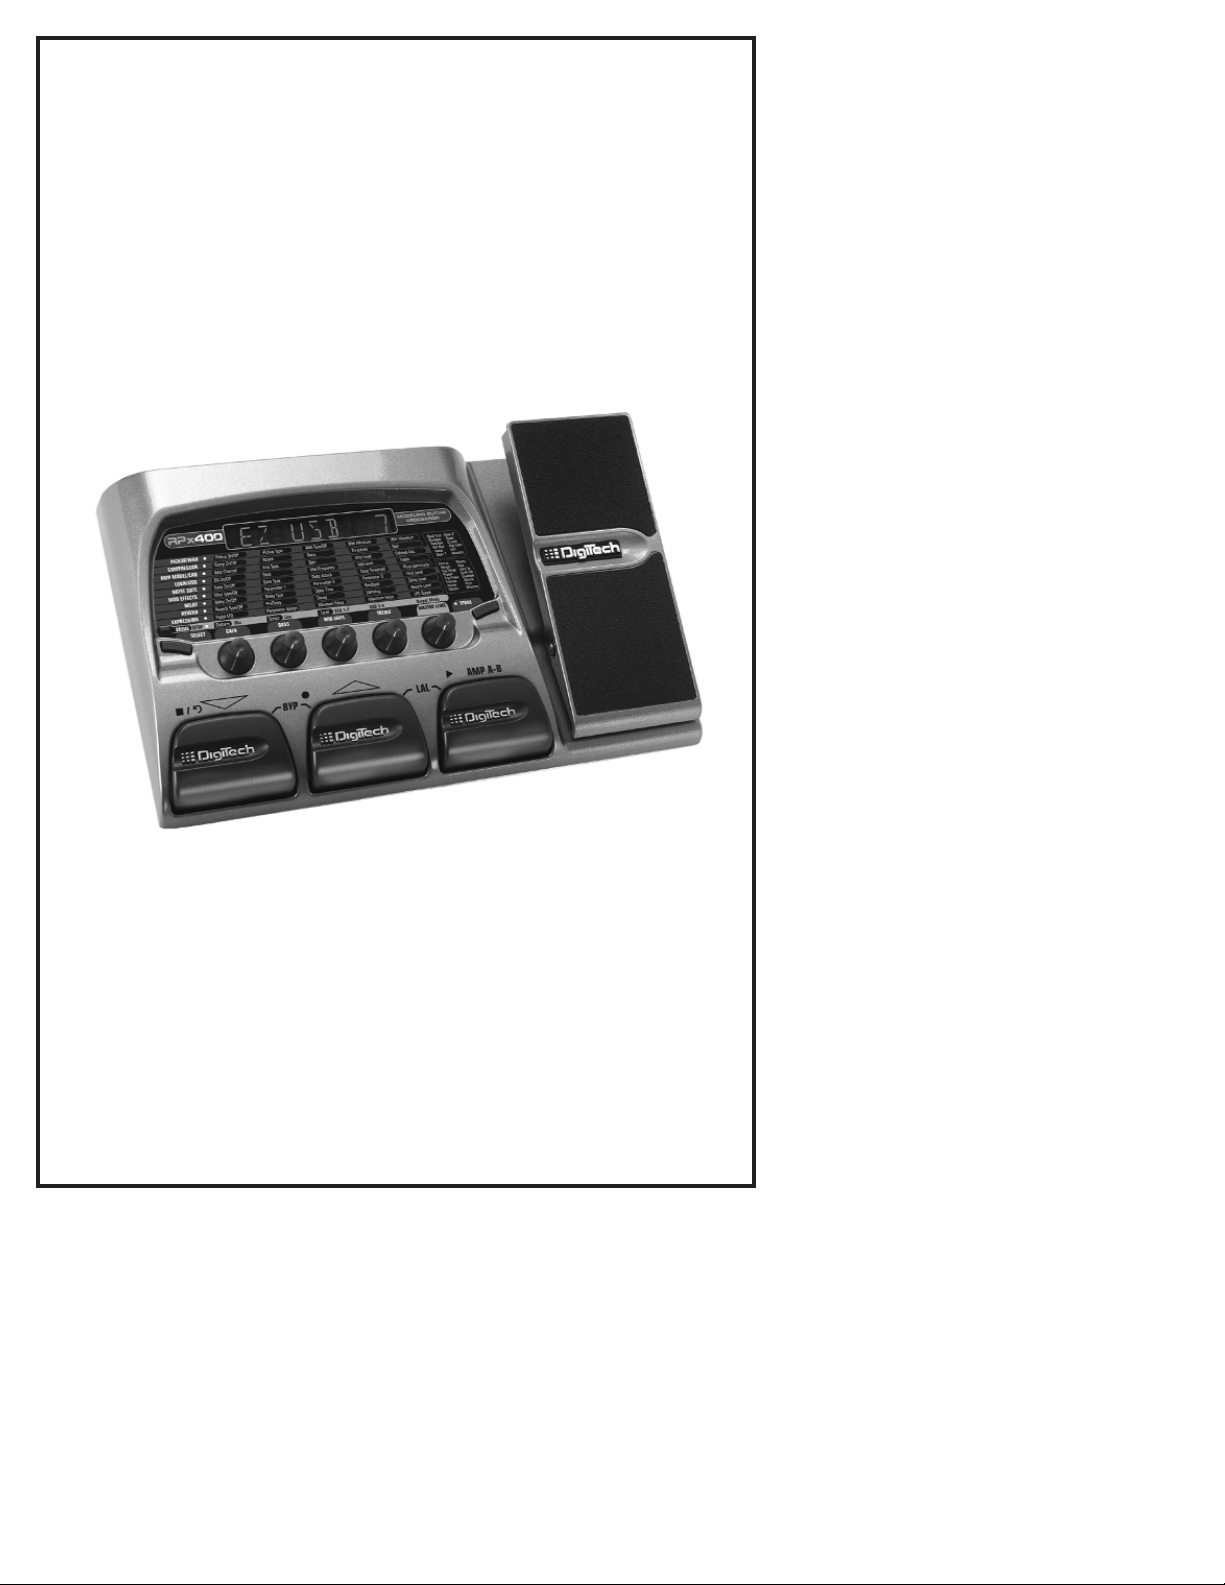
Congratulations on your purchase of a DigiTech RPx400. This installation guide
contains the information to install the required USB drivers, X-Edit editor/librarian and
Pro Tracks recording software for use with the RPx400. Please follow these
instructions carefully to ensure smooth installation of each of these components.
A. Installing Pro Tracks
1. Start your computer. Close any open programs you have running. Place the Pro
Tracks CD-ROM in your CD-ROM drive.
2. If you have autorun enabled, the Pro Tracks installation menu opens automatically,
showing you several buttons. If the menu does not appear automatically, you can
open it by selecting Start>Run and entering d:\Autorun.exe (where d:\ is the
letter of your CD-ROM drive).
3. Click the Install Pro Tracks button and follow the installation instructions on the
screen. If DirectX 8.1+ is not installed, the installer will automatically install it for
you. If DirectX is installed at this time, you will need to restart your computer and
return to Step 1.
NOTE: If you exit Setup without completing the installation, choose Start>Run, type
d:\Autorun.exe (where d:\ is your CD-ROM drive), and click OK. This will reopen
the installation menu. Click Install Pro Tracks to start installation again.
4. When the Installation Complete window appears deselect Launch Pro Tracks
and Read Me check boxes and click Finish.
5. Click Exit from Pro Tracks Installation screen.
B. Installing DigiTech USB Drivers
You must install the USB drivers to use the RPx400’s USB connection with your
computer. There are different installation procedures for Windows XP users and
Windows 2000 users. Follow the directions in the section that applies to your
operating system.
Windows XP Users
1. Take the RPx400 out of the box and plug the power in.
2. Remove the USB Warning sticker covering the RPx400’s USB port.
3. Connect the included USB cable to your computer and to the RPx400.
4. You will see multiple messages pop up from the task bar indicating that your
computer has found a new USB device. There are multiple messages because there
are four USB devices in the RPx400, two MIDI devices and two audio devices.
5. Wait until Windows has found and identified all of the USB devices from the
RPx400. When the message "Your new hardware is installed and ready to use"
appears,Windows has completed identifying your new hardware. however,
installation of the software IS NOT complete.
6. Put the X-Edit software CD into your CD-ROM drive. The installation menu should
Page 3
automatically appear (if installation does not start automatically, go to Start>Run,
click on Browse, type d:\instmenu.exe (where d:\ is your CD-ROM drive), and
click OK.
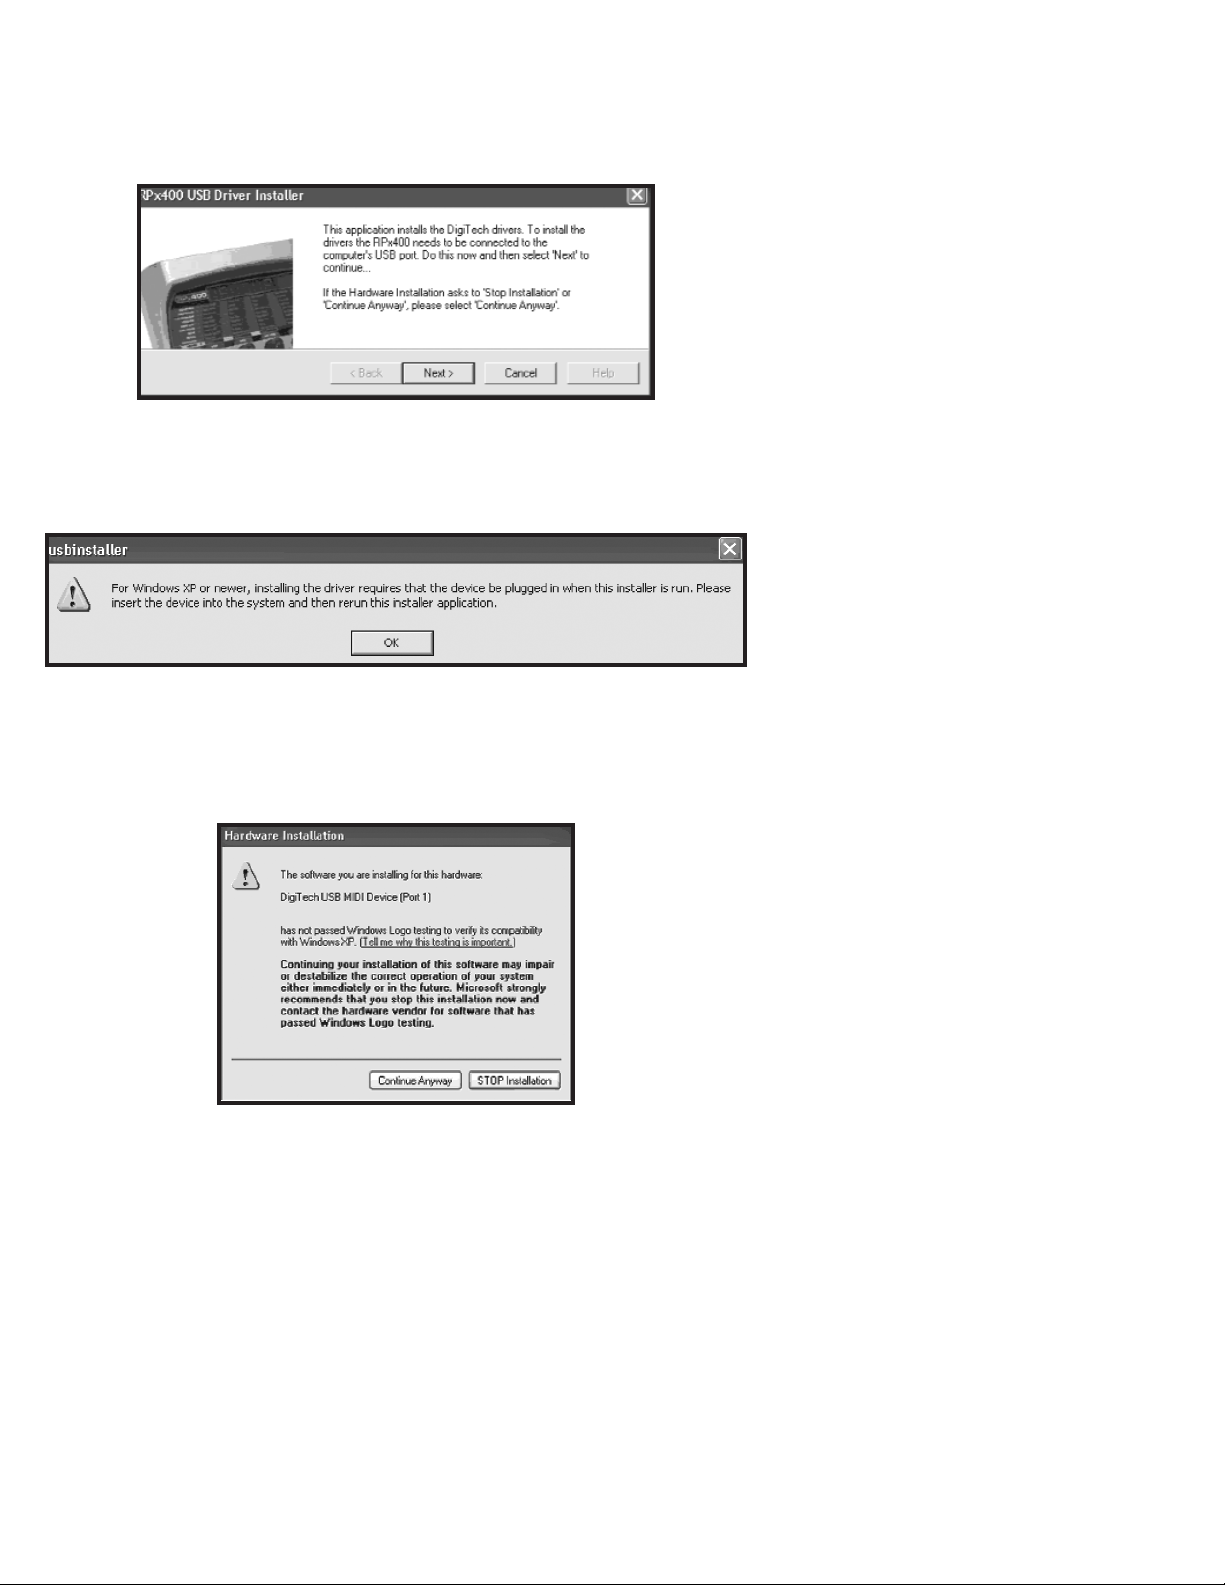
7. Now select USB Audio MIDI Drivers from the menu. You will see the following
window appear:
8. Click Next. Installation of the drivers could take several minutes.
NOTE: If you don’t have the USB cable connected to the RPx400 you will see this:
If you see this message, cancel the installation and connect the USB cable to the
RPx400 then restart the installation and begin with Step 1 of this section.
9. If the RPx400 is connected correctly to the computer you will see the following
message from Windows:
10. Click Continue Anyway and you will see:
Page 4
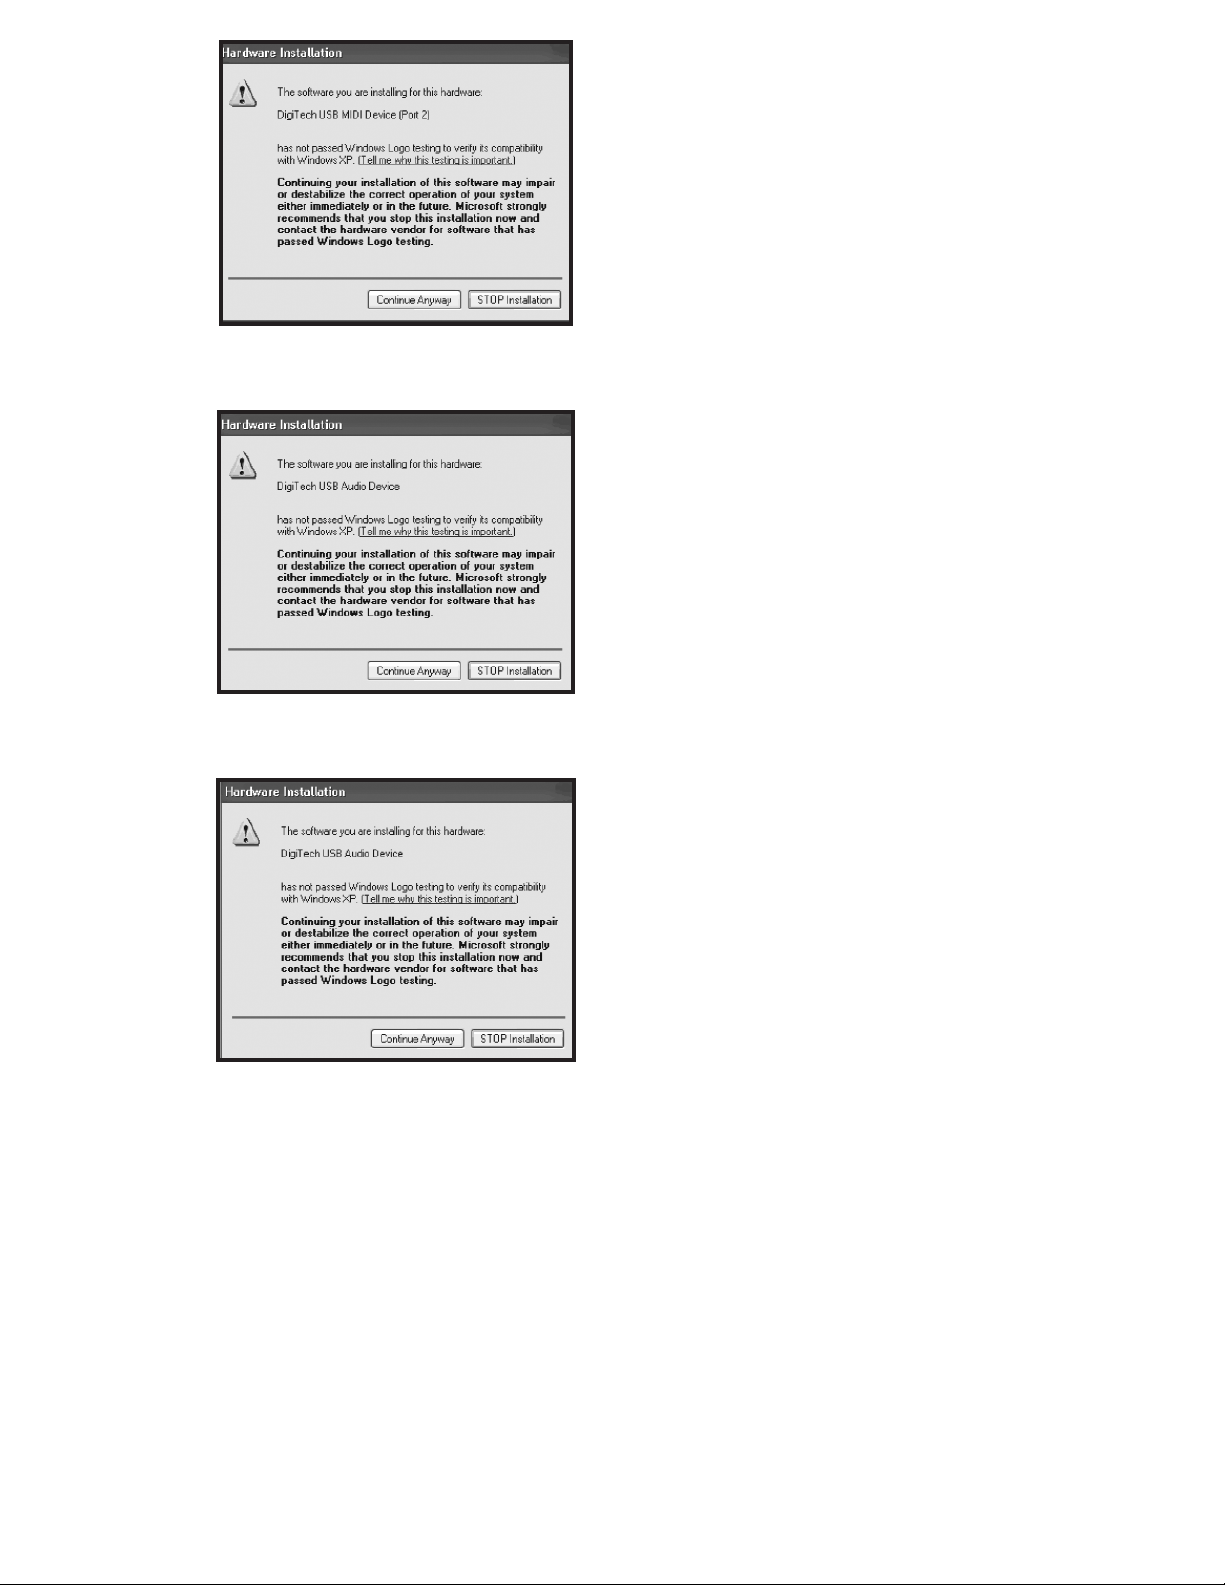
11. Click Continue Anyway and you will see:
12. Click Continue Anyway and you will see:
Page 5

13. Click Continue Anyway and you will see:
14. Click Finish. The RPx400 USB driver installation is now complete.
Windows 2000 Users
NOTE: DO NOT connect the RPx400 to your Windows 2000 computer until
AFTER the DigiTech USB drivers are installed or it may cause instability in Windows.
1. Make sure you DO NOT have the RPx400 USB plugged into your computer.
2. Put the X-Edit CD into your CD-ROM drive. The installation menu should
automatically appear (if installation does not start automatically, go to Start>Run,
click on Browse, type d:\instmenu.exe (where d:\ is your CD-ROM drive), and
click OK.
3. Select USB Audio MIDI Drivers from the menu that appears. You will see the
following window:
4. Click Next and Windows will display the following message:
Page 6

5..Click Ye s and you will see the same window appear one more time. Click Ye s and
you will see:
6. Click Finish.
7. Connect the RPx400 to the computer with the included USB cable. The following
window will appear:
8. Click Ye s and you will see:
Page 7

9. Click Finish and you will see:
10. You DO NOT need to restart your computer yet. Click No and you will see:
11. Click Ye s and you will see:
Page 8

12. Click Finish and you will see:
13. You DO NOT need to restart your computer yet. Click No and you will see:
14. Click Ye s and you will see:
Page 9

15. Click Finish and you will see:
16. Click No. Repeat steps 14 and 15 once more. Then you will see:
17. This time click Yes and your computer will restart. The RPx400 USB driver
installation is now complete.
C. Setup Windows Audio and MIDI
When we installed the DigiTech USB Audio and MIDI drivers,Windows may have
automatically selected them as your default audio and MIDI outputs. This means that
your Windows sounds will be sent to the RPx400. We need to check if these have
been changed and return the settings to what they were before.
Windows XP Users
1. Select Start>Control Panel>Sound and Audio Devices.
2. Select the Audio tab.
3. Under Sound playback>Default device, open the pull-down menu and make
sure your computer’s sound card is selected.
4. Under Sound recording>Default device, open the pull-down menu and make
sure your computer’s sound card is selected.
5. Under MIDI music playback>Default device, open the pull-down menu and
make sure your MIDI device is selected.
Windows 2000 Users
1. Select Start>Settings>Control Panel.
2. Select Sounds and Multimedia.
3. Select the Audio tab.
4. Under Sound Playback>Preferred device, open the pull-down menu and make
sure your sound car is selected.
5. Under Sound Recording>Preferred device, open the pull-down menu and make
sure your sound car is selected.
6. Under MIDI Music Playback>Preferred device, open the pull-down menu and
make sure your MIDI device is selected.
Page 10

These options only need to be changed once now that the drivers are installed. Later
we will change the settings in Pro Tracks to use the RPx400 for audio and MIDI.
At this point you are ready to use the RPx400 to record with Pro Tracks. You can
continue to the next section to install the X-Edit/Librarian. If you are anxious to
record, skip the Setting Up the RPx400 MIDI Section
D. Install DigiTech X-Edit Editor/Librarian
Installing X-Edit allows you to edit and store your presets on your computer. Exit any
programs that are still running before beginning the X-Edit Installation procedure.
NOTE: X-Edit requires Microsoft .NET Framework to run. This software will
automatically be installed by the X-Edit installer if it is not found on your computer. To
ensure that .NET installs smoothly, Microsoft recommends that you disable your anti
virus software before continuing. Once .NET and X-Edit are installed, you can reenable your anti virus protection.
CAUTION: If you are running Windows 2000 and McAfee AntiVirus, please
read the following note:
If you are running McAfee Antivirus, Microsoft recommends that you
completely un-install (NOT just disable) McAfee Antivirus from your
computer. McAfee interferes with Microsoft’s .NET installation process and
must be removed to ensure a smooth installation. Once the .NET and XEdit installation is compete, you may re-install McAfee and re-enable your
anti-virus protection.
1. Return to the installer menu. If it is no longer open, you can re-open it by selecting
Start>Run and entering d:\instmenu.exe (where d:\ is the letter of your CDROM drive).and select DigiTech X-Edit.
2. The installer will now check your computer for Microsoft .NET Framework. If it is
found, you can skip to Step 5. If it is not found, the .NET installer will be launched.
Follow the instructions that appear. This could take several minutes and you might
see the progress bar complete and start over again several times as well. This is
normal.
3. When the .NET installer has completed, you will need to restart your computer if
you are running Windows 2000. If not, move on to the next step. After you have
restarted your computer, the installer should automatically continue. If it does not,
start over at Step 2.
4. When the Welcome to the Installation Wizard for DigiTech X-Edit 1.0
window appears, click Next.
5. Fill in the customer information. Select Anyone who uses this computer to
allow all users to use X-Edit. Select Only for me if you want to be the only user
to use X-Edit on the computer. Click Next.
6. On the next screen, click Install.
7. When the installation is complete, click Finish.
Page 11

X-Edit is now installed on your computer. If you disabled or un-installed your antivirus
software, you can now reinstall or re-enable it. If you want to edit presets, make sure
that the RPx400 is powered on and connected to your computer with the USB cable.
Then you can start X-Edit.
E. Setting Up the RPx400 MIDI
1. Start Pro Tracks. The first time Pro Tracks is started, the Wave Profiler utility will
check and configure you current audio I/O devices. Click OK when these tests
have finished.
2. When prompted to register your Pro Tracks software, please take the time to fill
out the registration information.
3. If the Tip of the Day window appears, click Close.
4. If no previous MIDI outputs have been selected, the No MIDI Outputs Selected
window will appear. Click Choose MIDI Outputs Now button. The MIDI
Devices window will open. If the No MIDI Outputs Selected window does not
appear, go to the Options>MIDI Devices menu option.
5. Under both Inputs and Outputs, choose RPx400 USB MIDI. Do not select
DigiTech USB X-Edit or any other available selections. Click the Move
Selected Devices to Top button.
6. Click the OK button and the window will close.
7. If the Quick Start window appears, click the Close button.
F. Setting Up the RPx400 for Hands-Free Recording
1. From the Pro Tracks menu bar, select Options>Control Surfaces. The Control
Surfaces window will appear.
2. Click the yellow + button to add a new control surface. The Control Surface
Settings window will open.
3. In the Control Surface pull-down menu, select DigiTech RPx. Verify that the
Input and Output port settings still have RPx400 USB MIDI selected. If they do
not, do this now.
4. Click the OK button. DigiTech RPx should now be displayed as the Connected
Surface in the Control Surfaces Window.
5. Click the Close button.
Pro Tracks can now respond to the RPx400 for automated recording functions.
G. Setting up Pro Tracks for RPx400 Audio
1. From the Pro Tracks menu bar, select Options>Audio. The Audio Options
window will appear. Click the Drivers tab.
2. Under the Input Drivers settings, select DigiTech USB 1-2 In/Out and DigiTech
USB 3-4 In Only and deselect all other options.
3. Under the Output Drivers settings, select DigiTech USB 1-2 In/Out and deselect
all other options. DO NOT select DigiTech USB 3-4 Input Only.
4. Click the OK button.
Page 12

5. Click the OK button when the window stating changes will be saved upon re-start
appears.
6. Close Pro Tracks. When you are prompted to save changes, click No.
7. Re-start Pro Tracks.
8. Close the Tip of the Day and Quick Start windows if they appear.
9. From the Pro Tracks menu bar, select Options>Audio.
10. Verify that the Playback and Record Timing Master settings have DigiTech USB 1-2
In/Out selected. If not, select these now.
11. Set the number of Virtual Mains to 2.
12. Click the Wave Profiler button at the bottom.
13. Click the Ye s button to continue performing the tests.
14. When the profiling operation is successfully completed, click the OK button.
15. Click the OK button to close the Audio Options window if it is still open.
16. One last thing we recommend is enabling the auto save feature. Go to
Options>Global and select the General tab. Next to Auto save every, enter
10 minutes and then click OK.
You are now ready to use the RPx400 with Pro Tracks to record. Enjoy!
18-0234-A
 Loading...