

Page 1
Quick Start Guide MIP480 Mobile Printer
GEK-05024
Safety Guidelines
For detailed information, refer to the User Guide of the printer. The User Guide is provided as an Adobe Acrobat PDF file on the CD shipped
with your printer. Be sure to read the safety guidelines in the User Guide before using this product. Keep this User Guide in a place which is
easily accessible at all times.
1
WARNING
! Do not use the printer while driving.
! To avoid any possibility of injury, before cleaning the printer,
turn off the power to both the printer and the computer,
and unplug the printer.
! Do not use solvents, kerosene, or abrasive cleaning materials
that may damage the printer.
! Keep all liquids away from the printer.
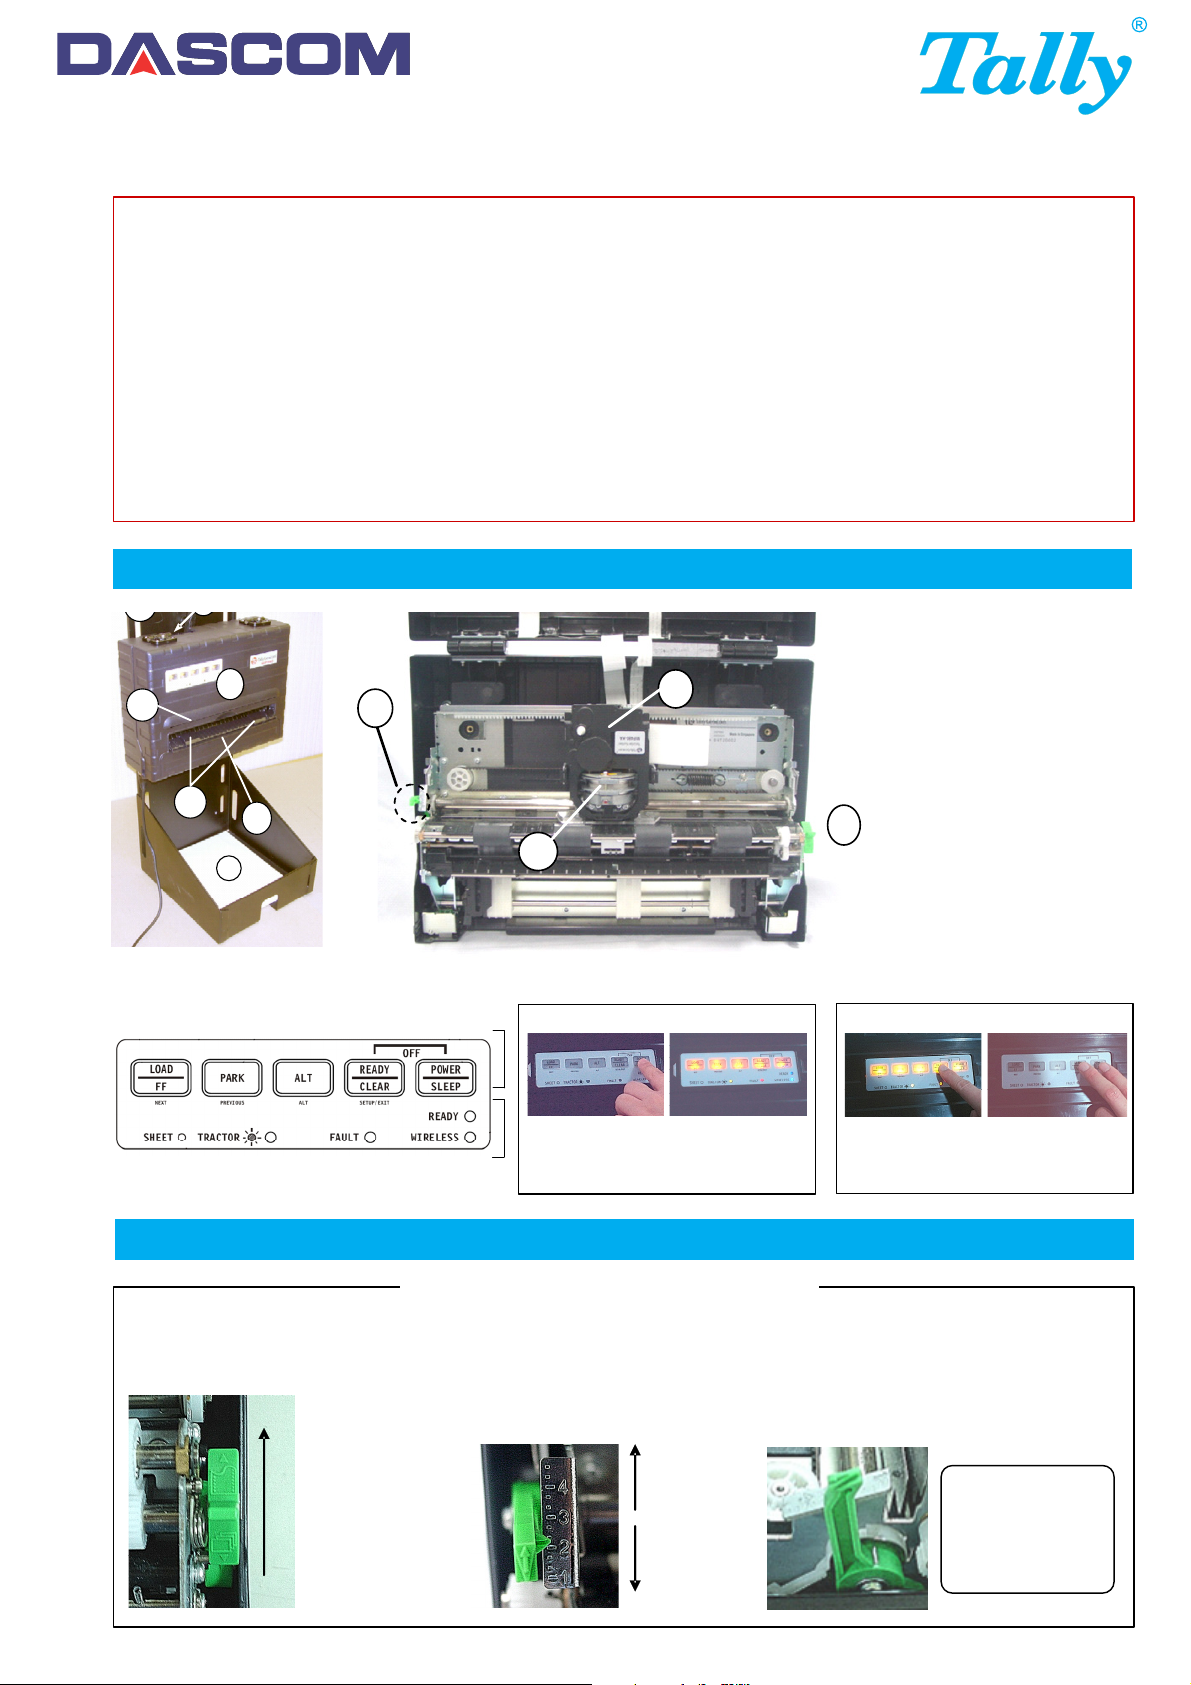
Detailed picture
1
3
7
2
9
4
5
6
10
CAUTION
! Before starting to print, check that the ribbon cartridge is correctly
installed the paper is loaded in the proper position.
! If the printer has worked for some time, avoid touching the printhead:
it can be very hot. It is advisable to wait a few minutes before
attempting to replace the ribbon cartridge.
! Once the printer has been turned off, wait at least 10 seconds before
turning it on again; this allows the internal reset circuitry to work properly.
! Do not self test without ribbon or paper.
! If you try to print crunched, folded or damaged material, this could lead
to paper jam.
1. Vertical Mount
2. Control Panel
8
11
3. Paper Tear Edge
4. Paper Edge Guides
5. Single-Sheet Paper Support
6. Paper Stack
7. Interface Connector
8. Ribbon Cartridge
9. Print Gap Lever
10. Print Head
11. Paper Select Lever
2
Control Panel - Printer Controls and Buttons
Paper handling
Paper handling
Control Buttons
Indicator Lights
Power On:
Press the POWER/SLEEP button
and release.
Power Off:
Press and hold the READY/CLEAR
button, then press the POWER/SLEEP
button and release to turn-off printer.
2-1 Loading Continuous Forms
The printer can handle paper with different thicknesses. The Print Gap Lever allows you to adjust for different paper thickness. Be sure to
adjust the Print Gap Lever whenever you change the number of copies to be printed. If desired, raise the paper support fully up, position
#4-2, for improved visual paper loading. After loading, move the paper support to fully down position #1.
A) Push the Paper
Select Lever up
to choose
Continuous Forms
B) Adjust for paper thickness
with the Print Gap Lever
Larger Print
Gap
Smaller
Print Gap
C) The Print Gap Lever
Caution: if printing
smears, the ribbon
misfeeds, or the
paper jams, move
the print gap lever
one position higher.
Page 2
Tractor Door
2-1 Loading Continuous Forms (Cont.)
Automatic Tear-Off
Your printer is factory-set for automatic
paper positioning for tear-off after a complete
form is printed.
Manual Tear-Off
Press the LOAD/FF button to position the
paper perforation in front of the tear edge.
Tear the paper against the tear edge.
Locking Lever
Release the tractor locking levers
by pulling them up. Once the forms
tractor is positioned, lock it by
pushing down its locking lever.
Holding the paper against the Easy-Load
platform, fit the paper into the tractor. Close
the door. Repeat the procedure for the left
tractor and adjust forms tractor to
accommodate the width of the form. Move the
paper to make the paper flat. Do not stretch
the paper too taut. Push the locking lever
down to secure the tractor in place.
2-2 Unloading Continuous Forms
To unload continuous forms: Press the PARK button. The continuous forms paper is retracted to the park position.
If the paper cannot be retracted in one operation, continue to press the PARK button until the paper is parked.
To remove the paper, raise the Tractor Doors and lift out the paper.
2-3 Loading a Single Sheet of Paper
Make sure that the printer is turned on. Check that tractor-fed continuous forms, if loaded, are retracted to the park position.
Move the Paper Select lever
down. (Adjust Print Gap Lever
if necessary)
Raise the Single Sheet
Paper Tray until it locks
in position 2.
Ejecting Single Sheets
If printing using software with form feed, each sheet is ejected automatically after a complete form is printed.
To manually eject sheets of paper press the LOAD/FF button to execute a forward form feed.
Line up the right sliding edge guide with
the rib on the paper support. Adjust the
left sliding edge guide to the width of the
paper. Insert the sheet into the raised
paper support. Make sure that the
bottom edge of the paper engages
snugly with the platen. The paper will
automatically advance to the top-of-form
position if the single sheet load option is
set to Automatic.
2-4 Switching Paper Types
Switching from continuous forms to single sheets:
1. Tear off your printed pages.
2. Retract the forms paper to the park position by pressing the
PARK button (the Fault indicator turns on).
3. Move the Paper Select Lever to the single sheet position and
insert a sheet according to the directions above.
4. Raise the single sheet paper support to position #2 and insert
a sheet according to the directions above.
Switching from single sheets to continuous forms:
1. If a sheet of paper is loaded, remove the paper by pressing
the LOAD/FF button.
2. Move the Paper Select Lever to the continuous forms position.
3. Move the single sheet paper support to the fully down
position #1.
4. Press the LOAD/FF button. The continuous forms paper
advances from the park position to the top-of-form position.
Ch
3
T
4
© September 2009 DASCOM Europe GmbH GEK-05024 (EN)
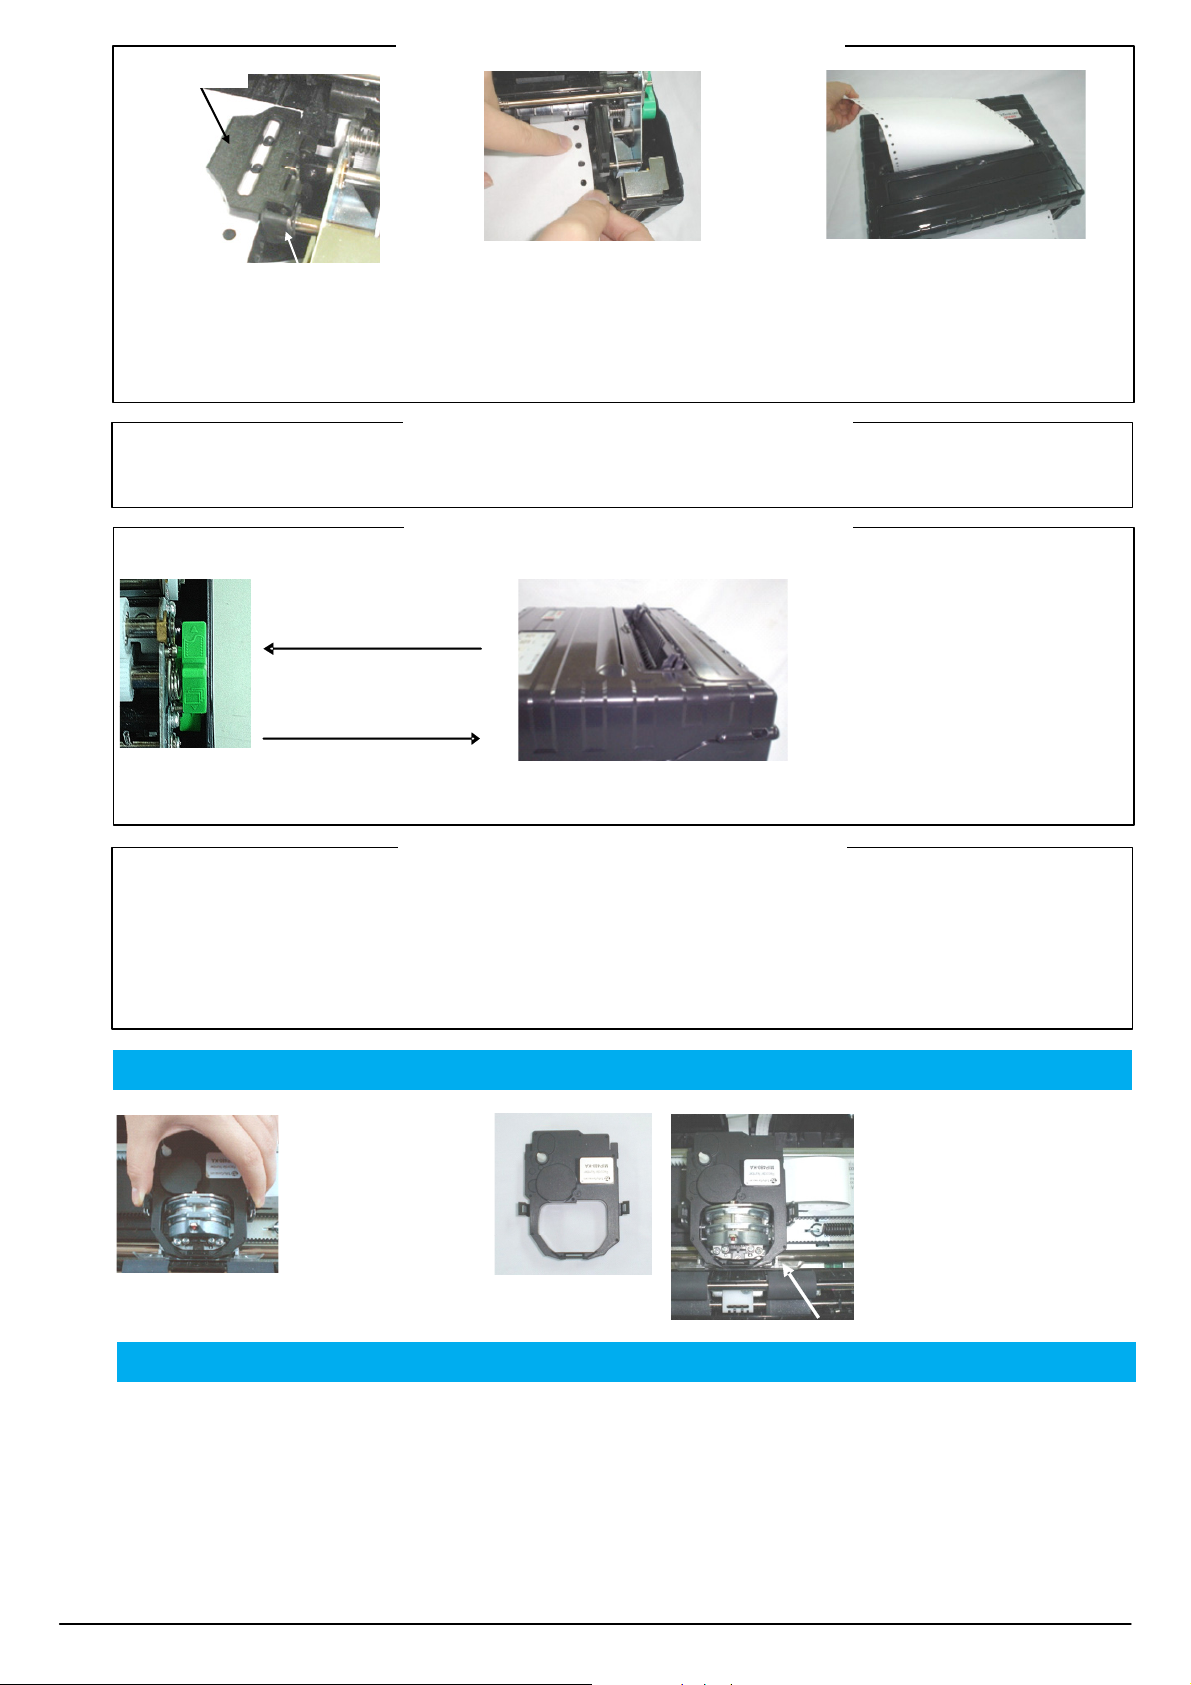
Changing the Ribbon Cartridge
Open print-gap lever fully
open. To remove the old
ribbon, squeeze both of
the ribbon's tabs and lift
the ribbon straight out of
its carriage.
Be careful of the print
head during this operation.
Ribbon Cartridge
Trouble Shooting
Trouble Shooting
Trouble Shooting
Trouble Shooting
Trouble Shooting
NO POWER
1. Ensure the power plug is properly seated in bottom of printer.
2. Check the in line fuse coming from the battery.
POOR PRINT QUALITY
1. Ensure the ribbon cartridge is properly seated on carriage
assembly.
2. Replace the ribbon.
3. Check the head gap position (Green tip lever on left – push
down and move lever 2 to 3 clicks upward or adjust
accordingly to darkness of print).
Before installing the ribbon cartridge,
release the two tabs on the side of
the cartridge, then move the roller to
the FREE position. If the tabs are not
released, the cartridge will not fit
onto the printer.
When placing the new ribbon
cartridge on the carriage, make sure
that the thin ribbon does not become
bunched or folded at the print head.
Readjust the print gap to achieve
good print quality.
PAPER JAMMING
1. Ensure the paper is aligned properly in the bottom tractors.
2. Ensure the tractor lids are closed and both tractors are in the locked position.
3. Ensure the head gap in not set too tight against the paper
(see step 3 in POOR PRINT QUALITY).
4. Ensure the ribbon is installed correctly.
5. Ensure the paper is not torn or ripped going into the printer.
PAPER NOT LOADING (Tractors Not Turning)
1. Open the cover, ensure green paper type switch (located on the
right side of the printer) is set for continuous feed paper.
2. Press the LOAD/FF button to see if tractors turn.
 Loading...