

Page 1
USER'S
MANUAL
Compact Ethernet Board
043962
Page 2

The information contained in this document is subject to change without prior notice.
All rights reserved. Any mechanical, electrical or electronic reproduction
or adaptation of the information in this document
without prior written permission from DASCOM is prohibited
DASCOM Europe GmbH, Heuweg 3, D-89079 Ulm, Germany
DASCOM AP Pte Ltd, 63 Hillview Avenue, #08-22, Singapore 669569
DASCOM Americas Corp., 421 W. Main Street, Waynesboro, VA 22980, USA
Copyright
© October 2011 Dascom www.dascom.com
Version:
1.0
Page 3

Contents
Compact Ethernet Board
1. Confirmation of Carton Contents
2. About Compact Ethernet Board
3. Operating Instructions
4. Warning
...................................................................................................................................
.......................................................................................................
..................................................................................
.....................................................................................
4
5
6
9
3
Page 4

1
Check carefully that the following accessories are includ ed in the ca rton:
Item Part name
1
2
Confirmation of Carton Contents
Compact Ethernet Board
Compact Ethernet Board
User's Manual
4
Page 5

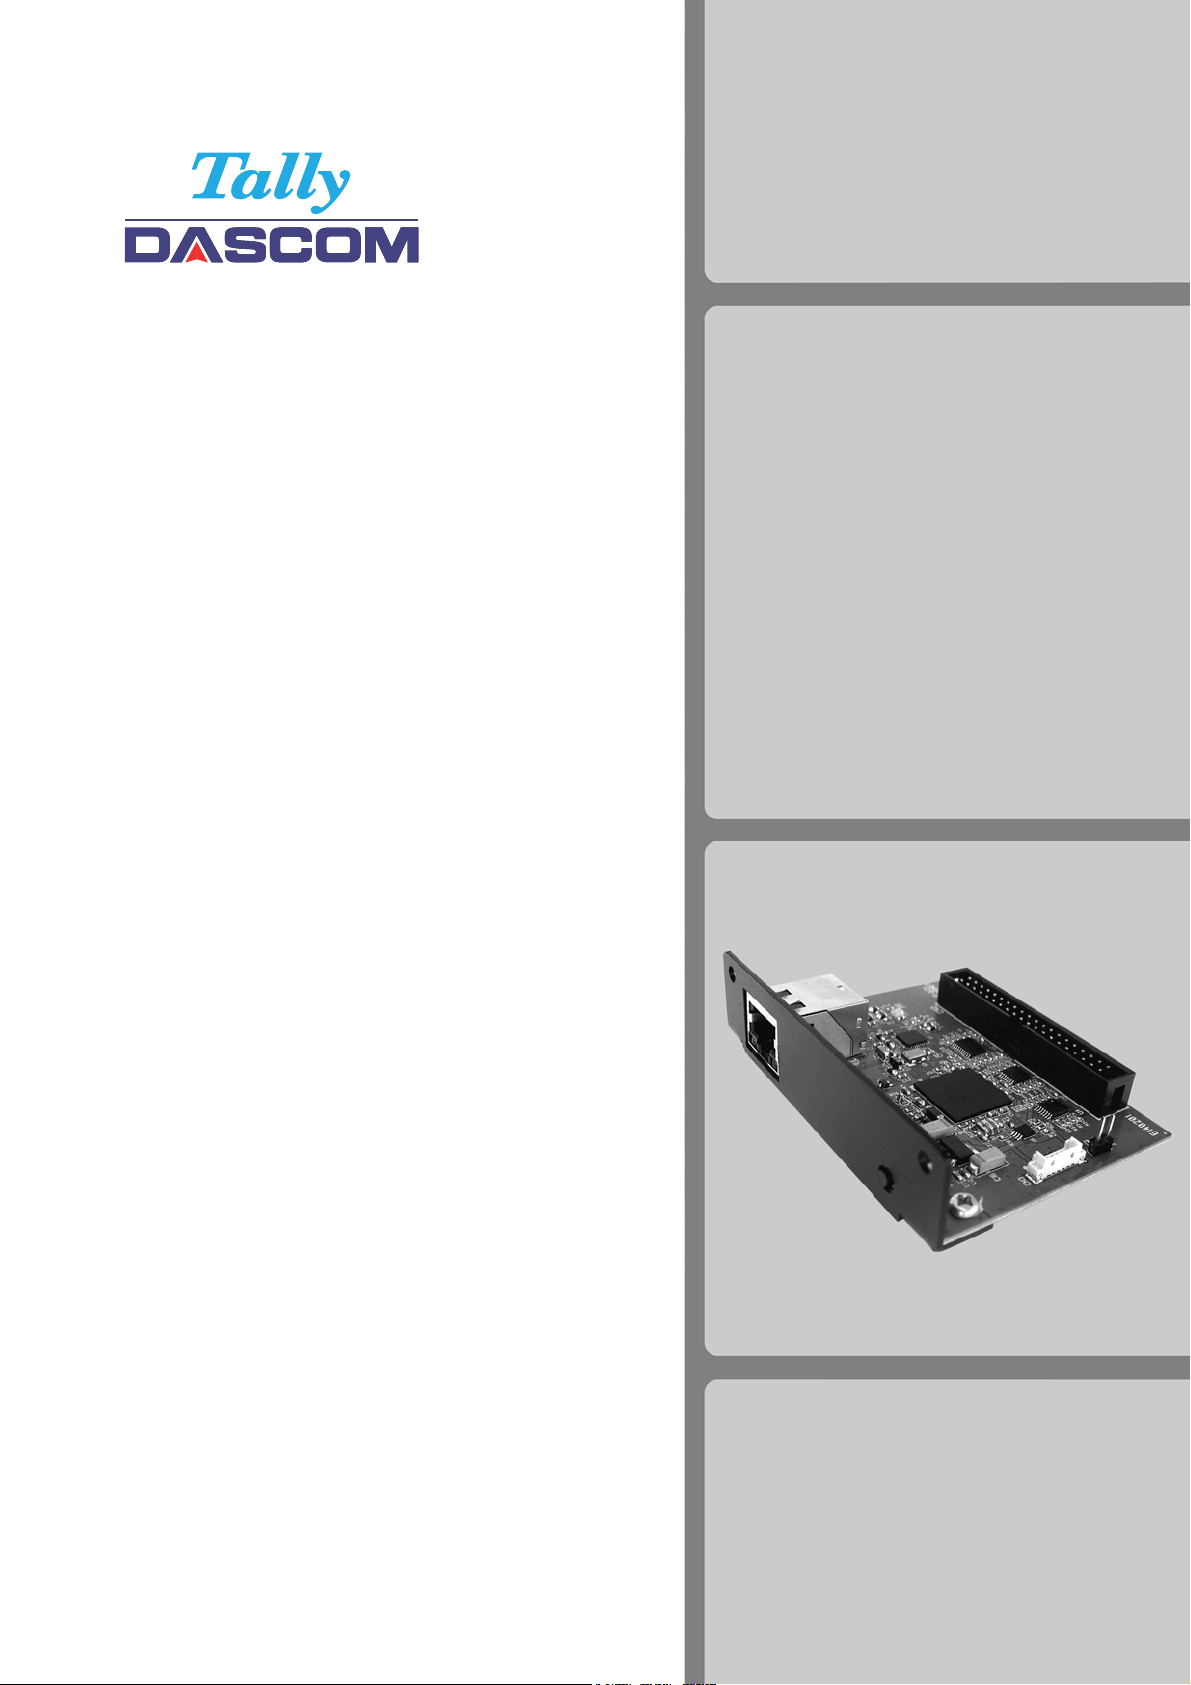
2
Function
About
Comapct Ethernet Board
The Compact Ethernet Board
of
7106, 7206 and 7010 Series printer
It is a
The module firmware allows a quick and easy adaptation to the user's local network
(LAN).
Main view
is a module, designed for connection
to
LAN
good and economical solution of this purpose.
.
¤
¢
¢
LAN Interface
£
Button (pressing this button causes the printing current printer's network settings)
¤
Connector to the printer
£
5
Page 6

3
Operating Instructions
Compact Ethernet Board
1. Getting information about the current network settings
of the printer
To get information about current network settings of the printer, do the following:
1.1.
Connect the printer to the LAN
1.2.
Press the buton
The following options are possible:
А.
£
to print the current network settings of the printer.
. Switch ON the printer.
DHCP server is enabled, the printer finds them and uses its IP address,
Subnet mask and Gateway settings.
B.
6
Page 7

DHCP server is enabled, but no DHCP server found (
Then the printer uses the static settings (manually loaded) for IP address,
Subnet mask and Gateway.
C.
Operating Instructions
Compact Ethernet Board
for about 24 sec.
).
DHCP server is desabled and the printer uses the static settings
(manually loaded) for IP address, Subnet mask and Gateway.
D.
Neither PC or local server found.
7
Page 8

Operating Instructions
Compact Ethernet Board
2. Changing the current network settings of the printer
To change the current network settings of the printer,
2.1.
Write the current printer IP in the BROWSER, that you have chosen.
Load by ENTER.
The following table is displayed on the screen:
do the following
:
2.2.
If you want the DHCP server data to be used by the printer (IP address,
Subnet mask and Gateway settings), switch ON (check) DHCP еnable.
2.3.
If you want to be used manually loaded static data (IP address, Subnet mask
and Gateway), switch OFF (do not check) DHCP еnable.
2.4.
To write changes, click Save.
•
If the settings are loaded correctly, a table, containing the new printer settings
and a message "
•
If an error is occured when loading settings, the changes are not saved and
an Syntax error message is displayed on the screen:
Settings not saved! Check syntax error!
Remove the error and save again.
2.5.
If you wish to return the current network settings of the printer,
click RELOAD.
Settings saved successfully!"
are appeared on the screen.
8
Page 9

4
Warning
Compact Ethernet Board
The printer can use new settings only after RESTART (ON/OFF).
The page, containing the settings table, can not be opened,
if the TCP printing connection is opened, at the same time.
This interface supportsTCP/IP protocol only.
Administration of the printer is not possible.
9
 Loading...