How it Works
Log In / Sign Up
Buy Points
How it Works
FAQ
Contact Us
Questions and Suggestions
Users
CITIZEN
Loading...
A
AT0595-56E
AT0596-53F
AT0605-03L
AT0606-01W
AT0607-08E
2
AT0609-02E
AT0611-51L
AT0617-55E
AT0650-50Y
AT0720-56E
AT0730-01E
AT0749-54E
AT0760-51A
AT0760-51E
AT0760-51 L
AT0761-08A
AT0761-08 E
AT0810-12E
AT0810-55X
AT0815-51E
AT0902-59E
AT0940-50F
AT1000-50E
AT1085-57F
AT1086-54G
AT1087-51B
AT1091-54F
AT1100-55B
AT1100-55 F
AT1100-55G
AT1100-55 L
AT1131-51A
AT1131-51 E
AT1150-14F
AT1151-03F
AT115154F
AT2074-58E
AT2100-09E
AT2130-59M
AT2240-51E
AT2242-55F
AT2248-59E
AT2358-51E
AT4000-02E
AT4004-52E
AT4007-54E
AT4008-51E
AT7030-05E
AT7035-01E
AT8
AT8010-58B
AT8010-58E
AT8014-57E
AT8030-18F
AT9
ATB
AU1012-03A
AU1012-54A
AU1060-51E
Auto-Cutter CL-S6621
AV0020-55H
AV0030-60A
AV0030-60 E
AV3 Series
AW1231-58L
AW-3
AW7014-53A
AY5 Series
AY5XXX
B
B023
B080
6
B11
6
B110
2
B51
6
B690
B74
2
B740
B741
3
B746
3
B870
4
B872
6
B873
7
B876
7
B877
6
BD2-1220
2
BD2-1221
5
BD2-2220
5
BD2-2221
2
BD2-2860
BD2-2880
2
BD2-2890
6
BD2-2890DD
BD2-3880
2
BD2-3890
4
BD-3890
BE9071-07F
BE9151-00C
BI0740-53B
BI074096P
BI0742-58P
Loading...
Loading...
Nothing found
AT8010-58B
User Manual
37 pgs
5.12 Mb
1
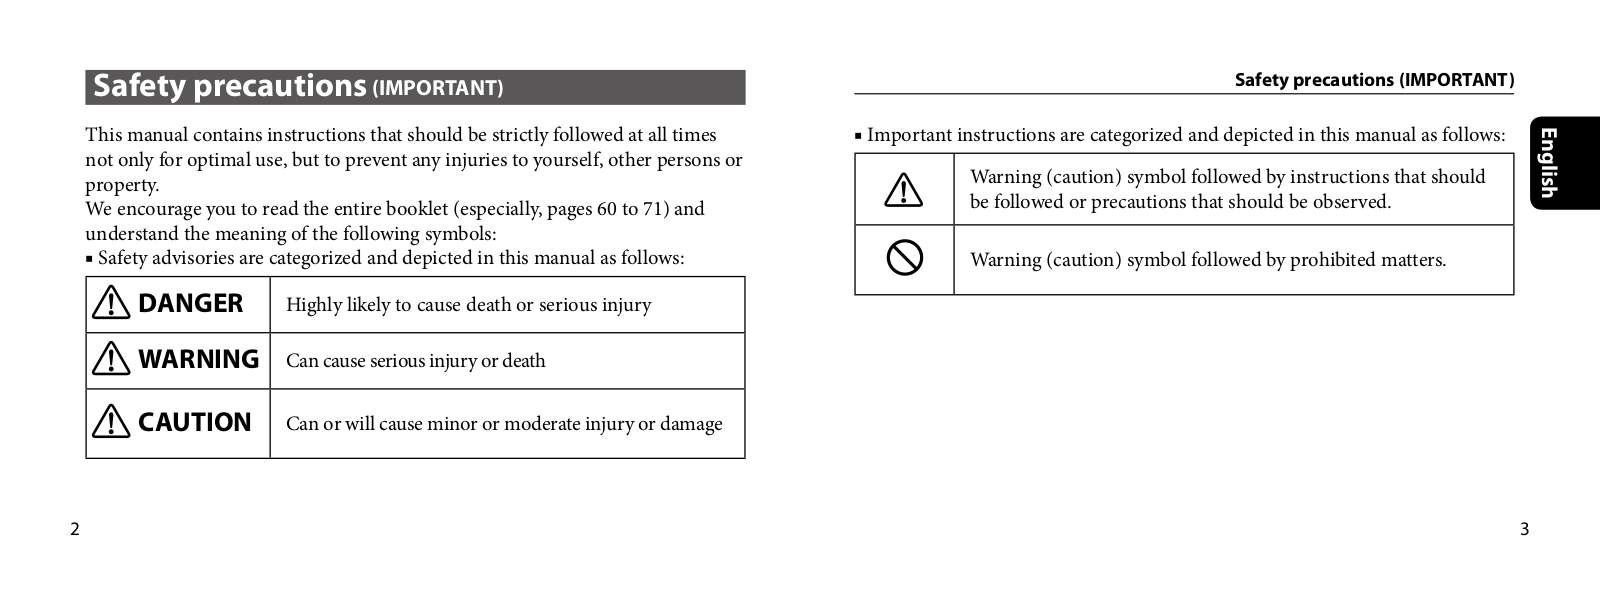
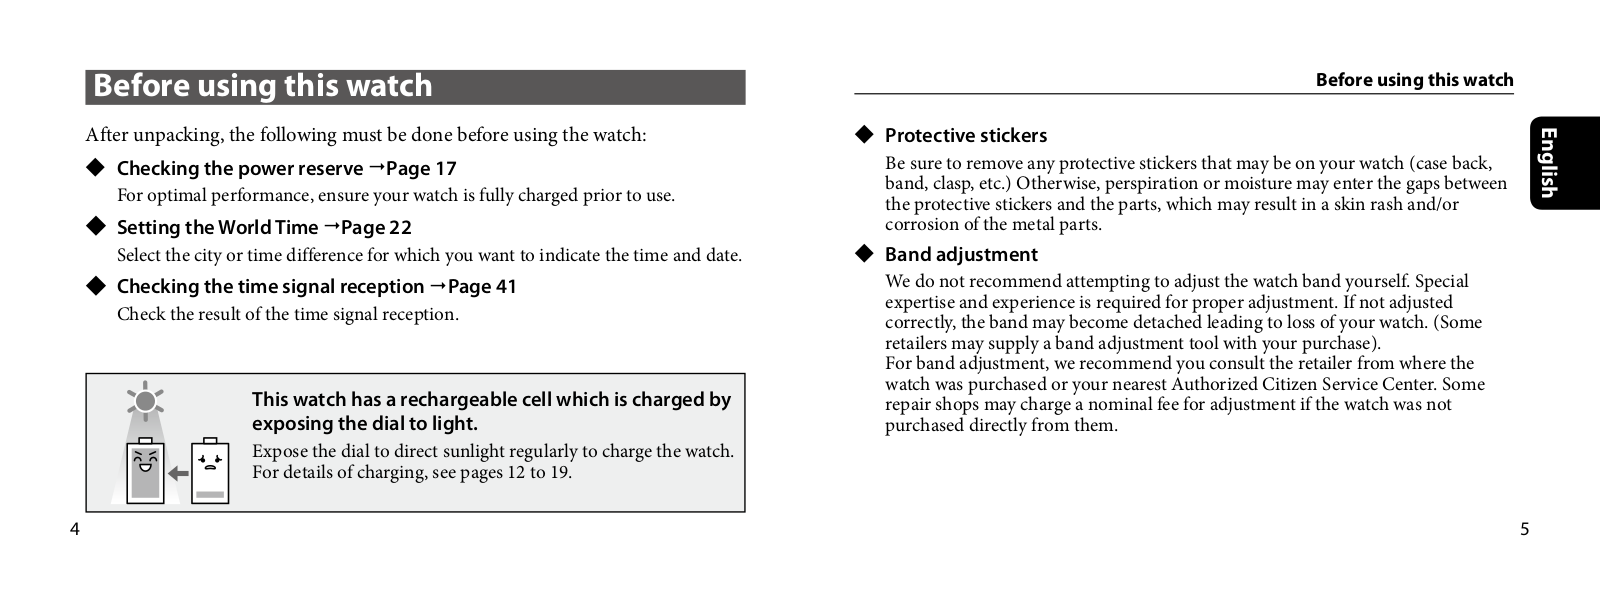
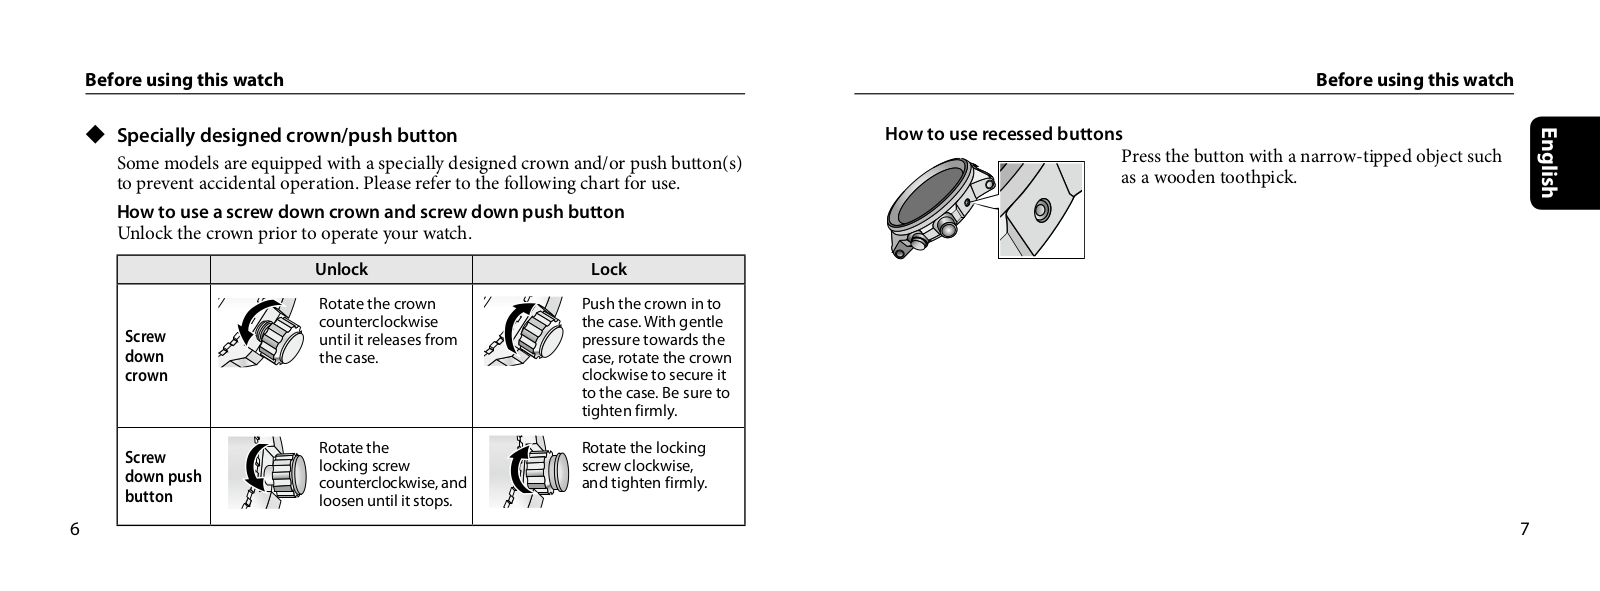
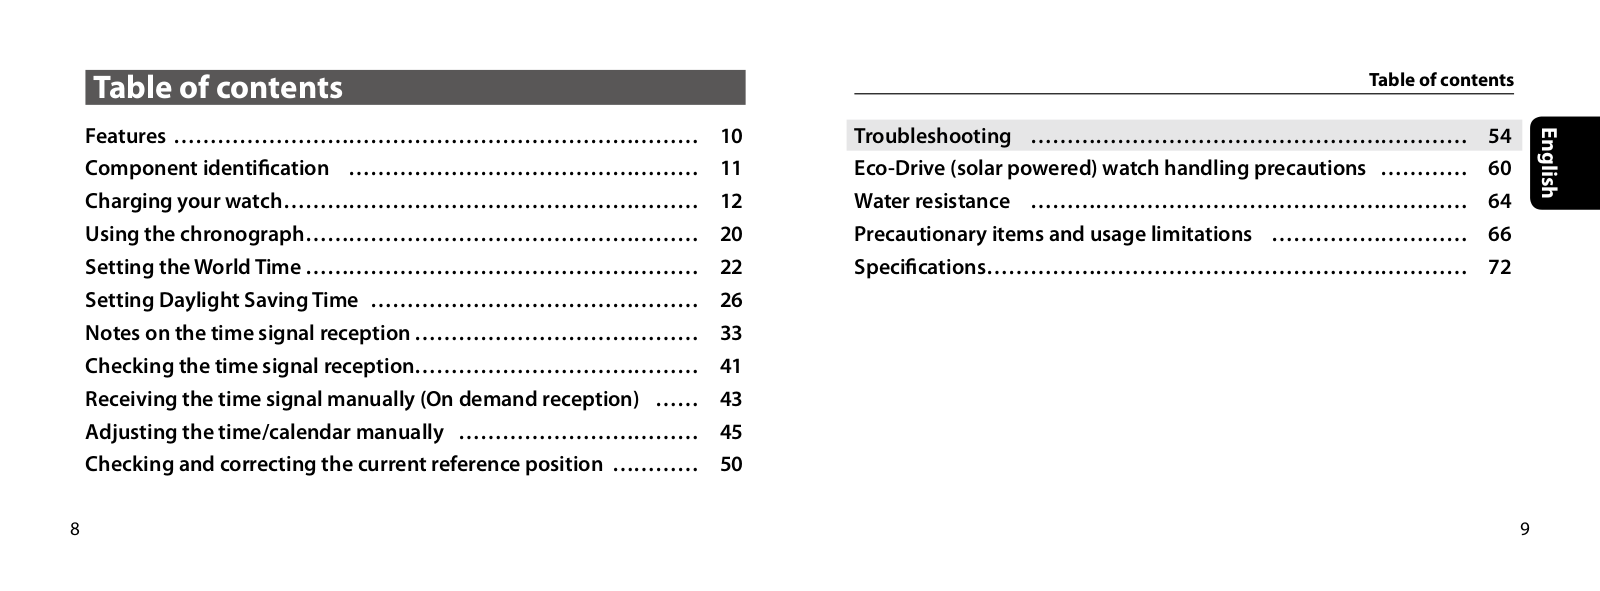
Table of contents
Loading...
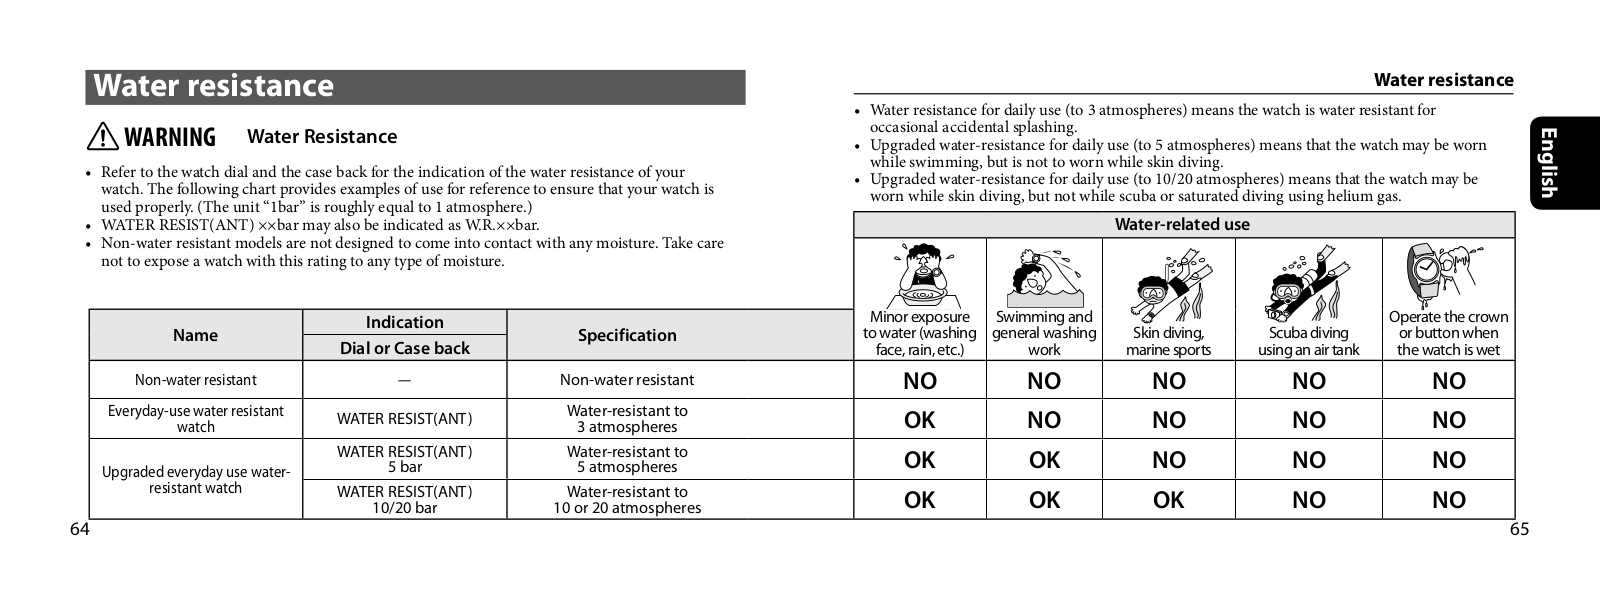
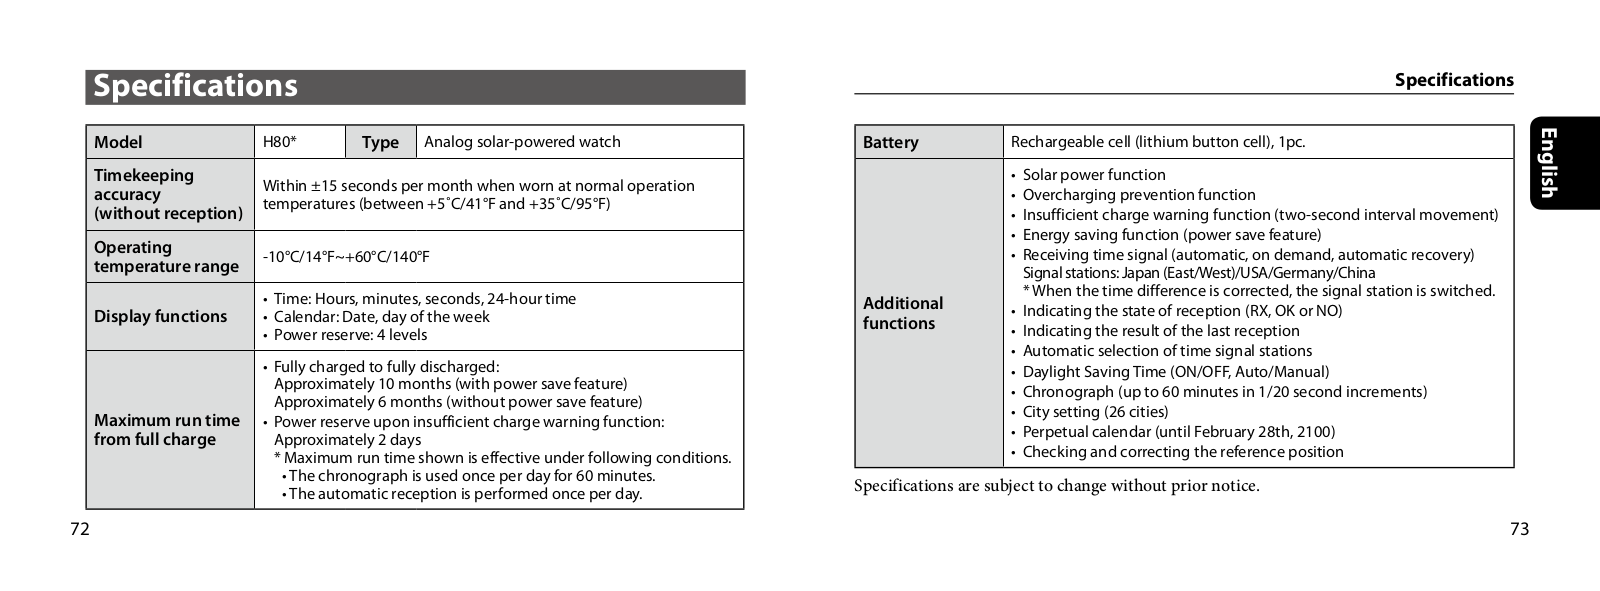
CITIZEN AT8010-58B, AT8010-58E, AT8014-57E, AT8030-18F User Manual
...
CITIZEN User Manual
Download
Specifications and Main Features
Frequently Asked Questions
User Manual
Download
Loading...
+
hidden pages
Unhide
You need points to download manuals.
1 point = 1 manual.
You can buy points or you can get point for every manual you upload.
Buy points
Upload your manuals
 Loading...