

Chicco Safari Car Toy Owner's Manual
2
3
B
F E
Fig. 1 Fig. 4.1Fig. 2
Fig. 3 Fig. 6Fig. 4
3
H
Fig. 4.1 Fig. 5
Fig. 6 Fig. 7
4
5
Manuale Istruzioni GIOCO AUTO SAFARI
I
Età: 12M+
• Si raccomanda di leggere prima dell’uso e conservare queste istruzioni per riferimento futuro.
• Il gioco funziona con le seguenti pile: 3 pile x AA da 1,5 Volt nel pannello (incluse), 2 pile x AAA
da 1,5 Volt nel comando ad infrarossi (incluse). Le pile incluse nel prodotto all’atto dell’acquisto
vengono fornite solo per la prova dimostrativa nel punto vendita e devono essere sostituite con
pile nuove subito dopo l’acquisto.
AVVERTENZE
Per la sicurezza del tuo bambino: ATTENZIONE!
• Prima dell’uso rimuovere eventuali sacchetti in plastica ed altri componenti non facenti parte
del giocattolo (es. legacci, elementi di ssaggio, ecc.) e tenerli fuori dalla portata dei bambini.
Rischio di soffocamento.
• Vericare regolarmente lo stato di usura del prodotto e la presenza di eventuali rotture. In caso di
danneggiamenti, non utilizzare più il giocattolo e tenerlo fuori dalla portata dei bambini.
• L’utilizzo del gioco deve avvenire sotto la sorveglianza di un adulto.
• Utilizzare il gioco solo con il seggiolino auto rivolto verso il senso di marcia.
• Il montaggio del pannello auto deve essere effettuato solo da parte di un adulto.
• Il pannello può essere istallato solo sul retro dei sedili anteriori dotati di poggiatesta.
• Assicurarsi che il pannello sia stato ssato correttamente e agganciato saldamente al poggiatesta. Vericarne frequentemente il ssaggio.
• Non lasciare mai il pannello sul sedile dell’auto non agganciato, potrebbe urtare o ferire i passeggeri.
• Si raccomanda di evitare di voltarsi per accendere il gioco o raccogliere il comando ad infrarossi
mentre si è alla guida dell’auto.
• Quando il sedile posteriore è vuoto, il comando ad infrarossi può essere ssato all’asola presente
sul pannello. Quando il bambino è seduto sul seggiolino, agganciare il comando ad infrarossi
esclusivamente alle cinture del seggiolino.
• Non effettuare modiche o aggiunte al prodotto, in particolare non aggiungere lacci o fascette.
FISSAGGIO DEL PANNELLO IN AUTO
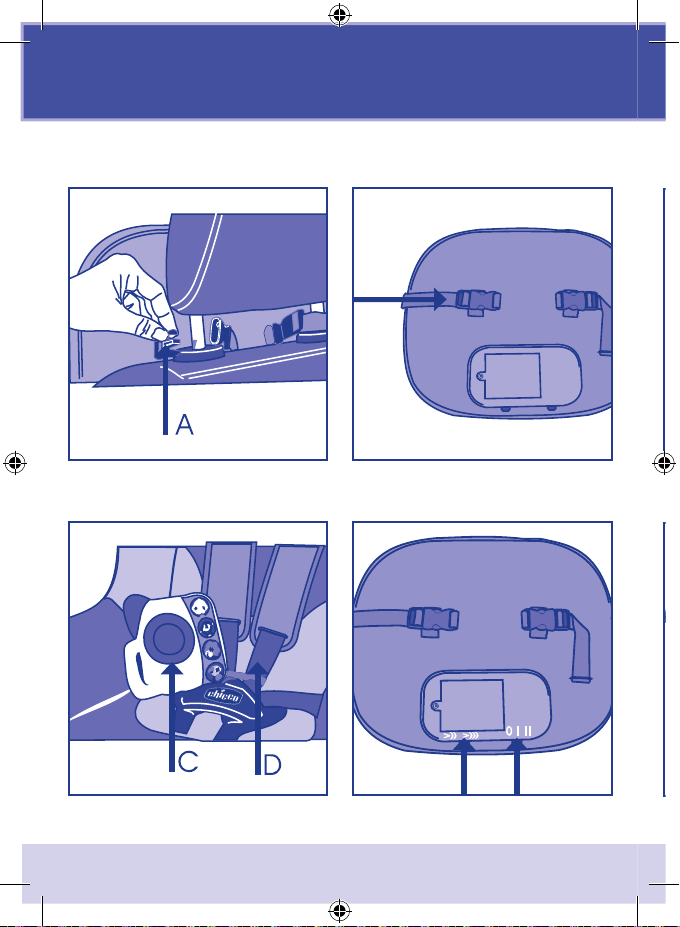
Aprire le bbie (A, Fig. 1) posizionate sul retro del pannello e richiuderle sui supporti del poggiatesta. Tirare le fettucce (B, Fig. 2) per far aderire il pannello al sedile.
FISSAGGIO DEL COMANDO AD INFRAROSSI
Agganciare il comando ad infrarossi (C, Fig.3) alla cintura di sicurezza del seggiolino auto (D, Fig.
3) attraverso la fettuccia dotata di chiusura a strappo. Ciò serve per evitare che il gioco possa
cadere frequentemente a terra durante lo spostamento in auto.
FUNZIONAMENTO DEL GIOCO
Accensione e spegnimento
• Accendere il pannello spostando il cursore E (Fig. 4) dalla posizione 0 alla posizione I (Relax) o II
(Fun) a seconda della modalità di gioco desiderata.
• Per scegliere il volume preferito spostare il cursore F (Fig. 4) dalla posizione <)) (basso) alla
posizione <))) (alto).
• Al ne di evitare un inutile consumo delle pile, si consiglia di spegnere sempre il gioco dopo l’uso
spostando il cursore E (Fig. 4) in posizione 0.
• Il comando ad infrarossi a forma di walkie talkie si attiva con l’inserimento delle pile ed è opera-
tivo solo quando il pannello è nella modalità Fun.
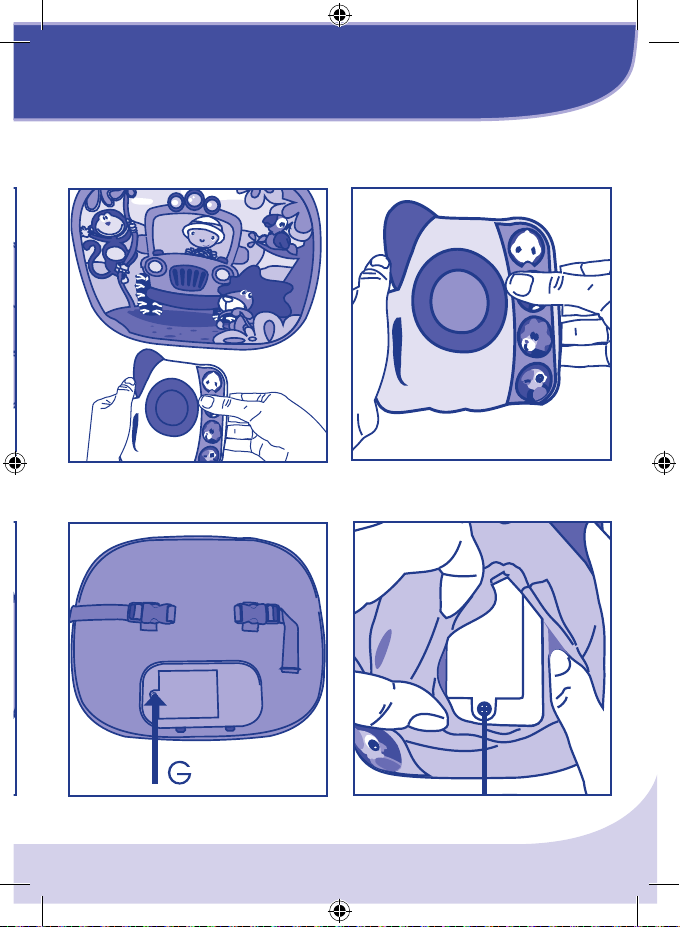
• Per attivare le funzioni del gioco, puntare il comando ad infrarossi direzionando il sensore, pre-
sente sullo stesso, verso il pannello (Fig.4.1)
Modalità di gioco
1. RELAX: per attivare questa modalità spostare il cursore E (Fig. 4) sulla posizione I.
Luci soffuse e dolci melodie cullano il bambino. In questa modalità di gioco il comando ad infra-
rossi non è operativo. Dopo circa 15 minuti il gioco si spegne automaticamente. Per riattivarlo,
spegnere il gioco spostando il cursore sulla posizione 0. Successivamente riaccenderlo nella mo-
dalità di gioco desiderata;
2. FUN: per attivare questa modalità spostare il cursore E (Fig. 4) sulla posizione II. Un effetto
sonoro ne conferma la selezione. In questa modalità di gioco, ogni volta che il bambino preme
uno dei pulsanti posizionati sul comando ad infrarossi (Fig. 5) ascolta l’effetto sonoro corrispon-
dente al tasto premuto. Una pressione consecutiva sullo stesso pulsante attiva una melodia. In
entrambi i casi, l’immagine corrispondente sul pannello si illumina, permettendo al bambino di ri-
conoscerla. Nella modalità FUN dopo circa 20 minuti di non utilizzo, un effetto sonoro comunica
lo spegnimento automatico del gioco. Per riattivarlo spegnere il gioco spostando il cursore sulla
posizione 0. Successivamente riaccenderlo nella modalità di gioco scelta.
RIMOZIONE ED INSERIMENTO DELLE PILE SOSTITUIBILI
• Per sostituire le pile del pannello: allentare la vite del coperchio (G, Fig. 6), posta sul retro dello
stesso, con un cacciavite, asportare il coperchio, rimuovere dal vano pile le pile scariche, inserire
le pile nuove facendo attenzione a rispettare la corretta polarità di inserimento (come indicato
sul prodotto), riposizionare il coperchio e serrare a fondo la vite.
• Per sostituire le pile nel comando ad infrarossi: aprire la chiusura a strappo situata sul retro dello
stesso, allentare la vite del coperchio (H, Fig. 7) con un cacciavite, asportare il coperchio, rimuo-
vere dal vano pile le pile scariche, inserire le pile nuove facendo attenzione a rispettare la corretta
polarità di inserimento (come indicato sul prodotto), riposizionare il coperchio e serrare a fondo
la vite. Una volta sostituite le pile vericare che la chiusura a strappo sia ben ssata.
ATTENZIONE
• La sostituzione delle pile deve essere sempre effettuata da parte di un adulto.
• Non lasciare le pile o eventuali utensili a portata dei bambini.
• Rimuovere sempre le pile scariche dal prodotto per evitare che eventuali perdite di liquido pos-
sano danneggiare il prodotto.
• Rimuovere sempre le pile in caso di non utilizzo prolungato del prodotto.
• Utilizzare pile alcaline uguali o equivalenti al tipo raccomandato per il funzionamento di questo
prodotto.

5
• Per scegliere il volume preferito spostare il cursore F (Fig. 4) dalla posizione <)) (basso) alla
posizione <))) (alto).
• Al ne di evitare un inutile consumo delle pile, si consiglia di spegnere sempre il gioco dopo l’uso
spostando il cursore E (Fig. 4) in posizione 0.
• Il comando ad infrarossi a forma di walkie talkie si attiva con l’inserimento delle pile ed è operativo solo quando il pannello è nella modalità Fun.
• Per attivare le funzioni del gioco, puntare il comando ad infrarossi direzionando il sensore, presente sullo stesso, verso il pannello (Fig.4.1)
Modalità di gioco
1. RELAX: per attivare questa modalità spostare il cursore E (Fig. 4) sulla posizione I.
Luci soffuse e dolci melodie cullano il bambino. In questa modalità di gioco il comando ad infrarossi non è operativo. Dopo circa 15 minuti il gioco si spegne automaticamente. Per riattivarlo,
spegnere il gioco spostando il cursore sulla posizione 0. Successivamente riaccenderlo nella modalità di gioco desiderata;
2. FUN: per attivare questa modalità spostare il cursore E (Fig. 4) sulla posizione II. Un effetto
sonoro ne conferma la selezione. In questa modalità di gioco, ogni volta che il bambino preme
uno dei pulsanti posizionati sul comando ad infrarossi (Fig. 5) ascolta l’effetto sonoro corrispondente al tasto premuto. Una pressione consecutiva sullo stesso pulsante attiva una melodia. In
entrambi i casi, l’immagine corrispondente sul pannello si illumina, permettendo al bambino di riconoscerla. Nella modalità FUN dopo circa 20 minuti di non utilizzo, un effetto sonoro comunica
lo spegnimento automatico del gioco. Per riattivarlo spegnere il gioco spostando il cursore sulla
posizione 0. Successivamente riaccenderlo nella modalità di gioco scelta.
RIMOZIONE ED INSERIMENTO DELLE PILE SOSTITUIBILI
• Per sostituire le pile del pannello: allentare la vite del coperchio (G, Fig. 6), posta sul retro dello
stesso, con un cacciavite, asportare il coperchio, rimuovere dal vano pile le pile scariche, inserire
le pile nuove facendo attenzione a rispettare la corretta polarità di inserimento (come indicato
sul prodotto), riposizionare il coperchio e serrare a fondo la vite.
• Per sostituire le pile nel comando ad infrarossi: aprire la chiusura a strappo situata sul retro dello
stesso, allentare la vite del coperchio (H, Fig. 7) con un cacciavite, asportare il coperchio, rimuovere dal vano pile le pile scariche, inserire le pile nuove facendo attenzione a rispettare la corretta
polarità di inserimento (come indicato sul prodotto), riposizionare il coperchio e serrare a fondo
la vite. Una volta sostituite le pile vericare che la chiusura a strappo sia ben ssata.
ATTENZIONE
• La sostituzione delle pile deve essere sempre effettuata da parte di un adulto.
• Non lasciare le pile o eventuali utensili a portata dei bambini.
• Rimuovere sempre le pile scariche dal prodotto per evitare che eventuali perdite di liquido possano danneggiare il prodotto.
• Rimuovere sempre le pile in caso di non utilizzo prolungato del prodotto.
• Utilizzare pile alcaline uguali o equivalenti al tipo raccomandato per il funzionamento di questo
prodotto.
6
7
• Non mischiare batterie vecchie e nuove.
• Nel caso le pile dovessero generare delle perdite di liquido, sostituirle immediatamente, avendo
cura di pulire l’alloggiamento delle pile e lavarsi accuratamente le mani in caso di contatto col
liquido fuoriuscito.
• Rimuovere le pile dal giocattolo prima del suo smaltimento.
• Non buttare le pile scariche nel fuoco o disperderle nell’ambiente, ma smaltirle operando la
raccolta differenziata.
• Non mischiare batterie alcaline standard (zinco-carbon), o batterie ricaricabili.
• Il giocattolo non è progettato per funzionare con batterie al Litio. ATTENZIONE: l’uso improprio
potrebbe generare condizioni di pericolo.
• Non porre in corto circuito i morsetti di alimentazione.
• Non tentare di ricaricare le pile non ricaricabili: potrebbero esplodere.
• Non è consigliato l’utilizzo di batterie ricaricabili, potrebbe diminuire la funzionalità del giocattolo.
• Nel caso di utilizzo di batterie ricaricabili, estrarle dal giocattolo prima di ricaricarle ed effettuare
la ricarica solo sotto la supervisione di un adulto.
Questo prodotto è conforme alla Direttiva EU 2002/96/EC.
Il simbolo del cestino barrato riportato sull’apparecchio indica che il prodotto, alla
ne della propria vita utile, dovendo essere trattato separatamente dai riuti dome-
stici, deve essere conferito in un centro di raccolta differenziata per apparecchiature
elettriche ed elettroniche oppure riconsegnato al rivenditore al momento dell’acquisto di una
nuova apparecchiatura equivalente. L’utente è responsabile del conferimento dell’apparecchio a
ne vita alle appropriate strutture di raccolta. L’adeguata raccolta differenziata per l’avvio successivo dell’apparecchio dismesso al riciclaggio, al trattamento e allo smaltimento ambientalmente
compatibile contribuisce ad evitare possibili effetti negativi sull’ambiente e sulla salute e favorisce
il riciclo dei materiali di cui è composto il prodotto. Lo smaltimento abusivo del prodotto da parte
dell’utente comporta delle sanzioni amministrative di cui al D.lgs. n. 22/1997 (art.50 e seguenti
del D.lgs 22/97).Per informazioni più dettagliate inerenti i sistemi di raccolta disponibili, rivolgersi
al servizio locale di smaltimento riuti, o al negozio in cui è stato effettuato l’acquisto.
Questo prodotto è conforme alla Direttiva EU 2002/95/EC.
Questo prodotto è conforme alla Direttiva EU 2006/66/CE
Il simbolo del cestino barrato riportato sulle pile o sulla confezione del prodotto, in-
dica che le stesse, alla ne della propria vita utile, dovendo essere trattato separa-
tamente dai riuti domestici, non devono essere smaltite come riuto urbano ma
devono essere conferite in un centro di raccolta differenziata oppure riconsegnate al rivenditore
al momento dell’acquisto di pile ricaricabili e non ricaricabili nuove equivalenti.
L’eventuale simbolo chimico Hg, Cd, Pb, posto sul cestino barrato, indica il tipo di sostanza contenuta nella pila: Hg=Mercurio, Cd=Cadmio, Pb=Piombo.
L’utente è responsabile del conferimento delle pile a ne vita alle appropriate strutture di raccol-
ta al ne di agevolare il trattamento e il riciclaggio. L’adeguata raccolta differenziata per l’avvio
successivo delle pile esauste al riciclaggio, al trattamento e allo smaltimento ambientalmente
compatibile contribuisce ad evitare possibili effetti negativi sull’ambiente e sulla salute e favorisce
il riciclo delle sostanze di cui sono composte le pile. Lo smaltimento abusivo del prodotto da parte
dell’utente comporta danni all’ambiente e alla salute umana. Per informazioni più dettagliate ine-
renti i sistemi di raccolta disponibili, rivolgersi al servizio locale di smaltimento riuti, o al negozio
in cui è stato effettuato l’acquisto.
PULIZIA E MANUTENZIONE DEL GIOCO
• Pulire il giocattolo in supercie utilizzando un panno morbido di tessuto o in microbra asciutto
o leggermente inumidito con acqua per non danneggiare il circuito elettrico. Non usare solven-
ti o detersivi per la pulizia del gioco.
• Proteggere il giocattolo da calore, polvere, sabbia, umidità e acqua.
Composizione tessile sia del pannello sia del comando ad infrarossi:
Esterno: 100% Poliestere
Imbottitura: 100 % Poliestere
Fabbricato in Cina.

7
ta al ne di agevolare il trattamento e il riciclaggio. L’adeguata raccolta differenziata per l’avvio
successivo delle pile esauste al riciclaggio, al trattamento e allo smaltimento ambientalmente
compatibile contribuisce ad evitare possibili effetti negativi sull’ambiente e sulla salute e favorisce
il riciclo delle sostanze di cui sono composte le pile. Lo smaltimento abusivo del prodotto da parte
dell’utente comporta danni all’ambiente e alla salute umana. Per informazioni più dettagliate inerenti i sistemi di raccolta disponibili, rivolgersi al servizio locale di smaltimento riuti, o al negozio
in cui è stato effettuato l’acquisto.
PULIZIA E MANUTENZIONE DEL GIOCO
• Pulire il giocattolo in supercie utilizzando un panno morbido di tessuto o in microbra asciutto
o leggermente inumidito con acqua per non danneggiare il circuito elettrico. Non usare solven-
ti o detersivi per la pulizia del gioco.
• Proteggere il giocattolo da calore, polvere, sabbia, umidità e acqua.
Composizione tessile sia del pannello sia del comando ad infrarossi:
Esterno: 100% Poliestere
Imbottitura: 100 % Poliestere
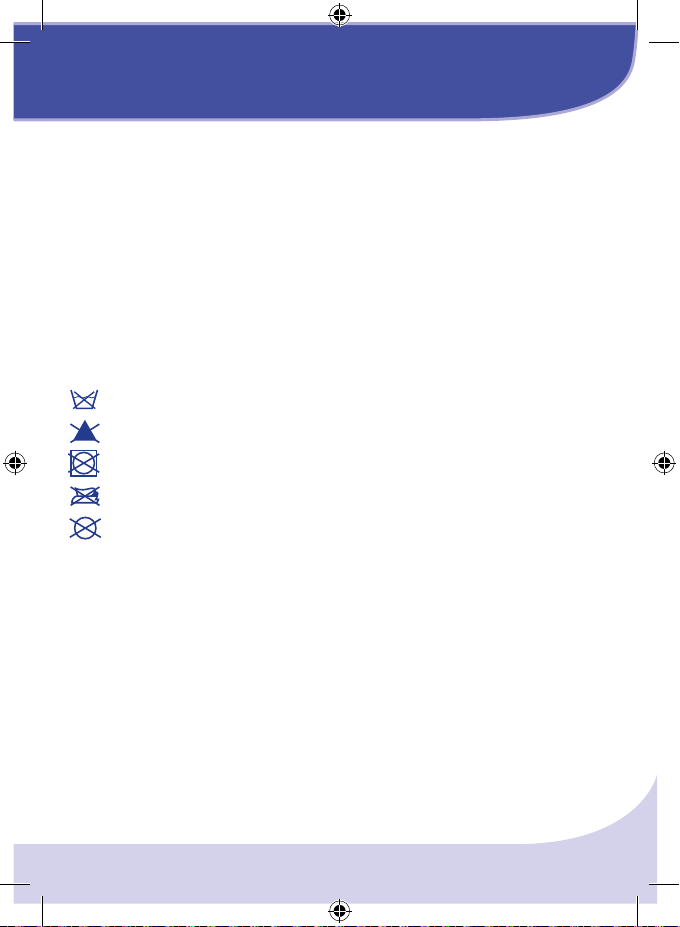
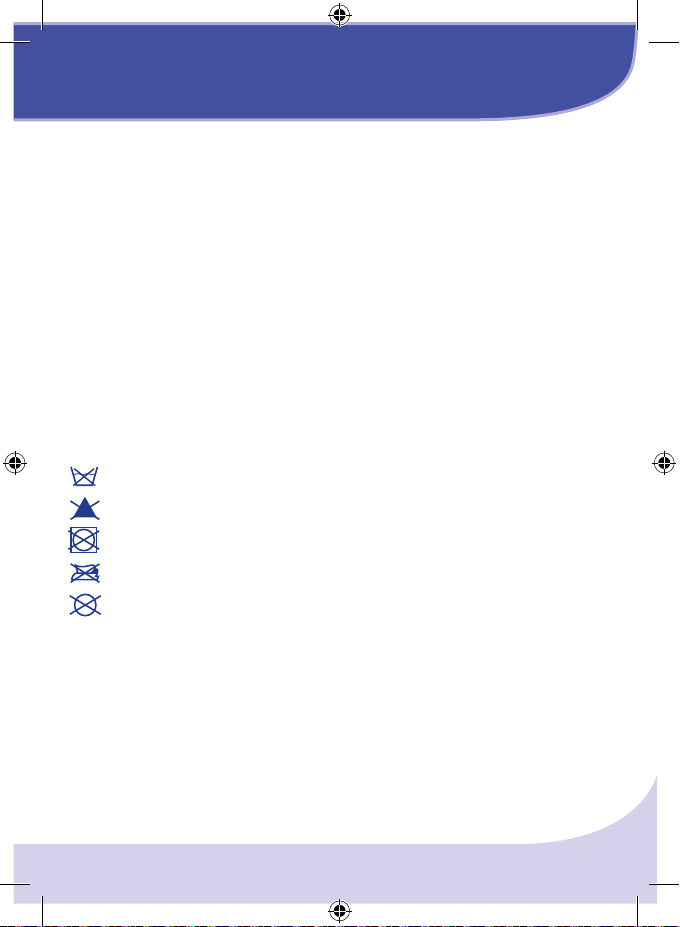
Non lavare in acqua
Non candeggiare
Non asciugare con macchina a tamburo
Non stirare
Non lavare a secco
Fabbricato in Cina.

8
9
Instruction manual SAFARI CAR TOY
GB
USA
Age: 12 Months +
• Please read these instructions carefully before using the toy and keep for future reference.
• The toy is battery operated as follows: 3 x 1.5 Volt AA batteries for the panel (included), 2 x 1.5
Volt AAA batteries for the infrared remote control (included). The batteries supplied with this
product, at the point of sale, are intended for demonstration purposes only; please replace them
immediately after completing your purchase.
WARNINGS
For your child's safety: WARNING!
• Before using the product remove and dispose of any plastic bags and any other packaging (e.g.
fasteners and xing ties etc) and keep them out of reach of children. Suffocation hazard.
• Check the toy regularly for signs of wear and damage and to ensure that it is assembled correctly.
Should any part be damaged, do not use the toy and keep it out of reach of children.
• This toy must only be used under adult supervision.
• Always use the toy with the child car seat facing forwards.
• This car panel must only be assembled and tted by an adult.
• The panel can only be installed on the back of front car seats which have a head rest.
• Make sure the panel is tted correctly and rmly attached to the head rest. Check it regularly to
ensure it has not come loose.
• Never leave the panel on a vehicle seat without fastening it securely in place; it could hurt or
injure other passengers in the car.
• Remember never to turn your head to switch the toy on, or pick up the infrared remote control
while you are driving the car.
• When the rear seat is empty, the infrared remote control can be fastened to the panel using the
relative slot. When the child is sitting in the car seat, fasten the infrared remote control to the
child car seat harness only.
• This product must not be modied in any way; never fasten other ties or straps to it.
INSTALLING THE PANEL IN THE CAR
Open the buckles (A. Diag. 1) found on the back of the panel and fasten them to the supports on
the head rest. Pull the straps (B, Diag. 2) to fasten the panel rmly to the seat.
FASTENING THE INFRARED REMOTE CONTROL TO THE CAR SEAT
Fasten the infrared remote control (C, Diag. 3) to the child car seat safety harness strap (D, Diag.
3) using the velcro fastener strap. This aims to prevent the toy from falling onto the oor when
travelling by car.
HOW TO USE THE TOY
Switching it ON and Off
• To switch the toy panel ON, move the switch E (Diag. 4) from the 0 position to the I position
(Relax) or II (Fun) position according to the game mode desired.
• To adjust the volume level, move the switch F (Diag. 4) from the <)) (low) position to the <)))
(high) position.
• In order to avoid using up the batteries for no reason, it is recommended to switch off the toy by
moving the switch E (Diag. 4) to the 0 position.
• Insert the batteries in the walkie-talkie style infrared remote control before using it; it only works
when the toy panel is set to Fun mode.
• To start the game functions, point the sensor on the infrared remote control at the panel (Diag.
4.1).
Play modes
1. RELAX: to enable this play mode, move the switch E (Diag. 4) to the I position.
The low lights and soft music gently soothe your baby. The infrared remote control does not work
when the toy is operating in this play mode. The toy will switch off automatically after 15 minutes.
To restart it, switch it off by moving the switch to the 0 position. Then switch it back on and set
the desired play mode.
2. FUN: to enable this play mode, move the switch E (Diag. 4) to the II position. A jingle will con-
rm the play mode choice. When set to Fun mode, every time the child presses one of the buttons
on the infrared remote control (Diag. 5) the relative sound effect will play. If the same button is
pressed a number of times, a tune will play. In both cases, the images linked to the buttons will be
displayed on the panel so your baby will learn to recognise them. When set to FUN mode, if the
toy is not used for about 20 minutes, it will play a sound effect and switch off automatically. To
restart it, switch it off by moving the switch to the 0 position. Then switch it back on and set the
play mode of your choice.
HOW TO FIT AND REMOVE THE REPLACEABLE BATTERIES
• To replace the panel batteries: loosen the screw on the battery compartment cover (G, Diag. 6)
on the back with a screwdriver and remove the cover; then remove the at batteries and t new
ones, ensuring that the battery polarity is correct (as shown on the product), close the battery
compartment cover, and tighten the screw rmly.
• To replace spent batteries inside the infrared remote control: open the velcro fastener on the
back, loosen the screw on the battery compartment cover (H, Diag. 7) on the back with a screw-
driver and remove the cover; then remove the at batteries and t new ones, ensuring that the
battery polarity is correct (as shown on the product), close the battery compartment cover, and
tighten the screw rmly. Close the velcro fastener rmly when you have nished changing the
batteries.
WARNING
• Batteries must only be tted by an adult.
• Always keep batteries and tools out of the reach of children.
• Always remove spent batteries from the toy to avoid the danger of leakage from the battery
damaging the product.
• Always remove the batteries if the product will not be used for a long period of time
9
• To adjust the volume level, move the switch F (Diag. 4) from the <)) (low) position to the <)))
(high) position.
• In order to avoid using up the batteries for no reason, it is recommended to switch off the toy by
moving the switch E (Diag. 4) to the 0 position.
• Insert the batteries in the walkie-talkie style infrared remote control before using it; it only works
when the toy panel is set to Fun mode.
• To start the game functions, point the sensor on the infrared remote control at the panel (Diag.
4.1).
Play modes
1. RELAX: to enable this play mode, move the switch E (Diag. 4) to the I position.
The low lights and soft music gently soothe your baby. The infrared remote control does not work
when the toy is operating in this play mode. The toy will switch off automatically after 15 minutes.
To restart it, switch it off by moving the switch to the 0 position. Then switch it back on and set
the desired play mode.
2. FUN: to enable this play mode, move the switch E (Diag. 4) to the II position. A jingle will con-
rm the play mode choice. When set to Fun mode, every time the child presses one of the buttons
on the infrared remote control (Diag. 5) the relative sound effect will play. If the same button is
pressed a number of times, a tune will play. In both cases, the images linked to the buttons will be
displayed on the panel so your baby will learn to recognise them. When set to FUN mode, if the
toy is not used for about 20 minutes, it will play a sound effect and switch off automatically. To
restart it, switch it off by moving the switch to the 0 position. Then switch it back on and set the
play mode of your choice.
HOW TO FIT AND REMOVE THE REPLACEABLE BATTERIES
• To replace the panel batteries: loosen the screw on the battery compartment cover (G, Diag. 6)
on the back with a screwdriver and remove the cover; then remove the at batteries and t new
ones, ensuring that the battery polarity is correct (as shown on the product), close the battery
compartment cover, and tighten the screw rmly.
• To replace spent batteries inside the infrared remote control: open the velcro fastener on the
back, loosen the screw on the battery compartment cover (H, Diag. 7) on the back with a screwdriver and remove the cover; then remove the at batteries and t new ones, ensuring that the
battery polarity is correct (as shown on the product), close the battery compartment cover, and
tighten the screw rmly. Close the velcro fastener rmly when you have nished changing the
batteries.
WARNING
• Batteries must only be tted by an adult.
• Always keep batteries and tools out of the reach of children.
• Always remove spent batteries from the toy to avoid the danger of leakage from the battery
damaging the product.
• Always remove the batteries if the product will not be used for a long period of time
10
11
• Only use alkaline batteries of the same type or equivalent to the type recommended for the
correct function of this product.
• Never mix new and old batteries.
• If the batteries happen to leak liquid, replace them immediately, making sure you clean the
compartment beforehand; wash your hands thoroughly if you come into contact with any such
liquid.
• Remove the batteries from the toy before disposing of the product.
• Do not burn or dispose of old batteries into the environment. Dispose of them at an appropriate
differentiated collection point.
• Never mix alkaline, standard (zinc-carbon) or rechargeable batteries.
• This product is not designed for use with lithium batteries. WARNING: Improper use could be
hazardous
• Do not short-circuit the battery terminals.
• Do not attempt to recharge non-rechargeable batteries: they might explode.
• The use of rechargeable batteries is not recommended as the toy may not work properly.
• If using rechargeable batteries, remove them from the toy before recharging them. Batteries
must always be recharged under adult supervision.
This product complies to EU directive 2002/96/EC.
The crossed bin symbol on the appliance indicates that the product, at the end of its
life, must be disposed of separately from domestic waste, either by taking it to a sepa-
rate waste disposal site for electric and electronic appliances or by returning it to your
dealer when you buy another similar appliance. The user is responsible for taking the appliance to
a special waste disposal site at the end of its life. If the disused appliance is collected correctly as
separate waste, it can be recycled, treated and disposed of ecologically; this avoids a negative impact on both the environment and health, and contributes towards the recycling of the product’s
materials. For further information regarding the waste disposal services available, contact your
local waste disposal agency or the shop where you bought the appliance.
This product complies to EU directive 2002/95/EC.
This product complies with EC directive 2006/66/EC.
The crossed bin symbol on the batteries or product pack indicates that, at the end
of their life, they must not be disposed of as urban refuse. They must be disposed of
separately from domestic waste, either by taking them to a separate waste disposal site for batteries or by returning them to your dealer when you buy similar rechargeable or non-rechargeable
batteries.
The chemical symbols Hg, Cd, Pb, printed under the crossed bin symbol, indicate the type of
substance contained in the batteries: Hg=Mercury, Cd=Cadmium, Pb=Led.
The user is responsible for taking the batteries to a special waste disposal site at the end of their
life, so that they can be treated and recycled. If the spent batteries are collected correctly as
separate waste, they can be recycled, treated and disposed of ecologically; this avoids a negative
impact on both the environment and human health, and contributes towards the recycling of the
batteries’ substances. Non-compliance with the norms on battery disposal damages the environ-
ment and human health. For further information regarding the waste disposal services available,
contact your local waste disposal agency or the shop where you bought the batteries.
CLEANING, CARE & MAINTENANCE OF THE TOY
• The toy should only be cleaned using a soft, dry or moistened fabric or microbre cloth to avoid
damage to its electric circuit. Do not clean the toy with detergents or solvents.
• Protect the toy against heat, dust, sand, humidity and water.
Fabric used for the toy panel and infrared remote control:
Outer cover: 100% Polyester
Padding: 100 % Polyester
Made in China.
11
separate waste, they can be recycled, treated and disposed of ecologically; this avoids a negative
impact on both the environment and human health, and contributes towards the recycling of the
batteries’ substances. Non-compliance with the norms on battery disposal damages the environment and human health. For further information regarding the waste disposal services available,
contact your local waste disposal agency or the shop where you bought the batteries.
CLEANING, CARE & MAINTENANCE OF THE TOY
• The toy should only be cleaned using a soft, dry or moistened fabric or microbre cloth to avoid
damage to its electric circuit. Do not clean the toy with detergents or solvents.
• Protect the toy against heat, dust, sand, humidity and water.
Fabric used for the toy panel and infrared remote control:
Outer cover: 100% Polyester
Padding: 100 % Polyester
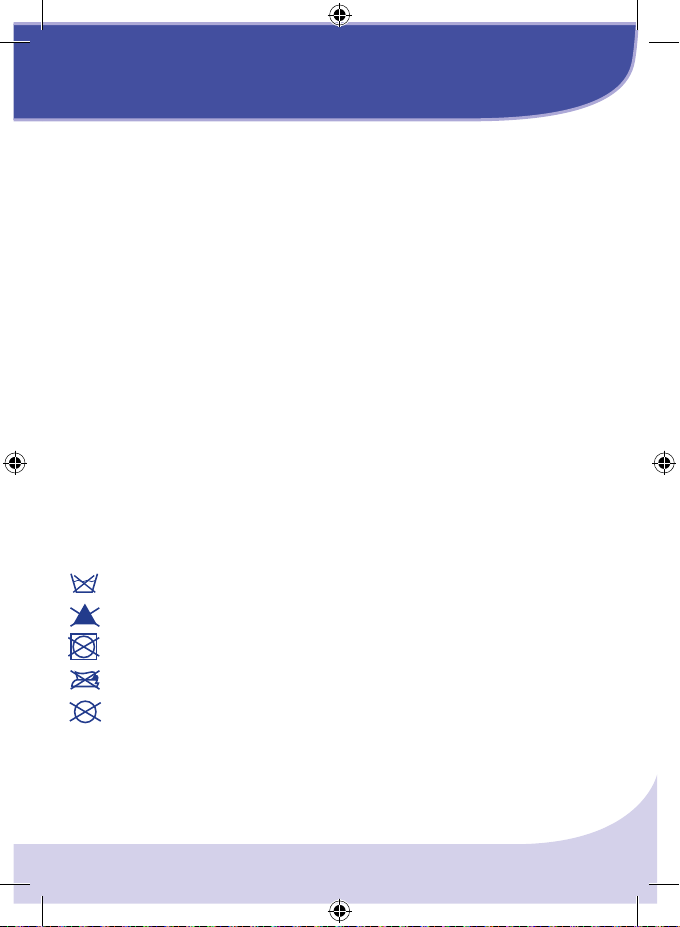
Do not wash in water
Do not bleach
Do not tumble dry
Do not iron
Do not dry clean
Made in China.

12
13
Notice d’emploi SAFARI VOITURE FUN TRAVEL
F
Âge: à partir de 12 mois +
• Il est recommandé de lire ces instructions avant l’emploi et de les conserver pour référence
future.
• Le jouet fonctionne avec les piles suivantes : 3 piles AA de 1,5 volt dans le tableau (incluses), 2
piles AAA de 1,5 volt dans la commande à infrarouge (incluses). Les piles incluses dans le produit
au moment de l’achat ne sont fournies que pour la démonstration sur le point de vente et doivent être remplacées par des piles neuves après l’achat.
PRECAUTIONS
Pour la sécurité de votre enfant : ATTENTION !
• Ôter et éliminer tous les sachets en plastique éventuels et tous les éléments composant l’embal-
lage du produit ou les conserver hors de portée des enfants. Risque d’étouffement
• Vérier régulièrement l’état d’usure du produit et la présence de détériorations éventuelles. En
cas de dommages visibles, ne pas utiliser le jouet et le tenir hors de portée des enfants.
• Le jouet doit être utilisé sous la surveillance permanente d’un adulte.
• Utiliser le jouet uniquement lorsque le siège auto est orienté dans le sens de la marche.
• Le montage du tableau auto doit être effectué par un adulte exclusivement.
• Il ne peut être installé qu’à l’arrière des sièges avant munis d’appuie-tête.
• Vérier que le tableau ait été bien accroché fermement à l‘appuie-tête. Contrôler fréquemment
la solidité de la xation.
• Ne jamais laisser le tableau non accroché sur le siège de la voiture : il risquerait d’heurter ou de
blesser les passagers.
• Il est conseillé de ne pas se tourner pour mettre le jouet en marche ou de récupérer la télécom-
mande en conduisant la voiture.
• Quand le siège arrière est vide, la commande à infrarouge peut être xée à l’encoche du tableau.
Quand l’enfant est assis sur le siège, accrocher la commande à infrarouge exclusivement aux
ceintures du siège.
• Ne jamais modier le produit ou ne jamais rien y ajouter, en particulier des rubans ou des ban-
delettes.
FIXATION DU TABLEAU DANS LA VOITURE
Ouvrir les boucles (A, Fig. 1) à l’arrière du tableau et les refermer sur les supports de l’appuie-tête.
Tirer les lacettes (B, Fig. 2) pour coller le tableau au siège.
FIXATION DE LA COMMANDE A INFRAROUGE
Accrocher la commande à infrarouge (C, Fig.3) à la ceinture de sécurité du siège auto (D, Fig. 3)
par la sangle de fermeture.
FONCTIONNEMENT DU JOUET
Mise en marche et arrêt
• Allumer le tableau en déplaçant le curseur E (Fig. 4) de la position 0 à la position I (Relax) ou II
(Fun) en fonction du mode voulu.
• Pour choisir le volume souhaité, déplacer le curseur F (Fig. 4) de la position <)) (bas) à la position
<))) (haut).
• Pour éviter une usure inutile des piles, il est recommandé de bien couper le jouet après usage en
déplaçant le curseur E (Fig. 4) en position 0.
• La commande à infrarouge s’enclenche lors de l’introduction des piles et ne fonctionne que
lorsque le tableau est en mode Fun.
• Pour enclencher les fonctions du jouet, pointer la télécommande en dirigeant son capteur vers
le tableau (Fig. 4.1)
Modes de jeu
1. RELAX : pour enclencher ce mode, déplacer le curseur E (Fig. 4) en position I.
Des lumières tamisées et de douces mélodies bercent l’enfant. La commande à infrarouge ne
fonctionne pas dans ce mode de jeu. Après environ 15 minutes, le jouet s’éteint automatique-
ment. Pour le réenclencher, éteindre le jouet en déplaçant le curseur en position 0. Rallumer
ensuite le jouet en mode voulu;
2. FUN : pour enclencher ce mode, déplacer le curseur E (Fig. 4) en position II. Un effet sonore
conrme la sélection. Dans ce mode de jeu, chaque fois que l’enfant appuie sur un des boutons
de la commande à infrarouge (Fig. 5), il entend l’effet sonore correspondant à la touche sollicitée.
Une nouvelle pression sur le bouton déclenche une mélodie. Dans les deux cas, l’image correspon-
dante s’allume sur le tableau, en permettant à l’enfant de la reconnaître. En mode FUN, le jouet
s’éteint automatiquement après 20 minutes d’inutilisation en le signalant par un effet sonore.
Pour le réenclencher, éteindre le jouet en déplaçant le curseur en position 0. Le rallumer ensuite
dans le mode de jeu désiré.
RETRAIT ET INTRODUCTION DE PILES NEUVES
• Pour remplacer les piles du tableau : Desserrer la vis du couvercle (G, Fig. 6) à l’arrière à l’aide
d’un tournevis, enlever le couvercle, enlever les piles usées du boîtier, introduire de nouvelles
piles en veillant à respecter la bonne polarité (comme indiquée sur le produit), remettre le cou-
vercle en place et serrer à fond la vis.
• Pour remplacer les piles dans la commande à infrarouge : Ouvrir la fermeture située à l’arrière,
desserrer la vis du couvercle (H, Fig. 7) avec un tournevis, enlever le couvercle, enlever les piles
usées du boîtier, introduire de nouvelles piles en veillant à respecter la bonne polarité (comme
indiquée sur le produit), remettre le couvercle en place et serrer à fond la vis. Après leur rempla-
cement, vérier que la fermeture à étirage soit bien xée.
ATTENTION
• Les piles doivent toujours être remplacées par un adulte.
• Ne pas laisser les piles ou des outils éventuels à la portée des enfants.
• Toujours enlever les piles usées du produit pour éviter les éventuelles pertes de liquide qui ris-
queraient d’endommager le produit.
• Veiller toujours à enlever les piles en cas d’inutilisation prolongée du produit.

13
• Pour choisir le volume souhaité, déplacer le curseur F (Fig. 4) de la position <)) (bas) à la position
<))) (haut).
• Pour éviter une usure inutile des piles, il est recommandé de bien couper le jouet après usage en
déplaçant le curseur E (Fig. 4) en position 0.
• La commande à infrarouge s’enclenche lors de l’introduction des piles et ne fonctionne que
lorsque le tableau est en mode Fun.
• Pour enclencher les fonctions du jouet, pointer la télécommande en dirigeant son capteur vers
le tableau (Fig. 4.1)
Modes de jeu
1. RELAX : pour enclencher ce mode, déplacer le curseur E (Fig. 4) en position I.
Des lumières tamisées et de douces mélodies bercent l’enfant. La commande à infrarouge ne
fonctionne pas dans ce mode de jeu. Après environ 15 minutes, le jouet s’éteint automatiquement. Pour le réenclencher, éteindre le jouet en déplaçant le curseur en position 0. Rallumer
ensuite le jouet en mode voulu;
2. FUN : pour enclencher ce mode, déplacer le curseur E (Fig. 4) en position II. Un effet sonore
conrme la sélection. Dans ce mode de jeu, chaque fois que l’enfant appuie sur un des boutons
de la commande à infrarouge (Fig. 5), il entend l’effet sonore correspondant à la touche sollicitée.
Une nouvelle pression sur le bouton déclenche une mélodie. Dans les deux cas, l’image correspondante s’allume sur le tableau, en permettant à l’enfant de la reconnaître. En mode FUN, le jouet
s’éteint automatiquement après 20 minutes d’inutilisation en le signalant par un effet sonore.
Pour le réenclencher, éteindre le jouet en déplaçant le curseur en position 0. Le rallumer ensuite
dans le mode de jeu désiré.
RETRAIT ET INTRODUCTION DE PILES NEUVES
• Pour remplacer les piles du tableau : Desserrer la vis du couvercle (G, Fig. 6) à l’arrière à l’aide
d’un tournevis, enlever le couvercle, enlever les piles usées du boîtier, introduire de nouvelles
piles en veillant à respecter la bonne polarité (comme indiquée sur le produit), remettre le couvercle en place et serrer à fond la vis.
• Pour remplacer les piles dans la commande à infrarouge : Ouvrir la fermeture située à l’arrière,
desserrer la vis du couvercle (H, Fig. 7) avec un tournevis, enlever le couvercle, enlever les piles
usées du boîtier, introduire de nouvelles piles en veillant à respecter la bonne polarité (comme
indiquée sur le produit), remettre le couvercle en place et serrer à fond la vis. Après leur remplacement, vérier que la fermeture à étirage soit bien xée.
ATTENTION
• Les piles doivent toujours être remplacées par un adulte.
• Ne pas laisser les piles ou des outils éventuels à la portée des enfants.
• Toujours enlever les piles usées du produit pour éviter les éventuelles pertes de liquide qui risqueraient d’endommager le produit.
• Veiller toujours à enlever les piles en cas d’inutilisation prolongée du produit.
14
15
• Utiliser des piles alcalines égales ou équivalentes au type recommandé pour le fonctionnement
de ce produit.
• Ne pas mélanger d’anciennes et de nouvelles piles.
• Si on constate une perte de liquide des piles, les remplacer immédiatement en veillant à nettoyer
le logement des piles et à se laver soigneusement les mains en cas de contact avec le liquide qui
s’en est échappé.
• Enlever les piles du jouet avant son élimination.
• Ne pas jeter les piles usagées dans le feu ou dans la nature mais les traiter séparément des
ordures ménagères.
• Ne pas mélanger les piles alcalines, normales (carbone –zinc) ou rechargeables (nickel- cadmium).
• Le jouet n’est pas conçu pour fonctionner avec des piles au lithium. ATTENTION : Un emploi
indu pourrait donner lieu à des situations dangereuses.
• Ne pas mettre les bornes d’alimentation en court-circuit.
• Ne pas tenter de recharger les piles non rechargeables : elles pourraient exploser.
• Il n’est pas conseillé d’employer des piles rechargeables, cela risquerait de diminuer le fonctionnement du jouet.
• En cas d’emploi de piles rechargeables, les ôter du jouet avant la recharge et les recharger uniquement sous la surveillance d’un adulte.
Ce produit est conforme à la Directive UE 2002/96/EC.
Le symbole de la poubelle barrée sur l’appareil indique que ce produit, à la n de
sa propre vie utile, devra être traité séparément des autres déchets domestiques ; il
faudra donc l’apporter dans un centre de collecte sélective pour les appareillages électriques et électroniques, ou bien le remettre au revendeur lors de l’achat d’un nouvel appareillage
équivalent. L’utilisateur est responsable du retour de l’appareil, à la n de sa vie, aux structures de
collecte appropriées. Une collecte sélective adéquate, visant à envoyer l’appareil que l’on n’utilise
plus au recyclage, au traitement et à l’élimination compatible avec l’environnement, contribue à
éviter les effets négatifs possibles sur l’environnement et sur la santé, et favorise le recyclage des
matériaux dont le produit est composé. Pour obtenir des renseignements plus détaillés sur les
systèmes de collecte disponibles, s’adresser au service local d’élimination des déchets, ou bien au
magasin où l’appareil a été acheté.
Ce produit est conforme à la Directive UE 2002/95/EC
Ce produit est conforme à la Directive UE 2006/66/EC.
Le symbole de la poubelle barrée apposé sur les piles ou l’emballage du produit in-
dique qu’à la n de la vie du produit, celui-ci doit être traité séparément des ordures
domestiques, non pas jeté comme un déchet urbain mais envoyé dans un centre de tri
sélectif pour appareils électriques et électroniques, ou remis au revendeur au moment de l’achat
de nouvelles piles rechargeables ou non rechargeables.
Le symbole chimique Hg, Cd, Pb dessiné sous la poubelle barrée indique la substance contenue
dans la pile : : Hg=Mercure, Cd=Cadmium, Pb=Plomb.
L’utilisateur est responsable de l’envoi des piles en n de vie aux structures de récupération appro-
priées pour en faciliter le traitement et le recyclage.
Un tri sélectif adéquat pour envoyer l’appareil inutilisé au recyclage, au traitement ou à une éli-
mination compatible avec l’environnement aide à prévenir d’éventuels effets négatifs sur l’envi-
ronnement et la santé et favorise le recyclage des matériaux contenus dans les piles. L’élimination
abusive du produit par l’utilisateur provoque des dommages à l’environnement et compromet
la santé. Pour plus d’informations sur les systèmes de ramassage disponibles, adressez-vous au
service local en charge du ramassage des ordures ou au magasin où a été acheté le produit.
NETTOYAGE ET ENTRETIEN DU JOUET
• Nettoyer le jouet en surface à l’aide d’un chiffon doux en tissu ou en microbre, sèche ou lé-
gèrement humidiée à l’eau, pour ne pas endommager le circuit électrique. Ne pas utiliser de
solvants ou de détergents pour nettoyer le jouet.
• Protéger le jouet contre la chaleur, la poussière, le sable, l’humidité et l’eau.
Composition textile du tableau et de la commande à infrarouge :
Extérieur : 100% polyester
Rembourrage : 100 % polyester
Fabriqué en Chine.
15
dans la pile : : Hg=Mercure, Cd=Cadmium, Pb=Plomb.
L’utilisateur est responsable de l’envoi des piles en n de vie aux structures de récupération appropriées pour en faciliter le traitement et le recyclage.
Un tri sélectif adéquat pour envoyer l’appareil inutilisé au recyclage, au traitement ou à une élimination compatible avec l’environnement aide à prévenir d’éventuels effets négatifs sur l’environnement et la santé et favorise le recyclage des matériaux contenus dans les piles. L’élimination
abusive du produit par l’utilisateur provoque des dommages à l’environnement et compromet
la santé. Pour plus d’informations sur les systèmes de ramassage disponibles, adressez-vous au
service local en charge du ramassage des ordures ou au magasin où a été acheté le produit.
NETTOYAGE ET ENTRETIEN DU JOUET
• Nettoyer le jouet en surface à l’aide d’un chiffon doux en tissu ou en microbre, sèche ou légèrement humidiée à l’eau, pour ne pas endommager le circuit électrique. Ne pas utiliser de
solvants ou de détergents pour nettoyer le jouet.
• Protéger le jouet contre la chaleur, la poussière, le sable, l’humidité et l’eau.
Composition textile du tableau et de la commande à infrarouge :
Extérieur : 100% polyester
Rembourrage : 100 % polyester
Ne pas laver à l’eau
Ne pas javelliser
Ne pas sécher en machine
Ne pas repasser
Ne pas nettoyer à sec
Fabriqué en Chine.

16
17
Gebrauchsanleitung AUTOSPIELZEUG SAFARI
D
Alter: 12 Monate +
GEBRAUCHSANLEITUNGEN
• Bitte lesen Sie vor dem Gebrauch diese Anleitungen durch und bewahren Sie sie für späteres
Nachlesen auf.
• Das Spiel funktioniert mit den folgenden Batterien: 3 Batterien AA zu 1,5 Volt in der Spieltafel
(der Packung enthalten), 2 Batterien AAA zu 1,5 Volt in der Infrarot-Fernbedienung (der Packung
enthalten). Die im Produkt beim Kauf enthaltenen Batterien dienen nur zu Vorführungszwecken
in der Verkaufsstelle und müssen gleich nach dem Kauf durch neue Batterien ersetzt werden.
HINWEISE
Für die Sicherheit Ihres Kindes: ACHTUNG!
• Vor dem Gebrauch eventuelle Plastiktüten und andere Teile, die nicht zum Spielzeug gehören
(wie z.B. Schnürbänder, Befestigungselemente usw.) entfernen und außer Reichweite der Kinder
aufbewahren. Erstickungsgefahr.
• Regelmäßig den Abnutzungszustand des Produkts und das Vorhandensein eventueller Schäden
überprüfen. Im Falle von Beschädigungen das Spielzeug nicht mehr verwenden und es außerhalb
der Reichweite von Kindern aufbewahren.
• Das Spiel muss unter Aufsicht eines Erwachsenen benutzt werden.
• Das Spiel ausschließlich mit dem Kinderautositz in Fahrtrichtung verwenden.
• Die Montage der Spieltafel im Auto darf nur von einem Erwachsenen ausgeführt werden.
• Die Tafel darf ausschließlich auf der Rückseite der Vordersitze des Fahrzeugs mit Kopfstütze
montiert werden.
• Sicherstellen, dass die Tafel korrekt befestigt wurde und fest an der Kopfstütze eingehängt ist.
Die Befestigung öfter überprüfen.
• Die Tafel niemals unbefestigt am Autositz lassen, sie könnte die Insassen verletzen.
• Wir empfehlen, sich möglichst nicht umzudrehen, um an das Spiel zu kommen oder die InfrarotFernbedienung zu nehmen, während man das Auto fährt.
• Wenn der Rücksitz nicht besetzt ist, kann die Infrarot-Fernbedienung an der Spieltafel vorhandenen Schlinge eingehängt werden. Wenn das Kind auf dem Kinderautositz sitzt, die InfrarotFernbedienung ausschließlich an den Gurten des Kinderautositzes einhängen.
• Das Produkt nicht verändern und nichts hinzufügen, vor allem keine Schnüren oder Bänder.
BEFESTIGUNG DER SPIELTAFEL IM AUTO
Die Schnallen (A, Abb. 1) auf der Rückseite der Tafel öffnen und an den Haltern der Kopfstütze
wieder schließen. Die Bänder (B, Abb. 2) festziehen, damit die Tafel am Sitz anliegt.
BEFESTIGUNG DER INFRAROT-FERNBEDIENUNG
Die Infrarot-Fernbedienung (C, Abb. 3) am Sicherheitsgurt des Kindersitzes (D, Abb. 3) mittels des
Bandes mit Klettverschluss einhängen. Dadurch wird vermieden, dass das Spiel während der Fahrt
wiederholt herunterfallen kann.
FUNKTIONSWEISE DES SPIELS
Ein- und Ausschalten
• Die Spieltafel einschalten, indem man den Schieber E (Abb. 4) von 0 auf I (Relax) oder auf II (Fun)
stellt, je nach gewünschter Spielart.
• Um die gewünschte Lautstärke zu wählen, den Schieber F (Abb. 4) von <)) (leise) bis zur Position
<))) (laut) verstellen.
• Um die Batterien nicht unnötig zu verbrauchen wird empfohlen, das Spiel nach dem Gebrauch
stets auszuschalten, indem man den Schieber E (Abb. 4) auf 0 stellt.
• Die Infrarot-Fernbedienung in Form eines Walkie-Talkie wird durch Einlegen der Batterien akti-
viert und funktioniert nur, wenn die Tafel in der Spielart Fun ist.
• Zum Starten der Spielfunktionen einfach die Infrarot-Fernbedienung mit dem darauf vorhande-
nen Sensor in Richtung der Spieltafel halten (Abb. 4.1)
Spielart
1. RELAX: Um diese Spielart zu aktivieren, den Schieber E (Abb. 4) auf I stellen.
Gedämpfte Lichter und sanfte Melodien begleiten das Kind in den Schlaf. In dieser Spielart funkti-
oniert die Infrarot-Fernbedienung nicht. Nach ca. 15 Minuten schaltet sich das Spiel automatisch
ab. Um es wieder zu aktivieren, das Spielzeug ausschalten, indem man den Schieber auf 0 stellt.
Danach das Spiel wieder in der gewünschten Spielart einschalten.
2. FUN: Um diese Spielart zu aktivieren, den Schieber E (Abb. 4) auf II stellen. Ein Klangeffekt
bestätigt die Auswahl. In dieser Spielart hört das Kind, jedes Mal, wenn es eine der Tasten auf der
Infrarot-Fernbedienung (Abb. 5) drückt, den dieser Taste entsprechenden Laut. Ein nachfolgender
Druck derselben Taste aktiviert eine Melodie. In beiden Fällen leuchtet das entsprechende Bild auf
der Spieltafel auf und ermöglicht dem Kind seine Erkennung. In der Spielart FUN weist ein Klan-
geffekt nach ca. 20 Minuten Nichtbenutzung darauf hin, dass das Spiel automatisch abgeschaltet
wird. Um es wieder zu aktivieren, das Spielzeug ausschalten, indem man den Schieber auf 0 stellt.
Danach das Spiel wieder in der gewählten Spielart einschalten.
ENTNEHMEN UND EINLEGEN DER AUSTAUSCHBAREN BATTERIEN
• Austauschen der Batterien der Spieltafel: Die auf der Rückseite des Deckels (G, Abb. 6) ange-
brachte Schraube mit einem Schraubenzieher lockern, den Deckel abnehmen, die leeren Batte-
rien aus dem Batteriefach nehmen, die neuen Batterien einlegen und dabei darauf achten, die
richtige Polarität einzuhalten (wie auf dem Produkt angegeben), den Deckel wieder aufsetzen
und die Schraube fest anziehen.
• Austauschen der Batterien in der Infrarot-Fernbedienung: Den Klettverschluss auf der Rückseite
öffnen, die Schraube des Deckels (H, Abb. 7) mit einem Schraubenzieher lockern, den Deckel
abnehmen, die leeren Batterien aus dem Batteriefach nehmen, die neuen Batterien einlegen und
dabei darauf achten, die richtige Polarität einzuhalten (wie auf dem Produkt angegeben), den
Deckel wieder aufsetzen und die Schraube fest anziehen. Nachdem die Batterien ausgetauscht
wurden, sicherstellen, dass der Klettverschluss richtig befestigt ist.

17
FUNKTIONSWEISE DES SPIELS
Ein- und Ausschalten
• Die Spieltafel einschalten, indem man den Schieber E (Abb. 4) von 0 auf I (Relax) oder auf II (Fun)
stellt, je nach gewünschter Spielart.
• Um die gewünschte Lautstärke zu wählen, den Schieber F (Abb. 4) von <)) (leise) bis zur Position
<))) (laut) verstellen.
• Um die Batterien nicht unnötig zu verbrauchen wird empfohlen, das Spiel nach dem Gebrauch
stets auszuschalten, indem man den Schieber E (Abb. 4) auf 0 stellt.
• Die Infrarot-Fernbedienung in Form eines Walkie-Talkie wird durch Einlegen der Batterien aktiviert und funktioniert nur, wenn die Tafel in der Spielart Fun ist.
• Zum Starten der Spielfunktionen einfach die Infrarot-Fernbedienung mit dem darauf vorhandenen Sensor in Richtung der Spieltafel halten (Abb. 4.1)
Spielart
1. RELAX: Um diese Spielart zu aktivieren, den Schieber E (Abb. 4) auf I stellen.
Gedämpfte Lichter und sanfte Melodien begleiten das Kind in den Schlaf. In dieser Spielart funktioniert die Infrarot-Fernbedienung nicht. Nach ca. 15 Minuten schaltet sich das Spiel automatisch
ab. Um es wieder zu aktivieren, das Spielzeug ausschalten, indem man den Schieber auf 0 stellt.
Danach das Spiel wieder in der gewünschten Spielart einschalten.
2. FUN: Um diese Spielart zu aktivieren, den Schieber E (Abb. 4) auf II stellen. Ein Klangeffekt
bestätigt die Auswahl. In dieser Spielart hört das Kind, jedes Mal, wenn es eine der Tasten auf der
Infrarot-Fernbedienung (Abb. 5) drückt, den dieser Taste entsprechenden Laut. Ein nachfolgender
Druck derselben Taste aktiviert eine Melodie. In beiden Fällen leuchtet das entsprechende Bild auf
der Spieltafel auf und ermöglicht dem Kind seine Erkennung. In der Spielart FUN weist ein Klangeffekt nach ca. 20 Minuten Nichtbenutzung darauf hin, dass das Spiel automatisch abgeschaltet
wird. Um es wieder zu aktivieren, das Spielzeug ausschalten, indem man den Schieber auf 0 stellt.
Danach das Spiel wieder in der gewählten Spielart einschalten.
ENTNEHMEN UND EINLEGEN DER AUSTAUSCHBAREN BATTERIEN
• Austauschen der Batterien der Spieltafel: Die auf der Rückseite des Deckels (G, Abb. 6) angebrachte Schraube mit einem Schraubenzieher lockern, den Deckel abnehmen, die leeren Batterien aus dem Batteriefach nehmen, die neuen Batterien einlegen und dabei darauf achten, die
richtige Polarität einzuhalten (wie auf dem Produkt angegeben), den Deckel wieder aufsetzen
und die Schraube fest anziehen.
• Austauschen der Batterien in der Infrarot-Fernbedienung: Den Klettverschluss auf der Rückseite
öffnen, die Schraube des Deckels (H, Abb. 7) mit einem Schraubenzieher lockern, den Deckel
abnehmen, die leeren Batterien aus dem Batteriefach nehmen, die neuen Batterien einlegen und
dabei darauf achten, die richtige Polarität einzuhalten (wie auf dem Produkt angegeben), den
Deckel wieder aufsetzen und die Schraube fest anziehen. Nachdem die Batterien ausgetauscht
wurden, sicherstellen, dass der Klettverschluss richtig befestigt ist.
18
19
ACHTUNG
• Die Batterien müssen immer von einem Erwachsenen ausgetauscht werden.
• Die Batterien oder eventuelle Werkzeuge nicht in Reichweite der Kinder lassen.
• Die leeren Batterien stets aus dem Produkt entfernen, damit dieses nicht durch eventuelle Flüssigkeitsverluste beschädigt werden kann.
• Die Batterien stets herausnehmen wenn das Produkt über längere Zeit nicht benutzt wird.
• Alkalibatterien vom gleichen oder einem gleichwertigen Typ, wie für den Betrieb dieses Produkts
empfohlen, verwenden.
• Alte und neue Batterien nicht zusammen verwenden.
• Falls Flüssigkeit aus den Batterien austritt, sie unverzüglich austauschen, das Batteriefach sorgfältig reinigen und falls man mit der ausgetretenen Flüssigkeit in Berührung gekommen ist, die
Hände gründlich waschen.
• Die Batterien aus dem Spielzeug nehmen, bevor dieses entsorgt wird.
• Die leeren Batterien nicht ins Feuer werfen, sondern sie als getrennten Abfall umweltgerecht
entsorgen.
• Keine Alkali-Standardbatterien (Zink/Kohle) und wiederauadbare Batterien miteinander mischen.
• Das Spielzeug ist nicht dazu geeignet mit Lithium-Batterien zu funktionieren ACHTUNG: Durch
unsachgemäße Verwendung können Gefahrensituationen entstehen.
• Die Klemmen der Speisung nicht kurzschließen.
• Nicht versuchen, die nicht wiederauadbaren Batterien aufzuladen: sie könnten explodieren.
• Die Verwendung wiederauadbarer Batterien wird nicht empfohlen, da sie die Funktionsweise
des Spielzeugs beeinträchtigen könnten.
• Falls man wiederauadbare Batterien verwendet, diese vor dem Auaden aus dem Spielzeug
nehmen und nur unter Aufsicht eines Erwachsenen auaden.
Dieses Produkt entspricht der EU-Richtlinie 2002/96/EC.
Die durchgestrichene Abfalltonne, die auf diesem Gerät abgebildet ist, bedeutet, dass
dieses Produkt nach dem Ende seiner Betriebszeit getrennt von den Haushaltsabfällen zu entsorgen ist. Entweder sollte es an einer Sammelstelle für elektrische und
elektronische Altgeräte abgegeben werden oder, bei Kauf eines neuen, äquivalenten
Geräts, dem Verkäufer zurückgegeben werden. Der Verbraucher ist in jedem Falle verantwortlich
für die ordnungsgemäße Entsorgung des Geräts nach Ende der Betriebszeit. Nur bei Abgabe des
Geräts an einer geeigneten Sammelstelle können einerseits Werkstoffe und Materialien wieder
verwendet werden und andererseits negative Folgen für Umwelt und Gesundheit ausgeschlossen
werden. Nähere Auskunft bekommen Sie bei ihrem örtlichen Amt für Abfallentsorgung oder in der
Verkaufsstelle dieses Geräts.
Dieses Produkt entspricht der EU-Richtlinie 2002/95/EC.
Dieses Produkt entspricht der EU-Richtlinie 2006/66/EC
Die durchgestrichene Abfalltonne, die auf den Batterien oder auf der Produktpackung
abgebildet ist, bedeutet, dass diese, da sie nach dem Ende ihrer Betriebszeit getrennt
von den Haushaltsabfällen zu entsorgen sind, nicht als Haushaltsabfall entsorgt werden dürfen,
sondern entweder an einer Sammelstelle für Altbatterien abgegeben werden oder, bei Kauf neuer,
gleichwertiger wieder auadbarer und nicht wieder auadbarer Batterien dem Verkäufer zurück-
gegeben werden müssen.
Das eventuelle chemische Symbol Hg, Cd, Pb unter der durchgestrichenen Abfalltonne gibt den in
der Batterie enthaltenen Substanztyp an: Hg = Quecksilber, Cd = Kadmium, Pb = Blei.
Der Verbraucher ist in jedem Falle für die ordnungsgemäße Entsorgung der Batterien nach Ende
der Betriebszeit verantwortlich. Nur bei Abgabe des Geräts an einer geeigneten Sammelstelle
können einerseits Werkstoffe und Materialien wieder verwendet werden und andererseits ne-
gative Folgen für Umwelt und Gesundheit ausgeschlossen werden. Die nicht ordnungsgemäße
Entsorgung des Produktes durch den Benutzer hat Schäden an der Umwelt und der menschlichen
Gesundheit zur Folge. Für weitere Informationen über die verfügbaren Entsorgungssysteme wen-
den Sie sich bitte an die zuständigen örtlichen Stellen oder an die Verkaufsstelle des Geräts.
REINIGUNG UND WARTUNG DES SPIELZEUGS
• Die Oberäche des Spielzeugs mit einem weichen, trockenen oder leicht mit Wasser angefeuch-
teten Tuch aus Stoff oder Mikrofaser reinigen, um den Stromkreis nicht zu beschädigen. Keine
Lösungs- oder Reinigungsmittel zum Reinigen des Spielzeugs verwenden.
• Das Spielzeug vor Hitze, Staub, Sand Feuchtigkeit und Wasser schützen.
Materialzusammensetzung sowohl der Spieltafel als auch der Infrarot-Fernbedie-
nung:
Außen: 100% Polyester
Füllung: 100 % Polyester
Made in China.
19
von den Haushaltsabfällen zu entsorgen sind, nicht als Haushaltsabfall entsorgt werden dürfen,
sondern entweder an einer Sammelstelle für Altbatterien abgegeben werden oder, bei Kauf neuer,
gleichwertiger wieder auadbarer und nicht wieder auadbarer Batterien dem Verkäufer zurückgegeben werden müssen.
Das eventuelle chemische Symbol Hg, Cd, Pb unter der durchgestrichenen Abfalltonne gibt den in
der Batterie enthaltenen Substanztyp an: Hg = Quecksilber, Cd = Kadmium, Pb = Blei.
Der Verbraucher ist in jedem Falle für die ordnungsgemäße Entsorgung der Batterien nach Ende
der Betriebszeit verantwortlich. Nur bei Abgabe des Geräts an einer geeigneten Sammelstelle
können einerseits Werkstoffe und Materialien wieder verwendet werden und andererseits negative Folgen für Umwelt und Gesundheit ausgeschlossen werden. Die nicht ordnungsgemäße
Entsorgung des Produktes durch den Benutzer hat Schäden an der Umwelt und der menschlichen
Gesundheit zur Folge. Für weitere Informationen über die verfügbaren Entsorgungssysteme wenden Sie sich bitte an die zuständigen örtlichen Stellen oder an die Verkaufsstelle des Geräts.
REINIGUNG UND WARTUNG DES SPIELZEUGS
• Die Oberäche des Spielzeugs mit einem weichen, trockenen oder leicht mit Wasser angefeuchteten Tuch aus Stoff oder Mikrofaser reinigen, um den Stromkreis nicht zu beschädigen. Keine
Lösungs- oder Reinigungsmittel zum Reinigen des Spielzeugs verwenden.
• Das Spielzeug vor Hitze, Staub, Sand Feuchtigkeit und Wasser schützen.
Materialzusammensetzung sowohl der Spieltafel als auch der Infrarot-Fernbedienung:
Außen: 100% Polyester
Füllung: 100 % Polyester
Nicht in Wasser waschen
Kein Bleichmittel verwenden
Nicht im Trommeltrockner trocknen
Nicht bügeln
Nicht chemisch reinigen
Made in China.

20
21
Manual de Instrucciones JUEGO AUTO SAFARI
E
Edad: desde los 12 meses +
MANUAL DE INSTRUCCIONES
• Se recomienda leer estas instrucciones antes del uso y guardarlas para referencia futura.
• El juego funciona con las siguientes pilas: 3 pilas tipo AA de 1,5 voltios en el panel (incluidas), 2
pilas tipo AAA de 1,5 voltios en el mando por infrarrojos (incluidas). Las pilas incluidas en el juguete a la hora de comprar están previstas sólo como prueba demostrativa en el punto de venta
y deben sustituirse de inmediato por pilas nuevas después de la compra.
ADVERTENCIAS
Por la seguridad de tu niño:¡ATENCIÓN!
• Antes de utilizar, quitar las posibles bolsas de plástico y todos los demás componentes que formen parte del embalaje del juguete (por ejemplo, cordones, elementos de jación, etc.) y guardarlos fuera del alcance de los niños. Riesgo de sofocación.
• Comprobar periódicamente el estado de desgaste del producto y la presencia de posibles roturas. En caso de daños dejar de utilizar el juguete y mantenerlo alejado del alcance de los niños.
• El uso del juguete tiene que realizarse bajo la vigilancia de un adulto.
• Utilizar el juguete sólo con el asiento auto dirigido hacia el sentido de la marcha.
• El montaje del panel auto tiene que ser efectuado sólo por parte de un adulto.
• El panel puede instalarse sólo en el reverso de los asientos delanteros provistos como apoyacabeza.
• Asegurarse de que el panel se haya jado correctamente y enganchado rmemente al apoyacabeza. Comprobar frecuentemente su jación.
• No dejar nunca el panel en el asiento del automóvil no enganchado, podría impactar contra los
pasajeros o herirlos.
• Se recomienda evitar girarse para acceder al juguete o recoger el mando por infrarrojos mientras
se esté conduciendo el coche.
• Cuando el asiento trasero esté vacío, el mando por infrarrojos puede sujetarse al hueco previsto
en el panel. Cuando el niño esté sentado en la sillita, sujetar el mando por infrarrojos únicamente
a los cinturones de la sillita.
• No realizar modicaciones o incorporaciones al producto, de forma especial, no añadir lazos ni
bandas.
FIJACIÓN DEL PANEL EL EN AUTOMÓVIL
Abrir las hebillas (A, g. 1) posicionadas en el reverso del panel y cerrarlas en los soportes del
apoyacabeza. Tirar las cintas (B, g. 2) para que el panel se adhiera el asiento.
FIJACIÓN DEL MANDO POR INFRARROJOS
Enganchar el mando por infrarrojos (C, g. 3) al cinturón de seguridad del asiento del coche (D,
Fig. 3) a través de la cinta provista de cierre despegable. Esto sirve para evitar que el juego pueda
caerse frecuentemente al suelo durante el desplazamiento en coche.
FUNCIONAMIENTO DEL JUGUETE
Encendido y apagado
• Encender el panel desplazando el cursor E (g. 4) de la posición 0 a la posición I (Relax) o II (Fun)
según el modo de juego deseado.
• Para elegir el volumen preferido desplazar el cursor F (g. 4) de la posición <)) (bajo) a la posición
<))) (alto).
• Para evitar un consumo inútil de las pilas, se aconseja apagar siempre el juguete después de
utilizarlo desplazando el cursor E (Fig. 4) a la posición 0.
• El mando por infrarrojos en forma de walkie talkie se activa al incorporar las pilas y es operativo
sólo cuando el panel se encuentre en el modo Fun.
• Para activar las funciones del juguete, apuntar el mando por infrarrojos dirigiendo el sensor
hacia el panel”
Modo de juego
1. RELAX: para activar este modo desplazar el cursor E (g. 4) a la posición I.
Luces difusas y melodía dulces acunan al niño. En este modo de juego el mando por infrarrojos no
es operativo. Después de unos 15 minutos el juguete se apaga automáticamente. Para reactivarlo,
apagar el juguete desplazando el cursor a la posición 0. Posteriormente, volverlo a encender en
el modo de juego deseado;
2. FUN: para activar este modo desplazar el cursor E (g. 4) a la posición II. Un efecto sonoro
conrma su selección. En este modo de juego, cada vez que el niño aprieta uno de los pulsadores
posicionados en el mando por infrarrojos (g. 5) escucha el efecto sonoro correspondiente a la te-
cla presionada. La presión consecutiva del mismo pulsador activa una melodía. En ambos casos, la
imagen correspondiente en el panel se ilumina, permitiendo al niño reconocerla. En el modo FUN
después de unos 20 minutos sin utilizar, un efecto sonoro comunica el apagado automático del
juguete. Para reactivarlo, apagar el juguete desplazando el cursor a la posición 0. Posteriormente,
volverlo a encender en el modo de juego deseado.
EXTRACCIÓN E INCORPORACIÓN DE LAS PILAS SUSTITUIBLES
• Para sustituir las pilas del panel: aojar el tornillo de la tapa del compartimento de las pilas (G,
g. 6), posicionado en el reverso del mismo, con un destornillador. Extraer la tapa y las pilas
agotadas del compartimiento correspondiente, incorporar las pilas nuevas, respetando la co-
rrecta polaridad de inserción (como se indica en el producto), volver a colocar la tapa y apretar
totalmente el tornillo.
• Para sustituir las pilas en el mando por infrarrojos: abrir el cierre despegable previsto en el rever-
so del mismo, aojar el tornillo de la tapa del compartimento de las pilas (H, g. 7) con un des-
tornillador. Extraer la tapa y las pilas agotadas del compartimiento correspondiente, incorporar
las pilas nuevas, respetando la correcta polaridad de inserción (como se indica en el producto),
volver a colocar la tapa y apretar totalmente el tornillo. Una vez sustituidas las pilas comprobar
que el cierre despegable se haya jado bien.
 Loading...