


SF-7100SY SF-7200SY
User’s Guide
E

GUIDELINES LAID DOWN BY FCC RULES FOR USE OF THIS UNIT IN THE U.S.A. (not applicable to other areas).
NOTICE
This equipment has been tested and found to comply with the limits for a Class B digital device, pursuant to Part 15 of the FCC Rules. These limits are designed to provide reasonable protection against harmful interference in a residential installation. This equipment generates, uses and can radiate radio frequency energy and, if not installed and used in accordance with the instructions, may cause harmful interference to radio communications. However, there is no guarantee that interference will not occur in a particular installation. If this equipment does cause harmful interference to radio or television reception, which can be determined by turning the equipment off and on, the user is encouraged to try to correct the interference by one or more of the following measures:
•Reorient or relocate the receiving antenna.
•Increase the separation between the equipment and receiver.
•Connect the equipment into an outlet on a circuit different from that to which the receiver is connected.
•Consult the dealer or an experienced radio/TV technician for help.
FCC WARNING
Changes or modifications not expressly approved by the party responsible for compliance could void the user’s authority to operate the equipment.
Proper connectors must be used for connection to host computer and/or peripherals in order to meet FCC emission limits.
Connector SB-63 ........ SF-7100SY/7200SY to SF-5590SY/5790SY/5990SY/
|
6500SY/6700SY/6900SY/7100SY/7200SY |
Connector FA-128 ...... SF-7100SY/7200SY to PC |
|
|
|
|
|
|
Declaration of Conformity |
Model Number: |
SF-7100SY/7200SY |
Trade Name: |
CASIO COMPUTER CO., LTD. |
Responsible party: |
CASIO, INC. |
Address: |
570 MT. PLEASANT AVENUE, DOVER, NEW JERSEY 07801 |
Telephone number: |
973-361-5400 |
This device complies with Part 15 of the FCC Rules, Operation is subject to the following two conditions: (1) This device may not cause harmful interference, and (2) this device must accept any interference received, including interference that may cause undesired operation.
•CASIO COMPUTER CO., LTD. assumes no responsibility for any damage or loss resulting from the use of this manual.
•CASIO COMPUTER CO., LTD. assumes no responsibility for any loss or claims by third parties which may arise through the use of the Digital Diary.
•CASIO COMPUTER CO., LTD. assumes no responsibility for any damage or loss caused by deletion of data as a result of malfunction, repairs, or battery replacement. Be sure to back up all important data on other media to protect against its loss.

 Before
 using
using the
the
 Digital
 Diary
Diary for
for
 the
the first
first time...

Use the following procedure to load batteries before using it for the first time.
1.Slide the battery switch on the back of the Digital Diary to the REPLACE BATTERIES position.
Battery switch
NORMAL OPERATION

 REPLACE BATTERIES
RESET 
2.Pressing down at the points marked (A) in the illustration, slide the battery compartment cover in the direction (B) to remove it.
(A)
(B)
3.Load two new batteries, making sure that their positive (+) and negative (–) ends are facing correctly.
NORMAL OPERATION

 REPLACE BATTERIES
RESET 
4.Close the battery compartment cover.
5.Slide the battery switch back to the NORMAL OPERATION position.
–1 –

–2 –
6.Pull the insulating tape from the back-up battery by pulling in the direction indicated by the arrow.
Important!
•Be sure to load the main batteries before removing the insulating tape from the back-up battery.
NORMAL OPERATION 

 REPLACE BATTERIES
RESET 
7. Press ON/OFF to turn power on.
•After about two seconds, the Home Time screen appears.
8.Press FUNCTION, select “Time set”, and then use the procedure on page 20 to set the Home Time.
•If you turn power off without setting the Home Time, the “SET TIME!” message appears the next time you turn power on. The Digital Diary will not operate properly until you set the Home Time.
Important!
•Turn on the Digital Diary at least once a month to check the current condition of the batteries.
■ Turning Power On and Off
Press ON/OFF to turn power on and off.
Important!
•If nothing appears on the display after you load batteries for the first time, press the RESET button.
•If nothing appears after you press the RESET button, it means that no power is being supplied from the main batteries. Replace the main batteries with new ones (page 15).
■ About the EL backlight
•This unit is equipped with an EL backlight that allows easy viewing of display contents in a theater, or anywhere else where lighting is dim.
•Note, however, that frequent or extended use of the EL backlight shortens battery life.
The following shows how backlight use affects battery life under controlled test conditions*.
Backlight Operation |
Battery Life |
|
|
3 minutes per hour |
Approximately 120 hours |
|
|
15 minutes per hour |
Approximately 80 hours |
|
|
*Test Conditions
•“Battery Life” is the number of hours before battery failure when the unit is left on with 5 minutes of a processing operation and 55 minutes of continuous display only (no processing operation) per hour, plus the backlight operation described below.
•“Backlight Operation” is the number of minutes the backlight is turned on per hour during the display only (no processing operation) period.
– 3 –

Contents |
|
Before using the Digital Diary for the first time... |
............... 1 |
Turning Power On and Off ........................................................... |
3 |
About the EL backlight ................................................................ |
3 |
Before using the Digital Diary... ............................................ |
8 |
Introduction ................................................................................... |
8 |
Write down important data somewhere! .................................... |
8 |
Important Precautions ................................................................. |
8 |
Getting Started ....................................................................... |
9 |
General Guide ............................................................................... |
9 |
Display ......................................................................................... |
10 |
All-Reset ...................................................................................... |
11 |
Power Supply .............................................................................. |
13 |
Turning Power On and Off ......................................................... |
17 |
Function Menus .......................................................................... |
17 |
System Language ....................................................................... |
17 |
Display Contrast ......................................................................... |
18 |
Key Input Sound ......................................................................... |
18 |
Destructive Backspace .............................................................. |
18 |
Memory Management ................................................................. |
19 |
Home Time Mode ................................................................. |
20 |
Using the Daily Alarm ................................................................. |
21 |
World Time Mode ................................................................. |
23 |
Zone Information Screen ........................................................... |
24 |
Data Bank Operations.......................................................... |
26 |
Inputting Text .............................................................................. |
26 |
Inputting Dates and Times ......................................................... |
27 |
Display Formats .......................................................................... |
28 |
Telephone Directory Mode .................................................. |
29 |
Record Summary ........................................................................ |
30 |
Memo Mode .......................................................................... |
31 |
Record Summary ........................................................................ |
31 |
Calendar Mode ..................................................................... |
32 |
Maneuvering Around Calendars ............................................... |
32 |
Appointment Markers ................................................................. |
33 |
Highlighting Calendar Dates ..................................................... |
34 |
Working Day Count .................................................................... |
35 |
Weekly Schedule Screen ........................................................... |
35 |
Schedule Keeper .................................................................. |
36 |
Maneuvering Around Schedule Keeper Dates ......................... |
36 |
Schedule Alarms ......................................................................... |
38 |
How Schedule Keeper Data is Sorted ....................................... |
38 |
Schedule Type Labels and Icons .............................................. |
39 |
Daily Schedule Screen ............................................................... |
40 |
Reminder Mode .................................................................... |
41 |
Reminder Alarms ........................................................................ |
42 |
To Do Mode ........................................................................... |
43 |
Record Summary ........................................................................ |
44 |
How To Do Data is Sorted .......................................................... |
45 |
Priority Icons ............................................................................... |
45 |
– 5 –
– 6 – |
|
Expense Manager Mode ...................................................... |
46 |
Expense Type Labels and Icons ................................................ |
47 |
Payment Type Labels ................................................................. |
48 |
Exchange Rate ............................................................................ |
48 |
Periodic Expense Report ........................................................... |
49 |
Record Summary ........................................................................ |
49 |
Searching for Data ............................................................... |
50 |
Scroll Search ............................................................................... |
50 |
Initial Character Search ............................................................. |
50 |
Wild Card Search ........................................................................ |
51 |
Date Search ................................................................................. |
51 |
Editing Data .......................................................................... |
52 |
Deleting Data ........................................................................ |
53 |
Deleting a Single Data Item ........................................................ |
53 |
Deleting All Data Items In a Mode ............................................. |
53 |
Deleting Marked Data Items Only .............................................. |
54 |
Deleting All Data Items In Specific Modes ............................... |
55 |
Secret Function .................................................................... |
56 |
Conversion Modes ............................................................... |
58 |
Metric Conversions .................................................................... |
59 |
Currency Conversions ............................................................... |
59 |
Game Modes ......................................................................... |
61 |
Poker Game ................................................................................. |
61 |
Blackjack Game .......................................................................... |
63 |
Calculator Mode ................................................................... |
65 |
Data Communications ......................................................... |
68 |
Setting Up for Data Communications ....................................... |
68 |
Sending Data ............................................................................... |
70 |
Sending All Data Items In a Mode ............................................. |
72 |
Data Synchronization ................................................................. |
73 |
Technical Appendix ............................................................. |
74 |
Memory Capacity ........................................................................ |
74 |
How the Digital Diary sorts data ............................................... |
75 |
Error Messages ........................................................................... |
76 |
Message Table ............................................................................ |
76 |
Specifications ............................................................................. |
78 |
– 7 –


 Before

 using
using
 the
the Digital
 Diary...


Introduction
Congratulations on your selection of CASIO’s new SF-7100SY/SF-7200SY (referred to as Digital Diary in this manual). Please keep this User’s Guide and all information handy for future reference.
Write down important data somewhere!
The memory of your Digital Diary holds information only while power is supplied by the batteries. Always write down important data somewhere.
Important Precautions
•Never expose the Digital Diary to fire.
•Avoid temperature extremes. Do not locate the Digital Diary in direct sunlight, near a window, near a heater, etc.
•In very low temperatures display response may slow down or fail entirely. This condition is temporary and operation should resume under normal temperatures.
•Avoid areas subject to excessive moisture, dirt, and dust.
•Avoid dropping the Digital Diary and otherwise subjecting it to strong impact.
•Never bend or twist the Digital Diary.
•Never try to take the Digital Diary apart.
•Do not use a pen, pencil, or other sharp object to press keys.
•To clean the exterior of the Digital Diary, wipe it with a soft cloth dampened in a weak solution of a mild neutral detergent and water. Be sure to wring out any excess moisture from the cloth before wiping off the Digital Diary. Never use benzene, thinner, or any other volatile agent to clean the unit. Doing so can remove the figures printed on the case or otherwise damage the case finish.
•The contents of this manual are subject to change without notice.
•CASIO COMPUTER CO., LTD. assumes no responsibility for any loss or claims by third parties that may arise from the use of this product.
•Note that pressing SHIFT and then LIGHT causes the backlight to light and stay lit as long as you continue to operate the Digital Diary, or until you press LIGHT again to turn it off manually.
Leaving the backlight on for long periods greatly reduces battery life!
•Be sure to use alkaline batteries only to power this Digital Diary.


 Getting
 Started


Make sure you read this part of the manual.
General Guide
Display
|
|
Mode keys |
|
|
Cursor keys |
Number |
|
Scroll/Search |
keys |
|
keys |
ON/OFF |
|
|
key |
|
|
SYNCHRONIZE |
|
Display Change key |
key |
|
|
LIGHT key |
|
Alpha keyboard |
|
|
|
Connector terminal |
ESC key |
FUNCTION key |
|
||
|
|
– 9 –
– 10 –
■ Display
When lighting is dim, you can turn on an EL (electro-luminescent) backlight for easier viewing.
To turn on the EL backlight
There are two ways to turn on the backlight of the display.
Pressing LIGHT causes the backlight to turn on for about 15 seconds, and then turn off automatically.
Pressing SHIFT and then LIGHT also turns on the backlight, but in this case the backlight stays on as long as you keep performing key operations on the Digital Diary. The backlight turns off automatically if you do not perform any key operation for about 15 seconds.
Leaving the backlight on for long periods greatly reduces battery life!
You can manually turn the backlight off by pressing LIGHT again.
Failure of the backlight to turn on indicates low battery power. Replace batteries as soon as possible.
Display Indicators
r
~
f
K
SHIFT
CAPS
CODE
NEW/EDIT
INDEX
DATA
SNOOZE
DAILY
KEY
L  C
C 


1 2 3 4 5 6 7 8 9 0 q w e
1Low battery warning |
eGame Modes |
2Memory locked |
rIndicates data above |
3Telephone Directory Mode |
tSHIFT key operation |
4Memo Mode |
yUpper-case input |
5To Do Mode |
uCODE key operation |
6Reminder Mode |
i NEW/EDIT screen |
7Schedule Keeper Mode |
oIndex display |
8Calendar Mode |
pData display |
9Expense Manager Mode |
aSnooze feature activated |
0Home Time/World Time Mode |
sDaily alarm on |
qCalculator Mode |
dKey sound on |
wConversion Modes |
fIndicates data below |

■ All-Reset
Use the following procedure to reset the unit to its initial settings.
Important!
•Do not use a very sharp pencil or other object to press the RESET button.
•Perform the reset operation only after main batteries and back-up battery are correctly installed.
To start the all-reset operation
1.Turn power off.
2.Press the RESET button on the back of the Digital Diary with a thin, pointed object.
3.Now you should press Y for “yes” or N for “no” in accordance with the conditions described below.
When to press Y for “yes”
•When you want to reset the unit and clear all data and settings.
•When you are resetting the unit after a data error (page 76).
1.Press Y in response to the message that appears on the display when you start the all-reset operation.
– 11 –

–12 –
2.Press ENTER to reset the Digital Diary or ESC to abort.
•After pressing ENTER, the message shown below appears to indicate that RESET is being performed. RESET takes about 10 seconds to complete.
•After the reset procedure is complete, the message “SET TIME!” appears.
•After about two seconds, the Home Time screen appears.
3.Press FUNCTION, select “Time set”, and then use the procedure on page 20 to set the Home Time.
•If you turn power off without setting the Home Time, the “SET TIME!” message appears the next time you turn power on. The Digital Diary will not operate properly until you set the Home Time.
When to press N for “no”
•When you are not resetting the unit to clear all data and settings.
•When you are not resetting the unit after a data error (page 76).
1.Press N in response to the message that appears on the display when you start the all-reset operation.
•At this time, the message “CHECKING DATA, PLEASE WAIT.” appears. After the data check procedure is complete, the message “SET TIME!” appears.
•After about two seconds, the Home Time screen appears.
2.Press FUNCTION, select “Time set”, and then use the procedure on page 20 to set the Home Time.
•If you turn power off without setting the Home Time, the “SET TIME!” message appears the next time you turn power on. The Digital Diary will not operate properly until you set the Home Time.
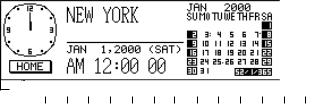
•Following are the initial settings of the unit after you perform the all-reset operation.
Home Time: |
New York |
|
JAN 1, 2000 (SAT) |
|
12:00 AM |
|
12-hour format |
World Time: |
London |
Daily Alarm: |
12:00 AM |
Sound: |
Daily alarm — OFF |
|
Key — ON |
Messages: |
English |
Character input: |
CAPS — ON |
■ Power Supply
Your Digital Diary is powered by two AA-size alkaline batteries, and its memory is protected by a single CR2032 lithium battery.
Low Battery Warning
Failure of anything to appear on the display after you turn on power or appearance of the low battery message, “MAIN BATTERIES WEAK! REPLACE THEM! UNIT WILL NOT TURN ON AGAIN!” (followed by the display turning off in about 10 seconds) normally indicates that main battery power is low.
Note, however, that pressing the RESET button on the back of the unit and then performing steps 1 and 2 of the procedure under “When to press N for “no”” above can sometimes restore normal operation. When the low battery message appears on the display even if you perform these steps, it means you should replace the main batteries as soon as possible.
Note
•Take care that you do not make a mistake and delete memory contents at this time.
Important!
•Replace batteries only when low battery power is indicated by failure of the Digital Diary to turn on when you press the ON key. Do not replace batteries as long as the Digital Diary turns on normally when you press the ON key.
•There is not low battery warning for the back-up battery. Be sure to replace the back-up battery once every 5 years.
•Be sure you keep a separate copy of all important data that you store in the Digital Diary.
Battery Precautions
Incorrectly using batteries can cause them to burst or leak, possibly damaging the interior of the Digital Diary. Note the following precautions.
•Be sure to use alkaline batteries only to power this Digital Diary.
•Be sure that the positive (+) side of each battery is facing in the correct directions.
•Never mix batteries of different types.
•Never mix old batteries and new ones.
•Do not expose batteries to direct heat, let them become shorted, or try to take them apart.
•Never leave dead batteries in the battery compartment.
•Remove batteries if you do not play to use the unit for a long time.
–13 –

–14 –
•Replace batteries at least once every year, no matter how much you use the unit during that period.
•Never try to recharge the batteries that come with the unit.
•Should a battery leak, clean out the battery compartment of the unit immediately, taking care to avoid letting battery fluid come into direct contact with your skin.
Keep batteries out of the reach of small children. If swallowed, consult with a physician immediately.
The batteries that come with this unit discharge slightly during shipment and storage. Because of this, they may require replacement sooner than the normal expected battery life.
Restructuring Files
Data files in memory must be restructured whenever both the main batteries and back-up battery go dead. The message shown below appears on the display after you load new main and back-up batteries on and turn on the unit.
•This message indicates that data files are being restructured. The restructuring takes a few minutes. Do not try to operate the unit or subject it to impact during that time.
•Data file restructuring also returns Home Time, World Time, System Language, and other settings to their initial factory defaults, which are shown below.
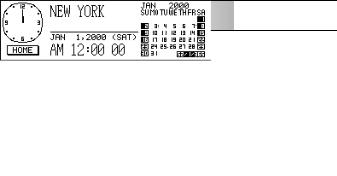
Home Time: |
New York |
|
JAN 1, 2000 (SAT) |
|
12:00 AM |
|
12-hour format |
World Time: |
London |
Daily Alarm: |
12:00 AM |
Sound: |
Daily alarm — OFF |
|
Key — ON |
Messages: |
English |
Character input: |
CAPS — ON |

To replace the main batteries
Important!
•Do not remove the main batteries from the Digital Diary while the back-up battery is removed.
•Be sure to replace both batteries with two new ones. Do not mix an old battery with a new one.
1.Press OFF to turn power off.
2.Slide the battery switch on the back of the Digital Diary to the REPLACE BATTERIES position.
Battery switch
NORMAL OPERATION

 REPLACE BATTERIES
RESET 
3.Pressing down at the points marked (A) in the illustration, slide the battery compartment cover in the direction (B) to remove it.
(A)
(B)
4.Remove both old batteries and replace them with new ones.
•Make sure that the positive (+) and negative (–) ends are facing correctly.
5.Close the battery compartment cover.
6.Slide the battery switch back to the NORMAL OPERATION position.
7.Press ON to turn power on.
•This causes the message “SET TIME!” to appear. Be sure to set the time again at this time. The Digital Diary suspends its clock operation while replacing batteries.
8.Press FUNCTION, select “Time set” and then use the procedure on page 20 to set the time.
–15 –

– 16 –
To replace the back-up battery
Important!
•Do not remove the back-up battery from the Digital Diary while the main batteries are removed or the low battery message appears on the display.
•Be sure to replace the back-up battery at least once every 5 years. Otherwise, you run the risk of losing data stored in memory.
1.Press OFF to turn power off.
2.Remove the screw that holds the back-up battery compartment cover in place and open the cover.
NORMAL OPERATION

 REPLACE BATTERIES
RESET 
3. Insert a thin, pointed object into (A) and remove the old battery.
RESET 
(A)
4.Load a new battery into the compartment, making sure that its positive side is facing up (so you can see it).
5.Replace the battery compartment cover and secure it with its screw.
•Take care that you do not overtighten the screw.
■ Turning Power On and Off
Press ON/OFF to turn power on and off.
Important!
•If nothing appears on the display when you turn on power, it means that the main batteries are low. Replace the batteries (page 13).
Auto Power Off Function
The unit automatically turns power off if you do not press any key for about three minutes. Any alarms you set still sound, even if power is turned off.
■ Function Menus
•Pressing FUNCTION displays a function menu, whose contents differs depending on the mode.
•Pressing SHIFT FUNCTION displays a function menu of general system settings (system function menu).
•Input the number of the left of the function you want to use to select it.
•To exit from a function menu, press ESC.
■ System Language
Your Digital Diary is capable of producing messages in any one of five languages (English, German, Spanish, French, Italian).
To select the system language
1.Press SHIFT FUNCTION and then select “Language”.
2.Press the number key that corresponds to the language that you want to use.
•To select “English”, you would press 1.
•The system language automatically changes to English whenever you perform the RESET operation (page 11) or after data files are restructured (page 14).
Note
• In this manual, all display messages are shown in English.
– 17 –

– 18 –
■ Display Contrast
Use the following procedure to make the figures on the display darker or lighter.
To adjust display contrast
1.Press SHIFT FUNCTION and then select “Display contrast”.
2.Use H and J to make display images darker or lighter.
3.Press ENTER to quit.
■ Key Input Sound
When the key input sound is turned on, your Digital Diary emits a beep each time you press one of its keys.
To turn key input sound on and off
1. Press SHIFT FUNCTION and then select “General setting”.
Currently selected setting
2.Use H and J to turn the key input sound on and off.
•The KEY  indicator is on the display while the key input sound is on.
3.Press ENTER to quit.
■ Destructive Backspace
When destructive backspace is turned on, the character at the cursor position is deleted when you press the BS key.
To turn destructive backspace on and off
1. Press SHIFT FUNCTION and then select “General setting”.
2.Use L to move the pointer to “Destructive”.
3.Use H and J to turn destructive backspace on and off.
4.Press ENTER to quit.
■ Memory Management
The memory of your Digital Diary is designed to make your normal data input and recall operations as quick and efficient as possible. After repeated storage and deletion of data, however, you may find that you are unable to store new data, even after you have deleted some data from memory. When this happens, you need to perform the following “memory management” procedure, which cleans up and rearranges unused memory to make it available for storage of more data. Note that a memory management operation does not affect all the data in memory. It affects only part of the data.
Note
When you need to perform memory management depends entirely on how often you delete data from memory and store new data. The more you delete and store, the sooner you will need to perform the memory management procedure.
To perform memory management
1. Press SHIFT FUNCTION and then select “Memory management”.
2.Press Y to start memory management or N to abort.
•Memory management takes up to three minutes to complete. Do not operate the unit during that time.
– 19 –


 Home
Home Time
Time

 Mode
Mode


The time kept in the Home Time Mode is used for control of various time based functions.
To enter the Home Time Mode
Press the HOME/WORLD key once.
To set your Home Time zone
1.In the Home Time Mode, press FUNCTION and then select “Time zone change”.
2.Use K and L to scroll through the city names.
•See page 25 for a complete list of time zones.
3.When the city you want is displayed, press ENTER.
•You can change your Home Time zone later if you like. When you do, only the zone changes, without affecting the time or date setting.
To set the time and date
1.In the Home Time Mode, press FUNCTION and then select “Time set”.
•The hour setting flashes on the display.
•Use H and J to move the flashing selection around the display.
2.Input numbers for the year, month, day, hour, and minutes.
•Input the year as four digits in the range of 1901 through 2099.
•Use 12-hour or 24-hour format depending on the Home Time format (page 21).
•All illegal input is ignored.
3.With 12-hour time format, press A for AM or P for PM.
4.Press ENTER to quit.
•Pressing ENTER resets the seconds count to “00”.
To switch between standard time and daylight saving time
In the Home Time Mode, press FUNCTION and then select “Daylight savings”.
•This toggles to the opposite setting and returns to the Home Time Mode screen.
 indicates daylight saving time.
To switch between 12-hour and 24-hour timekeeping
In the Home Time Mode, press FUNCTION and then select “12/24 hours”.
•This toggles to the opposite setting and returns to the Home Time Mode screen. The AM/PM indicator indicates 12-hour timekeeping.
•The time format you select is applied for all modes.
To select the date format
1.In the Home Time Mode, press FUNCTION and then select “Date format”.
2.Select the date format that you want to use.
•The following shows and example of each format
[1]Month/Date/Year: JAN 1, 2000 (SAT)
[2]Date/Month/Year: 1 JAN, 2000 (SAT)
[3]Year/Month/Date: 2000/1/1 (SAT)
•The date format you select is applied in all modes.
■ Using the Daily Alarm
The Daily Alarm, it sounds at the same time every day for 20 seconds and the Daily Alarm screen appears.
To change the Daily Alarm time
1.In the Home Time Mode, press FUNCTION and then select “Daily alarm set”.
•The hour setting flashes on the display.
•Use H and J to move the flashing.
2.Input numbers for the hour and minutes.
•All illegal input is ignored.
3.For 12-hour time format, press A for AM or P for PM.
4.Press ENTER to quit.
•Pressing ENTER automatically turns on the alarm.
To turn the Daily Alarm on and off
1.In the Home Time Mode, press FUNCTION and then select “Daily alarm sound”.
2.Use H and Jto turn the Daily Alarm on and off.
3.Press ENTER.
–21 –
– 22 –
How the Daily Alarm works
The daily alarm sounds at the alarm time you set. A snooze feature sounds the alarm more than once, helping to make sure you don’t oversleep or miss an appointment.
About the snooze feature
The snooze feature activates (and the SNOOZE indicator appears on the display) if you do not press any key or if you press the SPACE key after the Daily Alarm starts to sound.
•If you do not press any key, the alarm stops after 20 seconds, and sounds two more times every 10 minutes. In this case (you do not press any key), the alarm sounds a total of three times and then stops.
•Pressing the SPACE key while an alarm is sounding stops the alarm and resets the snooze feature for three more alarm operations spaced at 10-minute intervals.
•Pressing any key besides the SPACE key while an alarm is sounding stops the alarm and cancels the snooze feature, so the alarm does not sound again until an alarm time is reached.
Note
Note the following important points when you are using the Daily Alarm.
•If the alarm time is reached during data communications, the alarm does not sound until you complete the communications procedure.
•The alarm may fail to sound if battery power is too low.


 World
World
 Time
Time
 Mode
Mode


With World Time you can view the current time in time zones around the world.
To enter the World Time Mode
Press the HOME/WORLD key twice. From the Home Time Mode, press HOME/ WORLD only once.
Hours different from Home Time zone
Current World Time setting
•Every time you press HOME/WORLD, the Digital Diary switches between the Home Time Mode and World Time Mode.
To scroll through World Time Mode zones
In the World Time Mode, use K and L to scroll from zone-to-zone.
• Hold down either button to scroll at high speed.
To change a World Time zone’s settings
1.In the World Time Mode, display the zone you want.
2.Press FUNCTION.
3.Switch between 12/24 hour (page 21), switch between standard and daylight saving time (page 21), and set the date format (page 21).
•Timekeeping format and date format settings are applied to all World Time zones and to the Home Time Mode.
•The standard/daylight saving time setting is applied to the currently selected time zone only.
•See page 24 for details on using the Zone Change function menu item.
– 23 –
 Loading...