


SF-5590SY
Casio SF-5590SY, SF-5790SY, SF-5990SY, SF-5590SY PLUS, SF-5790SY PLUS Service Manual
...
SF-5590SY/5790SY/5990SY
SF-5590SY PLUS/5790SY PLUS/
5990SY PLUS (ZX-455)
R
SEP. 1997
(without price)
SF-5590SY
128KB
DIGITAL DIARY SF-5590SY
PC
sync

— 2 —
CONTENTS
1. SPECIFICATIONS................................................................................................3
2. GENERAL GUIDE ................................................................................................5
3. DATA COMMUNICATIONS ...............................................................................12
3-1. DATA TRANSMISSION FROM A UNIT TO ANOTHER UNIT ...................13
3-2.
DATA TRANSMISSION BETWEEN A UNIT AND PERSONAL COMPUTER USING FA-128 ......
13
4. OPERATION CHECK.........................................................................................15
5. ERROR MESSAGES..........................................................................................18
6. SCHEMATIC DIAGRAMS
6-1. MAIN PCB ASS'Y (A342054)-(1/4) ............................................................19
6-1. MAIN PCB ASS'Y (A342054)-(2/4) ............................................................20
6-1. MAIN PCB ASS'Y (A342054)-(3/4) ............................................................21
6-1. MAIN PCB ASS'Y (A342054)-(4/4) ............................................................22
6-2. KEYBOARD PCB ASS'Y (A342055)-(1/3) .................................................23
6-2. KEYBOARD PCB ASS'Y (A342055)-(2/3) .................................................24
6-2. KEYBOARD PCB ASS'Y (A342055)-(3/3) .................................................25
7. LSI PIN FUNCTION............................................................................................26
8. DISASSEMBLY ..................................................................................................27
9. PARTS LIST .......................................................................................................30
10. EXPLODED VIEW ..............................................................................................32

— 3 —
1. SPECIFICATIONS
Model: SF-5590SY/SF-5790SY/SF-5990SY
*PC LINK software and cable for data transmission (FA-128) are added to SF-5590SY
PLUS/5790SY PLUS/5990SY PLUS. See to 9. PARTS LIST.
Main Modes:
Telephone Directory, Memo, Schedule Keeper, To Do, Expense Manager, Reminder, Calendar, Home
Time, World Time, Calculator, Conversion (metric/currency) and Game (Poker/Blackjack)
Data storage:
Storage and recall of telephone, memo, schedule, to do, expense, reminder data; calendar display;
editing; memory status display
Clock:
World time; reminder alarm; schedule alarm; daily alarm; accuracy under normal temperatures: ±3
seconds per day
Calculation:
12-digit arithmetic calculations; independent memory; percentages; square roots; other mixed calcu-
lations
General:
Display element: 26-column × 8-line LCD
Memory capacity: SF-5590SY: 128 KB
SF-5790SY: 256 KB
SF-5990SY: 512 KB
Main component: LSI
Power supply:
Main: Two AAA-size alkaline batteries (Type: LR03 (AM4))
Back-up: One CR2032 lithium battery
Battery life:
Main: •Approximately 130 hours of continuous display only in Telephone
Directory Mode.
•Approximately 90 hours with 55 minutes of continuous display
only and 5 minutes of processing operation per hour.
•Approximately 80 hours with 55 minutes of continuous display
only and 5 minutes of processing operation per hour, plus 3 min-
utes of backlight operation per hour during continuous display
only period.
Back-up: Approximately 5 years if main batteries are replaced as soon as
they become weak.
Approximately 2 years if dead main batteries are left in the unit.
Power consumption: 0.25 W

— 4 —
Current consumption:
Main (Input voltage = 3.0 V): Telephone top menu (Backlight doesn't shine)-
4.3 mA (TYP.)/5.3 mA (MAX.)
Telephone top menu (Backlight shine)-
27 mA (TYP.)/38 mA (MAX.)
OFF (Using Mask ROM: regular)-
90 µA (TYP.)/130 µA (MAX.)
OFF (Using Flash ROM: irregular)-
120 µA (TYP.)/160 µA (MAX.)
Back-up (Input voltage = 3.0 V): 2.4 µA (TYP.)/10 µA (MAX.)
Auto power off: Approximately 3 minutes after last key operation
Operating temperature: 0 °C ~ 40 °C (30 °F ~ 104 °F)
Dimensions:
Unfolded: 8.8H × 163 W × 169D mm (3/8"H × 6 7/16"W × 6 5/8"D)
Folded: 21.5H × 163W × 91.5D mm (7/8"H × 6 7/16"W × 3 5/8"D)
Weight: Approximately 250 g (8.8 oz) including batteries

— 5 —
2. GENERAL GUIDE
■ Display
When lighting is dim, you can turn on an EL (electro-luminescent) backlight for easier viewing.
To turn on the EL backlight
There are two ways to turn on the backlight of the display.
Pressing LIGHT causes the backlight to turn on for about 15 seconds, and then turn off automatically.
Pressing SHIFT and then LIGHT also turns on the backlight, but in this case the backlight stays on as
long as you keep performing key operations on the Digital Diary . The backlight turns off automatically
if you do not perform any key operation for about 15 seconds.
Leaving the backlight on for long periods greatly reduces battery life!
You can manually turn the backlight off by pressing LIGHT again.
Failure of the backlight to turn on indicates low battery power. Replace batteries as soon as possible.
Function key Alpha keyboard
Memory keys
Mode key
10-key pad
Operator keys
Display Change key
Cursor keys
Scroll/Search keys
ESC key
Display
ON/OFF key
Mode keys
Light key
— 6 —
■ All-Reset
Use the following procedure to reset the unit to its initial settings.
Important!
• Do not use a very sharp pencil or other object to press the START button.
• Be sure to reset the unit before using it for the first time.
• Perform the reset operation only after main batteries and back-up battery are correctly installed.
• Be sure to press the START button (page 9) after loading main batteries for the first time or if the
previous set of batteries went dead.
To start the all-reset operation
1. Turn power off.
2. Press the START button on the back of the Digital Diary with a thin, pointed object.
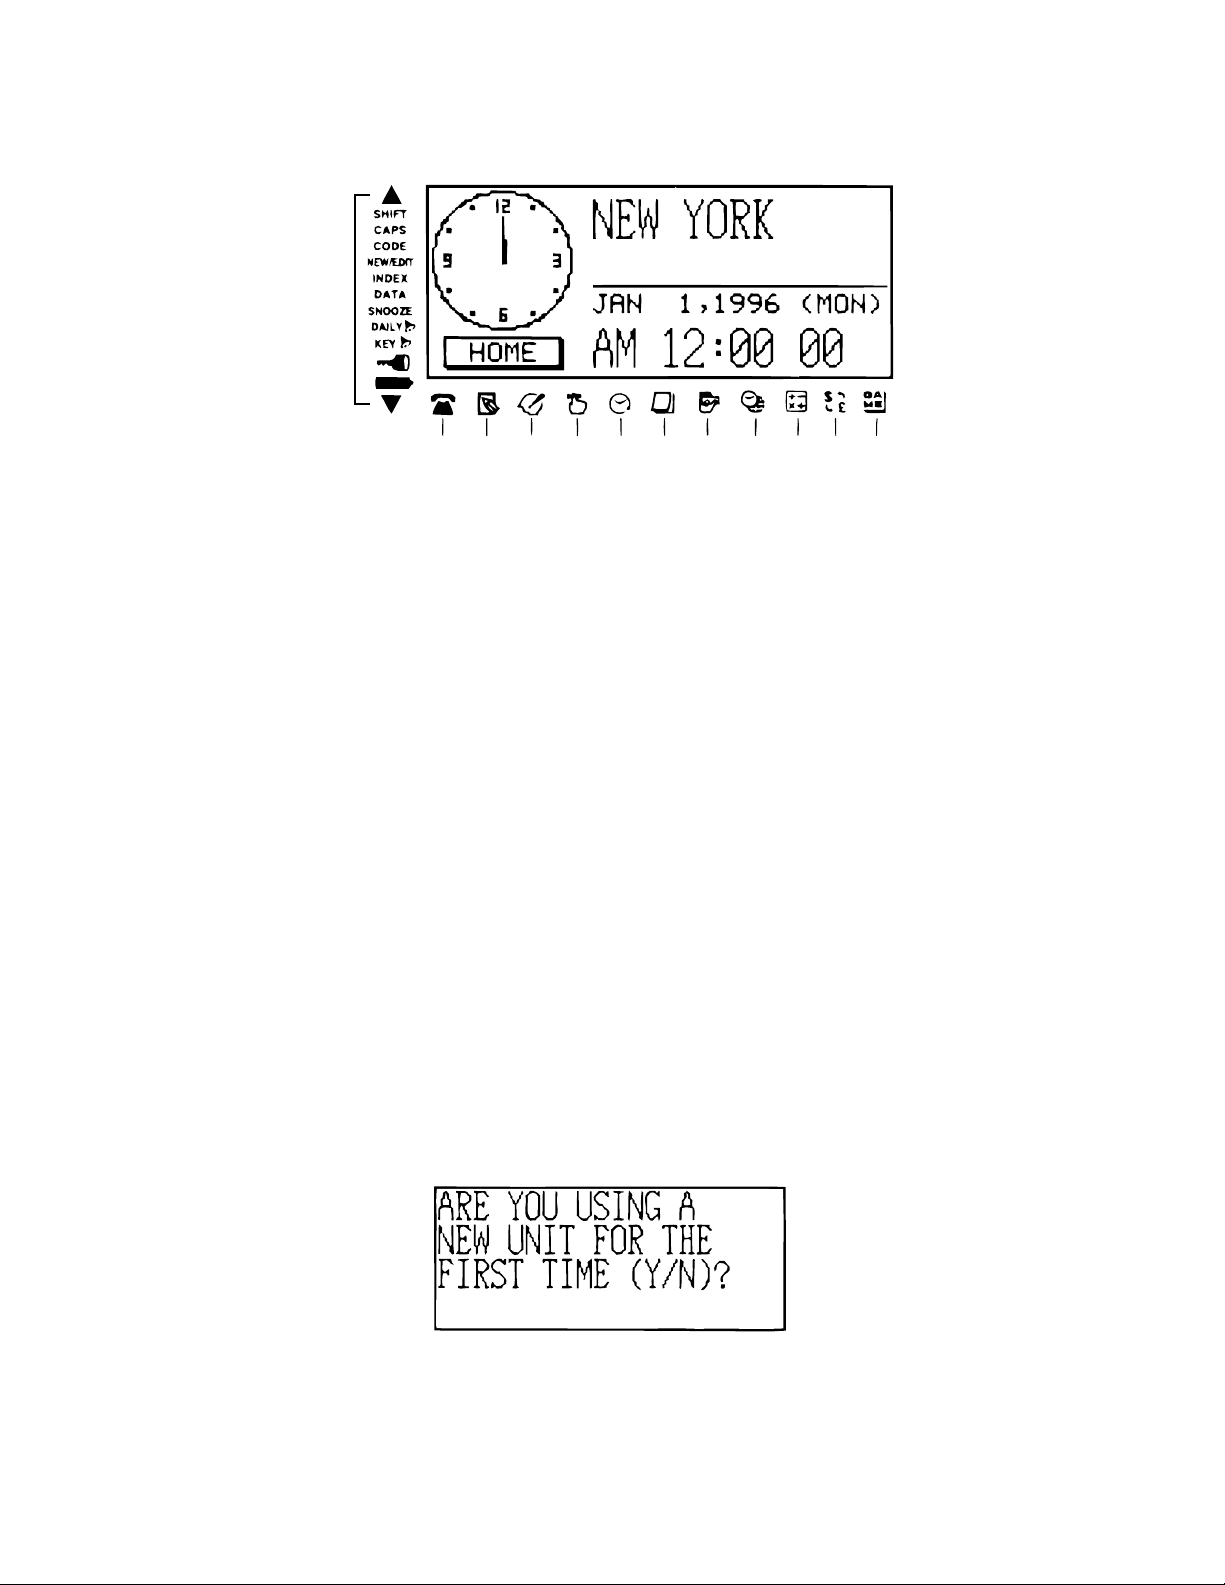
1 Telephone Directory Mode
2 Memo Mode
3 To Do Mode
4 Reminder Mode
5 Schedule Keeper Mode
6 Calendar Mode
7 Expense Manager Mode
8 Home Time/World Time Mode
9 Calculator Mode
0 Conversion Modes
A Game Modes
B Indicates data above
C SHIFT key operation
D Upper-case input
E CODE key operation
F NEW/EDIT screen
G Index display
H Data display
I Snooze feature activated
J Daily alarm on
K Key sound on
L Memory locked
M Low battery warning
N Indicates data below
Display Indicators
3. Now you should press Y for “yes” or N for “no” in accordance with the conditions described on the
next page.
1
B
N
234567 890A
~
— 7 —
When to press Y for “yes”
• When this is the first time you are using the unit.
• When you want to reset the unit and clear all data and settings.
• When you are resetting the unit after a data error (page 18).
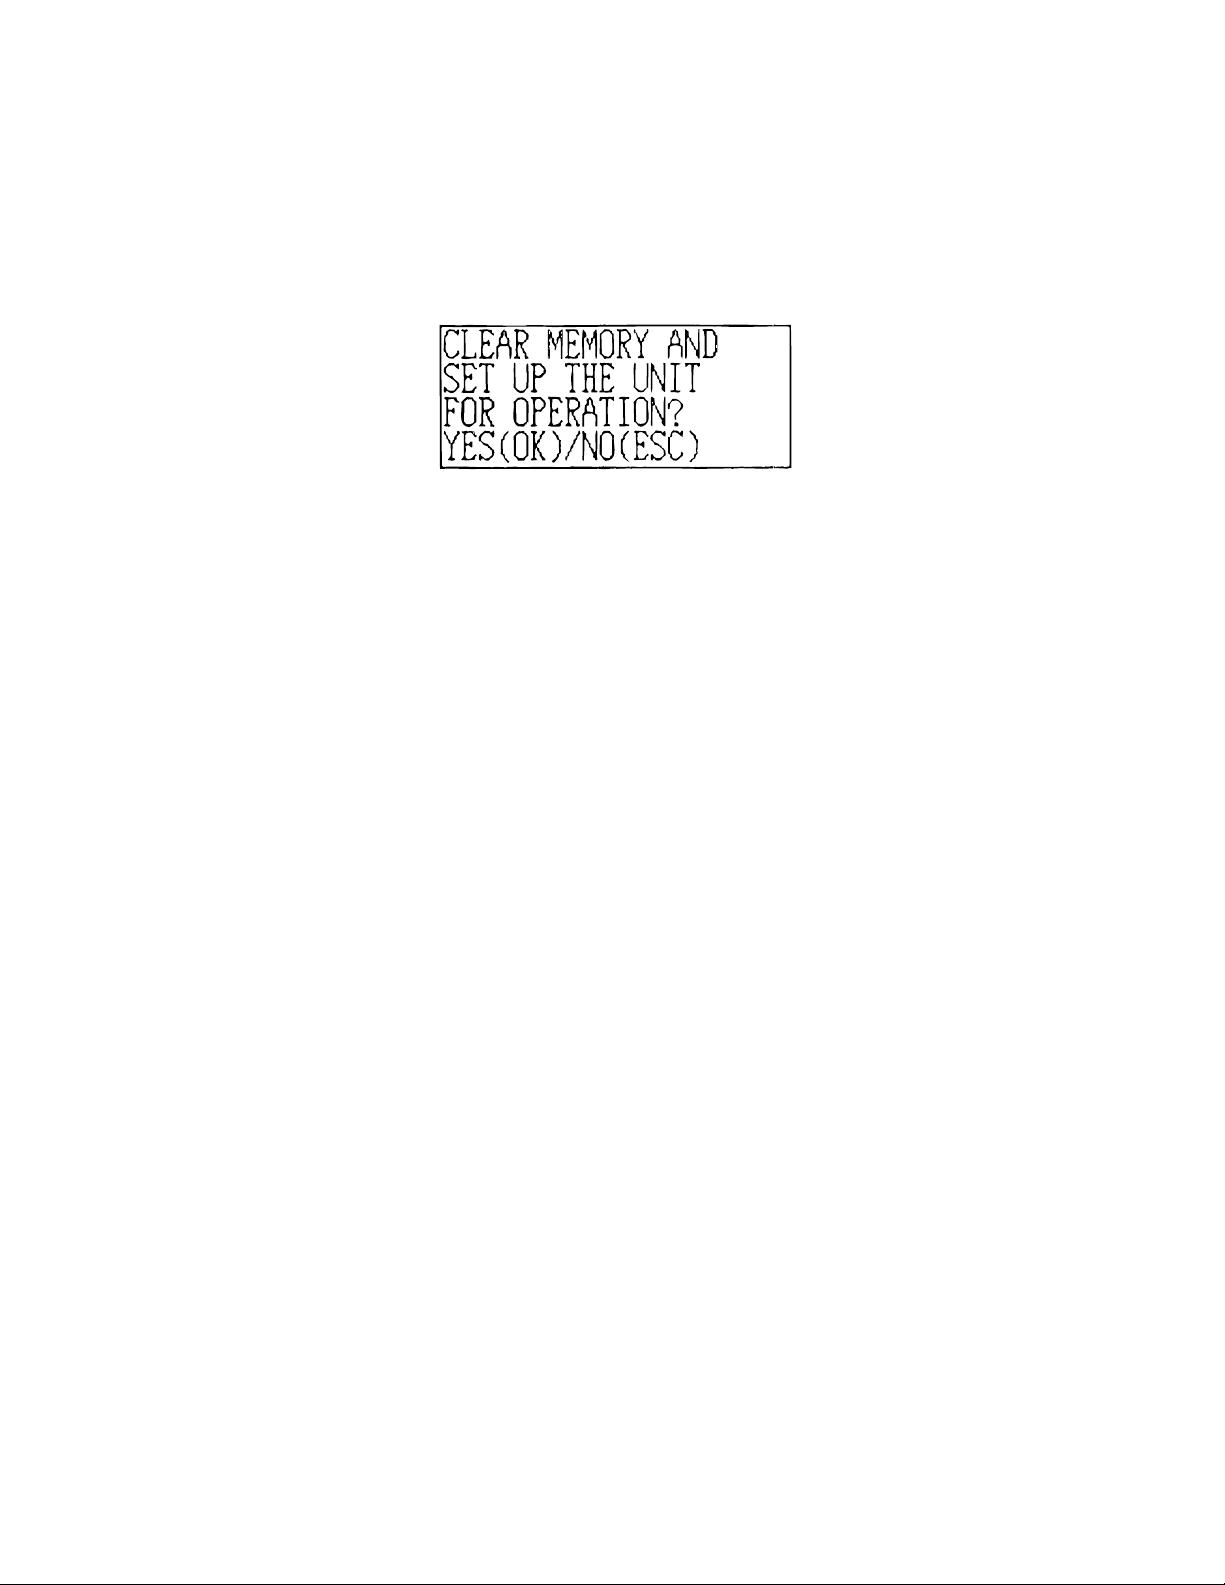
1. Press Y in response to the message that appears on the display when you start the all-reset
operation.
2. Press OK to reset the Digital Diary or ESC to abort.
• At this time the message “SET TIME!” appears.
• After about two seconds, the Home Time screen appears.
3. Press FUNC, select “Time set”, and then use the procedure on User’s Guide (page 18) to set the
Home Time.
• If you turn power off without setting the Home Time, the “SET TIME!” message appears the next
time you turn power on. The Digital Diary will not operate properly until you set the Home Time.
When to press N for “no”
• After replacing the main batteries.
• When you are not resetting the unit to clear all data and settings.
• When you are not resetting the unit after a data error (page 18).
1. Press N in response to the message that appears on the display when you start the all-reset
operation.
• At this time the message “SET TIME!” appears.
• After about two seconds, the Home Time screen appears.
2. Press FUNC, select “Time set”, and then use the procedure on User’s Guide (page 18) to set the
Home Time.
• If you turn power off without setting the Home Time, the “SET TIME!” message appears the next
time you turn power on. The Digital Diary will not operate properly until you set the Home Time.
• Following are the initial settings of the unit after you perform the all-reset operation.
Home Time: New York
JAN 1, 1998 (THU)
12:00 AM
12-hour format
World Time: London
Daily Alarm: 12:00 AM
Sound: Daily alarm — OFF
Key — ON
Messages: English
Character input: CAPS — OFF

— 8 —
■ Power Supply
Your Digital Diary is powered by two AAA-size alkaline batteries, and its memory is protected by a
single CR2032 lithium battery.
Low battery Warning
Failure of anything to appear on the display after you turn on power or appearance of the low battery
message, “MAIN BATTERIES WEAK! REPLACE THEM! UNIT WILL NOT TURN ON AGAIN!” (fol-
lowed by the display turning off in about 10 seconds) normally indicates that main battery power is low.
Note, however, that pressing the START button on the back of the unit and then performing steps 1
and 2 of the procedure under “When to press N for “no”” above can sometimes restore normal opera-
tion. When the low battery message appears on the display even if you perform these steps, it means
you should replace the main batteries as soon as possible.
Note
• Take care that you do not make a mistake and delete memory contents at this time.
Important!
• Replace batteries only when low battery power is indicated by failure of the Digital Diary to turn on
when you press the ON key. Do not replace batteries as long as the Digital Diary turns on normally
when you press the ON key.
• There is not low battery warning for the back-up battery. Be sure to replace the back-up battery
once every 5 years.
• Be sure you keep a separate copy of all important data that you store in the Digital Diary.
Battery Precautions
Incorrectly using batteries can cause them to burst or leak, possibly damaging the interior of the Digital
Diary. Note the following precautions.
• Be sure to use alkaline batteries only to power this Digital Diary.
• Be sure that the positive (+) side of each battery is facing in the correct directions.
• Never mix batteries of different types.
• Never mix old batteries and new ones.
• Do not expose batteries to direct heat, let them become shorted, or try to take them apart.
• Never leave dead batteries in the battery compartment.
• Remove batteries if you do not play to use the unit for a long time.
• Replace batteries at least once every five years, no matter how much you use the unit during that
period.
• Never try to recharge the batteries that come with the unit.
• Should a battery leak, clean out the battery compartment of the unit immediately, taking care to
avoid letting battery fluid come into direct contact with your skin.
Keep batteries out of the reach of small children. If swallowed, consult with a physician imme-
diately.
— 9 —
To replace the main batteries
Important!
• Do not remove the main batteries from the Digital Diary while the back-up battery is removed.
• Be sure to replace both batteries with two new ones. Do not mix an old battery with a new one.
• Be sure to press the START button after loading main batteries for the first time or if the previous
set of batteries went dead.
• Replace batteries only when low battery power is indicated by failure of the Digital Diary to turn on
when you press the ON key. Do not replace batteries as long as the Digital Diary turns on normally
when you press the ON key.
1. Press OFF to turn power off.
2. Remove the screw that holds the battery compartment cover in place and open the cover.
3. Remove both old batteries and replace them with new ones.
• Make sure that the positive (+) and negative (–) ends are facing correctly.
4. Replace the battery compartment cover and secure it with its screw.
• Take care that you do not overtighten the screw.
5. Press the START button.
• This causes the message “ARE YOU USING A NEW UNIT FOR THE FIRST TIME (Y/N)?” to
appear. Be sure to press N in response to this message (pressing Y will delete all data in memory).
Next, continue with the procedures in the section title “All-Reset” on page 6.
To replace the back-up battery
Important!
• Do not remove the back-up battery from the Digital Diary while the main batteries are removed.
• Be sure to replace the back-up battery at least once every 5 years. Otherwise, you run the risk of
losing data stored in memory.
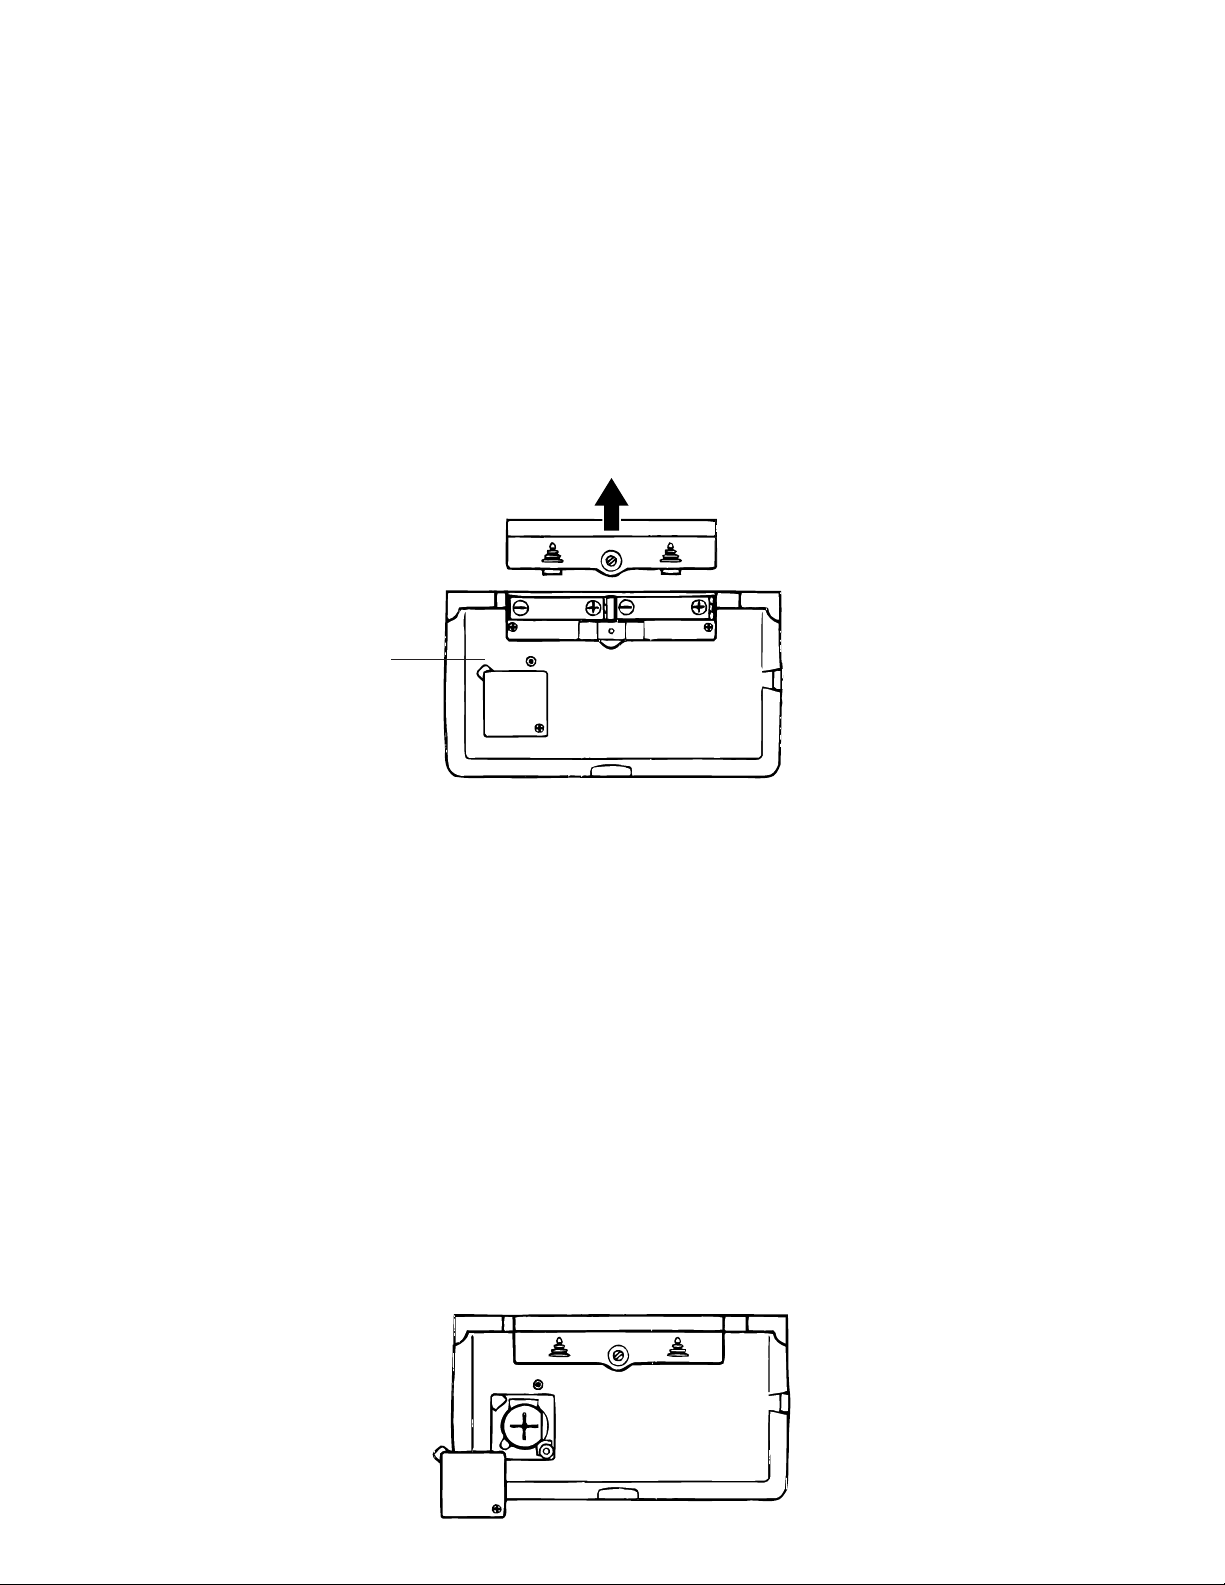
1. Press OFF to turn power off.
2. Remove the screw that holds the back-up battery compartment cover in place and open the cover.
START
START
START
button

— 10 —
3. Insert a thin, pointed object into (A) and remove the old battery.
4. Load a new battery into the compartment, making sure that its positive side is facing up (so you can
see it).
5. Replace the battery compartment cover and secure it with its screw.
• Take care that you do not overtighten the screw.
■ Turning Power On and Off
Press ON/OFF to turn power on and off.
Important!
• If nothing appears on the display when you turn on power, it means that the main batteries are low.
Replace the batteries (page 9) and press the START button to resume normal operation.
Auto Power Off Function
The unit automatically turns power off if you do not press any key for about three minutes. Any alarms
you set still sound, even if power is turned off.
■ Function Menus
• Pressing FUNC displays a function menu, whose contents differs depending on the mode.
• Pressing SHIFT FUNC displays a function menu of general system settings (system function menu).
• Input the number of the left of the function you want to use to select it.
• To exit from a function menu, press ESC.
■ System Language
Your Digital Diary is capable of producing messages in any one of three languages (English, French,
Spanish).
To select the system language
1. Press SHIFT FUNC and then select “Language”.
2. Press the number key that corresponds to the language that you want to use.
• To select “English”, you would press 1.
• The system language automatically changes to English whenever you perform the RESET opera-
tion (page 6).
Note
• In this manual, all display messages are shown in English.
■ Display Contrast
Use the following procedure to make the figures on the display darker or lighter.
To adjust display contrast
1. Press SHIFT FUNC and then select “Display contrast”.
2. Use O and P to make display images darker or lighter.
3. Press OK to quit.
(A)
 Loading...