

Carpigiani K3-E Installation Manual
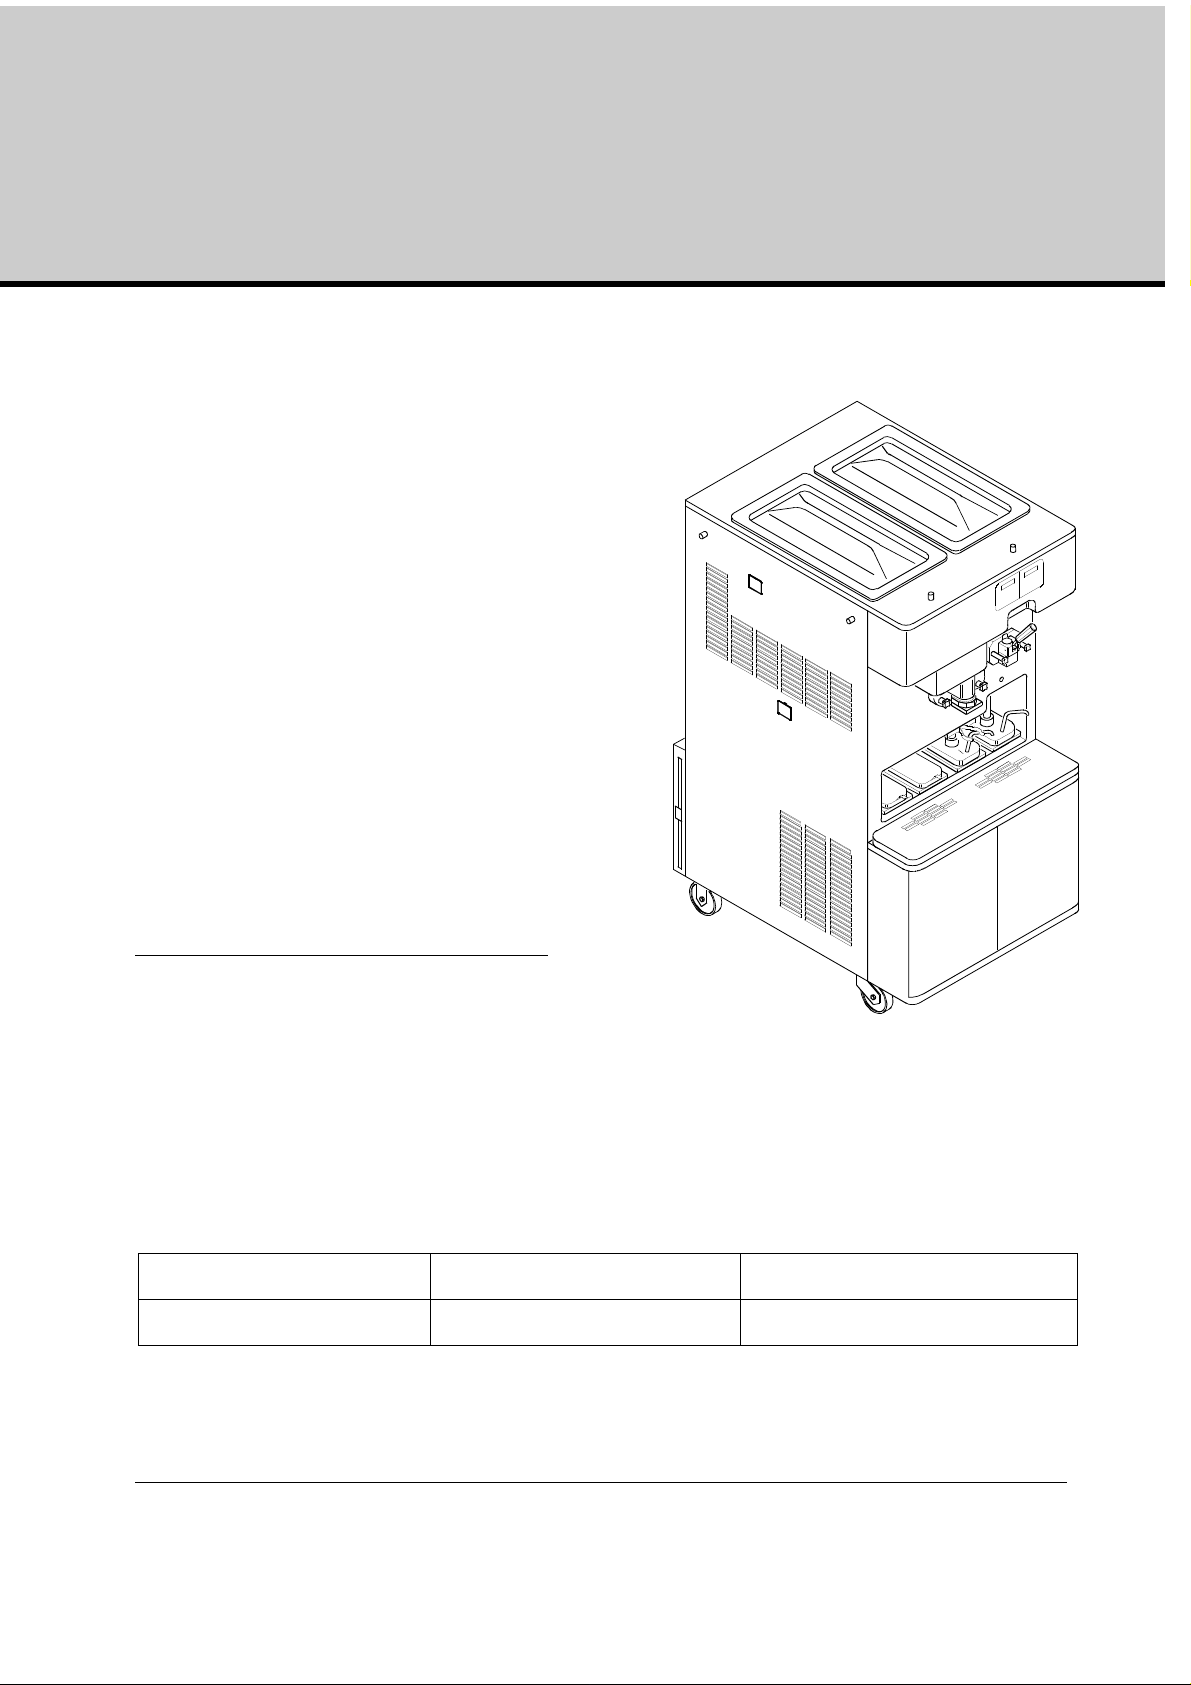
Combination shake/sundae dispenser K 3 – K3/E
Equipment Operating Manual
This manual is for the exclusive use of
licensees and employees of
McDonald’s Systems Inc
Manufactured by:
Carpigiani Group
Via Emilia, 45
Anzola dell'Emilia Bologna 40011
ITALY
Telephone:
Fax:
Edition:
5
Edited:
AM
Date:
10/2012
Checked:
SB/AO
Modification: 1.2.9
Approved;
RV
First Printing March 2006 Printed in Italy
Version 5: October 2012
Updates:

Carpigiani K 3 User’s guide
Table of Contents
CONVENTIONAL SYMBOLS ..................................................................................................... 5
REMOVING MACHINE FROM PACKAGING ................. ....................................................... 6
WEEE (WASTE ELECTRICAL AND ELECTRONIC EQUIPMENT) .................................. 7
TROUBLESHOOTING BACTERIA CONTAMINATION ...................................................... 7
1. INTRODUCTION ................................................................................................................... 9
1.1 GENERAL INFORMATION .................. .................................................. ....................... 9
1.1.1 MANUFACTURER'S IDENTIFICATION DATA .............................. ............................ 9
1.2 INFORMATION ABOUT THE MACHINE ........... ......................................................... 9
1.2.1 GENERAL DATA .......................................................................................................... 9
1.2.2 INTENDED USE ............ ............................................................................................... 9
1.2.3 NOISE ............................ ................................ ................................ ............................... 9
1.2.4 TECHNICAL FEATURES ... .. ..................................................................................... 10
1.2.5 MACHINE ASSEMBLY IDENTIFICATION ......... ................................ ... .................. 10
1.2.6 AUTOMATIC PASTEURISATION CYCLE ................................................................ 11
1.2.7 TEMPERATURE CONTROL ...................................................................................... 11
1.2.8 TANK LIDS HOLDER ................................................................... ... .......................... 11
1.2.9 MIXER (OPTIONAL) .................................................................................................. 12
2. INSTRUCTIONS FOR USE ................................................................................................ 13
2.1 CONTROLS ................................ .................. ...................... ..................... ..................... ..... 13
2.1.1 MILK SHAKE FUNCTIONS ..................... .................................................................. 14
2.1.2 SUNDAE FUNCTIONS .............................................................................................. 19
2.2 OPERATIONS ................................................................................................................ 24
2.2.1 DISPENSING MILK SHAKE ...................................................................................... 24
2.2.2 DISPENSING SUNDAE ............................................... .. ................................ ............. 24
2.3 PROGRAMMED CLEANING CYCLE ......................................................................... 24
2.4 POWER BLACK- OUT .................................................................................................. 25
3. DAILY CLOSING PROCEDURES .................................................................................... 26
3.1 SHAKE SIDE .................................................................................................................. 26
3.1.1 DISASSEMBLING AND CLEANING THE COMPONENTS: ....................................... 26
3.1.2 SANITIZING THE DOOR AREA: .................................................................................. 26
3.1.3 SYRUP LINE CLEANING / SANITIZING ........................................................ ... .......... 26
3.1.4 PREPARING THE MACHINE FOR THE OVERNIGHT HEAT TREATMENT CYCLE.
27
3.1.5 FRONT PANEL CLEANING ......................................................................................... 27
3.2 SUNDAE SIDE ............................................................................................................... 28
3.2.1. SANITIZING THE DOOR AREA SURFACE: .................................................................. 28
3.2.2 TOPPING PUMPS CLEANING: .................................................................................. 28
3.2.3 PREPARING THE MACHINE FOR THE OVERNIGHT PASTEURISATION CYCLE. 28
3.2.4 FRONT PANEL CLEANING ......................................................................................... 28
This manual is for the exclusive use of licensees and employees of McDonald’s Systems Inc Page 2 of 63
Version 5: October 2012

Carpigiani K 3 User’s guide
4.
DAILY OPENING PROCEDURES............... ... ................................................................ .. 29
4.1 MILK SHAKE SIDE ....................................................................................................... 29
4.1.2 STARTING UP THE MACHINE: .. ... ................................ ... ................................ .. ..... 29
4.2 SUNDAE SIDE ............................................................................................................... 30
4.2.1 SANITIZING THE DOOR AREA: .................................................................................. 30
4.2.2 PREPARING HOT TOPPINGS: ................................................................................... 30
4.2.3 STARTING UP THE MACHINE: ................................................................................. 30
5. WEEKLY CLEANING ................................................. ....................................................... 31
5.1 WASHING AND SANITIZING OF THE TOPPING CONTAINERS ........................... 31
5.1.1 CLEANING OF THE TOPPING BINS: .................................................... ..................... 31
5.1.2 CLEANING OFTHE TOPPING HOPPER ..................................................... ............... 31
5.2 DISASSEMBLING, WASHING AND SANITIZING OF THE HOT TOPPING PUMPS
31
5.3 CHECK TOPPING PUMP TEMPERATURE AND VOLUME ...................................................... 33
6. EVERY 14 DAYS CLEANING ...... ................................ ... ................................ ... ............... 34
6.1 DISASSEMBLING AND CLEANING THE MILK SHAKE SIDE .................................... ............... 34
6.1.1 CLEANING THE SHAKE SYRUP SYSTEM .................................................................. 34
6.1.2 DRAINING AND CLEANING THE MILK SHAKE SIDE ........................... .. ............. 35
6.1.3 DISASSEMBLING OF THE SHAKE MIX PUMP ...................................................... 37
6.1.4 DISASSEMBLING OF THE SHAKE DISPENSING DOOR..... .................................. 38
6.1.5 DISASSEMBLING OF THE SHAKE CYLINDER’S BEATER ................................... 39
6.2 DISASSEMBLING AND CLEANING OF THE SUNDAE SIDE 40
6.2.1 DRAINING AND CLEANING OF THE SUNDAE SIDE ............................................ 40
6.2.2 DISASSEMBLING OF THE MIX PUMP................................................................. 42
6.2.3 DISASSEMBLING OF THE SUNDAE DISPENSING DOOR ................................... 43
6.2.4 DISASSEMBLING OF THE SUNDAE BEATER ........................................................ 43
6.3 WASHING AND SANITIZING OF COMPONENT PARTS ..................................... ...... ..... ..... ... .. 44
6.4 REASSEMBLY OF WASHED AND SANITIZED COMPONENT PARTS ................ 46
6.4.1 REASSEMBLY OF THE SHAKE CYLINDER BEATER ............................................. 46
6.4.2 REASSEMBLY OF THE SHAKE DISPENSING DOOR............................................. 47
6.4.3 REASSEMBLY OF THE SHAKE MIX PUMP ............................................................ 48
6.4.4 REASSEMBLY OF THE MIX HOPPER AGITATOR ............................................. 50
6.5 REASSEMBLY OF WASHED AND SANITIZED COMPONENT PARTS ..................... 50
6.5.1 REASSEMBLY OF THE SUNDAE BEATER .................................... ... ....................... 50
6.5.2 REASSEMBLY OF THE SUNDAE DISPENSING DOOR .......................................... 50
6.5.3 REASSEMBLING OF THE SUNDAE MIX PUMP ..................................................... 51
6.5.4 REASSEMBLING OF THE MIX TANK AGITATOR .................................................. 52
6.6 SANITIZING OF THE ENTIRE MACHINE ................................................................. 52
6.6.1 SANITIZE THE HOPPER ........................................................................................... 52
6.6.2 SANITIZE THE PUMP AND FREEZING CYLINDER .............................................. 52
6.6.3 DRAIN THE SANITIZER ............................................................................................ 52
6.7 SYRUP SANITIZING, PRIMING AND CALIBRATION (SHAKE SIDE) ...................... ..... 53
6.8 MIX PRIMING ............................. ................................................... ............................... 54
7. MONTHLY CLEANING ..................................................................................................... 55
7.1 CLEAN MESH FILTERS (ONLY FOR AIR COOLED VERSION) ............................................... 55
This manual is for the exclusive use of licensees and employees of McDonald’s Systems Inc Page 3 of 63
Version 5: October 2012

Carpigiani K 3 User’s guide
8.
PREVENTATIVE MAINTENANCE ................................................................................. 56
8.1 CHECK OUT LIST ......................................................................................................... 56
8.2 PERIODICAL CHECK-UP AND MAINTENANCE ......................................................... 57
8.2.1 PERISTALTIC PUMP TUBE REPLACEMENT INSTRUCTION .................. .................................. 57
9. TROUBLESHOOTING ..................... ................................... ................................ ............... 59
9.1 ALARMS ........................................................................................................................ 59
FOLLOWING FIND THE ALARM LIST: ................ ............................................................... 59
This manual is for the exclusive use of licensees and employees of McDonald’s Systems Inc Page 4 of 63
Version 5: October 2012

Carpigiani K 3 User’s guide
Conventional Symbols
ATTENTION ELECTRIC SHOCK DANGER
The staff involved is warned that the in observance of safety rules in carrying out the
operation described may cause an electric shock.
ATTENTION GENERAL DANGER
The staff involved is warned that the operation described may do harm if not carried ou t in
the observance of safety rules.
NOTE
It points out significant information for the staff involved.
WARNING
The staff involved is warned that the in observance of information may cause a loss of data
and damages to the machine.
PROTECTIONS
This symbol placed by description side means that the operator must use personal
protections against an implicit risk of accident.
SAFETY
When using industrial equipment and plants, one must be aware of the fact that drive
mechanisms (rotary motion), high voltage of the components, as well as parts subject to high
temperatures may cause serious damages to persons and things.
The person in charge for plant’s safety must be on the look-out that
- an uncorrect use or handling is av oid ed
- Safety devices must neither be removed nor tampered
- Only original spare parts are to be used especially as far as those components with safety fu nctions are
concerned (ex.: protection microswitches, thermostats).
To achieve the above, the following is necessary:
- At working place an instruction manual relevant to the machine should be available.
- Such documentation must be carefully read and regulations must consequently be followed.
- Only adequately skilled personnel will have to be assigned to electrical equipment.
WARNING
The machine must be installed only by a specialized and authorized technician; when
installing the machine, insert a differential magnetothermal protection switch on all poles of
the line, adequately sized to the absorption power shown on machine data plate and with
contact opening of 3 mm at least. This switch is used to cut off the power supply. Any
replacement of the power cable must be carried out only by a specialized and authorized
technician.
Never put your hand into the machine, during production and cleaning opera tions. Before carrying
out any maintenance operation, make sure that the machine is in “STOP” position and main switch
has been cut out.
It is forbidden to wash the machine by means of a stream of water under pressure.
Disconnect electrical power before removing any side or rear panel.
CARPIGIANI is not responsible for any accident that might happen during operation, cleaning
and/or servicing of its units, if this warning has not been fully complied with.
This manual is for the exclusive use of licensees and employees of McDonald’s Systems Inc Page 5 of 63
Version 5: October 2012

Carpigiani K 3 User’s guide
Removing machine from packaging
1. Check the Shock-watch label which indicates whether the goods have been mishandled; inspect
the cardboard shipping carton for signs of damage. (See fig.1)
2. Cut the metal straps (beware of snapping metal), lift the cardboard carton up and off of the pallet (see picture
2).
3. Remove bag and Styrofoam prote ction. Inspect the m achine ag ain for sig ns of shipping da mage or
rough handling. If damage is visible, notify the r estaurant manager and/or the shipping company
(see fig. 3).
Fig. 1 Fig. 2
Fig. 3
CAUTION
removal from the pallet must be carried out by two qualified persons in material handling and in the
observation of safety rules.
4. The machine is attached to the pallet by 4 bolts. The bolt heads are on the bottom side of the pallet and
they tighten into threaded holes on the bottom of the machine. The two wooden shims, pl aced sideways
under the machine, make it possible to keep the wheels ¼" of the surface of the pallet (see fig. 4).
5. Now loosen the packing bolts from the bottom side of the pallet, on one side only, and let them drop to
the floor. It is not necessary to remove the side panels of the machine to do this (see fig. 4).
6. Slightly, incline the machine on one side and remove the wooden block. Please be careful. The wood blocks
keep the machine castors off the pallet by ¼" their removal will cause the machine to drop that distance (see
fig. 5).
7. Repeat the same procedure on the other side.
8. After the removal of the wooden blocks, the machine will directly rest with its wheels on the pallet.
9. In order to unload the machin e from the pallet, use the w ooden ramps, su pplied with the machine. Plac e the
wooden ramps in position against the rear side of the machine and push the machine from FRONT SIDE
moving it to the rear. Two persons, one in front and one in the rear, must handle and control the unit (see fig. 6).
Fig. 4 Fig. 5 Fig. 6
This manual is for the exclusive use of licensees and employees of McDonald’s Systems Inc Page 6 of 63
Version 5: October 2012

Carpigiani K 3 User’s guide
WEEE (Waste Electrical and Electronic Equipment)
In accordance with European Directives 2006/66CE on batteries and accumulators and waste batteries
and accumulators and with 2002/96/EC on WEEE (Waste Electrical and Electronic
Equipment), the presence of the above symbol on the product or on its packaging
indicates that this item must not be disposed of together with the other normal unsorte d
municipal waste. Instead, it is the user’s responsibility to dispose of this product by
returning it to a collection point designated for the recycling of electrical and electronic
equipment waste. Separate collection of this waste helps to optimise the recovery and
recycling of any reclaimable materials and also reduces the impact on human health
and the environment.
For more information concerning the correct disposal of this product, please contact
your local authority or the retailer where this product was purchased.
Troubleshooting Bacteria Contamination
Product samples should be taken periodically by a qualified expert in order to asses the
bacteria count in the product. The bacteria count in the samples should be below the
figures given below:
Standard Plate Count (SPC)……………...50,000
Coliform …………………………………………10
Should the bacteria counts exceed the figures listed above then there is a source of bacterial
contamination. The source of contamination must be identified and corrected. High bacteria counts are
indicate that a product is not safe for consumption. You must inform the machine operator on how to
prevent bacterial contamination of the product.
Note: Soft serve yogurt
product. However, COLIFORM bacteria contamination is NOT ACCEPTABLE in any food product. The
information given below will help prevent coliform bacteria contamination problems.
The following is a list of possible bacteria contamination sources together with methods of
prevention.
will generally have high bacteria counts – this is normal and helps define the
SOURCE OF
CONTAMINATION
1 - Operator contact.
2 - Mix residue/deposits (milkstone
build-up).
This manual is for the exclusive use of licensees and employees of McDonald’s Systems Inc Page 7 of 63
Version 5: October 2012
PREVENTION
1a - Wash hands and forearms thoro ughly.
1b - Wear rubber gloves if cuts or skin conditions exist.
1c - Wash hands periodically throughout the day.
2a - Provide the proper brushes.
2b - Thoroughly brush clean all parts and components to
prevent the formation of milkstone, a porous substance
which will house bacteria and contaminate fresh mix.

Carpigiani K 3 User’s guide
SOURCE OF
CONTAMINATION
3 - Worn or damaged parts.
4 - Incorrect cleaning and sanitation
procedures.
PREVENTION
3a - Lubricate all rubber parts contacting the mix with a food
grade lubricant.
3b - Inspect o-rings for damage. Only replace with factory
approved parts.
3c - Regularly check drip troughs for excessive leakage.
4a - Sink must be perfectly clean and contain enough solution
to cover the biggest component. Brush clean and sanitize
the freezer on a regular basis .
4b - Use the correct brushes, lubricants, and single service
towels.
4c - Store and use chemicals as directed by the instructions on
their labels.
4d - Use a few good employees to follow the cleaning
procedure correctly and consistently. Allow the employee
uninterrupted time to complete the cleaning procedure.
4e - Allow the sanitizing solution to stand in the hopper and
freezing cylinder for five minutes .
4f - Wash and sanitize the lubricant tube after each use.
Always replace the cap on the tube.
4g - Machine components and brushes should be air-dried
overnight. Never store them in the storage cooler.
4h - Always follow daily cleaning procedures. Regularly wipe
down the outside of the machine and dispensing spouts
with a sanitized towel.
5 - Improperly stored mix
5a - Use mix stock with oldest date first. Observe expiration
dates.
5b - Place the mix directly in the cooler. Do not stack mix
outside or under direct sunlight before placing it in the
cooler.
5c - Always leave one inch between the mix and other products
in the cooler to allow air to circulate.
5d - Mix must not remain at room temperature for long periods
of time.
5e - Hopper storage must maintain a temperature of 40°F
(4,4°C). Storage temperatures above 45°F will allow
bacteria to multiply to dangerous levels in less than one
hour.
5f - Once the mix is placed in the hopper, the ho pper covers
must be used to maintain the correct temperature and
minimize mix contamination.
This manual is for the exclusive use of licensees and employees of McDonald’s Systems Inc Page 8 of 63
Version 5: October 2012

Carpigiani K 3 User’s guide
1. Introduction
1.1 GENERAL INFORMATION
1.1.1 MANUFACTURER'S IDENTIFICATION DATA
The machine has a data plate carrying manufacturer data, machine type and serial number, assigned
when it is manufactured.
LEGEND:
A= Serial number
B= Machine type
C= Voltage
D= Fuss/Breaker size
E= Gas type and weight
F= Frequency
1.2 INFORMATION ABOUT THE MACHINE
1.2.1 GENERAL DATA
Electronic, self-heat-treatment, floor machine, for the production and immediate distribution of
milkshake/ice cream having the following main features:
Refrigerated upper tanks;
Cylinder feeding pumps (to control product overrun);
Automatic system to dispense the milkshake with a 4 flavours syrup selection;
Two containers for hot toppings, with pasteurisation temperature control;
Two containers for room temperature toppings;
Automatic pasteurisation system to heat-treatment the product inside the mix tank and inside the
cylinder during pause periods (for instance, during nig ht time);
Electronic consistency control system hard-o-matic.
1.2.2 INTENDED USE
The K 3 machine must only be used for the production of ice cream and milkshake, within the fu nctional
limits listed below:
Voltage: ±10%
Min. ambient temperature: 50°F (10°C)
Max. ambient temperature: 109°F (43°C)
Max relative ambient humidity: 85%
This machine has been designed for its use in closed places not subject to explosion-proof standards;
consequently, it shall be used in places complying with normal atmosphere..
1.2.3 NOISE
The continuous level of acoustic radiation pressure, which has been weighed and called A on working
place, turns to be lower than 70 dB(A), both by air-cooled and water-cooled units.
B
A
F
C
D
E
This manual is for the exclusive use of licensees and employees of McDonald’s Systems Inc Page 9 of 63
Version 5: October 2012

Carpigiani K 3 User’s guide
1.2.4 TECHNICAL FEATURES
n
i
2
4
i
n
n
i
2
n
i
8
2
60 in
58 in
4
0
i
n
4
1
i
n
Hou rly Prod u ction * Hopper capacity Flavors Electrical supply
Model
K 3
K3/E
SUNDAE SHAKE
3,5 oz. / 100 gr
lb /kg
82 / 38 380 88 / 40 160
portions
lb / kg
1.2.5
MACHINE ASSEMBLY IDENTIFICATION
LEGEND:
1 Syrup tanks cabinet
2 Hopper cover
3 Hot toppings
4 Room temperature toppings
5 Dispensing head shake side
6 Dispensing head soft side
7 Air condenser
13,5 oz. / 400 ml
portions
SUNDAE
Gallons
Liters
5,25 gal
20 l
TTS
SUNDAE SHAKE Volt - V Phase Cycle - Hz kW Amps
Galons
Liters
5,25 gal
20 l
1 5
208 - 230 3 60 5,5 30
380 - 415 3 50 5,5 20
7
Installed
power
Full
load
2
Net
weight
lb / kg
871 / 395
1
6
5
3
4
1
This manual is for the exclusive use of licensees and employees of McDonald’s Systems Inc Page 10 of 63
Version 5: October 2012

Carpigiani K 3 User’s guide
1.2.6 AUTOMATIC PASTEURISATION CYCLE
The machine has been pre-set in the factory to start automatically the pasteurisation cycle every night at 2
am. (the automatic pasteurisation time can be re-set at a different time by a trained technician.
1.2.7 TEMPERATURE CONTROL
When the machine is set to STOP, the tank temperature is controlled: if it is higher or equal to 59°F (15°C),
the execution of the pasteurisation program is forced. So, by pressing the PROD. button, the
pasteurisation program will automatically start.
NOTE:
After the machine’s brush cleaning, it is necessary to press the PROD. button within 60 minutes after the
front lid closing. During this 60 minutes the test at 59°F (15°C) is masked and Production is accepted. After
60 minutes, the machine does not accept the PROD. button any more and it sets to pasteurisation
function.
1.2.8 TANK LIDS HOLDER
When you need to refill the mix tank, lift the lid and turn it upside down. Insert the handle of the lid in the
slot of the holder placed on the other lid. You need not to remove the holder.
LID HOLDER
This manual is for the exclusive use of licensees and employees of McDonald’s Systems Inc Page 11 of 63
Version 5: October 2012

Carpigiani K 3 User’s guide
1.2.9 MIXER (OPTIONAL)
Operating procedure
1. Hold a cup under soft-serve dispensing nozzle.
2. Pull draw lever completely forward and fill up
the cup.
3. Place a dome lid on top of the cup.
Tip: Set the cup on a level surface.
6. Push the cup onto the blender mixing spoon,
hold the cup with one hand and push the
switch on with the other hand. Using one hand,
blend the cup for 7 seconds. While blending,
move the cup from side to side and up and
down.
4. Hold the cup under the requested inclusion
dispenser. Slide the mix-in dispenser’s handle,
to dispense the product
5. Snap mixing spoon onto blender connector (be
careful not to touch spoon)
7. Once blender stop rorating, hold the cup in
one hand and release the mixing spoon from
the blender with the other hand.
8. Serve the cup.
This manual is for the exclusive use of licensees and employees of McDonald’s Systems Inc Page 12 of 63
Version 5: October 2012

Carpigiani K 3 User’s guide
2. INSTRUCTIONS FOR USE
2.1 CONTROLS
The K 3 is equipped with two front push-button panels, one for the controls related to the SHAKE side and
one for the controls related to the SUNDAE side.
MILK SHAKE
DISPENSING BUTTONS
WHITE BASE DISPENSING BUTTON (for SMOOTHY)
- OPEN PISTON TO EMPTY THE MACHINE (CLEANING)
LCD back lights flashing for
warni ng :
“read info on display”
Warning light for LOW
mix level (reserve)
MAIN FUNCTIONS:
- Stop
- Production
Pasteurisation Led
lights on from start Past. till Past. End
“+” increase button for manager menu
Agitation Button/Lock button
Storage Led
lights on from Past. End
“-” decrease button for manager menu
Alarm and warning restore
IMPORTANT
Push-buttons are activated keeping the finger (not the nail) pressed on it for at least 1/2 second
(safety feature).
WARNING
TO REDUCE WEARING OF THE BEATER BLADE (POS. 430) USE AGITATION FUNCTION JUST FOR
THE TIME STRICTLY NECESSARY.
This manual is for the exclusive use of licensees and employees of McDonald’s Systems Inc Page 13 of 63
Version 5: October 2012

Carpigiani K 3 User’s guide
2.1.1 MILK SHAKE FUNCTIONS
STOP BUTTON
By pressing this button during operation, the machine stops (LED on).
DISPLAY Comments
16:29:27 Tue
When the machine is in STOP, the display shows Time
and Date.
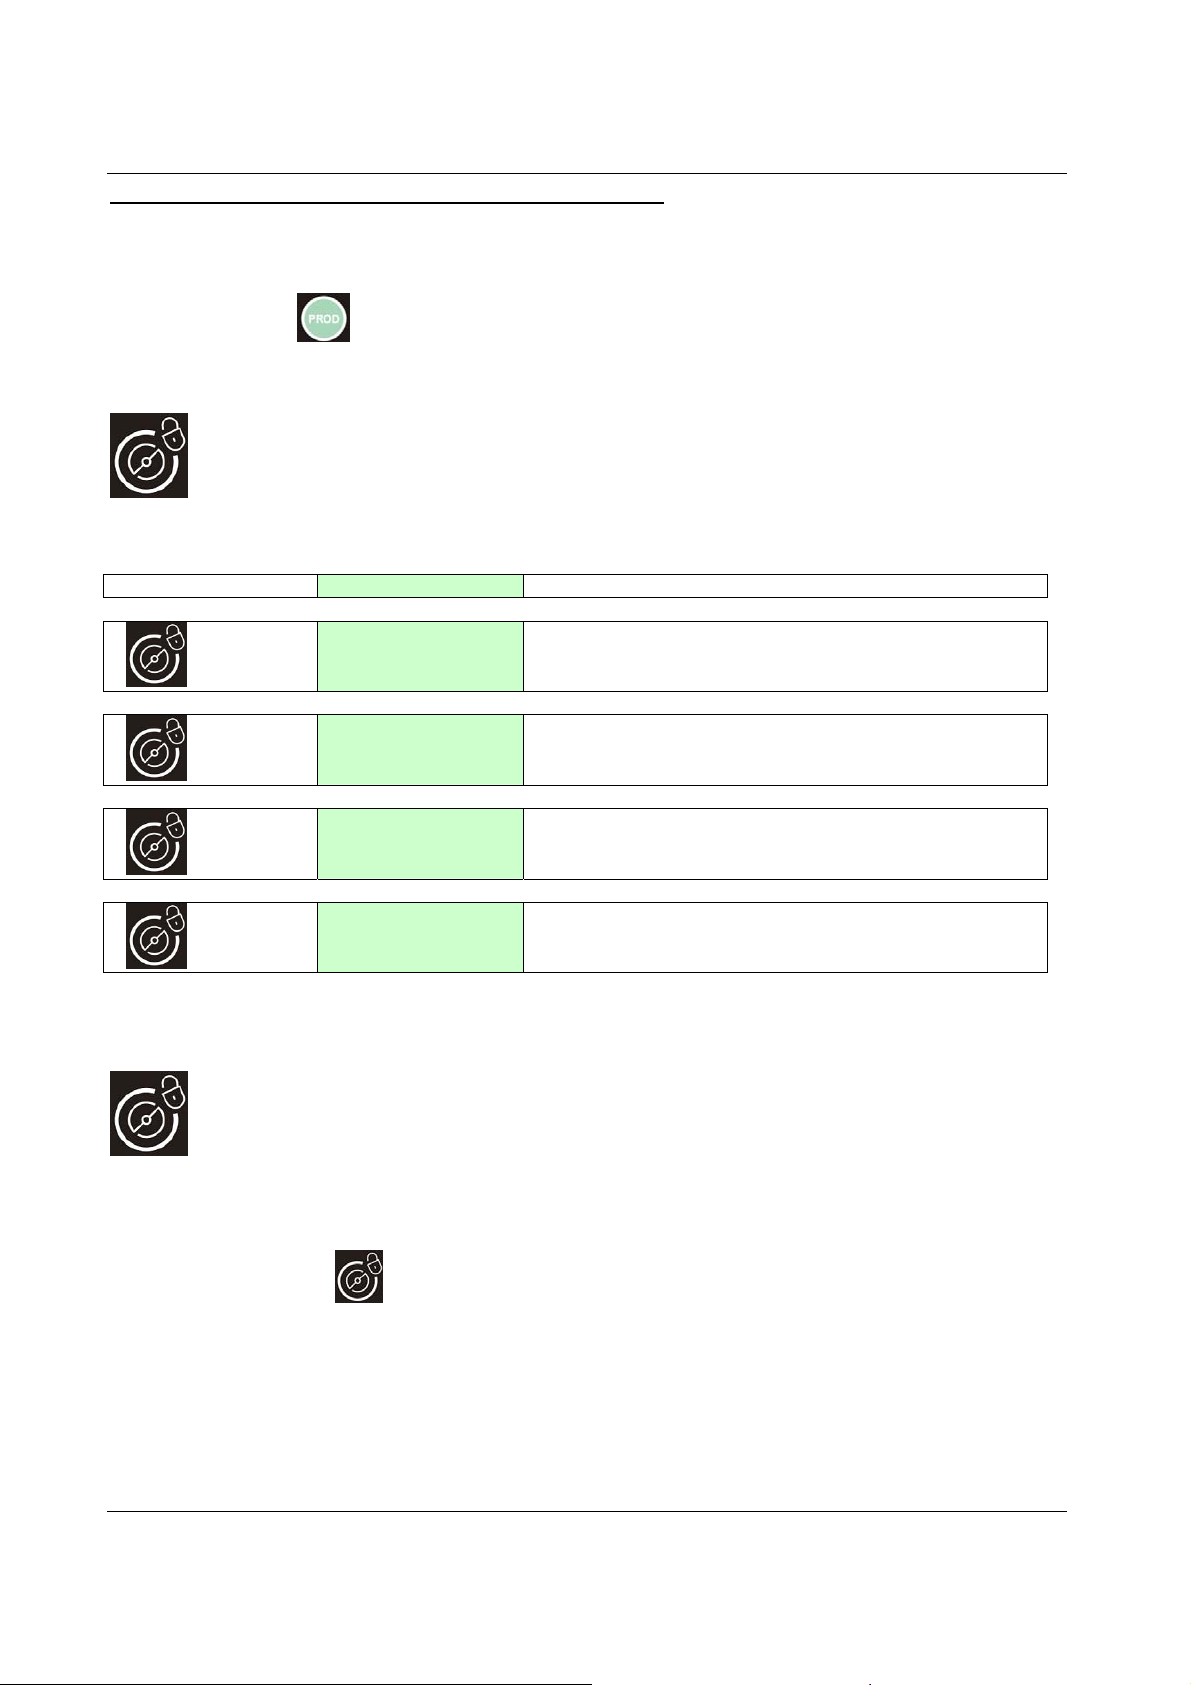
PRODUCTION BUTTON
Preparatio n (startup) :
machine is freezing the product. For that time, dispensing is not allowed.
Production (LED is always on):
desired consistency by the Hard-o-Tronic system. If the machine has been in the production
mode and then placed in Stop, the 15 minutes start up procedure will be automatically bypassed
if the time in Stop does not exceed 60 minutes; otherwise the start up procedure will be repeated.
By pressing this button when in STOP, the display indicates:
KEY
DISPLAY comments
Do Not Serve !
1
TEV +19°C W-14
Hopper +14°C
2
3
Cylinder +13°C
In this box the display shows in the first line (above):
Set=065 Hot=035
Lev=00000
Cones today
4
12345
Total Cones
5
0923456780
TEV+010 TGV-022
6
TEC+013 TE1-012
Pushing PROD again, we return to first display (1).
On pushing this button, its LED will blink for 15 minutes while the
The product is ready to be dispensed and it is kept at the
When the Milk Shake is not ready, the display shows: “DO
NOT SERVE“
In this box the display shows the Hopper’s temperature in
the first line (above) and the Cylinder’s temperature in the
second one.
Set=065: the shake consistency to be reached
Hot=035: the shake consistency actually detected in the
cylinder
Liv=00000 for technician
In this box the display shows the daily quantity of cones
(starting from 0:00 until 23:59).
In this box the display shows the total quantity of cones
In this box the display shows various probes of the SHAKE
part ( no °C nor °F are displayed).
This manual is for the exclusive use of licensees and employees of McDonald’s Systems Inc Page 14 of 63
Version 5: October 2012
Carpigiani K 3 User’s guide
Machines equipped with “LONWORKS” device, Service Pin:
Activation of the service pin, proceed as follows:
1. Place one side of the machine in STOP
2. Press PROD
At the end of the procedure put the side in standard function (Production or Storage)
AGITATION BUTTON (CLEANING)
button for 10 seconds (a beep signal is activated)
By pressing this button from STOP, the led turns on and the display indicates:
KEY DISPLAY Comments
HOT=058 TEC+014
Beater + Pump ON
1
2
3
4
Pressing Production again we return to first display.
HOT=058 TEC+014
Pump ON
HOT=058 TEC+014
Beater ON
HOT=058 TEC+014
Beater + Heating
Pressing this button one time, the beater motor and the
mix pump motor will turn ON. HOT (consistency) and TEC
(cylinder’s temperature) are displayed in the first line.
Pressing this button for the second time we arrest the
beater motor but the mix pump remains on.
Pressing this button for the third time we activate the
beater motor and the mix pump motor stops.
Pressing this button for the fourth time we activate both the
beater motor and the mix pump motor and the heating as
well to help the product to melt.
LOCK BUTTON
To clean the keyboard panel with a clean towel it is recommended to block the keys of the
keyboard as follows:
Keep the
the keyboard is locked. At this point you can clean the keyb oard safely. To restart it, just
keep the same key pressed for 3 seconds and the led will turn off.
button pressed for 3 seconds, the respective led will flash indicating that
This manual is for the exclusive use of licensees and employees of McDonald’s Systems Inc Page 15 of 63
Version 5: October 2012

Carpigiani K 3 User’s guide
PASTEURISATION FUNCTION / INCREASE FUNCTION
The pasteurisation function can be activated only if the mix in the hopper is a bove
the Medium Level (“ADD MIX” message on display must be off).
AUTOMATIC PASTEURISATION CYCLE:
(pasteurisation LED on) and the mix is above the medium level, the heat-treatment cycle
starts automatically at a certain time (as programmed in the Mana ger Menu normally at
2:00 AM).
During the display indicates “HEAT-TREATMENT CYCLE” the mix in the hopper and in the
cylinder is heated up to 65°C, k ept at 65°C for 30 minutes and finally cooled down to 2°C.
At the end of the cycle, the display shows “PASTO END” followed by date and hour of
termination. The machine passes automatically to STORAGE function.
To serve shake, press STOP, then the PROD button, but only if the machine hasn’t passed
automatically in PRODUCTION yet.
Note: Once the pasteurisation cycle has started, it can not be interrupted. The
complete pasteurisation cycle will take less than 4 hours to be completed.
During the pasteurisation and Pause cycles, the mix in the machine is very hot. Do
not attempt to recover the mix nor to disassemble the machine.
WARNING
Do not dispense sundae nor dismount the machine during the pasteurisation
because the product is very hot and under pressure.
while the machine is in production
STORAGE / DECREASE FUNCTION / RESET ALARM MESSAGES
The Storage Led lights ON as soon as the Pasteurisation cycle ends. The machine
preserves the mix at +2°C (35°F) in the hoppe r and in the cylinder.
- this button is also used to decrease the value in the Manager menu
- this button is also used to RESET the ALARM MESSAGES on the display.
MIX LEVEL SIGNAL
In each hopper we have 2 level sensors: MEDIUM level and LOW level.
- When the MIX LEVEL LED flashes, it means that the mix level in the hopper is lower
than the medium mix level sensor.
- When the MIX LEVEL LED is on, it means that the mix level in the hopper is lower
than the minimum mix level sensor.
The display indicates ADD MIX or MIX OUT.
Maximum filling
level indicator
Mix level
sensor
This manual is for the exclusive use of licensees and employees of McDonald’s Systems Inc Page 16 of 63
Version 5: October 2012

Carpigiani K 3 User’s guide
When the LCD back light is blinking, that means an alarm has tripped.
When it becomes still, the alarm which has previously tripped, has automatically reset and
the indication on the display must be reset by pressing RESET button
.
EVENTS
In order to read the events, the machine must be in STOP, so keep the pressed until ****READ
EVENTS**** is displayed.
02:00:00 06 APR
The first event will appear on the display. Push or in order to scroll UP or DOWN the events
list.
START PASTEUR
PUSH TO EXIT THE EVENTS READING AND GO TO STOP.
MILK SHAKE DISPENSING BUTTONS
Every “coloured cup” button corresponds to a milk shake flavour.
In PRODUCTION, the product is disp e nsed ac co rd ing to the flavou r selected.
If, while dispensing milk shake, you push any “coloured cup” button, the milk shake will
immediately stop without reaching its automatic level; this function may be used to
dispense small portions. (tasting function).
When in STOP, by pushing th e button
pushing again it closes.
When in STOP, the “coloured cup” button are used for calibration of syrup quantity.
the piston opens and remains opened; by
SYRUP QUANTITY CHECK AND SYRUP SYSTEM CLEANING
While the machine is in STOP:
- Push one time only the “coloured cup” button.
- Syrup will be dispensed for 5/7 seconds.
- Check the quantity of the syrup using the calibration cup.
- If the quantity of syrup is not satisfactory then modify the calibration as explained in
the manager menu.
- By pushing a second time while the syrup pump is ON, the pump will run at MAX
speed in order to flush and clean the syrup tubes.
This manual is for the exclusive use of licensees and employees of McDonald’s Systems Inc Page 17 of 63
Version 5: October 2012

Carpigiani K 3 User’s guide
MANAGER MENU
1) To access the Manager Menu press simultaneously both and keys, then release them
immediately.
On the display you will read the first step of the Manager Menu:
The first row indicates the step number, and the second row indicates the description and value.
Time
Step U01 10
2) Push
3) Push STOP to move to the next step.
4) To exit the Manager Menu push
The following table illustrates all steps of the Manager Menu:
U01 -> 06 Time and date settings
U07 Language selection.
U08 Start Production time.
U09 Start Pasteurisation time.
or in order to increase or decrease the value.
button.
STEP N°
(first row)
U01 Hours 00 23
U02 Minutes 00 59
U03 Day of Week SUN SAT
U04 Day of Month 01 31
U05 Month Jan Dec
U06 Year 2000 2099
U07 Language ITA DEU
U08 Start Prod. Hour 00
U09 Start Past .Hour 00 23+no
U10 Beeper Lev. Enabled No Yes+Man
U11 Syrup 1 pump speed 010 240
U12 Syrup 2 pump speed 010 240
U13 Syrup 3 pump speed 010 240
U14 Syrup 4 pump speed 010 240
Display
(second row)
Min Max
23+no+auto
U10 Disables/ enables the sound alarm when mix level is low..
U11 -> 14 Syrup pumps speed to calibrate the syrup quantity (1 oz fluid ounce in 5 or 7 sec)
THE MACHINE IS READY FOR START-UP ONLY AFTER IT HAS BEEN PERFECTLY
FOR HYGIENIC AND SAFETY REASONS, HANDS SHOULD
NEVER BE PLACED INSIDE THE MIX HOPPER WHILE THE MACHINE IS WORKING.
CLEANED AND SANITIZED.
Default
ENG
08
02
Yes
150
120
100
090
This manual is for the exclusive use of licensees and employees of McDonald’s Systems Inc Page 18 of 63
Version 5: October 2012

Carpigiani K 3 User’s guide
2.1.2 SUNDAE FUNCTIONS
STOP BUTTON
By pressing this push-button during operation, the machine stops (LED on).
DISPLAY Comments
10:33:21 Fri
When the machine is in STOP, the display shows Time and Date.
PRODUCTION BUTTON
Press PROD button to start the production mode (LED on). The motor and compressor are
automatically controlled by HARD-O-TRONIC system.
By pressing this button from STOP, the display indicates:
KEY DISPLAY comments
Do Not Serve!
1
TEV +19°C W -14
Sundae Ready!
TEV +19°C W -14
Do Not Serve!
Beater HT Sensor
Hopper +14°C
2
3
Cylinder +13°C
In this box the display shows in the first line (above):
Set=100 Hot=085
Cones today
4
12345
Total Cones
5
0923456780
TEV+010 TGV-022
6
TEC+013 TE1-012
Topping +057
7
Set Topping +055
Pushing PROD again, we return to the initial display.
When the sundae is not ready , the display shows: “DO
NOT SERVE“
When the sundae has re ached the desired consistency the
display shows “SUNDAE READY”.
In case of ALARM, this will be displayed in the second row
In this box the display shows the Hopper’s temperature in
the first line (above) and the Cylinder’s temperature in the
second one.
Set=100: set HOT SOFT
HOT=085: the consistency actually detected in the soft
cylinder.
In this box the display shows the daily quantity of cones
(starting from 0:00 until 23:59).
In this box the display shows the total quantity of cones.
In this box the display shows various probes of the SHAKE
part ( no °C nor °F are displayed).
In this box the display shows the Topping probe ( no °C
nor °F are displayed), with the respective temperature sets.
This manual is for the exclusive use of licensees and employees of McDonald’s Systems Inc Page 19 of 63
Version 5: October 2012
 Loading...