

Canon Mk1500 User Manual
User’s Guide
Please read this guide before operating this product.
After you finish reading this guide, store it in a safe place for future reference.

Regulations for this product FCC Regulations
This device complies with Part 15 of the FCC Rules.Operation is subject to the following two conditions: (1)
This device may not cause harmful interference, and (2) this device must accept any interference received,
including interference that may cause undesired operation.
Note: This equipment has been tested and found to comply with the limits for class B digital device,
pursuant to Part 15 of the FCC Rules. These limits are designed to provide reasonable protection against
harmful interference in a residential installation. This equipment generates, uses and can radiate radio
frequency energy and, if not installed and used in accordance with the instructions, may cause harmful
interference to radio communications. However, there is no guarantee that interference will not occur in a
particular installation. If this equipment does cause harmful interference to radio or television reception,
which can be determined by turning the equipment off and on, the user is encouraged to try to correct the
interference by one or more of the following measures:
• Reorient or relocate the receiving antenna.
• Increase the separation between the equipment and receiver.
• Connect the equipment into an outlet on a circuit different from that to which the receiver is connected.
• Consult the dealer or an experienced radio/TV technician for help.
Do not make any changes or modifications to the equipment unless otherwise specified in the manual.
If such changes or modifications should be made, you could be required to stop operation of the equipment.
Trademarks
• "Canon" and the Canon logo are the registered trademarks or the trademarks of Canon Inc.
Notices
• The contents of this document may not be duplicated in whole or in part by any means without
permission.
• The information in this document is subject to change without notice.
• In no event shall Nisca Corporation bear any responsibility for any direct or indirect damages arising
from the use of our product.
• In no event shall Nisca Corporation bear any responsibility for any direct or indirect damages resulting
from the improper use of our product by the customer, or from modifications or changes made to our
product by the customer.
• If you find any errors or omissions in this document, or if you have any questions concerning this
document, contact your nearest dealer.
• The data created/saved with this printer cannot be backed up in another storage device such as the
hard disk of the PC. We assume no responsibility for the loss caused by data disappearance due to a
machine failure, repair, inspection, or weak battery as well as the carry-over loss.
Copyright ©2011 Nisca Corporation all rights reserved.
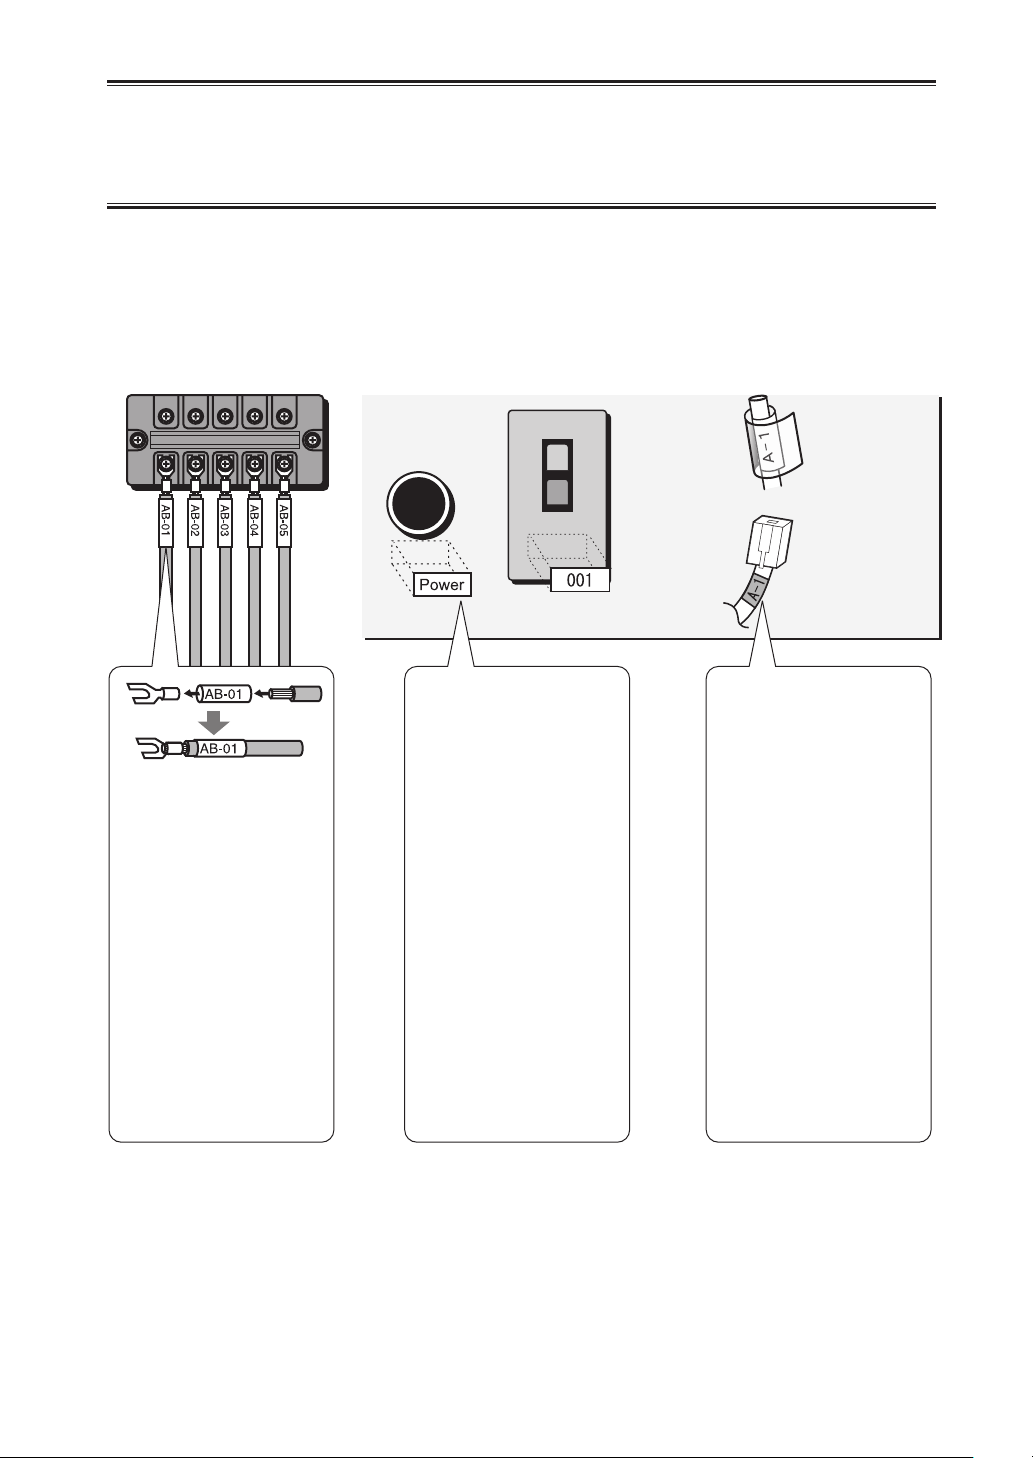
A Vital Tool for Electrical Facilities
Introducing the Mk1500
When you open a power distribution panel, you are confronted with an array of tightly packed terminals, circuit
breakers, and switches, and these myriad devices are connected by a maze of cables. If each device and cable
is not clearly labeled with a symbol or a number, maintenance can become a nightmare. In such electrical
facilities, it is common practice to use printed tube to identify cables and printed labels to identify switches.
The Mk1500 is used to print such labels and tube.
Clear
laminate seal
Tube
Labeled with switch
name or number
Easy yet high-quality
printing
Printing tube
The Mk1500 can print
tube that identify cables:
“AB-01” or “+20V”, for
example. Because the tube
that is used is available
commercially, the Mk1500
provides an economical
solution. The Mk1500 can
also be used to print on heat
shrink tube and 4mm I.D.
strip.
Label switches clearly
Printing labels
The Mk1500 can also be
used to print label tape (sold
separately). Because labels
that correspond to specifi c
cable tube labels can be
printed and applied to the
corresponding devices,
using such labels results in
improved effi ciency.
Label with clear adhesive
lamination
Wrap-around tape
with printable and
laminating layers
When applied after printing,
the printing is covered by
plastic laminating fi lm,
protecting the characters
from scratching.
Adheres to cables after they
have been connected.

Main Features
Compact and easy to carry
1
In addition to being compact at 250 mm (W) x 300 mm (D) x 85 mm (H), the printer also has a
lightweight design (2kg), making it easy to transport to the site of electrical facilities. Overall, the
printer greatly increases work effi ciency.
Supports a variety of printing media
2
The printer can print on commercially available tube, label tape, heat shrink tube, wrap around tape, and
4mm I.D. strip.
Legible printing even in cool environments
3
Install the optional Tube Warmer to print legibly in environments as cool as 5°C.
Many functions not normally found in a hand-portable machine
4
Includes a variety of standard features such as adjustable character size, spacing and margins, and fi le
saving capabilities that are hard to imagine in such a light-weight machine.

Contents
Explanation of Symbols .......................................4
Safety Precautions ...............................................5
Quick Guide to Using the Printer .......................12
Contents
Part 1 Before You Begin (Preparation)
1.1 Names and Functions of Parts .......... 18
Main Unit ....................................................18
LCD screen ................................................20
Keyboard ....................................................21
1.2 Connecting the AC Adapter................ 23
Part 2 Basic Operations
2.1 Printing on Tube and Clear Tube ........ 26
Install cassettes ......................26
Insert tube ..............................28
Turn the power switch on ........29
Input characters ......................30
Print ........................................33
2.2 Printing on Label Tape, Heat Shrink
Tube, and 4mm I.D. Strip ................. 34
Install cassettes ......................34
Turn the power switch on ........37
Input characters ......................38
Print ........................................41
2.3 Printing on Wrap-around Tape ........... 42
Installing the cassettes ...........42
Installing the wrap-around tape
guide .......................................43
Turn the power switch on ........44
Input characters ......................45
Print ........................................47
1

Part 3 Character Input
3.1 Inputting Characters ........................... 50
Inputting characters ....................................50
3.2 Inputting Symbols ...............................51
Inputting symbols ........................................51
3.3 Deleting Characters, Creating New
Pages, Moving the Cursor...............52
Deleting or changing characters .................52
Deleting all entered text data ......................53
Creating a new page ..................................53
Inserting a page .........................................54
Deleting a page ..........................................54
Moving the cursor .......................................55
Part 4 Advanced Operations
4.1 Changing the Characters and the
Number of Lines ..............................58
Changing character size .............................58
Changing the spacing between characters 59
Adding an underline to “6” and “9” ..............60
Adding a frame to characters......................61
Printing on two lines ...................................62
4.3 Various Printing Functions ................68
Printing count .............................................68
Changing the printing orientation ...............70
Changing the length and the character
alignment ................................................72
Printing a specific page multiple times
(Continuous Print) ................................... 74
Generating sequential characters (serial
printing) ................................................76
Adjusting the printing start position and
vertical position .......................................79
Adjusting the printing density .....................81
4.4 Changing the Cutting Method ............82
Half cuts and full cuts .................................82
Turning off half cuts ....................................82
4.5 Other Operations ................................ 84
Removing the print media ..........................84
Changing the display contrast ....................86
Restoring the initial settings ........................87
Increasing the printing speed .....................88
4.2 Saving, Retrieving and Deleting
Character Data ................................. 64
Files ............................................................64
Saving character data .................................65
Loading character data ...............................66
Deleting character data ..............................67
2

Contents
Part 5 Maintenance
5.1 If a Tube or Label Tape Becomes
Jammed ............................................ 90
Action to Take against Media Jam
(When the “Media JAM” message is
displayed)................................................90
Actions to Take against Other Jams
(When the “Media JAM” message is not
displayed)................................................92
When a Tube or Label Tape is Not
Ejected/Fed .............................................94
5.2 What To Do If the Cutter
Is Getting Blunt ................................ 96
Changing the cutting depth ........................96
5.3 Replacing the Cutter ........................... 98
5.4 Replacing the Cassette..................... 100
Replacing the ribbon cassette ..................100
Replacing a tube or the label tape
cassette ................................................. 101
Part 6 Appendices
6.1 Consumable Supplies and
Options ........................................... 106
Consumable supplies ............................... 106
Options ..................................................... 107
6.2 Message List ..................................... 108
6.3 Troubleshooting ................................ 109
6.4 List of Symbols ..................................111
6.5 List of Function ................................. 112
6.6 Main Specifications .......................... 113
5.5 Maintenance ...................................... 102
Cleaning the printer .................................. 102
Cleaning the transport rollers ...................102
Cleaning the print head ............................104
Cleaning/Replacing the tube cleaner .......104
3
Explanation of Symbols
The meanings of the symbols that are used in this manual are explained below.
WAR N I N G
CAUTION
CAUTION
A precaution to be followed to use the printer in safe is written. Failure to follow it can
result in fatal or serious injury. Be sure to follow it.
A precaution to be followed to use the printer in safe is written. Failure to follow it can
result in an injury. Be sure to follow it.
A precaution to be followed to use the printer properly is written. Failure to follow it can
break the printer or damage other products. Be sure to follow it.
An important notice or restriction to be followed to prevent troubles due to improper
operation is written. Be sure to read it.
Supplementary information is provided to facilitate operation.
Supplementary information about the operational procedure is written.
Indicates a page that should be referenced in regards to a specifi c operation. Refer to the
information on that page.
Indicates a key that should be pressed on the keyboard.
4
Safety Precautions
Safety Precautions
In order to ensure safe operation of the printer, be certain to observe the following safety precautions.
The shape of the power plug varies according to country.
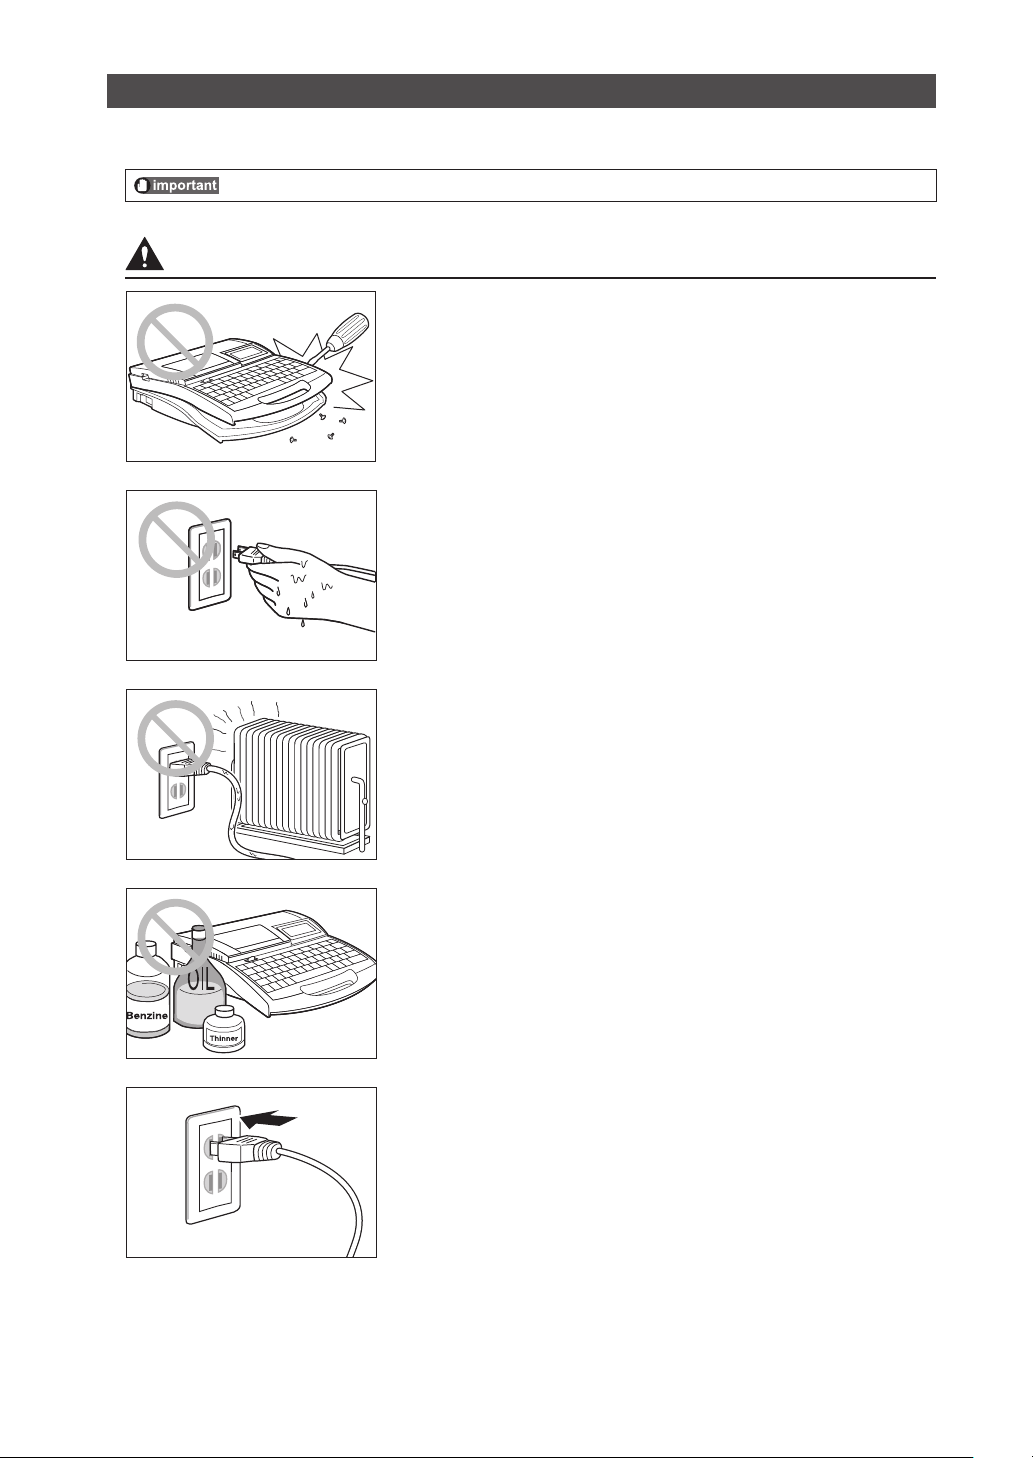
WARNING
Do not disassemble or modify the unit
Disassembling or modifying the unit could cause a fi re or damage the
unit.
Do not handle the power cord with wet hands
Do not attempt to plug in or unplug the AC adapter plug, etc., while
your hands are wet. Doing so could result in electric shock.
Do not place the unit in the vicinity of heating devices
Do not place the unit or the AC adapter cord in the vicinity of heating
devices. Doing so could cause the unit or the cord to melt, which could
result in fi re or electric shock.
Keep away from paint thinner, etc.
Do not place the unit near alcohol, paint thinner, or other fl ammable
solvents. The solvents could come into contact with internal electric
components and cause a fi re or electric shock.
Plug the power cord in securely
Be sure to plug the AC adapter plug into the power outlet securely.
Failing to do so could result in a fi re or electric shock.
5
Always keep the AC plug clean
Clean the AC adapter plug periodically. If dust, dirt, soot, etc., is
allowed to accumulate on the plug, the dust could absorb moisture,
creating an insulation fault that could cause a fi re.
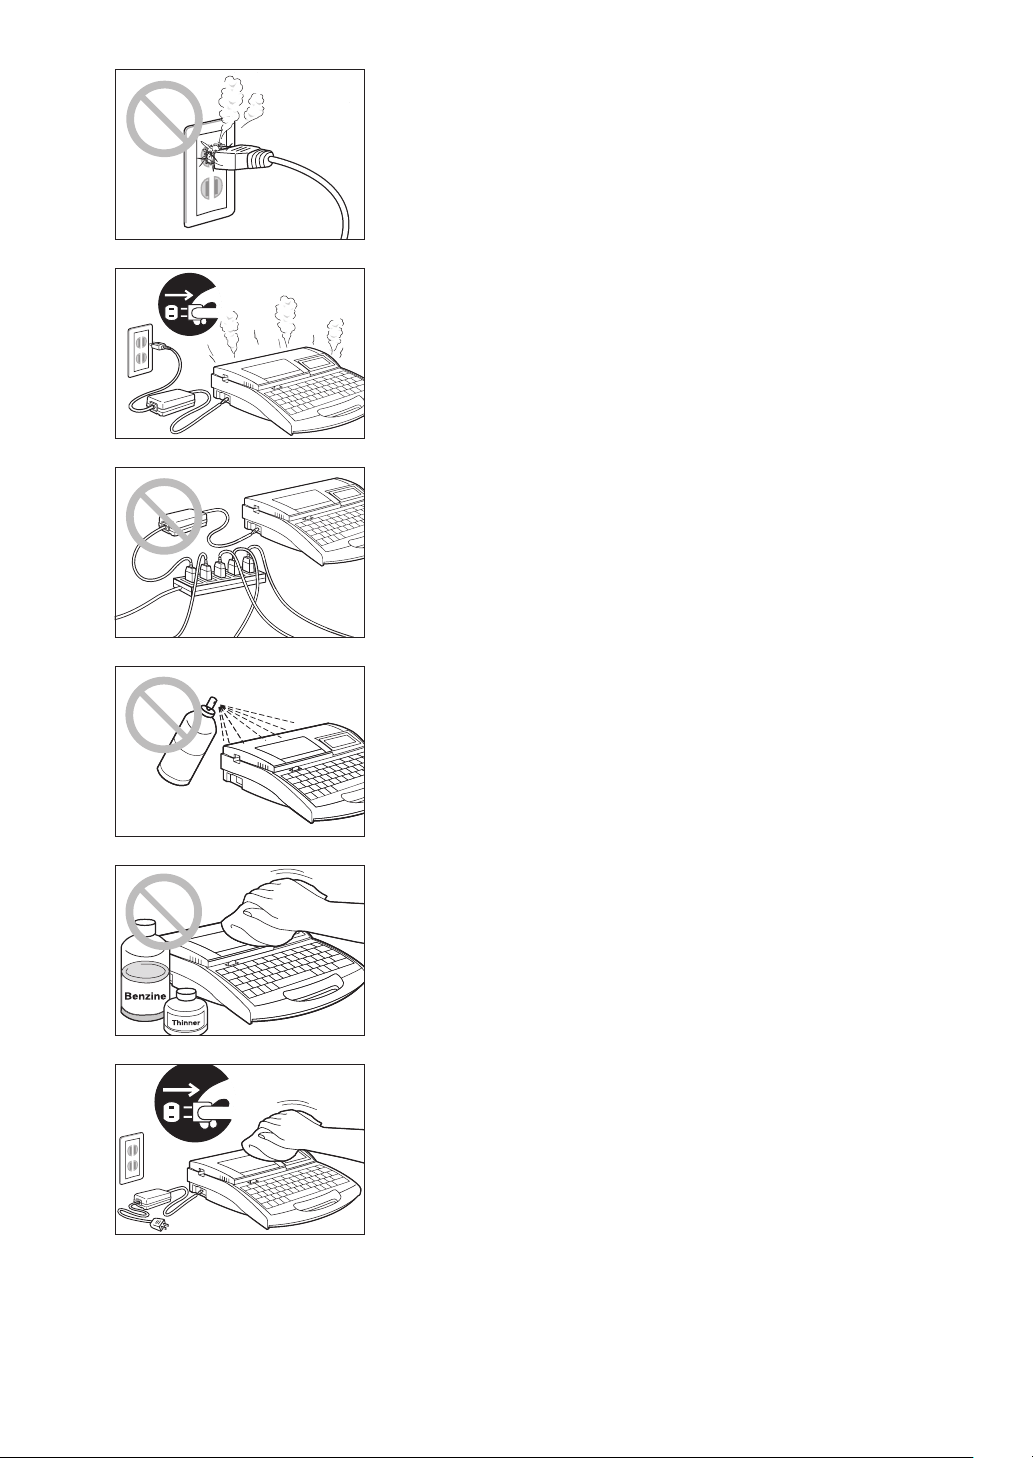
Do not continue to use the unit if an abnormality develops
If the unit begins to smoke or emit an unusual odor, turn the power
switch off immediately, unplug the AC adapter plug from the power
outlet, and then contact your nearest dealer. Continuing to use the unit
after an abnormal condition has developed could result in fi re or electric
shock.
Do not connect to a multi-outlet adapter or extension cord
Do not connect this unit to a multi-outlet adapter or extension cord.
Doing so could result in fi re or electric shock.
Do not power on with the power cord tied. It can cause fi re or electrical
shock.
Do not use sprays, etc., in the vicinity of the unit
Do not use fl ammable sprays in the vicinity of this unit. The spray
could come into contact with internal components of the unit, resulting
in a fi re or electric shock.
Do not clean with paint thinner, etc.
If it is necessary to wipe dirt off the unit, use gauze that has been
dampened with water and then thoroughly wrung out. Never use
fl ammable solvents such as alcohol, benzene or paint thinner. The
solvents could come into contact with internal electric components and
cause a fi re or electric shock.
Turn the unit off for cleaning
Before cleaning the unit, turn the power off and unplug the AC adapter
from the power outlet. Injury could result if the power switch is
inadvertently left in the “ON” position and the unit is put into operation.
6

Safety Precautions
Use a 100-240V AC power supply
Use only at the indicated power voltage.
Use at voltage between 100 and 240V AC. If not, it may result in fi re,
electrical shock or machine failure.
Do not use any AC adaptor or cord other than the included
one
Never use any other AC adaptor or cord than the included one. Using
it can result in fi re, electric shock, or printer failure. Do not use the
included AC adaptor for any other product. Fire or electric shock can
result.
When it thunders at a short distance, remove the power plug from the outlet
When it thunders at a short distance, remove the power plug from the outlet. If not, it may result in fi re,
electric shock, or machine failure.
Do not damage the AC adapter and cord
Do not damage, pull excessively, or modify the AC adapter and cord. Do not place a heavy thing on the AC
adapter and cord. A short-circuit can be caused at the damaged portion, resulting in a fi re or electric shock.
7

CAUTION
Do not place the unit on an unstable surface
Do not place the unit on an unstable surface or a surface that is subject
to vibration. The unit could fall or tip over and cause injury.
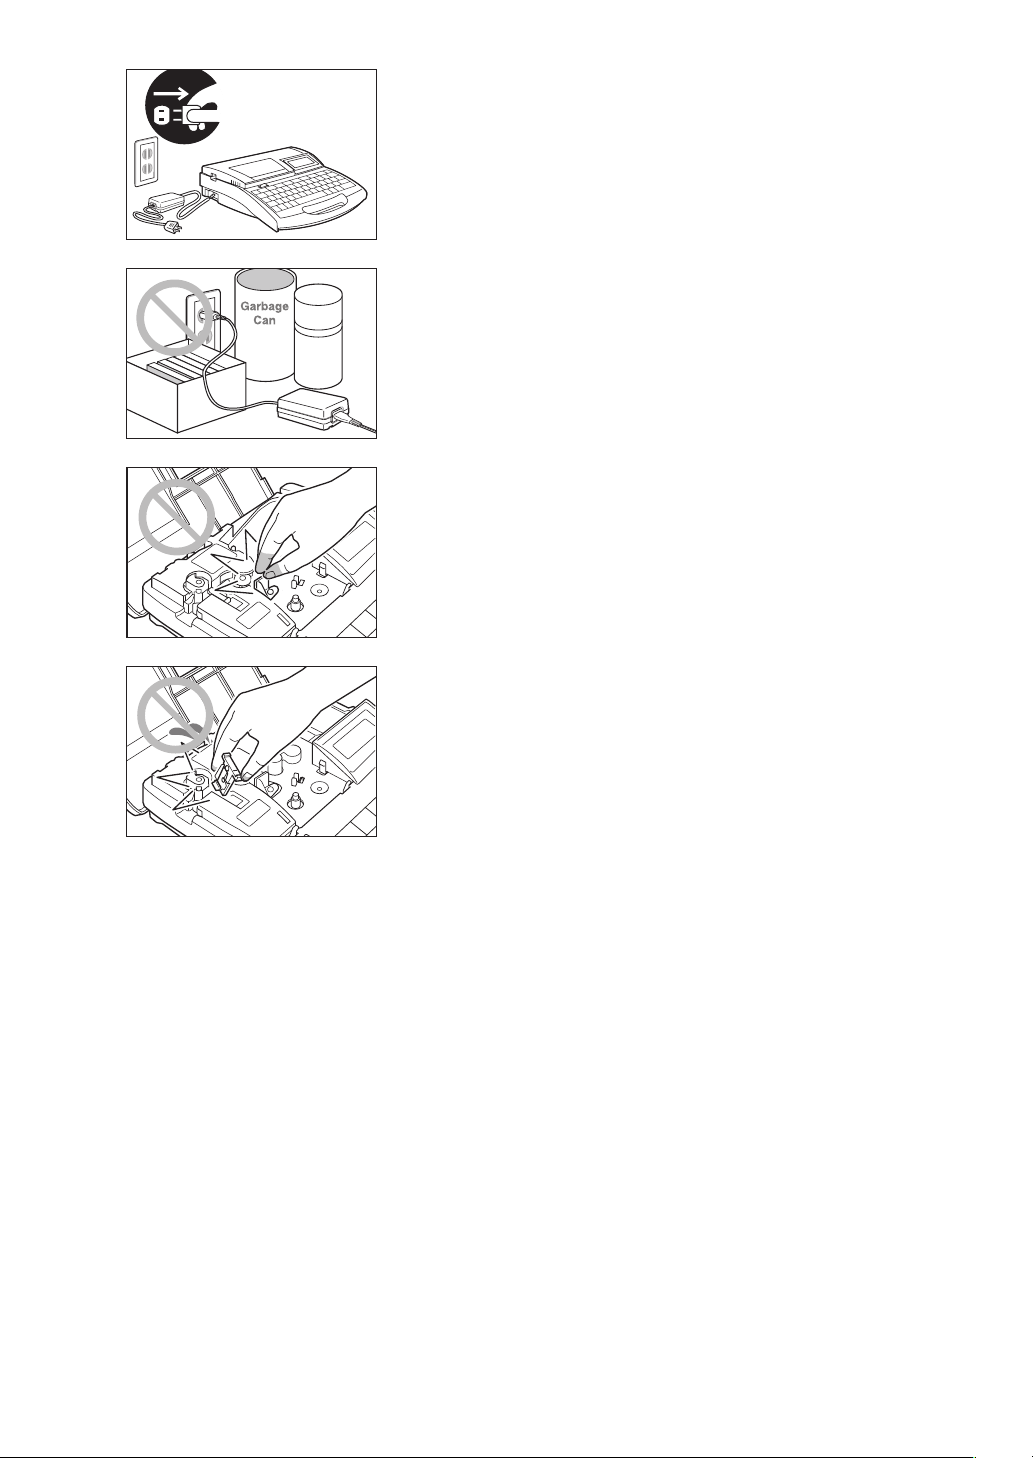
Do not place the unit on a carpet
Do not place the unit directly on a rug or carpet. Fibers and dust from
the carpet can get inside of the unit and cause a fi re.
Do not insert foreign objects inside the unit
Do not drop or insert foreign objects such as clips or staples in the
opening for the AC adaptor, cutter section, or inside the printer.
Otherwise it may cause fi re, electrical shock, machine failure, or injury.
Protect the unit from humidity and dust
Do not operate or store the unit in a hot and humid environment, in a
dusty environment, in an area exposed to direct sunlight, or near an
open fl ame. Doing so could result in fi re or electric shock.
Be sure to observe the storage and operating environment condition.
Operating environment:15-32.5°C, RH 10-85%
Storage environment: 5-35°C, RH 10-90%
Do not place heavy objects or metal objects on the unit
Do not place heavy objects on the unit. Doing so could damage the
unit.
Do not place metal objects such as accessories or containers such as cup
containing water or fl uid. Touching the electrical parts inside the printer
can cause short circuit and may result in fi re or electrical shock.
Handle the AC adapter carefully
When unplugging the power cord from an outlet, grasp the plug itself;
do not pull on the cord. Pulling on the cord could damage the cord,
which could result in fi re or electric shock. Furthermore, always be
sure to turn the power switch on the unit “OFF” before unplugging or
plugging in the AC adapter.
8
Safety Precautions
Unplug the unit when not in use
If the machine will not be used for a long time, unplug the AC adapter
from the power outlet. Otherwise, electrical leakage may occur, and fi re
could result if dust has accumulated.
Keep the area around the AC adapter clear
In order to allow you to unplug the AC adapter quickly in an emergency,
do not place other objects around the outlet. Inability to unplug the unit
quickly in an emergency could result in fi re or electric shock.
Do not touch the print head
Do not touch the print head while it is printing or immediately after
printing. Doing so could result in a burn.
Do not touch the cutter
This unit has a built-in cutter. To avoid injury, read this manual
thoroughly and handle the cutter carefully.
Keep small children away from the consumable
Always keep the consumable such as ribbon cassette, cleaner, etc., out of the reach of small children to avoid
accidents.
Securely hold the handle of the printer
To avoid personal injury, securely hold the handle of the printer when carrying it.
9
CAUTION
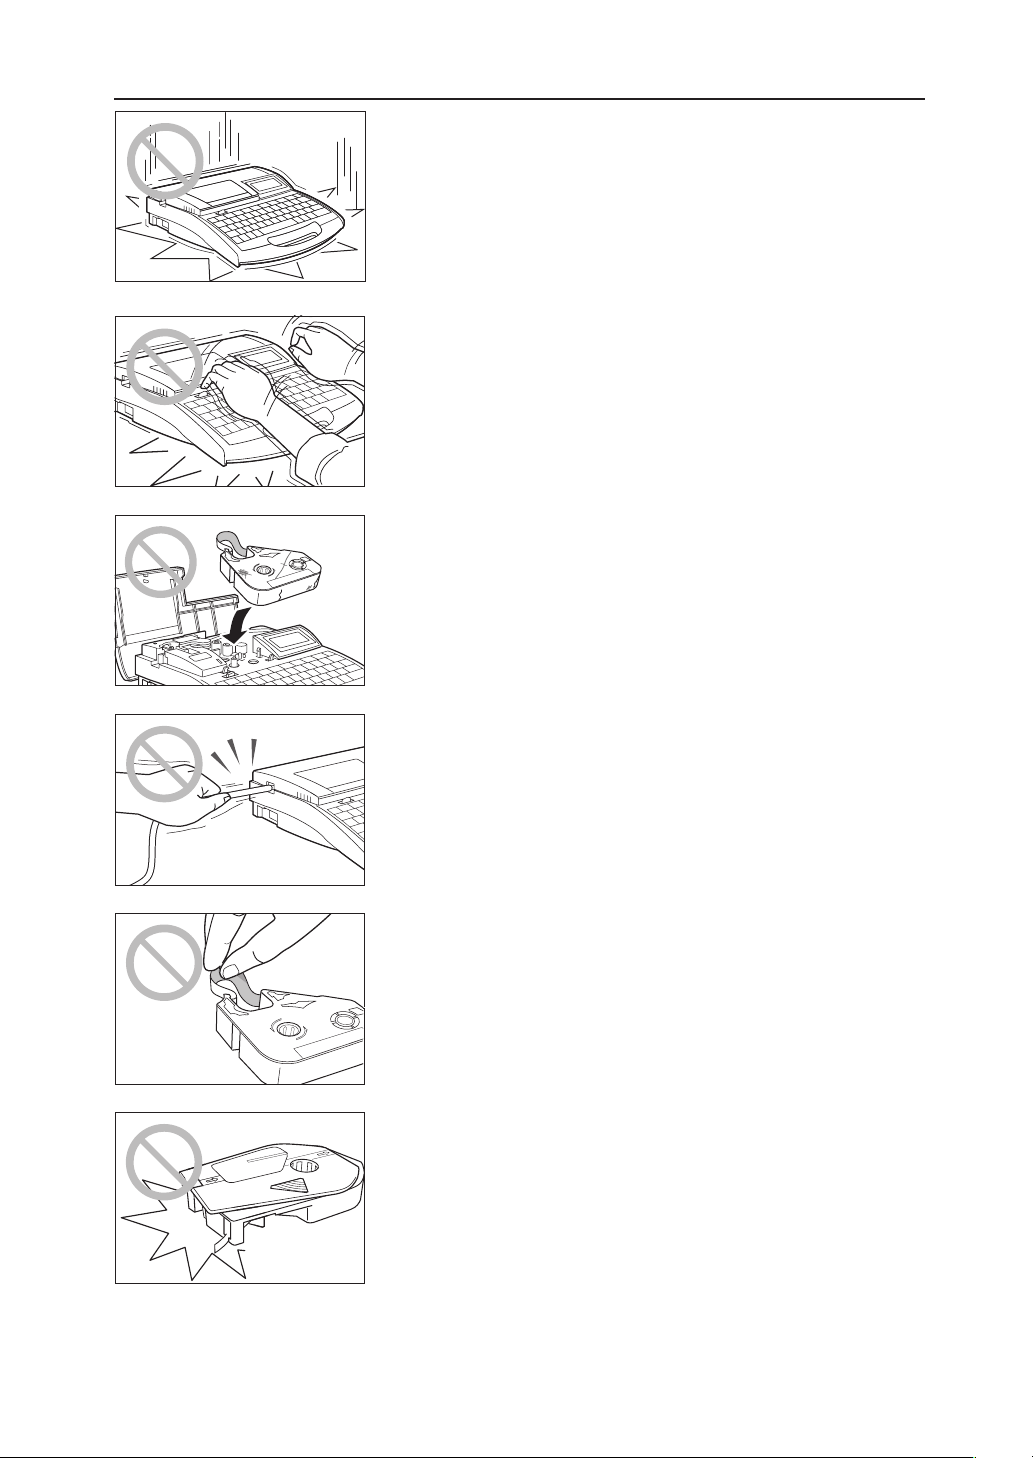
Handle the unit gently
Do not subject the unit to strong impacts. Doing so could damage the
unit.
Do not operate the keyboard roughly
Do not handle the keyboard roughly when typing. Rough handling
could result in damage to the unit.
Do not re-use ribbons or label tape
Do not attempt to re-use ribbons or label tape. Doing so could damage
the unit.
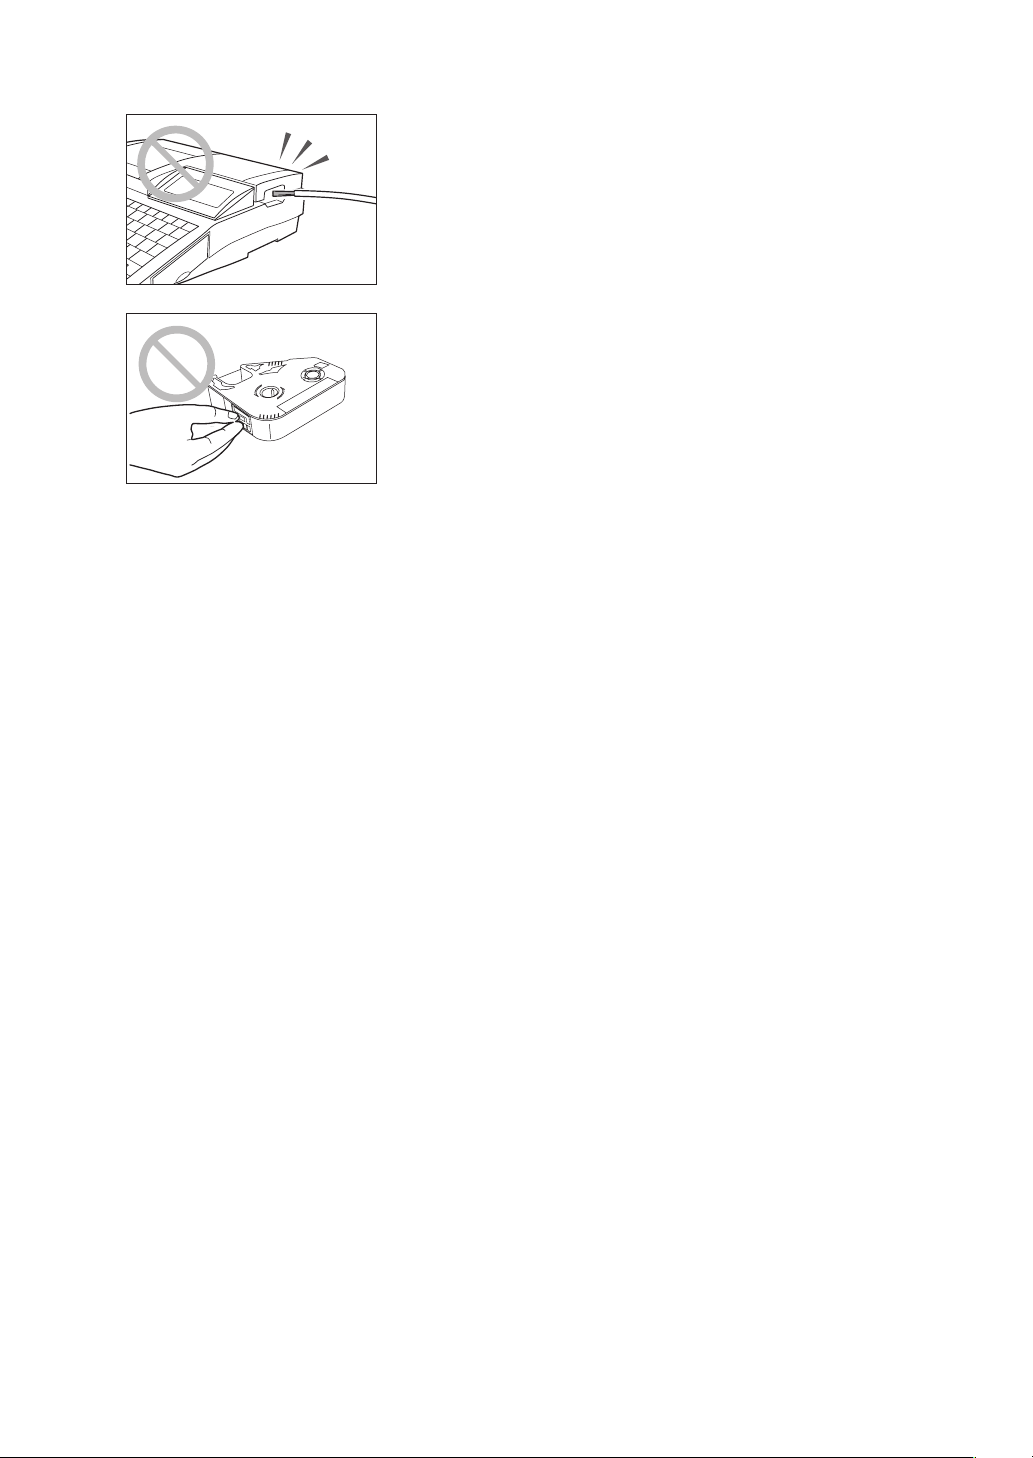
Do not attempt to pull tube out
Do not pull on a tube or tape while printing is in progress. Doing so
could result in poor printing quality or malfunction.
Do not touch ink ribbon
To avoid poor printing results with oil on your skin or staining your
hands, do not touch ink ribbon.
Using only cassettes designed for this unit
Use only the specifi ed types of ribbon cassettes, tube attachments, etc.
Never try to disassemble a cassette and install a new ribbon. Doing so
can result in poor printing quality or damage to the equipment.
10
Safety Precautions
Do not feed wires into the unit
The purpose of this unit is to print on tube or labels. This unit cannot
print directly on wires or cables, so do not attempt to feed wires or
cables into the unit. Doing so could result in damage to the unit.
Do not touch the connector (metal part)
Do not touch the connection terminal (metal part) of the cassette. Doing
so could cause an improper recognition of the cassette.
Do not leave the machine unused for a long time
Do not leave the printer in a sun-heated vehicle or any other extreme environment for an extended period.
11
Quick Guide to Using the Printer
This section explains the basic use of the printer for people who want to start using it quickly. Although the
printer features a wide variety of functions, this section explains only the most basic sequence of operations:
installing accessories → turn the power switch on → inputting characters → printing. Refer to the main body
of this manual for more specifi c details on the functions of the printer.
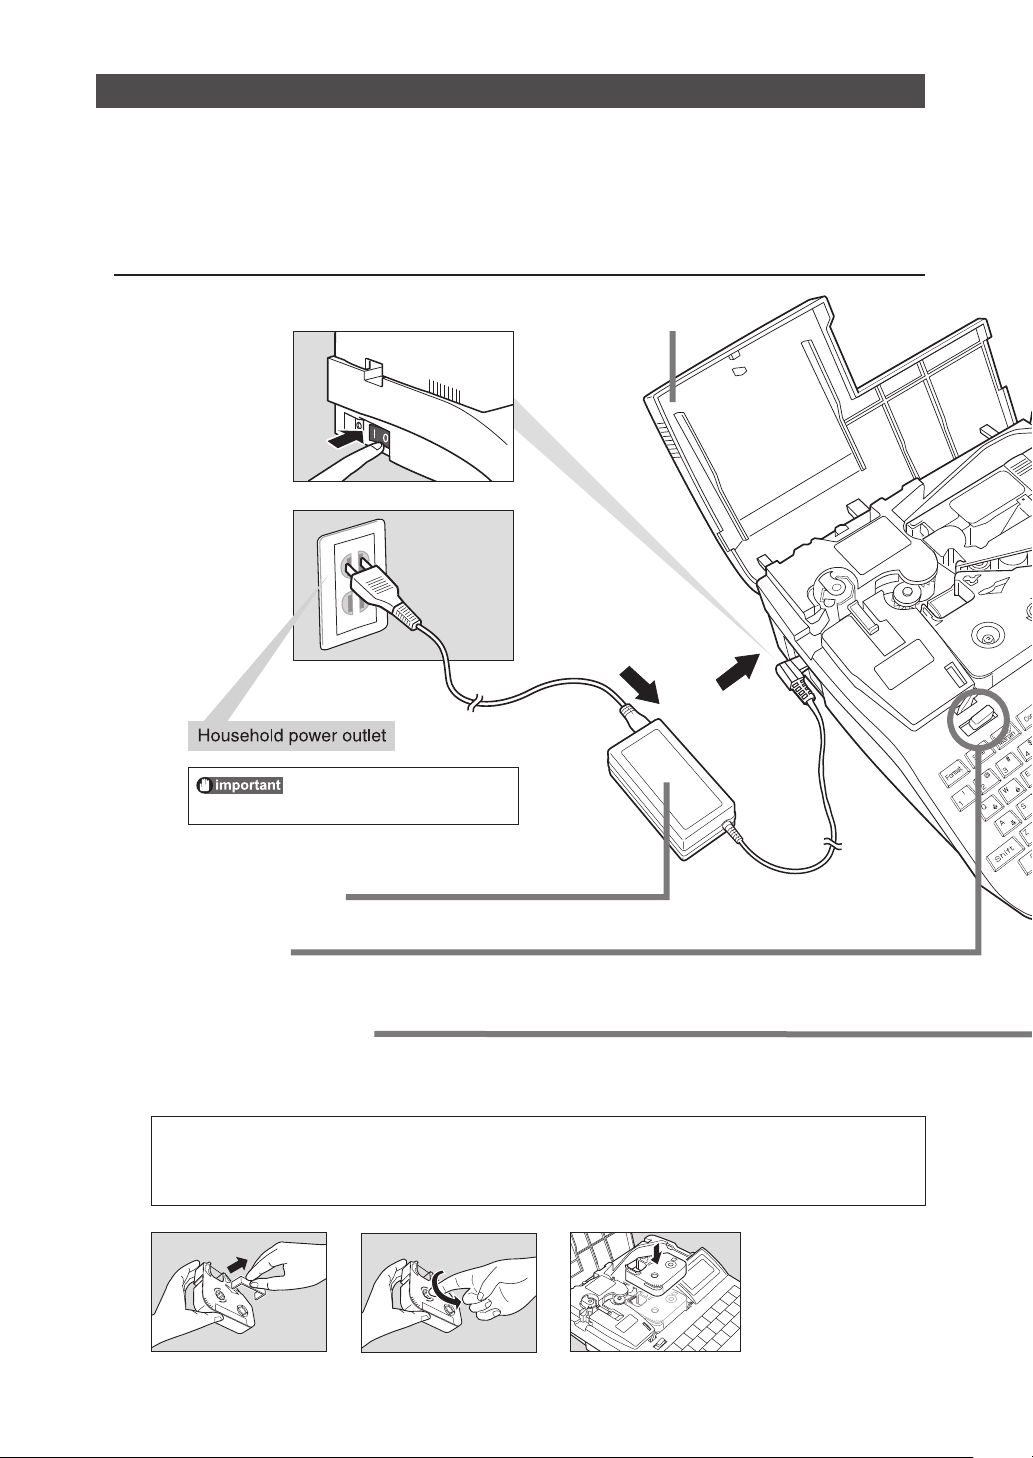
Installing Accessories
Check that the power switch is turned off.
1
Cover
The shape of the power plug
varies according to country.
Attach the AC adapter.
2
Open the cover.
3
Move this lever to the left, and then open the cover.•
Install the ribbon cassette.
4
Remove the stopper and take up any slack in the ribbon.
•
Push the cassette in until it clicks into place.
•
CAUTION
Do not touch the connector (metal part)
Do not touch the connection terminal (metal part) of the cassette. Doing so could cause an
improper recognition of the cassette.
K30120
12
Quick Guide to Using the Printer
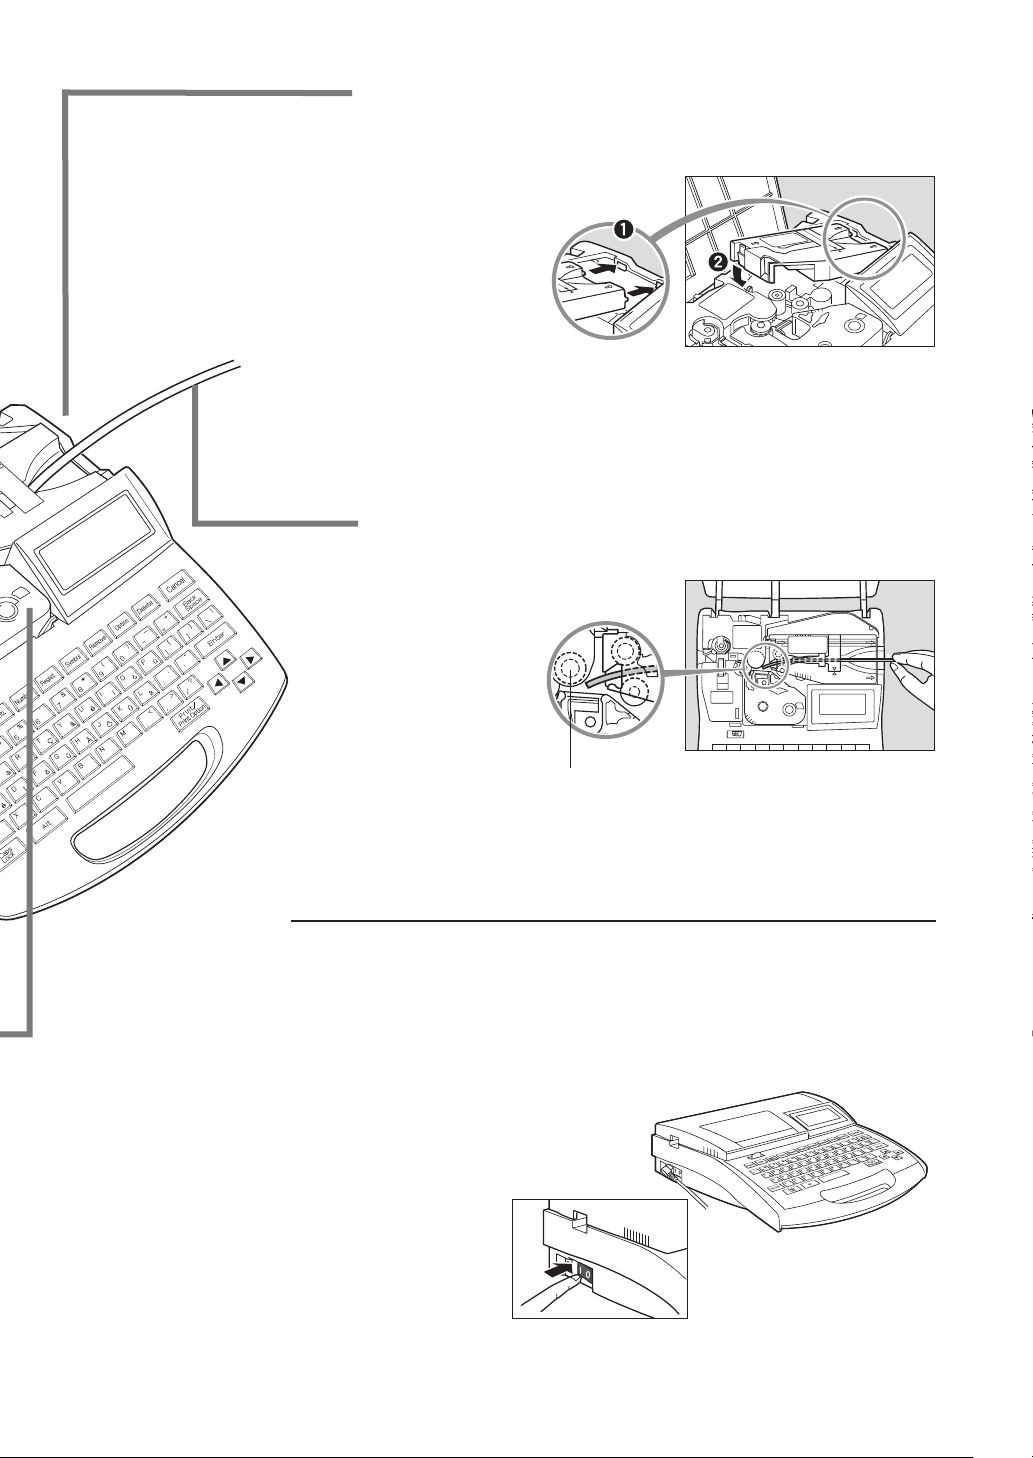
Install the tube attachment.
5
Align the hooks on the tube attachment with the holes in the printer.
•
Push the tube attachment in until it clicks into place.
•
Insert a tube.
6
Push the tube in until its tip touches transport roller 2.•
Transport roller 2
Turn the power switch on.
Close the cover.
7
Close the cover completely so that it clicks shut.
•
Turn on the power switch.
8
Character input diaplay appears after displaying the ribbon cassette information.
•
13

Inputting Characters
[Example]
Printing “C-2” on a 3.0mm-diameter tube
Printed results
While holding down [Shift], press [C].
9
Press [-].
10
To delete a character
ex. Although you meant to enter “C-2”, you entered
“C=2” by mistake.
Press [ ] and [ ], and move the cursor box to the
1
position of the “2”.
Press [Back Space].
2
The “=” disappears.•
Press [-].
3
Press [2].
11
14
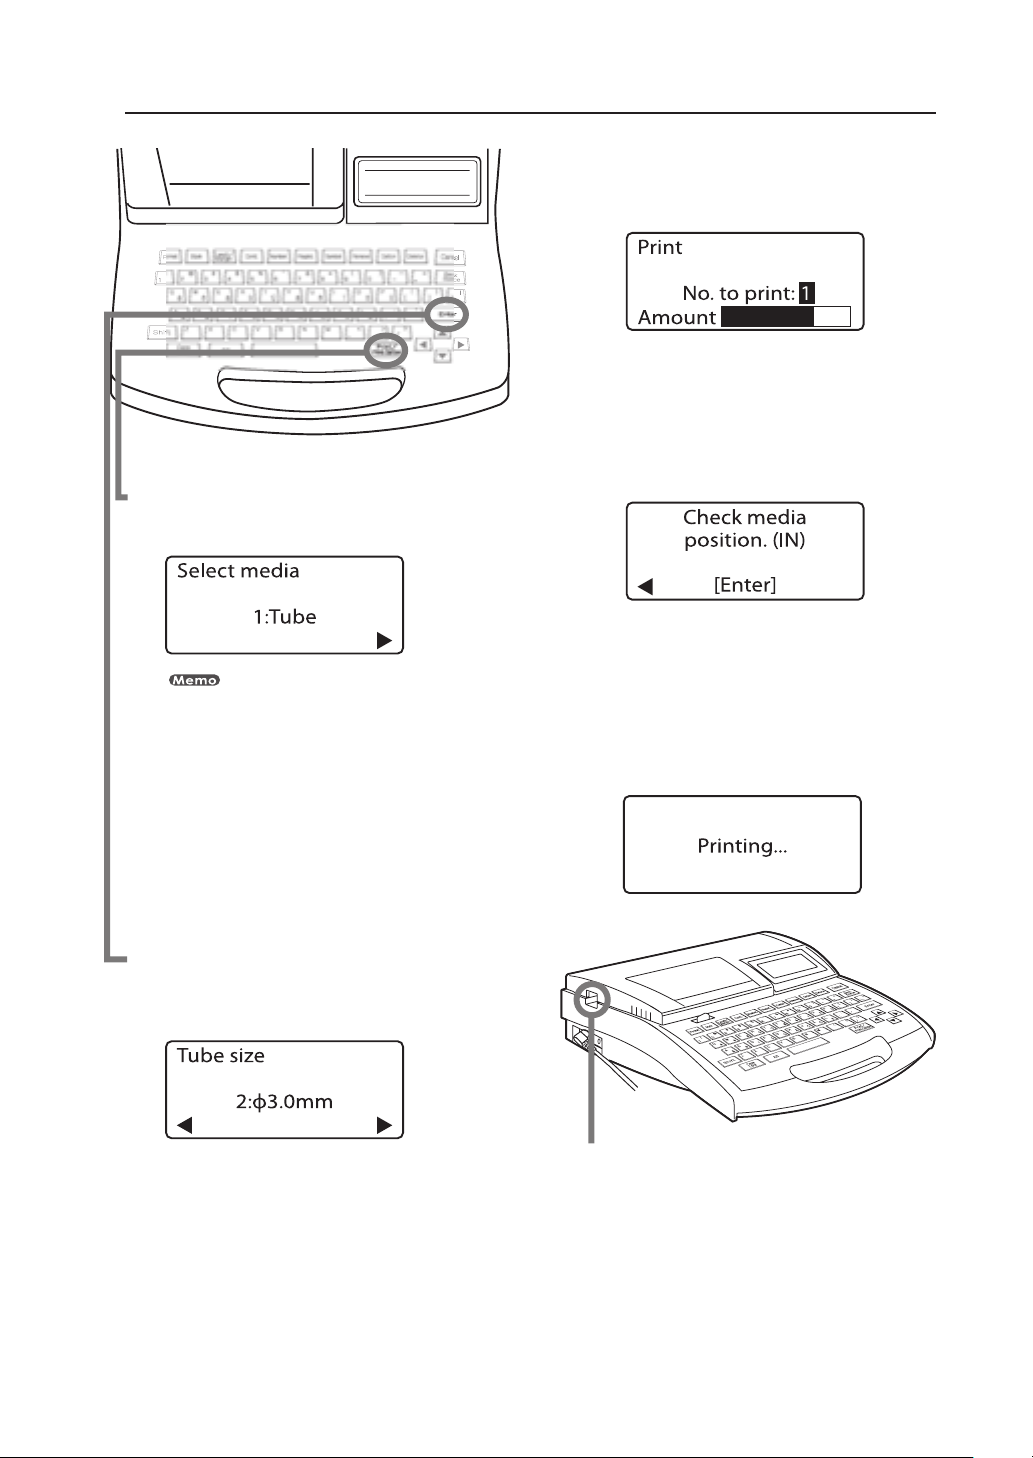
Printing
Press [Print/Print option].
12
•
Make sure that “1:Tube” is selected.
Safety Precautions
Press [Enter].
14
•
Make sure that “No. to print” is “1”.
Press [Enter].
15
•
Confirm that the leading end of the tube
is fully inserted.
“No ribbon cassette” is
displayed if the ribbon
cassette is not installed. Install
the ribbon cassette.
“No ribbon information. No
ribbon amount displayed.
Press enter” is displayed if
the information cannot be
read due to the ribbon cassette
failure and so forth. If this
message is displayed, follow
the instruction on the screen.
Press [Enter].
13
Make sure that “2:φ3.0mm” is selected.
•
Press [Enter].
16
•
The tube is automatically fed into the
printer and printing begins.
•
Once printing is completed, the tube is
cut automatically.
Take out the cut tube.
17
15

16

Part 1
Before You Begin
(Preparation)
This section describes preparations and
some things you should know before
entering characters.
1.1 Names and Functions
of Parts ............................... 18
Main Unit .................................................18
LCD screen .............................................20
Keyboard .................................................21
1.2 Connecting the
AC Adapter ......................... 23
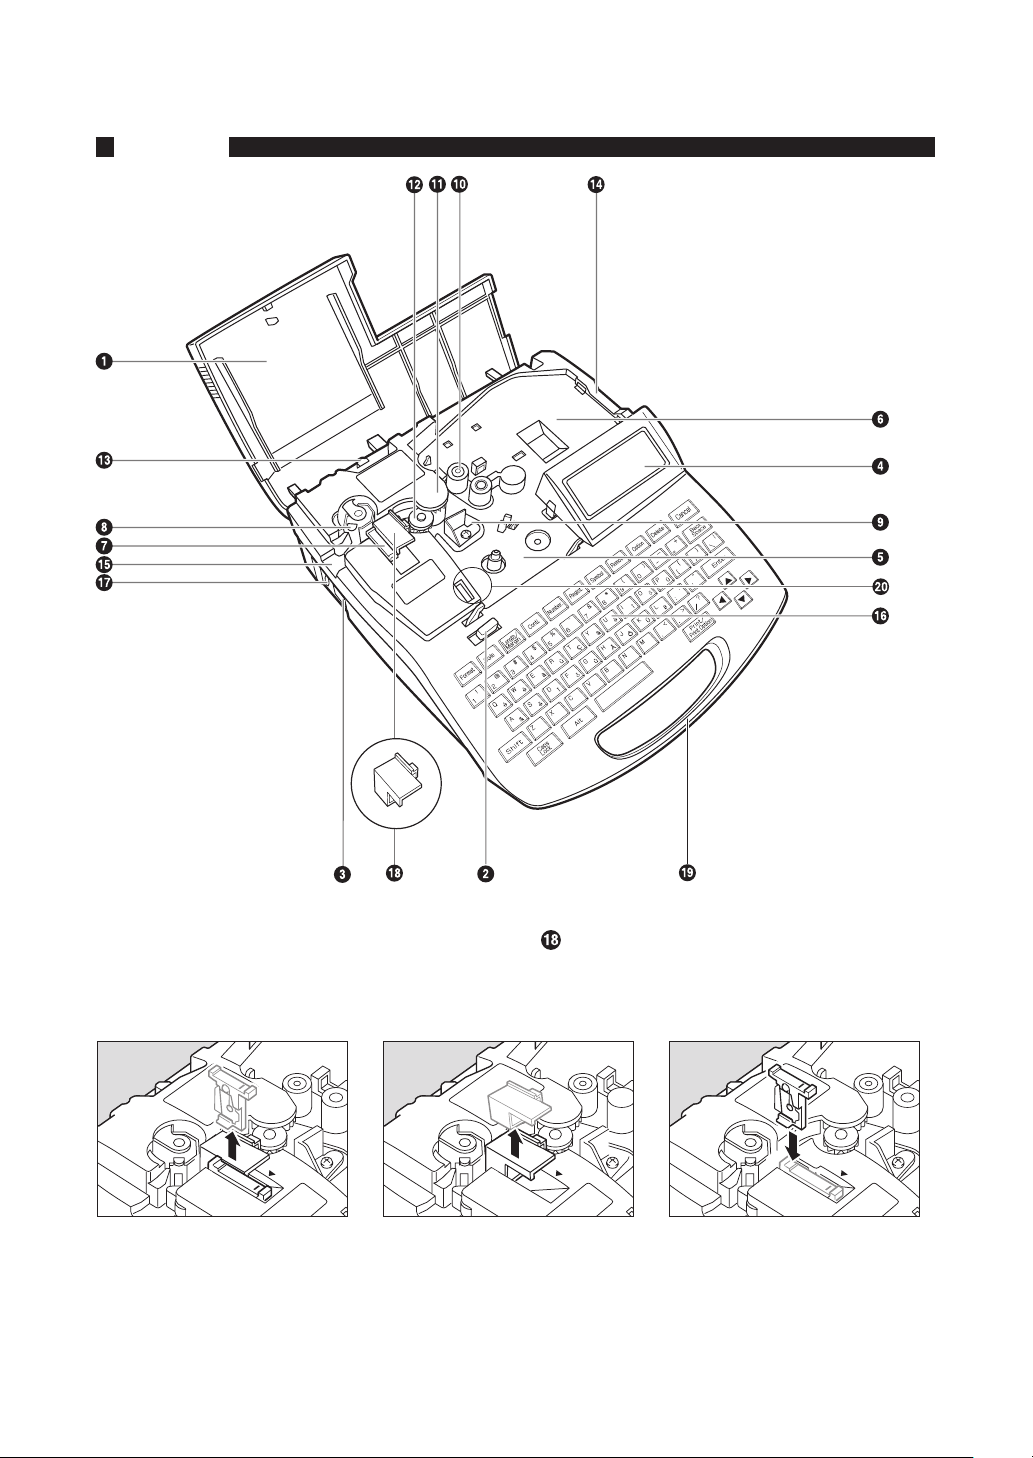
1. 1
Main Unit
Names and Functions of Parts
*Removing the wrap-around tape guide
To print to other media, remove the wrap-around tape guide
1. Pull out the cutter. 2. Pull out the wrap-around
tape guide.
18
.
3. Reinstall the cutter.

Cover
Open this cover when you need to load a cassette
or tube.
Before You Begin
Transport roller 3
This roller feeds printed printing media to the
cutter.
Part 1
Cover release
Pull this lever to the left to open the cover.
Power switch
Use this switch to turn the power on and off. Flip
the switch to the “|” position to turn the power on,
and fl ip the switch to the “ ” position to turn the
power off.
LCD screen
Displays text that has been input or the
information about settings.
Ribbon cassette holder
Place the ribbon cassette here.
Mounting location for tube attachment or
printing media cassette
Mount the tube attachment or label tape cassette
here. The optional Tube Warmer also mounts
here.
Cutter
The cutter cuts printing media automatically. The
cutter can be replaced.
Transport roller 3 release lever
Pull this lever to the right to release transport
roller 3. Use this lever when clearing jammed
printing media.
Tube intake
Insert tube here (when tube attachment installed).
Outlet
Printed printing media emerge here.
Keyboard
Input text to be printed and data for settings
through this keyboard.
AC adapter connector
Connect the AC adapter cable here.
Wrap-around tape guide
This guide is installed when printing on wrap-
around tape. Remove it when printing to other
media.
Handle
Hold this handle when carrying the printer.
Cutter receiver
This is the receiver for the cutter blade when
cutting printing media. When the cutter is
replaced, the cutter receiver is replaced at the
same time.
Print head
This device prints by applying heat to a ribbon.
As it becomes very hot, not touch this device
while printing is in progress or immediately after
printing.
Transport roller 1
This roller feeds printing media to the print head.
Transport roller 2
This roller feeds printing media past the print
head.
Connector for ribbon cassette
This is to read out information of the ribbon
cassette. Do not touch and deform the connector.
19
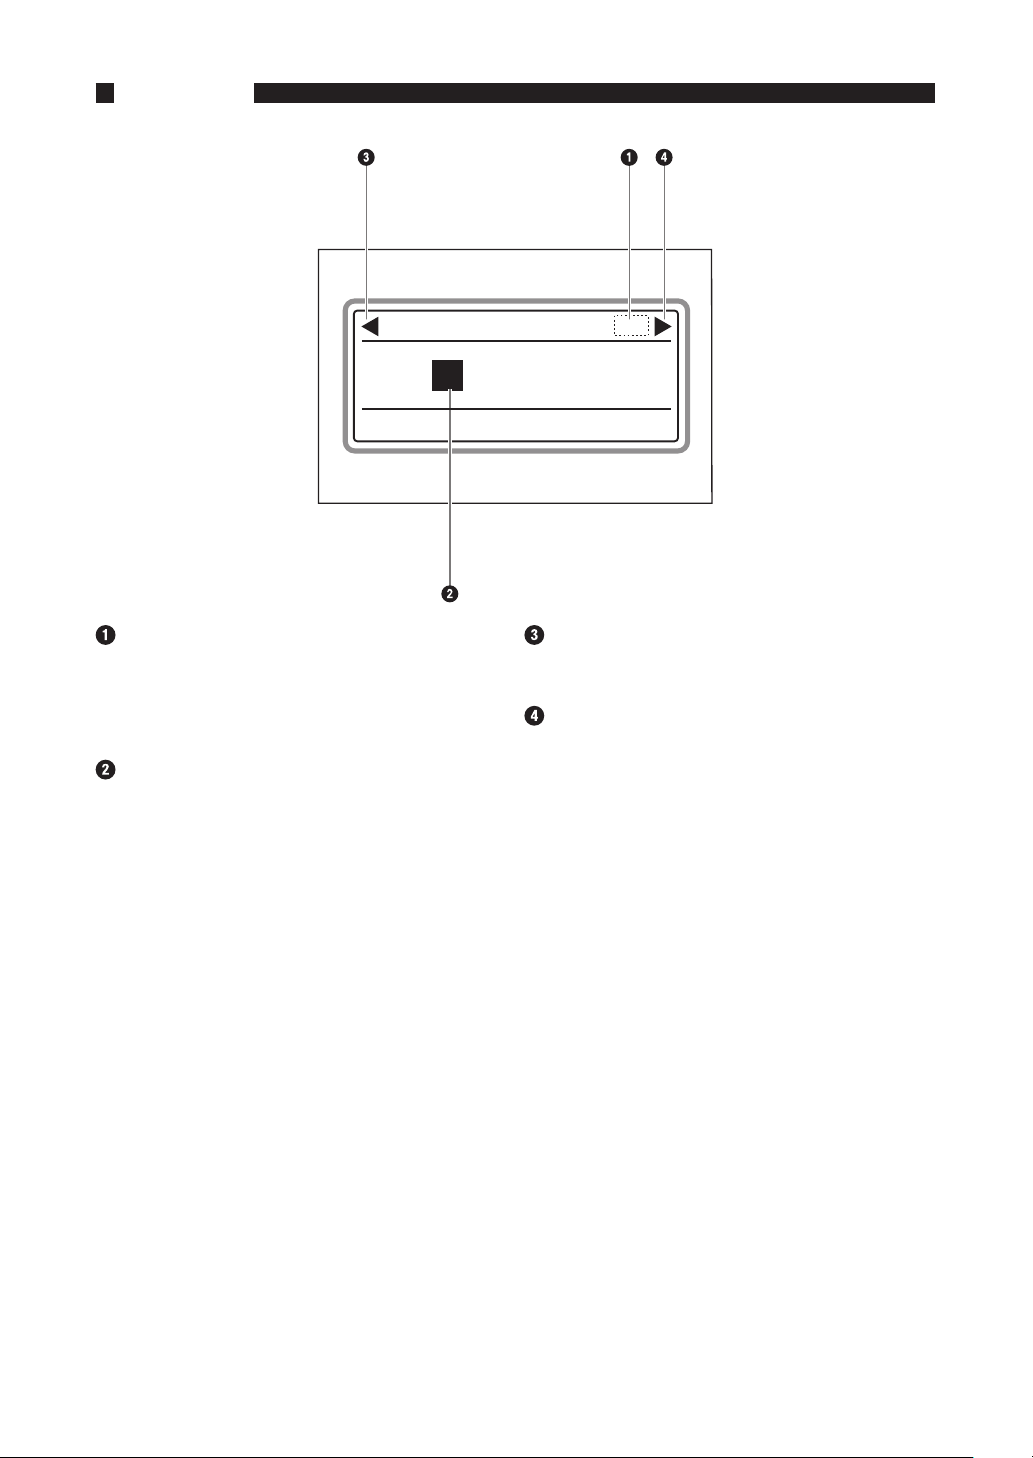
LCD screen
Caps Lock
Indicates whether the Caps Lock mode is active.
A: Active, so all alphabetic characters are
entered in uppercase.
a: Normal(inactive)
Cursor
The cursor appears as a rectangle (). Text is
input at the cursor position.
Previous page indicator
Indicates that another page exists prior to the
currently displayed page.
Next page indicator
Indicates that another page exists following the
currently displayed page.
20

Before You Begin
Keyboard
[Format] ( page 61, 70.)
This key is used to set the direction for printing text (horizontal/vertical) and to make the frame setting.
Part 1
[Style] ( page 58, 62.)
This key is used to set the character size, number of lines, and spacing between characters.
[Length/Margin] ( page 73.)
This key is used to set the length of the media and the left and right margins.
[Conti.] (Continuous Printing) ( page 74.)
This key is used to set continuous printing.
[Number.] (Numbering) ( page 76.)
This key is used to set serial number input.
[Regist.] (Registration) ( page 65.)
This key is used to register input data in the printer’s memory. This key is also used to call up or delete
registered data.
[Symbol] ( page 51.)
This key is used to input characters from the symbol list.
[Remove] ( page 84.)
This key is used to remove media.
21

[Option]
This key is used to set optional functions (for adjustment, maintenance mode, or print option).
[Delete] ( page 53.)
This key is used to delete all input data.
[Cancel]
•
This key is used to cancel settings or operations, and to return the display to the previous display.
•
This key is also used to cancel printing.
[Back Space]
This key is used to delete the character that precedes the cursor.
•
Press the [Shift] key and the [Back Space] key in order to delete an unwanted page which has no input
•
data.
[Enter]
This key is used to finalize a selection made for a given setting.
•
This key is also used to insert a page break at the end of text in order to proceed to the next page.
•
Press the [Shift] key and [Enter] in order to add (insert) a new page between existing pages.
•
Input keys
These keys are used to input characters, numbers, and symbols.
[Shift]
This key is used in combination with the input keys to input upper-case characters and additional symbols.
[Caps Lock]
This key is used to switch between upper-case input mode and lower-case input mode.
[Alt]
This key is used to input characters with diacritical marks by holding down this key while pressing the
corresponding character key.
[(Space)]
This key is used to input a space.
[Print/Print option]
This key is used to enter print mode and to make the print settings.
•
Cursor [◄][►][▲][▼]
These keys are used to move the cursor in the direction indicated by the arrow. The [▲] and [▼] keys
•
can only be used when the two-line setting is in effect.
[Shift] + [◄] moves the cursor to the first character on the previous page, and [Shift] + [►] moves the
cursor to the first character on the next page.
These keys are also used to make settings and to change set values.
•
22

Before You Begin
Part 1
1. 2
Connecting the AC Adapter
Make sure that the power switch is off.
1
Plug the power cord into the AC adapter.
2
Plug it in all the way.
Plug the AC adapter into the printer.
3
Plug the AC adapter power plug into a 100-240V power outlet.
4
Plug it in all the way.
The shape of the power plug varies according to country.
23
WARNING
CAUTION
Do not handle the power cord with wet hands
Do not plug in or unplug the AC adapter while your hands are wet. Doing so could
result in electric shock.
Do not connect to a multi-outlet adapter or extension cord
Do not connect this unit to a multi-outlet adapter or extension cord. Doing so could
result in fi re or electric shock.
Do not power on with the power cord tied. It can cause fi re or electrical shock.
Push the plug in all the way
Push the AC adapter power plug all of the way into the power outlet. Failure to do so
could result in fi re or electric shock.
Do not use any AC adaptor or cord other than the included one
Never use any other AC adaptor or cord than the included one. Using it can result in
fi re, electric shock, or printer failure. Do not use the included AC adaptor for any other
product. Fire or electric shock can result.
Use a 100-240V AC power supply
Use at voltage between 100 and 240V AC. If not, it may result in fi re, electrical shock
or machine failure.
When it thunders at a short distance, remove the power plug from the outlet
When it thunders at a short distance, remove the power plug from the outlet. If not, it
may result in fi re, electric shock, or machine failure.
Do not damage the AC adapter and cord
Do not damage, pull excessively, or modify the AC adapter and cord. Do not place a
heavy thing on the AC adapter and cord. A short-circuit can be caused at the damaged
portion, resulting in a fi re or electric shock.
Handle the AC adapter carefully
When unplugging the power cord from an outlet, grasp the plug itself; do not pull on
the cord. Pulling on the cord could damage it, which could result in injury, fi re or
electric shock.
Keep the area around the AC adapter clear
In order to allow you to unplug the AC adapter quickly in an emergency, do not place
other objects around the outlet. An inability to unplug the unit quickly in an emergency
could result in fi re or electric shock.
24
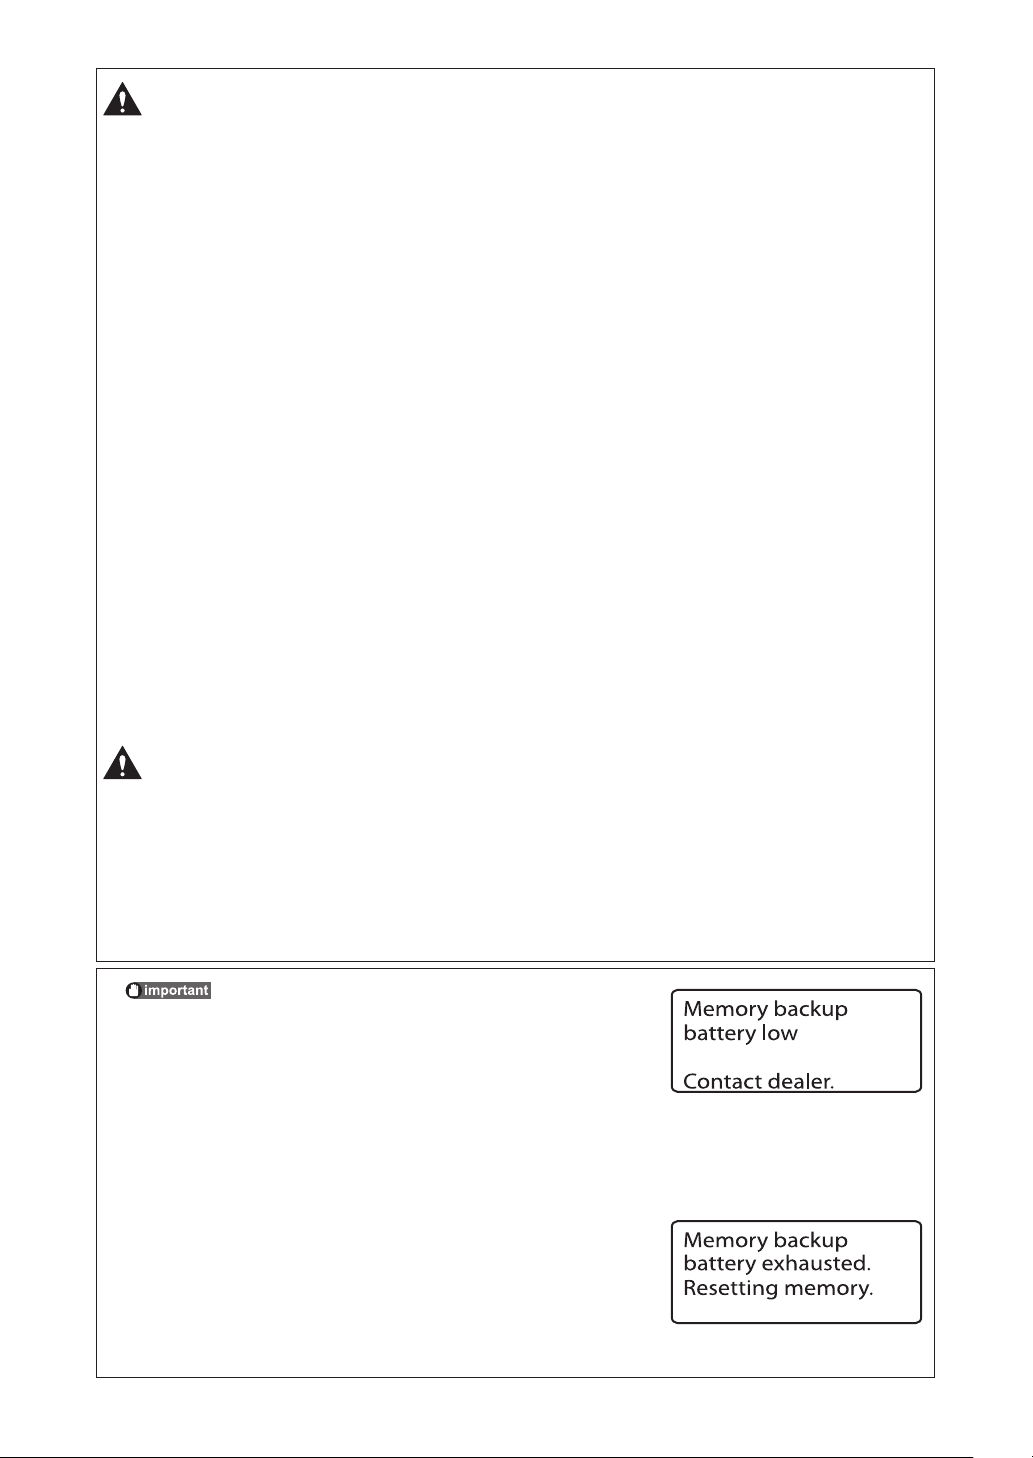
About the memory backup battery
If the memory backup battery starts become weak,
the message shown below is displayed when the
printer is turned on. If you continue to use the
printer without replacing the battery, the memory
backup battery will become completely dead, and
the next time that the printer is turned off all data
and settings will be lost. If this message appears,
be sure to contact your dealer.
If the memory backup battery becomes completely
dead, the message shown below is displayed when
the printer is turned on. If this message appears,
be sure to contact your dealer. If you continue to
use the printer without replacing the battery, the
printer may operate incorrectly.
After reading this message, press any
key to continue.

Part 2
Basic Operations
This section describes the basic steps to
take before printing.
2.1 Printing on Tube and Clear
Tube ..................................... 26
Install cassettes ....................26
Insert tube .............................28
Turn the power switch on ......29
Input characters ....................30
Print.......................................33
2.2 Printing on Label Tape, Heat
Shrink Tube, and 4mm I.D.
Strip .....................................34
Install cassettes ....................34
Turn the power switch on ......37
Input characters ....................38
Print.......................................41
2.3 Printing on Wrap-around
Tape ..................................... 42
Installing the cassettes ..........42
Installing the wrap-around
tape guide .............................43
Turn the power switch on ......44
Input characters ....................45
Print.......................................47
2.1
The procedure for printing on tube or clear tube is shown below.
Printing on Tube and Clear Tube
Install cassettes
Insert tube
Turn the power switch on
Input characters
Print
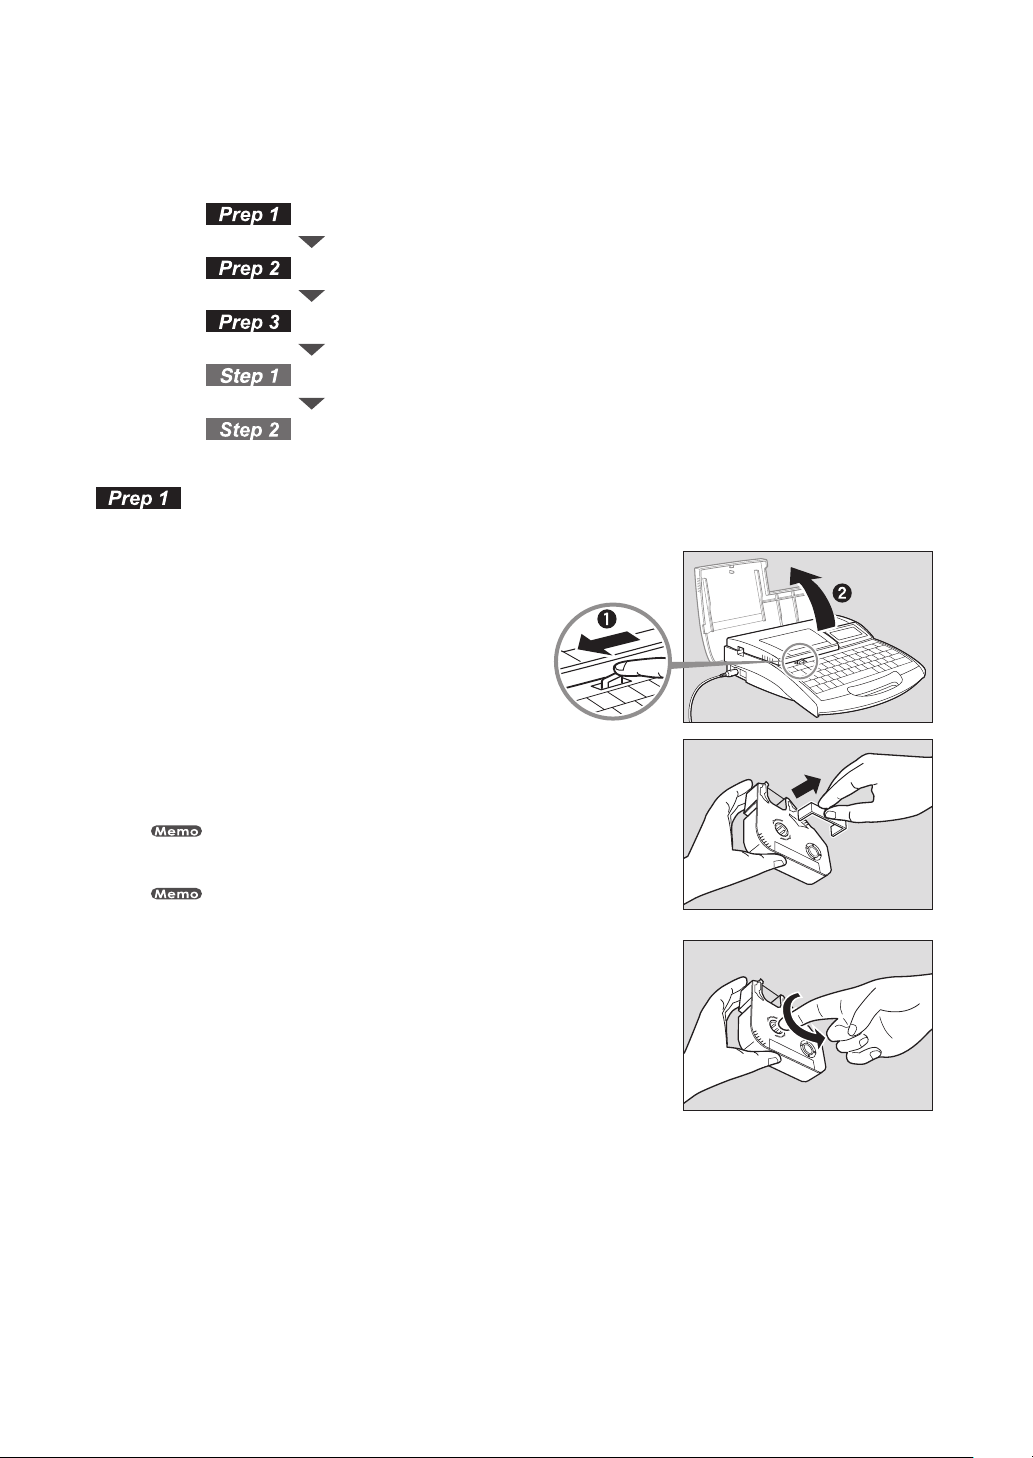
Install cassettes
Install the ribbon cassette and the tube attachment.
Open the cover.
1
Take up any slack in the ribbon.
2
•
Remove the stopper and then take up any slack in the ribbon.
The printer cannot detect the ribbon if it has any slack. Always be sure to take up slack in
the ribbon when installing the ribbon cassette.
Dispose the removed stopper according to local government regulation.
26
 Loading...