

Canon MG2500 series Online Manual

MG2500 series
Online Manual
Printing
Copying
English

Contents
Printing. . . . . . . . . . . . . . . . . . . . . . . . . . . . . . . . . . . . . . . . . . . . . . . . . . . . . . . . . 4
Printing from a Computer. . . . . . . . . . . . . . . . . . . . . . . . . . . . . . . . . . . . . . . . . . . . . . . . . . . 5
Printing with Application Software that You are Using (Printer Driver). . . . . . . . . . . . . . . . . . . . . . . . . . . 6
Printing with Easy Setup. . . . . . . . . . . . . . . . . . . . . . . . . . . . . . . . . . . . . . . . . . . . . . . . . . . . . . . . . . 7
Setting the Media Type with the Printer Driver. . . . . . . . . . . . . . . . . . . . . . . . . . . . . . . . . . . . 10
Various Printing Methods. . . . . . . . . . . . . . . . . . . . . . . . . . . . . . . . . . . . . . . . . . . . . . . . . . . . . . . . . 11
Setting a Page Size and Orientation. . . . . . . . . . . . . . . . . . . . . . . . . . . . . . . . . . . . . . . . . . . . 12
Setting the Number of Copies and Printing Order. . . . . . . . . . . . . . . . . . . . . . . . . . . . . . . . . . 14
Setting the Stapling Margin. . . . . . . . . . . . . . . . . . . . . . . . . . . . . . . . . . . . . . . . . . . . . . . . . . . 17
Fit-to-Page Printing. . . . . . . . . . . . . . . . . . . . . . . . . . . . . . . . . . . . . . . . . . . . . . . . . . . . . . . . . 19
Scaled Printing. . . . . . . . . . . . . . . . . . . . . . . . . . . . . . . . . . . . . . . . . . . . . . . . . . . . . . . . . . . . . 21
Page Layout Printing. . . . . . . . . . . . . . . . . . . . . . . . . . . . . . . . . . . . . . . . . . . . . . . . . . . . . . . . 24
Tiling/Poster Printing. . . . . . . . . . . . . . . . . . . . . . . . . . . . . . . . . . . . . . . . . . . . . . . . . . . . . . . . 26
Booklet Printing. . . . . . . . . . . . . . . . . . . . . . . . . . . . . . . . . . . . . . . . . . . . . . . . . . . . . . . . . . . . 30
Duplex Printing. . . . . . . . . . . . . . . . . . . . . . . . . . . . . . . . . . . . . . . . . . . . . . . . . . . . . . . . . . . . 32
Stamp/Background Printing. . . . . . . . . . . . . . . . . . . . . . . . . . . . . . . . . . . . . . . . . . . . . . . . . . . 34
Registering a Stamp. . . . . . . . . . . . . . . . . . . . . . . . . . . . . . . . . . . . . . . . . . . . . . . . . . . . . . . . 37
Registering Image Data to be Used as a Background. . . . . . . . . . . . . . . . . . . . . . . . . . . . . . . 41
Setting Up Envelope Printing. . . . . . . . . . . . . . . . . . . . . . . . . . . . . . . . . . . . . . . . . . . . . . . . . . 45
Displaying the Print Results before Printing. . . . . . . . . . . . . . . . . . . . . . . . . . . . . . . . . . . . . . 47
Setting Paper Dimensions (Custom Size). . . . . . . . . . . . . . . . . . . . . . . . . . . . . . . . . . . . . . . . 48
Editing the Print Document or Reprinting from the Print History. . . . . . . . . . . . . . . . . . . . . . . 50
Changing the Print Quality and Correcting Image Data. . . . . . . . . . . . . . . . . . . . . . . . . . . . . . . . . . 54
Setting the Print Quality Level (Custom). . . . . . . . . . . . . . . . . . . . . . . . . . . . . . . . . . . . . . . . . 55
Printing a Color Document in Monochrome. . . . . . . . . . . . . . . . . . . . . . . . . . . . . . . . . . . . . . . 57
Specifying Color Correction. . . . . . . . . . . . . . . . . . . . . . . . . . . . . . . . . . . . . . . . . . . . . . . . . . . 59
Optimal Photo Printing of Image Data. . . . . . . . . . . . . . . . . . . . . . . . . . . . . . . . . . . . . . . . . . . 62
Adjusting Colors with the Printer Driver. . . . . . . . . . . . . . . . . . . . . . . . . . . . . . . . . . . . . . . . . . 64
Printing with ICC Profiles. . . . . . . . . . . . . . . . . . . . . . . . . . . . . . . . . . . . . . . . . . . . . . . . . . . . . 66
Adjusting Color Balance. . . . . . . . . . . . . . . . . . . . . . . . . . . . . . . . . . . . . . . . . . . . . . . . . . . . . 70
Adjusting Color Balance Using Sample Patterns (Printer Driver). . . . . . . . . . . . . . . . . . . . . . 73
Adjusting Brightness. . . . . . . . . . . . . . . . . . . . . . . . . . . . . . . . . . . . . . . . . . . . . . . . . . . . . . . . 78
Adjusting Intensity. . . . . . . . . . . . . . . . . . . . . . . . . . . . . . . . . . . . . . . . . . . . . . . . . . . . . . . . . . 80
Adjusting Contrast. . . . . . . . . . . . . . . . . . . . . . . . . . . . . . . . . . . . . . . . . . . . . . . . . . . . . . . . . . 82
Adjusting Intensity/Contrast Using Sample Patterns (Printer Driver). . . . . . . . . . . . . . . . . . . . 84
Overview of the Printer Driver. . . . . . . . . . . . . . . . . . . . . . . . . . . . . . . . . . . . . . . . . . . . . . . . . . . . . 88

Canon IJ Printer Driver. . . . . . . . . . . . . . . . . . . . . . . . . . . . . . . . . . . . . . . . . . . . . . . . . . . . . . 89
How to Open the Printer Driver Setup Window. . . . . . . . . . . . . . . . . . . . . . . . . . . . . . . . . . . . 90
Canon IJ Status Monitor. . . . . . . . . . . . . . . . . . . . . . . . . . . . . . . . . . . . . . . . . . . . . . . . . . . . . 92
Checking the Ink Status from Your Computer. . . . . . . . . . . . . . . . . . . . . . . . . . . . . . . . . . . . . 94
Canon IJ Preview. . . . . . . . . . . . . . . . . . . . . . . . . . . . . . . . . . . . . . . . . . . . . . . . . . . . . . . . . . . 95
Deleting the Undesired Print Job. . . . . . . . . . . . . . . . . . . . . . . . . . . . . . . . . . . . . . . . . . . . . . . 96
Instructions for Use (Printer Driver). . . . . . . . . . . . . . . . . . . . . . . . . . . . . . . . . . . . . . . . . . . . . 97
Printer Driver Description. . . . . . . . . . . . . . . . . . . . . . . . . . . . . . . . . . . . . . . . . . . . . . . . . . . . . . . . . 99
Quick Setup tab Description. . . . . . . . . . . . . . . . . . . . . . . . . . . . . . . . . . . . . . . . . . . . . . . . . 100
Main tab Description. . . . . . . . . . . . . . . . . . . . . . . . . . . . . . . . . . . . . . . . . . . . . . . . . . . . . . . 107
Page Setup tab Description. . . . . . . . . . . . . . . . . . . . . . . . . . . . . . . . . . . . . . . . . . . . . . . . . . 115
Maintenance tab Description. . . . . . . . . . . . . . . . . . . . . . . . . . . . . . . . . . . . . . . . . . . . . . . . . 131
Canon IJ Preview Description. . . . . . . . . . . . . . . . . . . . . . . . . . . . . . . . . . . . . . . . . . . . . . . . 140
Canon IJ XPS Preview Description. . . . . . . . . . . . . . . . . . . . . . . . . . . . . . . . . . . . . . . . . . . . 144
Canon IJ Status Monitor Description. . . . . . . . . . . . . . . . . . . . . . . . . . . . . . . . . . . . . . . . . . . 155
Updating the MP Drivers. . . . . . . . . . . . . . . . . . . . . . . . . . . . . . . . . . . . . . . . . . . . . . . . . . . . . . . . 158
Obtaining the Latest MP Drivers. . . . . . . . . . . . . . . . . . . . . . . . . . . . . . . . . . . . . . . . . . . . . . 159
Deleting the Unnecessary MP Drivers. . . . . . . . . . . . . . . . . . . . . . . . . . . . . . . . . . . . . . . . . . 160
Before Installing the MP Drivers. . . . . . . . . . . . . . . . . . . . . . . . . . . . . . . . . . . . . . . . . . . . . . 162
Installing the MP Drivers. . . . . . . . . . . . . . . . . . . . . . . . . . . . . . . . . . . . . . . . . . . . . . . . . . . . 163
Sharing the Printer on a Network. . . . . . . . . . . . . . . . . . . . . . . . . . . . . . . . . . . . . . . . . . . . . . . . . . 165
Settings on Print Server. . . . . . . . . . . . . . . . . . . . . . . . . . . . . . . . . . . . . . . . . . . . . . . . . . . . . 166
Settings on Client PC. . . . . . . . . . . . . . . . . . . . . . . . . . . . . . . . . . . . . . . . . . . . . . . . . . . . . . . 168
Restrictions on Printer Sharing. . . . . . . . . . . . . . . . . . . . . . . . . . . . . . . . . . . . . . . . . . . . . . . 171
Copying. . . . . . . . . . . . . . . . . . . . . . . . . . . . . . . . . . . . . . . . . . . . . . . . . . . . . . . 173
Making Copies. . . . . . . . . . . . . . . . . . . . . . . . . . . . . . . . . . . . . . . . . . . . . . . . . . . . . . . . . 174
Switching the Page Size between A4 and Letter. . . . . . . . . . . . . . . . . . . . . . . . . . . . . . . 176

Printing
Printing from a Computer
Printing with Application Software that You are Using (Printer Driver)
4

Printing from a Computer
Printing with Application Software that You are Using (Printer Driver)
5

Printing with Application Software that You are Using
(Printer Driver)
Printing with Easy Setup Basic
Various Printing Methods
Changing the Print Quality and Correcting Image Data
Overview of the Printer Driver
Printer Driver Description
Updating the MP Drivers
Sharing the Printer on a Network
6
Printing with Easy Setup
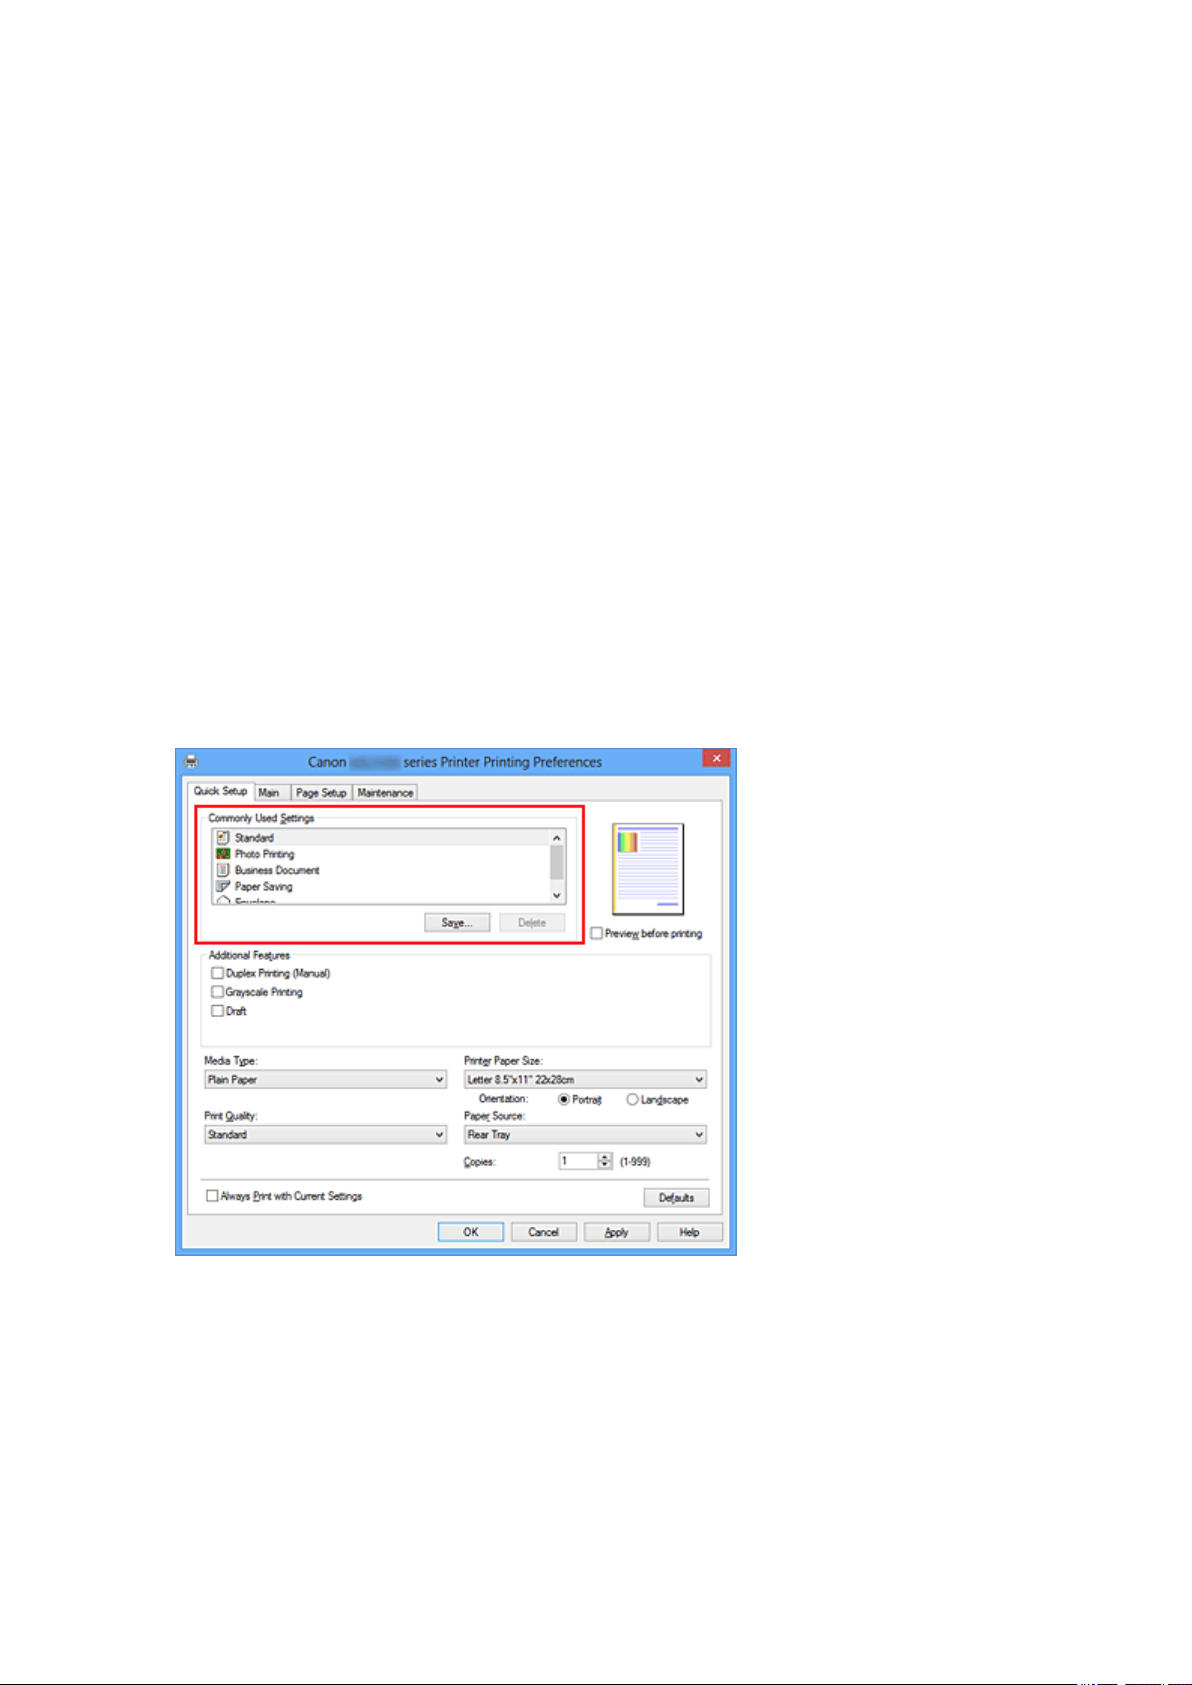
This section describes the simple procedure for setting the Quick Setup tab so that you can
carry out appropriate printing on this machine.
1. Check that the machine is turned on
2. Load paper on the machine
3. Open the printer driver setup window
4. Select a frequently used profile
In Commonly Used Settings on the Quick Setup tab, select a printing profile suited
for the purpose.
When you select a printing profile, the Additional Features, Media Type, and
Printer Paper Size settings are automatically switched to the values that were
preset.
5. Select the print quality
For Print Quality, select High, Standard, or Draft according to your purpose.
7

Important
The print quality settings that can be selected may differ depending on a printing
profile.
6. Complete the setup
Click OK.
When you execute print, the document is printed with settings that match your
purpose.
8

Important
When you select the Always Print with Current Settings check box, all settings
specified on the Quick Setup, Main, and Page Setup tabs are saved, and you can print
with the same settings from the next time as well.
In the Commonly Used Settings window, click Save... to register the specified
settings.
9

Setting the Media Type with the Printer Driver
When you use this machine, selecting a media type that matches the print purpose will help
you achieve the best print results.
You can use the following media types on this machine.
Commercially available papers
Media name Media Type in the printer driver
Plain Paper (including recycled paper) Plain Paper
Envelopes Envelope
Canon genuine papers (Photo Printing)
Media name <Model No.> Media Type in the printer driver
Photo Paper Plus Glossy II <PP-201> Photo Paper Plus Glossy II
Photo Paper Glossy <GP-501/GP-601> Glossy Photo Paper
10

Various Printing Methods
Setting a Page Size and Orientation
Setting the Number of Copies and Printing Order
Setting the Stapling Margin
Fit-to-Page Printing
Scaled Printing
Page Layout Printing
Tiling/Poster Printing
Booklet Printing
Duplex Printing
Stamp/Background Printing
Registering a Stamp
Registering Image Data to be Used as a Background
Setting Up Envelope Printing
Displaying the Print Results before Printing
Setting Paper Dimensions (Custom Size)
Editing the Print Document or Reprinting from the Print History
11
Setting a Page Size and Orientation
The paper size and orientation are essentially determined by the application software.
When the page size and orientation set for Page Size and Orientation on the Page Setup
tab are same as those set with the application software, you do not need to select them on
the Page Setup tab.
When you are not able to specify them with the application software, the procedure for
selecting a page size and orientation is as follows:
You can also set page size and orientation on the Quick Setup tab.
1. Open the printer driver setup window
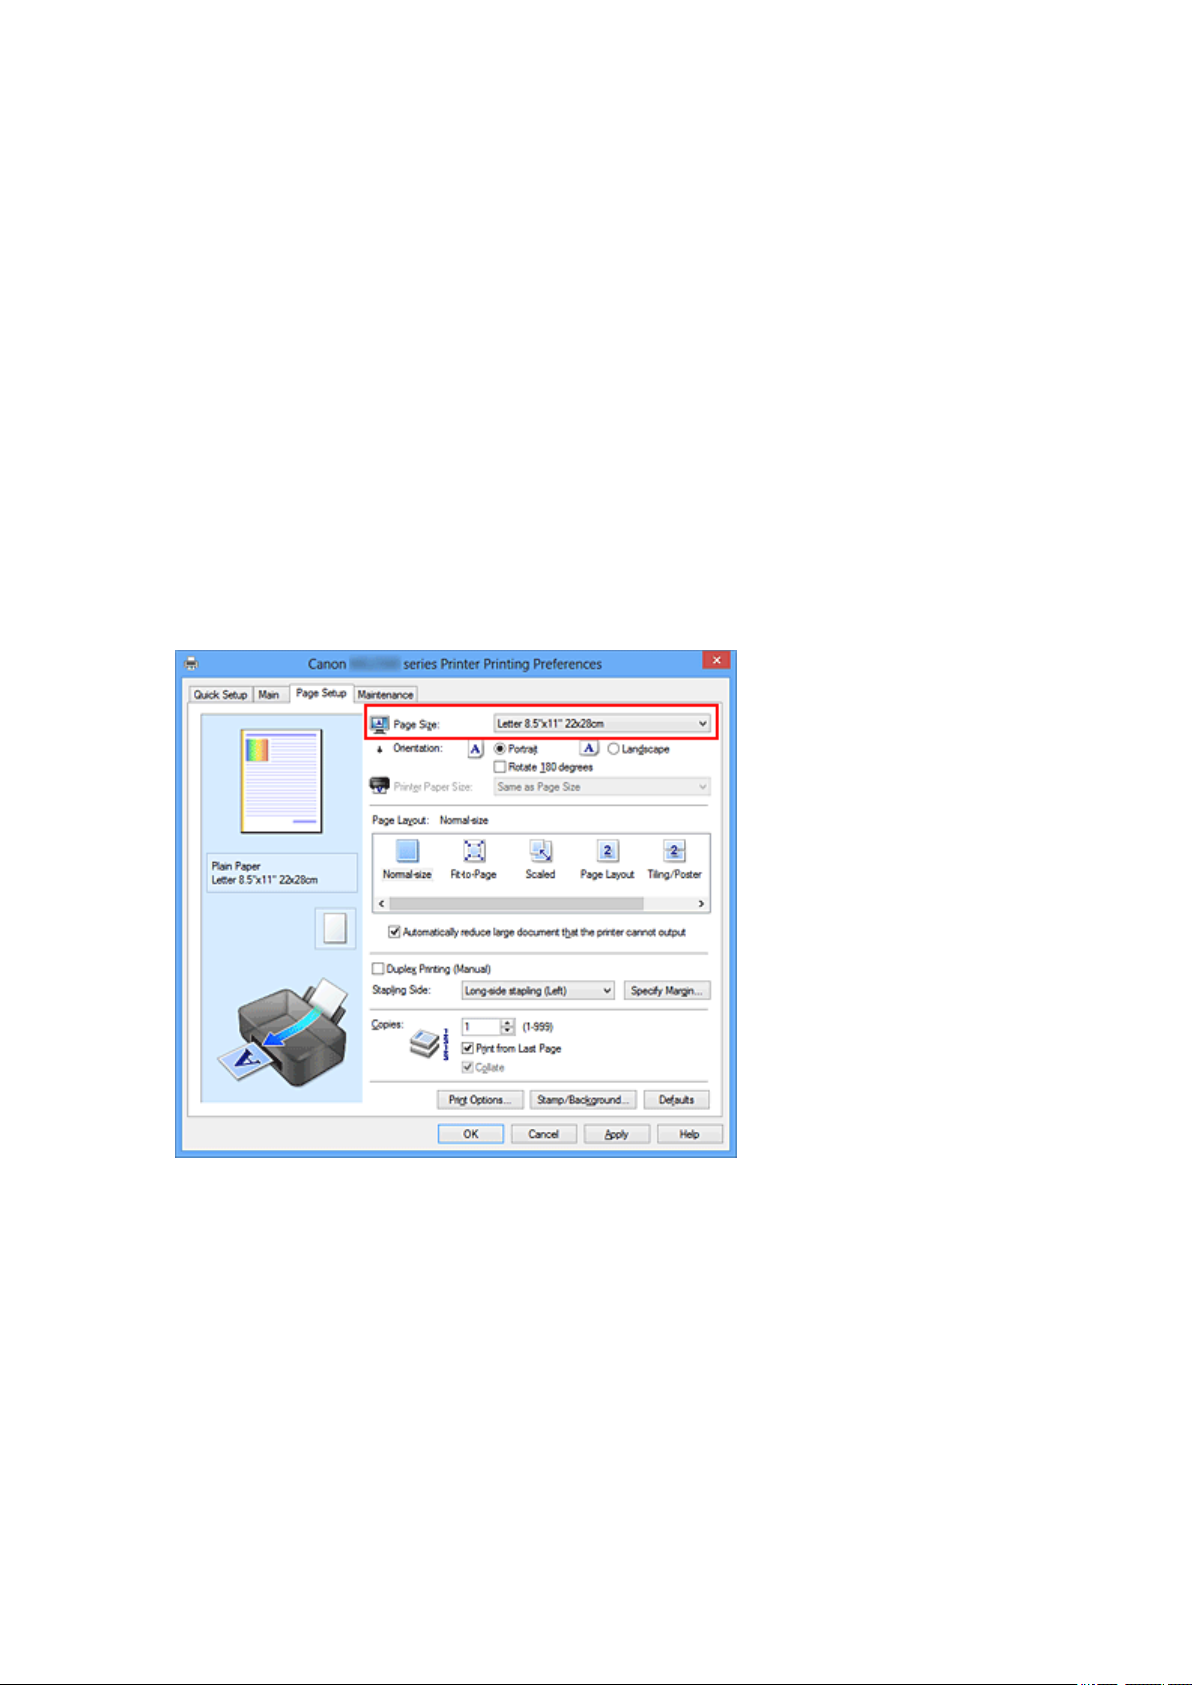
2. Select the paper size
Select a page size from the Page Size list on the Page Setup tab.
3. Set Orientation
Select Portrait or Landscape for Orientation. Check Rotate 180 degrees check
box when you want to perform printing with the original being rotated 180 degrees.
4. Complete the setup
Click OK.
When you execute print, the document will be printed with the selected page size and
the orientation.
12

Note
If Normal-size is selected for Page Layout, then Automatically reduce large
document that the printer cannot output is displayed.
Normally, you can leave the Automatically reduce large document that the printer
cannot output check box checked. During printing, if you do not want to reduce large
documents that cannot be printed on the printer, uncheck the check box.
13
Setting the Number of Copies and Printing Order
The procedure for specifying the number of copies and printing order is as follows:
You can also set the number of copies on the Quick Setup tab.
1. Open the printer driver setup window
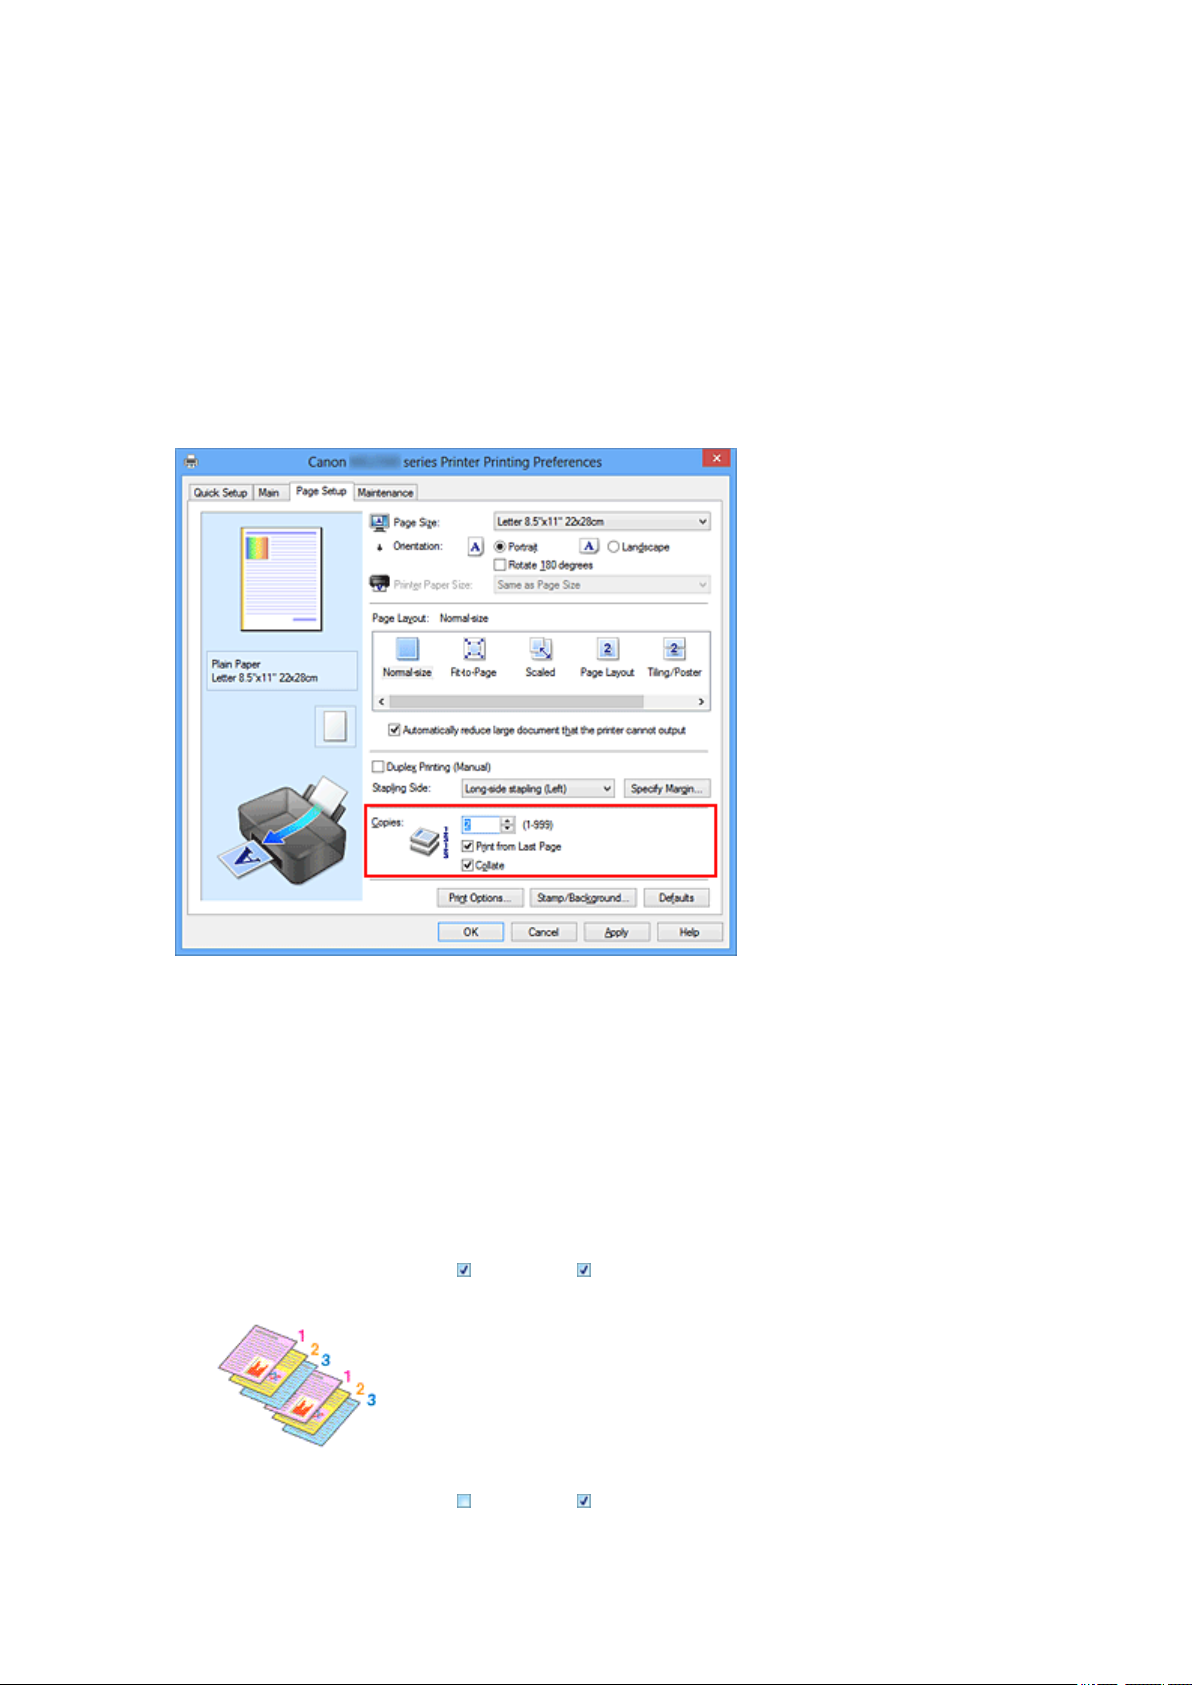
2. Specify the number of copies to be printed
For Copies on the Page Setup tab, specify the number of copies to be printed.
3. Specify the print order
Check the Print from Last Page check box when you want to print from the last
page in order, and uncheck the check box when you want to print from the first page.
Check the Collate check box when you are printing multiple copies of a document
and want to print out all pages in each copy together. Uncheck this check box when
you want to print all pages with the same page number together.
• Print from Last Page: /Collate:
• Print from Last Page: /Collate:
14
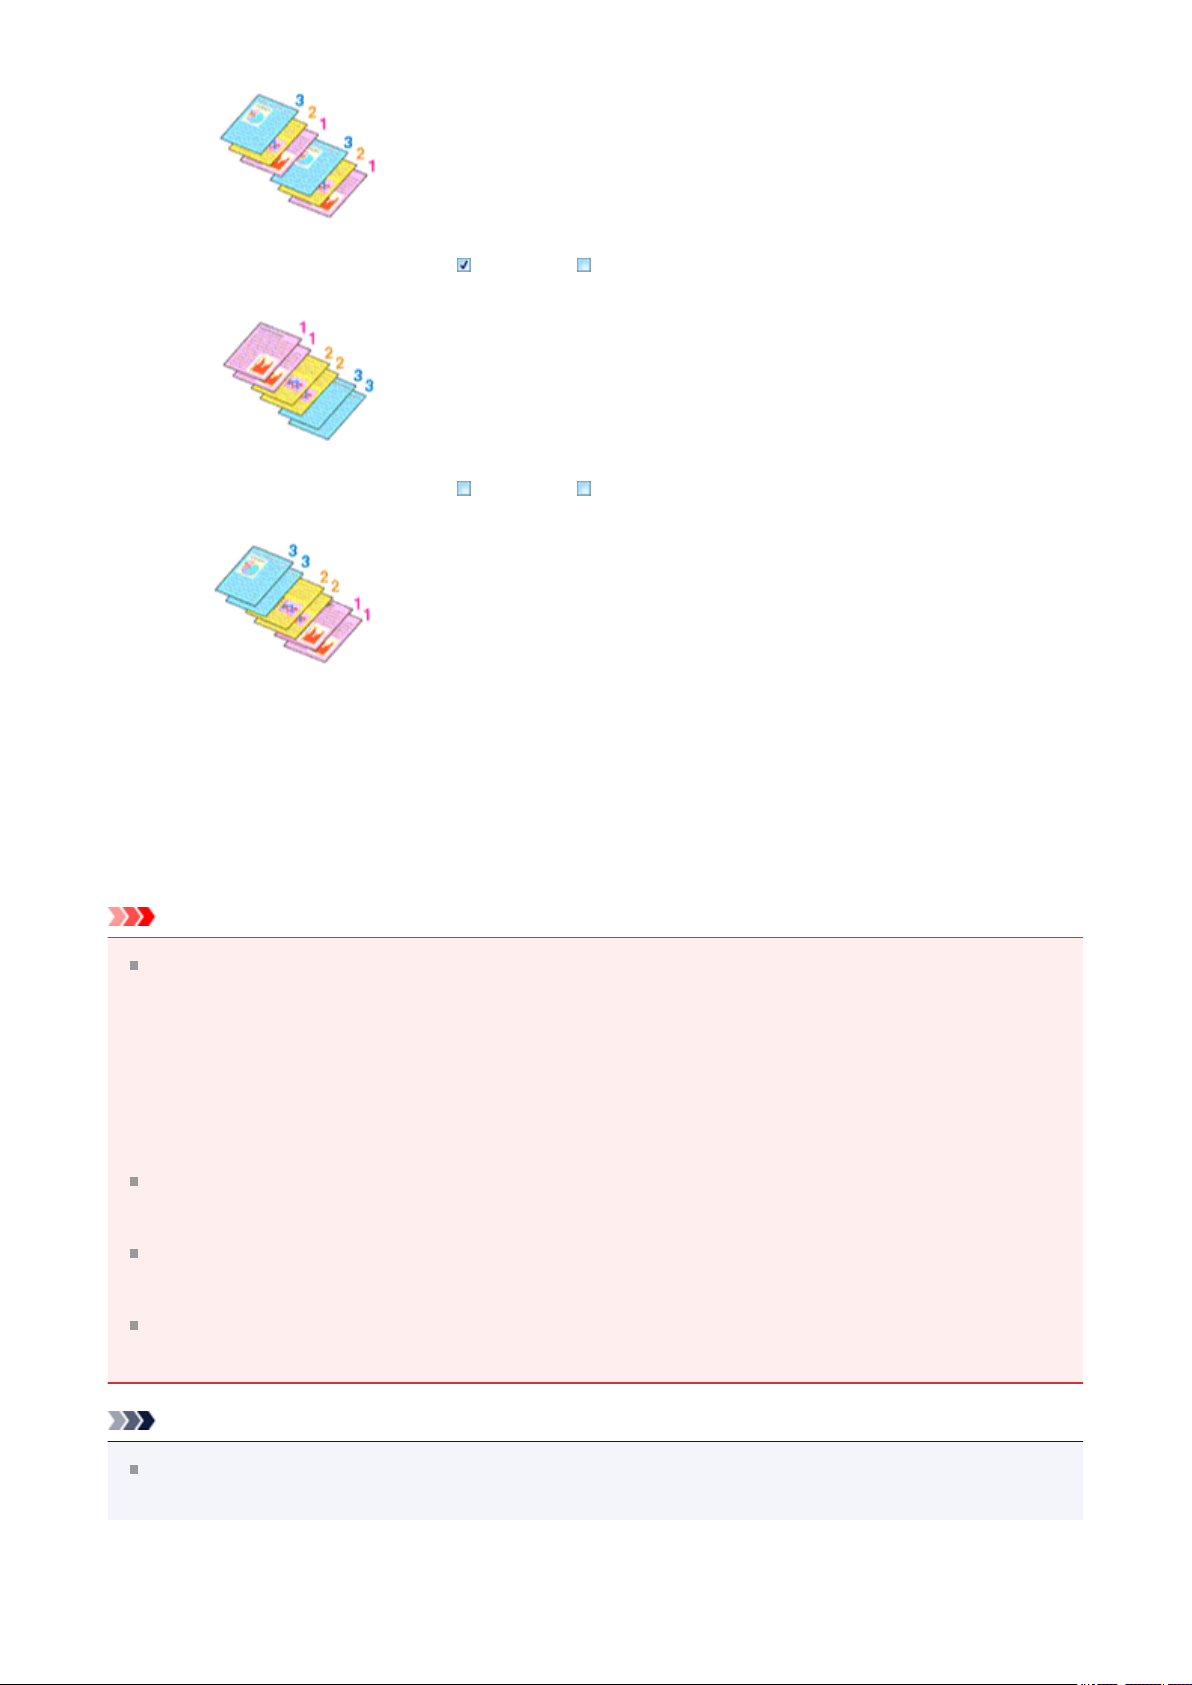
• Print from Last Page: /Collate:
• Print from Last Page: /Collate:
4. Complete the setup
Click OK.
When you execute print, the specified number of copies will be printed with the
specified printing order.
Important
When the application software that you used to create the document has the same
function, specify the settings on the printer driver. However, if the print results are not
acceptable, specify the function settings on the application software. When you specify
the number of copies and the printing order with both the application software and this
printer driver, the number of copies may be multiplied numbers of the two settings or the
specified printing order may not be enabled.
Print from Last Page appears grayed out and is unavailable when Tiling/Poster is
selected for Page Layout.
When Booklet is selected for Page Layout, Print from Last Page and Collate
appear grayed out and cannot be set.
When Duplex Printing (Manual) is selected, Print from Last Page appears grayed
out and cannot be set.
Note
By setting both Print from Last Page and Collate, you can perform printing so that
papers are collated one by one starting from the last page.
15

These settings can be used in combination with Normal-size, Fit-to-Page, Scaled,
Page Layout, and Duplex Printing (Manual).
16
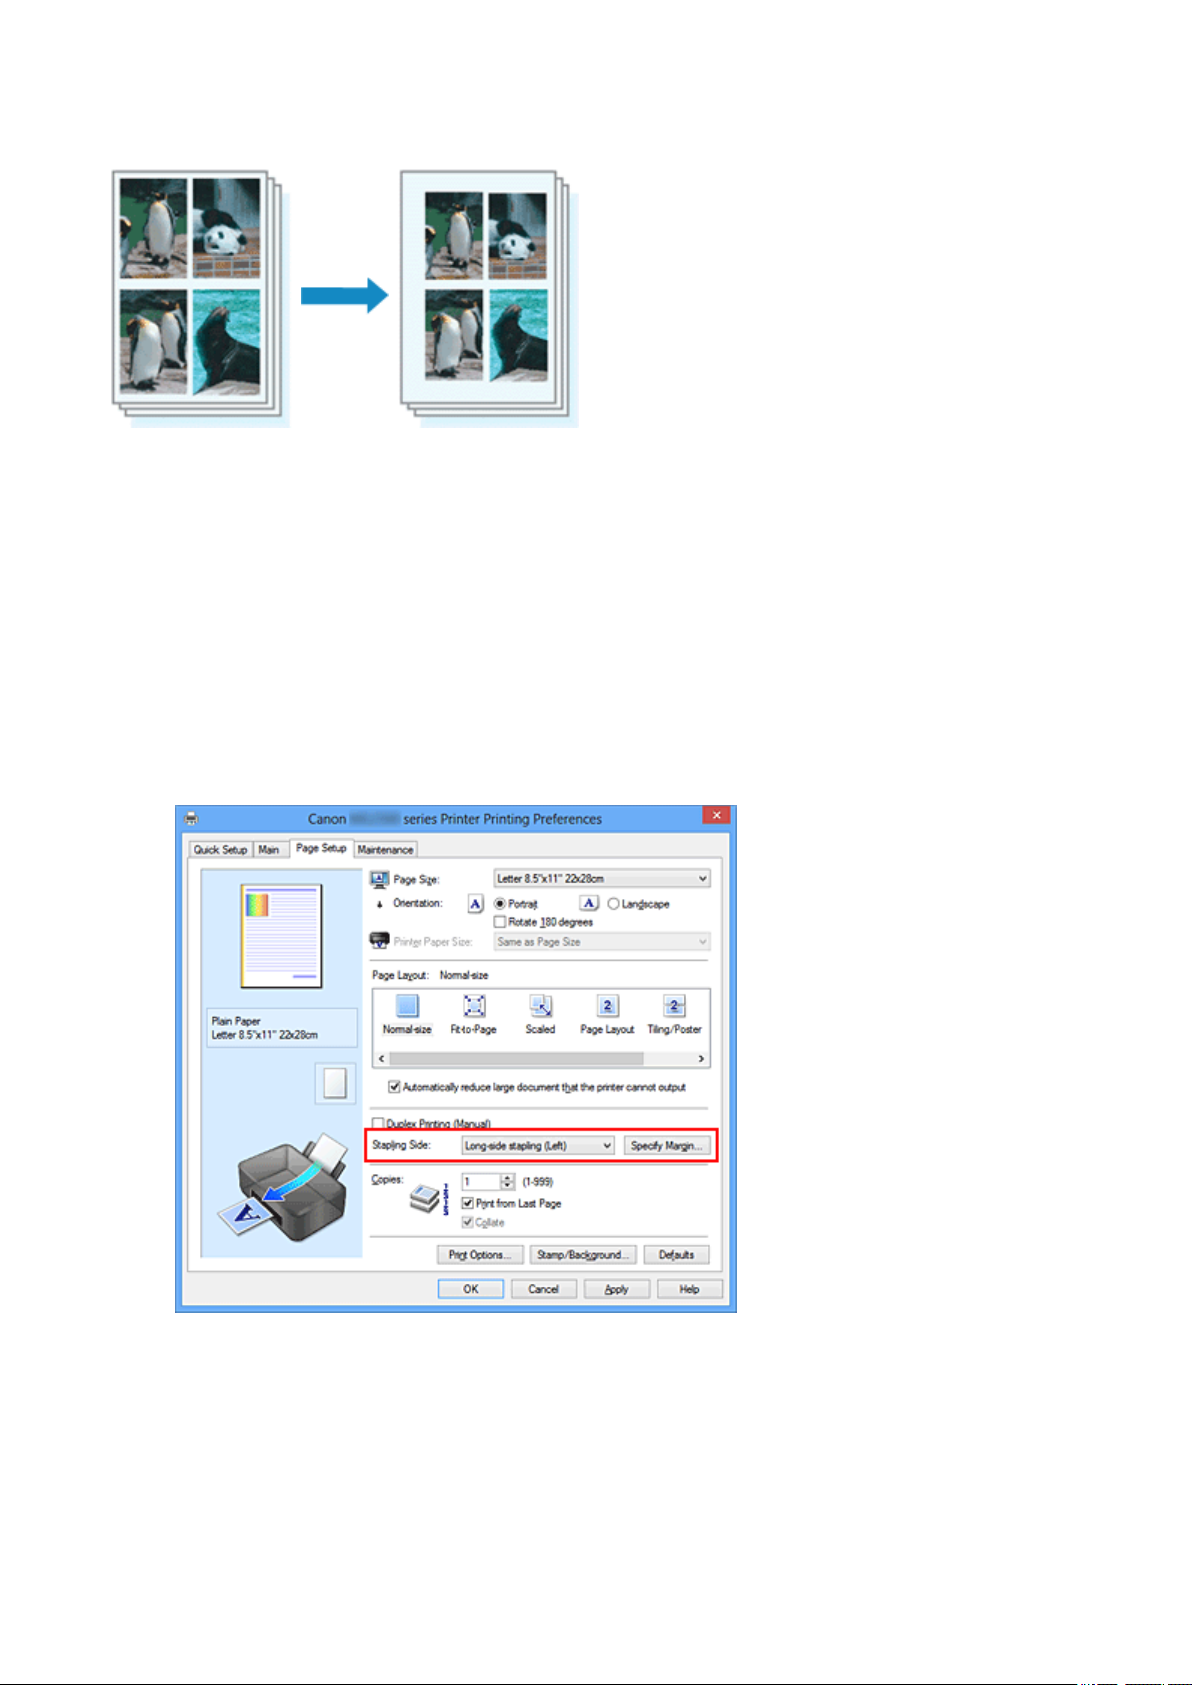
Setting the Stapling Margin
The procedure for setting the staple side and the margin width is as follows:
1. Open the printer driver setup window
2. Specify the side to be stapled
Check the position of the stapling margin from Stapling Side on the Page Setup tab.
The printer analyzes the Orientation and Page Layout settings, and automatically
selects the best staple position. When you want to change the setting, select from the
list.
3. Set the margin width
If necessary, click Specify Margin... and set the margin width, and then click OK.
17
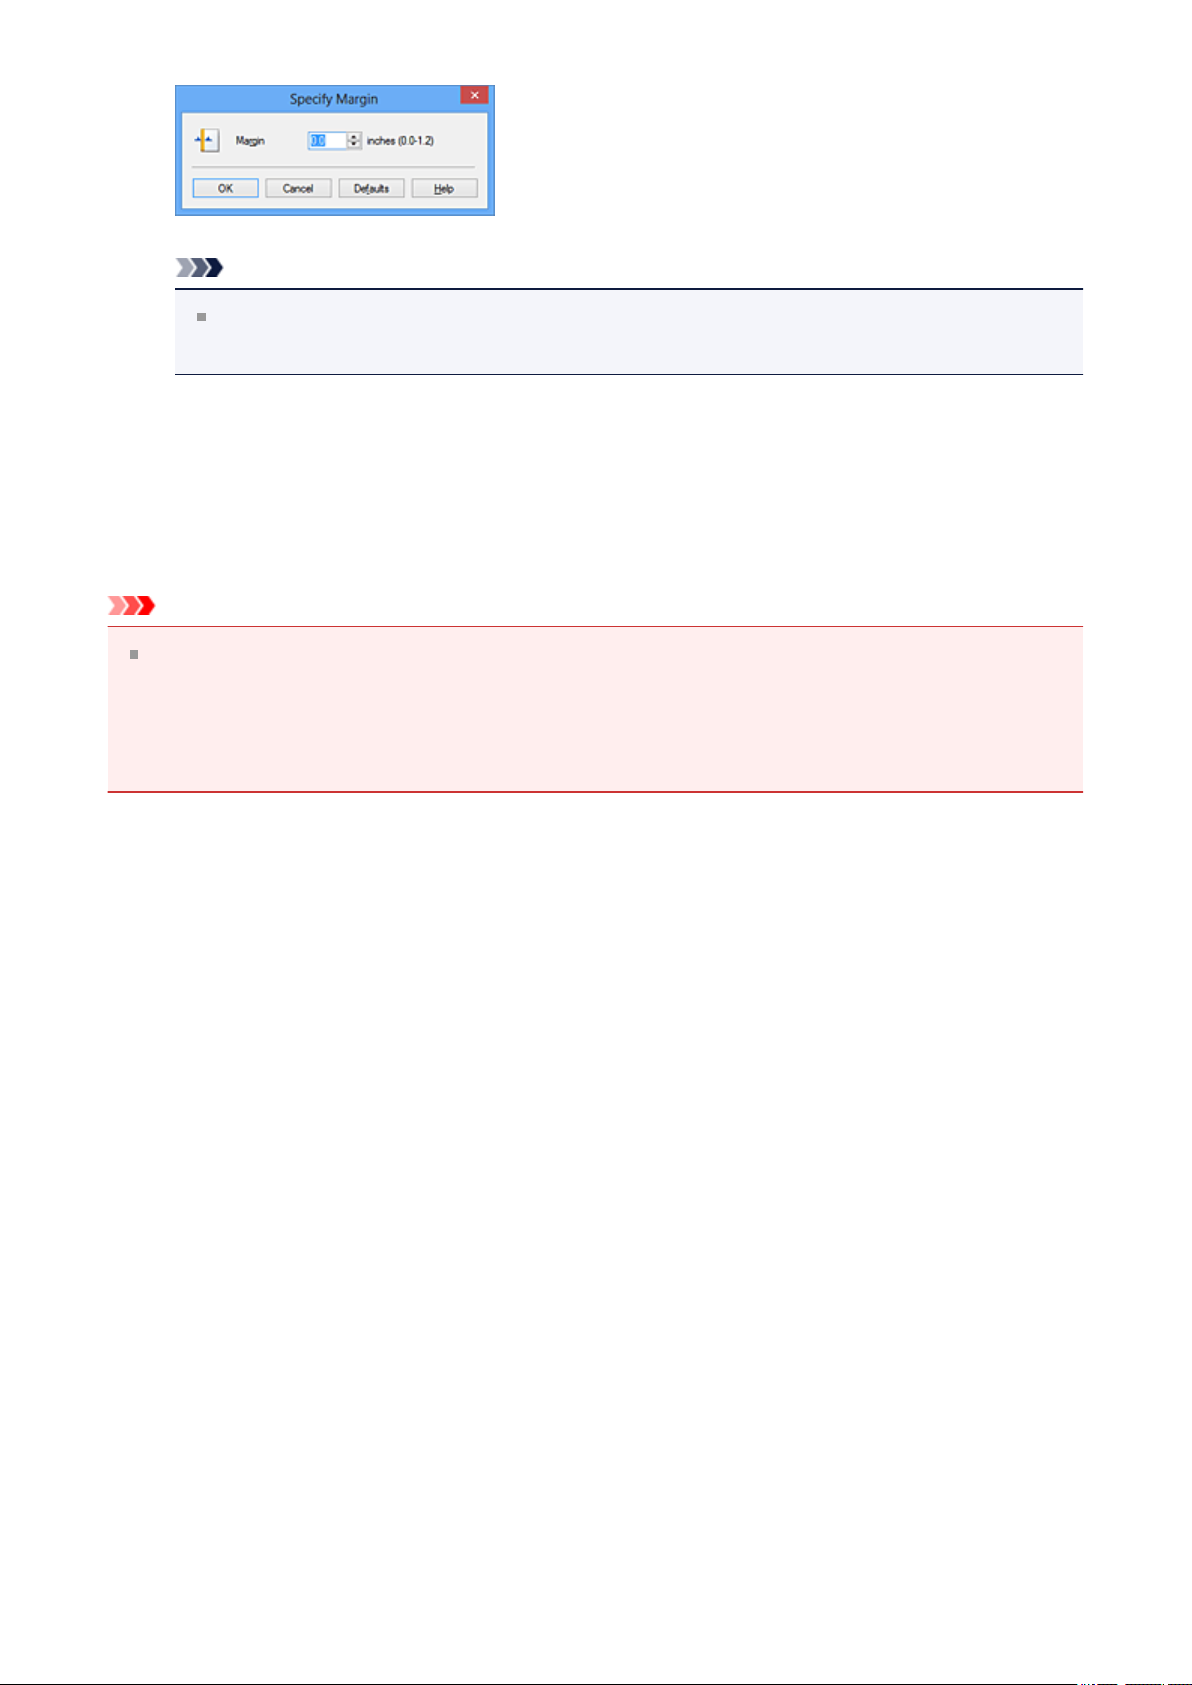
Note
The printer automatically reduces the print area depending on the staple
position margin.
4. Complete the setup
Click OK on the Page Setup tab.
When you execute print, the data is printed with the specified staple side and margin
width.
Important
Stapling Side and Specify Margin... appear grayed out and are unavailable when:
• Tiling/Poster or Booklet is selected for Page Layout
• Scaled is selected for Page Layout (When Duplex Printing (Manual) is also
selected, only Stapling Side can be specified.)
18
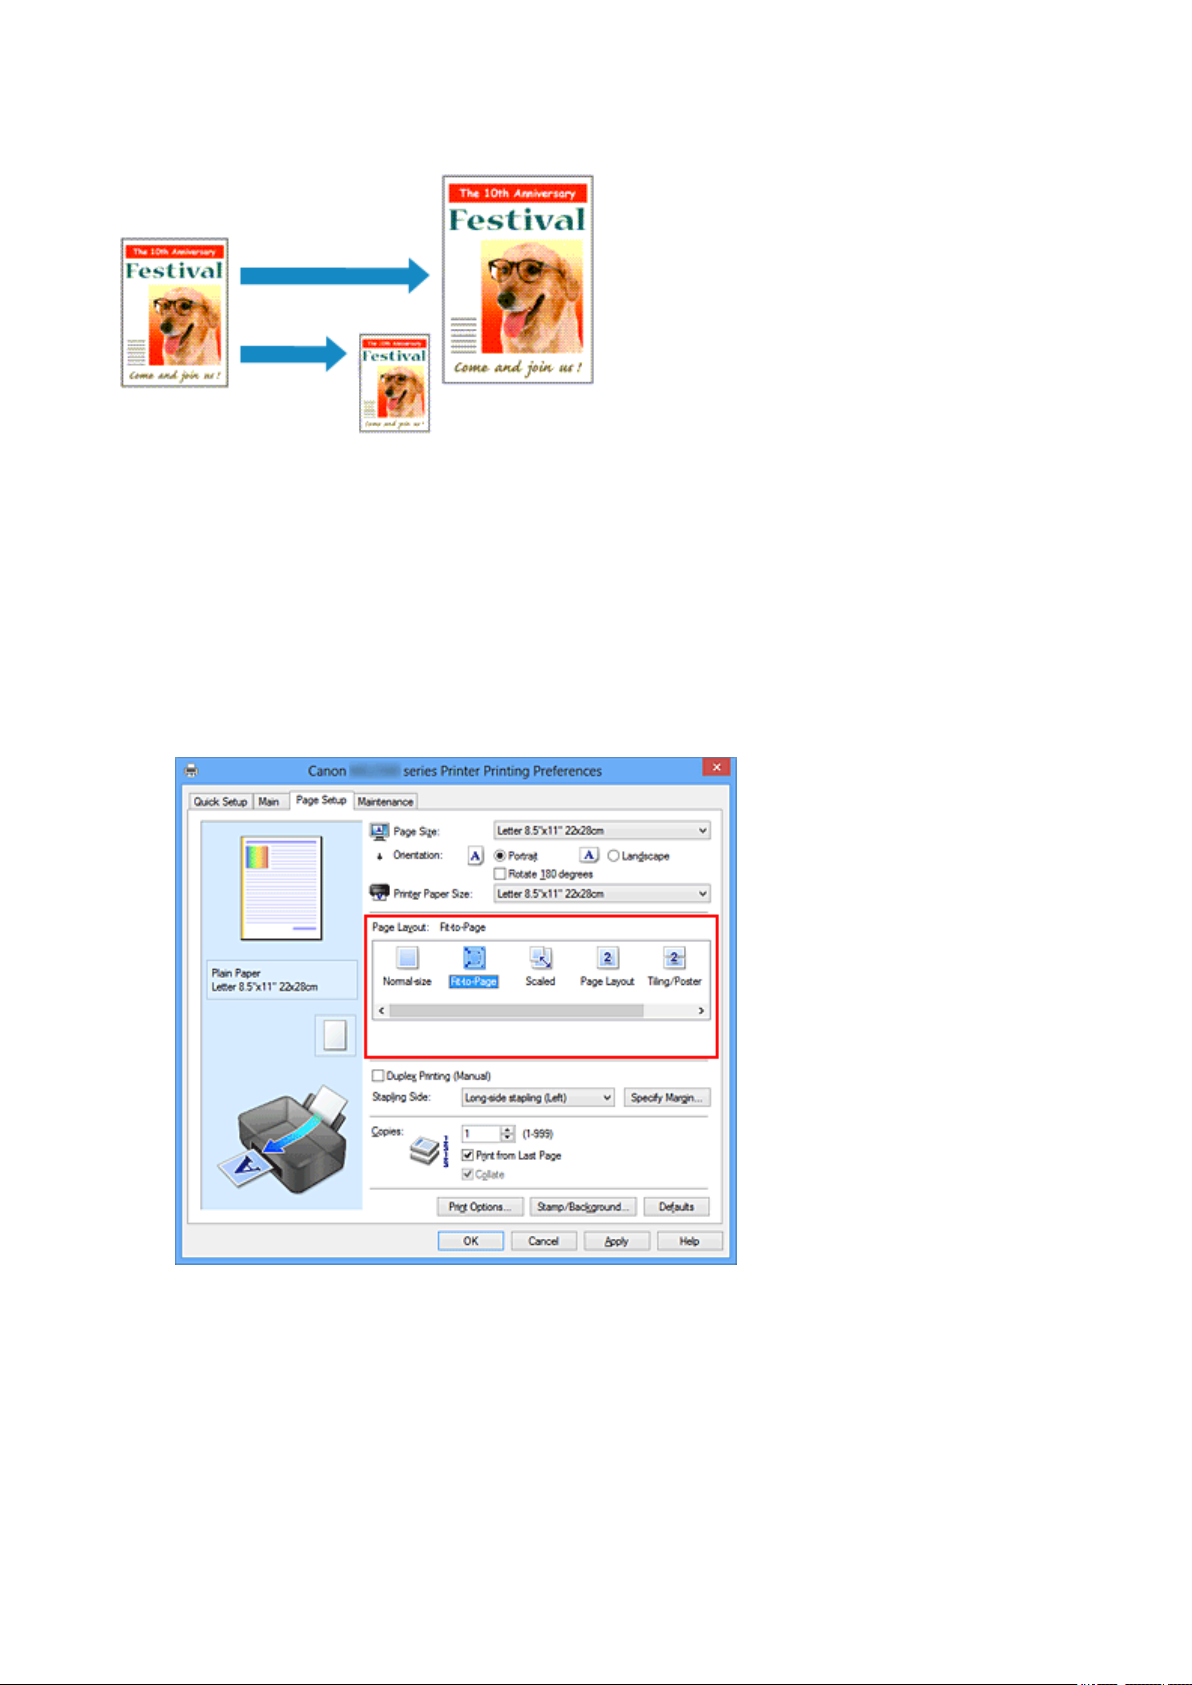
Fit-to-Page Printing
The procedure for printing a document that is automatically enlarged or reduced to fit the
page size to be used is as follows:
1. Open the printer driver setup window
2. Set fit-to-page printing
Select Fit-to-Page from the Page Layout list on the Page Setup tab.
3. Select the paper size of the document
Using Page Size, select the page size that is set with your application software.
4. Select the print paper size
Select the size of the paper loaded in the machine from the Printer Paper Size list.
When the Printer Paper Size is smaller than the Page Size, the page image will be
19

reduced. When the Printer Paper Size is larger than the Page Size, the page image
will be enlarged.
The current settings are displayed in the settings preview on the left side of the
printer driver.
5. Complete the setup
Click OK.
When you execute print, the document will be enlarged or reduced to fit to the page
size.
20
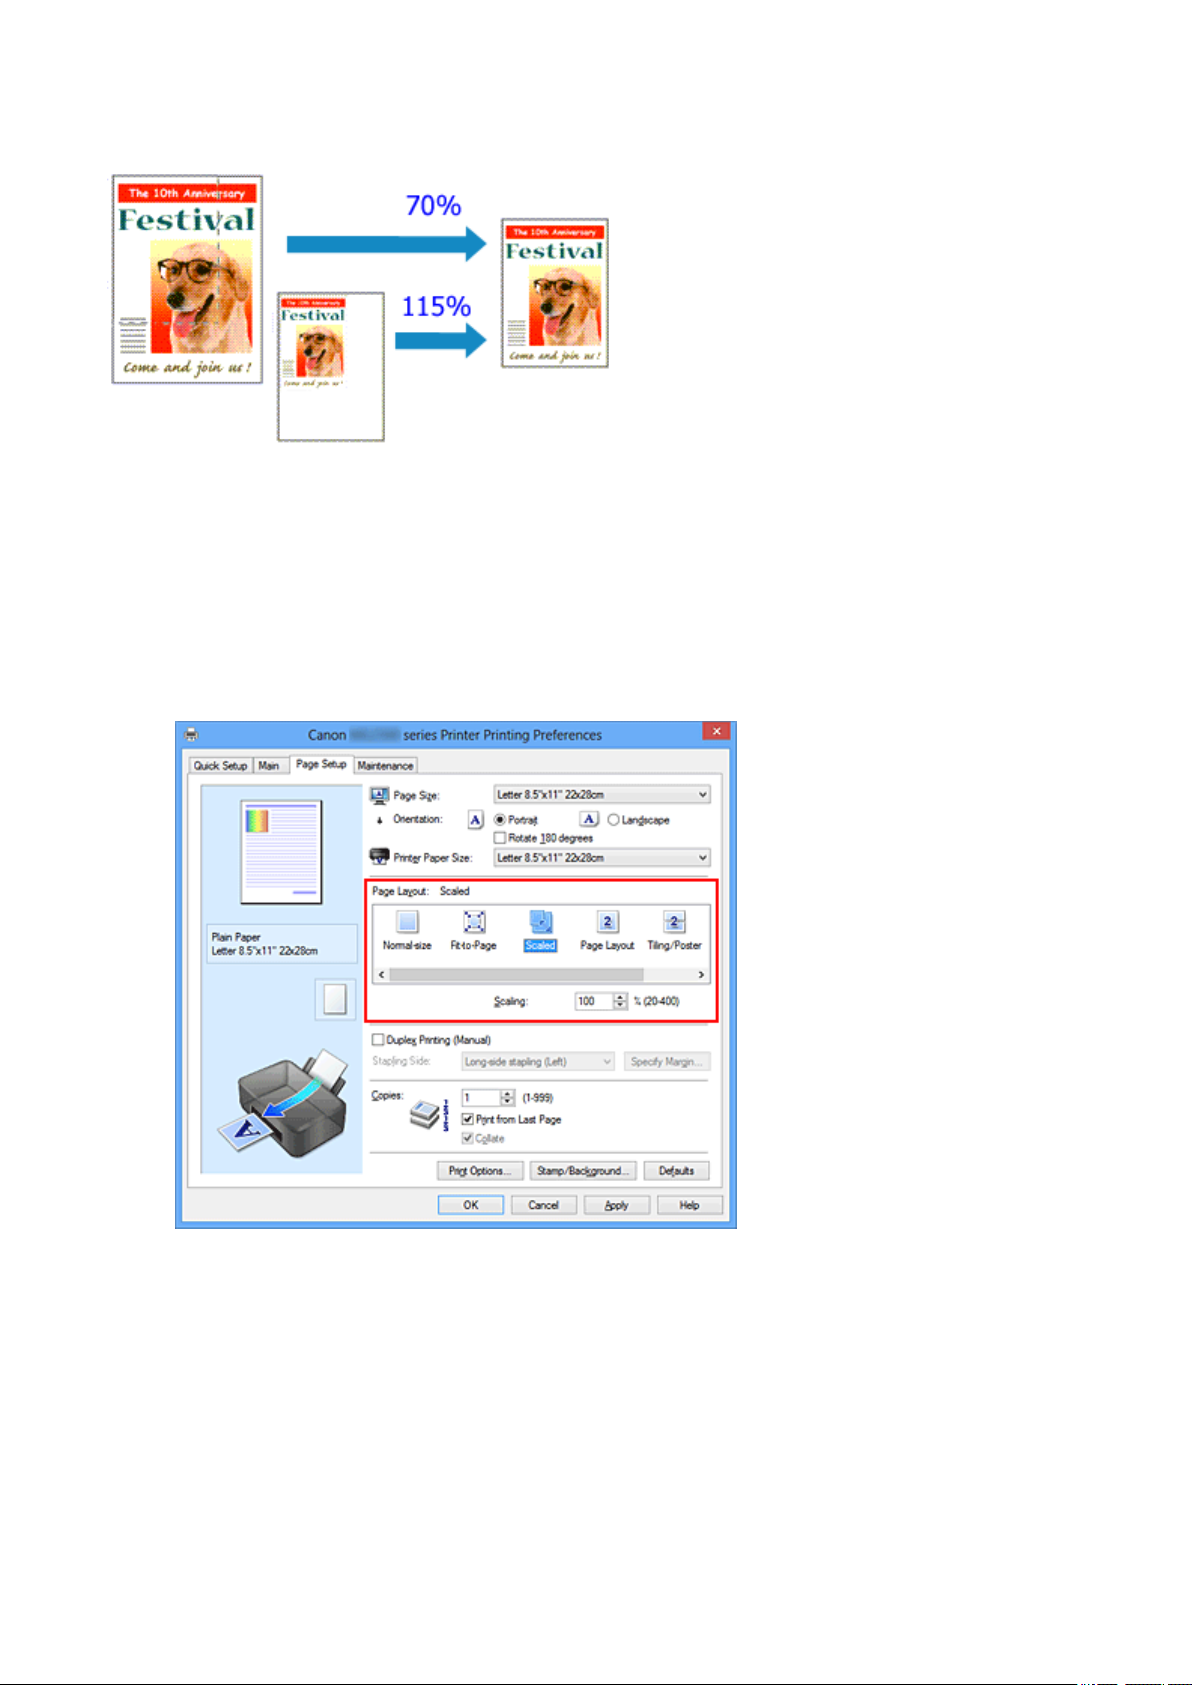
Scaled Printing
The procedure for printing a document with pages enlarged or reduced is as follows:
1. Open the printer driver setup window
2. Set scaled printing
Select Scaled from the Page Layout list on the Page Setup tab.
3. Select the paper size of the document
Using Page Size, select the page size that is set with your application software.
4. Set the scaling rate by using one of the following methods:
• Select a Printer Paper Size
21
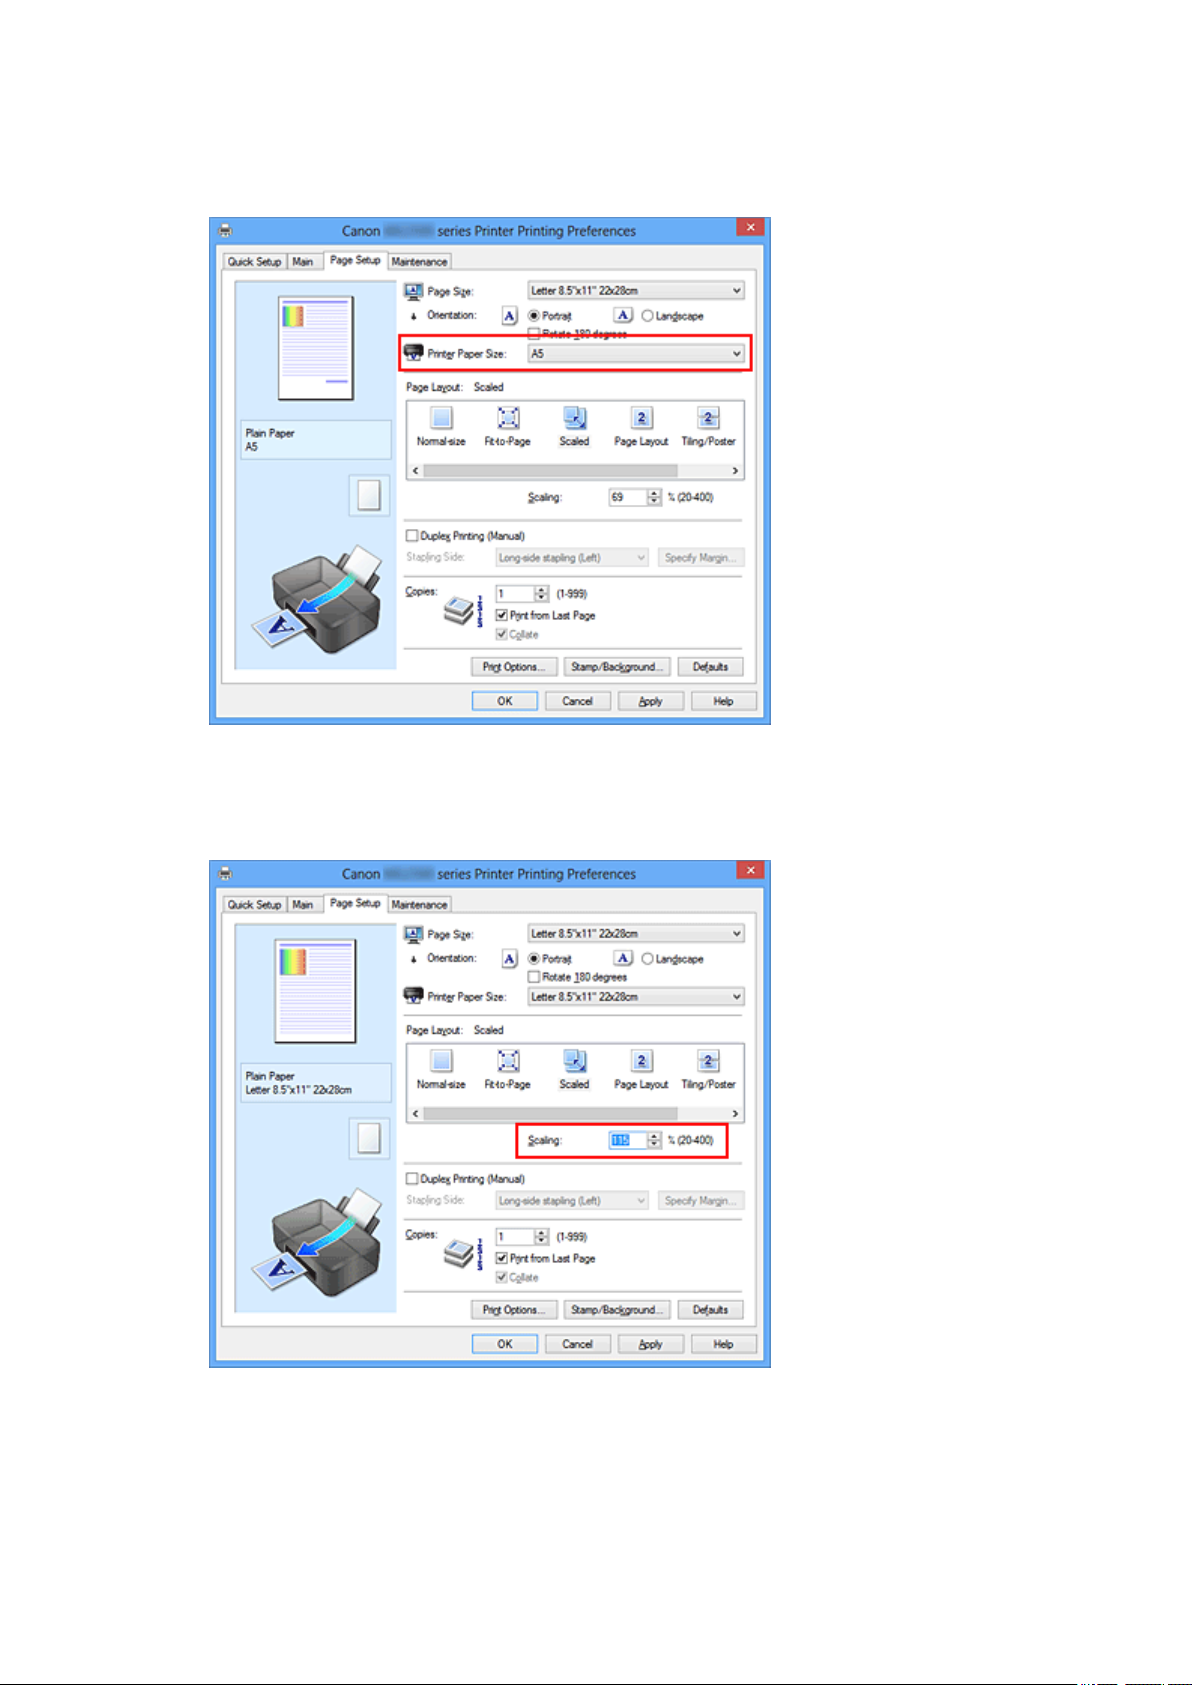
When the printer paper size is smaller than the Page Size, the page image will be
reduced. When the printer paper size is larger than the Page Size, the page
image will be enlarged.
• Specify a scaling factor
Directly type in a value into the Scaling box.
The current settings are displayed in the settings preview on the left side of the
printer driver.
5. Complete the setup
22

Click OK.
When you execute print, the document will be printed with the specified scale.
Important
When the application software which you used to create the original has the scaled
printing function, configure the settings on your application software. You do not need to
configure the same setting in the printer driver.
Note
Selecting Scaled changes the printable area of the document.
23
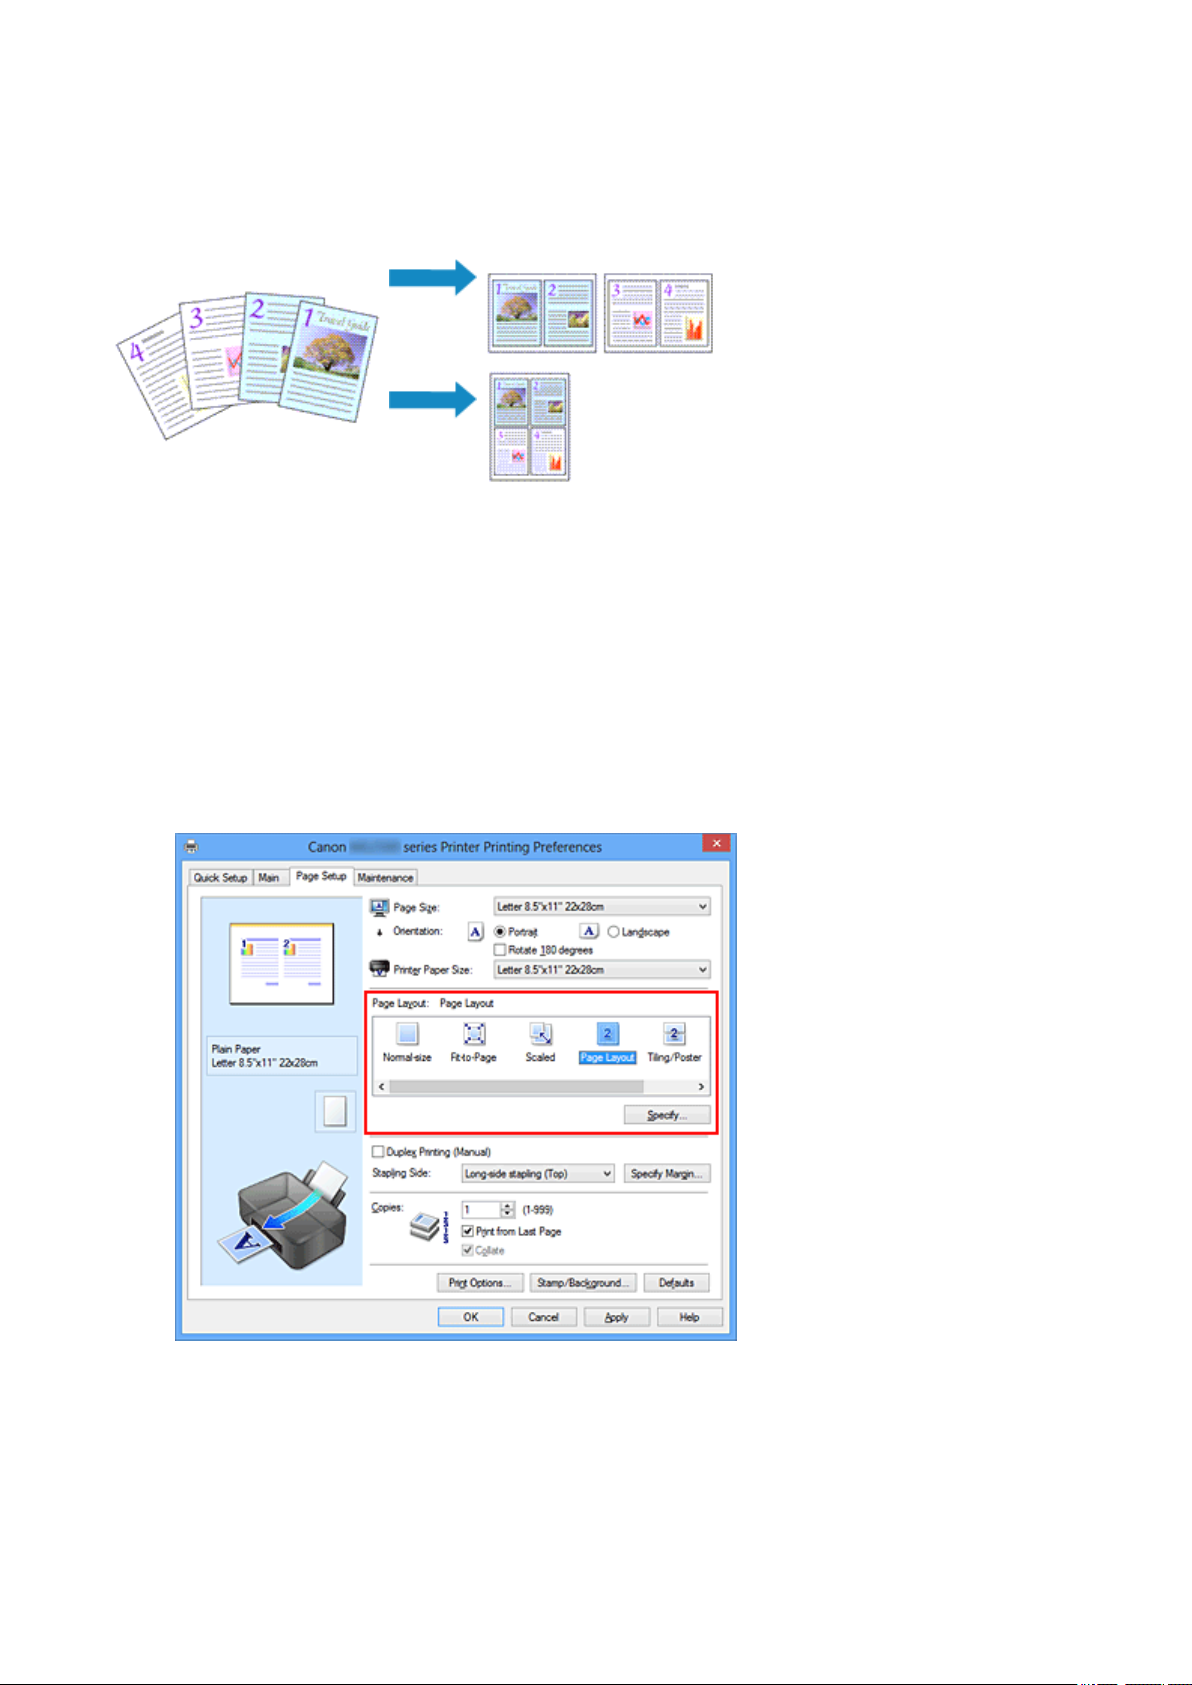
Page Layout Printing
The page layout printing function allows you to print more than one page image on a single
sheet of paper.
The procedure for performing page layout printing is as follows:
1. Open the printer driver setup window
2. Set page layout printing
Select Page Layout from the Page Layout list on the Page Setup tab.
The current settings are displayed in the settings preview on the left side of the
printer driver.
3. Select the print paper size
Select the size of the paper loaded in the machine from the Printer Paper Size list.
Setting the layout of two pages of the document from left to right is complete.
4. Set the number of pages to be printed on one sheet and the page order
24

If necessary, click Specify..., specify the following settings in the Page Layout
Printing dialog box, and click OK.
Pages
To change the number of pages to be printed on a single sheet of paper, select the
number of pages from the list.
Page Order
To change the page arrangement order, select a placement method from the list.
Page Border
To print a page border around each document page, check this check box.
5. Complete the setup
Click OK on the Page Setup tab.
When you execute print, the specified number of pages will be arranged on each
sheet of paper in the specified order.
25
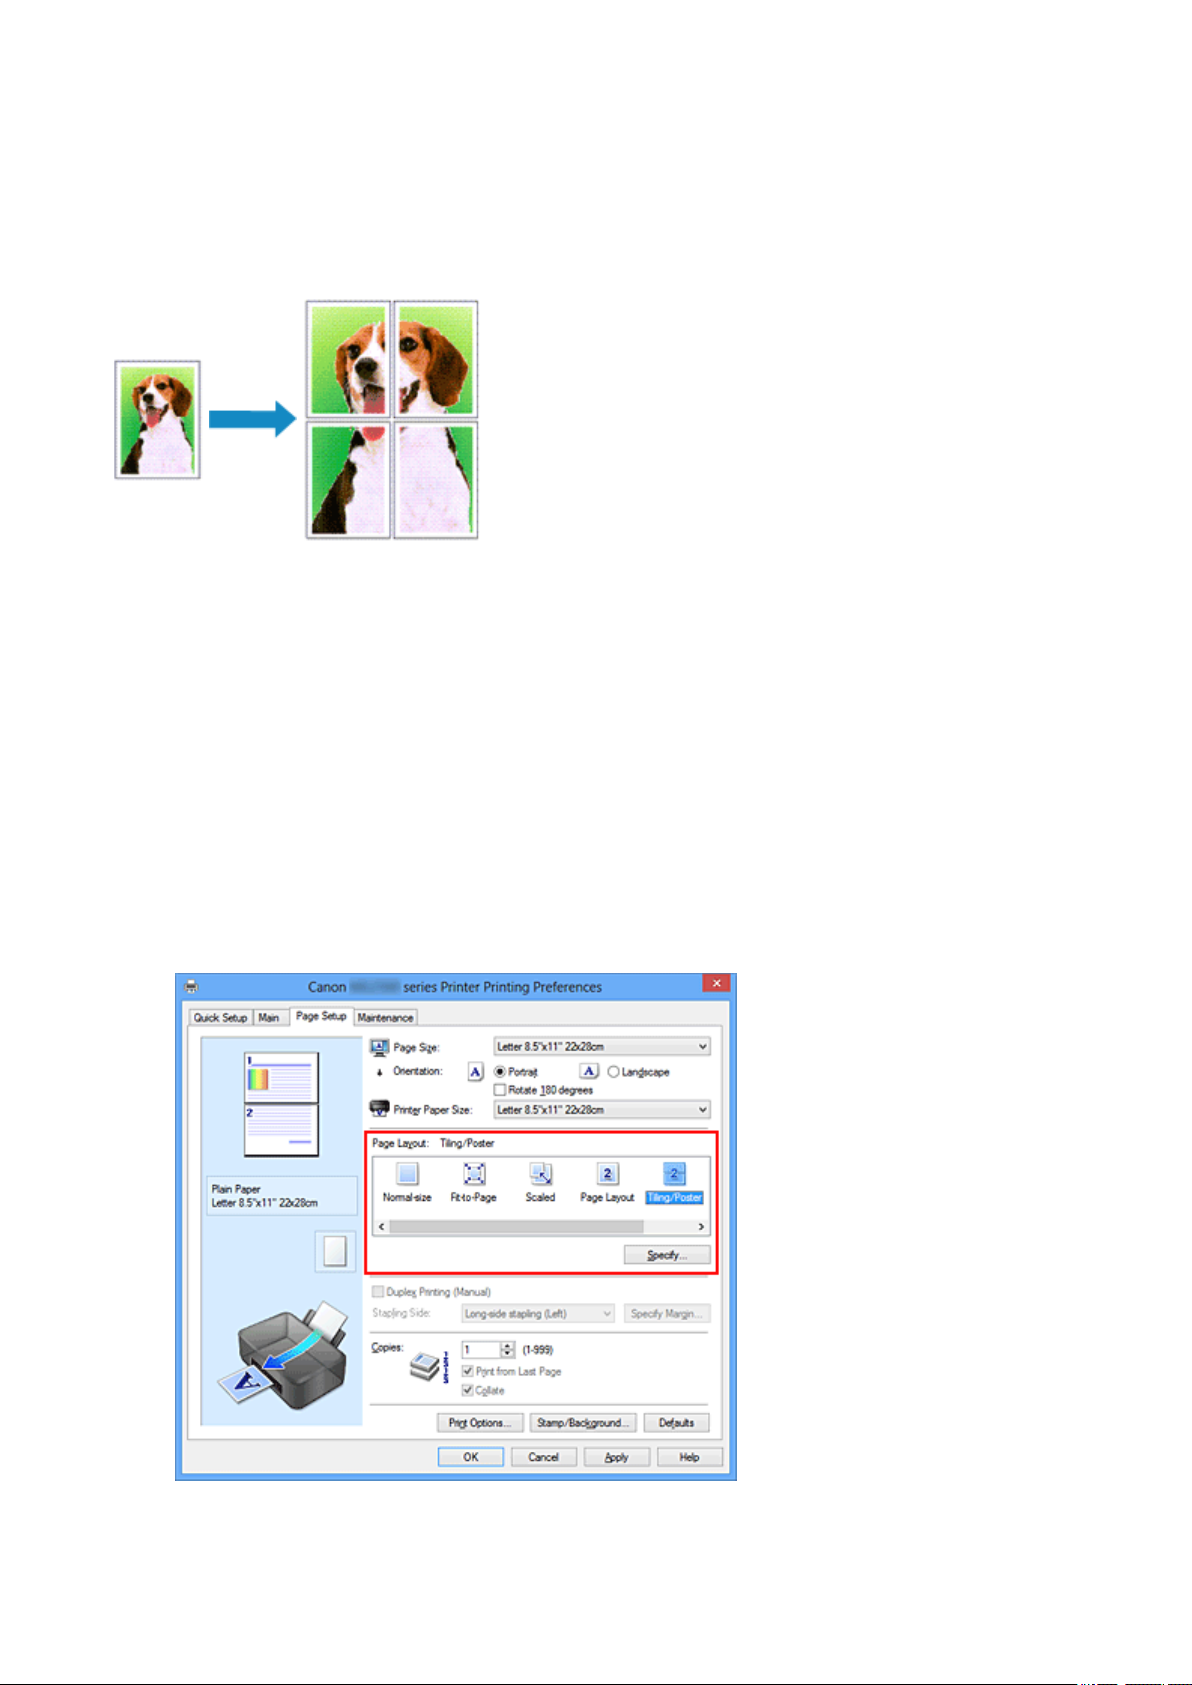
Tiling/Poster Printing
The tiling/poster printing function allows you to enlarge image data, divide it into several
pages, and print these pages on separate sheets of paper. You can also paste the pages
together to create a large print like a poster.
The procedure for performing tiling/poster printing is as follows:
Setting Tiling/Poster Printing
1. Open the printer driver setup window
2. Set tiling/poster printing
Select Tiling/Poster from the Page Layout list on the Page Setup tab.
The current settings are displayed in the settings preview on the left side of the
printer driver.
3. Select the print paper size
26
Select the size of the paper loaded in the machine from the Printer Paper Size list.
This completes the setup for dividing the document into 2 and performing tiling/poster
printing.
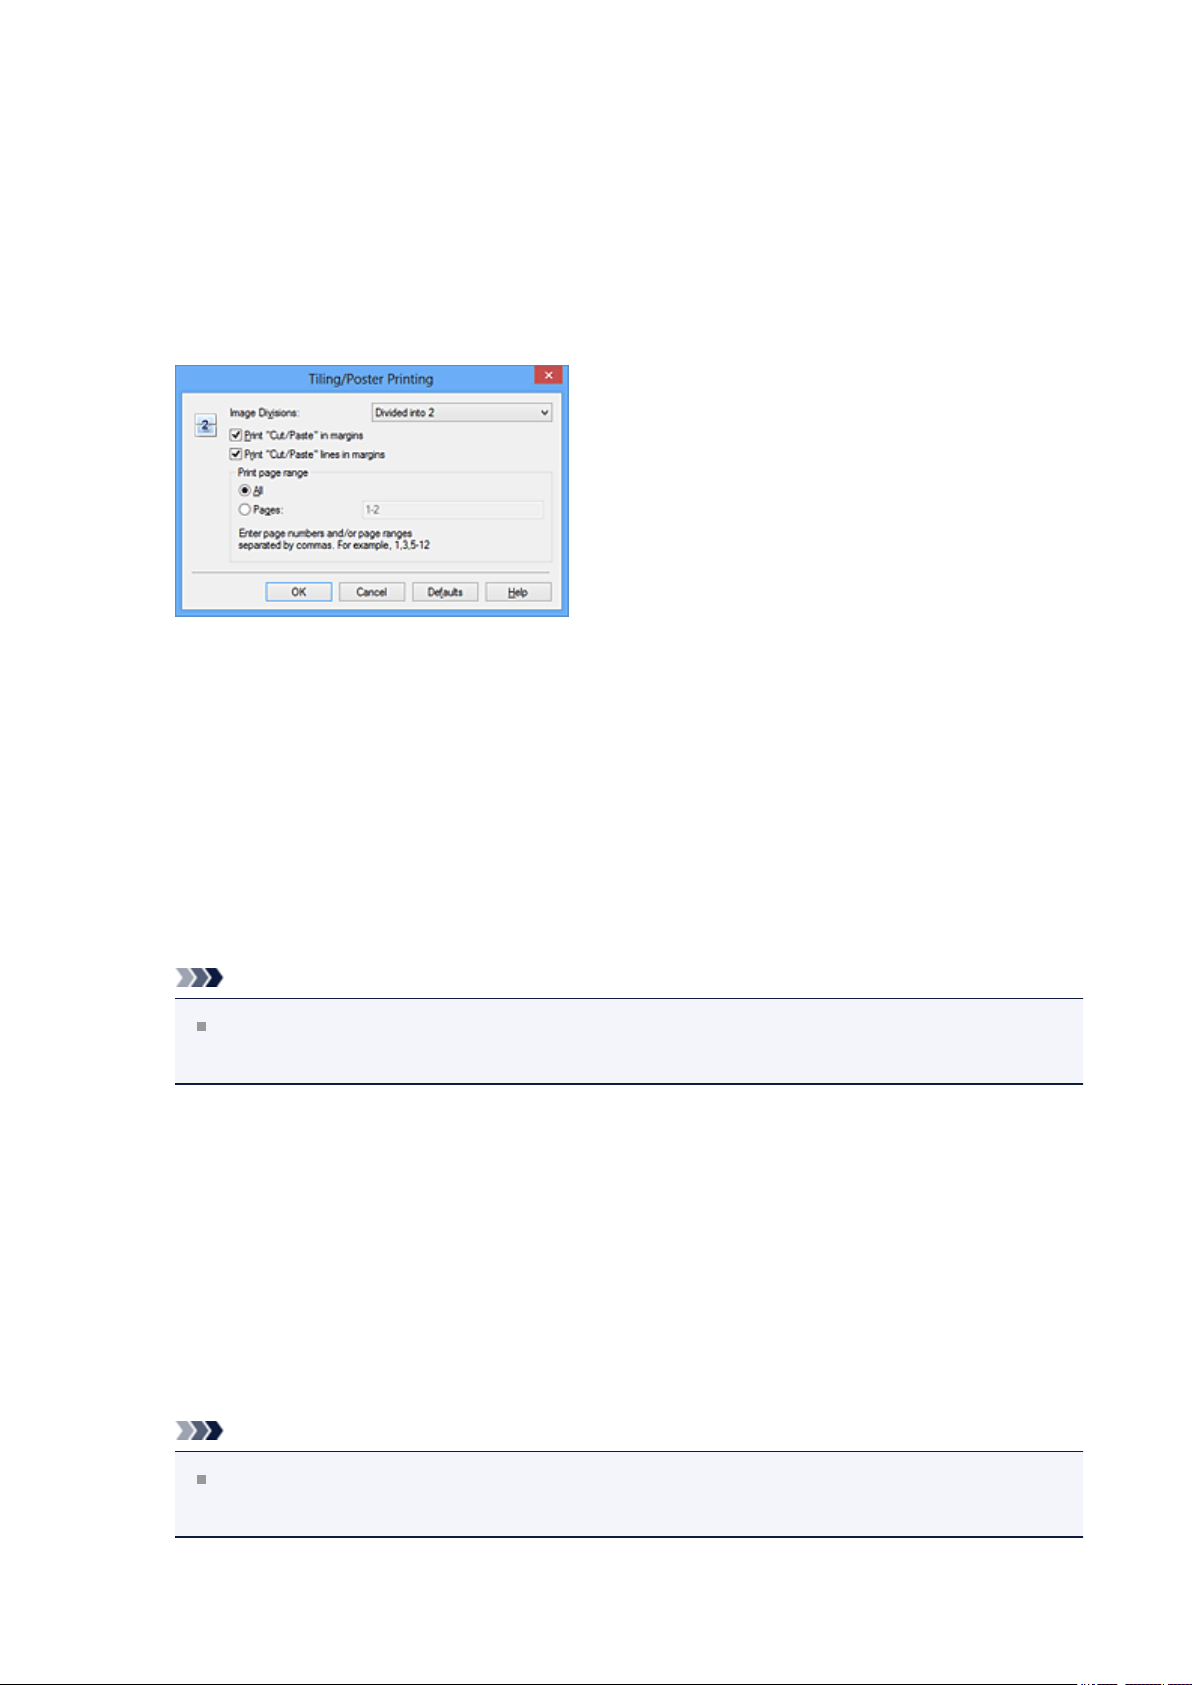
4. Set the number of image divisions and the pages to be printed
If necessary, click Specify..., specify the following settings in the Tiling/Poster
Printing dialog box, and then click OK.
Image Divisions
Select the number of divisions (vertical x horizontal). As the number of divisions
increases, the number of sheets used for printing increases. If you are pasting pages
together to create a poster, increasing the number of divisions allow you to create a
larger poster.
Print "Cut/Paste" in margins
To leave out words "Cut" and "Paste", uncheck this check box.
Note
This feature may be unavailable when certain printer drivers or operating
environments are used.
Print "Cut/Paste" lines in margins
To leave out cut lines, uncheck this check box.
Print page range
Specifies the printing range. Select All under normal circumstances.
To reprint only a specific page, select Pages and enter the page number you want to
print. To specify multiple pages, enter the page numbers by separating them with
commas or by entering a hyphen between the page numbers.
Note
You can also specify the print range by clicking the pages in the settings
preview.
27

5. Complete the setup
Click OK on the Page Setup tab.
When you execute print, the document will be divided into several pages during
printing.
Printing Only Specific Pages
If ink becomes faint or runs out during printing, you can reprint only the specific pages by
following the procedure below:
1. Set the print range
In the settings preview on the left of the Page Setup tab, click the pages that do not
need to be printed.
The pages that were clicked are deleted, and only the pages to be printed are
displayed.
Note
Click the deleted pages to display them again.
Right-click the settings preview to select Print all pages or Delete all pages.
2. Complete the setup
After completing the page selection, click OK.
When you execute print, only specified pages will be printed.
28

Important
Since tiling/poster printing enlarges the document when printing it, the print results
may become coarse.
29
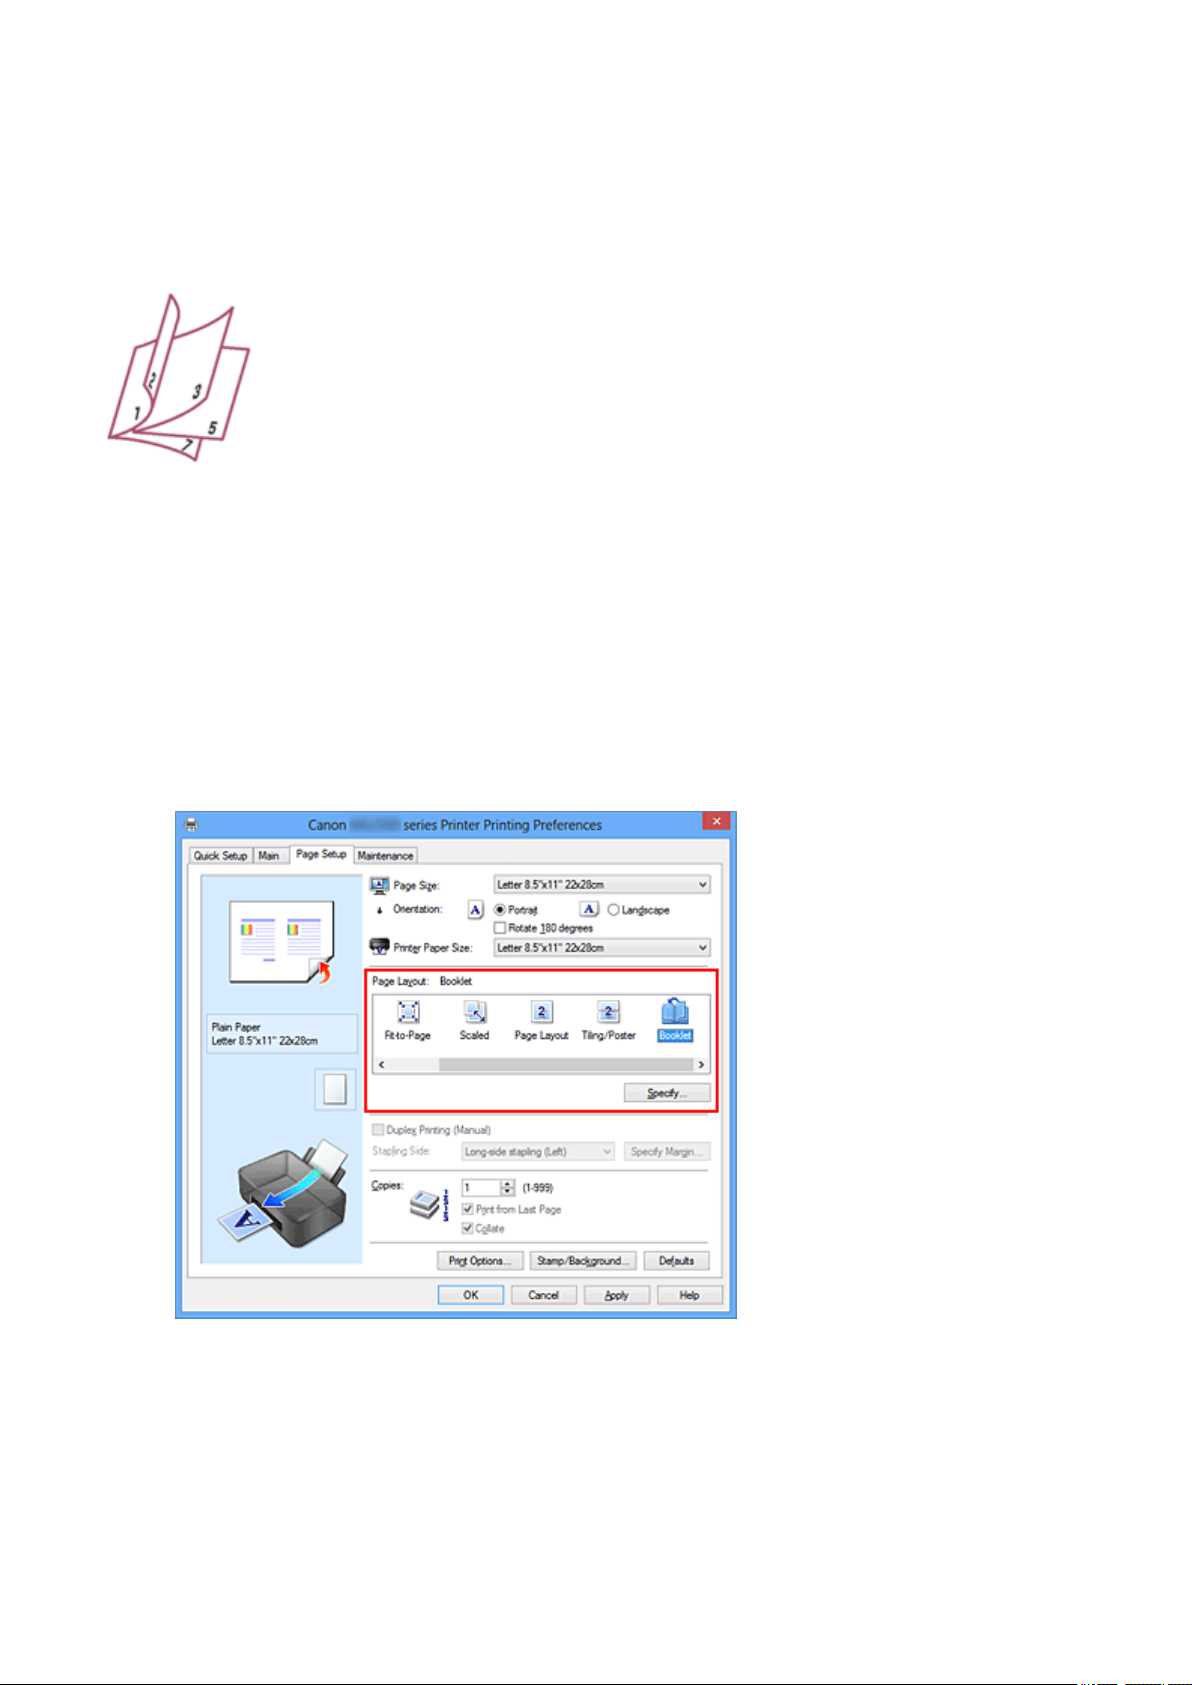
Booklet Printing
The booklet printing function allows you to print data for a booklet. Data is printed on both
sides of the paper. This type of printing ensures that pages can be collated properly, in
page number order, when the printed sheets are folded and stapled at the center.
The procedure for performing booklet printing is as follows:
1. Open the printer driver setup window
2. Set booklet printing
Select Booklet from the Page Layout list on the Page Setup tab.
The current settings are displayed in the settings preview on the left side of the
window.
3. Select the print paper size
Select the size of the paper loaded in the machine from the Printer Paper Size list.
4. Set the margin for stapling and the margin width
30
 Loading...