

Canon MF542 Series, MF543 Series Getting Started
Getting Started
Quick Setup
NEXT PAGE
Quick Operation
Please read "Important Safety Instructions" before operating this product. After you finish
reading this guide, store it in a safe place for future reference.
The information in this document is subject to change without notice.
https://oip.manual.canon/
P.19


Getting Started
Please read "Important Safety Instructions" before operating this product.
P.24
After you nish reading this guide, store it in a safe place for future reference.
The information in this document is subject to change without notice.
הדובעה תליחת
.הז רצומ תלעפה ינפל "תובושח תוחיטב תוארוה" תא ארק
34 דומע
.ידיתע שומישל חוטב םוקמב ותוא ןסחא ,הז ךירדמ אורקל םייסתש רחאל
.שארמ העדוה לכ אלל יונישל ןותנ הז ךמסמב עיפומש עדימה
You can access
https://oip.manual.canon/ to read the User's Guide that describes all
functions of this machine.
תבותכל סנכיהל ןתינ
לכ תא ראתמש שמתשמל ךירדמה תלבקל https://oip.manual.canon/
.הז רישכמ לש תויצקנופה
Quick Setup
3
Quick Setup
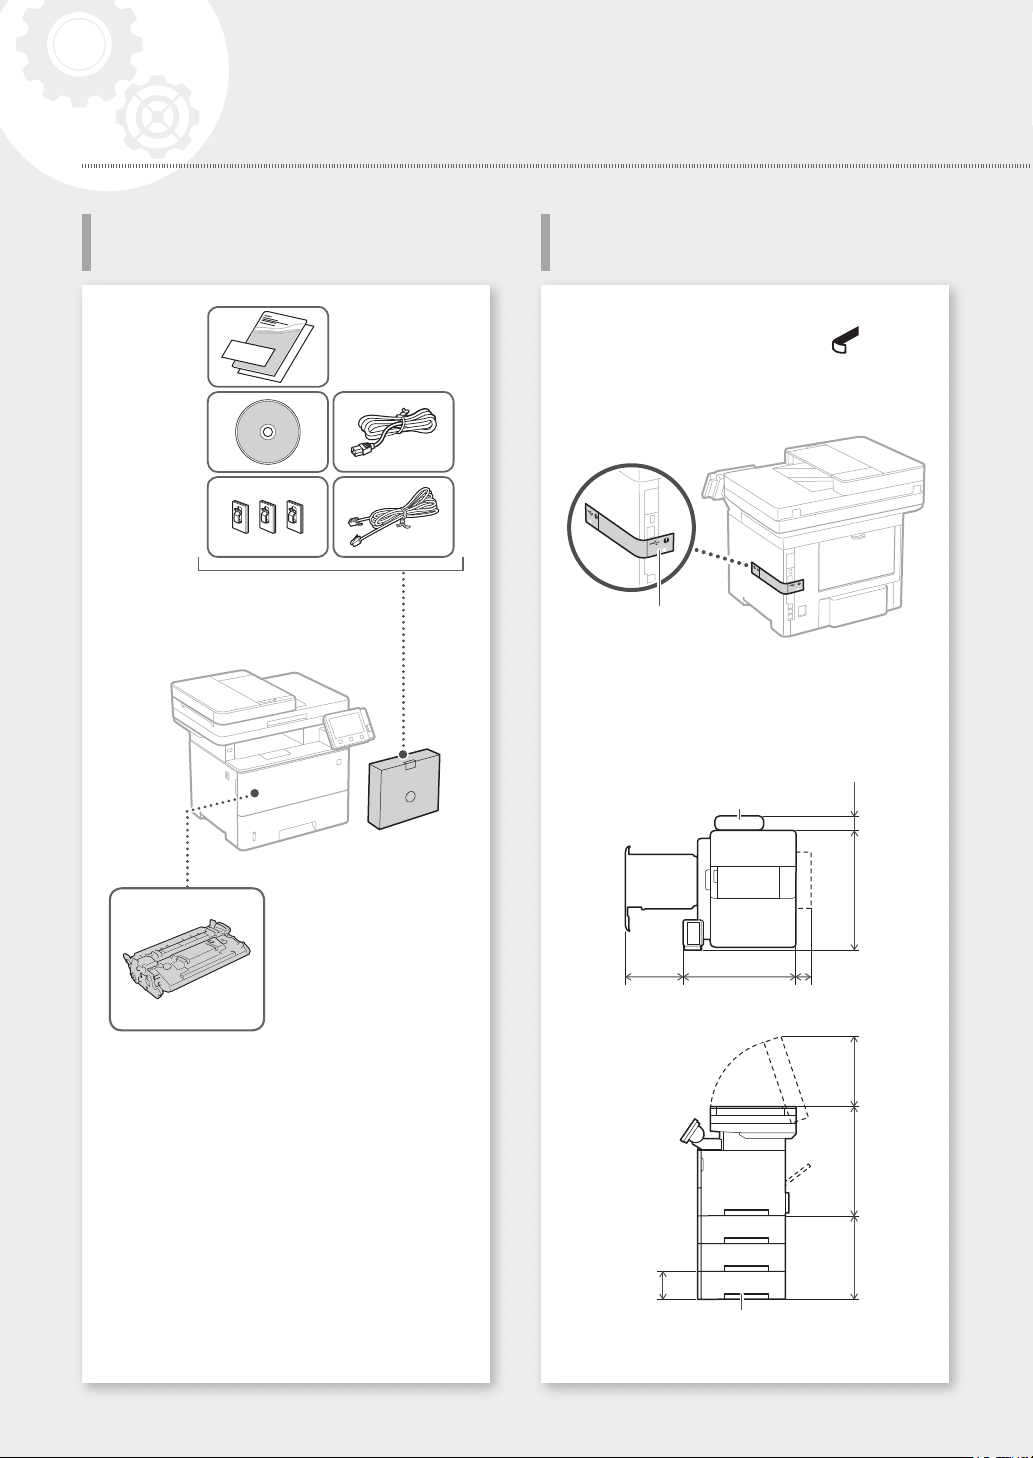
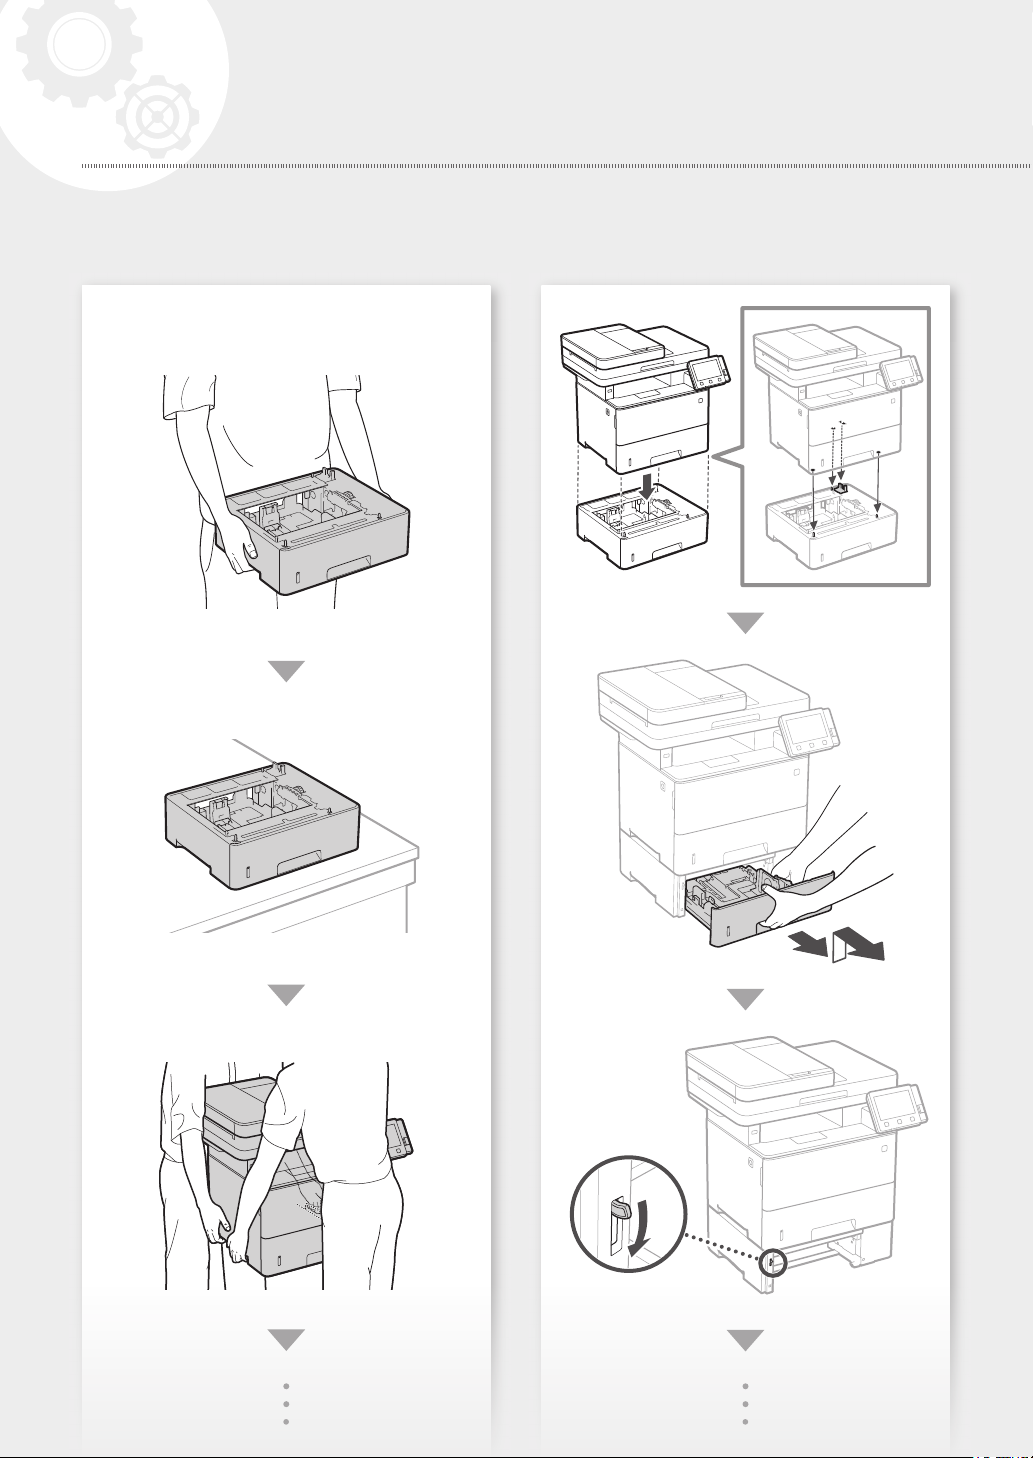
Installation of the Machine
Items Included with the Machine Installing the Machine
Before starting the installation
• Remove all of the tape.
• Do not remove the sticker that covers the USB
port.
*
* This item may not be
included depending on the
model of the machine.
Toner cartridge (included with the machine)
*
Sticker
Installation requirements
Provide a space of 100 mm or more around the
machine.
Handset
(optional)
494 mm 47 mm
370 mm 464 mm 71 mm
272 mm452 mm390 mm
130 mm
Paper feeder (optional)
4
Quick Setup
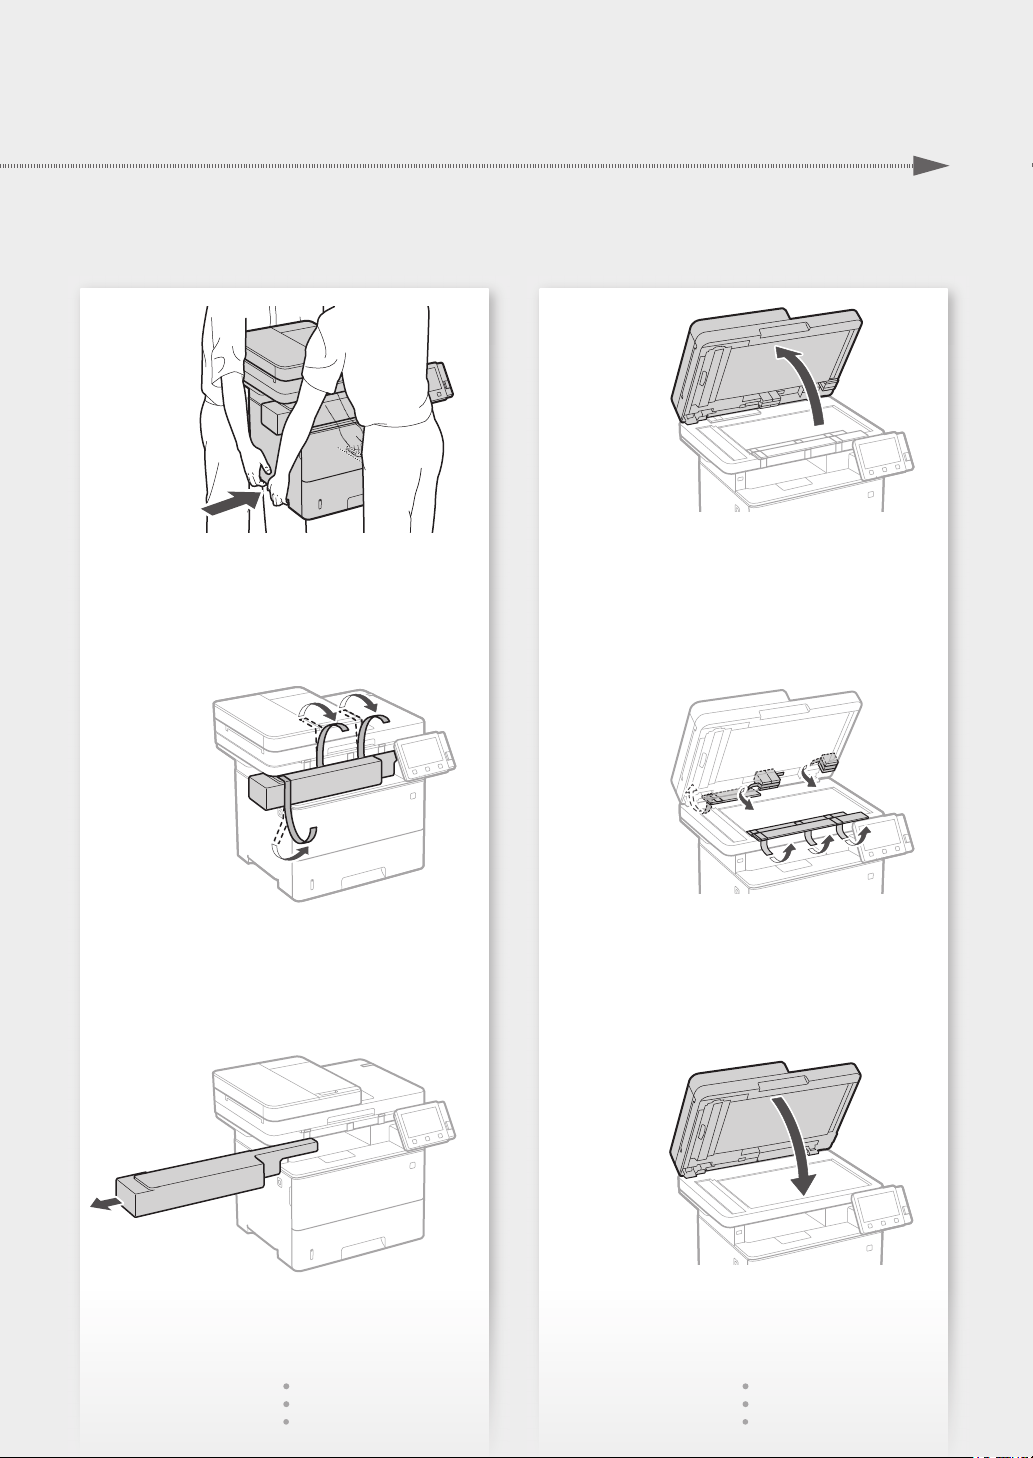
1
2
4
5
3
6
5
7
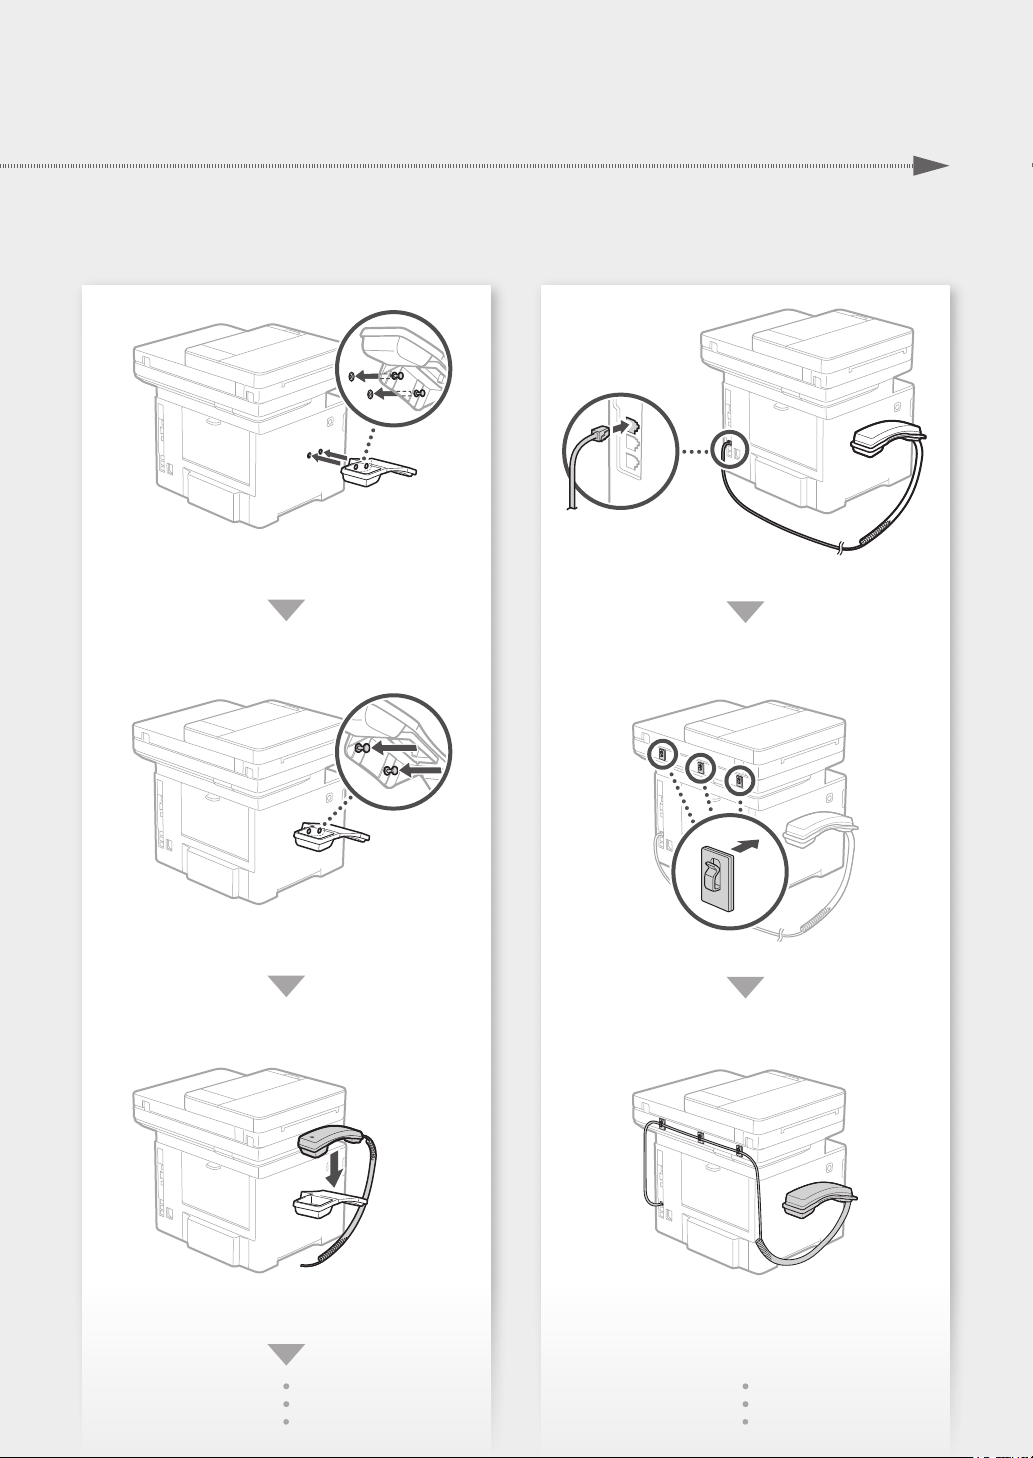
Quick Setup
Installation of the Machine
11
Up to here
8
9
12
Attach the handset (optional).
13
10
6
Quick Setup
7
Quick Setup
Installation of the Machine
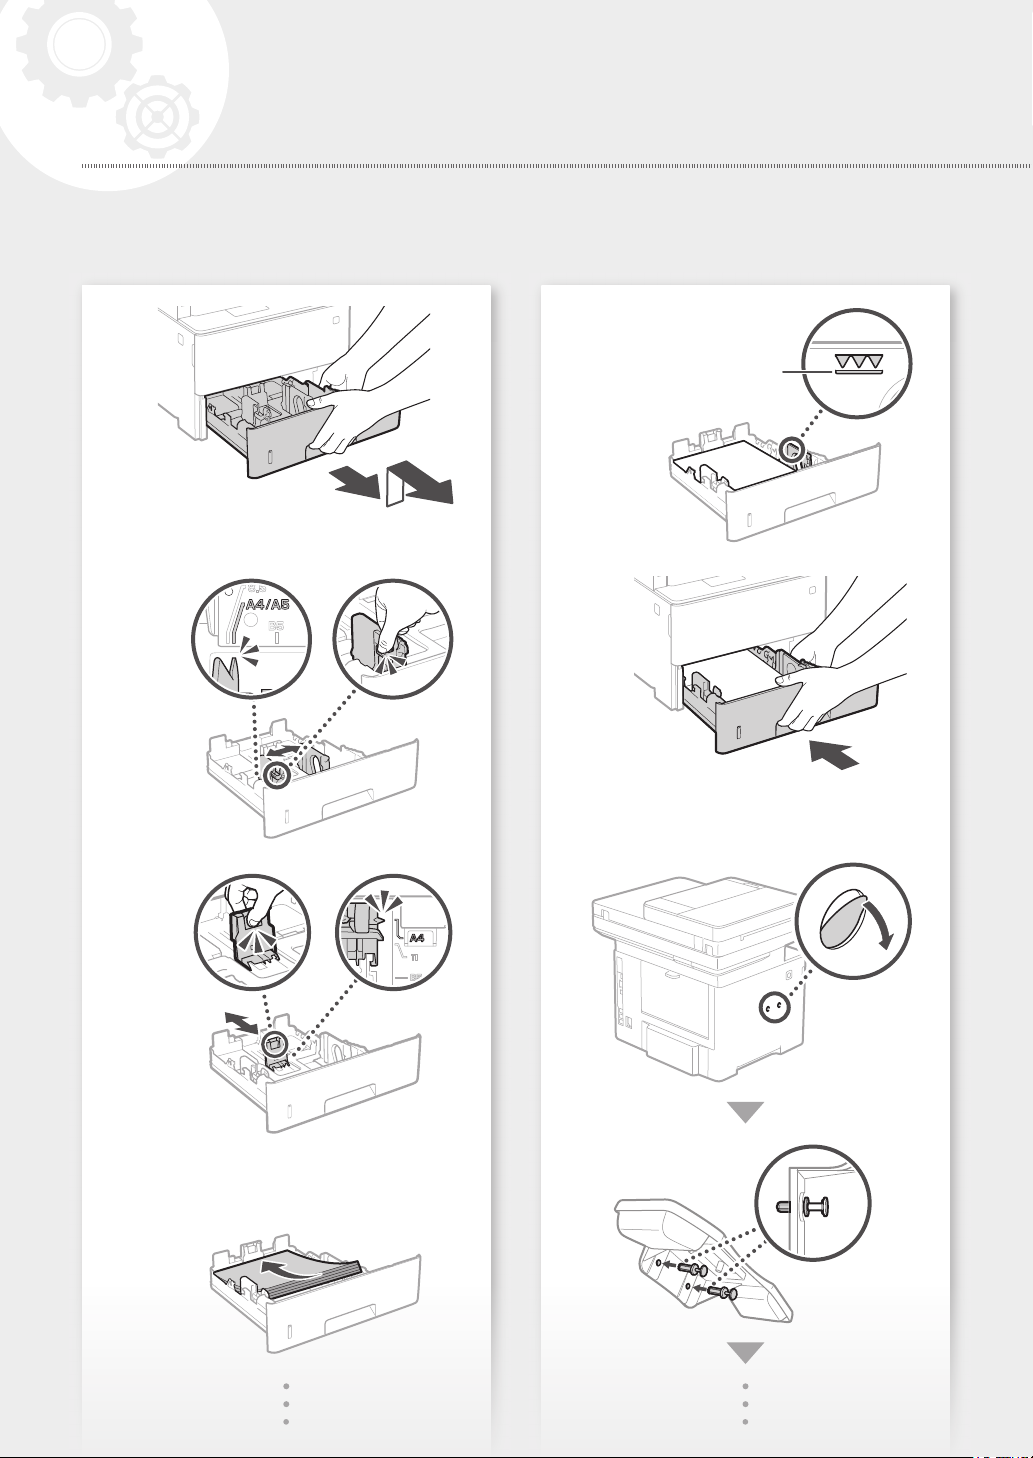
Install the paper feeder (optional).
14
8
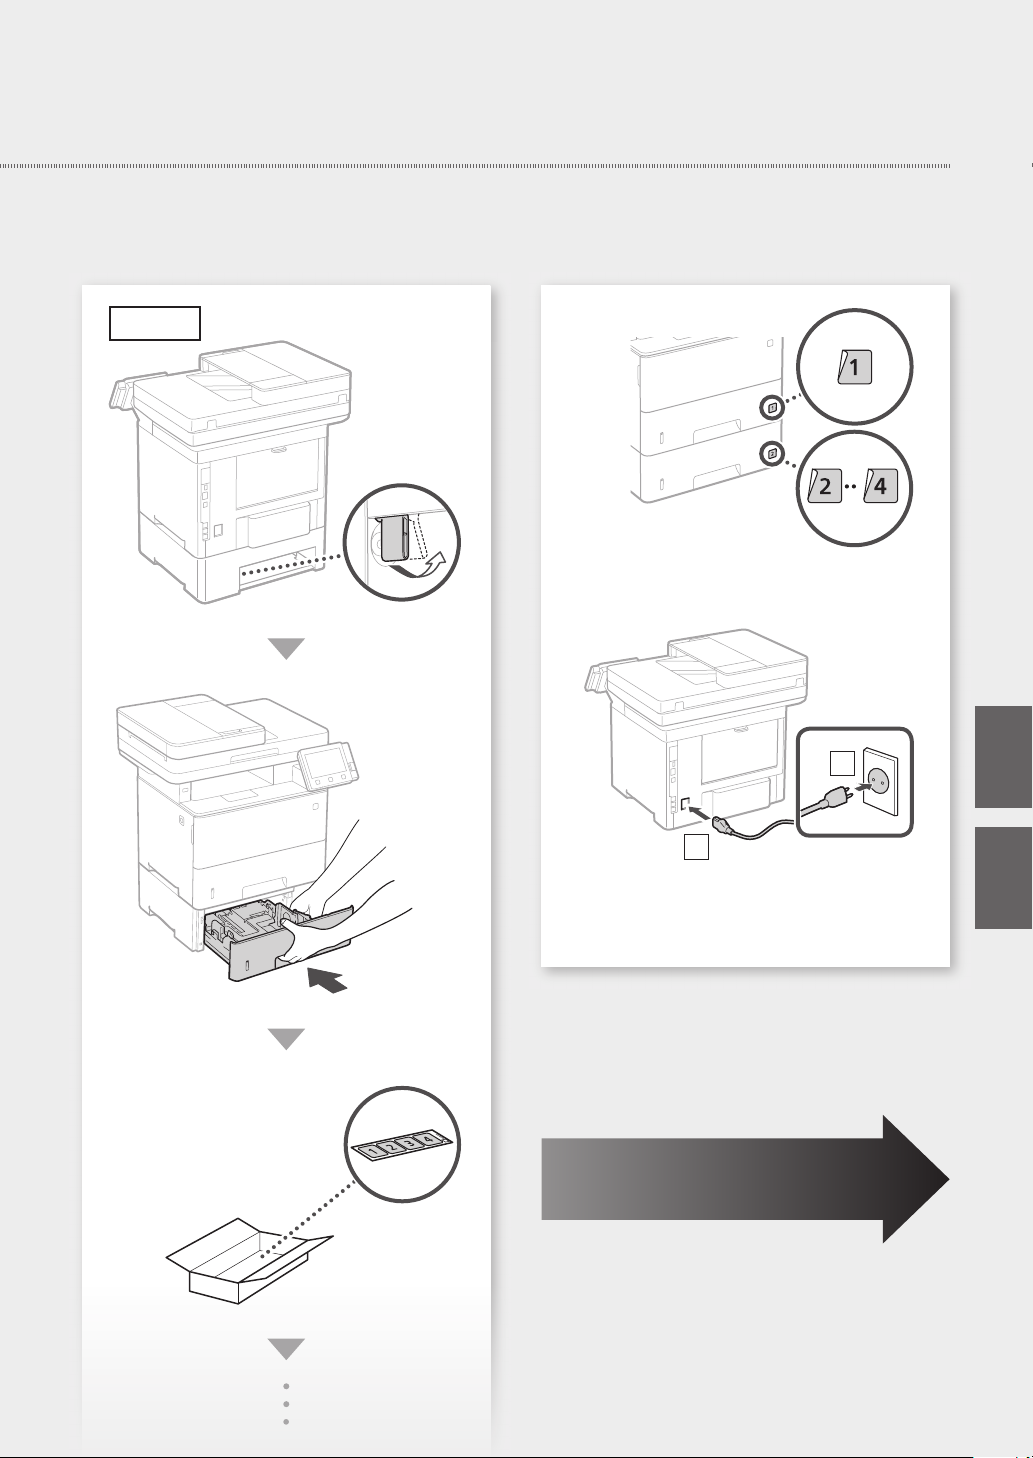
Back side
Quick Setup
15
2
1
Next, proceed to configure the machine.
En
He
9
Quick Setup
Conguring the Machine
Conguring the Initial Settings of
the Machine
About Application Library*
Application Library is an application
that allows you to use useful functions
for routine jobs or other convenient
functions in a one-touch operation
without necessity of making functional
settings every time. You can access each
registered function by simply pressing
the appropriate button displayed in
the Home screen. For the respective
function, see the description displayed in
the Setup Guide.
* This function may not be available, depending
on the model of the machine.
1.
Configure the settings in the following order.
Conguring the Method of
Connecting to a Computer
Before starting the configuration
• The machine cannot be connected to
both wired and wireless LANs at the
same time.
• If the machine is connected to an
unsecured network, your personal
information might be leaked to a third
party. Please be aware and careful of this.
• The machine does not come with a
router. Please have one ready, if necessary.
• Even in an environment without wireless
LAN router, you can use Access Point
Mode to make a wireless connection to
the machine directly from your mobile
device (Direct Connection).
User's Guide
En
Configure the initial settings, according to the
2.
screen.
• Set the language and country/region.
• Set the time zone and current date/time.
• Configure the settings to prevent
unauthorized access.
• For the purpose of confirmation, enter the
same PIN twice.
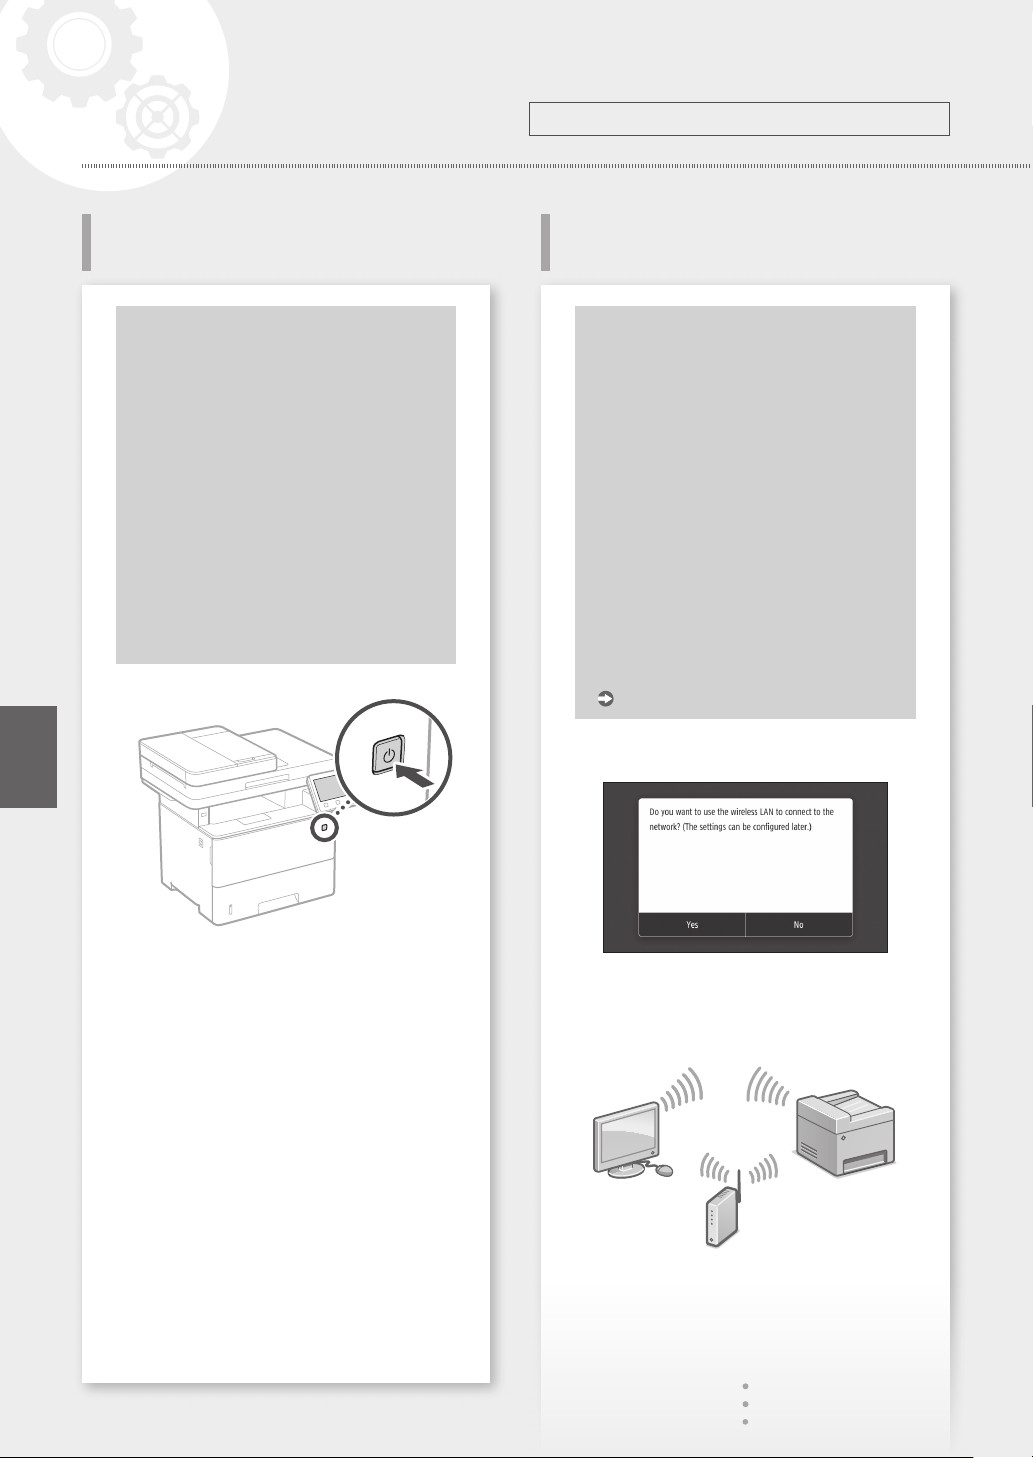
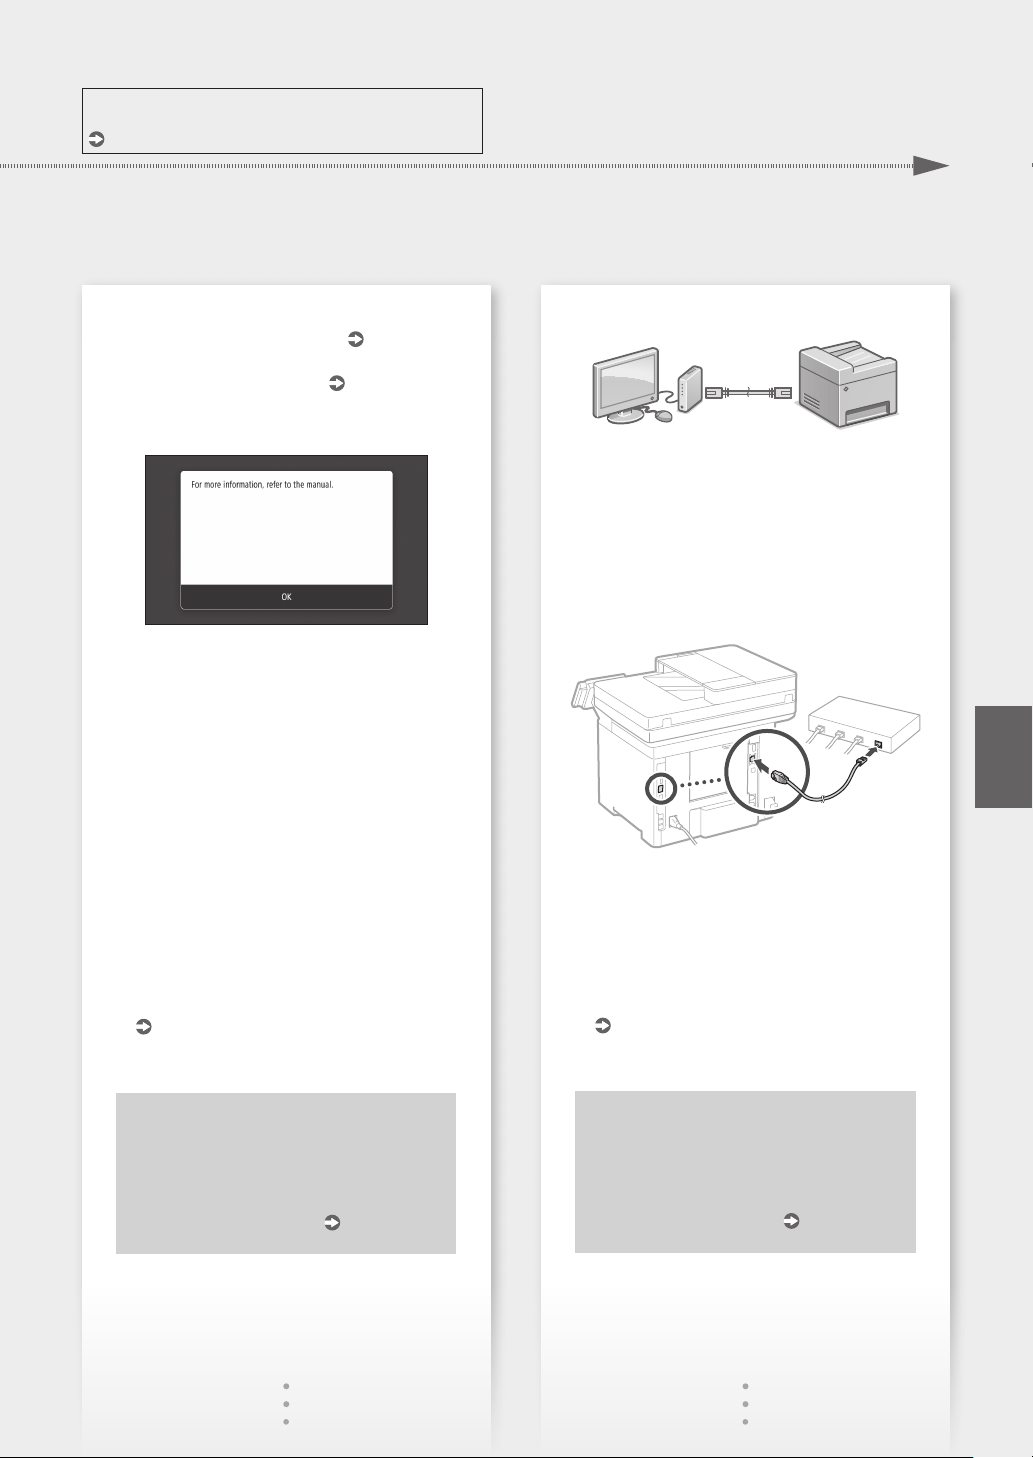
Specifying the connection method
• To connect via wireless LAN : <Yes>
• To connect via wired LAN or USB : <No>
To connect via wireless LAN
Make sure that the computer is connected to a
1.
router properly.
Check the network settings on the computer.
2.
10
For details
"Setting Up Using the Setup Guide" in the User's Guide
Quick Setup
Take note of the SSID and network key.
3.
• Check the label on the router.
• The setting operation is easier if the router is
provided with a WPS mark.
Set the access point and network key
4.
according to the screen below.
1. Select <OK>.
2. Select <SSID Settings>.
3. Select <Select Access Point>.
4. Select the access point (SSID), and select
<Next>.
5. Select <OK>.
6. Enter a network key, and select <Apply>.
7. Select <Yes>.
• Wait until message <Connected.> is
displayed.
8. Select <Close>.
• The IP address will be automatically
configured in a few minutes.
Install the driver and software.
5.
P.12 "Installing the software"
User's Guide
User's Guide
To connect via wired LAN
The machine does not come with a LAN cable.
Please have one ready, if necessary.
Make sure that the computer is connected to a
1.
router properly.
Check the network settings on the computer.
2.
Connect the LAN cable.
3.
• After connecting the cable, wait a few minutes
(until the IP address is set automatically).
• If a static IP address has been set on the
computer, set the machine's IP address
manually.
Install the driver and software.
4.
P.12 "Installing the software"
En
Now you are finished with the
configuration of the initial settings.
If your machine is provided with the fax
function, proceed to configuring
the fax settings.
P.13
Now you are finished with the
configuration of the initial settings.
If your machine is provided with the fax
function, proceed to configuring
the fax settings.
P.13
11
Quick Setup
Conguring the Machine
En
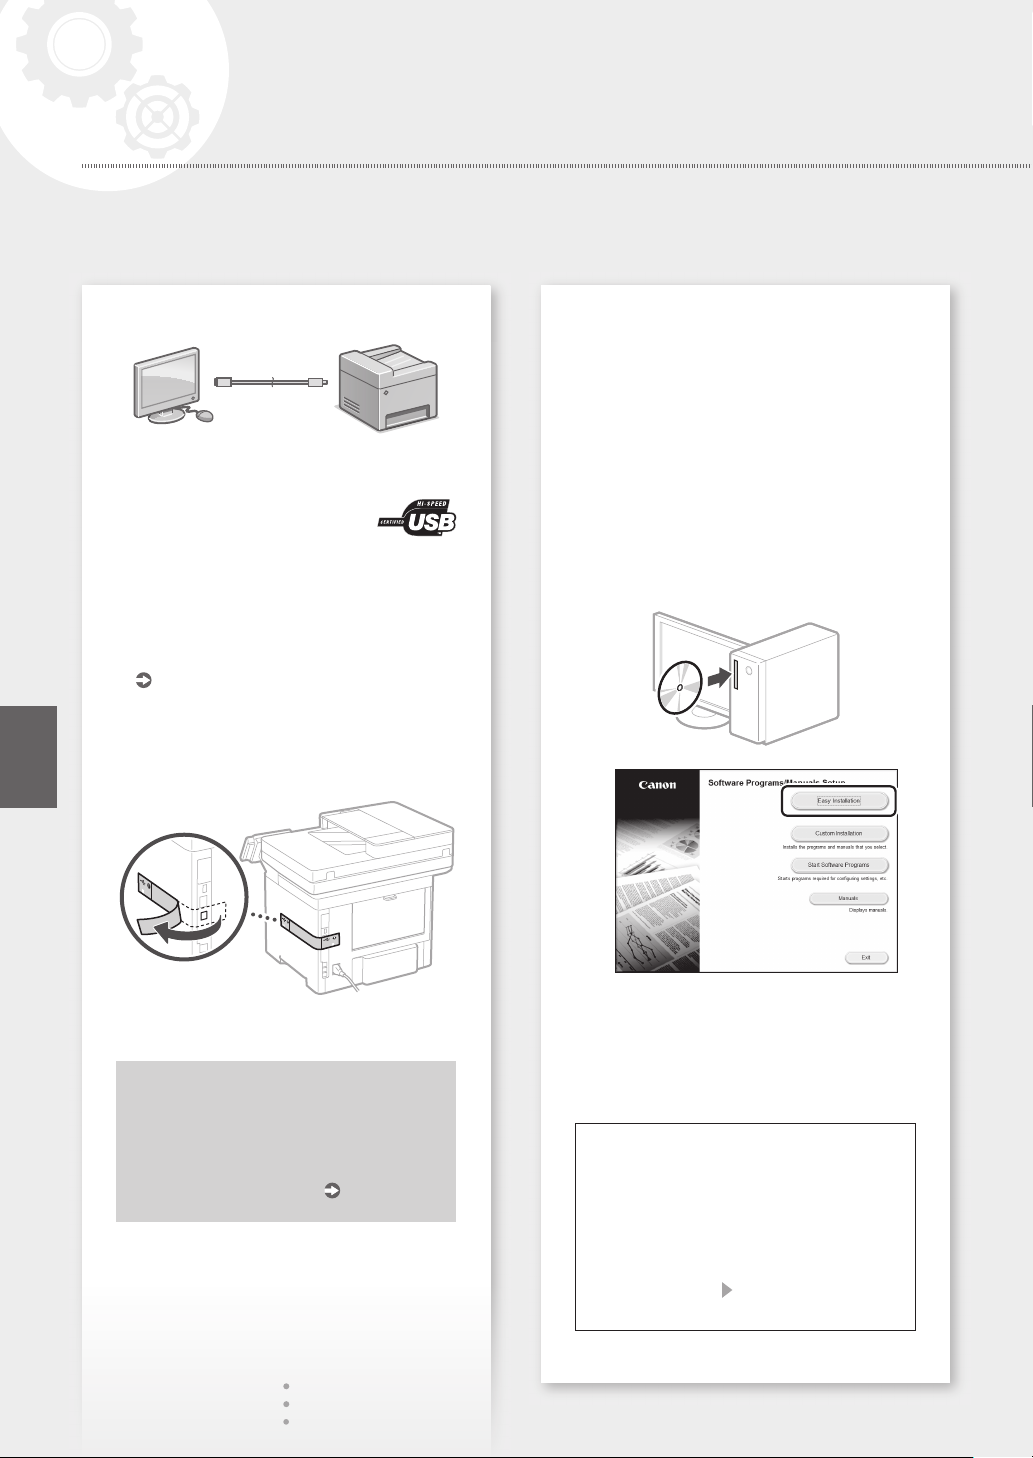
To connect via USB
• The machine does not come with a USB cable.
Please have one ready, if necessary.
• Make sure that the USB cable you
use has the following mark.
• Do not connect the USB cable before installing
the driver. If you did, disconnect the USB cable
from the computer, close the dialog box, and then
perform the following procedure from step 1.
Install the driver and software.
1.
P.12 "Installing the software"
• When a screen with instructions for
connecting the USB cable to the machine is
displayed, remove the sticker that covers the
USB port.
Installing the software
• The procedure described here is only applicable
when your computer runs on the Windows OS.
For more details on the software installation
procedure, see the driver's manual.
• For the installation when your computer runs on
the macOS, see the driver's manual.
• Your machine may not come with the driver for
the macOS, depending on the time of purchase.
New drivers are uploaded to the Canon website,
and you can download and use the latest one.
1.
2.
12
Now you are finished with the
configuration of the initial settings.
If your machine is provided with the fax
function, proceed to configuring
the fax settings.
P.13
If the screen is not displayed properly, reinsert the CD-ROM/DVD-ROM or search for
"D:\MInst.exe" on the Windows platform (This
description assumes that "D:" is the CD-ROM/
DVD-ROM drive name).
Using the scanner conveniently
Configuring the network settings with "Send
Function Setting Tool" allows you to directly
send scanned originals with e-mail or I-Fax
or store them in a shared folder or on the FTP
server.
In the screen displayed in step 2, select [Start
Software Programs] [Send Function Setting
Tool] to start the Send Function Setting Tool.
 Loading...