


MF525x / MF522x
User's Guide
USRMA-2873-01 2018-12 en Copyright CANON INC. 2018

Contents
Setting Up
Main Functions ......................................................................................................................................................... 4
Preparations Required Before Use ............................................................................................................................. 6
Preventing Unauthorized Access ................................................................................................................................ 8
Setting Up Using the Setup Guide ............................................................................................................................ 10
Setting the Date/Time ............................................................................................................................................. 12
Setting Up the Network Environment ...................................................................................................................... 14
Selecting Wired LAN or Wireless LAN ..................................................................................................................... 16
Connecting to a Wired LAN .................................................................................................................................. 17
Connecting to a Wireless LAN ............................................................................................................................... 18
Setting IP Addresses ........................................................................................................................................... 31
............................................................................................................................................................ 3
Setting Up Connection Using WPS Push Button Mode ....................................................................................... 20
Setting Up Connection Using WPS PIN Code Mode ........................................................................................... 22
Setting Up Connection by Selecting a Wireless Router ....................................................................................... 24
Setting Up Connection by Specifying Detailed Settings ...................................................................................... 27
Checking the SSID and Network Key ............................................................................................................... 30
Setting IPv4 Address ..................................................................................................................................... 32
Setting IPv6 Addresses .................................................................................................................................. 35
Viewing Network Settings .................................................................................................................................... 38
Conguring Settings for Communication with a Computer ...................................................................................... 40
Conguring Printing Protocols and WSD Functions ........................................................................................... 41
Conguring Printer Ports ............................................................................................................................... 44
Setting Up Print Server .................................................................................................................................. 48
Conguring the Machine for Your Network Environment ......................................................................................... 51
Conguring Ethernet Settings ........................................................................................................................ 52
Changing the Maximum Transmission Unit ...................................................................................................... 54
Setting a Wait Time for Connecting to a Network .............................................................................................. 55
Conguring DNS .......................................................................................................................................... 56
Conguring SMB .......................................................................................................................................... 60
Conguring WINS ......................................................................................................................................... 62
Registering LDAP Servers .............................................................................................................................. 64
Monitoring and Controlling the Machine with SNMP ......................................................................................... 69
Other Network Settings ................................................................................................................................. 73
Installing Drivers .................................................................................................................................................... 78
Conguring Initial Settings for Fax Functions ........................................................................................................... 79
Deciding Which Fax Receive Mode to Use .............................................................................................................. 80
Registering the Fax Number and Unit Name .......................................................................................................... 81
Selecting the Receive Mode .................................................................................................................................. 82
Connecting the Telephone Line ............................................................................................................................ 83
Conguring Scan Settings ....................................................................................................................................... 85
Preparing to Use the Machine as a Scanner ........................................................................................................... 86
Procedure for Setting to Send E-Mail/Send and Receive I-Fax ................................................................................... 87
Conguring Basic E-Mail Settings .................................................................................................................... 88
I

Conguring E-Mail/I-Fax Communication Settings ............................................................................................
Procedure for Setting a Shared Folder as a Save Location ........................................................................................ 95
Setting a Shared Folder as a Save Location ....................................................................................................... 96
Procedure for Setting a FTP Server as a Save Location ............................................................................................. 99
91
Basic Operations ........................................................................................................................................ 102
Parts and Their Functions ...................................................................................................................................... 106
Front Side ........................................................................................................................................................ 107
Back Side ......................................................................................................................................................... 109
Interior ........................................................................................................................................................... 110
Feeder ............................................................................................................................................................ 111
Multi-Purpose Tray ........................................................................................................................................... 112
Paper Drawer ................................................................................................................................................... 113
Operation Panel ............................................................................................................................................... 114
Turning ON the Machine ....................................................................................................................................... 116
Turning OFF the Machine ................................................................................................................................... 117
Powering OFF at a Fixed Time ...................................................................................................................... 118
Using the Operation Panel .................................................................................................................................... 120
Basic Screens ................................................................................................................................................... 121
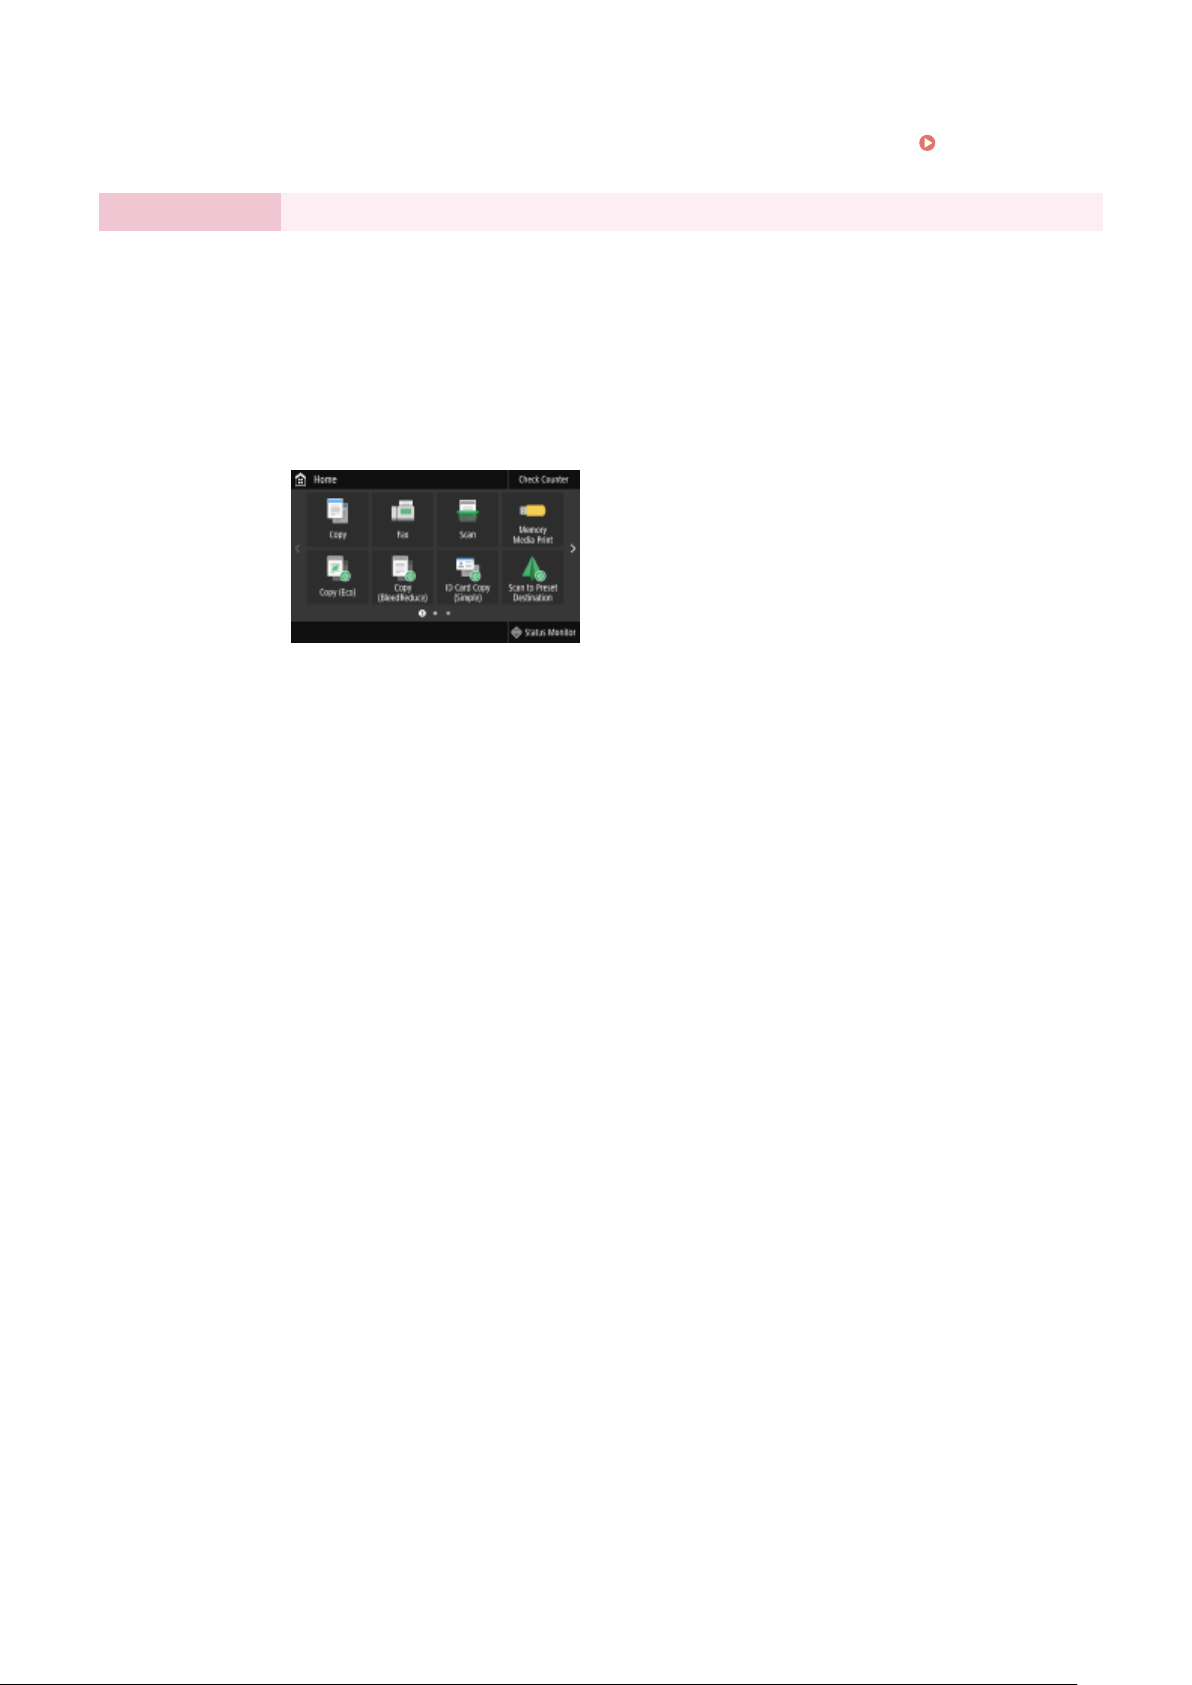
Home Screen ............................................................................................................................................. 122
<Status Monitor> Screen ............................................................................................................................. 125
Message Display ......................................................................................................................................... 127
Basic Operation ................................................................................................................................................ 128
Entering Text ................................................................................................................................................... 131
Logging in to the Machine ..................................................................................................................................... 133
Placing Originals ................................................................................................................................................... 135
Loading Paper ....................................................................................................................................................... 139
Loading Paper in the Paper Drawer .................................................................................................................... 141
Loading Paper in the Multi-Purpose Tray ............................................................................................................. 146
Loading Envelopes ............................................................................................................................................ 149
Loading Preprinted Paper .................................................................................................................................. 151
Specifying Paper Size and Type .......................................................................................................................... 155
Specifying Paper Size and Type in the Paper Drawer ....................................................................................... 156
Specifying Paper Size and Type in the Multi-Purpose Tray ................................................................................ 158
Registering Default Paper Settings for the Multi-Purpose Tray ......................................................................... 160
Registering a Custom Paper Size .................................................................................................................. 162
Limiting the Paper Sizes Displayed ................................................................................................................ 163
Automatically Selecting an Appropriate Paper Source for Each Function ............................................................ 164
Customizing the Display ........................................................................................................................................ 165
Customizing the Home Screen ........................................................................................................................... 166
Registering Frequently Used Settings .................................................................................................................. 169
Changing the Default Settings for Functions .......................................................................................................... 171
Setting Sounds ...................................................................................................................................................... 173
Entering Sleep Mode ............................................................................................................................................. 175
Registering Destinations ....................................................................................................................................... 177
II

Registering Destinations in the Address Book
Registering Multiple Destinations as a Group ................................................................................................. 182
Editing the Registered Destinations in the Address Book ................................................................................. 184
Using a USB Memory Device .................................................................................................................................. 185
...................................................................................................... 179
Copying .............................................................................................................................................................. 188
Copy Basic Features Screen ................................................................................................................................... 190
Basic Copy Operations ........................................................................................................................................... 192
Canceling Copies .............................................................................................................................................. 197
Checking the Copying Status and Log ................................................................................................................. 198
Enhancing and Adjusting Copy Quality ................................................................................................................... 200
Selecting the Type of Original for Copying ........................................................................................................... 201
Adjusting Sharpness for Copying (Sharpness) ...................................................................................................... 202
Erasing Dark Borders When Copying (Erase Frame) ............................................................................................... 203
Useful Copy Functions ........................................................................................................................................... 204
Copying Multiple Documents onto One Sheet (N on 1) .......................................................................................... 205
Collating Copies by Page ................................................................................................................................... 206
Making ID Card Copies ...................................................................................................................................... 207
Making Passport Copies .................................................................................................................................... 208
Faxing .................................................................................................................................................................. 211
Fax Basic Features Screen ...................................................................................................................................... 214
Basic Operations for Sending Faxes ....................................................................................................................... 215
Canceling Sending Faxes ................................................................................................................................... 223
Receiving Faxes .................................................................................................................................................... 224
Useful Functions When Sending ............................................................................................................................. 227
Recalling Previously Used Settings for Sending (Recall Settings) ............................................................................. 228
Sending a Fax after a Phone Call (Manual Sending) ............................................................................................... 231
Saving a Copy of a Sent Original ......................................................................................................................... 233
Various Receiving Methods .................................................................................................................................... 234
Saving Received Documents into the Machine (Memory Reception) ........................................................................ 235
Forwarding the Received Documents Automatically ............................................................................................... 237
Checking Status and Log for Sent and Received Documents .................................................................................... 239
Sending Faxes from Your Computer (PC Fax) .......................................................................................................... 241
Sending PC Faxes ............................................................................................................................................. 242
Using Internet Fax (I-Fax) ...................................................................................................................................... 244
Sending I-Faxes ................................................................................................................................................ 245
Receiving I-Faxes .............................................................................................................................................. 252
Printing .............................................................................................................................................................. 254
Printing from a Computer ..................................................................................................................................... 255
Canceling Prints ............................................................................................................................................... 257
Checking the Printing Status and Log .................................................................................................................. 259
Various Printing Methods ...................................................................................................................................... 261
III

Printing a Document Secured by a PIN (Secure Print) ............................................................................................
Printing via Secure Print .............................................................................................................................. 263
Printing from a USB Memory Device (Memory Media Print) .................................................................................... 266
262
Scanning ........................................................................................................................................................... 275
Scan Basic Features Screen .................................................................................................................................... 277
Basic Operations for Scanning Originals ................................................................................................................ 280
Scanning and Saving to a Computer .................................................................................................................... 281
Saving Data to a USB Memory Device .................................................................................................................. 283
Sending Data by E-Mail/Saving Data to a Shared Folder or FTP Server ..................................................................... 287
Canceling Sending Documents ........................................................................................................................... 296
Checking Status and Log for Scanned Originals .................................................................................................... 297
Scanning Clearly ................................................................................................................................................... 299
Adjusting Image Quality .................................................................................................................................... 300
Adjusting Density ............................................................................................................................................. 301
Adjusting Sharpness When Scanning (Sharpness) ................................................................................................. 302
Useful Scanning Functions .................................................................................................................................... 304
Enhancing the Security of Electronic Files ............................................................................................................ 305
Adjusting Balance between File Size and Image Quality (Data Size) ......................................................................... 308
Recalling Previously Used Settings for Sending/Saving (Recall Settings) ................................................................... 309
Specifying E-Mail Settings .................................................................................................................................. 312
Using Your Computer to Scan (Remote Scan) .......................................................................................................... 315
Scanning Documents from an Application ........................................................................................................... 316
Using ScanGear MF ........................................................................................................................................... 318
Linking with Mobile Devices ............................................................................................................ 320
Connecting with Mobile Devices ............................................................................................................................ 321
Connecting via a Wireless LAN Router (LAN Connection) ........................................................................................ 322
Connecting Directly (Access Point Mode) ............................................................................................................. 324
Utilizing the Machine through Applications ........................................................................................................... 328
Using AirPrint ....................................................................................................................................................... 329
Printing with AirPrint ........................................................................................................................................ 334
Scanning with AirPrint ....................................................................................................................................... 337
Faxing with AirPrint .......................................................................................................................................... 339
If AirPrint Cannot Be Used ................................................................................................................................. 341
Using Google Cloud Print ....................................................................................................................................... 342
Managing the Machine by the Remote Control ....................................................................................................... 344
Managing the Machine ........................................................................................................................ 347
Setting Access Privileges ....................................................................................................................................... 349
Setting the System Manager ID and PIN .............................................................................................................. 350
Setting the Department ID Management ............................................................................................................. 352
Setting a Remote UI PIN .................................................................................................................................... 358
LDAP Server Authentication ............................................................................................................................... 360
IV

Conguring the Network Security Settings
Restricting Communication by Using Firewalls ..................................................................................................... 366
Specifying IP Addresses for Firewall Settings .................................................................................................. 367
Specifying MAC Addresses for Firewall Settings .............................................................................................. 370
Changing Port Numbers .................................................................................................................................... 373
Setting a Proxy ................................................................................................................................................. 375
Conguring the Key and Certicate for TLS .......................................................................................................... 377
Generating the Key and Certicate for Network Communication ...................................................................... 380
Generating a Key and Certicate Signing Request (CSR) ................................................................................... 383
Registering the Key and Certicate for Network Communication ...................................................................... 386
Conguring IPSec Settings ................................................................................................................................. 388
Conguring IEEE 802.1X Authentication Settings .................................................................................................. 395
Restricting the Machine's Functions ...................................................................................................................... 399
Restricting Access to Address Book and Sending Functions .................................................................................... 401
Restricting Use of the Address Book ............................................................................................................. 402
Limiting Available Destinations ..................................................................................................................... 404
Restricting the Fax Sending Functions ........................................................................................................... 406
Restricting Printing from a Computer .................................................................................................................. 408
............................................................................................................ 364
Restricting USB Functions .................................................................................................................................. 409
Disabling HTTP Communication ......................................................................................................................... 411
Disabling Remote UI ......................................................................................................................................... 412
Increasing the Security of Documents .................................................................................................................... 413
Generating a Device Signature Key ..................................................................................................................... 414
Managing the Machine from a Computer (Remote UI) ............................................................................................ 415
Starting Remote UI ........................................................................................................................................... 416
Checking the Status and Logs ............................................................................................................................ 419
Setting Up Menu Options from Remote UI ........................................................................................................... 425
Registering Destinations from Remote UI ............................................................................................................ 428
Security Policy .................................................................................................................................................. 432
Importing/Exporting the Setting Data ................................................................................................................. 438
Updating the Firmware ......................................................................................................................................... 441
Initializing Settings ............................................................................................................................................... 443
Setting Menu List ...................................................................................................................................... 446
<Preferences> ....................................................................................................................................................... 447
<Display Settings> ............................................................................................................................................ 448
<English Keyboard Layout> ................................................................................................................................ 452
<Timer/Energy Settings> ................................................................................................................................... 453
<Network> ....................................................................................................................................................... 458
<External Interface> .......................................................................................................................................... 472
<Accessibility> .................................................................................................................................................. 473
<Adjustment/Maintenance> .................................................................................................................................. 474
<Adjust Image Quality> ..................................................................................................................................... 475
<Maintenance> ................................................................................................................................................ 483
<Function Settings> .............................................................................................................................................. 484
V

<Common>
<Copy> ............................................................................................................................................................ 491
<Printer> ......................................................................................................................................................... 493
<Send> ............................................................................................................................................................ 518
<Receive/Forward> ........................................................................................................................................... 530
<Store/Access Files> .......................................................................................................................................... 537
<Secure Print> .................................................................................................................................................. 543
<Set Destination> .................................................................................................................................................. 544
<Management Settings> ....................................................................................................................................... 545
<User Management> ........................................................................................................................................ 546
<Device Management> ...................................................................................................................................... 547
<License/Other> ............................................................................................................................................... 551
<Data Management> ........................................................................................................................................ 553
<Security Settings> ........................................................................................................................................... 555
...................................................................................................................................................... 485
Maintenance ................................................................................................................................................. 558
Regular Cleaning .................................................................................................................................................. 560
Cleaning the Exterior ........................................................................................................................................ 561
Cleaning the Platen Glass .................................................................................................................................. 562
Cleaning the Feeder .......................................................................................................................................... 563
Cleaning the Fixing Assembly ............................................................................................................................. 566
Replacing the Toner Cartridge ............................................................................................................................... 567
Checking the Remaining Amount of Consumables .................................................................................................. 570
Relocating the Machine ......................................................................................................................................... 571
Adjusting Image Quality ....................................................................................................................................... 573
Adjusting the Gradation and Density for Copy Jobs ............................................................................................... 574
Adjusting Values for Text Color Reproducibility ..................................................................................................... 576
Adjusting Print Density ...................................................................................................................................... 578
Adjusting Print Position ..................................................................................................................................... 579
Viewing the Counter Value .................................................................................................................................... 581
Printing Reports and Lists ..................................................................................................................................... 582
Consumables ........................................................................................................................................................ 587
Troubleshooting ......................................................................................................................................... 590
Common Problems ................................................................................................................................................ 592
Installation/Settings Problems ........................................................................................................................... 593
Copying/Printing Problems ................................................................................................................................ 597
Faxing/Telephone Problems ............................................................................................................................... 600
When You Cannot Print Properly ............................................................................................................................ 602
Printing Results Are Not Satisfactory ................................................................................................................... 604
Paper Creases or Curls ...................................................................................................................................... 615
Paper Is Fed Incorrectly ..................................................................................................................................... 617
A Message or a Number Starting with "#" (an Error Code) Is Displayed .................................................................... 618
Countermeasures for Each Message ................................................................................................................... 619
VI

Countermeasures for Each Error Code
Clearing Paper Jams .............................................................................................................................................. 643
Paper Jams in the Feeder ................................................................................................................................... 645
Paper Jams in the Main Unit ............................................................................................................................... 647
Paper Jams in a Paper Source ............................................................................................................................. 653
When a Problem Cannot Be Solved ......................................................................................................................... 655
................................................................................................................ 633
Appendix ........................................................................................................................................................... 657
Third Party Software ............................................................................................................................................. 659
Feature Highlights ................................................................................................................................................ 660
Going Green and Saving Money ......................................................................................................................... 661
Improving Eciency ......................................................................................................................................... 663
Going Digital .................................................................................................................................................... 665
So Much More .................................................................................................................................................. 667
Specications ....................................................................................................................................................... 669
Main Unit ........................................................................................................................................................ 670
Feeder ............................................................................................................................................................ 673
Available Paper ................................................................................................................................................ 674
Paper Feeder PF-C ............................................................................................................................................ 677
Copy Card Reader-F .......................................................................................................................................... 678
Fax Function .................................................................................................................................................... 679
Scan Function .................................................................................................................................................. 680
Printer Functions .............................................................................................................................................. 681
Management Functions ..................................................................................................................................... 683
System Environment ......................................................................................................................................... 685
Network Environment ....................................................................................................................................... 687
Options ................................................................................................................................................................ 688
Optional Equipment .......................................................................................................................................... 689
System Options ................................................................................................................................................ 691
Manuals and Their Contents .................................................................................................................................. 693
Using User's Guide ................................................................................................................................................ 694
Screen Layout of User's Guide ............................................................................................................................ 695
Viewing User's Guide ........................................................................................................................................ 698
Basic Windows Operations .................................................................................................................................... 699
Notice .................................................................................................................................................................. 707
VII

Setting Up
Setting Up
Setting Up ...............................................................................................................................................................
Main Functions ...................................................................................................................................................... 4
Preparations Required Before Use ....................................................................................................................... 6
Preventing Unauthorized Access .......................................................................................................................... 8
Setting Up Using the Setup Guide ...................................................................................................................... 10
Setting the Date/Time ......................................................................................................................................... 12
Setting Up the Network Environment ............................................................................................................... 14
Selecting Wired LAN or Wireless LAN .............................................................................................................. 16
Connecting to a Wired LAN ............................................................................................................................. 17
Connecting to a Wireless LAN ......................................................................................................................... 18
Setting Up Connection Using WPS Push Button Mode ............................................................................. 20
Setting Up Connection Using WPS PIN Code Mode .................................................................................. 22
Setting Up Connection by Selecting a Wireless Router ............................................................................. 24
Setting Up Connection by Specifying Detailed Settings ............................................................................ 27
Checking the SSID and Network Key ........................................................................................................ 30
Setting IP Addresses ....................................................................................................................................... 31
Setting IPv4 Address ................................................................................................................................ 32
Setting IPv6 Addresses ............................................................................................................................ 35
3
Viewing Network Settings ............................................................................................................................... 38
Conguring Settings for Communication with a Computer ............................................................................ 40
Conguring Printing Protocols and WSD Functions ................................................................................. 41
Conguring Printer Ports ......................................................................................................................... 44
Setting Up Print Server ............................................................................................................................ 48
Conguring the Machine for Your Network Environment ............................................................................... 51
Conguring Ethernet Settings ................................................................................................................. 52
Changing the Maximum Transmission Unit ............................................................................................. 54
Setting a Wait Time for Connecting to a Network .................................................................................... 55
Conguring DNS ...................................................................................................................................... 56
Conguring SMB ...................................................................................................................................... 60
Conguring WINS .................................................................................................................................... 62
Registering LDAP Servers ......................................................................................................................... 64
Monitoring and Controlling the Machine with SNMP ............................................................................... 69
Other Network Settings ........................................................................................................................... 73
Installing Drivers ................................................................................................................................................. 78
Conguring Initial Settings for Fax Functions ................................................................................................... 79
Deciding Which Fax Receive Mode to Use ....................................................................................................... 80
1

Setting Up
Registering the Fax Number and Unit Name ..................................................................................................
Selecting the Receive Mode ............................................................................................................................ 82
Connecting the Telephone Line ...................................................................................................................... 83
Conguring Scan Settings ................................................................................................................................... 85
Preparing to Use the Machine as a Scanner ................................................................................................... 86
Procedure for Setting to Send E-Mail/Send and Receive I-Fax ......................................................................... 87
Conguring Basic E-Mail Settings ............................................................................................................ 88
Conguring E-Mail/I-Fax Communication Settings ................................................................................... 91
Procedure for Setting a Shared Folder as a Save Location .............................................................................. 95
Setting a Shared Folder as a Save Location .............................................................................................. 96
Procedure for Setting a FTP Server as a Save Location ................................................................................... 99
81
2

Setting Up
Setting Up
Befor
e using the functions of the machine, the environmental conditions must be set in advance. To begin with, check
the sequences of ow required to complete the setup, and then perform the actual settings.
Befor
e Use(P. 6)
Preparations Required
261J-000
● The functions installed on the machine vary depending on the model you pur
machine, see
Main Functions(P. 4) and check the available functions.
chased. Before using the
Conguring Initial Settings of the Machine (Setup Guide)
ou can easily congure the initial settings required to use the machine, such as date, time, and network
● Y
settings, by following the on-screen guidance.
Setting Up Using the Setup Guide(P. 10)
3

Main Functions
Setting Up
261J-001
This manual co
vers all the functions of the model series you purchased. Before getting started, check which functions
are available on the model you purchased.
: With function : Without function
Function MF525x MF522x
Copy
Fax
Print
Scan
Feeder 2-sided scanning
2-sided printing
Wireless LAN
NFC
Default System Manager ID 7654321 7654321
Default System Manager PIN 7654321 7654321
Application Library
Paper Feeder PF-C *
TELEPHONE 6 KIT *
Copy Card Reader-F *
Barcode Printing Kit
Send PDF Security Feature Set
*
This is an optional item.
*
*
● For the available driver types, see the User Software CD-ROM/DVD-ROM supplied with the machine, or see
the Canon website (http://www.canon.com/).
LINKS
4

Viewing User's Guide(P. 698)
Setting Up
5

Setting Up
Preparations Required Before Use
261J-002
Set up the machine follo
to the corresponding section. In addition, to use the machine safely, also check
Access(P
. 8) .
Step 1 Setting Up Using the Setup Guide(P. 10)
Step 2 Setting Up the Network Environment(P. 14)
wing steps 1 to 5 in order. For more information about a particular step, click on the link to go
● Congur
to use the Setup Guide, congure the network settings from here.
e the network settings that are not covered in the Setup Guide. If you do not need
Preventing Unauthorized
Step 3 Installing Drivers(P. 78)
Step 4 Conguring Initial Settings for Fax Functions
Step 5 Conguring Scan Settings
(P. 85)
(P. 79)
6

Setting from the Remote UI
Setting Up
● When the network envir
using Remote UI.
Importing data fr
● As long as the model is the same, you can save setting data registered on another Canon printer/
multifunction machine to a computer (export) and load the setting data to this machine (import).
Importing/Exporting the Setting Data(P. 438)
onment settings are complete, you can eciently set the machine from a computer
Starting Remote UI(P. 416)
om another machine to save time
7

Setting Up
Preventing Unauthorized Access
261J-003
This section describes the security measur
a must-read for all users and administrators before using this machine, other printers, and multifunction machines
connected to the network. In recent years, a printer/multifunction machine connected to the network can offer you a
variety of useful functions, such as printing from a computer, operating from a computer using the remote function,
and sending scanned documents via the Internet. On the other hand, it is essential to take security measures to
reduce the security risk for information leakage, as a printer/multifunction machine has become more exposed to
threats, such as unauthorized access and theft, when it is connected to the network. This section explains necessary
settings you need to specify to prevent unauthorized access before using a printer/multifunction machine connected
to the network.
es on how to prevent unauthorized access from the external network. This is
Security Measures to Prevent Unauthorized Access from the External Network
Assigning a Private IP Address(P. 8)
Using Firewall to Restrict Transmission(P. 9)
Specifying the TLS Encrypted Communication (P. 9)
Setting PIN to Manage Information Stored in the Multifunction Machine(P. 9)
Assigning a Private IP Address
An IP address is a numerical label assigned to each device participating in a computer network. A "global IP address" is
used for the communication connecting to the Internet, and a "private IP address" is used for the communication
within a local area network, such as a LAN in the company. If a global IP address is assigned, your printer/
multifunction machine is open to the public and can be accessed via the Internet. Thus, the risk of information leakage
due to unauthorized access from external network increases. On the other hand, if a private IP address is assigned,
your printer/multifunction machine is closed to a local area network and can be accessed by only users on your local
area network, such as a LAN in the company.
Global IP Address
Can be accessed fr
Basically, assign a private IP address to your printer/multifunction machine. Make sure to conrm the IP address,
assigned to the printer/multifunction machine you are using, is a private IP address or not. A private IP address is
found in one of the following ranges.
om the external network
Can be accessed from the users within a local area network
Private IP Address
Ranges for Private IP addresses
om 10.0.0.0 to 10.255.255.255
● Fr
● From 172.16.0.0 to 172.31.255.255
● From 192.168.0.0 to 192.168.255.255
For information on how to conrm the IP address, see
Setting IPv4 Address(P. 32) .
● If a global IP addr
to reduce the risk of unauthorized access by installing security software, such as a rewall that prevents
ess is assigned to a printer/multifunction machine, you can create a network environment
8

Setting Up
access from the external networks. If you want to assign a global IP address to and use a printer/
multifunction machine, contact your network administr
ator.
Using Firewall to Restrict Transmission
A r
ewall is a system that prevents unauthorized access from the external networks and protects against attacks/
intrusions to a local area network. You can use a rewall on your network environment to block access from the
external network that appears to be dangerous, by restricting communication from specied IP address of the
external network. The function installed to a Canon printer/multifunction machine enables you to set up the IP
address lter. For information on how to set up an IP address lter, see
Settings(P
. 367) .
Specifying IP Addresses for Firewall
Specifying the TLS Encrypted Communication
For information on the TLS Encrypted Communication, see
and on the procedures to specify, see
Conguring the Ke
Conguring the Network Security Settings
y and Certicate for TLS(P. 377) .
(P. 364) ,
Setting PIN to Manage Information Stored in the Multifunction Machine
If a malicious thir
information stored in the machine will reduce the risk of information leakage. Canon printers/multifunction machines
enable you to protect various type of information by setting PIN.
Setting PIN to Each Function
● Setting PIN for Using Remote UI
For mor
● Setting PIN for the System Manager Settings
For mor
● Addr
For more information on setting a PIN, see
Listed abo
the other security measures, see
preventing unauthorized access to suit your environment.
ve are some examples of security measures for preventing unauthorized access. For more information on
d party attempts to gain unauthorized access to a printer/multifunction machine, setting PIN to
e information, see
e information, see
ess Book PIN
Setting a Remote UI PIN(P. 358) .
Setting the System Manager ID and PIN(P. 350) .
Restricting Use of the Address Book(P. 402) .
Managing the Machine(P. 347) and tak
e necessary security measures for
9

Setting Up
Setting Up Using the Setup Guide
261J-004
1660-009
When the machine is turned on ( Turning ON the Machine(P. 116) ) for the rst time, the Setup Guide starts up to
assist you to congur
setting screens are displayed in the following order.
Step 1 Setting the Display Language and the Country or Region
e the initial settings of the machine by following the on-screen guidance. In the Setup Guide, the
Set the language to be displayed on the operation panel screen or in reports, as well as the
country or r
egion where the machine will be used.
Select a language.
1
Select <Yes>.
2
Select a country or region.
3
Step 2 Setting the Date and Time
Adjust the machine's date/time.
Select a time zone.
1
What is UTC?
● Coor
Enter the date and time, and select <Apply>.
2
● Tap the entry eld, and enter the date and time.
Step 3 Setting the Access Security Measures
Set a PIN to access the Remote UI. Because the Remote UI can be used to change the machine
settings fr
om a computer, setting of a PIN is recommended.
Select <Yes>.
1
● If you select <No>, PIN is not set, and the Setup Guide proceeds to step 4.
● You can also set the access security measure of the Remote UI later.
dinated Universal Time (UTC) is the primary time standard by which the
world regulates clocks and time. The correct UTC time zone setting is required
for Internet communications.
a Remote UI PIN
(P. 358)
Setting
Enter a PIN, and then select <Apply>.
2
Enter the same PIN, and then select <Apply>.
3
Step 4 Setting the Wireless LAN
Congure the settings to connect to the network using the wir
Select <Yes>.
1
● If you select <No>, wireless LAN is not set, and the Setup Guide proceeds to
step 5.
Select <OK>.
2
eless LAN.
10
Select the setting method.
3
● For mor
Wir
Step 5 Viewing Application Library
The one-touch button referred to as "Application Library" is provided in the Home screen. You
can r
ead the description of each function.
To nish the Setup Guide, select <End>.
1
e information about the wireless LAN settings, see
eless LAN(P. 18) .
➠ When the Setup Guide is complete, the Home screen appears.
Setting Up
Connecting to a
11

Setting the Date/Time
Setting Up
261J-005
Set the date and time for the machine. The date and time ar
time, therefore, they need to be set accurately.
Setting the Time Zone(P. 12)
Setting the Current Date and Time(P. 12)
Setting the Daylight Saving Time(P. 13)
e used as the reference for the functions specifying the
Setting the Time Zone
If the time zone setting is changed, the values set in <Current Date/Time Settings> are also changed accordingly.
Select <Menu> in the Home screen.
1
Select <Preferences> <Timer/Energy Settings> <Date/Time Settings> <Time
2
Zone>.
Select the time zone.
3
Home Screen(P. 122)
What is UTC?
● Coor
dinated Universal Time (UTC) is the primary time standard by which the world regulates clocks and
time. Time differences exist depending on the country or area where the machine is used. The correct UTC
time zone setting is required for Internet communications.
Setting the Current Date and Time
Select <Menu> in the Home screen.
1
Select <Preferences> <Timer/Energy Settings> <Current Date/Time Settings>.
2
Enter the date and time.
3
● T
ap the entry eld, and enter the date and time.
Home Screen(P. 122)
12

Select <Apply>.
4
Setting Up
● Set <Time Zone> befor
current date and time are also changed accordingly.
● The display format of the date and time can be changed, r
<Date Format>(P. 454)
<Time Format>(P. 454)
e setting the current date and time. If the <Time Zone> setting is changed later, the
Setting the Daylight Saving Time
If daylight saving time is enabled, specify the dates fr
Select <Menu> in the Home screen.
1
Select <Preferences> <Timer/Energy Settings> <Date/Time Settings> <Daylight
2
Saving Time Settings>.
om which and to which daylight saving time is in effect.
espectively.
Home Screen(P. 122)
Select <Off> or <On> in <Daylight Saving Time>.
3
● When you select <On>, select <Start Date> and <End Date>, and set the month and day for each item. T
the day, specify "what day of which week."
Select <Apply>.
4
o set
13
Setting Up
Setting Up the Network Environment
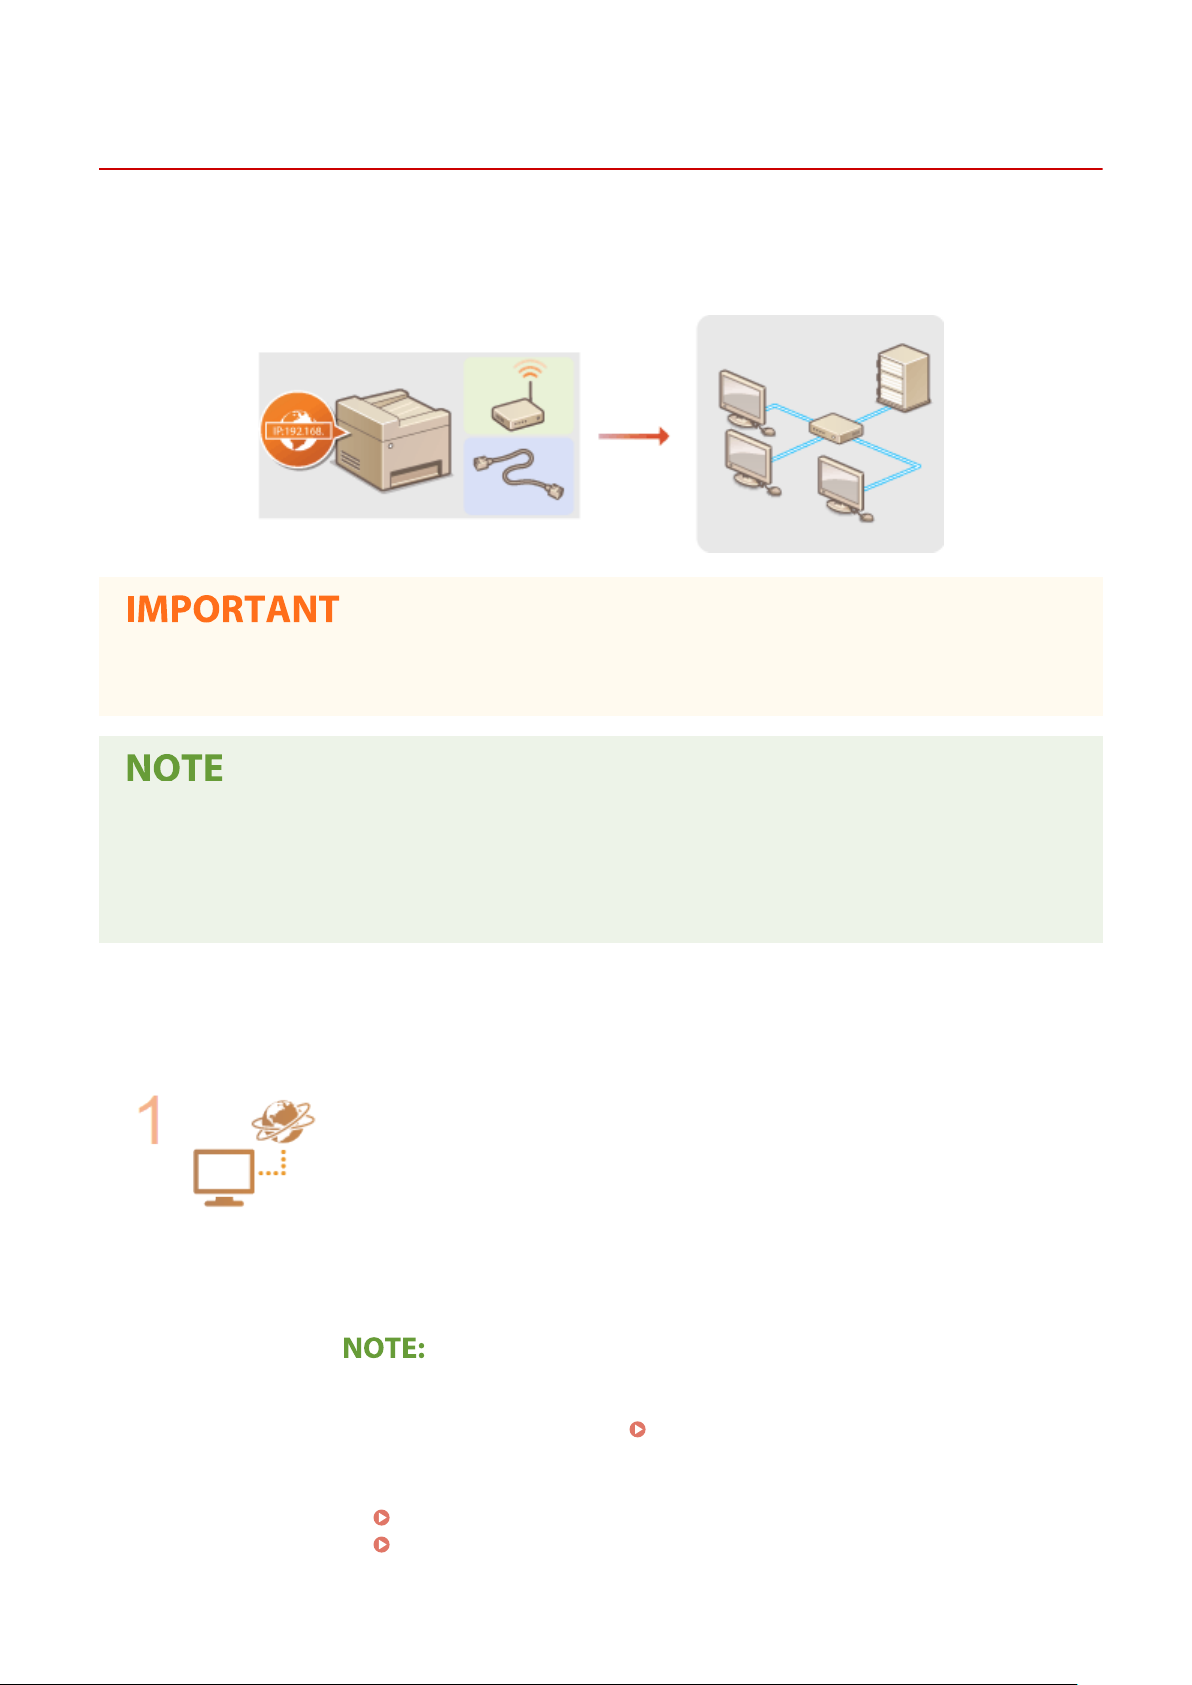
261J-006
When connecting the machine to a wir
the selected network. Select "wired" or "wireless" depending on your communication environment and networking
devices. For specic IP address settings, contact your Internet service provider or Network Administrator.
● If the machine is connected to an unsecur
party.
ed or wireless local area network (LAN), you need to set an IP address unique to
ed network, your personal information might be leaked to a third
● The machine cannot connect to both wir
● The machine does not come with a LAN cable or router. Have them ready as necessary.
● For more information about your networking devices, see the instruction manuals for the devices or contact
your manufacturer.
◼ Befor
Follow these steps to connect the machine to a network.
e You Start
Check your computer settings.
● Mak
e sure that the computer is correctly connected to the network. For more
information, see the instruction manuals for the devices you are using, or contact the
device manufacturers.
● Make sure that the network settings have been completed on the computer. If the
network has not been set up properly, you will not be able to use the machine on the
network, even if you perform the rest of the procedure below.
● Depending on the network, you may need to change settings for the communication
method or the Ethernet type ( Conguring Ethernet Settings(P
information, contact your Internet service provider or Network Administrator.
ed and wireless LANs at the same time.
. 52) ). For more
● To check the MAC address of the machine.
Viewing the MAC Address for Wired LAN(P. 38)
Viewing the MAC Address and Information for Wireless LAN(P. 39)
14

Setting Up
● T
o connect to an IEEE 802.1X network, see
Authentication Settings
Select wired or wireless LAN.
Selecting Wired LAN or Wireless LAN(P. 16)
Connect to a wired or wireless LAN.
oceed to the section that corresponds to the setting you selected in step 2.
● Pr
Connecting to a Wired LAN(P. 17)
Connecting to a Wireless LAN(P. 18)
(P. 395) .
Conguring IEEE 802.1X
Set the IP address as necessary.
● At the time of pur
Change this setting if you want to use a specic IP address.
Addr
esses(P. 31)
chase, the machine is set to automatically acquire an IP address.
LINKS
Conguring Settings for Communication with a Computer(P. 40)
Conguring the Machine for Your Network Environment(P. 51)
Setting IP
15

Setting Up
Selecting Wired LAN or Wireless LAN
261J-007
After you decide on wir
using the operation panel. Note that if you change the setting from <Wired LAN> to <Wireless LAN> or vice versa, you
will need to uninstall the drivers installed on your computer and then reinstall them. For more information, see the
manuals for the relevant drivers on the online manual website.
Select <Menu> in the Home screen.
1
Select <Preferences> <Network>.
2
● If the login scr
Select <Select Wired/Wireless LAN>.
3
Select <Wired LAN> or <Wireless LAN>.
4
LINKS
Setting Up the Network Environment(P. 14)
Connecting to a Wired LAN(P. 17)
Connecting to a Wireless LAN(P. 18)
ed or wireless LAN to connect the machine to the computer, select wired LAN or wireless LAN
Home Screen(P. 122)
een appears, enter the correct ID and PIN.
Logging in to the Machine(P. 133)
16
Setting Up
Connecting to a Wired LAN
261J-008
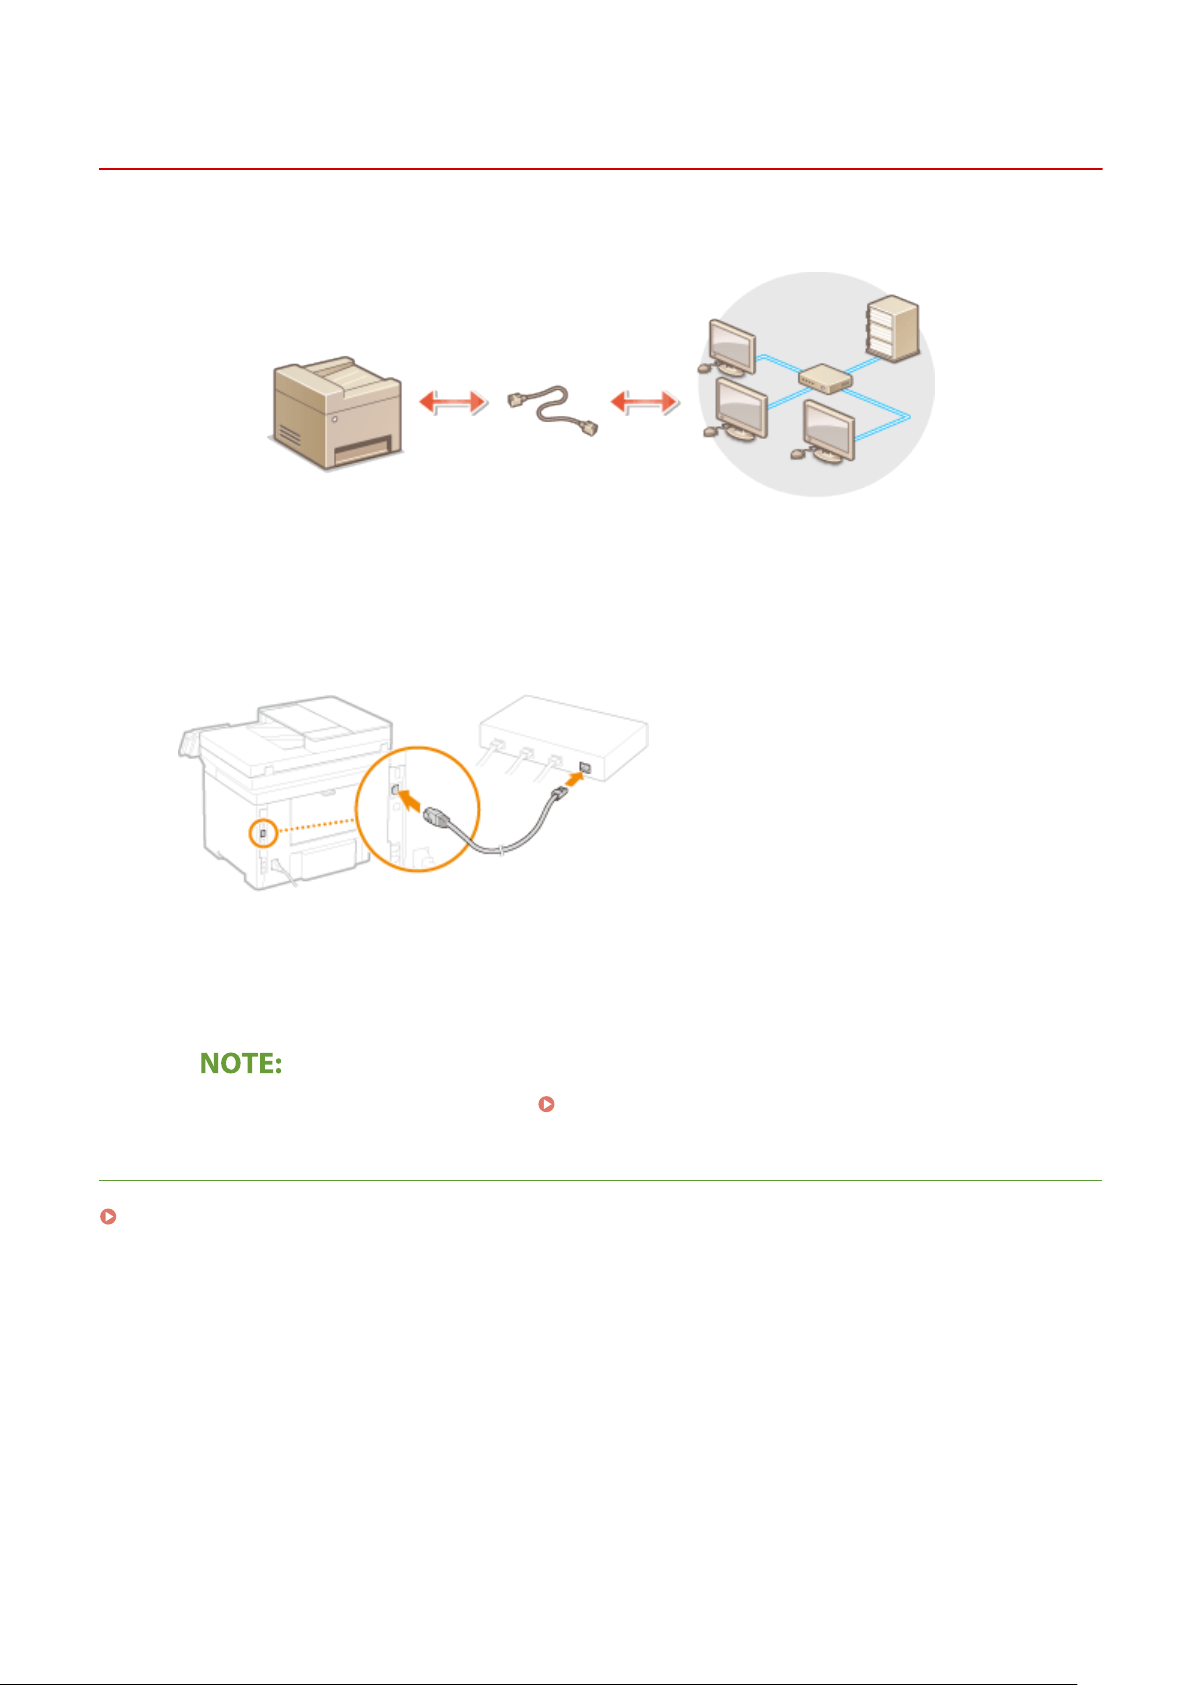
Connect the machine to a computer via a r
Connect a LAN cable.
1
● Connect the machine to a r
● Push the connector in until it clicks into place.
outer by using a LAN cable.
outer. Use a LAN cable to connect the machine to the router.
Wait for several minutes.
2
➠ The IP addr
ou can set the IP address manually.
● Y
LINKS
Setting Up the Network Environment(P. 14)
ess is set automatically.
Setting IP Addresses(P. 31)
17

Setting Up
Connecting to a Wireless LAN
261J-009
Wir
eless routers (or access points) connect the machine to a computer via radio waves. If your wireless router is
equipped with Wi-Fi Protected Setup (WPS), conguring your network is automatic and easy. If your networking
devices do not support automatic conguration, or if you want to specify authentication and encryption settings in
detail, you need to manually set up the connection. Make sure that your computer is correctly connected to the
network.
Setting Up Connection Using WPS(P. 18)
Manually Setting Up Connection(P. 19)
Risk of information leak
● Use wir
unsecured network, your personal information might be leaked to a third party because radio waves used in
wireless communication can go anywhere nearby, even beyond walls.
eless LAN connection at your own discretion and at your own risk. If the machine is connected to an
Wireless LAN security
● The wireless LAN function of this machine supports WEP, WPA-PSK, and WPA2-PSK. For the wireless security
compatibility of your wireless router, see the instruction manuals for your networking devices or contact
your manufacturer.
Required devices for wireless LAN connection
● The machine does not come with a wir
eless router. Have the router ready as necessary.
Setting Up Connection Using WPS
When using WPS, two modes ar
e available: push button mode and PIN code mode.
◼ Push Button Mode
Find the WPS mark shown below on the package of your wireless router. Also make sure that there is a WPS button on
your networking device.
Setting Up Connection Using WPS Push Button Mode(P. 20)
18

◼ PIN Code Mode
Setting Up
Some WPS r
the instruction manuals of your networking device, set up the connection by entering the PIN code.
Connection Using WPS PIN Code Mode(P
● If the wir
outers do not support the push button mode. If WPS PIN code mode is mentioned on the package or in
Setting Up
. 22)
eless router is set to use WEP authentication, you may not be able to set up connection using WPS.
Manually Setting Up Connection
When manually setting up a wir
information. Regardless of the method, make sure that you have the required setup information, including the SSID
and network key.
◼ Selecting a Wir
Select this setup option if you need to manually set up the connection but want to complete the setup as easily as
possible.
Setting Up Connection by Selecting a Wireless Router(P. 24)
Checking the SSID and Network Key(P. 30)
eless Router
◼ Manually Entering the Setup Information
eless connection, you can either select a wireless router or manually enter the required
If you want to specify security settings in detail, such as authentication and encryption settings, manually enter the
SSID and network k
ey to set up the connection.
Setting Up Connection by Specifying Detailed Settings(P. 27)
LINKS
Setting Up the Network Environment(P. 14)
Selecting Wired LAN or Wireless LAN(P. 16)
19

Setting Up
Setting Up Connection Using WPS Push Button Mode
1660-00J
If your wir
eless router supports WPS push button mode, you can easily set up a connection with a WPS button.
w to operate the wireless router may vary on each device. See the instruction manuals for your
● Ho
networking device for help.
261J-00A
Select <Menu> in the Home screen.
1
Select <Preferences>
2
● If the login scr
Select <Wireless LAN Settings>.
3
● If the <Do you want to enable the wir
Read the message that is displayed, and select <OK>.
4
Select <WPS Push Button Mode>.
5
Select <Yes>.
6
een appears, enter the correct ID and PIN.
<Network>.
eless LAN?> message is displayed, select <Yes>.
Home Screen(P. 122)
Logging in to the Machine(P. 133)
Press and hold the WPS button on the wireless router.
7
● The button must be pr
● Depending on the networking device, you may need to press and hold the button for 2 seconds or longer.
See the instruction manuals for your networking device for help.
If an error message is displayed during setup
● Select <Close> and r
essed within 2 minutes after selecting <Yes> in step 6.
eturn to step 5.
20

Setting Up
Wait until message <Connected.> is displayed.
8
Select <Close>.
9
➠ W
ait several minutes until the IP address and other items are set automatically.
Signal strength
● When
more than one wireless router is available for connection, the machine connects to the device
with the strongest signal. Signal strength is measured using RSSI (Received Signal Strength Indication).
● Y
ou can set the IP address manually.
● While
the machine is connected to the wireless LAN, the Wi-Fi icon is displayed in the Home screen or
the Basic Features screen of each function.
Setting IP Addresses(P. 31)
Basic Screens(P. 121)
Reducing power consumption
ou can set the machine to enter <Power Save Mode> based on signals emitted from the wireless router.
● Y
<Power Save Mode>(P. 459)
If the IP addr
● In a DHCP environment, the IP address of the machine may be changed automatically. If this happens, the
connection is maintained as long as the machine and the computer belong to the same subnet.
ess of the machine has changed
LINKS
Connecting to a Wireless LAN(P. 18)
21

Setting Up
Setting Up Connection Using WPS PIN Code Mode
261J-00C
If your wir
the networking device.
eless router supports WPS PIN code mode, generate a PIN code with the machine and register the code to
w to operate the wireless router may vary on each device. See the instruction manuals for your
● Ho
networking device for help.
From a Computer
Access your wireless router from a computer and display the screen for entering a
1
WPS PIN code.
● For more information, see the instruction manuals for your networking device.
From the Operation Panel
Select <Menu> in the Home screen. Home Screen(P. 122)
2
Select <Preferences>
3
● If the login scr
Select <Wireless LAN Settings>.
4
● If the <Do you want to enable the wir
Read the message that is displayed, and select <OK>.
5
Select <WPS PIN Code Mode>.
6
Select <Yes>.
7
➠ The PIN code is gener
From a Computer
een appears, enter the correct ID and PIN.
<Network>.
eless LAN?> message is displayed, select <Yes>.
ated and shown on the display.
Logging in to the Machine(P. 133)
Register the generated PIN code to the wireless router.
8
● Register the PIN code on the setup scr
een displayed in step 1.
22

Setting Up
● The PIN code must be r
If an error message is displayed during setup
● Select <Close> and r
egistered within 10 minutes after selecting <Yes> in step 7.
eturn to step 6.
From the Operation Panel
Wait until the message <Connected.> is displayed.
9
10
Select <Close>.
➠ W
ait several minutes until the IP address and other items are set automatically.
Signal strength
● When
more than one wireless router is available for connection, the machine connects to the device
with the strongest signal. Signal strength is measured using RSSI (Received Signal Strength Indication).
● Y
ou can set the IP address manually.
● While
the machine is connected to the wireless LAN, the Wi-Fi icon is displayed in the Home screen or
the Basic Features screen of each function.
Setting IP Addresses(P. 31)
Basic Screens(P. 121)
Reducing power consumption
ou can set the machine to enter <Power Save Mode> based on signals emitted from the wireless router.
● Y
<Power Save Mode>(P. 459)
If the IP addr
● In a DHCP environment, the IP address of the machine may be changed automatically. If this happens, the
connection is maintained as long as the machine and the computer belong to the same subnet.
ess of the machine has changed
LINKS
Connecting to a Wireless LAN(P. 18)
23

Setting Up
Setting Up Connection by Selecting a Wireless Router
261J-00E
Y
ou can search the wireless routers (or access points) available for connection and select one from the display of the
machine. For the network key, enter a WEP key or PSK. Before selecting a wireless router, check and write down the
required setup information, including the SSID and network key (
Security settings
Checking the SSID and Network Key(P. 30) ).
● If the wir
<Open System> or the WPA/WPA2 encryption method is set to <Auto> (AES-CCMP or TKIP). If you want to
select <Shared Key> for WEP authentication or <AES-CCMP> for WPA/WPA2 encryption, you need to set up
the connection using <Enter Manually>.
1
2
● If the login scr
3
● If the <Do you want to enable the wir
4
eless connection is set up by selecting a wireless router, the WEP authentication method is set to
Setting Up Connection by Specifying Detailed Settings(P. 27)
Select <Menu> in the Home screen. Home Screen(P. 122)
Select <Preferences>
een appears, enter the correct ID and PIN.
Select <Wireless LAN Settings>.
Read the message that is displayed, and select <OK>.
<Network>.
Logging in to the Machine(P. 133)
eless LAN?> message is displayed, select <Yes>.
Select <SSID Settings>.
5
Select <Select Access Point>.
6
➠ The machine starts sear
● If
a message is displayed telling that access point cannot be found, see
Message
Select a wireless LAN router.
7
● Select the r
(P. 619) .
outer whose SSID matches the one that you have written down, and select <Next>.
ching for available wireless routers.
Countermeasures for Each
24

To view details of security settings
● Select the wir
eless LAN router, and select <Details>. To return to the original screen, select
Setting Up
.
If your wir
● Check whether the machine is properly installed and ready to connect to the network.
Settings Pr
Enter the network key that you have written down.
8
● Enter the network k
● On how to enter text, see
Select <Yes>.
9
If an error message is displayed during setup
● Select <Close>, check whether the network k
10
Wait until message <Connected.> is displayed.
eless router is not found
oblems(P. 593)
ey, and select <Apply>.
Entering Text(P. 131) .
ey is correct, and return to step 5.
Installation/
11
Select <Close>.
➠ W
ait several minutes until the IP address and other items are set automatically.
Signal strength
● When
● Y
● While
more than one wireless router is available for connection, the machine connects to the device
with the strongest signal. Signal strength is measured using RSSI (Received Signal Strength Indication).
ou can set the IP address manually.
the machine is connected to the wireless LAN, the Wi-Fi icon is displayed in the Home screen or
the Basic Features screen of each function.
Setting IP Addresses(P. 31)
Basic Screens(P. 121)
Reducing power consumption
● Y
ou can set the machine to enter <Power Save Mode> based on signals emitted from the wireless router.
<Power Save Mode>(P. 459)
25

Setting Up
If the IP address of the machine has changed
● In a DHCP envir
connection is maintained as long as the machine and the computer belong to the same subnet.
onment, the IP address of the machine may be changed automatically. If this happens, the
LINKS
Connecting to a Wireless LAN(P. 18)
26

Setting Up
Setting Up Connection by Specifying Detailed Settings
261J-00F
If you want to specify the security settings in detail or cannot establish the wir
procedures, manually enter all the required information for the wireless LAN connection. Before specifying detailed
settings, check and write down the required information, including the SSID, network key, and wireless security
protocols.
1
2
3
4
5
Checking the SSID and Network Key(P. 30)
Select <Menu> in the Home screen.
Select <Preferences> <Network>.
● If the login scr
Select <Wireless LAN Settings>.
● If the <Do you want to enable the wireless LAN?> message is displayed, select <Yes>.
Read the message that is displayed, and select <OK>.
Select <SSID Settings>
een appears, enter the correct ID and PIN.
<Enter Manually>.
Home Screen(P. 122)
Logging in to the Machine(P. 133)
eless connection using the other
Enter the SSID that you have written down.
6
● Enter the SSID
● On how to enter text, see
Specify the security settings based on the information that you have written down.
7
● If you do not need to specify the security settings, select <None>.
Using WEP
Select <WEP>.
1
Select an authentication method.
2
, and select <Apply>.
Entering Text(P. 131) .
27

Setting Up
<Open System>
Sets open system authentication, which is also called "
<Shared Key>
Uses the WEP key as a password.
When <Open System> is selected
● When connecting to a wir
authentication is set on the wireless router. If this happens, the machine automatically changes the
setting to <Shared Key> and retries the connection.
eless LAN, the machine experiences an authentication error if the shared key
open authentication."
Select the WEP key you want to edit.
3
● Select the WEP key (1 to 4), and select <Edit>.
● Up to four WEP keys can be registered.
Enter the network key that you have written down.
4
● Enter the network key, and select <Apply>.
Select the desired WEP key.
5
● Select the WEP key you have edited, and select <Register>.
Using WPA-PSK or WPA2-PSK
Select <WPA/WPA2-PSK>.
1
Select an encryption method.
2
<Auto>
Sets the machine to automatically select AES-C
<AES-CCMP>
Sets AES-CCMP as the encryption method.
Enter the network key that you have written down.
3
● Enter the network key, and select <Apply>.
CMP or TKIP to match the setting of the wireless router.
28

Setting Up
Select <Yes>.
8
If an error message is displayed during setup
● Select <Close>, check whether the specied settings ar
Wait until message <Connected.> is displayed.
9
e correct, and return to step 5.
10
Select <Close>.
➠ W
ait several minutes until the IP address and other items are set automatically.
Signal strength
● When
● Y
● While
more than one wireless router is available for connection, the machine connects to the device
with the strongest signal. Signal strength is measured using RSSI (Received Signal Strength Indication).
ou can set the IP address manually.
the machine is connected to the wireless LAN, the Wi-Fi icon is displayed in the Home screen or
the Basic Features screen of each function.
Setting IP Addresses(P. 31)
Basic Screens(P. 121)
Reducing power consumption
● You can set the machine to enter <Power Save Mode> based on signals emitted from the wireless router.
<Power Save Mode>(P. 459)
If the IP addr
● In a DHCP environment, the IP address of the machine may be changed automatically. If this happens, the
connection is maintained as long as the machine and the computer belong to the same subnet.
ess of the machine has changed
LINKS
Connecting to a Wireless LAN(P. 18)
29

Setting Up
Checking the SSID and Network Key
261J-00H
When manually setting up a wir
The SSID and network key may be indicated on these networking devices. Check your devices and write down the
necessary information before setting up the connection. For more information, see the instruction manuals for your
networking devices or contact your manufacturer.
SSID A name given for identifying a specic wir
Network Key A keyword or password used for encrypting data or authenticating a network. Some other
Wireless Security Protocols
(Authentication/Encryption)
◼ Checking the SSID and Network Ke
The SSID or the network key may have been changed. If you do not know the SSID or the network key, you can check
them by using the "Canon MF/LBP Wireless Setup Assistant." Download the "Canon MF/LBP Wireless Setup Assistant"
from the Canon website (http://www.canon.com/), and start it up from a computer connected to a wireless LAN.
eless connection, you need to specify the SSID and network key of your wireless router.
eless LAN. Some other terms used for SSID include
"access point name" and "network name."
terms used for network key include "encryption key," "WEP key," "WPA/WPA2 passphrase,"
and "preshared key (PSK)."
When manually setting up a wireless connection by specifying detailed settings, you need to
specify security settings. Check the following information:
● Security types (WEP/WPA-PSK/WPA2-PSK)
● Authentication method (Open System/Shared Key)
● Encryption method (TKIP/AES-CCMP)
y from a Computer
● If no access point is displayed on the scr
check if the setup is completed both on the computer and the wireless LAN router.
een after startup of the "Canon MF/LBP Wireless Setup Assistant,"
LINKS
Connecting to a Wireless LAN(P. 18)
Setting Up Connection by Selecting a Wireless Router(P. 24)
Setting Up Connection by Specifying Detailed Settings(P. 27)
30

Setting IP Addresses
Setting Up
261J-00J
Connecting the machine to a network r
available: IPv4 and IPv6. Congure these settings depending on the network environment. To use IPv6 addresses, you
need to properly congure the IPv4 address settings.
Setting IPv4 Address(P. 32)
Setting IPv6 Addresses(P. 35)
equires a unique network IP address. Two versions of IP addresses are
31

Setting IPv4 Address
1660-00W
The machine's IPv4 address can be either assigned automatically by a dynamic IP
addr
essing protocol, such as DHCP, or entered manually. When connecting the
machine to a wired LAN, make sure that the connectors of the LAN cable are rmly
inserted into the ports (
network connection if necessary.
Setting IPv4 Address(P. 32)
Testing the Network Connection(P. 33)
Setting IPv4 Address
Setting Up
Connecting to a Wired LAN(P. 17) ). Y
261J-00K
ou can test the
Select <Menu> in the Home screen.
1
Select <Preferences> <Network>.
2
● If the login scr
Select <TCP/IP Settings> <IPv4 Settings> <IP Address Settings>.
3
Congure IP addr
4
<Auto Acquire>
Select to automatically assign an IP addr
addressing is enabled.
een appears, enter the correct ID and PIN.
ess settings.
ess via DHCP protocol. When <On> is displayed, automatic
Home Screen(P. 122)
Logging in to the Machine(P. 133)
<Manually Acquire>
Select to congure the IP address settings by manually entering an IP address. In order to select this option,
the automatic acquirement must be set to <Off>.
<Check Settings>
Select when you want to view the current IP address settings.
Automatically assigning an IP address
Select <Auto Acquire>.
1
Select <On> in <Auto Acquire>, and select <Select Protocol>.
2
Select <DHCP>.
3
32

Setting Up
If you do not want to use DHCP/BOOTP/RARP to assign an IP address
● Select <Off>. If you select <DHCP> when these services ar
and communications resources searching the network for these services.
Check that <Auto IP> is set to <On>.
4
● If <Off> is selected, change the setting to <On>.
Select <Apply>.
5
e unavailable, the machine will waste time
● IP addr
Manually entering an IP address
1
2
3
Select <OK>.
5
Restart the machine.
6
● T
urn OFF the machine, wait for at least 10 seconds, and turn it back ON.
Checking whether the settings are correct
esses assigned via DHCP override the address obtained via Auto IP.
Select <Auto Acquire>, and select <Off> <Apply> in <Auto Acquire>.
Select <Manually Acquire>.
Enter <IP Address>, <Subnet Mask>, and <Gateway Address>, and select <Apply>.
● Mak
e sure that the Remote UI screen can be displayed with your computer (
UI(P. 416) ). If a computer is not available, you can check the connection by using the operation panel (
Testing the Network Connection(P. 33) ).
When you have changed the IP address after installing the printer driver
● When the MFNP port is used, the connection is maintained as long as the machine and the computer belong
to the same subnet; therefore, you do not need to add a new port. When the standard TCP/IP port is used,
you need to add a new port. Conguring Printer Ports(P. 44)
*
If you do not know which port is used, see Checking the Printer Port(P. 704) .
Starting Remote
Testing the Network Connection
Select <Menu> in the Home screen. Home Screen(P. 122)
1
Select <Preferences>
2
● If the login scr
een appears, enter the correct ID and PIN.
<Network>.
Logging in to the Machine(P. 133)
33

Setting Up
Select <TCP/IP Settings>
3
Enter the IPv4 address of another device on the network, and select <Apply>.
4
➠ If a pr
LINKS
Setting IPv6 Addresses(P. 35)
Viewing Network Settings(P. 38)
Conguring WINS
oper connection has been established, <Received response from the host.> is displayed.
(P. 62)
<IPv4 Settings> <PING Command>.
34

Setting IPv6 Addresses
Setting Up
261J-00L
The IPv6 addresses of the machine can be congur
setting IPv6 addresses, check the IPv4 address settings (
Settings(P
Note that the scan function that uses the scanner driver or MF Scan Utility is not
available in an IPv6 environment. The machine can use the following multiple IPv6
addresses:
Type Description
Link-local address An address that is only valid within a subnet or link and cannot be used to communicate with
de
vices beyond a router. A link-local address is automatically set when the IPv6 function of the
machine is enabled.
Manual address An address that is entered manually. When using this address, specify the prex length and default
router address.
Stateless address An address that is generated automatically using the MAC address of the machine and the network
prex that is advertised by the router. Stateless addresses are discarded when the machine is
restarted (or turned ON).
Stateful address An address obtained from a DHCP server using DHCPv6.
. 38) ). You need to set the correct IPv4 settings to use IPv6 addresses.
ed via the Remote UI. Before
Viewing IPv4
● For mor
Remote UI, see
1
2
3
4
5
e information about the basic operations to be performed when setting the machine from the
Setting Up Menu Options from Remote UI(P. 425) .
Start the Remote UI and log in to System Manager Mode. Starting Remote
UI(P
. 416)
Click [Settings/Registration] on the Portal page.
Remote UI Screen(P. 417)
Select [Network Settings] [IPv6 Settings].
Click [Edit].
Select the [Use IPv6] check box and congur
e the required settings.
35

Setting Up
[Use IPv6]
Select the check bo
[Stateless Address 1]
Select the check box when using a stateless address. When not using a stateless address, clear the check box.
[Use Manual Address]
When you want to manually enter an IPv6 address, select the check box and enter the IP address, prex
length, and default router address in the corresponding text boxes.
[IP Address]
Enter an IPv6 address. Addresses that start with "ff" (or multicast address) cannot be entered.
[Prex Length]
Enter a number that indicates how many bits are available for the network address.
[Default Router Address]
Specify the IPv6 address of the default router as necessary. Addresses that start with "ff" (or multicast
address) cannot be entered.
[Use DHCPv6]
Select the check box when using a stateful address. When not using DHCPv6, clear the check box.
Click [OK].
6
x to enable IPv6 on the machine. When not using IPv6, clear the check box.
Restart the machine.
7
● T
urn OFF the machine, wait for at least 10 seconds, and turn it back ON.
Checking whether the settings are correct
● Mak
e sure that the Remote UI screen can be displayed with your computer by using the IPv6 address of the
machine.
Starting Remote UI(P. 416)
36

Setting Up
Selecting settings from the operation panel
● IPv6 settings can also be accessed fr
When you have changed the IP addr
● You need to add a new port.
Conguring Printer Ports(P
LINKS
Setting IPv4 Address(P. 32)
Viewing Network Settings(P. 38)
om <Menu> in the Home screen.
<IPv6 Settings>(P. 462)
ess after installing the printer driver
. 44)
37

Setting Up
Viewing Network Settings
Viewing IPv4 Settings(P. 38)
Viewing IPv6 Settings(P. 38)
Viewing the MAC Address for Wired LAN(P. 38)
Viewing the MAC Address and Information for Wireless LAN(P. 39)
261J-00R
● The IP addr
● Connecting the machine to a switching hub or bridge may result in a connection failure even when the IP
address is correctly congured. This problem can be solved by setting a certain interval before the machine
starts communicating.
ou can print a list of the current network settings.
● Y
ess is not correctly congured if it is displayed as "0.0.0.0".
Setting a Wait Time for Connecting to a Network(P. 55)
User Data List/System Manager Data List(P. 584)
Viewing IPv4 Settings
<Status Monitor> <Network Information> <IPv4> Select the setting to view Check the
settings
Viewing IPv6 Settings
<Status Monitor> <Network Information> <IPv6> Select the setting to view Check the
settings
Viewing the MAC Address for Wired LAN
Select <Menu> in the Home screen.
1
Select <Preferences> <Network>.
2
● If the login scr
Select <Ethernet Driver Settings>.
3
➠ The MA
een appears, enter the correct ID and PIN.
C address is displayed.
Home Screen(P. 122)
38
Logging in to the Machine(P. 133)

Setting Up
Viewing the MAC Address and Information for Wireless LAN
Select <Menu> in the Home screen.
1
Select <Preferences> <Network>.
2
● If the login scr
Select <Wireless LAN Settings>.
3
Read the message that is displayed, and select <OK>.
4
Select <Connection Information>.
5
Select the setting to view.
6
een appears, enter the correct ID and PIN.
Home Screen(P. 122)
Logging in to the Machine(P. 133)
Viewing security information
o view WEP and WPA/WPA2-PSK information, select <Security Settings>.
● T
Viewing from the <Status Monitor> screen
● <Wireless LAN Status> and <Latest Error Information> can be viewed from <Status Monitor>.
<Status Monitor>
LINKS
Connecting to a Wireless LAN(P. 18)
Setting IPv4 Address(P. 32)
Setting IPv6 Addresses(P. 35)
Conguring DNS(P
. 56)
<Network Information> <Network Connection Type> Select the setting to view
39

Setting Up
Conguring Settings for Communication with a
Computer
261J-00S
Specify the pr
machine for printing or faxing from a computer, perform the basic setup procedures. For more information, see the
manuals for the relevant drivers on the online manual website.
Conguring Printing Pr
Conguring Printer Ports(P
Setting Up Print Server(P. 48)
● Pr
otocol and port when operating the machine from a computer via the network. Before conguring the
otocols and WSD Functions(P. 41)
. 44)
otocols explained here are rules for delivering document data between a computer and the machine, and
can be selected according to intended purposes or the network environment.
● Ports are gateways for passing data between network devices. If a communication failure occurs in the
network connection, the port settings may be the cause of the problem.
40

Setting Up
Conguring Printing Pr
Congur
e the protocols that are used for printing documents from a networked computer.
● For mor
Remote UI, see
1
2
3
e information about the basic operations to be performed when setting the machine from the
Setting Up Menu Options from Remote UI(P. 425) .
Start the Remote UI and log in to System Manager Mode. Starting Remote
UI(P
. 416)
Click [Settings/Registration] on the Portal page.
Click [Network Settings].
otocols and WSD Functions
261J-00U
Remote UI Screen(P. 417)
Congure printing pr
4
Conguring LPD or RAW
Select [LPD Settings] or [RAW Settings]
1
Congure the settings as necessary
2
[Use LPD Printing]
Select the check bo
otocols.
[Edit].
.
x to print via LPD. When not using LPD printing, clear the check box.
[Use RAW Printing]
Select the check box to print via RAW. When not using RAW printing, clear the check box.
[RX Timeout]
Set a value as the restart wait time for data reception. If data reception does not resume within the set
time, printing is canceled.
Click [OK].
3
41

Conguring WSD
Select [WSD Settings] [Edit].
1
Setting Up
Congure the settings as necessary
2
[Use WSD Printing]
Select the check bo
[Use WSD Browsing]
Select the check box to obtain information about the machine from a computer via WSD. This check box is
automatically selected when the [Use WSD Printing] check box is selected.
[Use WSD Scanning]
WSD scanning enables you to scan documents to a computer without installing the scanner driver. Select
the check box to scan documents via WSD. When not using WSD scanning, clear the check box.
x to print via WSD. When not using WSD printing, clear the check box.
.
[Use Computer Scanning]
Select the check box to use WSD scanning by operating the machine with the operation panel. This check
box can only be selected when the [Use WSD Scanning] check box is selected. To perform scanning, select
<Scan> in the Home screen and specify a WSD-connected computer as a scan destination (
and Saving to a Computer(P
[Use Multicast Discovery]
Select the check box to set the machine to reply to multicast discovery messages. If the check box is
cleared, the machine stays in sleep mode even when multicast discovery messages are owing on the
network.
Click [OK].
3
Restart the machine.
5
● T
urn OFF the machine, wait for at least 10 seconds, and turn it back ON.
. 281) ).
Selecting settings from the operation panel
● LPD
, RAW, and WSD settings can also be accessed from <Menu> in the Home screen.
<LPD Settings>(P. 464)
<RAW Settings>(P. 465)
<WSD Settings>(P. 465)
Scanning
Setting up WSD network de
● The WSD network devices can be added from the printer folder. Open the printer folder (
Printer Folder(P
. 699) )
vices
click [Add a device] or [Add a printer] and follow the on-screen instructions. For
42
Displaying the

Setting Up
more information about how to install the driver for the WSD network, see the manuals for the relevant
drivers on the online manual website.
T
o change the port number
● The same port number used for the machine and a computer must be used for printing protocol.
Conguring Printer Ports(P
Changing Port Numbers(P. 373)
. 44)
LINKS
Conguring Printer Ports(P
. 44)
43

Conguring Printer Ports
Setting Up
261J-00W
Printing err
the Windows printer folder. These errors are typically caused by incorrect printer port settings. For example, an
incorrect port number or port type may have been specied. In such situations, your attempt to print fails because the
document data cannot reach the machine. To x this type of problem, congure the printer port settings on the
computer.
● T
ors can occur when the IP address of the machine has been changed, or when a printer has been added via
o perform the following procedure, log in to your computer with an administrator account.
Open the printer folder.
1
Right-click the driver icon for this machine, and click [Printer properties] or
2
[Pr
operties].
Click the [Ports] tab and congur
3
Displaying the Printer Folder(P. 699)
e the required settings.
Adding a port
If you have changed the IP addr
drivers from the Windows printer folder, add a new port. There are two types of port: "MFNP Port" and
"Standard TCP/IP Port." Select the port type according to your environment.
MFNP Port
(only for IPv4 envir
onment)
ess of the machine or you have selected an incorrect port while installing
This is a port that allows the IP address of the machine to be detected automatically.
Even if the IP addr
provided that the machine and the computer are in the same subnet. You do not need
to add a new port every time the IP address is changed. If you are using the machine
in an IPv4 environment, you should normally select this type of port.
● Y
ou can add an MFNP port only when you installed the driver from the provided
CD-ROM/DVD-ROM, or when you downloaded and installed the printer driver or
the fax driver from the Canon website.
ess of the machine is changed, the connection is maintained,
44

Setting Up
Standard TCP/IP Port This is a standard Windows port. When you use this type of port, you need to add a
ne
w port every time that the IP address of the machine is changed. Select this type of
port when you are using the machine in an IPv6 environment and when you cannot
add an MFNP port.
Adding an MFNP port
Click [Add Port].
1
Select [Canon MFNP Port] in [Available port types] and click [New Port].
2
Select [Auto Detect] and select the machine when it is detected, and then click [Next].
3
If the machine is not detected
● Click [Refr
MAC address of the machine (
Click [Add]
4
Click [Close].
5
Adding a standard TCP/IP port
Click [Add Port].
1
Select [Standard TCP/IP Port] in [Available port types] and click [New Port].
2
Click [Next].
3
Enter the IP address or the DNS name of the machine, and click [Next].
4
● The [Port Name] is enter
esh]. If the problem persists, select [IP address] or [MAC address], enter the IP address or
Viewing Network Settings(P. 38) ) and then click [Ne
[Finish].
ed automatically. If necessary, you can change it.
xt].
45

Setting Up
● When the ne
*
When you select the [De
Click [Finish].
5
Click [Close].
6
xt screen is displayed, follow the instructions on the screen.
vice Type], select [Canon Network Printing Device with P9100] under [Standard].
Changing the port type or number
If the printing pr
Pr
otocols and WSD Functions(P. 41) ) or the port number has been changed (
Numbers(P
not needed for WSD ports.
otocol (LPD or RAW) has been changed on the machine side (
. 373) ), the corresponding settings on the computer must also be congured. This operation is
Conguring Printing
Changing Port
MFNP port
Click [Congure Port].
1
Under [Protocol Type], select [RAW] or [LPR], and change the [Port Number].
2
Click [OK].
3
Standard TCP/IP port
Click [Congur
1
Under [Protocol], select [Raw] or [LPR].
2
e Port].
46

Setting Up
● If you selected [Raw], change the [Port Number].
● If you selected [LPR], enter "lp
Click [OK].
3
Click [Close].
4
LINKS
Setting Up Print Server(P. 48)
" in [Queue Name].
47

Setting Up Print Server
Setting Up
261J-00X
With a print server, you can r
possible to install the drivers on each computer over the network, which saves you the trouble of installing the drivers
on each computer by using the provided CD-ROM/DVD-ROM. To set up a computer on the network as a print server,
congure the settings for sharing the printer.
o perform the following procedure, log in to your computer with an administrator account.
● T
● You may be unable to install drivers over the network depending on the operating system and the bit
architecture (32-bit or 64-bit) of the print server and client computers.
● When implementing a print server in a domain environment, consult your Network Administrator.
To carry out Department ID Management when using a print server
● "Canon Driver Information Assist Service
information, see the manuals for the relevant drivers on the online manual website.
Open the printer folder.
1
educe the load on the computer that you print from. The print server also makes it
" must be added during the printer driver installation. For more
Displaying the Printer Folder(P. 699)
Right-click the printer driver icon for this machine and click [Printer properties] or
2
[Pr
operties].
Click the [Sharing] tab, select [Share this printer], and enter the share name of the
3
machine.
● Click the [Change Sharing Options] button if displayed.
Install additional drivers as necessary.
4
● This oper
architecture via the print server.
ation is required if you want to install the drivers in other computers running a different bit
48

Setting Up
Click [Additional Drivers].
1
Select the check box for the bit architecture that other computers are running, and click [OK].
2
● Select additional drivers fr
Print server Select the check box for
32-bit operating systems [x64]
64-bit operating systems [x86] under [Processor]
● If you do not kno
Checking the Bit Architecture(P. 702) .
Insert the provided CD-ROM/DVD-ROM into the drive on the computer, click [Browse] to specify the folder
3
that contains the drivers, and then click [OK].
● If the print server runs a 32-bit oper
[Driver] folders on the provided CD-ROM/DVD-ROM.
● If the print server runs a 64-bit oper
[Driver] folders on the provided CD-ROM/DVD-ROM.
Follow the on-screen instructions to install additional drivers.
4
w whether your Windows operating system is a 32-bit or 64-bit version, see
om the following, according to the operating system of the print server.
ating system, select [intdrv]
ating system, select [intdrv]
[UFRII] [uk_eng] [x64]
[UFRII] [uk_eng] [32BIT]
Click [OK].
5
◼ Installing the Drivers on a Computer via the Print Server
Locate the shared printer in the print server.
1
Print Server(P
Double-click the shared printer.
2
. 700)
49
Displaying Shared Printers in the

Follow the on-screen instructions to install the drivers.
3
LINKS
Printing from a Computer(P. 255)
Setting Up
50

Setting Up
Conguring the Machine for Y
our Network
Environment
261J-00Y
The congur
be compatible with as many network congurations as possible, and it is equipped with a variety of technologies.
Consult your Network Administrator and set a conguration to suit your network environment.
ation of a network varies depending on the purpose of the network. The machine has been designed to
Conguring Ethernet Settings(P
Changing the Maximum Transmission Unit(P. 54)
Setting a Wait Time for Connecting to a Network(P. 55)
Conguring DNS(P
Conguring SMB
Conguring WINS
Registering LDAP Servers(P. 64)
Monitoring and Controlling the Machine with SNMP(P. 69)
Other Network Settings(P. 73)
. 56)
(P. 60)
(P. 62)
. 52)
51

Setting Up
Conguring Ethernet Settings
Ethernet is a standard for communicating data in a local area network (LAN). You can
set the communication mode and the Ethernet type. In gener
used without changing the defaults (
you can change these settings to suit your network envir
261J-010
al, the machine can be
<Ethernet Driver Settings>(P. 469) ), but
onment.
Select <Menu> in the Home screen.
1
Select <Preferences>
2
● If the login scr
Select <Ethernet Driver Settings>.
3
Select whether to congur
4
● If auto-detection is enabled, the machine detects and automatically sets the Ethernet communication mode
and the type that can be used.
een appears, enter the correct ID and PIN.
<Network>.
e Ethernet settings automatically or manually.
Home Screen(P. 122)
Logging in to the Machine(P. 133)
Conguring Ethernet settings automatically
Select <On> in <Auto Detect>.
Conguring Ethernet settings manually
Select <Off> in <Auto Detect>.
1
<Communication Mode>
2
<Half Duplex>
Alternately sends and r
networking device using half duplex.
select the communication mode.
eceives communication data. Select when the machine is connected to a
52

<Full Duplex>
Simultaneously sends and r
Setting Up
eceives communication data. Use this setting for most environments.
<Ethernet Type>
3
Select <Apply>.
4
Select <OK>.
5
Restart the machine.
6
● T
urn OFF the machine, wait for at least 10 seconds, and turn it back ON.
LINKS
Changing the Maximum Transmission Unit(P. 54)
Setting a Wait Time for Connecting to a Network(P. 55)
select the Ethernet type.
53

Setting Up
Changing the Maximum Transmission Unit
261J-011
In most Ethernet networks, the maximum size of a pack
data into which the original data is divided before being sent. The maximum transmission unit (MTU) may vary on each
network. Change the settings of the machine as necessary. For more information, contact your Network Administrator.
Select <Menu> in the Home screen.
1
Select <Preferences> <Network>.
2
● If the login scr
Select <TCP/IP Settings> <MTU Size>.
3
Select the MTU.
4
een appears, enter the correct ID and PIN.
et that can be sent is 1500 bytes. A packet refers to a chunk of
Home Screen(P. 122)
Logging in to the Machine(P. 133)
Select <OK>.
5
Restart the machine.
6
● T
urn OFF the machine, wait for at least 10 seconds, and turn it back ON.
LINKS
Conguring Ethernet Settings(P
Setting a Wait Time for Connecting to a Network(P. 55)
. 52)
54

Setting Up
Setting a Wait Time for Connecting to a Network
261J-012
When a network is designed to enjo
mechanism to prevent packets from looping. One effective solution is to dene the role of each switch port. However,
communication may still be disrupted for several tens of seconds immediately after you change the way that network
devices are connected, or if you add a new device. If this type of problem occurs, set a wait time for connecting to the
network.
Select <Menu> in the Home screen.
1
Select <Preferences> <Network>.
2
● If the login scr
3
4
LINKS
Select <Wait Time for Conn. at Startup>.
Enter the waiting time required to start a communication with the network, and
select <Apply>.
een appears, enter the correct ID and PIN.
y redundant connectivity with multiple switching hubs or bridges, it must have a
Home Screen(P. 122)
Logging in to the Machine(P. 133)
Conguring Ethernet Settings(P
Changing the Maximum Transmission Unit(P. 54)
. 52)
55

Conguring DNS
Setting Up
261J-013
DNS (Domain Name System) pr
address. Congure the DNS, mDNS, or DHCP option settings as necessary. Note that the procedures for conguring
DNS are different for IPv4 and IPv6.
● For mor
Remote UI, see
1
2
e information about the basic operations to be performed when setting the machine from the
Start the Remote UI and log in to System Manager Mode. Starting Remote
UI(P
. 416)
Click [Settings/Registration] on the Portal page.
ovides a service for name resolution that associates a host (or domain) name with an IP
Setting Up Menu Options from Remote UI(P. 425) .
Remote UI Screen(P. 417)
Click [Network Settings].
3
Congure DNS settings.
4
Conguring IPv4 DNS
Select [IPv4 Settings]
1
Congure IPv4 DNS settings.
2
[Edit].
56

Setting Up
[DHCP Option Settings]
[Acquire Host Name]
Select the check box to enable Option 12 to obtain the host name from the DHCP server.
[DNS Dynamic Update]
Select the check box to enable Option 81 to dynamically update the DNS records through the DHCP
server.
[Acquire DNS Server Address]
Select the check box to enable Option 6 to obtain a DNS server address from the DHCP server.
[Acquire Domain Name]
Select the check box to enable Option 15 to obtain a domain name from the DHCP server.
[Acquire WINS Server Address]
Select the check box to enable Option 44 to obtain a WINS server address from the DHCP server.
[Acquire SMTP Server Address]
Select the check box to enable Option 69 to obtain an SMTP server address from the DHCP server.
[Acquire POP Server Address]
Select the check box to enable Option 70 to obtain a POP3 server address from the DHCP server.
[DNS Settings]
[Primary DNS Server Addr
Enter the IP address of a DNS server.
ess]
[Secondary DNS Server Address]
Enter the IP address of a secondary DNS server, if any.
[Host Name]
Enter alphanumeric characters for the host name of the machine that is to be registered to the DNS
server.
[Domain Name]
Enter alphanumeric characters for the name of the domain the machine belongs to, such as
"example.com."
[DNS Dynamic Update]
Select the check box to dynamically update the DNS records whenever the machine's IP address is
changed. When specifying the interval between updates, enter the time in hours in the [DNS
Dynamic Update Interval] text box.
57

[mDNS Settings]
[Use mDNS]
3
Adopted b
address without using DNS. Select the check box to enable mDNS and enter the mDNS name in the
[mDNS Name] text box.
Click [OK].
y Bonjour, mDNS (multicast DNS) is a protocol for associating a host name with an IP
Conguring IPv6 DNS
Select [IPv6 Settings] [Edit].
1
Congure IPv6 DNS settings.
2
● The [Use IPv6] check bo
Setting Up
x must be selected to congure the settings.
Setting IPv6 Addresses(P. 35)
[DHCP Option Settings]
[Acquire DNS Server Address]
Select the check box to enable Option 23 to obtain a DNS server address from the DHCP server.
[Acquire Domain Name]
Select the check box to enable Option 24 to obtain a domain name from the DHCP server.
[DNS Settings]
[Primary DNS Server Addr
Enter the IP address of a DNS server. Addresses that start with "ff" (or multicast address) cannot be
entered.
[Secondary DNS Server Address]
Enter the IP address of a secondary DNS server, if any. Addresses that start with "ff" (or multicast
address) cannot be entered.
[Use Same Host Name/Domain Name as IPv4]
Select the check box to use the same host and domain names as in IPv4.
[Host Name]
Enter alphanumeric characters for the host name of the machine that is to be registered to the DNS
server.
[Domain Name]
ess]
58

3
Setting Up
Enter alphanumeric characters for the name of the domain the machine belongs to, such as
"
example.com."
[DNS Dynamic Update]
Select the check box to dynamically update the DNS records whenever the machine's IP address is
changed. To specify the type(s) of addresses you want to register to the DNS server, select the
check box for [Register Manual Address], [Register Stateful Address], or [Register Stateless
Address]. To specify the interval between updates, enter the time in hours in the [DNS Dynamic
Update Interval] text box.
[mDNS Settings]
[Use mDNS]
Adopted b
address without using DNS. Select the check box to enable mDNS.
[Use Same mDNS Name as IPv4]
Select the check box to use the same mDNS name as in IPv4. To set a different name, clear the
check box and enter the mDNS name in the [mDNS Name] text box.
Click [OK].
y Bonjour, mDNS (multicast DNS) is a protocol for associating a host name with an IP
Restart the machine.
5
● Turn OFF the machine, wait for at least 10 seconds, and turn it back ON.
Selecting settings from the operation panel
● DNS settings can also be accessed from <Menu> in the Home screen. <DNS Settings>(P. 463)
LINKS
Setting IPv4 Address(P. 32)
Setting IPv6 Addresses(P. 35)
Viewing Network Settings(P. 38)
59

Setting Up
Conguring SMB
Server Message Block (SMB) is a protocol for sharing resources, such as les and
printers, with mor
scanned documents into a shared folder. Depending on your network, you may have
to set the NetBIOS name and workgroup name.
NetBIOS Name
In a Windows network that uses NetBIOS, NetBIOS names are used for identifying network-connected
computers as well as for le sharing and other network services. Most computers use the computer name as
the NetBIOS name.
orkgroup Name
W
Workgroup name is a name for grouping multiple computers so that basic network functions, such as le
sharing, become available in a Windo
machine belongs to.
ws network. Specify the workgroup name to identify the group that the
e than one device in a network. The machine uses SMB to store
261J-014
● For mor
Remote UI, see
1
2
3
4
5
e information about the basic operations to be performed when setting the machine from the
Setting Up Menu Options from Remote UI(P. 425) .
Start the Remote UI and log in to System Manager Mode.
. 416)
UI(P
Click [Settings/Registration] on the Portal page.
Select [Network Settings] [SMB Settings].
Click [Edit].
Specify the required settings.
Starting Remote
Remote UI Screen(P. 417)
60

Setting Up
[NetBIOS Name]
Enter alphanumeric char
[Workgroup Name]
Enter alphanumeric characters for the name of the workgroup that the machine belongs to.
acters for the NetBIOS name of the machine.
● NetBIOS names or workgr
Click [OK].
6
Restart the machine.
7
● T
urn OFF the machine, wait for at least 10 seconds, and turn it back ON.
LINKS
Conguring WINS(P. 62)
oup names that start with an asterisk (*) cannot be registered to a WINS server.
61

Setting Up
Conguring WINS
Windo
ws Internet Name Service (WINS) is a name resolution service that associates a NetBIOS name (a computer or
printer name in an SMB network) with an IP address. To enable WINS, the WINS server must be specied.
261J-015
● In or
● The function is not available in an IPv6 network.
● For mor
der to specify WINS server settings, NetBIOS name and workgroup name are required to be set.
Conguring SMB
e information about the basic operations to be performed when setting the machine from the
Remote UI, see
Start the Remote UI and log in to System Manager Mode.
1
. 416)
UI(P
Click [Settings/Registration] on the Portal page.
2
Select [Network Settings] [WINS Settings].
3
(P. 60)
Setting Up Menu Options from Remote UI(P. 425) .
Starting Remote
Remote UI Screen(P. 417)
Click [Edit].
4
Select the [WINS Resolution] check box, and specify the required settings.
5
[WINS Resolution]
Select the check bo
[WINS Server Address]
Enter the IP address of the WINS server.
x to use WINS for name resolution. When not using WINS, clear the check box.
62

Setting Up
● If
the IP address of the WINS server is obtained from a DHCP server, the obtained IP address overrides the
IP address entered in the [WINS Server Address] text box.
Click [OK].
6
Restart the machine.
7
● T
urn OFF the machine, wait for at least 10 seconds, and turn it back ON.
Selecting settings from the operation panel
● WINS settings can also be accessed fr
LINKS
Setting IPv4 Address(P. 32)
om <Menu> in the Home screen.
<WINS Settings>(P. 464)
63

Registering LDAP Servers
If an LDAP server is implemented in the network, you can search the server for fax
numbers or e-mail addr
them in the Address Book. Note also that if send function authentication (
Server Authentication
authentication. You can register a maximum of ve LDAP servers each for searching
and for authentication to the machine. Register LDAP servers via the Remote UI.
Setting Up
261J-016
esses, and then specify them as destinations or register
LDAP
(P. 360) ) is enabled, you must register the server used for
● For mor
Remote UI, see
1
2
3
4
● LD
e information about the basic operations to be performed when setting the machine from the
Setting Up Menu Options from Remote UI(P. 425) .
Start the Remote UI and log in to System Manager Mode.
. 416)
UI(P
Click [Settings/Registration] on the Portal page.
Click [LDAP Server Settings].
Click [Register New Server] for [LDAP Server (For Search)] or [LDAP Server (For
Authentication)].
AP server registration needs to be performed separately either for searching or for authentication. To use
an LDAP server for searching for fax and e-mail destinations, register it for searching, and to use it for
authenticating sending of e-mail or faxes, register it for authenticating.
Remote UI Screen(P. 417)
Starting Remote
To edit registered server information
● Click a te
To delete registered server information
● Click [Delete] on the right of the server name you want to delete
Register the LDAP server.
5
Register the server used for searches
Register the server for sear
xt link under [Server Name] for the edit screen.
ching for fax or e-mail destinations.
64
click [OK].

Setting Up
[Server Name]
Enter the name to be assigned to the LD
[Server Address]
Enter the IP address of the LDAP server or enter alphanumeric characters for the host name of the server
(example: ldap.example.com).
[Server Address] and DNS
● To prevent errors from occurring when searching for destinations, make sure to check the
following:
- If the host name is entered for [Server Address], make sure that a DNS server is available in the network.
- If the IP address is entered for [Server Address], check whether the DNS server supports only forward
lookup. If the server supports only forward lookup, select [Do Not Use] or [Use] for [Login Information]. If
you select [Use (Security Authentication)], make sure that the DNS server supports reverse lookup.
[Position to Start Search]
Specify the node in the dir
blank sets the machine to start search from an arbitrary node selected automatically.
● When specifying the node, enter "DC=," followed by a host name (a dot-delimited character string in the
Active Directory domain name), and separate each of the entries with a comma. If the domain name is
"john.example.com," for example, enter "DC=john,DC=example,DC=com."
[Use TLS]
Select the check box to encrypt communication with the LDAP server using TLS.
ectory information tree (DIT) that you want to start search from. Leaving the text box
AP server.
● This
[Port Number]
Enter the port number used for communicating with the LDAP server.
[Search Timeout]
is enabled only when [Use] or [Use (Security Authentication)] is selected in [Login
Information].
65

Setting Up
Specify how long the machine searches.
[Login Information]
Select [Do Not Use], [Use], or [Use (Security Authentication)] depending on the type of authentication
implemented b
y the LDAP server. When [Use] or [Use (Security Authentication)] is selected, the user name and
password must be specied.
[Do Not Use] Select not to authenticate the machine using the login information.
[Use] Select to authenticate the machine using the login information.
Select to use data obtained by Kerberos, a network authentication protocol, for the
[Use (Security Authentication)]
authentication passwor
synchronized with that of the LDAP server.
d. If this setting is selected, the clock of the machine needs to be
[Display Authentication Screen When Searching]
Select the check bo
x to require the user to enter the user name and password when a search is requested. If the
[Use Same Authentication Information as When Send Operation Started] check box is selected, the user name
and password used for authentication when sending faxes or scans are also used here. If the check box is
cleared, authentication is carried out using the information entered in [User Name] and [Password].
[Use Same Authentication Information as When Send Operation Started]
Set whether the authentication information when the fax or scan function was used is also used when
searching. This check box is normally displayed selected; however, it is only valid when the [Display
Authentication Screen When Searching] check box is selected.
[User Name]
Enter the user name of the machine that was registered to the LDAP server.
● When [Use] is selected for [Login Information], enter the user name in the form "(domain name)\(user
name)" (example: domain1\user1).
● When [Use (Security Authentication)] is selected, enter the user name only (example: user1).
[Set/Change Password]
To specify or change the password, select the check box and enter alphanumeric characters in the [Password]
text box.
[Domain Name]
When [Use (Security Authentication)] is selected for [Login Information], enter alphanumeric characters for the
directory tree name in Active Directory (example: example.com).
[Conrm TLS Certicate for LDAP Server Access]
Select the check box to verify the certicate when encrypting communication with the LDAP server using TLS.
Also, select the [Add CN to Verication Items] check box as necessary.
Registering the authentication server
If the use of the fax and scan functions is restricted, register the server used for authentication.
66

Setting Up
[Server Name]
Enter the name to be assigned to the LD
[Server Address]
Enter the IP address of the LDAP server or enter alphanumeric characters for the host name of the server
(example: ldap.example.com).
[Server Address] and DNS
● To prevent errors from occurring when searching for destinations, make sure to check the
following:
- If the host name is entered for [Server Address], make sure that a DNS server is available in the network.
- If the IP address is entered for [Server Address], check whether the DNS server supports only forward
lookup. If the server supports only forward lookup, select [Use] for [Login Information]. If you select [Use
(Security Authentication)], make sure that the DNS server supports reverse lookup.
[Position to Start Search]
Specify the node in the dir
blank sets the machine to start search from an arbitrary node selected automatically.
● When specifying the node, enter "DC=," followed by a host name (a dot-delimited character string in the
Active Directory domain name), and separate each of the entries with a comma. If the domain name is
"john.example.com," for example, enter "DC=john,DC=example,DC=com."
[Use TLS]
Select the check box to encrypt communication with the LDAP server using TLS.
ectory information tree (DIT) that you want to start search from. Leaving the text box
AP server.
● This is enabled only when [Use] is selected in [Login Information].
[Port Number]
Enter the port number used for communicating with the LD
[Authentication/Attribute Acquisition Timeout]
Specify how long authentication and attribute acquisition can continue.
AP server.
67

Setting Up
[User Name Attribute]
Enter the attribute name, to be compar
alphanumeric characters (Example: "sAMAccountName").
ed with a user name entered during authentication, consisting of
● Not r
[E-Mail Address Attribute]
Enter the attribute name, to be used for obtaining an e-mail address from the authentication server, consisting
of alphanumeric characters (Example: "mail").
[Login Information]
Select [Use] or [Use (Security Authentication)] depending on the type of authentication implemented by the
LDAP server.
[Use] Select to authenticate the machine using the System Manager ID.
[Use (Security Authentication)]
[Use System Manager ID]
If [Use] is selected in [Login Information], this species whether authentication using the system manager ID is
used. T
authentication. If you deselect the check box, logins are anonymous (no user name).
[User Name]
Enter the user name of the machine that was registered to the LDAP server in the form "(domain name)\(user
name)" (example: domain1\user1).
[Set/Change Password]
To specify or change the password, select the check box and enter alphanumeric characters in the [Password]
text box.
equired if [Use (Security Authentication)] is selected in [Login Information].
Select to use data obtained by Kerberos, a network authentication protocol, for the
authentication passwor
synchronized with that of the LDAP server.
o use the system manager ID, select the check box and specify the user name and password used for
d. If this setting is selected, the clock of the machine needs to be
[Domain Name]
When [Use (Security Authentication)] is selected for [Login Information], enter alphanumeric characters for the
directory tree name in Active Directory (example: example.com).
[Conrm TLS Certicate for LDAP Server Access]
Select the check box to verify the certicate when encrypting communication with the LDAP server using TLS.
Also, select the [Add CN to Verication Items] check box as necessary.
Click [OK].
6
LINKS
Conguring SNTP(P. 73)
Basic Operations for Sending Faxes(P. 215)
Basic Operations for Scanning Originals(P. 280)
LDAP Server Authentication(P. 360)
68

Setting Up
Monitoring and Controlling the Machine with SNMP
261J-017
Simple Network Management Pr
network by using Management Information Base (MIB). The machine supports SNMPv1 and security-enhanced
SNMPv3. You can check the status of the machine from a computer when you print documents or use the Remote UI.
You can enable either SNMPv1 or SNMPv3, or both at the same time. Specify the settings for each version to suit your
network environment and the purpose of use.
otocol (SNMP) is a protocol for monitoring and controlling communication devices in a
SNMPv1
SNMPv1 uses information called "community" to dene the scope of SNMP communication. Because this
information is e
ensure network security, disable SNMPv1 and use SNMPv3.
xposed to the network in plain text, your network will be vulnerable to attacks. If you want to
SNMPv3
With SNMPv3, you can implement network device management that is protected by robust security features.
Note that TLS must be enabled for the Remote UI befor
Certicate for TLS(P. 377) ).
e conguring SNMPv3 (
Conguring the Ke
y and
● The machine does not support the tr
● To change the port number of SNMP, see
● SNMP management softwar
monitor, and control the machine remotely from the computer. For more information, see the instruction
manuals for your management software.
● For more information about the basic operations to be performed when setting the machine from the
Remote UI, see
Start the Remote UI and log in to System Manager mode.
1
UI(P
. 416)
Click [Settings/Registration] on the Portal page.
2
Select [Network Settings] [SNMP Settings].
3
Click [Edit].
4
Setting Up Menu Options from Remote UI(P. 425) .
e, when installed on a computer on the network, enables you to congure,
ap notication feature of SNMP.
Changing Port Numbers(P. 373) .
Starting Remote
Remote UI Screen(P. 417)
69

Specify SNMPv1 settings.
5
Setting Up
● If you do not need to change SNMPv1 settings, pr
[Use SNMPv1]
Select the check bo
is selected.
x to enable SNMPv1. You can specify the rest of SNMPv1 settings only when this check box
oceed to the next step.
[Use Community Name 1]/[Use Community Name 2]
Select the check box to specify a community name. If you do not need to specify a community name, clear
the check box.
[Community Name]
Enter alphanumeric characters for the name of the community.
[MIB Access Permission]
For each community, select [Read/Write] or [Read Only] for the access privileges to MIB objects.
[Read/Write] Permits both viewing and changing the values of MIB objects.
[Read Only] Permits only viewing the values of MIB objects.
[Use Dedicated Community]
Dedicated Community is a pr
such as iW Management Console. Select the check box to use Dedicated Community, and specify [MIB Access
Permission]. If you do not need to use Dedicated Community, clear the check box.
Specify SNMPv3 settings.
6
● If you do not need to change SNMPv3 settings, pr
eset community, intended exclusively for Administrators using Canon software,
oceed to the next step.
70

Setting Up
[Use SNMPv3]
Select the check bo
is selected.
[Enable User]
Select the check box to enable [User Settings 1]/[User Settings 2]/[User Settings 3]. To disable user settings,
clear the corresponding check box.
[User Name]
Enter alphanumeric characters for the user name.
[MIB Access Permission]
Select [Read/Write] or [Read Only] for the access privileges to MIB objects.
[Read/Write] Permits both viewing and changing the values of MIB objects.
[Read Only] Permits only viewing the values of MIB objects.
[Security Settings]
Select [Authentication On/Encryption On], [Authentication On/Encryption Off], or [Authentication Off/
Encryption Off] for the desir
[Authentication Algorithm]
If you have selected [Authentication On/Encryption On] or [Authentication On/Encryption Off] in [Security
Settings], select the appropriate authentication algorithm for your network environment.
[Encryption Algorithm]
If you have selected [Authentication On/Encryption On] in [Security Settings], select the appropriate
encryption algorithm for your network environment.
x to enable SNMPv3. You can specify the rest of SNMPv3 settings only when this check box
ed combination of authentication and encryption settings.
[Set/Change Password]
To set or change the password, select the check box and enter alphanumeric characters for the password in
the [Authentication Password] or [Encryption Password] text box. For conrmation, enter the same password
in the [Conrm] text box. Passwords can be set independently for authentication and encryption algorithms.
Specify Printer Management Information Acquisition Settings.
7
71

Setting Up
● With SNMP
monitored and obtained regularly from a computer on the network.
[Acquire Printer Management Information from Host]
Select the check bo
To disable monitoring of the printer management information, clear the check box.
Click [OK].
8
Restart the machine.
9
, the printer management information, such as printing protocols and printer ports, can be
x to enable monitoring of the printer management information of the machine via SNMP.
● T
urn OFF the machine, wait for at least 10 seconds, and turn it back ON.
Disabling SNMPv1
● If SNMPv1 is disabled, some of the functions of the machine become unavailable, such as obtaining machine
information via the printer driver.
Using the oper
● You can enable or disable the SNMP settings from <Menu>.
Enabling Both SNMPv1 and SNMPv3
● If both versions of SNMP ar
[Read Only]. MIB access permission can be set independently in SNMPv1 and SNMPv3 (and for each user in
SNMPv3). Selecting [Read/Write] (full access permission) in SNMPv1 negates the robust security features
that characterize SNMPv3 because most of the machine settings can then be controlled with SNMPv1.
ation panel
<SNMP Settings>(P. 467)
e enabled, it is recommended that MIB access permission in SNMPv1 be set to
LINKS
Conguring the Ke
y and Certicate for TLS(P. 377)
72

Other Network Settings
Setting Up
261J-018
Congur
e the following items according to your network environment.
Conguring FTP P
Conguring SNTP
Monitoring the Machine from the Device Management Systems(P. 74)
ASV Mode(P. 73)
(P. 73)
Conguring FTP PASV Mode
PASV is an FTP communication mode used for le transfer. To connect to an FTP server through a rewall, you must
use PASV mode. First check that the PASV mode is set on the FTP server.
● Whether P
server to which data is being sent. For more information, contact your Network Administrator.
ASV mode is used for FTP depends on your network environment and the settings on the FTP
<Menu> <Preferences> <Network> <TCP/IP Settings> <Use FTP PASV Mode> <On>
<OK> Restart the machine
Conguring SNTP
Simple Network Time Pr
If SNTP is used, the time server is checked at the specied intervals; therefore, the correct time can always be
maintained. The time is adjusted based on Coordinated Universal Time (UTC), so specify the time zone setting before
conguring SNTP (
● The SNTP of the machine supports both NTP (version 3) and SNTP (versions 3 and 4) servers.
● For mor
Remote UI, see
1
2
3
e information about the basic operations to be performed when setting the machine from the
Start the Remote UI and log in to System Manager Mode.
. 416)
UI(P
Click [Settings/Registration] on the Portal page.
Select [Network Settings] [SNTP Settings].
otocol (SNTP) enables you to adjust the system clock by using the time server on the network.
Setting the Date/Time(P. 12) ). SNTP settings can be specied via the Remote UI.
Setting Up Menu Options from Remote UI(P. 425) .
Starting Remote
Remote UI Screen(P. 417)
Click [Edit].
4
73

Setting Up
Select the [Use SNTP] check box and specify the required settings.
5
[Use SNTP]
Select the check bo
[NTP Server Name]
Enter the IP address of the NTP or the SNTP server. If DNS is available on the network, you can enter a host
name (or FQDN) consisting of alphanumeric characters instead (example: ntp.example.com).
x to use SNTP for synchronization. If you do not want to use SNTP, clear the check box.
[Polling Interval]
Specify the interval between one synchronization and the next.
Click [OK].
6
Restart the machine.
7
● T
urn OFF the machine, wait for at least 10 seconds, and turn it back ON.
Testing communication with the NTP/SNTP server
● Y
ou can view communication status with the registered server by clicking [Settings/Registration]
Settings] [Check NTP Server] in [SNTP Settings]. If a proper connection has been established, the result is
displayed as sho
wn below. Note that this operation does not adjust the system clock.
[Network
Monitoring the Machine from the Device Management Systems
Y
ou can facilitate the collection and management of various information about networked devices by implementing
device management software, such as iW Management Console*, into the network. Information such as device
settings and error logs is retrieved and distributed via the server computer. If the machine is connected to such a
network, iW Management Console searches the network for the machine by using protocols such as Service Location
Protocol (SLP) to gather information from the machine, such as power supply status information. SLP settings can be
74

Setting Up
specied via the Remote UI. This section also describes the pr
between the machine and plug-ins for iW Management Console.
*
For more information about iW Management Console, contact your local authorized Canon dealer.
To use iW Management Console plug-ins
● Y
ou need to enable the settings of the dedicated port and the SNMP settings. As for the SNMP settings, set
[MIB Access Permission] to [Read/Write] for both SNMPv1 and SNMPv3.
<Use Dedicated Port>(P. 468)
Monitoring and Controlling the Machine with SNMP(P. 69)
Remote UI Oper
● For more information about the basic operations to be performed when setting the machine from the
Remote UI, see
ations
Setting Up Menu Options from Remote UI(P. 425) .
ocedure to congure settings for communication
◼ Conguring SLP Communication with Device Management Software
Start the Remote UI and log in to System Manager Mode. Starting Remote
1
. 416)
UI(P
Click [Settings/Registration] on the Portal page.
2
Click [Network Settings].
3
Specify SLP settings.
4
Specifying multicast device discovery
Select [Multicast Discovery Settings] [Edit].
1
Select the [Respond to Discovery] check box and specify the required settings.
2
Remote UI Screen(P. 417)
[Respond to Discovery]
Select the check bo
packets and enable monitoring by device management software.
x to set the machine to respond to device management software multicast discovery
75

Setting Up
● T
o change the port number for multicast discovery, see
[Scope Name]
T
o include the machine into a specic scope, enter alphanumeric characters for the scope name.
Click [OK].
3
Changing Port Numbers(P. 373) .
Notifying a device management software of the power status of the machine
Select [Sleep Mode Notication Settings]
1
Select the [Notify] check box and specify the required settings.
2
[Edit].
[Notify]
Select the check bo
[Notify] is selected, you can expect the machine to avoid unnecessary communication during sleep mode
and reduce the total power consumption.
[Port Number]
Change the port number for this function according to the network environment.
[Number of Routers to Traverse]
Specify how many routers the notication packets can pass through.
[Notication Interval]
Specify how often the machine noties a device management software of its power status.
Click [OK].
3
Restart the machine.
5
urn OFF the machine, wait for at least 10 seconds, and turn it back ON.
● T
x to notify a device management software of the power status of the machine. When
◼ Conguring Settings for Communication between the Machine and Plug-ins
You can specify the settings to enable communication between the machine and iW Management Console plug-ins.
Use of plug-ins allows you to manage the machine's settings from iW Management Console.
76

Setting Up
<Menu> <Preferences> <Network> <Device Settings Management> <On>
77

Installing Drivers
Setting Up
261J-019
Install the various drivers and associated softwar
Make the necessary preparation before proceeding with the installation.
1
● Install the optional de
● If the machine is supplied with a CD-ROM/D
computer.
● You can download drivers and software you are going to use from the Canon website (http://
www.canon.com/).
● When
● Depending on your machine or environmental conditions, some functions may not be available.
● Some of the drivers are not supported depending on the OS. For more information about the supported
Proceed with the installation.
2
new versions of drivers and software become available, they will be uploaded to the Canon website.
You can download them as necessary after checking their system requirements.
status of the latest OS, see the Canon website.
vices on the main unit in advance.
e on your computer.
Optional Equipment(P. 689)
VD-ROM, insert the CD-ROM/DVD-ROM into the drive on the
● For mor
going to use.
● Installation of drivers is impossible if sending and r
Settings]. For more information, see
● If sending and r
[Firewall Settings], it is no longer possible to perform printing or send faxes from that computer.
e information about the installation procedure, see the manuals for the drivers and software you are
eceiving of the IP address are not permitted in [Firewall
Specifying IP Addresses for Firewall Settings(P. 367) .
eceiving of the IP address of the computer on which drivers are installed become disabled by
78

Setting Up
Conguring Initial Settings for Fax Functions
261J-01A
1660-01J
Follo
w steps 1 to 4 described below to congure the fax settings. First, determine which receive mode best suits your
intended use, and then follow the on-screen instructions to congure the settings. For more information about a
particular step, click on the link to go to the corresponding section.
Step 1
Step 2
Step 3
Deciding Which Fax Receive Mode to Use(P. 80)
Registering the Fax Number and Unit Name(P. 81)
Selecting the Receive Mode(P. 82)
Step 4
Connecting the Telephone Line(P. 83)
79

Setting Up
Deciding Which Fax Receive Mode to Use
Befor
e conguring the fax settings, determine which receive mode best suits your intended use.
Intended use Receive mode
Use fax only/Never use telephone <Auto>
This setting is for when you want to use the machine e
and you do not want to use the telephone or optional handset.
261J-01C
xclusively for receiving faxes,
Mostly use telephone/Almost never use fax
Use both fax and telephone
● Depending on the type of telephone connected to it, the machine may not be able to send or r
properly.
<Manual>
Connect your telephone or handset to the machine. This setting is for when you
mostly want to use the telephone. Y
Use answering machine <Answering Machine>
Use standard telephone or
handset
ou can receive incoming faxes manually.
Connect your answering machine. Callers can
r
ecord a message if they call while you are away
from the telephone. The machine automatically
receives incoming faxes.
<Fax/Tel (Auto Switch)>
Connect your telephone or handset. The machine
automatically receives incoming faxes, and the
telephone rings for incoming calls.
eceive faxes
● You may be able to manually set receive modes other than those described above, depending on your
country or region.
Receiving Faxes(P. 224)
Continue to Registering the Fax Number and Unit Name(P. 81)
»
LINKS
Receiving Faxes(P. 224)
80

Setting Up
Registering the Fax Number and Unit Name
261J-01E
Register the fax number and unit name of your machine. This information is printed at the top of each page sent fr
the machine.
Select <Menu> in the Home screen.
1
Select <Function Settings> <Common> <Fax Setup Guide>.
2
Select <Set Up Now>.
3
Home Screen(P. 122)
om
Select <Next>.
4
Enter the fax number, and select <Apply>.
5
Select <Next>.
6
Enter the unit name (such as a user name or company name), and select <Apply>.
7
● On ho
»
LINKS
Receiving Faxes(P. 224)
w to enter text, see
➠ When the unit name has been r
Continue to
Entering Text(P. 131) .
egistered, the RX mode setting screen is displayed.
Selecting the Receive Mode(P. 82)
81

Setting Up
Selecting the Receive Mode
261J-01F
Select the r
Use(P
. 80) ).
1
2
● Select <Y
To set the receive mode to <Auto>
To set the receive mode to <Answering Machine>
To set the receive mode to <Fax/Tel (Auto Switch)>
eceive mode that suits your intended use beforehand (
Select <Next>.
Select the receive mode.
es> or <No> to select the receive mode for the operations you intend to carry out.
ou may be able to manually set receive modes other than those described below, depending on your
● Y
country or region.
Select <No>.
Select <Y
Select <Y
es>
es>
<Yes>.
<No> <Yes>.
Receiving Faxes(P. 224)
Deciding Which Fax Receive Mode to
To set the receive mode to <Manual>
Select <Yes> <No> <No>.
Select <Apply>.
3
➠ When the RX mode has been set, the telephone line connection method is displayed.
Continue to Connecting the Telephone Line(P. 83)
»
LINKS
Receiving Faxes(P. 224)
82

Setting Up
Connecting the Telephone Line
1660-01S
Connect the telephone line to the machine.
Connect the telephone line to the machine.
1
261J-01H
● Connect the included telephone cable to the telephone line jack on the machine (
jack on the wall.
● If you ar
● If you ar
e using a telephone or answering machine, connect it to the external telephone jack (
e using an optional handset, connect it to the handset jack (
).
) and the telephone line
).
you are connecting an external telephone with fax functions, set up the telephone to receive faxes
● If
manually.
Select <End> after the telephone line has been connected.
2
Select <Yes>.
3
If the machine does not automatically set the type of telephone line
Follow the procedure below to set the type of telephone line. If you are not sure of the type of phone line you
are using, contact your local telephone company. <Select Line Type> may not be available depending on the
country where you are using the machine.
<Menu> <Function Settings> <Send> <Fax Settings> <Set Line> <Select Line Type>
Select the type of telephone line
LINKS
Basic Operations for Sending Faxes(P. 215)
83

Receiving Faxes(P. 224)
Setting Up
84

Setting Up
Conguring Scan Settings
261J-01J
T
o send scanned originals directly by e-mail or I-Fax or save them to shared folders or FTP server, you need to
congure the network. The Send Function Setting Tool, an application that is included with the machine, will assist you
with the required setup. Set the necessary conguration depending on your purpose and network environment.
Saving to a Computer
Preparing to Use the Machine as a Scanner(P. 86)
Scanning to E-mail or I-Fax
Procedure for Setting to Send E-Mail/Send and Receive I-Fax(P. 87)
Scanning to Shar
Procedure for Setting a Shared Folder as a Save Location(P. 95)
ed Folders
Saving to FTP Server
Procedure for Setting a FTP Server as a Save Location(P. 99)
LINKS
System Environment(P. 685)
Scan Function(P. 680)
85

Setting Up
Preparing to Use the Machine as a Scanner
261J-01K
T
o use this machine as a scanner, you must complete preparations in advance, including installation of software to a
computer. For more information, see the manuals for the relevant drivers on the online manual website. In Windows,
when connecting this machine to a computer via a wireless or wired LAN, you need to register this machine in "MF
Network Scanner Selector" using the following procedure. This procedure is not required if the machine and your
computer are connected via USB.
● The scan function is not available if the machine and your computer ar
Use IPv4 or a USB connection.
Click
1
Select the check box for the machine, and click [OK].
2
in the system tray.
e connected in an IPv6 environment.
86

Setting Up
Procedure for Setting to Send E-Mail/Send and Receive I-Fax
261J-01L
Befor
e conguring the machine for scanning to e-mail, check the setup ow shown below.
Make sure that the machine and the computer are correctly connected.
Connecting to a Wireless LAN(P. 18)
Connecting to a Wired LAN(P. 17)
Make sure that you have the following information:
● The IP addr
● An e-mail addr
● Information about the e-mail server, including the SMTP server name, port
numbers, whether authentication is required, and the user name and password
for authentication.
● For mor
service provider or Network Administrator.
Make sure that the computer meets the system requirements for the Send
Function Setting T
● System requirements for the Send Function Setting Tool
Envir
● Also mak
Disabling HTTP Communication(P. 411)
Disabling Remote UI(P. 412)
ess of the machine.
ess to be registered as a destination.
e information about the e-mail server settings, contact your Internet
ool (sending e-mail).
onment(P. 685)
e sure that <Use HTTP> and <Use Remote UI> are set to <On>.
Viewing Network Settings(P. 38)
System
Set the machine congur
● Conguring Basic E-Mail Settings
● Conguring I-Fax Receiving Settings
Communication Settings
● Conguring Detailed E-Mail/I-Fax Communication Settings (Authentication,
Encryption, etc.)
ation.
Conguring Basic E-Mail Settings
Conguring E-Mail/I-Fax
(P. 91)
Conguring E-Mail/I-Fax Communication Settings
(P. 88)
87
(P. 91)

Setting Up
Conguring Basic E-Mail Settings
261J-01R
This section describes ho
Function Setting Tool, you can also register e-mail addresses to the Address Book.
● The Send Function Setting T
Send Function Setting Tool, you can use the Remote UI to congure more detailed settings such as the
settings for POP authentication before sending or for encrypted communication.
Fax Communication Settings
Start the Send Function Setting Tool.
1
w to congure the e-mail settings by using the Send Function Setting Tool. With the Send
ool helps you congure the basic settings for sending e-mails. Instead of the
Conguring E-Mail/I-
(P. 91)
Using a Web browser
Enter "http://<the IP addr
and press the [ENTER] key.
ess of the machine>/sendsupport_login.html" in the address eld of a Web browser,
Using the CD-ROM/DVD-ROM
Insert the provided CD-ROM/DVD-ROM into the drive on the computer.
1
● Select a language and click [OK] if you ar
Click [Start Software Programs].
2
● If the [Softwar
Pr
ograms/Manuals Setup] Screen(P. 701) .
● If [AutoPlay] is displayed, click [Run MInst.exe].
Click [Start] for [Send Function Setting Tool].
3
Click [Next].
4
● If you want to view "Send Setting Guide," click [How to Set].
● If the scr
Select the machine from [Device List] and click [Next].
5
e Programs/Manuals Setup] screen is not displayed, see
een that cancels the Windows rewall is displayed, click [Yes].
e prompted to do so.
Displaying the [Software
88

Setting Up
If the machine is not displayed in [Device List]
● Click [Sear
machine, and then click [OK].
Conrm the settings and click [OK].
6
Click [Start].
2
● If the login scr
click [Logon].
Click [Send to E-mail Settings].
3
● If the scr
and click [OK].
Specify the required settings.
4
een prompting you to enter the Address Book PIN is displayed, enter the PIN for the Address Book,
ch Again]. If the problem persists, click [Search by IP Address], enter the IP address of the
een is displayed, enter the appropriate ID and PIN in the corresponding text boxes, and then
Restricting Use of the Address Book(P. 402)
[Registration]
[Favorites Number]
89

Setting Up
With the Send Function Setting Tool, you can register an e-mail address into <Favorites> in the Address
Book. Select a number fr
[Name for Favorites Number]
Enter the name for identifying the destination to be registered. Set a name that will be easy for you to
nd later in the Address Book.
[Send Destination Settings]
om the drop-down list.
[Destination E-mail Addr
Enter the e-mail address that you want to send your scanned originals to.
[SMTP Server Settings]
[SMTP Server]
Enter the SMTP server name.
[SMTP Authentication]
Click the [Not Set] or [Set] r
[Set] is selected, enter the user name in the [User Name] text box and password in the [Password] text
box.
Authentication methods for sending e-mails
● T
o prevent e-mail transmissions by unauthorized users, the machine supports SMTP authentication (SMTP
AUTH) and POP before SMTP. For more information about the required authentication method, contact
your Internet service provider or Network Administrator.
● POP before SMTP authentication can only be congured by using the Remote UI.
Fax Communication Settings(P. 91)
Click [Next].
5
ess]
adio button to match the authentication settings of the SMTP server. When
Conguring
E-Mail/I-
Conrm the settings and click [Register].
6
Restart the machine.
7
● T
urn OFF the machine, wait for at least 10 seconds, and turn it back ON.
Additional settings may be required depending on the network you are using. For more information, contact
your Internet service pr
● To enable TLS for e-mailing, see
● To change port numbers, see
ovider or Network Administrator.
Conguring E-Mail/I-Fax Communication Settings
Changing Port Numbers(P. 373) .
(P. 91) .
LINKS
Procedure for Setting to Send E-Mail/Send and Receive I-Fax(P. 87)
Specifying E-Mail Settings(P. 312)
Registering Destinations(P. 177)
90

Setting Up
Conguring E-Mail/I-Fax Communication Settings
261J-01S
Use the Remote UI to congur
send and receive I-Faxes and the settings for POP authentication and encryption of communication before you send email or I-Faxes. Contact your provider or network administrator for the required settings.
● For mor
Remote UI, see
1
2
3
4
e information about the basic operations to be performed when setting the machine from the
Start the Remote UI and log in to System Manager Mode. Starting Remote
UI(P
. 416)
Click [Settings/Registration] on the Portal page.
Select [TX Settings] [Network Settings - E-Mail/I-Fax Settings].
Click [Edit].
e the detailed send and receive settings, such as the settings for using the machine to
Setting Up Menu Options from Remote UI(P. 425) .
Remote UI Screen(P. 417)
Specify the required settings.
5
[SMTP Server]
Enter alphanumeric characters as the SMTP server name (or IP address) for sending e-mail and I-Faxes.
[E-Mail Address]
Enter alphanumeric characters for the e-mail address that you want to use for the machine.
[POP Server]
Enter alphanumeric characters as the SMTP server name or IP address for sending e-mail and I-Faxes.
[User Name]
Enter alphanumeric characters as the user name for the specied e-mail account when a POP3 server is used.
[Set/Change Password]
To set or change the password when a POP3 server is used, select the check box and enter alphanumeric
characters in [Password].
91

Setting Up
Specify the settings required for I-Fax reception
[POP RX]
Select the check box to receive I-Faxes.
[POP Interval]
This sets the interval (in minutes) used for automatically connecting to the POP3 server. If there are any I-Fax
documents on the server, they are automatically received and printed.
To disable automatic reception
● Set [POP Interval] to [0]. When [0] is set, you r
Manually(P
. 252)
Conguring Pop Authentication befor
POP before SMTP authentication prevents unauthorized users from using e-mail and I-Faxes by performing
user authentication on the POP3 server.
eceive I-Faxes manually.
e Sending
Receiving I-Faxes
[Use POP Authentication Before Sending]
o use the POP3 server for authentication before you send e-mail or I-Faxes, select the check box.
T
[Use APOP Authentication]
Select the check box to use APOP to encrypt the password during the authentication process.
Conguring SMTP authentication
If you congur
performed at the time of sending e-mail or I-Fax.
e SMTP authentication (SMTP AUTH), user identication by user name and password is
92
 Loading...