

BTC BCO4816IA User Manual

Dual Digital Drive
COMBO 4816IA
User’s Manual

CLASS 1 LASER PRODUCT
APPAREIL A LASER DE CLASSE 1
LASER KLASSE 1
LUOKAN 1 LASERLAITE
PRODUIT LASER
CATEGORIE 1
DANGER INVISIBLE LASER RADIATION WHEN OPEN AVOID DIRECT
EXPOSURE TO BEAM
VORSICHT INSICHTBARE LASERSTRAHLUNG WENN ABDECKUNG GEÖFFNET
NICHT DEM STRAHL AUSSETSEN
ATTENTION RADIATION DU FAISCEAU LASER INVISIBLE EN CAS D’OUVERTURE.
EVITER TOUTE EXPOSITION AUX RAYONS.
Copyright Statement
It is a criminal offence, under applicable copyright laws, to make unauthorised
copies of copyright-protected material, including computer programs, films,
broadcasts and sound recordings. This equipment should not be used for such
purposes.

FCC Compliance Statement
This device complies with Part 15 of the FCC Rules. Operation is subject to the following
two conditions:
1. This device may not cause harmful interference, and
2. This device must accept any interference received, including interference that may
cause undesired operation.
FCC Warning Statement
This equipment has been tested and found to comply with the limits for a Class B digital
device, pursuant to Part 15 of the FCC Rules. These limits are designed to provide
reasonable protection against harmful interference in a residential installation. This
equipment generates, uses and can radiate radio frequency energy and, if not installed and
used in accordance with the instructions, may cause harmful interference to radio
communications. However, there is no guarantee that interference will not occur in a
particular installation. If this equipment does cause harmful interference to radio or
television reception, which can be determined by turning the equipment off and on, the user
is encouraged to correct the interference by one or more of the following measures:
• Reorient or relocate the receiving antenna
• Increase the separation between the equipment and the receiver
• Connect the equipment into an outlet on a circuit different from that to which the
receiver is connected
• Consult the dealer or an experienced radio/TV technician for help.
CAUTION
Any changes or modifications not expressly approved by the party responsible for
compliance could void the user’s authority to operate the equipment.
FOR EUROPE
“The drive is in conformity with the EMC directive and low-voltage directive.”

Table of Contents
INTRODUCTION 1
SYSTEM REQUIREMENTS 2
PACKAGE CONTENTS 2
INSTALLATION 3
HOST INTERFACE CONNECTIONS 3
HARDWARE INSTALLATION 4
DRIVER INSTALLATION 6
SOFTWARE INSTALLATION 9
DVD REGION CODE 11
OPERATION & CONNECTION 13
FRONT PANEL 13
REAR VIEW 15
TECHNICAL DATA 17

Dual Digital Drive
INTRODUCTION
Welcome to a multimedia world of CD-ReWritable technology, DVD-ROM
capabilities and, memory card compatibility!
This compact and high-performance COMBO 4816IA frees up precious bay
space and presents you as an IDE Combo (CD-RW+DVD ROM) Drive and
a USB- connected card reader. It reads CDs of all types at maximum 48X
speed, and DVD-ROMs at maximum 16X speed. For the writing ability, it
writes to CD-Rs at up to 48X speed, and to CD-RWs at up to 24X speed.
Other than that, the built-in 7 in 1 card reader which offers read-write ability
of 7 memory card types simplifies the process of exchanging data between
Digital cameras, voice recorders, PDAs, MP3s… and your computer.
With this multi-functional solution and the bundled software package, you
can view, archive, or write files/photos/video/music directly from the drive
and enjoy the fascinating digital as well as the DVD entertainment on your
desktop.
Here are some important features of this Combo Drive:
♦ Easy installation with Combo drive of IDE and card reader of USB
1.1 interface (on board connection)
♦ 8X, 16X, 24X, 32X, 40X and 48X writing speed on CD-R media
♦ 4X, 10X, 12X, 16X and 24X writing speed on CD-RW media
♦ Adopts “MTKSuperLink” to prevent Buffer Underrun
♦ Supports writing modes of TAO, DAO, SAO and packet writing
♦ Supports MultiRead function
♦ Four-slot integration works with CompactFlash, MicroDrive,
Memory Stick, Memory Stick Pro, MultiMediaCard, Secure Digital,
and SmartMedia
1

Dual Digital Drive
♦ Smooth DVD playback
System Requirements
For IBM compatible PCs, the system requirements recommended are as
follows:
♦ Pentium II, Celeron 400MHz & above with at least 64MB of
memory
♦ Fast and sufficient hard disk space (minimum 200MB for
installation, 1GB or more is recommended.)
♦ IDE host interface supporting ATAPI MMC command & USB host
interface (if you don’t have USB on-board connection)
♦ Microsoft Windows 98SE/2000/ME/XP
♦
Package Contents
The package contains the following items:
♦ Dual Digital Drive, COMBO 4816IA
♦ Audio cable
♦ 2 Application software discs
♦ 4pcs of screws/bag
♦ Quick Installation Guide
2
Dual Digital Drive
INSTALLATION
Host Interface Connections
Most current mainboard models have two IDE ports (primary and
secondary), which can connect two IDE cables. Two IDE cables allow you
to connect up to four devices, but it is recommended that you separate IDE
ports for your hard drive and your Dual Digital Combo Drive. This will
ensure that your hard drive’s performance and speed won’t be affected by
having the drive on the same cable.
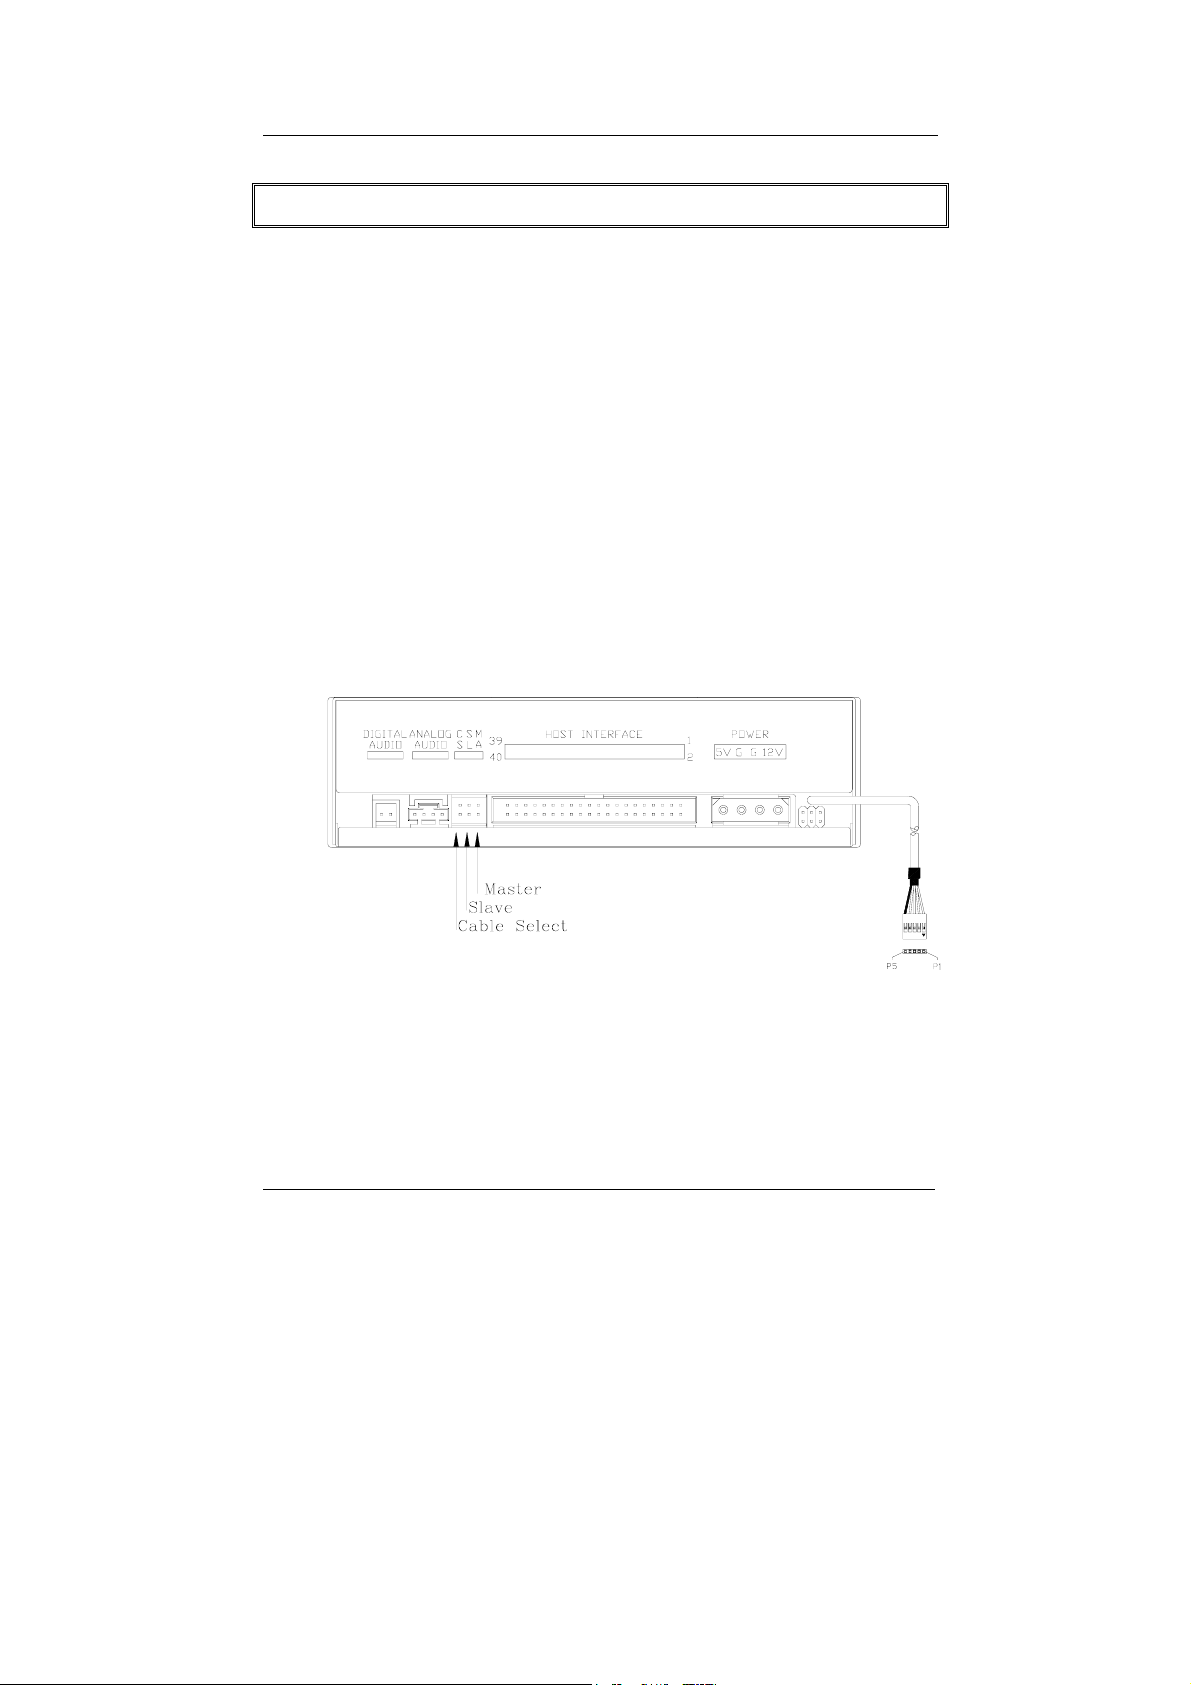
Jumper Setting
On the rear panel of this drive, you will find three pairs of jumpers: CS
(CSEL), SL (Slave) and MA (Master). Use the jumper cap to set the device
to CS, SL or MA mode corresponding to your PC configuration. If you
connect only one device on the IDE cable, you can set the jumper as
“MASTER” or “SLAVE”.
If you connect two devices on the same cable, set different jumper for each
device (one as “MASTER”, and the other one as “SLAVE”). The same rule
applies to the connection of having your hard disk and another device on
the same cable.
3
Dual Digital Drive
CSEL
SLAVE
MASTER
JUMPER
Improper or conflicting setting will cause the unit not detected by your
system.
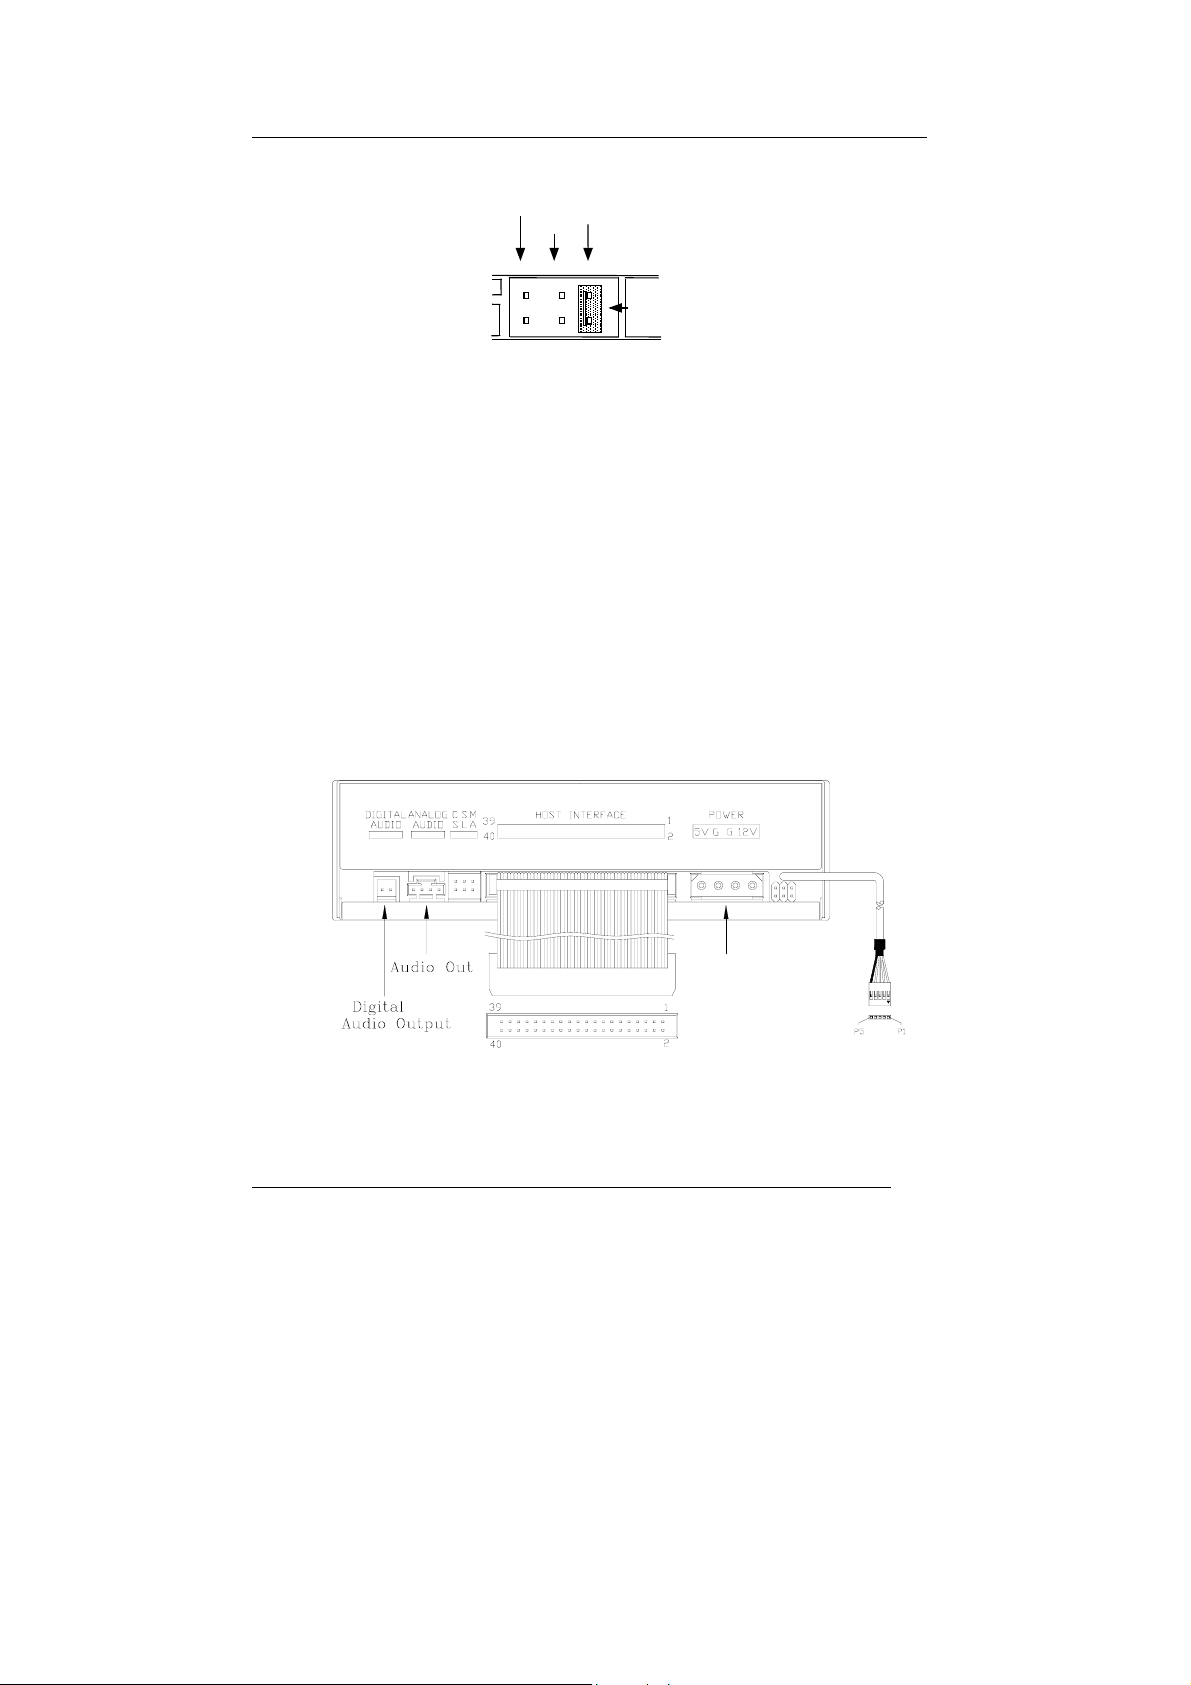
Hardware Installation
1. Turn off the power to your computer system.
2. Disconnect the power cord and all cables from the back of your
computer, and then remove the cover of the computer.
3. Insert the drive into one of the vacant 5.25" drive bays and
secure it to your PC with all four mounting screws.
4. Connect one end of the 40-pin IDE cable to the IDE connector of
this drive and the other end to the IDE port on your mainboard.
Also, connect the power supply cable to the back of the drive.
Power In
Make sure to align and connect the red-edge of the IDE Cable to
Pin 1 on the drive.
4
 Loading...