

Page 1

USB2.0 STORAGE DRIVE
User’s Manual
Page 2

Table of Contents
1. HARDWARE CONNECTION .............................1
2. DRIVER INSTALLATION ...................................2
2.1 Installation for Windows 98/98SE .....................2
3. SAFELY REMOVE USB STORAGE DRIVE......4
3.1 Windows 2000/XP/ME ......................................4
3.2 Windows 98/98SE.............................................6
3.3 Mac OS Users...................................................7
4. PERFORMANCE ...............................................7
5. ENVIRONMENT.................................................8
5.1 Temperature .....................................................8
5.2 Humidity............................................................8
5.3 Vibration............................................................8
5.4 Shock................................................................8
6. THE POWERBACKUP PROGRAM ...................9
6.1 How to back up your data: ..............................10
6.2 How to restore your data after a backup: ........11
6.3 How to use the Scheduler: ..............................13
Page 3
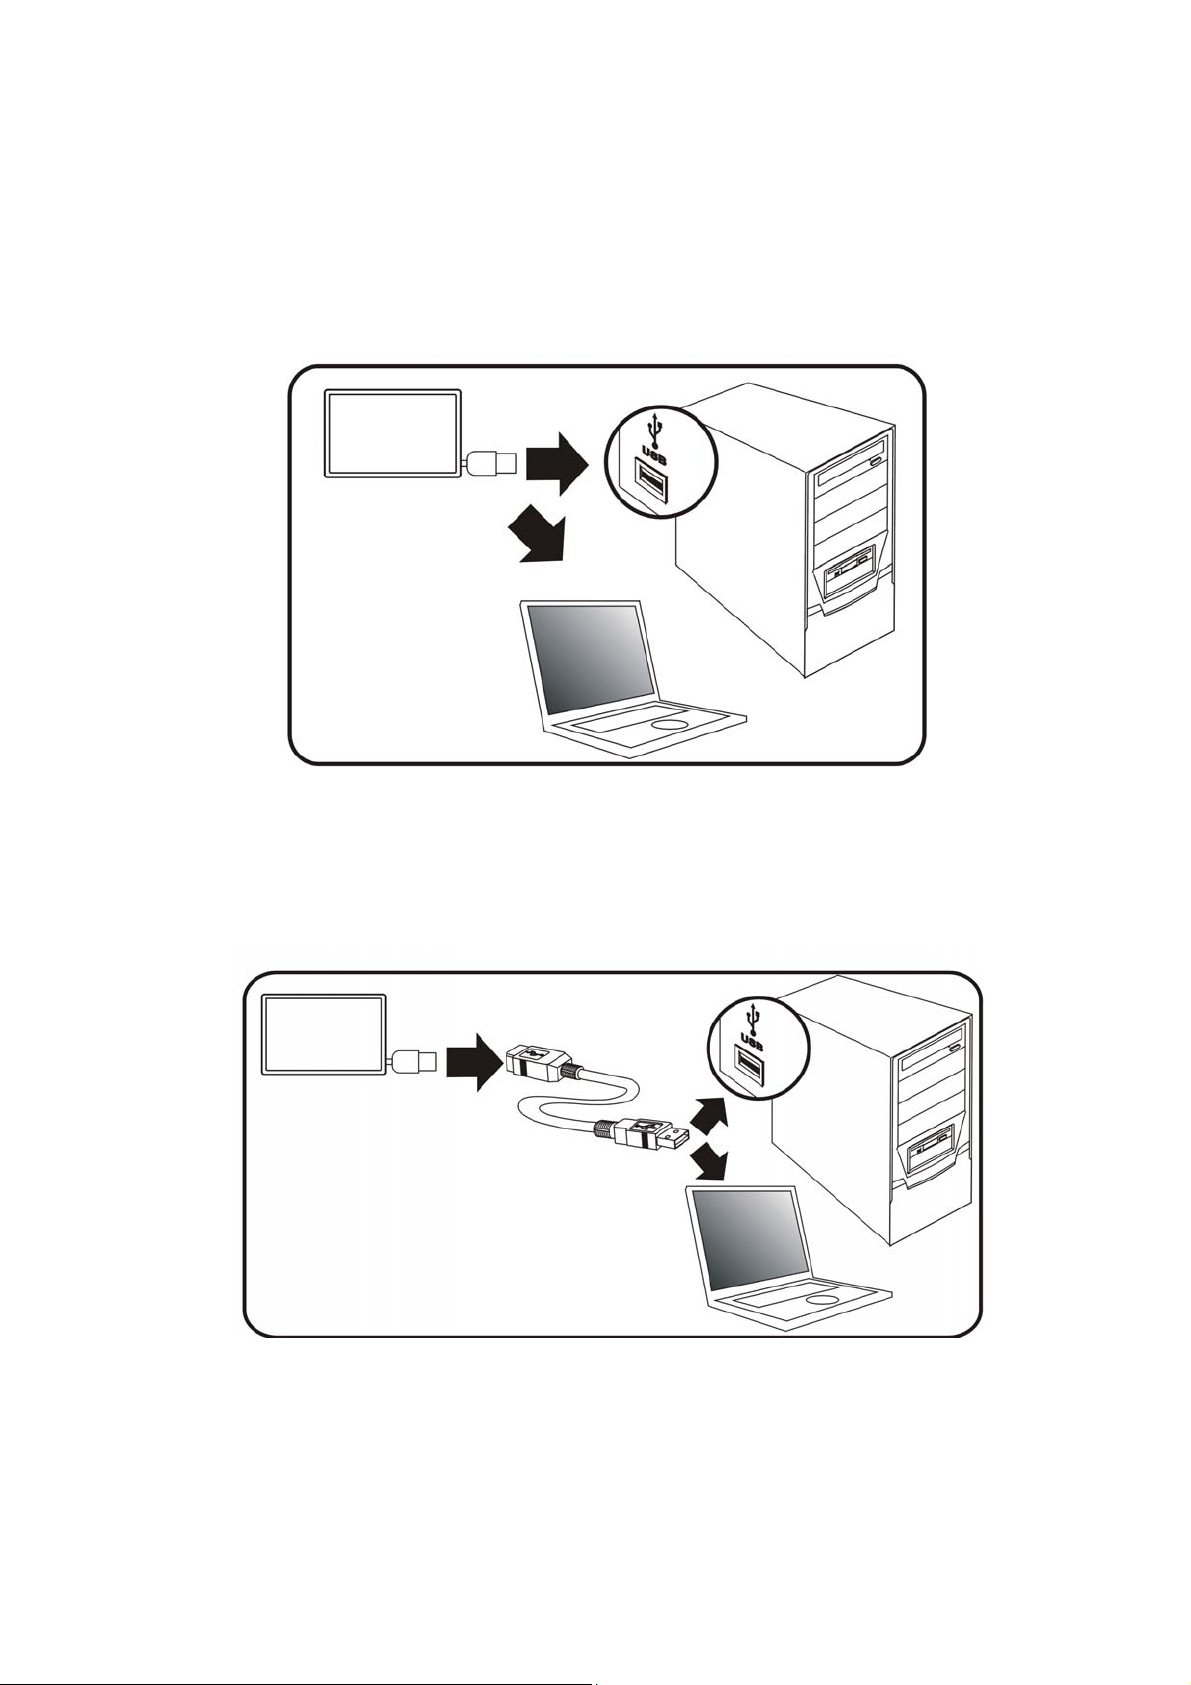
1. HARDWARE CONNECTION
Pull out the USB connector embedded in the socket
and plug into the USB port on your PC/Notebook.
Or,
Use a USB extension cable to connect the Storage
Drive and your PC/Notebook.
1
Page 4
2. DRIVER INSTALLATION
No driver is required for Windows ME/2000/XP or Mac
OS 9.0 and above. Drivers are only needed for
Windows 98/98SE.
2.1 Installation for Windows 98/98SE
Before installing the driver, please DON’T connect
the storage drive.
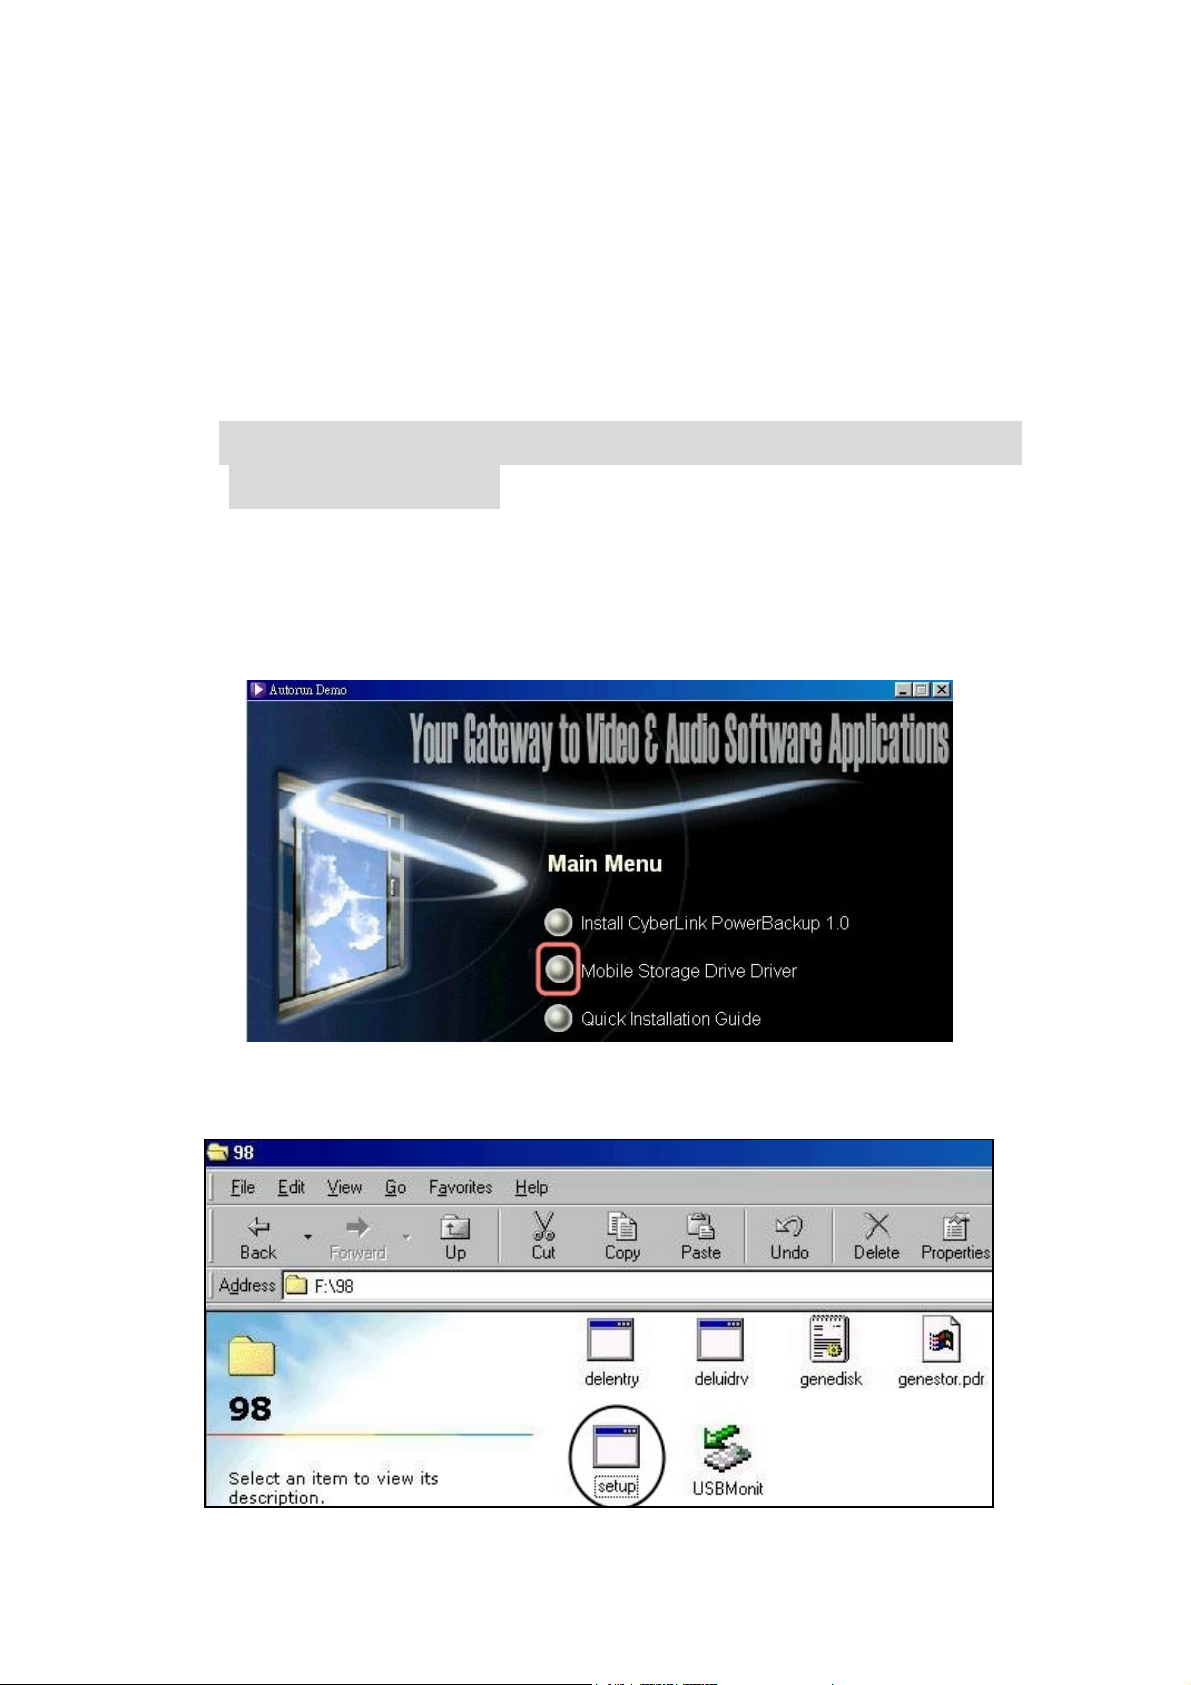
1. Insert the PowerBackup disc and the “Main Menu”
automatically pops up. Select “
Driver
.”
Mobile Storage Drive
2. Double click “Setup.exe” file to run it.
2
Page 5
(To start manually, go to “X:\PowerBackup\Mobile
Storage Drive Driver\Mobile Storage drive\
setup.exe” where X: is your CD-ROM drive letter.)
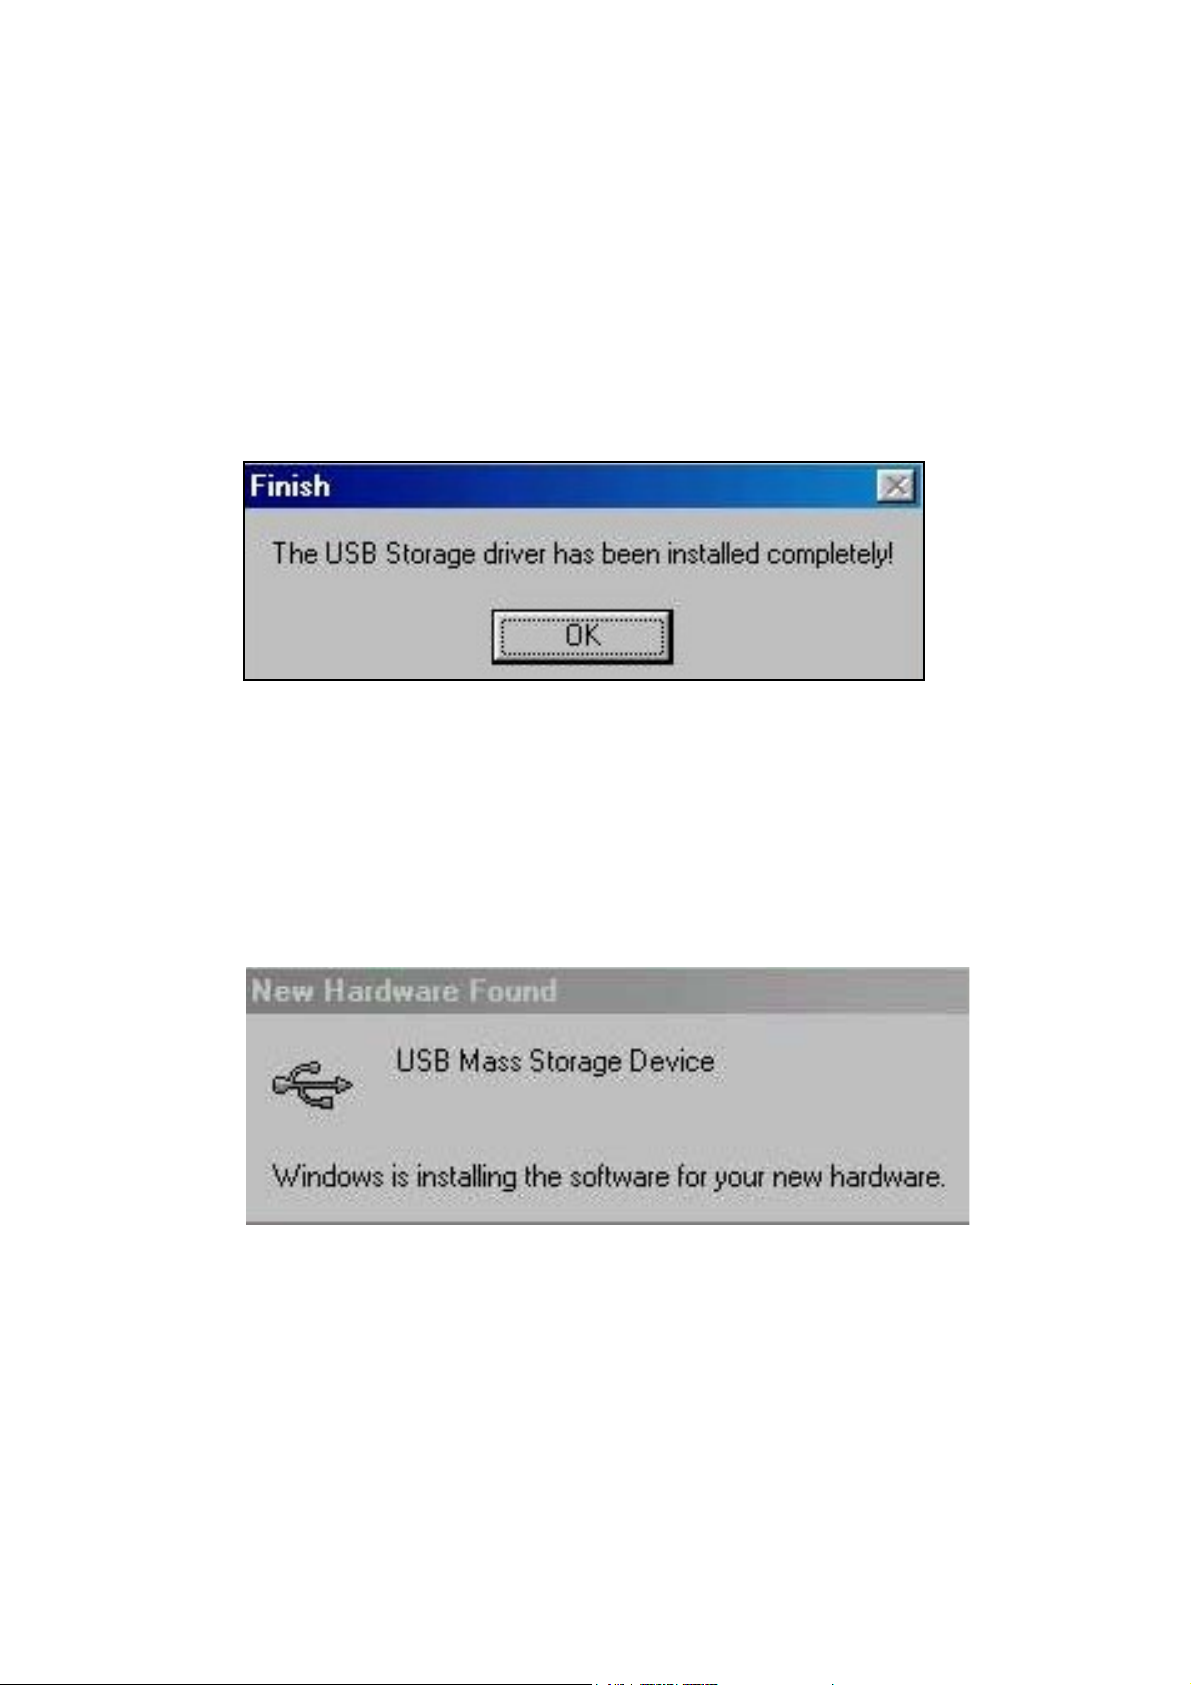
3. Driver installation is completed. Click “OK.”
Now you can connect the USB2.0 storage drive to your
pc/notebook. The system will automatically detect the
drive.
3
Page 6
3. SAFELY REMOVE USB STORAGE DRIVE
Warning: To protect against damage to your computer or
your data, it is strongly recommended that you follow the
instructions below to remove the USB Hard Drive.
3.1 Windows 2000/XP/ME
(Example demonstrated under Windows 2000).
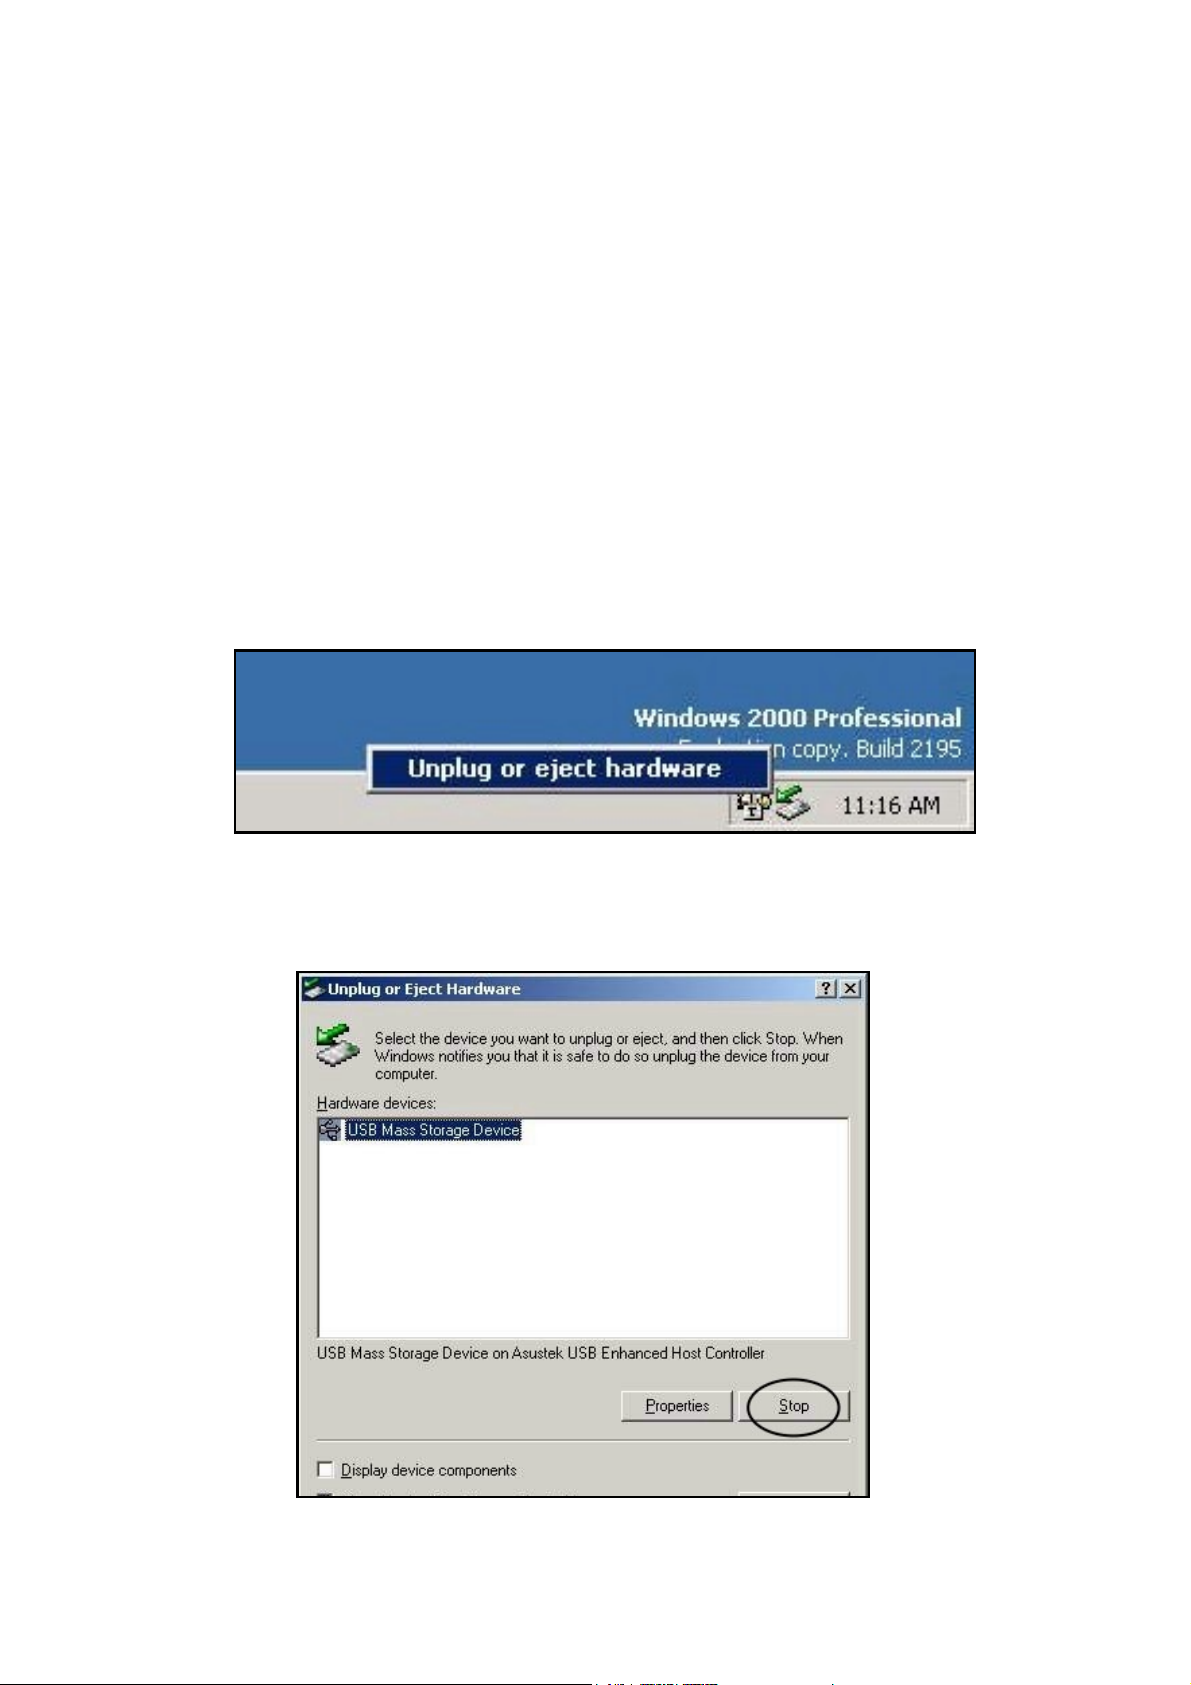
1. Click the removable icon showing “
hardware
” on the taskbar.
Unplug or eject
2. Select the device to unplug and click “Stop.”
4
Page 7
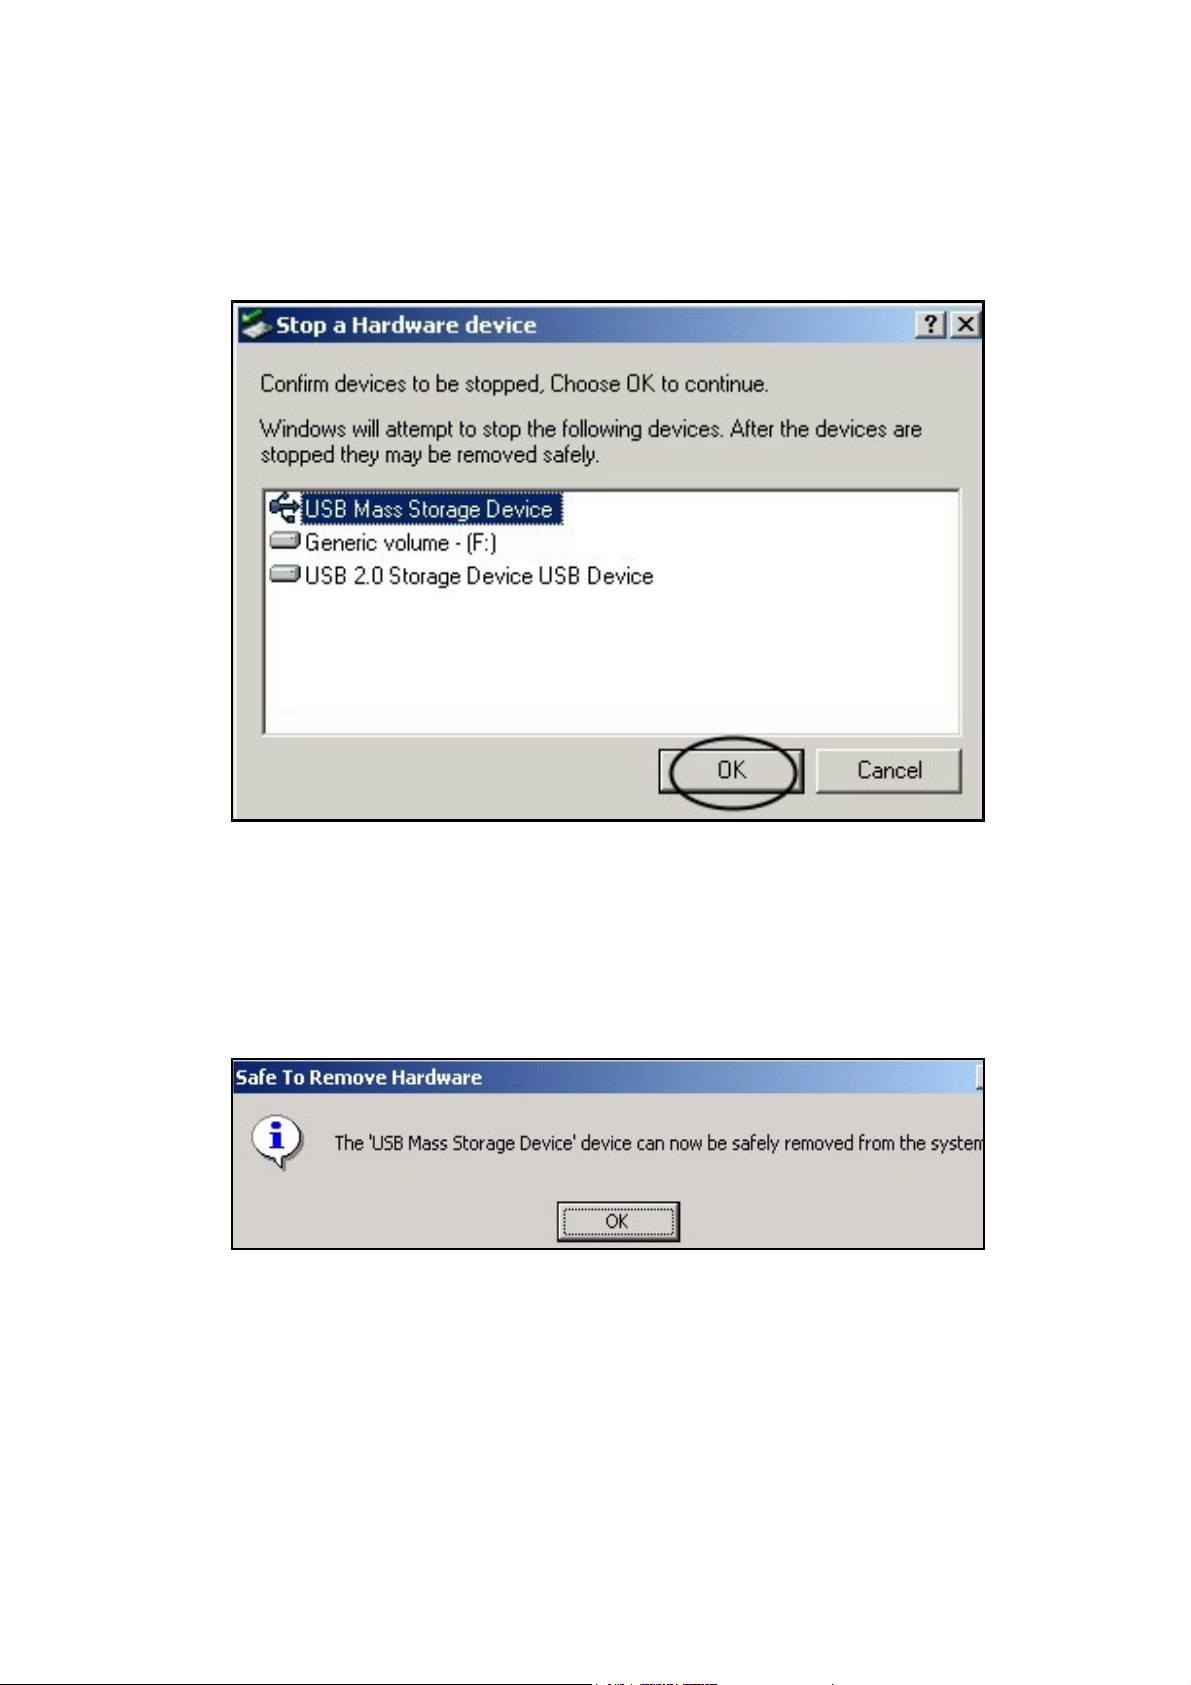
3. Confirm the highlight selection and click “OK” to
continue.
4. When the message box below appears, click “OK.”
You can now safely remove the device from the
USB port of your computer.
5
Page 8
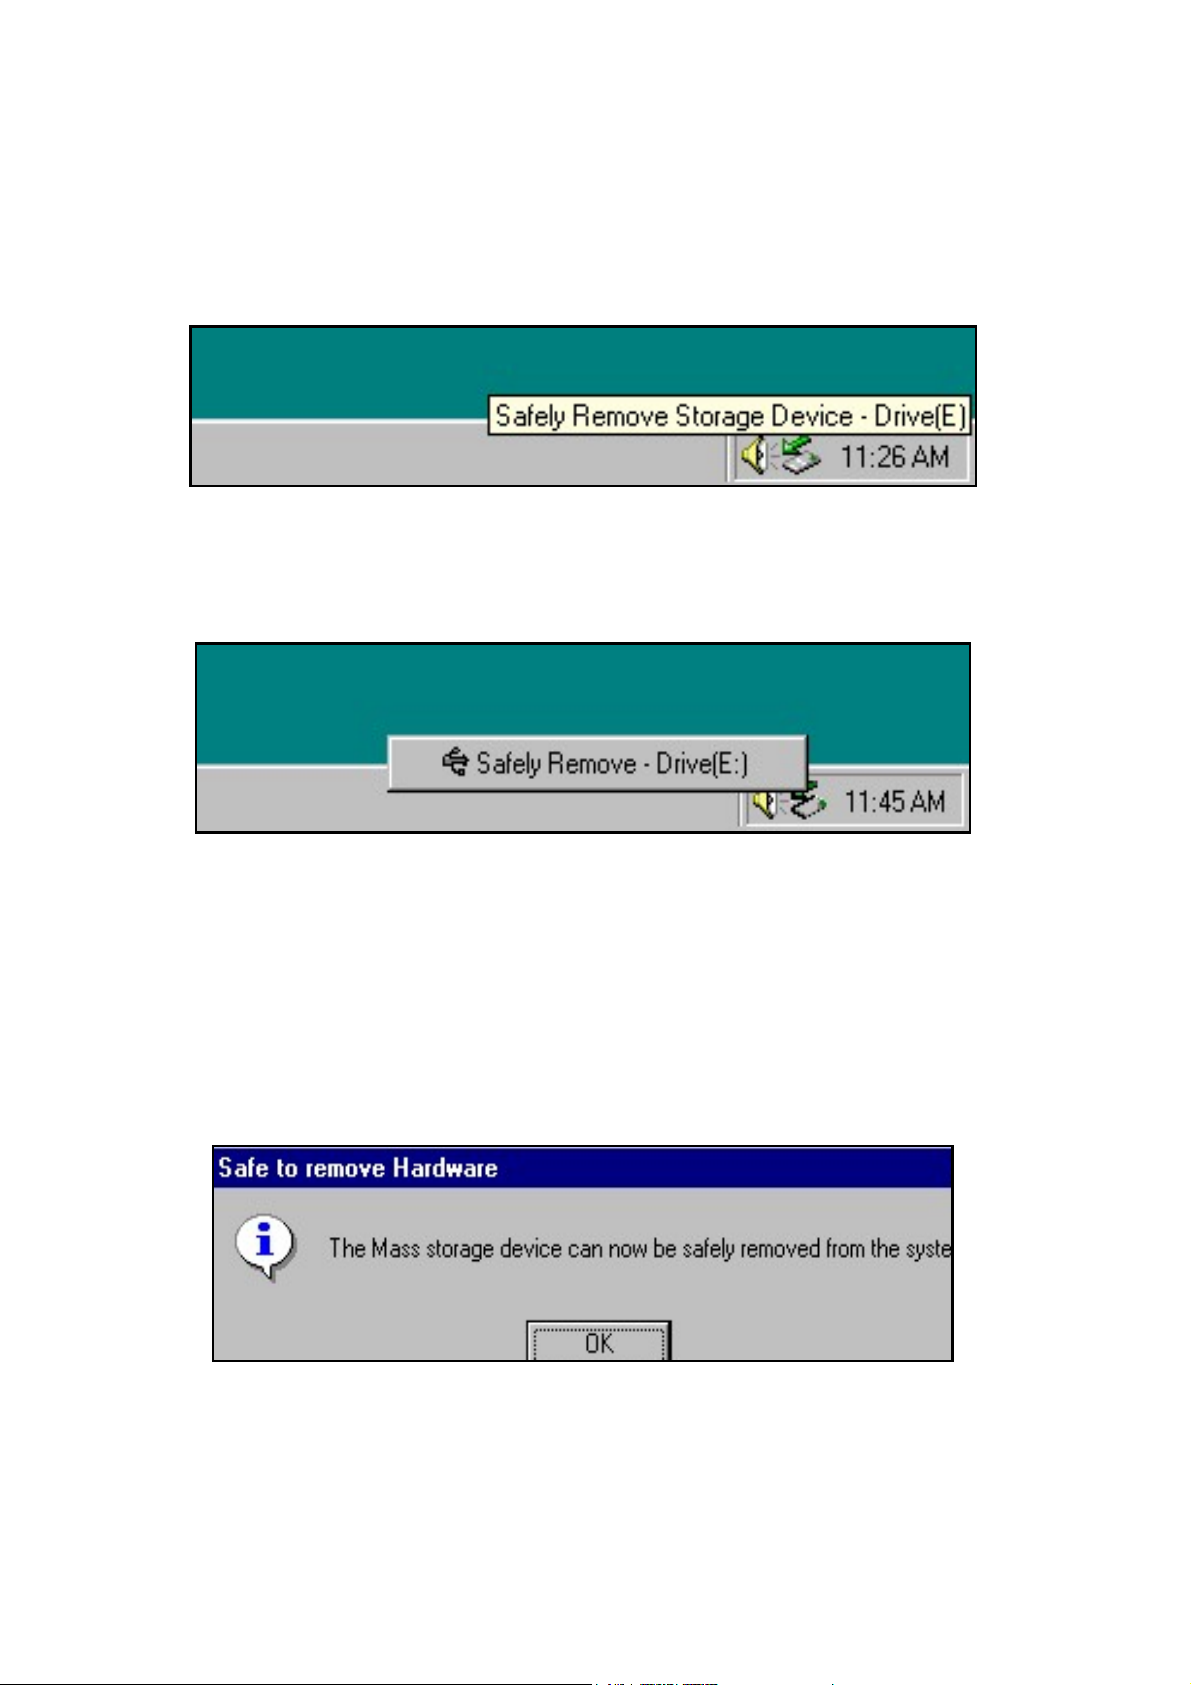
3.2 Windows 98/98SE
1. Locate the icon showing “
Device
” on the taskbar.
Safely Remove Storage
2. Click the icon to start to remove.
3. When the message box below appears, click
“OK.”
You can now safely remove the device from the
USB port of your computer.
6
Page 9

3.3 Mac OS Users
To unplug the USB hard drive, follow these steps:
1. Drag the icon for the USB hard drive to the trash
icon.
2. Wait until the USB hard drive icon disappears from
the desktop.
3. You can now disconnect the USB hard drive.
4. PERFORMANCE
Formatted
2.2 GB 3.3 GB 4.0 GB
Capacity
Data buffer 256KB
Rotational speed
Internal Transfer
Rate
Sustained
Transfer Rates
(Maximum)
Average (1/3
stroke) Seek
Track to Track
49.1 – 91.4
Mbits/sec
6.0 MB/sec 7.9 MB/sec 7.9 MB/sec
15 msec
(typical)
1.5 msec
4200 RPM
62.7–120.261
Mb/sec
15 msec
(typical)
1.5 msec
62.7–120.261
Mb/sec
15 msec
(typical)
1.5 msec
Seek
Full Stroke Seeks 18 msec
(typical)
(typical)
(typical)
18 msec
(typical)
7
(typical)
18 msec
(typical)
Page 10

5. ENVIRONMENT
5.1 Temperature
Operating +0°C to + 55°C
Non-Operating - 40°C to + 65°C
5.2 Humidity
Operating (non-condensing) 8%
Non-Operating (non-condensing) 5%
[RH] to
[RH] to
90%
95%
[RH
[RH]
5.3 Vibration
Operating 1G (Zero-to-peak), 5 to 500 to 5Hz
sine wave.
2.0 octave/min sweep rate
Non-Operating 5G (Zero-to-peak), 10 to 500 to
10Hz sine wave
5.4 Shock
Operating 10G half-sine shock pulse of 11ms
duration
]
3 seconds between shock pulses
Non-Operating 120G half-sine shock pulse of
11ms duration
8
Page 11
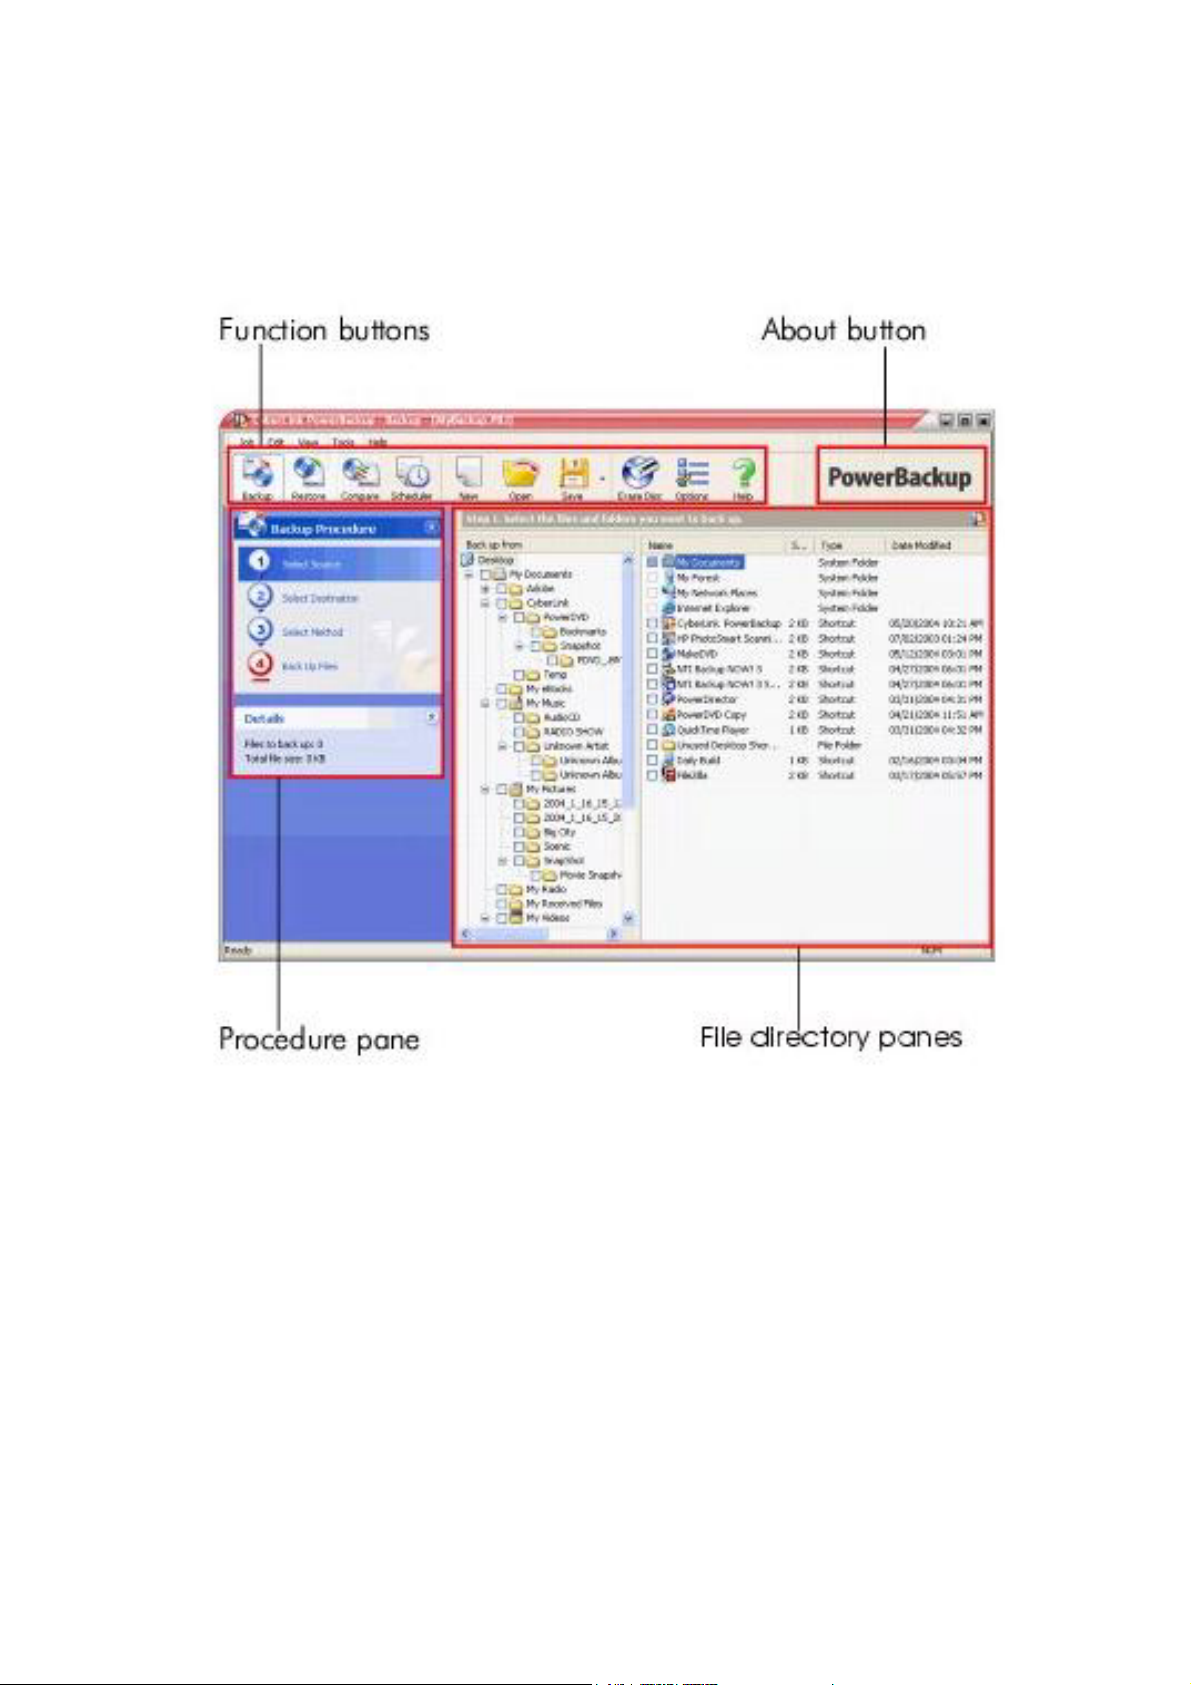
6. THE POWERBACKUP PROGRAM
When you first open PowerBackup, the program
appears as follows:
The program changes appearance according to the
procedure you are running. However, there are a few
common elements that remain available, including the
function buttons along the top and the procedure box
on the left. These are described below.
9
Page 12

6.1 How to back up your data:
1. Click
open the backup procedure. The
or use the
View
Backup
>
command to
Select Source
option opens by default.
2. Locate and check the files and folders that you want
to back up in the two file directory panes. (These
panes resemble Windows Explorer in functionality.)
•
An empty box indicates that the folder has not
been selected for backing up.
•
A green check mark indicates that all of the
folder's contents are selected for backing up.
• A yellow check mark indicates that only some of
the folder's contents are selected for backing up.
3. Click
Select Destination
, then set your backup
destination.
•
•
•
Backup destination
: Select your backup
destination from the drop-down box. Backup
destinations may include hard disk or a disc
burner (depending on your available hardware).
Backup filename
: Give each backup file a unique
name. To save the backup file to a different
directory, click
Browse
, then locate and select the
folder you want to use.
Split into volumes
: Divide your backup files into
volumes (portions) of the size you specify. The
Auto
option automatically detects the size of the
destination hard drive's file system. (To verify the
file system on your computer, open My Computer,
right-click on your hard drive, then select
Properties
.) The
DVD
option divides your backup
files into volumes that fit the capacity of a DVD.
The
CD
option divides your backup files into
10
Page 13

volumes that fit the capacity of a CD. To set a
custom volume size, select
Custom
size..., then
enter a size in megabytes.
4. Click
Select Method
, then choose the backup
method (and advanced options, if desired) that you
want to use.
• Backup methods include
Incremental
. For complete information on these
Full, Differential
backup methods, see Backup Methods.
• For more options, click Options.... For more
information, see Backup Options.
5. Click
Back Up Files
. Verify that the settings are
correct, then click one of the buttons to begin your
backup.
•
Click
Backup Now
to begin backing up
, and
immediately. To make the same backup
configuration available later (as a "job"), click
when you are prompted to save changes to your
backup file. After you save the file, the backup
begins immediately. (To begin the backup
immediately without saving the backup file, click
No
.)
•
Click
Add to Schedule
r to schedule the backup for
a later time.
6.2 How to restore your data after a backup:
1. Click
or use the
View
Restore
>
command to
Yes
open the restoration procedure. The
Select Source
option opens by default.
2. Select the restoration source from the Restore from
drop-down box.
11
Page 14

• Backup file: Restore from an existing backup file.
To open a backup file, click
and open the file you want to use.
•
My Catalog: Restore from existing records of
previous backup jobs. (To delete records from My
Catalog, use the
Delete All Catalog
•
3. Click
Disc drive
Select Destination
destination.
•
Original locatio
from which the files were backed up.
•
Alternative location: Restore to a new location. To
set a new directory, click
select the folder you want to use.
Browse
Edit > Delete Catalog Record or
Records
command.)
: Restore from a disc.
, then set your restoration
n: Restore to the original location
Browse
, then locate
, then locate and
•
Single directory
to a single new directory. To set a new directory,
click
want to use.
4. Click
Select Method
method you want to use.
•
Do not overwrite
found on your hard drive, and does not overwrite
existing files.
•
Overwrite older files
your hard drive if the backed-up copy is newer.
•
Always overwrite the files on my computer
Overwrites existing files on your hard drive with
the backed-up copy in every case.
Browse
: Restore all of the backed up files
, then locate and select the folder you
, then choose the restoration
: Restores only files that are not
: Overwrites existing files on
:
•
Ask before overwriting
: Prompts you to decide
which copy you want to keep.
5. Verify that the settings are correct, then click
Restore Now
to begin restoring files immediately.
12
Page 15
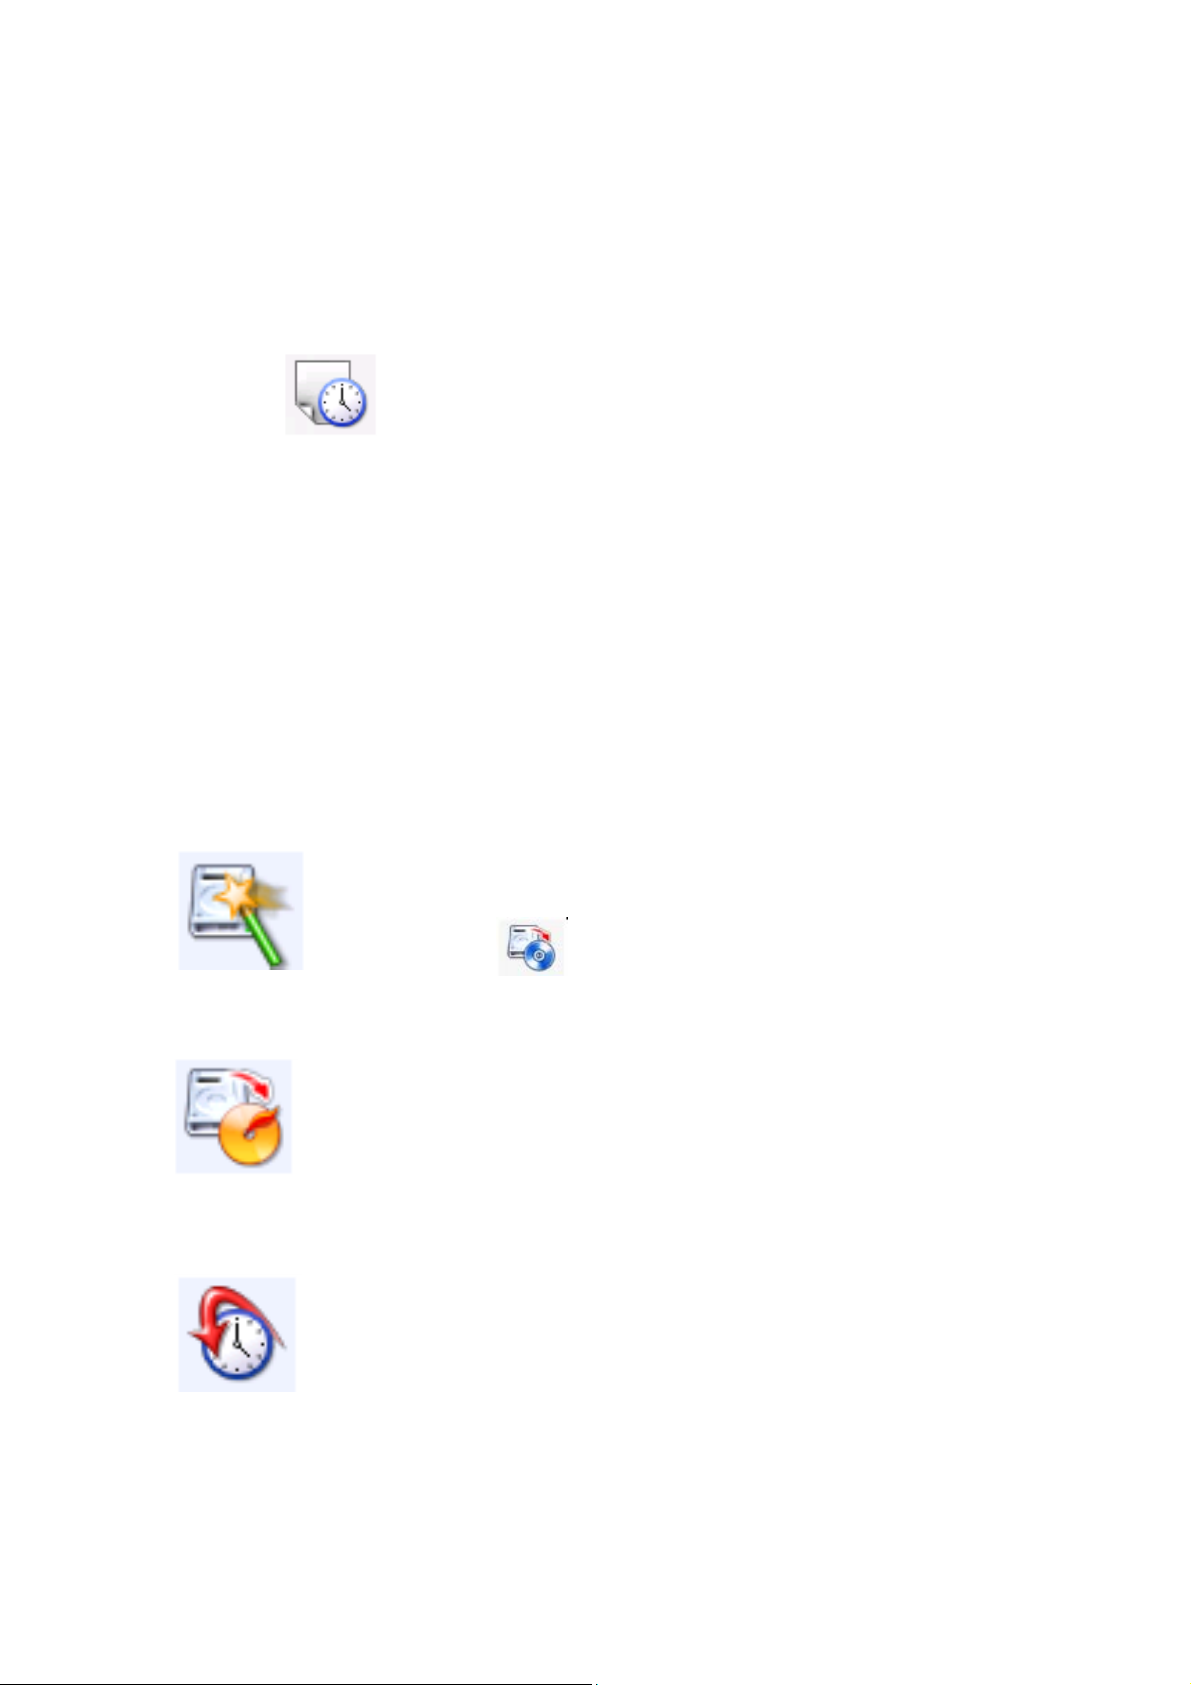
6.3 How to use the Scheduler:
Use the Scheduler to schedule backup jobs to run at a
future time and date. You can select to run jobs at a
regular interval or to run once only.
Click
or use the
View
Scheduler
>
command to
open the Scheduler function. The large central pane
displays a catalog of existing backup jobs at the top
and details of each record at the bottom.
On the left-hand side is a list of tasks that can be run
from the Scheduler.
The Scheduler offers the following tasks:
Edit Backup
: Opens the backup procedure,
allowing you to modify the backup source,
destination, or options. (This is the same as
clicking or using the
View
Backup
>
command.)
Back up Now
: Begins the backup process
immediately.
Reschedule
you can select a job interval (
Weekly
, or
run the backup process. The
option allows you to cancel the job, but to
keep it in the Scheduler indefinitely.
: Opens a dialog box in which
Once, Daily
Monthly
) and a time and date to
Postpone
13
,
Page 16
Add Job
can select an existing backup job to add to
the Scheduler.
Remove Job
you want to remove the selected job from
the Scheduler. Click Yes to delete the job,
or No to close the message without
deleting the job.
: Opens a dialog box in which you
: Displays a message asking if
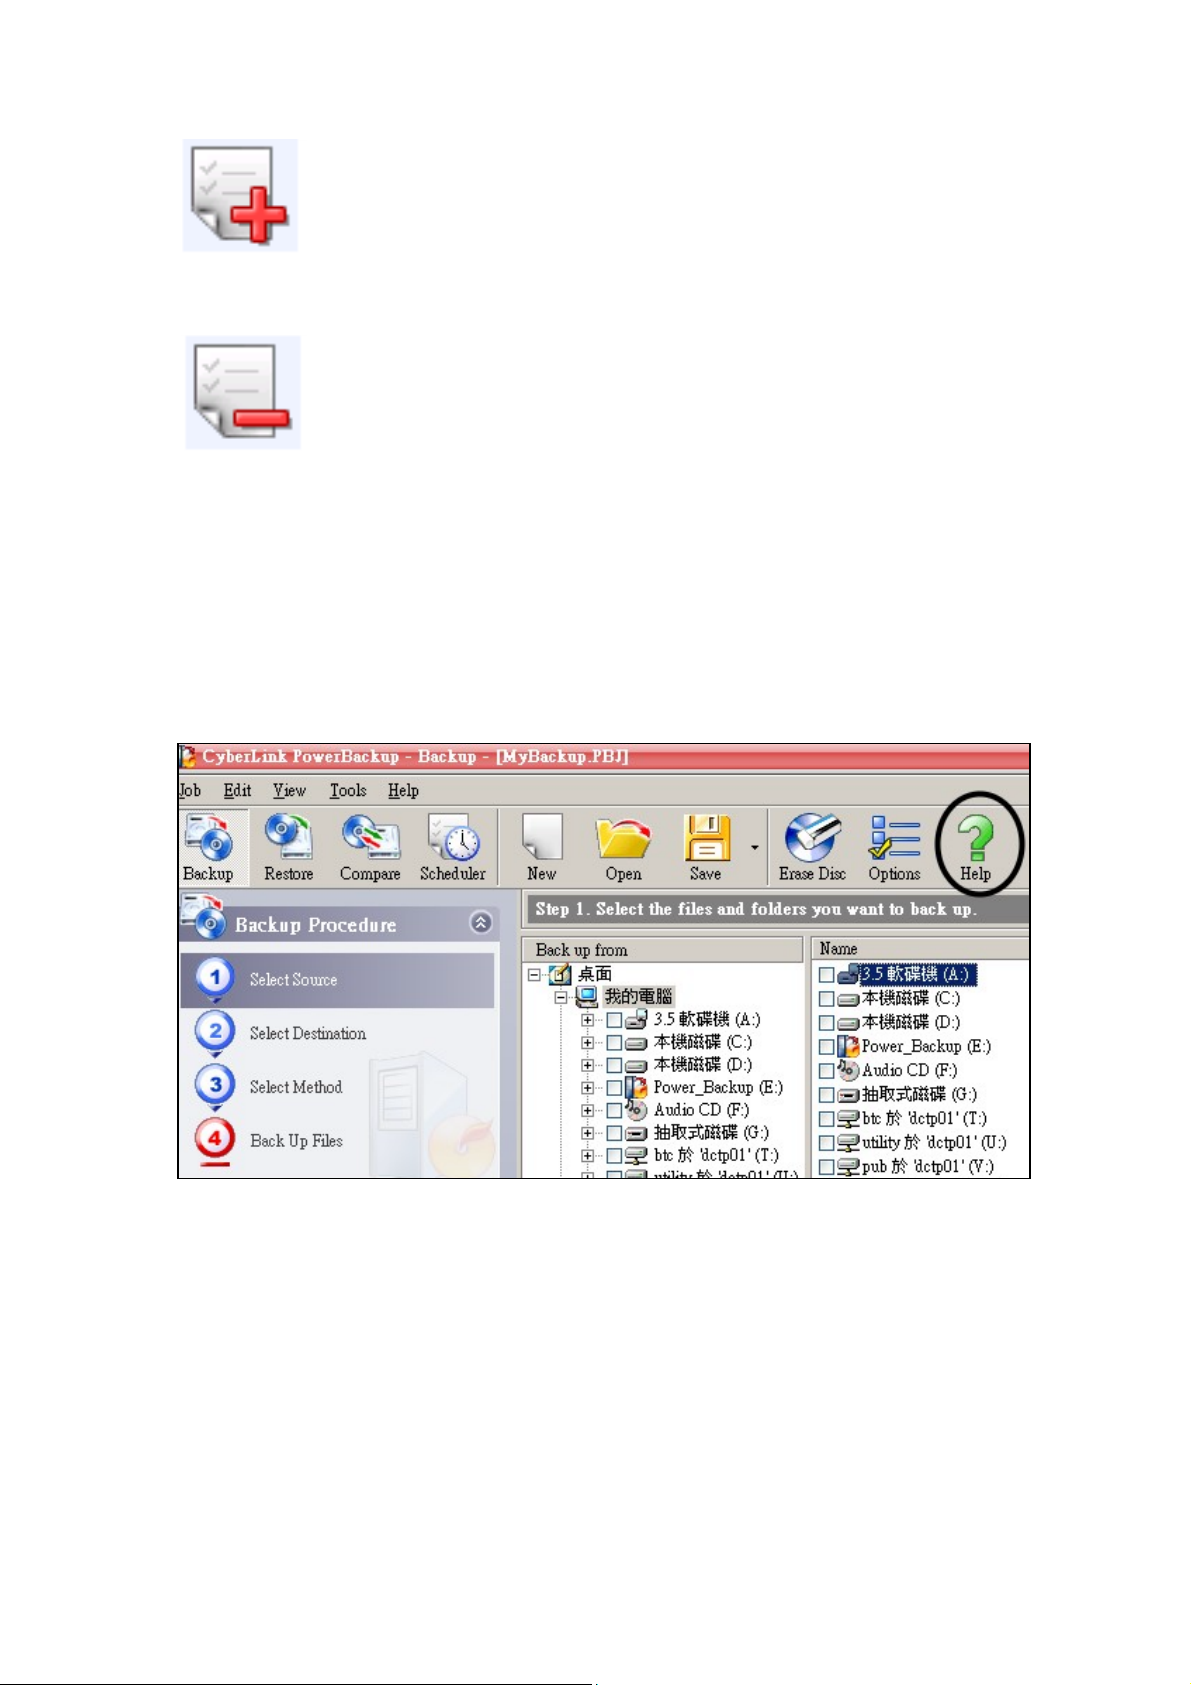
** For more detailed information about the operation of
PowerBackup, please refer to “Help” on the program
panel.
14
Page 17

Page 18

3100552730
Version 1.0
Jan. 2005
 Loading...