

Starting up P-touch Editor
Basic Operation
Layout area
Creating a new layout document
Working with text objects
Working with graphics objects
Modifying objects
Using the Auto Format Wizard
Printing a layout
Saving a layout document
Databases
Creating a database
Maintaining the database
Using database data in layouts
Printing a layout containing data merged from a record
Saving a database document
Reference
P-touch Editor Environment
Layout document window
Record view window
Pop-Up menu commands
Menu bar commands
1. All rights, titles and interests in and to this software product and the materials associated therewith
("SOFTWARE"), including but not limited to the program, images, clip art, fonts, templates, text and
documents, are owned by Brother Industries, Ltd. ("BROTHER") or its suppliers.
2. You may not reproduce, modify, reverse engineer, disassemble, or decompile any part of the SOFTWARE
without prior written permission by BROTHER.
Starting Up P-touch Editor
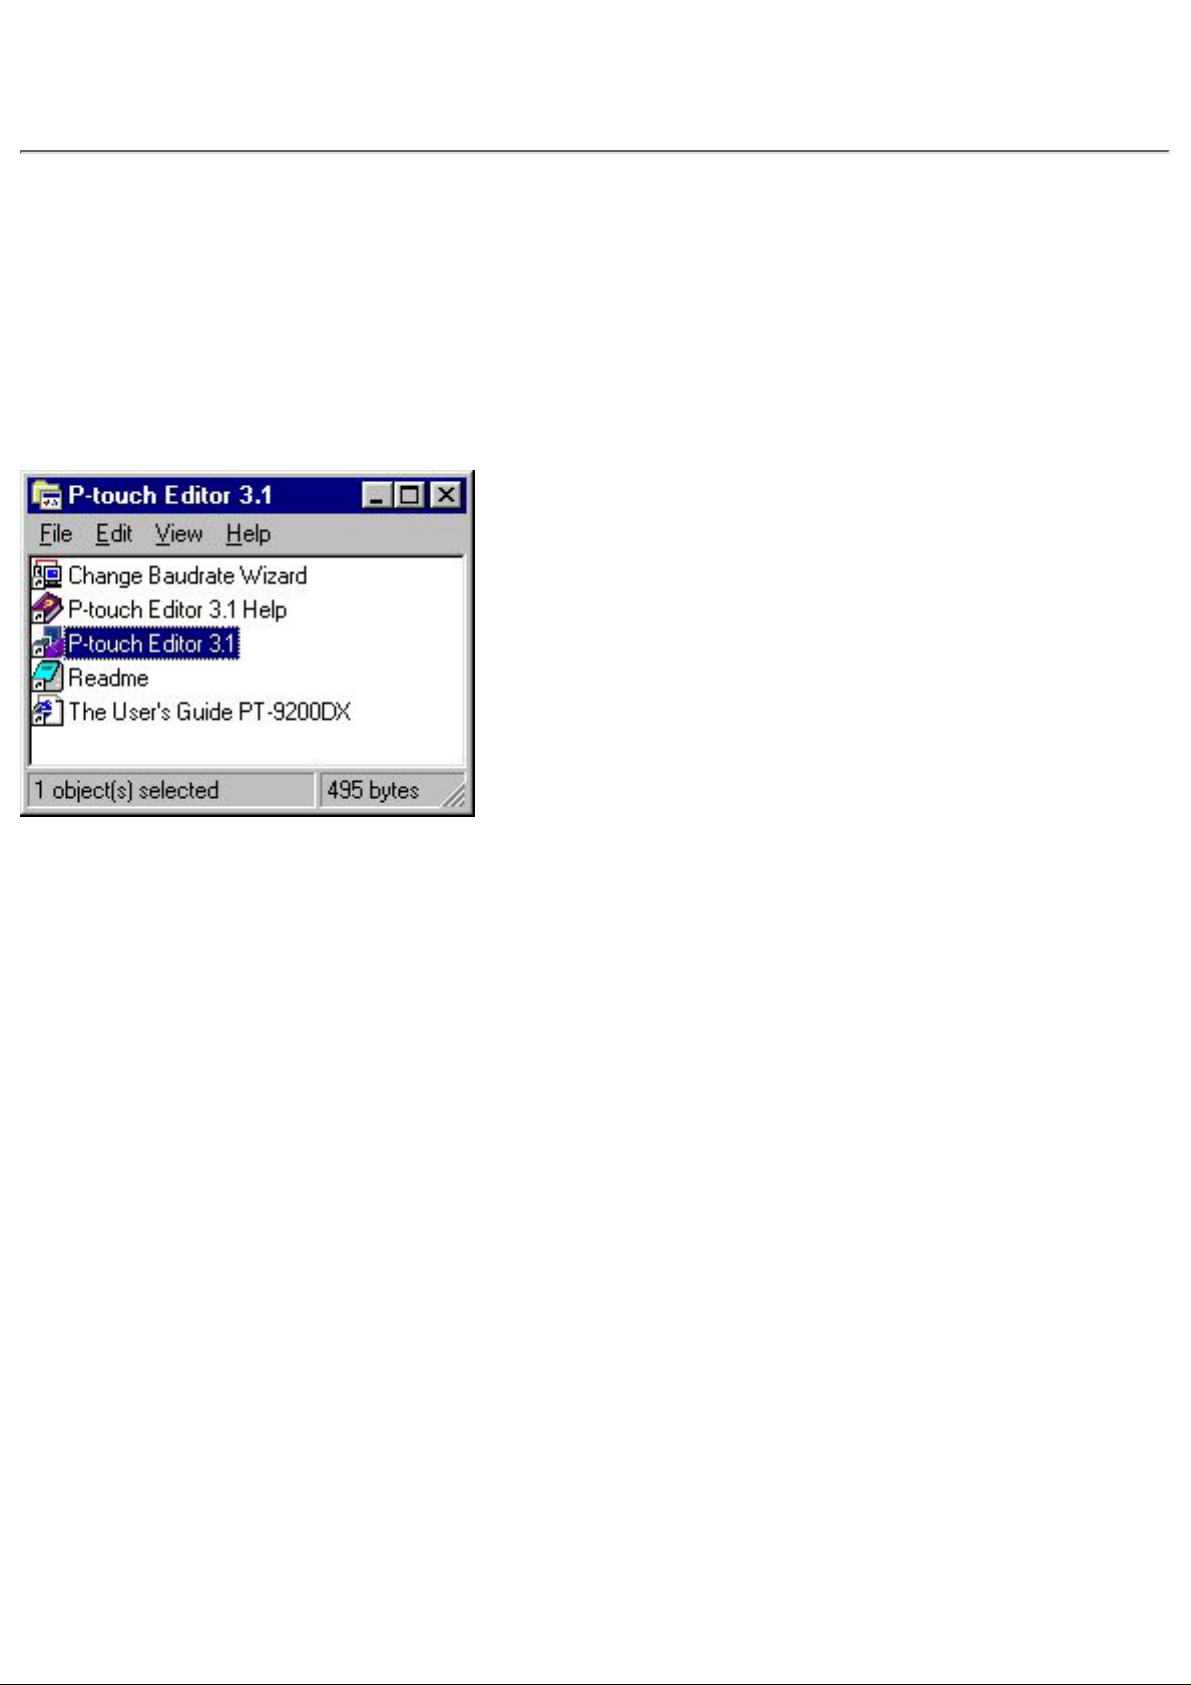
You can start up P-touch Editor by clicking its icon in the "P-touch Editor 3.1" group window or by
using the Start button or Windows Explorer.
Starting up by clicking the "P-touch Editor 3.1"
icon
Double-click the "P-touch Editor 3.1" icon in the "P-touch Editor 3.1" group window.
Starting up using the Start button
1. Click the Start button in the taskbar to display the Start menu.
2. Select "Programs".
3. Select "P-touch Editor 3.1".
4. Click "P-touch Editor 3.1".
Starting up using Windows Explorer
1. Start up Windows Explorer.
2. Select the drive and directory where P-touch Editor is installed.
3. Double-click "Ptedit3.exe".

Basic
Operations
This chapter walks you through the basics you need to know in order to start using P-touch Editor. We
recommend that you go through the examples to become familiar with how to use the mouse to create
objects and move them around the layout area and how to create your own database. Note that this
chapter provides only enough information to help you get started. More detailed explanations of
commands and dialog boxes can be found in Reference.
Layout area
Use the layout area to design your label. Each label is made up of a number of elements called
objects, which are arranged in a layout. There are various types of objects, each named according to
the type of information it contains. The following is a list of available objects, along with a short
explanation of the type of information it contains.
Text objects: text
Graphics objects: pictures drawn using the draw toolbar
Bitmap data objects: bitmap data (.bmp, .dib, .jpg, .tif, .ico or .wmf data imported from another
application, such as Paintbrush)
Arranged text objects: text created using the [Arrange Text] command
Date/Time/Calendar objects: date, time or calendar data created using the [Date/Time/Calendar]
command
Creating a new layout document
A new layout document can be created in either of the following ways:
starting up P-touch Editor (Click here)●
pulling down the [File] menu, then selecting the [New] command●
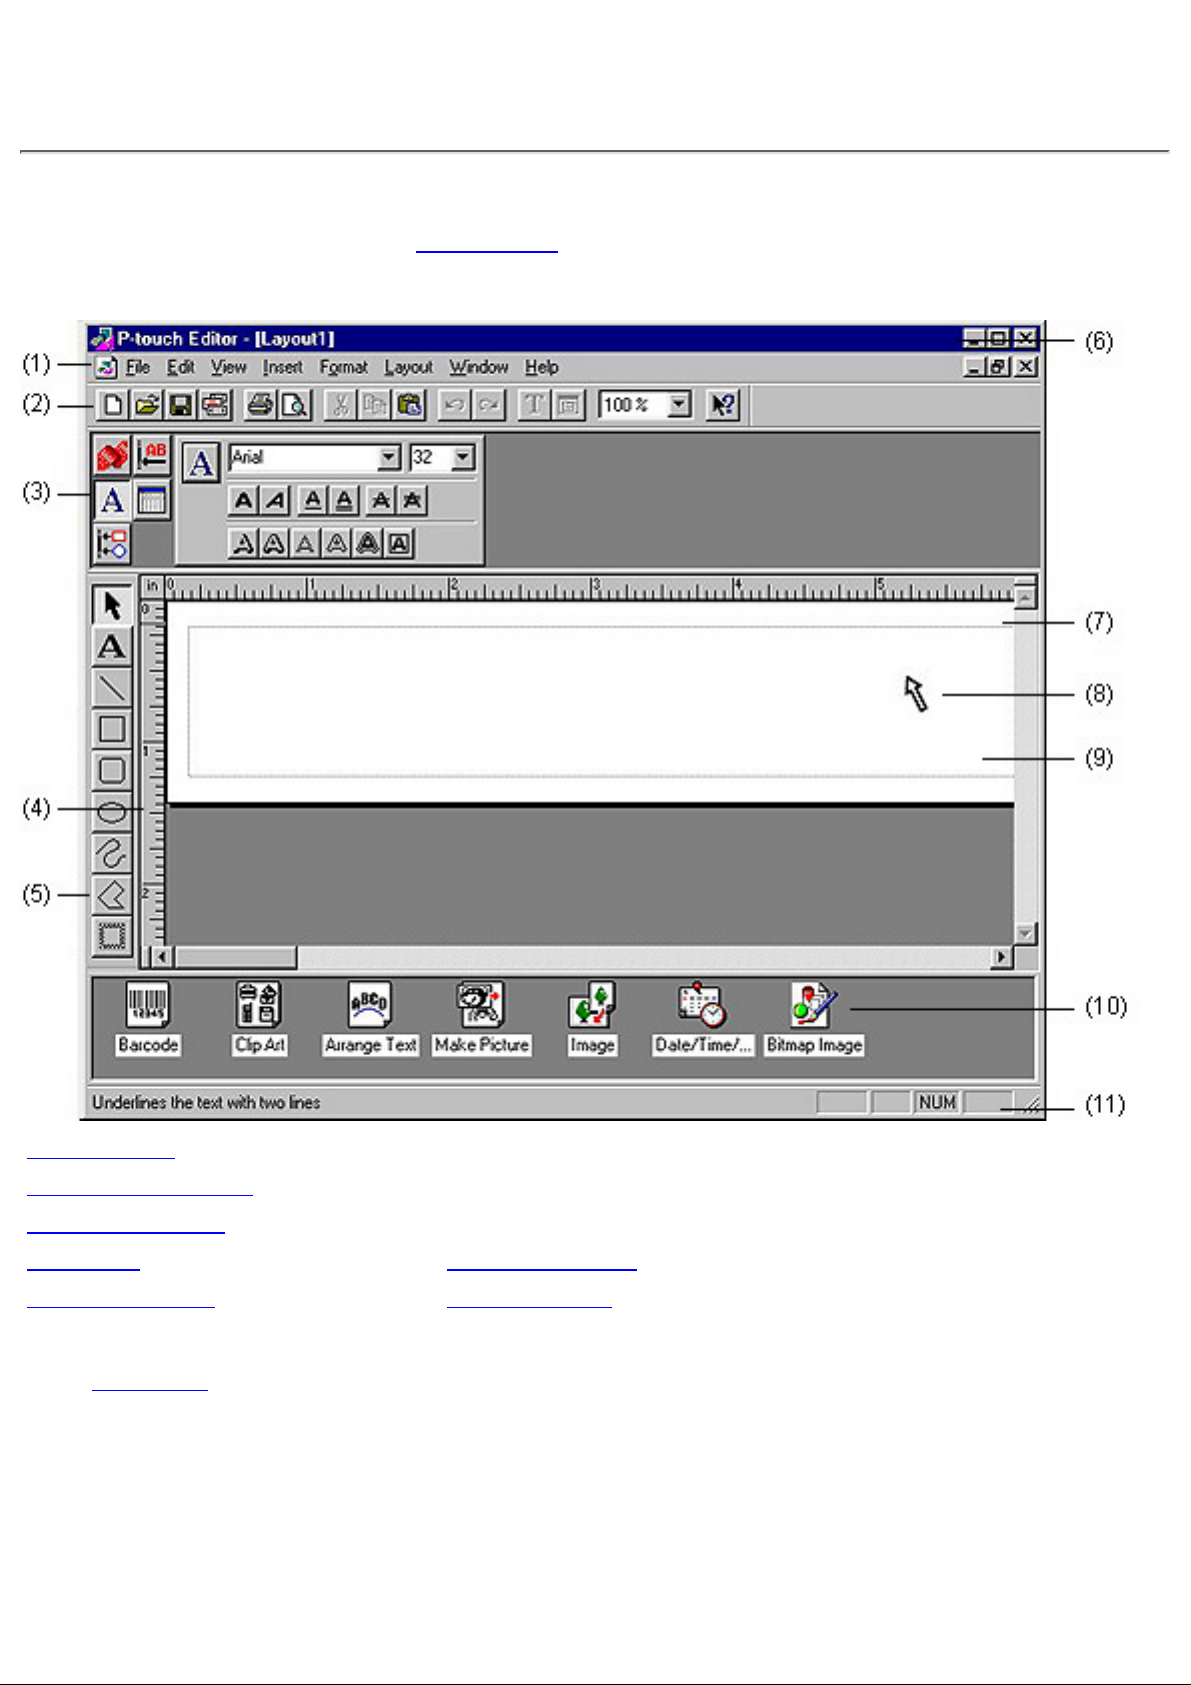
(1) Menu bar
(7) Layout area
(2) Standard toolbar
(8) Cursor
(3) Property dock
(9) Print area
(4) Rulers (10) Object dock
(5) Draw toolbar (11) Status bar
(6) Title bar
Click here for a detailed explanation of the layout document window and its components.●
Working with text objects
This section details the basics you need in order to create and work with text objects while designing
your own label layout.
Creating a text object
A text object is automatically created as soon as you type text into the layout area.
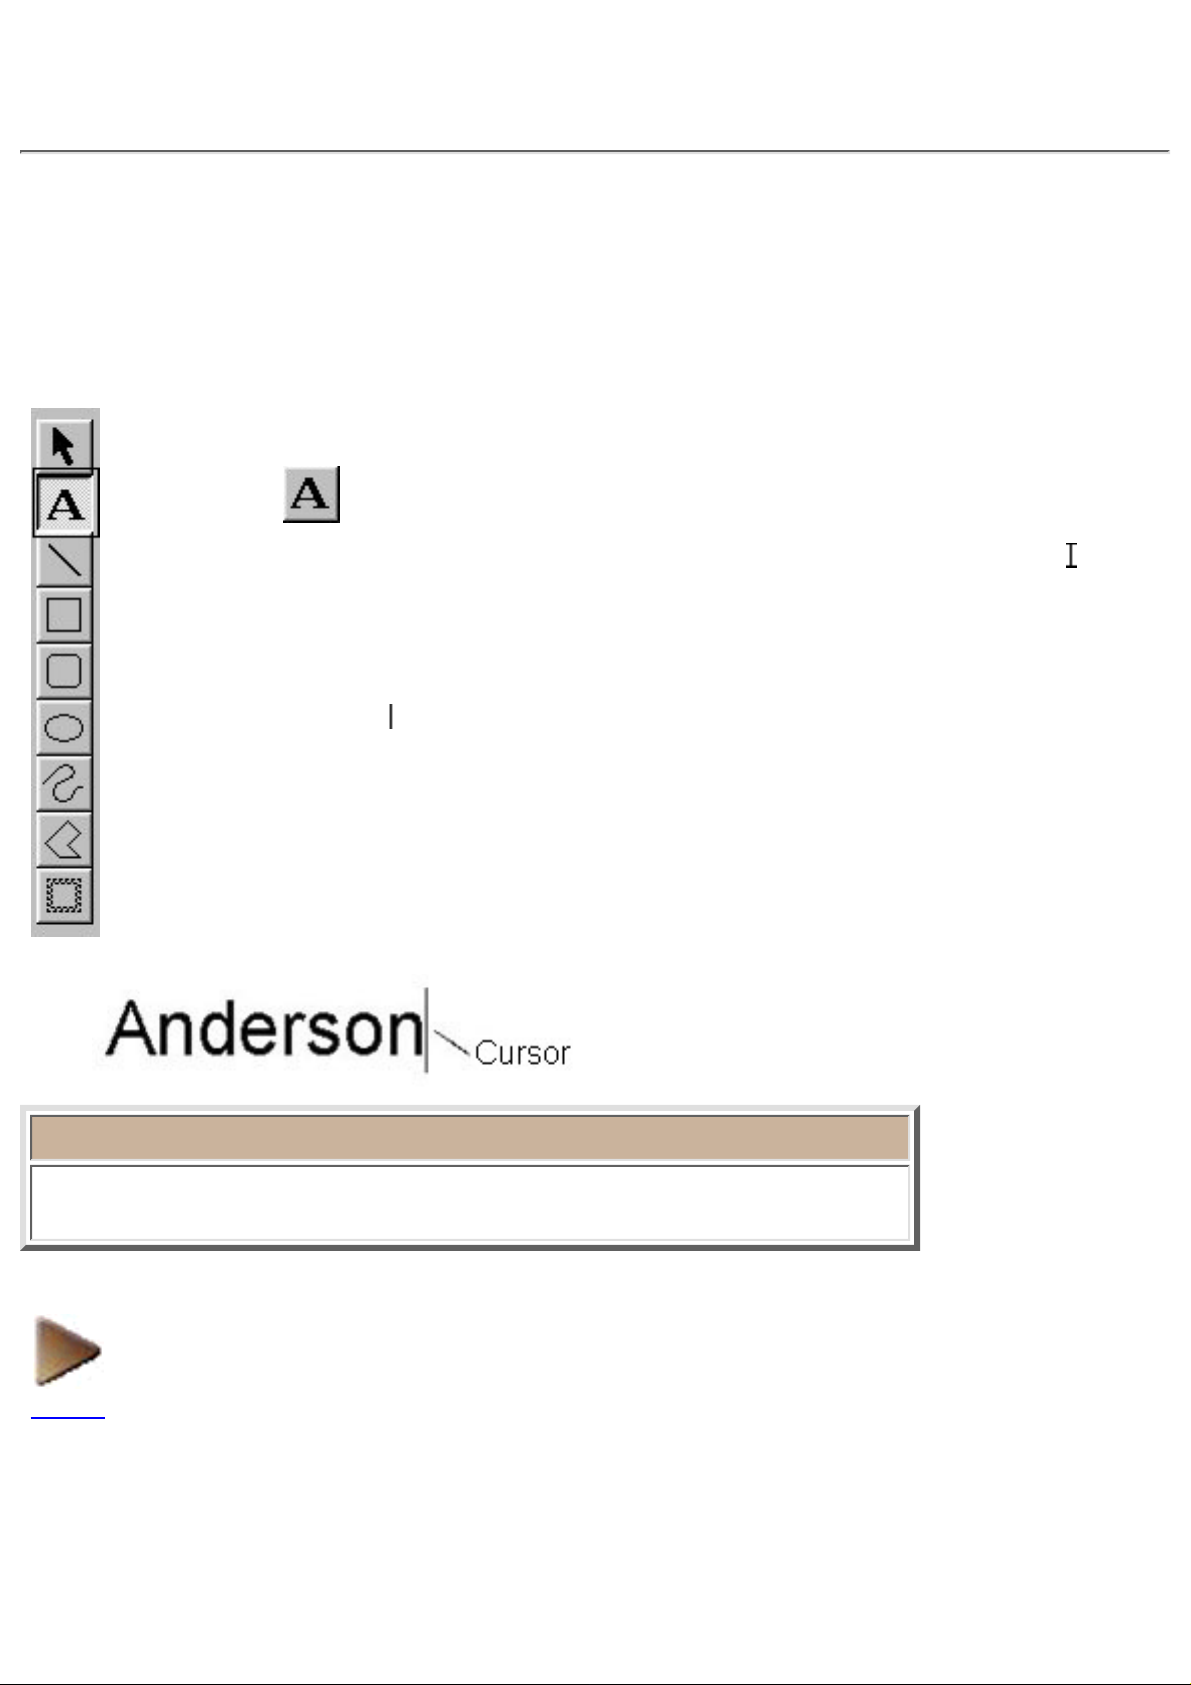
1. Click on the draw toolbar.
When you move the pointer back to the layout area, its shape changes to
. This
is the I-beam pointer.
●
2. Move the I-beam pointer to any place in the layout area, then click the left
mouse button.
The cursor (
) flashes in the layout area to indicate that you can now type in text.●
3. Type in some text.
To change the text, you can use your computer keyboard's arrow keys or the
mouse to move the cursor to the part of the text that you wish to change. Then,
use the keyboard's delete key to delete any text.
●
Note:
Text is always typed in using the insert mode. You cannot use the insert key
on your computer keyboard to switch to the overwrite mode.
NEXT
Modifying the appearance of text
You can modify the appearance of your text by changing its font, size, style, or the effects applied to
the characters. This can be done by clicking the [Font] command in the [Format] menu or by using the
Font Properties in the property dock.
The [Font] command in the [Format] menu displays the Font tab in the Text Properties dialog
box, which allows you to make many changes to the appearance of the text at one time. For
details on using these commands. (Click here)
●
The Font Properties allow you to make a single change at a time. (Click here)●
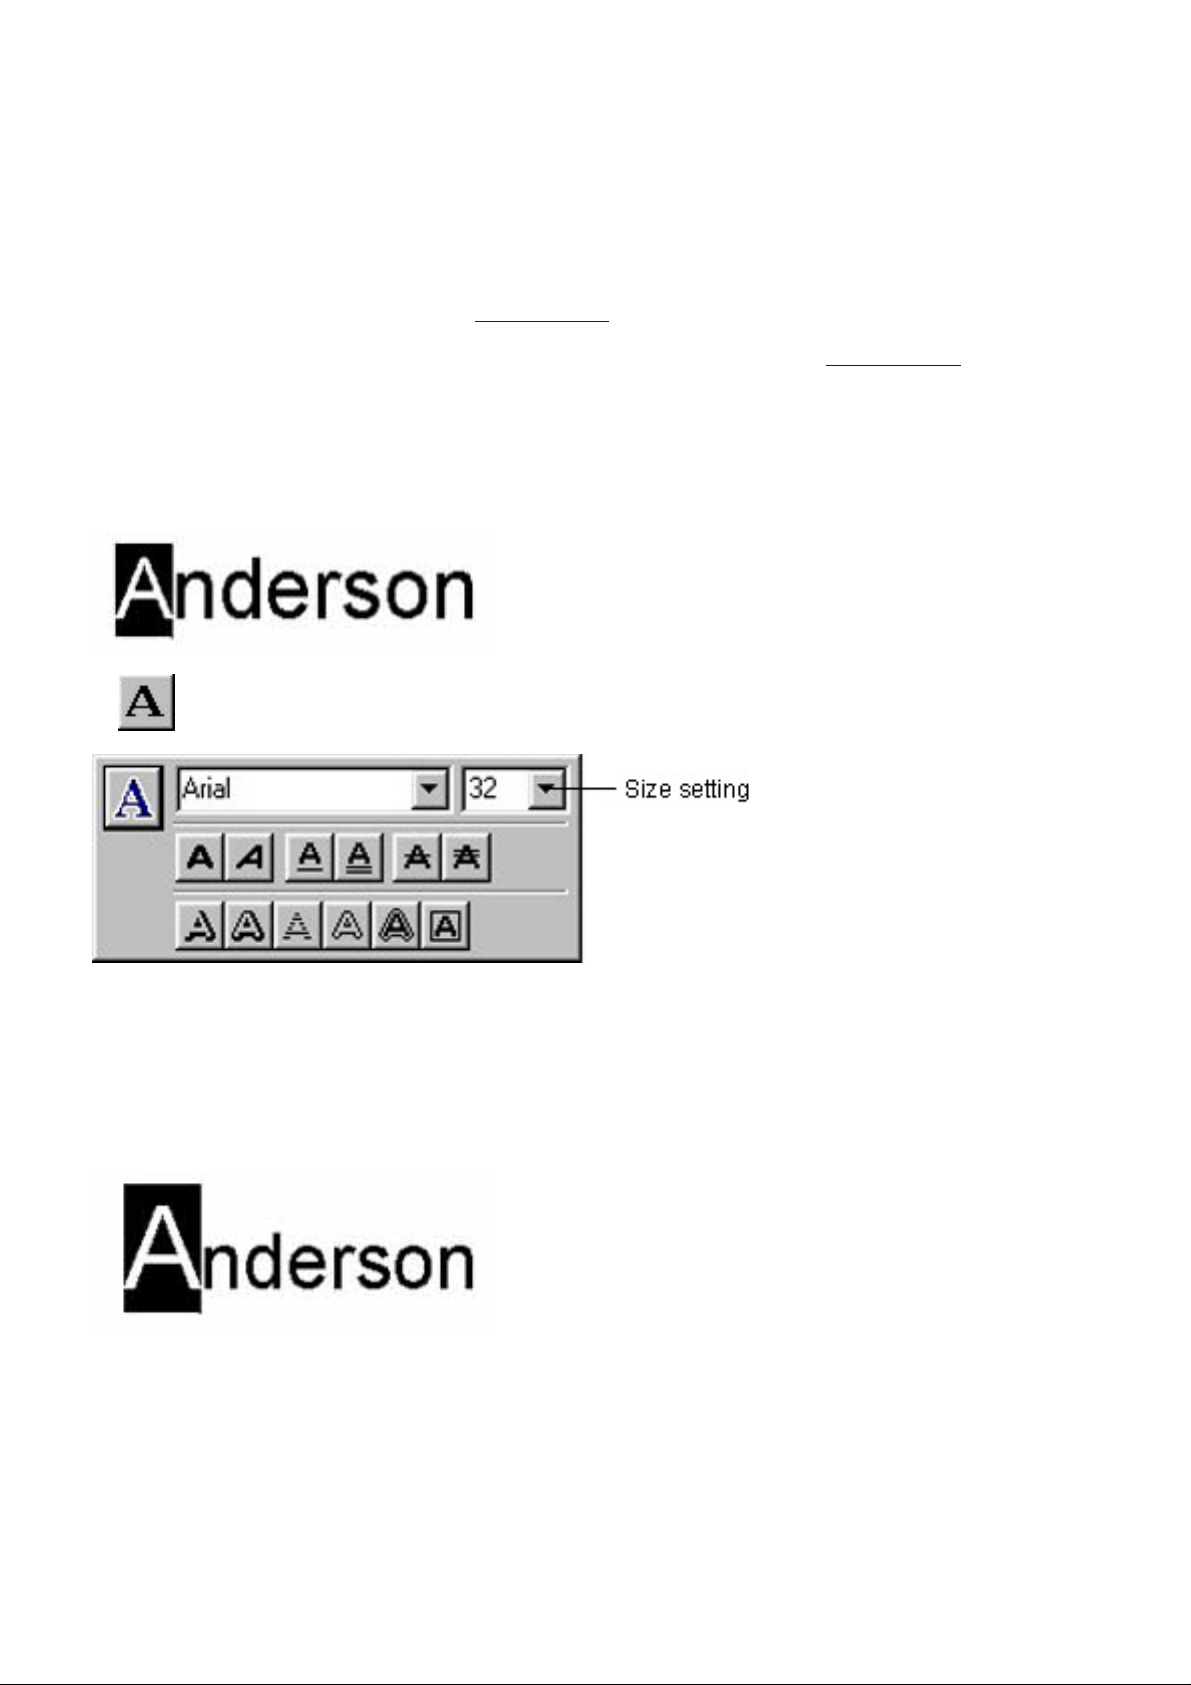
Here, let's use the Font Properties to make the first letter of the text larger than the other letters.
1. Highlight the first letter of the text by holding down the left mouse button and dragging the
I-beam pointer across it.
2. Click in the property dock to display the Font Properties.
3. Click the arrow button on the right side of the size setting.
This causes a pull-down menu of sizes to appear.
●
4. Select 48.
The size of the text you selected changes to 48 points.
●
You can select settings and click on other buttons in the Font Properties to change the font, size,
style (bold, italic, bold italic, etc.), and the effects that are applied.
●
Other text layout features
A number of other commands and functions let you lay out your text in exactly the orientation and
style you want. See the pages noted for detailed information about how to perform these text layout
operations.
Auto formatting●
Aligning●
Rotating●
Filling the print area with an object●
Inserting the date, the time or a calendar●
Auto arrangement of text●
Text alignment inside a box●
Auto editing of text in an existing layout●
BACK
Working with graphics objects
A graphics object is created each time you draw something in the layout area. The following
procedure shows how to draw a simple box.
Creating a graphics object
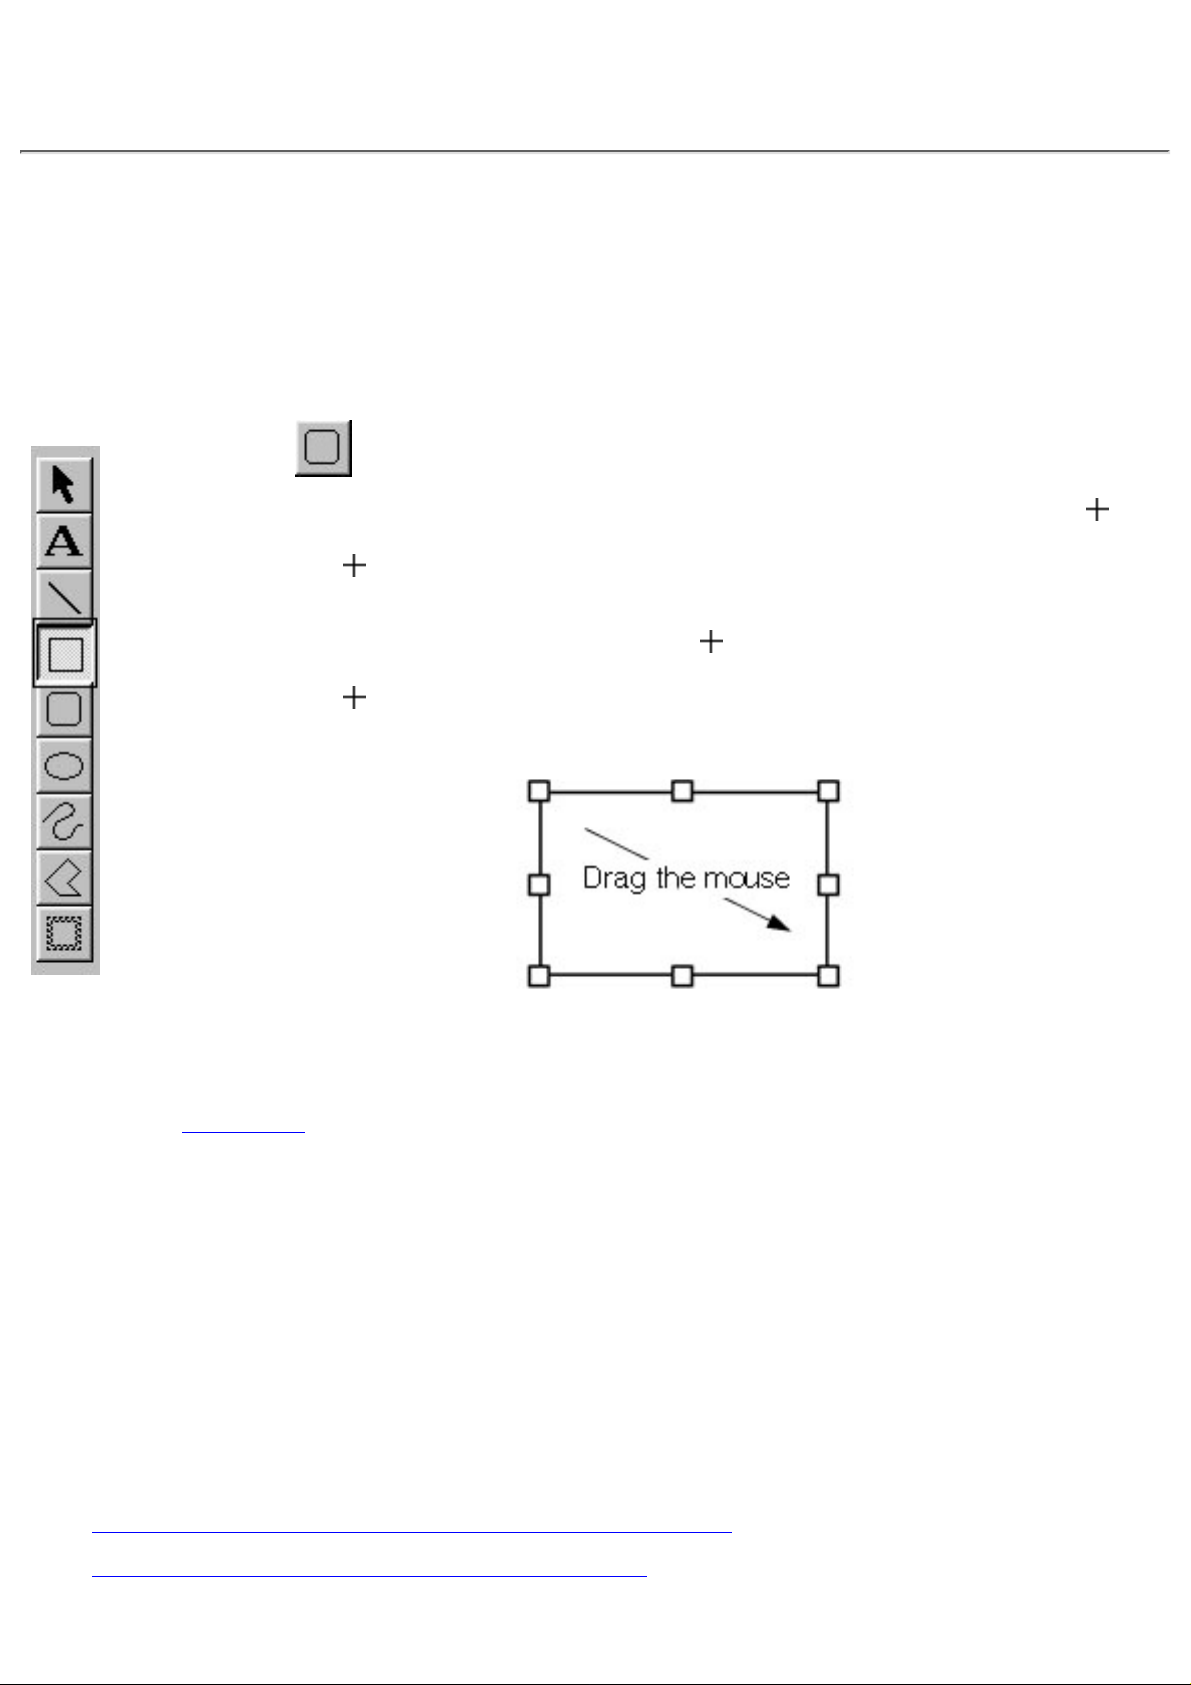
1. Click on the draw toolbar.
When you move the pointer back to the layout area, its shape changes to
.●
2. Move the pointer to any place in the layout area and hold down the left
mouse button.
This makes the current location of the
pointer one of the corners of the box.●
3. Move the pointer to where you want the opposite corner of the box to be
and release the mouse button.
You can use the other graphic tools in the same way to draw lines, rounded boxes, ellipses and
frames. Click here for details on using all of the draw toolbar buttors.
●
Holding down the computer keyboard's shift key while dragging the mouse allows you to draw
perfectly square boxes or perfectly round circles.
●
Other graphics features
The following is a list of other graphics commands and features that are available with this
application. See the pages noted for detailed information.
Drawing lines, boxes, rounded boxes, circles, and frames●
Specifying a line style, line width, and fill pattern●

Specifying a frame style●
Specifying the background, line, and foreground colors and patterns●
Auto formatting●
Aligning●
Rotating●
Filling the print area with an object●
Importing images●
Inputting clip art●
Combining parts to create an illustration or selecting ready-made pictures●
Modifying objects
Once you create an object, you can change its size, move it, or delete it. A number of other features let
you align and rotate objects quickly and easily.
Selecting and deselecting a single object
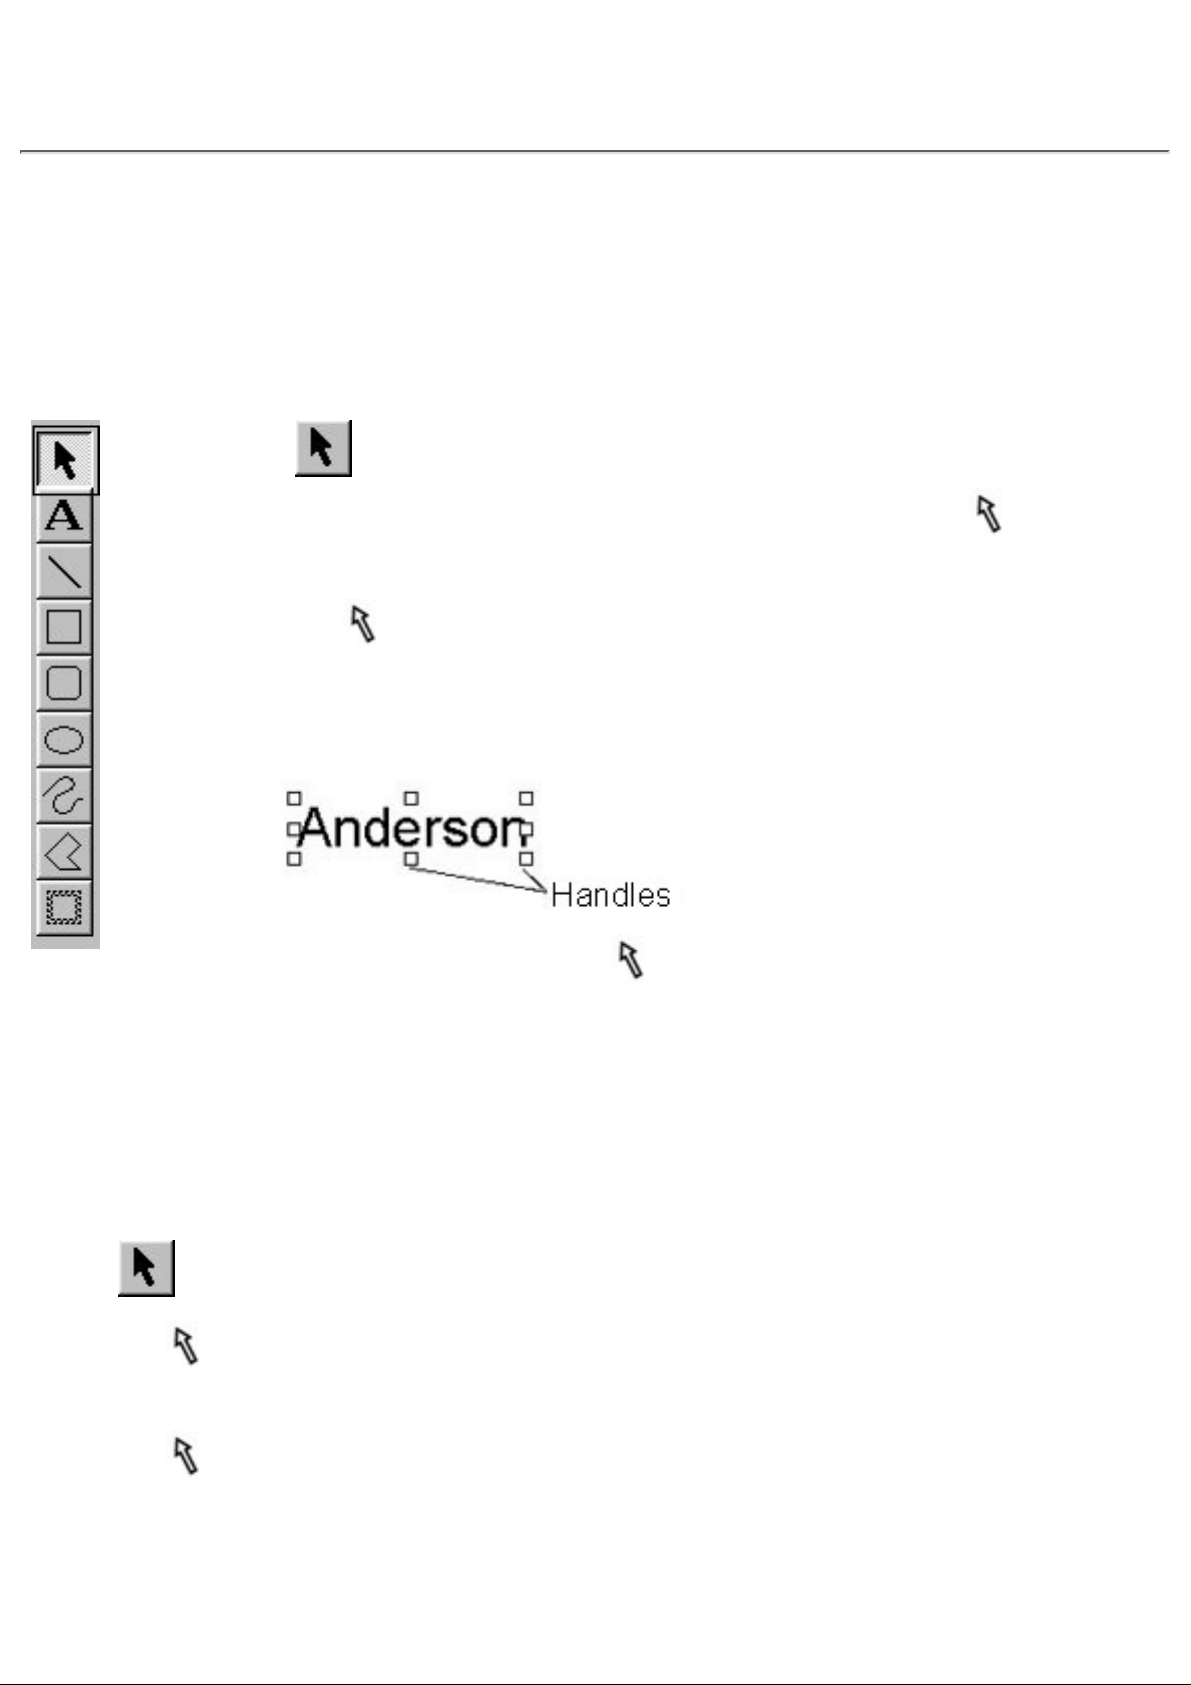
1. Click on the draw toolbar.
When you move the pointer back to the layout area, its shape (
) does not
change.
●
2. Move the pointer on top of the object you wish to select, then click the left
mouse button.
Small solid squares, called handles, appear around text or graphic objects to
indicate that they are selected.
●
3. To deselect the object, move the pointer anywhere in the layout area
outside of the selected object and click the left mouse button again.
At this time, the handles disappear from around the object.
●
Selecting and deselecting multiple objects
1. Click on the draw toolbar.
2. Move the
pointer so it is on top of the first object you wish to select, then click the left
mouse button.
3. Move the
pointer to the next object you wish to select, then hold down the keyboard's
shift key while clicking the left mouse button.
Now, two objects are selected.
●
4. Repeat step 3 to select all of the objects you want selected.

5. To deselect the objects, click anywhere in the layout area outside of the selected objects.
NEXT
Selecting and deselecting all objects
1. Pull down the [Edit] menu and click the [Select All] command.
This selects all the objects currently in the layout area.
●
2. To deselect the objects, click anywhere in the layout area outside of the selected objects.
Changing the drawing style of the object
1. Use the pointer to select the object you wish to modify.
2. Double-click the left mouse button to display a dialog box which allows you to edit the
drawing style of the object. The dialog box can also be displayed by clicking the right mouse
button, then clicking the [Properties] command in the pop-up menu.
3. Select the desired settings, then click
.
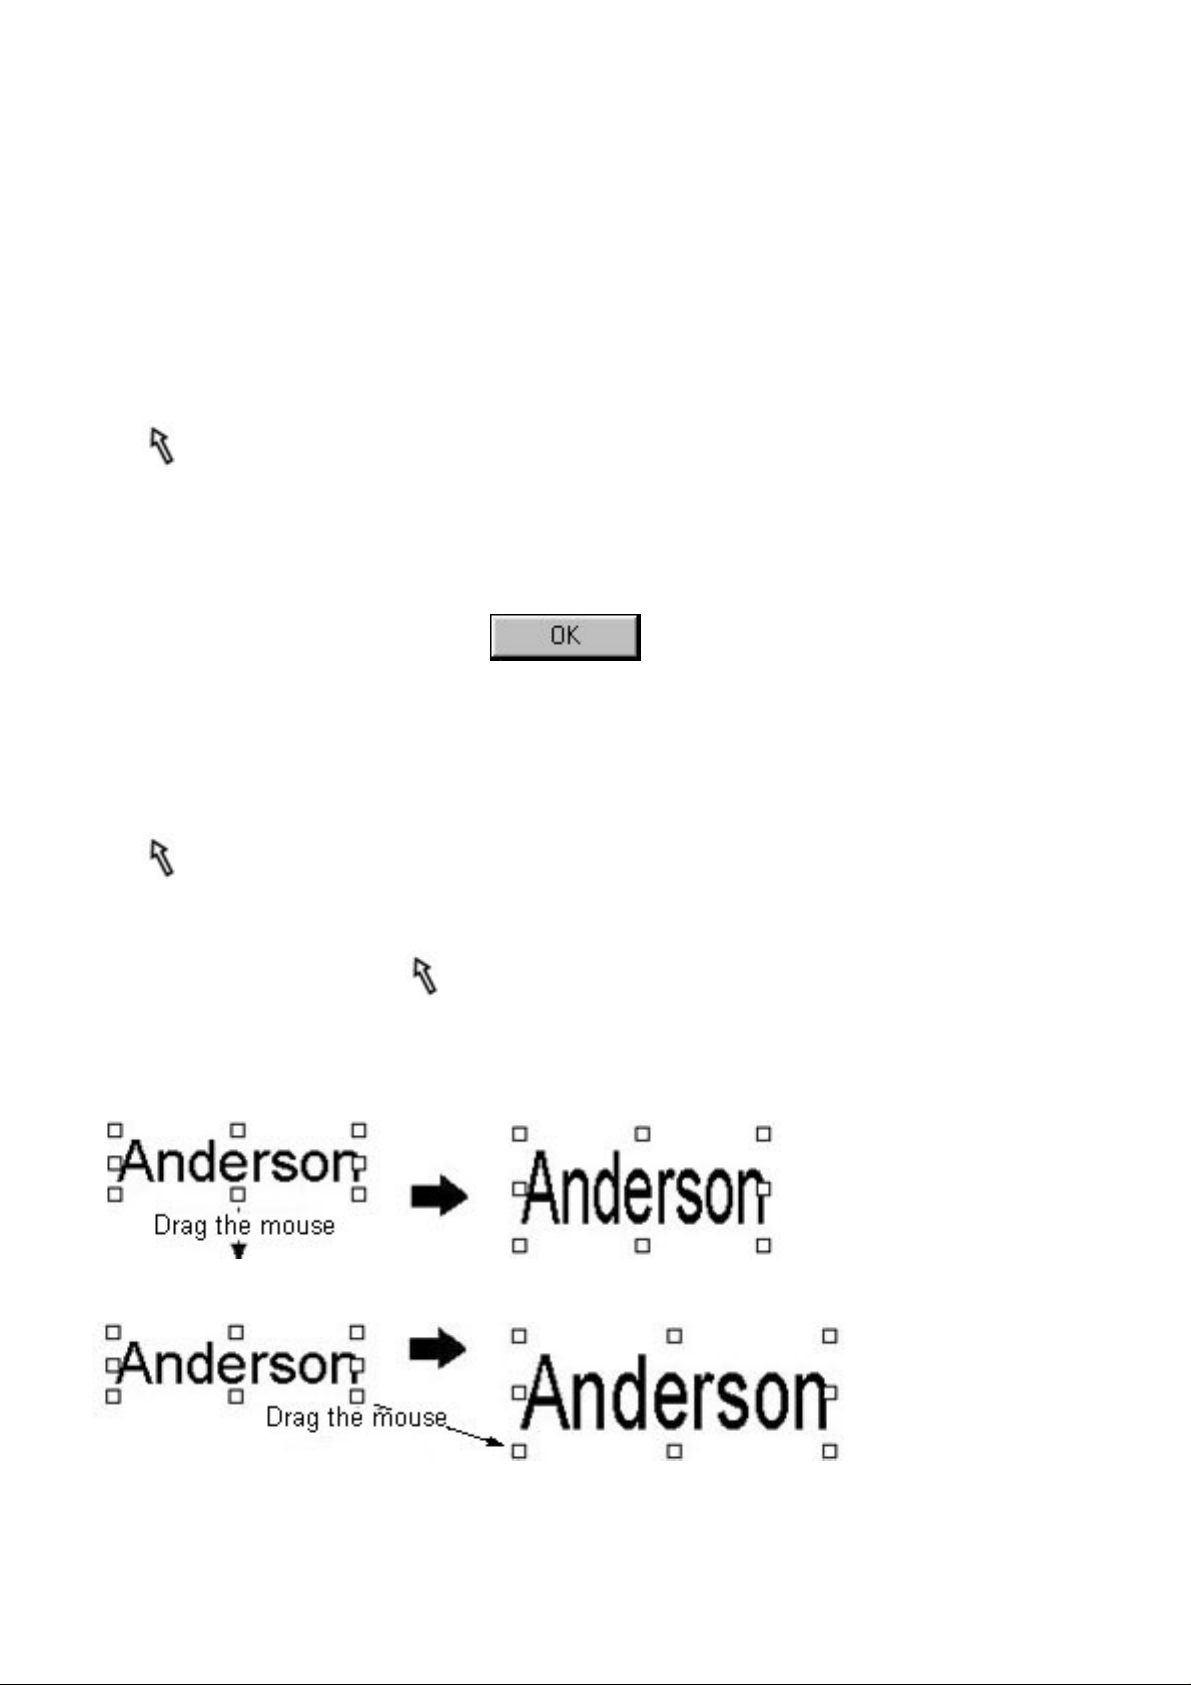
Changing the size of an object
1. Use the pointer to select the object you wish to modify.
2. Use the mouse to grab one of the object's handles, then drag the mouse.
To grab a handle, move the
pointer over it, then hold down the left mouse button.●
3. When the object is the size you want, release the left mouse button.
Dragging a middle handle only changes either the vertical or the horizontal dimension.
●
Dragging a corner handle modifies both dimensions.●
Holding down your keyboard's shift key while dragging a corner handle maintains the
vertical-to-horizontal ratio as you change the size of the object.
●

BACK NEXT
Moving an object using the pointer
1. Use the pointer to select the object you wish to move.
You could also select more than one object and move them all at one time.
●
2. Grab the selected object by placing the pointer inside the object and holding down the left
mouse button.
3. Drag the mouse to move the object.
4. When the object is moved to where you want it, release the mouse button.
Moving an object using your computer's arrow keys
1. Use the pointer to select the object you wish to move.
You could also select more than one object and move them all at one time.
●
2. Press the arrow key on your computer's keyboard for the direction that you want the object
to move.
Holding down an arrow key continually moves the selected object.
●
Deleting objects
1. Use the pointer to select the objects you wish to delete.
2. Pull down the [Edit] menu and select either the [Cut] or the [Clear] command. You can also
delete the selected object by pressing your keyboard's backspace/delete key.
The [Cut] command deletes the selected object and stores it on the clipboard. You can then
paste the contents of the clipboard in another location. (Click here)
●
The [Clear] command or your keyboard's backspace/delete key simply deletes the selected
object.
●
BACK
Using the Auto Format Wizard
P-touch Editor's Auto Format feature makes creating labels as easy as selecting a format and inputting
text. With this feature, you get a wide variety of automatically formatted templates, which are divided
into 14 different categories.
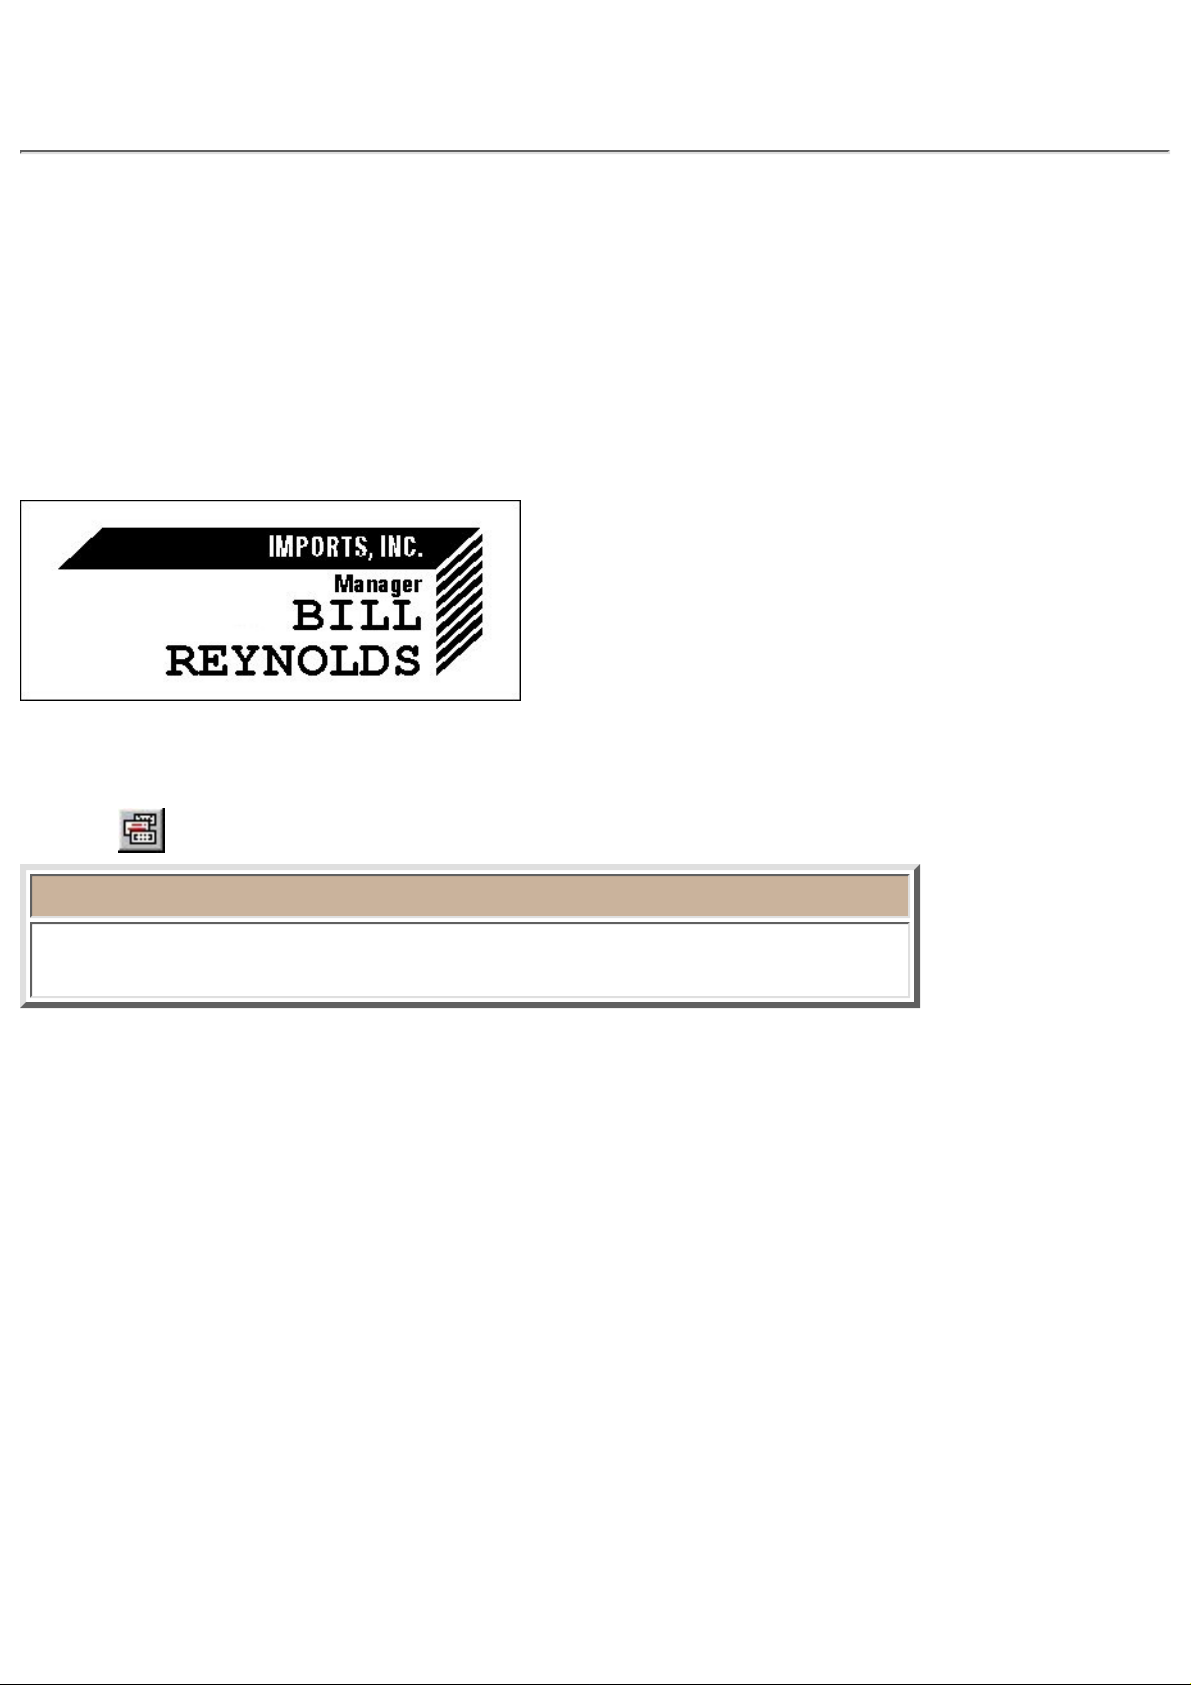
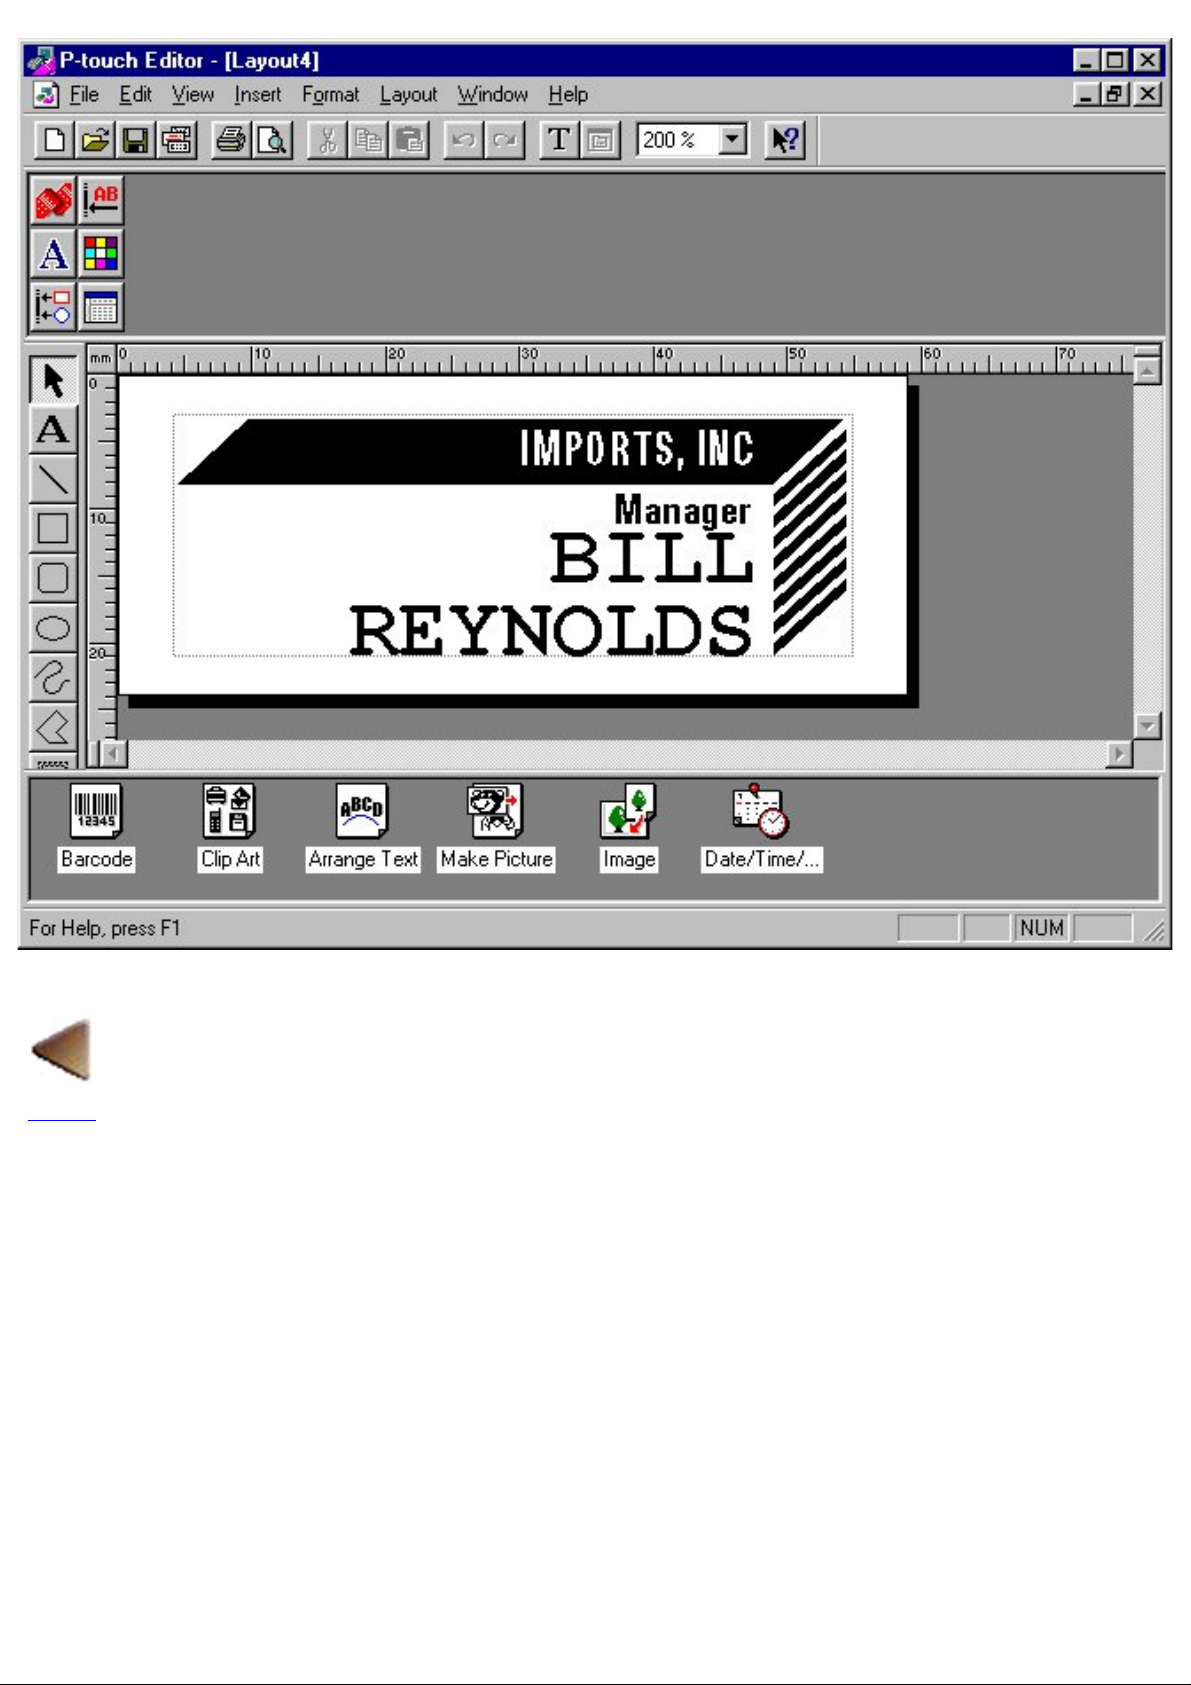
Creating a layout using the Auto Format Wizard
As an example, let's create a label like the following.
This label was created using the template named NAMEPLT2.LBL located in the category named
NAMEPLT.
1. Click
, or pull down the [File] menu and select the [Auto Format] command.
Note:
The templates that are available differ according to the P-touch model being
used.
2. In the "Category:" list view, select the category containing the template that you wish to use.
For our example, select "NAMEPLT".
●
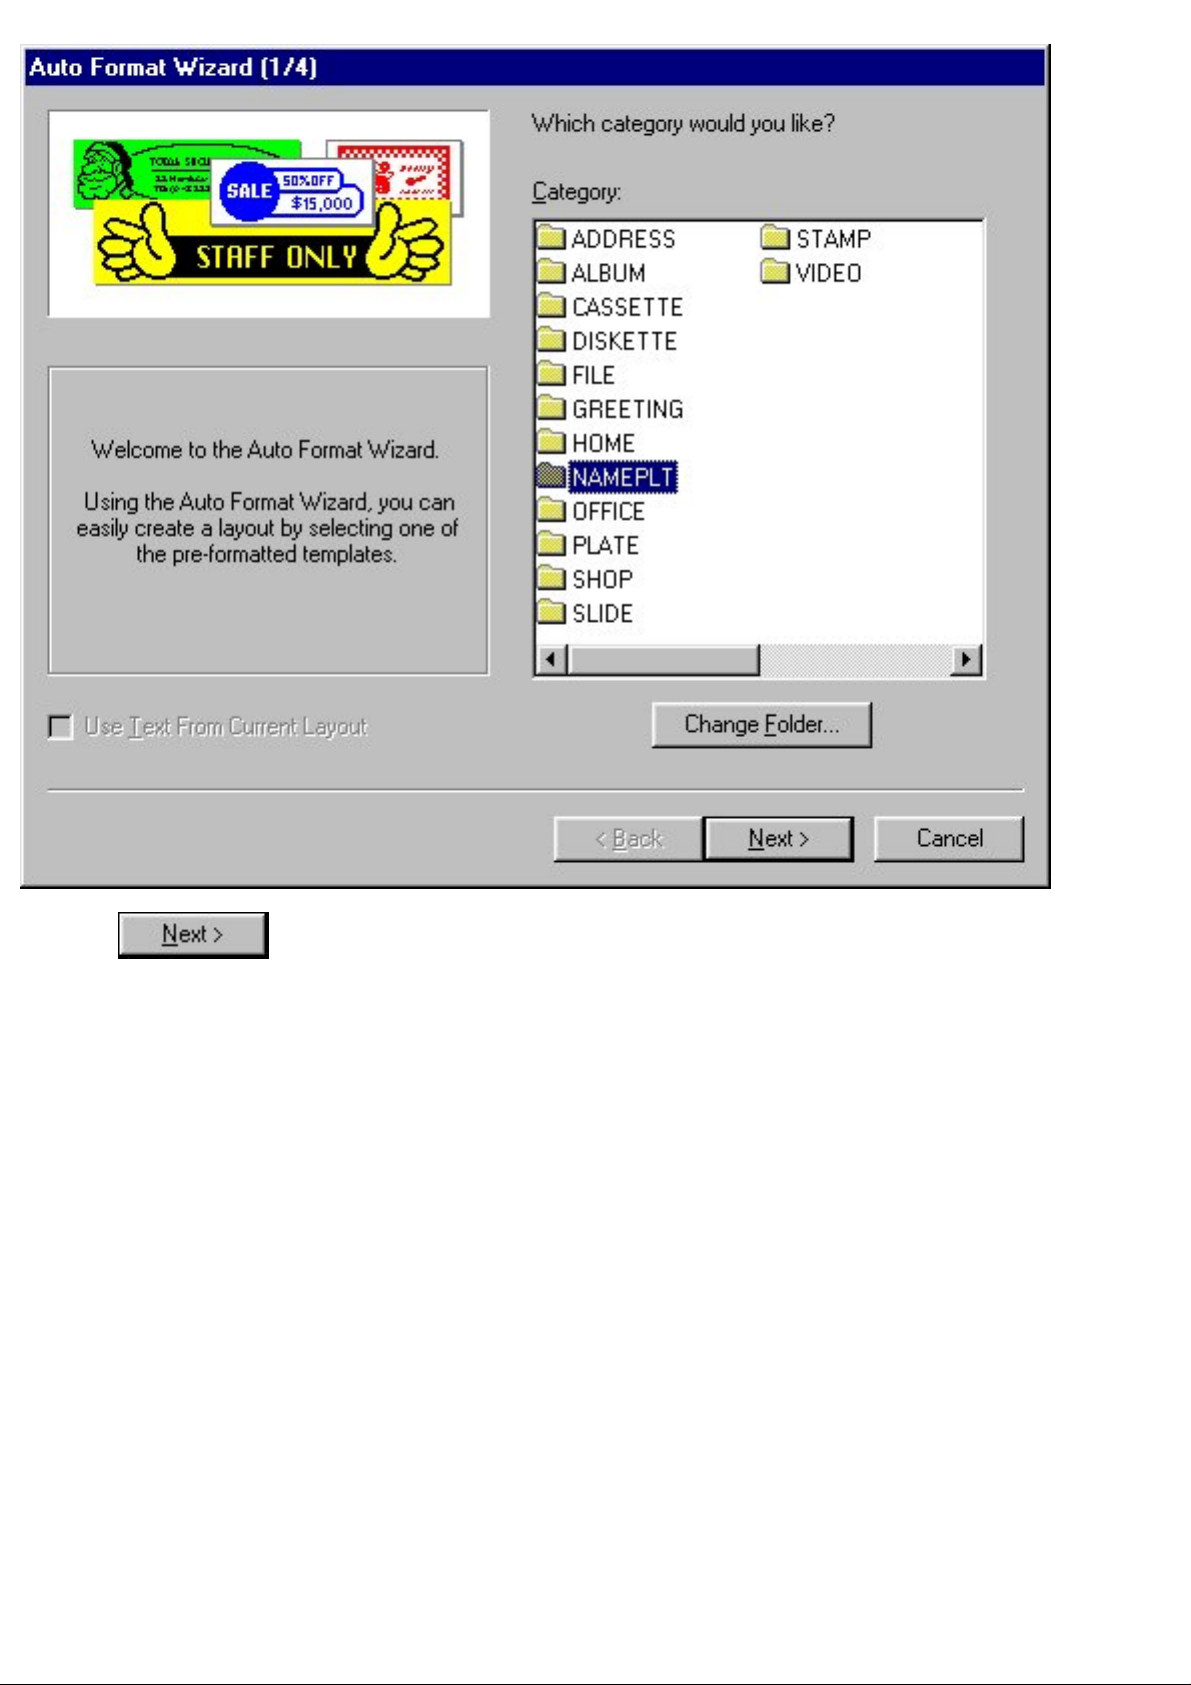
3. Click .
4. In the "Template:" list view, select your desired template.
Let's select on "NAMEPLT2.LBL".
●
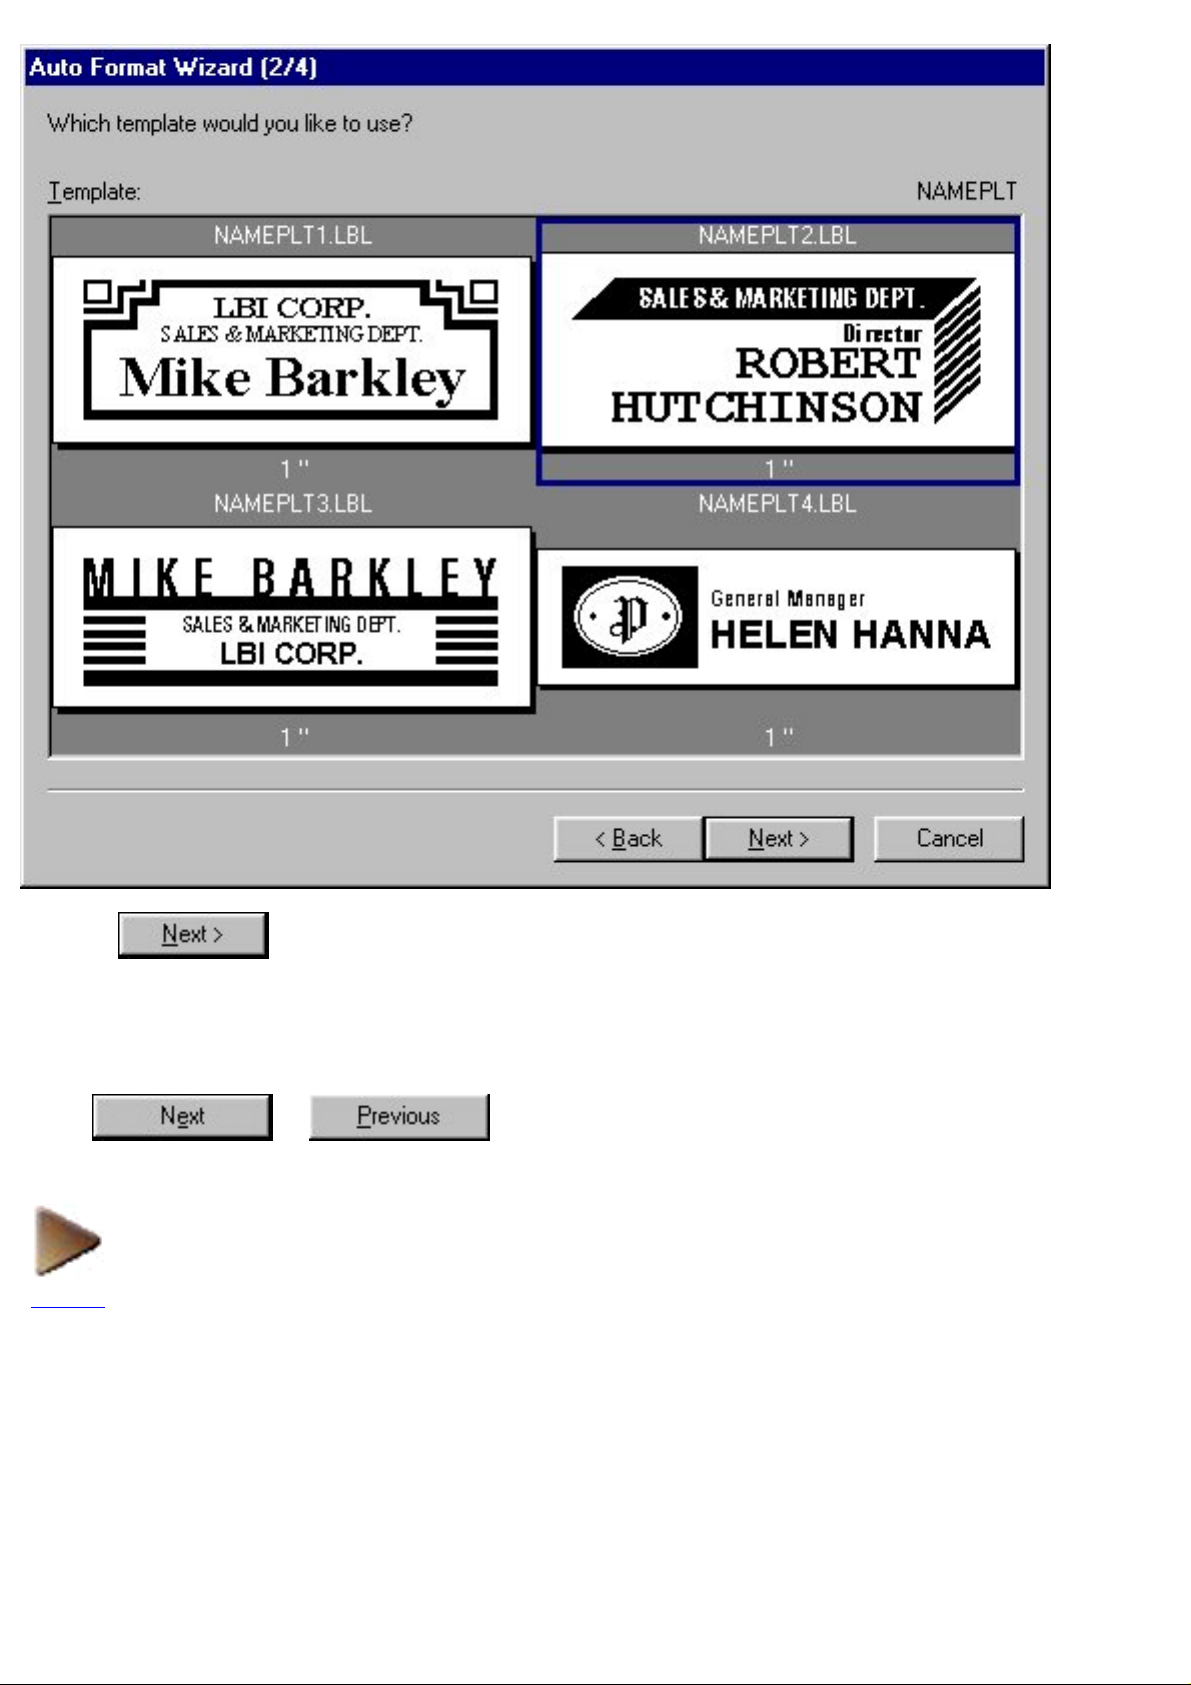
5. Click .
6. Select the text that you wish to change so that it is displayed in the "Input:" edit box.
Here, the first piece of text that we wish to change, the department name, is already selected.
●
The text can be selected by either clicking it in the sample that is shown or by clicking
or .
●
NEXT
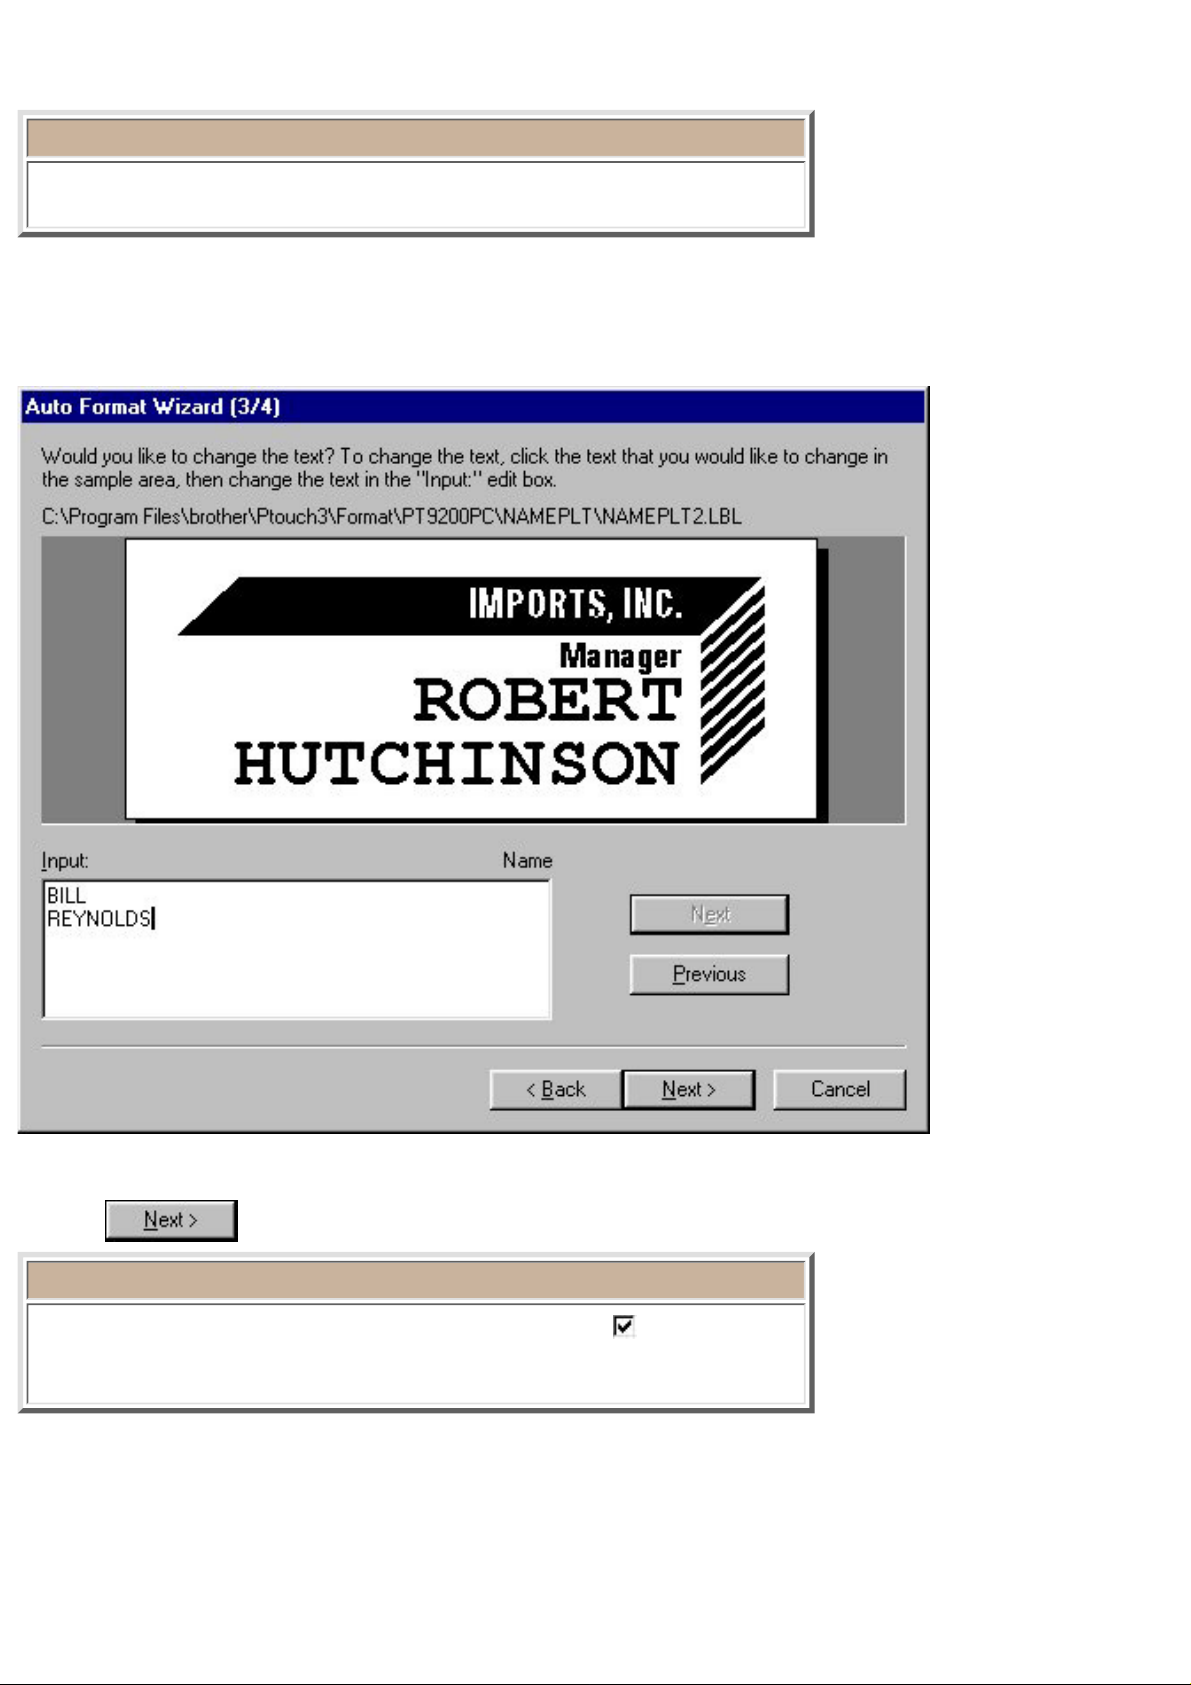
7. In the "Input:" edit box, change the text.
For our example, let's change the department name to the company name "IMPORTS, INC."
●
Note:
The templates that are available differ according to the P-touch model being
used.
8. Repeat steps 6 and 7 until the text appears as you wish.
Now, we can change the title to "Manager" and the name to "BILL REYNOLDS".
●
9. Click
to advance to the last Auto Format Wizard page appears.
Note:
When the "Use the Current Page Size" option is turned on , the size of the
new document created using the Auto Format Wizard is automatically
adjusted to the currently selected page size.
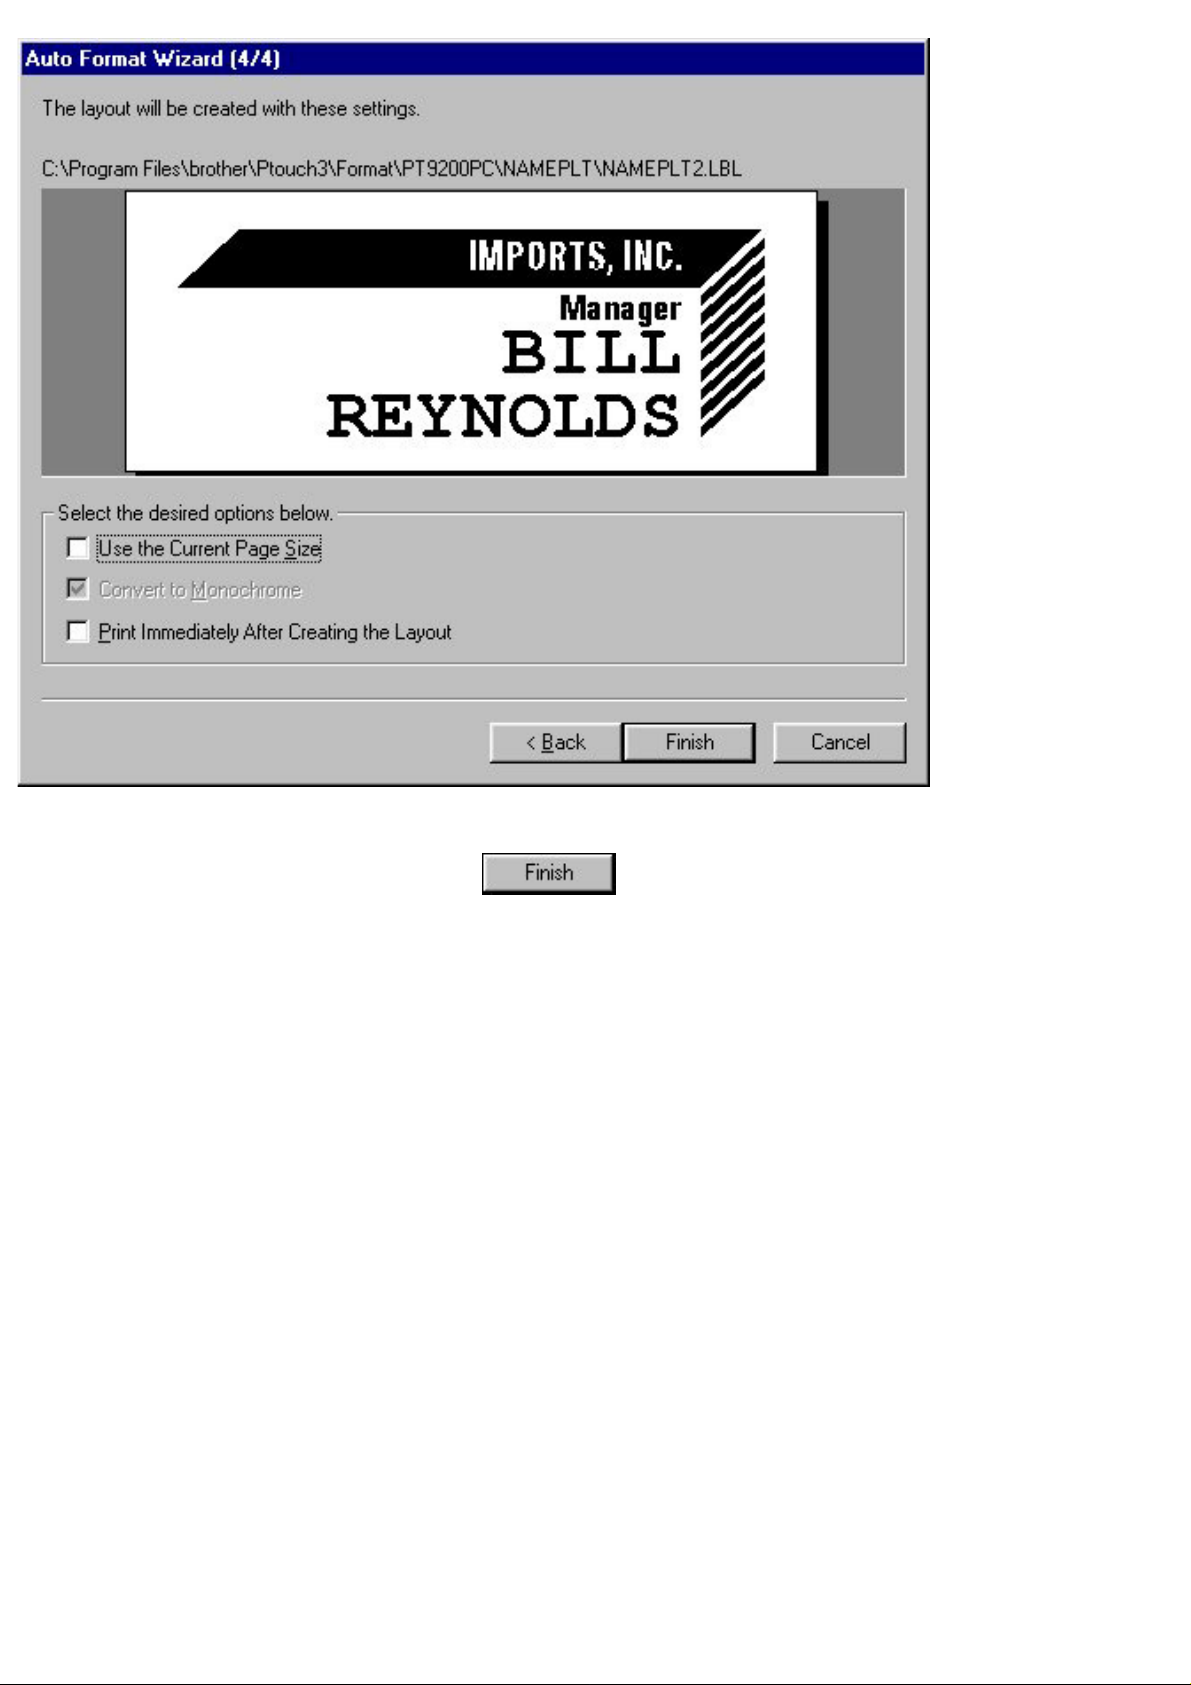
10. After selecting the desired options, click
to add the layout to the print area.
BACK
Printing a layout
The print function lets you print out the document using your computer printer or create a label using
your P-touch.
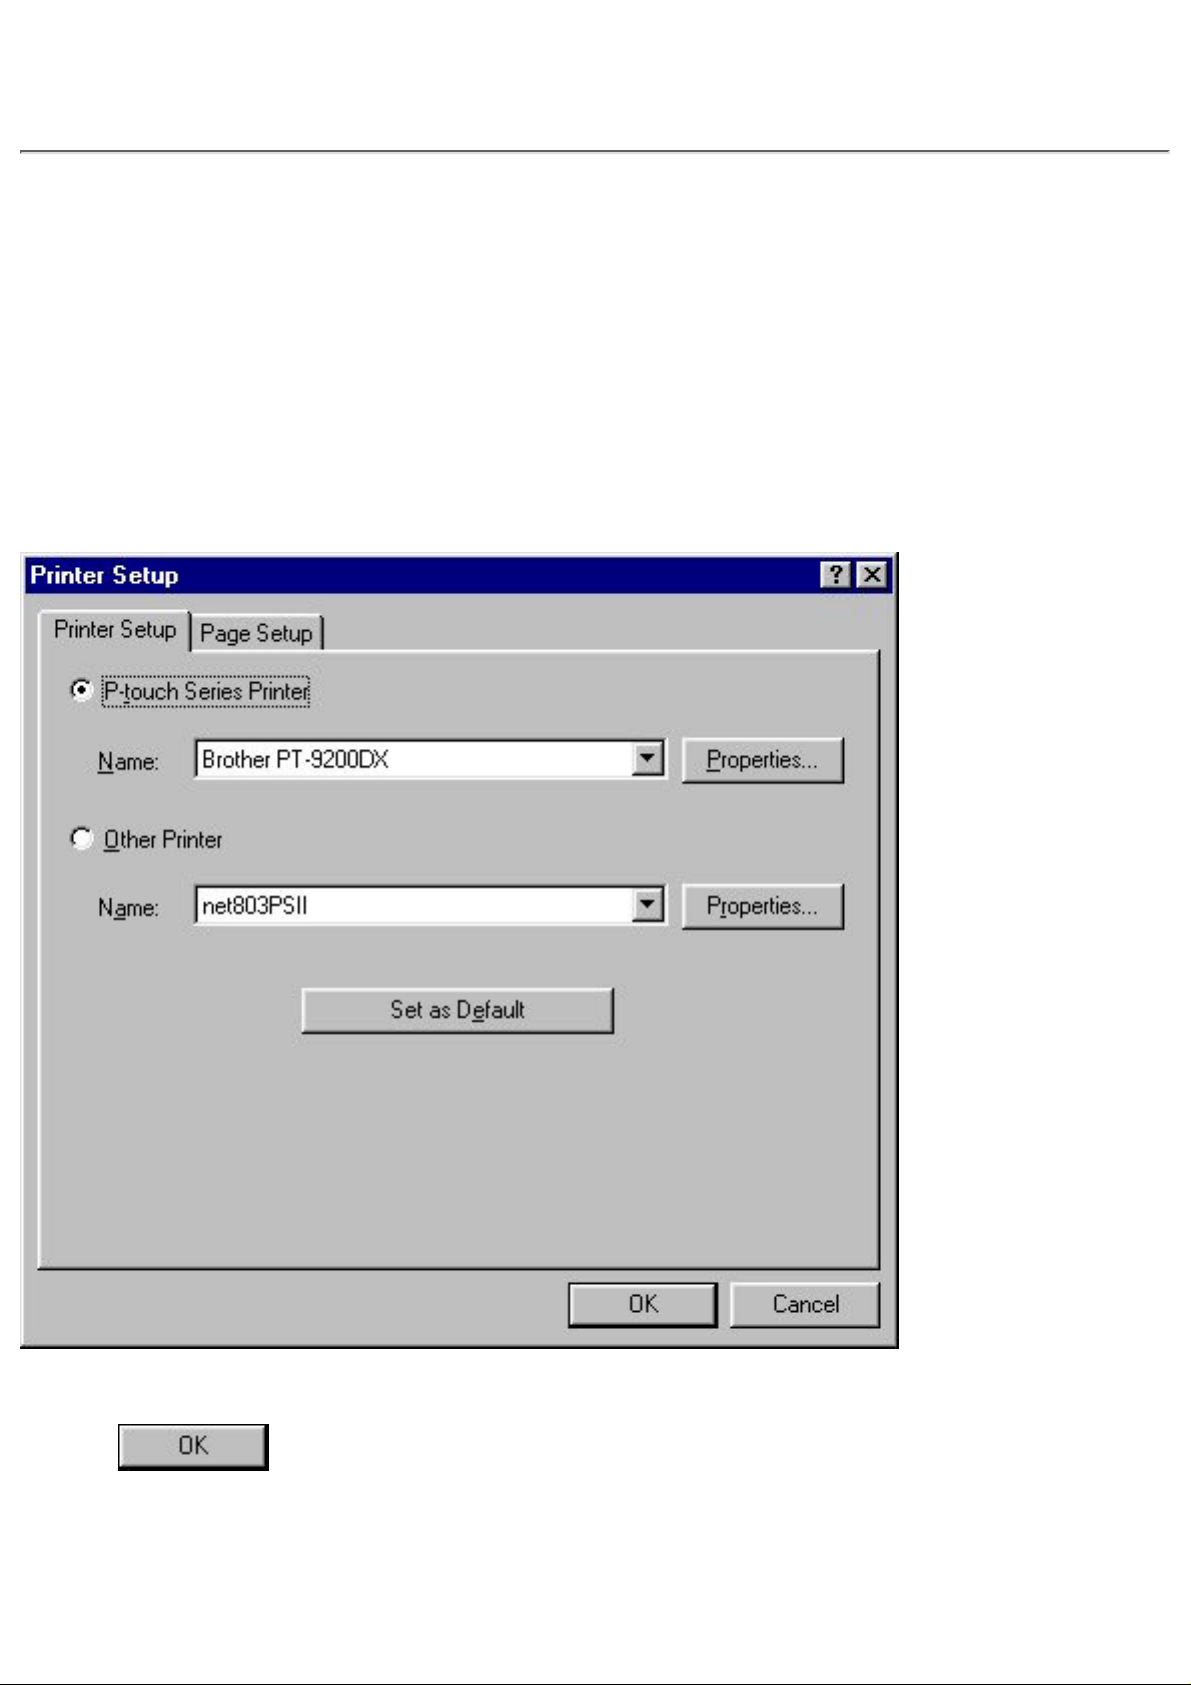
1. Select the printer.
1. Pull down the [File] menu and click the [Printer Setup] command to display the Printer Setup
dialog box.
(The dialog box shown is for the PT-9200DX(Serial) printer driver.)
2. Click "P-touch Series Printer" and select "PT-9200DX".
3. Click
to confirm your setting and close the Printer Setup dialog box.
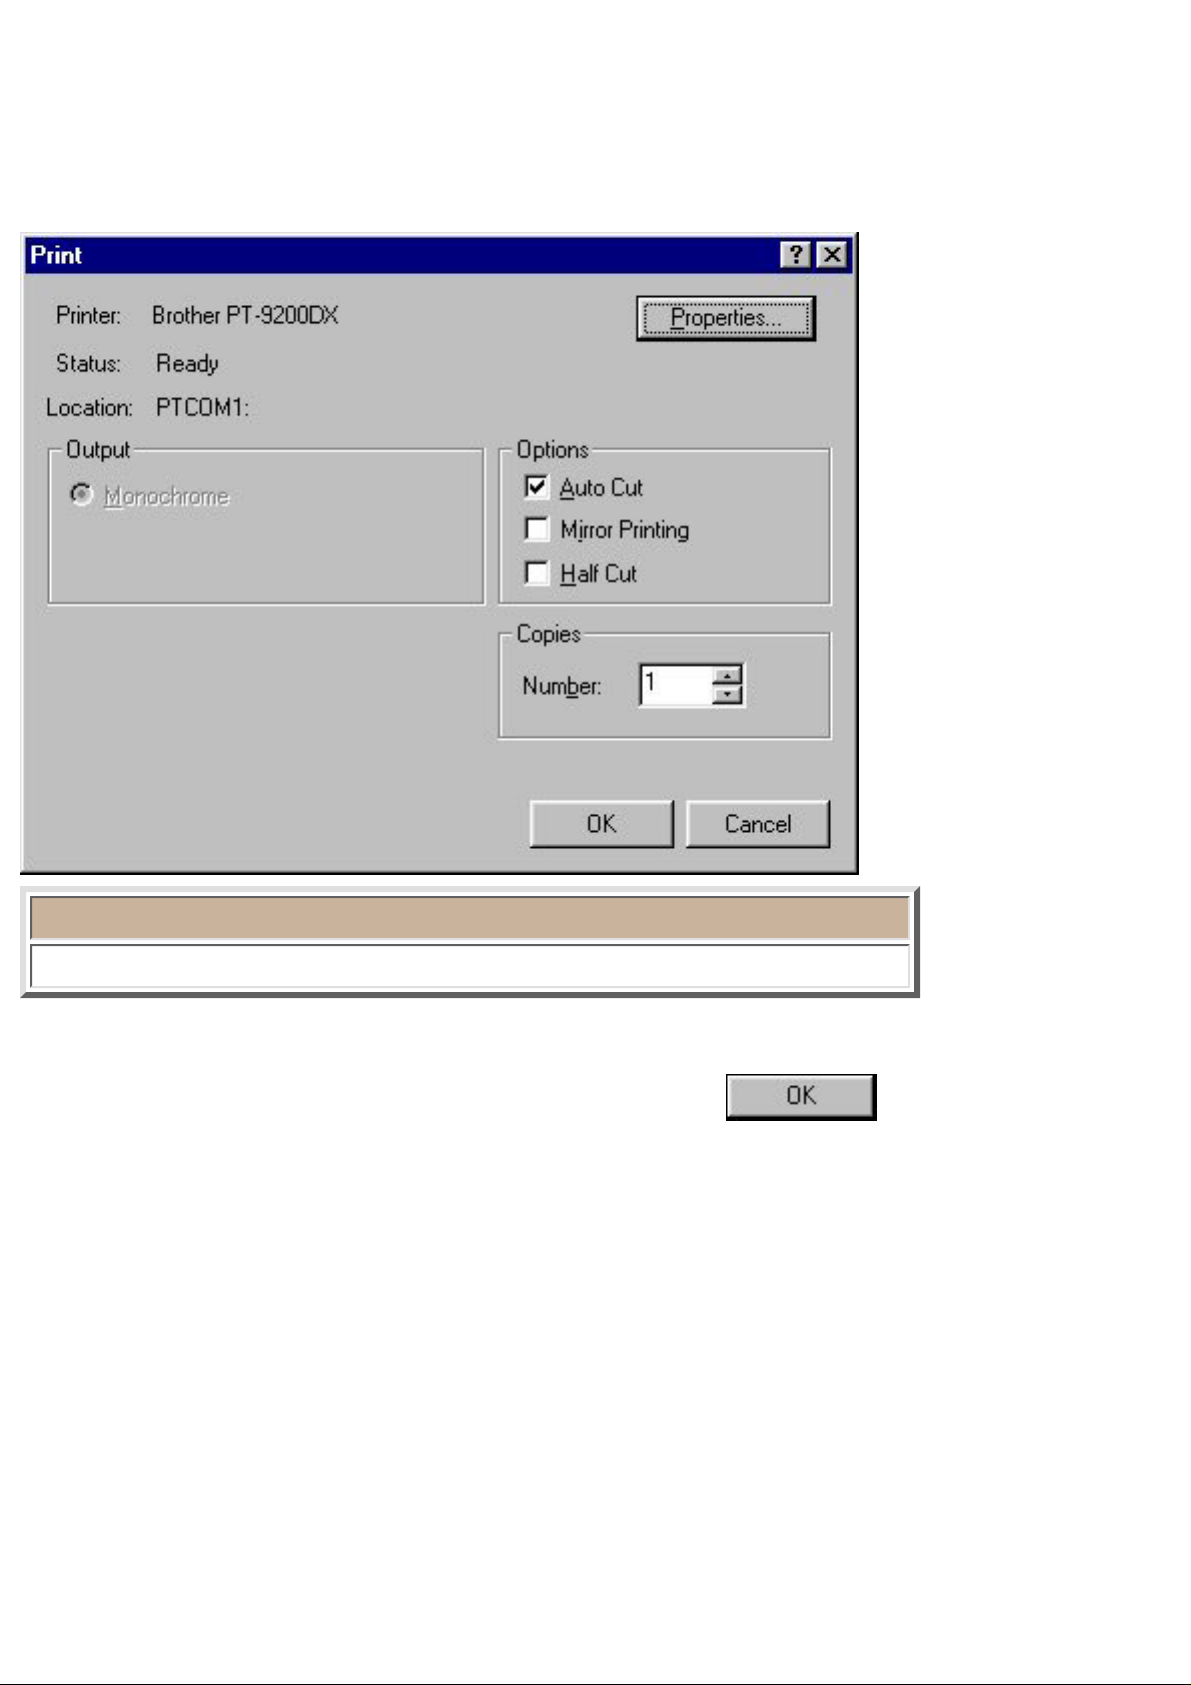
2. Print the layout.
1. Pull down the [File] menu and click the [Print] command to display the Print dialog box.
(The dialog box shown is for the PT-9200DX(Serial) printer driver.)
Note:
The Options that appear differ according to the printer that is selected.
2. Select the desired settings.
3. Make sure the printer is turned on and ready, then click
.

Saving a layout document
When you start working on a new layout, the P-touch Editor automatically gives it the name "Layout
1". This is only a temporary name; you must give the layout a name when you save it.
Saving a layout that already has a name
Pull down the [File] menu and click the [Save] command. This simply saves the layout under the file
name that is already assigned to it.
Saving a layout that does not have a name
Pull down the [File] menu and click the [Save] command.
A dialog box appears so that you can specify a drive, directory, and file name for the layout. (Click
here)
Saving a layout under a different name
Pull down the [File] menu and click the [Save As] command.
A dialog box appears so that you can specify a drive, directory, and new file name for the layout.
(Click here) This command makes it possible for you to keep copies of the old and the new versions
of a layout file.

Databases
With your P-touch Editor, you can create useful databases to help you collect, organize and retrieve
information.
A P-touch Editor database document is made up of a table, divided into records. Each record consists
of a number of fields, each containing text data. When a field is created, it is given a format which
determines the type of data that the field can contain.
The records are the rows of the table, and the fields are the columns. The field names appear at the top
of each column. If your database is a list of customers, for example, each record could contain a field
for the first name, a field for the last name, a field for the telephone number, etc. Any of the fields in
the database can be used to sort the records, making it easier to find a desired record.
Creating a database
The following are the basic steps for creating a database.
1. Create a new database document and a new table.
2. Define the field names and their formats.
3. Create records and input the record data.
Note:
Files saved in the .mdb Microsoft® Access 97 format can be opened in
P-touch Editor Ver. 3.1. However, files created in Microsoft® Access
versions other than 97 are incompatible with P-touch Editor Ver. 3.1.
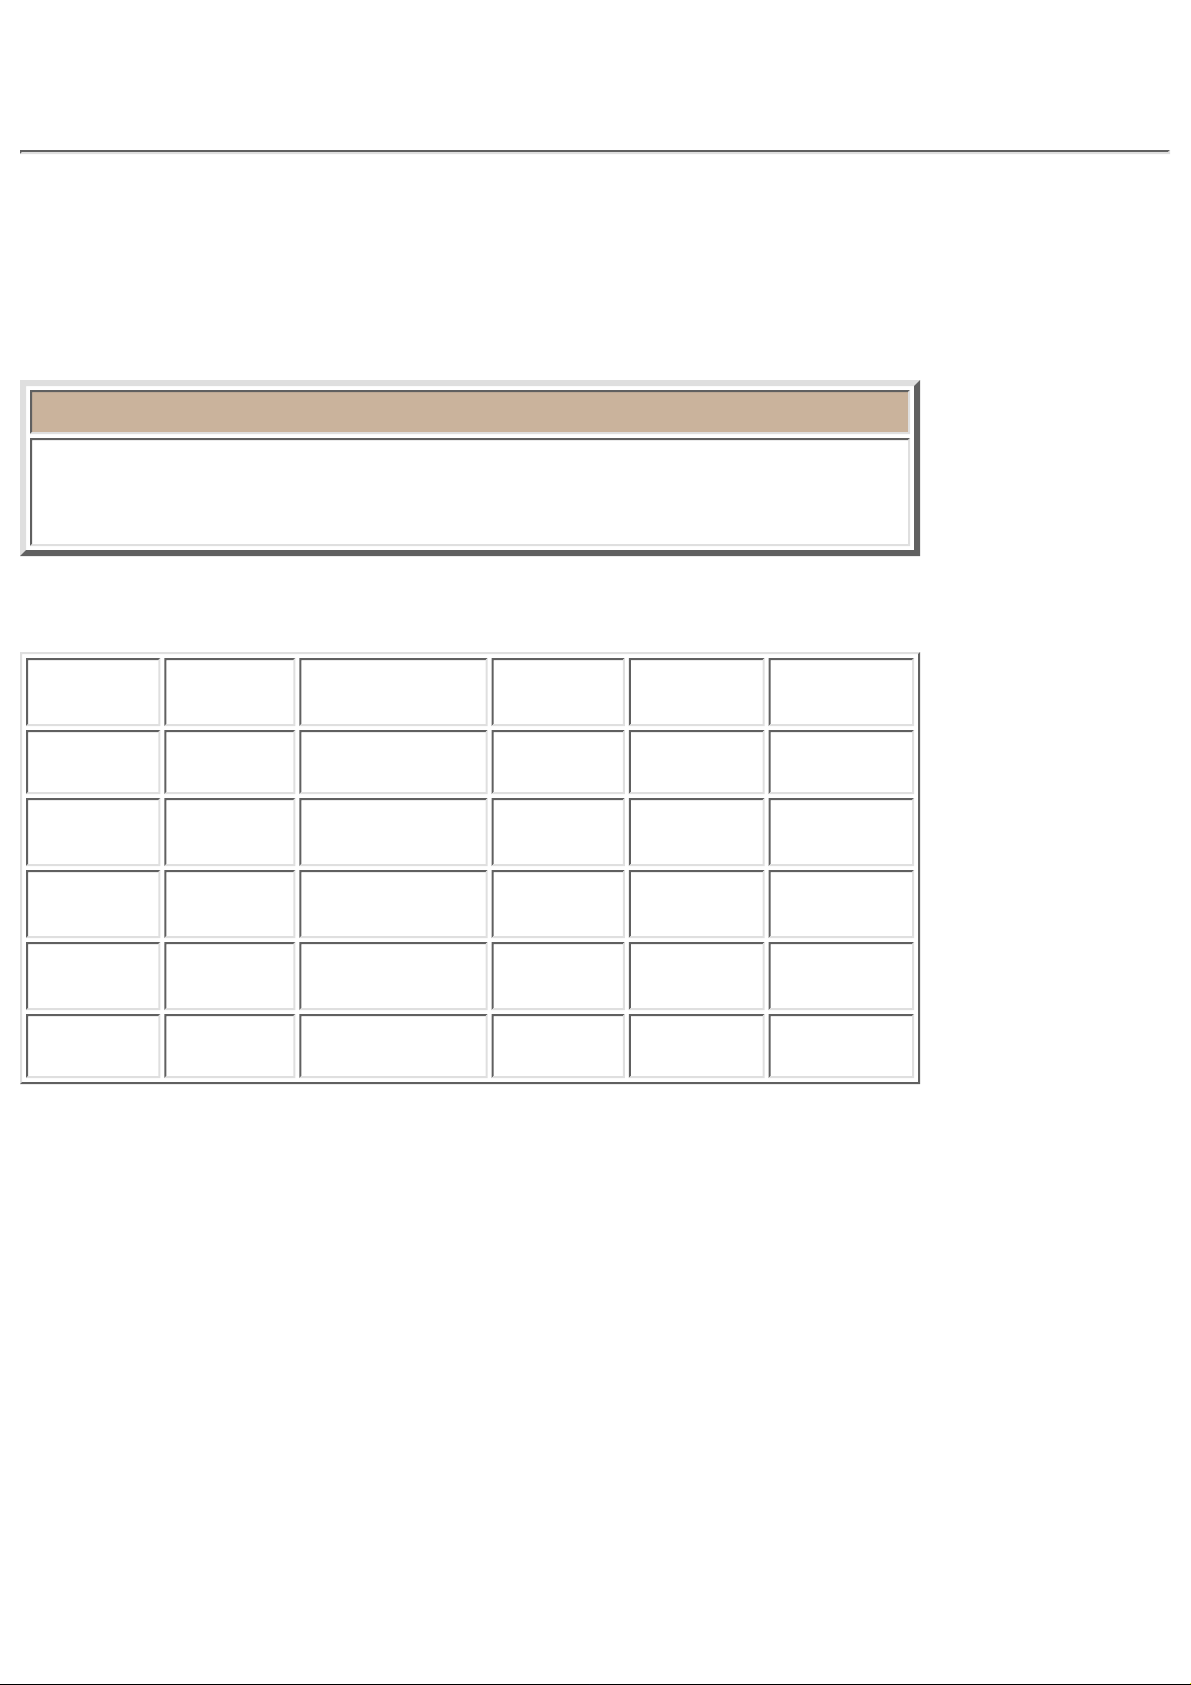
In order to understand how a database is created and used, we will perform the above steps to make a
database containing the following data:
First
Name
Last
Name
Address City State Zip Code
John Jones 1 Baker Street Portsmouth OH 32468
Mary Smith
1 Crescent
Road
Chicago IL 46901
Peter Brown 1 Main Street
Los
Angeles
CA 92802
Jane Thompson
1 Bradford
Street
New York NY 60867
John Peterson 1 Green Street Miami FL 32960
1. Create a new database document and new table.
A new table can easily be created by following the steps below.
1. Pull down the [File] menu, select the [New] command to display the [New] submenu, and then
click the [Database] command.
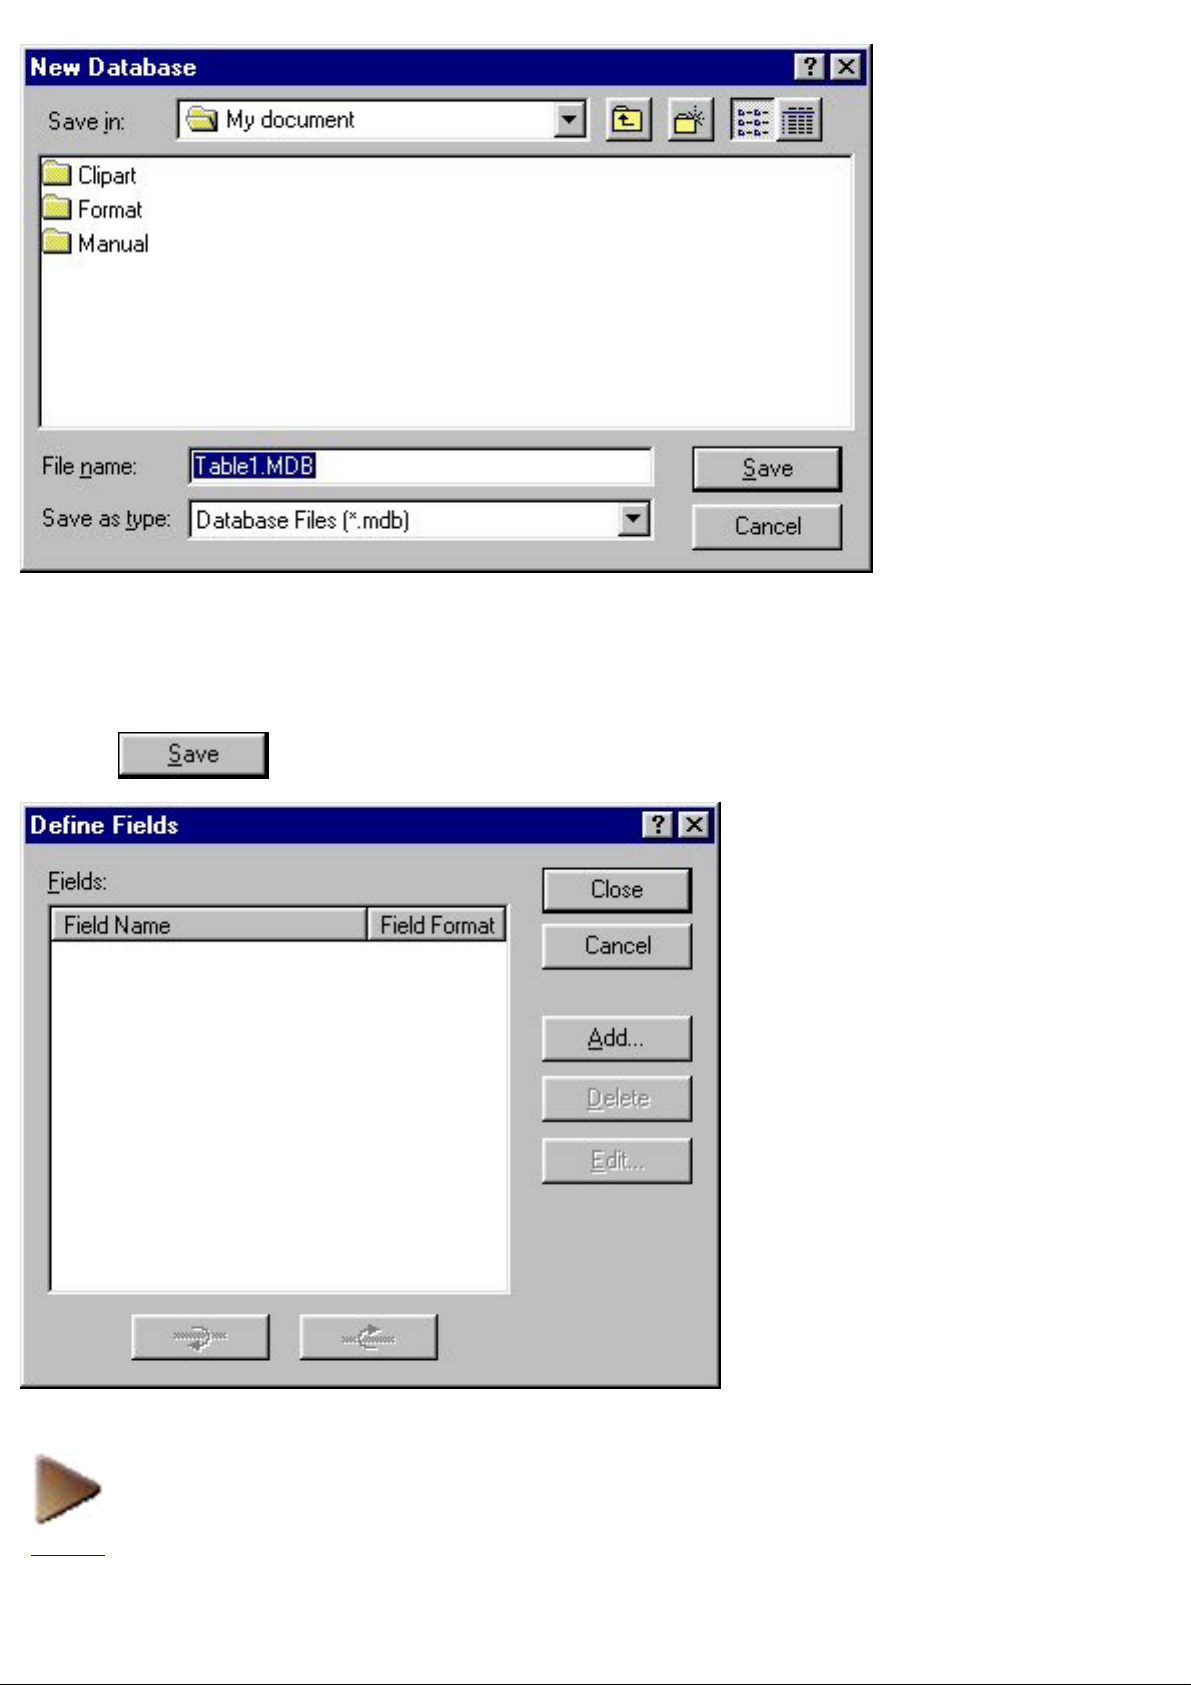
2. In the list box below the "Save in:" edit box, select the folder where you wish to save the
table.
3. In the "File name:" edit box, type in the name that you wish to give the new table.
4. Click
to display the Define Fields dialog box.
NEXT
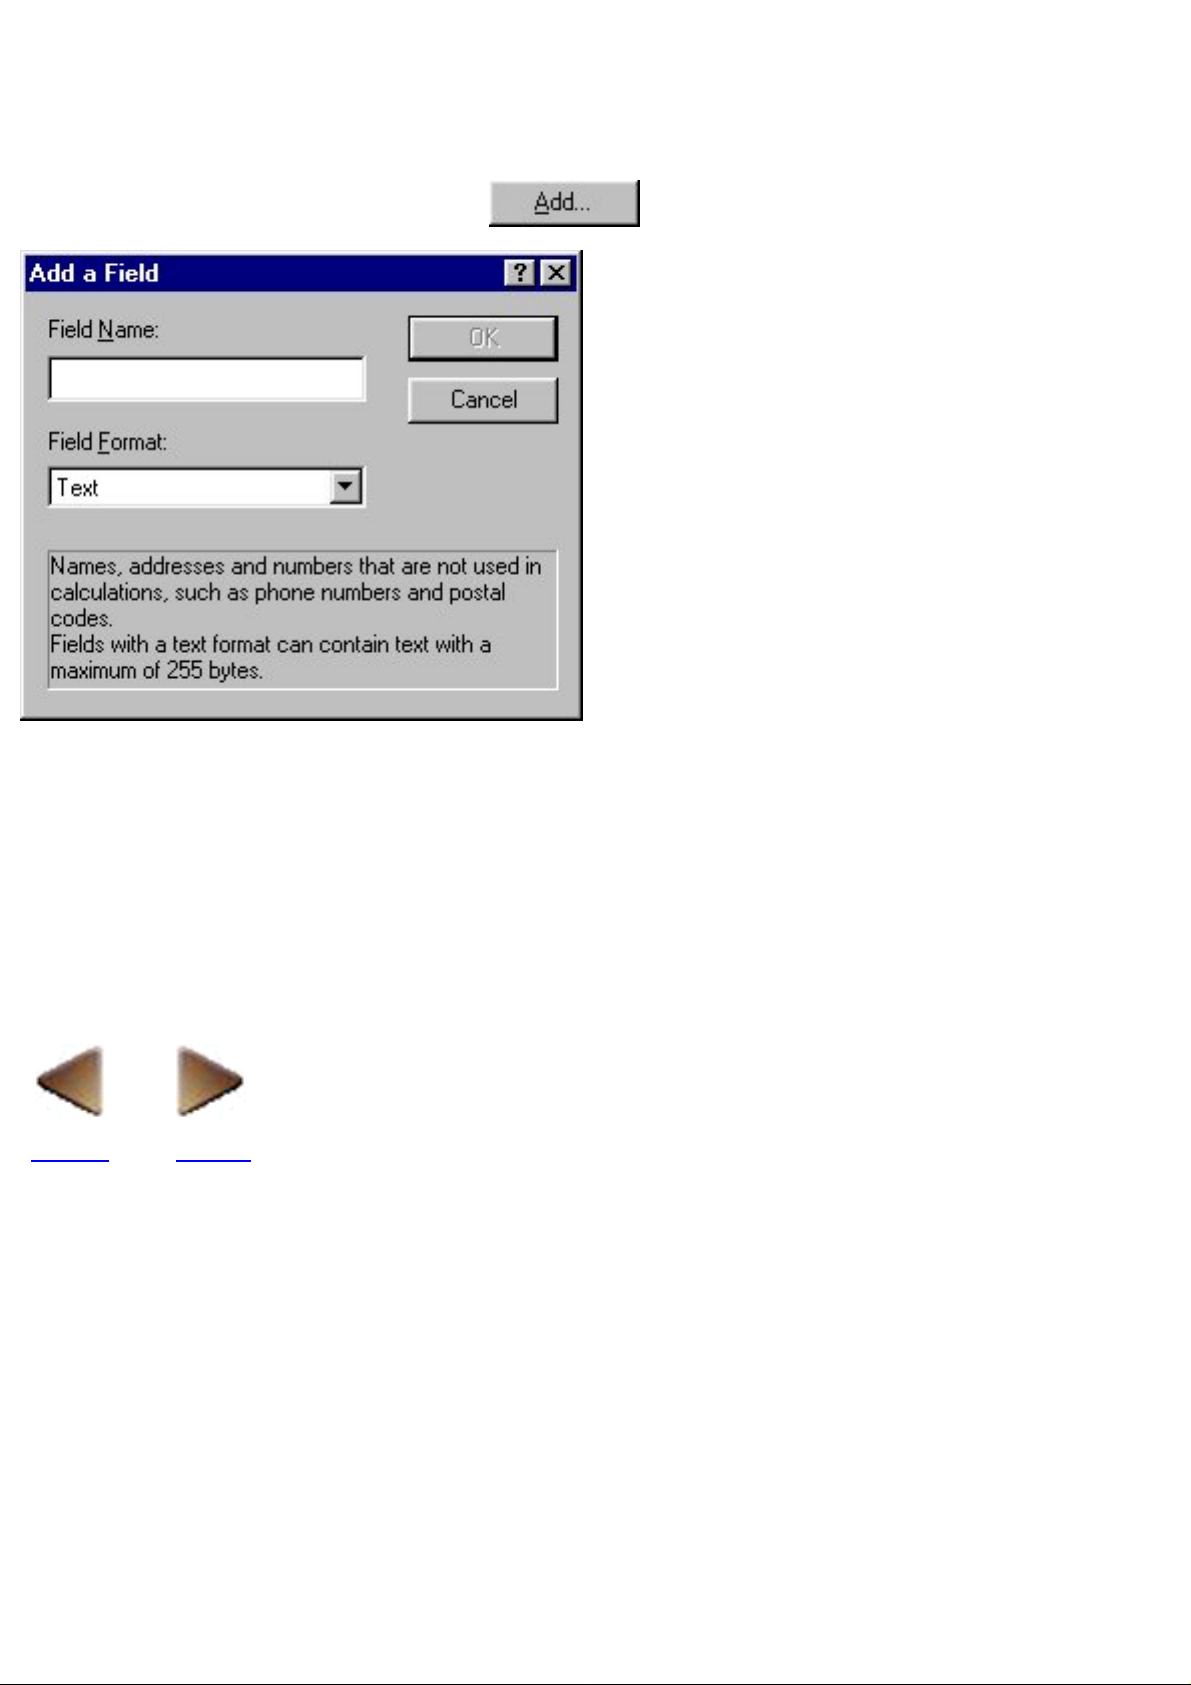
2. Define the field names and their formats.
A database is defined by the fields that make up its records.
1. In the Define Fields dialog box, click
to display the Add a Field dialog box.
2. In the "Field Name:" edit box, type the name of one of your fields.
Let's type in "Last Name" first so we can use the last name data to identify the records in our
database.
●
3. In the "Field Format:" box, pull down the list of field formats and select the format of the
entered field name.
All of the fields in this database can have the text format applied to them.
●
BACK NEXT
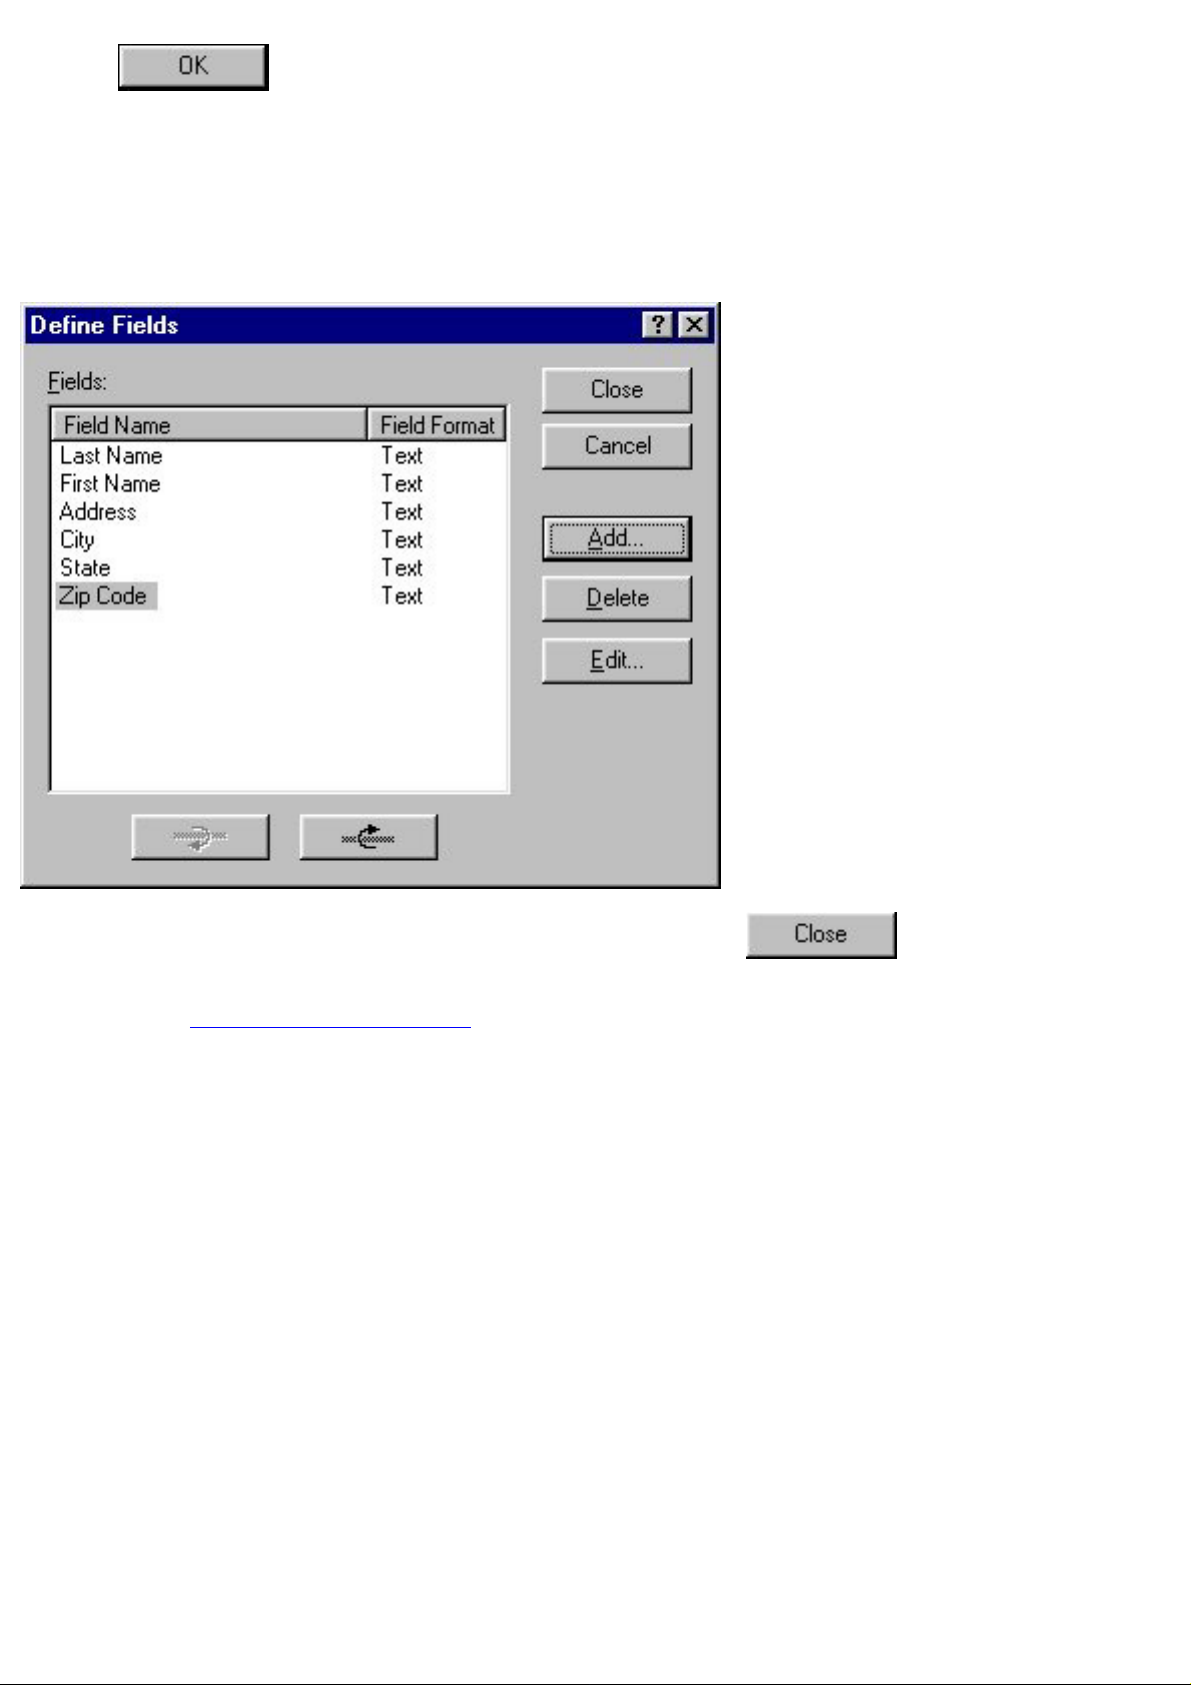
4. Click in the dialog box or press your keyboard's return key to close the Add a
Field dialog box.
5. Repeat steps 1 through 4 to define names for all of the fields that you wish to add to your
database.
For this example, let's define five more field names: First Name, Address, City, State and Zip
Code.
●
6. After you are finished defining all of the field names, click to close the Define
Fields dialog box.
Refer to Maintaining the database for information on how to make changes to existing field
names and their formats.
●
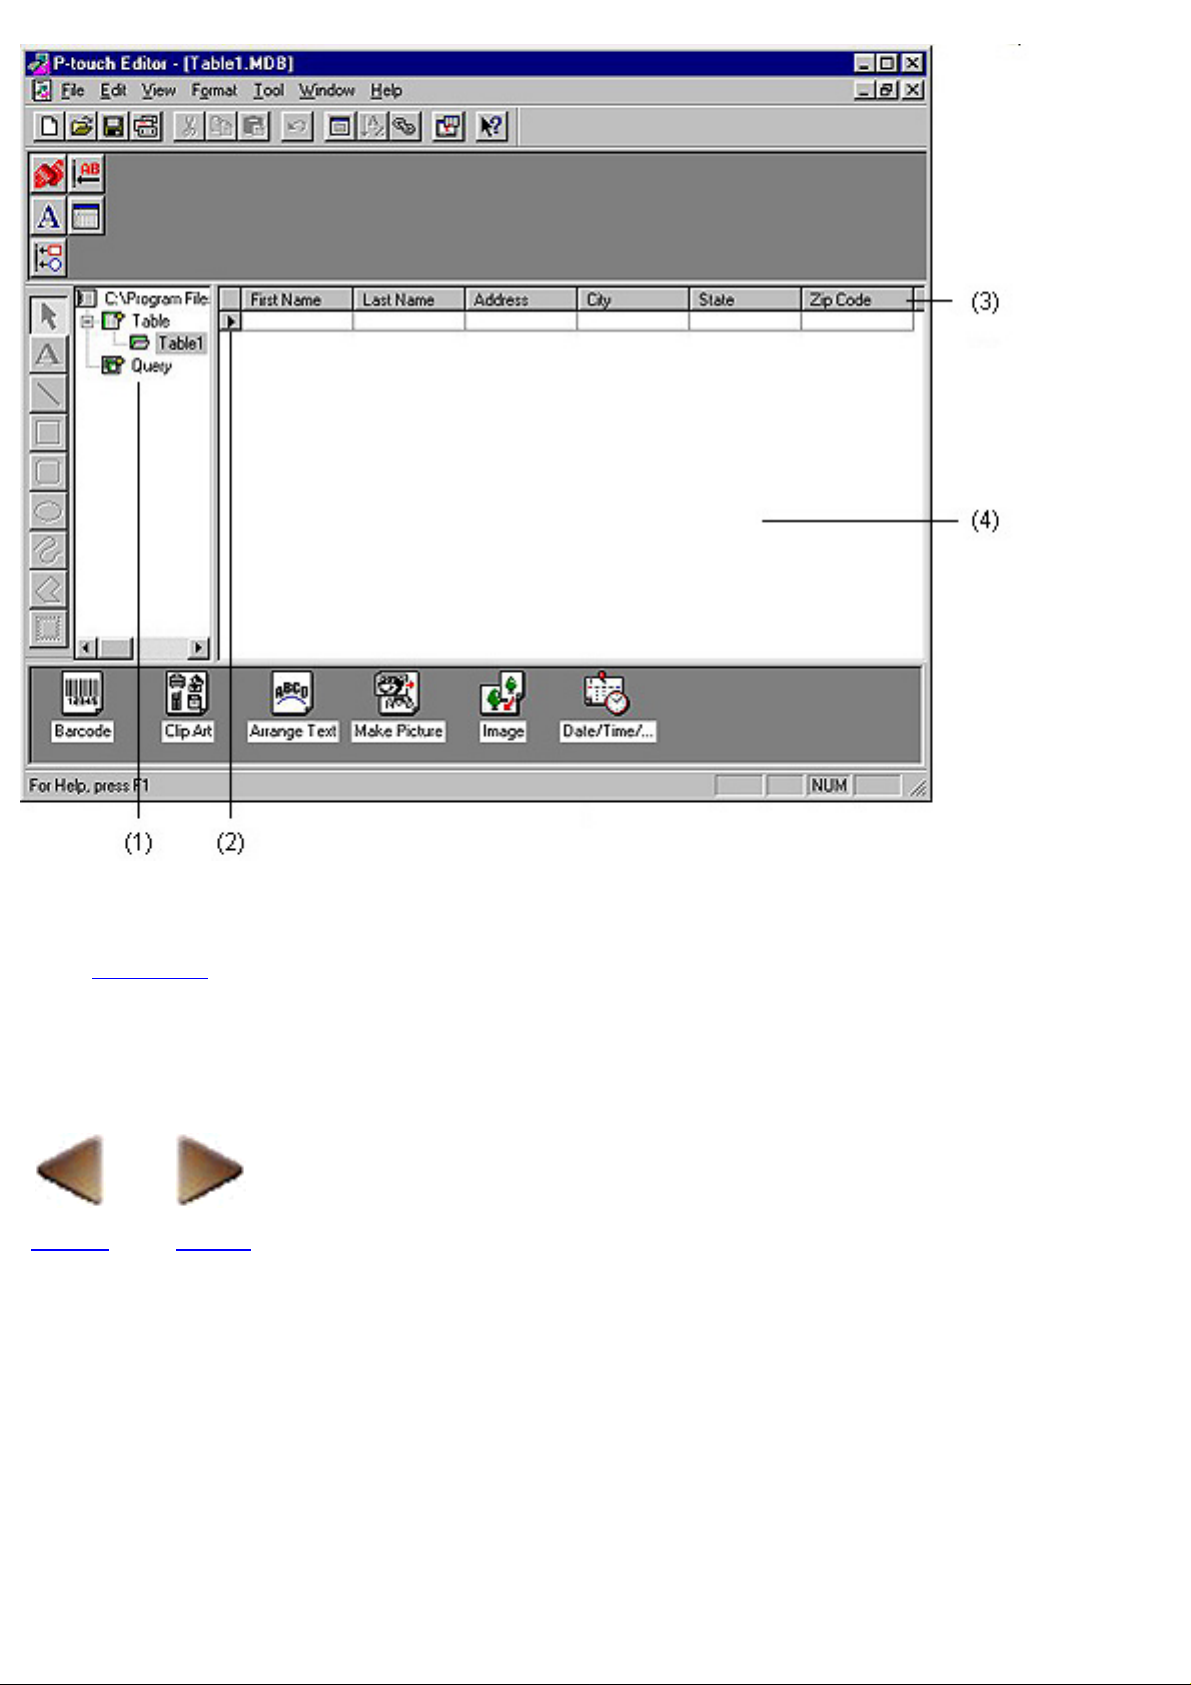
(1) Database tree view (3) Field selector row
(2) Record selector colum (4) Record view
Click here for a detailed explanation of the database document window and its components.●
Note that the database document window appears similar to the layout document window,
except for the differences in the menu bar and the standard toolbar.
●
BACK NEXT
 Loading...