

Page 1

Network User’s Guide
Multi-Protocol On-board Ethernet Multi-function Print Server
and Wireless Multi-function Print Server
This Network User's Guide provides useful information on wired and
wireless network settings, security settings and Internet fax settings
using your Brother machine. You can also find supported protocol
information and detailed troubleshooting tips.
To download the latest manual, please visit the Brother Solutions
Center at (http://solutions.brother.com/)
latest drivers and utilities for your machine, read FAQs and
troubleshooting tips, or learn about special printing solutions from the
Brother Solutions Center.
. You can also download the
Version A
ENG
Page 2
Applicable models
This User’s Guide applies to the following models.
HL-3180CDW/DCP-9015CDW/9020CDN/9020CDW/MFC-9130CW/9140CDN/9330CDW/9340CDW
Definitions of notes
The following icons are used throughout this User’s Guide.
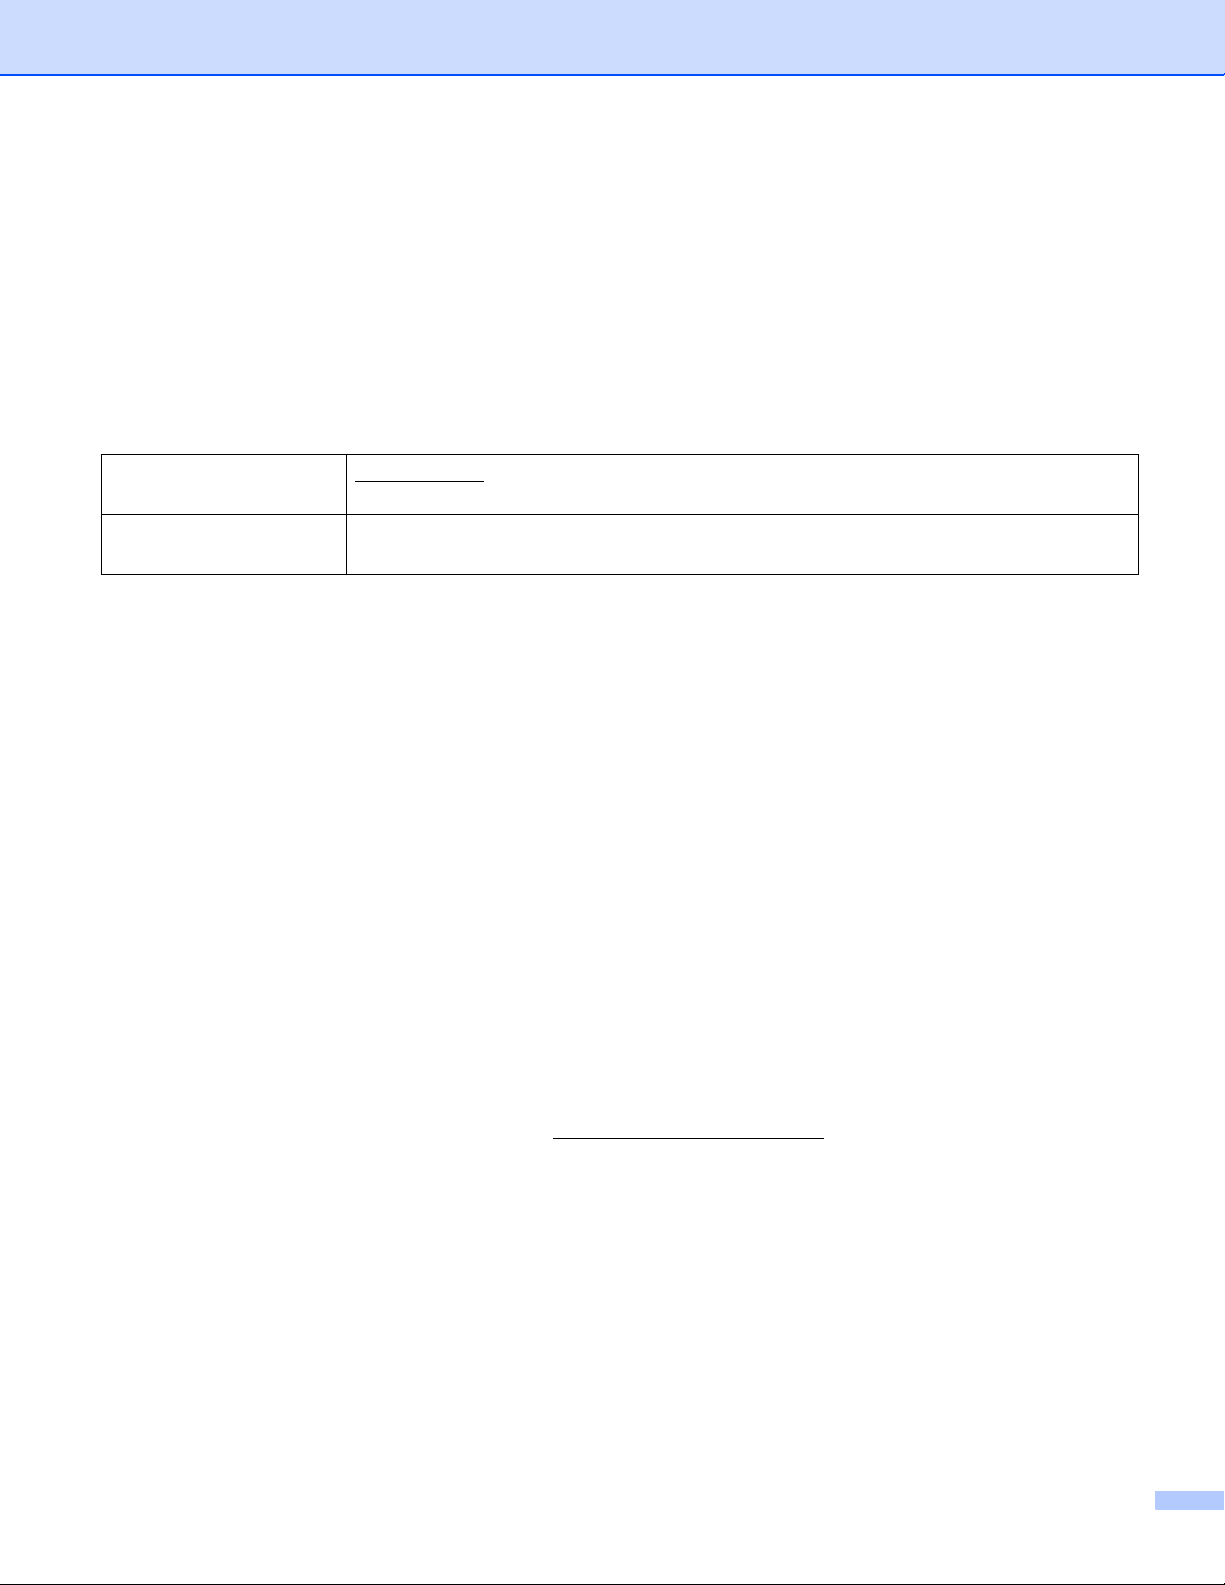
IMPORTANT
NOTE
IMPORTANT indicates a potentially hazardous situation which, if not avoided,
may result in damage to property or loss of product functionality.
Notes tell you how you should respond to a situation that may arise or give tips
about how the operation works with other features.
IMPORTANT NOTE
Do not use this product outside the country of purchase as it may violate the wireless telecommunication
and power regulations of that country.
Windows
Edition and Windows
Windows Server
x64 Edition.
Windows Server
R2.
Windows Server
Windows Vista
Windows
Windows
®
XP in this document represents Windows®XP Professional, Windows®XP Professional x64
®
XP Home Edition.
®
2003 in this document represents Windows Server® 2003 and Windows Server® 2003
®
2008 in this document represents Windows Server® 2008 and Windows Server® 2008
®
2012 in this document represents all editions of Windows Server® 2012.
®
in this document represents all editions of Windows Vista®.
®
7 in this document represents all editions of Windows®7.
®
8 in this document represents all editions of Windows® 8.
Please go to the Brother Solutions Center at http://solutions.brother.com/
page to download the other manuals.
Not all models are available in all countries.
and click Manuals on your model
i
Page 3

Table of Contents
Section I Network Operation
1 Introduction 2
Network features........................................................................................................................................2
Other Network features .......................................................................................................................4
2 Changing your machine’s network settings 5
How to change your machine’s network settings
(IP address, Subnet mask and Gateway) ...............................................................................................5
Using the control panel........................................................................................................................5
Using the BRAdmin Light utility ...........................................................................................................5
Other Management Utilities .......................................................................................................................8
Web Based Management (web browser) ............................................................................................8
BRAdmin Professional 3 utility (Windows
BRPrint Auditor (Windows
®
)................................................................................................................9
3 Configuring your machine for a wireless network (For HL-3180CDW, DCP-9015CDW,
DCP-9020CDW, MFC-9130CW, MFC-9330CDW and MFC-9340CDW) 10
®
) ........................................................................................8
Overview..................................................................................................................................................10
Confirm your network environment..........................................................................................................11
Connected to a computer with a WLAN access point/router in the network (Infrastructure mode) ...11
Connected to a wireless capable computer without a WLAN access point/router in the network
(Ad-hoc mode)...............................................................................................................................12
Wireless configuration temporarily using a USB cable (Recommended) ................................................13
Configuration using the machine’s control panel Setup Wizard ..............................................................18
Manual configuration from the control panel .....................................................................................19
Configuring your machine when the SSID is not broadcast ..............................................................21
Configuring your machine for an enterprise wireless network...........................................................23
One push configuration using WPS (Wi-Fi Protected Setup) or AOSS™ ...............................................27
Configuration using the PIN Method of WPS (Wi-Fi Protected Setup)....................................................29
Configuration in Ad-hoc mode.................................................................................................................32
Using configured SSID ......................................................................................................................32
Using a New SSID.............................................................................................................................34
4 Control panel setup 36
Network menu..........................................................................................................................................36
TCP/IP...............................................................................................................................................36
Ethernet (wired network only)............................................................................................................39
Wired Status (For HL-3180CDW, DCP-9015CDW, DCP-9020CDN, DCP-9020CDW,
MFC-9140CDN, MFC-9330CDW and MFC-9340CDW) ...............................................................39
Setup Wizard (wireless network only) ...............................................................................................39
WPS (Wi-Fi Protected Setup)/AOSS™ (wireless network only)........................................................39
WPS (Wi-Fi Protected Setup) w/PIN Code (wireless network only) ..................................................39
ii
Page 4

WLAN Status (For HL-3180CDW, DCP-9015CDW, DCP-9020CDW, MFC-9130CW,
MFC-9330CDW and MFC-9340CDW) ..........................................................................................39
MAC Address ....................................................................................................................................40
Set to Default.....................................................................................................................................40
Wired Enable (For DCP-9020CDW, MFC-9330CDW and MFC-9340CDW).....................................40
WLAN Enable ....................................................................................................................................40
E-mail / IFAX (MFC-9130CW, MFC-9140CDN, MFC-9330CDW and MFC-9340CDW:
available as a download)...............................................................................................................40
Fax to Server (MFC-9130CW, MFC-9140CDN, MFC-9330CDW and MFC-9340CDW:
available as a download)...............................................................................................................44
How to set a new default for Scan to FTP .........................................................................................46
How to set a new default for Scan to Network (Windows
Reset the network settings to the factory default.....................................................................................47
Printing the Network Configuration Report ..............................................................................................48
Printing the WLAN report
(For HL-3180CDW, DCP-9015CDW, DCP-9020CDW, MFC-9130CW, MFC-9330CDW and
MFC-9340CDW) ...................................................................................................................................48
Function table and default factory settings ..............................................................................................49
®
) ..............................................................46
5 Web Based Management 56
Overview..................................................................................................................................................56
How to configure the machine settings using Web Based Management (web browser).........................57
Setting a password ..................................................................................................................................58
Secure Function Lock 2.0........................................................................................................................59
How to configure the Secure Function Lock 2.0 settings using Web Based Management
(web browser)................................................................................................................................60
Synchronize with SNTP server................................................................................................................62
Store Print Log to Network.......................................................................................................................64
How to configure the Store Print Log to Network settings using Web Based Management
(web browser)................................................................................................................................64
Error Detection Setting ......................................................................................................................66
Understanding Error Messages.........................................................................................................67
Using Store Print Log to Network with Secure Function Lock 2.0.....................................................68
Changing the Scan to FTP configuration using a web browser...............................................................68
Changing the Scan to Network configuration using a web browser (Windows
®
) ....................................70
6 Internet fax (MFC-9130CW, MFC-9140CDN, MFC-9330CDW and MFC-9340CDW:
available as a download) 72
Internet fax overview................................................................................................................................72
Important information on Internet fax.................................................................................................73
How to Internet fax...................................................................................................................................74
Sending an Internet fax .....................................................................................................................74
Receiving E-mail or Internet fax ........................................................................................................75
Additional Internet Fax options ................................................................................................................77
Forwarding received E-mail and fax messages.................................................................................77
Relay broadcasting............................................................................................................................77
TX Verification Mail............................................................................................................................81
Error mail...........................................................................................................................................82
iii
Page 5

7 Security features 83
Overview..................................................................................................................................................83
Using Certificates for device security.......................................................................................................84
Configure certificate using Web Based Management .......................................................................85
Creating and installing a certificate....................................................................................................86
Choosing the certificate.....................................................................................................................88
How to install the self-signed certificate on your computer ...............................................................89
Import and export the certificate and private key...............................................................................93
Import and export a CA certificate .....................................................................................................94
Managing multiple certificates .................................................................................................................94
Managing your network machine securely using SSL/TLS .....................................................................95
Secure Management using Web Based Management (web browser) ..............................................95
Secure Management using BRAdmin Professional 3 (Windows
To use the BRAdmin Professional 3 utility securely, you need to follow the points below ................97
Printing documents securely using SSL/TLS...........................................................................................98
Sending or Receiving an E-mail securely ................................................................................................99
Configuration using Web Based Management (web browser) ..........................................................99
Sending an E-mail with user authentication ....................................................................................100
Sending or Receiving an E-mail securely using SSL/TLS...............................................................101
Using IEEE 802.1x authentication .........................................................................................................102
IEEE 802.1x authentication configuration using Web Based Management (web browser).............102
®
)..........................................................97
8 Troubleshooting 105
Overview................................................................................................................................................105
Identifying your problem ..................................................................................................................105
Section II Network Glossary
9 Types of network connections and protocols 114
Types of network connections ...............................................................................................................114
Wired network connection example.................................................................................................114
Protocols................................................................................................................................................116
TCP/IP protocols and functions.......................................................................................................116
10 Configuring your machine for a network 120
IP addresses, subnet masks and gateways ..........................................................................................120
IP address .......................................................................................................................................120
Subnet mask....................................................................................................................................121
Gateway (and router).......................................................................................................................121
IEEE 802.1x Authentication...................................................................................................................122
iv
Page 6

11 Wireless network terms and concepts (For HL-3180CDW, DCP-9015CDW,
DCP-9020CDW, MFC-9130CW, MFC-9330CDW and MFC-9340CDW) 124
Specifying your network.........................................................................................................................124
SSID (Service Set Identifier) and channels .....................................................................................124
Security terms........................................................................................................................................124
Authentication and encryption .........................................................................................................124
Authentication and Encryption methods for a personal wireless network .......................................125
Authentication and Encryption methods for an enterprise wireless network ...................................126
12 Additional network settings from Windows
Types of additional network settings......................................................................................................128
Installing drivers used for printing and scanning via Web Services
(Windows Vista
Uninstalling drivers used for printing and scanning via Web Services
(Windows Vista
Network printing and scanning installation for Infrastructure mode when using Vertical Pairing
(Windows
®
, Windows®7 and Windows®8) ..............................................................................128
®
, Windows®7 and Windows®8) ..............................................................................130
®
7 and Windows® 8)..........................................................................................................131
®
13 Security terms and concepts 133
Security features....................................................................................................................................133
Security terms..................................................................................................................................133
Security protocols............................................................................................................................134
Security methods for E-mail Sending and Receiving ......................................................................135
Section III Appendixes
A Appendix A 137
Supported protocols and security features ............................................................................................137
128
B Appendix B 138
Using services .......................................................................................................................................138
Other ways to set the IP address (for advanced users and administrators) ..........................................138
Using DHCP to configure the IP address ........................................................................................138
Using RARP to configure the IP address ........................................................................................139
Using BOOTP to configure the IP address......................................................................................140
Using APIPA to configure the IP address........................................................................................140
Using ARP to configure the IP address ...........................................................................................141
Using the TELNET console to configure the IP address .................................................................142
CIndex 143
v
Page 7

Section I
Network Operation I
Introduction 2
Changing your machine’s network settings 5
Configuring your machine for a wireless network
(For HL-3180CDW, DCP-9015CDW, DCP-9020CDW,
MFC-9130CW, MFC-9330CDW and MFC-9340CDW) 10
Control panel setup
Web Based Management 56
Internet fax (MFC-9130CW, MFC-9140CDN,
MFC-9330CDW and MFC-9340CDW:
available as a download) 72
Security features
Troubleshooting 105
36
83
Page 8

1
NOTE
Introduction 1
Network features 1
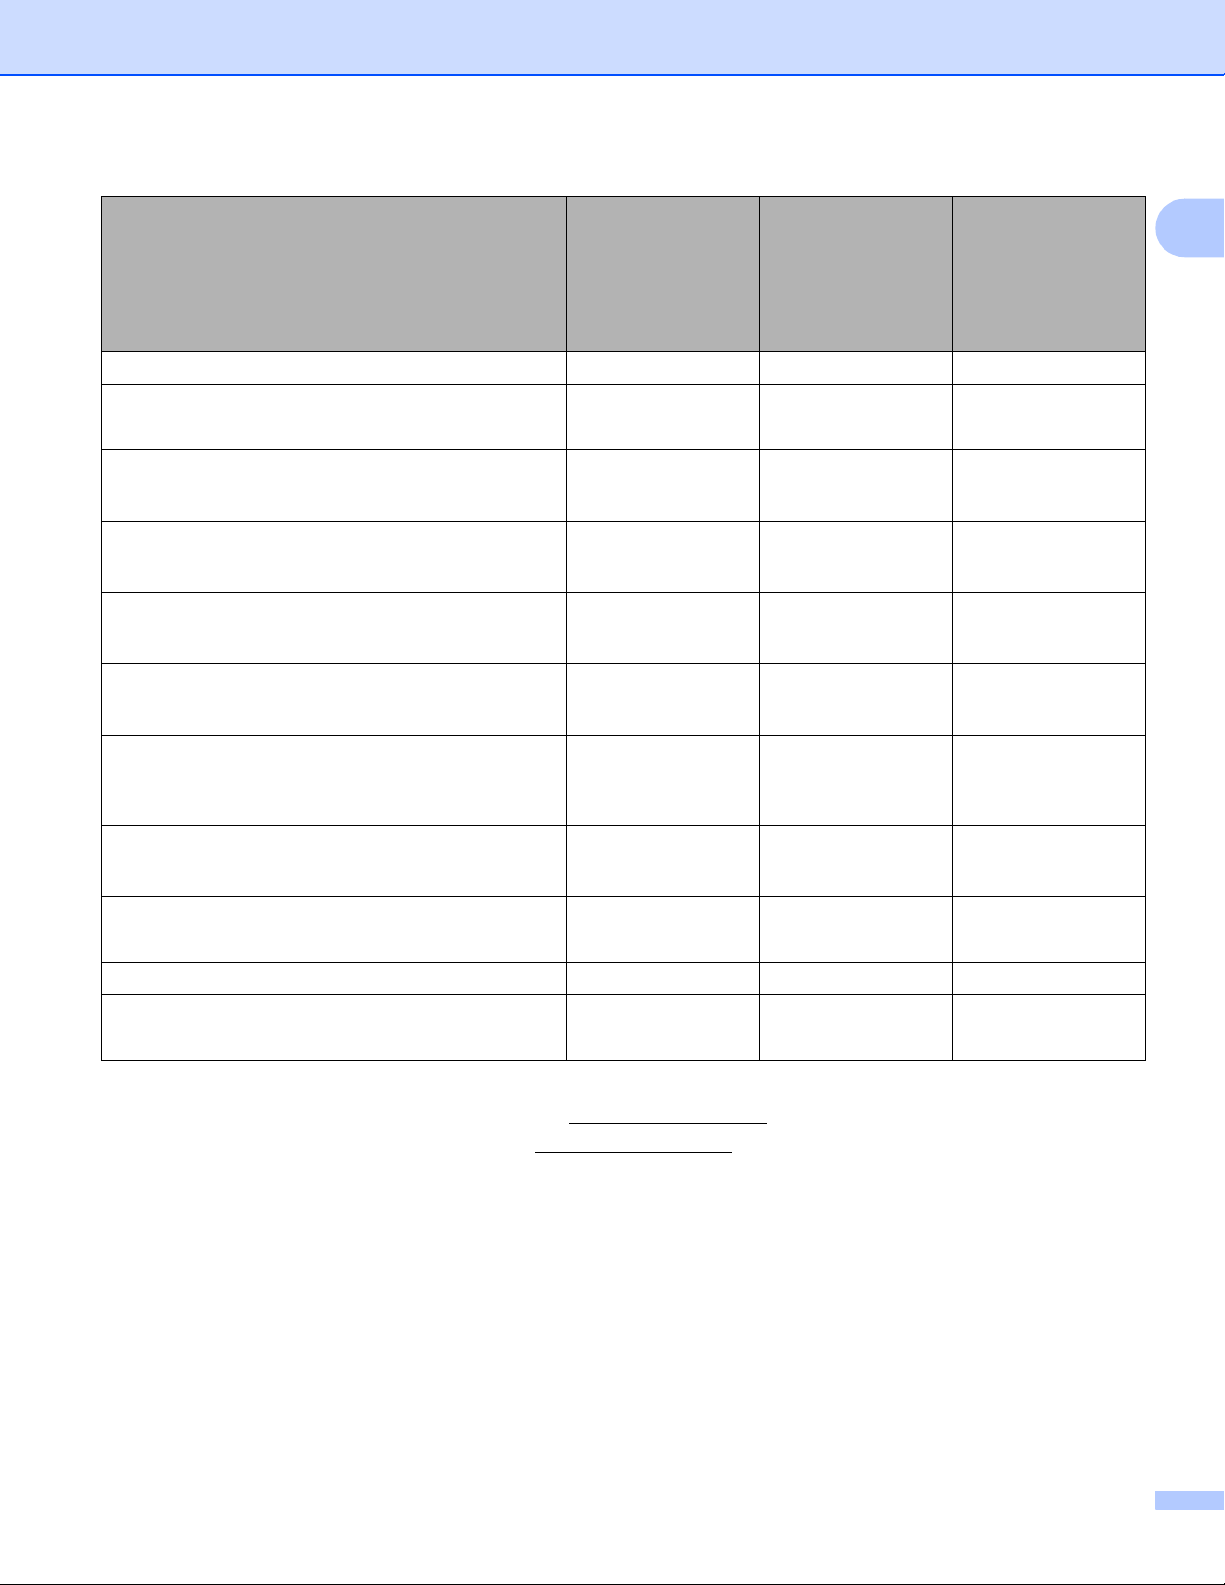
Your Brother machine can be shared on a 10/100 MB wired1 or IEEE 802.11b/g/n wireless (for wireless
models) Ethernet network using the internal network print server. The print server supports various functions
and methods of connection depending on the operating system you are running on a network supporting
TCP/IP. The following chart shows what network features and connections are supported by each operating
system.
• Although the Brother machine can be used in both a wired1 and wireless network, only one connection
method can be used at a time. However, a wireless network connection and Wi-Fi Direct™ connection, or
a wired network connection and Wi-Fi Direct connection can be used at the same time.
• For details, please refer to the Wi-Fi Direct™ Guide located on the Manuals download page for your model
on the Brother Solutions Center (http://solutions.brother.com/
1
A wired network interface is available on the DCP-9020CDW, MFC-9330CDW and MFC-9340CDW.
).
1
2
Page 9
Introduction
Operating Systems
Windows® XP
Windows Vista
Windows Server®
2003/2008/2012
®
Mac OS X v10.6.8,
10.7.x, 10.8.x
1
Windows®7
Windows® 8
Printing rrr
Scanning
rr
See Software User's Guide
PC Fax Send
1
rr
See Software User's Guide
PC Fax Receive
1
r
See Software User's Guide
BRAdmin Light
2
rrr
See page 5.
BRAdmin Professional 3
3
rr
See page 8.
Web Based Management
(web browser)
rrr
See page 56.
Remote Setup
1
rr
See Software User's Guide
Status Monitor
rr
See Software User's Guide
Driver Deployment Wizard rr
Vertical Pairing
See page 131.
r
4
1
Not available for DCP models.
2
BRAdmin Light for Macintosh is available as a download from http://solutions.brother.com/.
3
BRAdmin Professional 3 is available as a download from http://solutions.brother.com/.
4
Windows®7 and Windows® 8 only.
3
Page 10

Introduction
Other Network features 1
Internet fax (MFC-9130CW, MFC-9140CDN, MFC-9330CDW and MFC-9340CDW: available as a download)
Internet fax (IFAX) allows you to send and receive fax documents using the Internet as the transport
mechanism. (See Internet fax (MFC-9130CW, MFC-9140CDN, MFC-9330CDW and MFC-9340CDW:
available as a download) on page 72.)
In order to use this function, please download the necessary firmware from the “Downloads” page for your
model on the Brother Solutions Center at http://solutions.brother.com/
to configure the necessary machine settings using the machine’s control panel, BRAdmin Professional 3, or
Web Based Management. For details, please refer to the user’s guide for Internet fax on the website listed
above.
Security 1
Your Brother machine employs some of the latest network security and encryption protocols available. (See
Security features on page 83.)
. Before using this function, you have
1
1
Fax to Server (MFC-9130CW, MFC-9140CDN, MFC-9330CDW and MFC-9340CDW: available as a download) 1
The Fax to Server feature allows the machine to scan a document and send it over the network to a separate
fax server. (See Fax to Server (MFC-9130CW, MFC-9140CDN, MFC-9330CDW and MFC-9340CDW:
available as a download) on page 44.)
In order to use this function, please download the necessary firmware from the “Downloads” page for your
model on the Brother Solutions Center at http://solutions.brother.com/
to configure the necessary machine settings by using the machine’s control panel, BRAdmin Professional 3,
or Web Based Management. For details, please refer to the user’s guide for Internet fax on the website listed
above.
. Before using this function, you have
Secure Function Lock 2.0 1
Secure Function Lock 2.0 increases security by restricting the use of functions. (See Secure Function
Lock 2.0 on page 59.)
Store Print Log to Network 1
The Store Print Log to Network feature allows you to save the print log file from your Brother machine to a
network server using CIFS. (See Store Print Log to Network on page 64.)
Brother Web Connect 1
Brother Web Connect allows you to download and print images and to upload files by accessing services on
the Internet directly from your machine. For details, please refer to the Web Connect Guide located on the
Manuals download page for your model on the Brother Solutions Center (http://solutions.brother.com/
).
4
Page 11

Changing your machine’s network
2
settings
How to change your machine’s network settings (IP address, Subnet mask and Gateway)
The machine’s network settings can be changed using the control panel, BRAdmin Light, Web Based
Management, and BRAdmin Professional 3. Please read this chapter for details.
Using the control panel 2
You can configure your machine for a network using the Network control panel menu. (See Control panel
setup on page 36.)
Using the BRAdmin Light utility 2
The BRAdmin Light utility is designed for initial setup of Brother network connected devices. It also can
search for Brother products in a TCP/IP environment, view the status and configure basic network settings,
such as IP address.
2
2
2
Installing BRAdmin Light for Windows
®
a Please make sure that your machine is ON.
b Turn on your computer. Close any applications running before configuration.
c Put the installer CD-ROM into your CD-ROM drive. The opening screen will appear automatically. If the
model name screen appears, choose your machine. If the language screen appears, choose your
language.
d The CD-ROM main menu will appear. Click Custom Installation, and then Network Utilities.
e Click BRAdmin Light and follow the on-screen instructions.
Installing BRAdmin Light for Macintosh 2
You can download Brother's latest BRAdmin Light utility from http://solutions.brother.com/.
2
5
Page 12
Changing your machine’s network settings
NOTE
Setting the IP address, Subnet Mask and Gateway using BRAdmin Light 2
• You can download Brother's latest BRAdmin Light utility from http://solutions.brother.com/.
• If you require more advanced machine management, use the latest version of BRAdmin Professional 3
utility that is available as a download from http://solutions.brother.com/
®
Windows
users.
. This utility is only available for
• If you are using a firewall function of anti-spyware or antivirus applications, temporarily disable them. Once
you are sure that you can print, re-enable the application.
• Node name: The Node name appears in the current BRAdmin Light window. The default node name of
the print server in the machine is “BRNxxxxxxxxxxxx” for a wired network or “BRWxxxxxxxxxxxx” for a
wireless network. (“xxxxxxxxxxxx” is your machine’s MAC Address / Ethernet Address.)
• No password is required by default. Enter a password if you have set one and press OK.
a Start the BRAdmin Light utility.
Windows
(Windows®XP/Windows®Vista/Windows®7/Windows Server®2003/Windows Server®2008)
®
2
Click (Start) > All Programs > Brother > BRAdmin Light > BRAdmin Light.
(Windows
®
8/Windows Server®2012)
Click (BRAdmin Light).
Macintosh
When the download has completed, double click the BRAdmin Light.jar file to start the BRAdmin
Light utility.
b BRAdmin Light will search for new devices automatically.
6
Page 13

Changing your machine’s network settings
NOTE
c Double-click the unconfigured device.
Windows
®
Macintosh
• If the print server is set to its factory default settings (if you do not use a DHCP/BOOTP/RARP server), the
device will appear as Unconfigured in the BRAdmin Light utility screen.
• You can find the Node Name and MAC Address (Ethernet Address) by printing the Network Configuration
Report (See Printing the Network Configuration Report on page 48 ). You can also find the Node Name
and MAC Address from the control panel. (See Chapter 4: Control panel setup.)
d Choose STATIC from Boot Method. Enter the IP Address, Subnet Mask and Gateway (if needed) for
your machine.
2
Windows
®
Macintosh
e Click OK.
f With the correctly programmed IP address, you will see the Brother machine in the device list.
7
Page 14

Changing your machine’s network settings
NOTE
Other Management Utilities 2
Your Brother machine has the following management utilities other than the BRAdmin Light utility. You can
change your network settings using these utilities.
Web Based Management (web browser) 2
A standard web browser can be used to change your print server settings using the HTTP (Hyper Text
Transfer Protocol) or HTTPS (Hyper Text Transfer Protocol over Secure Socket Layer). (See How to
configure the machine settings using Web Based Management (web browser) on page 57.)
BRAdmin Professional 3 utility (Windows®) 2
BRAdmin Professional 3 is a utility for more advanced management of network connected Brother devices.
This utility can search for Brother products on your network and view the device status from an easy to read
Explorer style window that changes color identifying the status of each device. You can configure network
®
and device settings along with the ability to update device firmware from a Windows
BRAdmin Professional 3 can also log activity of Brother devices on your network and export the log data in
an HTML, CSV, TXT, or SQL format.
computer on your LAN.
2
For users who want to monitor locally connected machines, install the Print Auditor Client software on the
client PC. This utility allows you to monitor machines that are connected to a client PC via the USB or parallel
interface from BRAdmin Professional 3.
For more information and to download the software, visit us at http://solutions.brother.com/
• Please use the latest version of the BRAdmin Professional 3 utility that is available as a download from
http://solutions.brother.com/
• If you are using a firewall function of anti-spyware or antivirus applications, temporarily disable them. Once
you are sure that you can print, configure the software settings following the instructions.
• Node name: The Node name for each Brother device on the network appears in BRAdmin Professional 3.
The default Node name is “BRNxxxxxxxxxxxx” for a wired network or “BRWxxxxxxxxxxxx” for a wireless
network. (“xxxxxxxxxxxx” is your machine’s MAC Address / Ethernet Address.)
. This utility is only available for Windows® users.
.
8
Page 15

Changing your machine’s network settings
BRPrint Auditor (Windows®) 2
The BRPrint Auditor software brings the monitoring power of Brother network management tools to locally
connected machines. This utility allows a client computer to collect usage and status information from a
Brother machine connected via the parallel or USB interface. The BRPrint Auditor can then pass this
information to another computer on the network running BRAdmin Professional 3. This allows the
administrator to check items such as page counts, toner and drum status and the firmware version. In addition
to reporting to Brother network management applications, this utility can E-mail the usage and status
information directly to a predefined E-mail address in a CSV or XML file format (SMTP Mail support required).
The BRPrint Auditor utility also supports E-mail notification for reporting warning and error conditions.
2
9
Page 16

NOTE
Configuring your machine for a wireless
3
network (For HL-3180CDW,
DCP-9015CDW, DCP-9020CDW,
MFC-9130CW, MFC-9330CDW and
MFC-9340CDW)
Overview 3
To connect your machine to your wireless network, we recommend following one of the setup methods
outlined in the Quick Setup Guide.
The wireless setup method using the installer CD-ROM and a USB cable is the easiest method for setup.
For additional wireless configuration methods, please read this chapter for more details on how to configure
the wireless network settings. For information on TCP/IP settings, see How to change your machine’s
network settings (IP address, Subnet mask and Gateway) on page 5.
• To achieve optimum results with normal everyday document printing, place the Brother machine as close
to the WLAN access point/router as possible with minimal obstructions. Large objects and walls between
the two devices as well as interference from other electronic devices can affect the data transfer speed of
your documents.
3
3
Due to these factors, wireless may not be the best method of connection for all types of documents and
applications. If you are printing large files, such as multi-page documents with mixed text and large
1
graphics, you may want to consider choosing wired Ethernet for a faster data transfer
fastest throughput speed.
• Although the Brother machine can be used in both a wired
method can be used at a time. However, a wireless network connection and Wi-Fi Direct connection, or a
wired network connection and Wi-Fi Direct connection can be used at the same time.
• For details, please refer to the Wi-Fi Direct™ Guide located on the Manuals download page for your model
on the Brother Solutions Center (http://solutions.brother.com/
• Before configuring wireless settings, you will need to know your Network name: (SSID) and Network Key.
If you are using an enterprise wireless network, you also need to know the User ID and Password.
1
A wired network interface is available on the DCP-9020CDW, MFC-9330CDW and MFC-9340CDW.
1
and wireless network, only one connection
).
, or USB for the
10
Page 17
Configuring your machine for a wireless network (For HL-3180CDW, DCP-9015CDW, DCP-9020CDW, MFC-9130CW,
MFC-9330CDW and MFC-9340CDW)
Confirm your network environment 3
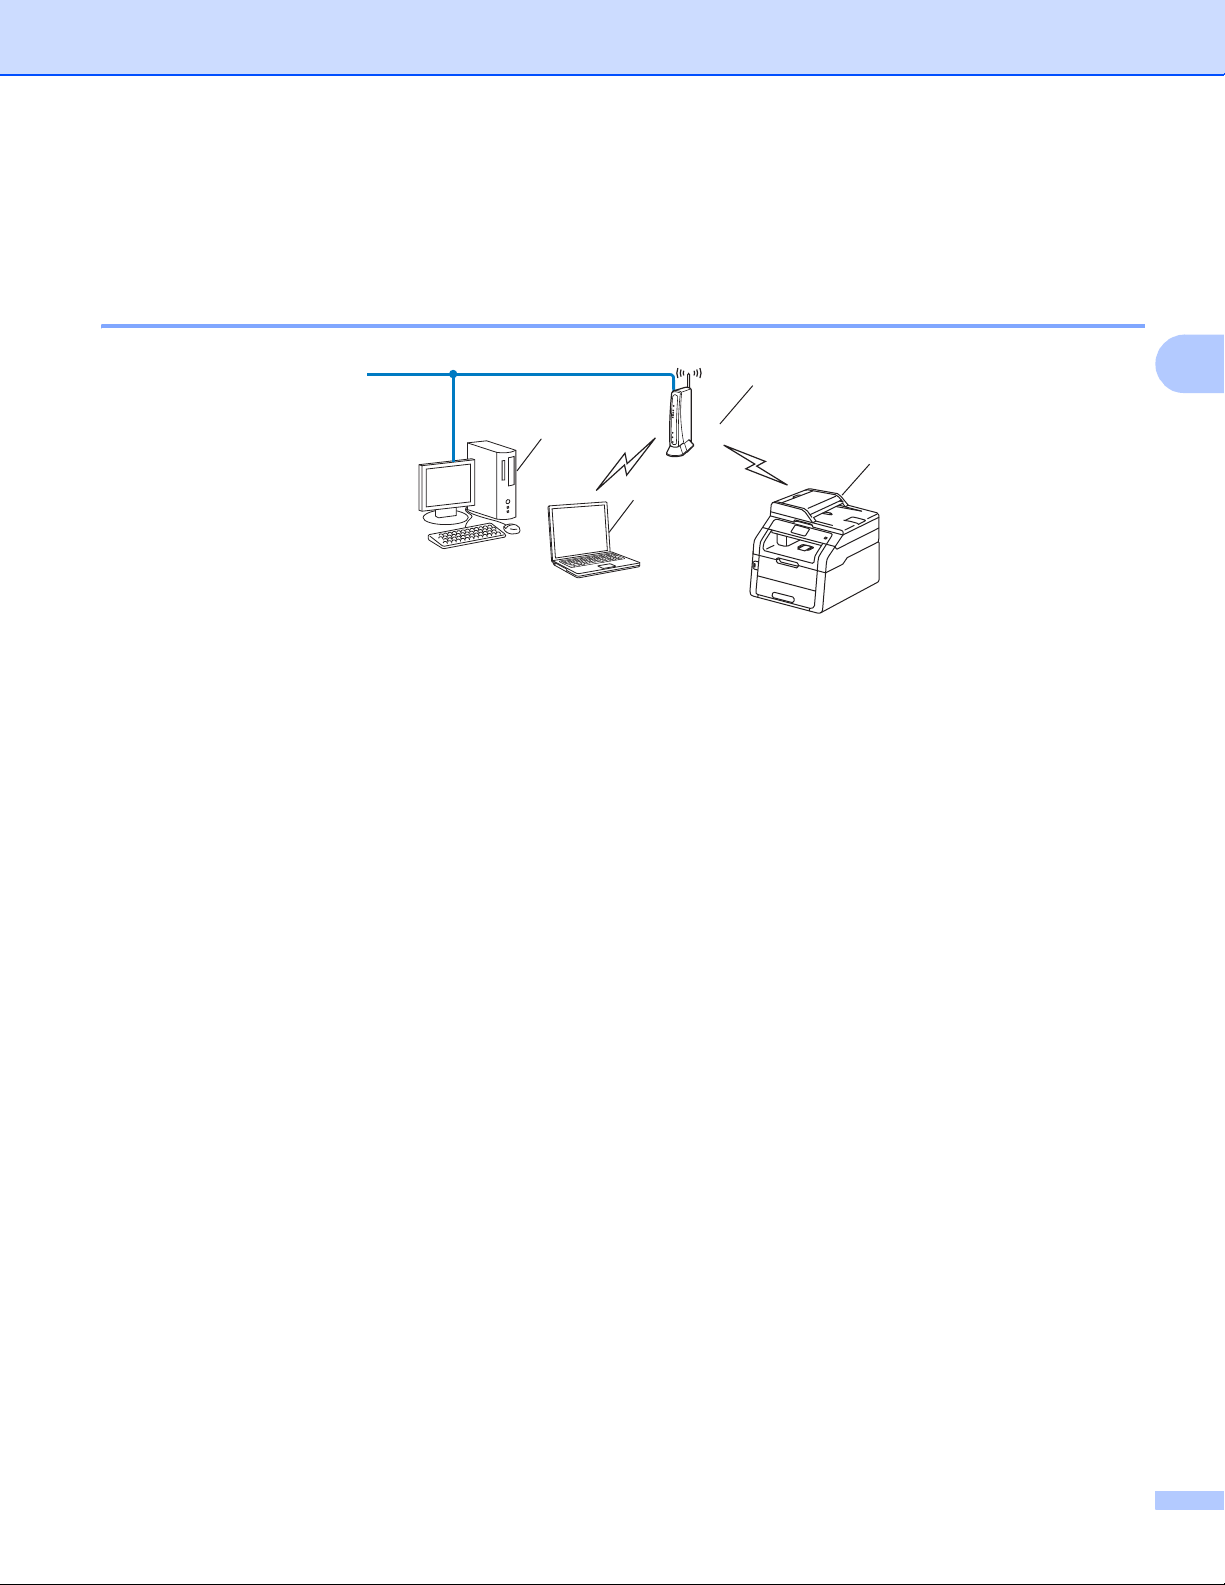
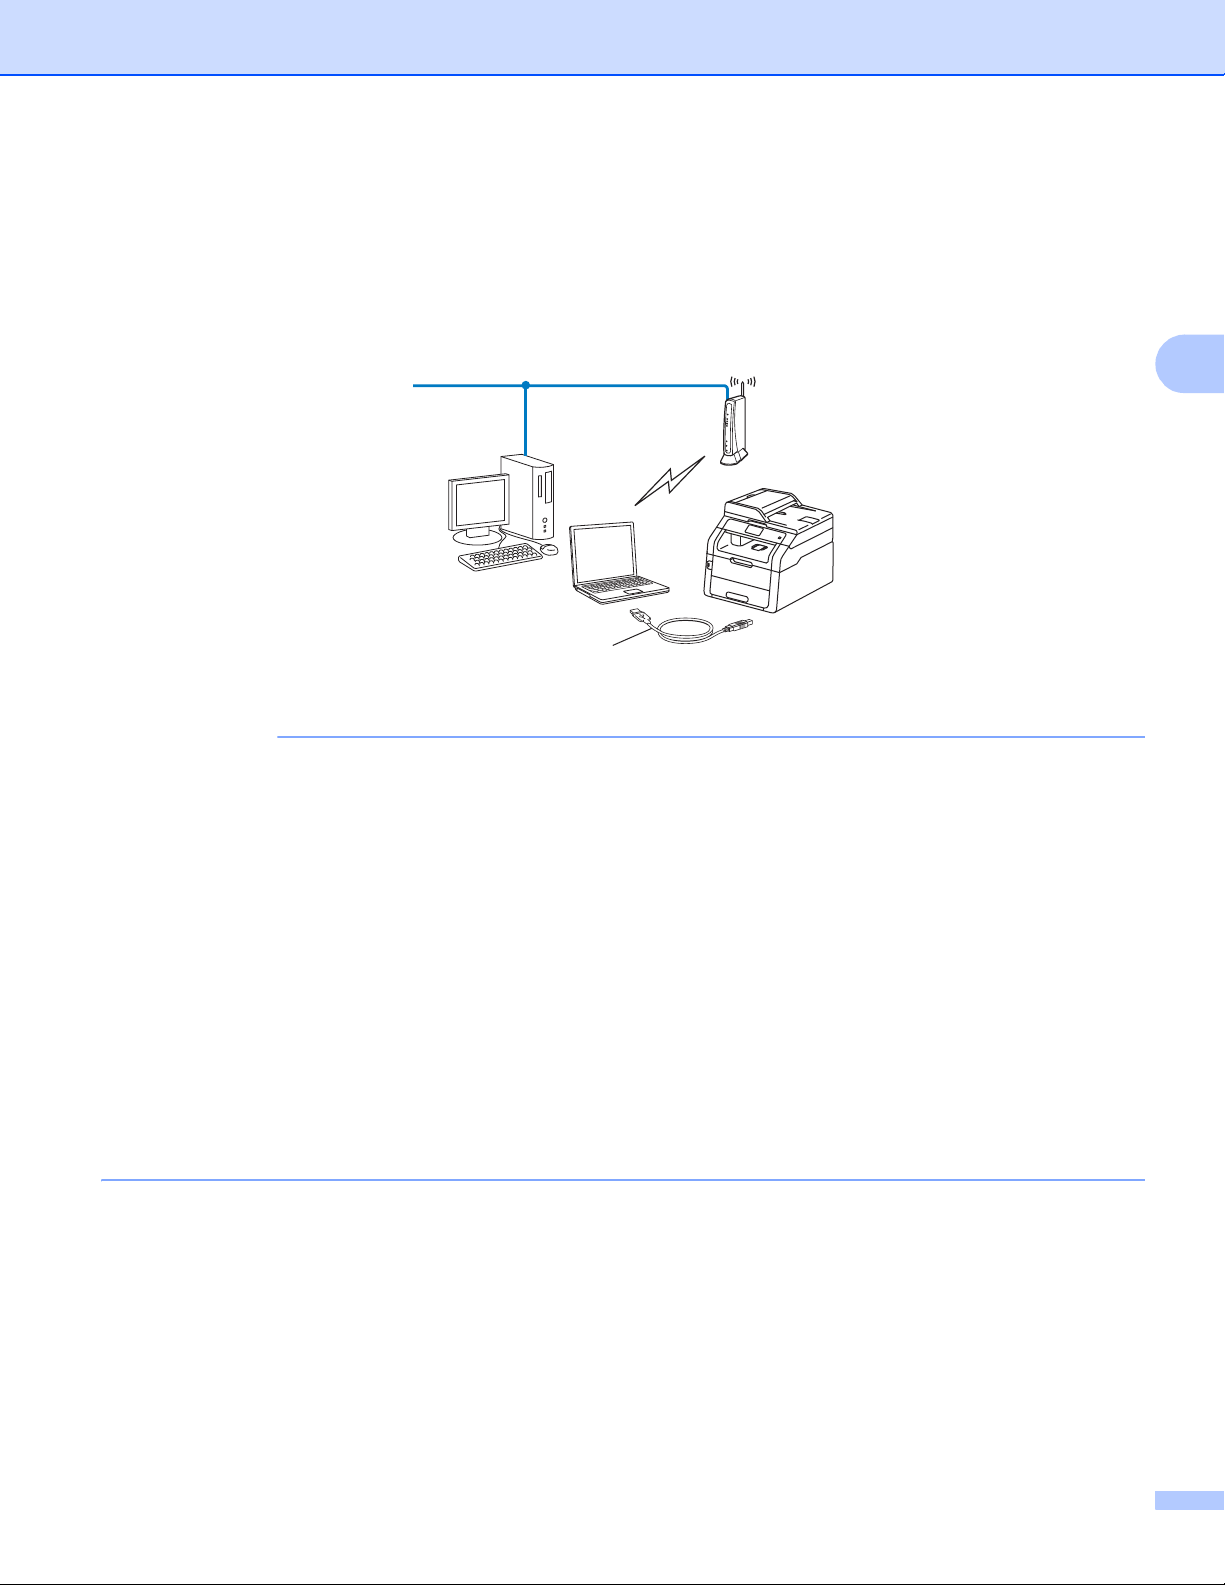
Connected to a computer with a WLAN access point/router in the network (Infrastructure mode) 3
1
4
2
3
3
1 WLAN access point/Router
1
If your computer supports Intel® MWT (My WiFi Technology), you can use your computer as a WPS (Wi-Fi Protected Setup) supported access
point.
1
2 Wireless network machine (your machine)
3 Wireless capable computer connected to the WLAN access point/router
4 Wired computer which is not wireless capable connected to the WLAN access point/router with a
network cable
Configuration method 3
The following instructions will offer four methods for configuring your Brother machine in a wireless network
environment. Choose the method you prefer for your environment.
Wireless configuration temporarily using a USB cable (Recommended)
See Wireless configuration temporarily using a USB cable (Recommended) on page 13.
Wireless configuration using the Setup Wizard from the control panel
See Configuration using the machine’s control panel Setup Wizard on page 18.
One push wireless configuration using WPS (Wi-Fi Protected Setup™) or AOSS™
See One push configuration using WPS (Wi-Fi Protected Setup) or AOSS™ on page 27.
PIN Method wireless configuration using WPS
See Configuration using the PIN Method of WPS (Wi-Fi Protected Setup) on page 29.
11
Page 18
Configuring your machine for a wireless network (For HL-3180CDW, DCP-9015CDW, DCP-9020CDW, MFC-9130CW,
MFC-9330CDW and MFC-9340CDW)
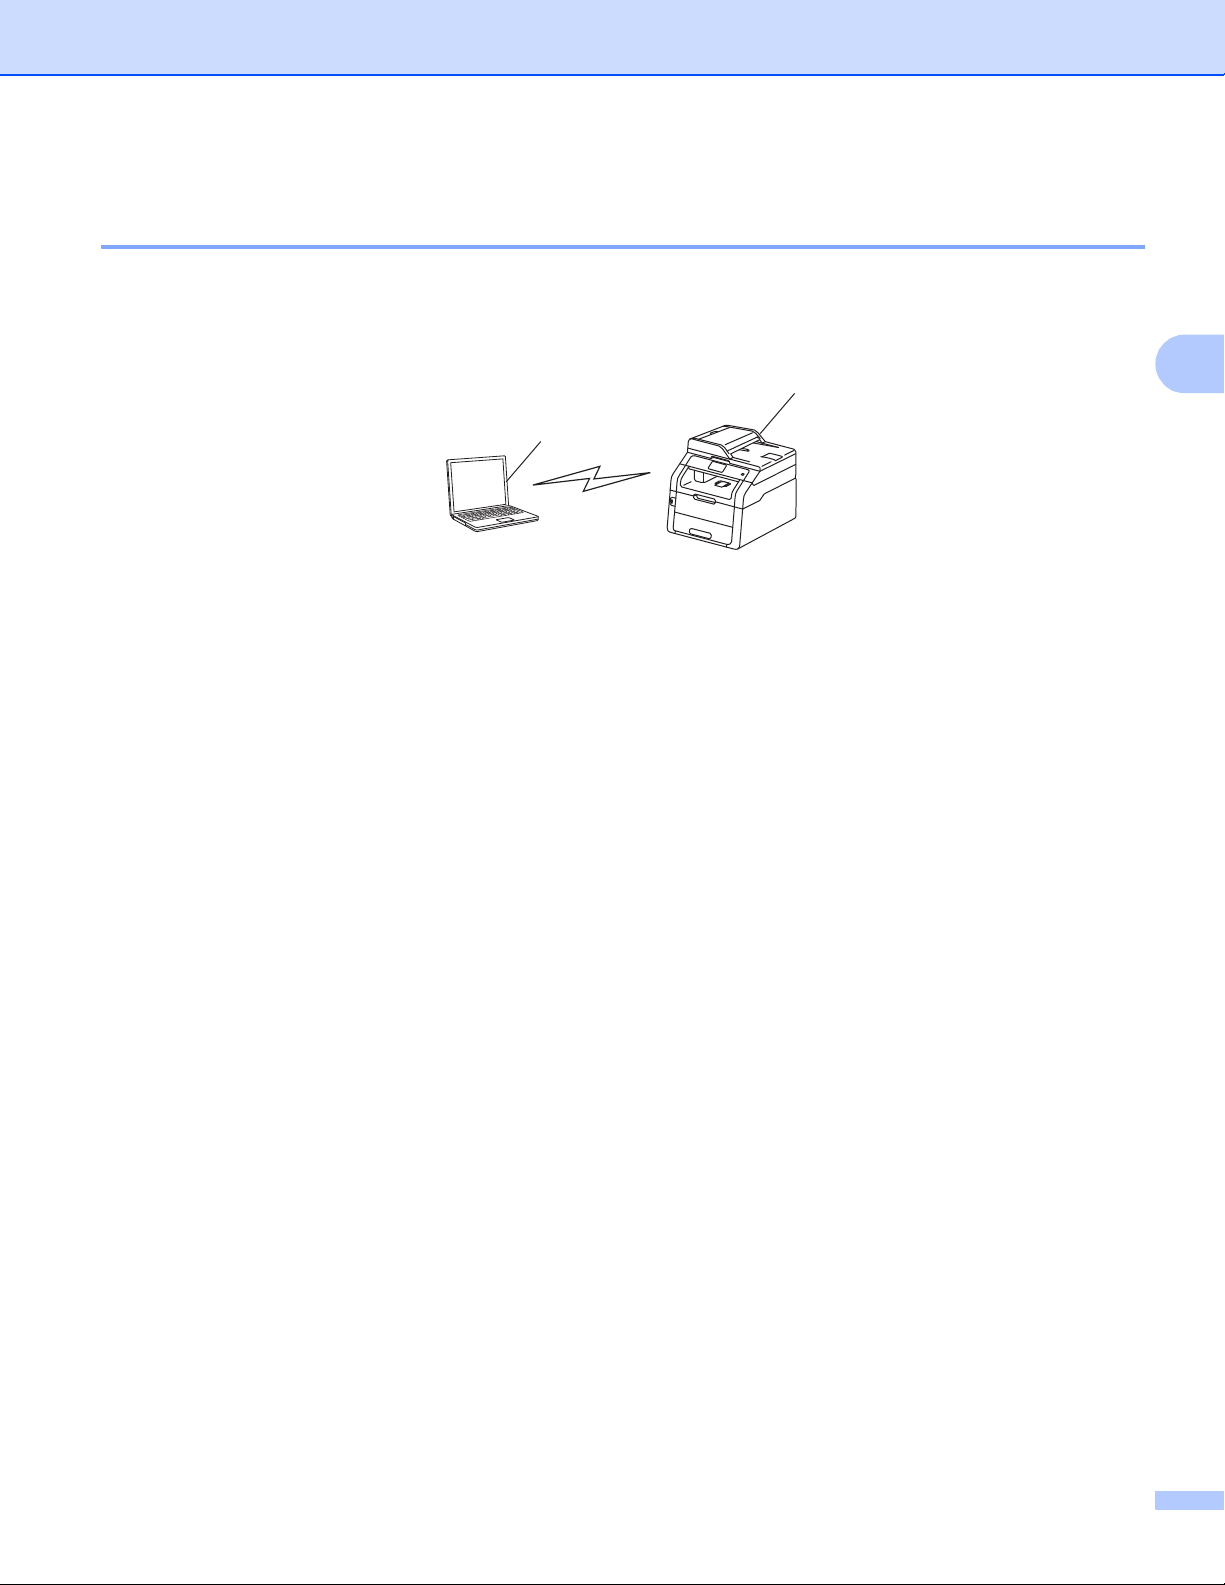
Connected to a wireless capable computer without a WLAN access point/router in the network (Ad-hoc mode) 3
This type of network does not have a central WLAN access point/router. Each wireless client communicates
directly with each other. When the Brother wireless machine (your machine) is part of this network, it receives
all print jobs directly from the computer sending the print data.
1
2
1 Wireless network machine (your machine)
2 Wireless capable computer
We do not guarantee the wireless network connection with Windows Server
set up your machine in Ad-hoc mode, see Configuration in Ad-hoc mode on page 32.
®
products in Ad-hoc mode. To
3
12
Page 19
Configuring your machine for a wireless network (For HL-3180CDW, DCP-9015CDW, DCP-9020CDW, MFC-9130CW,
IMPORTANT
MFC-9330CDW and MFC-9340CDW)
Wireless configuration temporarily using a USB cable (Recommended) 3
It is recommended that you use a computer wirelessly connected to your network for this method.
You can remotely configure the machine from the computer on the network using a USB cable (A)
A
1
You can configure the wireless settings of the machine using a USB cable temporarily connected to a wired or wireless computer.
1
.
3
• The following instructions will install your Brother machine in a network environment using the Brother
installer application found on the CD-ROM we have provided with the machine.
• If you have previously configured the wireless settings of the machine, you must reset the LAN settings
before you can configure the wireless settings again.
To reset the LAN settings, see Reset the network settings to the factory default on page 47.
®
• If you are using the Windows
Firewall or a firewall function of anti-spyware or antivirus applications,
temporarily disable them. Once you are sure that you can print, please re-enable your firewall.
• You need to temporarily use a USB cable during configuration.
• You must know your wireless network settings before you proceed with this installation.
If you are going to connect your Brother machine to your network, we recommend that you contact your
system administrator prior to installation.
• If your router uses WEP encryption, enter the key used as the first WEP key. Your Brother machine
supports the use of the first WEP key only.
13
Page 20
Configuring your machine for a wireless network (For HL-3180CDW, DCP-9015CDW, DCP-9020CDW, MFC-9130CW,
MFC-9330CDW and MFC-9340CDW)
a Before configuring your machine, we recommend you write down your wireless network settings. You
will need this information before you continue with the configuration.
For a personal wireless network configuration
If you are configuring your machine for a smaller wireless network, such as your home environment,
record your SSID and the Network key.
If you are using Windows
®
XP or using a network cable to connect your computer with your wireless
access point/router, you need to know the SSID and Network Key of your WLAN access point/router
before you proceed.
Network name: (SSID) Network Key
For example:
Network name: (SSID) Network Key
HELLO 12345678
3
3
14
Page 21
Configuring your machine for a wireless network (For HL-3180CDW, DCP-9015CDW, DCP-9020CDW, MFC-9130CW,
MFC-9330CDW and MFC-9340CDW)
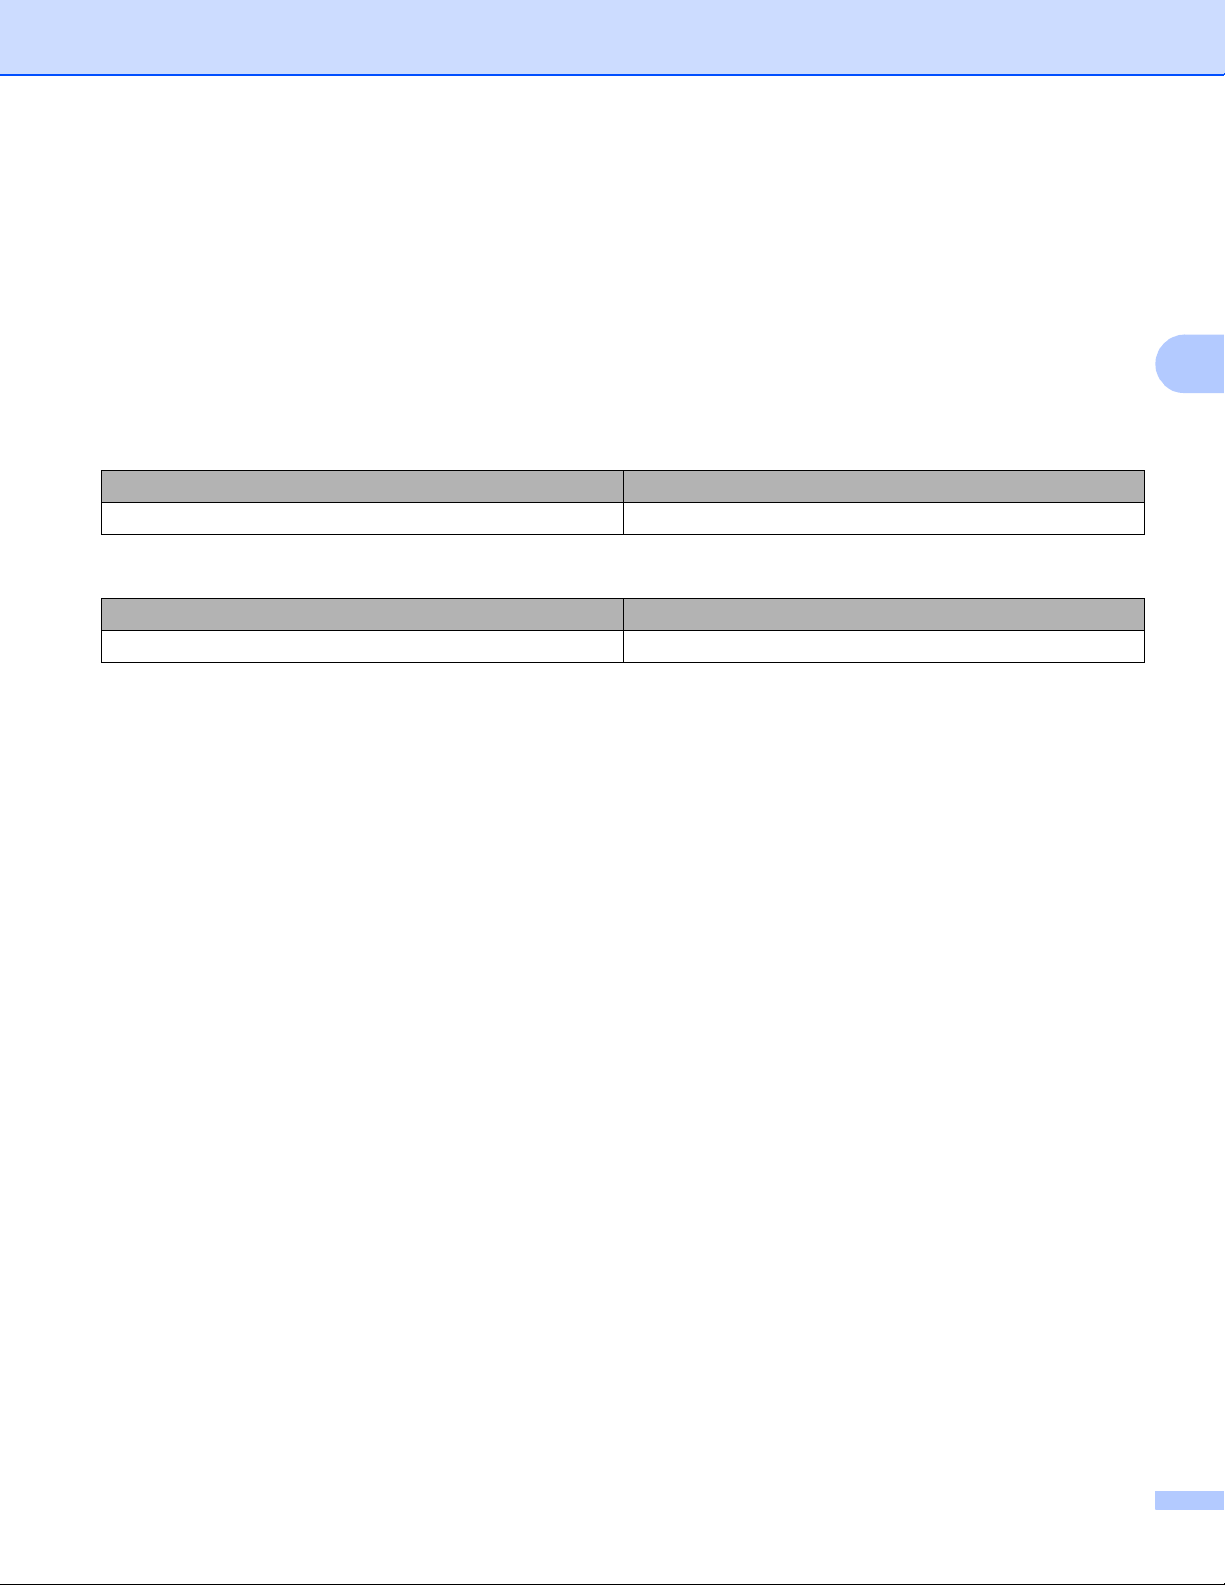
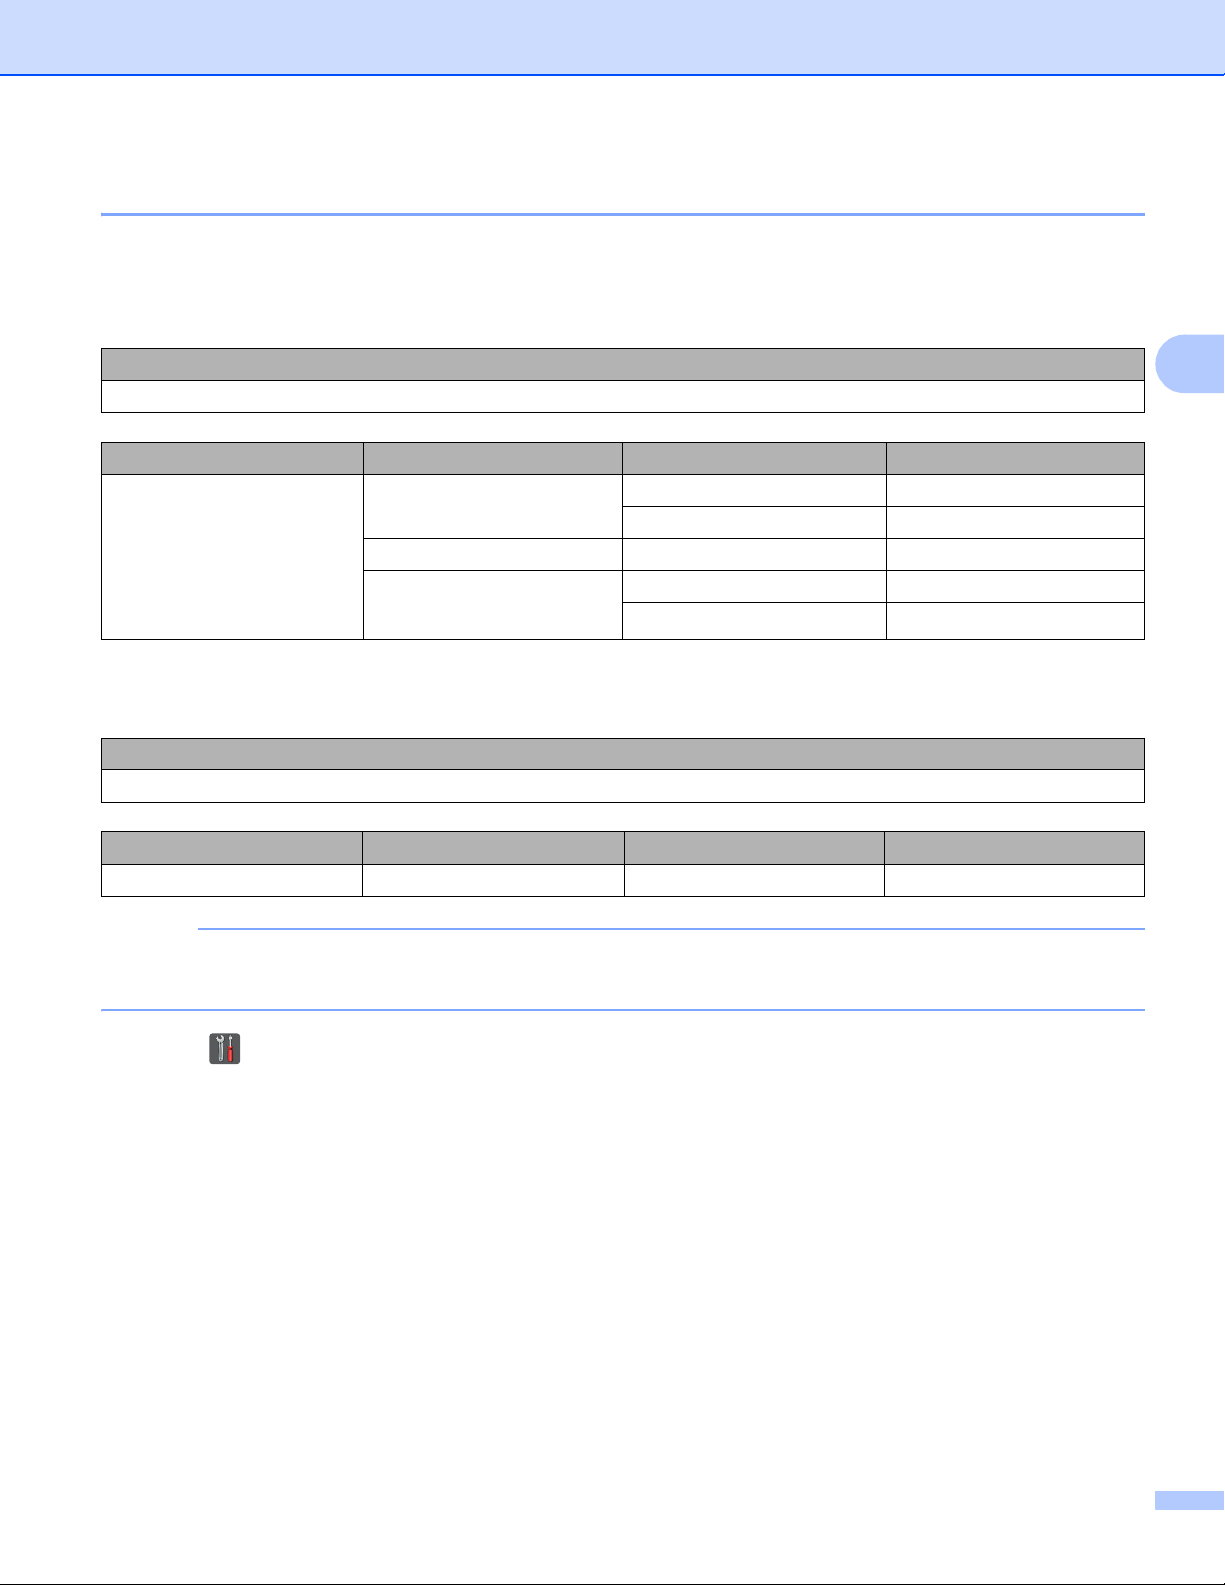
For an enterprise wireless network configuration 3
If you are configuring your machine for an IEEE 802.1x supported wireless network, record your
Authentication method, Encryption method, User ID and Password.
Network name: (SSID)
Communication Mode Authentication method Encryption mode User ID Password
Infrastructure LEAP CKIP
EAP-FAST/NONE AES
TKIP
EAP-FAST/MS-CHAPv2 AES
TKIP
EAP-FAST/GTC AES
TKIP
PEAP/MS-CHAPv2 AES
TKIP
PEAP/GTC AES
TKIP
EAP-TTLS/CHAP AES
TKIP
EAP-TTLS/MS-CHAP AES
TKIP
EAP-TTLS/MS-CHAPv2 AES
TKIP
EAP-TTLS/PAP AES
TKIP
EAP-TLS AES —
TKIP —
3
For example:
Network name: (SSID)
HELLO
Communication Mode Authentication method Encryption mode User ID Password
Infrastructure EAP-FAST/MS-CHAPv2 AES Brother 12345678
15
Page 22

Configuring your machine for a wireless network (For HL-3180CDW, DCP-9015CDW, DCP-9020CDW, MFC-9130CW,
NOTE
NOTE
MFC-9330CDW and MFC-9340CDW)
• If you configure your machine using EAP-TLS Authentication, you must install the Client Certificate issued
by a CA (Certificate Authority) before you start configuration. Contact your network administrator about the
Client Certificate. If you have installed more than one certificate, we recommend you write down the
certificate name you want to use. For details on installing the certificate, see Using Certificates for device
security on page 84.
• If you verify your machine using the Common Name of the Server Certificate, we recommend you write
down the Common Name before you start configuration. Contact your network administrator about the
Common Name of the Server Certificate.
b Turn on your computer and put the installer CD-ROM into your CD-ROM drive.
®
(Windows
1 The opening screen will appear automatically.
If the model name screen appears, choose your machine. If the language screen appears, choose
your language.
2 The CD-ROM main menu will appear. Click Install MFL-Pro Suite and click Yes if you accept the
license agreements. Follow the on-screen instructions.
) 3
3
• If the Brother screen does not appear automatically, go to Computer (My Computer). (For Windows®8:
Click the (File Explorer) icon on the taskbar, and then go to Computer.) Double-click the CD-ROM
icon, and then double-click start.exe.
• When the User Account Control screen appears,
®
(Windows Vista
(Windows
®
) click Allow.
7/Windows® 8) click Yes.
3 Choose Wireless Network Connection, and then click Next.
4 Choose the option of the Firewall setting in the Firewall/AntiVirus detected screen, and then click
Next.
16
Page 23

Configuring your machine for a wireless network (For HL-3180CDW, DCP-9015CDW, DCP-9020CDW, MFC-9130CW,
NOTE
MFC-9330CDW and MFC-9340CDW)
(Macintosh) 3
1 The opening screen will appear automatically. Click Start Here OSX. Choose your machine and click
Next.
2 Choose Wireless Network Connection and then click Next.
c Choose Yes, I have a USB cable to use for installation. and then click Next.
d Follow the on-screen instructions to configure the wireless settings.
• When the Available Wireless Networks screen appears, if your access point is set to not broadcast the
SSID, you can manually add it by clicking the Advanced button. Follow the on-screen instructions for
entering the Name (SSID).
• If the wireless setup failure screen appears, click Retry and try again.
After you have completed the wireless setup, you can proceed to the drivers and software
necessary for operating your device. Click Next in the installation dialog box and follow the
on-screen instructions.
3
17
Page 24

Configuring your machine for a wireless network (For HL-3180CDW, DCP-9015CDW, DCP-9020CDW, MFC-9130CW,
IMPORTANT
MFC-9330CDW and MFC-9340CDW)
Configuration using the machine’s control panel Setup Wizard 3
You can use the machine’s control panel to configure your wireless network settings. By using the control
panel Setup Wizard function, you can easily connect your Brother machine to your wireless network. You
must know your wireless network settings before you proceed with this installation.
• If you have previously configured the wireless settings of the machine, you must reset the LAN settings
before you can configure the wireless settings again.
To reset the LAN settings, see Reset the network settings to the factory default on page 47.
• If your router uses WEP encryption, enter the key used as the first WEP key. Your Brother machine
supports the use of the first WEP key only.
If you are configuring your machine for a smaller wireless network, such as your home environment:
• To configure your machine for an existing wireless network using the SSID and Network Key (if
required), see Manual configuration from the control panel on page 19.
3
• If your WLAN access point/router is set to not broadcast the SSID name, see Configuring your machine
when the SSID is not broadcast on page 21.
• If you are configuring your machine for Ad-hoc mode, see Configuration in Ad-hoc mode on page 32.
If you are configuring your machine for an IEEE 802.1x supported wireless network, see Configuring your
machine for an enterprise wireless network on page 23.
If your WLAN access point/router supports WPS or AOSS™, see One push configuration using WPS
(Wi-Fi Protected Setup) or AOSS™ on page 27.
If you are configuring your machine using WPS (PIN Method), see Configuration using the PIN Method of
WPS (Wi-Fi Protected Setup) on page 29.
18
Page 25
Configuring your machine for a wireless network (For HL-3180CDW, DCP-9015CDW, DCP-9020CDW, MFC-9130CW,
NOTE
MFC-9330CDW and MFC-9340CDW)
Manual configuration from the control panel 3
a Before configuring your machine, we recommend you write down your wireless network settings. You
will need this information before you continue with the configuration.
Check and record the current wireless network settings.
Network name: (SSID) Network Key
For example:
Network name: (SSID) Network Key
HELLO 12345678
• If your router uses WEP encryption, enter the key used as the first WEP key. Your Brother machine
supports the use of the first WEP key only.
• If you see the button at the top right on the Touchscreen, you can configure the wireless settings by
pressing the button. Go to step e.
b Press .
c Press Network.
d Press WLAN.
e Swipe up or down, or press a or b to display Setup Wizard.
Press Setup Wizard.
3
f When Enable WLAN? is displayed, press Yes to accept.
This will start the wireless setup wizard.
To cancel, press No.
g The machine will search for available SSIDs. If a list of SSIDs is displayed, press a or b to choose the
SSID you wrote down in step a. Press OK.
Do one of the following:
If you are using an authentication and encryption method that requires a Network Key, go to step h.
If your authentication method is Open System and your encryption mode is None, go to step j.
If your WLAN access point/router supports WPS, The selected access point/router
supports WPS. Use WPS? appears. To connect your machine using the automatic wireless mode,
press Yes. (If you choose No (Manual), go to h to enter the Network Key.) When Start WPS on
your wireless access point/router, then press [Next]. appears, press the WPS
button on your WLAN access point/router, and then press Next. Go to step i.
19
Page 26

Configuring your machine for a wireless network (For HL-3180CDW, DCP-9015CDW, DCP-9020CDW, MFC-9130CW,
MFC-9330CDW and MFC-9340CDW)
h Enter the Network Key you wrote down in step a. (For information on how to enter text: see Quick Setup
Guide.)
Press OK.
When you have entered all the characters, press Yes to apply your settings. Go to step i.
i Your machine will now try to connect to your wireless network using the information you have entered.
j If your wireless device is connected successfully, the display shows Connected.
The machine will print your machine's wireless status report. If the connection failed, check the error
code on the printed report. (See Quick Setup Guide: Troubleshooting.)
(Windows®)
You have completed the wireless network setup. If you would like to continue installing drivers
and software necessary for operating your device, please choose Install MFL-Pro Suite from
the CD-ROM menu.
(Macintosh)
You have completed the wireless network setup. If you would like to continue installing drivers
and software necessary for operating your device, please choose Start Here OSX from the
CD-ROM menu.
3
20
Page 27
Configuring your machine for a wireless network (For HL-3180CDW, DCP-9015CDW, DCP-9020CDW, MFC-9130CW,
NOTE
MFC-9330CDW and MFC-9340CDW)
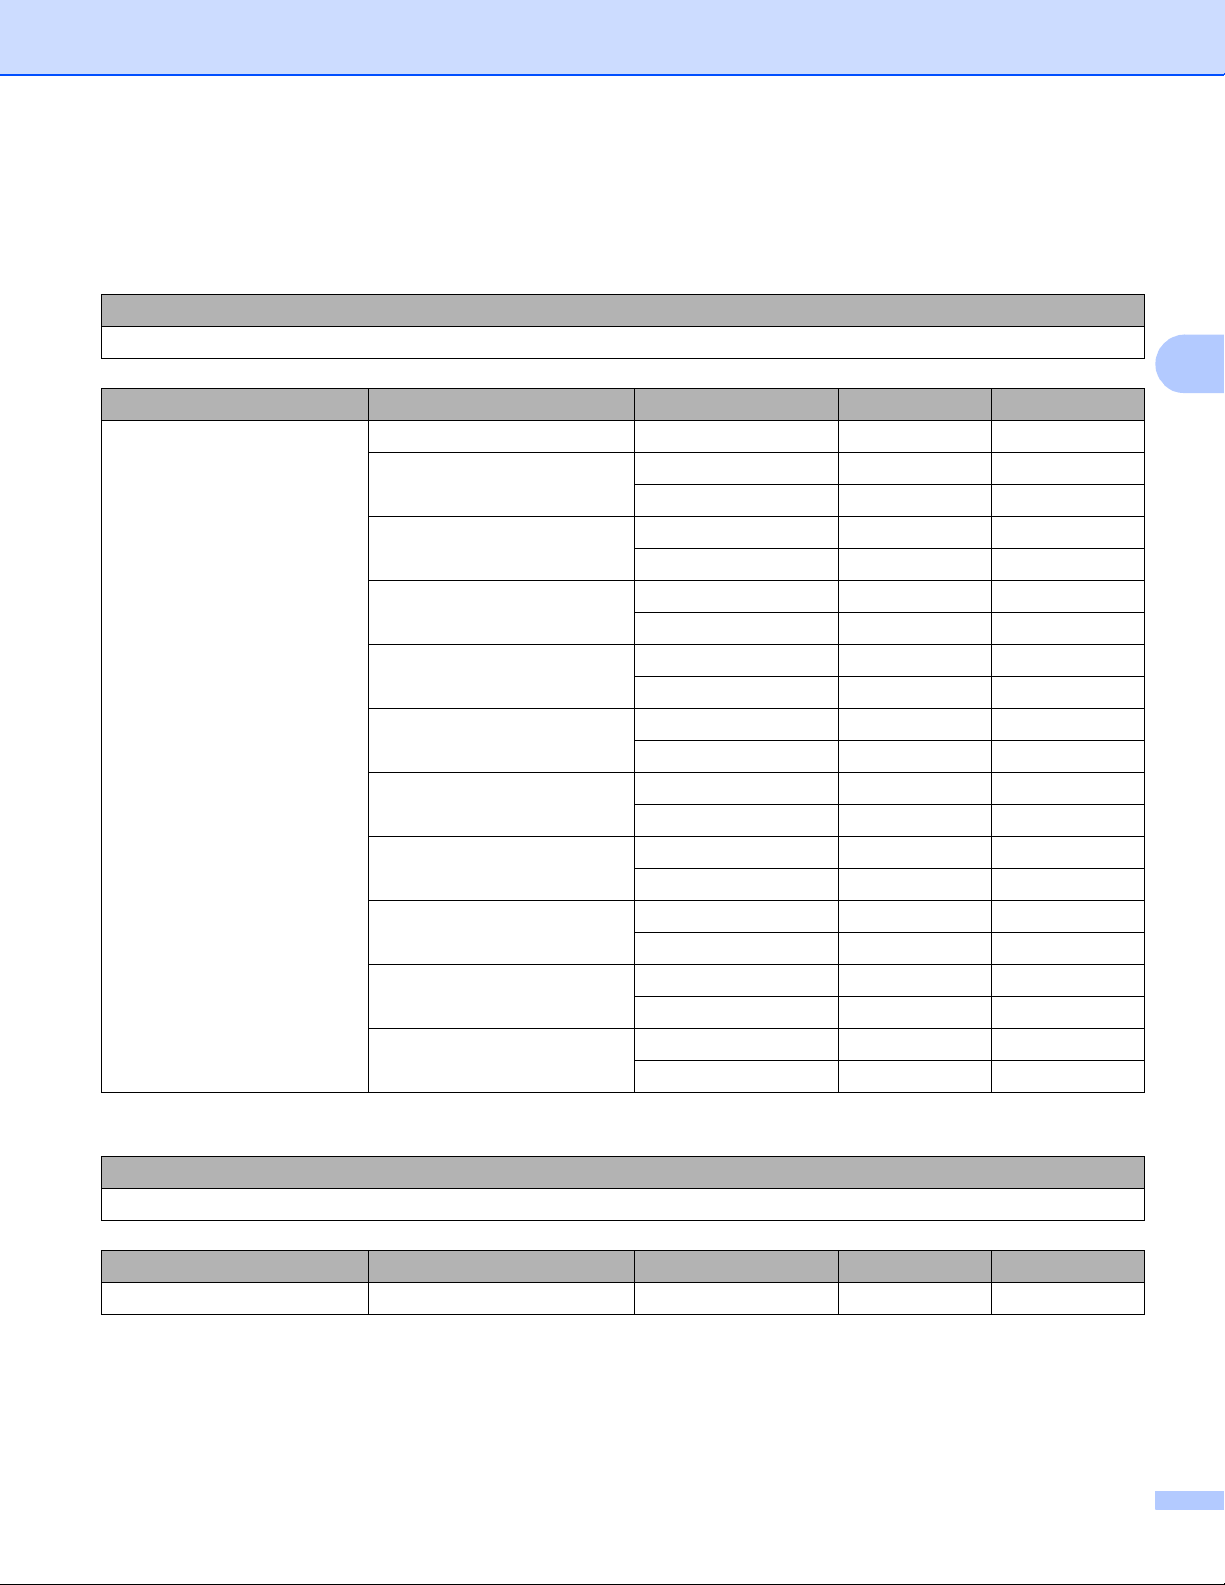
Configuring your machine when the SSID is not broadcast 3
a Before configuring your machine, we recommend you write down your wireless network settings. You
will need this information before you continue with the configuration.
Check and record the current wireless network settings.
Network name: (SSID)
Communication Mode Authentication method Encryption mode Network key
Infrastructure Open system NONE —
WEP
Shared key WEP
WPA/WPA2-PSK AES
1
TKIP
1
TKIP is supported for WPA-PSK only.
For example:
Network name: (SSID)
HELLO
Communication Mode Authentication method Encryption mode Network key
Infrastructure WPA2-PSK AES 12345678
3
If your router uses WEP encryption, enter the key used as the first WEP key. Your Brother machine
supports the use of the first WEP key only.
b Press .
c Press Network.
d Press WLAN.
e Swipe up or down, or press a or b to display Setup Wizard.
Press Setup Wizard.
f When Enable WLAN? is displayed, press Yes to accept.
This will start the wireless setup wizard.
To cancel, press No.
g The machine will search for your network and display a list of available SSIDs. Choose <New SSID>
using a or b.
Press OK.
21
Page 28

Configuring your machine for a wireless network (For HL-3180CDW, DCP-9015CDW, DCP-9020CDW, MFC-9130CW,
MFC-9330CDW and MFC-9340CDW)
h Enter the SSID name. (For information on how to enter text: see Quick Setup Guide.)
Press OK.
i Press Infrastructure when instructed.
j Choose and press the Authentication method.
Do one of the following:
If you chose Open System, go to step k.
If you chose Shared Key, go to step l.
If you chose WPA/WPA2-PSK, go to step m.
k Choose and press the Encryption type None or WEP.
Do one of the following:
If you chose None, go to step o.
If you chose WEP, go to step l.
l Enter the WEP key you wrote down in step a. Press OK. Go to step o. (For information on how to enter
text: see Quick Setup Guide.)
m Choose and press the Encryption type TKIP or AES. Go to step n.
3
n Enter the WPA key you wrote down in step a. Press OK. Go to step o. (For information on how to enter
text: see Quick Setup Guide.)
o To apply the settings, press Yes. To cancel, press No.
Do one of the following:
If you chose Yes, go to step p.
If you chose No, go back to step g.
p The machine will attempt to connect to the wireless network you have chosen.
q If your wireless device is connected successfully, the display shows Connected.
The machine will print your machine's wireless status report. If the connection failed, check the error
code on the printed report. (See Quick Setup Guide: Troubleshooting.)
(Windows®)
You have completed the wireless network setup. If you would like to continue installing drivers
and software necessary for operating your device, please choose Install MFL-Pro Suite from
the CD-ROM menu.
(Macintosh)
You have completed the wireless network setup. If you would like to continue installing drivers
and software necessary for operating your device, please choose Start Here OSX from the
CD-ROM menu.
22
Page 29
Configuring your machine for a wireless network (For HL-3180CDW, DCP-9015CDW, DCP-9020CDW, MFC-9130CW,
MFC-9330CDW and MFC-9340CDW)
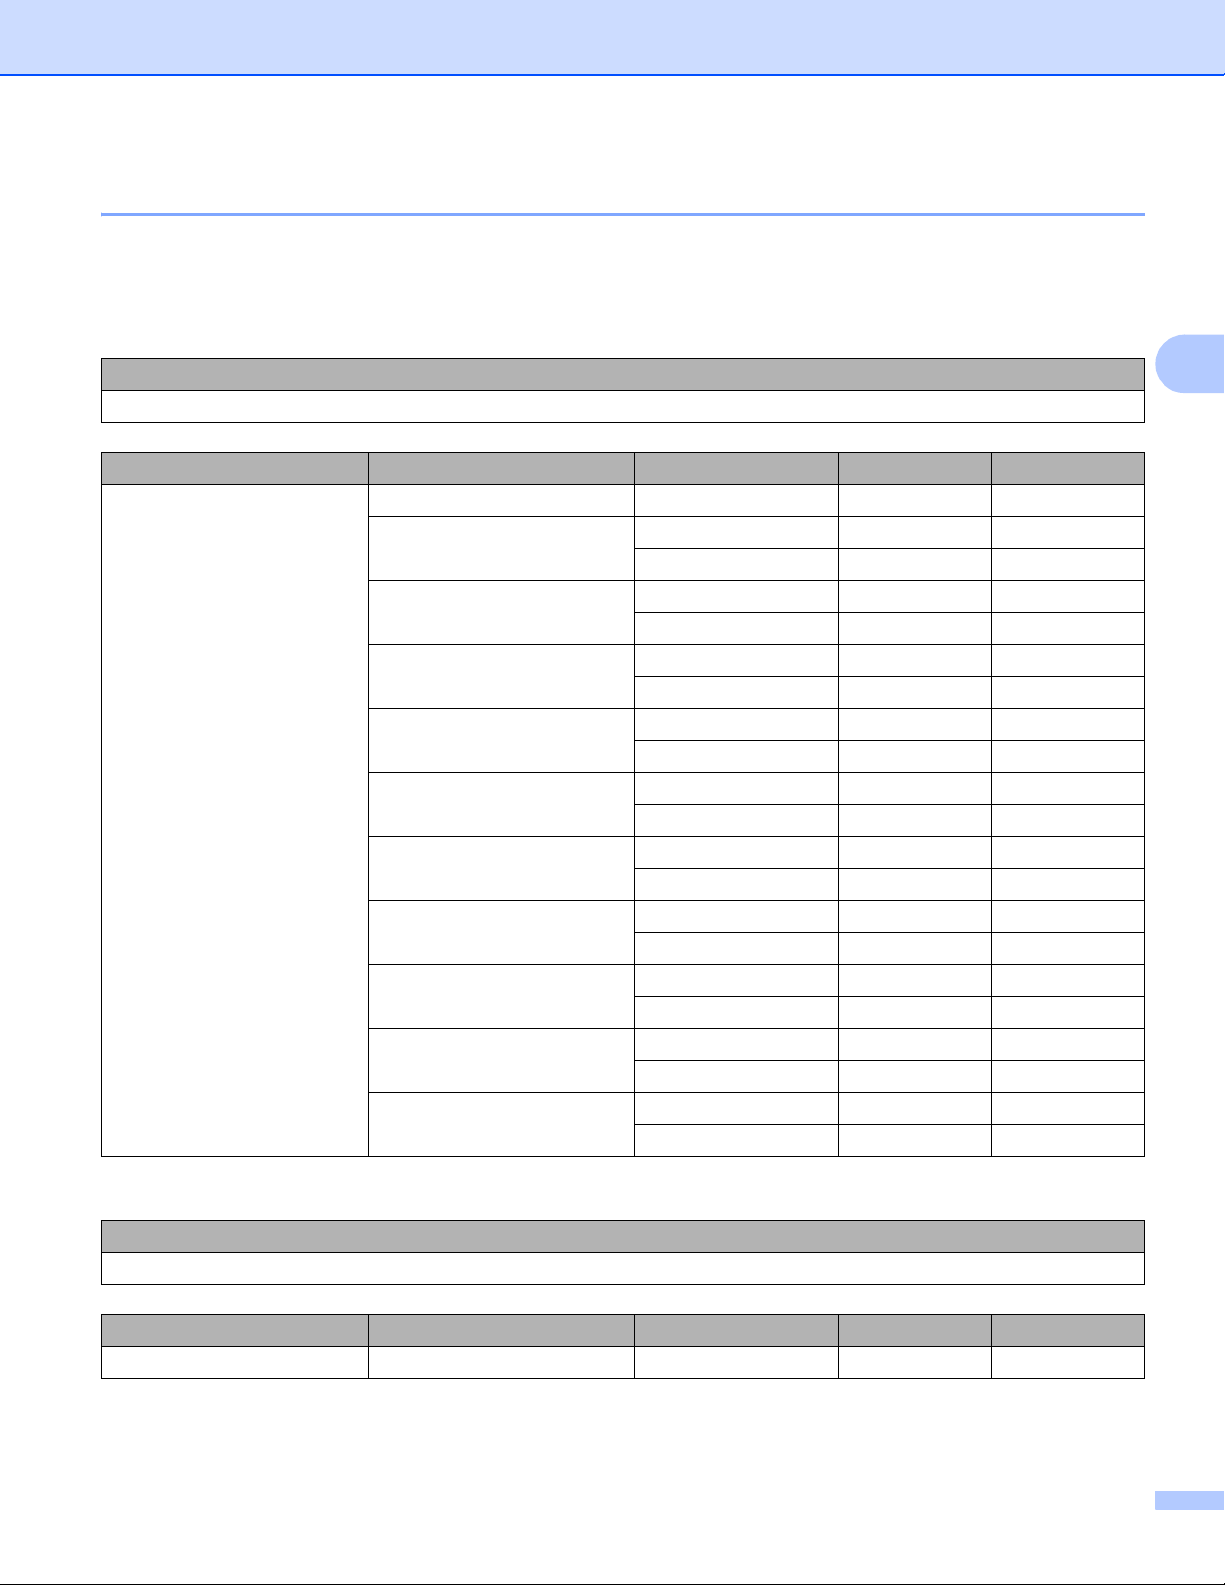
Configuring your machine for an enterprise wireless network 3
a Before configuring your machine, we recommend you write down your wireless network settings. You
will need this information before you continue with the configuration.
Check and record the current wireless network settings.
Network name: (SSID)
Communication Mode Authentication method Encryption mode User ID Password
Infrastructure LEAP CKIP
EAP-FAST/NONE AES
TKIP
EAP-FAST/MS-CHAPv2 AES
TKIP
EAP-FAST/GTC AES
TKIP
PEAP/MS-CHAPv2 AES
TKIP
PEAP/GTC AES
TKIP
EAP-TTLS/CHAP AES
TKIP
EAP-TTLS/MS-CHAP AES
TKIP
EAP-TTLS/MS-CHAPv2 AES
TKIP
EAP-TTLS/PAP AES
TKIP
EAP-TLS AES —
TKIP —
3
For example:
Network name: (SSID)
HELLO
Communication Mode Authentication method Encryption mode User ID Password
Infrastructure EAP-FAST/MS-CHAPv2 AES Brother 12345678
23
Page 30

Configuring your machine for a wireless network (For HL-3180CDW, DCP-9015CDW, DCP-9020CDW, MFC-9130CW,
NOTE
MFC-9330CDW and MFC-9340CDW)
• If you configure your machine using EAP-TLS Authentication, you must install the Client Certificate issued
by a CA before you start configuration. Contact your network administrator about the Client Certificate. If
you have installed more than one certificate, we recommend you write down the certificate name you want
to use. For installing the certificate, see Using Certificates for device security on page 84.
• If you verify your machine using the Common Name of the Server Certificate, we recommend you write
down the Common Name before you start configuration. Contact your network administrator about the
Common Name of the Server Certificate.
b Press .
c Press Network.
d Press WLAN.
e Swipe up or down, or press a or b to display Setup Wizard.
Press Setup Wizard.
f When Enable WLAN? is displayed, press Yes to accept.
This will start the wireless setup wizard.
To cancel, press No.
3
g The machine will search for your network and display a list of available SSIDs.
You should see the SSID you wrote down earlier. If the machine finds more than one network, swipe up
or down, or press a or b to choose your network. Go to step k. Press OK.
If your access point is set to not broadcast the SSID, you will have to add the SSID name manually. Go
to step h.
h Swipe up or down, or press a or b to choose <New SSID>. Press OK.
Go to step i.
i Enter the SSID name. (For information on how to enter text: see Quick Setup Guide.)
Press OK. Go to step j.
j Choose Infrastructure when instructed.
k Choose the Authentication method using a or b.
Do one of the following:
If you chose LEAP, go to step q.
If you chose EAP-FAST, go to step l.
If you chose PEAP, go to step l.
If you chose EAP-TTLS, go to step l.
If you chose EAP-TLS, go to step m.
24
Page 31

Configuring your machine for a wireless network (For HL-3180CDW, DCP-9015CDW, DCP-9020CDW, MFC-9130CW,
NOTE
NOTE
MFC-9330CDW and MFC-9340CDW)
l Choose the Inner Authentication method NONE, CHAP, MS-CHAP, MS-CHAPv2, GTC or PAP.
Go to step m.
Depending on your Authentication method, the Inner Authentication method selections differ.
m Choose encryption type TKIP or AES.
Do one of the following:
If your Authentication method is EAP-TLS, go to step n.
For other Authentication methods, go to step o.
n The machine will display a list of available Client Certificates. Choose the certificate and go to step o.
o Choose the verification method No Verification, CA or CA + Server ID.
Do one of the following:
If you chose CA + Server ID, go to step p.
For other selections, go to step q.
If you have not imported a CA certificate on your machine, the machine will display No Verification.
To import a CA certificate, see Using Certificates for device security on page 84.
p Enter the server ID. (For information on how to enter text: see Quick Setup Guide.)
Press OK. Go to step q.
3
25
Page 32

Configuring your machine for a wireless network (For HL-3180CDW, DCP-9015CDW, DCP-9020CDW, MFC-9130CW,
MFC-9330CDW and MFC-9340CDW)
q Enter the user ID you wrote down in step a. Press OK. (For information on how to enter text: see Quick
Setup Guide.)
Do one of the following:
If your Authentication method is EAP-TLS, go to step s.
For other Authentication methods, go to step r.
r Enter the Password you wrote down in step a. Press OK. Go to step s.
s To apply the settings, choose Yes. To cancel, choose No.
Do one of the following:
If you chose Yes, go to step t.
If you chose No, go back to step g.
t The machine will attempt to connect to the wireless network you have chosen.
u If your wireless device is connected successfully, the display shows Connected.
The machine will print your machine's wireless status report. If the connection failed, check the error
code on the printed report. (See Quick Setup Guide: Troubleshooting.)
(Windows®)
You have completed the wireless network setup. If you would like to continue installing drivers
and software necessary for operating your device, please choose Install MFL-Pro Suite from
the CD-ROM menu.
3
(Macintosh)
You have completed the wireless network setup. If you would like to continue installing drivers
and software necessary for operating your device, please choose Start Here OSX from the
CD-ROM menu.
26
Page 33

Configuring your machine for a wireless network (For HL-3180CDW, DCP-9015CDW, DCP-9020CDW, MFC-9130CW,
IMPORTANT
MFC-9330CDW and MFC-9340CDW)
One push configuration using WPS (Wi-Fi Protected Setup) or AOSS™ 3
You can use WPS or AOSS™ from the control panel menu to configure your wireless network settings if your
1
WLAN access point/router (A) supports either WPS (PBC
) or AOSS™.
A
3
1
Push Button Configuration
• If you are going to connect your Brother machine to your network, we recommend that you contact your
system administrator prior to installation. You must know your wireless network settings before you
proceed with this installation.
• If you have previously configured the wireless settings of the machine, you must reset the LAN settings
before you can configure the wireless settings again.
To reset the LAN settings, see Reset the network settings to the factory default on page 47.
a Press .
b Press Network.
c Press WLAN.
d Swipe up or down, or press a or b to display WPS/AOSS.
Press WPS/AOSS.
e When Enable WLAN? is displayed, press Yes to accept.
This will start the wireless setup wizard.
To cancel, press No.
27
Page 34

Configuring your machine for a wireless network (For HL-3180CDW, DCP-9015CDW, DCP-9020CDW, MFC-9130CW,
MFC-9330CDW and MFC-9340CDW)
f When the Touchscreen shows Start WPS or AOSS on your wireless access point/router,
then press [OK]., press the WPS or AOSS™ button on your wireless access point/router. See the
user's guide for your wireless access point/router for instructions.
Then press OK and your machine will now automatically detect which mode (WPS or AOSS™) your
wireless access point/router uses and try to connect to your wireless network.
g If your wireless device is connected successfully, the display shows Connected.
The machine will print your machine's wireless status report. If the connection failed, check the error
code on the printed report. (See Quick Setup Guide: Troubleshooting.)
(Windows®)
You have completed the wireless network setup. If you would like to continue installing drivers
and software necessary for operating your device, please choose Install MFL-Pro Suite from
the CD-ROM menu.
(Macintosh)
You have completed the wireless network setup. If you would like to continue installing drivers
and software necessary for operating your device, please choose Start Here OSX from the
CD-ROM menu.
3
28
Page 35

Configuring your machine for a wireless network (For HL-3180CDW, DCP-9015CDW, DCP-9020CDW, MFC-9130CW,
NOTE
A
A
C
MFC-9330CDW and MFC-9340CDW)
Configuration using the PIN Method of WPS (Wi-Fi Protected Setup) 3
If your WLAN access point/router supports WPS (PIN Method), you can configure the machine easily. The
PIN (Personal Identification Number) Method is one of the connection methods developed by the Wi-Fi
®
Alliance
manages the wireless LAN), you can setup the WLAN network and security settings. See the user’s guide
supplied with your WLAN access point/router for instructions on how to access the WPS mode.
Connection when the WLAN access point/router (A) doubles as a Registrar
. By inputting a PIN which is created by an Enrollee (your machine) to the Registrar (a device that
1
.
3
Connection when another device (C), such as a computer is used as a Registrar1.
1
The Registrar is a device that manages the wireless LAN.
Routers or access points that support WPS have a symbol as shown below.
29
Page 36

Configuring your machine for a wireless network (For HL-3180CDW, DCP-9015CDW, DCP-9020CDW, MFC-9130CW,
NOTE
MFC-9330CDW and MFC-9340CDW)
a Press .
b Press Network.
c Press WLAN.
d Swipe up or down, or press a or b to display WPS w/ PIN Code.
Press WPS w/ PIN Code.
e When Enable WLAN? is displayed, press Yes to accept.
This will start the wireless setup wizard.
To cancel, press No.
f The Touchscreen will show an 8 digit PIN and the machine starts searching for an access point.
g Using a computer that is on the network, type “vaccess point’s IP address/” into your browser.
1
(Where “access point’s IP address” is the IP address of the device that is used as the Registrar
the WPS setting page and input the PIN which the Touchscreen shows in f to the Registrar. Follow the
on-screen instructions.
1
The Registrar is normally the WLAN access point / router.
.) Go to
3
The setting page is different, depending on the brand of access point / router. See the instruction manual
supplied with your access point / router.
30
Page 37

Configuring your machine for a wireless network (For HL-3180CDW, DCP-9015CDW, DCP-9020CDW, MFC-9130CW,
NOTE
MFC-9330CDW and MFC-9340CDW)
Windows Vista®/Windows®7/Windows®8 3
If you are using your computer as a Registrar, follow these steps:
• To use a Windows Vista®, Windows®7 or Windows®8 computer as a Registrar, you need to register it to
your network in advance. See the instruction manual that came with your WLAN access point / router.
• If you use Windows
®
7 or Windows®8 as a Registrar, you can install the printer driver after the wireless
configuration by following the on-screen instructions. If you want to install the full driver and software
package: see Quick Setup Guide.
1 (Windows Vista®)
Click the button and then Network.
®
(Windows
7)
Click the button, and then Devices and Printers.
(Windows®8)
Move your mouse to the lower right corner of your desktop. When the menu bar appears, click
Settings, and then click Control Panel. In the Hardware and Sound group, click View devices and
printers.
®
2 (Windows Vista
)
Click Add a wireless device.
(Windows
®
7/Windows®8)
Click Add a device.
3
3 Choose your machine and click Next.
4 Type the PIN which the Touchscreen shows in step f, and then click Next.
5 Choose your network and then click Next.
6 Click Close.
h If your wireless device is connected successfully, the display shows Connected.
The machine will print your machine's wireless status report. If the connection failed, check the error
code on the printed report. (See Quick Setup Guide: Troubleshooting.)
(Windows®)
You have completed the wireless network setup. If you would like to continue installing drivers
and software necessary for operating your device, please choose Install MFL-Pro Suite from
the CD-ROM menu.
(Macintosh)
You have completed the wireless network setup. If you would like to continue installing drivers
and software necessary for operating your device, please choose Start Here OSX from the
CD-ROM menu.
31
Page 38

Configuring your machine for a wireless network (For HL-3180CDW, DCP-9015CDW, DCP-9020CDW, MFC-9130CW,
NOTE
NOTE
MFC-9330CDW and MFC-9340CDW)
Configuration in Ad-hoc mode 3
Using configured SSID 3
If you are trying to pair the machine to a computer that is already in Ad-hoc mode with a configured SSID,
you will need to complete the following steps:
a Before configuring your machine, we recommend you write down your wireless network settings. You
will need this information before you continue with the configuration.
Check and record the current wireless network settings of the computer you are connecting with.
The wireless network settings of the computer you are connecting with must be set to Ad-hoc mode with
a SSID already configured. For instructions on how to configure your computer to Ad-hoc mode, please
see the information included with your computer or contact your network administrator.
Network name: (SSID)
3
Communication Mode Encryption mode Network key
Ad-hoc NONE —
WEP
For example:
Network name: (SSID)
HELLO
Communication Mode Encryption mode Network key
Ad-hoc WEP 12345
Your Brother machine supports the use of the first WEP key only.
b Press .
c Press Network.
d Press WLAN.
32
Page 39

Configuring your machine for a wireless network (For HL-3180CDW, DCP-9015CDW, DCP-9020CDW, MFC-9130CW,
MFC-9330CDW and MFC-9340CDW)
e Swipe up or down, or press a or b to display Setup Wizard.
Press Setup Wizard.
f When Enable WLAN? is displayed, press Yes to accept.
This will start the wireless setup wizard.
To cancel, press No.
g The machine will search for your network and display a list of available SSIDs. Choose the SSID you
wrote down in step a using a or b.
Press OK.
Do one of the following:
If the SSID is unencrypted, go to step j.
If the SSID is encrypted, go to step h.
h Enter the WEP key you wrote down in step a. Press OK. Go to step i. (For information on how to enter
text: see Quick Setup Guide.)
i To apply the settings, press Yes. To cancel, press No.
Do one of the following:
If you chose Yes, go to step j.
If you chose No, go back to step g.
j The machine will attempt to connect to the wireless device you have chosen.
k If your wireless device is connected successfully, the display shows Connected.
The machine will print your machine's wireless status report. If the connection failed, check the error
code on the printed report. (See Quick Setup Guide: Troubleshooting.)
(Windows®)
You have completed the wireless network setup. If you would like to continue installing drivers
and software necessary for operating your device, please choose Install MFL-Pro Suite from
the CD-ROM menu.
3
(Macintosh)
You have completed the wireless network setup. If you would like to continue installing drivers
and software necessary for operating your device, please choose Start Here OSX from the
CD-ROM menu.
33
Page 40

Configuring your machine for a wireless network (For HL-3180CDW, DCP-9015CDW, DCP-9020CDW, MFC-9130CW,
NOTE
MFC-9330CDW and MFC-9340CDW)
Using a New SSID 3
If you are using a new SSID then all other devices will connect using the SSID that you assign to the machine
in the following steps. You will need to connect to this SSID from your computer when it is placed in Ad-hoc
mode.
a Press .
b Press Network.
c Press WLAN.
d Swipe up or down, or press a or b to display Setup Wizard.
Press Setup Wizard.
e When Enable WLAN? is displayed, press Yes to accept.
This will start the wireless setup wizard.
To cancel, press No.
f The machine will search for your network and display a list of available SSIDs. Choose <New SSID>
using a or b. Press OK.
3
g Enter the SSID name. (For information on how to enter text: see Quick Setup Guide.)
Press OK.
h Press Ad-hoc when instructed.
i Choose and press the Encryption type None or WEP.
Do one of the following:
If you chose None, go to step k.
If you chose WEP, go to step j.
j Enter the WEP key. Press OK. Go to step k. (For information on how to enter text: see Quick Setup
Guide.)
Your Brother machine supports the use of the first WEP key only.
34
Page 41

Configuring your machine for a wireless network (For HL-3180CDW, DCP-9015CDW, DCP-9020CDW, MFC-9130CW,
MFC-9330CDW and MFC-9340CDW)
k To apply the settings, press Yes. To cancel, press No.
Do one of the following:
If you chose Yes, go to step l.
If you chose No, go back to step f.
l The machine will attempt to connect to the wireless device you have chosen.
m If your wireless device is connected successfully, the display shows Connected.
The machine will print your machine's wireless status report. If the connection failed, check the error
code on the printed report. (See Quick Setup Guide: Troubleshooting.)
(Windows®)
You have completed the wireless network setup. If you would like to continue installing drivers
and software necessary for operating your device, please choose Install MFL-Pro Suite from
the CD-ROM menu.
(Macintosh)
You have completed the wireless network setup. If you would like to continue installing drivers
and software necessary for operating your device, please choose Start Here OSX from the
CD-ROM menu.
3
35
Page 42

4
NOTE
Control panel setup 4
Network menu 4
The Network menu selections of the control panel allow you to set up the Brother machine for your network
configuration. (For more information on how to use the control panel: see Basic User's Guide.) Press ,
All Settings and then press Network. Proceed to the menu selection you wish to configure. (For
additional information on the menu, see Function table and default factory settings on page 49.)
1
Please note that the machine is supplied with the BRAdmin Light utility
2
Remote Setup
Management Utilities on page 8.)
1
For Macintosh users, you can download Brother's latest BRAdmin Light utility from http://solutions.brother.com/.
2
Not available for DCP models.
applications, which also can be used to configure many aspects of the network. (See Other
TCP/IP 4
If you connect the machine with a network cable to your network, use the Wired LAN menu selections. If
you connect the machine to a wireless Ethernet network, use the WLAN menu selections.
, Web Based Management or
4
Boot Method 4
This selection controls how the machine obtains an IP address.
Auto mode
In this mode, the machine will scan the network for a DHCP server. If it can find one, and if the DHCP server
is configured to allocate an IP address to the machine, then the IP address supplied by the DHCP server will
be used. If no DHCP server is available, the IP Address is set using the APIPA protocol. After the machine is
initially powered ON, it may take a few minutes for the machine to scan the network for a server.
Static mode
In this mode the machine’s IP address must be manually assigned. Once entered the IP address is locked to
the assigned address.
If you do not want your print server configured via DHCP, BOOTP, or RARP, you must set the
BOOT Method to Static so that the print server has a static IP address. This will prevent the print server
from trying to obtain an IP address from any of these systems. To change the Boot Method, use the
machine’s control panel, BRAdmin Light utility, Web Based Management, or Remote Setup.
4
4
36
Page 43

Control panel setup
IP Address 4
This field displays the current IP address of the machine. If you have chosen a BOOT Method of Static,
enter the IP address that you wish to assign to the machine (check with your network administrator for the IP
address to use). If you have chosen a method other than Static, the machine will attempt to determine its
IP address using the DHCP or BOOTP protocols. The default IP address of your machine will probably be
incompatible with the IP address numbering scheme of your network. We recommend that you contact your
network administrator for an IP address for the network the unit will be connected on.
Subnet Mask 4
This field displays the current subnet mask used by the machine. If you are not using DHCP or BOOTP to
obtain the subnet mask, enter the desired subnet mask. Check with your network administrator for the subnet
mask to use.
Gateway 4
This field displays the current gateway or router address used by the machine. If you are not using DHCP or
BOOTP to obtain the gateway or router address, enter the address you wish to assign. If you do not have a
gateway or router, leave this field blank. Check with your network administrator if you are unsure.
Node Name 4
You can register the machine name on the Network. This name is often referred to as a NetBIOS name; it will
be the name that is registered by the WINS server on your network. Brother recommends the name
“BRNxxxxxxxxxxxx” for a wired network or “BRWxxxxxxxxxxxx” for a wireless network. (“xxxxxxxxxxxx” is
your machine’s MAC Address / Ethernet Address.)
WINS Config 4
This selection controls how the machine obtains the IP address of the WINS server.
Auto 4
4
Automatically uses a DHCP request to determine the IP addresses for the primary and secondary WINS
servers. You must set the BOOT Method to Auto for this feature to work.
Static
Uses a specified IP address for the primary and secondary WINS servers.
WINS Server 4
Primary WINS Server IP Address 4
This field specifies the IP address of the primary WINS (Windows® Internet Name Service) server. If set to a
®
non-zero value, the machine will contact this server to register its name with the Windows
Service.
Internet Name
37
4
Page 44

Control panel setup
NOTE
Secondary WINS Server IP Address 4
This field specifies the IP address of the secondary WINS server. It is used as a backup to the Primary WINS
server address. If the Primary server is unavailable, the machine still can register itself with a secondary
server. If set to a non-zero value, the machine will contact this server to register its name with the Windows
®
Internet Name Service. If you have a primary WINS server, but no secondary WINS server, simply leave this
field blank.
DNS Server 4
Primary DNS Server IP Address 4
This field specifies the IP address of the primary DNS (Domain Name System) server.
Secondary DNS Server IP Address
This field specifies the IP address of the secondary DNS server. It is used as a backup to the Primary DNS
server address. If the Primary server is unavailable, the machine will contact the Secondary DNS server. If
you have a primary DNS server, but no secondary DNS server, simply leave this field blank.
APIPA 4
The setting of On will cause the print server to automatically allocate a Link-Local IP address in the range
(169.254.1.0 - 169.254.254.255) when the print server cannot obtain an IP address through the Boot Method
you have set. (See Boot Method on page 36.) Choosing Off means the IP address does not change, when
the print server cannot obtain an IP address through the Boot Method you have set.
IPv6 4
This machine is compatible with IPv6, the next generation Internet protocol. If you want to use the IPv6
protocol, choose On. The default setting for IPv6 is Off. For more information on the IPv6 protocol, visit
http://solutions.brother.com/
.
4
4
• If you set IPv6 to On, turn off the power switch and then turn it back on to enable this protocol.
• After you choose IPv6 On, this setting will be applied to both the wired and wireless LAN interface.
38
Page 45

Control panel setup
NOTE
Ethernet (wired network only) 4
Ethernet link mode auto allows the print server to operate in 100BASE-TX full or half duplex or in 10BASE-T
full or half duplex mode by auto negotiation.
If you set this value incorrectly, you may not be able to communicate with your print server.
Wired Status (For HL-3180CDW, DCP-9015CDW, DCP-9020CDN, DCP-9020CDW, MFC-9140CDN, MFC-9330CDW and MFC-9340CDW) 4
This field displays the current wired network status.
Setup Wizard (wireless network only) 4
The Setup Wizard guides you through the wireless network configuration. (For more information:
see Quick Setup Guide or Manual configuration from the control panel on page 19.)
WPS (Wi-Fi Protected Setup)/AOSS™ (wireless network only) 4
If your WLAN access point/router supports either WPS (PBC1) or AOSS™ (Automatic Wireless mode), you
can configure the machine easily. (For more information: see Quick Setup Guide or One push configuration
using WPS (Wi-Fi Protected Setup) or AOSS™ on page 27.)
1
Push Button Configuration
WPS (Wi-Fi Protected Setup) w/PIN Code (wireless network only) 4
If your WLAN access point/router supports WPS (PIN Method), you can configure the machine easily. (For
more information, see Configuration using the PIN Method of WPS (Wi-Fi Protected Setup) on page 29.)
4
WLAN Status (For HL-3180CDW, DCP-9015CDW, DCP-9020CDW, MFC-9130CW, MFC-9330CDW and MFC-9340CDW) 4
Status 4
This field displays the current wireless network status.
Signal 4
This field displays the current wireless network signal strength.
SSID 4
This field displays the current wireless network SSID. The display shows up to 32 characters of the SSID
name.
39
Page 46

Control panel setup
NOTE
Comm. Mode 4
This field displays the current wireless network communication mode.
MAC Address 4
The MAC address is a unique number assigned for the machine’s network interface. You can check your
machine’s MAC address from the control panel.
Set to Default 4
The Set to Default allows you to reset each wired or wireless settings to the factory default. If you want
to reset both wired and wireless settings, see Reset the network settings to the factory default on page 47.
Wired Enable (For DCP-9020CDW, MFC-9330CDW and MFC-9340CDW) 4
If you want to use the wired network connection, set Wired Enable to On.
WLAN Enable 4
If you want to use the wireless network connection, set WLAN Enable to On.
If a network cable is connected to your machine, set Wired Enable to Off.
E-mail / IFAX (MFC-9130CW, MFC-9140CDN, MFC-9330CDW and MFC-9340CDW: available as a download) 4
This menu has five selections: Mail Address, Setup Server, Setup Mail RX, Setup Mail TX and
Setup Relay. As this section requires you to enter a lot of text characters, you may find that it is more
convenient to use Web Based Management and your favorite web browser to configure these settings (see
Web Based Management on page 56). These settings must be configured for the IFAX feature to work. (For
more details about Internet fax, see Internet fax (MFC-9130CW, MFC-9140CDN, MFC-9330CDW and
MFC-9340CDW: available as a download) on page 72.)
4
You can also access the character you want by repeatedly pressing the appropriate number key using the
machine’s control panel. (For information on how to enter text: see Basic User's Guide.)
40
Page 47

Control panel setup
NOTE
Mail Address 4
You can set your machine’s E-mail address.
Setup Server 4
SMTP
SMTP Server
This field displays the node name or IP address of an SMTP mail server (outgoing E-mail server) on your
network.
(e.g. “mailhost.brothermail.net” or “192.000.000.001”)
SMTP Port
This field displays the SMTP port number (for outgoing E-mails) on your network.
Auth. for SMTP
You can specify the security method for E-mail notification. (For details on the security methods for E-mail
notification, see Sending or Receiving an E-mail securely on page 99.)
SMTP SSL/TLS
You can choose the encryption method between the machine and the SMTP server.
4
Verify Cert.
You can enable or disable the use of the security certificate between the machine and the SMTP server.
4
POP3
POP3 Server
This field displays the node name or IP address of the POP3 server (incoming E-mail server) used by the
Brother machine. This address is necessary for the Internet fax features to function correctly.
(e.g. “mailhost.brothermail.net” or “192.000.000.001”)
POP3 Port
This field displays the POP3 port number (for incoming E-mails) used by the Brother machine.
Mailbox Name
You can specify a mailbox name on the POP3 server where the Internet print jobs are to be retrieved.
Mailbox Pwd
You can specify the password for the POP3 server account where the Internet print jobs are to be
retrieved.
To set for no password, enter a single space.
POP3 SSL/TLS
You can choose the encryption method between the machine and the POP3 server.
41
Page 48

Control panel setup
Verify Cert.
You can enable or disable the use of the security certificate between the machine and the POP3 server.
APOP
You can enable or disable the APOP (Authenticated Post Office Protocol).
Setup Mail RX 4
Auto Polling
When set to On, the machine automatically checks the POP3 server for new messages.
4
Poll Frequency
Sets the interval for checking for new messages on the POP3 server (default is 10 minutes).
4
Header
This selection allows the contents of the mail header to be printed when the received message is printed.
4
4
Delete Error Mail
When set to On, the machine automatically deletes error mails that the machine cannot receive from the
POP3 server.
4
Notification
The notification feature allows a confirmation of receipt message to be transmitted to the sending station
when the Internet Fax has been received.
This feature only works on Internet Fax machines that support the “MDN” specification.
Setup Mail TX 4
Sender Subject
This field displays the subject that is attached to the Internet fax data being sent from the Brother machine to
a computer (default is “Internet Fax Job”).
42
Page 49

Control panel setup
NOTE
4
Size Limit
Some E-mail servers do not allow you to send large E-mail documents (the system administrator will often
place a limit on the maximum E-mail size). With this function enabled, the machine will display
OutofMemory when trying to send E-mail documents over 1 Mbyte in size. The document will not be sent
and an error report will be printed. The document you are sending should be separated into smaller
documents that will be accepted by the mail server. (For your information, a 42 page document based on the
ITU-T Test Chart #1 test chart is approximately 1 Mbyte in size.)
4
Notification
The notification feature allows a confirmation of receipt message to be transmitted to the sending station
when the Internet Fax has been received.
This feature only works on Internet Fax machines that support the “MDN” specification.
Setup Relay 4
Relay Broadcast
This function allows the machine to receive a document over the Internet, and then relay it to other fax
machines through conventional analog landlines.
4
Relay Domain
You can register the Domain Names (Max. 10) that are allowed to request a Relay Broadcast.
4
Relay Report
A Relay Broadcast Report can be printed at the machine that will act as a Relay Station for all Relay
Broadcasts.
4
Its primary function is to print reports of any relayed broadcasts that have been sent through the machine.
Please note: In order to use this function, you must assign the relay domain in the “Trusted Domains” section
of the Relay function settings.
For more information on Relay Broadcast, see Relay broadcasting on page 77.
43
Page 50

Control panel setup
NOTE
Fax to Server (MFC-9130CW, MFC-9140CDN, MFC-9330CDW and MFC-9340CDW: available as a download) 4
The Fax to Server feature allows the machine to scan a document and send it over the network to a separate
fax server. The document will then be sent from the server as fax data to the destination fax number over
standard phone lines. When the Fax to Server feature is set to On, all automatic fax transmissions from the
machine will be sent to the fax server for fax transmission. You can also continue to send a fax directly from
the machine using the manual fax feature.
To send a document to the fax server, the correct syntax for that server must be used. The destination fax
number must be sent with a prefix and a suffix that match the parameters used by the fax server. In most
cases, the syntax for the prefix is “fax=” and the syntax for the suffix would be the domain name of the fax
server E-mail gateway. The suffix must also include the “@” symbol at the beginning of the suffix. The prefix
and the suffix information must be stored in the machine before you can use the Fax to Server function.
Destination fax numbers can be saved in the Speed Dial locations or entered using the dial pad (up to 20 digit
numbers). For example, if you wanted to send a document to a destination fax number of 123-555-0001, use
the following syntax:
Your fax server application must support an E-mail gateway.
4
44
Page 51

Control panel setup
NOTE
Setting Fax to Server to On 4
You can store the prefix/suffix address for the fax server in the machine.
a Press .
b Press All Settings.
c Swipe up or down, or press a or b to display Network.
Press Network.
d Swipe up or down, or press a or b to display Fax to Server.
Press Fax to Server.
e Press On.
f Press Prefix.
g Enter the prefix using the on-screen keyboard.
h Press OK.
4
i Press Suffix.
j Enter the suffix using the on-screen keyboard.
k Press OK.
l Press .
• You can enter the prefix and suffix address using a total of up to 40 characters.
• For information on how to enter text: see Basic User's Guide.
45
Page 52

Control panel setup
How to operate Fax to Server 4
a Place the document in the ADF or on the scanner glass.
b Enter the fax number.
c Press Fax Start.
The machine will send the message over a TCP/IP network to the fax server.
How to set a new default for Scan to FTP 4
You can choose the default color and file type for the Scan to FTP function. (For how to operate Scan to FTP:
see Software User's Guide.)
How to set a new default for Scan to Network (Windows®) 4
You can choose the default color and file type for the Scan to Network function to scan a document directly
to a server supporting CIFS on your local network or on the Internet. (For information about the CIFS protocol,
see CIFS on page 119.) (For how to operate Scan to Network: see Software User's Guide.)
4
46
Page 53

Control panel setup
NOTE
Reset the network settings to the factory default 4
You can reset the print server back to its default factory settings (resetting all information such as the
password and IP address information).
• This function resets all wired and wireless network settings to the factory default.
• You can also reset the print server back to its factory default settings using the BRAdmin applications or
Web Based Management. (For more information, see Other Management Utilities on page 8.)
a Press .
b Press All Settings.
c Swipe up or down, or press a or b to display Network.
Press Network.
d Swipe up or down, or press a or b to display Network Reset.
Press Network Reset.
4
e Press Yes.
f Press Yes for 2 seconds to confirm.
47
Page 54

Control panel setup
NOTE
NOTE
Printing the Network Configuration Report 4
Node name: The Node name appears on the Network Configuration Report. The default node name is
“BRNxxxxxxxxxxxx” for a wired network or “BRWxxxxxxxxxxxx” for a wireless network. (“xxxxxxxxxxxx” is
your machine’s MAC Address / Ethernet Address.)
The Network Configuration Report prints a report listing all the current network configuration including the
network print server settings.
a Press .
b Press All Settings.
c Swipe up or down, or press a or b to display Print Reports.
Press Print Reports.
d Press Network Configuration.
e Press OK.
4
If the IP Address on the Network Configuration Report shows 0.0.0.0, wait for one minute and try again.
Printing the WLAN report (For HL-3180CDW, DCP-9015CDW, DCP-9020CDW, MFC-9130CW, MFC-9330CDW and MFC-9340CDW)
The WLAN Report prints your machine’s wireless status report. If the wireless connection failed, check the
error code on the printed report. See Quick Setup Guide: Troubleshooting.
a Press .
b Press All Settings.
c Swipe up or down, or press a or b to display Print Reports.
Press Print Reports.
d Swipe up or down, or press a or b to display WLAN Report.
Press WLAN Report.
e Press OK.
4
48
Page 55

Control panel setup
NOTE
Function table and default factory settings 4
The factory settings are shown in Bold with an asterisk.
(For MFC-9130CW, MFC-9140CDN, MFC-9330CDW and MFC-9340CDW)
• Internet Fax, Fax to Server and Scan to E-mail Server functions are available as downloads.
• In order to use this function, please download the necessary firmware from the “Downloads” page for your
model on the Brother Solutions Center at http://solutions.brother.com/
Main Menu Submenu Menu Selections Options
Network Wired LAN
TCP/IP
BOOT Method
.
Auto*
4
(DCP-9020CDN,
DCP-9020CDW,
MFC-9140CDN,
MFC-9330CDW
and
MFC-9340CDW)
Static
RARP
BOOTP
DHCP
(If you choose Auto, RARP, BOOTP or
DHCP, you will be asked to enter how
many times the machine tries to
obtain the IP address.)
IP Address
Subnet Mask
Gateway
Node Name BRNxxxxxxxxxxxx
WINS
Configuration
WINS Server
[000-255].[000-255].[000-255].
[000-255]
[000].[000].[000].[000]*
[000-255].[000-255].[000-255].
[000-255]
[000].[000].[000].[000]*
[000-255].[000-255].[000-255].
[000-255]
[000].[000].[000].[000]*
(up to 32 characters)
Auto*
Static
Primary
1
1
[000-255].[000-255].[000-255].
[000-255]
[000].[000].[000].[000]*
Secondary
[000-255].[000-255].[000-255].
[000-255]
[000].[000].[000].[000]*
49
Page 56

Control panel setup
Main Menu Submenu Menu Selections Options
Network
Wired LAN
TCP/IP
DNS Server Primary
(continued)
(DCP-9020CDN,
DCP-9020CDW,
MFC-9140CDN,
MFC-9330CDW
and
MFC-9340CDW)
(continued)
(continued)
APIPA On*
IPv6 On
Ethernet — Auto*
Wired Status — Active 100B-FD
[000-255].[000-255].[000-255].
[000-255]
[000].[000].[000].[000]*
Secondary
[000-255].[000-255].[000-255].
[000-255]
[000].[000].[000].[000]*
Off
Off*
100B-FD
100B-HD
10B-FD
10B-HD
Active 100B-HD
4
WLAN
(HL-3180CDW,
DCP-9015CDW,
DCP-9020CDW,
MFC-9130CW,
MFC-9330CDW
and
MFC-9340CDW)
Active 10B-FD
Active 10B-HD
Inactive
Wired OFF (Not available for
DCP-9020CDN)
MAC Address ——
Set to Default — Yes
No
Wired Enable
(DCP-9020CDW,
MFC-9330CDW and
MFC-9340CDW)
TCP/IP
— On*
Off
BOOT Method
Auto*
Static
RARP
BOOTP
DHCP
(If you choose Auto, RARP, BOOTP or
DHCP, you will be asked to enter how
many times the machine tries to
obtain the IP address.)
50
Page 57

Control panel setup
Main Menu Submenu Menu Selections Options
Network
(continued)
WLAN
(HL-3180CDW,
DCP-9015CDW,
DCP-9020CDW,
MFC-9130CW,
MFC-9330CDW
and
MFC-9340CDW)
(continued)
TCP/IP
(continued)
IP Address
Subnet Mask
Gateway
[000-255].[000-255].[000-255].
[000-255]
[000].[000].[000].[000]*
[000-255].[000-255].[000-255].
[000-255]
[000].[000].[000].[000]*
[000-255].[000-255].[000-255].
[000-255]
[000].[000].[000].[000]*
Node Name BRWxxxxxxxxxxxx
(up to 32 characters)
WINS
Configuration
WINS Server
Auto*
Static
Primary
[000-255].[000-255].[000-255].
[000-255]
1
1
4
[000].[000].[000].[000]*
Secondary
[000-255].[000-255].[000-255].
[000-255]
[000].[000].[000].[000]*
DNS Server Primary
[000-255].[000-255].[000-255].
[000-255]
[000].[000].[000].[000]*
Secondary
[000-255].[000-255].[000-255].
[000-255]
[000].[000].[000].[000]*
APIPA On*
Off
IPv6 On
Off*
Setup Wizard ——
WPS/AOSS ——
WPS w/ PIN Code ——
51
Page 58

Control panel setup
Main Menu Submenu Menu Selections Options
Network
(continued)
WLAN
(HL-3180CDW,
DCP-9015CDW,
DCP-9020CDW,
MFC-9130CW,
MFC-9330CDW
and
MFC-9340CDW)
(continued)
WLAN Status Status Active(11n)
Active(11b)
Active(11g)
Wired LAN Active (Not available
for HL-3180CDW, DCP-9015CDW,
MFC-9130CW)
WLAN Off
AOSS Active
Connection Fail
Signal Strong
Medium
Weak
None
SSID —
Comm. Mode Ad-hoc
4
Wi-Fi Direct
(HL-3180CDW,
DCP-9015CDW,
DCP-9020CDW,
MFC-9130CW,
MFC-9330CDW
and
MFC-9340CDW)
2
Infrastructure
None
MAC Address ——
Set to Default — Yes
No
WLAN Enable — On
Off*
Push Button ——
PIN Code ——
Manual ——
Group Owner — On
Off*
Device Information
Device Name
SSID —
IP Address —
—
52
Page 59

Control panel setup
Main Menu Submenu Menu Selections Options
2
Network
(continued)
Wi-Fi Direct
(HL-3180CDW,
DCP-9015CDW,
DCP-9020CDW,
MFC-9130CW,
MFC-9330CDW
and
MFC-9340CDW)
(continued)
Status Information Status G/O Active(**)
** = number of devices
Client Active
Not Connected
Off
Wired LAN Active (Not available
for HL-3180CDW, DCP-9015CDW,
MFC-9130CW)
Signal Strong
Medium
Weak
None
(When Group Owner is On, the
signal is set to Strong.)
I/F Enable — On
4
E-mail/IFAX
(MFC-9130CW,
MFC-9140CDN,
MFC-9330CDW
and
MFC-9340CDW)
Off*
Mail Address — Name (Up to 60 characters)
Setup Server
SMTP
SMTP Server
SMTP Port 25*
Auth. for SMTP
SMTP SSL/TLS
Verify SMTPCert.
Name (Up to 64 characters)
IP Address
[000-255].[000-255].[000-255].
[000-255]
[00001-65535]
None*
SMTP-AUTH
POP bef. SMTP
None*
SSL
TLS
On
Off*
53
Page 60

Control panel setup
Main Menu Submenu Menu Selections Options
Network
E-mail/IFAX
Setup Server
POP3
POP3 Server
Name (Up to 64 characters)
(continued)
(MFC-9130CW,
MFC-9140CDN,
MFC-9330CDW
and
MFC-9340CDW)
(continued)
(continued)
Setup Mail RX
IP Address
[000-255].[000-255].[000-255].
[000-255]
POP3 Port 110*
[00001-65535]
Mailbox Name
Mailbox Password
POP3 SSL/TLS
Verify POP3Cert.
APOP On
Auto Polling Auto Polling
Poll Frequency
(When
Auto Polling
is set to
Header — All
On
(Up to 60 characters)
(Up to 32 characters)
None*
SSL
TLS
On
Off*
Off*
On*
Off
10 minutes*
(1 minute to 60 minutes)
.)
4
Delete Error Mail
Notification
Subject+From+To
None*
— On*
Off
— On
MDN
Off*
54
Page 61

Control panel setup
Main Menu Submenu Menu Selections Options
Network
E-mail/IFAX
Setup Mail TX
Sender Subject
— Internet Fax Job*
(continued)
(MFC-9130CW,
MFC-9140CDN,
MFC-9330CDW
and
MFC-9340CDW)
(continued)
Web Connect
Settings
3
Fax to Server
(Up to 40 characters)
Size Limit — On
Off*
Notification
— On
Off*
Setup Relay
Relay Broadcast
— On
Off*
Relay Domain
— RelayXX:
Relay(01 - 10)
Relay Report
— On
Off*
Manual POP3 Receive ——
Proxy Settings Proxy
Connection
On
Off*
Address —
Port 8080*
User Name —
Password —
Fax to Server
——On
4
(MFC-9130CW,
MFC-9140CDN,
MFC-9330CDW
and
Prefix ———
Suffix
Off*
MFC-9340CDW)
Network Reset
———Yes
No
1
On connection to the network, the machine will automatically set the IP address and Subnet Mask to values appropriate for your network.
2
For details, please see the Wi-Fi Direct™ Guide located on the Manuals download page for your model on the Brother Solutions Center
(http://solutions.brother.com/
3
For details, please see the Web Connect Guide located on the Manuals download page for your model on the Brother Solutions Center
(http://solutions.brother.com/
).
).
55
Page 62

5
NOTE
Web Based Management 5
Overview 5
A standard Web Browser can be used to manage your machine using the HTTP (Hyper Text Transfer
Protocol) or HTTPS (Hyper Text Transfer Protocol over Secure Socket Layer). You can perform the function
listed or get the following information from a machine on your network using a web browser.
Machine status information
Change Fax configuration items, such as General Setup, Address Book settings and Remote Fax (for
MFC models).
Change network settings such as TCP/IP information
Configure Secure Function Lock 2.0 (see Secure Function Lock 2.0 on page 59).
Configure Store Print Log to Network (see Store Print Log to Network on page 64).
Configure Scan to FTP (see Changing the Scan to FTP configuration using a web browser on page 68).
Configure Scan to Network (see Changing the Scan to Network configuration using a web browser
®
(Windows
Software version information of the machine and print server
Change network and machine configuration details
We recommend to use Windows® Internet Explorer®8.0/9.0 or Safari 5.0 for Macintosh. Please also make
sure that JavaScript and Cookies are always enabled in whichever browser you use. If a different web
browser is used, make sure it is compatible with HTTP 1.0 and HTTP 1.1.
You must use the TCP/IP protocol on your network and have a valid IP address programmed into the print
server and your computer.
) on page 70).
5
56
Page 63

Web Based Management
NOTE
NOTE
NOTE
How to configure the machine settings using Web Based Management (web browser) 5
A standard web browser can be used to change your print server settings using the HTTP (Hyper Text
Transfer Protocol) or HTTPS (Hyper Text Transfer Protocol over Secure Socket Layer).
• We recommend to use HTTPS protocol for your security when configuring the settings using Web Based
Management.
• When you use the HTTPS protocol for Web Based Management configuration, your browser will display
a warning dialog box.
a Start your web browser.
b Type “vmachine’s IP address/” into your browser’s address bar (where “machine’s IP address” is the
IP address of the machine or the print server name).
For example: v192.168.1.2/
5
• If you are using a Domain Name System or enable a NetBIOS name, you can enter another name such
as “SharedPrinter” instead of the IP address.
• For example: vSharedPrinter/
If you enable a NetBIOS name, you can also use the node name.
• For example: vbrnxxxxxxxxxxxx/
The NetBIOS name can be seen in the Network Configuration Report (see Printing the Network
Configuration Report on page 48).
• For Macintosh users, you can have easy access to the Web Based Management System by clicking the
machine icon on the Status Monitor screen. For more information: see Software User's Guide.
c No password is required by default. If you have previously set a password, enter it and press .
d You can now change the print server settings.
If you have changed the protocol settings, restart the machine after clicking Submit to activate the
configuration.
57
Page 64

Web Based Management
NOTE
Setting a password 5
We recommend setting a login password to prevent unauthorized access to the Web Based Management.
a Click Administrator.
b Enter the password you want to use (up to 32 characters).
c Re-enter the password in Confirm New Password box.
d Click Submit.
From the next time you access the Web Based Management, enter the password in the Login box, and
then click .
After configuring the settings, logout by clicking .
You can also set a password by clicking Please configure the password on the machine’s web page if
you are not setting a login password.
5
58
Page 65

Web Based Management
Secure Function Lock 2.0 5
Secure Function Lock 2.0 from Brother helps you to save money and increase security by restricting the
functions available on your Brother machine.
Secure Function Lock allows you to configure passwords for selected users. You can grant access to some
or all of these functions, or restrict them to a page limit. This means that only authorized people can use them.
You can configure and change the following Secure Function Lock 2.0 settings using Web Based
®
Management or BRAdmin Professional 3 (Windows
Print
USB Direct Print
12
3
Copy
Color Print
Page Limit
Fax TX
Fax RX
Scan
4
Web Connect (Upload)
Web Connect (Download)
Page Counter
1
Print includes print jobs sent via AirPrint, Google Cloud Print and Brother iPrint&Scan.
2
If you register the PC user login names, you can restrict PC print without the user entering a password. For more detail, see Restricting PC print
by PC user login name on page 61.
3
Supported models only.
4
Scan includes scan jobs sent via Brother iPrint&Scan.
5
Available for Print, USB Direct Print, Copy and Web Connect (Download).
125
5
3
3
3
3
5
only).
5
59
Page 66

Web Based Management
NOTE
How to configure the Secure Function Lock 2.0 settings using Web Based Management (web browser) 5
Basic configuration 5
a Click Administrator on the machine’s web page, and then click Secure Function Lock.
b Choose On from Function Lock.
c Enter an alphanumeric group name or user name of up to 15 digits in the ID Number/Name box, and
then enter a four-digit password in the PIN box.
d Uncheck the functions that you want to restrict in the Print Activities box or the Others box. If you want
to configure the maximum page count, check the On check box in Page Limit, and then enter the
number in the Max. box. Then click Submit.
If you want to restrict the PC printing by PC user login name, click PC Job Restriction by Login Name
and configure the settings. (See Restricting PC print by PC user login name on page 61.)
Scanning when using Secure Function Lock 2.0 5
The Secure Function Lock 2.0 feature allows the administrator to restrict which users are allowed to scan.
When the scan feature is set to off for the public user setting, only users who have scan selected in the check
box will be able to scan. To push scan from the control panel of the machine, users must enter their PIN to
access the scan mode. To pull scan from their computer, restricted users must also enter their PIN on the
control panel of the machine before they can scan from their computer. If the PIN is not entered at the
machine’s control panel, the user will get an error message on their computer when they attempt to pull scan.
5
60
Page 67

Web Based Management
NOTE
NOTE
Setting up public mode 5
You can set up the public mode to restrict what functions are available for public users. Public users do not
need to enter a password to access the features made available through this setting.
Public mode includes print jobs sent via AirPrint, Google Cloud Print and Brother iPrint&Scan.
a Uncheck the check box for the function that you want to restrict in the Public Mode box.
b Click Submit.
Restricting PC print by PC user login name 5
By configuring this setting, the machine can authenticate by PC user login name to allow a print job from a
registered computer.
a Click PC Job Restriction by Login Name.
b Choose On from PC Job Restriction.
c Choose the ID Number you set in the ID Number/Name in step c. See Basic configuration on page 60
from the ID Number drop-down list for each Login Name and then enter the PC user login name in the
Login Name box.
d Click Submit.
• If you want to restrict PC print per group, choose the same ID Number for each PC login name you want
in the group.
• If you are using the PC login name feature, you must also make sure that the Use PC Login Name box
in the printer driver is checked. For more information about the printer driver: see Software User's Guide.
• The Secure Function Lock feature does not support the BR-Script3 driver for printing.
Other features 5
5
You can set up the following features in Secure Function Lock 2.0:
All Counter Reset
You can reset the page counter by clicking All Counter Reset.
Export to CSV file
You can export the current page counter, including ID Number/Name information, as a CSV file.
Last Counter Record
The machine retains the page count after the counter has been reset.
Counter Auto Reset
You can automatically reset the page counters by configuring the time interval based on Daily, Weekly, or
Monthly settings.
61
Page 68

Web Based Management
NOTE
Synchronize with SNTP server 5
SNTP is the protocol used to synchronize the time used by the machine for authentication with the SNTP time
server (this time is not the time displayed on the Touchscreen of the machine). You can synchronize the time
used by the machine on a regular basis with the Coordinated Universal Time (UTC) provided by the SNTP
time server.
This function is not available in some countries.
a Click Network, and then click Protocol.
b Select the SNTP check box to activate the setting.
c Click Advanced Setting.
Status
Displays whether the SNTP server settings are enabled or disabled.
SNTP Server Method
Choose AUTO or STATIC.
• AUTO
If you have a DHCP server on your network, the SNTP server will automatically obtain the address
from that server.
• STATIC
Enter the address you want to use.
Primary SNTP Server Address, Secondary SNTP Server Address
Enter the server address (up to 64 characters).
The Secondary SNTP server address is used as a backup to the Primary SNTP server address. If the
Primary server is unavailable, the machine will contact the Secondary SNTP server. If you have a
Primary SNTP server, but no Secondary SNTP server, simply leave this field blank.
Primary SNTP Server Port, Secondary SNTP Server Port
5
Enter the Port number (1 to 65535).
The Secondary SNTP server port is used as a backup to the Primary SNTP server port. If the Primary
port is unavailable, the machine will contact the Secondary SNTP port. If you have a Primary SNTP
port, but no Secondary SNTP port, simply leave this field blank.
62
Page 69

Web Based Management
NOTE
Synchronization Interval
Enter the number of hours between server synchronization attempts (1 to 168 hours).
• You must configure Date&Time to synchronize the time used by the machine with the SNTP time server.
Click Date&Time and then configure Date&Time on the General screen. You can also configure the date
and time from the machine’s control panel.
5
• Choose the Synchronize with SNTP server check box. You also need to verify your time zone settings
correctly. Choose the time difference between your location and UTC from the Time Zone drop-down list.
For example, the time zone for Eastern Time in the USA and Canada is UTC-05:00.
Synchronization Status
You can confirm the latest synchronization status.
d Click Submit to apply the settings.
63
Page 70

Web Based Management
NOTE
Store Print Log to Network 5
The Store Print Log to Network feature allows you to save the print log file from your Brother machine to a
1
network server using CIFS
the number of printed pages for every print job.
1
CIFS is the Common Internet File System protocol that runs over TCP/IP allowing computers on a network to share files over an intranet or the
Internet.
The following print functions are recorded in the print log:
Print jobs from your computer
USB Direct Print (Supported models only)
Copy
Received Fax (Supported models only)
Web Connect Print
• The Store Print Log to Network feature supports Kerberos Authentication and NTLMv2 Authentication.
You must configure the SNTP protocol (network time server), or you must set the date, time and time zone
correctly on the control panel for Authentication. (For information about setting SNTP, see Synchronize
with SNTP server on page 62. For information about setting the date, time and time zone: see Quick Setup
Guide.)
. You can record the ID, type of print job, job name, user name, date, time and
5
• You can set the file type to TXT or CSV when storing a file to the server.
How to configure the Store Print Log to Network settings using Web Based Management (web browser) 5
a Click Administrator on the machine’s web page, and then click Store Print Log to Network.
b Choose On from Print Log.
c You can configure the following settings using a web browser.
Host Address
The Host Address is the Host name of the CIFS server. Enter the Host Address (for example:
mypc.example.com) (up to 64 characters) or the IP address (for example: 192.168.56.189).
Store Directory
Enter the destination folder where your log will be stored on the CIFS server (for example:
brother\abc) (up to 60 characters).
File Name
Enter the file name you want to use for the print log (up to 15 characters).
File Type
Choose the file type TXT or CSV for the print log.
64
Page 71

Web Based Management
NOTE
Auth. Method
Choose the authentication method required for access to the CIFS server Auto, Kerberos
2
NTLMv2
1
Kerberos is an authentication protocol which allows devices or individuals to securely pr ove their identity to network servers using a
single sign-on.
2
NTLMv2 is the authentication method used by Windows to log into servers.
.
• Auto: If you choose Auto, the machine will initially search for a Kerberos server. If the Kerberos
server is not detected, NTLMv2 will be used for the authentication method.
• Kerberos: Choose Kerberos to use Kerberos Authentication only.
1
, or
• NTLMv2: Choose NTLMv2 to use NTLMv2 Authentication only.
For Kerberos and NTLMv2 Authentication, you must also configure the Date&Time settings or
the SNTP protocol (network time server).
For configuring the Date&Time and the SNTP settings, see Synchronize with SNTP server
on page 62.
You can also configure the Date&Time settings from the machine’s control panel. See Quick
Setup Guide.
Username
Enter the Username for the authentication (up to 96 characters).
If the username is part of a domain, please input the username in one of the following styles: user@domain
or domain\user.
Password
Enter the password for the authentication (up to 32 characters).
Kerberos Server Address (if needed)
Enter the KDC Host Address (for example: mypc.example.com) (up to 64 characters) or the IP
address (for example: 192.168.56.189).
5
Error Detection Setting (See Error Detection Setting on page 66.)
d In the Connection Status, you can confirm the last log status. For more information, see Understanding
Error Messages on page 67.
e Click Submit to display the Test Print Log to Network page.
To test your settings, click Yes and go to step f.
To skip the test, click No. Your settings will be submitted automatically.
f The machine will test your settings.
g If your settings are accepted, Test OK appears on the page.
If Test Error appears, check all settings, and then click Submit to display the Test page again.
65
Page 72

Web Based Management
NOTE
Error Detection Setting 5
You can choose what action is taken when the print log cannot be stored to the server due to a network error.
a Choose Cancel Print or Ignore Log & Print in the Error Detection Setting of Store Print Log to
Network.
Cancel Print
If you choose Cancel Print, the print jobs are canceled when the print log cannot be stored to the
server.
Even if you choose Cancel Print, your machine will print a received fax.
Ignore Log & Print
If you choose Ignore Log & Print, the machine prints the document even if the print log cannot be
stored to the server.
When the store print log function has recovered, the print log is recorded as follows:
• If the log cannot be stored at the end of printing, the print log except the number of printed pages
will be recorded. (1)
• If the Print Log cannot be stored at the beginning and the end of printing, the print log of the job
will not be recorded. When the function has recovered, the occurrence of an error is shown in the
log. (2)
Example of the print log:
5
b Click Submit to display the Test Print Log to Network page.
To test your settings, click Yes and go to step c.
To skip the test, click No. Your settings will be submitted automatically.
c The machine will test your settings.
d If your settings are accepted, Test OK appears on the page.
If Test Error appears, check all settings, and then click Submit to display the Test page again.
66
Page 73

Web Based Management
NOTE
Understanding Error Messages 5
You can confirm the error status on the Touchscreen of your machine or Connection Status in Web Based
Management.
Server Timeout, contact your administrator.
This message will appear when you cannot connect to the server.
Make sure that:
• Your server address is correct.
• Your server is connected to the network.
• The machine is connected to the network.
Authentication Error, contact your administrator.
The message will appear when your Authentication Setting is not correct.
Make sure that:
1
• The Username
1
If the username is part of a domain, please input the username in one of the following styles: user@domain or domain\user.
• The time of the log file server matches the time from the SNTP server, or the Date&Time settings.
and Password in Authentication Setting are correct.
5
• The SNTP time server settings are configured correctly so the time matches the time used for
authentication by Kerberos or NTLMv2. If there is no SNTP server, make sure the Date&Time and
Time Zone settings are set correctly using Web Based Management or the control panel so the
machine matches the time being used by the server providing the authentication.
File Access Error, contact your administrator.
This message will appear when you cannot access the destination folder.
Make sure that:
• The store directory name is correct.
• The store directory is write-enabled.
• The File is not locked.
Wrong Date&Time, contact your administrator.
This message will appear when your machine does not obtain the time from the SNTP time server. Make
sure that:
• The settings to access the SNTP time are correct using Web Based Management.
• In Web Based Management, confirm the Date & Time settings of your machine are correct.
If you choose the Cancel Print option in Web Based Management, the Log Access Error message
will remain on the Touchscreen for about 60 seconds.
67
Page 74

Web Based Management
Using Store Print Log to Network with Secure Function Lock 2.0 5
When Secure Function Lock 2.0 is active, the names of the registered users for copy, Fax RX, Web Connect
Print and USB Direct Print (if available) functions will be recorded in the Store Print Log to Network report.
Example of the Print Log with Secure Function Lock 2.0 users:
Changing the Scan to FTP configuration using a web browser5
Scan to FTP allows you to scan a document directly to an FTP server on your local network or on the Internet.
For more details on Scan to FTP: see Software User's Guide.
5
a Click Scan on the machine’s web page, and then click Scan to FTP/Network.
b You can choose what profile numbers (1 to 10) to use for Scan to FTP settings.
You can also store two user defined file names that can be used for creating an FTP Server Profile in
addition to the seven preset file names in Create a User Defined File Name. A maximum of 15
characters can be entered in each of the two fields.
c Click Submit.
68
Page 75

Web Based Management
NOTE
d Click Scan to FTP/Network Profile on the Scan page.
Now you can configure and change the following Scan to FTP settings using a web browser:
Profile Name (Up to 15 characters)
Host Address (FTP server address)
Username
Password
Store Directory
File Name
Quality
File Type
Glass Scan Size
File Size
Remove Background Color
Passive Mode
Port Number
5
You can set Passive Mode to Off or On depending on your FTP server and network firewall
configuration. By default, this setting is On. You can also change the port number used to access the
FTP server. The default for this setting is port 21. In most cases these two settings can remain set as
default.
Scan to FTP is available when FTP server profiles are configured using Web Based Management.
e Click Submit.
69
Page 76

Web Based Management
NOTE
Changing the Scan to Network configuration using a web browser (Windows®) 5
Scan to Network allows you to scan documents directly to a shared folder on a CIFS1 server located on your
local network or the Internet: see Software User's Guide for more details on Scan to Network
1
The Common Internet File System (CIFS) is the standard way that computer users share files and printers in Windows®.
Scan to Network supports Kerberos Authentication and NTLMv2 Authentication.
You must configure the SNTP protocol (network time server), or you must set the date, time and time zone
correctly on the control panel for authentication. (For information about setting SNTP, see Synchronize
with SNTP server on page 62. For information about setting the date, time and time zone: see Quick Setup
Guide.)
a Click Scan on the machine’s web page, and then click Scan to FTP/Network.
b Choose Network in the profile numbers (1 to 10) you want to use for Scan to Network settings.
You can also store two user defined file names that can be used for creating a Scan to Network Profile
in addition to the seven preset file names in Create a User Defined File Name. A maximum of 15
characters can be entered in each of the two fields.
5
c Click Submit.
70
Page 77

Web Based Management
NOTE
d Click Scan to FTP/Network Profile on the Scan page.
Now you can configure and change the following Scan to Network settings using a web browser:
Profile Name (Up to 15 characters)
Host Address
Store Directory
File Name
Quality
File Type
Glass Scan Size
File Size
Remove Background Color
Use PIN for Authentication
PIN Code
Auth. Method
Username
5
Password
Kerberos Server Address
Scan to Network is available when Network server profiles are configured using Web Based Management.
e Click Submit.
71
Page 78

NOTE
Internet fax (MFC-9130CW,
6
MFC-9140CDN, MFC-9330CDW and
MFC-9340CDW: available as a download)
Internet fax overview 6
Internet faxing (IFAX) allows you to send and receive fax documents using the Internet as the transport
mechanism. Documents are transmitted in E-mail messages as attached TIFF-F files. This means that
computers are also able to receive and send documents, providing that the computer has as an application
that can generate and view TIFF-F files, you can use any TIFF-F viewer application. Any documents sent via
the machine will automatically be converted into a TIFF-F format. If you wish to send and receive messages
to and from your machine, your mail application on the computer must be able to support the MIME format.
In order to use this function, please download the necessary firmware from the “Downloads” page for your
model on the Brother Solutions Center at http://solutions.brother.com/
2
.
6
6
3
1 Sender
2 Internet
3 Receiver
4 E-mail server
Internet Fax is available in Black & White only.
4
4
4
3
1
72
Page 79

Internet fax (MFC-9130CW, MFC-9140CDN, MFC-9330CDW and MFC-9340CDW: available as a download)
2
11
3
3
Forwarding received E-mail and fax messages
You can forward received E-mail or standard fax messages to another E-mail address or fax machine. For
more information see Forwarding received E-mail and fax messages on page 77.
Relay broadcast
If you want to fax the document long distance (such as abroad), the "relay broadcast" function allows you
to save the communication fee. This function allows the Brother machine to receive the document over the
Internet, and then relay it to other fax machines through conventional telephone lines. For more
information see Relay broadcasting on page 77.
6
1 Internet
2 Telephone line
3 E-mail server
Important information on Internet fax 6
Internet fax communication on a LAN system is basically the same as communication via E-mail; however, it
is different from fax communication using standard phone lines. The following is important information for
using Internet fax:
Factors such as the receiver’s location, structure of the LAN system, and how busy the circuit (such as the
Internet) is may cause the system to take a long time. (normally 20 sec. to 30 sec.)
In the case of transmission through the Internet, due to its low level of security, we recommend that you
use standard phone lines to send confidential documents.
If the receiver’s mail system is not compatible with the MIME format, you cannot transmit a document to
the receiver. Depending on the receiver’s server, there may be some cases in which the error mail will not
be sent back.
If the size of a document’s image data is too large, there is a possibility of unsuccessful transmission.
You cannot change the font or character size of Internet mail that you received.
73
Page 80

Internet fax (MFC-9130CW, MFC-9140CDN, MFC-9330CDW and MFC-9340CDW: available as a download)
How to Internet fax 6
Before using Internet fax you must configure your Brother machine to communicate with your network and
mail server. You can configure these items from the control panel, Web Based Management, Remote setup,
or BRAdmin Professional 3. You must ensure the following items are configured on your machine:
IP address (If you are already using your machine on your network, the machine’s IP address has been
configured correctly.)
E-mail address
SMTP, POP3 server address/port/Authentication method/Encryption method/Server Certificate
Verification
Mailbox name and password
If you are unsure of any of these items, please contact your systems administrator.
Sending an Internet fax 6
Before sending an Internet fax 6
6
To send an Internet fax, you can configure the following items from the control panel, Web Based
Management or Remote Setup.
Sender Subject (if needed)
Size Limit (if needed)
Notification (if needed) (For more information, see TX Verification Mail on page 81.)
How to send an Internet fax 6
Sending an Internet fax is the same as sending a normal fax (for more information: see Basic User's Guide:
Sendingafax). If you have already programmed the addresses of the destination Internet fax machines as
Speed-Dial locations, you can send the Internet fax by loading the document into the machine. If you want to
change the resolution, choose Fax Resolution from the FAX menu to set the preferred resolution, choose
a Speed Dial (S.Fine is not supported for Internet fax).
74
Page 81

Internet fax (MFC-9130CW, MFC-9140CDN, MFC-9330CDW and MFC-9340CDW: available as a download)
NOTE
NOTE
• If you wish to manually enter the Internet fax address, load the document into the machine and do one of
the following.
• Press and then press to choose numbers, characters, or special characters. Enter the
address, and then press Fax Start.
For more information to manually enter the Internet fax address: see Basic User's Guide.
• You can register the E-mail address information from Web Based Management or Remote Setup.
After the document is scanned, it is transmitted to the recipient Internet fax machine automatically via your
SMTP server. You can cancel the send operation by pressing during scanning. After the transmission is
finished, the machine will return to standby mode.
Some E-mail servers do not allow you to send large E-mail documents (the system administrator will often
place a limit on the maximum E-mail size). With this function enabled, the machine will display
Out of Memory when trying to send E-mail documents over 1 Mbyte in size. The document will not be
sent and an error report will be printed. The document you are sending should be separated into smaller
documents that will be accepted by the mail server. (For your information, a 42 page document based on
the ITU-T Test Chart #1 test chart is approximately 1 Mbyte in size.)
6
Receiving E-mail or Internet fax 6
Before receiving an Internet fax 6
To receive an Internet fax, you should configure the following items from the control panel, Web Based
Management or Remote Setup:
Auto Polling (if needed)
Poll Frequency (if needed)
Header (if needed)
Delete Error Mail (if needed)
Notification (if needed) (For more information, see TX Verification Mail on page 81.)
75
Page 82

Internet fax (MFC-9130CW, MFC-9140CDN, MFC-9330CDW and MFC-9340CDW: available as a download)
NOTE
NOTE
How to receive an Internet fax 6
There are 2 ways you can receive E-mail messages:
POP3 receiving at regular intervals
POP3 receiving (manually initiated)
Using POP3 receiving the machine must poll the E-mail server to receive the data. This polling can occur at
set intervals (for example, you can configure the machine to poll the E-mail server at 10 minute intervals) or
you can manually poll the server by pressing , All Settings, Network, E-mail/IFAX, and then
Manual POP3 Receive.
If your machine starts to receive E-mail data, the Touchscreen will reflect this activity. For example, you will
see Receiving on the Touchscreen followed by XX/XX E-mail(s). If you press , All Settings,
Network, E-mail/IFAX, and then Manual POP3 Receive to manually poll the E-mail server for E-mail
data and there are no mail documents waiting to be printed, the machine will display No Mail on the
Touchscreen for two seconds.
• If your machine is out of paper when receiving data, the received data will be held in the machine’s
memory. This data will be printed automatically after paper is re-inserted into the machine.
6
• If the received mail is not in a plain text format or an attached file is not in the TIFF-F format, the following
error message will be printed: “ATTACHED FILE FORMAT NOT SUPPORTED. FILE
NAME:XXXXXX.doc” If the received mail is too large, the following error message will be printed: “E-MAIL
FILE TOO LARGE.”. If Delete POP Receive Error Mail is ON (default) then the error mail is automatically
deleted from the E-mail server.
Receiving an Internet fax to your computer 6
When a computer receives an Internet fax document, the document is attached to a mail message that
informs the computer that it has received a document from an Internet fax. This is notified in the subject field
of the received mail message.
If the computer to which you wish to send a document is not running Windows®XP,
®
Windows Server
computer’s owner that they may need to install some software that can view TIFF-F files.
2003/2008/2012, Windows Vista®, Windows®7 or Windows®8, please inform the
76
Page 83

Internet fax (MFC-9130CW, MFC-9140CDN, MFC-9330CDW and MFC-9340CDW: available as a download)
Additional Internet Fax options 6
Forwarding received E-mail and fax messages 6
You can forward received E-mail or standard fax messages to another E-mail address or fax machine.
Received messages can be forwarded via E-mail to a computer or Internet fax. They can also be forwarded
via standard phone lines to another machine.
The setting can be enabled using a web browser or through the control panel of the machine. The steps for
configuring fax forward can be found in the Advanced User's Guide if supported by your machine.
Relay broadcasting 6
This function allows the Brother machine to receive a document over the Internet, and then relay it to other
fax machines through conventional telephone lines.
Before relaying broadcast 6
To relay broadcast, you must configure the following items from the control panel, Web Based Management,
or Remote Setup:
Relay Broadcast
You must enable the relay broadcast.
Relay Domain
You must configure your machine’s domain name on the machine that will broadcast the document to the
conventional fax machine. If you wish to use your machine as a relay broadcast device, you must specify
the domain name that you trust at the machine, in other words, the portion of the name after the “@” sign.
Use care in selecting a trusted domain since any user on a trusted domain will be able to send a relay
broadcast.
You can register up to 10 domain names.
Relay Report
6
77
Page 84

Internet fax (MFC-9130CW, MFC-9140CDN, MFC-9330CDW and MFC-9340CDW: available as a download)
UKFAX@brother.co.uk(fax#123456789)
E-mail address
Fax Phone Number
The word "fax#" must be
included with the phone
number inside the parenthesis.
Relay broadcast from a machine 6
FAX@brother.com UKFAX@brother.co.uk 123456789
1
UKFAX@brother.co.uk(fax#123456789)
1 Internet
In this example, your machine has an E-mail address of FAX@brother.com, you wish to send a document
from this machine to another machine in England with an E-mail address of UKFAX@brother.co.uk, this
machine will then forward the document to a standard fax machine using a conventional telephone line. If
your E-mail address is FAX@brother.com, you must configure a trusted domain name of brother.com on the
machine in England that will broadcast the document to the conventional fax machine. If you do not enter the
domain name information, then the machine in the middle (the machine that will broadcast the document) will
not trust any Internet jobs that it receives from the machine in the @brother.com domain.
6
After the trusted domain is set you can send the document from your machine [e.g. FAX@brother.com] by
entering the E-mail address of the machine [e.g. UKFAX@brother.co.uk] that will forward the document
followed by the phone number of the fax that will receive the document. The following is an example of how
to enter the E-mail address and phone number.
78
Page 85

Internet fax (MFC-9130CW, MFC-9140CDN, MFC-9330CDW and MFC-9340CDW: available as a download)
Sending to multiple phone numbers: 6
If you want to have the document relayed to more than one standard fax machine, the address can be entered
using the following method:
a Press Fax.
b Load your document.
c Press Options.
d Swipe up or down, or press a or b to display Broadcasting.
Press Broadcasting.
e Press Add Number.
f You can add E-mail addresses to the broadcast in the following ways:
Press Add Number and press , enter the E-mail address and press OK.
Press Add from Address book.
Press the check boxes of the E-mail address you want to add to the broadcast.
After you have checked all the E-mail address you want, press OK.
Press Search in Address book.
Enter the name and press OK.
The search results will be displayed. Press the name and then press the E-mail address you want to
add to the broadcast.
g After you have entered all the E-mail addresses by repeating step f, press OK.
h Press Fax Start.
6
79
Page 86

Internet fax (MFC-9130CW, MFC-9140CDN, MFC-9330CDW and MFC-9340CDW: available as a download)
NOTE
UKFAX@brother.co.uk 123456789
UKFAX@brother.co.uk(fax#123456789)
1
Relay broadcast from a computer 6
1 Internet
You can also send E-mail from your computer and have it relayed to a conventional fax machine. The method
of entering the phone number of the conventional fax machine that will receive the relayed E-mail will vary
depending on the mail application you are using. The following are some examples of different mail
applications:
Some E-mail applications do not support sending to multiple phone numbers. If your E-mail application
cannot support multiple phone numbers you will only be able to relay to one fax machine at a time.
6
Enter the address of the relay machine and phone number of the fax in the “TO” box using the same method
used when sending from a machine.
UKFAX@brother.co.uk(fax#123456789)
For Microsoft® Outlook® 97 or greater, the address information must be entered into the address book as
follows:
Name: fax#123456789
E-mail address: UKFAX@brother.co.uk
80
Page 87

Internet fax (MFC-9130CW, MFC-9140CDN, MFC-9330CDW and MFC-9340CDW: available as a download)
TX Verification Mail 6
Transmission Verification Mail supports two separate functions. Verification Mail for sending allows you to
request notification from the receiving station that the Internet Fax or E-mail was received and processed.
Verification Mail for receiving allows you to transmit a default report back to the sending station after
successfully receiving and processing an Internet Fax or E-mail.
To use this feature you must set the Notification option within the Setup Mail RX and
Setup Mail TX options.
Setup Mail TX 6
You can set the Notification option in the Setup Mail TX option to either On or Off. When switched
to On an additional field of information is sent with the image data. This field is named “MDN”.
MDN (Message Disposition Notification):
This field requests the status of the Internet Fax/E-mail message after delivery through the SMTP (Simple
Mail Transfer Protocol) transport system. Once the message has arrived at the receiver this data is used
when the machine or user reads or prints the received Internet Fax or E-mail. For example, if the message is
opened for reading or is printed the receiver sends back a notification to the original sending machine or user.
The receiver must support the MDN field in order to be able to send a notification report, otherwise the request
will be ignored.
6
Setup Mail RX 6
There are three possible settings for this option On, MDN or Off.
Receive Notification “On”
When switched to “On” a fixed message is sent back to the sender to indicate successful reception and
processing of the message. These fixed messages depend on the operation requested by the sender.
Report messages consist of:
SUCCESS: Received From <mail address>
Receive Notification “MDN”
When switched to “MDN” a report as described above is sent back to the sender if the originating station sent
the “MDN” field to request confirmation.
Receive Notification “Off”
Off switches all forms of receive notification Off, no message is sent back to the sender regardless of the
request.
81
Page 88

Internet fax (MFC-9130CW, MFC-9140CDN, MFC-9330CDW and MFC-9340CDW: available as a download)
NOTE
To receive the TX verification mail properly, you must configure the following settings.
• Sender
• Switch Notification in the Setup Mail TX to on.
• Switch Header in the Setup Mail RX to All or Subject+From+To.
• Receiver
• Switch Notification in the Setup Mail RX to on.
Error mail 6
If there is a mail delivery error while sending an Internet fax, the mail server will send an error message back
to the machine and the error message will be printed. If there is an error while receiving mail, an error
message will be printed (Example: “The message being sent to the machine was not in a TIFF-F format.”).
To receive the error mail properly, you must switch Header in the Setup Mail RX to All or Subject+From+To.
6
82
Page 89

7
NOTE
Security features 7
Overview 7
In today’s world, there are many security threats to your network and the data that travels over it. Your Brother
machine employs some of the latest network security and encryption protocols available today. These
network features can be integrated into your overall network security plan to help protect your data and
prevent unauthorized access to the machine. This chapter explains how to configure them.
You can configure the following security features:
Managing your network machine securely using SSL/TLS (See Managing your network machine securely
using SSL/TLS on page 95.)
Managing your network machine securely using SNMPv3 protocol (See Secure Management using
Web Based Management (web browser) on page 95 or Secure Management using BRAdmin
®
Professional 3 (Windows
Secure Management using BRAdmin Professional 3 (Windows
BRAdmin Professional 3 (Windows
Printing documents securely using SSL/TLS (See Printing documents securely using SSL/TLS
on page 98.)
) on page 97.)
®
) on page 97.)
®
) (See Secure Management using
7
Sending and Receiving an E-mail securely (See Sending or Receiving an E-mail securely on page 99.)
Using IEEE 802.1x authentication (See Using IEEE 802.1x authentication on page 102.)
Certificate for secure management (See Using Certificates for device security on page 84.)
Managing multiple certificates (See Managing multiple certificates on page 94.)
We recommend to disable the Telnet, FTP and TFTP protocols. Accessing the machine using these
protocols is not secure. (For how to configure the protocol settings, see How to configure the machine
settings using Web Based Management (web browser) on page 57.) If you disable FTP, the Scan to FTP
function will be disabled.
83
Page 90

Security features
NOTE
NOTE
Using Certificates for device security 7
Your Brother machine supports the use of multiple security certificates allowing secure management,
authentication and communication with the machine. The following security certificate features can be used
with the machine.
SSL/TLS communication
IEEE 802.1x authentication
SSL communication for SMTP/POP3
The Brother machine supports the following certificates.
Pre-installed certificate
Your machine has a pre-installed self-signed certificate.
Using this certificate, you can easily use the SSL/TLS communication without creating or installing a
certificate.
The pre-installed self-signed certificate cannot protect your communication from spoofing. We recommend
using a certificate that is issued by a trusted organization for better security.
Self-signed certificate
This print server issues its own certificate. Using this certificate, you can easily use the SSL/TLS
communication without having a certificate from a CA. (See Creating and installing a certificate
on page 86.)
Certificate from a CA
There are two methods for installing a certificate from a CA. If you already have a certificate from a CA or
if you want to use a certificate from an external trusted CA:
• When using a CSR (Certificate Signing Request) from this print server. (See How to create a CSR
on page 87.)
• When importing a certificate and a private key. (See Import and export the certificate and private key
on page 93.)
CA certificate
If you use a CA certificate that identifies the CA (Certificate Authority) itself and owns its private key, you
must import a CA certificate from the CA prior to the configuration. (See Import and export a CA certificate
on page 94.)
7
• If you are going to use SSL/TLS communication, we recommend that you contact your system
administrator first.
• When you reset the print server back to its default factory settings, the certificate and the private key that
are installed will be deleted. If you want to keep the same certificate and the private key after resetting the
print server, export them before resetting and re-install them. (See How to export the self-signed
certificate, the certificate issued by a CA, and the private key on page 93.)
84
Page 91

Security features
NOTE
Configure certificate using Web Based Management 7
This feature can be configured using Web Based Management only. Follow these steps to access the
configure certificate page using Web Based Management.
a Start your web browser.
b Type “vmachine’s IP address/” into your browser’s address bar (where “machine’s IP address” is the
IP address of the machine or the print server name).
For example: v192.168.1.2/
c No password is required by default. If you have previously set a password, enter it and press .
d Click Network.
e Click Security.
f Click Certificate.
g You can configure the certificate settings from the screen below.
7
• The functions that are grayed and unlinked indicate they are not available.
• For more information on configuration, see the Help text in the Web Based Management.
85
Page 92

Security features
NOTE
Creating and installing a certificate 7
Step by step chart for creating and installing a certificate 7
self-signed certificate or certificate from a CA
Create a self-signed certificate using Web
Based Management. (See page 86.)
Install the self-signed certificate to your
computer. (See page 89.)
Create a CSR using Web Based Management.
(See page 87.)
Install the certificate issued by the CA to your
Brother machine using Web Based
Management. (See page 88.)
You have completed creating and installing the
certificate.
Install the certificate to your computer. (See
page 88.)
You have completed creating and installing the
certificate.
How to create and install a self-signed certificate 7
a Click Create Self-Signed Certificate on the Certificate page.
7
b Enter a Common Name and a Valid Date.
• The length of the Common Name must be less than 64 characters. Enter an identifier such as an IP
address, node name, or domain name to use when accessing this machine through SSL/TLS
communication. The node name is displayed by default.
• A warning will pop-up if you use the IPPS or HTTPS protocol and enter a different name in the URL than
the Common Name that was used for the self-signed certificate.
c You can choose the Public Key Algorithm and Digest Algorithm settings from the drop-down list. The
default settings are RSA(2048bit) for Public Key Algorithm and SHA256 for Digest Algorithm.
d Click Submit.
e The self-signed certificate is created and saved in your machine's memory successfully.
To use SSL/TLS communication, the self-signed certificate also needs to be installed on your computer.
For more information, see How to install the self-signed certificate on your computer on page 89.
86
Page 93

Security features
NOTE
NOTE
How to create a CSR 7
a Click Create CSR on the Certificate page.
b Enter a Common Name and your information, such as Organization.
• We recommend that the Root Certificate from the CA be installed on your computer before creating the
CSR.
• The length of the Common Name must be less than 64 characters. Enter an identifier such as an IP
address, node name, or domain name to use when accessing this printer through SSL/TLS
communication. The node name is displayed by default. The Common Name is required.
• A warning will pop-up if you enter a different name in the URL than the Common Name that was used for
the certificate.
• The length of the Organization, the Organization Unit, the City/Locality and the State/Province must
be less than 64 characters.
•The Country/Region should be an ISO 3166 country code composed of two characters.
• If you are configuring X.509v3 certificate extension, choose the Configure extended partition check box
and then choose Auto (Register IPv4) or Manual.
c You can choose the Public Key Algorithm and Digest Algorithm settings from the drop-down list. The
default settings are RSA(2048bit) for Public Key Algorithm and SHA256 for Digest Algorithm.
d Click Submit.
e When the contents of the CSR appear, click Save to save the CSR file to your computer.
f The CSR is created.
• Follow your CA policy regarding the method to send a CSR to your CA.
• If you are using Enterprise root CA of Windows Server
Server for the certificate template when creating the Client Certificate for secure management. If you are
creating a Client Certificate for an IEEE 802.1x environment with EAP-TLS authentication, we recommend
using User for the certificate template. For more information, see the SSL communication page from the
top page for your model at http://solutions.brother.com/
®
2003/2008/2012, we recommend using the Web
.
7
87
Page 94

Security features
NOTE
How to install the certificate to your machine 7
When you receive the certificate from a CA, follow the steps below to install it into the print server.
Only a certificate issued with this machine’s CSR can be installed. When you want to create another CSR,
make sure that the certificate is installed before creating another CSR. Create another CSR after installing
the certificate to the machine; Otherwise the CSR you have made before installing will be invalid.
a Click Install Certificate on the Certificate page.
b Specify the file of the certificate that has been issued by a CA, and then click Submit.
c Now the certificate is created and saved in your machine memory successfully.
To use SSL/TLS communication, the Root Certificate from the CA needs to be installed on your
computer. Contact your network administrator about installation.
Choosing the certificate 7
After you install the certificate, follow the steps below to choose the certificate you want to use.
a Click Network.
b Click Protocol.
c Click HTTP Server Settings and then choose the certificate from the Select the Certificate drop-down
list.
7
88
Page 95

Security features
NOTE
NOTE
How to install the self-signed certificate on your computer 7
• The following steps are for Windows® Internet Explorer®. If you use another web browser, follow the help
text of the web browser itself.
• You must have administrator rights to install the self-signed certificate.
For Windows Vista®, Windows®7, Windows®8, Windows Server®2008 and Windows Server®2012
users that have administrator rights 7
a (Windows Vista
®
/Windows®7/Windows Server®2008)
Click the button and All Programs.
®
(Windows
8)
Right-click on the (Internet Explorer) icon on the taskbar.
(Windows Server
®
2012)
Click (Internet Explorer), and then right-click on the (Internet Explorer) icon appeared on the
taskbar.
b Right-click Internet Explorer, and then click Run as administrator.
7
If the User Account Control screen appears,
®
(Windows Vista
(Windows
®
) Click Continue (Allow).
7/Windows® 8) Click Yes.
89
Page 96

Security features
c Type “https://machine’s IP address/” into your browser to access your machine (where “machine’s IP
address” is the machine’s IP address or the node name that you assigned for the certificate).
Then click Continue to this website (not recommended)..
7
d Click Certificate Error, and then click View certificates. For the rest of the instructions, follow the steps
from step d in For Windows®XP and Windows Server®2003 users on page 91.
90
Page 97

Security features
For Windows®XP and Windows Server®2003 users 7
a Start your web browser.
b Type “https://machine’s IP address/” into your browser to access your machine (where “machine’s IP
address” is the IP address or the node name that you assigned for the certificate).
c When the security alert dialog box appears, do one of the following:
Click Continue to this website (not recommended).. Click Certificate Error, and then click
View certificates.
d Click Install Certificate... from the General tab.
7
e When the Certificate Import Wizard appears, click Next.
f You need to specify a location to install the certificate. We recommend you choose Place all certificates
in the following store, and then click Browse....
91
Page 98

Security features
NOTE
g Choose Trusted Root Certification Authorities, and then click OK.
h Click Next.
7
i Click Finish.
j Click Yes, if the fingerprint (thumbprint) is correct.
The fingerprint (thumbprint) is printed on the Network Configuration Report (See Printing the Network
Configuration Report on page 48).
92
Page 99

Security features
NOTE
NOTE
k Click OK.
l The self-signed certificate is now installed on your computer, and SSL/TLS communication is available.
Import and export the certificate and private key 7
You can store the certificate and private key on the machine and manage them by importing and exporting.
How to import the self-signed certificate, the certificate issued by a CA, and the private key 7
a Click Import Certificate and Private Key on the Certificate page.
b Specify the file that you want to import.
c Enter the password if the file is encrypted, and then click Submit.
d Now the certificate and private key are imported to your machine successfully.
To use SSL/TLS communication, the Root Certificate from the CA needs to also be installed on your
computer. Contact your network administrator about the installation.
7
How to export the self-signed certificate, the certificate issued by a CA, and the private key 7
a Click Export shown with Certificate List on the Certificate page.
b Enter the password if you want to encrypt the file.
If a blank password is used, the output is not encrypted.
c Enter the password again for confirmation, and then click Submit.
d Specify the location where you want to save the file.
e Now the certificate and private key are exported to your computer.
You can import the file that you exported.
93
Page 100

Security features
NOTE
Import and export a CA certificate 7
You can store a CA certificate on the machine by importing and exporting.
How to import a CA certificate 7
a Click CA Certificate on the Security page.
b Click Import CA Certificate and choose the certificate. Click Submit.
How to export a CA certificate 7
a Click CA Certificate on the Security page.
b Choose the certificate you want to export and click Export. Click Submit.
c Click Save to choose the destination folder.
d Choose the destination you want to save the exported certificate and then save the certificate.
Managing multiple certificates 7
This multiple certificate feature allows you to manage each certificate that you have installed using Web
Based Management. After installing certificates, you can view what certificates are installed from the
Certificate page and then view each certificate's content, delete, or export the certificate. For information on
how to access the Certificate page, see Configure certificate using Web Based Management on page 85.
The Brother machine allows you to store up to four self-signed certificates or up to four certificates issued by
a CA. You can use the stored certificates for using the HTTPS/IPPS protocol, IEEE 802.1x authentication, or
a Signed PDF.
You can also store up to four CA certificates for using IEEE 802.1x authentication and SSL for SMTP/POP3.
We recommend you store one certificate less and keep the last free to deal with certificate expiration. For
example, if you want to store a CA certificate, store three certificates and leave one storage as a backup. In
the case of re-issuing the certificate, such as when the certificate is expired, you can import a new certificate
to the backup and then you can delete the expired certificate to avoid configuration failure.
• When you use HTTPS/IPPS, IEEE 802.1x, or Signed PDF, you must choose which certificate you are
using.
• When you use SSL for SMTP communications, you do not have to choose the certificate. The necessary
certificate will be chosen automatically.
7
94
 Loading...