

Page 1
USER’S GUIDE
Read this User’s Guide before you start using your P-touch.
Keep this User’s Guide in a handy place for future reference.
Page 2
PREFACE
Thank you for purchasing this P-touch!
With your new P-touch, you can create labels for any purpose. Select from a variety of frames, fonts
and character styles to design beautiful custom labels. In addition, the many pre-formatted templates
available make label- and stamp-making quick and easy.
Installing the P-touch Editor software on your computer will provide you with many more illustration and layout tools to design labels, which can then be printed on your P-touch.
You can print professional-looking labels in no time. The quality and performance of this P-touch
make it an extremely practical machine to meet all your labelling needs.
Although this P-touch is easy to use, we suggest that you read this User’s Guide carefully before
starting. Keep this manual nearby for future reference.
Declaration of Conformity
We, Brother International Europe Ltd.
Brother House
1 Tame Street
Audenshaw
Manchester M34 5JE
U.K.
declare that this product conforms with the following normative documents:
Safety: EN 60950
EMC: EN 55022 Class B
EN 50082-1
and follow the provisions of the Low Voltage Directive 73/23/EEC and the Electromagnetic Compatibility Directive 89/336/EEC (as amended by 91/263/EEC
and 92/31/EEC).
Issued by: Brother International Europe Ltd.
European Technical Services
Division
The enclosed interface cable should be used in order to ensure compliance with
the limits for EMC.
Page 3

Page 4

CONTENTS
QUICK REFERENCE
Chapter 1
Before You Start....................................................... 1
EXAMPLES OF WHAT YOU CAN MAKE WITH THIS P-TOUCH ..2
GENERAL DESCRIPTION..............................................................4
Features............................................................................................................... 4
LCD display......................................................................................................... 5
Menus................................................................................................................... 5
Keyboard.............................................................................................................. 6
Chapter 2
Getting Started......................................................... 7
PRECAUTIONS .............................................................................8
Connecting the power supply cord...................................................................... 9
Installing a TZ tape cassette.............................................................................. 11
Connecting to the computer...............................................................................12
Turning on & off the P-touch............................................................................. 12
Installing P-touch Editor................................................................................... 13
Using P-touch Editor......................................................................................... 18
Reading the User’s Guide.................................................................................. 21
Chapter 3
Functions ............................................................... 23
Performing basic operations .............................................................................24
Entering text....................................................................................................... 25
Editing text.........................................................................................................36
Formatting......................................................................................................... 40
Storing and recalling files ................................................................................. 61
Printing.............................................................................................................. 64
Setting display features......................................................................................73
i
Page 5

Chapter 4
Using Labels and Stamps........................................ 75
Laminated tape...................................................................................................76
Non-laminated tape............................................................................................76
Instant-lettering tape..........................................................................................76
Iron-on transfer tape ..........................................................................................77
Stamp film...........................................................................................................78
ERROR MESSAGE LIST ...............................................................81
TROUBLESHOOTING ................................................................ 88
MACHINE SPECIFICATIONS...................................................... 91
Appendix ............................................................... 93
Symbols ..............................................................................................................94
Special barcode characters ...............................................................................98
Fonts ..................................................................................................................98
Sizes and widths .................................................................................................99
Type styles .......................................................................................................100
Framing and shading patterns ........................................................................101
Background designs ........................................................................................102
Pre-set templates .............................................................................................103
Template text styles .........................................................................................107
Text transformation styles ...............................................................................108
INDEX ......................................................................................109
ACCESSORIES........................................................................... 112
ii
Page 6
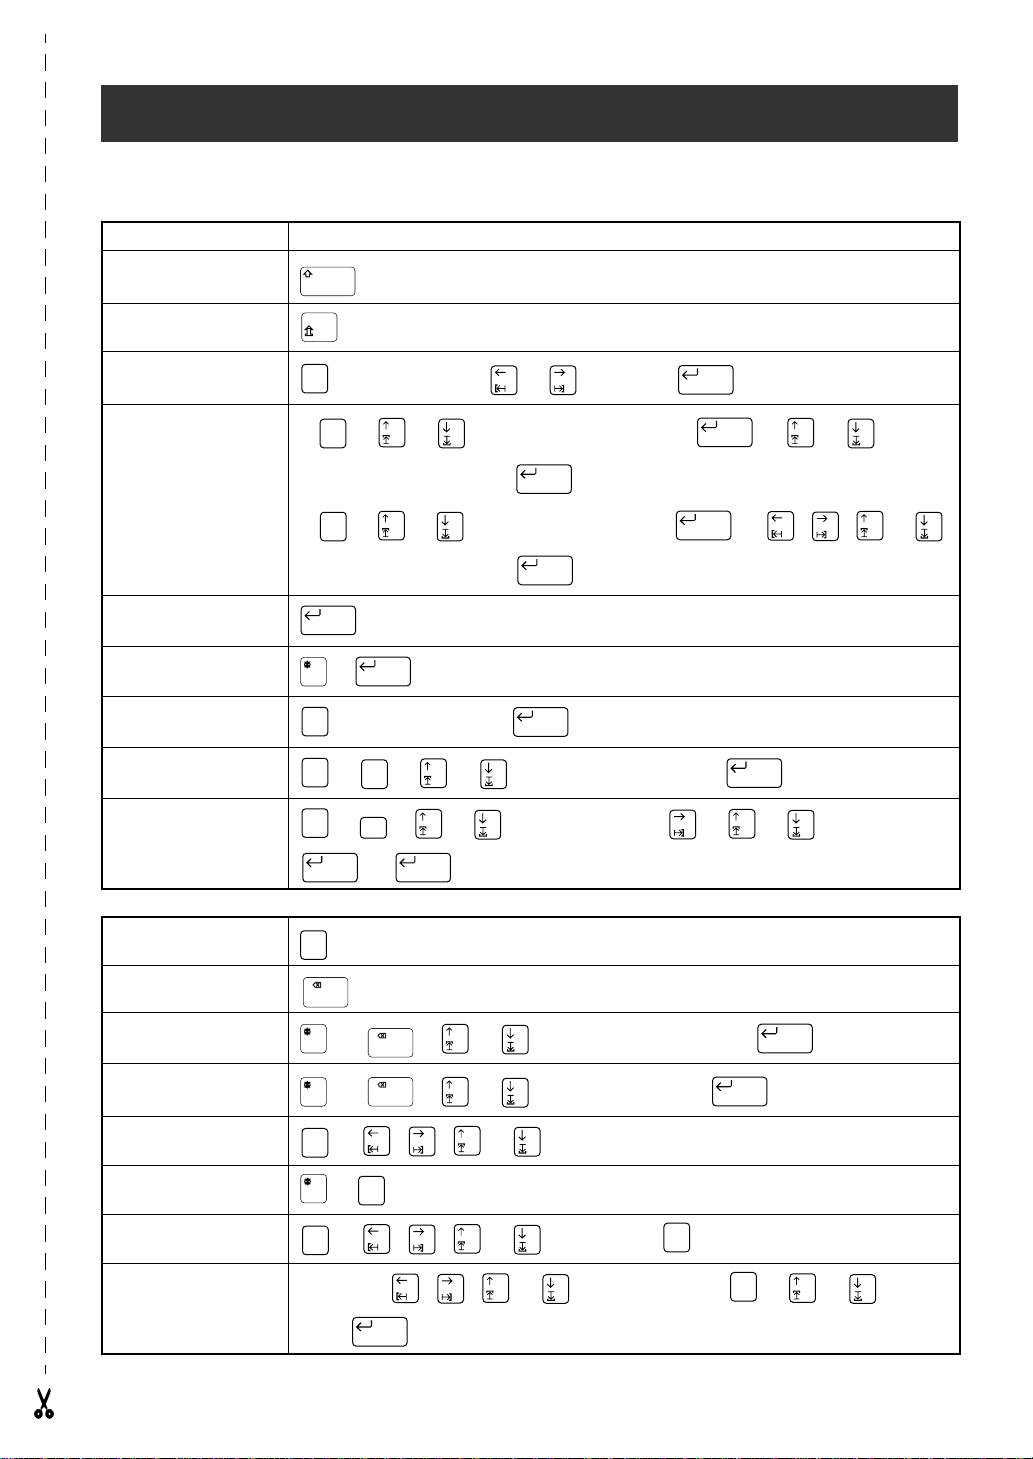
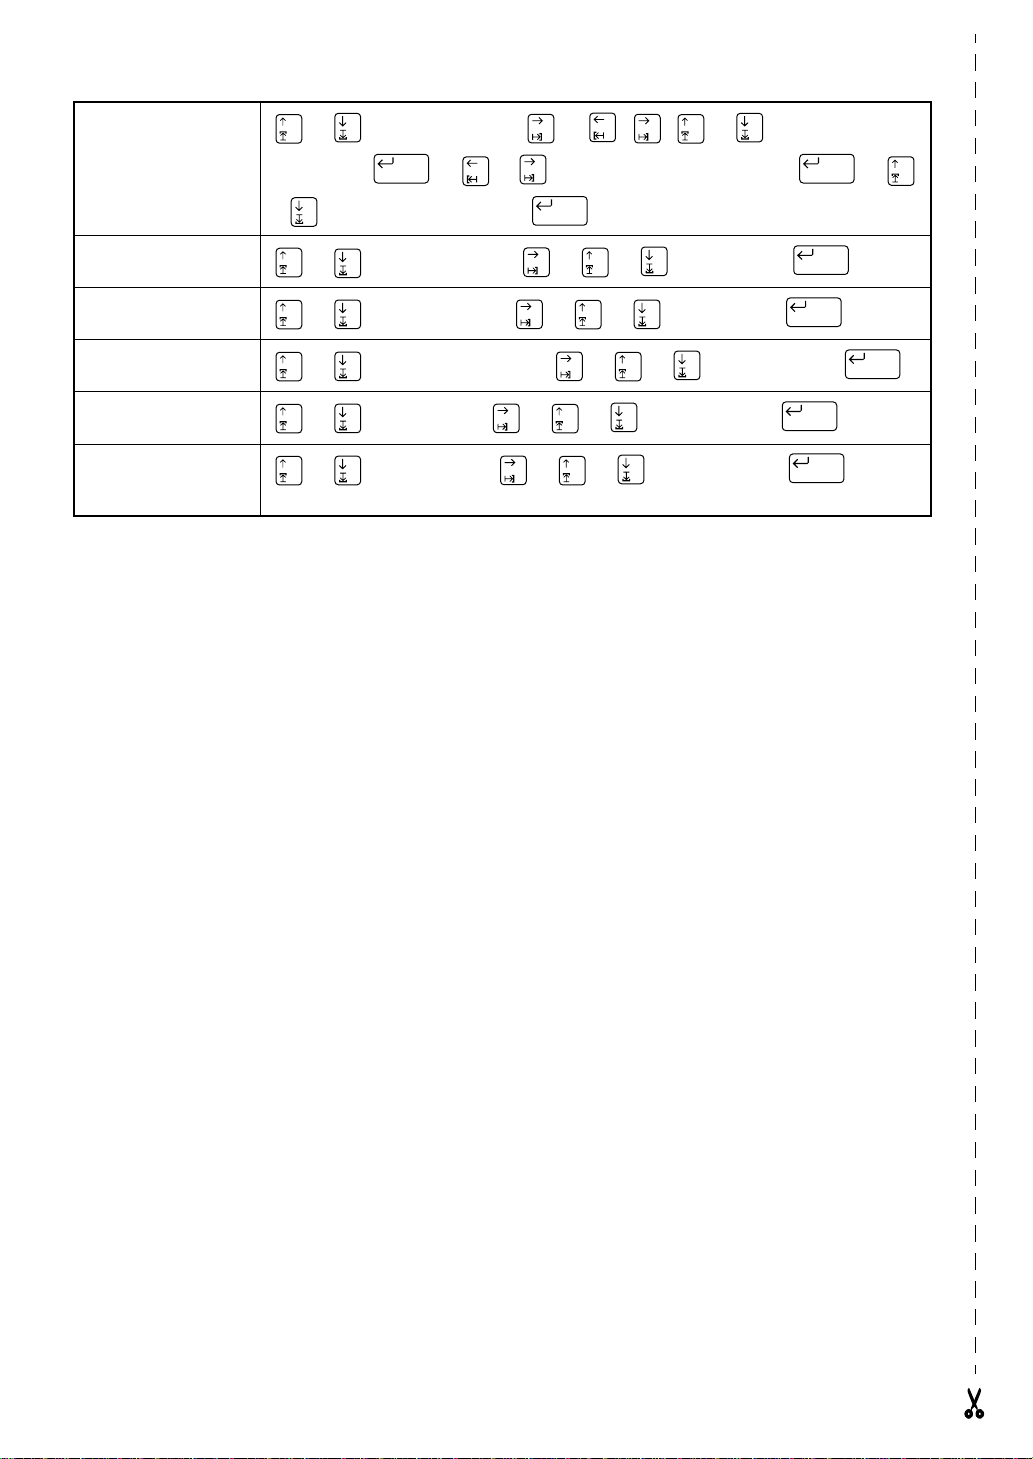
Entering text
Adding a space Space bar
Adding an uppercase
letter
Adding a series of
uppercase letters
Adding an accented
character
Adding a symbol
→ Type character
Alt
→ Type character → or to select →
Symbol
a) → or to select
QUICK REFERENCE
+ desired character
New Block
CATALOGUE NO.
→ → or to select
New Block
Adding a new line
Adding a new block
Adding a barcode
Adding a special character to the barcode
Changing a barcode
parameter
Editing text
Zooming in and out
Deleting text
Clearing all of the text
and formats
Clearing only the text
Selecting an area of the
text
Selecting all of the text
Copying text
Pasting text
(or type) symbol number →
Symbol
b) → or to select symbol category → → , , or
to select symbol number →
New Block
+
New Block
Barcode
→ Type barcode data →
Barcode
Symbol
→ → or to select special character →
Barcode
Format
→ → or to select parameter → → or to select setting →
→
New Block New Block
Zoom
Image
Clear
+ → or to select
Clear
+ → or to select
Clear
Area
→ , , or to select text
All
Area
+
All
Area
→ , , or to select text→
All
Copy text → , , or to position cursor → → or to select
New Block
New Block
New Block
New Block
TEXT & FORMATS
Copy
&Paste
→
TEXT ONLY
New Block
→
New Block
Copy
&Paste
New Block
OK
→
New Block
Page 7

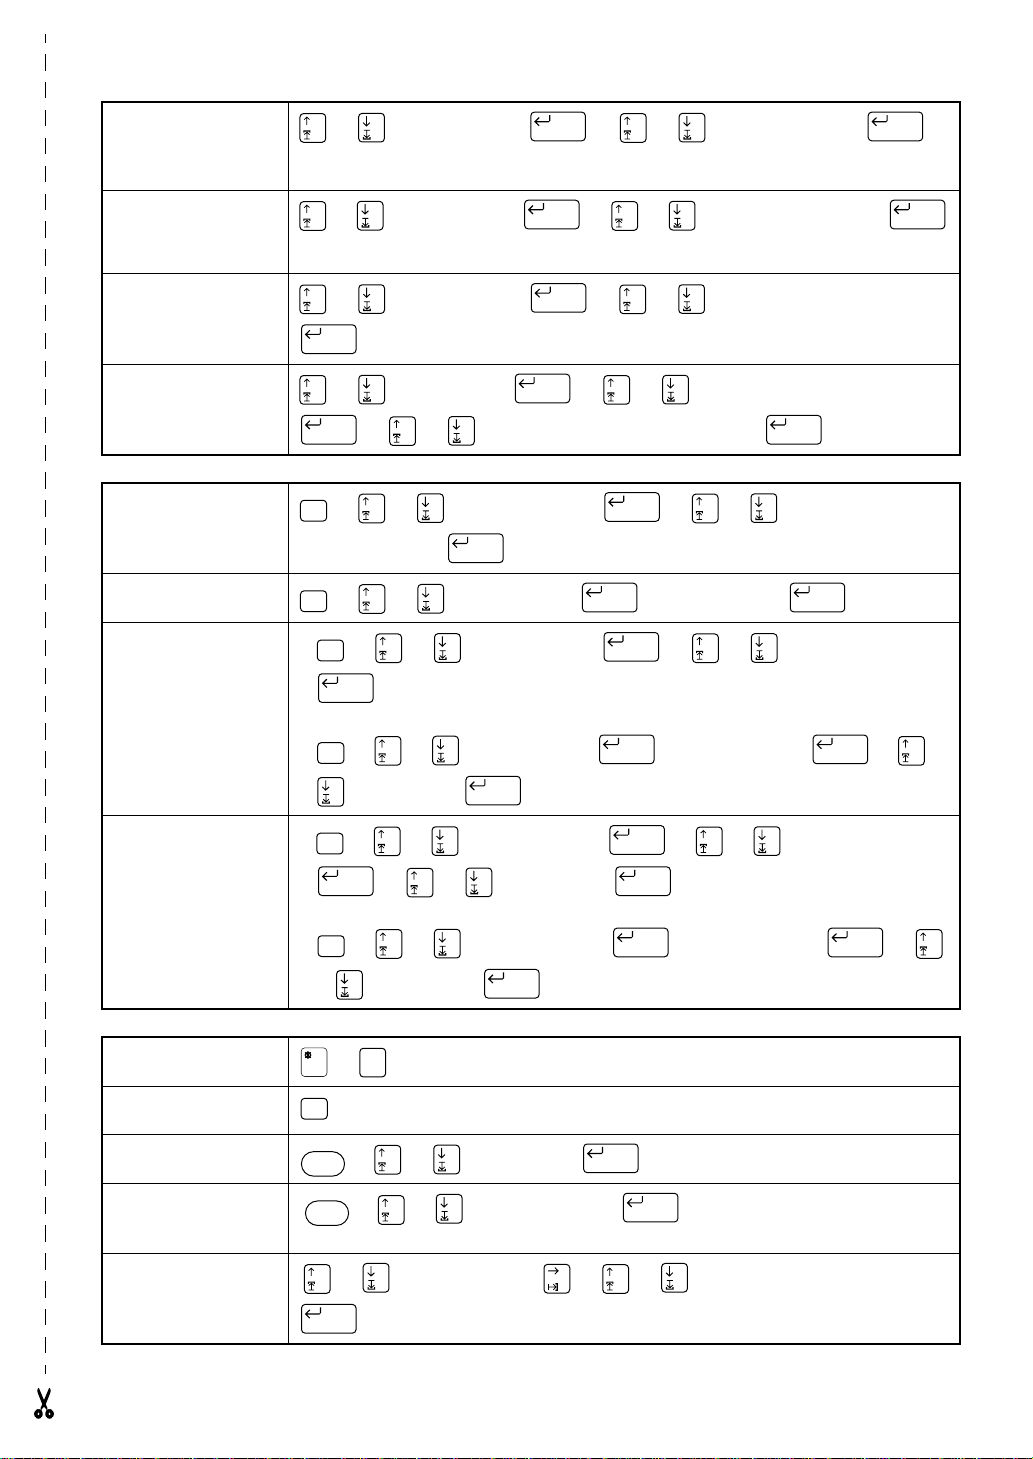
Formatting text
Changing the font
Font
Changing the character
size
Changing the character
width
Changing the character
style
Changing the italic setting
Changing the line effects
Changing the vertical
printing setting
Changing the label
length
Changing the margins
Changing the horizontal
alignment
Changing the pitch
Changing the background
Size
Width
Style
Italic
/
Vert
Format
→ or to select
New Block
Format
→ or to select
Format
→ or to select
Format
→ or to select
Format
a) → or to select
LENGTH
MARGIN →
→ → or to select (or type) setting →
→
H.ALI →
PITCH →
BACK →
→
→
→
or to select setting →
or to select setting →
or to select setting →
or to select design →
New Block
New Block
New Block
New Block
Using a template
Creating a label or
stamp from a template
1 Changing the style
of the template
2 Editing the template
text
3 Printing a template
other than one from
the
STAMP
category
Format
b) → or to select
→ type text → to select font and →
New Block
Templt
a) → or to select
type) template number
→
BACK →
Font
CATALOGUE NO. →
→ Type line of text and → Continue with 1,
New Block New Block
→
or to select
New Block New Block
New Block
SMALL
→
or to select (or
or
LARGE
2, 3, 4 or 5
Templt
b) → or to select template category → → or to select
template number →
→ Type line of text and → Continue with 1, 2, 3,
New Block New Block
New Block
4 or 5
or to select
→
New Block New Block
or to select
or to select
→
CHANGE STYLE →
New Block
CONTINUE →
PRINT →
New Block New Block
→ or to select
New Block New Block
→
→
Change the text →
→
or
OK →
to select setting
→
Page 8
Changing the print
options (for a template
other than one from the
category)
STAMP
4 Printing a template
from the
STAMP
cat-
egory
or to select
PRINT →
New Block New Block
Continue with 6, 7, 8, 9, 0, A or B
or to select
PRINT →
New Block New Block
→ or to select
→ or to select
OPTION →
PRINT STAMP →
→
Printing an ID label (for
a template from the
category)
STAMP
5 Storing the template
text
or to select
New Block
or to select
New Block New Block
Storing, recalling deleting text files
Saving a file that has not
been saved before
File
→ or to select
→ Type file name →
Saving a previously
saved file
Recalling a previously
saved file
Deleting a previously
saved file
File
→ or to select
File
a) → or to select
New Block
File
b) → or to select
File
a) → or to select
→
or
to select file →
PRINT →
FILE →
New Block
→ or to select
New Block
→
or
to select file name → Type file name →
→
→
Edit file name →
→
→ Type file name → →
New Block
New Block
SAVE AS →
SAVE →
OPEN →
OPEN →
New Block
New Block
New Block New Block
New Block
New Block New Block
DELETE →
PRINT LABEL
to select
SAVE AS or SAVE →
or
or
→
or
→
to select file number →
to select file number →
or
to select file number →
Printing text
Previewing the label
appearance
Feeding and cutting 25
mm of tape
Printing using the current print options
Changing the print
options
6 Printing many cop-
ies
→
New Block New Block
File
b) → or to select
or
+
Feed
& Cut
Print
→
Print
or
to select file →
Zoom
Image
→
or
or
to select
New Block
to select
to select
OK
DELETE →
→
OK
New Block
OPTION
or B
or
New Block
to select
COPIES
→
→
→
New Block New Block
→ → Continue with 6, 7, 8, 9, 0, A
→ Type file name → →
New Block
or
to select (or type) number →
Page 9
7 Printing many cop-
ies while increasing
selected text
or
bering field → → or to select end of numbering field → →
or
to select
NUMBER
New Block New Block
to select (or type) number →
→
New Block
→ ,
or to select start of num-
,
8 Printing a mirror
image of the text
9 Inverting the printed
and unprinted areas
0 Changing the shape
of the text
A Changing how
labels are cut
B Enlarging text and
printing it on 2, 3 or
4 labels
or
or
or
or
or
to select
to select
to select
to select
to select
MIRROR
INVERT
TRANSFORM
CUT
SPLIT
→ → or to select ON →
→ → or to select ON →
→
→
→ or to select setting →
→
→ or to select setting →
→ or to select setting →
New Block
New Block
New Block
New Block
New Block
Page 10

Ch.1 Before You Start
Chapter
1
Before You Start
B
efore
Y
ou
S
tart
1
Page 11
Ch. 1 Before You Start
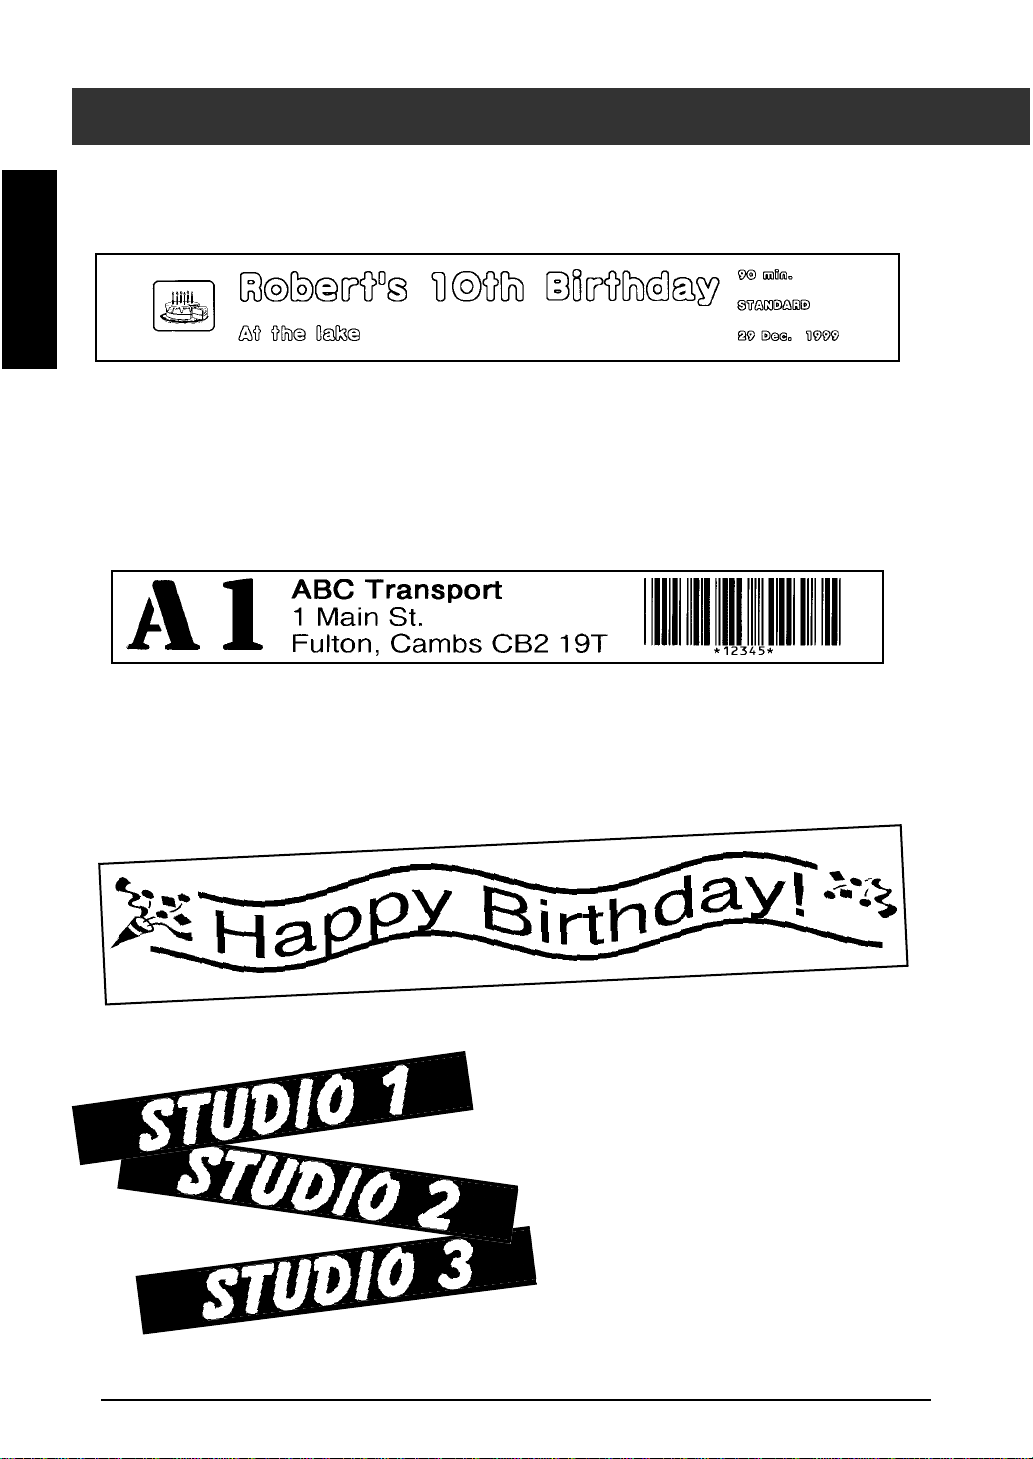
EXAMPLES OF WHAT YOU CAN
Before You Start
Quickly create a label for a home video by using the Template function (➩ p. 57). If you
wish, you can then change the overall style of the text (➩ p. 58).
With the New Block function (➩ p. 27), your labels can contain sections with dif-
ferent numbers of lines. In this label, part of the text was formatted using a different
font (➩ p. 40) and a different style (➩ p. 43). In addition, the Barcode function
makes creating and printing barcodes easy.
Decorate your text using the many frames and shadings (➩ p. 47). Then,
just before printing, use the TRANSFORMATION function (➩ p. 69) to
change the shape of the text.
Use the NUMBER (numbering)
function (➩ p. 65) to print several
numbered labels at one time, without changing the text for each label.
You can also invert the printing to
make the light parts dark and the
dark parts light (➩ p. 68).
2
Page 12
Ch.1 Before You Start
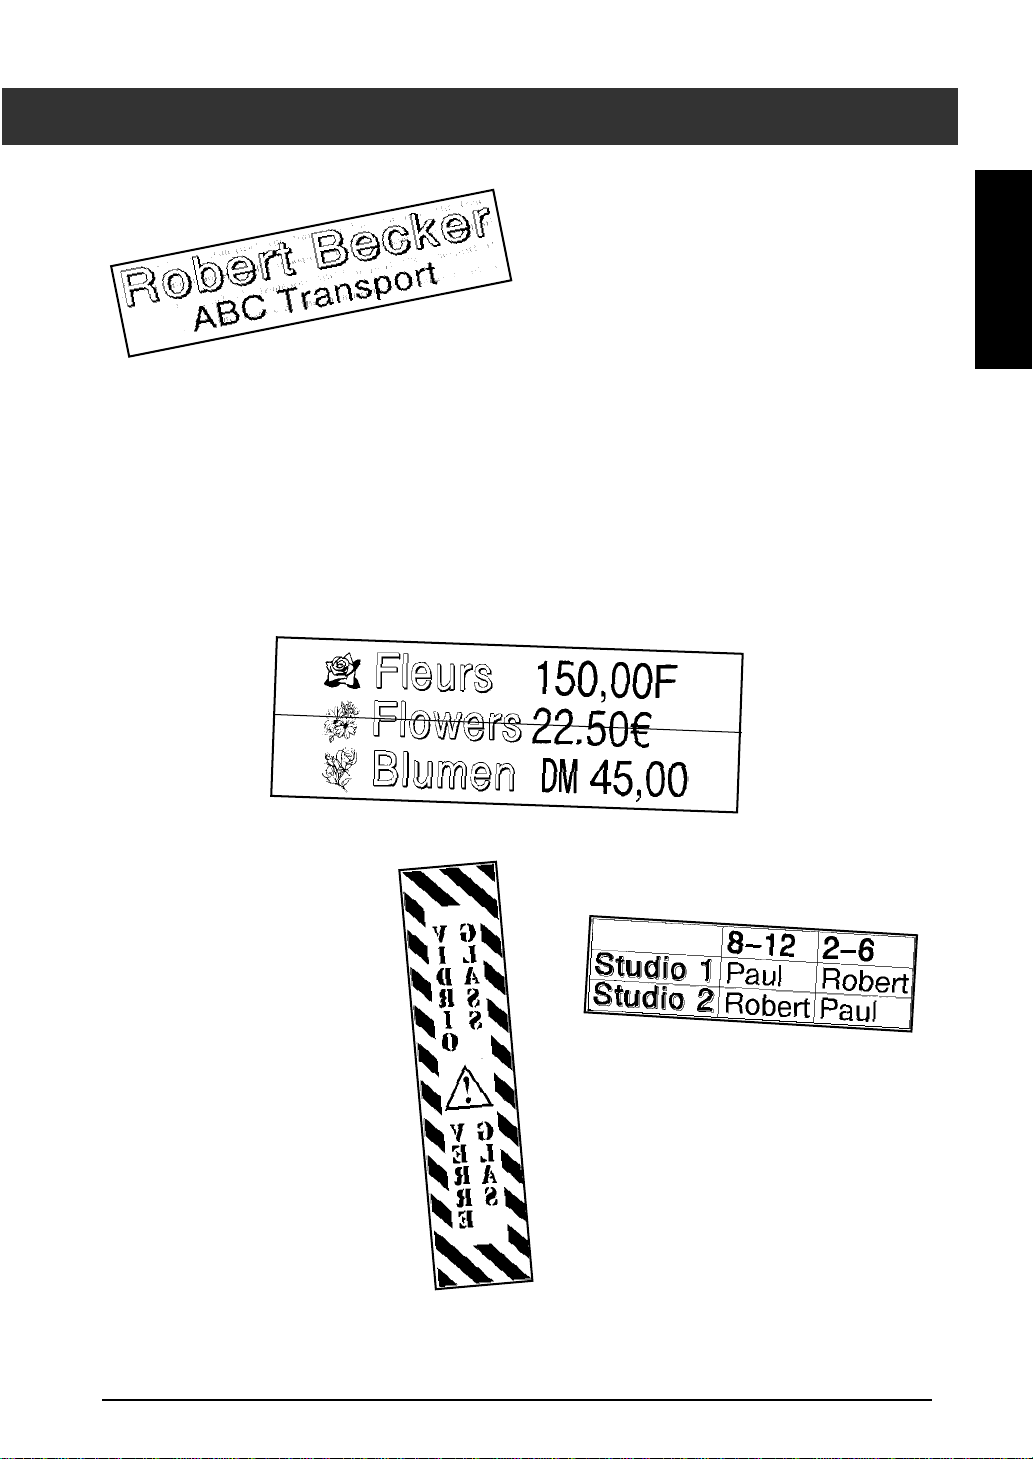
MAKE WITH THIS P-TOUCH
With the Area function (➩ p. 38), you can
select certain parts of the text and change their
font, size and style (➩ p. 40–47). Give your
label a different look by adding one of the 13
different background designs (➩ p. 55). The
[SMALL] and [LARGE] background settings
allow you to create your own background
design.
Create larger labels by enlarging the text and printing it on two, three or four labels, which
can then be put together (➩ p. 71). With the currency conversion function, you can quickly
convert a price into a different currency (➩ p. 31). In addition, you can decorate your label
using the 475 symbols and pictures available with the Symbol function (➩ p. 27).
Before You Start
Using clear tape and the MIR-
ROR function (➩ p. 67) to
print in reverse, this sign for a
glass door can be read from
the adhesive side. In this
example, a warning symbol
was added (Symbol function
➩ p. 27), and the entire text
was framed using the Frame/
Shading function (➩ p. 47). In
addition, the label was
printed vertically using the
Vertical function (➩ p. 46).
Create a table using the Frame/
Shading function (➩ p. 47) to put a
box around each line of each block
in the text. Then, use the Area func-
tion (➩ p. 38) to format the headings
of the table.
3
Page 13
Ch. 1 Before You Start
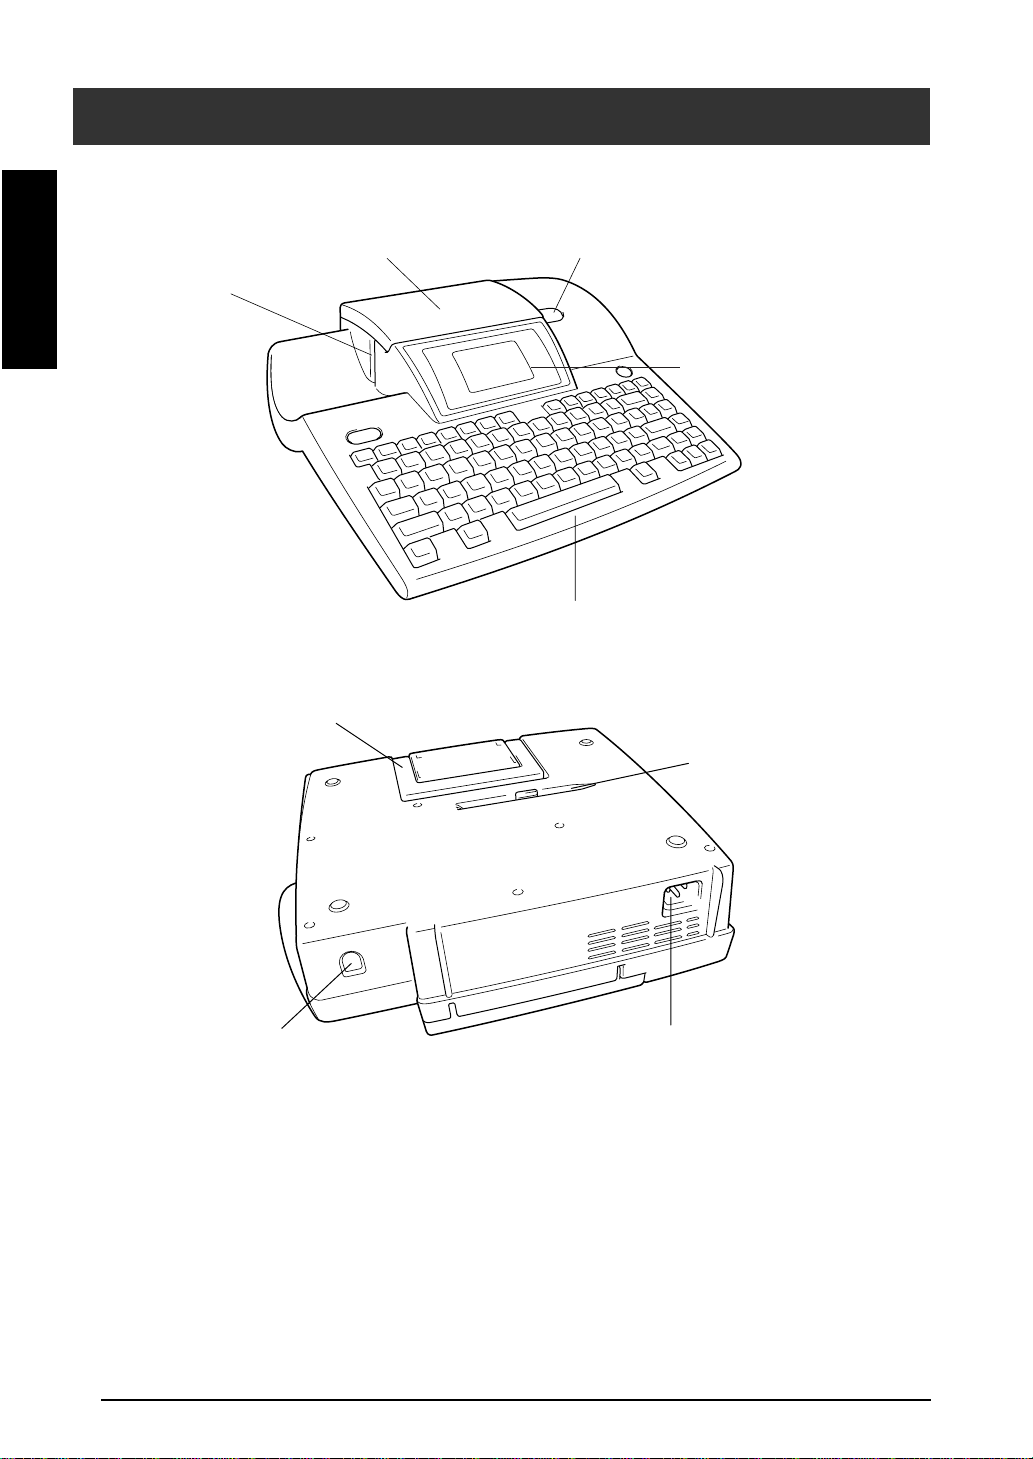
Features
Before You Start
Tape exit slot
GENERAL DESCRIPTION
Tape compartment cover
Cover release button
LCD display
Keyboard
Handle
Interface connector
Lettering stick
Power supply connector
4
Page 14

Ch.1 Before You Start
LCD display
1 Caps indicator ➩ p. 25 9 Tape length setting ➩ p. 52
2 Alt indicator ➩ p. 25 0 Margin setting ➩ p. 53
3 Template indicator ➩ p. 57 A Cursor ➩ p. 24
4 Zoom indicator ➩ p. 36 B Style setting indicator ➩ p. 43
5 Background indicator ➩ p. 55 C Italic setting indicator ➩ p. 44
6 Half cutter indicator ➩ p. 70 D Vertical printing indicator ➩ p. 46
7 Font setting ➩ p. 40 E Character size setting ➩ p. 41
8 Tape width indicator ➩ p. 11
Before You Start
Menus
Caps Alt Template Zoom
[ ]:CONFIRM
BACKGROUND
OFF
[SMALL]
[LARGE]
PARQUET
METAL
MOSAIC
Style Italic Vertical
Caps Alt Template Zoom
[ ]:CHANGE SETTINGS
OPTION
COPIES:1
NUMBER:OFF
MIRROR:OFF
INVERT:OFF
TRANS-:
FORM ABC
Style Italic Vertical
Back
Half
ground
Cut
36mm
24mm
18mm
12mm
9mm
A
6mm
The colour of the arrows on the ends of
the scroll bar shows whether or not more
settings are available. When the arrows
are light ( and ), no more settings
are available. When the arrows are dark
( and ), more settings can be seen
by pressing or to move 9 or Î
up or down.
In menus where 9 appears beside a set-
Back
Half
ground
Cut
36mm
24mm
18mm
12mm
9mm
A
6mm
ting or function, pressing con-
New Block
firms the selection.
In menus where Î appears beside a
function, pressing displays the menu
for the selected function. On the other
hand, pressing confirms all of
New Block
the settings displayed in the menu.
5
Page 15
Ch. 1 Before You Start
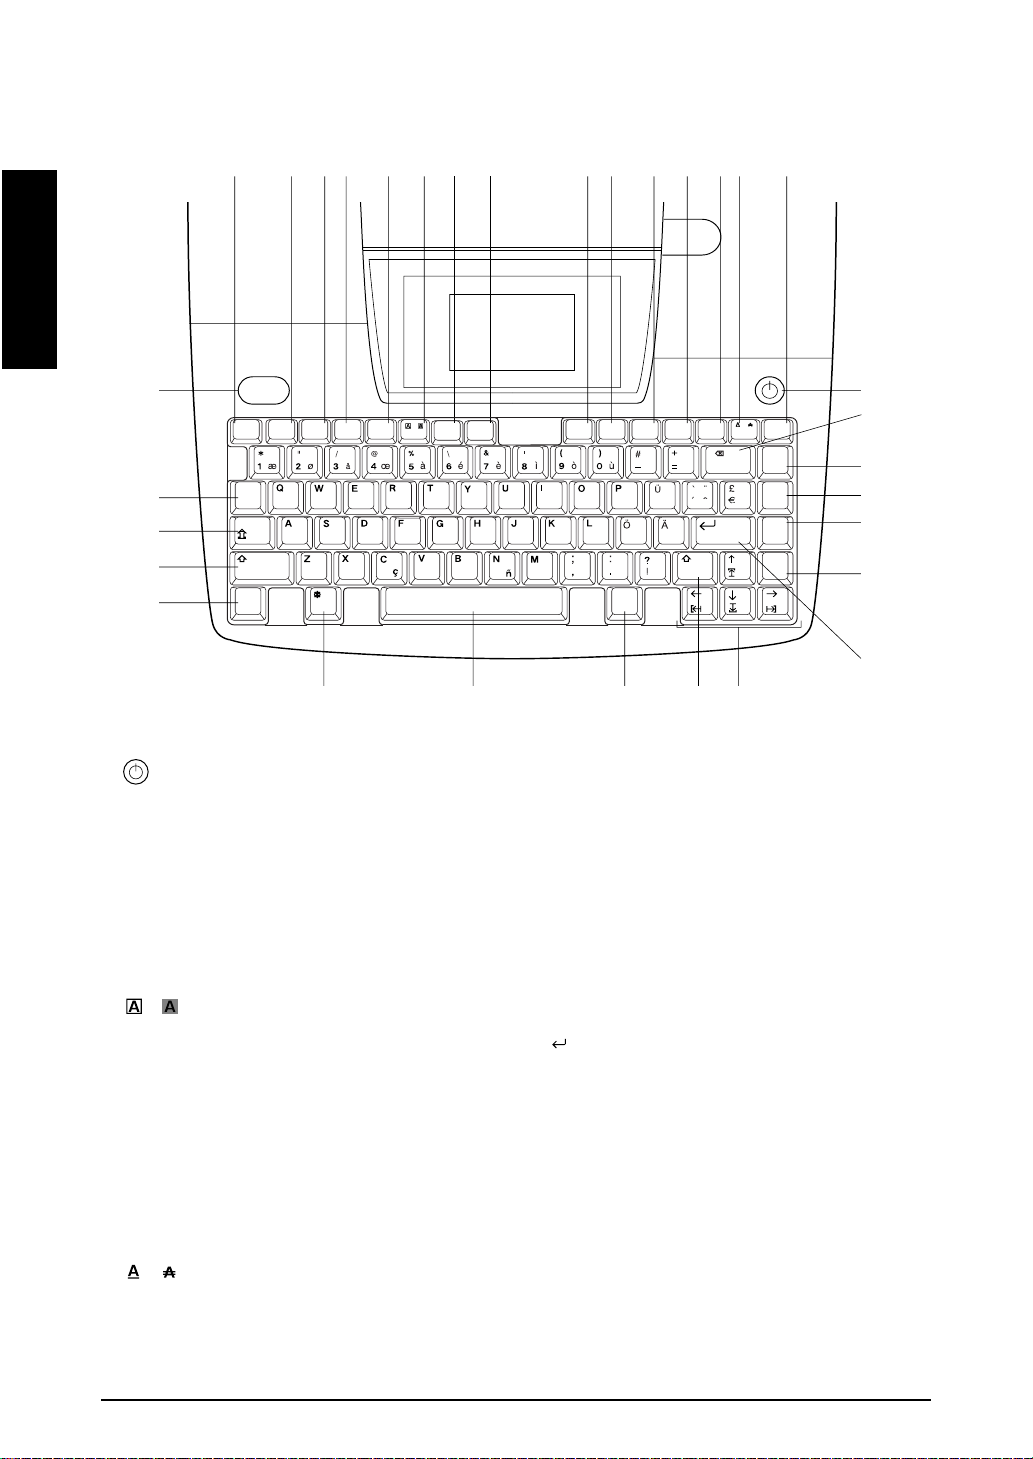
Keyboard
3 456 7 8 AB CDEF G
90
Before You Start
2
U
T
S
R
Print
Feed
File Templt Format Setup
& Cut
Alt
Cancel
/
I / F
/
Conv.
Setup
Size
Font
Width
Symbol
Italic
Style
New Block
Clear
Vert
Copy
&Paste
Barcode
Zoom
Image
Area
All
1
H
I
J
K
L
M
OPQ
S
N
1 (power supply) key ➩ p. 12
H Back Space key ➩ p. 37
2 Print key ➩ p. 64 Clear function ➩ p. 37
3 Feed & Cut key ➩ p. 64 I Copy & Paste key ➩ p. 39
4 File key ➩ p. 61 J Barcode key ➩ p. 29
5 Templt (template) key ➩ p. 57 K Zoom key ➩ p. 36
6 Format key ➩ p. 52 Image function ➩ p. 64
7 Setup key ➩ p. 73 L Area key ➩ p. 38
8 (frame/shading) key ➩ p. 47
/
9 Interface key ➩ p. 12
All function ➩ p. 39
M (enter) key ➩ p. 24 & 27
0 Currency conversion key ➩ p. 31 New Block function ➩ p. 27
A Font key ➩ p. 40 N Cursor keys ➩ p. 24
B Size key ➩ p. 41 O Symbol key ➩ p. 27
C Width key ➩ p. 42 P Space bar ➩ p. 25
D Style key ➩ p. 43 Q Code key ➩ p. 24
E Italic key ➩ p. 44 R Cancel key ➩ p. 24
F (line effects) key ➩ p. 45
/
S Shift key ➩ p. 25
G Vert (vertical) key ➩ p. 46 T Caps key ➩ p. 25
U Alt key ➩ p. 25
6
Page 16

Ch. 2 Getting Started
G
etting
tarted
S
Chapter
2
Getting Started
7
Page 17

Ch. 2 Getting Started
PRECAUTIONS
● Use only Brother TZ tapes with this machine. Do not use tapes that do not have the
mark.
● Before installing a tape cassette, be sure that the tape is correctly fed under the tape guides.
● Do not pull on the tape being fed from the P-touch. Doing so may damage the tape cassette.
● Avoid using the machine in extremely dusty places. Keep it out of both direct sunlight and rain.
● Do not expose the machine to extremely high temperatures or humidity.
● Do not leave any rubber or vinyl on the machine for an extended period of time. Doing so may
Getting Started
cause staining.
● Do not clean the machine with alcohol or other organic solvents. Only use a soft, dry cloth.
● Do not put any foreign objects into or heavy objects on the machine.
● To avoid injuries, do not touch the cutter’s edge.
● Use only the power supply cord designed exclusively for this machine. Use of any other cord
will void the warranty.
● When the machine is not being used for a long period of time, disconnect the power supply
cord.
● A blank horizontal line appearing in a printed label may indicate that there is dust on the print
head. Clean the print head by gently wiping up and down along the print head with a dry cotton
swab. For more details, see page 89.
● Never try to disassemble the P-touch.
8
Page 18
Ch. 2 Getting Started
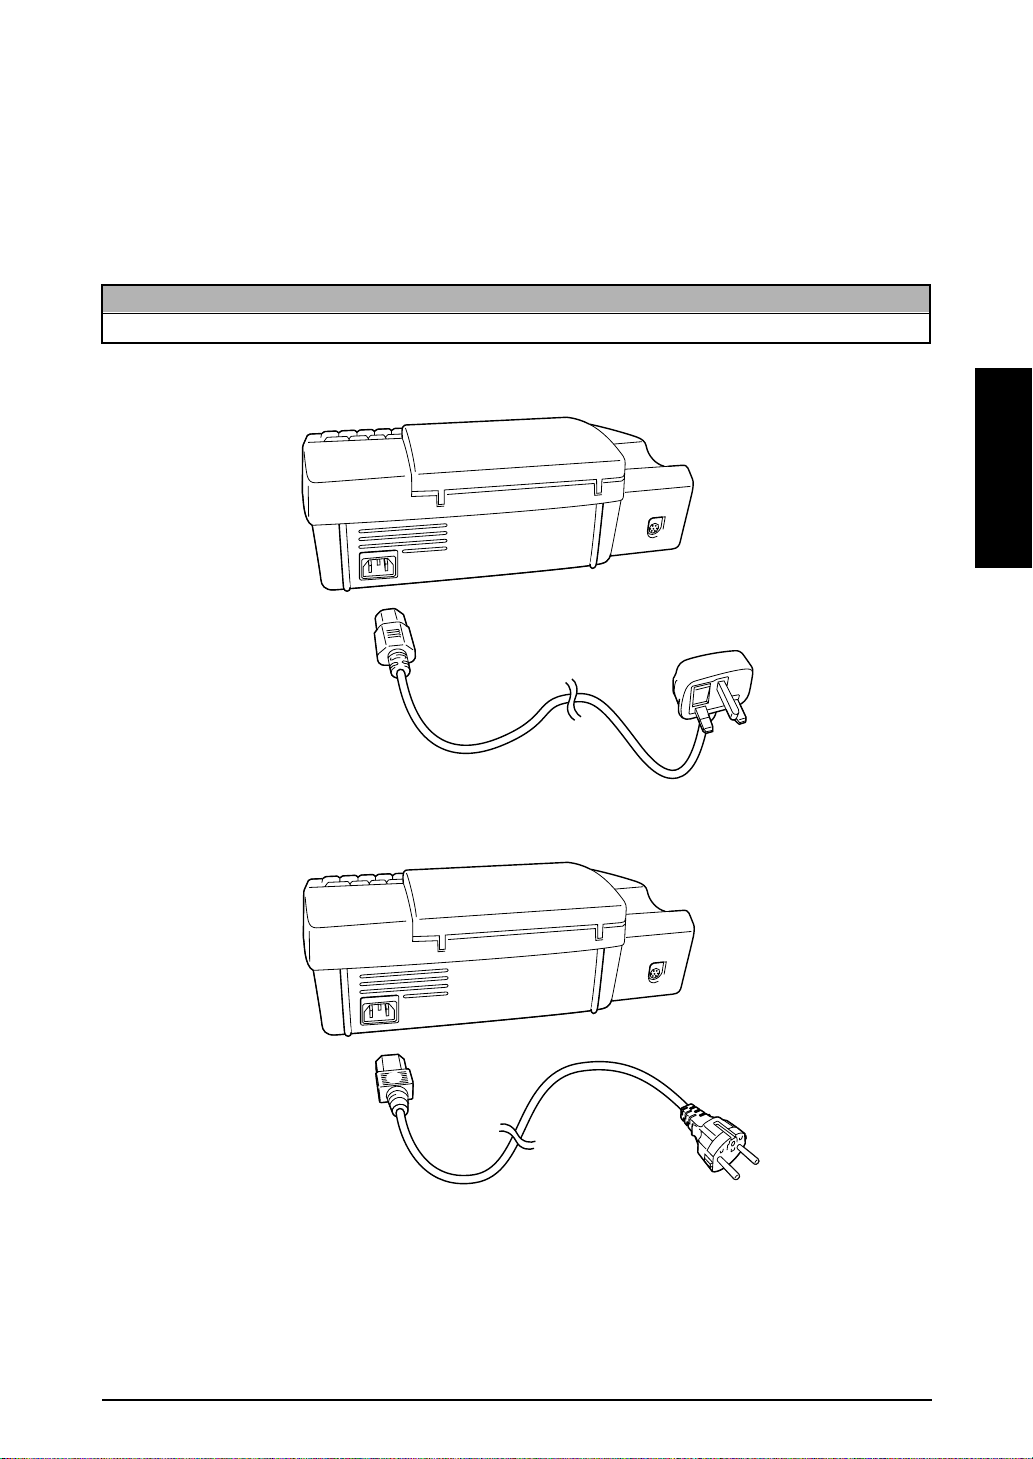
Connecting the power supply cord
● ● ● ● ● ● ● ● ● ● ● ● ● ● ● ● ● ● ● ● ● ●
This P-touch can be used anywhere a standard electrical outlet is available.
1 Insert the plug on the end of the power supply cord into the power supply connector on the
back of the P-touch.
2 Insert the pronged plug on the other end of the power supply cord into an AC outlet.
NOTE
Only use the power supply cord designed exclusively for this machine.
For the UK and Ireland
Getting Started
For continental Europe
9
Page 19
Ch. 2 Getting Started
For UK and Ireland
IMPORTANT - Wiring Information
If the power cord supplied with this product is not suitable for your electrical outlet,
remove the plug from the mains cord and fit an appropriate three pin plug. If the replacement plug is intended to take a fuse, then fit the same fuse as the original.
If a moulded plug is severed from the power cord, then it should be destroyed because a
plug with cut wires is dangerous if plugged into a live socket outlet. Do not leave it where
a child might find it.
In the event of replacing the plug fuse, fit a fuse approved by ASTA to BS1362 with the
Getting Started
same rating as the original fuse.
Always replace the fuse cover. Never use a plug with the cover omitted.
WARNING - THIS PRODUCT MUST BE PROPERLY EARTHED.
This wires in the mains cord are coloured in accordance with the following code:
The colours of the wiring in the power lead of this product may not correspond with the
markings which identify the terminals in your plug. If you need to fit a different plug, proceed as follows.
Remove a length of the cord’s outer sheath, taking care not to damage the coloured insulation of the wires inside.
Cut each of the three wires to the appropriate length. If the construction of the plug permits, leave the green and yellow wire longer than the others so that, in the event that the
cord is pulled out of the plug, the green and yellow wire will be the last to disconnect.
Remove a short section of the coloured insulation to expose the wires.
The wire coloured green and yellow must be connected to the terminal in the plug marked
with the letter “E” or by the earth symbol, or coloured green or green and yellow.
The wire coloured blue must be connected to the terminal marked with the letter “N” or
coloured black or blue.
The wire coloured brown must be connected to the terminal marked with the letter “L” or
coloured red or brown.
The outer sheath of the cord must be secured inside the plug. The coloured wires should
not hang out of the plug.
Green and yellow: Ground
Blue: Neutral
Brown: Live
10
If in any doubt, consult a qualified electrician.
Page 20
Ch. 2 Getting Started
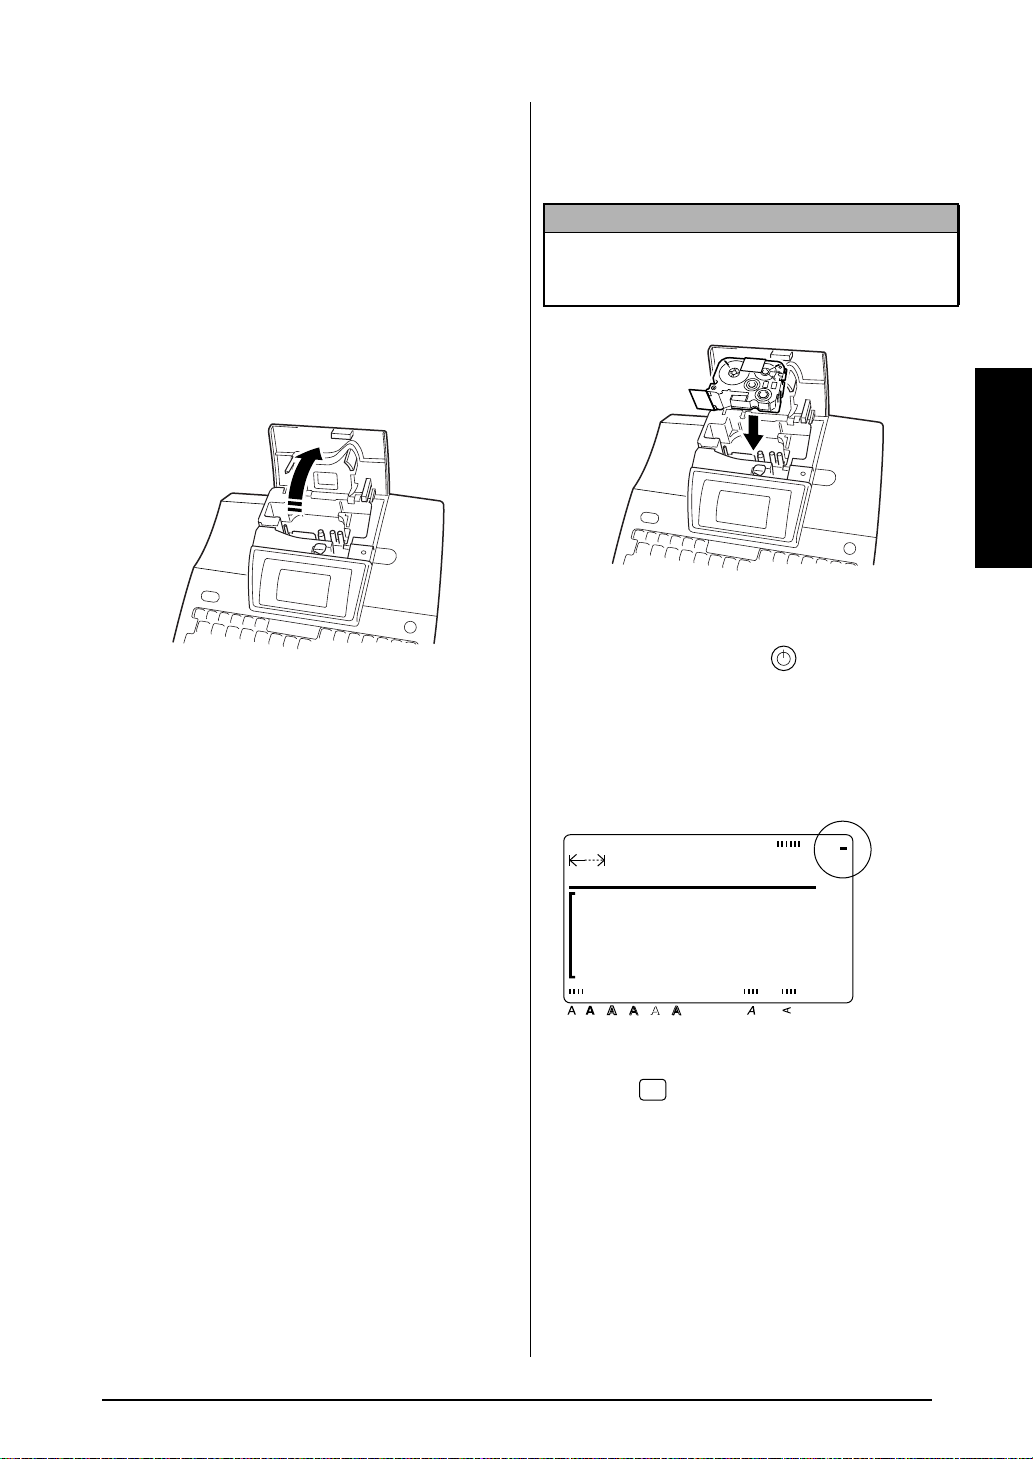
Installing a TZ tape cassette
● ● ● ● ● ● ● ● ● ● ● ● ● ● ● ● ● ● ● ● ● ●
A TZ tape cassette is supplied with this P-touch.
TZ tape cassettes are available for this machine
in a wide variety of colours and sizes, making it
possible to make distinctive colour-coded and
stylised labels. In addition, this machine has
been designed to allow you to change the tape
cassettes quickly and easily.
1 Press the cover release button, and then lift
open the tape compartment cover.
2 If a tape cassette is already installed and
you wish to replace it, remove it by pulling
it straight out.
3 If the ink ribbon is loose in the tape cassette
to be installed, use your finger to wind the
toothed wheel in the direction of the arrow
on the cassette until there is no slack in the
ribbon. Also, make sure that the end of the
tape feeds under the tape guides.
4 Insert the tape cassette firmly into the com-
partment, making sure that the entire back
of the cassette touches the bottom of the
compartment.
NOTE
When inserting the tape cassette, make sure that the
ink ribbon does not catch on the corner of the
metal guide.
.
5 Close the compartment cover and press the
power supply key ( ) to turn on the
machine if it is off. The width of the cur-
rently installed tape is shown by the tape
width indicator on the right edge of the display.
Back
Half
Caps Alt Template Zoom
0.0cm HELSI
MARGIN:WIDE AUTO
Style Italic Vertical
ground
Cut
36mm
24mm
18mm
12mm
9mm
A
6mm
Getting Started
Feed
6 Press once to remove any slack in the
& Cut
tape and cut off the excess.
11
Page 21
Ch. 2 Getting Started
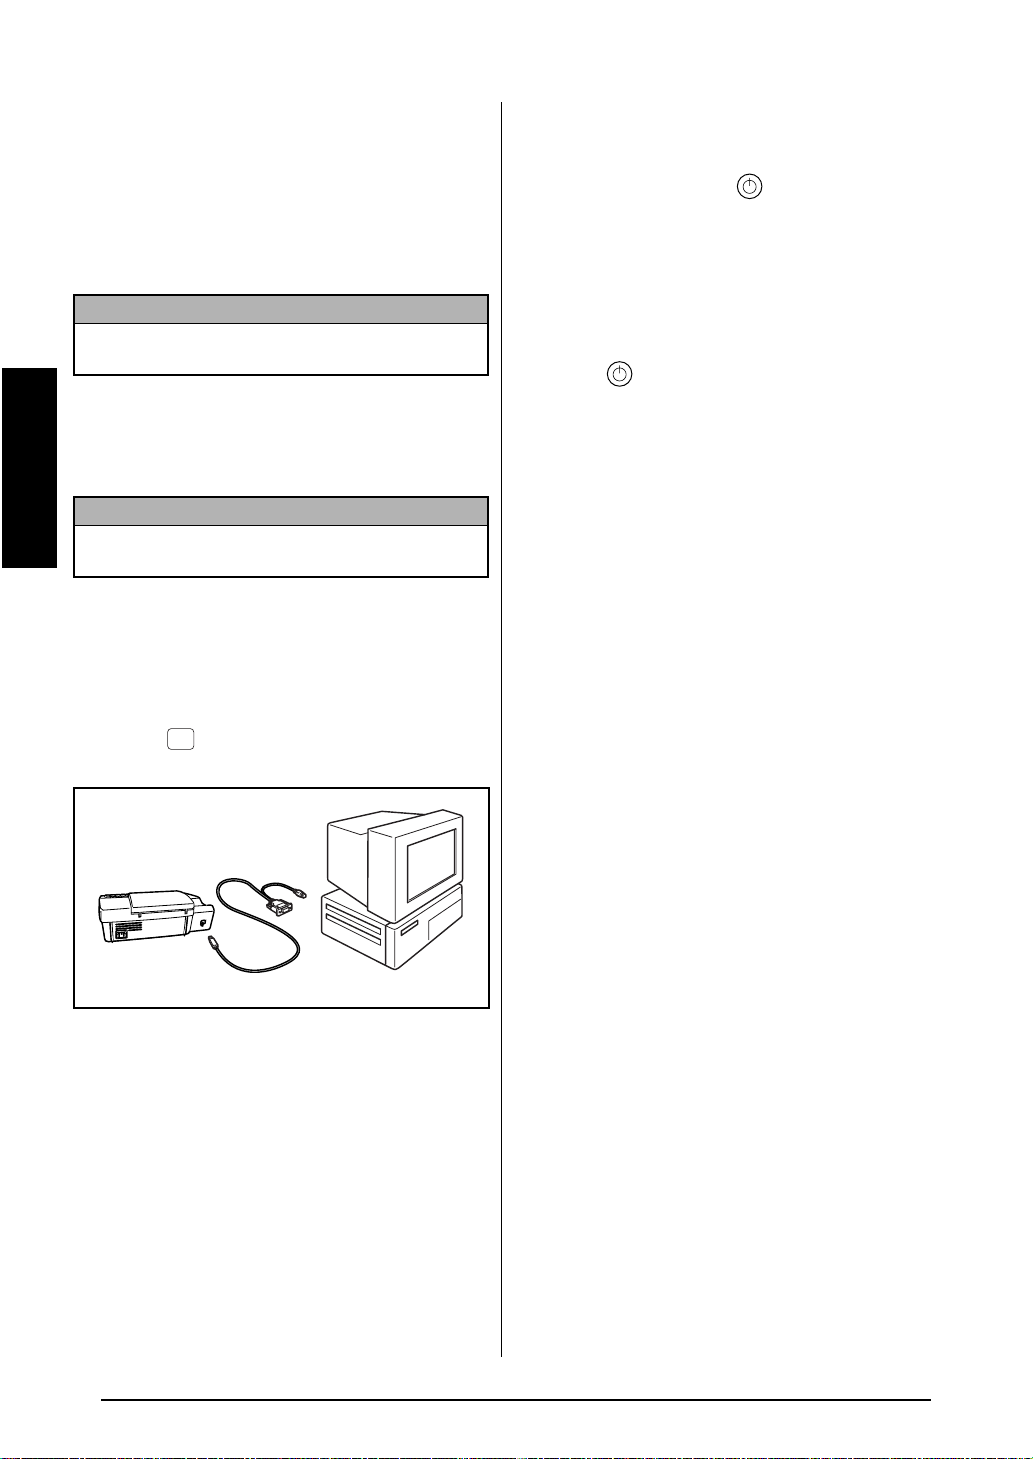
Connecting to the computer
● ● ● ● ● ● ● ● ● ● ● ● ● ● ● ● ● ● ● ● ● ●
This machine is equipped with an interface connector, which allows you to print labels and
stamps that you create with the P-touch Editor
software installed on your IBM PC-compatible
computer and Macintosh.
NOTE
Only the US English version of the P-touch Editor
software for the Mac is available.
1 Turn off both the P-touch and the computer.
Getting Started
2 Insert the small plug on the interface cable
into the interface connector on the back of
the P-touch.
NOTE
Only use the interface cable designed exclusively
for this machine.
3 Insert the 9-pin connector into the serial
(COM) port of your computer and tighten
the screws to lock it into place.
4 Turn on the P-touch, and then start up the
computer.
5 Press on the P-touch to enter Interface
mode
I / F
.
Turning on & off the P-touch
● ● ● ● ● ● ● ● ● ● ● ● ● ● ● ● ● ● ● ● ● ●
The power supply key ( ) is located in the
top right corner of the machine’s keyboard.
This P-touch will automatically turn off if no key
is pressed or no operation is performed for 30
minutes. In addition, if it has remained plugged
in, the previous session’s text is displayed when
you turn it on again.
● Press to turn on or turn off the P-touch.
12
Page 22
Ch. 2 Getting Started
Installing P-touch Editor
● ● ● ● ● ● ● ● ● ● ● ● ● ● ● ● ● ● ● ● ● ●
Installing the P-touch Editor software and printer
driver adds even more illustration and layout
features to the label-making possibilities availa-
ble with the many functions of your P-touch.
NOTE
Since the P-touch Editor software can be used with
both the PT-9400 and the PT-9200PC, the illustrations in the printer screens may not always match
your model.
On an IBM PC-compatible computer:
1 Check that your system configuration meets
the following requirements.
Computer: IBM PC or compatible
Operating system: Microsoft Windows
98 or NT 4.0
Hard disk free space: At least 20 MB
NOTE
A few hundred megabytes of additional free space
may be needed when printing long labels or large
amounts of data.
Monitor: VGA or higher graphics card
Serial port: 9-pin connector jack
CD-ROM drive
2 Connect the PT-9400 to the computer’s
serial port and turn both of them on.
3 Insert the P-touch Editor CD-ROM into the
computer’s CD-ROM drive. A dialogue box
that allows you to select the language of the
programme appears
.
®
95,
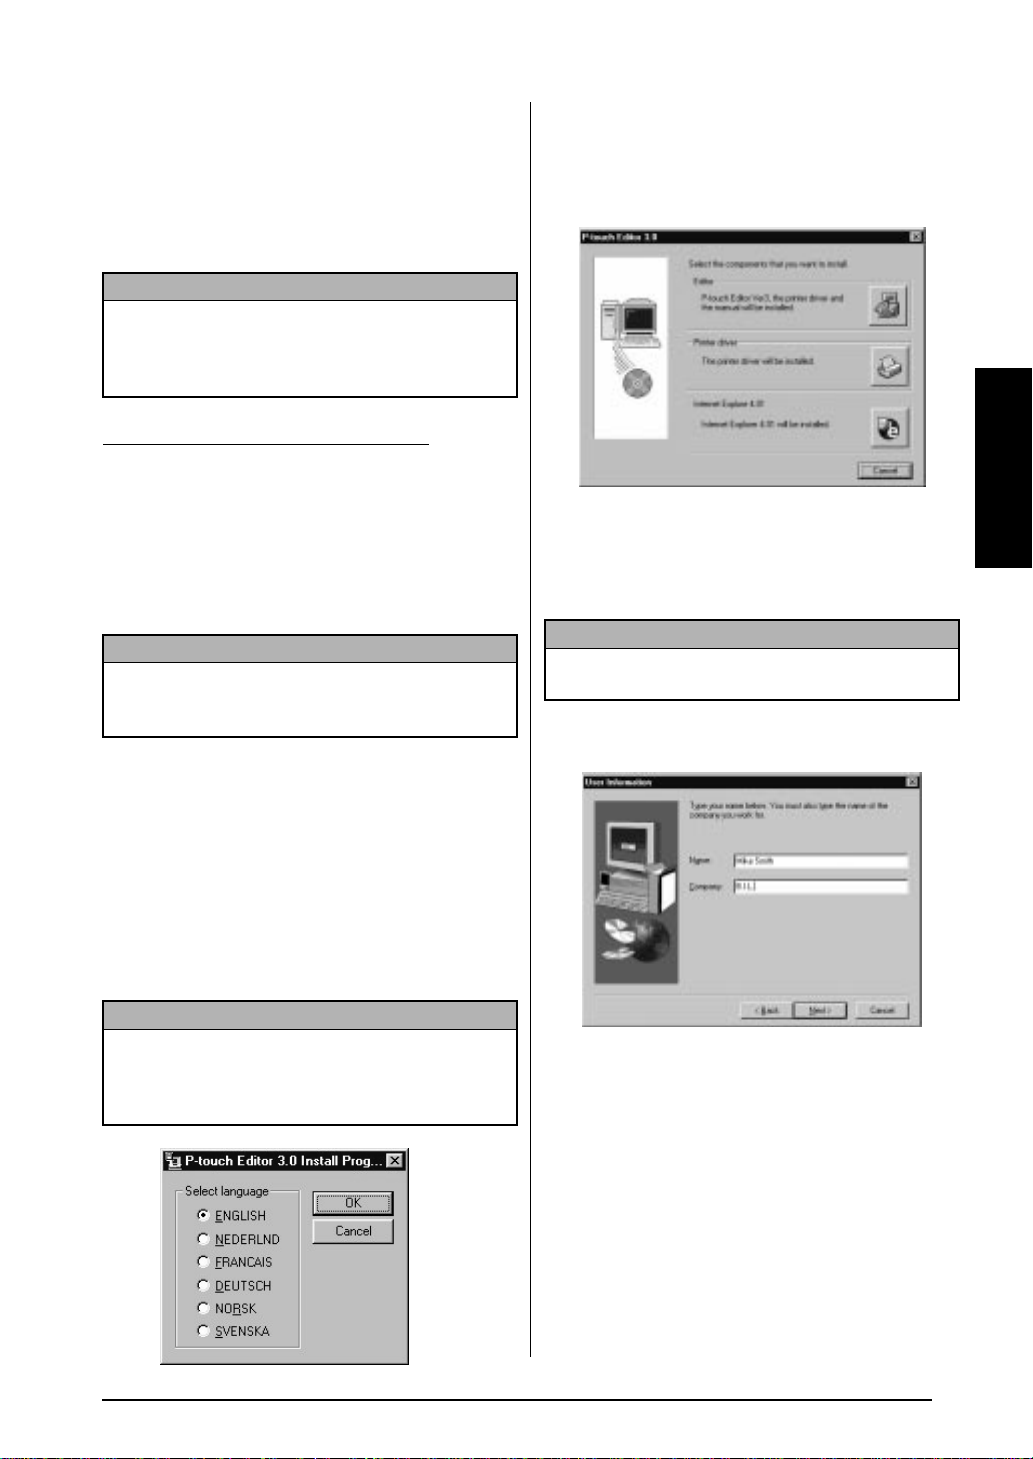
4 Select the language of the P-touch Editor
software that you wish to install, and then
click the OK button. A dialogue box which
allows you to select what to install is displayed.
5 Click the top button to start up the
®
InstallShield
Wizard for installing the P-
touch Editor software and the PT-9400
printer driver.
NOTE
To install only the printer driver, click the Printer
driver button, and then skip to step B.
6 Click the Next button to display the User
Information dialogue box.
Getting Started
NOTE
The installers for the P-touch Editor programme,
printer driver and User’s Guide can also be copied
from the CD-ROM onto floppy disks. Refer to the
Readme file for more details.
7 Type your name and company’s name into
the appropriate boxes to personalise your
copy of the P-touch Editor software.
8 Click the Next button to enter the informa-
tion. A dialogue box asking for confirmation
on the entered information appears.
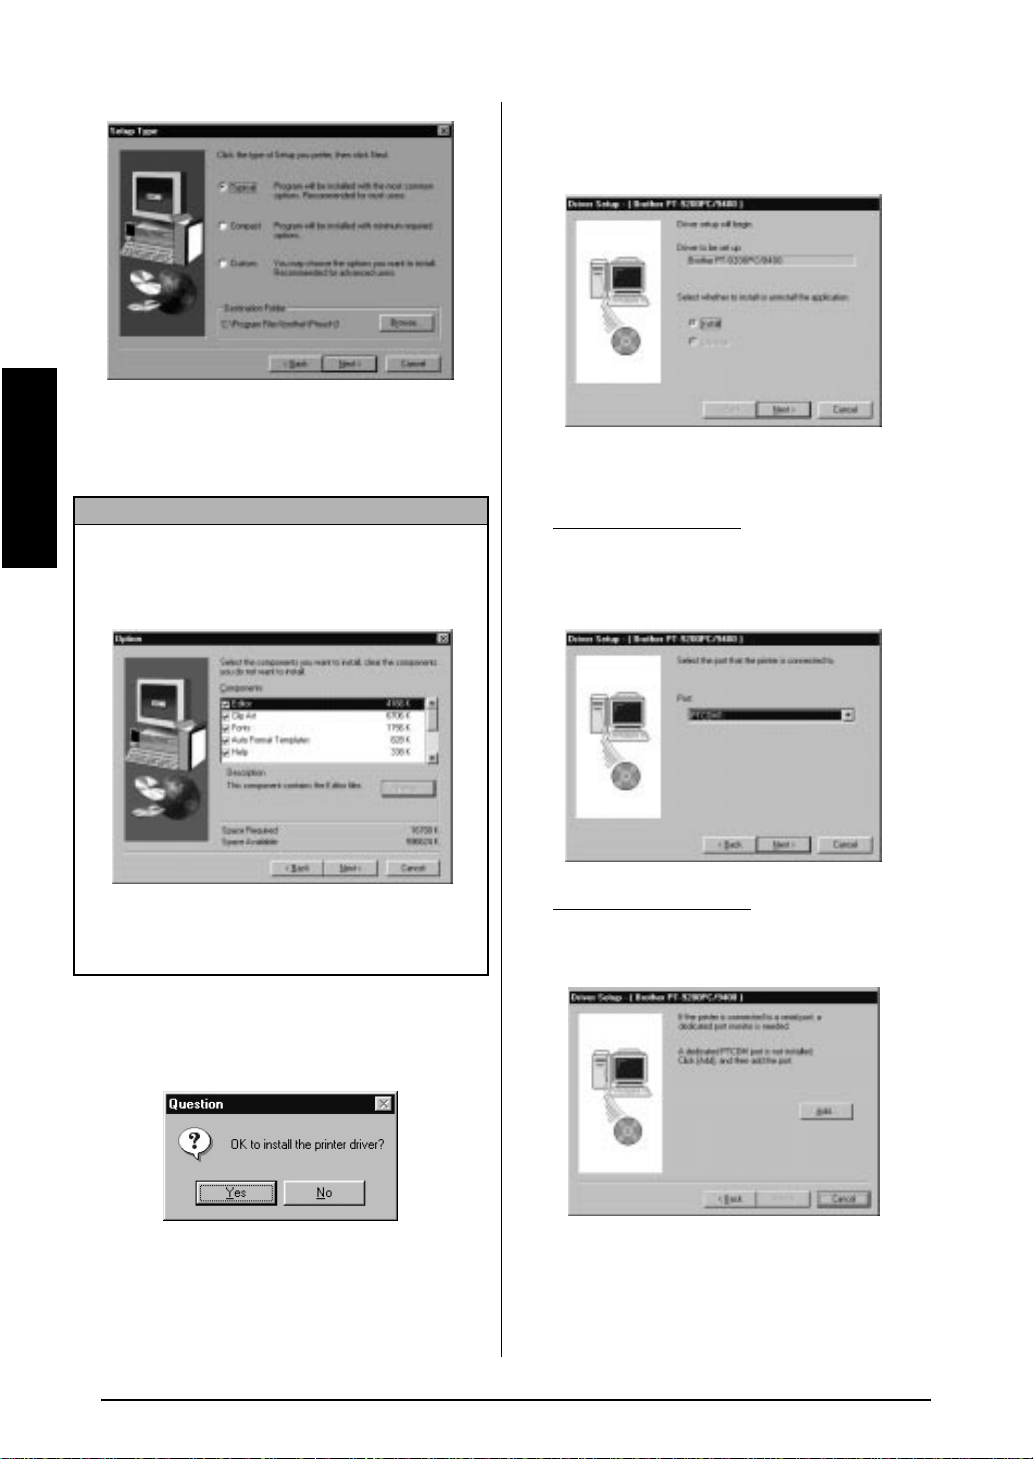
9 Click the Yes button to register the entered
information. The Setup Type dialogue box,
which allows you to select the options to be
installed, is displayed.
13
Page 23
Ch. 2 Getting Started
0 Select “Typical” (installs all of the basic
Getting Started
options), “Compact” (installs only the minimum necessary options), or “Custom” (allows
you to select which options to install).
NOTE
☞ If you chose “Custom”, click the Next button
to display the Option dialogue box, which
allows you to select which options will be
installed.
B Click the Yes button. A dialogue box that
allows you to select whether to install or
uninstall the application is displayed.
C Select “Install”, and then click the Next but-
ton.,
For Windows 95/98:
®
A dialogue box that allows you to select the
PTCOM port where the PT-9400 is connected appears.
☞ If you choose to install the User’s Guide onto
your computer, it will quickly be available
each time you wish to refer to it.
A Click the Next button to install the P-touch
Editor software. After it is installed, a dialogue box that allows you to select whether
or not to install the printer driver appears.
14
For Windows NT 4.0:
®
A dialogue box that allows you to add a
PTCOM port appears.
Page 24
NOTE
If a PTCOM port is not installed, one can be added
by clicking the Add button.
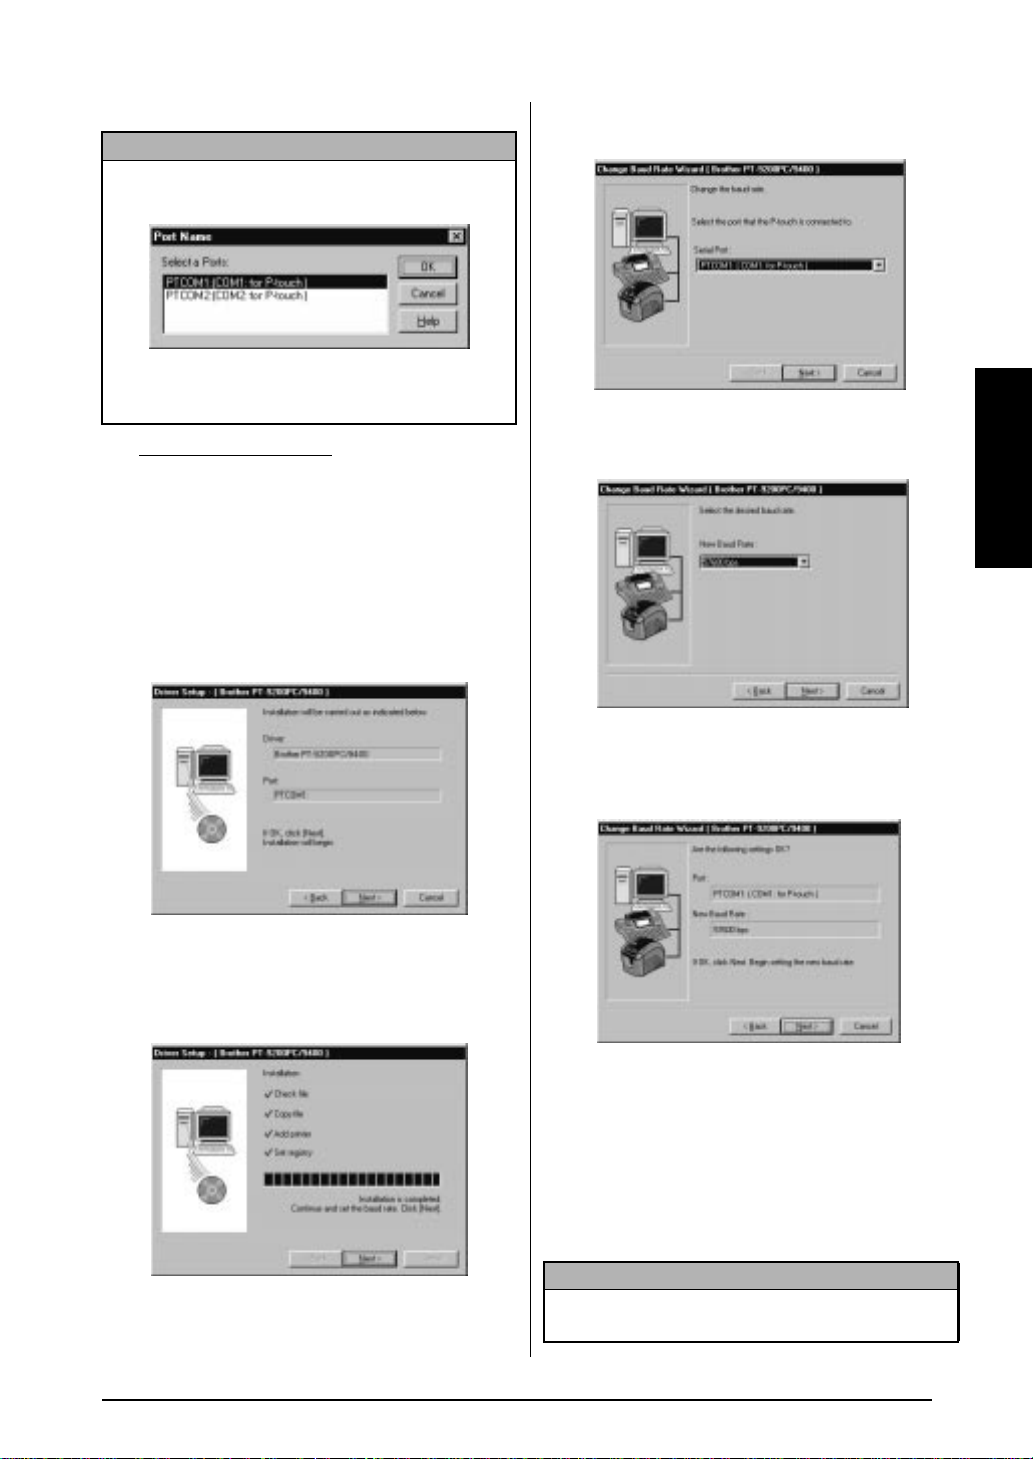
Select the port where the PT-9400 is connected,
and then click the OK button.
D For Windows NT 4.0:
®
Clilck the Next button.
A dialogue box that allows you to select the
PTCOM port where the PT-9400 is connected appears.
E Select the PTCOM port that the PT-9400 is
connected, and then click the Next button.
A dialogue box confirming how the installation will be carried out appears.
Ch. 2 Getting Started
G Click the Next button. The Change Baud
Rate Wizard starts up.
H Select the serial port where the PT-9400 is
connected, and then click the Next button.
Getting Started
F Click the Next button. A dialogue box
showing that the printer driver has been
installed appears.
I Select the desired baud rate, and then click
the Next button. A dialogue box confirming
the settings appears.
J Click the Next button to enter the settings. A
dialogue box appears showing that the
baud rate has been set to the selected rate.
K Click the Finish button. A dialogue box
appears showing that installation is completed.
L Click the Finish button.
NOTE
If you installed only the driver, be sure to select
“Yes, I want to restart my computer now.”
15
Page 25
Ch. 2 Getting Started
On a Macintosh computer:
Follow the procedure below to install the Ptouch Editor software on the Mac.
NOTE
Only the US English version of the P-touch Editor
software for the Mac is available.
1 Check that your system configuration meets
the following requirements.
Computer:
Hard disk free space:
NOTE
Getting Started
A few hundred megabytes of additional free space
may be needed when printing long labels or large
amounts of data.
Operating system:
Printer port:
Macintosh or Power Macintosh
At least 20 MB
System 7.5.3 or later
8-pin connector jack
CD-ROM drive
2 Connect the PT-9400 to the computer’s
printer port and turn both of them on.
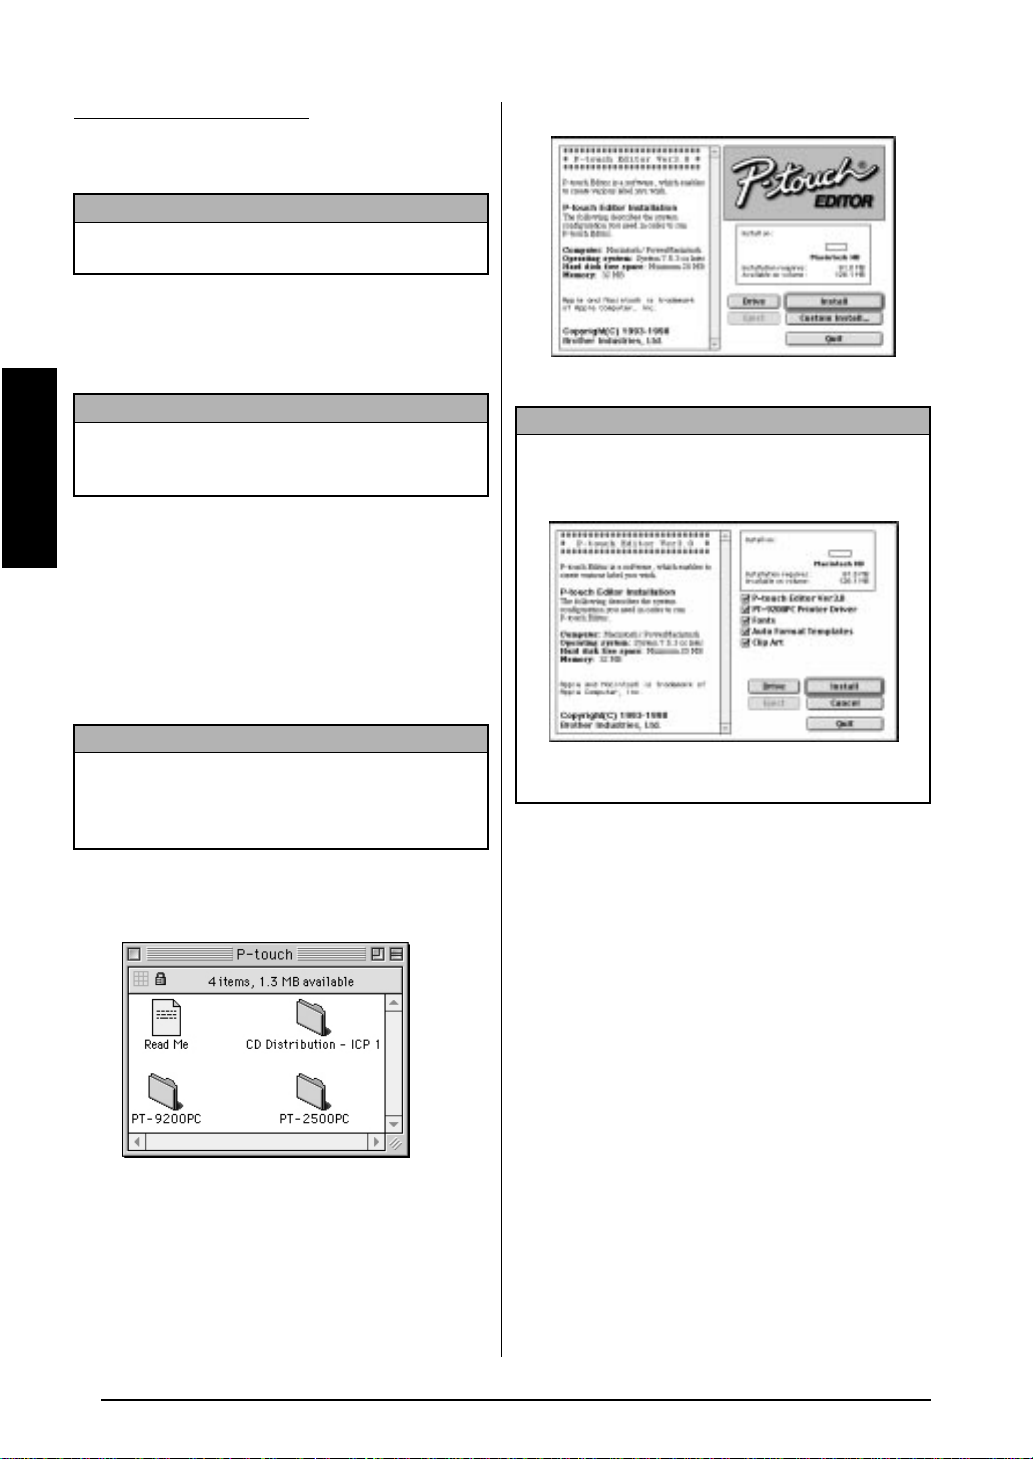
3 Insert the P-touch Editor CD-ROM into the
computer’s CD-ROM drive and doubleclick the CD-ROM icon.
NOTE
If you clicked the Custom Install button, the dialogue
box shown below is displayed allowing you to select
which options will be installed.
NOTE
The installers for the P-touch Editor programme and
the User’s Guide can also be copied from the CDROM onto floppy disks. Refer to the Readme file for
more details.
4 Open the “PT-9200PC” folder, and then dou-
ble-click the “P-touch Editor 3.0 Installer”
icon.
5 Click either the Install button (installs all
options) or the Custom Install button (allows
you to select which options to install).
After selecting the desired options, click the Install
button to install the selected options.
6 In the dialogue box that appears when
installation is completed, click the Quit button. A dialogue box which allows you to
restart your computer appears.
7 Click the Restart button.
16
Page 26
Ch. 2 Getting Started
a
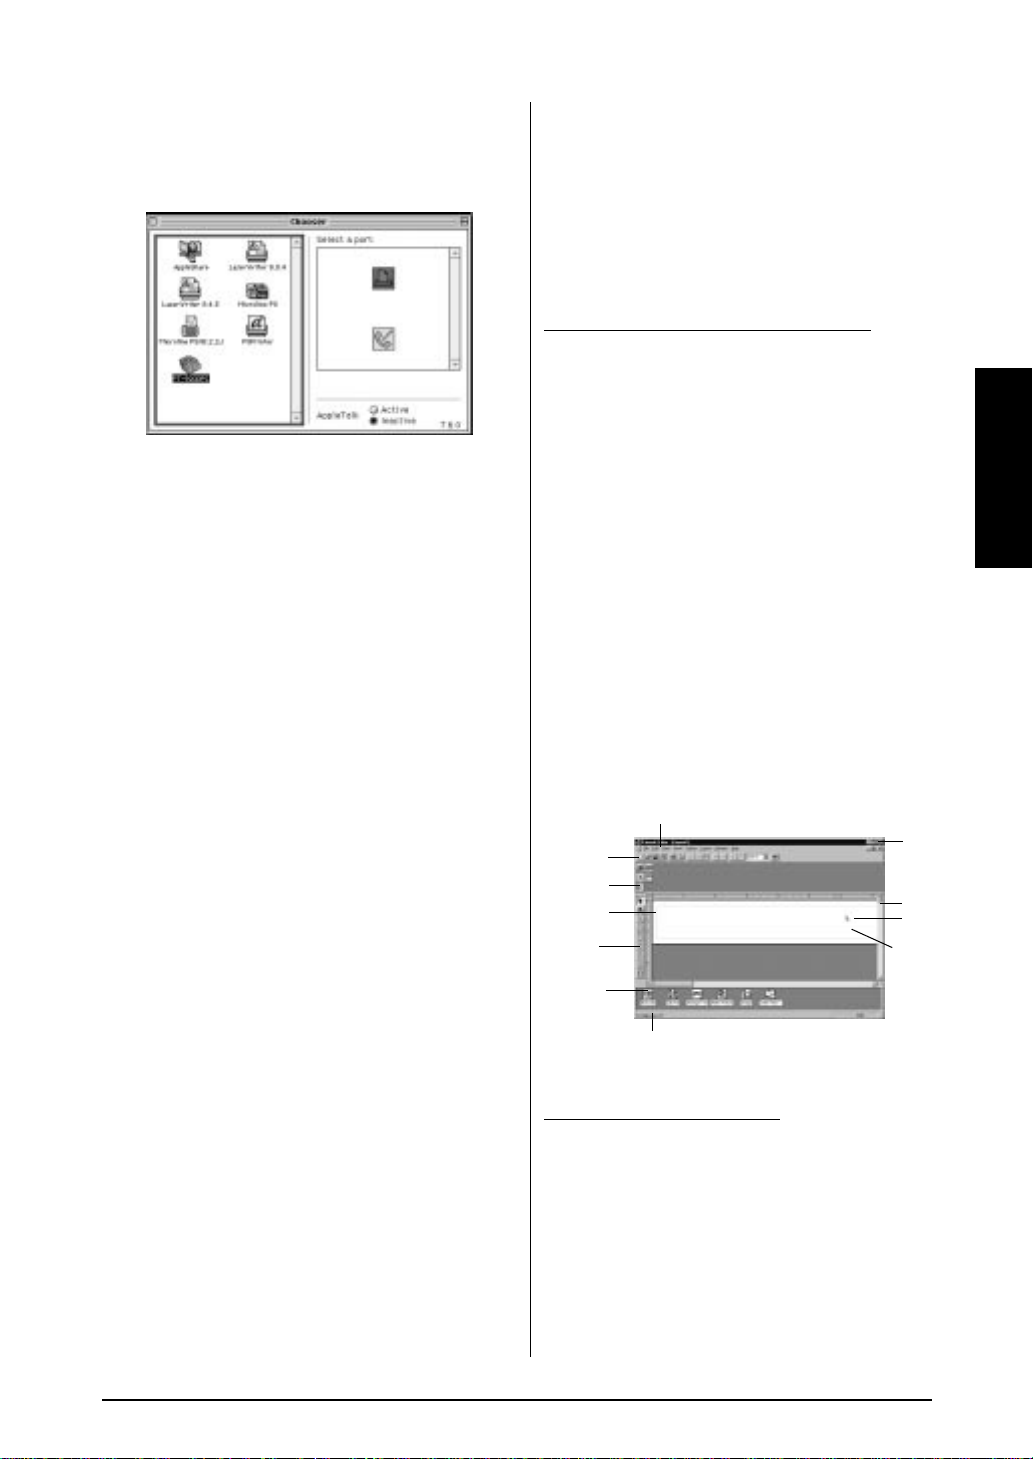
Follow the procedure below to select the PT9400 as your printer.
1 Pull down the Apple menu and select
“Chooser” to display the Chooser window.
2 Click the PT-9200PC icon in the list on the
left.
3 Click the icon for the printer port in the list
on the right.
4 Close the Chooser window to confirm your
settings.
Using P-touch Editor
● ● ● ● ● ● ● ● ● ● ● ● ● ● ● ● ● ● ● ● ● ●
The P-touch Editor application makes it easy for
anyone to design and print labels for almost any
need imaginable.
Starting up P-touch Editor:
On an IBM PC-compatible computer:
- By clicking the P-touch Editor icon:
Double-click the “P-touch Editor 3” icon in
the “P-touch Editor 3” group window.
- With the Start button:
1 Click the Start button in the taskbar to dis-
play the Start menu.
2 Select “Programs”.
3 Select “P-touch Editor 3”.
4 Click “P-touch Editor 3”.
- With Windows Explorer:
1 Start up Windows Explorer.
2 Select the drive and directory where P-
touch Editor is installed.
3 Double-click “Ptedit3.exe”.
After P-touch Editor is started, the following
window is displayed.
Getting Started
Menu bar
Standard
tool bar
Property
dock
Layout
area
Draw
toolbar
Object
dock
Status bar
Title bar
Rulers
Cursor
Print are
On a Macintosh computer:
- Double-click the “P-touch Editor Ver3.0” icon
in the “P-touch Editor Ver3.0” folder installed
on the computer.
After P-touch Editor is started, the following
window is displayed.
17
Page 27
Ch. 2 Getting Started
Layout
Print
Rulers
Menu bar
Draw toolbar
Print toolbar
Database toolbar
Status bar Object dock Property dock
Getting Started
Designing a layout from an Auto For-
area
area
Title bar
mat template:
In addition to allowing you to draw pictures and
arrange text using any of the available fonts,
sizes, and styles, P-touch Editor comes with a
variety of pre-formatted templates, which make
creating label layouts quick and easy. Now let’s
see how simple it is to create a label layout with
the [Auto Format] command.
3 Click the Next button.
4 In the “Template:” list view, select the tem-
plate that you wish to use. Here, let’s select
the one named NAMEPLT2.LBL.
5 Click the Next button.
On an IBM PC-compatible computer:
1 Select the [Auto Format] command in the
[File] menu to start up the Auto Format
Wizard.
2 In the “Category:” box, select the category
containing the Auto Format template that
you wish to use. As an example, let’s select
“NAMEPLT”.
6 Click the Next or the Previous buttons until
the text that you wish to change appears in
the “Input:” edit box.
7 Change the text so that the desired text is
entered.
8 Repeat steps 6 and 7 until all of the text is
entered in the way that you want, and then
click the Next button. For this example, let’s
change the department name to “IMPORTS,
INC.”, the title to “Manager” and the name
to “BILL REYNOLDS”.
18
Page 28
Ch. 2 Getting Started
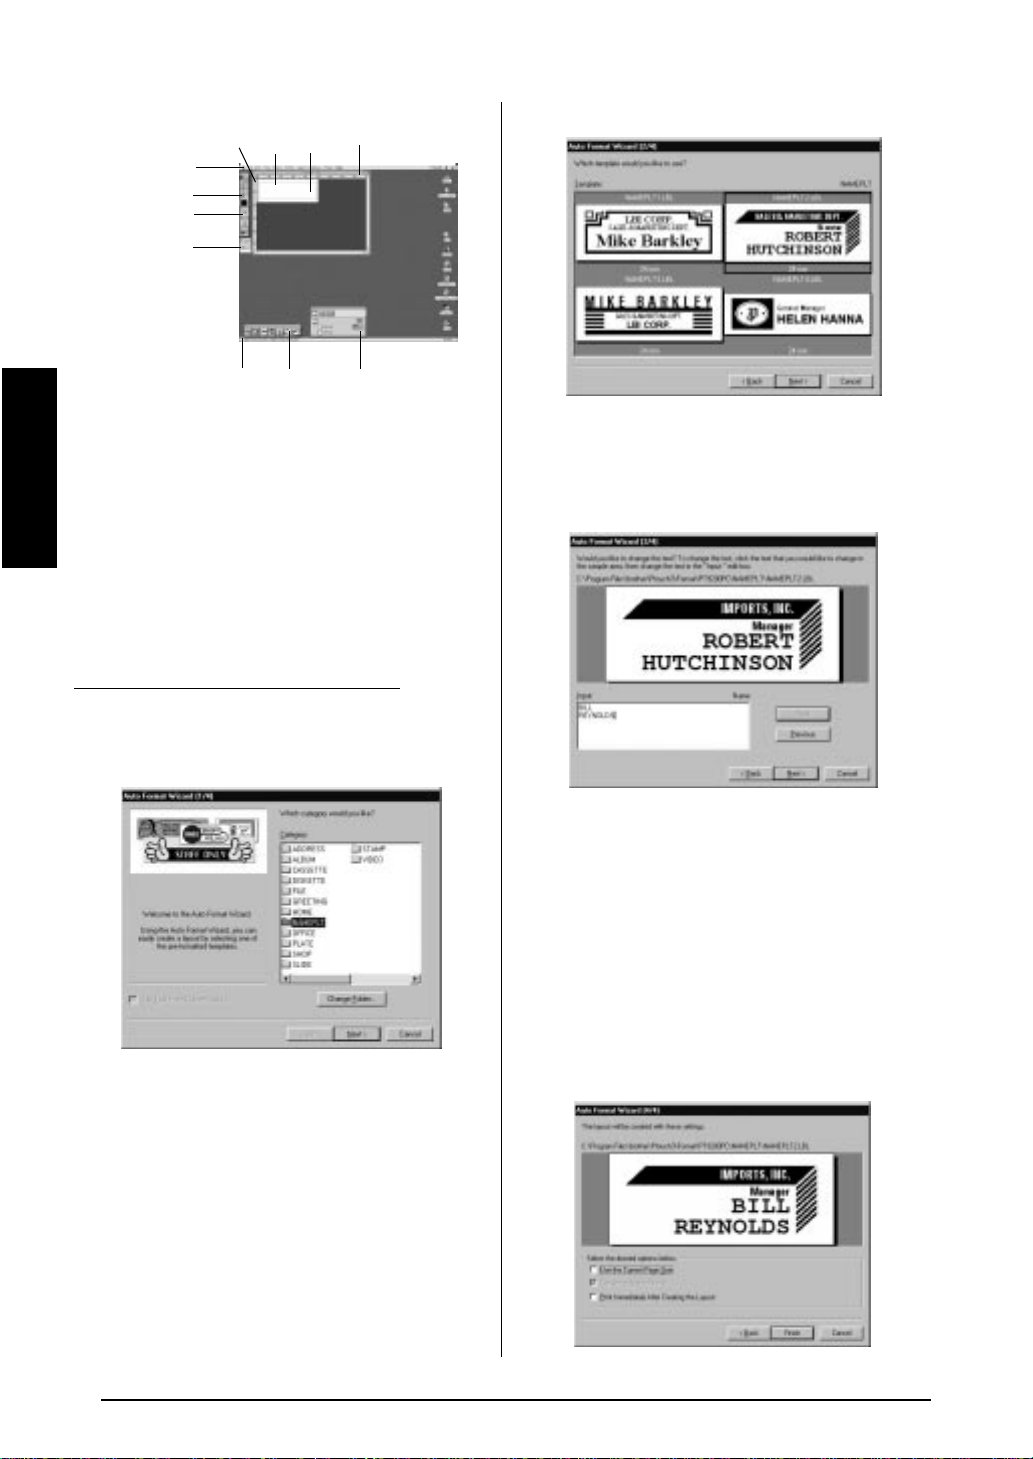
9 Check that the layout contains the text that
you want to use.
0 Click the Finish button. A new layout docu-
ment containing the pre-formatted text is
created.
On a Macintosh computer:
1 Select the [Auto Format] command in the
[File] menu to display the Auto Format dialogue box.
2 In the “Category:” list box, select the cate-
gory containing the template that you wish
to use. For this example, let’s select “shop”.
5 Click the Next or the Previous buttons until
the text that you wish to change appears in
the “Input:” edit box. Here, the first line of
text that we wish to change, “CAMERA”, is
already displayed.
6 Change the text so that the desired text is
entered. We can start by changing the product name to “VCR”.
7 Repeat steps 5 and 6 until all of the text is
entered in the way that you want, and then
click the Next button. Let’s finish editing the
text by changing the original price to
“$415.” and the sale price to “$215.”
Getting Started
8 Click the Close button. The text in the lay-
out is replaced by the newly entered text.
3 In the “Template:” list box, select the tem-
plate that you wish to use. Let’s select the
one named shop3.lbl.
4 Click the OK button. A new layout contain-
ing the selected pre-formatted text is created and the Auto Text dialogue box is
displayed.
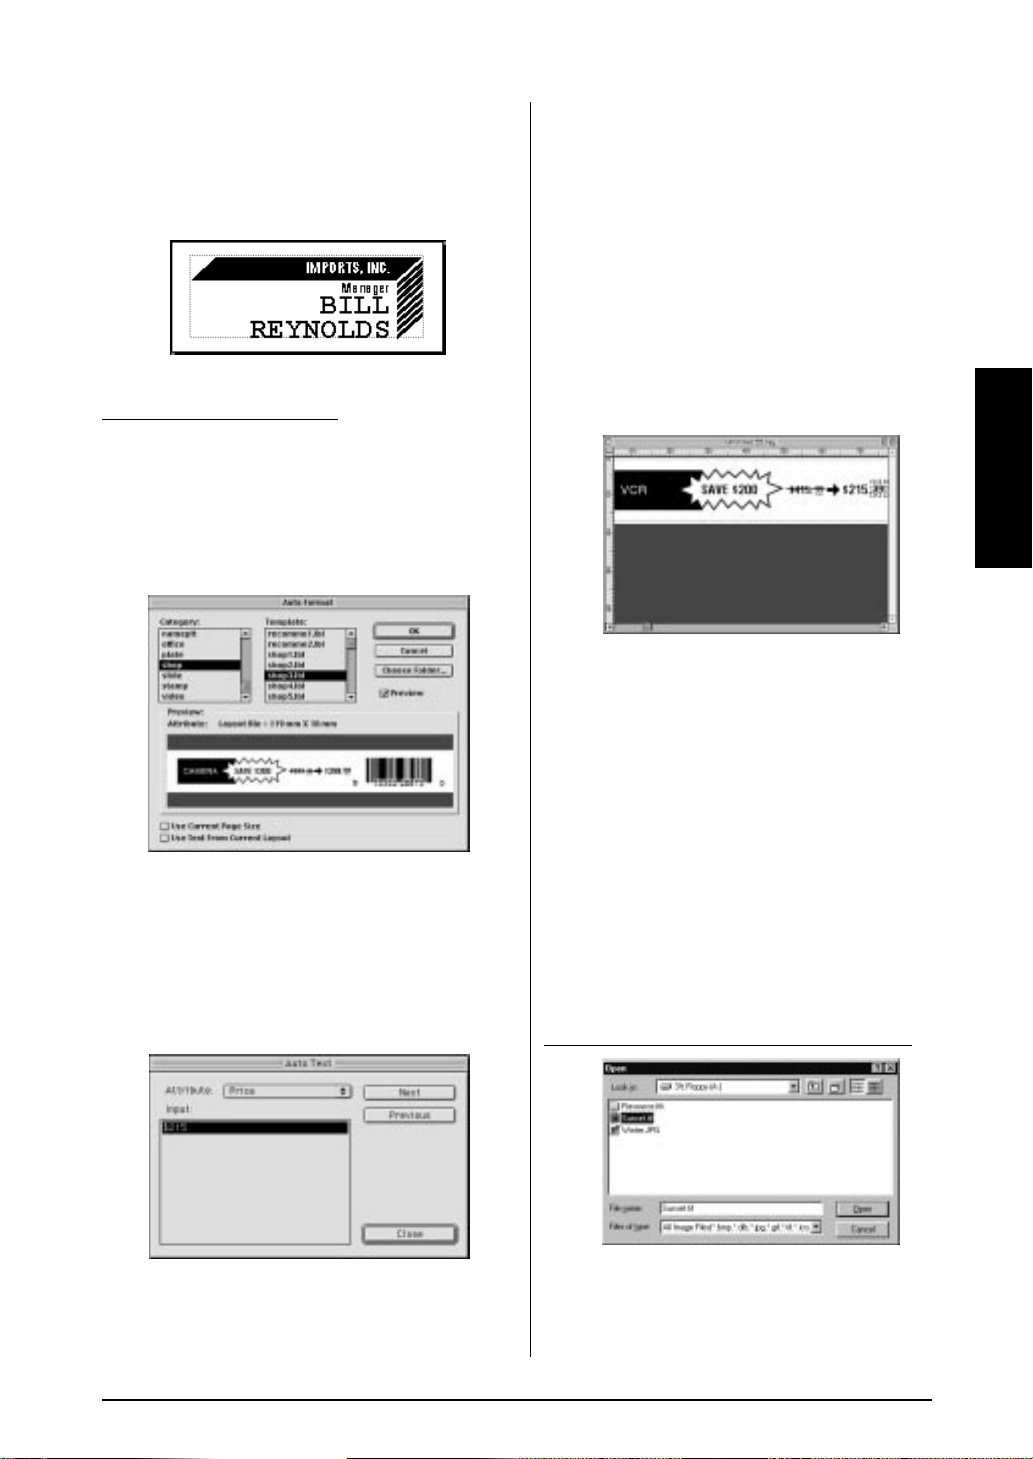
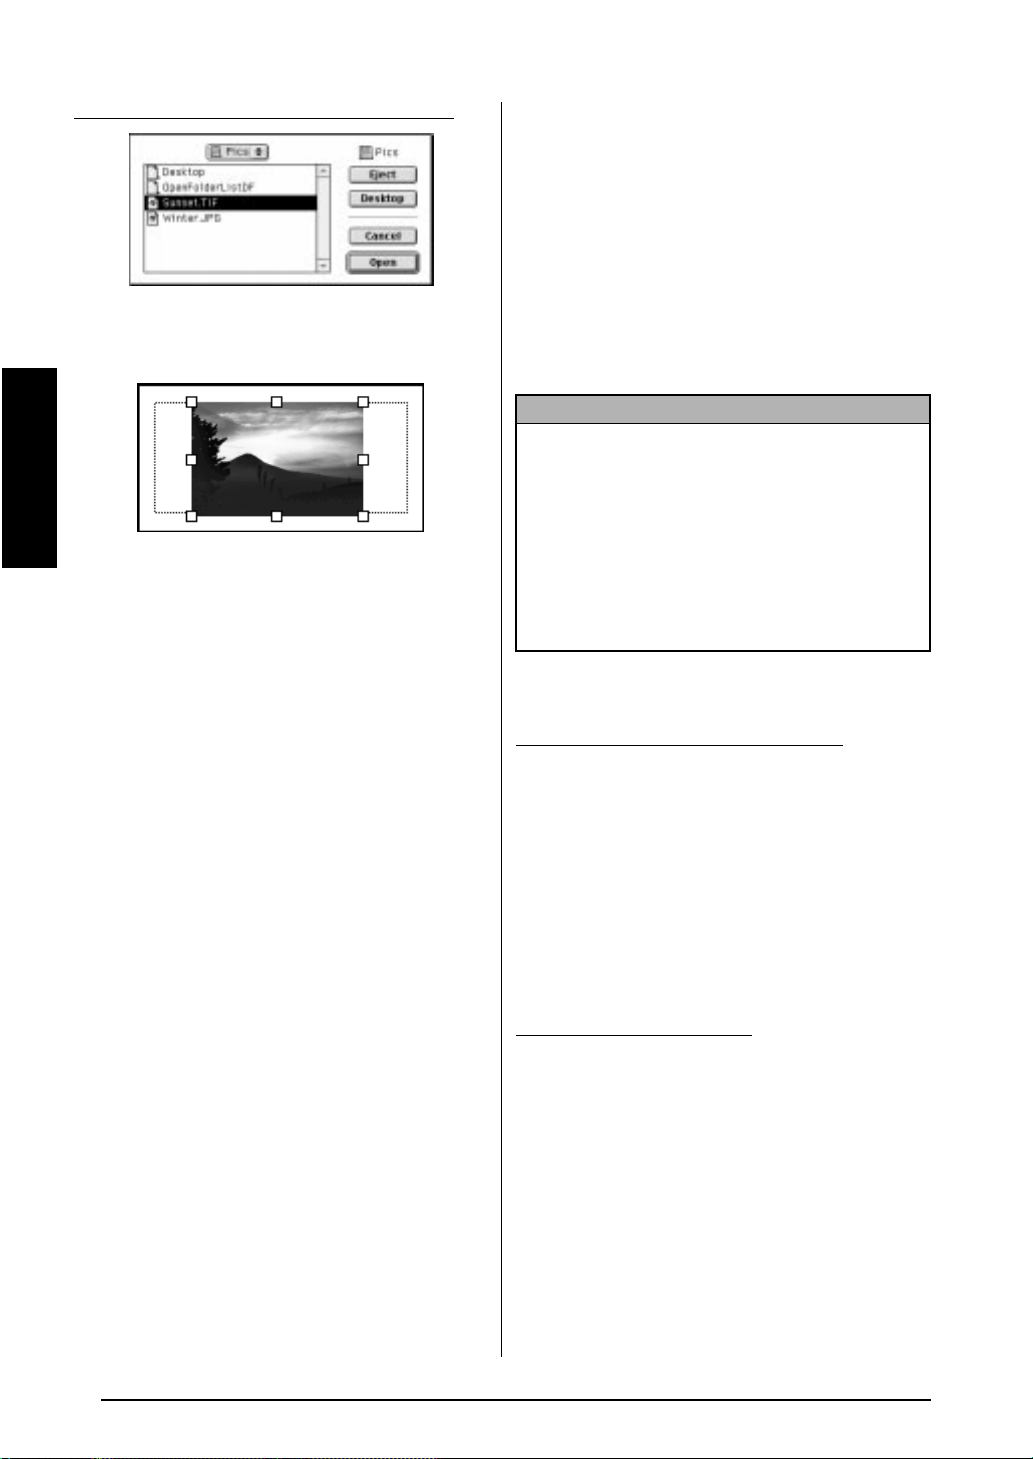
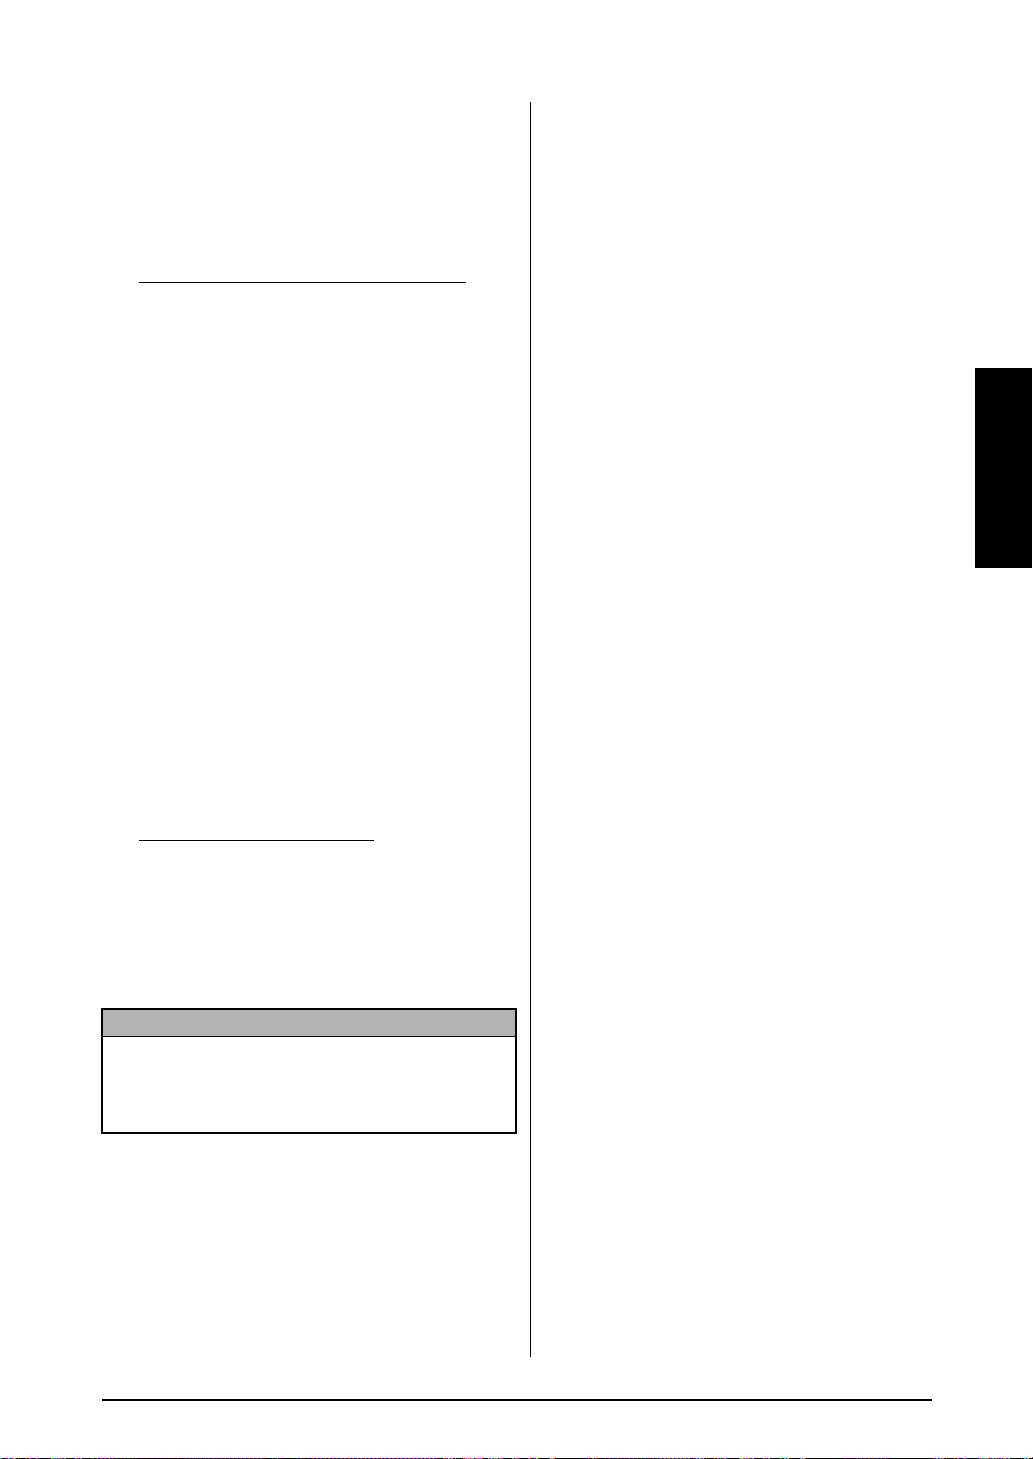
Importing a graphics file:
With the P-touch Editor application, you can
also import images files in a variety of formats
(.bmp, .dib, .jpg, .gif, .tif, .ico, and .wmf on the
PC or PICT, JPEG, TIFF and BMP on the Mac)
into your layout.
1 With a layout document displayed, select
the [Image] command in the [Insert] menu
(in the PC software) or the [Object] menu
(in the Mac software). A dialogue box that
allows you to select the image file appears.
When using the P-touch Editor for the PC:
19
Page 29
Ch. 2 Getting Started
When using the P-touch Editor for the Mac:
2 Select the graphic file that you wish to add
to the layout and double-click it. The image
appears in the layout.
Getting Started
Reading the User’s Guide
● ● ● ● ● ● ● ● ● ● ● ● ● ● ● ● ● ● ● ● ● ●
The P-touch Editor User’s Guide can be read
either by inserting the CD-ROM into the drive
each time you wish to refer to it or by installing
it onto your hard disk so that it is quickly available at any time. Since the User’s Guide is an
HTML document, a browser is needed to read it.
The installer for the Internet Explorer 4.01
browser (English version) is also available on the
CD-ROM.
NOTE
For details on the P-touch Editor software,
☞
refer to the User’s Guide on the CD-ROM.
For details on the PT-9400, refer to this
printed User’s Guide.
The P-touch Editor User’s Guide can be read
☞
using other browsers; however, some pages
may not be displayed correctly.
Internet Explorer 4.01 for other languages can
☞
be downloaded from the Microsoft web site.
Installing Internet Explorer 4.01:
On an IBM PC-compatible computer:
1 Insert the P-touch Editor CD-ROM into the
CD-ROM drive. A dialogue box that allows
you to select the language of the programme appears.
2 Select the desired language, and then click
the OK button. A dialogue box that allows
you to select what to install is displayed.
3 Click the bottom button to start up the Inter-
net Explorer 4.01 Installer.
On a Macintosh computer:
1 Insert the P-touch Editor CD-ROM into the
CD-ROM drive.
2 Double-click the “Installer” icon in the
“CD-Distribution - ICP1” folder of the CDROM’s “P-touch” folder.
20
Page 30
Reading the P-touch Editor User’s Guide:
1 If the User’s Guide was not installed onto
the computer’s hard disk, insert the P-touch
Editor CD-ROM into the CD-ROM drive.
2 Start up the User’s Guide.
On an IBM PC-compatible computer:
- By clicking the P-touch Editor icon:
Double-click “The User’s Guide PT-
9200PC” icon in the “P-touch Editor 3”
group window.
- With the Start button:
(a) Click the Start button in the taskbar to
display the Start menu.
(b) Select “Programs”.
(c) Select “P-touch Editor 3”.
(d) Click “The User’s Guide PT-9200PC”.
- With Windows Explorer:
(a) Start up Windows Explorer.
(b) Select the CD-ROM drive (if the User’s
Guide is not installed on the hard disk),
or select the drive and directory where
P-touch Editor is installed (if the User’s
Guide is installed on the hard disk).
(c) Double-click “Main.htm” in the “Man-
ual” folder.
Ch. 2 Getting Started
Getting Started
On a Macintosh computer:
- Double-click “Main.htm” in the “User’s
Guide” folder of the CD-ROM’s “P-touch”
folder (if the User’s Guide is not installed
on the hard disk), or of the installed “Ptouch Editor Ver3.0” folder (if the User’s
Guide is installed on the hard disk).
NOTE
The PT-9200PC Quick Reference is installed along
with the P-touch Editor User’s Guide.
However, the Quick Reference should be ignored
since it refers to a different model.
21
Page 31

Ch. 2 Getting Started
Getting Started
22
Page 32

Ch. 3 Functions
unctions
F
Chapter
3
Functions
23
Page 33

Ch. 3 Functions
Performing basic operations
● ● ● ● ● ● ● ● ● ● ● ● ● ● ● ● ● ● ● ● ● ●
Although most functions can be used just by
pressing their keys, the following keys may be
needed with certain functions.
Code ( )
To use a function printed in yellow on a key,
hold down , and while holding down, press
the key for the function that you wish to use.
Enter ( )
To select a function from a menu or an item
from a list, or to apply the selected setting, press
New Block
Cancel ( )
To quit a function without applying any changes
that you may have made, press .
Functions
Cursor keys
The four cursor keys ( , , , and )
can be used to perform two operations: to move
the cursor, which appears as either a bracket ([)
or an underline (_), or to make a selection.
New Block
.
Cancel
Cancel
(left)
To move the cursor one space or character
●
to the left, press once. If the cursor is at
the beginning of a line when this key is
pressed, the cursor moves to the end of the
previous line.
To move the cursor to the beginning of the
●
current line of text, hold down and
press .
To move the cursor to the beginning of the
●
current text block, hold down and
press . If the cursor is already at the
beginning of a text block when these keys
are pressed, the cursor moves to the beginning of the previous block.
To select the item on the left in a list, press
●
.
(up)
To move the cursor to the character in the
●
line directly above the cursor’s current position, press once.
To move the cursor to the beginning of the
●
(right)
To move the cursor one space or character
●
to the right, press once. If the cursor is
at the end of a line when this key is pressed,
the cursor moves to the beginning of the
next line.
To move the cursor to the end of the current
●
line of text, hold down and press .
To move the cursor to the beginning of the
●
next text block, hold down and
press .
To select the item on the right in a list, press
●
.
24
entire text, hold down and press .
To select the item above in a menu or list,
●
press .
(down)
To move the cursor to the character in the
●
line directly below the cursor’s position,
press once.
To move the cursor to the end of the entire
●
text, hold down and press .
To select the item below in a menu or list,
●
press .
Page 34

Entering text
D
N
″
● ● ● ● ● ● ● ● ● ● ● ● ● ● ● ● ● ● ● ● ● ●
Typing in the text for your labels is the same as
typing on a typewriter or a computer. In addition, the entered text is normally displayed in
WYSIWYG (what-you-see-is-what-you-get)
mode, which allows you to see exactly how the
label would appear if it were printed.
Space bar ( )
To add a blank space to the text, press
(space bar).
Shift ( )
To type an uppercase letter or the symbol
printed on the top half of certain keys, like on a
typewriter or a computer, hold down
while pressing the key for the character that you
wish to type.
Caps ( )
To type in series of uppercase letters without
holding down , Caps mode must be
turned on. Caps mode can be turned on or off
by pressing . When Caps mode is on, the
Caps indicator lights up.
NOTE
When a number key is pressed, the number—
☞
not the symbol above it—is typed in, unless
is held down.
To type lowercase letters while the
☞
is on, hold down while pressing the
key of the desired character.
Caps Alt Template Zoom
0.0cm HELSI
MARGIN:WIDE AUTO
Style Italic Vertical
Caps
mode
Back
Half
ground
Cut
36mm
24mm
18mm
12mm
9mm
A
6mm
Ch. 3 Functions
Alt
Alt ( )
Characters printed on the right sides of keys in
addition to many more special characters and
punctuation marks can be added to the text
using the Alt mode. Alt mode can be turned on
or off by pressing . When Alt mode is on,
Alt
the Alt indicator lights up.
Back
Half
ground
Caps Alt Template Zoom
11.6cm HELSI
MARGIN:WIDE AUTO
ouffl
Style Italic Vertical
A
Cut
36mm
24mm
18mm
12mm
9mm
6mm
The following table shows the available characters.
Charac-
ter key
Without
held down, or with
Caps mode off
a
A ä á à â ã å æ a Ä Á À Â Ã Å Æ A
Cç c Ç C
D ð d Ð D
E ë é è ê e Ë É È Ê E
I ï í ì î ij i Ï Í Ì Î I
L l L
N ñ n Ñ N
O ö ó ò ô õ ø œ o Ö Ó Ò Ô Õ O
P p P
R r R
S š s Š S
T t T
U ü ú ù û u Ü Ú Ù U
Yÿ ý y Ý Y
Z z Z
! ! ¡ ? ¿ . , : ; ” ’ – ! ¡ ? ¿ . , : ; ” ’ –
a
c´c C
d
d
e
e
l LLL
l
l
n´
n
°
o
o
p
´
r
r
s´
t
t
°
″
u
u
°
´
z
z
z
With held
down, or Caps mode on
AA
´
C
E
E
´
N
°
″
O
P
´
R
R
´
S
T
T
°
″
Û U
U
°
´
Z
Z
Z
Ø Œ O
Functions
25
Page 35

Ch. 3 Functions
To add an accented character or a special
punctuation mark to the text:
1 Press . The Alt indicator lights up.
Alt
2 Press the key for the desired character.
NOTE
☞ To display uppercase letters, hold down
(or press to turn on Caps mode) before
pressing a letter key.
Pressing a key that has an accented character
☞
on the right side of the key displays the corresponding list of accented characters with the
one on the key selected.
☞ To turn off the Alt mode without adding a char-
Back
ground
Alt
Half
Cut
Functions
acter to the text, press (or ) at any time
Caps Alt Template Zoom
Cancel
ëéèêeee
uffl ë
Style Italic Vertical
3 Press or until the desired accented
character or symbol is highlighted.
Caps Alt Template Zoom
ëéèêeee
A
Back
Half
ground
Cut
uffl é
Style Italic Vertical
A
36mm
24mm
18mm
12mm
9mm
6mm
36mm
24mm
18mm
12mm
9mm
6mm
4 Press . The selected character is
New Block
added to the text and Alt mode turns off.
NOTE
To enter a series of characters in Alt mode, hold
down before pressing . Then, con-
New Block
tinue adding characters by selecting them as
explained in steps 2 and 3, and holding down
while pressing . Press just
New Block New Block
after selecting the last character in the series.
Composite characters
In some languages, composite characters, which
consist of a letter and a diacritical mark, are
often used. This P-touch can display and print
these characters. The available diacritical marks
are ´, `, ˆ, and ¨.
The following diacritical mark and letter combinations are available:
Diacritical
mark
´
`
ˆ
¨
NOTE
Some of these composite characters can also be
typed in using the Alt mode (refer to page 25).
To type in a composite character:
1 For the ˆ or ¨ diacritical mark only: Press
Alt
to turn on Alt mode. The Alt indicator
lights up.
2 For the ` or ¨ diacritical mark only: Hold
down .
Letters which can be
combined
a e i o u n c r s y z
A E I O U N C R S Y Z
a e i o u
A E I O U
a e i o u
A E I O U
a e i o u y
A E I O U
26
3 Press . The diacritical mark is added to
the text.
Page 36

Ch. 3 Functions
4 Press the key for the letter that you wish to
combine with the diacritical mark. The letter is also added to the text.
NOTE
To type in an uppercase letter, hold down
(or press to turn on Caps mode) before pressing the letter key.
Enter ( )
New Block
To create a new line and move the cursor to the
beginning of it, press once you have fin-
New Block
ished entering a line of text.
NOTE
A single block of text can only contain the maximum number of lines shown in the table below. If
the block already contains the maximum number of
lines when you press , the error message
New Block
“LINE LIMIT” will appear.
Tape widths
6 mm 2
9 mm 3
12 mm 4
18 mm 6
24 mm 8
36 mm 10
Maximum number of
lines that can be entered
A maximum of three lines can be printed when
instant lettering tape or iron-on tape is used.
New Block ( + )
New Block
To change the number of lines in a section of
the label, create a new block by holding down
and pressing .
NOTE
A single label can only contain a maximum of
☞
five blocks. If five blocks already exist when
New Block
Symbol ( )
Symbol
In addition to the letters, symbols and numerals
on the key tops, there are 475 additional symbols and pictures available with the Symbol
function. After these symbols or pictures are
added to the text, they can be deleted like any
other character and some can be formatted
using certain text format functions (see pages 40
through 46).
A table of the available symbols can be found
on pages 94 through 97.
To add a symbol or picture to the text:
1 Press .
2 Press or until
Symbol
Back
Caps Alt Template Zoom
ground
[ ]:CONFIRM
SYMBOL
CATALOGUE NO.
PUNCTUATION
BRACKET
ARROW
UNIT
Style Italic Vertical
either CATALOGUE NO.
A
Half
Cut
36mm
24mm
18mm
12mm
9mm
6mm
9
moves beside
or the desired cat-
egory name.
NOTE
☞ To return to the previous screen without keep-
ing any changes, press .
Cancel
☞ To return to the text without adding a symbol,
Symbol
press at any time.
3 Press .
New Block
Functions
is held down and is pressed, the
New Block
error message “5 BLOCK LIMIT” will appear.
☞ To split a text block into two so that the charac-
ter on the right of the cursor is at the beginning
of the second block, position the cursor in the
middle of the block, and then hold down
and press .
New Block
27
Page 37

Ch. 3 Functions
4 Select the desired symbol.
If
CATALOGUE NO. was selected:
Type in a symbol number (or press
or ) until the desired symbol is displayed. The name of the category con-
taining the selected symbol is shown in
the second line at the top of the display.
Back
Caps Alt Template Zoom
ground
INPUT NO. 1
PUNCTUATION
Style Italic Vertical
A
Half
Cut
36mm
24mm
18mm
12mm
9mm
6mm
Back
Half
Caps Alt Template Zoom
Style Italic Vertical
5 Press . The selected symbol is added
New Block
ground
Cut
36mm
24mm
18mm
12mm
9mm
A
6mm
to the text.
NOTE
☞ To enter a series of symbols, hold down
Functions
If a category was selected:
Press or until the desired row
of symbols is selected, and then press
or until the desired symbol is
highlighted. An enlargement of the
selected symbol is shown on the right
half of the display. For the numbers of
symbols, refer to the list of symbols in
the Appendix.
NOTE
☞ To select the first symbol in a different category,
hold down and press or .
☞ To select the first symbol, press
(space bar) (or hold down and press ).
☞ To select the last symbol, hold down and
press .
before pressing . Then, continue add-
New Block
ing characters by selecting them as explained in
steps 2 through 4, and holding down
while pressing . Press just after
New Block New Block
selecting the last symbol in the series.
Some symbols typed into templates (Template
☞
function) and backgrounds (BACKGROUND
function of the FORMAT menu) appear on the
display as “ ”. To view an enlargement of the
×
symbol, move the cursor below it, and then
Zoom
press .
Image
28
Page 38

Barcode ( )
Barcode
The Barcode function allows you to add your
desired barcode to your label. In addition, the
various barcode parameters enable you to create custom barcodes.
NOTE
This section will explain how to enter a barcode
☞
into your text. It is not intended as a comprehensive introduction to the concept of barcoding. For more detailed information, please
consult one of the many reference books available.
Since this machine is not specifically designed
☞
for special barcode label-making, some barcode readers may not be able to read the labels.
Barcodes should be printed on white labels
☞
with black ink.
It is recommended that barcodes be printed
☞
with the
WIDE
set to
ter set to
MARGIN
function (
and the barcode
WIDE
; otherwise, barcodes may be
FORMAT
WIDTH
parame-
menu)
difficult to read.
To create a barcode:
1 Press .
Barcode
Ch. 3 Functions
To change the barcode parameters:
Format
2 Press . All or some of the following
Format
parameters can be set.
TYPE (type of protocol)
WIDTH (bar width)
UNDER# (numbers printed below barcode)
CH.DIG. (check digit)
Back
Half
Caps Alt Template Zoom
[ ]:CHANGE SETTINGS
PARAMETER
TYPE :CODE39
WIDTH :LARGE
UNDER# :ON
CH.DIG.:OFF
Style Italic Vertical
ground
Cut
36mm
24mm
18mm
12mm
9mm
A
6mm
3 Press or until Î moves beside the
parameter that you want to change.
4 Press . The available settings are dis-
played.
Functions
NOTE
☞ To change the data or parameters of a barcode
that has already been added to the text, position
the cursor in the middle of the barcode mark
before pressing .
Barcode
☞ To return to the previous screen without keep-
ing any changes, press .
Cancel
☞ To return to the text without adding a barcode,
Barcode
press at any time.
Back
Half
Caps Alt Template Zoom
TYPE :CODE39
**
[FORMAT]:PARAMETER
[SYMBOL]:SPECIAL
CHARACTER
Style Italic Vertical
ground
Cut
36mm
24mm
18mm
12mm
9mm
A
6mm
Caps Alt Template Zoom
[ ]:CONFIRM
TYPE
CODE39
I-2/5
EAN13
EAN8
UPC-A
UPC-E
Style Italic Vertical
A
Back
ground
Half
Cut
36mm
24mm
18mm
12mm
9mm
6mm
29
Page 39

Ch. 3 Functions
5 Press or until 9 moves beside the
desired setting.
NOTE
To select the default setting, press
(space bar).
Back
Half
Caps Alt Template Zoom
ground
Cut
[ ]:CONFIRM
TYPE
CODABAR
EAN128
CODE128
ISBN 5
ISBN 2
Style Italic Vertical
6 Press to confirm the setting and
Functions
return to the PARAMETER menu.
New Block
7 Repeat steps 3 through 6 until all parame-
ters are set as you wish.
A
36mm
24mm
18mm
12mm
9mm
6mm
To enter the barcode data:
9 Type in the barcode data.
Back
Half
Caps Alt Template Zoom
TYPE :CODABAR
A123456D
[FORMAT]:PARAMETER
[SYMBOL]:SPECIAL
CHARACTER
Style Italic Vertical
ground
Cut
36mm
24mm
18mm
12mm
9mm
A
6mm
To add special characters to barcodes (only
with protocols EAN128, CODE128, CODE39
or CODABAR):
0 Press or until the cursor is below
the character on the right of where you
want to add the special character.
A Press .
Symbol
8 Press to apply the settings.
New Block
Caps Alt Template Zoom
Back
ground
Half
Cut
TYPE :CODABAR
[FORMAT]:PARAMETER
[SYMBOL]:SPECIAL
CHARACTER
Style Italic Vertical
A
36mm
24mm
18mm
12mm
9mm
6mm
Back
Half
Caps Alt Template Zoom
[ ]:CONFIRM
SPECIAL CHARA.
SYMBOL 1 +
SYMBOL 2 $
Style Italic Vertical
B Press or until
ground
Cut
36mm
24mm
18mm
12mm
9mm
A
9
moves beside the
6mm
special character that you want to add.
NOTE
Refer to page 98 for tables of the special characters
that are available.
C Press . The selected special charac-
New Block
ter is added to the barcode data.
30
Page 40

Ch. 3 Functions
To add the barcode to the text:
D Press .
NOTE
To delete a barcode, move the cursor to the centre
or to the right of the barcode and press .
When the message “OK TO CLEAR BARCODE?”
appears, press or until
OK, and then press . To return to the text
without deleting the barcode, press (or move
9
beside CANCEL, and then press ).
New Block
New Block
Clear
9
moves beside
Cancel
New Block
Back
Half
Caps Alt Template Zoom
9.9cm HELSI
MARGIN:WIDE AUTO
Style Italic Vertical
ground
Cut
36mm
24mm
18mm
12mm
9mm
A
6mm
Currency conversion ( )
Conv.
Setup
This extremely useful function automatically
converts one currency into another (
RENCY
2ND CURRENCY
↔↔↔↔
). Simply set up this
1ST CUR-
function once with the desired currency formats
so that the next time you wish to print labels
with prices on them, one currency can instantly
be converted into another. After a price has
been converted and entered in the text, you can
format the label and the text as usual.
The general procedure for setting up the currency conversion function is:
1. Set the
2. Set the
1ST CURRENCY
2ND CURRENCY
parameters.
parameters.
3. Select which currencies will be printed
and their format.
4. Exit the currency conversion setup.
NOTE
If the setup is not exited by selecting EXIT SETUP,
the settings will not be saved.
To set the 1ST CURRENCY parameters:
1 Hold down and press .
Conv.
Setup
Functions
Caps Alt Template Zoom
[ ]:CONFIRM
SETUP
1ST CURRENCY
2ND CURRENCY
PRINT FORMAT
EXIT SETUP
Style Italic Vertical
2 Since
9
is already beside 1ST CURRENCY,
press .
New Block
Caps Alt Template Zoom
A
ground
[ ]:CHANGE SETTINGS
1ST CURRENCY
CURRENCY:EURO
LAYOUT :1
DIVIDER :,
RATE : =
1.0EURO
X,XXX.XX
Style Italic Vertical
A
Back
Back
ground
Half
Cut
Half
Cut
36mm
24mm
18mm
12mm
9mm
6mm
36mm
24mm
18mm
12mm
9mm
6mm
31
Page 41

Ch. 3 Functions
3 Since Î is already beside CURRENCY,
press .
Back
Half
Caps Alt Template Zoom
ground
Cut
[ ]:CONFIRM
1ST CURRENCY
EURO
ATS
BEF
DEM
ESP
FIM
Style Italic Vertical
NOTE
When setting the parameters for the second cur-
2ND
rency,
will be displayed instead of
4 Press or until 9 moves beside the
Functions
desired currency. The following currency
settings are available:
EURO, ATS (Austrian schilling), BEF (Belgian franc), DEM (German mark), ESP
(Spanish peseta), FIM (Finnish markka), FRF
(French franc), IEP (Irish punt), ITL (Italian
lira), LUF (Luxembourg franc), NLG (Netherlands guilder), or PTE (Portuguese
escudo).
Caps Alt Template Zoom
A
Back
Half
ground
Cut
[ ]:CONFIRM
1ST CURRENCY
EURO
ATS
BEF
DEM
ESP
FIM
Style Italic Vertical
A
1ST
36mm
24mm
18mm
12mm
9mm
6mm
.
36mm
24mm
18mm
12mm
9mm
6mm
5 Press to confirm the setting and
New Block
return to the 1ST CURRENCY menu.
NOTE
When setting the parameters for the second currency,
2ND
will be displayed instead of
1ST
.
6 Press or until Î moves beside
LAYOUT (the layout of the price).
7 Press .
Back
Half
Caps Alt Template Zoom
[ ]:CONFIRM
1ST LAYOUT
1DM XXX.XX___
2___XXX___
3___XXX___XX
4XXX___XX___
Style Italic Vertical
ground
Cut
36mm
24mm
18mm
12mm
9mm
A
6mm
8 Press or until 9 moves beside the
desired setting.
NOTE
The first layout selected is the default layout for
☞
the selected currency.
Cur-
rency
EURO ___XXX.XX _ IEP IEPXXX.XX___
ATS öS XXX.XX___ ITL L. XXX___
BEF ___XXX.XXBEF LUF ___XXX.XXLUF
DEM DM XXX.XX___ NLG fl XXX.XX___
ESP ___XXXpta PTE ___XXXEsc
FIM ___XXX.XX mk ANY ___XXX.XX___
FRF ___XXX.XX FF
Default layout
Cur-
rency
Default layout
NOTE
☞ To return to the previous screen without keep-
Cancel
ing any changes, press .
☞ To return to the previous screen with the new
setting, press .
32
Each “X” represents a digit and the decimal
point indicates the decimal position.
☞ To type characters in the spaces, press or
to move the cursor to the desired position,
and then type in the desired characters.
☞ To select the default layout, hold down
before pressing (space bar).
Page 42

Ch. 3 Functions
9 Press to confirm the setting.
New Block
If a setting containing a decimal point was
selected:
1ST D. POINT
The
Caps Alt Template Zoom
[ ]:CONFIRM
1ST D.POINT
. (PERIOD)
, (COMMA)
$
Style Italic Vertical
menu is displayed.
Back
Half
ground
Cut
A
36mm
24mm
18mm
12mm
9mm
6mm
Press or until 9 moves beside the
desired decimal symbol setting, and then
press to confirm the settings and
New Block
return to the 1ST CURRENCY menu.
If a setting not containing a decimal point
was selected:
The 1ST CURRENCY menu is displayed
again.
0 Press or until Î moves beside
DIVIDER (the symbol for separating threedigit sets).
A Press .
Back
Half
Caps Alt Template Zoom
[ ]:CONFIRM
1ST DIVIDER
. (PERIOD)
, (COMMA)
.
(BULLET)
SPACE
' (APOSTROPHE)
NONE
Style Italic Vertical
ground
Cut
36mm
24mm
18mm
12mm
9mm
A
6mm
B Press or until 9 moves beside the
desired setting.
NOTE
☞ To return to the previous screen without keep-
ing any changes, press .
Cancel
☞ To return to the previous screen with the new
setting, press .
C Press to confirm the setting and
New Block
return to the 1ST CURRENCY menu.
D Press again to apply the settings
New Block
and return to the SETUP menu.
In order to convert a currency automatically, the
parameters for another currency must be set.
To set the 2ND CURRENCY parameters:
E Press or until 9 moves beside
2ND CURRENCY (the second currency).
F Press .
New Block
Back
Half
Caps Alt Template Zoom
ground
Cut
[ ]:CHANGE SETTINGS
2ND CURRENCY
CURRENCY:EURO
LAYOUT :1
DIVIDER :,
RATE : =
1.0EURO
X,XXX.XX
Style Italic Vertical
A
36mm
24mm
18mm
12mm
9mm
6mm
G Repeat steps 3 through C until the 2ND
CURRENCY, 2ND LAYOUT, 2ND
D.POINT, and 2ND DIVIDER parameters
are set.
NOTE
In addition to the currency settings listed in step
☞
4, ANY is available, allowing you to make cur-
rency conversions into a from a different currency after entering the corresponding
exchange rate.
If a currency symbol was typed in the 2ND
☞
LAYOUT setting in step 8, that symbol is dis-
played instead of ANY.
Functions
33
Page 43

Ch. 3 Functions
H If ANY was selected for the second cur-
rency, press or until Î moves
beside RATE (the exchange rate).
If a setting other than ANY was selected for
the second currency, skip to step M.
I Press .
Back
Half
Caps Alt Template Zoom
ground
Cut
[ ]:CONFIRM
RATE
1 =RATE ANY
1ANY =RATE
RATE=
0.
Style Italic Vertical
J Press or until 9 moves beside the
Functions
desired exchange rate calculation.
NOTE
Entering an exchange rate based on the euro makes
it possible to convert automatically between the
new currency (ANY) and any of the other preset
currencies.
A
36mm
24mm
18mm
12mm
9mm
6mm
O Press .
New Block
Back
Half
Caps Alt Template Zoom
ground
Cut
[ ]:CHANGE SETTINGS
PRINT FORMAT
PRINT CURRENCY:
1ST 2ND
ORIENTATION :
/
Style Italic Vertical
A
36mm
24mm
18mm
12mm
9mm
6mm
P Since Î is already beside PRINT CUR-
RENCY, press .
Back
Half
Caps Alt Template Zoom
[ ]:CONFIRM
PRINT CURRENCY
1ST *YES NO
2ND *YES NO
Style Italic Vertical
ground
Cut
36mm
24mm
18mm
12mm
9mm
A
6mm
K Type in the current exchange rate.
NOTE
Up to 10 digits and a decimal point can be
☞
entered for the exchange rate.
If a currency symbol was typed in the 2ND
☞
LAYOUT setting in step 8, that symbol is dis-
played instead of ANY.
L Press once to confirm the setting
New Block
and return to the 2ND CURRENCY menu.
M Press again to apply the settings
New Block
and return to the SETUP menu.
To select which currencies are printed:
N Press or until 9 moves beside
PRINT FORMAT.
Q Press or until 9 moves beside the
setting that you wish to change.
R Press or until the desired setting is
selected.
NOTE
☞ To print the currency, move * beside YES. Cur-
rencies set to NO will not be printed.
☞ To return to the previous screen without keep-
ing any changes, press .
Cancel
S Repeat steps Q and R until the desired set-
tings are selected.
T Press to confirm the settings and
New Block
return to the PRINT FORMAT menu.
To select how the currencies are printed:
U Press or until Î moves beside
ORIENTATION.
34
Page 44

V Press .
Back
Half
Caps Alt Template Zoom
[ ]:CONFIRM
ORIENTATION
/
HORIZONTAL
Style Italic Vertical
ground
Cut
36mm
24mm
18mm
12mm
9mm
A
6mm
W Press or until 9 moves beside the
desired setting.
NOTE
☞ To return to the previous screen without keep-
ing any changes, press .
Cancel
☞ To return to the previous screen with the new
setting, press .
X Press once to confirm the setting.
New Block
If
HORIZONTAL was selected:
The SEPARATOR menu is displayed.
Back
Half
Caps Alt Template Zoom
[ ]:CONFIRM
SEPARATOR
/
:
;
SPACE
Style Italic Vertical
ground
Cut
36mm
24mm
18mm
12mm
9mm
A
6mm
Press or until 9 moves beside the
desired setting, and then press to
New Block
confirm the settings and return to the PRINT
FORMAT menu.
Ch. 3 Functions
If
VERTICAL1 or VERTICAL2 was selected:
The PRINT FORMAT menu is displayed
again.
Y Press again to apply the settings
New Block
and return to the SETUP menu.
STATEMENT ABOUT CURRENCY CONVERSION
In view of the changes in Europe towards the
implementation of the EMU, it is in the interest of
the user to confirm that this method complies with
(and provides results consistent with) any laws governing currency conversions.
To exit the currency conversion setup:
Z Press or until 9 moves beside EXIT
SETUP.
[ Press .
New Block
To convert currencies:
Conv.
1 Press .
Setup
Back
Caps Alt Template Zoom
ground
[ ]:CONFIRM
CONVERSION
DEM EURO
EURO DEM
0.
Style Italic Vertical
A
Half
Cut
36mm
24mm
18mm
12mm
9mm
6mm
2 Press or until 9 moves beside the
desired exchange rate calculation.
3 Type in the value that you wish to convert
into other currencies.
NOTE
The value can have as many as 10 digits, but is limited to 2 decimal digits.
Functions
35
Page 45

Ch. 3 Functions
4 Press .
NOTE
New Block
The preset currencies are calculated based on the
following rates:
Cur-
rency
EURO 1 FRF 6.55957
ATS 13.7603 IEP 0.787564
BEF 40.3399 ITL 1936.27
DEM 1.95583 LUF 40.3399
ESP 166.386 NLG 2.20371
FIM 5.94573 PTE 200.482
Conversion
rate
(1 =)
Cur-
rency
Functions
Conversion
rate
(1 =)
Editing text
● ● ● ● ● ● ● ● ● ● ● ● ● ● ● ● ● ● ● ● ● ●
Zoom ( )
To view text that is too small to be read on the
display, the
making it easier to edit the text.
be turned on or off by pressing . When the
Zoom
Zoom
In
the label are shown by dark lines and the current line number is shown at the bottom of the
display.
NOTE
☞
☞ To return to WYSIWYG mode, press (or
Zoom
Image
Zoom
mode must be turned on,
Zoom
mode can
Zoom
Image
mode is on, the
Zoom
indicator lights up.
mode, the top, bottom, and left edge of
Use the cursor keys to move around the text.
Cancel
Zoom
).
Image
Back
Half
Caps Alt Template Zoom
11.6cm BRUSS
MARGIN:WIDE AUTO
Bill R
[LINE: 1/2]
Style Italic Vertical
ground
Cut
36mm
24mm
18mm
12mm
9mm
A
6mm
36
In addition, pressing while typing text into
templates (
BACKGROUND
(
Template
Zoom
Image
function) and backgrounds
function of the
FORMAT
menu) displays an enlargement of the character
above the cursor. This allows you to view sym-
bols which appear on the display as “ ”.
NOTE
To return to editing the text, press any key
×
Page 46

Caps Alt Template Zoom
EDIT TEXT
Style Italic Vertical
A
Back
ground
Half
Cut
36mm
24mm
18mm
12mm
9mm
6mm
Back
Caps Alt Template Zoom
OK TO CLEAR
!
TEXT BUFFER?
ground
TEXT & FORMATS
TEXT ONLY
CANCEL
Style Italic Vertical
A
Ch. 3 Functions
Half
Cut
36mm
24mm
18mm
12mm
9mm
6mm
Backspace ( )
Clear
To remove the character in the text that is to the
left of the cursor’s current position, press .
Each time is pressed, one character is
Clear
Clear
deleted. If the cursor is at the beginning of a line
or a block when is pressed, the current
Clear
line or block is joined with the previous one.
Clear ( + )
Clear
Once you have printed your text, you will need
to erase the display so that you can design a
new one. With the
Clear
function, you can
select whether all of the text and all of the format settings, or just the text and its text format
settings will be erased.
NOTE
The cursor can be located anywhere in the text.
To erase all of the text and formats:
1 Hold down and press .
NOTE
To return to the text without erasing anything, press
Cancel
(or move
).
New Block
9
beside CANCEL and press
Clear
2Since
9
is already beside TEXT & FOR-
MATS, press . All of the text is
New Block
erased and all of the format functions are
reset to their default settings.
To erase only the text:
1 Hold down and press .
NOTE
To return to the text without erasing anything, press
Cancel
(or move
New Block
).
9
beside CANCEL and press
Clear
Back
Half
Caps Alt Template Zoom
OK TO CLEAR
!
TEXT BUFFER?
TEXT & FORMATS
TEXT ONLY
CANCEL
Style Italic Vertical
ground
Cut
36mm
24mm
18mm
12mm
9mm
A
6mm
2 Press or until 9 moves beside
TEXT ONLY.
Functions
37
Page 47

Ch. 3 Functions
.
Back
Half
Caps Alt Template Zoom
OK TO CLEAR
!
TEXT BUFFER?
ground
Cut
TEXT & FORMATS
TEXT ONLY
CANCEL
Style Italic Vertical
3 Press . The text is erased and the
New Block
text format functions are reset to their
default settings, but the label format functions (FORMAT menu) remain unchanged.
Area
Area ( )
All
Text formatting with the Area function is different from creating a new block using the New
Functions
Block function. With the Area function, text
within a line or group of lines can be selected so
that its text formats can be changed. The
selected text can also be deleted or copied and
pasted in a different place in the text.
The following two labels show how these functions can be used.
A
36mm
24mm
18mm
12mm
9mm
6mm
To select an area of the text:
1 Press , , , or until the cursor
is beside the first character that you want to
select.
Back
Half
Caps Alt Template Zoom
13.5cm HELSI
MARGIN:WIDE AUTO
ert Becker
Transport
Style Italic Vertical
Area
2 Press . The first character is highlighted.
All
Caps Alt Template Zoom
13.5cm HELSI
MARGIN:WIDE AUTO
ert Becker
Transport
Style Italic Vertical
ground
Cut
36mm
24mm
18mm
12mm
9mm
A
Back
Half
ground
Cut
A
6mm
36mm
24mm
18mm
12mm
9mm
6mm
The multiple blocks in this label were created
using the New Block function. The first block of
this text contains a single line, the second contains four lines, and the third, two lines.
This is a single-block, single-line label with different parts of the text formatted using the Area
function. After all of the text was typed in, section “(123) 456-7890” was selected and given a
smaller character size.
38
3 Press , , , or until all of the
characters that you want to select are highlighted.
Back
Half
Caps Alt Template Zoom
13.5cm HELSI
MARGIN:WIDE AUTO
ert Becker
Transport
Style Italic Vertical
ground
Cut
36mm
24mm
18mm
12mm
9mm
A
6mm
Page 48

4 Format the text using the text format func-
tions (see pages 40 through 46) or use the
Copy & Paste function to copy the text and
paste it into a different place in the text (see
page 39).
Ch. 3 Functions
Copy
Copy & Paste ( )
&Paste
The Copy & Paste function is useful for copying
already entered characters and pasting them
into a different section of the text.
NOTE
☞ To deselect the text, press (or ).
Cancel
☞ To delete the selected characters, press .
Area
All
Clear
When the message “OK TO CLEAR AREA?”
appears, press or until
beside OK, and then press . To return
New Block
9
moves
to the text without deleting the selected area,
Cancel
press (or move 9 beside CANCEL, and
then press ).
All (
+
Area
All
New Block
)
With the All function, all of the text can be
selected so that it can be formatted together,
deleted, or copied and pasted in another place
in the text.
To select all of the text:
Area
1 Hold down and press . All of the
All
text is highlighted.
To copy and paste text:
1 Select the text that you wish to copy and
paste using either the AREA function (see
page 38) or the ALL function (see page 39).
Copy
2 Press . The selected characters are cop-
&Paste
ied, but not removed from the text.
3 Press , , , or until the cursor
is positioned where you want to add the
copied text.
Copy
4 Press .
&Paste
Caps Alt Template Zoom
OK TO PASTE?
!
OK
CANCEL
Style Italic Vertical
A
Back
ground
Half
Cut
36mm
24mm
18mm
12mm
9mm
6mm
Functions
Back
Half
Caps Alt Template Zoom
13.5cm HELSI
MARGIN:WIDE AUTO
ert Becker
Transport
Style Italic Vertical
ground
Cut
36mm
24mm
18mm
12mm
9mm
A
6mm
2 Format the text using the text format func-
tions (see pages 40 through 46) or use the
Copy & Paste function to copy the text and
paste it into a different place in the text (see
page 39).
NOTE
To deselect the text, press .
Cancel
5 Press or until 9 moves beside OK.
6 Press . The text is added at the cur-
New Block
sor’s location.
39
Page 49

Ch. 3 Functions
Formatting
● ● ● ● ● ● ● ● ● ● ● ● ● ● ● ● ● ● ● ● ● ●
A variety of formatting functions are available
for making more decorative labels.
The following text formatting functions can be
used to change the appearance of characters:
Font, Size, Width, Style, Italic, (line
effects) and Vert (vertical). They can be applied
to part or all of the text, either before or after
you have entered it.
The label formats, listed in the FORMAT menu,
specify the general appearance of the label.
Font ( )
With the Font function, you can change your
text’s font to one of the many that are available.
Refer to the font samples on page 98. The font
of the text at the cursor’s current position is
shown at the right end of the top line in the top
of the display.
Functions
NOTE
While selecting a Font setting, the following operations may be used:
☞
☞
☞
☞
Font
To display the previous setting, hold down
and press .
To select the default setting (
down and press .
Font
HELSINKI
Font
To return all text formatting functions to their
default settings, hold down and press
(space bar).
To return to the text without making any
changes, press .
Caps Alt Template Zoom
Cancel
Back
ground
Half
Cut
0.0cm HELSI
MARGIN:WIDE AUTO
Style Italic Vertical
A
/
), hold
36mm
24mm
18mm
12mm
9mm
6mm
To change the font before entering the text:
1 Press , , , or until the cursor
is moved to the point where you want to
begin using a different font.
2 Press until the desired font is selected.
Font
The current setting is shown below FONT at
the top of the display and a sample (A) can
be seen to the right of the cursor.
Back
Half
Caps Alt Template Zoom
FONT
BRUSSELS
A
Style Italic Vertical
ground
Cut
36mm
24mm
18mm
12mm
9mm
A
6mm
3 Type in the new text.
To change the font of the text in a selected
area:
1 Hold down and press to select all
of the text, or press and use , ,
Area
All
Area
All
, or to select only a part of it.
2 Press until the text is displayed in the
Font
desired font. The current setting is shown
below FONT at the top of the display.
Back
Half
Caps Alt Template Zoom
FONT
BRUSSELS
rt Becker
Transport
Style Italic Vertical
3 Press . The selected text is displayed
New Block
ground
Cut
36mm
24mm
18mm
12mm
9mm
A
6mm
in the desired font.
40
Page 50

Ch. 3 Functions
Size ( )
Size
The character size can be adjusted using the
Size function. With the AUTO setting, the
machine compares your text with the width of
the installed tape and automatically adjusts the
characters to the largest possible size. Refer to
page 99 for examples of the Size settings. The
size of the text at the cursor’s current position is
shown at the right end of the second line in the
top of the display.
Back
Half
Caps Alt Template Zoom
13.5cm HELSI
MARGIN:WIDE AUTO
ert Becker
Transport
Style Italic Vertical
ground
Cut
36mm
24mm
18mm
12mm
9mm
A
6mm
NOTE
With the AUTO setting selected and 12 mm, 18
☞
mm, 24 mm or 36 mm-wide tape installed, the
size of text with just one line and not containing
lowercase letters or certain symbols is printed
slightly larger.
If a very small text size is selected, the text may
☞
not be readable in WYSIWYG mode. When
editing such small text, turn on the Zoom mode.
For more details, refer to page 36.
Since the text sizes that can be printed depends
☞
on the width of the tape, the following table
shows the maximum text size that can be used
with each tape width.
Tape widths
6 mm 12
9 mm 18
12 mm 24
18 mm 36
24 mm 60
36 mm 72
Maximum text size
(in points)
NOTE
While selecting a Size setting, the following operations may be used:
To display the previous setting, hold down
☞
and press .
To select the default setting (
☞
To return all text formatting functions to their
☞
Size
and press .
Size
AUTO
), hold down
default settings, hold down and press
(space bar).
To return to the text without making any
☞
changes, press .
Cancel
To change the text size before entering the
text:
1 Press , , , or until the cursor
is moved to the point where you want to
begin using a different text size.
2 Press until the desired text size is
Size
selected. The current setting is shown
below SIZE at the top of the display and a
sample (A) can be seen to the right of the
cursor.
Back
Half
Caps Alt Template Zoom
SIZE
48pt
A
Style Italic Vertical
ground
Cut
36mm
24mm
18mm
12mm
9mm
A
6mm
3 Type in the new text.
Functions
41
Page 51

Ch. 3 Functions
To change the size of the text in a selected
area:
Area
1 Hold down and press to select all
of the text, or press and use , ,
All
Area
All
, or to select only a part of it.
2 Press until the text is displayed in the
Size
desired text size. The current setting is
shown below SIZE at the top of the display.
Back
Half
Caps Alt Template Zoom
ground
Cut
SIZE
24pt
Robert Becker
ABC Transport
A
Functions
Style Italic Vertical
36mm
24mm
18mm
12mm
9mm
6mm
Width ( )
Width
The Width function can be used with any of the
text sizes to make the size of the characters
wider or more narrow. Refer to page 99 for
examples of the Width settings.
NOTE
While selecting a Width setting, the following operations may be used:
To display the previous setting, hold down
☞
and press .
To select the default setting (
☞
down and press .
To return all text formatting functions to their
☞
default settings, hold down and press
To return to the text without making any
☞
changes, press .
Width
(space bar).
Cancel
Width
MEDIUM
), hold
3 Press . The selected text is displayed
New Block
in the desired text size.
To change the width before entering the text:
1 Press , , , or until the cursor
is moved to the point where you want to
begin using a different text width.
2 Press until the desired width is selected.
Width
The current setting is shown below WIDTH
at the top of the display and a sample (A)
can be seen to the right of the cursor.
Back
Half
Caps Alt Template Zoom
WIDTH
WIDE
A
Style Italic Vertical
ground
Cut
36mm
24mm
18mm
12mm
9mm
A
6mm
3 Type in the new text.
42
Page 52

Ch. 3 Functions
To change the width of the text in a selected
area:
Area
1 Hold down and press to select all
of the text, or press and use , ,
All
Area
All
, or to select only a part of it.
2 Press until the text is displayed in the
Width
desired width. The current setting is shown
below WIDTH at the top of the display.
Back
Half
Caps Alt Template Zoom
WIDTH
WIDE
ecker
sport
Style Italic Vertical
3 Press . The selected text is displayed
New Block
ground
Cut
36mm
24mm
18mm
12mm
9mm
A
6mm
in the desired text width.
Style ( )
Style
You can choose from 7 different text styles to
create more personalized labels. Refer to the
style samples on page 100. The style of the text
at the cursor’s current position is shown by the
Style indicators at the bottom of the display.
NOTE
While selecting a Style setting, the following operations may be used:
To display the previous setting, hold down
☞
and press .
To select the default setting (
☞
down and press .
To return all text formatting functions to their
☞
default settings, hold down and press
To return to the text without making any
☞
changes, press .
Style
NORMAL
Style
(space bar).
Cancel
Back
Half
Caps Alt Template Zoom
ground
Cut
0.0cm HELSI
MARGIN:WIDE AUTO
Style Italic Vertical
A
), hold
36mm
24mm
18mm
12mm
9mm
6mm
Functions
To change the text style before entering the
text:
1 Press , , , or until the cursor
is moved to the point where you want to
begin using a different text style.
2 Press until the desired style is selected.
Style
The current setting is shown below STYLE at
the top of the display and a sample (A) can
be seen to the right of the cursor.
43
Page 53

Ch. 3 Functions
Back
Half
Caps Alt Template Zoom
ground
Cut
STYLE
OUTLINE
Style Italic Vertical
3 Type in the new text.
To change the style of the text in a selected
area:
1 Hold down and press to select all
of the text, or press and use , ,
Functions
, or to select only a part of it.
2 Press until the text is displayed in the
Style
desired style. The setting is shown below
STYLE at the top of the display.
Caps Alt Template Zoom
A
Area
All
Area
All
Back
Half
ground
Cut
STYLE
OUTLINE
Style Italic Vertical
A
36mm
24mm
18mm
12mm
9mm
6mm
36mm
24mm
18mm
12mm
9mm
6mm
Italic ( )
Italic
The Italic function can be combined with each
of the other text format settings to provide an
even larger variety of text styles. When the Italic
function is turned on for the text at the cursor’s
current position, the Italic indicator at the bottom of the display lights up.
NOTE
While selecting an Italic setting, the following
operations may be used:
To select the default setting (
☞
and press .
To return all text formatting functions to their
☞
Italic
OFF
), hold down
default settings, hold down and press
(space bar).
To return to the text without making any
☞
changes, press .
Caps Alt Template Zoom
0.0cm HELSI
MARGIN:WIDE AUTO
Cancel
Back
Half
ground
Cut
Style Italic Vertical
A
36mm
24mm
18mm
12mm
9mm
6mm
To change the Italic setting before entering the
text:
3 Press . The selected text is displayed
New Block
in the desired text style.
44
1 Press , , , or until the cursor
is moved to the point where you want to
begin using a different Italic setting.
2 Press to select either ON or OFF. The
Italic
current setting is shown below ITALIC at
the top of the display and a sample (A) can
be seen to the right of the cursor.
Page 54

Ch. 3 Functions
Back
Half
Caps Alt Template Zoom
ITALIC
ON
A
Style Italic Vertical
ground
Cut
36mm
24mm
18mm
12mm
9mm
A
6mm
3 Type in the new text.
To change the Italic setting for the text in a
selected area:
Area
1 Hold down and press to select all
Area
of the text, or press and use , ,
All
All
, or to select only a part of it.
2 Press until the text is displayed with the
Italic
desired Italic setting. The current setting is
shown below ITALIC at the top of the display.
Back
Half
Caps Alt Template Zoom
ITALIC
ON
ert Becker
Transport
Style Italic Vertical
ground
Cut
36mm
24mm
18mm
12mm
9mm
A
6mm
Line effects ( )
/
The Line effects function enables you to under-
line or strike out certain parts of your text.
OFF STRIKE OUT
NOTE
While selecting a Line effects setting, the following
operations may be used:
To display the previous setting, hold down
☞
and press .
To select the default setting (
☞
To return all text formatting functions to their
☞
default settings, hold down and press
To return to the text without making any
☞
changes, press .
UNDERLINE
/
and press .
/
(space bar).
Cancel
OFF
), hold down
To change the Line effects setting before entering the text:
1 Press , , , or until the cursor
is moved to the point where you want to
begin using a different Line effects setting.
2 Press until the desired setting is
/
selected. The current setting is shown
below LINE EFFECTS at the top of the dis-
play and a sample (A) can be seen to the
right of the cursor.
Functions
3 Press . The selected text is displayed
New Block
with the desired Italic setting.
Caps Alt Template Zoom
LINE EFFECTS
STRIKE OUT
A
Style Italic Vertical
3 Type in the new text.
A
Back
ground
Half
Cut
36mm
24mm
18mm
12mm
9mm
6mm
45
Page 55

Ch. 3 Functions
To change the Line effects setting for the text in
a selected area:
Area
1 Hold down and press to select all
Area
of the text, or press and use , ,
All
All
, or to select only a part of it.
2 Press until the text is displayed with the
/
desired Line effects setting. The current setting is shown below LINE EFFECTS at the
top of the display.
Back
Half
Caps Alt Template Zoom
ground
Cut
LINE EFFECTS
UNDERLINE
ert Becker
Transport
Functions
Style Italic Vertical
A
36mm
24mm
18mm
12mm
9mm
6mm
Vertical ( )
Vert
With the Vertical function, you can print your
text vertically along the length of your label.
OFF
ON
When the Vertical function is turned on for the
text at the cursor’s current position, the Vertical
indicator at the bottom of the display lights up.
NOTE
While selecting a Vertical setting, the following
operations may be used:
To select the default setting (
☞
and press .
To return all text formatting functions to their
☞
Vert
default settings, hold down and press
(space bar).
OFF
), hold down
3 Press . The selected text is displayed
New Block
with the desired Line effects setting.
To return to the text without making any
☞
Cancel
changes, press .
Back
Half
Caps Alt Template Zoom
0.0cm HELSI
MARGIN:WIDE AUTO
Style Italic Vertical
ground
Cut
36mm
24mm
18mm
12mm
9mm
A
6mm
To change the Vertical setting before entering
the text:
1 Press , , , or until the cursor
is moved to the point where you want to
begin using a different Vertical setting.
46
Page 56

Ch. 3 Functions
2 Press to select either ON or OFF. The
Vert
current setting is shown below VERTICAL at
the top of the display and a sample (A) can
be seen to the right of the cursor.
Back
Half
Caps Alt Template Zoom
VERTICAL
ON
A
Style Italic Vertical
ground
Cut
36mm
24mm
18mm
12mm
9mm
A
6mm
3 Type in the new text.
To change the Vertical setting for the text in a
selected area:
1 Hold down and press to select all
of the text, or press and use , ,
Area
All
Area
All
, or to select only a part of the text.
2 Press until the text is displayed with the
Vert
desired Vertical setting. The current setting
is shown below VERTICAL at the top of the
display.
Back
Half
c
p
ground
Cut
36mm
24mm
18mm
12mm
9mm
6mm
e
r
r
t
k
o
A
Caps Alt Template Zoom
VERTICAL
ON
e
B
s
n
Style Italic Vertical
3 Press . The selected text is displayed
New Block
with the desired Vertical setting.
Frame/shading ( )
/
You can choose from a variety of frames and
shadings for emphasizing certain parts or all of
the text in your label. Refer to the samples of the
frames and shadings on page 101.
To apply a frame or shading to all of the text:
1 Press .
NOTE
To return to the text without adding a frame or
shading, press at any time.
/
/
2 Press or until 9 moves beside the
desired setting.
NOTE
☞ To select the first setting in a menu, press
(space bar).
☞ To return to the previous screen without keep-
ing any changes, press .
Cancel
Back
Half
Caps Alt Template Zoom
[ ]:CONFIRM
FRAME/SHADING
FRAME
SHADING
Style Italic Vertical
3 Press .
New Block
Caps Alt Template Zoom
[ ]:CONFIRM
SHADING
ALL
BLOCK
LINE
CHARACTER
Style Italic Vertical
ground
Cut
36mm
24mm
18mm
12mm
9mm
A
Back
Half
ground
Cut
A
6mm
36mm
24mm
18mm
12mm
9mm
6mm
Functions
47
Page 57

Ch. 3 Functions
4 Since 9 is already beside ALL, press
New Block
.
5 Press or until 9 moves beside the
desired frame or shading pattern.
Back
Half
Caps Alt Template Zoom
ground
Cut
[ ]:CONFIRM
SHADING
OFF
Style Italic Vertical
6 Press . The desired frame or shading
New Block
is applied to all of the text.
Functions
To apply a frame or shading to selected blocks
of text:
1 Press .
NOTE
To return to the text without adding a frame or
shading, press at any time.
/
A
/
36mm
24mm
18mm
12mm
9mm
6mm
Back
Half
Caps Alt Template Zoom
[ ]:CONFIRM
FRAME/SHADING
FRAME
SHADING
Style Italic Vertical
3 Press .
New Block
ground
Cut
36mm
24mm
18mm
12mm
9mm
A
6mm
4 Press or until 9 moves beside
BLOCK.
Back
Half
Caps Alt Template Zoom
[ ]:CONFIRM
SHADING
ALL
BLOCK
LINE
CHARACTER
Style Italic Vertical
ground
Cut
36mm
24mm
18mm
12mm
9mm
A
6mm
2 Press or until 9 moves beside the
desired setting.
NOTE
☞ To select the first setting in a menu, press
(space bar).
☞ To return to the previous screen without keep-
ing any changes, press .
48
Cancel
Page 58

Ch. 3 Functions
5 Press .
New Block
6 Press or until the first block that
you wish to frame or shade is selected.
Back
Half
Caps Alt Template Zoom
[ ]:SET END POINT
A1
Style Italic Vertical
7 Press .
New Block
ground
ABC Tr
1 Main
London
A
Cut
36mm
24mm
18mm
12mm
9mm
6mm
8 Press or until all of the blocks that
you wish to frame or shade are selected.
Back
Half
Caps Alt Template Zoom
[ ]:SET END POINT
A1
Style Italic Vertical
ground
Cut
ABC Tr
1 Main
London
A
36mm
24mm
18mm
12mm
9mm
6mm
A Press . The desired frame or shading
New Block
is applied to the selected blocks of text.
NOTE
To delete the frame or shading, position the cursor
on the left side of the frame/shading that you wish
to delete, and then press . When the mes-
Clear
sage “OK TO CLEAR FRAME/SHADING?” appears,
press or until 9 moves beside OK and
press . To keep the frame/shading, press
New Block
Cancel
(or move 9 beside CANCEL, and then press
).
New Block
To apply a frame or shading to selected lines of
text:
1 Press .
NOTE
To return to the text without adding a frame or
shading, press at any time.
/
/
2 Press or until 9 moves beside the
desired setting.
NOTE
☞ To select the first setting in a menu, press
(space bar).
Functions
9 Press .
New Block
0 Press or until 9 moves beside the
desired frame or shading pattern.
Back
Half
Caps Alt Template Zoom
[ ]:CONFIRM
SHADING
OFF
Style Italic Vertical
ground
Cut
36mm
24mm
18mm
12mm
9mm
A
6mm
☞ To return to the previous screen without keep-
ing any changes, press .
Caps Alt Template Zoom
[ ]:CONFIRM
FRAME/SHADING
FRAME
SHADING
Style Italic Vertical
Cancel
Back
Half
ground
Cut
36mm
24mm
18mm
12mm
9mm
A
6mm
49
Page 59

Ch. 3 Functions
3 Press .
New Block
4 Press or until 9 moves beside
LINE.
Back
Half
Caps Alt Template Zoom
ground
Cut
[ ]:CONFIRM
SHADING
ALL
BLOCK
LINE
CHARACTER
Style Italic Vertical
5 Press .
New Block
6 Press or until the first line that you
wish to frame or shade is selected.
Functions
Caps Alt Template Zoom
A
Back
Half
ground
Cut
[ ]:SET START POINT
ABC Tr
1 Main
A1
Style Italic Vertical
7 Press .
New Block
London
A
8 Press or until all of the lines that
you wish to frame or shade are selected.
Back
Half
Caps Alt Template Zoom
ground
Cut
[ ]:SET END POINT
ABC Tr
1 Main
A1
Style Italic Vertical
London
A
36mm
24mm
18mm
12mm
9mm
6mm
36mm
24mm
18mm
12mm
9mm
6mm
36mm
24mm
18mm
12mm
9mm
6mm
9 Press .
New Block
0 Press or until 9 moves beside the
desired frame or shading pattern.
Back
Half
Caps Alt Template Zoom
[ ]:CONFIRM
SHADING
OFF
Style Italic Vertical
A Press . The desired frame or shading
New Block
ground
Cut
36mm
24mm
18mm
12mm
9mm
A
6mm
is applied to the selected lines of text.
To apply a frame or shading to selected characters in the text:
1 Press .
NOTE
To return to the text without adding a frame or
shading, press at any time.
/
/
2 Press or until 9 moves beside the
desired setting.
NOTE
☞ To select the first setting in a menu, press
(space bar).
☞ To return to the previous screen without keep-
ing any changes, press .
Cancel
50
Page 60

Ch. 3 Functions
Back
Half
Caps Alt Template Zoom
[ ]:CONFIRM
FRAME/SHADING
FRAME
SHADING
Style Italic Vertical
3 Press .
New Block
ground
Cut
36mm
24mm
18mm
12mm
9mm
A
6mm
4 Press or until 9 moves beside
CHARACTER.
Back
Half
Caps Alt Template Zoom
[ ]:CONFIRM
SHADING
ALL
BLOCK
LINE
CHARACTER
Style Italic Vertical
5 Press .
New Block
ground
Cut
36mm
24mm
18mm
12mm
9mm
A
6mm
6 Press , , , or until the first
character that you wish to frame or apply a
shading to is selected.
7 Press .
New Block
8 Press , , , or until all of the
characters that you wish to frame or apply a
shading to are selected.
Back
Half
Caps Alt Template Zoom
[ ]:SET END POINT
Robert Beck
ABC Transp
Style Italic Vertical
9 Press .
New Block
ground
Cut
36mm
24mm
18mm
12mm
9mm
A
6mm
0 Press or until 9 moves beside the
desired frame or shading pattern.
Back
Half
Caps Alt Template Zoom
[ ]:CONFIRM
SHADING
OFF
Style Italic Vertical
ground
Cut
36mm
24mm
18mm
12mm
9mm
A
6mm
Functions
Back
Half
Caps Alt Template Zoom
ground
[ ]:SET START POINT
ert Becker
Transport
Style Italic Vertical
A
Cut
36mm
24mm
18mm
12mm
9mm
6mm
A Press . The desired frame or shading
New Block
is applied to the selected characters.
51
Page 61

Ch. 3 Functions
Format ( )
Format
Pressing the Format key displays a menu containing five label format functions, which can be
used to change the label’s general appearance.
To change the LENGTH setting:
The currently set label length is shown at the left
end of the top line in the top of the display.
When the arrow symbol is displayed as “ ”,
the label length is set to AUTO. When the arrow
symbol is displayed as “ ”, the label length
is set to a certain value.
Back
Half
Caps Alt Template Zoom
ground
Cut
0.0cm HELSI
MARGIN:WIDE AUTO
Functions
Style Italic Vertical
1 Press .
Format
NOTE
☞ To return to the text without making any
changes, press at any time.
☞ To return all functions in the FORMAT menu to
their default settings, hold down and press
A
Format
36mm
24mm
18mm
12mm
9mm
6mm
2 Since Î is already beside LENGTH, press
.
3 Press or until the desired setting is
displayed (or type in the desired length).
NOTE
☞ To select the default setting (AUTO), press
(space bar).
☞ To return to the previous screen without keep-
ing any changes, press .
Cancel
☞ To return to the previous screen with the new
setting, press (or ).
4 Press once to confirm the setting
New Block
New Block
and return to the FORMAT menu.
5 Press again to apply the setting.
New Block
52
(space bar).
Back
Half
Caps Alt Template Zoom
ground
Cut
[ ]:CHANGE SETTINGS
FORMAT
LENGTH:AUTO
MARGIN:WIDE
H.ALI :LEFT
PITCH :PS
BACK :OFF
Style Italic Vertical
A
36mm
24mm
18mm
12mm
9mm
6mm
Page 62

To change the MARGIN setting:
]
Ch. 3 Functions
This function allows you to select the size of the
margins on the left and right sides of your text.
When NONE, NARROW or MEDIUM is
selected, some extra tape is fed out so that the
left and right margins are equal.
ABC
25 mm
ABC
4 mm 4 mm
ABC
8 mm 8 mm
ABC
12 mm 12 mm
ABC
25 mm
ABC
ABC
ABC
[WIDE]
[NONE]
[NARROW
[MEDIUM]
The current margin setting is shown at the left
end of the second line in the top of the display.
Back
Half
Caps Alt Template Zoom
0.0cm HELSI
MARGIN:WIDE AUTO
Style Italic Vertical
ground
Cut
36mm
24mm
18mm
12mm
9mm
A
6mm
Back
Half
Caps Alt Template Zoom
[ ]:CHANGE SETTINGS
FORMAT
LENGTH:AUTO
MARGIN:WIDE
H.ALI :LEFT
PITCH :PS
BACK :OFF
Style Italic Vertical
ground
Cut
36mm
24mm
18mm
12mm
9mm
A
6mm
2 Press or until Î moves beside
MARGIN.
3 Press .
Back
Half
Caps Alt Template Zoom
[ ]:CONFIRM
MARGIN
ABC
ABC
ABC
Style Italic Vertical
ground
[NONE]
[NARROW]
A
Cut
[WIDE]
36mm
24mm
18mm
12mm
9mm
6mm
4 Press or until 9 moves beside the
desired setting.
NOTE
Functions
1 Press .
NOTE
Format
☞ To return to the text without making any
changes, press at any time.
Format
☞ To return all functions in the FORMAT menu to
their default settings, hold down and press
(space bar).
☞ To select the default setting (
ABC
[WIDE]), press (space bar).
☞ To return to the previous screen without keep-
ing any changes, press .
Cancel
☞ To return to the previous screen with the new
setting, press (or ).
5 Press once to confirm the setting
New Block
New Block
and return to the FORMAT menu.
6 Press again to apply the setting.
New Block
53
Page 63

Ch. 3 Functions
To change the H.ALI (horizontal alignment)
setting:
You can choose to align the text in your label in
one of four ways:
ABC [LEFT]
ABC [CENTRE]
ABC [RIGHT]
ABC [JUSTIFY]
Functions
1 Press .
NOTE
Format
☞ To return to the text without making any
changes, press at any time.
Format
☞ To return all functions in the FORMAT menu to
their default settings, hold down and press
(space bar).
3 Press .
Back
Half
Caps Alt Template Zoom
[ ]:CONFIRM
HORIZONTAL ALIGN
ABC [LEFT]
ABC [CENTRE]
ABC [RIGHT]
ABC [JUSTIFY]
Style Italic Vertical
ground
Cut
36mm
24mm
18mm
12mm
9mm
A
6mm
4 Press or until 9 moves beside the
desired setting.
NOTE
☞ To select the default setting ( ),
ABC [LEFT]
press (space bar).
☞ To return to the previous screen without keep-
ing any changes, press .
Cancel
☞ To return to the previous screen with the new
setting, press (or ).
5 Press once to confirm the setting
New Block
New Block
and return to the FORMAT menu.
6 Press again to apply the setting.
New Block
Back
Half
Caps Alt Template Zoom
[ ]:CHANGE SETTINGS
FORMAT
LENGTH:AUTO
MARGIN:WIDE
H.ALI :LEFT
PITCH :PS
BACK :OFF
Style Italic Vertical
ground
Cut
36mm
24mm
18mm
12mm
9mm
A
6mm
2 Press or until Î moves beside
H.ALI.
54
Page 64

Ch. 3 Functions
To change the PITCH setting:
With this function, you can select whether or
not each character is given an equal width.
HIHIHI
[PS]
HIHIHI
[FIXED]
1 Press .
NOTE
☞ To return to the text without making any
☞ To return all functions in the FORMAT menu to
Format
changes, press at any time.
Format
their default settings, hold down and press
(space bar).
3 Press .
Back
Half
Caps Alt Template Zoom
[ ]:CONFIRM
PITCH
HIHIHI
[PS]
HIHIHI
[FIXED]
Style Italic Vertical
ground
Cut
36mm
24mm
18mm
12mm
9mm
A
6mm
4 Press or until 9 moves beside the
desired setting.
NOTE
☞ To select the default setting (
HIHIHI
[PS]), press (space bar).
☞ To return to the previous screen without keep-
ing any changes, press .
Cancel
☞ To return to the previous screen with the new
setting, press (or ).
5 Press once to confirm the setting
New Block
New Block
and return to the FORMAT menu.
6 Press again to apply the setting.
New Block
Functions
Back
Half
Caps Alt Template Zoom
[ ]:CHANGE SETTINGS
FORMAT
LENGTH:AUTO
MARGIN:WIDE
H.ALI :LEFT
PITCH :PS
BACK :OFF
Style Italic Vertical
ground
Cut
36mm
24mm
18mm
12mm
9mm
A
6mm
2 Press or until Î moves beside
PITCH.
To change the BACK (background) setting:
From the many designs available, choose a
background for your label. You can even create
your own backgrounds using text or symbols.
1 Press .
NOTE
Format
☞ To return to the text without making any
changes, press at any time.
Format
☞ To return all functions in the FORMAT menu to
their default settings, hold down and press
(space bar).
55
Page 65

Ch. 3 Functions
Back
Half
Caps Alt Template Zoom
ground
Cut
[ ]:CHANGE SETTINGS
FORMAT
LENGTH:AUTO
MARGIN:WIDE
H.ALI :LEFT
PITCH :PS
BACK :OFF
Style Italic Vertical
2 Press or until Î moves beside
BACK.
3 Press .
Caps Alt Template Zoom
Functions
[ ]:CONFIRM
BACKGROUND
OFF
[SMALL]
[LARGE]
PARQUET
METAL
MOSAIC
Style Italic Vertical
4 Press or until 9 moves beside the
desired setting.
NOTE
☞ To select the default setting (OFF), press
A
A
(space bar).
Back
ground
Half
Cut
36mm
24mm
18mm
12mm
9mm
6mm
36mm
24mm
18mm
12mm
9mm
6mm
5 Press once to confirm the setting.
New Block
If SMALL or LARGE was selected, type in
the desired text, change the font by press
Font
until the desired font setting is dis-
played, and then press . The FOR-
New Block
MAT menu appears again.
NOTE
Up to 20 characters can be entered. Symbols
☞
(see pages 27 and 28) and accented characters
(see page 25) can also be added.
☞ To display an enlarged view of the character or
symbol above the cursor, press . Press any
key to continue editing the text.
Zoom
Image
☞ To return to the previous screen without keep-
ing any changes, press .
Caps Alt Template Zoom
[ ]:CONFIRM
BACKGROUND
TEXT INPUT
(FONT:HELSI)
Style Italic Vertical
Cancel
Back
Half
ground
Cut
36mm
24mm
18mm
12mm
9mm
A
6mm
If a pre-made background design was
selected, the FORMAT menu appears again.
6 Press again to apply the setting. The
New Block
Background indicator lights up.
☞ To return to the previous screen without keep-
ing any changes, press .
Cancel
☞ To return to the previous screen with the new
setting, press (or ).
56
New Block
Page 66

Ch. 3 Functions
Template ( )
Templt
The Template function makes creating a label or
stamp quick and easy. After selecting one of the
various pre-formatted templates, simply change
the text, and then it is ready to be printed. The
many templates available are useful for com-
mon needs
—from addressing envelopes to
identifying floppy disks or audio and video cassettes. The tape width and length of each label
printed from a template is preset. Refer to the
samples of the available templates on pages 103
to 106.
After the text is entered, the style of the text can
easily be changed just by selecting one of the 7
available style formats. Refer to page 107 for
samples of the style formats.
To create a label or stamp from a template:
1 Press . The Template indicator lights
Templt
up.
NOTE
If there was text in the display when the Tem-
☞
plate function was started, the message “OK TO
CLEAR TEXT BUFFER?” appears.
●
To delete the text, press or until 9
2 Select the desired template.
NOTE
☞ To select the first template, press
(space bar) (or hold down and press ).
☞ To select the last template, hold down and
press .
If
CATALOGUE NO. was selected:
Type in a template number (or press
or ) until the desired template is
displayed. The name of the selected
template is shown in the second line at
the top of the display.
Back
Half
Caps Alt Template Zoom
INPUT NO. 1
ADDRESS 1
Style Italic Vertical
ground
Cut
36mm
24mm
18mm
12mm
9mm
A
6mm
Functions
moves beside OK, and then press .
● To return to the text without deleting it, press
Cancel
(or move 9 beside CANCEL, and then
press ).
New Block
☞ To return to the previous screen, press .
New Block
Cancel
Back
Half
Caps Alt Template Zoom
ground
Cut
[ ]:CONFIRM
TEMPLATE
CATALOGUE NO.
ADDRESS
EQUIPMENT
PLATE
NAMEPLATE
Style Italic Vertical
A
36mm
24mm
18mm
12mm
9mm
6mm
If a category was selected:
Press or until the desired template is displayed. The number and
name of the current template are displayed at the top of the display and the
dimensions are shown below it.
Back
Half
Caps Alt Template Zoom
ground
Cut
1:ADDRESS 1
W 24mm× 8.0cm
Style Italic Vertical
A
36mm
24mm
18mm
12mm
9mm
6mm
57
Page 67

Ch. 3 Functions
3 Press . The first line of the tem-
New Block
plate’s text is shown below EDIT TEXT at
the top of the display. For template numbers
and samples, refer to the list of templates in
the Appendix.
Back
Half
Caps Alt Template Zoom
ground
Cut
EDIT TEXT
Smith's Rent-A-Bi
Style Italic Vertical
4 Type in the new text.
NOTE
Symbols can also be added. Refer to pages 27
☞
Functions
and 28 for details.
☞ To display an enlarged view of the character or
symbol above the cursor, press . Press any
key to return to editing the text.
☞ To move the cursor through the line of text,
press or . To display a different line of
A
Zoom
Image
36mm
24mm
18mm
12mm
9mm
6mm
6 Repeat steps 4 and 5 until all of the text
that you wish to use is entered. The MENU
appears after the last line of text in the tem-
plate is edited and is pressed.
NOTE
To quit Template mode, press or until 9999
moves beside FINISH, and then press .
When the message “OK TO FINISH TEMPLATE?”
appears, press or until 9999 moves beside
OK and press . To return to Template
New Block
Cancel
mode, press (or move 9999 beside CANCEL, and
then press ).
New Block
Caps Alt Template Zoom
[ ]:CONFIRM
MENU
PRINT
FINISH
CONTINUE
CHANGE STYLE
FILE
Style Italic Vertical
A
New Block
ground
Back
Half
Cut
New Block
36mm
24mm
18mm
12mm
9mm
6mm
text, press or .
☞ To quit using the current template and return to
step 2, press . When the message “OK TO
CONTINUE TEMPLATE?” appears, press
(or move 9 beside CANCEL, and then press
New Block
plate, press or until 9 moves beside
OK, and then press .
5 Press to display the next line of text
Cancel
Cancel
). To continue using the current tem-
New Block
New Block
in the template.
58
To change the style of a label or stamp created
from a template:
7 Press or until 9 moves beside
CHANGE STYLE.
8 Press . The current style setting is
New Block
displayed.
Back
Half
Caps Alt Template Zoom
[ ]:CHANGE SETTINGS
STYLE
CHAR.:ORIGINAL
Style Italic Vertical
ground
Cut
36mm
24mm
18mm
12mm
9mm
A
6mm
Page 68

Ch. 3 Functions
9 Press .
Back
Half
Caps Alt Template Zoom
[ ]:CONFIRM
CHAR.
ORIGINAL
ITALIC
DYNAMIC
ARTISTIC
FORMAL
ELEGANT
Style Italic Vertical
ground
Cut
36mm
24mm
18mm
12mm
9mm
A
6mm
0 Press or until 9 moves beside the
desired setting. Refer to page 107 for samples of these settings.
A Press once to confirm the setting
New Block
and return to the STYLE menu.
B Press again to apply the setting.
New Block
To continue editing the label or stamp:
C Press or until 9 moves beside
CONTINUE.
D Repeat steps 4 and 5 until the text is
edited as you wish. The MENU appears
again after the last line of text in the tem-
plate is edited and is pressed.
New Block
To print a label or stamp created using a template:
E Press or until 9 moves beside
PRINT.
F Press .
NOTE
Be sure that the correct tape cassette is installed.
New Block
● When printing a stamp, install a stamp film
cassette.
● When printing a label, install a label tape cas-
sette.
If a template other than one from the
STAMP category was used, the following
display appears.
Back
Half
Caps Alt Template Zoom
OK TO PRINT?
!
OK
OPTION
CANCEL
Style Italic Vertical
ground
Cut
36mm
24mm
18mm
12mm
9mm
A
6mm
If a template from the STAMP category was
used, the following display appears.
Functions
Caps Alt Template Zoom
OK TO PRINT?
!
PRINT STAMP
PRINT LABEL
CANCEL
Style Italic Vertical
A
Back
ground
Half
Cut
36mm
24mm
18mm
12mm
9mm
6mm
59
Page 69

Ch. 3 Functions
G Press or until 9 moves beside the
desired setting.
For a label created using a template other
than one from the STAMP category:
To print, select OK. Refer to page 64 for
more details on printing.
To change the printing options, select
OPTION. Refer to pages 65 through 69
for more details on the printing options.
For a stamp created using a template from
the STAMP category:
To print out a stamp stencil, select
PRINT STAMP.
To print an identification label, select
PRINT LABEL.
NOTE
Use 12-mm-wide tape to make an identification
label for a stamp with a STAMP M size and use 18mm-wide tape to make a label for a stamp with a
Functions
STAMP L size.
H Press .
New Block
To store the label or stamp created using a template:
I Press or until 9 moves beside
FILE.
J Press .
New Block
K Press or until 9 moves beside the
desired setting, and then press .
New Block
Refer to pages 61 and 62 for more details
on saving files.
If the file has not been saved before, select
SAVE AS.
Back
Half
Caps Alt Template Zoom
FILE DESCRIPTION
0:
Style Italic Vertical
ground
Cut
36mm
24mm
18mm
12mm
9mm
A
6mm
If the file has been saved before, select
SAVE.
Back
Half
Caps Alt Template Zoom
FILE DESCRIPTION
0: Address
Style Italic Vertical
ground
Cut
36mm
24mm
18mm
12mm
9mm
A
6mm
Caps Alt Template Zoom
[ ]:CONFIRM
FILE
NEW
SAVE AS
SAVE
60
Back
Half
ground
Cut
Style Italic Vertical
A
36mm
24mm
18mm
12mm
9mm
6mm
L Type in the desired file name.
NOTE
A file name can only be up to 10 characters long.
M Press . The text is saved under the
New Block
selected number with the entered file name.
To create another label or stamp using a different template:
N Press or until 9 moves beside
FILE.
Page 70

Ch. 3 Functions
O Press .
New Block
Caps Alt Template Zoom
[ ]:CONFIRM
FILE
NEW
SAVE AS
SAVE
Style Italic Vertical
A
Back
ground
Half
Cut
36mm
24mm
18mm
12mm
9mm
6mm
P Press or until 9 moves beside
NEW.
Q Press .
New Block
Caps Alt Template Zoom
OK TO CLEAR
!
EDITED
TEMPLATE?
OK
CLEAR
Style Italic Vertical
A
Back
ground
Half
Cut
36mm
24mm
18mm
12mm
9mm
6mm
R Press or until 9 moves beside OK.
NOTE
To return to the FILE menu without erasing the
edited template, press (or move 9 beside
CANCEL, and then press ).
S Press .
New Block
Cancel
New Block
Storing and recalling files
● ● ● ● ● ● ● ● ● ● ● ● ● ● ● ● ● ● ● ● ● ●
You can store frequently used text in the memory. These text files remain in the memory, even
after all characters are erased from the display
with the Clear function (see page 37).
When each file is stored, it can be given a file
name so that it can be searched for. Up to 100
files or about 3,000 characters can be stored in
the memory.
Since a copy of the stored text file is recalled
when using the OPEN function, the text can be
edited or printed without changing the originally stored file. However, the SAVE function
can be used to replace the previously saved file
with the new edited one. When a file is no
longer needed or more space is necessary, the
DELETE function can be used to delete it.
To save a file that has not been saved before:
1 Press .
2 Since 9 is already beside SAVE AS, press
NOTE
To return to the previous screen without making
any changes, press .
File
Caps Alt Template Zoom
[ ]:CONFIRM
FILE
NEW
SAVE AS
SAVE
OPEN
DELETE
Style Italic Vertical
.
New Block
Cancel
Back
Half
ground
Cut
36mm
24mm
18mm
12mm
9mm
A
6mm
Functions
61
Page 71

Ch. 3 Functions
Back
Half
Caps Alt Template Zoom
ground
Cut
FILE DESCRIPTION
0:
Robert Beck
ABC Transp
Style Italic Vertical
3 Press or until the file number
where you want to store the text is displayed.
NOTE
File numbers that are not displayed already contain
a text file.
4 Type in the desired file name.
Functions
NOTE
A file name can only be up to 10 characters long.
5 Press . The text is saved under the
New Block
selected number with the entered file name.
To save a file that has been saved before:
1 Press .
File
Caps Alt Template Zoom
[ ]:CONFIRM
FILE
NEW
SAVE AS
SAVE
OPEN
DELETE
Style Italic Vertical
A
Back
Half
ground
Cut
A
36mm
24mm
18mm
12mm
9mm
6mm
36mm
24mm
18mm
12mm
9mm
6mm
NOTE
To return to the previous screen without making
any changes, press .
3 Press .
New Block
Caps Alt Template Zoom
FILE DESCRIPTION
0: Address
Robert Beck
ABC Transp
Cancel
Back
Half
ground
Cut
Style Italic Vertical
A
36mm
24mm
18mm
12mm
9mm
6mm
4 Edit the file name if you wish.
NOTE
A file name can only be up to 10 characters long.
5 Press . The text is saved under the
New Block
selected number with the entered file name.
To recall a file that has been saved:
1 Press .
File
Caps Alt Template Zoom
[ ]:CONFIRM
FILE
NEW
SAVE AS
SAVE
OPEN
DELETE
Style Italic Vertical
A
Back
ground
Half
Cut
36mm
24mm
18mm
12mm
9mm
6mm
2 Press or until 9 moves beside
SAVE.
62
Page 72

Ch. 3 Functions
2 Press or until 9 moves beside
OPEN.
NOTE
To return to the previous screen without making
any changes, press .
3 Press .
NOTE
New Block
Cancel
If there was text in the display before the File func-
tion was started, the message “OK TO CLEAR TEXT
BUFFER?” appears.
● To delete the text, press or until 9
moves beside OK, and then press .
● To return to the FILE menu without deleting
the text in the display, press (or move 9
beside CANCEL, and then press ).
Back
Caps Alt Template Zoom
ground
SEARCH FOR
0:Address
Robert Beck
ABC Transp
Style Italic Vertical
A
Half
Cut
New Block
Cancel
New Block
36mm
24mm
18mm
12mm
9mm
6mm
4 Select the file that you want to open.
To scan through the saved files, press
or .
To search for a specific file, type in a part of
the name of the desired file, and then press
New Block
. The files with names containing
the text that you searched for are found and
the first file is displayed. If more than one
file is found, press or until the file
that you want to open is displayed.
5 Press . The selected file appears in
New Block
the display.
NOTE
When a file created using a template is opened, it is
opened in Template mode.
To delete a file that has been saved:
1 Press .
File
Caps Alt Template Zoom
[ ]:CONFIRM
FILE
NEW
SAVE AS
SAVE
OPEN
DELETE
Style Italic Vertical
A
Back
ground
Half
Cut
36mm
24mm
18mm
12mm
9mm
6mm
2 Press or until 9 moves beside
DELETE.
NOTE
To return to the previous screen without making
any changes, press .
3 Press .
New Block
Caps Alt Template Zoom
SEARCH FOR
0:Address
Robert Beck
ABC Transp
Cancel
Back
Half
ground
Cut
Style Italic Vertical
A
36mm
24mm
18mm
12mm
9mm
6mm
Functions
63
Page 73

Ch. 3 Functions
4 Select the file that you want to delete, and
then press .
New Block
To scan through the saved files, press
or .
NOTE
To select all of the stored files, hold down and
press . The message “OK TO DELETE
New Block
FILES?” appears.
To search for a specific file, type in a part of
the name of the desired file, and then press
New Block
. The files with names containing
the text that you searched for are found and
the first file is displayed. If more than one
file is found, press or until the file
that you want to delete is displayed.
NOTE
Functions
To select all of the found files, hold down and
press . The message “OK TO DELETE ALL
New Block
SEARCHED FILES?” appears.
Back
Half
Caps Alt Template Zoom
OK TO DELETE
!
FILE?
ground
Cut
OK
CANCEL
Style Italic Vertical
5 Press or until 9 moves beside OK.
NOTE
To return to the previous screen without deleting
the file, press (or move 9 beside CANCEL,
and then press ).
A
Cancel
New Block
36mm
24mm
18mm
12mm
9mm
6mm
Printing
● ● ● ● ● ● ● ● ● ● ● ● ● ● ● ● ● ● ● ● ● ●
Image ( + )
To preview an image of the entire text before it
is printed, hold down and press . All of
the text slowly scrolls across the display to the
left. Press (space bar) to stop or continue scrolling the text. Move the text in the
desired direction by pressing and . To
quit the Image function and return to the text,
Cancel
press .
Feed & Cut ( )
To feed out 25 mm of tape and automatically
cut it, press . Press this key to feed out any
leftover printed tape after pressing to quit
printing.
Print ( )
After you have typed in your text and chosen all
of the text and label formats that you want to
use, you can print it out. A few additional settings can be selected before printing out your
label.
To print a label using the current print settings:
1 Press . The message “OK TO PRINT?”
Print
appears.
Caps Alt Template Zoom
OK TO PRINT?
!
OK
OPTION
CANCEL
Zoom
Image
Feed
& Cut
Feed
& Cut
Print
Back
ground
Style Italic Vertical
A
Half
Cut
Cancel
Image
Zoom
36mm
24mm
18mm
12mm
9mm
6mm
6 Press . The selected file is deleted.
New Block
64
Page 74

Ch. 3 Functions
2 Since 9 is already beside OK, press .
New Block
The label is printed out.
NOTE
To quit printing, press . Be sure to press
Cancel
Feed
& Cut
once before printing the next label.
To print multiple copies of a label:
1 Press .
Print
Caps Alt Template Zoom
OK TO PRINT?
!
OK
OPTION
CANCEL
Style Italic Vertical
A
Back
ground
Half
Cut
36mm
24mm
18mm
12mm
9mm
6mm
2 Press or to move 9 beside
OPTION.
NOTE
To return to the text without making any changes,
Print
press at any time.
3 Press .
NOTE
New Block
☞ To display the OPTION menu quickly, hold
down and press .
Print
Back
Half
Caps Alt Template Zoom
[ ]:CHANGE SETTINGS
OPTION
COPIES:1
NUMBER:OFF
MIRROR:OFF
INVERT:OFF
TRANS-:
FORM ABC
Style Italic Vertical
ground
Cut
36mm
24mm
18mm
12mm
9mm
A
6mm
4 Since Î is already beside COPIES, press
.
Back
Half
Caps Alt Template Zoom
[ ]:CONFIRM
COPIES
Style Italic Vertical
ground
Cut
36mm
24mm
18mm
1
A
12mm
9mm
6mm
5 Type in a number (or press or )
until the desired number of copies is displayed.
NOTE
To select the default setting (1), press
(space bar).
Functions
☞ To return to the previous screen without keep-
Cancel
ing any changes, press .
☞ To return all functions in the OPTION menu to
their default settings, hold down and press
(space bar).
6 Press to confirm the setting and
New Block
return to the OPTION menu.
To change the NUMBER setting:
The NUMBER (numbering) function can be used
to print many copies of the same text while
increasing certain characters (letters, number or
barcode data) after each label is printed. This
type of automatic incrementation is very useful
when printing serial number labels, production
control labels or other labels requiring ascending codes.
65
Page 75

Ch. 3 Functions
Letters and numbers increase as shown below:
0 Î 1 Î ...9 Î 0 Î ...
A Î B Î ...Z Î A Î ...
a Î b Î ...z Î a Î ...
A0 Î A1 Î ...A9 Î B0 Î ...
Spaces (shown as underlines “_” in the examples below) can be used to adjust the space
between characters or to control the number of
digits that are printed:
1_9Î 2_0 Î ...9_9 Î __0 Î ...
_9 Î 10 Î ...99 Î _0 Î ...
_Z Î AA Î ...ZZ Î _A Î ...
NOTE
Only one numbering field can be selected from
☞
Functions
any text.
If you include a non-alphanumeric character
☞
such as a symbol in the numbering field, only
the letters and numbers in the numbering field
will be increased when the labels are printed,
or just one label will be printed if the field only
contains a non-alphanumeric character.
1 Press .
Print
Caps Alt Template Zoom
OK TO PRINT?
!
Back
ground
Half
Cut
OK
OPTION
CANCEL
Style Italic Vertical
A
36mm
24mm
18mm
12mm
9mm
6mm
2 Press or to move 9 beside
OPTION.
NOTE
To return to the text without making any changes,
Print
press at any time.
3 Press .
NOTE
New Block
☞ To display the OPTION menu quickly, hold
down and press .
Print
☞ To return to the previous screen without keep-
ing any changes, press .
Cancel
☞ To return all functions in the OPTION menu to
their default settings, hold down and press
(space bar).
Back
Half
Caps Alt Template Zoom
[ ]:CHANGE SETTINGS
OPTION
COPIES:1
NUMBER:OFF
MIRROR:OFF
INVERT:OFF
TRANS-:
FORM ABC
Style Italic Vertical
ground
Cut
36mm
24mm
18mm
12mm
9mm
A
6mm
4 Press or to move Î beside
NUMBER.
5 Press .
Back
Half
Caps Alt Template Zoom
[ ]:SET START POINT
io 1A
Style Italic Vertical
ground
Cut
36mm
24mm
18mm
12mm
9mm
A
6mm
66
Page 76

Ch. 3 Functions
6 Press , , , or until the first
character that you wish to select for the
numbering field is selected.
7 Press .
New Block
Back
Half
Caps Alt Template Zoom
ground
Cut
[ ]:SET END POINT
io 1A
Style Italic Vertical
A
36mm
24mm
18mm
12mm
9mm
6mm
8 Press or until all of the characters
that you wish to select for the numbering
field are selected.
NOTE
If a barcode was selected in step 6, this step is
☞
skipped.
A numbering field must be located entirely
☞
within one line of text of a single block.
The maximum number of characters in a num-
☞
bering field is five.
If you try to choose more than five characters,
☞
the error message “INCORRECT OPERATION
FOR NUMBERING FUNCTION” will appear.
9 Press .
New Block
Caps Alt Template Zoom
[ ]:CONFIRM
NUMBER
1
Style Italic Vertical
A
Back
ground
Half
Cut
36mm
24mm
18mm
12mm
9mm
6mm
0 Type in a number (or press or )
until the desired number of copies is displayed.
NOTE
To select the default setting (OFF), press
(space bar).
A Press to confirm the setting and
New Block
return to the OPTION menu.
To print a mirror image of the text:
With the MIRROR function, you can print your
text in reverse so that it can be read from the
adhesive side of the tape.
[OFF]
[ON]
If these labels are printed on clear tape and
affixed to glass or any other clear material, the
text can be read correctly from the opposite
side.
1 Press .
Print
Caps Alt Template Zoom
OK TO PRINT?
!
OK
OPTION
CANCEL
Style Italic Vertical
A
Back
ground
Half
Cut
36mm
24mm
18mm
12mm
9mm
6mm
2 Press or to move 9 beside
OPTION.
NOTE
To return to the text without making any changes,
Print
press at any time.
Functions
67
Page 77

Ch. 3 Functions
3 Press .
NOTE
New Block
☞ To display the OPTION menu quickly, hold
down and press .
Print
☞ To return to the previous screen without keep-
ing any changes, press .
Cancel
☞ To return all functions in the OPTION menu to
their default settings, hold down and press
(space bar).
Back
Half
Caps Alt Template Zoom
ground
Cut
[ ]:CHANGE SETTINGS
OPTION
COPIES:1
NUMBER:OFF
Functions
MIRROR:OFF
INVERT:OFF
TRANS-:
FORM ABC
Style Italic Vertical
A
36mm
24mm
18mm
12mm
9mm
6mm
6 Press or to move 9 beside the
desired setting.
NOTE
To select the default setting ( [OFF]), press
ABC
(space bar).
7 Press to confirm the setting and
New Block
return to the OPTION menu.
To print an inverted image of the text:
The INVERT function prints all light areas so
that they are dark and all dark areas so that they
are light.
NOTE
Some fine details in the printing may be lost when
this function is used.
ABC
ABC
[OFF]
[ON]
4 Press or to move Î beside MIR-
ROR.
5 Press .
Back
Half
[OFF]
[ON]
ABC
A
ground
Cut
36mm
24mm
18mm
12mm
9mm
6mm
Caps Alt Template Zoom
[ ]:CONFIRM
MIRROR
ABC
Style Italic Vertical
1 Press .
Print
Caps Alt Template Zoom
OK TO PRINT?
!
OK
OPTION
CANCEL
Style Italic Vertical
A
Back
ground
Half
Cut
36mm
24mm
18mm
12mm
9mm
6mm
2 Press or to move 9 beside
OPTION.
NOTE
To return to the text without making any changes,
Print
press at any time.
68
Page 78

Ch. 3 Functions
3 Press .
New Block
NOTE
☞ To display the OPTION menu quickly, hold
down and press .
Print
☞ To return to the previous screen without keep-
ing any changes, press .
Cancel
☞ To return all functions in the OPTION menu to
their default settings, hold down and press
(space bar).
Back
Half
Caps Alt Template Zoom
[ ]:CHANGE SETTINGS
OPTION
COPIES:1
NUMBER:OFF
MIRROR:OFF
INVERT:OFF
TRANS-:
FORM ABC
Style Italic Vertical
ground
Cut
36mm
24mm
18mm
12mm
9mm
A
6mm
7 Press to confirm the setting and
New Block
return to the OPTION menu.
To change the shape of the text:
Use the TRANSFORMATION function to create
interesting text effects by molding the text into
different shapes. Refer to page 69 for samples of
the shapes that are available.
1 Press .
Print
Caps Alt Template Zoom
OK TO PRINT?
!
OK
OPTION
CANCEL
Style Italic Vertical
A
Back
ground
Half
Cut
36mm
24mm
18mm
12mm
9mm
6mm
2 Press or to move 9 beside
OPTION.
Functions
4 Press or to move Î beside
INVERT.
5 Press .
Back
Half
Caps Alt Tempalte tZoom
[ ]:CONFIRM
INVERT
ABC
ABC
Style Italic Vertical
ground
[OFF]
[ON]
A
Cut
36mm
24mm
18mm
12mm
9mm
6mm
6 Press or to move 9 beside the
desired setting.
NOTE
To select the default setting ( [OFF]), press
(space bar).
ABC
NOTE
To return to the text without making any changes,
Print
press at any time.
3 Press .
New Block
NOTE
☞ To display the OPTION menu quickly, hold
down and press .
Print
☞ To return to the previous screen without keep-
ing any changes, press .
Cancel
☞ To return all functions in the OPTION menu to
their default settings, hold down and press
(space bar).
69
Page 79

Ch. 3 Functions
To change the CUT setting:
Back
Half
Caps Alt Template Zoom
ground
Cut
[ ]:CHANGE SETTINGS
OPTION
COPIES:1
NUMBER:OFF
MIRROR:OFF
INVERT:OFF
TRANS-:
FORM ABC
Style Italic Vertical
4 Press or to move Î beside
TRANSFORM.
5 Press .
Caps Alt Template Zoom
A
Back
ground
Half
Cut
[ ]:CONFIRM
Functions
TRANSFORMATION
ABC
[OFF]
ABC
ABC
Style Italic Vertical
A
6 Press or to move 9 beside the
desired setting.
36mm
24mm
18mm
12mm
9mm
6mm
36mm
24mm
18mm
12mm
9mm
6mm
The way that labels are cut off after being
printed can be selected using the CUT function.
A full cut completely cuts off the label. When a
half cut setting is selected, the HALF CUT indi-
cator lights up and the tape is cut without cutting the label backing. This makes it easier to
remove the backing paper from the labels.
Back
Half
Caps Alt Template Zoom
0.0cm HELSI
MARGIN:WIDE AUTO
Style Italic Vertical
ground
Cut
36mm
24mm
18mm
12mm
9mm
A
6mm
The following CUT settings are available:
ABC ABC
ABC ABC
ABC ABC
ABCABC
1 Press .
Print
[FULL&HALF]
(both full and half cuts)
[FULL]
(full cut only)
[HALF]
(half cut only)
[OFF]
(no cuts)
NOTE
To select the default setting ( [OFF]), press
ABC
(space bar).
7 Press to confirm the setting and
New Block
return to the OPTION menu.
70
Back
Half
Caps Alt Template Zoom
OK TO PRINT?
!
OK
OPTION
CANCEL
Style Italic Vertical
ground
Cut
36mm
24mm
18mm
12mm
9mm
A
6mm
2 Press or to move 9 beside
OPTION.
NOTE
To return to the text without making any changes,
Print
press at any time.
Page 80

Ch. 3 Functions
3 Press .
NOTE
New Block
☞ To display the OPTION menu quickly, hold
down and press .
Print
☞ To return to the previous screen without keep-
ing any changes, press .
Cancel
☞ To return all functions in the OPTION menu to
their default settings, hold down and press
(space bar).
Back
Half
Caps Alt Template Zoom
[ ]:CHANGE SETTINGS
OPTION
COPIES:1
NUMBER:OFF
MIRROR:OFF
INVERT:OFF
TRANS-:
FORM ABC
Style Italic Vertical
ground
Cut
36mm
24mm
18mm
12mm
9mm
A
6mm
4 Press or to move Î beside CUT.
5 Press .
Back
Half
ABC
A
ground
Cut
36mm
24mm
18mm
12mm
9mm
6mm
Caps Alt Template Zoom
[ ]:CONFIRM
CUT
ABC ABC
[FULL&HALF]
ABC
[FULL]
Style Italic Vertical
7 Press to confirm the setting and
New Block
return to the OPTION menu.
To use SPLIT printing:
The SPLIT function enlarges the text and prints it
on 2, 3 or 4 labels, which can be assembled to
create extra-large labels.
ABC1
ABC1
Cut off the blank space on the bottom of the first
label, then put the top and bottom parts together so
that there is no break in the characters.
NOTE
If the labels are printed on transparent tape, they
can be put together without being cut.
1 Press .
2 Press or to move 9 beside
NOTE
To return to the text without making any changes,
press at any time.
Print
Caps Alt Template Zoom
OK TO PRINT?
!
OK
OPTION
CANCEL
Style Italic Vertical
OPTION.
Print
Back
Half
ground
Cut
36mm
24mm
18mm
12mm
9mm
A
6mm
Functions
6 Press or to move 9 beside the
desired setting.
NOTE
To select the default setting (
[FULL&HALF]), press (space bar).
ABC ABC
71
Page 81

Ch. 3 Functions
3 Press .
New Block
NOTE
☞ To display the OPTION menu quickly, hold
down and press .
Print
☞ To return to the previous screen without keep-
ing any changes, press .
Cancel
☞ To return all functions in the OPTION menu to
their default settings, hold down and press
(space bar).
Back
Half
Caps Alt Template Zoom
ground
Cut
[ ]:CHANGE SETTINGS
OPTION
COPIES:1
NUMBER:OFF
Functions
MIRROR:OFF
INVERT:OFF
TRANS-:
FORM ABC
Style Italic Vertical
A
36mm
24mm
18mm
12mm
9mm
6mm
7 Press to apply the setting and return
New Block
to the OPTION menu.
4 Press or to move Î beside SPLIT.
5 Press .
Back
Half
Caps Alt Template Zoom
[ ]:CONFIRM
SPLIT
OFF
DOUBLE
TRIPLE
QUADRUPLE
Style Italic Vertical
ground
Cut
36mm
24mm
18mm
12mm
9mm
A
6mm
6 Press or to move 9 beside the
desired setting.
NOTE
To select the default setting (OFF), press
(space bar).
72
Page 82

Ch. 3 Functions
Setting display features
● ● ● ● ● ● ● ● ● ● ● ● ● ● ● ● ● ● ● ● ● ●
Setup ( )
Pressing displays four functions which let
you change the general appearance of text
shown on the display.
To change the LINE NO. setting:
This function allows you to select whether or
not the number of the line currently containing
the cursor is displayed during Zoom mode. (The
line numbers are not displayed in WYSIWYG
mode.)
1 Press .
NOTE
To return all functions in the SETUP menu to their
default settings, hold down and press
2 Since Î is already beside LINE NO., press
Setup
Setup
Setup
(space bar).
Back
Half
Caps Alt Template Zoom
ground
Cut
[ ]:CHANGE SETTINGS
SETUP
LINE NO. :ON
CONTRAST : 0
BAUD RATE:
57600 bps
Style Italic Vertical
A
36mm
24mm
18mm
12mm
9mm
6mm
3 Press or to move 9 beside the set-
ting that you wish to select.
NOTE
To select the default setting, press
(space bar).
4 Press once to confirm the setting
New Block
and return to the SETUP menu.
5 Press again to apply the setting.
New Block
To change the CONTRAST setting:
The CONTRAST function enables you to make
the LCD display lighter or darker.
1 Press .
NOTE
To return all functions in the SETUP menu to their
default settings, hold down and press
Setup
(space bar).
Back
Half
Caps Alt Template Zoom
ground
Cut
[ ]:CHANGE SETTINGS
SETUP
LINE NO. :
CONTRAST :
BAUD RATE:
57600 bps
Style Italic Vertical
A
36mm
24mm
18mm
12mm
9mm
6mm
Functions
.
Caps Alt Template Zoom
[ ]:CONFIRM
LINE NO.
ON
OFF
Style Italic Vertical
A
Back
ground
Half
Cut
36mm
24mm
18mm
12mm
9mm
6mm
2 Press or to move Î beside CON-
TRAST.
3 Press .
73
Page 83

Ch. 3 Functions
Back
Half
Caps Alt Template Zoom
ground
Cut
[ ]:CONFIRM
CONTRAST
+2
+1
0
-1
-2
Style Italic Vertical
4 Press or to move 9 beside the set-
ting that you wish to select.
NOTE
To select the default setting, press
(space bar).
Functions
5 Press once to confirm the setting
New Block
and return to the SETUP menu.
6 Press again to apply the setting.
New Block
To change the BAUD RATE setting:
A
36mm
24mm
18mm
12mm
9mm
6mm
Back
Half
Caps Alt Template Zoom
[ ]:CHANGE SETTINGS
SETUP
LINE NO. :
CONTRAST :
BAUD RATE:
57600 bps
Style Italic Vertical
ground
Cut
36mm
24mm
18mm
12mm
9mm
A
6mm
2 Press or to move Î beside BAUD
RATE.
3 Press .
Back
Half
Caps Alt Template Zoom
[ ]:CONFIRM
BAUD RATE
9600 bps
57600 bps
115200 bps
Style Italic Vertical
ground
Cut
36mm
24mm
18mm
12mm
9mm
A
6mm
This function lets you choose the baud rate for
sending data when the P-touch is connected to
a computer.
1 Press .
NOTE
To return all functions in the SETUP menu to their
default settings, hold down and press
Setup
(space bar).
4 Press or to move 9 beside the set-
ting that you wish to select.
NOTE
To select the default setting, press
(space bar).
5 Press once to confirm the setting
New Block
and return to the SETUP menu.
6 Press again to apply the setting.
New Block
74
Page 84

Ch. 4 Using Labels and Stamps
Chapter
4
U
sing
abels and
L
tamps
S
Using Labels and Stamps
75
Page 85

Ch. 4 Using Labels and Stamps
●
●
●
Laminated tape
● ● ● ● ● ● ● ● ● ● ● ● ● ● ● ● ● ● ● ● ● ●
The backing from labels printed on laminated
tapes can easily be removed if a half cut setting
was used (refer to page 70). However, if a half
cut setting was not used, the backing paper can
be removed by using the enclosed lettering
stick.
1 Hold the tape in your left hand, with the
printed surface facing up, and hold the lettering stick in your right hand.
2 Pass the tape halfway through the long nar-
row hole in the stick.
3 Turn the stick three quarters of a turn
towards you and pull the stick away from
you as shown below.
4 Peel off the label backing.
GH
ABCDEF
Using Labels and Stamps
Non-laminated tape
● ● ● ● ● ● ● ● ● ● ● ● ● ● ● ● ● ● ● ● ● ●
5 Slightly fold labels printed on non-lami-
nated tape in half so that the inside edges of
the two backing pieces come off the label,
enabling them to be peeled off easily.
Instant-lettering tape
● ● ● ● ● ● ● ● ● ● ● ● ● ● ● ● ● ● ● ● ● ●
By printing your text on instant-lettering tape
(rub-on transfers), you can transfer the text
directly onto a sheet of paper.
1 Place the label with its printed side facing
down on the paper.
2 Rub the label’s non-printed side with the
enclosed lettering stick.
76
ABCDEF
NOTE
☞ Hold the label very firmly so that it does not
move while you transfer the text.
ABC
Page 86

●
Iron-on transfer tape
● ● ● ● ● ● ● ● ● ● ● ● ● ● ● ● ● ● ● ● ● ●
Anything you print on iron-on transfer tape can
be transferred onto fabrics.
NOTE
☞ Although the iron-on transfers are non-toxic, do
not place them in your mouth.
☞ Do not store iron-on transfer tape cassettes in
areas exposed to direct sunlight, high humidity
or dust.
1 Iron the garment to flatten it before transfer-
ring the text.
2 Place the label at the desired position on
the garment with the label’s non-printed
side facing up.
3 Set the iron to cotton (150 to 180 °C), and
then press down on the label with the iron
for about 15 seconds.
4 Allow the iron-on transfer to cool (for about
60 seconds), and then carefully remove the
backing tape.
Ch. 4 Using Labels and Stamps
NOTE
☞ White garments made from 100% cotton with a
plain (smooth) surface are best for making ironon transfers.
☞ You can also make transfers to garments made
from 100% linen or cotton/polyester blends as
long as they have a plain (smooth) surface.
☞ The iron-on will not adhere properly to any
cloth with a rough surface, such as pile or
denim, or with a waterproof surface. Heat-sensitive materials, such as nylon, acetate or other
similar fibres, are unsuitable since they may be
damaged when pressed with an iron at a high
temperature.
☞ Press the iron straight down onto the cloth. Do
not move the iron while pressing, otherwise the
label may move out of desired position.
☞ After the backing tape has been removed, the
transferred iron-on may appear glossy. In addition, some white spots may have appeared on
the iron-on if it was touched while the backing
tape was peeled off. These can be removed by
ironing over the iron-on transfer with a piece of
cloth placed between it and the iron.
☞ The iron-on transfer will have a white back-
ground if it is ironed onto coloured cloth.
☞ Since the transferred iron-on cannot be
removed once it is applied, make all transfers
with care.
Washing
Garments with iron-ons can be washed over 20
times if the iron-on has been transferred correctly. General household detergents may be
Using Labels and Stamps
used.
The iron-on may become discoloured if the garment is placed in bleach for an extended length
of time.
Be careful that hard objects, such as buckles or
buttons, do not come into contact with the ironon in the wash.
Do not dry clean garments which have had
iron-on transfers applied.
77
Page 87

Ch. 4 Using Labels and Stamps
●
Drying
Do not tumble dry garments which have had
iron-on transfers applied. The transfers may
come off and stick to other items of clothing.
Garments with iron-on transfers may be dried
either inside or outside out.
Ironing
Use normal temperature settings to iron garments with transfers.
Iron with a piece of cloth placed between the
iron and the iron-on transfer to prevent it from
sticking to the iron.
P-TOUCH
Using Labels and Stamps
Stamp film
● ● ● ● ● ● ● ● ● ● ● ● ● ● ● ● ● ● ● ● ● ●
In addition to labels, your P-touch can be used
to make custom, pre-inked stamps for various
uses (optional stamp kit required). Simply design
your own customised stamps using one of the
pre-formatted stamp templates, and then affixing
the printed stamp stencil to a self-inking stamp
film holder.
1 Install a stamp film cassette and enter text
into a pre-formatted stamp template. Refer
to pages 57 through 61 for more details on
using templates.
2 Print out the stamp stencil and remove its
backing paper.
3 Remove the frame from around the stamp
holder ink pad, one end at a time, and then
remove the protective seal covering the ink
pad.
NOTE
☞ If the stamp holder already contains a stamp
film, hold the stamp over a piece of scrap paper
and remove the stamp frame by pulling it off,
one end at a time. Then, slowly peel off the
stamp film. Be careful that the ink does not
splatter.
☞ Keep the stamp film holder out of the reach of
children.
☞ Avoid getting ink in your eyes or mouth. If ink
gets in your eyes or mouth, immediately wash it
with fresh water for several minutes and consult
a doctor.
☞ Keep ink off skin, clothes and important papers.
Immediately use soap to wash skin that has
come in contact with ink. Even washing may
not remove all ink.
78
Page 88

Ch. 4 Using Labels and Stamps
4 With the glossy side of the stamp film facing
up, align one end of the stamp film with the
slit in the side of the stamp holder.
Glossy side
Tape end
Slit
5 Hold the end of the stamp film in place with
your thumb, then pass the stamp film
through the guides while pulling it tight.
Fold over
7 Fit the frame over the stamp film, and then
push the frame into place.
8 Insert the stamp holder straight into the cap.
NOTE
☞ Be sure that the cap correctly covers the stamp
in order to prevent ink spills.
☞ When the stamp is not being used, firmly cover
it with the cap and always store it standing up
with the stamp facing downward. Do not leave
the stamp laying on its side or leaning.
☞ Store stamp film holders and stamp film cas-
settes in a location where they are not exposed
to high temperatures, high humidity or direct
sunlight.
6 Fold the other end of the stamp film over
the other side of the stamp holder and hold
it in place with your finger.
Guides
Using Labels and Stamps
79
Page 89

Ch. 4 Using Labels and Stamps
Printing an identification label for the stamp
holder
1 Insert a TZ tape cassette into the tape com-
partment.
NOTE
Use 12-mm-wide tape to make an identification label for
an M-size stamp and use 18-mm-wide tape to make a
label for an L-size stamp.
2 Print out the identification label. Refer to
page 60 for more details on printing identification labels.
Back
Half
Caps Alt Template Zoom
OK TO PRINT?
!
ground
Cut
PRINT STAMP
PRINT LABEL
CANCEL
Style Italic Vertical
3 After the label is cut off, affix it to the end of
the holder so that its bottom edge is on the
same side of the stamp holder as the raised
“brother” logo.
Using Labels and Stamps
A
36mm
24mm
18mm
12mm
9mm
6mm
Stamping
Since the length of time and amount of pressure
that the stamp holder should be held down
depends on the amount of ink in the holder, first
practise stamping on a piece of scrap paper.
You can expect to use a stamp film holder
approximately 300 to 500 times, although some
ink is lost when the stamp film is changed. The
actual life of the stamp film holder will vary
depending on the size and thickness of the char-
acters, whether a shading pattern is used, etc.
NOTE
☞ After stamping, wait until the ink has com-
pletely dried before touching it in order to prevent smearing.
☞ If the stamp holder is not pressed straight down,
the stamp may be blurred.
☞ Do not press the stamp holder down too force-
fully.
☞ Do not stamp on wet, sticky, rough or uneven
surfaces. Only stamp on paper. The ink will not
dry on plastic overhead projector transparencies and other ink-impermeable objects.
☞ If a stamp made with a new stamp film is faint
or incomplete, even after forcefully pressing
down the stamp holder for up to 30 seconds,
replace the stamp holder with a new one. Do
not try to refill the stamp holder.
80
Page 90

ERROR MESSAGE LIST
ERROR MESSAGE LIST
ERROR MESSAGE CAUSE SOLUTION
4 DIGITS MINIMUM ● This message appears if less than
the minimum four digits are
entered as the barcode data.
5 BARCODE LIMIT ● This message appears if five bar-
codes already exist when you
press .
Barcode
● Enter a minimum of four
digits before pressing
.
New Block
● Limit the number of bar-
codes in the text to five.
5 BLOCK LIMIT ● This message appears if five blocks
already exist when you hold down
and press to add a
New Block
new block or when you try to add
currency conversion text.
10 LINE LIMIT ● This message appears if ten lines
have already been entered in a
block of text when you press
or try to add currency
New Block
conversion text.
● This message appears if you press
to delete text, causing the
Clear
number of lines in a block to
exceed the ten-line limit.
30 CHARACTER
LIMIT
BARCODE MUST
START & END WITH
A, B, C OR D
● This message appears if more than
30 characters are selected when
Copy
you press .
● This message appears if A, B, C or
&Paste
D has not been entered at the
beginning and end of a barcode
with the CODABAR protocol.
● Limit the number of blocks
in the text to five.
● Limit the number of lines
in the text block to ten or
hold down and press
to create a new
New Block
block.
● Adjust the number of lines
so that the block will not
have more than ten lines.
● Limit the number of char-
acters that will be copied
and pasted to 30.
● Enter A, B, C or D at the
beginning and end of the
barcode.
81
Page 91

ERROR MESSAGE LIST
ERROR MESSAGE CAUSE SOLUTION
BUFFER EMPTY ● This message appears if no text has
been typed in when you press
Print
or , when you hold and
● Type in some text before
Area
All
trying to perform any of
these operations.
press or , or when you
press after selecting
Area
All
New Block
Zoom
Image
BLOCK, LINE or CHARACTER
(FRAME or SHADING menus), or
SAVE AS or SAVE (FILE menu).
BUFFER FULL ● This message appears if enough
text has already been entered to
fill the buffer, and you try to paste
in text or add a character, a space,
a new line, a new block, a symbol,
an accented character, a diacritical mark, a barcode or currency
conversion text.
● This message appears if enough
text has already been entered to
fill the buffer, and you press ,
Style
Font
Size
, , , , , or
Vert
.
Width
Italic
/
/
CAN’T FIND FILE ● This message appears if a file with
the entered file name cannot be
found.
CLOSE CASSETTE
COVER
CUTTER ERROR
TURN POWER OFF,
● This message appears if the tape
compartment cover is open.
● This message appears if the cutter
did not operate correctly.
THEN ON AGAIN
HALF-CUT ERROR
TURN POWER OFF,
● This message appears if the half
cutter did not operate correctly.
THEN ON AGAIN
INCORRECT NUMBER
OF DIGITS FOR
BARCODE TYPE
● This message appears if the bar-
code data that is entered contains
the incorrect number of digits for
the selected barcode protocol.
● Delete some of the text
before trying to add any
more.
● Delete some of the text
before trying to change the
text format.
● Search for a different file
name.
● Close the compartment
cover.
● Turn off the P-touch, and
then turn it on again.
● Turn off the P-touch, and
then turn it on again.
● Enter barcode data that
contains the correct
number of digits.
82
Page 92

ERROR MESSAGE LIST
ERROR MESSAGE CAUSE SOLUTION
INCORRECT
OPERATION FOR
NUMBERING
FUNCTION
● This message appears if charac-
ters in different lines or blocks are
selected as a numbering field
(NUMBER function on the
● Adjust the numbering field
so that it only contains
characters within a single
line of a single block.
OPTION menu).
● This message appears if a barcode
is selected together with other
characters as a numbering field
● Select either the barcode
or the characters alone as
the numbering field.
(NUMBER function on the
OPTION menu).
● This message appears if more than
five characters are selected as the
● Limit the numbering field
to five characters.
numbering field (NUMBER function on the OPTION menu).
INSERT CASSETTE ● This message appears if no tape
cassette is installed when you try
● Install a tape cassette and
try again.
to print text.
INTERFACE MODE
INTERFACE ERROR
● This message appears if an error
occurs while receiving data.
● This message appears if the size of
the data being sent is larger than
the width of the installed tape cas-
● Cancel the print job, and
then try printing again.
● Cancel the print job, install
the correct tape cassette,
and then try printing again.
sette.
INTERFACE MODE
TAPE CASSETTE
CHANGED
● This message appears if the tape
cassette is changed between the
moment that the data begins to be
● Cancel the print job, install
the correct tape cassette,
and then try printing again.
received until the moment that the
print command is received.
83
Page 93

ERROR MESSAGE LIST
ERROR MESSAGE CAUSE SOLUTION
LENGTH LIMIT ● This message appears if you try to
paste in text or add a character, a
space, a new block, a symbol, a
diacritical mark, an accented char-
● Delete some of the text or
reduce the character size
before trying to add more
text.
acter, a barcode, currency conversion text or a frame/shading,
causing the text to exceed the 1.2metre limit.
● This message appears if you press
after changing a label for-
New Block
● Delete some of the text
before trying to change the
label or text formats.
mat function on the FORMAT
Font
Size
menu, or press , , ,
Style
, , or , causing
/
Italic
Vert
Width
the text to exceed the 1.2-metre
limit.
● This message appears if you try to
print using the NUMBER (number-
● Delete some of the text or
reduce the character size.
ing) function, causing the text to
exceed the 1.2-metre limit.
● This message appears if you press
to delete text, causing the
Clear
● Delete some of the text or
reduce the character size.
text to exceed the 1.2-metre limit.
● This message appears if you try to
recall a text file from the memory,
● Delete some of the text
before recalling it.
causing the text to exceed the 1.2metre limit.
LIMIT EXCEEDED
SET BETWEEN
4.0-30.0 cm
● This message appears if the set
label length (LENGTH function on
the FORMAT menu) is not within
● Type in a label length that
is within the specified
range.
the range 4.0 to 30.0 cm.
LIMIT REACHED ● This message appears if you try to
add more than 50 underlines,
frames and shadings.
● Limit the number of under-
lines, frames and shadings
in the text to 50.
84
Page 94

ERROR MESSAGE LIST
ERROR MESSAGE CAUSE SOLUTION
LINE LIMIT ● This message appears if you press
to delete text, press
Clear
to add a new line, or try to
New Block
● Adjust the number of lines
so that the block will not
have more than the maximum possible.
add currency conversion text,
causing the number of lines in a
block to exceed the maximum
possible for the installed tape.
● This message appears if you try to
recall a file or print text which
contains more lines than the maxi-
● Reduce the number of
lines or install a wider
tape.
mum possible for the installed
tape.
MACHINE ERROR
TURN POWER OFF,
THEN ON AGAIN
MEMORY FULL ● This message appears if you try to
● This message appears if there is a
problem with the machine’s memory.
store a message that is too large to
fit in the available memory space
● Contact your service repre-
sentative.
● Delete an unwanted file to
make space for the new
one.
(maximum of 3,000 characters).
MEMORY FULL.
DELETE SOME
FILES & TRY
AGAIN
NO FILES ● This message appears if no files
● This message appears if there are
no empty files available when
NEW or SAVE AS (FILE menu) is
selected.
are stored in the memory when
● Delete any unwanted files
to make space for new
ones.
● Store a text file before try-
ing to recall or delete one.
you try to recall or delete one.
OVERFLOW ● This message appears if you press
to calculate a currency
New Block
conversion, but the resulting text
● Change the currency con-
version setup so that the
resulting text will not
exceed 12 characters.
exceeds 12 characters.
RAM PROBLEM ● This message appears if there is a
problem with the machine’s mem-
● Contact your service repre-
sentative.
ory.
ROM PROBLEM ● This message appears if there is a
problem with the machine’s mem-
● Contact your service repre-
sentative.
ory.
SET 9mm ● This message appears if a 9-mm-
wide tape cassette is not installed
● Install a 9-mm-wide tape
cassette.
when printing a label created
using a template for 9-mm-wide
tape.
85
Page 95

ERROR MESSAGE LIST
ERROR MESSAGE CAUSE SOLUTION
SET 12mm ● his message appears if a 12-mm-
wide tape cassette is not installed
● Install a 12-mm-wide tape
cassette.
when printing a label created
using a template for 12-mm-wide
tape.
SET 18mm ● This message appears if a 18-mm-
wide tape cassette is not installed
● Install a 18-mm-wide tape
cassette.
when printing a label created
using a template for 18-mm-wide
tape.
SET 24mm ● This message appears if a 24-mm-
wide tape cassette is not installed
● Install a 24-mm-wide tape
cassette.
when printing a label created
using a template for 24-mm-wide
tape.
SET 36mm ● This message appears if a 36-mm-
wide tape cassette is not installed
● Install a 36-mm-wide tape
cassette.
when printing a label created
using a template for 36-mm-wide
tape.
SET STAMP L ● This message appears if an L-size
stamp film cassette is not installed
● Install an L-size stamp film
cassette.
when printing a stamp created
using a template for L-size stamp
film.
SET STAMP M ● This message appears if an M-size
stamp film cassette is not installed
● Install an M-size stamp
film cassette.
when printing a stamp created
using a template for M-size stamp
film.
SYSTEM ERROR ● This message appears if there is a
problem with the machine’s soft-
● Contact your service repre-
sentative.
ware.
TAPE END. PLEASE
CHANGE TAPE
CASSETTE
TEMPLATES CANNOT
BE PRINTED ONTO
LETTERING OR
● This message appears if the end of
the tape in the cassette has been
reached.
● This message appears if you try to
print a template on iron-on or lettering tape.
● Replace the tape cassette.
● Install a tape cassette that
does not contain iron-on
or lettering tape.
IRON-ON TAPES
TEXT TOO HIGH ● This message appears if the height
of the text is larger than the width
of the installed tape.
● Reduce the number of
lines in the text, reduce the
size of the characters, or
install a tape with a greater
width.
86
Page 96

ERROR MESSAGE LIST
ERROR MESSAGE CAUSE SOLUTION
TEXT TOO LONG ● This message appears if the length
of the text is longer than the label
length that has been set.
● Delete some of the text,
reduce the character
width, or increase the set
label length.
● This message appears if the text
● Enter fewer characters.
typed into a line in a template
(TEMPLATE function) exceeds the
preset length.
UNABLE TO
PERFORM THIS
OPERATION HERE
● This message appears if the cursor
is located in a barcode mark when
you try to paste in text or add a
● Move the cursor or delete
the barcode before trying
to add any more text.
character, a space, a new line, a
new block, a symbol, a diacritical
mark, an accented character or
currency conversion text.
● This message appears if the cursor
is located in a barcode mark when
Font
Size
you press , , , ,
Italic
, or .
Vert
/
Width
● Move the cursor or delete
the barcode before trying
Style
to change the text format.
87
Page 97

TROUBLESHOOTING
TROUBLESHOOTING
Problem Solution
(1) The display stays blank after you have
turned on the machine, or abnormal characters are displayed.
(2) The text shown in the display cannot be
read.
(3) The machine does not print or the printed
characters are blurred.
(4) The text is printed on striped tape.
● Check that the power supply cord is con-
nected.
● Reset the machine by turning it off, and
while holding down and , turn-
R
ing the machine back on.
☞
The text and formats in the display and all
text files stored in the memory are erased.
● Use the Zoom mode to zoom in on the
text. Refer to page 36.
● Check that the tape cassette has been
inserted properly.
● If the tape cassette is empty, replace it
with a new one.
● Make sure that the tape compartment
cover has been closed.
● You have reached the end of the tape in
the cassette. Replace it with a new one.
88
Page 98

Problem Solution
(5) A blank horizontal line appears through
the text in the printed label.
TROUBLESHOOTING
1 Turn off the machine.
2 Open the tape compartment cover, then
remove the tape cassette if one is installed.
The print head and rollers are located in the
tape compartment.
3 Print head: Use a dry cotton swab to gently
wipe up and down along the print head.
Print head
Rollers: Use a dry cotton swab to wipe up
and down along each roller while rotating
them with your finger.
Print head
Rollers
Cotton
swab
4 Install a tape cassette, close the tape com-
partment cover, and then try printing again.
5 If a blank streak still appears in the printed
label, repeat steps 2 through 4 using a
cotton swab dipped in isopropyl (rubbing)
alcohol.
If none of the above works, contact your service
representative.
89
Page 99

TROUBLESHOOTING
Problem Solution
(6) The tape is not ejected correctly after being
automatically cut.
● Turn off the machine, open the tape com-
partment cover, and remove the tape cassette if one is installed.
Using a cotton swab dipped in isopropyl
(rubbing) alcohol, clean off the metal piece
in the exit slot to the left of the cutter.
Cutter
Cotton swab
Metal piece
(Area to be cleaned)
(7) The machine has “locked up” (i.e., noth-
ing happens when a key is pressed).
(8) After turning on the P-touch, the message
“BACKUP MEMORY CLEARED” appears
and all of the files in the memory are lost.
● Reset the machine by turning it off, and
while holding down and , turn-
R
ing the machine back on.
☞
All text and formats in the display and in
the memory will be erased.
● The internal backup battery is low. Con-
tact your nearest service representative.
90
Page 100

MACHINE SPECIFICATIONS
HARDWARE
Power supply: Input AC 230 V 50Hz
(Auto power off if no key is pressed within 30 minutes)
Input device: Keyboard (79 keys)
LCD: 118 × 64 dots
21 indicators (with back light)
Print tape: 6 widths available:
6 mm
9 mm
12 mm
18 mm
24 mm
36 mm
Print head: 384 dots/360-dpi resolution
MACHINE SPECIFICATIONS
Tape cutter: Auto full cutter
Auto half cutter
Dimensions: 335 × 312 × 101 mm
Weight: 2.5 kg
SOFTWARE
Character fonts: 10 built-in fonts (Helsinki, Brussels, Calgary, US, San Diego, Florida,
Brunei Bold, Los Angeles, Bermuda Script, and Istanbul)
Character sizes: AUTO plus 9 point sizes (6, 9, 12, 18, 24, 36, 48, 60, and 72 points)
Character styles: 9 built-in type styles (Normal, Bold, Outline, Solid, Shadow, Out-
line+Shadow, Stripe, Italic, and Vertical)
Buffer size: Maximum 1.2-metre line of text
Maximum 10 lines
Maximum 5 blocks
Memory size: Approximately 3,000 characters
91
 Loading...