

Bosch DS7446KP Installation Instructions Manual
www.boschsecuritysystems.com
© 2006 Bosch Security Systems
4998149923D
DS7446KP
1
1
2
Four-wire, no shield
Viervoudige bedrading, zonder afscherming
Câble 4 conducteurs sans écran
Vier Drähte, nicht geschirmt
Cavo a quattro conduttori senza protezione
Cuatro cables, sin apantallar
Fyra ledare, ingen skärmning
For Wall Mounting
Voor bevestiging aan de
muur
Pour le montage mural
Für die Wandmontage
Per il montaggio a parete
Para montaje en pared
For Electrical Box Mounting
Voor bevestiging op een
elektrische kast
Pour le montage sur boîtier
électrique encastré
Für die Montage an
Elektrodose
Per il montaggio della
scatola elettrica
Para montaje en caja
eléctrica
För montering i elbox
For Contrast Control
Voor contrastcontrole
Pour le réglage du contraste
Für die Kontrastregelung
Per la regolazione del
contrasto
Para control de contraste
För kontrastreglering
Tools Needed
Benodigde materialen
Outils nécessaires
Herramientas necesarias
Behövliga verktyg
Erforderliches Werkzeug
Strumenti necessari
Installation
Installatie
Installation
Instalación
Installation
Montage
Installazione
Installation Considerations
Aandachtspunten voor installatie
Conseils relatifs à l’installation
Consejos de instalación
Installationsbeaktanden
Montagehinweise
Informazioni sull’installazione
Keypad
Installation Instructions
Installatiehandleiding voor
het bedieningspaneel
Notice d’installation du
clavier de commande
Instrucciones de instalación
del teclado numérico
Installationsanvisningar för
manöverpanel
Installationanleitungen
für die Tastatur
Istruzioni di installazione
della tastiera
Compliance
Naleving
Conformité
Conformidad
Överensstämmelse
Compliance
Conformità

© 2006 Bosch Security Systems
4998149923D
2
3
4
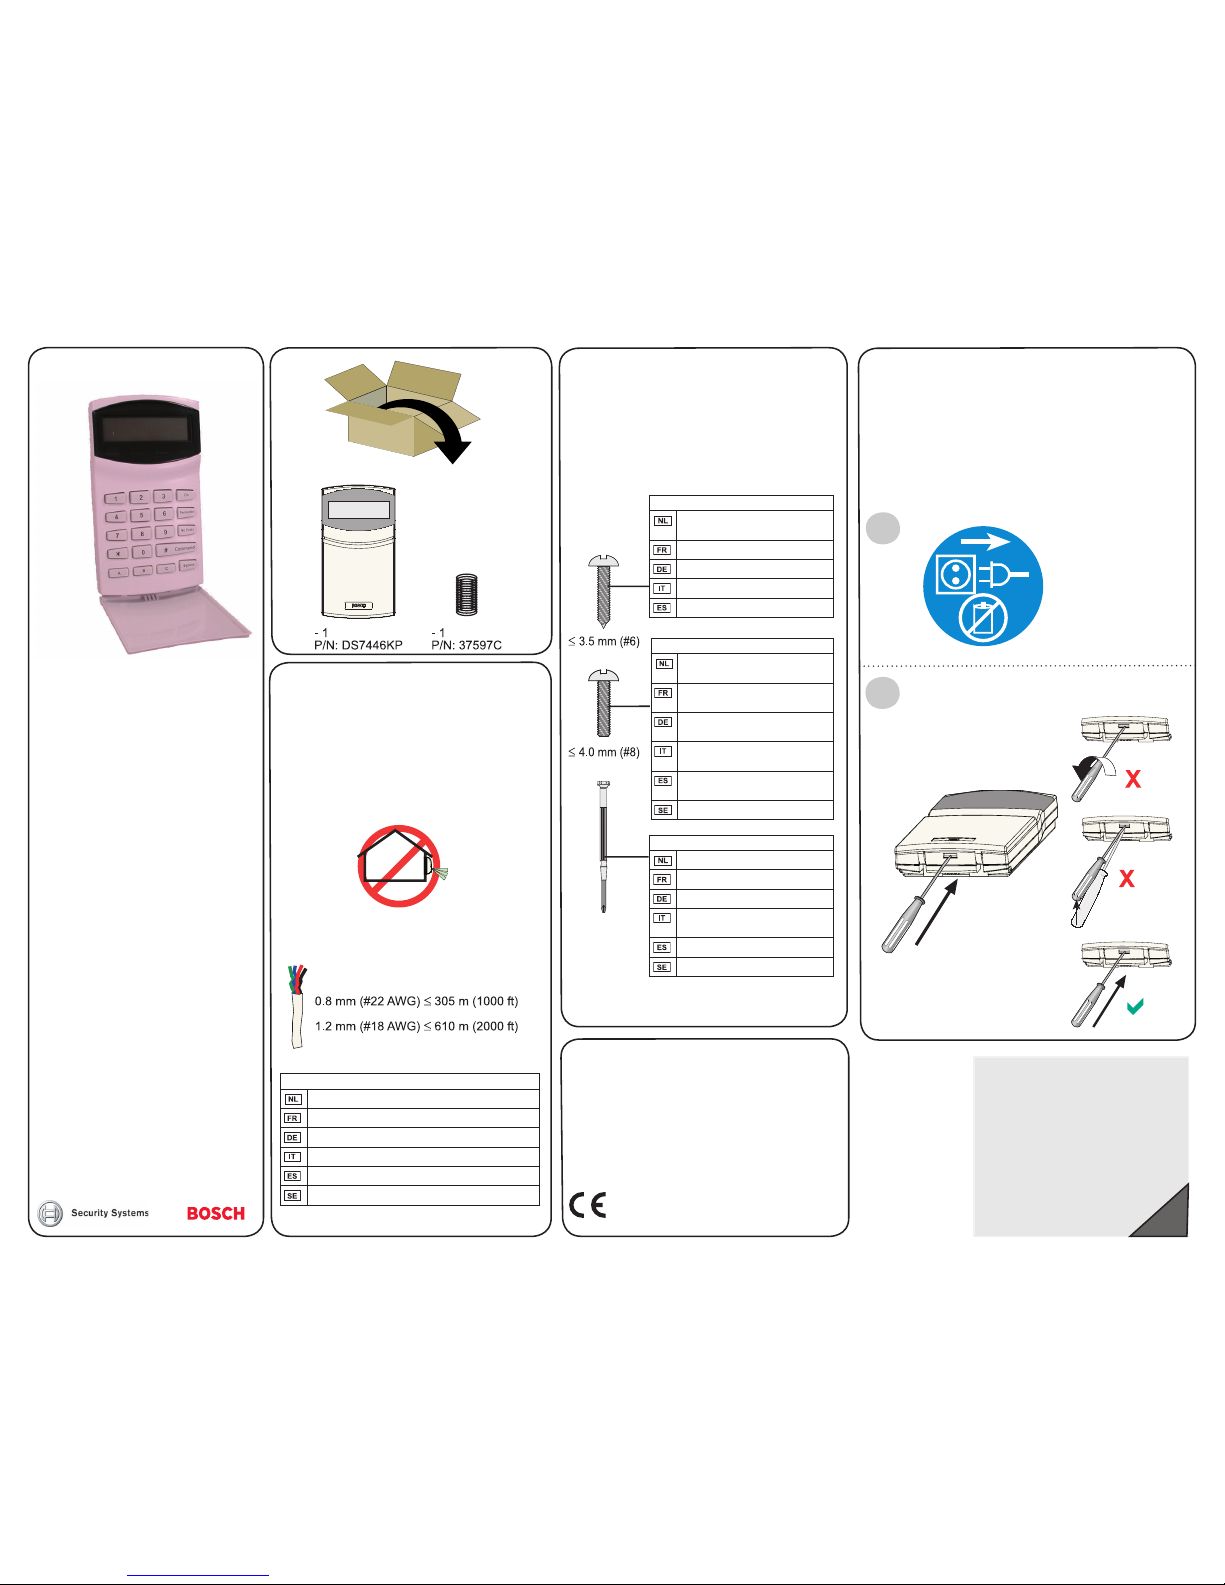
Cut opening in wall for wire entrance.
Maak een gat in de wand voor het
binnenvoeren van de bedrading.
Percez un orifi ce dans le mur
pour insérer les câbles
Schneiden Sie für die Drähte eine
Öffnung in die Wand.
Realizzare un foro nella parete
per l’ingresso dei cavi.
Abra un espacio en la pared para
introducir los cables.
Gör hål i väggen för
kabelgenomföring.
Wall Tamper (optional)
Sabotageschakelaar
(optioneel)
Autosurveillance à l’arrachement
(en option)
Abreißsabotageüberwachung
(optional)
Dispositivo antirimozione
(opzionale)
Bucle de antisabotaje (opcional)
Sabotageskydd för
väggmontering (valfri)
Select an address between 1 and 32.
Each keypad must have a unique
address.
Kies een adres tussen de 1 en 32.
Elk bedieningspaneel moet een
uniek adres hebben.
Sélectionnez une adresse entre 1
et 32.
Chaque clavier doit avoir une
adresse
unique.
Wählen Sie eine Adresse zwischen
1 und 32.
Jede Tastatur muss ihre eigene
Adresse haben.
Selezionare un indirizzo compreso
fra 1 e 32.
Ogni tastiera deve avere un
indirizzo univoco.
Seleccione una dirección entre 1
y 32.
Cada teclado numérico debe tener
una dirección
única.
Välj en adress mellan 1 och 32.
Varje manöverpanel måste ha en
unik adress.
DIP Switch ON Position
AAN-stand van DIP-switch
Commutateur DIP en position
ON
DIP-Schalterposition ON (EIN)
DIP Switch in posizione ON
Posición de encendido (ON) del conmutador DIP
DIP-switch, läge ON
DIP Switch OFF Position
UIT-stand van DIP-switch
Commutateur DIP en position OFF
DIP-Schalterposition OFF (AUS)
DIP Switch in posizione OFF
Posición de apagado (OFF) del conmutador DIP
DIP-switch, läge OFF
Sample electrical box
Voorbeeld elektrische kast.
Modèle de boîtier électrique.
Beispiel für Elektrobox.
Modello di scatola elettrica.
Caja eléctrica de ejemplo.
Exempel på elbox.
 Loading...