

Page 1
Gel Doc EZ System
Installation Guide
(The Chinese version of this document begins on page 11.)
Installing the Gel Doc EZ system requires
the following steps:
1. Install Image Lab™ software on the
PC or Macintosh computer you intend
to use with the imager.
2. Connect the imager to the computer.
3. Initialize the sample trays.
1 Install Image Lab Software
Windows
• Place the Image Lab software CD in your CD-ROM drive. The installation should
start automatically.
NOTE: If the installation does not start, open My Computer and click the CD drive
icon. Double-click setup.exe to start the installation manually.
The Image Lab software icon appears on your desktop. Follow the instructions in the next
section to connect the imager to your computer.
1
Page 2
Gel Doc™ EZ System Installation Guide
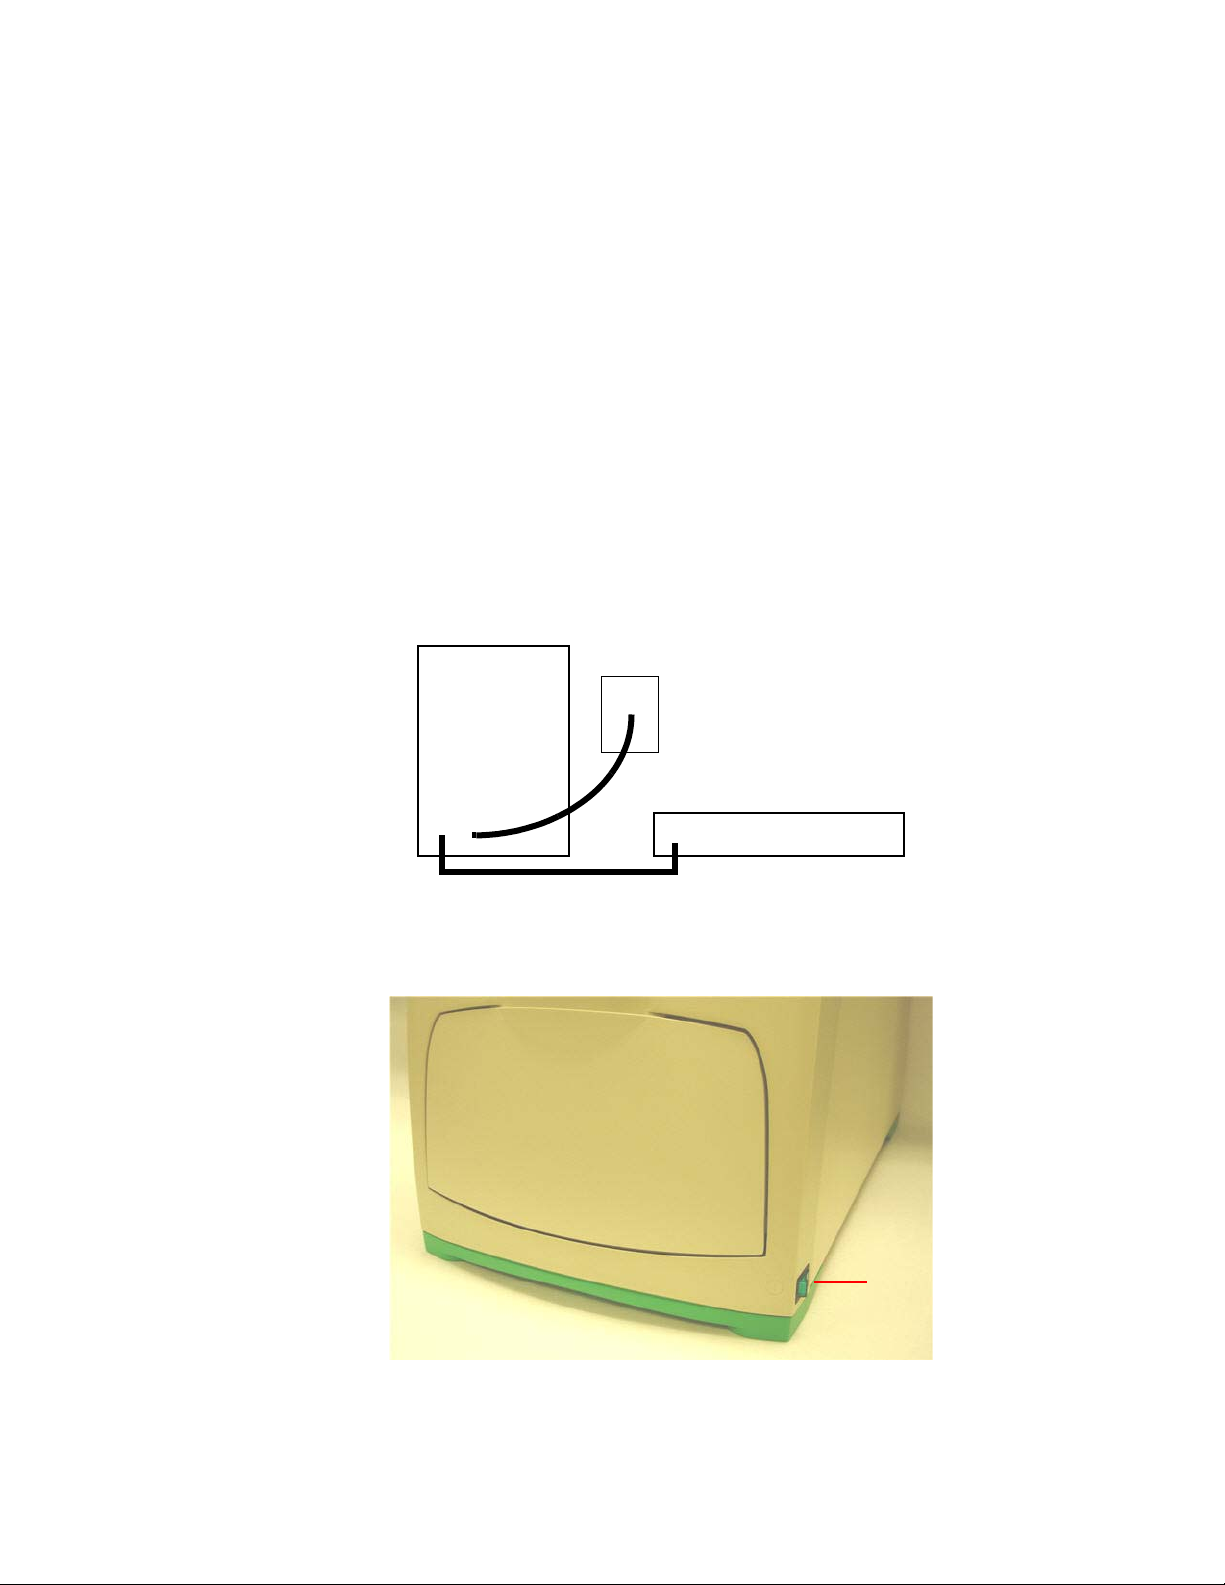
USB cable
Rear of imager
PC
AC
cord
Power
switch
Macintosh
1. Place the Image Lab software CD in your CD-ROM drive.
2. Double-click the CD icon on your desktop to see the folder contents.
3. Double-click the file Image Lab.dmg.
4. Drag the Image Lab application icon into the Applications folder.
Follow the instructions in the next section to connect the imager to your computer.
2 Connect the Imager to the Computer
NOTE: Install or upgrade Image Lab software before connecting the Gel Doc EZ
imager to a computer.
1. Connect the imager to the computer on which you installed Image Lab software using
the USB cable provided with the Gel Doc EZ system.
2. Connect the Gel Doc EZ imager to AC power using the power cord provided.
3. Turn on power to the imager using the switch on the side of the instrument.
2
Page 3

Gel Doc™ EZ System Installation Guide
IF YOUR COMPUTER IS RUNNING WINDOWS XP
After the power is turned on, the PC automatically recognizes the imager, and the software
prompts you to install the driver.
4. Select No, not this time, and then select Next. The following screen appears.
5. Install the software automatically is selected by default. Click Next. The following screen
appears:
3
Page 4

Gel Doc™ EZ System Installation Guide
6. Click Continue Anyway. Windows installs the driver.
7. Click the Finish button when it appears. A message appears briefly in the lower right
corner of the screen: Your new hardware is ready to use.
NOTE: Windows XP may prompt you to go through the driver installation a second
time. If this happens, repeat steps 4 through 7 until you receive the message: Your
new hardware is ready to use.
IF YOUR COMPUTER IS RUNNING WINDOWS 7
During the installation process the following warning may appear. This warning can be ignored
because it appears even when the driver has been installed correctly.
4
Page 5
3 Configure the System
To use the Gel Doc EZ imager with Image Lab software, the imager must first be configured.
Configuration consists of initializing the sample trays and collecting the dark image.
The imager is configured in the setup wizard, which appears the first time the imager is
connected to a computer.
To configure the imager:
1. Turn on the imager and start Image Lab software. The setup wizard appears.
2. Complete the steps in the wizard as described in the following pages.
NOTE: You must go all the way through the wizard or the imager will not be
usable.
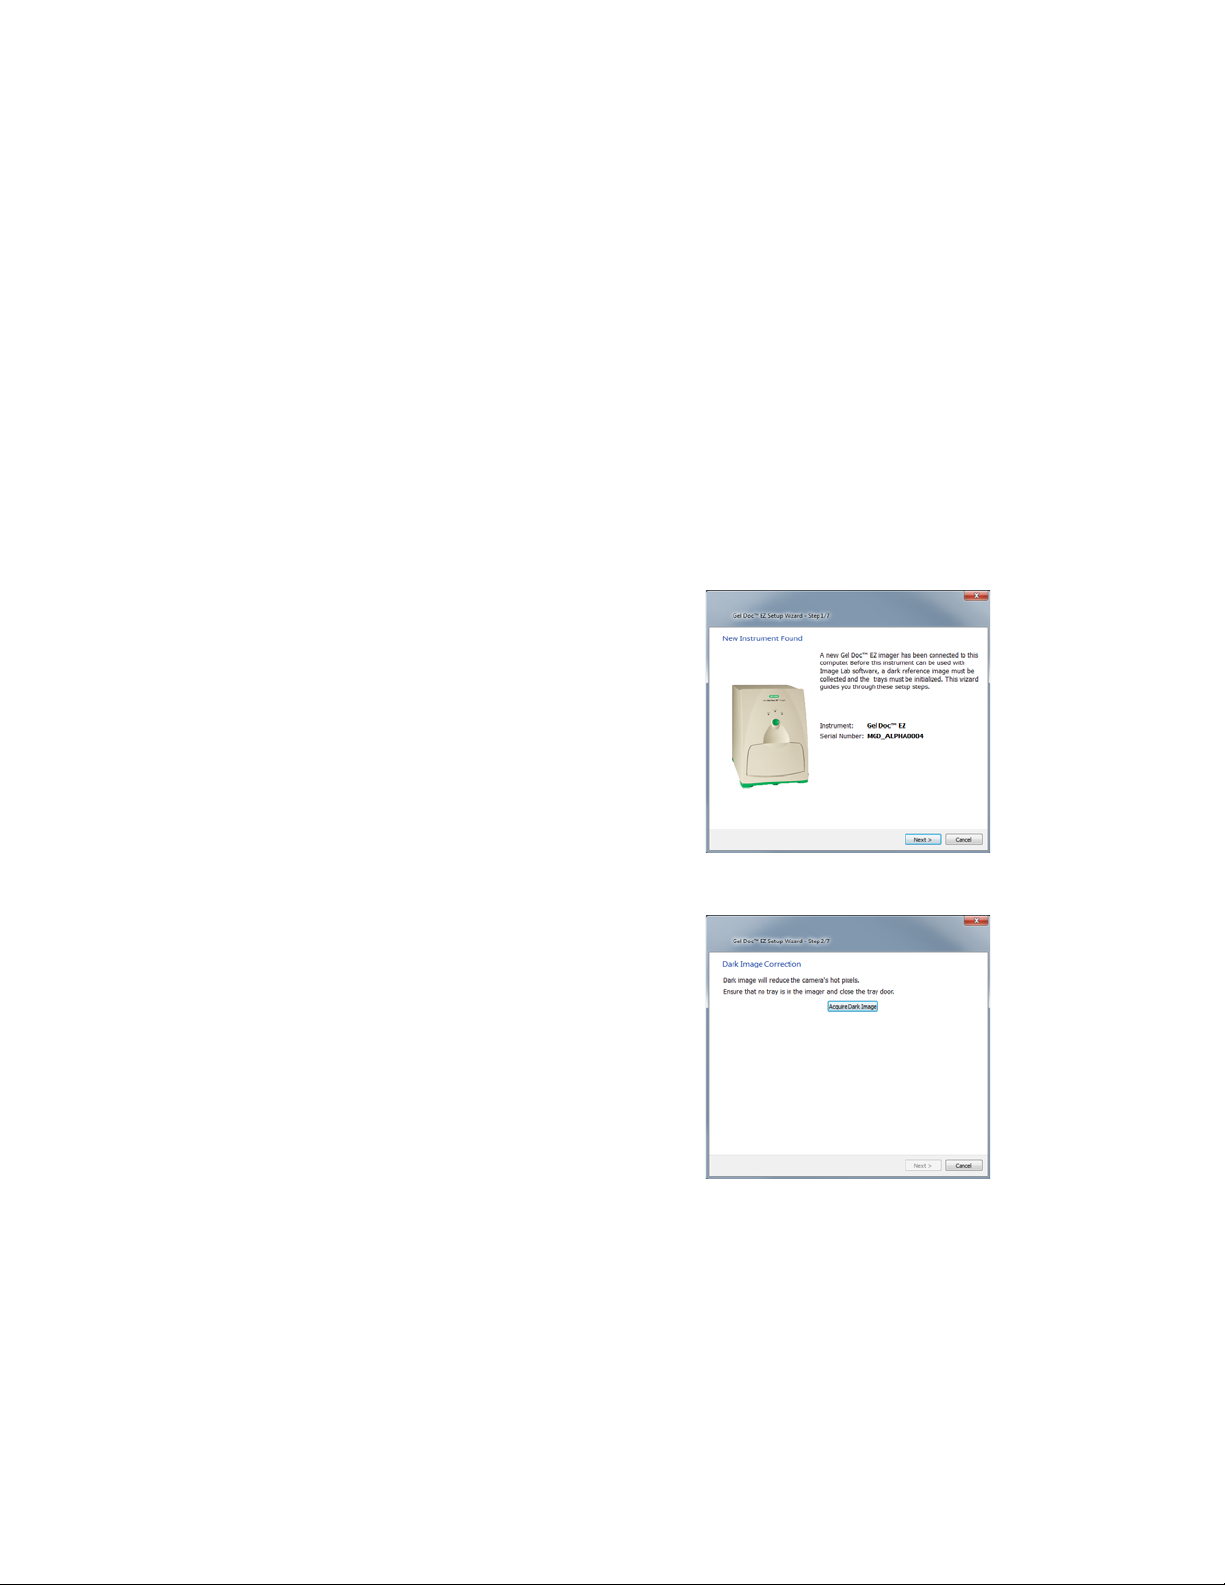
The first page of the setup wizard indicates that
a new instrument has been found on the system
and displays the instrument’s serial number.
1. Click Next.
Gel Doc™ EZ System Installation Guide
The Dark Image Correction page appears.
Correcting the dark image reduces dark current
noise generated from the charge-coupled
device (CCD). Dark current noise is typical of all
CCDs and is a result of the accumulation of
charge in the absence of light.
2. If a tray is in the imager, remove it and close
the tray door.
3. Click Acquire Dark Image.
A progress indicator reports the acquisition of
the dark image.
5
Page 6
Gel Doc™ EZ System Installation Guide
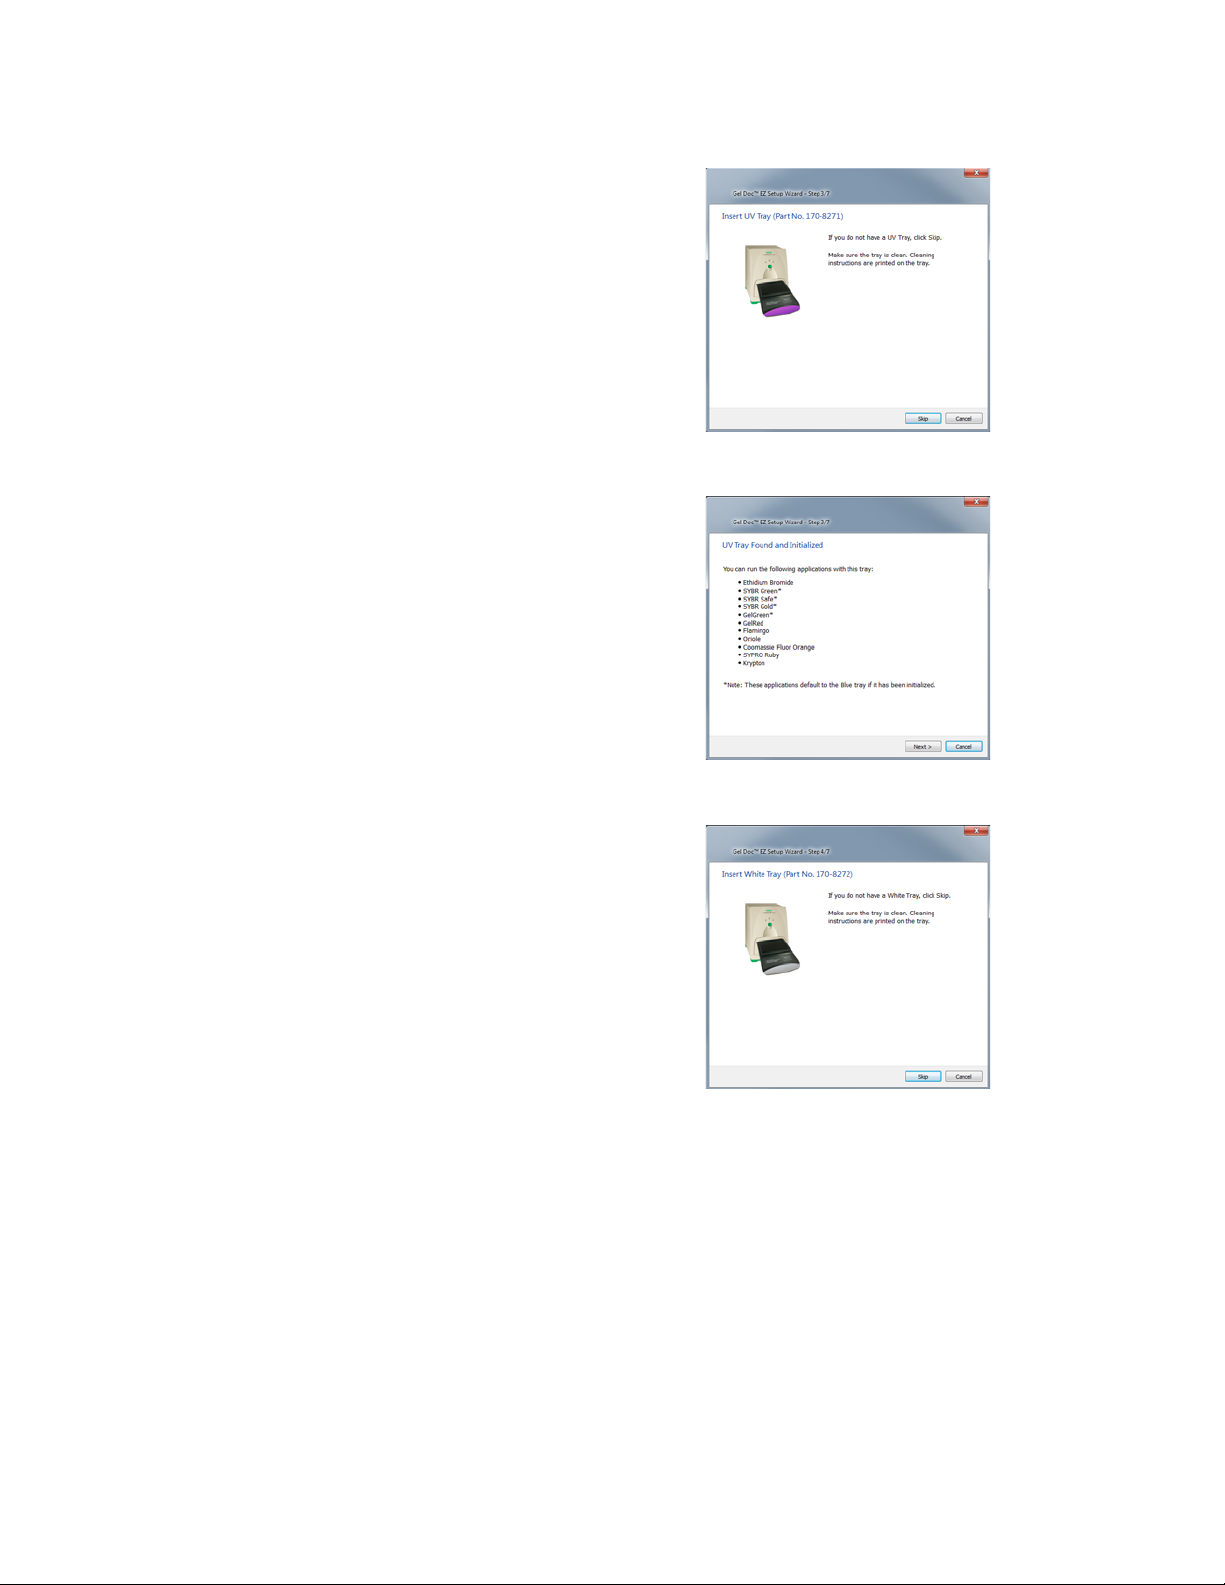
When the dark image has been acquired, the
wizard prompts you to initialize the UV tray.
4. If you do not have a UV tray, click Skip and
go to step 7.
5. Make sure the UV tray is clean. Then insert
the tray into the imager and close the door.
A progress indicator reports the initialization of
the tray.
When the tray has been initialized, the next
page confirms that the tray has been found and
initialized and lists the applications you can run
with this tray.
6. Remove the UV tray from the imager. Then
click Next.
The wizard prompts you to initialize the white
tray.
7. If you do not have a white tray, click Skip and
go to step 10.
8. Make sure the white tray is clean. Then insert
the tray into the imager and close the door.
A progress indicator reports the initialization of
the tray.
6
Page 7
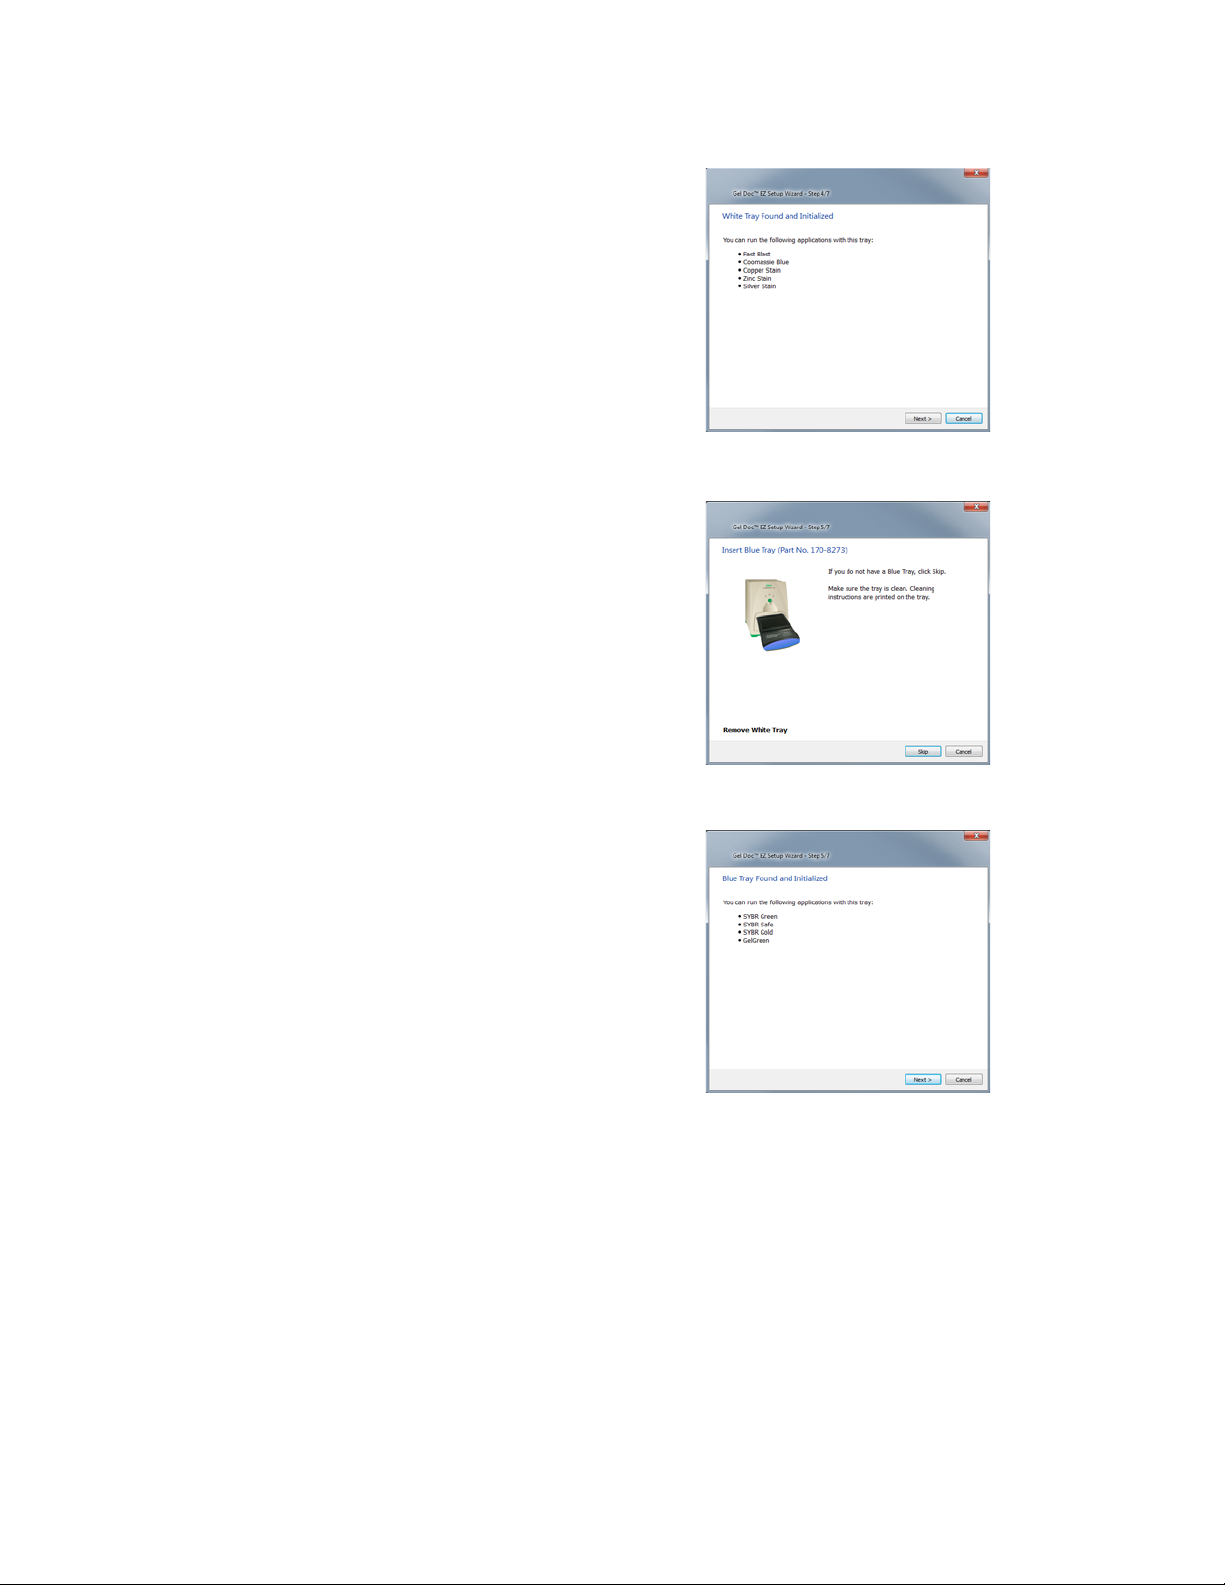
When the tray has been initialized, the next
page confirms this and lists the applications
you can run with the tray.
9. Remove the white tray from the imager. Then
click Next.
The wizard prompts you to initialize the blue
tray.
10. If you do not have a blue tray, click Skip and
go to step 13.
11. Make sure the blue tray is clean. Then insert
the tray into the imager and close the door.
Gel Doc™ EZ System Installation Guide
A progress indicator reports the initialization of
the tray.
When the tray has been initialized, the next
page confirms this and lists the applications
you can run with the tray.
12. Remove the blue tray from the imager. Then
click Next.
7
Page 8

Gel Doc™ EZ System Installation Guide
The wizard prompts you to initialize the stainfree tray.
13. If you do not have a stain-free tray, click
Skip and go to step 16.
14. Make sure the stain-free tray is clean. Then
insert the tray into the imager and close the
door.
A progress indicator reports the initialization of
the tray.
When the tray has been initialized, the next
page confirms this and lists the applications
you can run with the tray.
15. Click Next.
A tray summary page lists all the trays and their
status. Trays you initialized appear as ready to
use.
16. Click Finish to exit the wizard.
See Chapter 4, Acquiring Images, in Using Image Lab Software with the Gel Doc™ EZ System,
on the software CD to configure the default protocols, which run when the green button is
pressed on the imager.
Initializing an Additional Tray
After you configure the imager, you can add another tray to the system when you need it.
To initialize an additional tray:
1. Insert a new type of tray in the imager. The New Tray Found wizard opens.
8
Page 9

Gel Doc™ EZ System Installation Guide
2. Complete the steps in the wizard as described in the following pages.
The wizard identifies the new tray.
1. Click Next.
The wizard begins initializing the tray.
A progress indicator reports the initialization of the
tray.
When the tray has been initialized, the wizard
displays a list of the applications you can run using
the tray.
2. Click Next.
9
Page 10

Gel Doc™ EZ System Installation Guide
The wizard displays the Tray Summary, which
shows the highlighted, initialized new tray.
3. Do one of the following:
Click Finish to leave the wizard and display the
Default Protocol Setup dialog box, where you can
start creating a default protocol for the new tray.
OR
Clear the checkbox at the bottom of the wizard
page to skip setting up a default protocol. Then
click Finish to leave the wizard.
Refer to Using Image Lab Software with the Gel Doc™ EZ System on the software CD for
detailed instructions on working with the system.
10
Macintosh is a trademark of Apple, Inc. Windows is a trademark of Microsoft Corporation.
Page 11

Gel Doc EZ 系统安装指南
需要按照以下步骤安装 Gel Doc EZ 系统:
1. 在要使用成像仪的 PC 或 Macintosh 计
算机上安装 Image Lab™ 软件。
2. 将成像仪连接到计算机。
3. 初始化样本托盘。
1 安装 Image Lab 软件
Windows
1. 将 Image Lab 软件 CD 放入 CD-ROM 驱动器中。会自动启动安装过程。如果未自动安装,
请打开 “ 我的电脑 ” 并单击 CD 驱动器图标。双击 setup.exe 此时安装程序会将 Image
Lab 软件安装到计算机上。
桌面上会显示 Image Lab 软件图标。请按照下一部分中的说明将成像仪连接到计算机
11
Page 12

Gel Doc™EZ 系统安装
USB 电缆
成像仪背面
PC
交流电源
电线
电源
开关
Macintosh
1. 将 Image Lab 软件 CD 放入 CD-ROM 驱动器中
2. 双击桌面上的 CD 图标以查看文件夹内容。
3. 双击 Image Lab.dmg 文件
4. 将 Image Lab 应用程序图标拖入 “ 应用程序 ” 文件夹中
请按照下一部分中的说明将成像仪连接到计算机。
2 将成像仪连接到计算机
注意: 在将 Gel Doc EZ 成像仪连接到计算机之前安装或升级 Image Lab 软件。
1. 使用 Gel Doc EZ 系统随附的 USB 电缆将成像仪连接到安装了 Image Lab 软件的计算机
2. 使用提供的电源线将 Gel Doc EZ 成像仪连接到交流电源
12
3. 使用成像仪侧面的开关打开电源
Page 13

如果计算机运行的是 WINDOWS XP
电源打开后, PC 会自动识别成像仪,软件会提示您安装驱动程序
Gel Doc™EZ
4. 选择 “ 否,暂时不 ”,然后选择 “ 下一步 ”。将出现以下屏幕。
5. 默认选择 “ 自动安装软件 ”。单击 “ 下一步 ”。将出现以下屏幕:
13
Page 14

Gel Doc™EZ
6. 单击 “ 仍然继续 ”。 Windows 会安装驱动程序。
7. 出现 “ 完成 ” 按钮时单击该按钮。屏幕右下角会立即出现一条消息。新硬件已可用。
注意: Windows XP 可能会再次提示您完成驱动程序安装过程。如果出现这样的提示,
请重复步骤 4 至步骤 7,直至您收到以下消息:新硬件已可用。
如果计算机正在运行 WINDOWS 7
安装过程中可能会出现以下警告消息。可以忽略它,因为即使已正确安装驱动程序,也会出现该
警告。
14
Page 15

3 配置系统
要在 Gel Doc EZ 成像仪中使用 Image Lab 软件,必须先配置成像仪。配置包括初始化样本托盘
和收集暗色图像。
在安装向导中对成像仪进行配置,初次将成像仪连接到计算机时会出现该向导。
配置成像仪:
1. 打开成像仪并启动 Image Lab 软件。即会出现设置向导。
2. 按随后出现的页面中所述完成向导中的步骤。
设置向导的第一页指示在系统中发现新仪器,并
且显示仪器的序列号。
1. 单击 “ 下一步 ”。
Gel Doc™EZ
注意: 您必须完成向导中的所有步骤,否则成像仪将不可用。
出现 “ 暗色图像校正 ” 页面。校正暗色图像会
减少电荷耦合元件 (CCD) 产生的暗电流噪声。暗
电流噪声是所有 CCD 的特性,是在缺少光照的情
况下因电荷积聚而导致的。
2. 如果托盘在成像仪中,将其取出并关闭托盘门。
3. 单击 “ 获取暗色图像 ”。
进度指示器会报告暗色图像的获取情况。
15
Page 16

Gel Doc™EZ
获取暗色图像之后,向导会提示您初始化紫外线
托盘。
4. 如果没有紫外线托盘,请单击 “ 跳过 ” 并转
到步骤 7。
5. 确保紫外线托盘干净。然后将托盘插入成像仪
并关上托盘门。
进度指示器会报告托盘的初始化情况。
托盘初始化完成后,下一页会确认已发现并初始
化托盘,同时列出可使用此托盘运行的应用程序。
6. 从成像仪中移除紫外线托盘。然后单击 “ 下
一步 ”
向导将提示您初始化白色托盘。
7. 如果没有白色托盘,请单击 “ 跳过 ” 并转到
步骤 10
8. 确保白色托盘干净。然后将托盘插入成像仪并
关上托盘门。
进度指示器会报告托盘的初始化情况。
16
Page 17

托盘初始化完成后,下一页会对此进行确认并列
出可使用此托盘运行的应用程序。
9. 从成像仪中移除白色托盘。然后单击“下一步”。
10. 向导将提示您初始化蓝色托盘。如果没有蓝
色托盘,请单击 “ 跳过 ” 并转到步骤 13
11. 确保蓝色托盘干净。然后将托盘插入成像仪
并关上托盘门。
进度指示器会报告托盘的初始化情况。
Gel Doc™EZ
托盘初始化完成后,下一页会对此进行确认并列
出可使用此托盘运行的应用程序。
12. 从成像仪中移除蓝色托盘。然后单击 “ 下
一步 ”
17
Page 18

Gel Doc™EZ
13. 向导将提示您初始化免染托盘。如果没有免
染托盘,请单击 “ 跳过 ” 并转到步骤 16。
14. 确保免染托盘干净。然后将托盘插入成像仪
并关上托盘门。
进度指示器会报告托盘的初始化情况。
托盘初始化完成后,下一页会对此进行确认并列
出可使用此托盘运行的应用程序。
15. 单击 “ 下一步 ”。
托盘摘要页会列出所有托盘及其状态。已初始化
的托盘显示为可用。
16. 单击 “ 完成 ” 退出向导。
请参阅软件 CD 上的 《将 Image Lab™ 软件用于 Gel Doc™ EZ 系统》中的第四章
”,以配置按下成像仪上的绿色按钮时运行的默认实验协议。
初始化其他托盘
配置成像仪之后,可以在需要时将其他托盘添加到系统中。
初始化其他托盘:
1. 在成像仪中插入新的托盘类型。
“ 获取图像
“ 找到新托盘 ” 向导将打开。
18
Page 19

2. 按随后出现的页面中所述完成向导中的步骤。
向导会识别新托盘。
1. 单击 “ 下一步 ”。
向导会开始初始化托盘。
进度指示器会报告托盘的初始化情况。
托盘初始化完成之后,向导会显示可使用此托盘运
行的应用程序的列表。
Gel Doc™EZ
2. 单击 “ 下一步 ”。
19
Page 20

Gel Doc™EZ
有关如何使用系统的详细说明,请参阅软件 CD 上的 《将 Image Lab™ 软件用于 Gel Doc™ EZ
系统 》
向导将显示托盘摘要,其中会高亮显示已初始化的
新托盘。
3. 执行以下操作之一:
单击 “ 完成 ” 退出向导,并显示 “ 默认实验协议
设置 ” 对话框,您可以在该框中开始创建新托盘的
默认实验协议。
或者
清除向导页底部的复选框,以跳过设置默认实验协
议步骤。然后单击 “ 完成 ” 退出向导。
20
Macintosh 是 Apple, Inc 的商标。 Windows 是 Microsoft Corporation 的商标。
Page 21

Gel Doc™EZ
21
Page 22

10019635 Rev B US/EG
0910 Sig 1109
 Loading...