

Page 1
IMAGING
Stain-Free Software Upgrade
Quick Start Guide
Stain-Free Imaging on the Gel Doc™ XR+ and ChemiDoc™ XRS+ Systems
This guide will walk you through the steps to install Image Lab™ software version 5.1 beta.
Note: If you already have Image Lab software installed, then you will have to run the installer twice. First to uninstall the previous version, and then a
second time to install version 5.1 beta. Alternatively, you may use Control Panel/Uninstall a Program to remove the previous version first.
1
Installing Image Lab software version 5.1 beta
After you have downloaded Image Lab software, proceed to
installing the software by double clicking Setup
Click Next to launch the installation wizard
Select “I accept the terms” and click Next
Click Next to install Standard Edition
Note: If you are in a regulated environment, you may wish to install the Security
Edition. You will need to have purchased a Security Edition license from
Bio-Rad Laboratories, Inc. to install the Security Edition. If you already
have the Security Edition and have activated your license, reactivation of
Image Lab is not necessar y.
Click Next to install to the default location or change to install
to a different folder
Click Install to begin installation. Click Finish to complete
installation. Installation of Image Lab software version
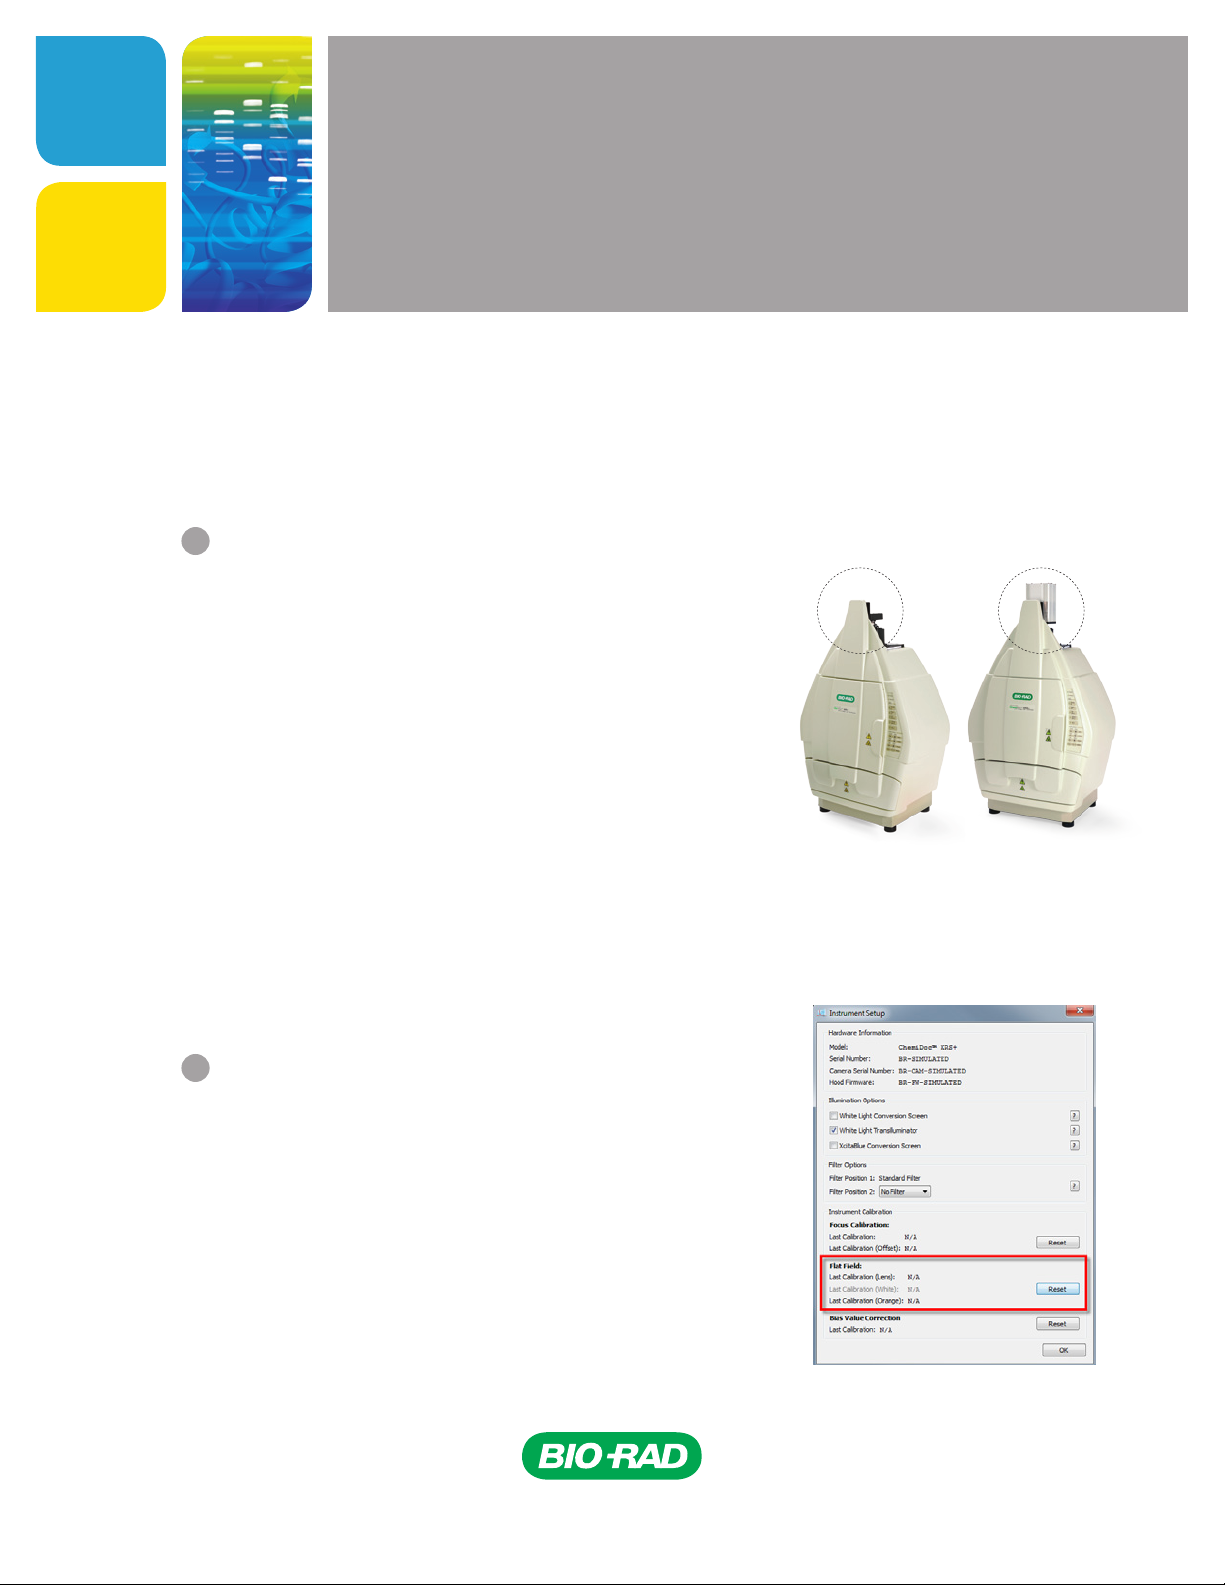
Fig. 1. Gel Doc XR+ and ChemiDoc XRS+ camera locations.
5.1 beta is now complete
If you are upgrading a Gel Doc XR+ system, it is now stain-free enabled and ready to image stain-free
gels. For upgrading Image Lab software on a ChemiDoc XRS+ system, a flat fielding calibration step
will be required. Take a look at the camera on your imager if you are
unsure which Bio-Rad imager you have (see Figure 1)
Gel Doc XR+ System ChemiDoc XRS+ System
2
Performing flat fielding calibration
(optional step for Gel Doc XR+)
To perform flat fielding you will need an orange fluorescent
reference plate (catalog #170-8008)
Note: To obtain an orange fluorescent refere nce plate, required for flat fielding
calibration, contact Bio-Rad tech support at: lsg.techserv.us@bio-rad.com or
1-800 -4- BIORAD, option 2.
Select Edit in the menu bar of Image Lab software
Then select Instrument Setup
In the Flat Field section of the Instrument Setup window click Reset
(see Figure 2)
Click Skip to bypass the lens flat fielding calibration because this
procedure was done during installation of the imager
Fig. 2. Instrument Setup window.
Page 2
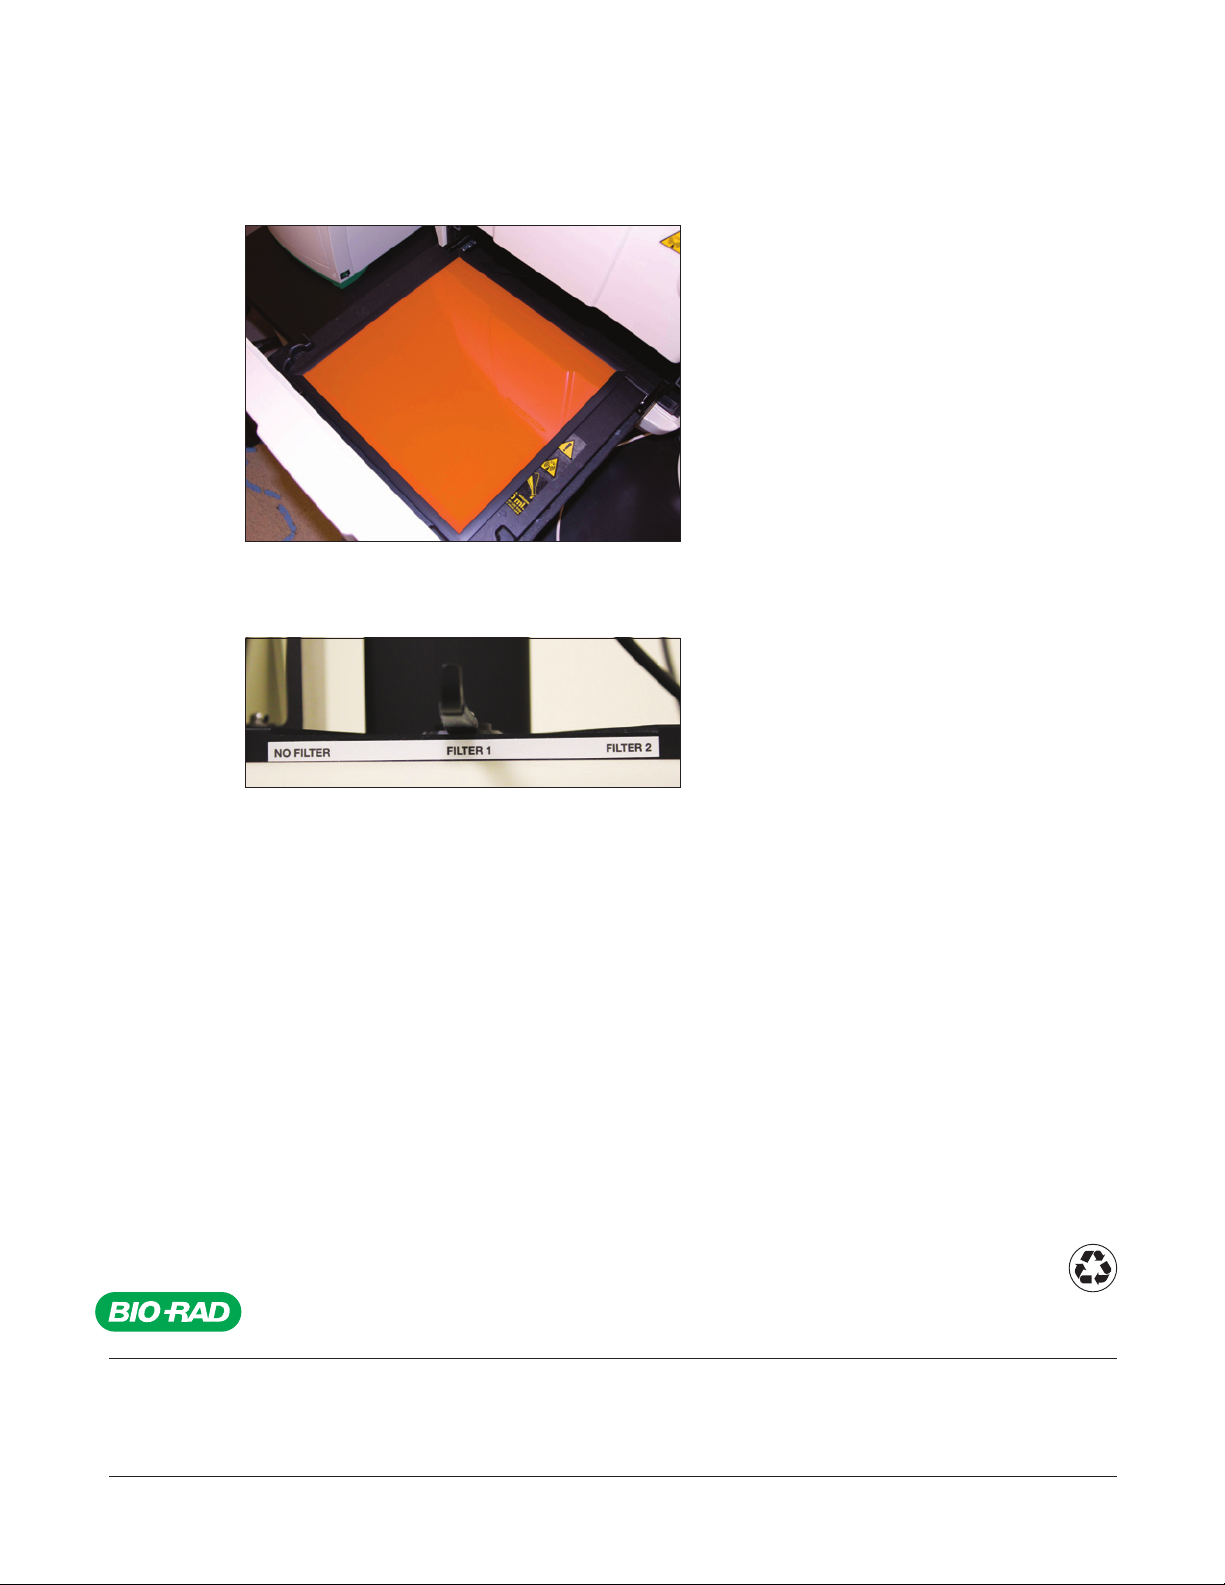
Go to the imaging hood and center the orange plate on the imaging stage, then close the door
Click Start Calibration. On the upper right side of the hood, move the filter to position 1, then click OK.
The flat fielding procedure will take a few minutes
Life Science
Group
When the procedure is complete remove the orange plate. Click OK two times to exit out of
the Instrument Setup window
Congratulations! Your Bio-Rad imager is now stain-free enabled. This additional calibration step generates flat
field correction profiles needed to account for nonuniformity of the UV light source and is critical for accurate stain-free
total protein normalization.
Bio-Rad
Laboratories, Inc.
Web site ww w.bio-rad.com USA 800 4 24 6723 Australia 61 2 9914 2800 Austria 01 877 89 01 Belgium 09 385 5 5 11 Brazil 55 11 5044 569 9
Canada 905 364 3435 China 86 21 6169 8500 Czec h Republ ic 420 241 430 532 Denmark 44 52 10 00 Finland 09 80 4 22 00
France 01 47 95 69 65 Germany 089 31 884 0 Greece 30 210 9532 220 Hong Kong 8 52 2789 3300 Hungar y 36 1 459 6100 India 91 124 4029300
Israel 03 963 6050 Italy 39 02 2160 91 Japan 03 6361 7000 Korea 82 2 3473 4460 Mexico 52 555 4 88 7670 The Netherlands 0318 540666
New Zealand 64 9 415 2280 Nor way 23 38 41 30 Poland 48 22 331 99 99 Por tugal 351 21 472 7700 Russia 7 495 721 14 04
Singapore 65 6415 3188 South Africa 27 861 246 723 Spain 34 91 590 52 00 Swede n 08 555 12700 Switzerland 026 674 55 05
Taiwan 886 2 2578 7189 Thailand 800 88 22 88 United Kingdom 020 8328 200 0
13-1490 0813 Sig 1212Bulletin 6483 Rev A US/EG
 Loading...