

Avery Sport3 9433 Quick Reference
QUICK REFERENCE
This Quick Reference contains supply loading information and
general care and maintenance procedures for the Monarch® Sierra
Sport3™ 9433™ printer. For more detailed information, refer to the
Operator’s Handbook available on our Web site (www.paxar.com).
Note: Information in this document supercedes information in
previous versions. Check our Web site for the latest
documentation and release information.
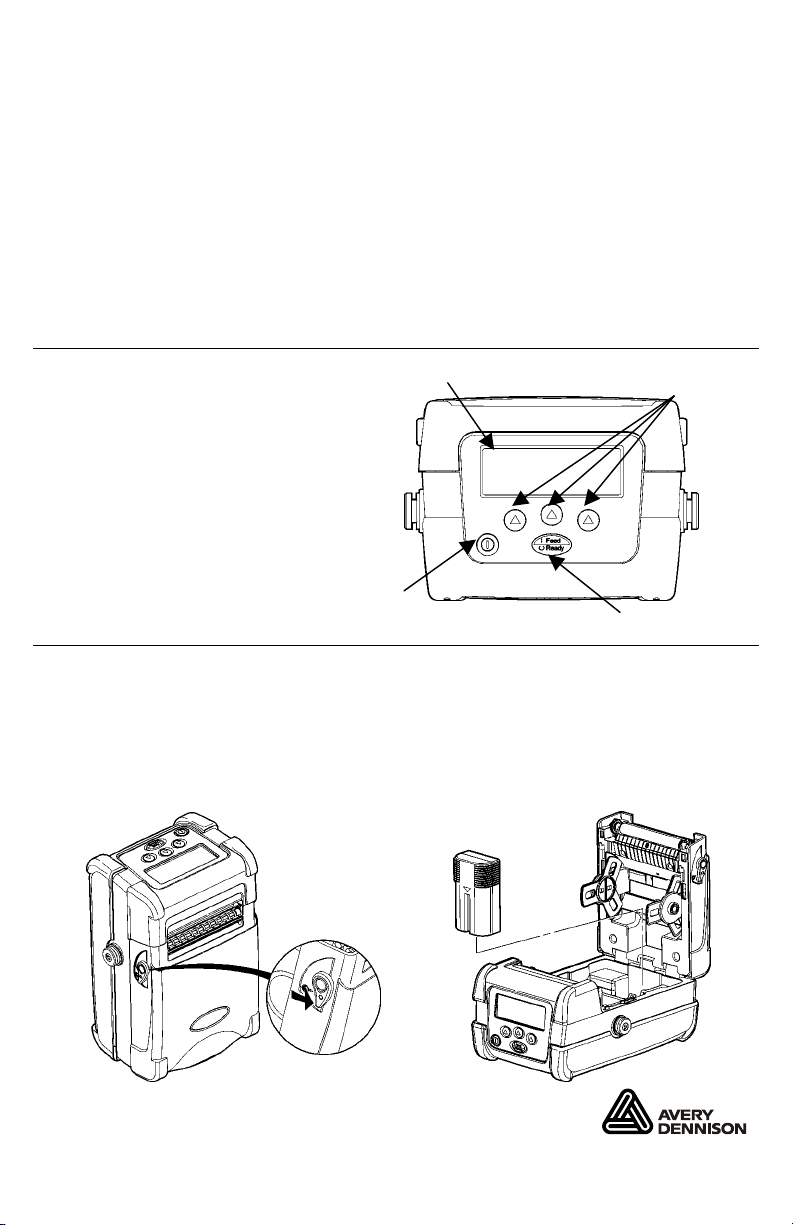
Using the Display and Buttons
P Turns the printer on and
off. Press and hold for two
seconds.
F Advances the supply or
returns the printer to Ready
Mode.
A Selects options on the
display.
On/Off
Button
Display
Using the Battery
You can install the battery with or without supplies loaded.
Navigation
Buttons
Feed/Ready
Button
1. Pull the release levers located on both sides of the printer to open
the supply door.
2. Insert the connector end of the battery into the printer.
3. Close the supply door until the release levers click into place.
Release lever
Monarch®, Sierra Sport, and 9433 are trademarks of Paxar Americas, Inc.
TC9433QR Rev. AD 12/07 2005 Paxar Americas, Inc. a subsidiary of Avery Dennison Corp.
All rights reserved.

To check the battery:
The battery status flashes briefly
when you turn on the printer. If
the printer is already on, press
A under p. To return to Ready
Mode, press A under R.
Sleep Mode
If this option is enabled, the printer goes into sleep mode when it is
inactive for a period of time to conserve battery power. The printer
displays a coffee cup icon when it is in sleep mode. To wake the
printer, press any button except the power button (P). Refer to the
System Administrator’s Guide for more information on enabling and
disabling sleep mode.
Connecting the Communications Cable
1. Open the hinged cable door by loosening the Philips screws and
lifting up on the door.
2. Plug one end of the cable into the printer port and plug the other
end into your computer port.
3. Place the cable in the cable cavity.
4. Close the hinged cable door and tighten the screws.
DB9 Port
DB9
Connector
Cable in
Cable Cavity
A USB cable is also available. Refer to the Operator’s Handbook
for more information.
2
 Loading...