

Page 1

User’s Manual
Upgrading the SNAP
Printer Through the Web
Server
AVERY DENNISON
29 April 2013
Version 1.1
Page 2

Overview
It is possible to upgrade the SNAP Printer through the Web Server. To
accomplish this, the upgrade file is transferred to the printer through an FTP
Client Application, and then the user can start the printer upgrade through the
Web Server.
This instruction uses the Filezilla FTP Client Application as an example. Filezilla
is an open source FTP client that is available freely from http://filezilla-
project.org/ . Other FTP clients operate in a similar manner.
This upgrade procedure is only available in printer firmware version 3.28.11.01
and above. If the printer is not at this version or above it must be upgraded
through PCMate or a USB drive. Future upgrades can then be done through the
Web Server.
Accessing the printer though Filezilla or another
ftp client allows access to the entire printer file
structure. Moving, deleting or otherwise changing
operation or disabling of the printer. Use caution.
WARNING!
any files or folders can result in erroneous
SNAP Printer Upgrade Through the Web Server V1_1.doc Page 2 of 5
Page 3
Connecting to the Printer through
Filezilla
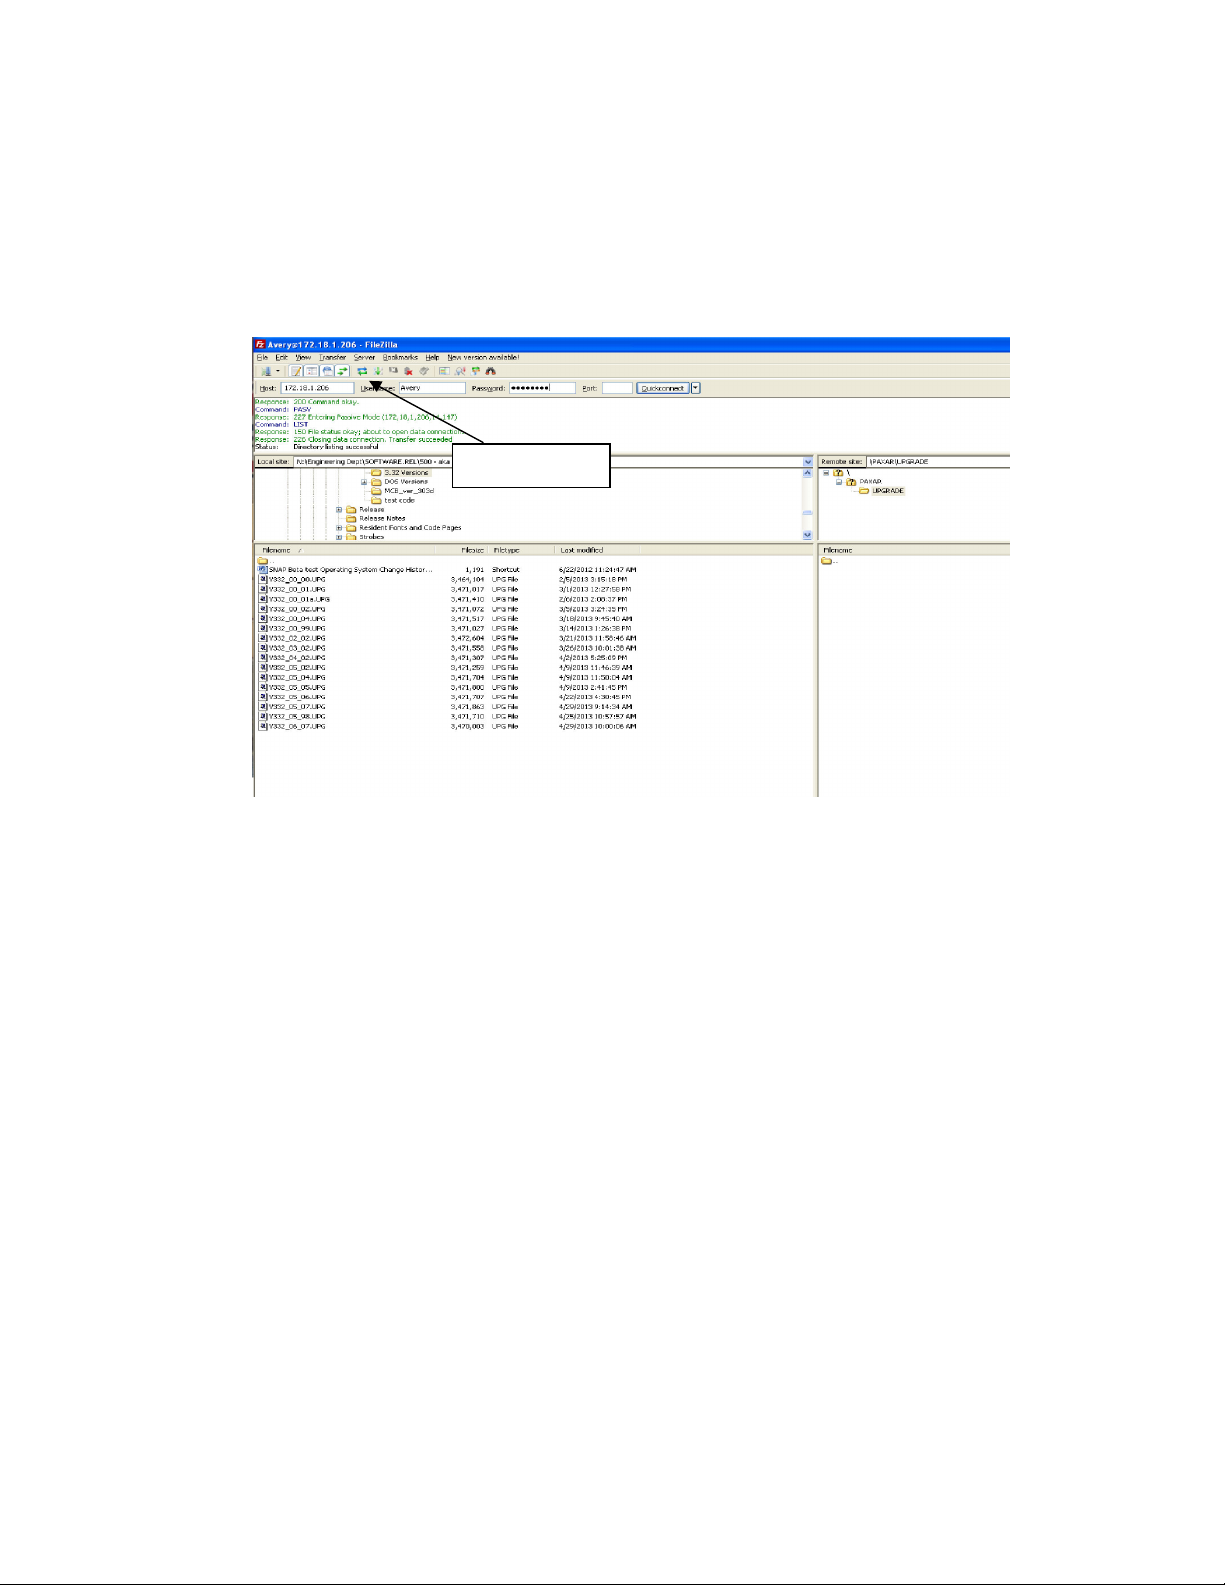
Start the Filezilla application. The following window will appear:
Refresh icon
Enter the printer’s IP address in the host box, enter the printer’s username (Avery)
and password (Dennison) in the corresponding boxes, and click the Quickconnect
button.
The screen is divided into two sets of panes. The left panes show folders on the
computer on the top and the files in that folder on the bottom. The right panes
show the UPGRADE folder on the printer, and the contents of that folder. The
UPGRADE folder should be empty when you first connect to the printer. The
UPGRADE folder is the only folder on the printer that is accessible. If you try to
change the folder, you will get an error message. Select View – Refresh from the
menu or click the Refresh icon to refresh the view.
The information in these panes is not live – it is a snapshot of the file structure
when the screen was last refreshed. To refresh the screen, select View – Refresh
from the menu or click the Refresh icon on the toolbar.
SNAP Printer Upgrade Through the Web Server V1_1.doc Page 3 of 5
Page 4
Transferring the Upgrade File to the
Printer
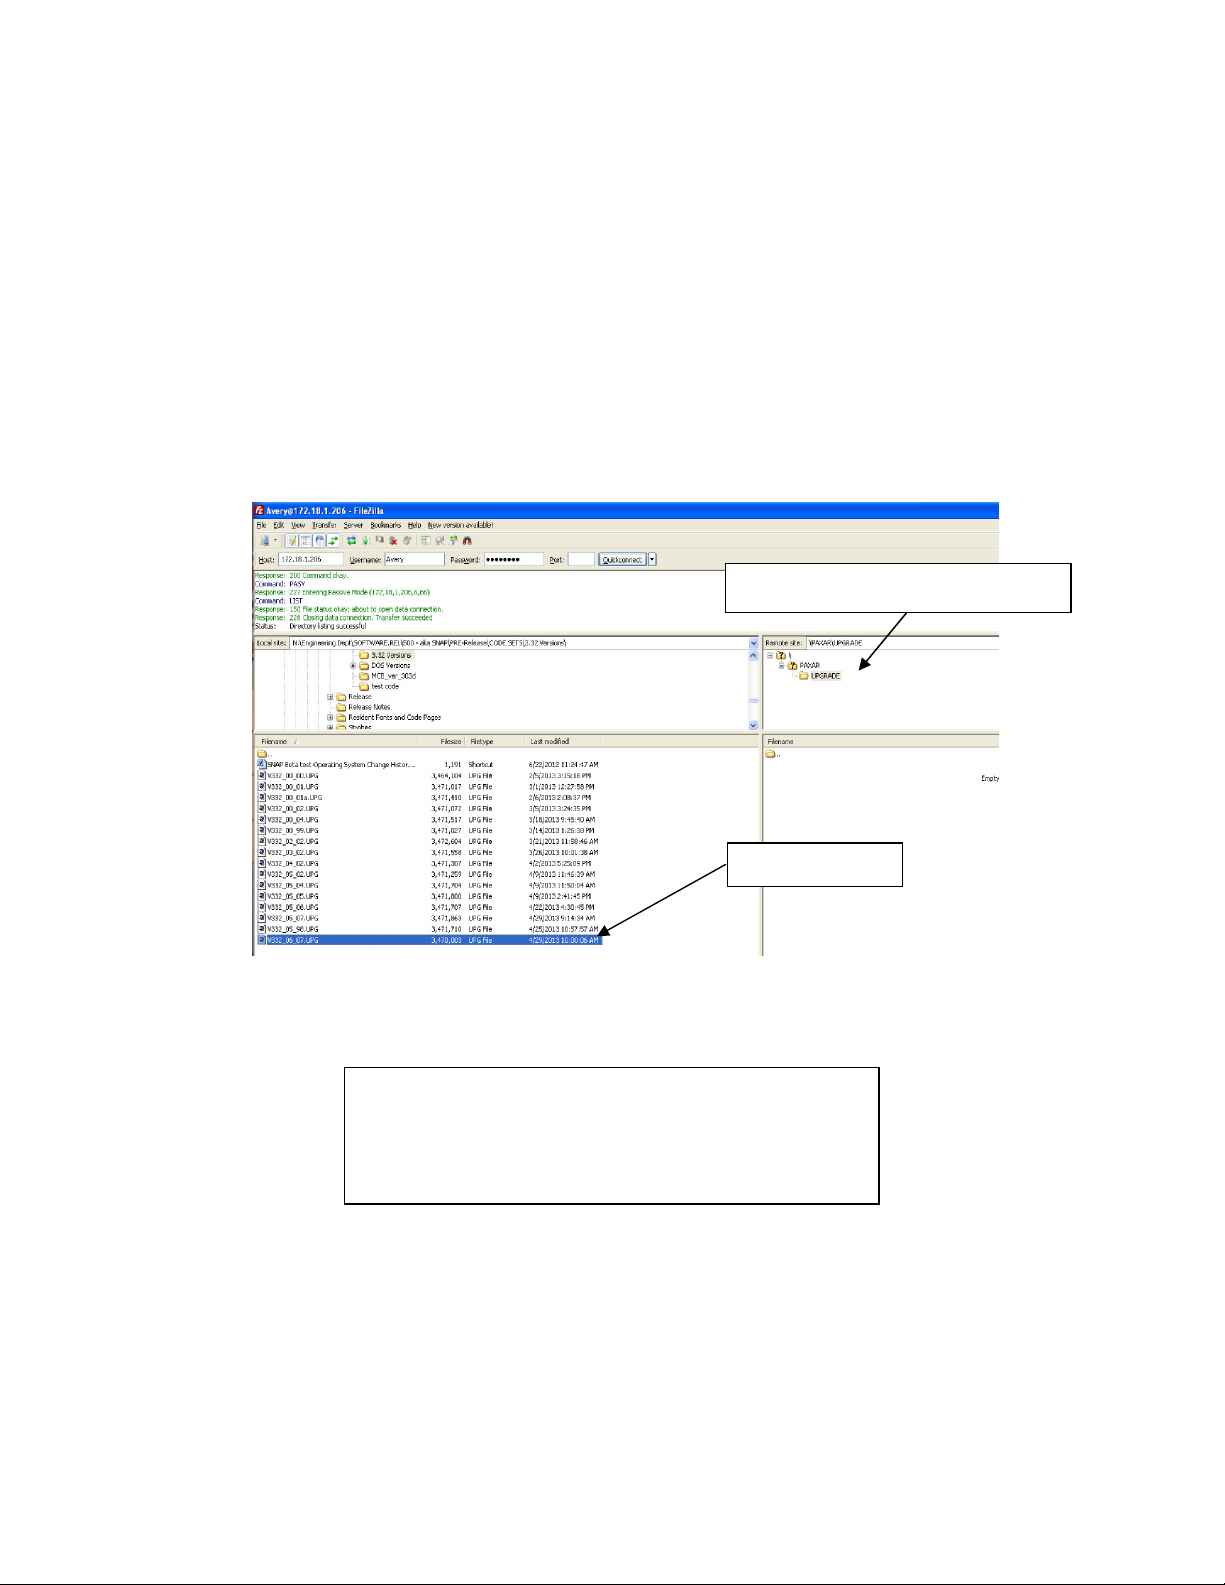
The screen below shows Filezilla ready to transfer the upgrade file to the printer.
In the left panes, the folder on the computer that hold the upgrade file has been
selected in the upper pane and the upgrade file is selected in the lower pane. In the
right panes, the UPGRADE directory of the printer is shown. This is the only
folder on the printer that is accessible. The upgrade file must be placed in the
printer’s UPGRADE directory.
Printer’s UPGRADE Directory
Upgrade File
To transfer the file, simply drag it from the bottom left pane to the bottom right
pane, or double click the upgrade file. After the transfer, the file will appear in the
UPGRADE folder.
If the file does not appear in the Upgrade folder,
check the Filename Filters (View – Filename
Filters…) to ensure that no filters are set.
NOTE
SNAP Printer Upgrade Through the Web Server V1_1.doc Page 4 of 5
Page 5
Upgrading the Printer
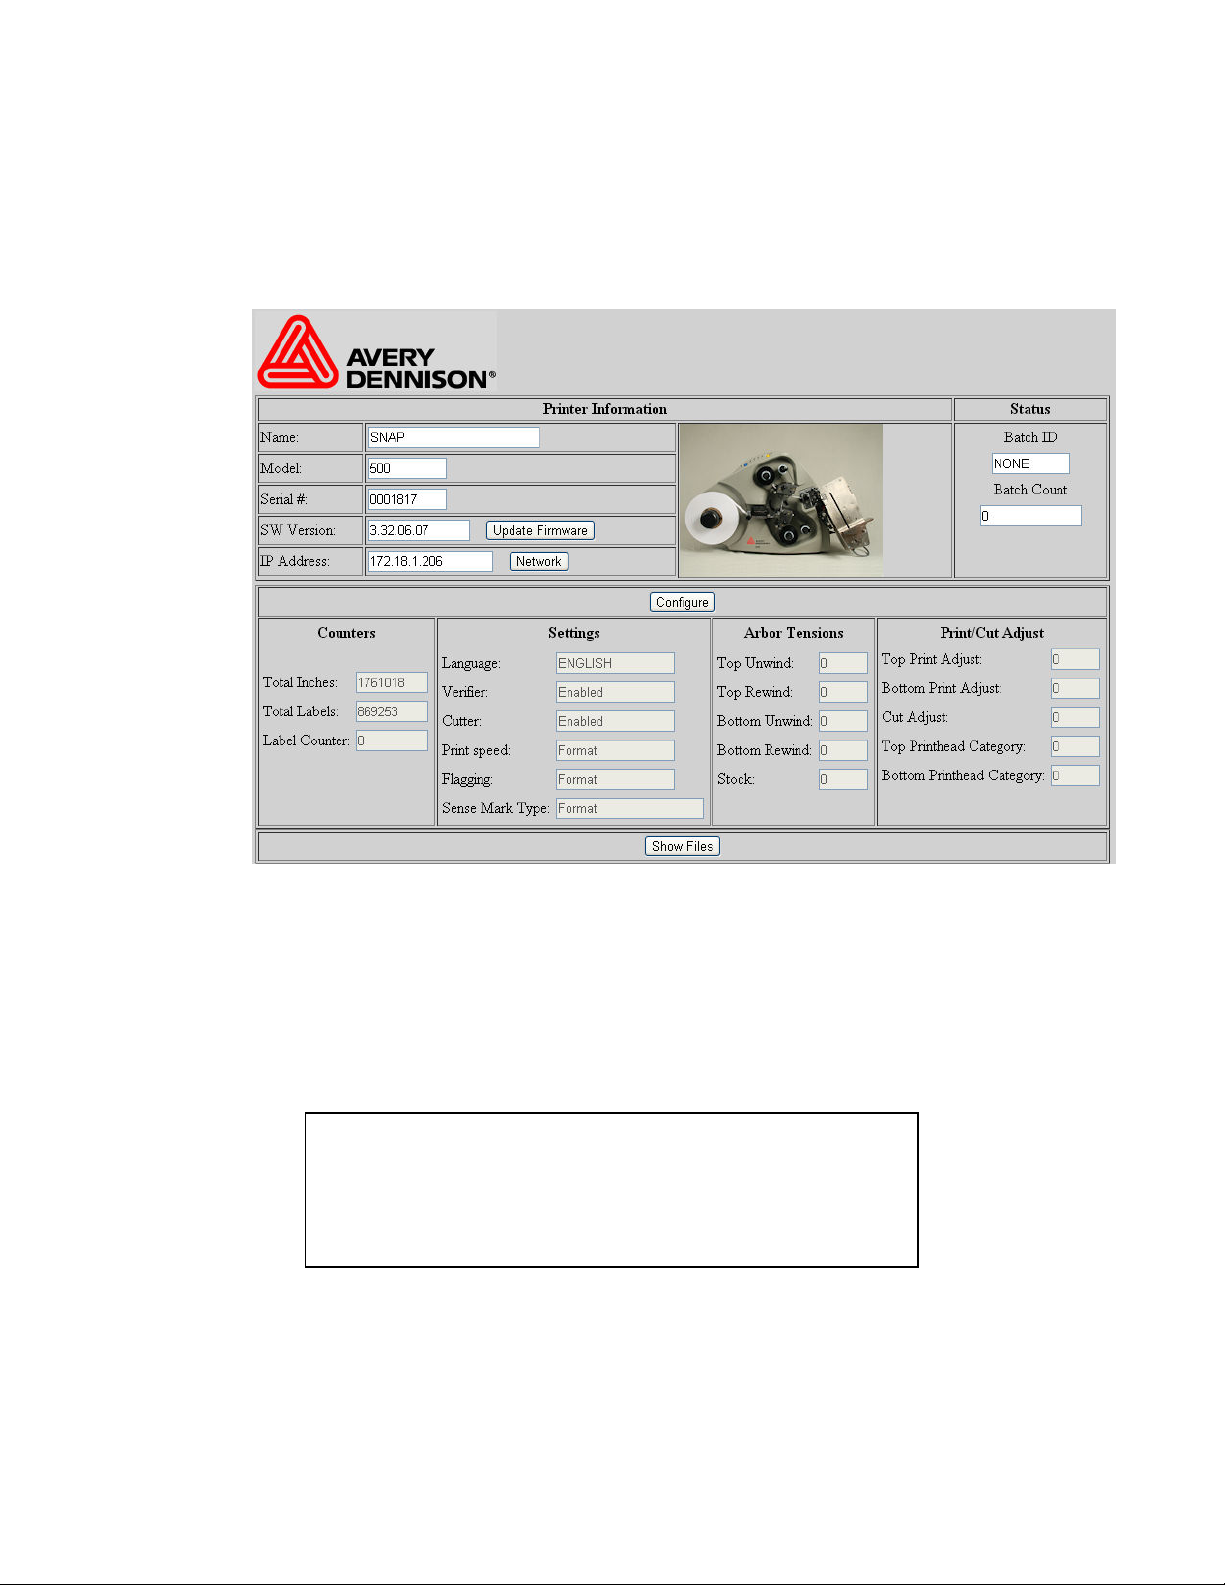
To upgrade the printer, first open a browser window, enter the printer’s IP address
in the address bar, and press Enter. The following window will appear.
Simply click the Upgrade Firmware button. The printer will perform the upgrade
operation automatically.
The browser window will not refresh automatically, and the web server will not
be available during the upgrade. To determine if the upgrade is complete, refresh
the browser window. When the upgrade is complete, the above window will
reappear with the new firmware version shown in the SW Version box.
If you refresh the browser window during the upgrade
process, you will receive an error message that the
connection has timed out or the web page is unavailable.
Simply refresh again until the web page appears.
NOTE
SNAP Printer Upgrade Through the Web Server V1_1.doc Page 5 of 5
 Loading...