

Page 1
1
User’s manual
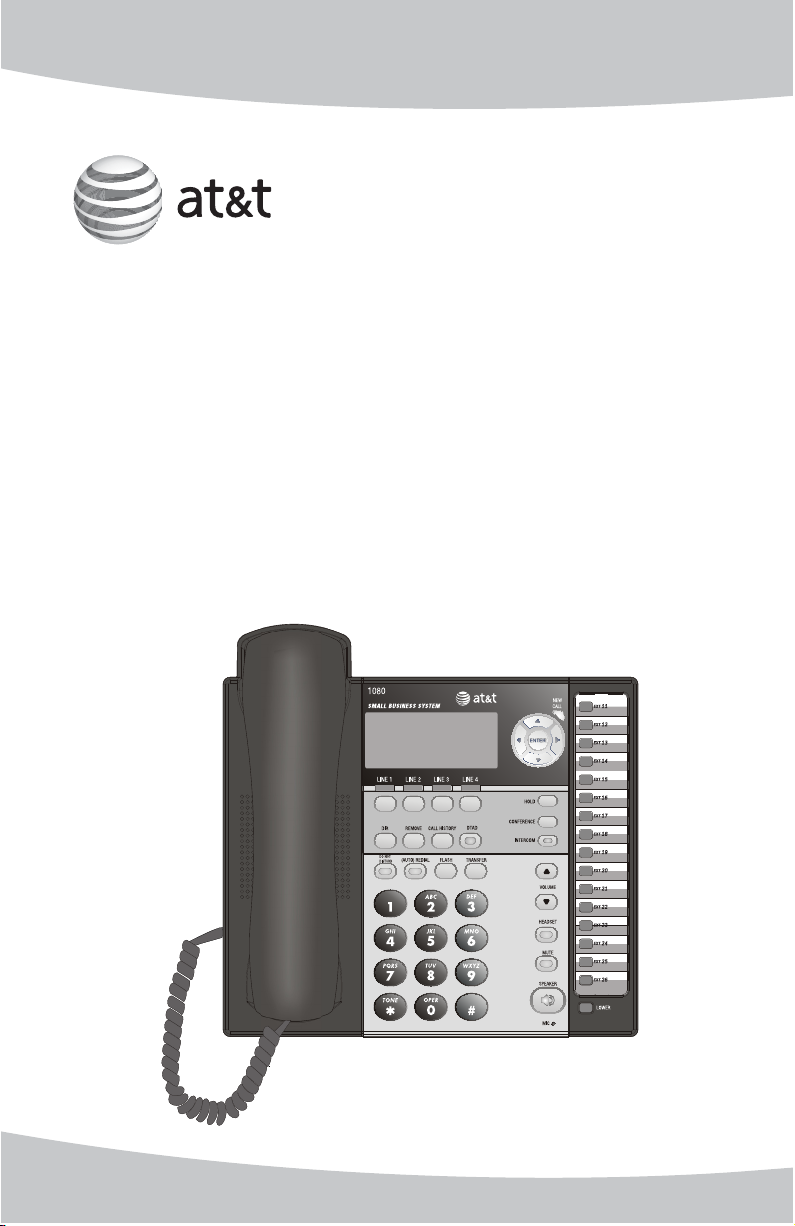
1080
4-Line small business
system with digital
answering system and
caller ID/call waiting
Page 2

Congratulations
on purchasing your
new AT&T product.
Before using this AT&T product, please
read the Important product information
on pages 91-92 of this manual.
Please thoroughly read the user’s
manual for all the feature operation
and troubleshooting information you
need to install and operate your new
AT&T product. You can also visit our
website at www.telephones.att.com
or call 1 (800) 222-3111.
In Canada, dial 1 (866) 288-4268.
© 2007 Advanced American Telephones. All rights reserved.
AT&T and the AT&T logo are trademarks of AT&T Intellectual Property II, L.P. d/b/a
AT&T Intellectual Property licensed to Advanced American Telephones. Printed in China.
Page 3

STOP!
Do you receive DSL, (Digital subscriber line,) service for highspeed internet access through your telephone line(s) from your
telephone company? If so, you will need to add either DSL
splitters and/or microfilters to your installation. See page 9 of
the installation guide.
For customer service or product information, visit our website at
www.telephones.att.com or call 1 (800) 222-3111. In
Canada, dial 1 (866) 288-4268.
CAUTION: To reduce the risk of fire or injury to persons or damage to
the telephone, read and follow these instructions carefully:
• Use only alkaline 9V batteries (size 1604A, purchased separately).
• Do not dispose of the battery in a fire. Like other batteries of this type, it
could explode if burned. Check with local codes for special disposal instructions.
• Do not open or mutilate the battery. Released electrolyte is corrosive and may
cause damage to the eyes or skin. It may be toxic if swallowed.
• Exercise care in handling batteries in order not to create a short circuit. Do
not allow conductive materials such as rings, bracelets, or keys to touch the
battery. The battery or conductor may overheat and cause harm.
• Use the battery identified for use with this product only in accordance with
the instructions and limitations specified in this manual.
• Observe proper polarity orientation between the battery and metallic contacts.
• Do not disassemble your telephone. There are no user-serviceable parts inside. Refer to qualified service personnel for servicing.
Page 4

User's manual
1080
4-line small business
system with digital
answering system and
caller ID/call waiting
Table of contents
Getting started
Introduction ...........................................................................................................................................1
Telephone overview ..........................................................................................................................2
Display screen messages ...............................................................................................................4
Indicator lights & tones ...................................................................................................................6
Indicator lights ................................................................................................................................6
Alert tones .........................................................................................................................................7
Directory card ......................................................................................................................................8
Telephone operation
Basic phone operation ....................................................................................................................9
Lit line indicators............................................................................................................................9
Making and answering calls .....................................................................................................9
Switching among handset, speakerphone and headset mode ............................ 12
Timer .................................................................................................................................................12
Volume control .............................................................................................................................13
RINGER ON/OFF .......................................................................................................................... 14
RINGER TYPE ................................................................................................................................. 14
DO NOT DISTURB ........................................................................................................................ 15
Last number redial ..................................................................................................................... 16
Redial stack ....................................................................................................................................17
Auto-redial .................................................................................................................................... 18
Call waiting .................................................................................................................................... 19
MUTE ................................................................................................................................................. 19
Temporary tone dialing ............................................................................................................ 19
HOLD ................................................................................................................................................. 20
Switching between lines .........................................................................................................21
Call privacy.....................................................................................................................................21
Conference calls .......................................................................................................................... 22
Call transfer .......................................................................................................................................23
Transfer a call ............................................................................................................................... 23
Blind transfer ................................................................................................................................23
Transfer a call and speak to the receiving party ........................................................24
Answer a transferred call .......................................................................................................24
Intercom operation
Intercom overview .........................................................................................................................25
i
Page 5

Intercom ............................................................................................................................................. 26
Make an intercom call with the handset ........................................................................ 26
Make an intercom call with the speakerphone or headset ................................... 27
Answer an intercom call ......................................................................................................... 28
End an intercom or page call ............................................................................................... 28
Voice page .......................................................................................................................................... 29
Page a specific extension (single-phone page) ........................................................... 29
Answer a single-phone page ................................................................................................ 30
Page all (system-wide page) ................................................................................................. 31
Answer a system-wide page ................................................................................................. 32
Room monitor ............................................................................................................................... 33
Make an intercom conference call ..................................................................................... 33
One-touch setup and operation
One-touch overview ......................................................................................................................34
One touch ........................................................................................................................................... 35
PREFERENCE .................................................................................................................................. 35
One-touch storage ......................................................................................................................... 36
To dial a one-touch number ...................................................................................................... 38
To view or delete a one-touch number ............................................................................... 39
To view a one-touch number ................................................................................................39
To delete a one-touch number ............................................................................................ 39
To modify a one-touch number ..............................................................................................40
Directory
Directory overview .......................................................................................................................... 42
Menu structure ............................................................................................................................. 42
Store a name and number in the directory ....................................................................... 43
Store a pause in a directory number ................................................................................ 44
Store a temporary tone signal in a directory number..............................................45
Store a FLASH in a directory number ............................................................................... 45
Review directory entries .............................................................................................................. 46
Edit a directory entry ....................................................................................................................47
Dial and remove an entry from the directory ...................................................................48
Dial a number from the directory ....................................................................................... 48
Remove a name and number from the directory ....................................................... 48
Remove all entries from the directory ................................................................................. 49
To save an entry to a one-touch key .................................................................................... 49
Caller ID operation
Caller ID operation ......................................................................................................................... 50
About caller ID ............................................................................................................................. 50
How caller ID works ..................................................................................................................51
Calls received on two or more lines simultaneously ................................................52
Call history ......................................................................................................................................53
Unreviewed and total calls .....................................................................................................53
Menu structure ..............................................................................................................................53
Reviewing the call history and returning calls ..................................................................54
To review the call history ........................................................................................................54
To return a call ..............................................................................................................................54
To delete an entry or all entries...............................................................................................55
Changing the format of the caller ID number ..............................................................55
To remove a specific entry ......................................................................................................55
To remove all call summary entries ...................................................................................55
ii
Page 6

To store an entry to the directory or a one-touch key .................................................56
To save an entry to the directory ........................................................................................56
To save an entry to a one-touch key .................................................................................56
Call waiting and message waiting ...........................................................................................57
CID with call waiting ..................................................................................................................57
Message waiting and NEW CALL light ..............................................................................57
COVM RESET ................................................................................................................................58
Auto attendant operation
About the auto attendant and message recording.........................................................59
About auto attendant operation ..............................................................................................60
Using multiple auto attendants ................................................................................................61
Auto attendant sequence for callers......................................................................................62
Auto attendant flow chart ...........................................................................................................63
Answering system operation
Answering system operation ......................................................................................................64
Incoming messages ....................................................................................................................64
Message capacity .........................................................................................................................64
DTAD setup ..........................................................................................................................................65
To turn the private message answering system on or off ......................................65
ANSWER STATUS ..........................................................................................................................65
ANSWER DELAY ............................................................................................................................66
TOLL SAVER ....................................................................................................................................66
REMOTE CODE ...............................................................................................................................67
MESSAGE ALERT ...........................................................................................................................67
MESSAGE LENGTH........................................................................................................................68
CALL SCREENING .........................................................................................................................69
DTAD INTERCEPT ..........................................................................................................................69
DTAD features ....................................................................................................................................70
Private outgoing announcement ..............................................................................................71
To record your announcement ..............................................................................................71
To play your outgoing announcement ..............................................................................72
To delete your outgoing announcement .........................................................................72
Private message playback ...........................................................................................................73
To playback private messages ..............................................................................................73
Information about messages .................................................................................................73
Options during message playback ......................................................................................74
To delete all private messages .............................................................................................74
To record and play memos..........................................................................................................75
To record a memo .......................................................................................................................75
To play back a memo ................................................................................................................75
To record and play two-way conversations ........................................................................76
To record a two-way conversation......................................................................................76
To play back a two-way conversation ...............................................................................76
Remote access ...................................................................................................................................77
Central message playback...........................................................................................................79
About central messages ...........................................................................................................79
To play back central messages .............................................................................................79
Information about messages .................................................................................................80
Options during message playback ......................................................................................80
To delete all central messages .............................................................................................80
iii
Page 7

SYS EXT mailbox ............................................................................................................................. 81
About system extension mailboxes ...................................................................................81
REMOVE EXT MSGS.....................................................................................................................82
To delete all messages from one SYS EXT telephone .............................................. 82
Appendix A, Glossary ............................................................................................................ 83
Appendix B, Time/date ........................................................................................................ 86
Appendix C, Centrex operation ......................................................................................... 88
Set ring delay duration .............................................................................................................88
Answer a delayed ring ..............................................................................................................88
Pick up another station’s line ................................................................................................88
Centrex service call example .................................................................................................89
Appendix D, General product care ...................................................................................90
Appendix E, Important product information ................................................................91
Safety information .......................................................................................................................91
Especially about corded telephones ..................................................................................92
Especially about telephone answering systems ...........................................................92
Appendix F, FCC and ACTA information .........................................................................93
Appendix G, Part 15 of FCC rules .....................................................................................95
Appendix H, Limited warranty .............................................................................................96
Appendix I, Technical specification ...................................................................................99
Appendix J, In case of difficulty ...................................................................................... 100
Index .................................................................................................................................................... 110
Remote access wallet card ......................................................................................................112
iv
Page 8

Getting started
Introduction
This AT&T Small Business System is expandable to a 16-extension telephone
system. The 1080 telephone is compatible with 1070 and 1040 telephones.
For details, see the Installation Guide. This system is not compatible with any
other AT&T 4-line small business telephones, except for the 1070 and 1040
telephones.
The 1080 telephone is hearing-aid compatible and can be connected to up
to four incoming telephone lines. This telephone features a speakerphone
for handsfree use and a headset jack compatible with most two-band 2.5mm
headsets (sold separately). There are two additional ports available for
connecting the telephone to another device such as a fax machine or modem.
The 1080 allows paging, intercom and call transfers between system telephones
and is capable of connecting three parties in the same conference call.
This telephone also features a 32-number one- and two-touch memory
for faster dialing and has a directory which can store up to 200 additional
numbers with names.
This telephone has a caller ID feature which supports caller ID with call
waiting service. (Caller ID services are subscriber services available from many
local telephone companies for a fee).
Your 1080 telephone also features a built-in digital answering system which
can store approximately 60 minutes of messages, memos and conversations
or a total of up to 99 messages. You can access the answering system from a
remote non-system touch-tone telephone or from another system telephone.
This 1080 telephone is equipped to function as an Auto Attendant in a multitelephone system. An Auto Attendant telephone can pick up and redirect
incoming calls to other extensions in your telephone system. You may assign
more than one Auto Attendant for your telephone system. For details, see the
Auto attendant operation section (pages 59-63).
The 1080 telephone is compatible with Centrex service. Centrex is a special
subscriber service which may be available from your local telephone company
for a fee. If you subscribe to Centrex service, refer to the Centrex operation
section (page 88).
This user's manual contains detailed instructions for using your AT&T Small
Business System 1080 telephone. Please read this user’s manual before using
this 1080 telephone.
1
Page 9
Getting started
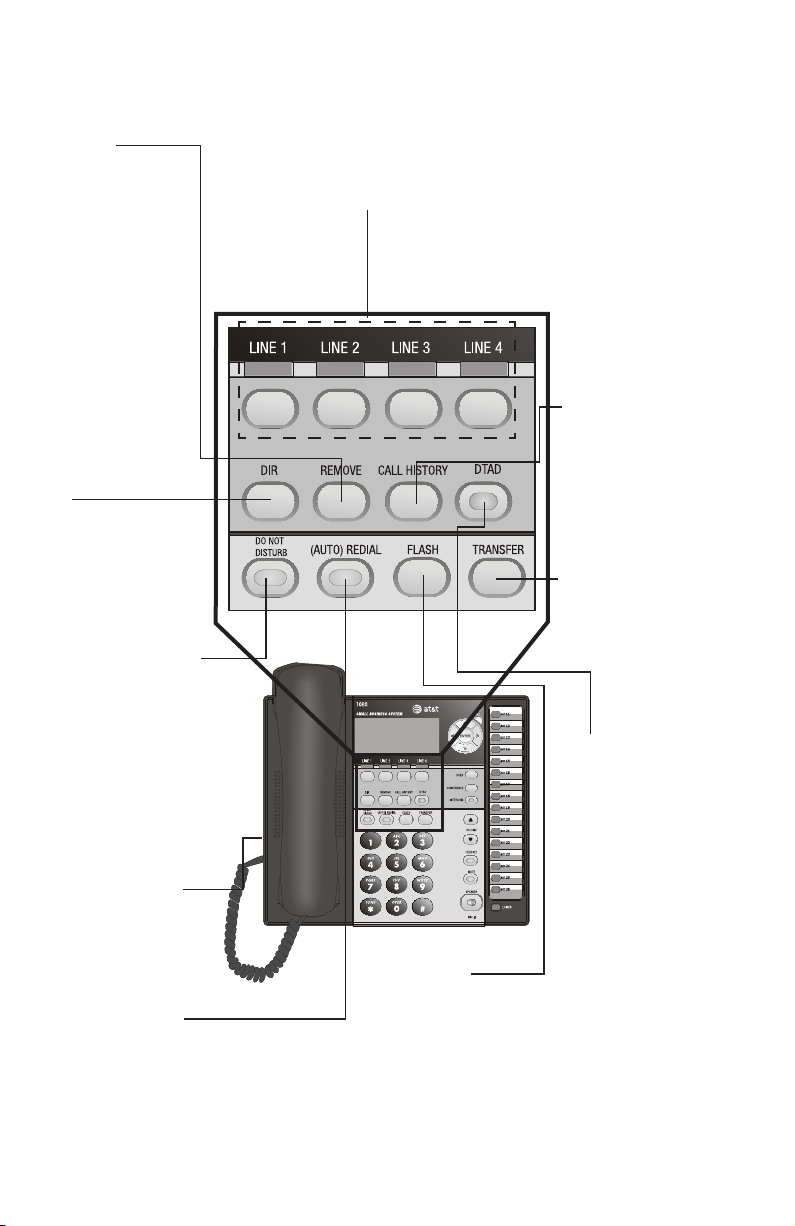
Telephone overview
REMOVE
While playing a
message, press to
delete it.
While reviewing
the call history,
directory or redial
stack, press to delete an individual
entry.
While entering or
editing a name or
number, press to
delete a character.
DIR
Press to store or display directory entries
(page 46).
Press again to quit.
DO NOT DISTURB
Press twice to
activate the Do
Not Disturb feature
(page 15).
Press again to
resume normal use
(page 15).
HEADSET JACK
(Beneath the small
rubber flap,) for
2.5mm headset
(AUTO) REDIAL
Press to view the
redial stack (page
17).
Press again to quit.
LINE BUTTONS, 1-4
Press to make or answer a call on the desired line (page 10).
While on a call, press to release the call privacy feature
(page 21).
CALL HISTORY
Press until you see
caller ID information
(page 54).
Press again to quit.
TRANSFER
Press to transfer
an outside call to
another 1080, or
a 1070, or a 1040
(page 23).
DTAD
Press to access
setting up the
answering system
(pages 65-69).
Press again to quit.
FLASH
During a call, press to receive
an incoming call if call waiting
service is activated (page 19).
2
Page 10

Getting started
Telephone overview
Navigation keys
Press to scroll up, down,
left or right while in
the menu.
ENTER
Press until you see the
main menu. Once in the
menu, press to select
an item or save an entry
or setting.
Press and hold to exit
the menu.
HOLD
Press to place an outside call on hold (page
20).
CONFERENCE
Press to create a
three-way conversation (page 22).
INTERCOM
Press to intercom or
page another extension
(pages 25-33).
SPEAKER
Press to turn on the
speakerphone. Press
again to turn off
(page 10).
One-touch keys
Press to make an
intercom call (page
26) or a one-touch
outside call (page 38).
VOLUME
While the telephone
is not in use, press to
adjust ringer volume
(page 13).
During a call, press
to adjust listening
volume (page 13).
During message playback, press to adjust
the playback volume
(page 74).
HEADSET
Press to turn on the
headset (page 11).
MUTE
Press so that the
other party cannot
hear you.
Press again to resume
the conversation
(page 19).
LOWER
Press to dial a telephone number stored
in the lower location of
a one-touch key (page
38).
3
Page 11

Getting started
Display screen messages
LCD CONTRAST
Your set's display provides important information.
SPECIAL OPTIONS
LEVEL-4
LCD CONTRAST
You can adjust the screen contrast to one of eight
levels to optimize readability in different lighting
conditions.
1. Press [ENTER].
2. Press [ ] or [ ] until you see SPECIAL OPTIONS.
Press [ENTER].
3. Press [ ] or [ ] until you see LCD CONTRAST.
4. Press [ ] or [ ] to select the screen contrast
level (1-8).
5. To move to the next feature, press [ ].
-OR-
To exit setup, press and hold [ENTER].
AA Flashes when this 1080 extension is an auto attendant.
AC FAIL There is no AC power to the set. If a good battery is
installed, basic phone operation is supported (such
as making and answering calls on the handset.)
Speakerphone, headset and call privacy are not
supported. Ringer and handset volume will be at the
minimum level.
COVM The telephone is ready to receive a voice mail signal from
your local telephone company.
COVM
There are new voice mail messages.
1 2 3 4
DND The Do Not Disturb mode is on.
DTAD: XX/YY Flashes when this extension’s mailboxes are full.
XX flashes when there is a new private message (XX is the
total number of private messages).
YY flashes when there is a new central message (YY is the
total number of central messages).
continued on next page
4
Page 12

Getting started
Display screen messages
continued from previous page
DTAD FULL! The recording memory is full. You will have to delete some
messages before new ones can be recorded.
(EMPTY) The directory or one-touch location is empty.
EXT BUSY-AA The auto attendant system is answering a call.
EXT BUSY-REC The answering system is answering a call.
EXT BUSY-REMOTE The telephone is in the remote or internal access mode.
EXT XX RING There is an incoming Centrex call.
FULL! The directory is full.
INITIALIZING. . The telephone is warming up.
INTERCOM FROM XX Another system telephone XX is calling (XX is the
extension number).
LIST EMPTY The redial memory is empty.
LOW BATT There is no spare battery in the telephone or the
battery power is low.
LOWER The [LOWER] key is pressed for the lower section of a
one-touch key.
NO ENTRIES FOR "Y" There are no entries in the directory matching the key
pressed.
PAGE FROM XX The telephone is on a single page call with another
system telephone XX (XX is the extension number).
PAGE ALL FROM XX
[ENTER]: ANSWER
SAVED ! The entry was saved to the directory or one-touch
TRANSFER FROM XX There is an incoming call transferred from another
The telephone is on a system-wide page call with
another system telephone XX (XX is the extension
number).
location successfully.
system telephone XX (XX is the extension number) or
the auto attendant system.
5
Page 13

Getting started
Indicator lights & tones
Indicator lights
LINE
Green:
• On when the line is in use.
• Flashing slowly when the line is on hold.
• Flashes quickly when a person has transferred a
• Flashes quickly when there is an incoming auto
• Flashes rapidly when there is an incoming call.
Red:
• On when another telephone in the system is using
• Flashes slowly when the line is on hold by
call on that line.
attendant transferred call on the line.
the line.
another telephone in the system.
DTAD
• On when the answering system or auto attendant
system is ready to answer calls.
• Flashes when there are new private or central
messages.
(AUTO) REDIAL
When auto-redial is active:
• Flashes when the telephone is dialing the desired
number.
• On between dialing attempts.
DO NOT DISTURB
• On when the Do Not Disturb function is on.On when the Do Not Disturb function is on.
6
Page 14

Getting started
Indicator lights & tones
NEW CALL
• On when there are unreviewed calls.
• Flashes when there are new voice mail messages.
The screen will display ”COVM”, with “1”, “2”, “3”,
and/or “4” under “COVM”, depending on which
lines have messages waiting.
INTERCOM
• On when the telephone is on an intercom call or a
paged call.
• On when the system is busy and the intercom is
unavailable.
• Flashes during an incoming intercom call’s ringing.
HEADSET
• On when the headset is in use.
• Flashes when there is an auto-redial call with the
headset.
MUTE
• On when the microphone is muted.
SPEAKER
• On when the speakerphone is in use.
• Flashes when there is an auto-redial call with the
speakerphone.
Alert tones
Confirmation tone Programming command completed successfully.
One double-beep Message alert tone feature is on and there are
every 30 seconds new private or central messages or when the
hold reminder feature is on and there is a line
on hold.
A triple-beep During volume adjustment, the volume level is
at the maximum or minimum.
7
Page 15

Getting started
Directory card
To write names and/or phone numbers on the directory card, follow the steps
below:
1. Remove the clear plastic cover by inserting a small item such as paperclip
into the hole on the lower right corner.
2. Pull out the directory card.
3. Write the information on the directory card.
4. Replace the directory card and then the plastic cover.
NOTE: There is a replacement directory card in the telephone package. You
can use it to replace the current one on the telephone if necessary.
8
Page 16

Telephone operation
Basic phone operation
This phone comes programmed to use line 1
(default prime line) for calls if you do not press a
line button. (To change the prime line, see PRIME
LINE on page 39 of the installation guide.) When
you answer a call, the phone automatically selects
the ringing line.
Lit line indicators
The four indicators above the [LINE] keys will
indicate the state of the corresponding phone line.
The four LINE lights have two colors:
• Green is for outside calls.
a. On when the line is in use on this phone.
b. Flashes slowly when the line is on hold.
c. Flashes rapidly when there is a transferred
call on the line.
d. Flashes quickly when there is an incoming
auto attendant transferred call on the line.
e. Flashes rapidly when there is an incoming
call on that line.
• Red is for the state of the phone system.
a. On when another phone is using the line.
b. Flashes slowly when the line is held by
another phone on the same system.
Making and answering calls
This phone will automatically make and answer
calls in the mode (speakerphone or headset) you
programmed (see AUTOMATIC MODE on page 39
of the installation guide.). Follow the directions on
the next page to choose a mode manually. If the
phone is in use on one line, any other calls made
or answered will use the same mode already in
use.
continued on next page
9
Page 17

Telephone operation
Basic phone operation
continued from previous page
Handset
• To make a call:
1. Lift the handset.
2. Dial a number.
• To override automatic line selection, press the
LINE button for the line you wish to select, then
lift the handset.
• To answer a call, lift the handset.
• To hang up, place the handset on the base.
Speakerphone
• To make a call:
1. Press and release the desired LINE button or
[ SPEAKER]. The SPEAKER light goes on.
2. Wait for a dial tone, then dial the number.
• To answer a call, press [ SPEAKER] or press
the LINE button of the incoming call.
• To end the call, press [ SPEAKER].
NOTES:
• If HEADSET is programmed as the default mode
(see AUTOMATIC MODE on page 39 of the instal-
lation guide), you must press [ SPEAKER] to
activate the speakerphone.
• If SPEAKERPHONE is selected in the AUTOMATIC
MODE menu, pressing any line key will select the
line and activate the speakerphone. If HEADSET
is selected in the AUTOMATIC MODE menu (page
39 of the installation guide) and a headset is connected, pressing any LINE key will select the line
and activate the headset.
continued on next page
10
Page 18

Telephone operation
Basic phone operation
continued from previous page
Headset (purchased separately)
You can use this phone hands-free when you
install any industry-standard two-band 2.5mm
headset or other compatible, electronically
isolated headset. The headsets must be purchased
separately.
• To make a call:
1. Press [HEADSET] (if a headset is connected
to the telephone base).
2. Wait for a dial tone, then dial the number.
• To answer a call, press [HEADSET].
• To hang up, press [HEADSET].
Make sure the headset is plugged into the
HEADSET jack. You will hear a triple-beep if
you press [HEADSET] when the headset is not
plugged in.
NOTE: If SPEAKERPHONE is selected in the
AUTOMATIC MODE menu (page 39 of the installa-
tion guide), pressing any line key will select the line
and activate the speakerphone. If HEADSET is select-
ed in the AUTOMATIC MODE menu and a headset
is connected, pressing any [LINE] key will select the
line and activate the headset.
11
Page 19

Telephone operation
Basic phone operation
Switching among handset, speakerphone and
headset mode
To switch from handset to headset or
speakerphone, press [HEADSET] or [ SPEAKER],
then replace the handset. (In order to use the
headset, it must be plugged in.)
To switch from speakerphone to handset, lift the
handset. (Do not press [ SPEAKER] or the call
will be disconnected.)
To switch from speakerphone to headset, insert
the headset plug into the jack on the side of the
telephone base, and press [HEADSET].
To switch from headset to handset when
the handset is in the telephone base, lift the
handset.
To switch from headset to handset when the
handset is off-hook, press [HEADSET] again.
10:01AM 11/23
00:30
5550100
To switch from headset to speakerphone, press
[ SPEAKER].
To override automatic line selection, press
and release a line button. This activates
the speakerphone or headset, whichever is
programmed as the default mode.
Timer
When you make or answer a call, the timer
automatically starts. The screen displays the
elapsed time in minutes and seconds for the
first hour (up to 59:59) and then begins again.
The timer stops automatically when you hang up
and the recorded time is displayed for about 10
seconds. The timer also stops when you place a
call on hold and resets to 00:00 when you release
the hold.
12
Page 20

Telephone operation
Basic phone operation
Volume control
The volume key control the level of the incoming
voice as well as the ringer volume.
Handset/speakerphone/headset volume
• While using the handset, press [ VOLUME] to
adjust the listening volume (1-5).
• While using the speakerphone, press [ VOLUME]
to adjust the listening volume (1-8).
• While using the headset, press [ VOLUME] to
adjust the listening volume (1-5).
While using the volume control, you will hear
a triple-beep when you reach the minimum or
maximum level.
Your 1080 remembers the volume setting for each
mode.
Ringer volume
• When the telephone is idle, press [ VOLUME] to
sample and select the desired volume (1-4) for
all ringers. When changing the volume, the new
setting is saved.
• While the phone is ringing, press [ VOLUME] to
adjust the ringer volume (1-4). As you adjust the
ringer, you will hear the ring change.
NOTE: You can turn the external ringer off sepa-
rately for each line (page 14)
13
Page 21

Telephone operation
Basic phone operation
RINGER ON/OFF
RINGER ON/OFF
ON
L1 RINGER
RINGER TYPE
TYPE 1
L1 RINGER TYPE
This feature controls whether there is an audible
alert for outside calls on the designated line.
1. Press [ENTER].
2. Press [ ] or [ ] until you see PHONE SETTINGS.
Press [ENTER].
3. Press [ ] or [ ] until you see RINGER ON/OFF.
Press [ENTER].
4. Press [ ] or [ ] to select the desired line
(L1 RINGER, L2 RINGER, L3 RINGER or L4
RINGER).
5. Press [ ] or [ ] to turn the ringer ON or OFF.
ON is the default setting.
6. To move to the next line, press [ ].
-OR-
To exit setup, press and hold [ENTER].
RINGER TYPE
Use this feature to choose one of the four ringer
types for incoming calls. You can choose different
ringer types for the different lines so you can
easily identify which line is ringing.
1. Press [ENTER].
2. Press [ ] or [ ] until you see PHONE
SETTINGS. Press [ENTER].
3. Press [ ] or [ ] until you see RINGER TYPE.
Press [ENTER].
4. Press [ ] or [ ] to highlight the desired
line (L1 RINGER TYPE, L2 RINGER TYPE, L3
RINGER TYPE or L4 RINGER TYPE).
5. Press [ ] or [ ] to highlight the desired ringer
type (TYPE 1, TYPE 2, TYPE 3 or TYPE 4).
6. To move to the next line, press [ ].
-OR-
To exit setup, press and hold [ENTER].
14
Page 22

Telephone operation
Basic phone operation
DO NOT DISTURB
When you activate the do not disturb (DND)
function, you will not hear paging tones, voice
paging, or incoming call rings.
Instead, the LINE light flashes to signal an
incoming call. If you receive an intercom call, the
[INTERCOM] light flashes, and the number of the
incoming intercom call appears on the display.
1. Press [DO NOT DISTURB] twice to prevent
interruptions. The DO NOT DISTURB light goes on
and the screen displays DND.
2. Press [DO NOT DISTURB] again to resume
normal call alerts. The DO NOT DISTURB light
goes off and the screen no longer shows DND.
Callers will hear very long beeps, the same tone
as if the system phone is ringing normally.
15
Page 23

Telephone operation
Basic phone operation
Last number redial
The last number dialed from this extension (up to
32 digits) is stored in the redial memory until you
dial another number. Press [(AUTO) REDIAL] you
will see the most recently dialed number (up to 32
digits).
• You must go off hook (lift the handset or press
a [LINE] button or press [ SPEAKER] or
[HEADSET]) before you press [(AUTO) REDIAL].
If you press [(AUTO) REDIAL] without going
off hook, the screen displays the redial memory
stack. (See Redial stack on page 17.)
• You will experience a one-second delay before
the call is dialed when using the redial feature.
This is normal.
See Redial stack on the next page to learn how
to delete redial numbers and store them into
memory locations.
16
Page 24

NOTE: If the desired
redial number is longer
than 16 digits, the screen
will only display the first
14 digits.
Telephone operation
Basic phone operation
Redial stack
The last six numbers dialed from this extension
are automatically stored in the redial memory
stack. You can review the numbers in the redial
memory and dial one if you wish.
1. When the phone is idle, press [(AUTO) REDIAL].
2. Press [ ] or [ ] to scroll through the last six
numbers dialed at this extension.
3. When the desired number is displayed, press
[ENTER] twice to dial the call.
-OR-
Pick up the handset to dial the call.
NOTE: While reviewing the numbers in the redial
stack, if you want to place a new call other than
the displayed number, you need to press and hold
[ENTER] or wait for 30 seconds to return to idle.
• To delete a redial number, press [REMOVE]
while the redial number is displayed.
• To store a redial number in a one-touch key:
1. While the number is displayed, press
[ENTER].
2. Press [ ] or [ ] until you see COPY TO 1-
TOUCH. Press [ENTER].
3. Press a one-touch key or press [LOWER], then
a one-touch key (page 56).
• To store a redial number in the directory:
1. While the number is displayed, press [ENTER].
2. Press [ ] or [ ] until you see COPY TO DIR.
Press [ENTER].
3. Enter the name (page 43).
4. Press [ENTER] twice.
• To exit, press [(AUTO) REDIAL].
17
Page 25

NOTES:
• When the telephone
automatically redials, it
always uses the prime
line.
• While reviewing the
numbers in the redial
stack, if you want to
place a new call other
than the displayed
number, you need
to press and hold
[ENTER] or wait for
30 seconds to return
to idle.
• Within the 30-second
auto redialing period,
you must lift the
handset, or press
[ SPEAKER] or
[HEADSET] if you
want to stay in the
call, otherwise, the
line will hang up and
redial again.
• During these 30 seconds, if you want
to end the autoredial attempts, press
[ SPEAKER] twice
(or [HEADSET] twice
if the headset is
being used).
Telephone operation
Basic phone operation
Auto-redial
This phone can automatically redial a number
every 60 seconds up to ten times. When the
phone automatically redials the number, it always
uses the line you originally used to dial the call.
1. Follow the instructions under Redial stack,
(page 17), to find the number you want to call.
2. Press a [LINE] button.
-OR-
Press [ SPEAKER] or [HEADSET].
-OR-
Press [ENTER]. Scroll to AUTO REDIAL and
then press [ENTER] again.
3. When the other line rings or the other party
answers, to speak with the other party, lift the
handset.
-OR-
Press [ SPEAKER].
-OR-
Press [HEADSET] if the headset is connected to
speak with the other party.
While auto-redial is active:
• The telephone will activate the speakerphone
or headset (depending on the AUTOMATIC MODE
you set, page 39 of the installation guide) and
call the desired number automatically. The
[(AUTO) REDIAL] light will flash.
• If the line is busy, there is a busy tone lasting for
approximately 20-25 seconds before hanging
up. After another 30 seconds, the call will be
redialed again. The [(AUTO) REDIAL] light will
remain on.
NOTE: During these 30 seconds, if you want
to stop the auto-redial feature, press [(AUTO)
REDIAL].
This process will be repeated up to 10 times or until
the called number is free to accept calls. If the line
is still busy after 10 attempts, no more attempts
will be made.
18
Page 26

Telephone operation
Basic phone operation
Call waiting
If you subscribe to call waiting service with your
local telephone company, there will be a beep if
there is an incoming call when you are already on
a call on the same line.
1. Press [FLASH] to put your current call on hold
and take the new call.
2. Press [FLASH] anytime to switch back and forth
between calls. For more information on caller
ID with call waiting, see page 57.
MUTE
During a telephone conversation, press [MUTE] to
silence the microphone. You will be able to hear the
other party, but the other party will not be able to
hear you until you press [MUTE] again and resume
speaking. Mute is automatically cancelled when you
end a call.
When mute is active, the MUTE light will be on.
NOTE: Switching from handset to speakerphone
or headset, or from speakerphone or headset to
handset, changing lines, and putting a call on hold
also cancels the mute function.
Temporary tone dialing
If you have dial pulse (rotary) service only, you can
temporarily switch dial pulse to touch-tone dialing
during a call by pressing [*TONE].
1. Dial the number.
2. Press and release [*TONE]. Buttons pressed after
this send touch-tone signals.
3. After you hang up, the phone automatically
returns to pulse dial mode.
19
Page 27

Telephone operation
Basic phone operation
HOLD
You can use the hold feature to hold one line
while accessing another, or as part of the
conference and call transfer features.
While on a call, press and release [HOLD]. The
LINE light for the line on hold flashes slowly
in green, and a double-beep sounds every 30
seconds to remind you that the call is on hold (To
turn off the reminder beep, see HOLD REMINDER
on page 36 of the installation guide).
If you were using the handset, you can place
the handset in the telephone base without
disconnecting the call. If you were using the
speakerphone, the speakerphone is automatically
turned off when you press [HOLD].
To release the hold, press and release the [LINE]
button of the call on hold.
NOTES:
• The phone automatically disconnects a call on
hold after 20 minutes. To keep a call on hold longer than 20 minutes, release hold within 20 minutes and then place the call on hold again.
• You cannot put an intercom call on hold.
• If a line is in use, pressing [INTERCOM] will place
the line on hold and activate the intercom (page
26).
20
Page 28

Telephone operation
Basic phone operation
Switching between lines
During an outside call:
1. Press and release [HOLD] to maintain the
connection to the call on the active line.
2. Press and release the LINE button of another
line to make or answer another call.
3. To return to the first call, press [HOLD] to put
the current call on hold. Then press the [LINE]
button of the original line.
Call privacy
To ensure call privacy, this phone allows only one
set at a time to use a line.
Cancel call privacy
During the call, press the [LINE] button for the
call. You’ll hear a short beep. Others can now join
the call by pressing the appropriate line button.
Restore call privacy
Press the [LINE] button again during the call.
You’ll hear a double-beep. The other phones will
be dropped from the call.
NOTES:
• Call privacy is automatically restored when you
end the call.
• When a non-system phone answers a call,
any other system phone can pick up the call
by pressing the [LINE] button. Once a system
phone picks up the call, call privacy is activated
and no other system phones can listen to the
call unless call privacy is canceled, but non-system phones which share that line can still join
the call.
21
Page 29

NOTES:
•
Occasionally, the
far-end parties on a
conference call might
not hear one another.
• If you are experiencing
difficulty in using the
conference features
on this phone, please
consider using AT&T’s
complete line of
teleconference services
to find a solution that
best meets your needs.
AT&T TeleConference
Services reduces travel
time and expense
while increasing
productivity wherever
people are located
allowing you to host
truly virtual meetings
and share important
information in real
time. To sign up for
AT&T TeleConference
Services, go to:
www.att.com/
orderconference
for details.
Telephone operation
Basic phone operation
Conference calls
This feature lets you set up a three-party call by
using two lines at the same time. You can also
join an intercom call with a call on an outside
line. The outside line call must be established first
because an intercom call cannot be placed on
hold.
1. Make or answer an outside call.
2. Press and release [HOLD].
3. Call someone on another line, or intercom
someone.
4. When this call is answered, press
[CONFERENCE]. The three-party conference
begins immediately.
To talk privately with one party (two-line
conference only):
1. Press [HOLD] to place both lines on hold.
2. Press a [LINE] button to talk privately with the
person on that line.
3. Press [CONFERENCE] to resume then
conference call.
To drop one line:
Press the [LINE] button of the party you want to
keep. The other line will be dropped.
To drop an extension:
Press the [LINE] button twice. The other system
extension will hang up.
To end a two-line conference call, hang up. All
parties will disconnect.
To end a two-extension conference call, hang
up on both system extensions. All parties will
disconnect.
22
Page 30

Telephone operation
Call transfer
Transfer a call
You can transfer a call to any other system phone.
Once you transfer a call, it can be picked up at
any other system phone, not just at the extension
you called.
NOTE:: If a transferred call is not picked up
within 20 minutes, the phone will automatically
disconnect the call.
Blind transfer
While on a call:
10:01AM 11/23
00:30
10:01AM 11/23
00:30
TRANSFER LINE#1
TO
10:01AM 11/23
EXT 11
TRANSFER LINE #1
TO 12
1. Press [TRANSFER]. The outside call will
automatically be put on hold. You will see
TRANSFER LINE#Y TO (with Y being the line in
use) on the third line of the display.
2. Press the one-touch button for the destination
extension for the call.
-OR-
Dial the destination extension number to which
you’re transferring the call. You will see the
extension number in the fourth line of the
display.
3. Hang up.
Your phone reminds you with a double-beep every
30 seconds when a transferred call has not been
answered (To turn off the reminder beep, see
HOLD REMINDER on page 36 of the installation
guide).
NOTE:: If you do not dial an extension
within 10 seconds, the transfer is automatically
canceled. The call is still on hold. Press the
corresponding LINE key to resume the call.
23
 Loading...