

Page 1

Logic Express 7
Reference Manual
Page 2

Apple Computer, Inc.
© 2004 Apple Computer, Inc. All rights reserved.
Under the copyright laws, this manual may not be
copied, in whole or in part, without the written consent
of Apple. Your rights to the software are governed by
the accompanying software licence agreement.
The Apple logo is a trademark of Apple Computer, Inc.,
registered in the U.S. and other countries. Use of the
“keyboard” Apple logo (Option-Shift-K) for commercial
purposes without the prior written consent of Apple
may constitute trademark infringement and unfair
competition in violation of federal and state laws.
Every effort has been made to ensure that the
information in this manual is accurate. Apple Computer,
Inc. is not responsible for printing or clerical errors.
Apple Computer, Inc.
1 Infinite Loop
Cupertino, CA 95014-2084
408-996-1010
www.apple.com
Apple, the Apple logo, Aqua, Final Cut, Final Cut Pro,
FireWire, iBook, iMac, iPod, iTunes, Logic, Mac,
Macintosh, Mac OS, PowerBook, Power Mac, Power
Macintosh, and QuickTime are trademarks of Apple
Computer, Inc., registered in the U.S. and other
countries.
Finder and GarageBand are trademarks of Apple
Computer, Inc.
AppleCare is a service mark of Apple Computer, Inc.
Helvetica is a registered trademark of Heidelberger
Druckmaschinen AG, available from Linotype Library
GmbH.
Other company and product names mentioned herein
are trademarks of their respective companies. Mention
of third-party products is for informational purposes
only and constitutes neither an endorsement nor a
recommendation. Apple assumes no responsibility with
regard to the performance or use of these products.
Page 3

1
Contents
Preface 9 Logic Reference
9 What Is Logic?
10 About This Manual
Chapter 1 13 Using Logic
13 Using the Mouse 14 Input Options 16 Tools and the Toolbox 21 Window Functions 32 Edit Operations 33 Selection Techniques
35 General Functions of the Editors 36 Key Commands 44 Step Input 49 Caps Lock Keyboard
51 Song Administration 60 Standard MIDI Files 62 Apple Loops 67 GarageBand File Import 68 ReCycle Import 70 OPEN TL Import 70 Bouncing and POW-r Dithering
Chapter 2 73 Transport
73 The Transport Window 82 The Bar Ruler 84 Cycle Mode 86 Recording 89 Chase Events
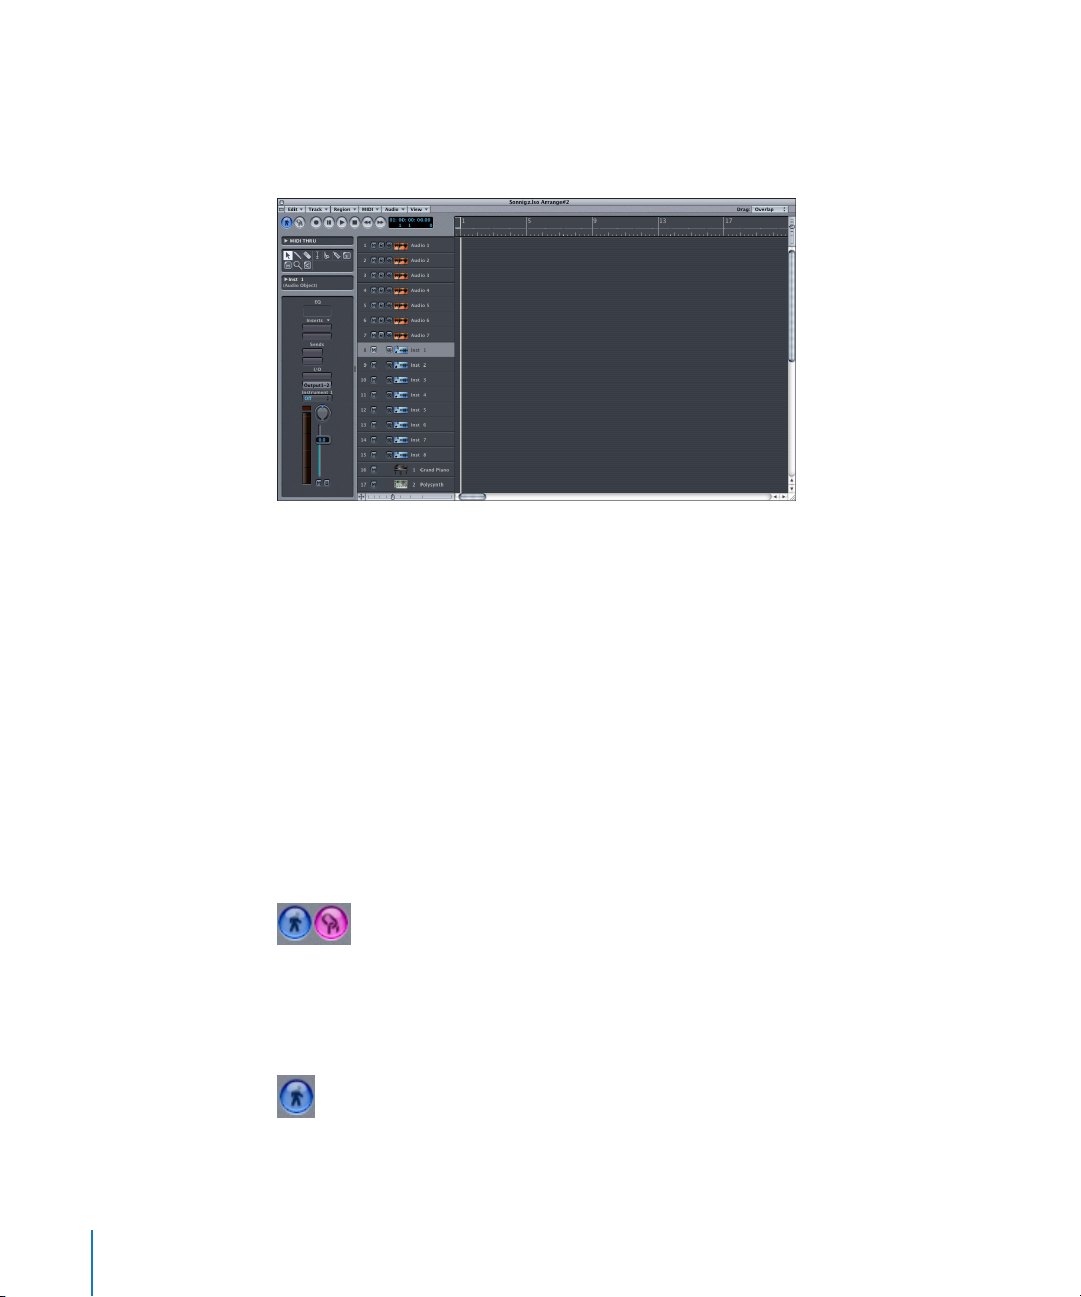
Chapter 3 91 Arrange Window
91 Overview 92 Tracks
100 Arrange Channel Strip
3
Page 4

101 MIDI Instruments
107 MIDI Regions
116 MIDI Region Playback Parameters 120 Quantization 122 Folders 124 Aliases 127 Time and Key Signature Editor 128 Altering the Display
132 Reset Functions
Chapter 4 133 Audio in the Arrange Window
133 Regions
141 Audio Recording 145 Functions 14 8 F re ez e
Chapter 5 153 The Environment
153 Environment—Introduction 154 Basic Operation 159 The MIDI Signal Path 162 Environment Objects
181 Faders 189 Environment Exchange
Chapter 6 191 Logic’s Mixing Facilities
192 Audio Mixer 194 Audio Objects in the Audio and Track Mixer
211 Audio Object Types
218 Track Mixer 221 MIDI Channel Strips
Chapter 7 225 Automation
225 Automation—Introduction 227 Track Based Automation 232 Region Based Automation 233 Hyper Draw 236 Conversion of Automation Data
Chapter 8 239 Global Tracks
240 Display Options for Global Tracks 240 How to Create, Move, Copy, and Delete Global Events 242 Tempo Track 244 Signature Track 245 Transposition Track
4
Contents
Page 5

247 Video Track
Chapter 9 249 Audio Window
249 Audio Window—Introduction
251 Layout
253 Display 256 Operation 260 File Administration 268 Further Options
Chapter 10 271 Audio Drivers
271 The Audio Hardware and Drivers Dialog
274 Audio Engine 274 Realtime Sample Rate Conversion
Chapter 11 275 Sample Editor
275 Sample Editor—Introduction 277 Display 280 The Sample Edit Window in Use 288 Functions 291 Digital Factory
Chapter 12 297 Event List
297 Using the Event List 299 Display 300 Operation 302 Event List Structure 305 Event Type Structure 309 Tips for Numerical Input
310 Event Float Window
Chapter 13 311 Hyper Editor
311 Hyper Editor—Introduction 312 Hyper Sets 313 Event Definitions 319 Operation
Chapter 14 323 Matrix Editor
323 Matrix Editor—Introduction 324 Display 325 Editing Notes 327 Hyper Draw in the Matrix Window
Contents
5
Page 6

Chapter 15 329 Score Editor
329 Score Editor—Introduction
331 Elements of the Score Edit Window 332 Notation Concept 336 General Appearance 339 Input Methods in the Score Window 339 Score Display Options—a Survey
341 Printout 342 Graphic Export 343 Realtime MIDI Recording 343 Step Input 344 Mouse Input 348 The Part Box 369 Move, Copy, and Paste
371 Editing or Deleting Notes and Symbols
374 The Display Parameter Box 380 Score Styles 398 Note Attributes
401 Instrument Sets and Score Display Levels
410 Song Settings for Score Display 423 Score Preferences 425 Text: Input and Display 432 Chord Symbols
Chapter 16 437 The Transform Window
437 Transform Window—Introduction 439 Transformation 444 Parameter Sets
Chapter 17 447 Tempo
447 Display and Functions 448 Tempo List Editor
Chapter 18 451 Synchronization
451 Functions 453 Synchronization Window 459 Bar Ruler—Time Ruler 460 Sync Problems and Solutions
Chapter 19 461 Video
461 Synchronizing QuickTime Movies
Chapter 20 465 Song Settings and Preferences
466 Song Settings
6
Contents
Page 7

476 Preferences
Chapter 21 487 Control Surface Support
488 Installation 490 Setup Window Parameters 495 Control Surface Preferences 498 Customizing Control Surfaces 500 The Controller Assignments Window
Glossary 501
Index 511
Contents
7
Page 8

Page 9

Logic Reference
Recent years have seen a revolution in the use of
personal computers for creating music.
Music projects that until recently would have required an array of professional studio
equipment can now be completed in a home or project studio, using a personal
computer and readily available resources. A personal computer with a fast processor
and enough RAM can now serve as a workstation for recording, arranging, mixing, and
producing complete music projects, which can be played back on the computer,
burned on a CD or DVD, or distributed over the Internet.
What Is Logic?
Logic is an integrated system for composing, producing, and scoring music, built
specifically for Mac OS X. Musicians can create professional sounding original music
compositions, royalty-free soundtracks for Final Cut Pro video projects, and more.
Logic allows you to build musical arrangements using MIDI and software instruments
alongside audio recordings of acoustic instruments, vocal performances and
prerecorded audio files.
You can freely combine and arrange loops plus MIDI and software instrument parts in
Logic’s Arrange window, add professional-quality effects, mix your music in stereo, and
export the final mix to a standard audio file or an audio CD that can be played on any
multimedia-equipped computer, home stereo or imported into Final Cut Pro or other
applications.
Preface
Logic includes the following features, amongst many others:
•
Record MIDI information via connected MIDI input devices, such as keyboards, and
play back this information via any connected MIDI device or Logic’s integrated
software instruments.
•
Create, arrange, and edit MIDI projects, and print out musical notation via a printer
connected to your computer.
•
Digitally record acoustic and electric instruments or vocal performances into your
projects, and process these audio recordings with Logic’s in-built real-time effects.
9
Page 10

Make use of the integrated software instruments, including: ES1 and EXS24 or third-
•
party Audio Unit instruments.
Load songs or channel strips from Apple’s
•
GarageBand
application, and edit them,
making use of the additional processing and editing possibilities afforded by Logic.
•
Mix your MIDI and audio tracks, including effects and software-based instrument
settings, via a sophisticated total recall mix automation system. Logic includes highquality effects plug-ins that you can use in your projects. You can also install thirdparty effects in the Audio Units plug-in format.
•
Bounce all audio data, including effects and mix automation settings, to a stereo file
for mastering or further processing.
•
Work in real time: You can work on Logic projects in real time, adding, and editing
audio and MIDI parts while the project is playing, and hear the results of your
changes immediately.
•
Use existing loop libraries: Logic directly supports Apple Loop files, and is
compatible with a wide variety of existing audio file types, including those created in
ReCycle.
Locate and preview files easily: The Apple Loop Browser, part of the Logic interface,
•
provides powerful file browsing and search features, making it easy to locate loops
by instrument, genre, mood, or other search criteria.
Mix Apple Loops recorded at different tempos and keys: Logic automatically
•
matches loops to the project tempo and key, allowing you to freely combine loops
from different sources in a single project.
About This Manual
This book is the final arbiter on all things in Logic, and covers all areas of the program
in detail.
You will find descriptions of the most essential aspects of Logic’s interface, commands,
and menus in the
instructions or examples for accomplishing specific tasks.
Chapter 2 discusses the use of Logic’s Transport functions and covers the navigation of
your Logic projects.
The following chapters will provide you with an overview and complete description of
all parameters and functions available in each of Logic’s editing and file handling
windows. You will learn how to make use of the arranging, recording, and editing
facilities available—for MIDI and audio data—in these chapters.
Later chapters discuss mixing, automation, and Logic’s preferences, Song settings and
synchronization options.
10 Preface
Using Logic
Logic Reference
chapter. These descriptions are often paired with
Page 11

The Onscreen Help system—accessible from Logic’s Help menu—is fundamentally the
Reference Manuals in electronic form. It has the advantage of being at your fingertips
when you need it, and is also searchable.
Even if you’re the type who just doesn’t like reading manuals, we ask that you read the
next section. It will provide you with essential information on the basic operation of
Logic’s interface.
Please note that all topics described herein were accurate at the date of printing. For
up to date information on changes or additions made after printing, please refer to the
Late Breaking News
on the Logic DVD, and/or to the
Update Info,
included with each
Logic update.
Conventions of This Manual…
Before commencing, we’d like to cover the following conventions used in this manual.
Menu Functions
For functions that can be reached via hierarchical menus, the different menu levels are
described as follows:
Important Entries
Some text will be shown as follows:
Menu > Menu entry > Function
.
Important:
Information on function or parameter.
These entries discuss a key concept or technical information that should, or must, be
followed or taken into account. Please pay special attention to these entries.
Notes
Some sections provide additional information or tips that will assist your use of Logic.
These are displayed as shown below:
Note:
Information on function or parameter.
Key Commands
Many Logic functions can be activated or accessed with key commands—computer
keyboard shortcuts. The key commands mentioned in this guide are based on the
standard Key Command Set, assigned by the Logic Setup Assistant. Where possible, we
have also included the standard Key Commands for PowerBook users. These are based
on the PowerBook Key Command Set, assigned in the Logic Setup Assistant.
Preface
Logic Reference
11
Page 12

Page 13

1
Using Logic
1
The following chapter will guide you through Logic’s basic
interface elements, file handling options and common input
techniques.
You will also learn about a number of shortcuts and features that will accelerate your
workflow, and assist you while learning about Logic.
Using the Mouse
The mouse can be used in the following ways in Logic:
Clicking
Place the mouse pointer on the object (button, input field and so on) and press the
mouse button once.
Double-Clicking
The same as clicking on an object, but you press the mouse button twice, in quick
succession. You can set a suitable interval between clicks in the System Preferences
(Keyboard and Mouse pane).
Grabbing or Clicking and Holding
The same as clicking on an object, but you keep the mouse button held down.
Moving or Dragging
Grab the object, and move the mouse (keeping the mouse button held down) to the
desired position.
Mouse Wheel Events
You can use the mouse wheel to scroll vertically in Logic. There are also some modifiers
supported:
If you press Command, the mouse wheel can be used to scroll horizontally.
•
•
If you press Option, the mouse wheel can be used to zoom in/out vertically.
•
If you press Option-Command, the mouse wheel can be used to zoom in/out
horizontally.
13
Page 14
If you press Option-Control, the mouse wheel can be used to zoom in/out in both
•
directions.
Note:
Logic also supports mice with two wheels. The second wheel works like the first
wheel, but with interchanged axes.
Input Options
This section discusses the various methods available for interaction with parameters,
and data entry tasks.
Mouse Input
Checkboxes
Checkboxes are square boxes that are “checked” when you click them, in order to
activate an option (or function). Click the checkbox a second time to remove the
“check”, and deactivate the option.
Pull-Down Menus
Pull-down menus open when you click-hold on certain input fields or buttons. You can
select a function from within such menus by highlighting the desired item with the
mouse, and releasing the mouse button. If you wish to select an item that is outside
the visible section of the menu,
move the mouse over the top or bottom edge of the menu; the further you move it,
•
the faster you will scroll through the menu.
hold down Shift as you do this. You can then release the mouse button, and use the
•
scroll bar to the right of the pull-down menu to browse. When the mouse reaches
the entry you wish to use, release Shift.
Mouse as Slider
You can set most numerical parameters (even note values or names) by grabbing the
parameter value, and moving the mouse up or down. If the parameter consists of
several separate numbers (song position, for example), you can adjust each number
individually using this method.
14 Chapter 1
Using Logic
Page 15
Using the Mouse for In/Decrementing
Nearly all parameter values that can be set using the mouse as a slider (and even some
of the pull-down menu parameters) may also be increased or decreased in single units
by clicking on the top or bottom half of the value, while holding down Control.
Numerical Input
Double-clicking on a numerical parameter value opens an input field. The existing
value is highlighted, and ready to be overwritten by a new entry. You can also use the
mouse to make a partial selection in an input field, so that only the highlighted part is
overwritten. As long as the input field is open, the computer keyboard may only be
used for data entry, and may not be used for key commands (with the exception of the
main menu functions).
Arithmetical Operations
You can enter numbers at any time by typing in an arithmetical operation: “+2” or “−5”,
for example, which changes the current value by/to that amount.
ASCII Code
You can also input numbers as ASCII code: just place a ` or " in front of the selected
key, and the ASCII code will be input as a number. As an example:
"! results in a value of 33
•
•
"a results in a value of 97
This function is particularly useful for entering text in SysEx strings.
Cancel Numerical Input
Direct numerical input can be canceled by entering no text at all and pressing Enter or
Return.
Chapter 1
Using Logic
15
Page 16
Text Input
You can input text names in the same way as numbers, but you only need to click a
name field once to allow input. You can directly click on an object with the Text tool to
rename it.
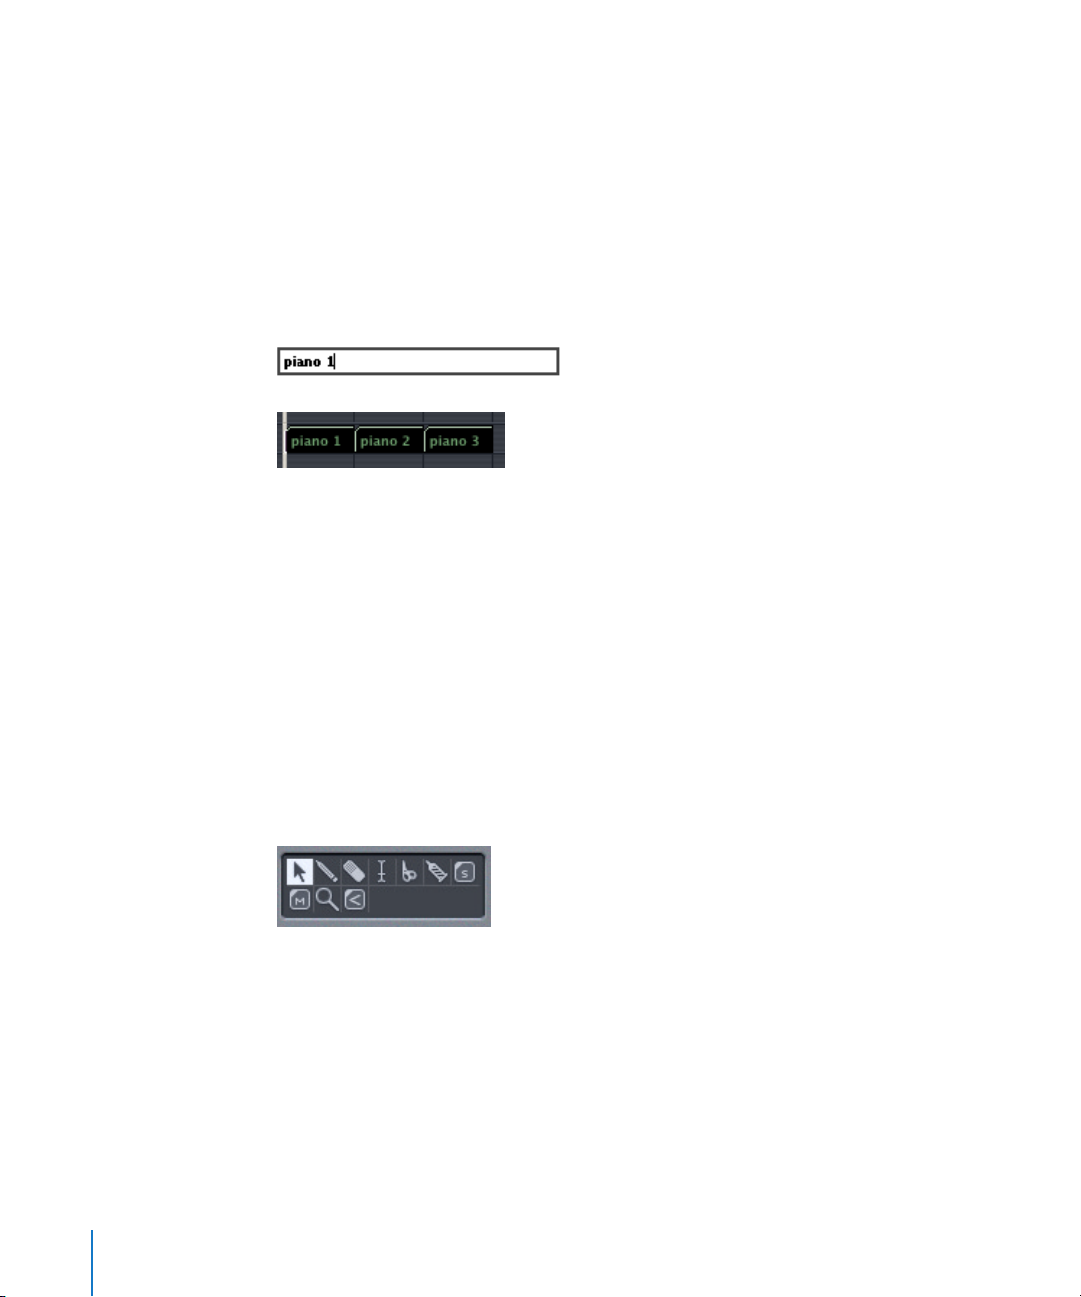
Numbered Names
Any number of selected Objects or Regions can be assigned same name. If the name
ends with a number, this number will automatically be incremented by 1 for each
subsequent Object or Region. This allows you to quickly, and uniquely, name all of the
Regions on a track or all of the Fader Objects in the Environment, as examples.
Note:
To turn off automatic numbering, place a space after the number at the end of
the Object or Region name. All selected Objects and Region will then end in the same
number.
Tools and the Toolbox
Logic allows recorded data to be handled graphically. This means that you don’t need
to input instructions in command lines in order to perform operations, but rather, do so
by manipulating graphical “objects”. This is done with the help of Tools (see “The Tools”
on page 18). Each edit window provides different Toolboxes that are suitable for the
tasks performed in the editor.
The Arrange window Toolbox looks like this:
When editing objects graphically, you always have two tools available at the mouse
pointer position: one is already active, the other is activated by holding down
Command.
16 Chapter 1
Using Logic
Page 17

You can change the currently active tool by clicking on another tool in the Toolbox. The
mouse pointer then adopts the shape of the tool you clicked on, allowing you to
instantly identify the active tool by looking at the cursor graphic: the Eraser is used for
deleting, the Scissors for cutting and the Glue Tool for merging Regions, as examples.
To assign a tool to Command, click on the desired tool in the Toolbox, with Command
depressed.
If you have a suitable mouse, you can also assign the right mouse button to a third
tool, allowing the use of three assignable tools:
•
left-click
•
Command- (left) click
right-click
•
Note:
You can also assign the Toolbox to the right mouse button with the
Editing > Right Mouse Button Opens Toolbox
preference. This allows you to open the
Global >
Toolbox at the mouse cursor position by right-clicking anywhere in the working area of
the open window.
Tools are only effective in the working area of the window in which they were selected.
You can define individual tools for each opened window.
A tool (the Scissors, for example) basically affects the Objects or Regions that you click
on. If multiple Objects or Regions are selected, they will all be affected by the tool (the
Scissors would cut all selected Regions at the same song position, for example).
Note:
The Toolbox can be hidden in the Arrange and Score Editor windows to save
onscreen space, which can be very helpful if you only have a small monitor. The
function is accessible via the
View > Toolbox
menu option.
Selecting Tools
You select the tool you wish to use by clicking on it (with the left or right mouse
button) in the Toolbox (or clicking while holding down Command for the alternate
tool).
Note:
You can use the
the neighboring tool in the top window.
Opening the Toolbox at the Mouse Position
Use the
Show Tools
position. When a Toolbox is opened at the mouse position, you can also use one of the
number keys to select a tool. The tools are always numbered from left to right and top
to bottom. Press the
and close the Toolbox.
Chapter 1
Using Logic
Set next Tool
and
Set previous Tool
key commands to switch to
key command (default: Esc) to open a Toolbox at the mouse
Show Tools
key command a second time to switch to the pointer,
17
Page 18
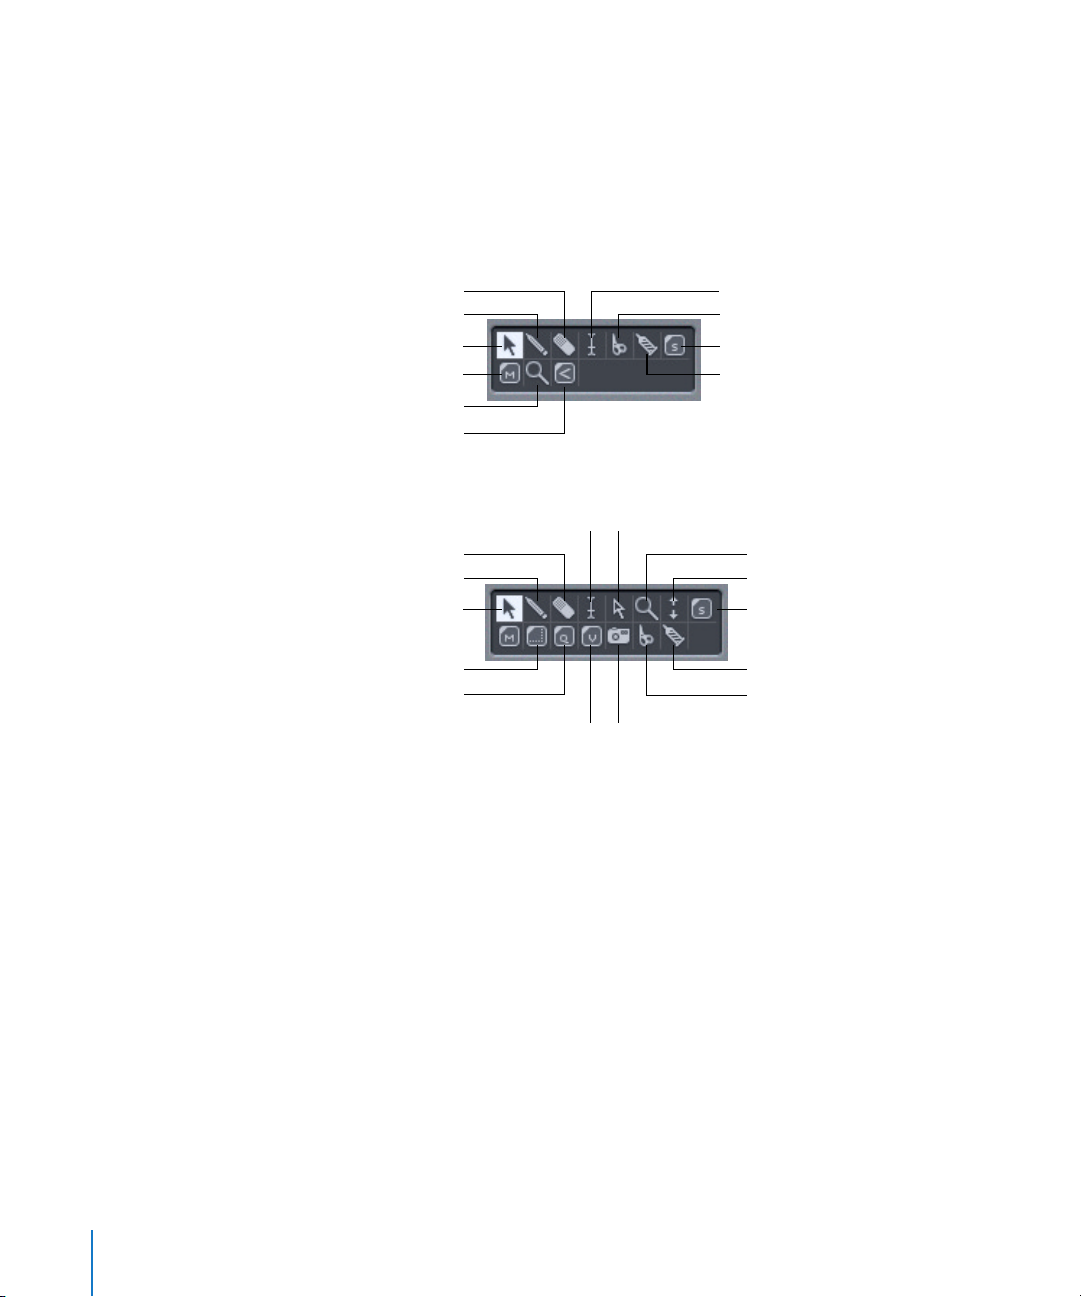
Pointer
Mute tool
Solo tool
Pencil
Eraser
Voice Splitter
Magnifying Glass
Sizer tool
Quantize tool
Glue tool
Scissors
Layout tool
Camera tool
Text tool
Velocity tool
Using Key Commands
Each tool can be selected via a specific key command. Key commands that switch to a
specific tool toggle between this tool and the previously selected tool.
The Tools
Here are two example Toolboxes, which contain most of the tools available in Logic:
Arrange Toolbox
Eraser
Pencil
Pointer
Mute tool
Magnifying Glass (Zoom tool)
Crossfade tool
Text tool
Scissors
Solo tool
Glue tool
Score Toolbox
All tools, including a number of tools not displayed in the images, are described below.
As mentioned earlier, some tools are specific to certain editing windows.
Pointer
The Pointer is the default tool. The mouse also takes on this shape outside the working
area when making a menu selection or inputting a data value. Within the working area,
the pointer is used for selecting (by clicking on Objects or Regions), moving (by
grabbing and dragging), copying (by holding down Option and dragging), and editing
lengths (by grabbing the bottom right corner and dragging). Grabbing and dragging
anywhere on the window background activates a “rubber band”, that allows the
selection of multiple Regions or Objects.
Note:
18 Chapter 1
When changing the lengths of multiple Regions, you can make all lengths equal
by holding Shift-Option.
Using Logic
Page 19

Pencil
The Pencil is used to add new Regions. You can also select, drag, and alter the length of
Regions while the Pencil tool is active.
Scissors
The Scissors tool is used to split Regions, allowing individual sections to be copied,
moved or deleted.
Tex t Tool
The Text tool is used to name Regions, or add text to a musical score.
Layout Tool
The Layout tool is used to graphically move events in the Score Editor, in order to
optimize the display (bars to lines: “Local Formatting”, for example), without altering
the timing of the actual MIDI events.
Size Tool
The Size tool is used to adjust the size of graphic elements in the score. It looks similar
to the bottom right corner of a Mac window, which is also used for resizing tasks.
Magnifying Glass
The Magnifying Glass allows you to zoom in on a “rubber-banded” section, up to the
full window size. You can revert to the normal zoom level by clicking on the
background with the tool. You can also access this function when other tools are
selected by holding down Control.
Solo Tool
Click-holding on a Region with the Solo tool allows you to listen to the selected
Regions in isolation during playback. Moving the mouse vertically also outputs any
events the cursor touches, even when the sequencer is stopped.
Mute Tool
Clicking on a Region with the Mute tool prevents it from playing. A dot is placed in
front of the Region name (and the Region is shaded if the
Arrange > Muted Regions are textured
preference is active), to indicate that it is muted.
Preferences > Display >
You can unmute the Region by clicking on it again with the Mute tool. If multiple
Regions are selected, the setting of the clicked Region applies to all selected Regions.
Finger Tool
The Finger is used to alter note lengths in the Matrix Editor.
Eraser Tool
The Eraser deletes selected Regions and Objects. When you click on an Object or
Region with the Eraser, all of the currently selected Objects and Regions are deleted (as
if you had used Backspace).
Chapter 1
Using Logic
19
Page 20
Glue Tool
The Glue tool performs the reverse operation of the Scissors tool. All selected Regions
are merged into a single Region, which is assigned the name and track position of the
first Region on the time axis.
Crosshair Tool
The Crosshair is used to input a linear series of MIDI events in the Hyper Editor.
MIDI Thru Tool
Clicking on an instrument in the Environment with the MIDI Thru tool assigns the
instrument to the selected track in the Arrange window, thereby making it the active
MIDI Thru instrument.
Voice Splitter Tool
You can separate polyphonic voices onto different staves in the Score Editor by
drawing a dividing line with the Voice Splitter tool (provided you are using a
polyphonic score style).
Camera Tool
The Camera tool is used to select, and export, sections of the Score Editor display as
graphics files.
Quantize Tool
The Quantize tool is used to correct the timing of MIDI note events in the Matrix and
Score Editors.
Velocity Tool
You can use the Velocity tool to change the velocity of notes in the Matrix and Score
Editors.
Help Tags
A help tag appears just below the mouse cursor position—for as long as the mouse
button is held down—when using many of the tools. The help tag provides useful
feedback about the type of operation you are performing.
Important: You must enable the Preferences > Display > Show Help Tags option in order
to view help tags during editing operations.
During operations involving Regions, the help tag will look something like this:
From left to right (and from top to bottom), the values indicate: (name of) operation,
mouse (or Region) position, Region name, track number, and length of the Region.
20 Chapter 1 Using Logic
Page 21

During operations involving events, the help tag looks something like this:
From left to right, the values indicate: (name of) operation, mouse (or event) position,
event type, event MIDI channel, first data byte (note pitch, for example), second data
byte (note velocity, for example), and event length (note length, for example).
Window Functions
The basic functions of the Logic windows are the same as those in other Macintosh
applications. The display options available in Logic’s windows are far more extensive,
however, than those of other programs.
In Logic, you can open different combinations of windows (even several of the same
type) and adjust each one individually. All open windows in a song are constantly
updated. This means that the windows update to follow the song position, and any
alterations made in one window immediately update the display of all other windows
you are working with. It is also easy to save different window arrangements (called
“Screensets”), and recall them with the push of a button.
Working With Windows
Opening Windows
All Logic windows can be opened from the Windows menu. The corresponding key
command (Open Arrange, Command-1, for example) is displayed beside each menu
item, allowing you to open the window without using the mouse. You can open as
many of the same type of window as you like.
The Toggle … Window key commands allow you to define one key command to:
• bring an open window (of an assigned type) to the front,
• open a window of the assigned type,
• close a window of the assigned type, if it is in front (the active window).
Setting Window Size
You can adjust window size by dragging the lower right-hand corner of the window, as
with any window in the Finder.
Chapter 1 Using Logic 21
Page 22

Window Buttons
The three buttons found at the top left of all windows (except the Transport) perform
the following operations:
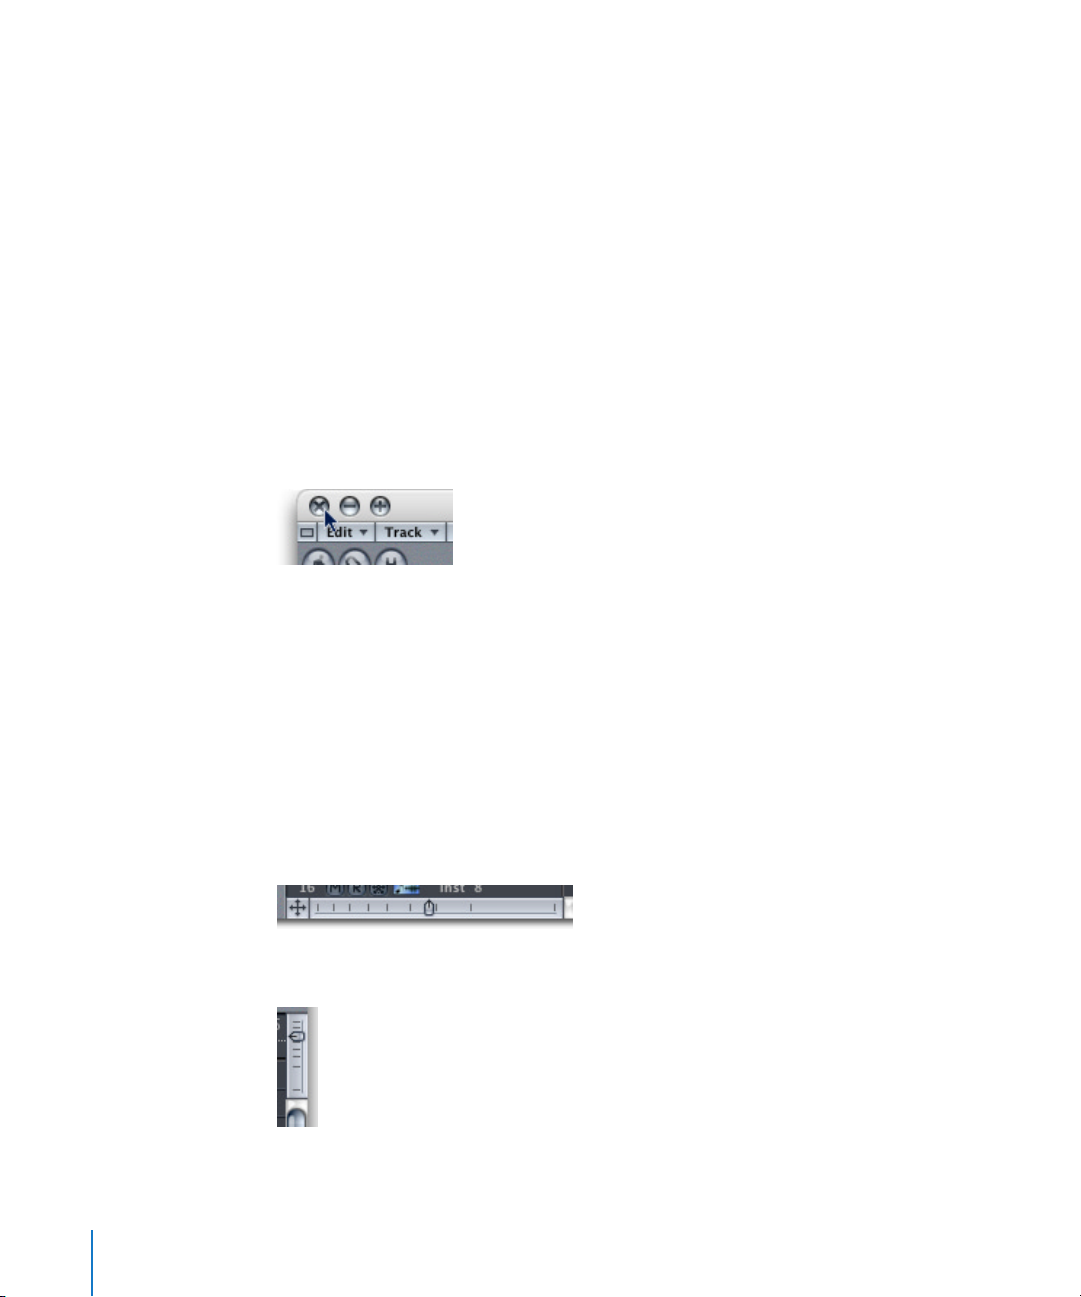
• Left button (black dot): closes the window.
• Center button (minus sign): minimizes the window, and places an icon on the Dock.
The window can be restored by clicking on the icon in the Dock.
• Right button (plus sign); resizes the window to the maximum screen size. A second
click on the icon will restore the original window size.
Moving Up One Level in the Display Hierarchy
Clicking the button featuring the square graphic (Up One Display Level button—or
UDL button) in the top left corner of the window takes you to the next (higher) display
level.
Note: Double-clicking on the background of the edit area of a window also takes you
to the next highest display level.
Display Levels in the Editors
Normally, the editors are at the lowest display level, which shows individual events.
Clicking the UDL button, at the upper left corner of the editor window, allows you to
move up one level in the hierarchy. As an example, if you are currently looking at the
events in a MIDI Region inside a folder, the display will switch to a view of the MIDI
Region in the parent folder.
In the Matrix and Hyper Editors, this step up the display hierarchy means that you will
then see an Arrange window. In this scenario, a change to the lowest display hierarchy
level will cause the relevant editor to reappear. At the Arrange level, you will see the
local menus of the Matrix or Score Editors, which also contain all of the Arrange
window functions. Double-clicking on a MIDI Region opens the Hyper, Matrix, Score
Editor, or Event List display of the contents of the MIDI Region. Use of this facility, in
conjunction with the UDL button allows you to quickly switch to another MIDI Region,
and edit its contents.
22 Chapter 1 Using Logic
Page 23

Clicking the UDL button in the Event List moves you up one level in the hierarchy, just
like the other editors. In the Event List, however, the form of the display remains the
same but instead of a listing of individual events, you’ll see a list of Regions—along
with their position, name, track number, and length. The MIDI Region that you were
just editing will be selected in the list of Regions.
Once again, double-clicking on a MIDI Region (or using the Go Into Folder or Region key
command) takes you back to the lowest display level, showing the contents of the MIDI
Region.
Double-clicking on an Audio Region opens the Region in the Sample Editor.
In the Score Editor, clicking on the UDL button, or double-clicking on the background
takes you to the higher display level. Unlike the other editors, individual events can also
be edited while in higher display levels in the Score Editor. Double-clicking on a staff (at
an empty point), takes you back to a lower display level.
Selecting the Working Area
The scroll bars are situated at the right and bottom edges of a window, if you can only
see a portion of the total working area in either the vertical or horizontal dimension.
You can move the visible section by clicking the arrows, or grabbing and dragging the
scroll slider. There are two points of note:
• The size relationship of the scroll slider to the entire scroll bar corresponds to the size
of the visible section of the window, in relation to the overall window size.
• The visible section changes as you move the scroll slider.
The X/Y scroll element is situated at the bottom left corner of the window. By grabbing
and dragging it, you can move the horizontal and vertical window section, as if you
were dragging both scroll bars simultaneously. When the cursor hovers over the X/Y
scroll element, a crosshair icon with four arrowheads is displayed.
You can also engage the X/Y scroll feature by holding down a third button (the mouse
wheel button, for example), and moving the mouse. The distance of the mouse pointer
position from the initial clicked position determines the scrolling speed.
Note: Touching the background of the Arrange Window while holding Shift-Control
also allows you to scroll the window both horizontally and vertically.
Chapter 1 Using Logic 23
Page 24
Use the Page Up, Page Down, Page Left, and Page Right key commands to scroll one
page up, down, left, or right, as if you had clicked in the grey region (in the scroll bar)
above/below the vertical scroll slider, or to the left/right of the horizontal scroll slider.
The Page Top, Page Bottom, Page Left most and Page Right most key commands move
the visible section of the working area to the top, bottom, left, or right, just as if you
had grabbed one of the scrollers, and moved it to one of its extreme positions.
In the Arrange window, Event List, Hyper, and Matrix editors, View > Scroll To Selection
allows you to move the visible window section to the first set of selected events. This
function is available as a key command in the Arrange and Various MIDI Region Editors
area. The key command works in the currently-active window.
Closing Windows
You can close windows by clicking on the close symbol at the top left. If you hold
down Option as you click, all windows of the active song will be closed. Holding Shift
while clicking closes all windows of all currently loaded songs.
Zooming
The Zoom sliders are used to zoom in and out of the working area display. Selection of
different Zoom slider values reduces or increases the size of Objects and Regions in the
displayed screen section, allowing you to see more Objects and Regions in the same
space (zoom out) or a detailed display of fewer Objects and Regions (zoom in).
While zooming, the top-left selected Object/Region is kept in the visible area of the
screen, whenever possible.
The horizontal Zoom slider is located to the bottom-left of the working area of the
screen—in the Arrange window, it’s just under the Track List.
The vertical Zoom slider is found at the top right of the active window.
24 Chapter 1 Using Logic
Page 25
Clicking on the more closely spaced bars will reduce the zoom level. Clicking on the
widely spaced bars will increase the zoom level. You can click-hold and drag the Zoom
sliders to step through several zoom levels. Any relative size differences between
tracks/objects will be retained when zooming. Command-clicking in the left/right
(horizontal) or top/bottom (vertical) half of the Zoom slider decreases/increases the
zoom factor by one step.
Storing and Recalling Zoom Settings
You can store three different zoom settings for each window via use of the Save as
Zoom 1–3 key commands. Use Recall Zoom 1–3 to recall your zoomed settings. These
commands only apply to the top (active) window.
Zooming in on One Section of the Screen
To enlarge a section of the screen to fill the whole window, use the Magnifying Glass
tool to drag a “rubber band” over the desired area. You can do this more than once.
Auto Track Zoom
The Arrange menu View > Auto Track Zoom function automatically enlarges the
currently selected track. The track size can be manually set by dragging the lower left
corner of any track in the Track List (the cursor will change to a “finger” icon).
Reverting to the Previous Zoom Setting
Click on the background with the Magnifying Glass. This will return the zoom level to
the original setting, by backtracking through the previous steps. You can access the
Magnifying Glass functions from any other tool (apart from the Pencil) by holding
down Control. The pointer will display the active tool, until you press the mouse
button. As long as the button is pressed, it will display the Magnifying Glass tool.
Window Elements
Adjusting the Size of the Window Elements
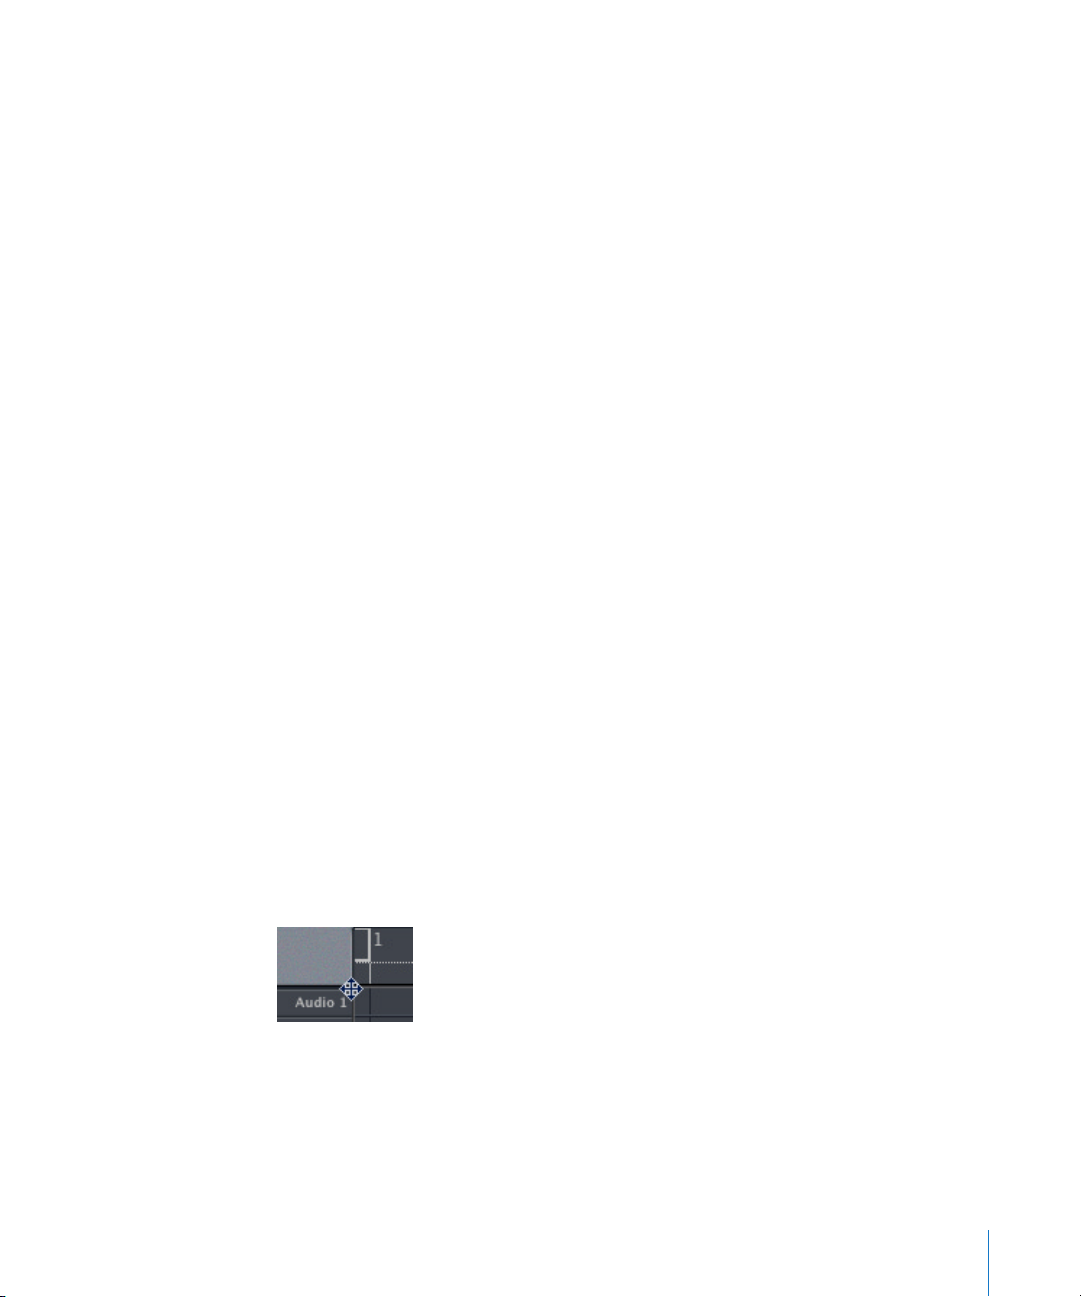
If you move the mouse over the top left corner of the Arrange area, the mouse pointer
turns into a crosshair. By dragging it, you can adjust the size of the Bar Ruler, Arrange
area, Track List, and Transport field buttons. You can also adjust the window elements in
the Score, Hyper, and Matrix Editors using the same method.
Concealing/Revealing the Transport Functions
Use View > Transportto display or remove the Transport panel from the top left corner
of the Hyper, Matrix, or Arrange windows. The number of buttons and indicators shown
is dependent on the amount of available screen space.
Chapter 1 Using Logic 25
Page 26

Concealing/Revealing the Parameters
The View > Parameters function allows you to display or remove the entire area (which
contains the Region parameters, Instrument parameters, and the Toolbox) to the left of
the Arrange, Environment, and other edit windows. Hiding these parameters provides
more space for the editing window itself.
In many windows, you can hide and/or reveal further screen elements, such as the
Toolbox. These display options are always available from the View menu.
Concealing/Revealing the Local Menu Bar and Scroll Bars
Command-Option-click on the window title bar to toggle the display of the local menu
bar and scroll bars. This allows you configure small floating windows, which can be
stored as part of a Screenset.
Resizing the Parameters Area
You can alter the size of the entire Parameters area in the Arrange, Score, Hyper, and
Environment windows by moving your mouse cursor over the resize bars (the gray,
vertical bar with the two vertical lines) between the Parameters area and the column to
the right. As an example, the Arrange window’s Track List. The cursor appearance will
change, allowing you to click and drag horizontally. As you do so, the Parameters area
is resized, until the mouse button is released. The smallest “unit” of the resizing grid is
the width of a tool in the toolbox.
This facility makes reading parameter names and labels clearer.
Menu Handling
Given Logic’s extensive range of data manipulation functions, it would be impractical
to display all of them in the main menu bar. To ensure that only relevant functions are
available in each editor, a local menu system is employed.
Logic’s menus are accessed in the same way as in other applications: click-hold on the
menu title, move the mouse over the desired item, and release the mouse button. In
hierarchical menus, a right-pointing arrow is shown beside the item. If you highlight
such an item, a sub-menu will be displayed to the right. To select an item from this submenu, move the mouse to the right, into the sub-menu, and then move vertically over
the desired item. Release the mouse button to activate the selected function.
Note: A short click on any of the local menus will result in the menu remaining open,
even after you have released the mouse button. A long click will result in the behavior
described above.
26 Chapter 1 Using Logic
Page 27
Window Types
There are two different types of windows in Logic: normal windows and float windows.
The contents of all windows that belong to the current song are always updated,
regardless of type.
Normal Windows
You can open as many normal windows as you want, including several of the same
type. Even though the contents of all windows are constantly updated, only one of the
windows ever has the status of being the “top”, or “active” window. This is the window
that is in the foreground when several normal windows overlap.
Topped, or active, windows can be recognized by a title bar that is not dimmed out,
and black name.
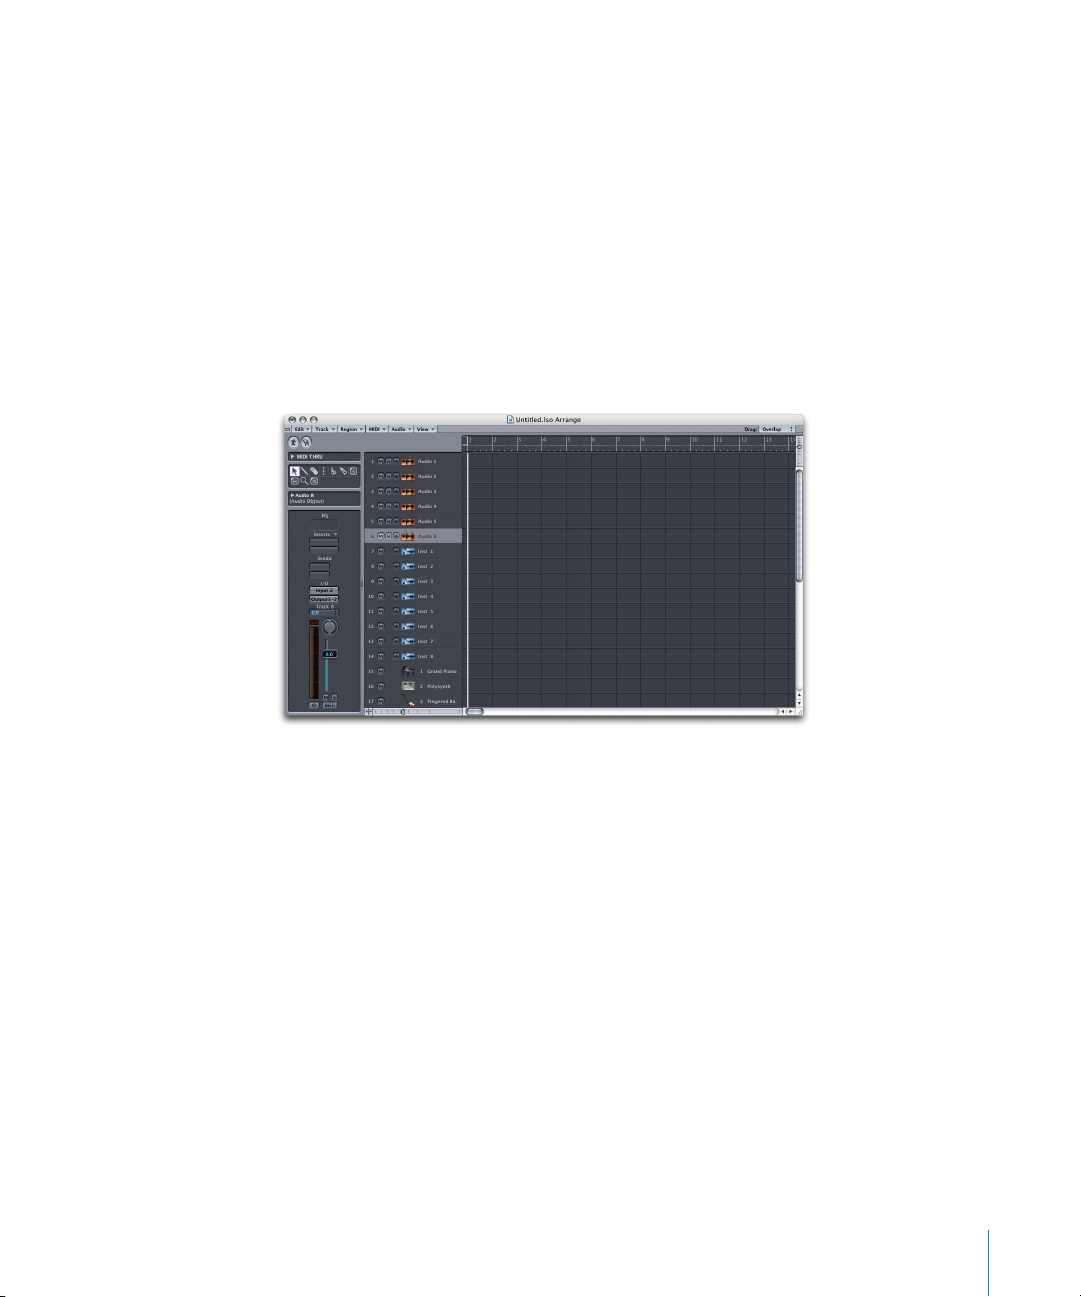
The illustration above shows the active, non-floating Arrange window
The main distinguishing characteristic of this window is that key commands only affect
this window, and not any of the others. The Windows > Next Window menu function
brings the next open window to the top, if it is fully obscured by other windows.
In background windows, you can not only observe changes, but make almost any kind
of change, without having to bring the window into the foreground. To do so, simply
long click on it. Background windows are identified by a white title bar (they can be
positioned next to the top window, or tiled underneath it) and faded name. You can
bring a window to the foreground by clicking on it, clicking on the title bar, or by
accessing one of the local menu functions.
Chapter 1 Using Logic 27
Page 28
Float Windows
Float windows are so named because they always “float” in the foreground, even above
the topped normal window (if there are a lot of open float windows, they will
inevitably cover each other up—just click on one to bring it to the foreground).
The illustration above shows the Arrange window as float window.
Float windows are recognizable by their narrower, gray title bar. Mouse operations can
be carried out in the same way as in normal windows.
The most common example of a float window is the Transport window. You can open
any other window as a float window by holding down Option while selecting the
desired edit window from the Windows menu.
Note: Holding down Option while opening a window with a key command does not
open the window as a float.
Relationships Between Windows
The two buttons at the top left of a window, determine its relationship to the song
position (Catch), or to other windows (Link, Contents Link, or Contents Catch).
Catch
The Catch function ensures that the visible section of a window follows the song
position as the song plays.
28 Chapter 1 Using Logic
Page 29
If the button featuring the walking man is lit, the window’s display follows the song
position as the song plays. If the button is not lit, the display does not update, even
when the song position line moves past the right edge of the visible portion of the
window (Catch Clock Position).
Note: If you move the visible section manually, Catch is automatically switched off,
ensuring that the newly displayed section doesn’t then disappear.
The Catch when Sequencer starts (Preferences > Global > Catch) option enables Catch
mode whenever you press Play or Pause.
Link, Contents Link, and Contents Catch
You can define these display options to control how information is displayed when
working with related editor windows.
Link
When the button featuring the chain link icon is activated in a given window, this
window always displays the same contents as the topped window. The display is
adjusted whenever the selection in the topped window is altered.
Here’s an example: imagine the topped window is an editor. In Linked mode, the other
editor windows can display the same data in another form (with the exception of the
Arrange window, which does not display event data).
Here’s another example, using the Environment window; The top window is the
Arrange window. In Linked mode, the Environment window will display the instrument
that corresponds to the selected track in the Arrange window. As you switch tracks in
the Arrange, the Environment will update to reflect the selection.
Contents Link
Double-clicking on the Link button activates Contents Link mode. This means that the
window always shows the contents of the Region or Object selected in the top
window. The display is therefore always one level below that of the top window.
Here’s an example: if the top window is an Arrange window, in Contents Link mode
the editor windows can show the events of a selected MIDI Region. Selecting a
different MIDI Region in the Arrange window will cause the display of the linked editor
to switch to the newly-selected MIDI Region.
Chapter 1 Using Logic 29
Page 30
You could also use Contents Link mode in an Arrange window, to display the contents
of the folders in another Arrange window.
Contents Catch
By simultaneously switching on Catch and Contents Link, you activate Contents Catch
mode. Initially, this is equivalent to Contents Link mode, but when the song position
reaches the next Region on the same track, the contents of this Region are then
displayed.
You could use this mode in an Arrange window, much as you would in Contents Link
mode. The editors would then show the events of whichever MIDI Region is currently
being played on a track.
Screensets
Normally, you lay out your windows on the screen in a way that suits your working
methods. This layout of various windows, including the display size, zoom, position of
each window and other settings is called a Screenset, and can be stored. Once defined,
you can freely switch between different Screensets, much as you might swap between
different computer monitors.
Storing Screensets
Screensets are numbered from 1 to 99 (using only the 1 to 9 computer keys. The 0 key
is used for the Stop command). You can see the number of the current Screenset
beside the word Windows in the main menu. You don’t need to save Screensets with an
explicit command. It happens automatically, as soon as you switch to another
Screenset. Thus, without any effort, your current working view is always stored in the
current Screenset.
Switching Screensets
Just input the number of the desired Screenset (1 to 9). For two-digit Screensets hold
down Control while entering the first digit.
Protecting Screensets
Use the Lock/Unlock Current Screenset key command or Windows > Screensets > Lock
Screensetmenu option to prevent the current Screenset from being altered. A • appears
in front of the Screenset number to indicate that it is locked. Reuse the key or menu
command (the default is Shift-L) to unlock the Screenset.
The File > New command deactivates all Screenset locks.
30 Chapter 1 Using Logic
Page 31

Copying Screensets
To copy the current Screenset to a destination Screenset, hold down Shift when you
switch Screensets. Two digit Screensets are copied by holding Shift-Control 1+1, …,
9+9.
You can also use menu functions to copy Screensets via the Clipboard: Switch to the
Screenset you would like to copy, and select Windows > Screensets > Copy Screenset,
then type in the Screenset number that you wish to copy to, and select Windows >
Screensets > Paste Screenset.
You can also copy individual Screensets between different songs using this method. To
import all Screensets from another song, please make use of the File > Song Settings >
Import Settings option.
Reverting to a Stored Screenset
The Revert to Current Screenset key command resets your screen to its state prior to
importing the current Screenset.
Recalling Screensets 1 to 9
Screensets 1 to 9 can be recalled by freely-defined key and MIDI remote commands,
not only the number keys. This allows you to define the number keys for other
purposes, such as toggling windows on and off, as described above. The 1 to 9 key
commands are called Recall Screenset 1 (…9, respectively) in the Key Commands
window.
Sequencer Controlled Screenset Switching
You can automatically switch Screensets through the use of meta event # 49—just add
it to a MIDI Regionin the Event Editor.
To switch a Screenset automatically:
1 Set the song position to the point where you’d like the Screenset to change.
2 Hold down Command and click in the Event Editor on the button shown below.
3 The inserted meta event has a default value of 50 (Song Select).
4 Alter the number in the NUM column from 50 to 49. This changes the name to
Screenset.
5 Input the desired Screenset number in the (VA L) column.
You can stop the switching by muting the MIDI Region that contains the meta 49
event.
Chapter 1 Using Logic 31
Page 32

Window Management Functions
The Windows > Tile Windows function tiles all open windows, and makes them all the
same size.
The Windows > Stack Windows function stacks all open windows on top of one another,
so that at least a part of the title bar is visible for each window, no matter which is the
foreground window at the time.
The Windows > Tile Windows horizontally function tiles all open windows, using all
available horizontal space for each individual window (if possible).
Edit Operations
The local edit menus in Logic’s various windows all take the same form. The top two
items are Undo and Redo. Below Redo are the typical Clipboard functions (see “The
Clipboard” on page 32), and at the bottom of each are the main selection commands.
Undo
Undo allows you to reverse the previous edit. The default key command for Undo is
Command-Z.
Multiple Undo and Redo
An unlimited number of editing steps can be undone. This also applies to the Redo
function. You can determine the number of undo steps in the Preferences menu.
The Clipboard
The Clipboard is an invisible area of memory, into which you can cut or copy selected
objects, allowing them to be pasted to a different location.
The Clipboard is universal, which means that it can be used to exchange objects
between songs.
Cut
All selected objects are removed from their current position, and placed on the
Clipboard. The previous contents of the Clipboard are overwritten in the process (key
command is Command-X).
Copy
A copy of all selected objects is placed on the Clipboard. The selected objects are left in
place. Here too, the previous contents of the Clipboard are overwritten (key command
is Command-C).
Paste
All objects from the Clipboard are copied into the top window. The Clipboard is not
erased in the process (key command is Command-V).
32 Chapter 1 Using Logic
Page 33

The contents of the Clipboard are added at the current song position (if they are events
or Regions). The song position is incremented by the length of the pasted Region/
event(s).
In the Arrange window, the contents of the Clipboard are pasted to the selected track.
If events are pasted into the Arrange window, either a new MIDI Region or Region is
created, or the events are added to a selected MIDI Region. Any existing Regions
remain unchanged.
In the Environment window, the Objects are pasted into the layer currently being
displayed, at their original positions.
Clear
Any selected objects are erased. Clear has no effect on the Clipboard, and is
functionally identical to pressing the Backspace key.
Selection Techniques
Whenever you want to perform a function on one or more objects, you first need to
select the objecs. This applies equally to Regions, individual events or Environment
Objects. Selected objects are either displayed in an inverted color scheme, or will flash
(in the Score Editor).
An object selected in one window will also be selected in all other windows that
display that object. Changing the top window doesn’t affect the selection (as long as
you don’t click on the background, which deselects everything. Be sure to click on the
window’s title bar).
Goto Selection Start/End
The Goto Selection Start/End key command moves the song position line to the location
of the first/most recently selected event in the top window.
Selecting Individual Objects
Individual objects may be selected by clicking on them, and deselected by clicking on
the background or by selecting another object.
You can also use the Select next/previous Region/event key commands (default: right/left
arrows, M/I in the Event List). Select first/last selects the first/last object of the currently
displayed level.
Selecting Alphabetically
The Tab key selects the next alphabetical object. In the Arrange or Environment
windows, pressing any letter key selects the first object with a name that begins with
the chosen letter (as in the Mac’s Finder), provided that no key command is assigned to
this key.
Chapter 1 Using Logic 33
Page 34

Selecting Several Objects
To select several non-contiguous objects, hold down Shift as you click them. As
subsequent objects or events are selected, the previous selections are retained. This
also works with horizontal or rubber band selection.
Horizontal Selection
To select all Regions on a track, click on the track name in the Track List. In the same
way, you can select all events (of a specified event definition) in the Hyper Editor, by
clicking on the event definition name, or all notes of a certain pitch in the Matrix Editor
by clicking the relevant key on the Matrix Editor’s keyboard.
In Cycle mode, the selection techniques covered above only affect events that fall
within the Cycle area.
“Rubber-Banding”
To select consecutive objects, click on the background and drag a “rubber band” over
them. All objects touched, or enclosed, by the rubber band will be selected.
Toggling the Selection Status
When you make any selection (including by rubber band or horizontal selection) while
holding down Shift, the active selection status of the objects (events) will be reversed.
You can reverse the selection status of all objects (events) by using Edit > Toggle
Selection. As an example of where this would be useful: if you want to select all
Regions in a song, with the exception of a few, first select the Regions that you don’t
wish to use, and then Toggle Selection.
Selecting Following Regions/Events
To select all Regions/events after the currently selected one (or, if no Region/event is
currently selected, to select all Regions/events after the song position line), use the Edit
> Select all Following function.
Selecting Regions/Events Within the Locators (Vertical Selection)
Edit > Select Inside Locatorsselects all Regions/events lying wholly or partly inside the
locator positions.
34 Chapter 1 Using Logic
Page 35

General Functions of the Editors
Logic’s MIDI editors allow the editing of events (MIDI messages). Logic’s MIDI editors
include the Score, Matrix, and Hyper Editor, Event List and Transform windows.
Opening Editors
Double-clicking on a MIDI Region opens the Score Editor. There is a pull-down menu
on the Preferences > Global > Editing page, which lets you select the editor that will be
opened when you double-click on a MIDI Region. The options are: the Score, Event,
Matrix, and Hyper Editor.
Control Output via MIDI
Switching on the MIDI Out button causes MIDI events to be sent when they are added,
selected, or edited. This allows you to audibly monitor every editing stage, whether you
are scrolling through the Event List (automatic selection) or transposing a note.
Deleting Events
The basic techniques are the same as those for deleting Regions:
• Backspace deletes all selected events.
• The Eraser also deletes all selected events, and any events that you click with it
(whether previously selected or not).
Event and Note Quantization
The Event List and Matrix Editor have a separate quantization function, which can be
applied to all selected events. Unlike quantization for MIDI Regions, event quantization
applies to all events, not just notes. It irreversibly alters their positions (only notes can
be returned to their original recorded positions).
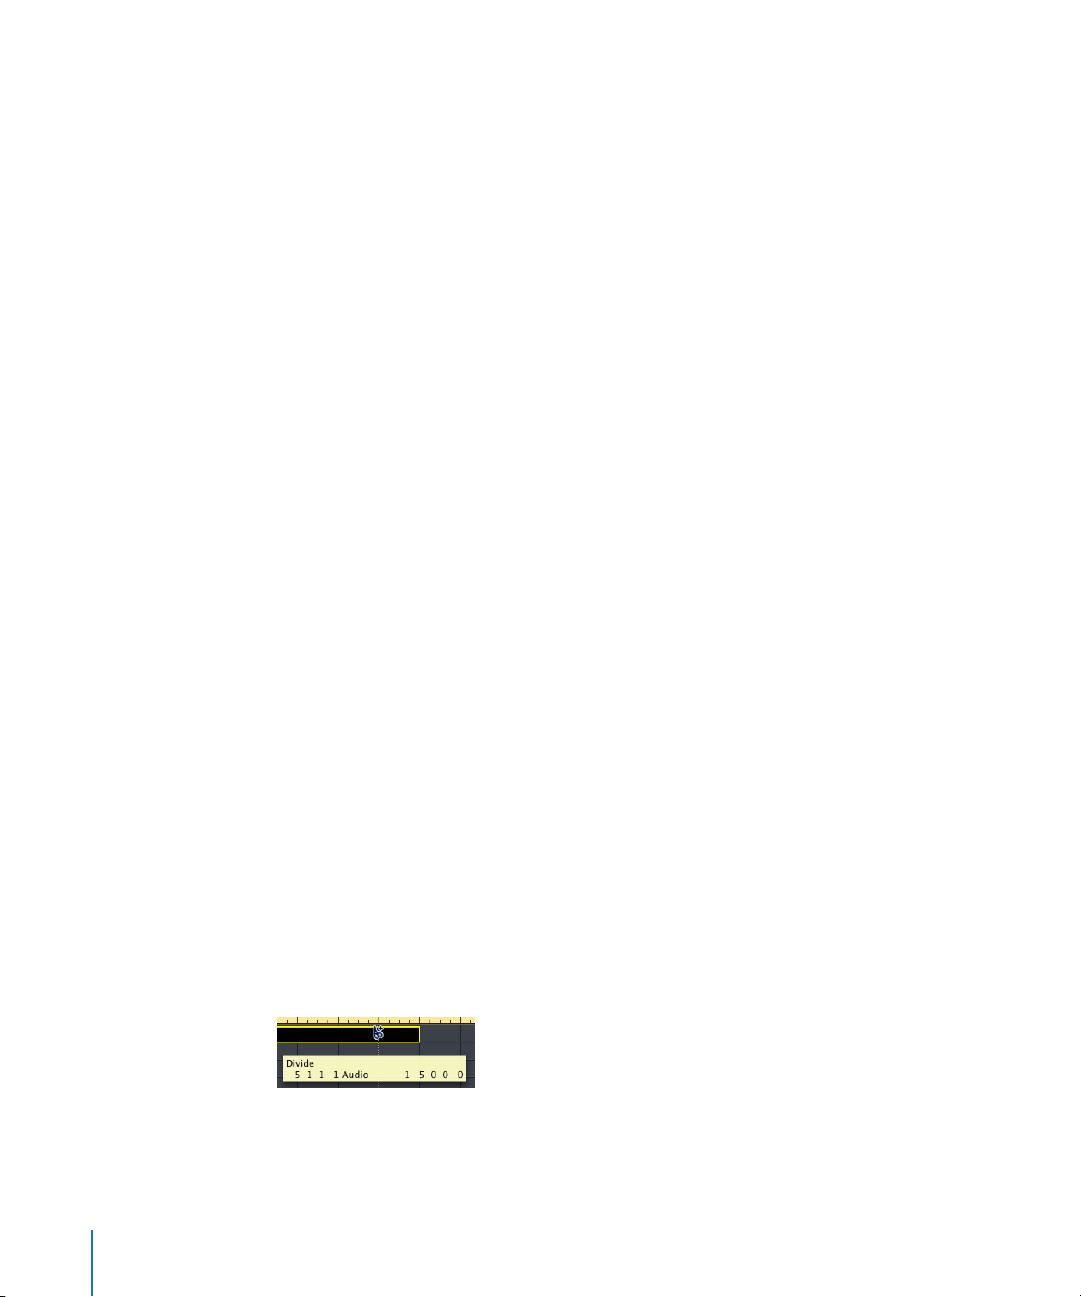
Quantizing Events
Select the events that you want to quantize. Then open the pull-down Quantization
menu by grabbing the Q button shown in the image (the Q button in the Matrix Editor
looks slightly different).
This is identical to the pull-down menu found in the Region Parameter box, and
contains its own quantization grid (see “Quantization” on page 120). As soon as you
select an item from the menu, all selected events are quantized.
Note: You can only reverse note quantization. All other events are permanently shifted.
Chapter 1 Using Logic 35
Page 36

To apply the same quantization value to another series of selected events (even in
other editor windows), select Functions > Quantize Again, or click (quickly) on the Q
button a second time.
Note Quantization
Normally, all notes in a MIDI Region are quantized in accordance with the Quantization
parameter value chosen in the Region Parameter box
Reversing Note Quantization
Note events can be returned to their original record positions, or moved manually, by
selecting the off setting in the Quantization menu. Alternately, you can click on the Q
button while holding down Option.
You can also achieve the same result by selecting Functions > De-Quantize.
Key Commands
You can activate nearly all Logic functions with key commands or MIDI messages. The
Key Commands window is used for the assignment of key commands to computer
keyboard keys or to MIDI messages.
Note: A number of Logic functions are only available as key commands.
Whenever this manual mentions a key command, this refers to a function or option
that can be accessed by either a computer keyboard keystroke (or keystroke
combination) or a MIDI message. This allows you to completely customize Logic to suit
your own working style.
Saving Key Commands
Your personal key assignments are stored in a separate Preferences file. You should:
• Make a backup of this file at another hard disk location.
• Make a backup on removable media (a CD-ROM, for example), in case you need to
use Logic on another computer.
Whenever you install Logic updates, your personal key commands will remain
unaltered.
Note: Even the fixed global key commands of older versions are user-definable. Please
keep in mind that some of these commands such as Undo, Save, Quit, New, Open, Cut,
Copy, and Paste follow Mac OS X conventions, and probably shouldn’t be altered.
36 Chapter 1 Using Logic
Page 37

Special Keys
Some keys have special functions:
• The Shift, Control, Option, and Command modifier keys can only be used in
conjunction with other keys.
• The Backspace key has the fixed “delete selected objects” function. It can only be
assigned to another function in conjunction with the modifier keys.
• The key combinations assigned to the options in the main menu bar cannot be
reassigned. The relevant key commands are displayed after the main menu items.
• The plus and minus keys increase or decrease any selected parameter value in single
units. They can be assigned different functions which override this behavior.
Key Commands Window
The Key Commands window can be opened by selecting Preferences > Key Commands.
All available key commands are listed on the left side. They are grouped according to
various categories. The global key commands work regardless of which Logic window
is currently active; the other commands require the corresponding window(s) to be
topped. This allows you the assign the same key command to different functions in
different windows.
A “•” in front of the description of the function indicates that the function is only
available as a key command or MIDI command. To the right of the key command
listing, you can see the currently assigned key, and below this, the assigned MIDI
message (if applicable).
Chapter 1 Using Logic 37
Page 38

Key Commands List
In the list shown to the left of the Key Commands window, the following applies:
• Groups can be extended or collapsed by clicking on the disclosure triangle to the
left.
• Columns can be changed in width by dragging the separating lines between the
headers (Command, Key, MIDI, and so on)
• When the list has keyboard focus, physically pressing a key command (or key
command combination) selects the appropriate function in the list.
• If the triggered key command is located in a collapsed group, the group will
automatically be expanded.
Options Menu
The Options menu offers:
• Import and Copy key command functions
• Expand/Collapse and Scroll to Selection functions for the Key Commands List
window
• Several Initialize options
Importing Key Commands
This function is particularly useful if you need to work temporarily on someone else’s
system; you might want to use your personal key assignments on it, without altering
the other system’s settings.
The Options > Import Key Commands function allows you to import the key
assignments from any Logic Preferences file. When selected, a file selector box allows
you to browse any internal drive or removable media for the desired Logic Preferences
file.
The existing Preferences file (on the target system) is automatically saved as a ∗.bak file.
This file contains the old key commands.
Note: You don’t need to restart Logic to begin using the new key command set.
38 Chapter 1 Using Logic
Page 39

Printing a Key Command List
The Options > Copy Key Commands to Clipboard function copies the key commands into
the Clipboard as text. From here, it’s a simple matter of pasting the results into any
word processor, formatting as desired, and printing them out.
The Copy to Clipboard function also takes into account the Show and Find function
settings (see below). You could, therefore, export a certain group of key commands
(those containing a particular character string, for example). What you see in the
window display is exactly what’s exported.
Initializing Key or MIDI Event Assignments
The Options > Initialize all Key Commands menu item initializes all key assignments.
The Options > Initialize all MIDI Commands menu item initializes all MIDI assignments.
Once initialized, default assignments will be used.
Note: You will lose your existing key command assignments if you make use of the
Initialize functions, so ensure that you have created a copy of your Logic Preferences
file before doing so.
Switching MIDI Remote On/Off
You can use the MIDI Remote checkbox to globally switch on/off responses to all
defined MIDI messages. The MIDI command for this (Toggle MIDI remote) is always
active, even when MIDI Remote is disabled, and is therefore always available.
If you have assigned MIDI Remote commands to all of the keys on your master
keyboard, it’s advisable to use a second foot pedal or a programmable button on your
keyboard for Toggle MIDI Remote. If no such facility is available, use a key you are
unlikely to press by accident (the lowest or highest key, for example) during
recording—but you will no longer be able to use this key to record notes.
The MIDI Remote checkbox also applies to MIDI events that are created with
Transformer or Fader Objects in the Environment, and are routed to the Physical Input
Object.
Valid MIDI commands are recognized, and filtered, by the Physical Input Object,
because it makes no sense to record them.
Show Menu
You can use the Show menu to filter all the used, or unused key commands from the
window display. All other Key Commands window functions remain available for use.
Chapter 1 Using Logic 39
Page 40

Find Function
The Find field is used to find key commands by name or partial name:
• The search is performed as you enter text. There is no need to press the Return key.
• The Cancel button to the right (that appears as soon as any text is entered) clears any
entered text, and displays all key commands.
• The Find menu to the left (the magnifying glass) retains a history of recently used
search terms. The Clear menu item erases the Find history.
Note: The Find history is limited to searches that were completed with a press of the
Return key.
Key Command Properties
The box shown below displays the selected key command’s properties:
• Key: the key’s name (or a negative number if it’s a scan code). This parameter cannot
be edited.
• Modifiers: the modifier keys which need to be held down in order to execute the key
command function. These can be edited.
• Learn by Key Label: enables you to teach Logic to use a particular key or key
combination to perform a function.
• Learn by Key Position: stores the code from the incoming key. This is different to the
Learn by Key Label functionality in that a scan code allows you to use the number
keys and plus/minus keys (above the keyboard and on the numeric keypad) for
different functions. This also means that the key position remains the same if you
switch between different operating system language settings or different keyboards.
40 Chapter 1 Using Logic
Page 41

MIDI
• The uppermost box, the Status menu, displays the type of MIDI message that is used
for the key command.
• Channel: Indicates the MIDI channel number of the incoming message. This
parameter is disabled if the Status menu is set to unused.
• Data 1: This field indicates the first MIDI data byte. As an example: This field will
show and allow the entry of a MIDI note value if the Status menu is set to Note.
• Data 2: This field indicates the second MIDI data byte. It is disabled if the Status
menu is set to anything other than Control Change or Poly Pressure.
• Learn MIDI button: Enables you to teach Logic a particular MIDI command to perform
a key command function. You must enable this button before Logic will accept any
MIDI data for use as a key command trigger.
Assignments
This field displays the control surface assignment associated with the selected key
command. It is only relevant when a control surface is used with Logic.
Each line displays:
• The name of the control surface, or the MIDI string if the assignment is from an
unsupported control surface.
• The name of the control. If the name is shown in gray, this indicates that the
assignment is currently inactive (because it is part of an inactive mode).
• Zone and Mode that the Assignment belongs to, if applicable.
Note: The display is updated when a Zone changes its Mode (when holding down a
modifier button, for example).
Double-clicking on a row will show the assignment in the Controller Assignments
Editor (see “The Controller Assignments Window” on page 500).
Chapter 1 Using Logic 41
Page 42

The Learn New Assignment button allows you to “teach” Logic a new assignment for the
selected key command. Click on the button, and use the desired control.
Note: If you wish to set up assignments for an entire control surface, be it supported or
unsupported, make use of the Preferences > Control Surfaces > Learn Assignment for xxx
function. This is discussed in detail in the Control Surfaces chapter of this manual (see
“Customizing Control Surfaces” on page 498).
Assigning and Deleting Key Commands
This section discusses a number of Learn functions that allow you to assign particular
computer keys or MIDI commands to Logic functions. Closing the Key Commands
window automatically disables any active Learn button.
To assign a function to a key:
1 Activate the Learn by Key Label button.
2 Select the desired function with the mouse.
3 Press the desired key, along with the desired modifier keys (Shift, Control, Option,
Command), if necessary.
4 If you want to make another assignment, repeat steps 2 and 3.
5 Deactivate Learn by Key Label Key
Learn by Key Positionworks in the same way, but differs in that it’s not just a reference to
an ASCII code that is stored, but the actual code of the key that is pressed.
In practice, this means that you can, for example, assign different commands to the
number keys on the numeric keypad and the number keys above the keyboard—and
the same goes for the different plus and minus keys on the numeric keypad and main
keyboard.
The only disadvantage is that the key code (a number), rather than the ASCII symbol, is
displayed in the Key Commands window. The ASCII symbol is more useful for reference
purposes.
To clarify the difference between these two functions, here’s a short comparison:
If you use the Learn by Key Label function, and define only one key command for the
key, it will be used, no matter which of the two keys (either plus key, for example) is
pressed.
If you use the Learn by Key Position function, and define two key commands (one for
the alphanumeric keyboard, one for the numeric keypad), then the appropriate key
command will be used (one for each plus key, for example).
42 Chapter 1 Using Logic
Page 43

To delete key assignments:
1 Activate the Learn by Key Label or Learn by Key Position button.
2 Use the mouse to select the function/key assignment that you want to delete.
3 Press Backspace.
4 To erase more assignments, repeat the second and third steps.
5 Deactivate the Learn by Key Label button.
To assign a function to a MIDI message:
1 Activate the Learn MIDI button.
2 Select the desired function with the mouse.
3 Send the desired MIDI message from your controller.
4 If you want to make another assignment, repeat steps 2 and 3.
5 Deactivate the Learn MIDI button.
Note: If you want to assign a Note On message, remember to switch off Learn MIDI
before you release the key in question (and thereby transmit a Note Off message). The
assignment used is always the last message received.
To delete a MIDI assignment:
1 Activate the Learn MIDI button.
2 Use the mouse to select the function/assignment that you want to delete.
3 Press Backspace.
4 To erase more assignments, repeat the second and third steps.
5 Deactivate the Learn MIDI button.
To learn a controller assignment:
1 Activate the Learn Assignment button.
2 Select the desired function with the mouse.
3 Send the desired MIDI message from your controller.
Note: The Learn Assignment button will be deactivated automatically when the entire
message has been received. This avoids reception of the message sent by the device
when you release the button. To ensure reliable reception, hold the button for a short
period before releasing it.
Chapter 1 Using Logic 43
Page 44

4 If you want to make another assignment, repeat steps 2 and 3.
Note: If you wish to set up assignments for an entire Control Surface, be it supported
or unsupported, make use of the Control Surfaces > Learn Assignment for xxx option. This
is discussed in detail in the Control Surfaces section of the manual (see “Customizing
Control Surfaces” on page 498).
Step Input
The Step Input functions allow you to insert MIDI notes when Logic is not in a realtime
Record mode. This allows you to input notes that may be too fast for you to play, or
may be useful if replicating sheet music, but you don’t sight read. You can use any of
the following for step entry:
• a screen keyboard (Step Input Keyboard window)
• the computer keyboard
• MIDI
Notes are inserted in all modes at the current song position. All three methods can, and
should, be combined to make full use of the features that each option offers. Here is an
example: you can set the note length in the Step Input Keyboard Window, insert notes
via a MIDI keyboard and locate the Song Position Line using key commands.
Note: It is also possible to enter note data in realtime with the computer keyboard (see
“Caps Lock Keyboard” on page 49).
Step Input Keyboard Window
The Step Input Keyboard window can be opened via the main menu Windows > Step
Input Keyboard. It allows you to insert notes in any MIDI editor.
44 Chapter 1 Using Logic
Page 45

Key Commands
There is a set of key commands for the insertion of notes via the computer keyboard.
To activate Step Input mode, the In button (see picture below) must be switched on in
the selected MIDI editor.
This mode (and the In button) is available in the Event, Matrix, and Score Editor. You will
find the relevant key commands in the Keyboard Input section of the Key Commands
window.
MIDI Input
When the In button is engaged, you can insert notes via an external MIDI keyboard.
You can use the Step Input Keyboard window and/or the Input key commands to
adjust any settings that are not available from the MIDI keyboard itself. These
include: the length of the note and location commands. As with Key Commands Input,
the MIDI Input is available in the following windows: Event, Matrix, and Score Editor.
Input via Screen Keyboard
You can open the Step Input Keyboard window via Windows > Step Input Keyboard.
If you decide to work in the Score Editor, you need to adjust the display settings for the
selected MIDI Region accordingly: Interpretation (see “Interpretation” on page 378)
should be off, the Display Quantize (Qua) setting (see “Qua—Display Quantization” on
page 377) should be set to the smallest note value that you intend to insert.
Before starting note entry, set the Song Position Line to the spot where you want to
insert the first note. This can be done in a number of ways, such as adjusting the song
position in the Transport window, for example.
Single Notes
We suggest that you use the mouse while familiarizing yourself with step entry. Click
on the key of the desired pitch in the Step Input Keyboard, and make use of the
buttons for note length, velocity, and other parameters. This will insert a note of the
selected pitch (at the current song position, in the selected MIDI Region), with the
length and velocity that you chose earlier in the Step Input Keyboard window.
The pitch of an inserted note is determined by the key that you click in the Step Input
Keyboard window.
Chapter 1 Using Logic 45
Page 46
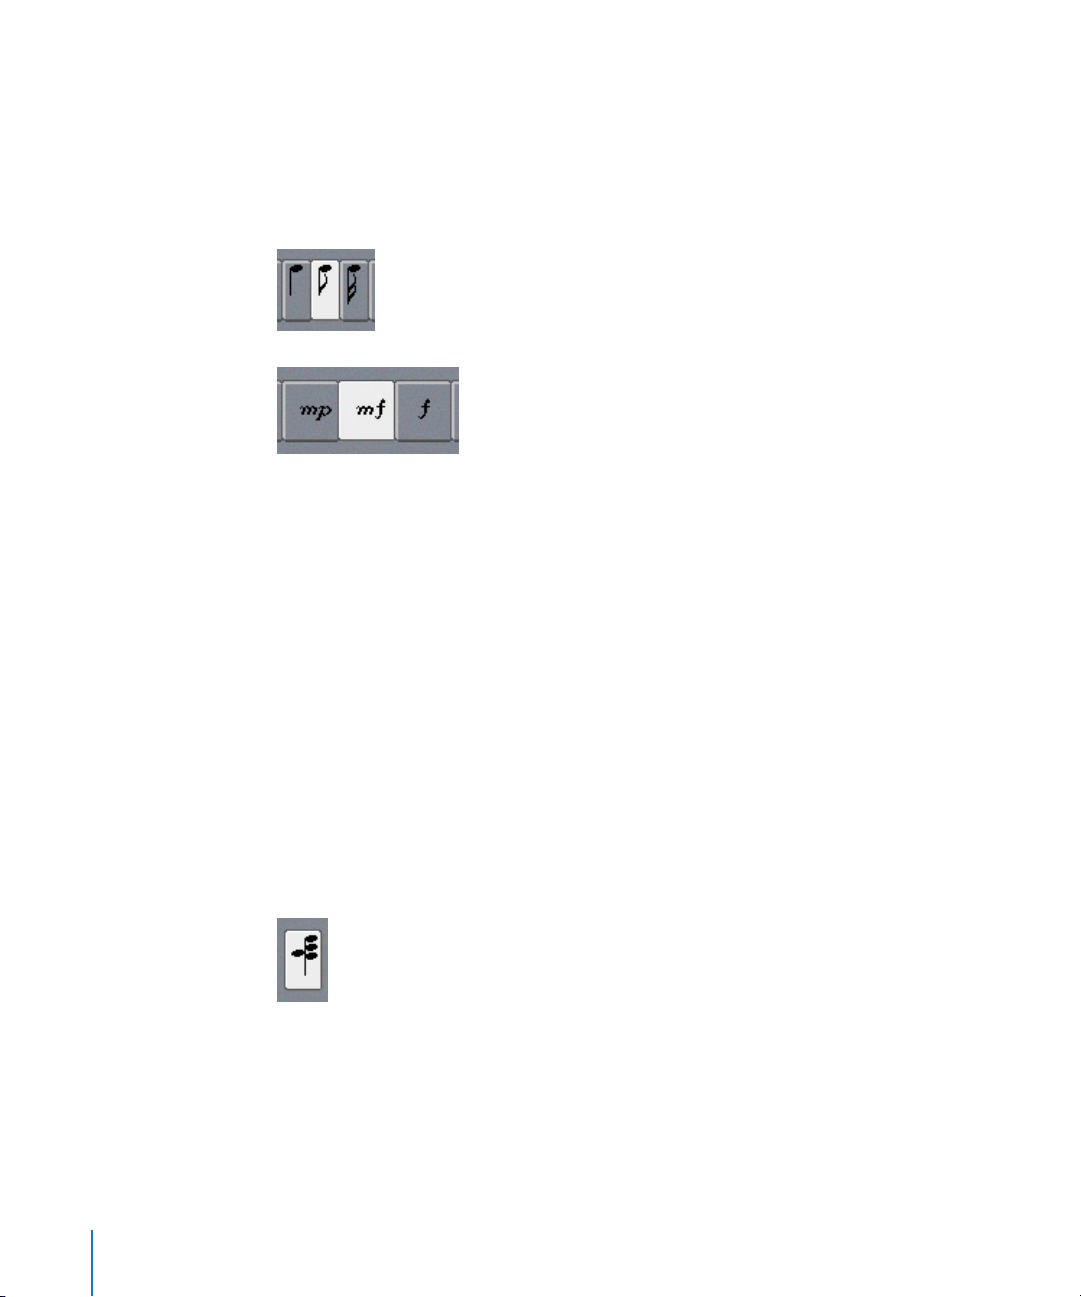
Length and velocity are determined by the corresponding buttons in that window. If the
buttons look like those shown in the illustrations below, a sixteenth note with a
velocity setting of 96 would be inserted—this value (96) corresponds to the forte (f)
indicator. The eight available velocity values are represented by the traditional volume
indicators ppp, pp, p, mp, mf, f, ff, and fff, which correspond to velocity values 16, 32, 48,
64, 80, 96, 112, and 127, respectively.
The MIDI channel of an inserted note is determined by the Channel setting in the Step
Input Keyboard window.
Note: The channel settings of individual notes usually have no effect on the playback
channel and therefore the sound of the MIDI Region—this is determined by the track
instrument settings in the Arrange window. The channel settings of individual notes are
mainly used for polyphonic score display.
Proceeding
After a note is inserted, the Song Position Line will always jump to the end of the
inserted note. The following note can be inserted immediately, following the same
principles.
Chords
To insert several notes at the same bar position, Chord mode needs to be activated. To
do so, click on the button at the far left side of the window or use the Chord Mode key
command.
Chord mode prevents the Song Position Line from moving after insertion of a note,
allowing the user to insert as many notes as desired at the same bar position, one after
the other. Another click on the Chord button (or the key command) will deactivate
Chord mode (this should be done before inserting the last note into the chord), and the
Song Position Line will advance as per usual, after note insertion.
46 Chapter 1 Using Logic
Page 47

Input via the Computer Keyboard
Note input with the computer keyboard follows the same principles as input via the
on-screen keyboard (see “Input via Screen Keyboard” on page 45). Where it differs is
that key commands are used for all functions, rather than choosing pitch, velocity, note
length, and so on with mouse clicks. It is recommended that the Keyboard window
should remain open when you first start using these functions, to make the learning
process easier. Once familiar, you can leave it closed as it is unnecessary to open the
Keyboard window when using key commands.
All key commands for step input are user definable. They can be found at the very
bottom of the list, under the header Keyboard Input, in the Preferences > Key Commands.
Note: It is also possible to enter note data in realtime with the computer keyboard (see
“Caps Lock Keyboard” on page 49).
Pitch
The twelve Note C to Note B key commands will insert a note (of the selected pitch)
with the set length and velocity at the current song position in the selected MIDI
Region. To insert chords, use the Chord Mode key command. You can switch off chord
mode with the same key command.
Rather than assigning key commands to all twelve pitches, you also have the option to
only define key commands for the seven pitches of the C major scale, and use these in
combination with the Next note will be sharp and Next note will be flat key commands to
insert the other pitches.
When creating a system for these key command assignments, two approaches seem
obvious: either to arrange these commands on the computer keyboard similarly to a
piano keyboard (C D E F G A B in one row, next to each other, and C# D# F# G# A#
above these at corresponding positions), or to assign keys to pitches of the C major
scale according to their note names—especially when the second approach mentioned
above is used.
Octave Ranges
The octave of an inserted note depends on the current position of the insert range bar.
This can be seen in the Keyboard Window: There is a small horizontal bar above the
piano key image that spans one octave exactly. The chosen note will always be inserted
inside the range marked by that bar.
This bar continuously changes its position in accordance with the last inserted
note: The center of the insert range bar will always be aligned to the last inserted note.
The next note will be inserted in that range unless the range bar is moved via key
commands or the mouse.
Chapter 1 Using Logic 47
Page 48

An example: If a G is inserted immediately after inserting a C, the G will be placed
below the C. Inserting the C places the range beam between G (left end) and F# (right
end), with the C in the center. Regardless of which note is chosen next, it will always be
inserted inside this range. The range beam will, however, move as further notes are
inserted, with the (range beam) center always aligned to the most recently inserted
note.
Further key commands allow you to place the range bar in different octaves: Octave 0
to Octave 6, and also Octave +1/−1/+2/−2, which move the range bar up or down one
or two octaves. The range bar can also be moved with the mouse.
Note Length and Velocity
Note Length and Velocity are determined before a pitch command is used to actually
insert a note. The currently selected values can be seen in the Keyboard Window.
Rests, Correction, Moving Forward and Back
The Rest key command moves the Song Position Line forward (in accordance with the
currently set note value) without inserting a note, thereby creating a rest.
The Step backwards and Step forward key commands also move the Song Position Line
forward or back by the length of the selected note value.
The Erase key command will delete the most recently inserted note, and move the
Song Position Line back to the position where the note (previously) began. This allows
quick corrections—another note can be inserted immediately, replacing the erased
one.
Triplets, Dotted Note Groups
The Next three notes are triplets key command is self-explanatory. The rhythmic value of
the triplets corresponds to the currently selected note value in the Keyboard Window. If
an eighth note is selected, an eighth note triplet will be created. After three notes have
been inserted, binary values will be inserted, unless the command is reused.
Next two notes are a dotted group works in a similar way. The special thing about this
key command is that a pair of notes that complement each other will be inserted. A
dotted eighth and a sixteenth note, for example.
Interaction with Other Key Commands
If the input mode is activated in an editor window (Score, Matrix, or Event List), these
key commands have priority over all other key commands.
This means that you may also assign keys or key combinations to these functions
which are already assigned to other functions. As long as the input mode is active,
these key assignments will apply; if the input mode is switched off, any other
assignments (for the same keys) will have priority.
48 Chapter 1 Using Logic
Page 49

Note: As you can use key assignments that are already in use for other functions, you
should take care to avoid using keys that are assigned to functions that you might also
want to use when working in step input mode.
Input via MIDI
Note input via MIDI works as per input via the on-screen keyboard (see “Input via
Screen Keyboard” on page 45). Obviously, you press keys on your real-world MIDI
keyboard, rather than clicking notes on the on-screen keyboard. Incoming MIDI note
Velocity information is stored when using MIDI Step Input. It is recommended that the
Keyboard window should remain open when you first start using these functions, to
make the learning process easier. Once familiar, you can leave it closed as it is
unnecessary to open the Keyboard window when using key commands.
It is also recommended that you make use of the Input key commands (see “Input via
the Computer Keyboard” on page 47) to quickly switch values such as the note length,
or to determine the insert position.
Chords can be inserted by playing the chord on the MIDI keyboard. You don’t need to
switch on Chord Mode in order to do so.
Caps Lock Keyboard
This feature allows you to use the computer keyboard as a realtime MIDI keyboard. This
is ideal for situations where no external MIDI or USB keyboard is available, such as
when travelling with your PowerBook.
The Caps Lock Keyboard supports more than ten octaves, and even includes support of
Sustain and Velocity information.
The Caps Lock Keyboard is enabled/disabled by pressing the Caps Lock key on your
computer keyboard. As long as the Caps Lock LED is lit, your Caps Lock Keyboard is
active.
Needless to say, while in this mode, many keys have different functions and their usual
key command assignments are not active.
This is the English version of the CapsLock Keyboard—German, Spanish, or French
versions will appear, dependent on your Mac OS X Keyboard setting.
Chapter 1 Using Logic 49
Page 50

The Escape key sends an All Notes Off command, should you encounter hanging notes.
The numeric keys (above the QWERTY keyboard) are used to define the octave for the
MIDI keyboard.
The two rows below the numeric keys function as the actual MIDI keyboard keys,
starting with the note C, assigned to the alphabetical A key (or Q, as would be the case
if using a French keyboard, for example).
See the black and white keys in the picture above for details.
The lowest row of letter keys sets the velocity for MIDI notes. There are preset values
ranging from pianissimo to forte fortissimo. Each value can be finely adjusted via the
two keys to the right of this row (these are assigned to the comma and period keys on
an English QWERTY type keyboard). This keyboard configuration allows you to send
any MIDI velocity value from 1 to 127.
The Space bar provides a Sustain function—played with your thumbs rather than your
feet. You can freely trigger new notes or switch between octave or velocity values while
notes are sustained.
The current octave and velocity values for the MIDI notes are displayed at the upper
edge of the Caps Lock Keyboard window. A Transparency fader is also available for this
window, making visualization clearer or allowing the window to be “ghosted” over the
background.
Caps Lock Keyboard Preferences
The Enable Caps Lock Keys option allows you to completely enable or disable the Caps
Lock Keyboard functionality.
After familiarizing yourself with the operation of the Caps Lock Keyboard for a while,
you may wish to prevent the window from appearing when using it. To do so, disable
the Show Window when Active option in the Preferences > Global > Caps Lock Keys menu.
Should you wish to use the Space bar key command (usually Start/Stop), rather than as
the Sustain function for the Caps Lock Keyboard (when active), you can disable the
Preferences > Global > Caps Lock Keys > Space bar acts as Sustain Pedal option.
Additional Caps Lock Keyboard Info
Due to technical limitations of computer keyboards, there is a maximum number of six
notes that can be played simultaneously. There are further limitations regarding timing
precision, and when trying to play certain note clusters (which are musically unusual, at
any rate).
Please keep in mind the original intention of this facility—as a useful aid when
composing on a train or plane—not as a full-on replacement for a real MIDI keyboard.
50 Chapter 1 Using Logic
Page 51

Song Administration
All events, other objects and settings (apart from the preferences and key commands)
are components of a song. Songs are handled in the main File menu.
Projects
The illustration above shows a typical Project folder file structure in Logic’s Open
dialog.
Creating a Project
The File > New entry launches the following dialog:
If the Create Project Folder checkbox remains unchecked and no template is selected in
the Templates menu, functionality is as follows:
• The Autoload Song will be opened. The search for the Autoload Song is conducted in
the following order:
Chapter 1 Using Logic 51
Page 52

• Preset Templates folder (/Library/Application Support/Logic/Song Templates/
Autoload or Autoload.lso)
• User Templates folder (~/Library/Application Support/Logic/Song Templates/
Autoload or Autoload.lso)
• the Application folder (Logic 6 series/Autoload or Autoload.lso).
• If no Autoload Song exists in any of the aforementioned locations, or the Option key
is pressed, the empty default song (besed on the .plist created by the Logic Setup
Assistant) will be launched.
Note: The search for the Autoload Song, as you’ll note from the above, takes place in
the Templates folders before searching the Application folder. In earlier Logic versions,
the Autoload Song needed to be placed inside the Logic program folder. While this can
still be done, we encourage you to move your existing Autoload Song into the User
Templates folder (see “About Templates” on page 56).
If the Create Project Folder box is selected, followed by a click on the OK button, a
project will be opened, rather than a song or template. This occurs in the following
fashion:
• A folder is created in the chosen location, with the desired name—as typed in by
you.
• A song is opened (either the empty default song if no template was chosen, or the
chosen template song).
• This song is saved into the newly-created folder.
• An Audio Files folder is created within the new folder.
• The audio recording path is automatically routed to the new Project > Audio Files
folder.
The checkboxes below the Set button represent the Project settings (these can be
changed at any time). The project settings determine how files imported from external
locations (locations outside the project folder) should be handled. They either:
• stay where they are (if the checkbox is unchecked)
• or are copied into the project folder (if the checkbox is checked).
Audio files are automatically moved as soon as they are imported into the Audio
window (resulting in a sample rate conversion, if necessary).
Note: The Convert Audio File Sample Rate When Importing option is designed to allow
the automatic sample rate conversion of imported audio files.
EXS instruments and samples are only moved into the project folder when the song is
saved.
If you disable the Copy EXS Samples to Project Folder option, only the EXS instrument
files will be automatically copied to the project folder when saving, not the samples
associated with the EXS instrument files.
52 Chapter 1 Using Logic
Page 53

Project settings can be changed via the File > Project > Settings menu entry, which
launches the following dialog:
If Copy (or Move, see “Saving as Project” section below) is set for audio files, sampler
instruments/samples the “copy” flag will be associated with that file type in the Project
settings.
Warning: If a new project is closed without saving it, you will be asked if the created
files and folders should be deleted. Clicking on Delete will result in all files (including
any newly-recorded audio files) being moved to the trash—so take care!
Saving as Project
You can use the File > Save as Project function to save a song or project. If the open
song isn’t already a project, the saved song file is assigned “project” status. This allows
you to set the Project settings (File > Project > Settings) which determine how imported
files are handled. This also makes the project “safe”, allowing you to move or copy the
project folder without losing any file references that point to items within the folder.
In the Save As Project dialog you can choose, if the project files should be copied or
moved into the project folder.
The Sampler Instruments and Samples pull-down menu in the Save as Project dialog
features a Copy Instruments Only option which leaves the samples in their existing
location.
The Copy All button presets all pull-down menus to the Copy state.
The Move All button presets all pull-down menus to the Move state.
Chapter 1 Using Logic 53
Page 54

Copying or Moving the Project Folder
If the project folder is moved or copied to another location, the files in the resulting
folder will still be found correctly, provided that they are all in (or are in subfolders of)
the appropriate project subfolder—audio files are found in the Audio Files sub-folder,
samples in the Samples sub-folder, sampler instruments in Sampler Instruments subfolder and so on.
Project Clean Up
Should there be any unused audio files or EXS instruments in your project folder, make
use of the File > Project > Clean up menu option. If any unused audio or EXS instrument
files are found, the following dialog will be displayed:
The checkboxes in the first column can be used to remove/add items to/from the
deletion list. The name and path of the file to be deleted is shown in the last two
columns.
Only files with active checkboxes in the first column will be deleted. All unchecked
entries will remain untouched.
If multiple rows are selected, a click on any checkbox will switch all selected rows to
the new state.
Note: Clean up will only delete unused audio files (WAVE, SDII, AIFF) and EXS
instrument files. All other files will be ignored.
Note: Clean up takes into account the project currently loaded, and all other Logic
songs in the project folder—only files that are not used by any of these songs will be
displayed in the “Clean up” list.
54 Chapter 1 Using Logic
Page 55

Consolidate Project Settings
The File > Project > Consolidate function launches the following dialog:
As you can see, it is basically the same as the Save As Project dialog, but with the Song
File pull-down menu missing.
How Consolidate Works
• If Consolidate is used on a saved song, the song will be moved into a newly created
folder (named after the song). Following the consolidation, the usual Save As Project
functions (copying or moving files) can be performed.
The newly saved song is assigned “project” status (see page 53), allowing you to
change the Project settings after the fact, and making the song folder safe to move
or copy.
• If Consolidate is used on a song which is already a project, all referenced files that are
not yet in the correct location within the project folder are automatically moved or
copied (dependent on the specified options) to the appropriate sub-folders.
Project Preferences
The dialog options for all of the abovementioned operations are saved into the
preferences file.
The default settings for these dialogs are as follows:
• Move Song
• Copy Audio
• Copy EXS Instruments
• Delete Empty Directories
• Unused Audio like Used
Once any changes have been made to these options, and the dialog was closed by
pressing the OK button, the default values are overwritten, and the new settings will be
used.
ReCycle Import Handling in Projects
EXS instruments created via a ReCycle import are placed in a Sampler Instruments/
ReCycle sub-folder of the project folder. All audio data generated by a ReCycle import
are placed in the ReCycle Audio folder, alongside the song file.
Chapter 1 Using Logic 55
Page 56

About Templates
A template is a song file that is stored in either of two specific locations (see below).
Any song file may act as a template. You can view templates much like having multiple
Autoload Songs.
The advantage of using templates is that not all projects have the same needs, so
customizing several songs to meet these needs offers an ideal “starting point” for
different jobs. As examples:
• A template that is software instrument-focussed, for Dance projects. This would
feature 32 Audio Instrument tracks, and say eight audio tracks.
• An audio track-centric template, featuring say 64 audio tracks, would be ideal for live
recording.
• A specific live performance template that makes the job of quickly switching
between parts faster, or perhaps makes heavy use of Environment Objects such as
Arpeggiators or Touch Tracks.
• Several scoring templates for: choirs, a rock band, symphony orchestra, string
quartet, jazz combo, and so on.
• A template for video work. This would typically contain a Video track plus specific
dialog, foley, and music tracks.
• Screensets can be customized for each template, or you can make use of the Import
functions to copy them between templates.
To use Templates:
m
Choose File > New and select a template in the Template pop-up menu, that shows all
songs in the /Library/Application Support/Logic/Song Templates (system volume) folder
and the ~/Library/Application Support/Logic/Song Templates (user) folder.
To save Templates:
m
Simply select the File > Save as Template menu option, and type in the desired name.
Loading a Song
You use File > Open (Command-O) to launch a typical file selection box. If there is
already a song loaded, you will be asked if the currently-loaded song should be closed
(select Close) or not (select Don’t Close). You can disable this prompt by selecting
Preferences > Global > Song Handling > When Opening a song, ask to ‘Close current
song(s)?’.
File > Open
The Open dialog offers an Open File Type menu, where you can activate the following
options:
• All Logic document types—Displays all song file types supported by Logic.
• Logic Songs—Songs created with current or earlier Logic versions.
• GarageBand songs—Songs created in Apple’s GarageBand application.
• Notator SL songs—Songs created in C-Lab/Emagic Notator or Creator SL.
• MIDI Files—Standard MIDI Files in either format 0 or 1 can be loaded.
56 Chapter 1 Using Logic
Page 57

Direct Access to Your Current Songs
You can open any of your most recently opened songs directly without the usual file
selection dialog by selecting File > Open Recent.
Different Songs Open at the Same Time
If you have several songs open at once, you can switch the currently active song from
the Windows menu—the active song is the one marked with a tick. Provided that the
Preferences > Global > Hide Windows of Inactive Songs option is switched off, you can
also switch the active song by clicking on one of the other song windows.
Song and MIDI File Import by Drag and Drop
Songs and Standard MIDI files can be dragged from the Finder, and dropped into the
Logic Arrange window. The mouse position—when the mouse button is released—
determines the clock position (rounded by bar) and destination of the first track for
placement of the imported file.
Opening Pre Version 7 Songs
When loading a song created in a pre-version 7 Logic, the song format will be
converted to the version 7 format. When saving this song for the first time, a file
selector dialog will be opened, so that the old song file will not be overwritten
automatically.
Note: Once saved in version 7 format, a song can no longer be opened with versions
prior to version 7 (exception: Logic versions 6.4.3 and higher can open the song, but at
the expense of all Logic 7 specific features). A song can be exported (see “Saving
Songs” on page 58) as a version 4.8 song.
Special Functions
Checking/Repairing Songs
If you double-click on the remaining number of free events display (see “Tempo/Free
Memory” on page 77) on the Transport Bar, the memory will be reconfigured. At the
same time, the current song will be checked for any signs of damage, structural
problems, and unused blocks.
If any unused blocks are found—which normally shouldn’t happen—you will be able
to remove these, and repair the song.
Chapter 1 Using Logic 57
Page 58
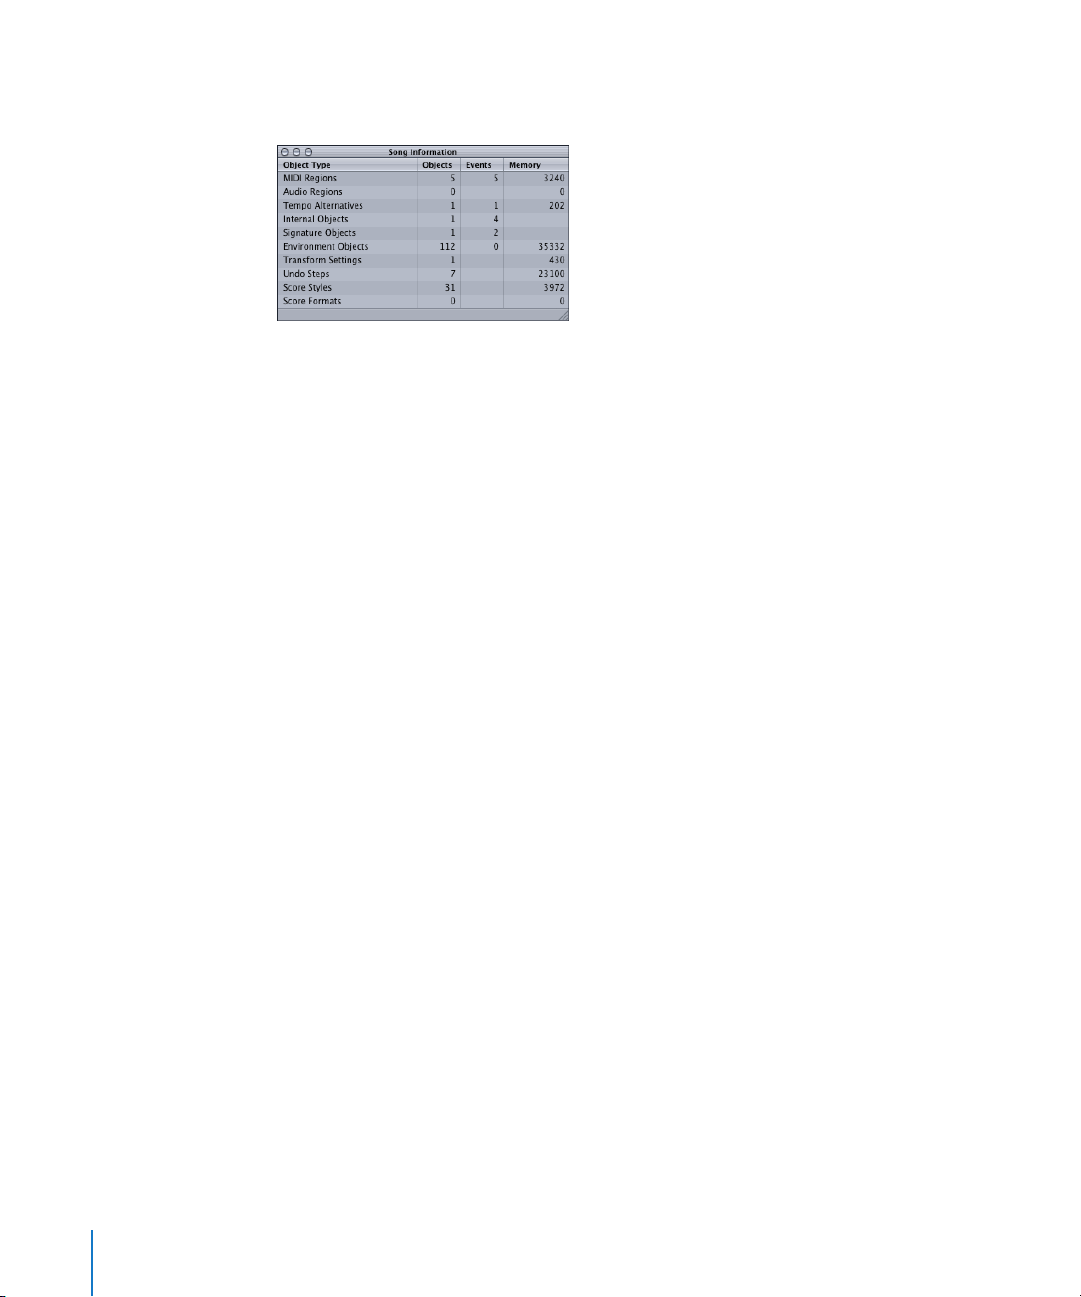
Song Information Window
The Song Information window can be opened via Options > Song Information.
It contains information about various aspects of your song. This information might not
be directly useful for you, but you may be asked to provide this information (in case
there is problem with a specific song) by the Support Team.
Saving Songs
When you select File > Save (or Command-S), the current song will be saved—with its
current name intact.
If you don’t wish to overwrite the last version of the song saved with this name (which
is what will happen if you use File > Save or Command-S), make use of the File > Save As
or File > Save a Copy As options. In the ensuing file selector dialog, you can enter a new
name for the song (and select a new directory or even create a new folder).
• File > Save as—The next time you save using the straight Save (Command-S)
function, the new file name and path will be used.
• File > Save a Copy As—The next time you save with the straight Save (Command-S)
function, the existing file name and path will continue to be used. The “copy” is a
replica of the existing song, stored in a different location. It does not update the file
save path. Save a Copy as is ideal for archiving and moving data.
Important: Songs saved in version 7 of Logic cannot be opened in older versions.
Export Song as Logic 4.8 Song
Choose File > Export > Song as Logic 4.8 Song to save your song in Logic 4.8 format. This
allows versions prior to version 5 to open a song file. Please note that not all song
information can be stored in the older format, including any track automation data
(see “Automation—Introduction” on page 225). You may wish to convert track
automation data into Region data first, should you need to export in 4.8 Song format.
58 Chapter 1 Using Logic
Page 59

Automatic Backup Files
When you save a song, Logic will first make a safety copy of the previous file. You can
switch off this function in the Global preferences (Preferences > Global), and also set the
number of backup files that will be made—up to 100.
This function allows you to store up to 100 earlier versions of your song, thereby
retaining a complete record of your song’s development.
Backup files are saved in a backup folder within the Project folder, and are named after
the song/project, but feature the “.bak” file name extension. The backup files
themselves are also named after the song, but are sequentially numbered. As an
example: if the song is called “My Song”, the backup folder will be “My Song.bak”, and
the backup files within the folder will be called “My Song00”, “My Song01”, and so on.
Note: If you want to know what the latest version is, take a look at the contents of the
Project > Backup folder in the Finder, making sure you sort the contents of the window
by date (select “By Date” in the Finder’s View menu with the backup folder open, and
selected). The Finder cannot distinguish between files if they were saved during the
same minute.
Reverting to the Saved Version
Any time you make a mistake, you can undo it by selecting Edit > Undo (Command Z).
If you have made some really serious blunders (as unlikely as that may be), or you
decide that in the 15 minutes since you last saved, your creative efforts have resulted in
material too unpleasant to describe here politely, you may find the File > Revert to Saved
function very helpful. This replaces the current song with the previously saved version.
Closing and Quitting
Closing a Song
File > Close (Command-Option-W) closes the currently active song. If you have made
any changes since the last save operation, Logic will ask you if the song should be resaved before closing, to preserve any changes you have made.
Quitting the Program
Choose File > Quit (Command-Q) to leave the program. If you’ve made changes, but
haven’t saved them, you will be asked if you want to do so before quitting (press Enter
to save).
Chapter 1 Using Logic 59
Page 60

Standard MIDI Files
Standard MIDI files are not specific to a particular sequencer program, or type of
computer. They contain the following information:
• MIDI events, including time positions and channel assignments
• Names of the individual tracks
• Tempo changes
• Copyright marks
Logic supports the importing and exporting of Standard MIDI file formats 0 and 1:
• Format 0 can contain one track.
• Format 1 can contain multiple tracks.
Neither format recognizes any division of a track (into several MIDI Regions, for
example).
Loading Standard MIDI Files
To load a Standard MIDI file, select File > Import.
Note: If you select the MIDI files option in the Open file type menu, only MIDI files will
be displayed in the File Selector.
If a song is loaded, you will be asked to “Create new environment or copy current
environment for MIDI File? New/Copy”.
If you click Copy, the existing environment is copied. The tracks of the Standard MIDI file
are automatically assigned to suitable instruments.
If no song is loaded, or you answer the question by clicking New, the default
environment (the default song) is used.
Bank Select
When you open Standard MIDI files, program change and controller events occurring at
the same position are moved by one tick, so that they will remain in their intended
order. This prevents Logic from reversing the transmission order of events. The reason
for this is that certain MIDI devices will not respond properly to program change and
bank select events that do not occur in the correct order.
This also guarantees that there will be no timing problems, because the transmission of
a MIDI event always lasts longer than one tick.
60 Chapter 1 Using Logic
Page 61

Saving Standard MIDI Files
If you want to play a Logic song on another sequencer, you can do so by saving it as a
Standard MIDI File. Consult the other sequencer’s instruction manual to see what
Standard MIDI File formats it can read. Any sequencer should be able to interpret at
least the type 0 file format.
Preparing the Song
Due to limitations of the Standard MIDI File format, you should prepare your Logic
song in the following way:
• Neutralize all playback parameters with the normalize function (select them all by
pressing Command-A, then select MIDI > Region Parameters > Normalize Region
Parameters)
• Convert all playback quantization with the Apply Quantization Settings Destructively
function (Command-A, MIDI > Region Parameters > Apply Quantization Settings
Destructively)
• Convert all aliases into real copies (Command-A, MIDI > Alias > Turn to Real Copy)
• Convert all loops into real copies (Command-A, MIDI > Region Parameters > Turn
Loops to Real Copies)
• Convert all MIDI Regions on each track into a continuous MIDI Region (Command-A,
Region > Merge > Regions per Tracks
• MIDI > Insert Instrument MIDI settings as Events
Additional Preparations for File Format 0
As Standard MIDI file type 0 format files can only save one MIDI Region, you must also
merge all MIDI Regions into one (Command-A, Region > Merge > Regions).
Saving a Song as a Standard MIDI File
Select all of the required MIDI Regions, and select File > Export > Export Selection as MIDI
File. You can now enter the destination directory. Remember that most hardware
sequencers can only read MS-DOS formatted disks, so limit your file name to an 8.3
character name. As an example: “song0001.MID”.
In File Format 0
Ensure that the Preferences > Global > ‘Export MIDI File…’ saves single MIDI Regions as File
Format 0 parameter is checked. If it is, selecting File > Export > Export Selection as MIDI
File when only one MIDI Region is selected means that file format 0 will automatically
be used.
Chapter 1 Using Logic 61
Page 62

Apple Loops
Logic ships with a number of Apple Loops. Apple Loops are musical phrases that can
be repeated seamlessly. In comparison to “normal” audio loops, Apple Loops have a
significant advantage: they can be transposed and (automatically) time stretched.
Logic allows you to import Apple Loops, using the Loop Browser. You can also create
your own Apple Loops with the Apple Loops Utility.
The Loop Browser
The Loop Browser allows the import of Apple Loops. When you add an Apple Loop to a
Logic song, it will automatically be matched with the tempo and key of the song. This
function allows you to use several Apple Loops simultaneously, even if they are of
different speeds and keys.
The Audio menu contains a Loop Browser option that launches the following window,
when selected.
The new Apple Loops file format adds tags that allows you to quickly locate files by
Instrument, Genre, or Mood. Further search refinements can be made by Scale and
Signature.
The View buttons at the top left switch between a matrix display and a traditional
Mac OS X file menu that is hierarchically separated into All, By Genre, By Instruments, By
Moods, and Favorites search criteria.
62 Chapter 1 Using Logic
Page 63

The Scale pull-down menu offers Minor, Major, Neither, and Good For Both options. Use
of these options limits the search for Apple Loops to the selected Scale type, within the
chosen category. As an example, if Country, Acoustic, and Relaxed categories were
selected, you would be presented with twenty files that matched your choices.
Selection of the Minor Scale option would reduce this list to ten possible Apple Loops,
making the task of auditioning and selecting the most appropriate material faster.
The Signature pull-down menu performs a similar task to the Scale menu, but limits
searches to Apple Loops that match the selected time signature.
The Search field is used to find Apple Loops by name or partial name:
• Type in the desired search term, and press the Return key. Any files that match your
search term will be displayed in the file browser at the bottom of the window.
• The Cancel button to the right (which appears as soon as any text was entered) clears
any entered text. It also clears the search history.
• The Find menu to the left (the magnifying glass) retains a history of recently used
search terms.
The categories matrix shows categories by instrument, genre, or mood. Simply click on
the desired boxes in the matrix to narrow your search for appropriate Apple Loops.
Selected boxes are highlighted. Multiple categories can be selected, either in
conjunction with the Scale and Signature pull-down options, or without.
Note: You can switch a displayed category via the pop-up menu that opens when you
Control-click the category box.
The Key pull-down menu determines the playback key of the selected Apple Loop.
The Volume fader adjusts the playback level of the selected file in the Loop Browser
window.
The list at the bottom of the window displays all Apple Loops that match the criteria
set with the parameters discussed above.
• Clicking on any of the column titles will sort the list of results by Name, Tempo, Key,
and so on.
• Clicking on the arrow in any selected column title will sort the list in ascending or
descending alphabetical, tempo, key, beat, or favorite order.
• Columns can be resized by dragging the vertical lines between column titles.
• Selection of any entry in the list of files will automatically begin playback. You can
stop playback by clicking on the speaker icon in the left-hand column.
There are two types of Apple Loops: those featuring a blue sound wave icon and
others with a green note icon. The Apple Loops that feature the blue icon can be
added to audio tracks, and can be edited like other Audio Regions. These files have the
major advantage of automatic tempo and key matching to that of the song tempo and
key.
Chapter 1 Using Logic 63
Page 64

The Apple Loops that feature the green icon can also be added to audio tracks, where
they behave exactly like their blue icon counterparts. They may further be added to all
Audio Instrument and MIDI tracks. On such tracks, these files they can be edited like
other MIDI Regions, including individual note editing.
Another interesting thing about the green Apple Loops is that if dragged onto a
“blank” Audio Instrument track (one with an empty channel strip), the corresponding
instrument, effect, and input setting are automatically inserted.
Note: The Transpose Global track will only transpose Apple Loops used on audio tracks
by ±36 semitones. This is a designed limitation in Logic, as Apple Loops don’t sound
that great when transposed further. This is also true for the Transpose parameter of the
Region Parameter box.
To add an Apple Loop to your song:
m
Simply drag the desired loop to the appropriate track and desired position.
Apple Loops Utility
The Apple Loops Utility allows you to create your own Apple Loops. Apple Loops are
simply audio loops that include metadata “tags” with your loops. These tags provide
information about the audio recorded in a file.
Logic uses tags in one of two ways:
• to help locate files when using the Search features of Logic’s Loop Browser.
• to provide information that Logic uses when matching the file’s tempo and key to
the project tempo and key, this ensuring the best possible playback quality.
Tagged audio files can also contain information about transients. Transients indicate
where beats occur in the file, and Logic uses these transients to play back audio files at
the highest level of quality. The Apple Loops Utility can detect transients present in an
audio file, and you can use the utility to add markers for additional transients, and
move them to new locations.
If you select a Region in Logic’s Arrange window and choose Audio > Open in Apple
Loops Utility the following window opens:
The Apple Loops Utility window consists of the Tags and Transients panes. The bottom
of the window includes a set of playback controls and file management buttons. The
Apple Loops Utility also includes an Assets drawer, located to the right of the main
window, where you manage open files.
Tags Pane
The Tags pane includes areas for different types of tags. It also includes a set of
playback controls that you can use to listen to an open file.
64 Chapter 1 Using Logic
Page 65

Property Tags
• Number of Beats field: Displays the number of beats in the file.
• File Type button: sets the file type, which can be One-shot (One-shots are audio files
not suitable for repetition) or Looped.
• Key pop-up menu: Sets the key of the file.
• Scale Type pop-up menu: Sets the file’s scale type. The choices are Major, Minor,
Good for Both, and Neither.
• Time Signature pop-up menu: Sets the file’s time signature. The choices are 4/4, 3/4,
5/4, 6/8, and 7/8.
• Author field: Displays the name of the file’s author.
• Copyright field: Displays the file’s copyright date, if one exists.
• Comment field: Displays any comments about the file.
Search Tags
These tags are used by the Search feature in Logic’s Loop Browser when you search for
files matching specific criteria.
• Genre pop-up menu: Displays choices for the musical genre of the file.
• Instrumentation list: Displays choices for the musical instrument or instrument
category recorded in the file. Selecting an instrument category in the left column
displays the list of instruments in that category in the right column.
File Info
This area of the Tags pane includes rows with Kind, Length, Date Modified, Sample
Rate, Channels, Tempo, and File Location information. This information is for viewing
only, and cannot be edited in the Tags pane.
Descriptors
Descriptors are complementary pairs of keywords that describe the mood or character
of the music recorded in the file. Each pair of keywords offers a row of buttons,
allowing you to choose either one keyword from the pair, or neither keyword.
Transients Pane
The Transients pane contains a large waveform display, with a Beat ruler and a
horizontal scroll bar. Markers indicate the position of transients in the file. Typically,
transients correspond to the widest parts of a sound’s waveform. The Transients pane
includes controls for the beat division and transient detection sensitivity. You can also
listen to the file (using the playback controls) to determine where transients occur.
The Transients pane includes the following controls:
• Transient Division pop-up menu: Sets the beat value used for transient detection by
the Apple Loops Utility. Choosing a larger beat value results in fewer transients being
detected. Choosing a smaller beat value can also result in fewer transients being
detected, if they are present in the audio recorded in the file.
Chapter 1 Using Logic 65
Page 66

• Sensitivity slider: Sets the degree of sensitivity for transient detection. When you
increase the sensitivity of transient detection, the Apple Loops Utility considers
points of higher amplitude in the waveform as transients, regardless of whether or
not they occur at a beat value.
When you open a file in the Apple Loops Utility, it looks for transients at every 16th
note position, based on the file’s tempo and number of beats tags. You can change the
beat value used for transient detection via the Transient Division pop-up menu.
To display a file in the Transients pane:
m
Select the file in the Assets drawer, then click the Transients tab.
Note: The Transients window can only display one file at a time. If multiple files are
selected, no waveform is displayed in the window.
The waveform display in the Transients pane displays both the transients detected by
the Apple Loops Utility and transients you add to the file. You can add transients and
move existing transients in the Transients pane.
To add a new transient:
m
Click in the darker area above the Beat ruler in the waveform display.
To move a transient marker:
m
Drag the marker by its handle in the area above the Beat ruler.
To remove a transient, do one of the following:
m
Click the transient’s handle in the area above the Beat ruler, then press the Delete key.
m
Drag the transient out of the area above the Beat ruler.
Assets Drawer
The Assets drawer lists the files open in the Apple Loops Utility. The drawer contains a
Name column that lists the name of each open file, and a Changes column, which
indicates any files that you have altered.
Playback and File Management Controls
The bottom of the Apple Loops Utility window contains a set of playback controls,
allowing you to audition the selected file. These controls do not affect the file’s tags.
• Go to Beginning button: Starts playback from the beginning of the selected file.
• Play button: Plays back the selected file.
• Stop button: Stops playback of the selected file.
• Key pop-up menu: Transposes the selected file to a new key for playback.
• Tempo slider: Sets the playback tempo of the selected file.
• Volume slider: Sets the playback volume of the selected file.
Note: When multiple files are selected, the playback controls are not available. You
cannot play more than one file at a time.
66 Chapter 1 Using Logic
Page 67

There are two additional buttons at the bottom of the window, the Assets button and
the Save button.
• Assets button: Shows and hides the Assets drawer.
• Save button: Saves your changes to the currently selected files in the Assets drawer.
GarageBand File Import
Logic supports the importing of GarageBand files via the File > Open menu option.
On opening the file:
• Logic will automatically create the required number, and type, of tracks to mirror
those used in the GarageBand song.
• Apple Loops audio data should import without issues.
• The tempo of the GarageBand song will be used.
• Software Instrument parts will be played by GarageBand Instruments in Logic.
Further to this, any mixing data and effects (plus their Settings) used by Software
Instruments or Apple Loops-based tracks in GarageBand will also be imported into
Logic.
Once the GarageBand song is loaded into Logic, you may freely change parts, mixing
levels, instrument, and effect parameters as in any Logic project.
GarageBand Instruments are automatically installed with Logic.
You can insert them exactly as you would with other software instruments:
1 Click-hold on an Audio Object’s Instrument slot.
2 The Instrument menu appears, showing all of Logic’s available instruments. Move the
mouse through the different levels to Mono/Stereo > Logic > GarageBand Instruments
and choose an Instrument by releasing the mouse.
The Channel Strip settings of GarageBand translate 1:1 into Logic—with the nice
exception that you can now access the individual plug-ins that are inserted into a
GarageBand channel strip. The GarageBand Channel Strip setting files are visible in
Logic’s Channel Strip menu in a subfolder called GarageBand. Logic’s Channel Strip
menu is accessible via a long click on the word Inserts on each channel strip.
GarageBand’s two bus effects (Reverb and Echo) are also translated when opened in
Logic. They are replaced by the Platinum Verb and Tape Delay on Busses 1 and 2.
Note: GarageBand projects will only open in Logic Express 7 and Logic Pro 7—not in
older Logic versions. It is not possible to open Logic songs in GarageBand.
More information about GarageBand file support in Logic can be found in the
“Introduction to Logic for GarageBand Users” tutorial.
Chapter 1 Using Logic 67
Page 68

ReCycle Import
ReCycle is the name of a software application by manufacturer Propellerhead, which
mainly serves as an editing and production tool for loops (repeatedly looped audio
samples). ReCycle uses specific file formats that can be imported by Logic.
Recognized ReCycle File Formats
Logic can import the following file formats:
Old ReCycle File
• File Suffix: .rcy
• Abbreviation: RCSO
Old ReCycle export file
• File Suffix: .rex
• Abbreviation: REX
ReCycle 2.0 file
• File Suffix: .rx2
• Abbreviation: REX2
Importing ReCycle Files Into the Arrange Window
To import a ReCycle file to an audio track use the same options as for normal audio
files:
• Select Audio > Import Audio File and select a ReCycle file instead of a regular audio
file, or
• Command-Shift-click on an audio track and select a ReCycle file, or
• Drag a ReCycle file from the Macintosh Finder onto an audio track.
As a result, Logic will create a folder containing one audio track (using the same Audio
Mixer Object as the track it is created on) which in turn contains the slices of the
ReCycle file at the appropriate positions. Each of these slices will reference the same
audio file, which can be found in the Audio Window, as usual.
Important: If you move the created folder to another audio track, the Audio Mixer
Object references will not change accordingly! You will need to open the folder and
change it manually if that is what you want to do.
Copying Audio Data Into the Clipboard
You can copy audio data into the Clipboard for further use in ReCycle by selecting local
window Audio > Copy ReCycle Loop. This option will only be active if you have selected
one audio part in the Arrange window, and will copy the selected region of the
referenced audio file into the Clipboard. You can then use the Paste as new document
function in ReCycle to create a new ReCycle document using this audio data. In
conjunction with the Paste ReCycle Loop function (see below), you can perform a
complete data transfer from Logic to ReCycle, and back, without using any file selector
dialogs!
68 Chapter 1 Using Logic
Page 69

The size of the transferred audio region is limited to 10 MB, due to the fact that the
Clipboard resides in the computer’s RAM. 10 MB, however, should be sufficient for most
ReCycle loops (an eight bar stereo loop in 4/4 at 70 bpm uses approximately 5 MB, for
example).
Pasting ReCycle Loops Into the Arrange Window
If you use the “Copy Loop” option in ReCycle to copy the loop currently being edited
into your computers Clipboard, you can paste this loop into the Arrange window by
selecting Audio > Paste ReCycle Loop. The result will be the same as if a ReCycle file had
been imported.
ReCycle File Import Overlap Function
On occasion, you may encounter a dialog regarding overlaps, when importing ReCycle
files.
The launching of this window results from:
• The tempo used in Logic being higher than that of the imported Recycle file.
• Use of the Stretch function in ReCycle.
You may handle the imported file in the following ways:
• Don’t Fix—imports the file as is. All “slices” of the file will overlap, to match Logic’s
tempo.
• Add tracks—will distribute the slices across multiple audio tracks, allowing you to
adjust the position or delete slices freely. The Number of additional Audio tracks panel
in the window determines how many tracks are used for the distribution of the slices.
These tracks are in addition to the original audio track, on which the Recycle file was
imported.
• Crossfade—All slices of the file are imported to the same track and automatically
crossfaded. The crossfade is equal powered. The length of the crossfade is
determined by the value (shown in milliseconds) displayed in the Crossfade length
panel.
• Render into single file—When importing Rex files this function writes all ReCycle slices
into a single audio file using the current Logic song tempo for the rendering process.
The adjustment of the numerical values is via use of the mouse as a slider, or doubleclicking on the panel(s), and direct numerical entry.
Chapter 1 Using Logic 69
Page 70

OPEN TL Import
Logic has the ability to import song contents using theOpenTL (Open Track List) file
format.
The OpenTL format is mainly used for data exchange with Tascam hard disk recorders,
such as the MX2424. It only supports the exchange of audio data (audio media and the
use of this audio media in a song)—MIDI and automation data will be ignored when
using the export functions.
To import an OpenTL file, choose File > Import. A file selector opens, which allows you
to choose OpenTL files. Note that if you choose the Open TL files option in the Open File
Type menu, only files with the “.TL” extension will be shown in the file selector. If the
first event in the imported song starts at a time greater than 1 hour, the following
dialog appears:
Set SMPTE start time of song so that events start at the same SMPTE time as they do in the
imported project?
Confirm it by pressing Set if you want the SMPTE start time of the song to be changed
accordingly, or Don’t set if the song’s SMPTE start time should not be changed.
Should the first audio part found by OpenTL import have a start time greater than zero
(less than zero is impossible), Logic will ask if you wish to: Set the start time of first
imported event to start of song? If you answer with Set, the first audio part imported will
be placed precisely at the song start position.
This solves the problem of the song on the Tascam machine starting at a large time
value, but less than 1 hour (such as 59 minutes). In this situation, the user can’t
immediately see the imported audio parts because they are usually imported beyond
the song’s end point (possibly even beyond the largest possible song end point,
depending on the song tempo).
Bouncing and POW-r Dithering
Logic provides you with the leading professional POW-r dither algorithm, designed for
the conversion of 24 bit recordings to 16 bit files—as required for CD burning, for
example. POW-r (Psychoacoustically Optimized Wordlength Reduction) is licensed from
the development team of the POW-r Consortium LLC.
POW-r dithering is applied when:
• bouncing audio files to disk
Bouncing can be performed directly in the Arrange (and other) windows by selecting
the File > Bounce menu option, which will launch the Bounce dialog. Bouncing can also
be initiated by clicking on the Bounce button found on Audio Output Objects (see
“Bounce” on page 204).
70 Chapter 1 Using Logic
Page 71

POW-r offers three distinct dithering modes.
• No Dithering: No dithering is applied.
• POW-r #1: uses a special dithering curve to minimize quantization noise.
• POW-r #2: (Noise Shaping): uses additional noise shaping over a wide frequency
range, which can extend the dynamic range by 5 to 10 dB.
• POW-r #3: (Noise Shaping): uses additional, optimized noise shaping which can
extend the dynamic range by 20 dB within the 2 to 4 kHz range—the range the
human ear is most sensitive to.
Note: Noise Shaping minimizes side effects caused by bit reduction through spectral
displacement of quantization noise above 10 kHz—the range the human ear is least
sensitive to.
The mode which will sound the best to you is primarily dependent on the program
material and on your personal taste. The “right” setting is best determined by
auditioning the audio material with each of the dithering modes.
Important: Dithering the same audio signal multiple times should be avoided.
Chapter 1 Using Logic 71
Page 72

Page 73

2 Transport
In this section, you will learn how to move to different
parts of the song, start and limit passages, and to isolate
and audition specific portions and components within
the song.
In short, you’ll learn all about Logic’s Transport window. This also includes a brief
introduction to Logic’s recording functions.
The Transport Window
The Transport window is used to control and display Logic’s recording and playback
functions.
2
These are the different sections of the transport window:
Transport buttons (see “Transport Buttons” on page 79)
Mode buttons (see “Mode Buttons” on page 81)
73
Page 74

Position display, Locators (see “Position Display” on page 76)
Tempo and Time Signature display (see “Tempo/Free Memory” on page 77)
MIDI Input—Output/Song End (see “MIDI Monitor/Song End” on page 78)
Note: As a floating window, the Transport window is always in the foreground, and can
not be covered by other (non-floating) windows.
All display fields in the Transport window (apart from the song name) can be used for
data input. You can either: double-click on the desired display field and input the
numbers with the keyboard, or adjust the individual numbers by using the mouse as a
slider.
Note: All Transport functions are also available as preset (but also user-definable)
keyboard commands, even if the Transport window is not open.
To open the Transport window:
m
Select Windows > Transport, or press Command-7.
Note: Logic allows an unlimited number of Transport windows to be simultaneously
opened. Additional Transport windows can be used as giant displays for the Bar or
SMPTE position, as examples.
To close the Transport window
m
Click the close button at the top left of the Transport window.
Note: The bar that contains the close/open and minimize buttons is normally found at
the top of most windows. In the Transport window, this bar is located to the left.
To reposition the Transport window onscreen:
m
Grab anywhere in the gray area of the Transport window (not on a function or field),
and drag it to the desired position.
74 Chapter 2 Transport
Page 75

The Transport Bar in Other Windows
You can also configure a fixed Transport window in the Arrange and Matrix windows.
Select View > Transport and a Transport field appears in the top left corner of the
window. The number of visible buttons and displays is dependent on the size of the
area available. You can adjust this area by click-holding on the intersection of the Track
List, Arrange area and Bar Ruler (the cursor will change to a four-headed arrow), and
dragging.
Altering the Display
The Transport window pull-down menu opens when you click on the arrow at the
bottom right. This menu is used to reconfigure the Transport window’s appearance.
Smaller/Larger
You can adjust the size of the Transport bar to nine different size settings. This is
achieved by dragging the bottom right corner of the Transport window.
Legend
This display option conceals/reveals a description of all window elements, and is very
helpful if you are still getting to know the program.
Position Slider
This hides/shows a bar along the bottom edge of the window. The size of the bar is
directly related to the current portion of the song shown in the Arrange area, and this
portion’s relationship to the overall song length (see “MIDI Monitor/Song End” on
page 78). You can click-hold on the bar and drag left or right to quickly move to a
different song position.
Use SMPTE View Offset
This alters the display of the SMPTE time shown at the song startpoint, regardless of
the true SMPTE start time being read from an external time code source. More
information on this can be found in the SMPTE View Offset section (see “General” on
page 453).
Chapter 2 Transport 75
Page 76

SMPTE View Offset
This menu option launches the Song Settings > Synchronization > General tab, allowing
you to define the Bar Position and/or SMPTE time for both the actual song position and
the SMPTE view offset.
Position Display
The current song position is shown in two formats:
Above: SMPTE time
Hours: Minutes: Seconds: Frames/Subframes.
Below: bar position
Bar—Beat—Division—Ticks.
A beat corresponds to the denominator in the time signature, a division is a freelydefinable part of a beat. A tick is the smallest possible bar sub-division or system
quantization—of just 1/3840 note.
Locators
You can define two sets of locator points: one for the Cycle (see “Cycle Mode” on
page 84), and the other for the Autodrop (see “Autodrop” on page 88) zone. The lefthand side locators on the Transport window define the Cycle—a passage that is
constantly repeated.
The locators shown at the bottom/to the right on the Transport window define the
Autodrop range (see Autodrop)
Note: Both sets of locators are only displayed when the Cycle and Autodrop functions
(buttons on the Transport) are switched on.
Note: Any mention of the “left or right locators” refers to the Cycle locators, rather than
the Autodrop locators. The top value denotes the left locator position, and the bottom
one, the right locator position.
Adjusting Locators to Fit Selected Regions
Set Locators by Regionsmatches the locator positions with the start and end points of
one (or more) selected Region(s). The Set Rounded Locators by Regions key command
rounds the locator positions to whole bars.
76 Chapter 2 Transport
Page 77

Tempo/Free Memory
Tempo
Tempo is displayed as quarter notes per minute, or beats per minute (bpm). It ranges
from 5 to 9999 bpm, and is adjustable to four decimal places after the whole value.
Programming Tempo Changes
This functionality is described in the Tempo chapter (see “Display and Functions” on
page 447).
Free Memory
Below the Tempo display, you will see the amount of free memory (events) available in
the record buffer. You can increase the amount of free memory by reconfiguring the
memory.
To reconfigure the memory:
1 Double-click on the free memory display.
2 A “Reorganize Memory?” dialog will appear.
3 Confirm by clicking the Reorganize button.
This reorganization is also carried out automatically after saving or loading a song. A
common (and good) use of this feature is to free up memory after closing a song, if
two or more songs were open at the same time.
Time Signature and Division
This is where you can see, and set the time signature of the song. The format is:
Bar numerator—Bar denominator—Division
The division defines the third format value in all position displays (such as in the Event
Edit window), and forms the grid for various length and placement operations. The
division is normally set to 1/16 notes, but has a value range of 1/4 to 1/192 note. If the
note value of the division is equal to or greater than the bar denominator, the third
value of the position display is automatically removed.
Apart from the features described below, you can also use the Global Signature track to
edit time signatures.
Chapter 2 Transport 77
Page 78
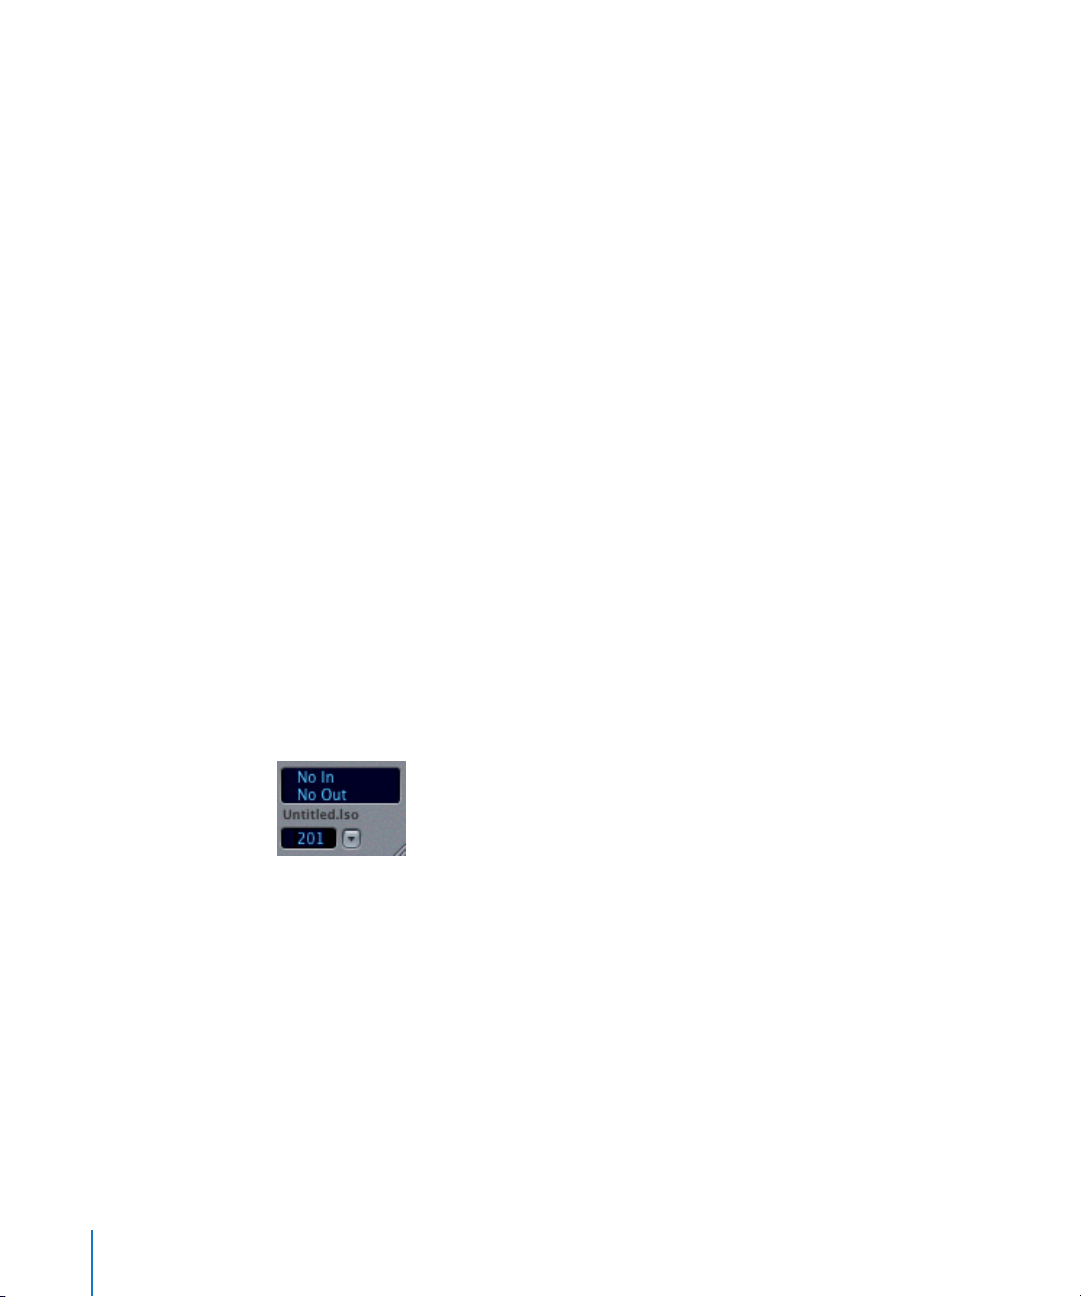
Time Signature Changes
If you alter the bar numerator or denominator in the Transport window, a time
signature is created at the start of the bar occupied by the current song position. This is
shown in the Bar Ruler, to the left of the bar number and in the Global Signature track,
if visible. A time signature change does not affect the absolute positions of any existing
time signature events that are already inserted.
Note: You can also add time signature changes directly in the Score Editor (see “Time
Signatures” on page 362) by double-clicking on any MIDI Region that spans the
signature change.
To edit time signature changes:
m
Move the Song Position Line to the target bar, and set the new time signature in the
Transport window. Alternately, you can activate the Signature track via the View >
Global Tracks menu option, and manually insert them (see “Signature Track” on
page 244).
You can also edit the time signature in the Score Editor.
To erase time signature changes:
m
Simply change the time signature to match the value of the preceding/previously used
time signature.
Note: You can also erase time signatures in the Score Editor by selecting them, and
hitting Backspace. To erase all time signature events, select Edit > Select Similar
Objectsbefore doing so.
MIDI Monitor/Song End
MIDI Monitor and Panic Function
MIDI Monitor
The top line shows the last MIDI message received, and the bottom line the last MIDI
message transmitted. The monitor is mainly used for checking MIDI connections.
Automatic Chord Interpretation
The MIDI activity panel of the Transport window shows chord symbols when Logic
receives more than one MIDI note simultaneously. The respective, held intervals
(between notes) are interpreted and displayed as chords.
78 Chapter 2 Transport
Page 79

Panic Function
Click on the MIDI monitor to silence any hanging notes. If this doesn’t work, doubleclicking on it will initiate a Full Panic reset, which should do the trick (see “Reset
Functions” on page 132).
Song Title
The title of the active song is shown below the MIDI monitor.
Song End
Below the song title, you’ll see a numerical field that indicates the song end position.
As soon as Logic reaches this position, it will stop automatically, except when
recording. In this situation, the song end point is automatically moved to the end of
the recording.
The maximum length of a Logic song is 8550 quarter notes, or about 2158 bars in 4/4
time.
A song can therefore last a maximum of around 70 minutes at a tempo of 120 bpm. At
95 bpm, the maximum length is over an hour and a half.
If you need to increase this length, for film synchronization as an example, just halve
the tempo. You can achieve the same result by using 4/8 time instead of 4/4 time, and
treating quarter notes as eighth notes. A 4/8 song at a tempo of 60 bpm (equivalent to
4/4 at a tempo of 120) has a maximum length of more than 4273 bars, or over 2 hours
and 22 minutes.
Transport Buttons
Record
Recording normally starts after the count-in, at the start of the current bar. In Cycle
mode, it starts at the left locator. You can also choose to have one beat constantly
repeated, until a MIDI message is received, at which point recording begins.
Pause
Pauses recording or playback, until you press pause or play again. During paused
recording, you can add individual events which will be recorded.
Chapter 2 Transport 79
Page 80

Play
Starts playback at the current position, or from the left locator position when in Cycle
mode.
You can use the Play from beginning key command to start playback at the beginning
of the song.
Stop
Ends recording or playback—the sequencer stops. If the sequencer is already stopped,
pressing stop moves the song position line to the song start point, or to the left locator
position if Cycle mode is active.
Rewind/Forward
If the sequencer is stopped, these buttons work as you would expect. If the sequencer
is running, you can monitor as you go (cueing/scrubbing), with MIDI events being
output at a faster rate. This also occurs when rewinding.
A click on either button will jump one bar forward or backward. Click-holding on either
button will rewind or forward. Moving the mouse left or right will increase or decrease
the rewind/forward speed.
Note: Both normal (Rewind/Forward) and fast (Fast Rewind/Fast Forward) winding are
available from the keyboard.
Shuttle—Winding Like a Reel-to-Reel Tape Recorder
There are two key commands for “winding the reels”—moving the Song Position
Line—called Shuttle Rewind and Shuttle Forward. You will find them in the Key
Commands window (see “Key Commands” on page 36) by searching for the Shuttle
character string. Repeated hits of the key will increase the winding speed. Repeated
hits of the opposing “shuttle” key will slow down the shuttle speed, and eventually
change the winding direction. Shuttle disables Cycle mode. Shuttling is halted by the
Stop command.
80 Chapter 2 Transport
Page 81

Mode Buttons
The mode buttons do not immediately trigger an action. Rather, they switch operating
states. The relevant button will illuminate to indicate that the mode is activated.
Cycle, Autodrop, and Replace
Autodrop
Cycle Replace
More information about the Cycle switch can be found in the Cycle Mode section (see
“Cycle Mode” on page 84). For more details about Autodrop (see “Autodrop” on
page 88), and the Replace switch (see “Options” on page 87).
Solo and Solo Lock
In Solo mode, only the selected Regions are played. The data output from all other
Regions is muted. This is known as: “soloing the Regions”. You can of course, change
the Solo mode of Regions by changing your selection (default key command: S).
If you want to carry out specific functions on individual Regions, regardless of the solo
status of other Regions, you need to be able to select these Regions without affecting
the Solo status of others.
This is what the Solo Lock function is for. After soloing the desired Regions, double-click
on the solo button, and a padlock symbol will appear on it to indicate “solo lock” status.
You can now alter the selection without affecting the solo status of other Regions.
Sync
This button allows you to synchronize Logic with an external source (make Logic the
synchronization “slave” to another device). If Logic is running by itself, or acting as the
synchronization source (it is the synchronization “master”), this button should not be
activated. When you first boot Logic, manual Sync mode is automatically switched off.
Click-holding the Sync button opens a pull-down menu, where you can define the
following:
• the type of external synchronization.
Chapter 2 Transport 81
Page 82

• direct access to the tempo editors (see “Display and Functions” on page 447).
• direct access to the Synchronization settings.
Metronome
This button (default: C) is used to turn the metronome on and off. Logic remembers
the Metronome status for recording and playback.
Click-holding the Metronome button offers pull-down menu access to the Recording
and Metronome Settings.
The Bar Ruler
There is a Bar Ruler at the top of the Arrange, Matrix, Hyper, and Score windows.
This ruler is used to display, and set, the:
• song position.
• start and end of the song or folder.
• cycle and autodrop locators.
Color and Display
The Bar Ruler changes color depending on the transport mode:
• Red—Record
• Yellow—Solo
• Blue—External Synchronization.
Dependent on the zoom settings (see “Zooming” on page 24), the bars are shown at
the top edge in units of 1, 4, 8, or 16. Changes in time signature are also shown here.
In the bottom third, there is a vertical line for each bar. The shorter lines represent one
beat, but are not always visible (depending on the zoom setting).
82 Chapter 2 Transport
Page 83

Start and End Markers
The song start point is normally at position 1 1 1 1. You can move the song start point
to an earlier position for playing upbeats or program change commands, by grabbing
and dragging it with the mouse. The position display in the top left of the window will
indicate where it is. The song end (default: bar 201) can be set using the same method,
or with the numerical Song End display (see “MIDI Monitor/Song End” on page 78).
In folders, the start and end markers refer to the folder rather than the song. The length
of a folder can also be adjusted from within the folder itself.
Song Position Line
The Song Position Line (SPL) is a vertical line which indicates the current song position
in all horizontal, time-based windows. You can grab the line with the mouse, and drag
it to the desired position (but only if there is no Region or event at the mouse position
when you drag it). Selecting Wide Song Position Line in the Preferences > Display >
General page switches to a thicker SPL.
Direct Placement
As it can be difficult to grab the SPL in the window itself, you can also directly position
it by using the bottom third of the Bar Ruler. Just click at the desired position in the
lower third of the Bar Ruler to make the SPL jump to the point you’ve clicked.
Double-clicking on the bottom third of the Bar Ruler repositions the SPL, and also
toggles between playback (or record) and stop modes.
Chapter 2 Transport 83
Page 84

Numerically
Selecting Goto Position opens the dialog box shown above, allowing you to input the
song position numerically. The last division used (bar position or SMPTE time) is
automatically selected, with the last input value as a default. As the numbers are
registered from the left, it is enough just to enter the bar number.
In the Score Window, you can set the SPL position directly by clicking into a staff at the
desired point while pressing Option. This function is only available when the sequencer
is stopped. The selected position is displayed in the help tag for as long as the mouse
key is pressed. This method is especially handy when working in page view mode, as
no Bar Ruler is visible in this mode.
Scrubbing
Start playback, and grab the bottom third of the Bar Ruler. By moving the mouse to the
left or right, you can now scrub through the song, moving the SPL to hear all “cued”
events. As soon as you stop moving the mouse, normal playback is resumed.
Cycle Mode
In Cycle mode, a selected passage of the current song is constantly repeated. This is
useful for:
• composing a song section.
• practicing a recording.
• recording individual tracks consecutively.
• editing events.
The Cycle area is shown as a green stripe in the top part of the Bar Ruler.
There are four ways of switching Cycle mode on and off:
• clicking on the Cycle button.
• using the Cycle key command.
• clicking on the top part of the Bar Ruler.
• inputting a Cycle area graphically in the Bar Ruler.
84 Chapter 2 Transport
Page 85

How Logic behaves in Cycle mode:
• The Song Position Line jumps from the end of the Cycle to the beginning.
• When this happens, the playback from Environment Objects that are generating
notes is interrupted.
• The Play command starts playback from the beginning of the Cycle.
• To start playback from another position, hit Pause twice, or Pauseand then Play.
• At the cycle jump point, you can use the Chase Events (see “Chase Events” on
page 89) function—File > Song Settings > MIDI > Chase > Chase on Cycle Jump.
• You can determine the way recording works in Cycle mode, by using the various
options on the File > Song Settings > Recording page.
Defining the Cycle
There are a number of different ways to define a Cycle.
Defining the Cycle graphically in the Bar Ruler:
m
Click-hold in the top third of the Bar Ruler, and define the desired Cycle area by
dragging the mouse from left to right. Dragging from right to left generates a Skip
Cycle (see “Skip Cycle” on page 86).
Grab the Cycle “bar” in the middle to reposition it.
Grab the bottom corners to move the start or end points of the Cycle (you can even do
this while the sequencer is still running.). If you set the start and end points to the
same position, Cycle mode is switched off.
Note: You can reset the nearest edge of the Cycle beam by clicking on it while holding
down Shift, even if the beam is outside the visible range, or Cycle mode is switched off.
When you set the size of a Cycle graphically in the Bar Ruler, its size is quantized to the
nearest bar. Locator positions can only be changed by division at high zoom
resolutions, or if you hold down Control as you drag (the Cycle). If you hold down Shift
and Control, at a really high zoom resolution, you can drag and change the size of the
Cycle in ticks.
To set locator positions that do not lie on whole bar lines, regardless of the zoom
resolution, enter your locator positions numerically in the Transport window.
Numerical Entry
The positions of the left and right locators (start and end points of the Cycle) are shown
in the Transport window, where they can also be altered.
By Regions
You can use the Set Locators by Regions (default: B) and Set Locators & Play key
commands to set the locators at the start and end of selected Regions; the latter
command also starts playback.
• Set rounded Locators by Regions rounds the position of the locators to the nearest bar.
Chapter 2 Transport 85
Page 86
• The Set rounded Locators & Play key command achieves the same result, but also
starts playback.
Skip Cycle
You can skip a passage in play mode, which is useful for trying out the musical effect of
various transitions.
To set up Skip Cycle:
m
Drag the Skip Cycle area from right to left in the Bar Ruler. If a (normal) Cycle area
already exists, just move the left locator to the right of the right locator.
The Skip Cycle area is shown as a very thin strip at the top edge of the Bar Ruler.
Features of Skip Cycle Mode
When the SPL reaches the right locator position, it skips to the left locator (the “right”
and “left” locators swap positions).
You can use Skip Cycle mode when editing, to leave out parts of the song that you
don’t want to be affected by the edit.
Recording
Selecting a Track
To select the desired recording track, simply click on it.
Only one MIDI track can be record enabled in Logic Express, which may be on another
folder level.
During recording, incoming events are stored in a Region on the selected track.
Note: Audio tracks must be record enabled, and a recording path (a hard disk drive)
defined before audio files can be recorded.
Changing MIDI Tracks
If you record MIDI information, you can change the record track, without stopping
recording—just select a new track, using the Select previous/next track key commands
(default keys: Up or Down Arrow).
86 Chapter 2 Transport
Page 87

Count-In
The Count-in and Record Pre-roll values can be defined in File > Song Settings >
Recording (see “Metronome Settings” on page 466).
This is often useful if the section of the song (just before the part you’re recording)
lacks the sort of rhythmic information necessary to play new parts in time, but there’s
plenty of rhythmic material, once the section you’re recording to gets going.
Options
Record Toggle—Record Repeat
The Record Toggle key command switches between playback and record mode. Record
Repeat repeats the recording from the previous drop-in point.
Record into Selected MIDI Region
Normally, a new MIDI Region is created during every recording. In the Recording
Options (see “Recording Settings” on page 468) of the Song Settings you can activate
Merge New Recording With Selected Region, so that any new data is incorporated into an
existing (and selected) MIDI Region.
Replace Mode
To activate Replace mode, press the Replace button. In replace mode, any newly
recorded data is always stored in a new Region. In addition, any existing Region on the
destination track are cut at the punch in/out points of the recording, and any data
between these points is deleted.
Destructive MIDI Recording
If you select File > Song Settings > Recording > Merge New Recording With Selected Region
(r), and switch on Replace mode, newly recorded events will replace those in existing
MIDI Regions.
The Merge/Replace combination can itself be coupled with the Autodrop and/or Cycle
functions.
Recording in Cycle Mode
All settings for recording in Cycle mode can be made in the Song Settings > Recording
Options (see “Recording Settings” on page 468). You can either use several cycle passes
to record a single Region (Merge only New Regions in Cycle Record (checked), or you can
create a new Region for every cycle pass (unchecked).
A new track can be automatically created for each of these Regions (Auto Create Tracks
in Cycle Record). The Regions you create can also be automatically muted (Auto Mute in
Cycle Record). This mode is very well suited to recording several consecutive versions of
a solo, and then picking the best one.
Chapter 2 Transport 87
Page 88
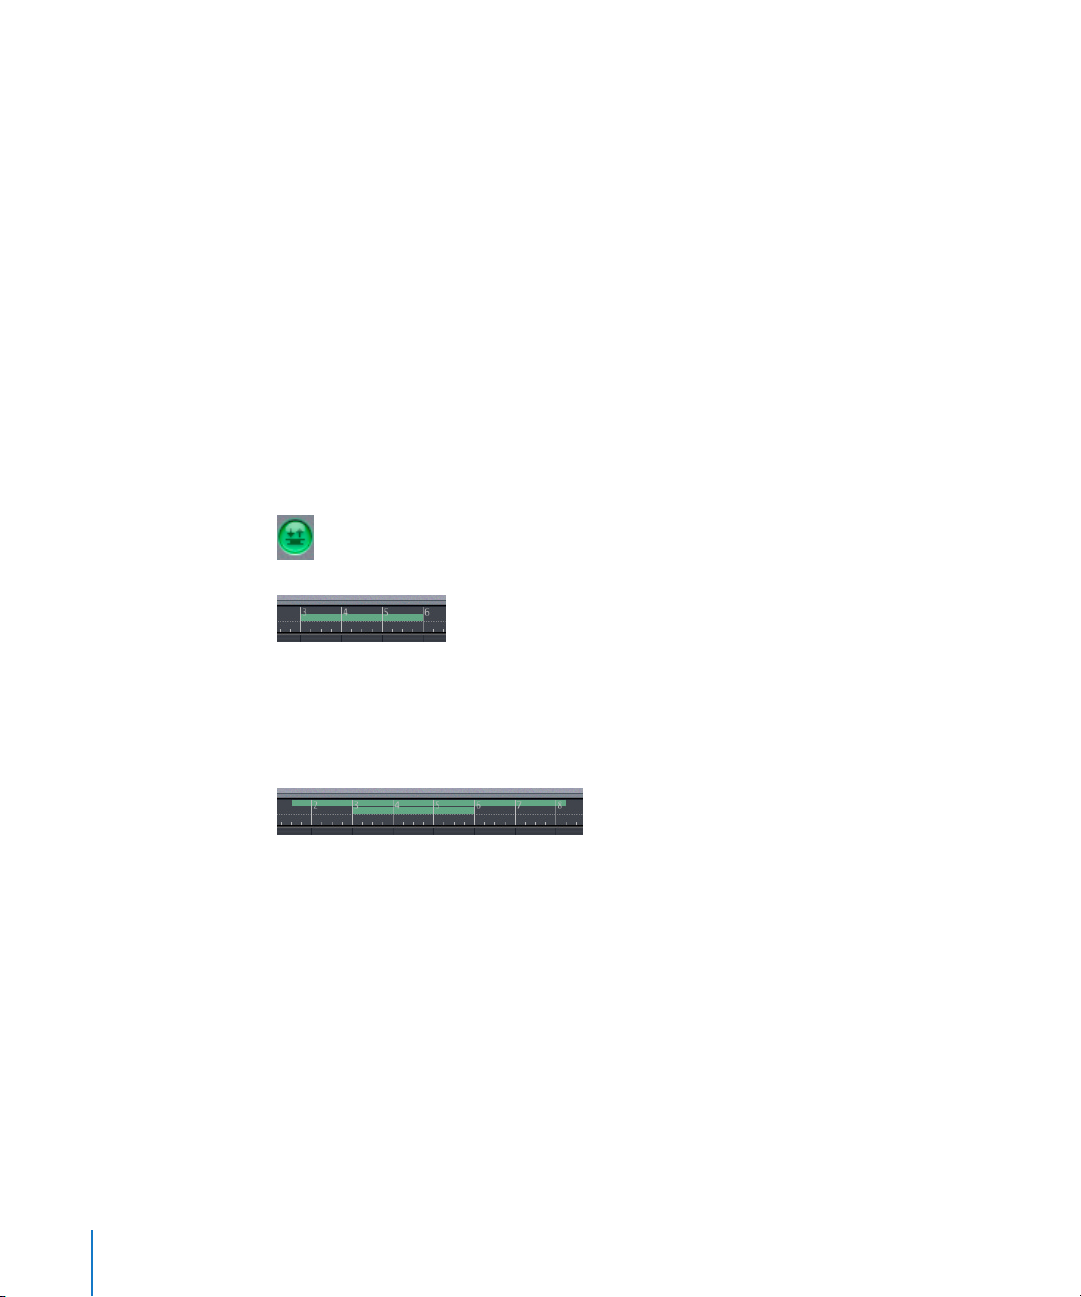
Cycle and Replace
During a cycle recording in Replace mode, existing Regions are deleted during the first
cycle pass—from the punch-in point to either; a punch-out point or the end of the
Cycle. When the second cycle pass begins, recording continues, but no further Regions
are deleted. If you want to replace the end of an existing Region, you don’t need to
stop recording before the second cycle pass begins: the start of the existing Region
remains intact.
Recording With Skip Cycle
If Skip Cycle is switched on, the Cycle area is bypassed during recording.
Autodrop
The term Autodrop means the automatic activation and deactivation of record mode at
predefined positions. Autodrop mode is most commonly used to re-record a badly
played section of an otherwise flawless recording. The advantage of Autodrop mode is
that you can concentrate on your playing, rather than starting and stopping record
mode.
If Cycle mode is inactive, the left and right locators serve as drop-in and drop-out
points. Autodrop is activated by clicking on the Autodrop button.
Defining the Autodrop Area
If both Cycle and Autodrop modes are active, you will see an independent pair of
locators available for the Autodrop range. There are two stripes in the Bar Ruler, the top
one representing the Cycle area, and the bottom one the Autodrop range. The
Autodrop range can be graphically altered in the Bar Ruler, just as you would with a
Cycle area.
Note: If the Bar Ruler display is narrow, hold down Option to ensure that any
alterations made to the Cycle only affect the Autodrop range.
The grid scale—for graphic operations in the Bar Ruler—can be reduced to division
resolution by holding down Control, and to tick resolution by holding down ShiftControl.
88 Chapter 2 Transport
Page 89

Setting Autodrop Numerically
The positions of the Autodrop locators are displayed numerically, to the right of the
Cycle locators on the Transport window. These positions can be altered by using the
mouse as a slider, or by direct numerical entry in this display window.
Recording in Autodrop Mode
To make an autodrop recording, place Logic in Record mode at any position before the
drop-in point. Any events played before the drop-in or after the drop-out points are
channelled through the sequencer as usual, but are not recorded.
If the SPL is positioned after the right locator when you start recording, recording
automatically begins at the drop-in point, following the count-in.
If Autodrop is enabled during recording, the Record button will flash while the song
position is outside the drop locators. This indicates that no recording takes place.
Combining Cycle and Autodrop
If you want to improve a difficult part of a certain passage, you can use a combination
of the cycle and autodrop functions. Cycle mode allows you to practice as many times
as you like before the “final take”. On each cycle pass, only events that fall within the
autodrop range are recorded. This allows you to make use of the preceding song
section to “get into the groove”.
Chase Events
Chase Events searches all MIDI Regions playing at a specified “jump-in” point. The
function examines what all MIDI Regions are doing before the jump-in point, to
determine which events would have affected playback at the jump-in point, if reached
by playing through the song, rather than by just jumping there.
This is a difficult concept to grasp, so here’s another explanation:
If you start playback in the middle of a song by jumping straight to that point (via Cycle
mode looping or by direct SPL placement), you might expect a problem or two with
note playback. If an important note started playing just before the playback start point,
you would expect Logic to overlook it, and the note wouldn’t be heard. Notes, however,
are not the only potential problem. If there were a maximum pitch-bend message just
before the playback start point, you would miss out on this too. Fortunately, Logic is
smarter than your average MIDI sequencer, to misquote Yogi Bear…
Open the File > Song Settings > MIDI > Chase page, to set up the Chase Events function.
Chapter 2 Transport 89
Page 90

The Chase Events function searches all MIDI Regions at the playback start point. It looks
for a selection of the following before the playback start point:
• any notes due to start playing at the playback start point.
• any notes that are still playing at playback start point—held-down sustain pedal
(Chase sustained Notes).
• program changes.
• pitch-bend information.
• continuous controllers 0 to 15.
• continuous “switch” controllers 64 to 71.
• all other controllers (all other Controls).
• monophonic (channel) aftertouch.
There is a potential problem when chasing notes that are used to trigger a drum loop
in a sampler. Unless you are lucky enough to start the MIDI Region precisely at the
beginning of the sample loop, the sample will be triggered at the wrong time and will,
therefore, be played out of sync with the rest of the MIDI Region (at least until the next
trigger note). The problem is that most samplers can only play samples from the
beginning, and cannot synchronize them to the beat when started in the middle.
To solve this potential issue:
Activate the No Transposeparameter of your drum loop instrument, in the instrument’s
Object Parameter box, and switch off the In ‘No Transpose’ instruments option in the
MIDI > Chase page of the Song Settings. The result of this selection is that whenever the
song jumps to a new position, your drum loops will not play until they reach the next
“trigger note”.
The No Transpose parameter actually prevents transposition by the Region playback
parameters, which is also not desirable for drum sounds or loops.
90 Chapter 2 Transport
Page 91

3 Arrange Window
3
The Arrange window is the heart of Logic. It is the view
that you will see most often when working with the
program.
You will learn all about the different interface elements, functions, and features of the
Arrange window in this section. You will also discover how to handle both MIDI and
audio tracks plus a number of other important techniques.
Overview
The Arrange area is where all MIDI and audio information is recorded, on horizontal
tracks. Individual MIDI recordings are called MIDI Regions, audio recordings are called
Audio Regions. Both Region types are displayed as horizontal “beams”. Above the
Arrange area is the Bar Ruler, which displays position information.
91
Page 92

To the left of the Arrange area is the Track List (see “Tracks” on page 92). This is where
you determine which (Audio) Object should play the MIDI or audio information on
each track. You can make various settings for these Objects in the Object Parameter box
in the lower left corner.
As the Regions are arranged graphically, you can also use specialized mouse tools from
the Toolbox to help you perform different operations.
The Region Parameter box (see “MIDI Region Playback Parameters” on page 116) is used
to set playback parameters, such as transposition and quantization (see “Quantization”
on page 120), for individual Regions.
The channel strip at the bottom left corner of the Arrange window always shows the
mixer channel strip of the currently selected track.
Opening the Arrange Window
The Arrange window can be opened by selecting Windows > Arrange in the main
menu, or by pressing Command-1.
If preferred, you may define an alternate key command for Open Arrange Window in the
Key Commands window (see “Key Commands” on page 36).
Note: Many Arrange window features apply to MIDI and Audio Regions, but some are
only relevant to one or the other. This chapter describes general and MIDI features.
Specific audio features are dealt with in Chapter 4, “Audio in the Arrange Window,” on
page 133.
Tracks
A track is where audio signals and MIDI events are recorded (into Regions and MIDI
Regions, respectively). They are stacked vertically and extend horizontally across the
Arrange area. Most of the functions described in this section are identical for MIDI and
audio tracks.
92 Chapter 3 Arrange Window
Page 93
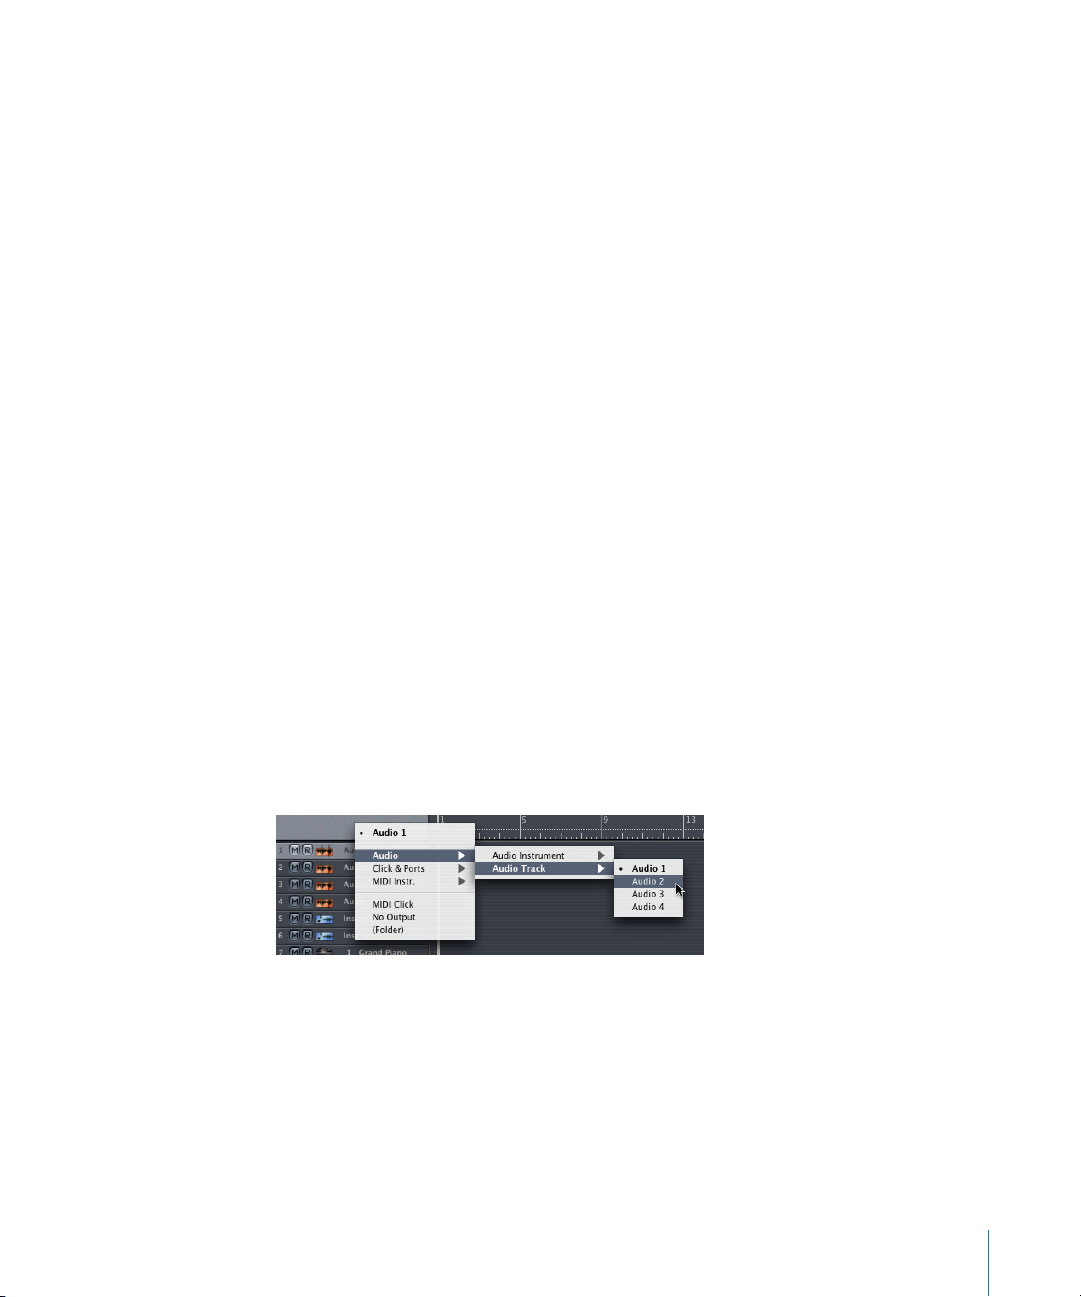
Overview
There are basically three types of tracks:
• Audio tracks: for playback, recording, and automation of audio signals.
• Audio Instrument tracks: for playback, recording, and automation of MIDI data sent
to software instruments.
• MIDI tracks: for playback, recording, and automation of MIDI data sent to external
MIDI devices.
In addition to these tracks, there are also tracks with very specific functions, such as the
Global tracks (see “Global Tracks” on page 239). The descriptions in this section don’t
deal with these special tracks.
Each track is numbered from top to bottom in the Track List. During playback, a small
level meter appears next to the track number.
For MIDI or Audio Instrument tracks:
This indicates the velocity of the recording, and turns red to denote a maximum
velocity value. MIDI tracks also indicate MIDI controller data playback via a small c that
appears temporarily over the track number.
For audio tracks:
The level meter denotes the output level.
Note: The level indicator is only displayed if selected via the Arrange window View >
Track Numbers/Level Meters menu option.
To the right of the track number (and possibly, the Mute, Record, Solo, and Freeze
buttons—dependent on track type and View menu settings) is an icon and a name.
Click-holding on the track name allows you to assign a destination for the track—
regardless of track type.
If you wish to route a track (containing MIDI events in a MIDI Region) to a MIDI sound
generator or software instrument, select a suitable instrument as the track destination.
If you wish to route a track (containing audio data in an Audio Region) to a specific
audio channel number, select the desired audio channel as the track destination.
Chapter 3 Arrange Window 93
Page 94

Note: Strictly speaking, tracks don’t need to be routed to an instrument or audio
channel, as you can assign any Environment Object to the output of a track. The track
data could conceivably be sent to a folder, or directly to a MIDI port (a MIDI Region).
Obviously, audio data would not be understood by a MIDI sound module, so there is no
point in routing a track that contains audio data (in a Region) to an instrument.
Similarly, there is no point in routing a track that contains MIDI data (in a MIDI Region)
to an audio channel.
To aid understanding, we will use the term “instrument” rather than “audio channel” (or
the correct, but long-winded, “track data destination object”) in this section.
A MIDI track is automatically record enabled when selected. The Record Enable button
turns red to indicate this “armed” state. During recording, a MIDI Region (containing the
recorded MIDI events) is created on the selected (and armed) track.
An audio track is not automatically record enabled when selected. You must press the
Record Enable button on the desired track, which will turn red to indicate an “armed”
state. During recording, an Audio Region (a pointer to the recorded audio file) is
created on the selected (and armed) track.
Track Icons
Logic offers high resolution, scalable (from 128 × 128 pixels downwards), and userdefinable icons.
User-Definable Icons
You can create your own icons for tracks. These icons must be of 128 × 128 pixels in size,
must have an alpha channel for transparency and must be saved in the portable
network graphics format (with the “.png” suffix). The filename must also start with a
three-digit number. If this number is below 325, the corresponding built-in Logic icon
will be replaced with your new graphic (you can check the number of existing Logic
icons by clicking on them in the Object Parameter box).
There are two possible locations for user icons:
The ~/Library/Application Support/Logic/Logic Resources/Icons folder can contain icons
which are only valid for the particular user (~ is the user name). If you save your icons
in the root directory—/Library/Application Support/Logic/Logic Resources/Icons—the
icons are valid for all users. If icons with identical numbers exist in both folders, the
icons found in the user folder have priority.
94 Chapter 3 Arrange Window
Page 95

Icon Color
The small, monochromatic icons adopt the color of their “parent” Audio Object or MIDI
Instrument Object—which is also used for newly recorded Regions in the Arrange
window.
The high resolution Arrange icons have their own color and, therefore, cannot adopt
the color of the “parent” Object.
Selecting a Track
You can select a track by clicking on its name or icon in the Track List. This also selects
all Regions on the track (or if the Cycle function is switched on, it only selects the
Regions that fall within the defined Cycle area).
Use the Select Next/Previous Track key commands to select the track above/below the
selected track in the track list (default key assignments: Up Arrow/Down Arrow).
Changing Tracks While Retaining Your Selections
If you click on a new track while holding down Option, the track will be selected
without changing the existing selection of Regions.
Sorting Tracks
To change the position of a track in the Track List, grab the track number, and drag it
up or down. The cursor will turn into a hand graphic, to indicate that the track can be
repositioned vertically.
Creating Tracks
To create a track, use the Track > Create command. The new track is created at the
currently selected track position, and all ensuing tracks (below it) are moved down the
Track List.
To create a track at the bottom of the Track List, double-click below the lowest track in
the track list.
Creating a Track with the Next Instrument
The Track > Create with next Instrument function, creates a new track below the selected
track, and assigns the next instrument to it (from the instrument selection list). Under
most circumstances, this would be the next MIDI channel in the same sound module.
You can also hold down Option while double-clicking under the Track List when you
create a new track.
Copying a Track
If you hold down Option when moving a track, a copy of the track is created at the
destination position. All selected Regions on the old track are also moved to the new
track.
Chapter 3 Arrange Window 95
Page 96

Note: If you hold down Option before grabbing the track number, no extra Regions on
the track will be selected. If no Regions were selected in the first place, an empty track
with the same track instrument is created at the destination position.
If the Cycle function is switched on, all Regions in the Cycle area are moved from the
old track to the new track. The musical result is not any different, because the new track
is played by the same track instrument.
Moving Regions onto a Track
The function Region > Move Selected Regions to Current Track moves all selected Regions
from different tracks onto the selected track. The time position of all Regions is
retained.
Deleting Tracks
To delete the selected track, use the Track > Delete function. If there are any Regions on
the track, a warning message appears first.
If there is no Region selected in the Arrange area, you can perform the same function
by pressing Backspace.
A third method is to grab the track as if to reposition it (see above), and remove it from
the Track List by dragging it to the left.
Deleting Unused Tracks
Use the Track > Delete Unused function to delete any tracks that don’t contain any
Regions.
Naming Tracks
To name a track independently of its assigned instrument, select Track > Create Track
Name.
You can also change the name of an existing track by double-clicking on the
instrument name in the Track List, while holding down Command, and typing in the
text input field that appears.
The track name is then displayed in place of the instrument name in the Track List, and
will be used as the default name for recorded Regions.
If there is enough room vertically (achieved by zooming in vertically), both the track
and instrument name will be displayed.
You can see the instrument name in the Object Parameter box, or check it by clicking
on the track name and holding down the mouse button.
96 Chapter 3 Arrange Window
Page 97

Name While Creating a Track
When you create a track (by double-clicking below the bottom track in the Track List)
you can hold down Command at the same time to open the input box for the track
name.
Deleting Track Names
To delete a track name, select Track > Delete Track Name.
You can also double-click on the track name while holding down Command. This opens
the text input field for the track name. The name can be deleted using Backspace. The
instrument name will then appear in the Track List again.
Muting Tracks
Both MIDI and audio tracks have Mute buttons to the left side of the Track List,
between the track number and the icon. Muting a track stops it from playing. To show
or hide the blue Mute buttons, select View > Track Mute Buttons.
Muting When the Mute Buttons Are Hidden
If the Mute buttons are hidden—to save space—you can still mute a track to the left of
the track number.
If you move the mouse to the left edge of the Track List by the track number, the
mouse pointer turns into a hand; clicking the mouse shortly now mutes the track (or if
the track is already muted, it cancels the mute). Muted tracks are then indicated by a •.
You can also use the Mute Track key command to mute a track.
Muting All Tracks
If you hold Command while clicking on a Mute button in the Track List, all tracks in the
currently-selected display level (or folder) are muted. If they were already muted, they
will be unmuted.
Mute Instrument
If you mute a track while holding down Command-Option, all tracks in the current
song with the same track instrument (including those in all folders) are muted.
Chapter 3 Arrange Window 97
Page 98

Soloing Tracks
Both MIDI and audio tracks (and folders) offer Track Solo buttons to the left side of the
Track List, between the track number and the icon. Soloing a track isolates it while
playing—and mutes all other tracks. To show or hide the yellow Track Solo buttons,
select View > Track Solo Buttons.
Activating any Track Solo button enables Solo Lock mode (see “Solo and Solo Lock” on
page 81), if necessary, and adds all Regions on that track to the Solo Lock Group. The
button turns yellow when active. Deactivating a Track Solo button removes all Regions
on the track from the Solo Lock group and—in cases where no other Track’s Solo
button is active—disables Solo Lock. Disabling the global Solo (Lock), sets all individual
Track Solo buttons to the Off position.
Soloing When the Track Solo Buttons Are Hidden
If the Track Solo buttons are hidden—to save space—you can still solo a track with the
Solo button on the Transport bar.
Simply press the Transport Solo button, and click on the desired track. Soloed tracks are
indicated by a yellow outline.
Soloing Multiple Tracks
If you hold down Shift while the Transport Solo button is active, and click on the
desired track names, you will solo them (when the track Solo buttons are hidden).
If you hold any modifier while clicking on a Solo button in the Track List, all tracks in
the currently-selected display level (or folder) are soloed. If they were already soloed,
they will be unsoloed.
Note: You can make use of the Track Button Slide Activation feature for both the Track
Solo and Mute button functions (see “Track Button Slide Activation” on page 98).
Track Button Slide Activation
Buttons on Arrange tracks (Solo, Mute, Record Enable, Freeze) support “slide activation”,
which is similar to running your finger across several channel strip buttons on good
hardware mixing consoles.
As a usage example of slide activation in Logic, click-hold on the Mute button of one
track, and drag the mouse up or down. The Mute buttons of all “swiped” tracks will
switch to the same state.
Simply drag over the Mute buttons of the same tracks to undo the Mute.
98 Chapter 3 Arrange Window
Page 99

Selecting an Instrument
Click-holding on an Instrument’s name (or icon) in the Track List opens a hierarchical
pull-down menu. The sub menus of this pull-down menu correspond to the
Environment layers (see “Layers” on page 154) of your song. This is where you select
and assign Instruments to a track.
Changing an Instrument Assignment Globally
If you hold down Option while selecting an Instrument, the previously selected
Instrument will be replaced in every track in the current song by the new Instrument
(even in tracks in folders).
Selecting Track Instruments by Drag and Drop
You can select any of the Objects in the Environment window to be the current track
Instrument, by simply dragging one out of the Environment window, and dropping it
onto the Track List.
If you move a Multi Instrument into the Track List, the selected sub-channel is set as the
track Instrument. If no sub-channel is selected, all initialized (the sub-channels that are
not crossed out) sub-channels are set for the destination track, and the tracks below
that. If there are no tracks below the destination track, new tracks will be created.
In all cases, the Environment Objects involved are completely unaltered.
Special Types of Instruments
In addition to the normal instruments which are described in the Instruments section
(see “MIDI Instruments” on page 101), there are two other possible track settings for
which there is no corresponding Environment Object:
No Output
Tracks assigned as No Output send no data. This can be useful in situations where you
wish to store data (such as SysEx) that you don’t wish to send.
Folder
This setting is used when you want the track to play a folder (see “Overview” on
page 122). Normal Regions will not play on a track set to the Folder instrument.
Protecting Tracks
Tracks can be protected, preventing any alterations:
• Existing Regions and their contents cannot be altered.
• No recording is possible on protected tracks.
• New Regions cannot be created.
Chapter 3 Arrange Window 99
Page 100

If the Track Protect button is not visible in the Track List, you can switch it on via the
Arrange menu View > Track Protect Buttons. Clicking on the Lock button(s) toggles
between locked and unlocked mode.
If you hold Command while clicking on a Track Protect button in the Track List, all
tracks in the currently-selected display level (or folder) are protected. If they were
already protected, they will be unprotected.
Arrange Channel Strip
The channel strip of the currently selected Arrange track will appear in the Parameters
area of the Arrange window, provided that there is sufficient space to display it.
If there is not enough vertical room, click the upper left triangles in the Region
Parameter and/or Object Parameter boxes and/or hide the Toolbox (View > Toolbox).
Note: The Channel Strip Only option in the View menu (and key command) allows you
to hide all elements of the Parameters area — except the Arrange channel strip.
100 Chapter 3 Arrange Window
 Loading...