


TCX-85
Atomic Time Clock
Installation and Operation Guide 
PIX-75 |
www.amano.com/time 1-800-253-9836 |
1 |

Thank You….
For purchasing another fine product from Amano Cincinnati, Inc.
For safe and proper operation, please carefully read the manual before using the time clock and save it for reference.
Proprietary Notice
This document contains proprietary information and such information may not be reproduced in whole or part without the written permission from:
Amano Cincinnati, Inc.
140 Harrison Ave.,
Roseland, New Jersey 07068-1239
Amano Cincinnati, Inc. reserves the right to make equipment changes and improvements, which may not be reflected in this document. Portions of this document may have been updated to include the latest hardware or firmware version, if applicable.
To ensure safe use of this time recorder/stamp, be sure to thoroughly read this manual in its entirety before any attempt is made to operate the equipment. After you have finished reading this manual, be sure to store it in a safe place for future reference.
For more information about Amano’s complete line of time products, visit our web site at:
http://www.amano.com/Time
Warranty Notice
Any claim for warranty, express or implied, due to the clocks failure to properly receive the radio signal because of interference, whatever may be the source of this interference, are hereby expressly excluded.
The TCX-85 has the atomic clock (radio-controlled clock) feature which displays the current time precisely by automatically receiving time code signals on long wave radio from the transmitting station. The unit receives the time code signal via its built-in antenna system.
Note: This equipment has been tested and found to comply with the limits for a Class A digital device, pursuant to part 15 of the FCC Rules. These limits are designed to provide reasonable protection against harmful interference when the equipment is operated in a commercial environment. This equipment generates uses and can radiate radio frequency energy and, if not installed and used in accordance with the instruction manual, may cause harmful interference to radio communications. Operation of this equipment in a residential area is likely to cause harmful interference in which case the user will be required to correct the interference at his own expense.
PIX-75 |
www.amano.com/time 1-800-253-9836 |
2 |

Table of Contents |
|
GUIDELINES FOR SAFE OPERATION….. ................................................................................................................4 |
|
Remove the Cover & Packing Material .................................................................................................................. |
6 |
Setting the Time (P1) ........................................................................................................................................ |
7 |
Setting the Date [Month/Date/Year](P2) .............................................................................................................. |
7 |
Enabling or Disabling Daylight Saving Time (P3).................................................................................................... |
8 |
Changing the Print Format (P4) 12Hr (Standard) or 24Hr (Military) Default = Format-1 (12hr)..................................... |
8 |
Set Print Hours Format (P501).......................................................................................................................... |
10 |
Set Print Minutes Format (P502) ....................................................................................................................... |
10 |
Set Print Year Format (P503)............................................................................................................................ |
12 |
Set Print Leading Zero (P504)........................................................................................................................... |
13 |
Set Print Language (P505) ............................................................................................................................... |
13 |
Setting Custom Print (Symbol Printing) (P506).................................................................................................... |
15 |
Enabling/Disabling Auto Print (P601) ................................................................................................................. |
20 |
Set Paper Detection (P602) .............................................................................................................................. |
21 |
Set Print Direction (P603) ................................................................................................................................ |
21 |
Set Display Hour Format (P604)........................................................................................................................ |
22 |
Enable/Disable Atomic Clock Feature (P605) ....................................................................................................... |
22 |
Set Display Contrast (P606) ............................................................................................................................. |
23 |
Set LCD Backlight (P607)................................................................................................................................. |
24 |
Set Auxiliary Display (P608) ............................................................................................................................. |
24 |
Changing Begin Date for Daylight Saving Time (P609).......................................................................................... |
25 |
Changing End Date for Daylight Saving Time (P610) ............................................................................................ |
26 |
Set Time Zone (P611) ..................................................................................................................................... |
27 |
Diagnostics.................................................................................................................................................... |
28 |
Main Board Version (P701)............................................................................................................................... |
28 |
Show Ink Count (P702) ................................................................................................................................... |
29 |
Warning Message (P703) ................................................................................................................................. |
29 |
LCD Test (P704) ............................................................................................................................................. |
30 |
Advanced Diagnostics (P705) ........................................................................................................................... |
30 |
Invalid Codes ................................................................................................................................................. |
31 |
Atomic Clock Diagnostic ON (Code 11)............................................................................................................... |
31 |
Atomic Clock Diagnostic OFF (Code 12).............................................................................................................. |
32 |
Reset Settings to Factory Defaults (Code 32) ...................................................................................................... |
32 |
Show Total Prints (Code 88) ............................................................................................................................. |
32 |
Acceptable Print Media .................................................................................................................................... |
33 |
Adjusting the Print Margin................................................................................................................................ |
33 |
Atomic Clock Feature (Not available in HI and AK) ............................................................................................... |
34 |
Ribbon Cartridge Replacement.......................................................................................................................... |
35 |
Parts............................................................................................................................................................. |
37 |
Error Messages............................................................................................................................................... |
37 |
TCX-85 Support.............................................................................................................................................. |
39 |
TCX-85 Cleaning............................................................................................................................................. |
40 |
Resetting Clock After Extended Loss of Power ..................................................................................................... |
40 |
TCX-85 Power Modes ...................................................................................................................................... |
40 |
TCX-85 Time Display Modes ............................................................................................................................. |
40 |
Wall Mounting Template .................................................................................................................................. |
41 |
TCX-85 Programable Features Summary ............................................................................................................ |
42 |
Warranty Notice ............................................................................................................................................. |
43 |
Wall Mounting (Optional) ................................................................................................................................. |
43 |
Chapter 2 – Operation ..................................................................................................................................... |
45 |
TCX-85 Views ................................................................................................................................................ |
45 |
TCX-85 View Description.................................................................................................................................. |
45 |
Auxiliary Display............................................................................................................................................. |
47 |
Warranty Information...................................................................................................................................... |
48 |
Specifications................................................................................................................................................. |
49 |
Mounting Template ......................................................................................................................................... |
51 |
PIX-75 |
www.amano.com/time 1-800-253-9836 |
3 |
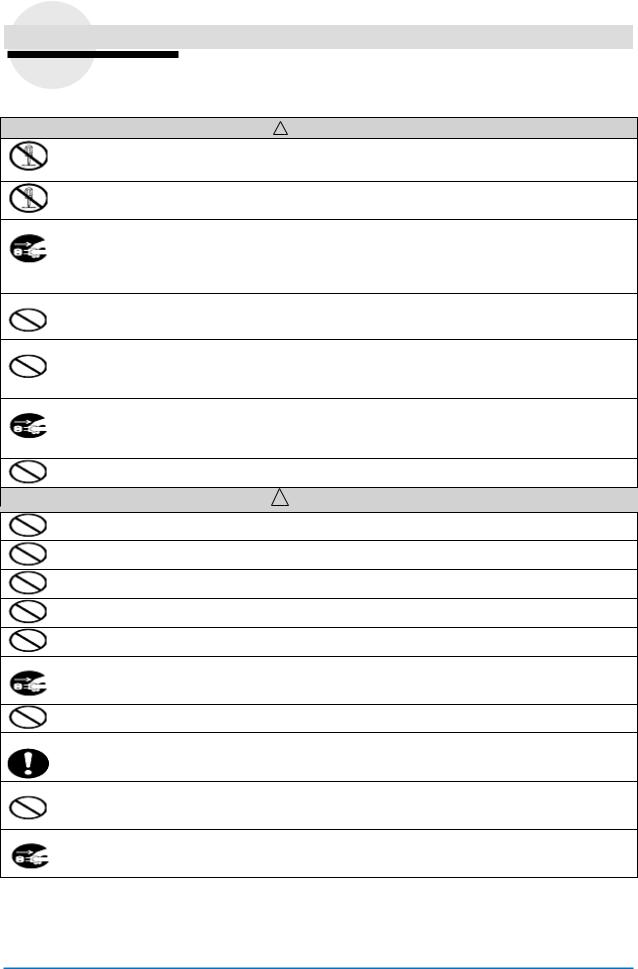
GUIDELINES FOR SAFE OPERATION…..
To ensure safe operation, please carefully read the following warnings and cautions prior to using the TCX-85 Electronic time recorder/stamp.
Warning
Do not disassemble the unit. There is a high voltage present inside, possibly leading to an electric shock.
Do not modify the unit. Modifications may cause a fire and/or electric shock.
If any anomaly occurs, for example, heat or smoke is generated or an odor is emitted, unplug the unit immediately and contact your dealer for servicing. There is a danger that further use may cause a fire or electric shock.
Do not use any voltage of the power source other than designated.
Do not share a single outlet with another plug. These may lead to fire or shock hazards.
Do not damage, break, or modify the power cord. Do not put a heavy object on, pull, or forcefully bend the cord, either. These may damage the cord, possibly resulting in a fire or electric shock.
If foreign matter should get in the unit (including a piece of metal, water, or liquid), disconnect the plug from the outlet immediately and contact your dealer for servicing. There is a danger that further use may cause a fire or electric shock.
Do not plug or unplug the unit with a wet hand. You may get an electric shock.
Caution
Do not place the unit on an uneven or tilted surface. This may result in injuries due to the unit dropping or falling off.
Do not put a water-filled container or a metal object on top of the unit. If water is spilled or the metallic object slips inside, a fire or shock hazard may occur.
Do not install the unit in a humid or dusty environment. It may cause a fire or electric shock.
Do not place the unit near kitchen counter or humidifier. Oil, smoke, or steam generating from them may cause fire or shock hazards.
Do not yank the power cord to disconnect from the outlet. Hold the plug with your hand to do so, or the cord may be damaged, possibly leading to a fire or electric shock.
Remove the line cord plug from the outlet before transferring the unit, or it may damage the cord, possibly leading to a fire or electric shock.
Be careful not to contact the print head, as you may get hurt or burned.
Make sure to insert the power plug as far as it will go. Improper insertion of the plug may develop fire or shock hazards.
Do not insert or drop any other time card than specified into the slot. Such misuse may cause a fire or electric shock.
If the unit should be dropped or the case is broken, unplug the unit and contact your dealer for servicing. Further use may lead to a fire or shock hazard.
Relation to the Health and the Environment
The plastic currently used for the outer enclosure of this apparatus does not contain the halogen substance.
PIX-75 www.amano.com/time 1-800-253-9836 4
Cover Removal
Note – See www.amano.com/tkb for videos and/or the latest information about the TCX-85, etc. The printed time format can be different than the display format!
PIX-75 |
www.amano.com/time 1-800-253-9836 |
5 |

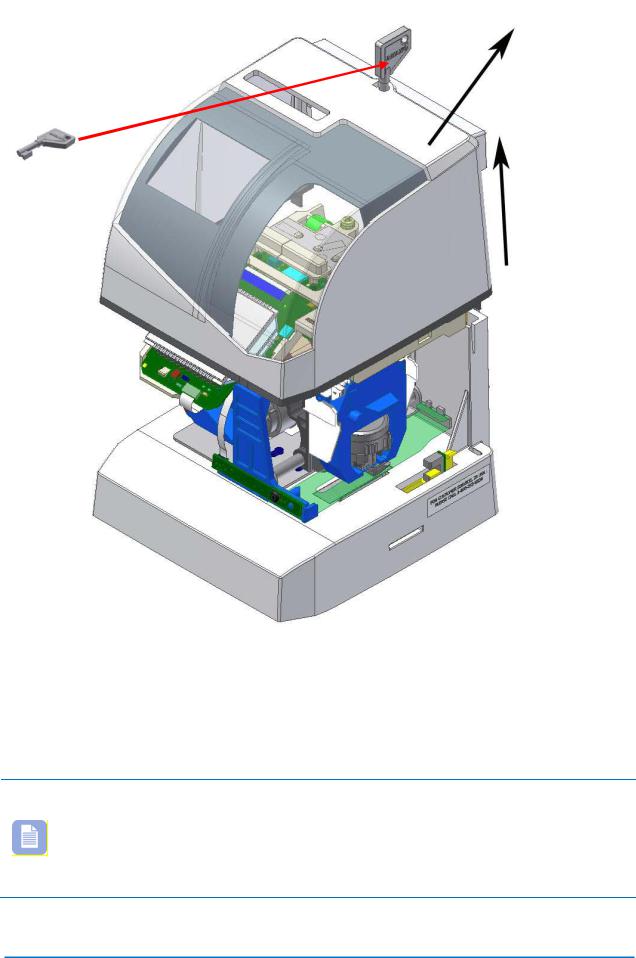
Remove the Cover & Packing Material
1.Insert the key provided into the keyhole on top of the clock, turn clockwise ¼ turn to unlock the cover and lift the cover to remove (see Figure on previous page).
2.Remove the cardboard spacer located above the ribbon cartridge by pulling straight out (see right-hand Figure).
3.Lift up the printer carriage by placing your fingers under the metal motor on the left-hand side and remove the foam spacer (white) located under the print head (see right-hand Figures). Release the printer carriage.
4.After removing the foam spacer with the
cover off plug in the clock!
Note –Should the clock not power up, verify that the AC Adapter is plugged into the rear of the clock. See Figure 4 on page 41 and Figure 5 on page 44 for AC Adapter plug-in location.
Note – If your TCX-85 is located in an area that cannot receive the Atomic time signal, DO NOT be concerned. The TCX-85 will accurately keep the time using its Quartz mechanism (plus or minus three seconds per week).
When you first receive the clock, it may be necessary to adjust the time so the test printout may not show the accurate time.
PIX-75 |
www.amano.com/time 1-800-253-9836 |
6 |
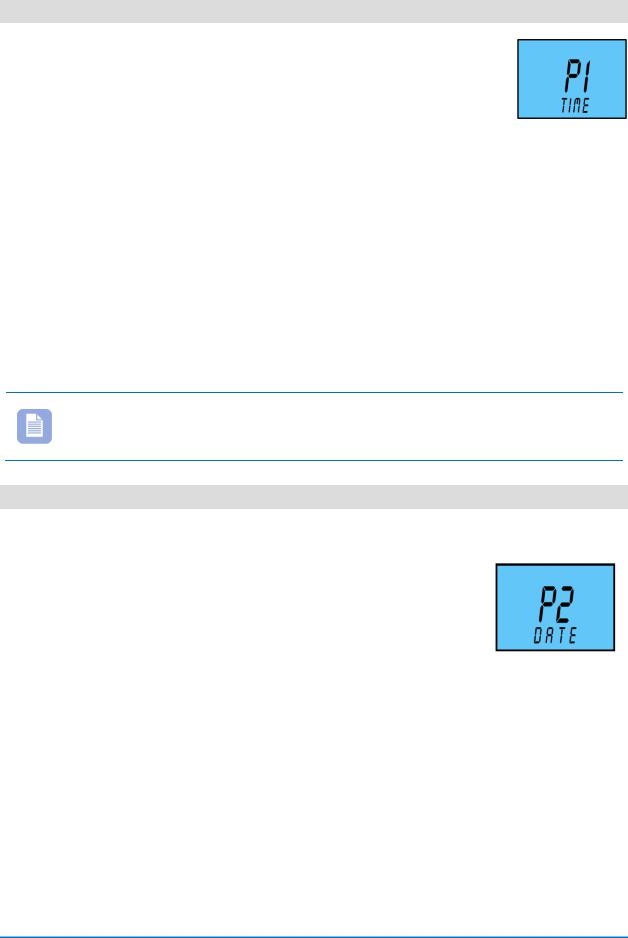
Setting the Time (P1)
1.With the cover removed, press the PROGRAM button to begin programming mode and P1 TIME will appear.
2.Press the ENTER button one time. The hours will start flashing.
3.Press the + or – button to increase or decrease the hours to the desired value.
4.Press the ENTER button once to accept the current hours and go to the minutes setup mode. The minutes will start flashing.
5.Press the + or – button to increase or decrease the minutes. The seconds will automatically start at zero when entering minutes.
6.Press the ENTER button once to accept the current minutes and go back to the previous menu.
7.Press the PROGRAM button to exit programming or Press + to go to the next program menu.
Note – During programming the time should be set depending on the mode the display is currently set in [either 12-hour or 24hour].
Setting the Date [Month/Date/Year](P2)
1.With the cover removed, press the PROGRAM button to begin programming mode and P1 TIME will appear.
2.Press the + button to change the current programming mode until the display shows P2 DATE.
3.Press the ENTER button once and the clock will display the current date on the 2nd line. The month will start flashing. Press the + or – button to increase or decrease the month value.
4.When the desired month is reached, press the ENTER button once to accept the current month and go to the date setup mode.
5.The date of the month will start flashing. Press the + or – button to increase or decrease the date to the desired value.
6.Press the ENTER button once to accept the current displayed date of the month and go to the year setup mode.
7.The year will start flashing. Press the + or – button to increase or decrease the year to the desired value.
8.Press the ENTER button once to accept the current displayed year and return to the previous menu.
PIX-75 |
www.amano.com/time 1-800-253-9836 |
7 |
9.Press the PROGRAM button to exit programming or Press + to go to the next program menu.
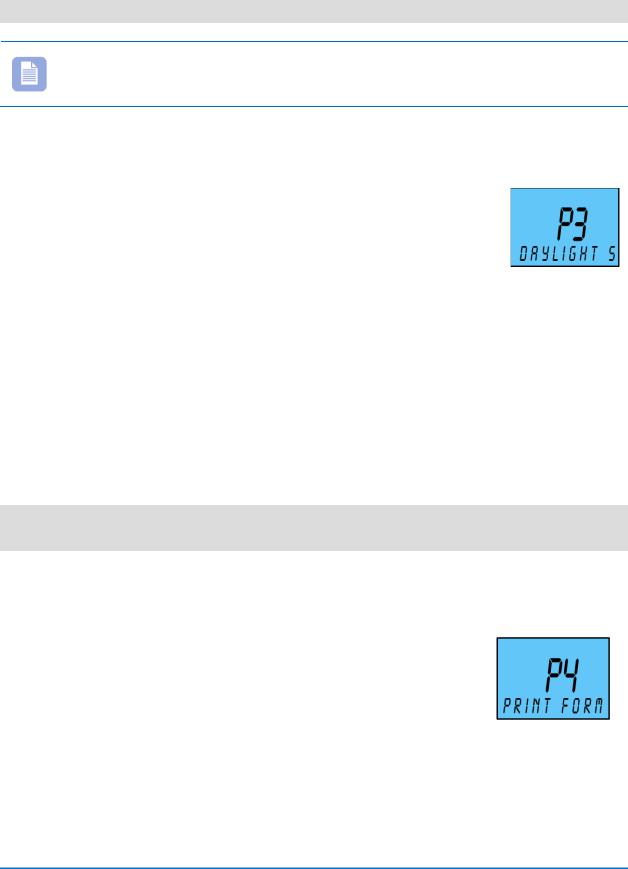
Enabling or Disabling Daylight Saving Time (P3)
Note – when this setting is set to ENABLED, the clock’s time will automatically change for Daylight Saving. When this setting is set to DISABLED, the clock’s time will NOT change for Daylight Saving.
1.With the cover removed, press the PROGRAM button to begin programming mode and P1 TIME will appear.
2.Press the + button to change the current programming mode until the display shows P3 DAYLIGHT SAVING. [The second line will scroll].
3.Press the ENTER button and the clock will begin flashing
the current Daylight Saving setting.
4.Press the + or – button to change the Daylight Saving setting to the desired value of ENABLED or DISABLED. The default setting = Enabled [ON].
5.Press the ENTER button to set [save] the current value and go back to the previous menu.
6.Press the PROGRAM button to exit programming or Press + to go to the next program menu.
Changing the Print Format (P4) 12Hr (Standard) or 24Hr (Military) Default = Format-1 (12hr)
1.With the cover removed, press the PROGRAM button to begin programming mode and P1 TIME will appear.
2.Press the + button to change the current programming
mode until the display shows P4 PRINT FORMAT. [The second line will scroll].
3.Press the ENTER button once and the clock will flash the current print format. The default setting = FORMAT- 1.
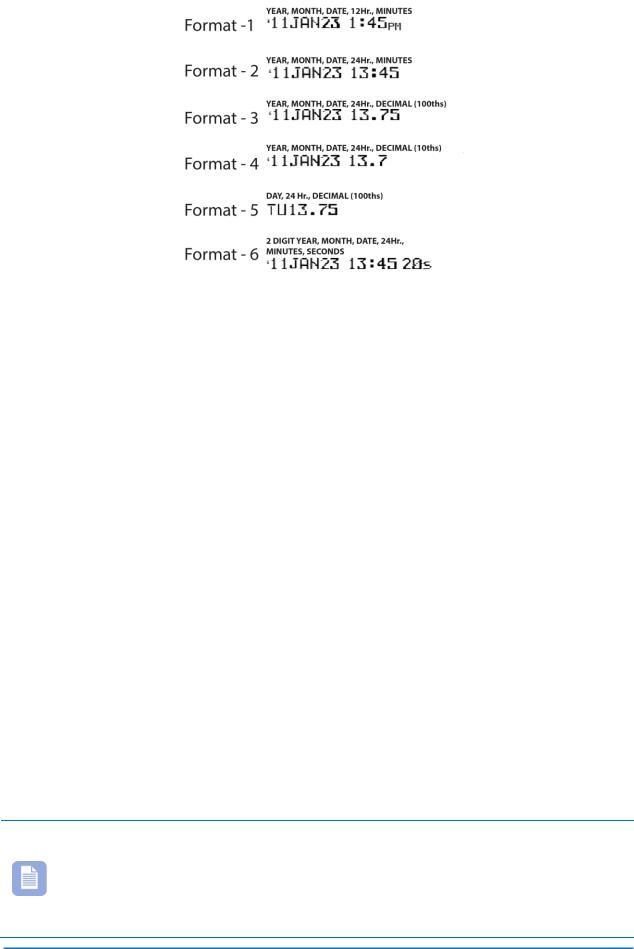
4.Press the + or – button to increase or decrease the print format value to 1, 2, 3, 4, 5, or 6. See the following for examples of Print Format:
PIX-75 |
www.amano.com/time 1-800-253-9836 |
8 |
5.Press the ENTER button once to accept the current value.
6.Press the PROGRAM button to exit programming or Press + to go to the next program menu.
There are six (6) print formats pre-configured to select [Format 1 thru Format 6]. Each print format has its own pre-configured print content. See the previous illustration or the following:
Format 1 [default] |
|
|
|
|
|
|
|
|
|
|
|
|
|
|
|
|
|
|
|
||||
2 Digit Year |
|
Space |
|
Month |
|
Space |
|
Date |
|
Space |
12 Hour |
|
60th Minutes |
|
|||||||||
Format 2 |
|
|
|
|
|
|
|
|
|
|
|
|
|
|
|
|
|
|
|
|
|
|
|
2 Digit Year |
|
Space |
|
Month |
|
Space |
|
Date |
|
Space |
24 Hour |
|
60th Minutes |
|
|||||||||
Format 3 |
|
|
|
|
|
|
|
|
|
|
|
|
|
|
|
|
|
|
|
|
|
|
|
2 Digit Year |
|
Space |
|
Month |
|
Space |
|
Date |
|
Space |
24 Hour |
|
100th Minutes |
|
|||||||||
Format 4 |
|
|
|
|
|
|
|
|
|
|
|
|
|
|
|
|
|
|
|
|
|
|
|
2 Digit Year |
|
Space |
|
Month |
|
Space |
|
Date |
|
Space |
24 Hour |
|
10th Minutes |
|
|||||||||
Format 5 |
|
|
|
|
|
|
|
|
|
|
|
|
|
|
|
|
|
|
|
|
|
|
|
Day |
|
Space |
|
24 Hour |
|
100h Minutes |
|
|
|
|
|
|
|
|
|||||||||
Format 6 |
|
|
|
|
|
|
|
|
|
|
|
|
|
|
|
|
|
|
|
|
|
|
|
2 Digit |
|
Space |
|
Month |
Space |
|
Date |
|
Space |
24 Hour |
|
60 th |
Second |
|
|||||||||
Year |
|
|
|
|
|
|
|
|
|
|
|
|
|
|
|
|
|
|
Minutes |
s |
|
||
Note – When the print format is changed, the following settings are overridden:
The custom symbol printing is overridden by the selected format.
There will only be one line printed for the selected format.
The “Print Year”, “Print Minute”, and “Print Hour” settings will be overridden by the selected pre-defined print format. However, these settings can be changed after selecting the pre-defined print format.
PIX-75 |
www.amano.com/time 1-800-253-9836 |
9 |
Set Print Hours Format (P501)
This setting will override the default print hour setting of the selected print format.
1.With the cover removed, press the PROGRAM button to begin programming mode and P1 TIME will appear.
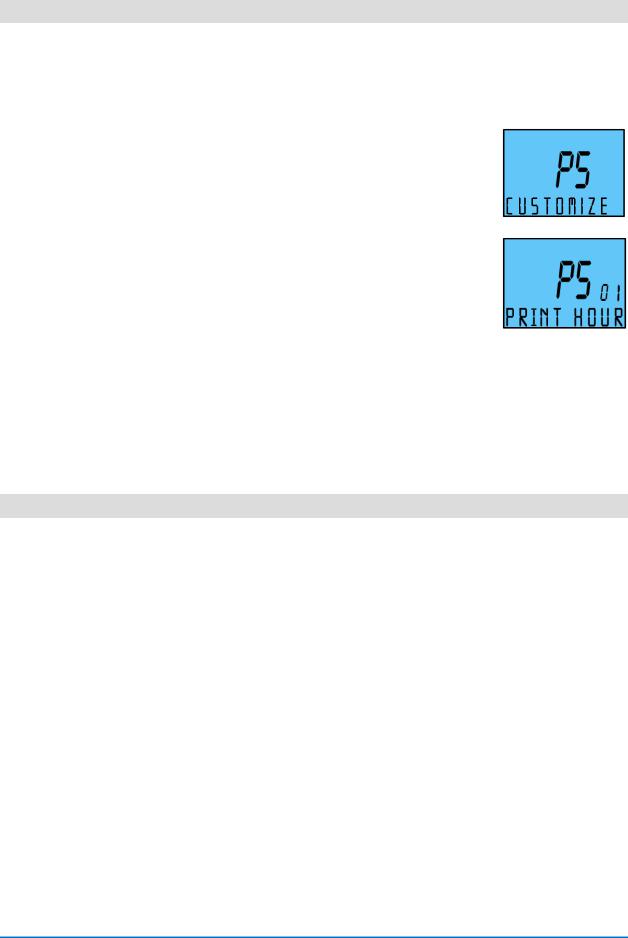
2.Press the + or – button to change the current
programming mode until the display shows P5
CUSTOMIZE.
3.Press the ENTER button once and the clock will
display P501 PRINT HOUR.
4.Press the ENTER button once and the clock will start flashing the current print hours format.
5.Press the + or – button to change the value. The
choices are 12-HOUR or 24-HOUR. The default setting = 12-HOUR.
6.Press the ENTER button once to accept the current displayed value and go back to the previous menu.
7.Press the PROGRAM button 2 times to exit ALL programming or Press + to go to the next program menu.
Set Print Minutes Format (P502)
1.With the cover removed, press the PROGRAM button to begin programming mode and P1 TIME will appear.
2.Press the + or – button to change the current programming mode until the display shows P5 CUSTOMIZE.
3.Press the ENTER button once and the clock will display the submenu for other settings such as P501.
4.Press the + or – button until the display shows
P502 PRINT MINUTE. [The second line will scroll].
5.Press the ENTER button once and the clock will start flashing the current print minutes format.
6.Press the + or – button to change the value. The choices are 1/60th
MINUTE, 1/100th MINUTE, 1/10th MINUTE, or 1/20th MINUTE. The default = 1/60th.
7.Press the ENTER button once to accept the current displayed value and go back to the previous menu.
PIX-75 |
www.amano.com/time 1-800-253-9836 |
10 |
8.Press the PROGRAM button 2 times to exit ALL programming or Press + to go to the next program menu.
The user can set the print minutes from any of the following options:
1/10th Minutes – The minutes will be printed in 1/10 format, which means 6 minutes equal to 0.1 hour.
1/20th Minutes – The minutes will be printed in 1/20 format, which means 3 minutes equal 0.05 hour.
1/60th Minutes – The minutes will be printed in 1/60 format (Default), which means 1 minute equals 0:01 hour.
1/100th Minutes – The minutes will be printed in 1/100 format, which means 36seconds equal 0.01 hour.
Based on the “print minute” setting, an imprint will be made as illustrated in the following table:
M’S” |
0’00” |
0’36” |
1’00” |
1’12” |
1’48” |
2’00” |
2’24” |
3’00” |
3’36” |
|
4’00” |
4’12” |
4’48” |
5’00” |
5’24” |
60th |
hh:00 |
hh:00 |
hh:01 |
hh:01 |
hh:01 |
hh:02 |
hh:02 |
hh:03 |
hh:03 |
|
hh:04 |
hh:04 |
hh:04 |
hh:05 |
hh:05 |
10th |
hh.0 |
hh.0 |
hh.0 |
hh.0 |
hh.0 |
hh.0 |
hh.0 |
hh.0 |
hh.0 |
|
hh.0 |
hh.0 |
hh.0 |
hh.0 |
hh.0 |
100th |
hh.00 |
hh.01 |
hh.01 |
hh.02 |
hh.03 |
hh.03 |
hh.04 |
hh.05 |
hh.06 |
|
hh.06 |
hh.07 |
hh.08 |
hh.08 |
hh.09 |
20th |
hh.00 |
hh.00 |
hh.00 |
hh.00 |
hh.00 |
hh.00 |
hh.00 |
hh.05 |
hh.05 |
|
hh.05 |
hh.05 |
hh.05 |
hh.05 |
hh.05 |
|
|
|
|
|
|
|
|
|
|
|
|
|
|
|
|
M’S” |
6’00” |
6’36” |
7’00” |
7’12” |
7’48” |
8’00” |
8’24” |
9’00” |
9’36” |
|
10’00” |
10’12” |
10’48” |
11’00” |
11’24” |
60th |
hh:06 |
hh:06 |
hh:07 |
hh:07 |
hh:07 |
hh:08 |
hh:08 |
hh:09 |
hh:09 |
|
hh:10 |
hh:10 |
hh:10 |
hh:11 |
hh:11 |
10th |
hh.1 |
hh.1 |
hh.1 |
hh.1 |
hh.1 |
hh.1 |
hh.1 |
hh.1 |
hh.1 |
|
hh.1 |
hh.1 |
hh.1 |
hh.1 |
hh.1 |
100th |
hh.10 |
hh.11 |
hh.11 |
hh.12 |
hh.13 |
hh.13 |
hh.14 |
hh.15 |
hh.16 |
|
hh.16 |
hh.17 |
hh.18 |
hh.18 |
hh.19 |
20th |
hh.10 |
hh.10 |
hh.10 |
hh.10 |
hh.10 |
hh.10 |
hh.10 |
hh.15 |
hh.15 |
|
hh.15 |
hh.15 |
hh.15 |
hh.15 |
hh.15 |
|
|
|
|
|
|
|
|
|
|
|
|
|
|
|
|
M’S” |
12’00” |
12’36” |
13’00” |
13’12” |
13’48” |
14’00” |
14’24” |
15’00” |
15’36” |
|
16’00” |
16’12” |
16’48” |
17’00” |
17’24” |
|
|
|
|
|
|
|
|
|
|
|
|
|
|
|
|
60th |
hh:12 |
hh:12 |
hh:13 |
hh:13 |
hh:13 |
hh:14 |
hh:14 |
hh:15 |
hh:15 |
|
hh:16 |
hh:16 |
hh:16 |
hh:17 |
hh:17 |
10th |
hh.2 |
hh.2 |
hh.2 |
hh.2 |
hh.2 |
hh.2 |
hh.2 |
hh.2 |
hh.2 |
|
hh.2 |
hh.2 |
hh.2 |
hh.2 |
hh.2 |
100th |
hh.20 |
hh.21 |
hh.21 |
hh.22 |
hh.23 |
hh.23 |
hh.24 |
hh.25 |
hh.26 |
|
hh.26 |
hh.27 |
hh.28 |
hh.28 |
hh.29 |
20th |
hh.20 |
hh.20 |
hh.20 |
hh.20 |
hh.20 |
hh.20 |
hh.20 |
hh.25 |
hh.25 |
|
hh.25 |
hh.25 |
hh.25 |
hh.25 |
hh.25 |
|
|
|
|
|
|
|
|
|
|
|
|
|
|
|
|
M’S” |
18’00” |
18’36” |
19’00” |
19’12” |
19’48” |
20’00” |
20’24” |
21’00” |
21’36” |
|
22’00” |
22’12” |
22’48” |
23’00” |
23’24” |
|
|
|
|
|
|
|
|
|
|
|
|
|
|
|
|
60th |
hh:18 |
hh:18 |
hh:19 |
hh:19 |
hh:19 |
hh:20 |
hh:20 |
hh:21 |
hh:21 |
|
hh:22 |
hh:22 |
hh:22 |
hh:23 |
hh:23 |
10th |
hh.3 |
hh.3 |
hh.3 |
hh.3 |
hh.3 |
hh.3 |
hh.3 |
hh.3 |
hh.3 |
|
hh.3 |
hh.3 |
hh.3 |
hh.3 |
hh.3 |
100th |
hh.30 |
hh.31 |
hh.31 |
hh.32 |
hh.33 |
hh.33 |
hh.34 |
hh.35 |
hh.36 |
|
hh.36 |
hh.37 |
hh.38 |
hh.38 |
hh.39 |
20th |
hh.30 |
hh.30 |
hh.30 |
hh.30 |
hh.30 |
hh.30 |
hh.30 |
hh.35 |
hh.35 |
|
hh.35 |
hh.35 |
hh.35 |
hh.35 |
hh.35 |
|
|
|
|
|
|
|
|
|
|
|
|
|
|
|
|
M’S” |
24’00” |
24’36” |
25’00” |
25’12” |
25’48” |
26’00” |
26’24” |
27’00” |
27’36” |
28’00” |
28’12” |
28’48” |
29’00” |
29’24” |
|
|
|
|
|
|
|
|
|
|
|
|
|
|
|
|
|
60th |
hh:24 |
hh:24 |
hh:25 |
hh:25 |
hh:25 |
hh:26 |
hh:26 |
hh:27 |
hh:27 |
hh:28 |
hh:28 |
hh:28 |
hh:29 |
hh:29 |
|
10th |
hh.4 |
hh.4 |
hh.4 |
hh.4 |
hh.4 |
hh.4 |
hh.4 |
hh.4 |
hh.4 |
hh.4 |
hh.4 |
hh.4 |
hh.4 |
hh.4 |
|
100th |
hh.40 |
hh.41 |
hh.41 |
hh.42 |
hh.43 |
hh.43 |
hh.44 |
hh.45 |
hh.46 |
|
hh.46 |
hh.47 |
hh.48 |
hh.48 |
hh.49 |
20th |
hh.40 |
hh.40 |
hh.40 |
hh.40 |
hh.40 |
hh.40 |
hh.40 |
hh.45 |
hh.45 |
hh.45 |
hh.45 |
hh.45 |
hh.45 |
hh.45 |
|
|
|
|
|
|
|
|
|
|
|
|
|
|
|
|
|
M’S” |
30’00” |
30’36” |
31’00” |
31’12” |
31’48” |
32’00” |
32’24” |
33’00” |
33’36” |
|
34’00” |
34’12” |
34’48” |
35’00” |
35’24” |
|
|
|
|
|
|
|
|
|
|
|
|
|
|
|
|
60th |
hh:30 |
hh:30 |
hh:31 |
hh:31 |
hh:31 |
hh:32 |
hh:32 |
hh:33 |
hh:33 |
|
hh:34 |
hh:34 |
hh:34 |
hh:35 |
hh:35 |
10th |
hh.5 |
hh.5 |
hh.5 |
hh.5 |
hh.5 |
hh.5 |
hh.5 |
hh.5 |
hh.5 |
|
hh.5 |
hh.5 |
hh.5 |
hh.5 |
hh.5 |
100th |
hh.50 |
hh.51 |
hh.51 |
hh.52 |
hh.53 |
hh.53 |
hh.54 |
hh.55 |
hh.56 |
|
hh.56 |
hh.57 |
hh.58 |
hh.58 |
hh.59 |
20th |
hh.50 |
hh.50 |
hh.50 |
hh.50 |
hh.50 |
hh.50 |
hh.50 |
hh.55 |
hh.55 |
|
hh.55 |
hh.55 |
hh.55 |
hh.55 |
hh.55 |
|
|
|
|
|
|
|
|
|
|
|
|
|
|
|
|
M’S” |
36’00” |
36’36” |
37’00” |
37’12” |
37’48” |
38’00” |
38’24” |
39’00” |
39’36” |
|
40’00” |
40’12” |
40’48” |
41’00” |
41’24” |
60th |
hh:36 |
hh:36 |
hh:37 |
hh:37 |
hh:37 |
hh:38 |
hh:38 |
hh:39 |
hh:39 |
|
hh:40 |
hh:40 |
hh:40 |
hh:41 |
hh:41 |
10th |
hh.6 |
hh.6 |
hh.6 |
hh.6 |
hh.6 |
hh.6 |
hh.6 |
hh.6 |
hh.6 |
|
hh.6 |
hh.6 |
hh.6 |
hh.6 |
hh.6 |
100th |
hh.60 |
hh.61 |
hh.61 |
hh.62 |
hh.63 |
hh.63 |
hh.64 |
hh.65 |
hh.66 |
|
hh.66 |
hh.67 |
hh.68 |
hh.68 |
hh.69 |
20th |
hh.60 |
hh.60 |
hh.60 |
hh.60 |
hh.60 |
hh.60 |
hh.60 |
hh.65 |
hh.65 |
|
hh.65 |
hh.65 |
hh.65 |
hh.65 |
hh.65 |
|
|
|
|
|
|
|
|
|
|
|
|
|
|
|
|
M’S” |
42’00” |
42’36” |
43’00” |
43’12” |
43’48” |
44’00” |
44’24” |
45’00” |
45’36” |
|
46’00” |
46’12” |
46’48” |
47’00” |
47’24” |
PIX-75 |
www.amano.com/time 1-800-253-9836 |
11 |
60th |
hh:42 |
hh:42 |
hh:43 |
hh:43 |
hh:43 |
hh:44 |
hh:44 |
hh:45 |
hh:45 |
hh:46 |
hh:46 |
hh:46 |
hh:47 |
hh:47 |
10th |
hh.7 |
hh.7 |
hh.7 |
hh.7 |
hh.7 |
hh.7 |
hh.7 |
hh.7 |
hh.7 |
hh.7 |
hh.7 |
hh.7 |
hh.7 |
hh.7 |
100th |
hh.70 |
hh.71 |
hh.71 |
hh.72 |
hh.73 |
hh.73 |
hh.74 |
hh.75 |
hh.76 |
hh.76 |
hh.77 |
hh.78 |
hh.78 |
hh.79 |
20th |
hh.70 |
hh.70 |
hh.70 |
hh.70 |
hh.70 |
hh.70 |
hh.70 |
hh.75 |
hh.75 |
hh.75 |
hh.75 |
hh.75 |
hh.75 |
hh.75 |
|
|
|
|
|
|
|
|
|
|
|
|
|
|
|
M’S” |
48’00” |
48’36” |
49’00” |
49’12” |
49’48” |
50’00” |
50’24” |
51’00” |
51’36” |
52’00” |
52’12” |
52’48” |
53’00” |
53’24” |
|
|
|
|
|
|
|
|
|
|
|
|
|
|
|
60th |
hh:48 |
hh:48 |
hh:49 |
hh:49 |
hh:49 |
hh:50 |
hh:50 |
hh:51 |
hh:51 |
hh:52 |
hh:52 |
hh:52 |
hh:53 |
hh:53 |
10th |
hh.8 |
hh.8 |
hh.8 |
hh.8 |
hh.8 |
hh.8 |
hh.8 |
hh.8 |
hh.8 |
hh.8 |
hh.8 |
hh.8 |
hh.8 |
hh.8 |
100th |
hh.80 |
hh.81 |
hh.81 |
hh.82 |
hh.83 |
hh.83 |
hh.84 |
hh.85 |
hh.86 |
hh.86 |
hh.87 |
hh.88 |
hh.88 |
hh.89 |
20th |
hh.80 |
hh.80 |
hh.80 |
hh.80 |
hh.80 |
hh.80 |
hh.80 |
hh.85 |
hh.85 |
hh.85 |
hh.85 |
hh.85 |
hh.85 |
hh.85 |
|
|
|
|
|
|
|
|
|
|
|
|
|
|
|
M’S” |
54’00” |
54’36” |
55’00” |
55’12” |
55’48” |
56’00” |
56’24” |
57’00” |
57’36” |
58’00” |
58’12” |
58’48” |
59’00” |
59’24” |
60th |
hh:54 |
hh:54 |
hh:55 |
hh:55 |
hh:55 |
hh:56 |
hh:56 |
hh:57 |
hh:57 |
hh:58 |
hh:58 |
hh:58 |
hh:59 |
hh:59 |
10th |
hh.9 |
hh.9 |
hh.9 |
hh.9 |
hh.9 |
hh.9 |
hh.9 |
hh.9 |
hh.9 |
hh.9 |
hh.9 |
hh.9 |
hh.9 |
hh.9 |
100th |
hh.90 |
hh.91 |
hh.91 |
hh.92 |
hh.93 |
hh.93 |
hh.94 |
hh.95 |
hh.96 |
hh.96 |
hh.97 |
hh.98 |
hh.98 |
hh.99 |
20th |
hh.90 |
hh.90 |
hh.90 |
hh.90 |
hh.90 |
hh.90 |
hh.90 |
hh.95 |
hh.95 |
hh.95 |
hh.95 |
hh.95 |
hh.95 |
hh.95 |
Set Print Year Format (P503)
This setting will override the default print year setting of the selected print format.
1.With the cover removed, press the PROGRAM button to begin programming mode and P1 TIME will appear.
2.Press the + or – button to change the current programming mode until the display shows P5 CUSTOMIZE.
3.Press the ENTER button once and the clock will display the submenu for other settings such as P501.
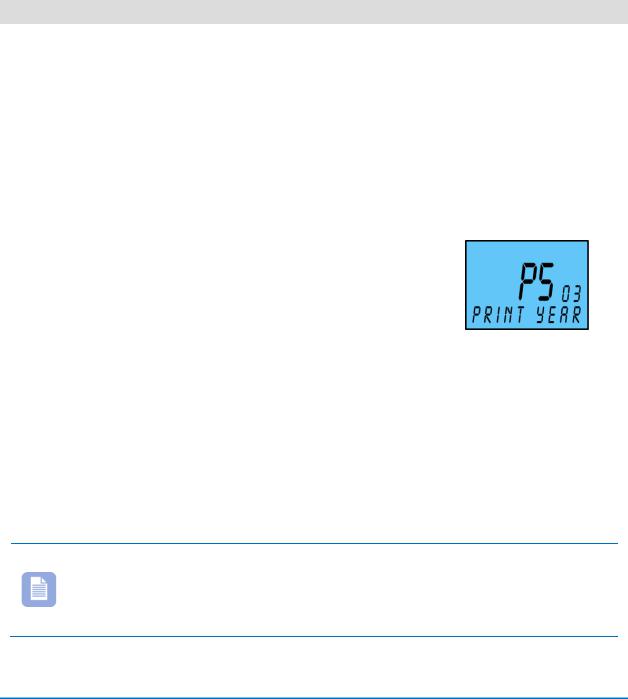
4.Press the + or – button until the display shows
P503 PRINT YEAR.
5.Press the ENTER button once and the clock will start flashing the current print year format.
6.Press the + or – button to change the value. The
choices are 2-DIGIT or 4-DIGIT. The default = 2-DIGIT. For example; 2 digit year = 2 digits with apostrophe, i.e., 2010 = ’10. For example; 4 digit year for 2010 = 2010 printed.
7.Press the ENTER button once to accept the current displayed value and go back to the previous menu.
8.Press the PROGRAM button 2 times to exit ALL programming or Press + to go to the next program menu.
Note – Print FORMAT – 6 is not supported with print year set to 4-digit year.
PIX-75 |
www.amano.com/time 1-800-253-9836 |
12 |
Set Print Leading Zero (P504)
The leading zero setting affects the month (if language is set to numeric), date, and hour printing. The other symbols [year, seconds, minutes, etc.] will ignore this setting and always print a leading zero in front of a single digit.
1.With the cover removed, press the PROGRAM button to begin programming mode and P1 TIME will appear.
2.Press the + or – button to change the current programming mode until the display shows P5 CUSTOMIZE.
3.Press the ENTER button once and the clock will display the submenu for other settings such as P501.
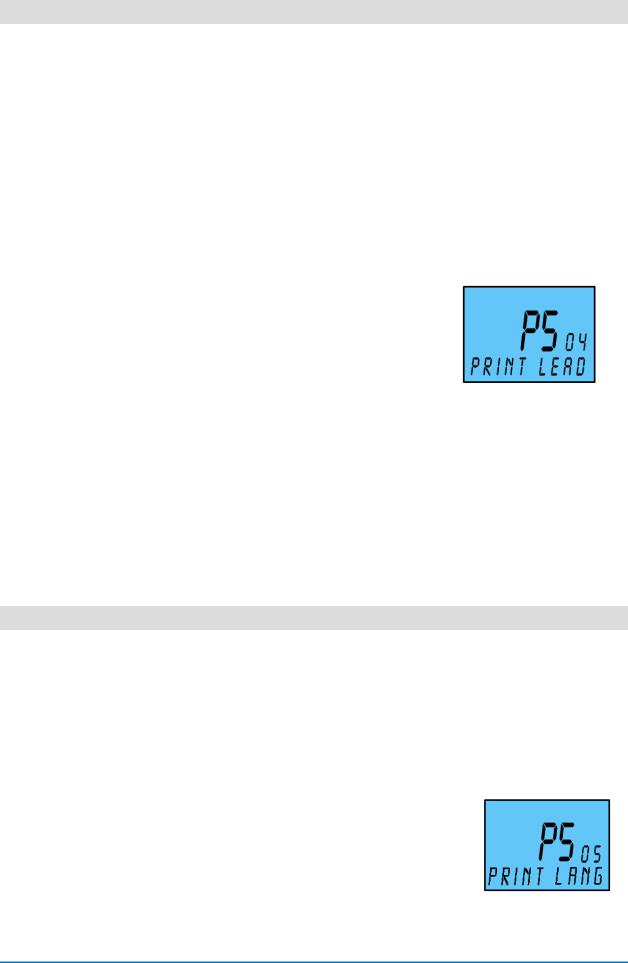
4.Press the + or – button until the display shows
P504 PRINT LEADING ZERO. [The second
line will scroll]
5.Press the ENTER button once and the clock will start flashing the current leading zero format.
6.Press the + or – button to change the LEADING
ZERO setting to the desired value. Your choices are ENABLED or DISABLED. The default setting = Disabled [OFF]. When it is turned off, the printer will not print a leading zero before a single digit number [example: Jan 1].
7.Press the ENTER button once to accept the current displayed value and go back to the previous menu.
8.Press the PROGRAM button 2 times to exit ALL programming or Press + to go to the next program menu.
Set Print Language (P505)
1.With the cover removed, press the PROGRAM button to begin programming mode and P1 TIME will appear.
2.Press the + or – button to change the current programming mode until the display shows P5 CUSTOMIZE.
3.Press the ENTER button once and the clock will display the submenu for other settings such as P501.
4.Press the + or – button until the display shows
P505 PRINT LANGUAGE. [The second line will
scroll].
5.Press the ENTER button once and the clock will start flashing the current print language format. The default setting = ENGLISH.
PIX-75 |
www.amano.com/time 1-800-253-9836 |
13 |

6.Press the + or – button to change the PRINT LANGUAGE setting to the desired value. Your choices are ENGLISH, SPANISH, FRENCH, GERMAN, ITALIAN, PORTUGUESE or NUMERIC. See the table below for a complete listing of language characters.
7.Press the ENTER button once to accept the current displayed value and go back to the previous menu.
8.Press the PROGRAM button 2 times to exit ALL programming or Press + to go to the next program menu.
Table: Print Languages
|
English |
Spanish |
French |
Germany |
Italy |
Portuguese |
Numeric |
|
|
|
|
|
|
|
|
Monday |
MO |
LU |
LU |
MO |
LU |
SG |
1 |
|
|
|
|
|
|
|
|
Tuesday |
TU |
MA |
MA |
DI |
MA |
TR |
2 |
|
|
|
|
|
|
|
|
Wednesday |
WE |
MI |
ME |
MI |
ME |
QU |
3 |
|
|
|
|
|
|
|
|
Thursday |
TH |
JU |
JE |
DO |
GI |
QI |
4 |
|
|
|
|
|
|
|
|
Friday |
FR |
VI |
VE |
FR |
VE |
SX |
5 |
|
|
|
|
|
|
|
|
Saturday |
SA |
SA |
SA |
SA |
SA |
SB |
6 |
|
|
|
|
|
|
|
|
Sunday |
SU |
DO |
DI |
SO |
DO |
DO |
7 |
|
|
|
|
|
|
|
|
January |
JAN |
ENE |
JAN |
JAN |
GEN |
JAN |
1 |
|
|
|
|
|
|
|
|
February |
FEB |
FEB |
FEV |
FEB |
FEB |
FEV |
2 |
|
|
|
|
|
|
|
|
March |
MAR |
MAR |
MAR |
MAR |
MAR |
MAR |
3 |
|
|
|
|
|
|
|
|
April |
APR |
ABR |
AVR |
APR |
APR |
ABR |
4 |
|
|
|
|
|
|
|
|
May |
MAY |
MAY |
MAI |
MAI |
MAG |
MAI |
5 |
|
|
|
|
|
|
|
|
June |
JUN |
JUN |
JUN |
JUN |
GIU |
JUN |
6 |
|
|
|
|
|
|
|
|
July |
JUL |
JUL |
JUL |
JUL |
LUG |
JUL |
7 |
|
|
|
|
|
|
|
|
August |
AUG |
AGO |
AOU |
AUG |
AGO |
AGO |
8 |
|
|
|
|
|
|
|
|
September |
SEP |
SEP |
SEP |
SEP |
SET |
SET |
9 |
|
|
|
|
|
|
|
|
October |
OCT |
OCT |
OCT |
OKT |
OTT |
OUT |
10 |
|
|
|
|
|
|
|
|
November |
NOV |
NOV |
NOV |
NOV |
NOV |
NOV |
11 |
|
|
|
|
|
|
|
|
December |
DEC |
DIC |
DEC |
DEZ |
DIC |
DEZ |
12 |
|
|
|
|
|
|
|
|
received |
RCVD |
RCBDO |
RECU |
EING |
RICEV |
RCBDO |
RCVD |
|
|
|
|
|
|
|
|
sent |
SENT |
ENVDO |
ENV |
AUSG |
SPED |
ENVDO |
SENT |
|
|
|
|
|
|
|
|
faxed |
FAXED |
FAX |
FAXE |
FAX |
FAX |
FAX |
FAXED |
|
|
|
|
|
|
|
|
void |
VOID |
ANLDO |
ANNUL |
LAGER |
ANNUL |
ANUL |
VOID |
|
|
|
|
|
|
|
|
paid |
PAID |
PGADO |
PAYE |
BEZ |
PAGA |
PAGO |
PAID |
|
|
|
|
|
|
|
|
confirmed |
CFM’D |
CONF |
CONF |
EMPF |
CONF |
CONF |
CFM’D |
|
|
|
|
|
|
|
|
approved |
APR’D |
APBDO |
APPR |
BEST |
APPR |
APRV |
APR’D |
|
|
|
|
|
|
|
|
completed |
CMPL’D |
TRMDO |
TERM |
ABGES |
COMPL |
TERM |
CMPL’D |
|
|
|
|
|
|
|
|
origin |
ORIGN |
ORIGN |
ORIG |
ORIG |
ORIG |
ORIG |
ORIGN |
|
|
|
|
|
|
|
|
file |
FILE |
ARCH |
FICH |
AKTE |
FILE |
ARQV |
FILE |
|
|
|
|
|
|
|
|
in |
IN |
ENTRA |
ENTRE |
KOMMT |
ENTRA |
ENTRA |
IN |
|
|
|
|
|
|
|
|
out |
OUT |
SALID |
SORTI |
GEHT |
USCIT |
SALID |
OUT |
|
|
|
|
|
|
|
|
Used |
USED |
UTIL |
UTIL |
GEBRA |
UTIL |
UTIL |
USED |
|
|
|
|
|
|
|
|
PIX-75 |
www.amano.com/time 1-800-253-9836 |
14 |
Setting Custom Print (Symbol Printing)(P506)
1.With the cover removed, press the PROGRAM button to begin programming mode and P1 TIME will appear.
2.Press the + or – button to change the current programming mode until the display shows P5 CUSTOMIZE.
3.Press the ENTER button once and the clock will display the submenu for other settings such as P501.
4.Press the + or – button to change the current programming mode until the display shows
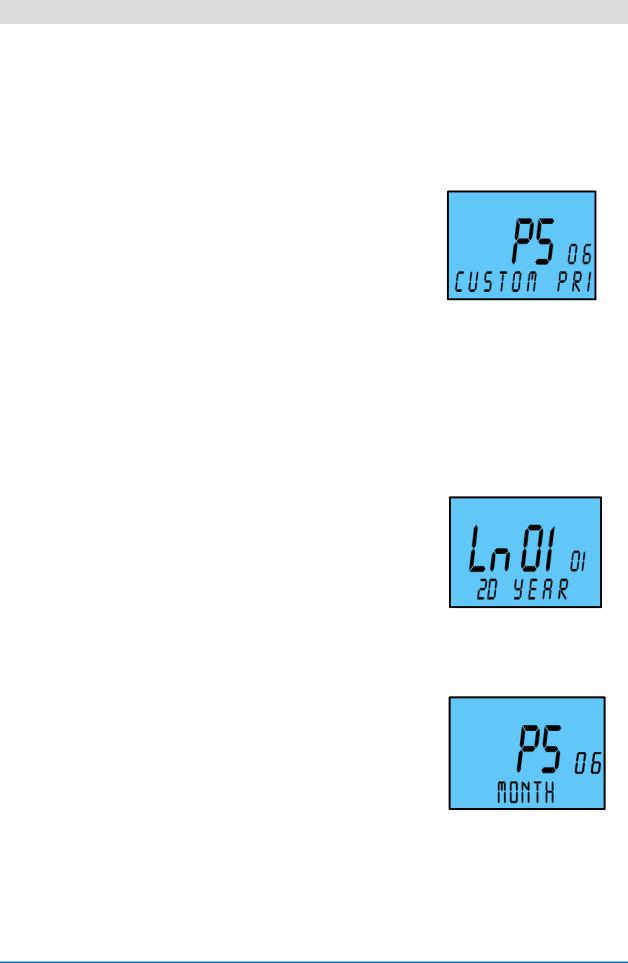
P506 CUSTOM PRINT.
5.Press the ENTER button and the clock will display LINE- - 1 01, press ENTER and the
clock will display Ln0101 – END. Press ENTER one more time to finish or the + / – buttons to change values (See Symbol Table on page 19).
6.Once Line – 1 has been programmed and saved (by pressing enter) , you can go back to step 5 and select LINE - - 1 or LINE - -2 by using the + or – buttons.
7.From the chosen line (either Line – 1 or Line – 2), press the ENTER button once to begin programming that line.
(Line 2 does not have to be programmed). During custom print setup the 2nd line on the display [auxiliary display line] will display the current print symbol option item (see righthand Figure).
8.Press the + or – button until the desired print
symbol item is displayed and press the ENTER button once to accept the flashing symbol value. Once a symbol item has been selected the number of symbols shown on the right will
increment by one. See right-hand Figure for example showing MONTH as the 02 [second] print symbol selected for Line -1.
9.Repeat the process described in step 8 to enter each element for line 1. Select the “END”
symbol followed by pressing the ENTER button once to complete custom programming of line 1.
PIX-75 |
www.amano.com/time 1-800-253-9836 |
15 |
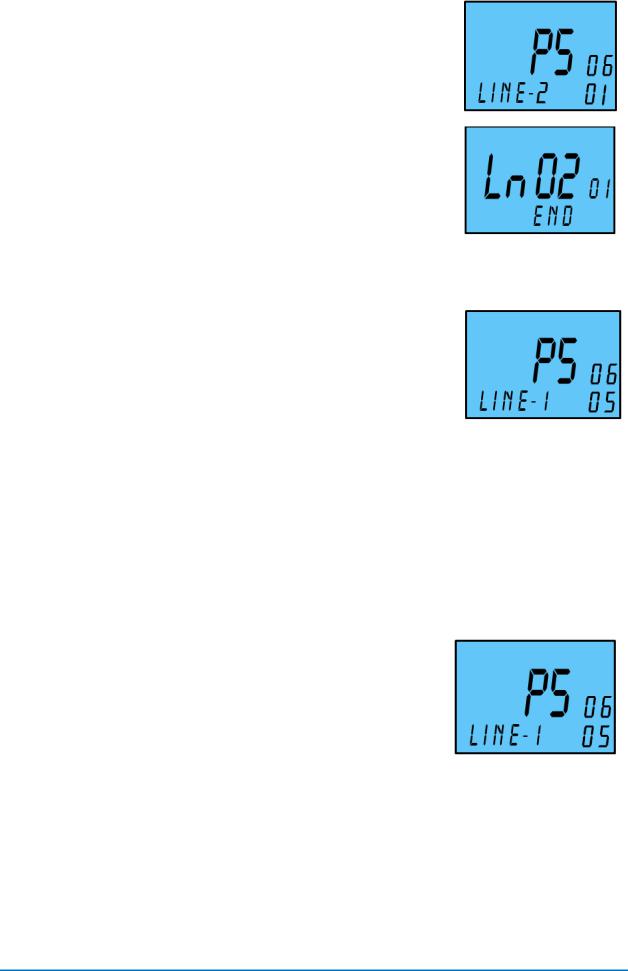
10.If desired, press the + button once to advance to Line – 2 custom programming (see right-hand Figure).
11.Press the ENTER button to begin symbol programming for line 2 and follow the same procedure as described in steps 8 and 9. The first symbol to appear will be the “END” symbol (see right-hand Figure).
12.When finished, press the PROGRAM button 2 times to exit ALL programming or Press + to go scroll through sub menu options for P5 Customize again
To delete a Whole Line of Symbol Printing
1.Press the ENTER button once from the P506 submenu for custom print and the clock will display
Line – 1 and the number of programmed symbols (see right-hand Figure for example of line-1 with 5 symbols).
2.If you need to delete/add a symbol in line 2 of
printing, press the + button once now to advance to Line – 2 then follow steps below. Otherwise proceed with step 3 below.
3.Press the ENTER button once to enter into the custom print line. Press the + or – buttons to navigate to the “END” symbol. With this symbol flashing on the Auxiliary Display Line, press the ENTER button once to save the “END” symbol at the beginning of the symbol line. This will terminate/delete that line of symbol printing.
To Add a Symbol to a Custom Print Line
1.Press the ENTER button once from the P506 submenu and the clock will display Line – 1 and the number of programmed symbols (see righthand Figure for example of a line-1 with 5 symbols).
2.If desired, press the + button once to advance to
Line – 2.
3.Press the ENTER button once to enter into the custom print line. Press the ENTER button on each symbol of your print line until you see the symbol you want to insert something before. [The new symbol will always be inserted before the flashing symbol].
4.Press the + or – button to navigate to the “ADD” symbol then press ENTER to begin the add function.
PIX-75 |
www.amano.com/time 1-800-253-9836 |
16 |
 Loading...