


PIX-15
Electronic Time Recorder
Operation Manual

Thank you…
for purchasing another fine product from Amano Cincinnati, Inc.
Important
Note that the government standard for Daylight Saving Time (DST) is subject to change. Your clock is factory-set for correct DST based upon when it was manufactured, but any revision to DST begin or end dates may require updating the system-set DST calendar.
If you live in Arizona, Hawaii, parts of Indiana, or any other area that does not use Daylight Saving Time, refer to this document’s DST settings instruction for details regarding disabling the DST function.
Do not return this clock to the retailer. If you have any questions or need assistance, please call us toll free at:
1-800-253-9836
Proprietary Notice
This document contains proprietary information and such information may not be reproduced in whole or part without the written permission from Amano Cincinnati, Inc. 140 Harrison Ave., Roseland, New Jersey 07068. Amano Cincinnati, Inc. reserves the right to make equipment changes and improvements, which may not be reflected in this document.
We recommend that this document be read in its entirety before any attempt is made to operate the equipment.
Need Ribbons, Keys and Accessories?
Visit
www.amano.com
or
Call - (800)-253-9836
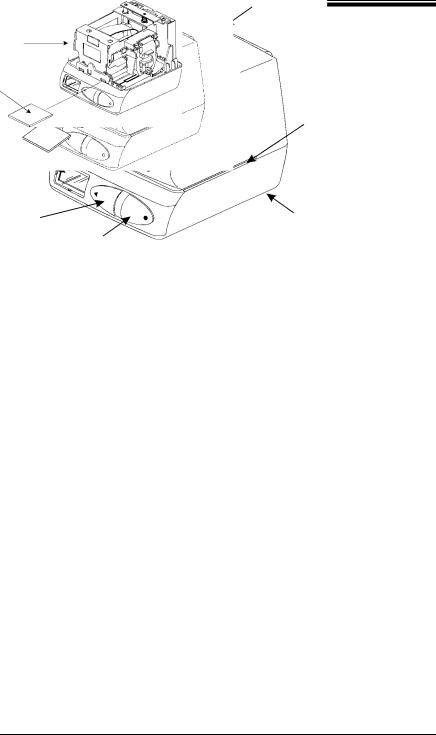
Your PIX-15
Keyhole
Print Window
Print Slot |
|
|
|
Digital Clock |
Margin |
Change |
|
Button |
Reset Switch |
Enter |
(on bottom) |
Button |
|
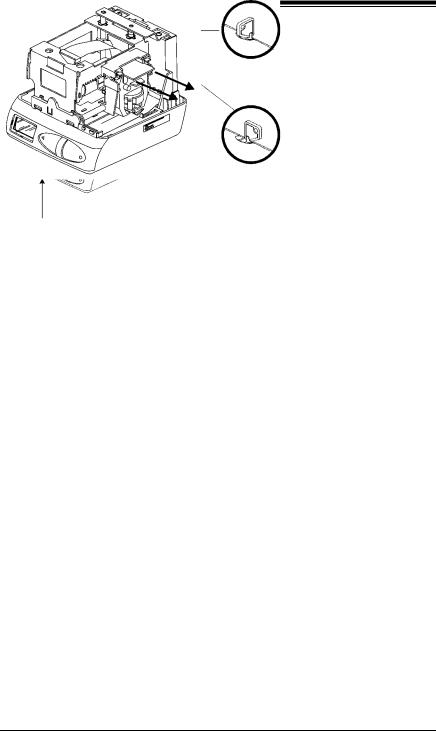
Removing the Cover and Packing Materials
Note: You must remove the packaging spacers from the printer block and the printer carriage before attempting to use your PIX-15.
1. Lift the printer block and remove the spacer.
Spacer
Printer
Block
Spacer
Amano PIX-15 Operation Manual |
1 |
2.Insert the key provided and turn clockwise to open the case. Lift the cover to remove.
Open
Closed
3.Remove the spacer between the Ribbon Cartridge and the Printer Carriage.
Remove
Spacer
4.Re-install the cover. Your PIX-15 is ready for use!
2 |
Amano PIX-15 Operation Manual |
Before You Change Any Settings
Take a moment to familiarize yourself with the items explained below.
The Front Panel
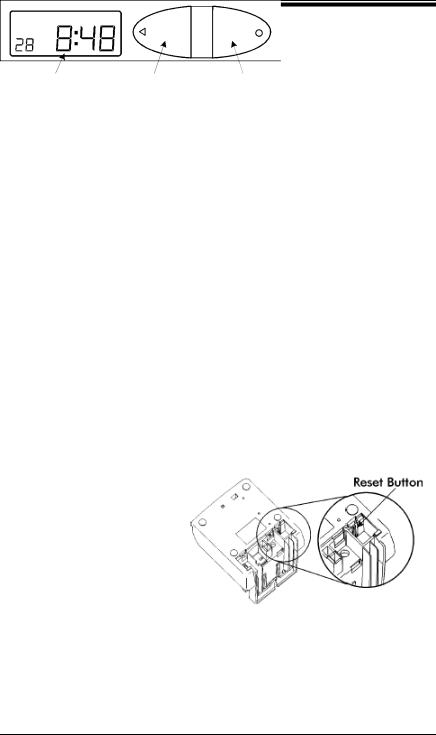
LCD Display Window CHANGE Button ENTER Button
Normally, the Display Window shows the date and time. When you use the Quick Set or Program Mode to change the settings of the PIX-15, the instructions to change the clock are shown in this window.
The two buttons on the front panel are used to navigate through the Quick Set and Program Mode to change the clock’s settings.
The left button is marked with a ◄ symbol. It is called the
CHANGE Button. Use this button to change the information shown on the display when you are in the Quick Set or Program Mode.
The right button is marked with a ● symbol. It is called the
ENTER Button. When you are in the Quick Set or Program Mode, use this button to enter the setting shown on the display into memory.
The Reset Button
The RESET Button (which is long) is located in the right lower corner on the bottom of the clock.
Please Note:
You do not need the key to set the time or to program the clock!! However, you do need the key to change the ribbon, or mount the clock on the wall (see page 9).
If you have any questions, please call 1-800-253-9836.
Amano PIX-15 Operation Manual |
3 |
 Loading...