


INE-W987D
Table of contents
 Loading...
FOR CAR USE ONLY/NUR FÜR AUTOMOBIL GEBRAUCH/POUR APPLICATION AUTOMOBILE UNIQUEMENT/PARA USO EN
R
AUTOMÓVILES/SOLO PER L’UTILIZZO IN AUTOMOBILE/ENDAST FÖR BILBRUK/ALLEEN VOOR GEBRUIK IN DE AUTO/
/
ДЛЯ ИСПОЛЬЗОВАНИЯ В АВТОМОБИЛЯХ
DO UŻYCIA TYLKO W SAMOCHODZIE
ТОЛЬКО
8-INCH ADVANCED NAVI STATION
X80 0D-U
7-INCH ADVANCED NAVI STATION
INE-W987D
(INE-W987D only)
• OWNER’S MANUAL
Please read before using this equipment.
• BEDIENUNGSANLEITUNG
Lesen Sie diese Bedienungsanleitung
bitte vor Gebrauch des Gerätes.
• MODE D’EMPLOI
Veuillez lire avant d’utiliser cet appareil.
• MANUAL DE OPERACIÓN
Léalo antes de utilizar este equipo.
• ISTRUZIONI PER L’USO
Si prega di leggere prima di utilizzare il
attrezzatura.
• ANVÄNDARHANDLEDNING
Innan du använder utrustningen bör du läsa
igenom denna användarhandledning.
• GEBRUIKERSHANDLEIDING
Lees deze aanwijzingen aandachtig alvorens
dit toestel te gebruiken.
• РУКОВОДСТВО ПО ЭКСПЛУАТАЦИИ
Прочтите настоящее руководство перед
началом использования оборудования.
• INSTRUKCJA OBSŁUGI
Prosimy zapoznać się z tą instrukcją przed
przystąpieniem do użytkowania urządzenia.
R
EN
DE
FR
ES
IT
SE
NL
RU
ALPINE ELECTRONICS MARKETING, INC.
1-7, Yukigaya-Otsukamachi, Ota-ku,
Tokyo 145-0067, JAPAN
Phone: 03-5499-4531
ALPINE ELECTRONICS OF AMERICA, INC.
19145 Gramercy Place, Torrance,
California 90501, U.S.A.
Phone 1-800-ALPINE-1 (1-800-257-4631)
ALPINE ELECTRONICS OF AUSTRALIA PTY. LTD.
161-165 Princes Highway, Hallam
Victoria 3803, Australia
Phone 03-8787-1200
Wilhelm-Wagenfeld-Str. 1-3, 80807 München, Germany
ALPINE ELECTRONICS GmbH
Phone 089-32 42 640
ALPINE ELECTRONICS OF U.K. LTD.
Fletchamstead Highway, Coventry CV4 9TW, U.K.
ALPINE ELECTRONICS FRANCE S.A.R.L.
98, Rue de la Belle Etoile, Z.I. Paris Nord Il,
B.P. 50016, 95945 Roissy Charles de Gaulle
Alpine House
Phone 0870-33 33 763
(RCS PONTOISE B 338 101 280)
Cedex, France
Phone 01-48638989
ALPINE ITALIA S.p.A.
Viale C. Colombo 8, 20090 Trezzano
Sul Naviglio (MI), Italy
Phone 02-484781
ALPINE ELECTRONICS DE ESPAÑA, S.A.
Portal de Gamarra 36, Pabellón, 32
01013 Vitoria (Alava)-APDO 133, Spain
Phone 945-283588
Designed by ALPINE Japan
68-24567Z44-A
PL


ENGLISH
Contents
Operating
Instructions
PRECAUTIONS
IMPORTANT INFORMATION, PLEASE
READ CAREFULLY BEFORE USING THIS
PRODUCT. ................................................... 8
WARNING
Points to Observe for Safe Usage ..................... 8
WARNING ................................................. 8
CAUTION .................................................. 9
NOTICE ................................................... 10
Discs Playable on This Unit ................. 11
Features
Auto user setting change ................................ 15
My Favourites ................................................. 15
Easy sound setting by car type
(i-Personalize) ............................................. 16
About Dual Screen ......................................... 16
Dual Screen Display Position ..................... 17
Getting Started
Accessory List ................................................ 18
Location of Controls ...................................... 18
Turning Power On or Off ............................... 19
Turning the System On ................................... 19
Initial System Start-Up ................................... 19
Inserting/Ejecting a Disc ................................ 19
Inserting the Disc ........................................ 19
Removing the Disc ...................................... 19
Adjusting the Screen Viewing Angle ............. 20
Detaching and Attaching the Screen
(INE-W987D Only) .................................... 20
Detaching .................................................... 20
Attaching ..................................................... 21
Adjusting the Volume ..................................... 21
Lowering Volume Quickly ............................. 21
Common Operations
Using My Favourites .......................................21
User Registration ............................................22
Setting My Favourites .....................................22
Adding My Favourites .................................23
Editing My Favourites .................................23
Displaying the Camera Image .....................24
i-Personalize Setup ......................................24
Easy Sound Setup mode/BASS ENGINE SQ
mode ............................................................25
Easy Sound Setup mode ..............................25
BASS ENGINE SQ mode ...........................26
Settings When Switching Users ......................26
How to Input Characters and Numbers
(Keypad) ......................................................27
Top banner and Bottom banner Fade Out
Setting ..........................................................27
Switching Sources ...........................................28
Screen Off Function .....................................28
Rear Entertainment Function ..........................28
Switching the Dual Screen Display ................29
Touch operation ..............................................29
Selecting an Item in a List ..............................29
About the Indicator Display ............................30
Parking Assist Interrupt Function ...................30
Access to Climate Mode .................................31
Applying TuneIt ..............................................31
Adjusting the sound via the smartphone .....31
Facebook Notification Function ..................31
Radio
Listening to the Radio .....................................33
Presetting Stations Manually ..........................33
Presetting Stations Automatically ...................33
Tuning to Preset Stations ................................33
RDS
Turning AF (Alternative Frequencies) On or
Off ................................................................34
Receiving Traffic Information ........................34
Receiving Traffic Information Manually ........35
PTY (Programme Type) Tuning .....................35
Priority News ..................................................35
Displaying Radio Text ....................................35
3-EN

DAB/DAB+/DMB
Listening to DAB/DAB+/DMB ...................... 36
Presetting Service ........................................... 36
Tuning to Preset Service ................................. 36
Service Search Function ................................. 37
Updating the Service List ............................... 37
Receiving Traffic Information ........................37
PTY (Programme Type) Search Function ......37
Priority News ..................................................37
Displaying DAB Text .....................................37
About DAB/DAB+/DMB ............................... 37
CD/MP3/WMA/AAC
Playback ..........................................................38
Repeat Play ..................................................... 38
M.I.X. (Random Play) ....................................38
Selecting Folders
(Concerning MP3/WMA/AAC) ..................39
Searching from CD Text ................................. 39
File/Folder Name Search
(Concerning MP3/WMA/AAC) ..................39
About MP3/WMA/AAC .................................39
DVD
Playing a Disc ................................................41
If a Menu Screen Appears ........................... 42
Numeric Keypad Input Operations .............42
Displaying the Top Menu Screen ...............43
Displaying the Menu Screen ...................... 43
Stopping Playback (PRE STOP) ...................43
Stopping Playback .........................................43
Fast-forwarding/Fast-reversing ...................... 43
Finding the Beginnings of Chapters/Tracks/
Files ............................................................ 43
Playing Still Frames (Pausing) ...................... 44
Forward frame-by-frame Playback ................44
Slow Motion Playback ...................................44
Selecting Folders ........................................... 44
Repeat Playback ............................................ 44
Searching by Title Number ............................ 45
Searching Directly by Chapter Number ........45
Searching for a Desired Video File ................ 45
Switching the Angle ...................................... 45
Switching the Audio Tracks .......................... 46
Switching the Subtitles
(Subtitle Language) .................................... 46
®
About DivX
..................................................46
Setup
Setup Operation
General Setup
General Setup Operation ................................47
Language Setting ............................................47
Setting the Scroll .........................................47
Format settings ............................................48
Setting the Menu Language ........................ 48
Remote Sensor Setting .................................... 48
Opening/Closing Screen Automatically ......... 48
Setting the Remove Screen Angle .................. 48
Security Code Setting .....................................48
Setting Security code ................................... 48
Setting Top banner and Bottom banner
Display ........................................................49
Screen/LED Customize .................................. 49
Setting the Brightness of the
Backlighting ............................................. 49
Adjusting the Minimum Level of
Backlight ..................................................49
Adjusting the Dimmer of Button Lighting at
Night ........................................................49
Switching the Display Colour ..................... 49
Adjusting the Touch Panel ..........................50
Initialising the Touch Panel Corrected
Values ....................................................... 50
Visual Setting ..................................................50
Switching Display Modes ........................... 50
Adjusting the Live Contrast ........................ 51
Selecting the Visual EQ Mode
(Factory’s setting) .................................... 51
Adjusting Brightness ................................... 51
Adjusting Colour of Picture ........................ 51
Adjusting Tint of Picture .............................51
Adjusting Image Contrast ...........................51
Adjusting Picture Quality ............................51
Saving and calling the adjusted picture
quality ......................................................51
About X800D-U/INE-W987D ....................... 51
Displaying the Product Information ............ 51
Checking the DivX
Initialising the System ................................. 52
Installation Setup ............................................52
Setting the Parking Assist Interrupt
On/Off ......................................................... 52
®
Registration ............... 52
4-EN

Setting the Climate Interrupt On/Off .............. 52
Setting the External Audio Processor
On/Off ......................................................... 53
Setting the Digital Output ............................... 53
Sound Setup
Sound Setup Operation ................................... 53
Setting the Balance/Fader/Subwoofer ............54
Setting the Balance/Fader ............................ 54
Rear Speaker Setting ...................................54
Turning Subwoofer ON/OFF ...................... 54
Adjusting the Subwoofer Level ................... 54
Setting the Subwoofer Phase ....................... 54
Setting the MX (Media Xpander) ...................54
Equalizer Presets ............................................. 55
Adjusting the Parametric Equalizer Curve
(Parametric EQ) ........................................... 55
Adjusting the Time Correction
(Time Correction) ........................................ 56
Adjusting the Crossover Settings
(X-OVER) ................................................... 57
Setting Defeat .................................................57
Volume Setting ................................................ 57
Setting the Volume for Each Source ...............57
About Time Correction ...................................57
About the Crossover ....................................... 59
Source Setup
Source Setup Operation .................................. 59
Source Layout Setting .................................... 60
Setting the Slide Source Change ................. 60
Setting the Easy Sound Setup Position ....... 60
Customizing the Source Banner .................. 60
Disc Setting ..................................................... 60
Changing the language setting .................... 60
Setting of the Menu Language .................... 60
Setting of the Audio Language ................... 60
Setting of the Subtitle Language ................. 61
Changing the Country Code Setting ........... 61
Setting the Rating Level (Parental Lock) .... 61
Setting the TV Screen Mode ....................... 61
Radio Setting .................................................. 62
PI SEEK Setting .......................................... 62
Receiving RDS Regional (Local)
Stations .....................................................62
Switching the Display Language of PTY
(Programme Type) ...................................62
Setting PTY31 (Emergency Broadcast)
Reception .................................................62
Setting the TUNER (FM) Tone Quality
(Tuner Condition) ....................................62
DAB Setting ....................................................63
Setting Alarm (Emergency Broadcast)
reception ..................................................63
Receiving weather information ................... 63
Receiving sports information ...................... 63
Setting the FM Linking ON/OFF
(Service Following) ................................. 63
Setting the DAB Antenna ON/OFF ............ 63
AUX Setting ...................................................63
Setting the AUX Mode ................................ 63
Setting the Primary AUX Name
(AUX Setup) ............................................ 64
Setting the AUX3 ........................................ 64
Setting the AUX3 Sel. (Switching the Visual
Input Signal System) ................................64
RSE Setting .....................................................64
Setting the Rear Seat Entertainment
System ......................................................64
TuneIt Setting .................................................65
Setting the Communication Mode with a
smartphone ...............................................65
BLUETOOTH Setup
BLUETOOTH Setup Operation ..................... 65
BLUETOOTH Setting .................................... 66
Displaying BLUETOOTH Information .......... 66
Registering the BLUETOOTH Device ........... 66
Automatic Connection setting ........................ 66
Setting the Passcode ....................................... 66
Changing the Character Code of the Phone
Book ............................................................67
Selecting the Output Speaker ......................... 67
Adjusting the Caller Volume .......................... 67
Adjusting the Microphone Level .................... 67
Adjusting the Ring Tone Volume ................... 67
Deleting All the Histories ............................... 67
Camera Setup
Camera Setup Operation .................................68
Direct Camera Setting ....................................68
Setting the Camera Input .............................68
AUX Camera Setting ...................................... 69
Setting the Camera Input .............................69
Camera Interrupt Setting
(Power OFF Mode) ..................................... 70
Reverse Mute Setting ...................................... 70
5-EN

BLUETOOTH Operation
Setup Before Using ......................................... 71
About BLUETOOTH .................................. 71
About the Hands-Free Phone ...................... 71
Before Using BLUETOOTH .......................71
Hands-Free Phone Control
Connecting a BLUETOOTH Device ..............71
Disconnecting the BLUETOOTH
Connection ...............................................71
Changing the connecting BLUETOOTH
Device .......................................................... 72
Answering a Call ............................................72
Adjusting ringtone volume ..........................72
Hanging up the Telephone .............................. 72
Calling ............................................................72
Using Short Cut Dialling to Make a Call ....72
Dialling a Number In Call History .............. 72
Dialing a Number In the Phone Book ......... 73
Entering a Phone Number to Make a
Call ...........................................................73
Redial Function ........................................... 73
Using Voice Recognition function .................. 73
Using Siri ....................................................73
Voice Dial Function .....................................74
Operations During a Conversation ................. 74
Adjusting the Speech Volume .....................74
Changing the Voice Output ......................... 74
DTMF (Touch-Tone) Function .................... 74
Phone Book Function .....................................75
Synchronising the Phone Book ................... 75
Adding the Phone Book .............................. 75
Deleting the Phone Book Entries ................ 75
Assigning as a Short Cut Dialling Number .... 76
BLUETOOTH Audio
Playback ..........................................................77
Repeat Play ..................................................... 77
M.I.X. (Random Play) ....................................77
Selecting Groups ............................................. 77
Search Function ..............................................77
Auxiliary Device (Optional)
Operating Auxiliary Devices (Optional) ........ 78
Operating an External DVD Player ................ 78
Change to the External DVD Mode ............78
About the DVD Operation Screen ............... 78
Operating an External DVD Changer ............. 79
Change to the External DVD Changer
Mode ........................................................79
About the DVD Changer Operation
Screen ......................................................79
Operating the Mobile Digital TV Receiver
(DVB-T) ...................................................... 80
Changing to the Mobile Digital TV Receiver
(DVB-T) Mode ........................................ 80
About the DVB-T operation screen .............80
Operating a TV ...............................................80
Change to the TV mode .............................. 80
About the TV operation screen ................... 80
Camera Operation (Optional)
Rear Camera Operation ..................................81
Displaying the rear view video while the car
is in reverse ..............................................81
Switching the Image Pattern for the Rear
Camera .....................................................81
Guide Display ON/OFF Setting .................. 81
Adjusting the Caution Display Location ..... 81
About the Rear Camera Guide ........................ 82
Front Camera Operation .................................84
Displaying the Front View Video
Manually ..................................................84
Switching the Image Pattern for the Front
Camera .....................................................84
About the adjustment of guide display ON/OFF
setting and adjustment of Caution display
location ....................................................84
Other Camera Operation .................................84
About the adjustment of the Caution display
location ....................................................84
USB Memory (Optional)
Playback ..........................................................85
Repeat Play ..................................................... 86
Random Play (M.I.X.) ....................................86
Random Play (M.I.X. ALL) ........................... 86
Searching for a Desired Song .........................86
File/Folder Name Search .............................86
Tag Search ................................................... 87
Direct Up/Down Function ..............................87
Select the desired Folder
(Folder up/down) ......................................... 87
iPod/iPhone (Optional)
Playback ..........................................................89
Searching for a Music File .............................. 89
Searching for a Desired Video File ................. 90
6-EN

Alphabet Skip Function ..................................90
Direct Up/Down Function .............................. 90
Search Position Memory ................................91
Repeat Play ..................................................... 91
Random Play (Shuffle) ...................................91
Random Play (Shuffle All) ............................. 91
HDMI Device (Optional)
MirrorLink™ Operation (Optional)
DISCLAIMER ................................................93
Using MirrorLink™ ........................................93
Switching the Media Control button
Operation .................................................93
Setting the Media Control button ................94
Information
Product Software Update ................................95
About DVDs ...................................................95
List of Language Codes .................................. 96
List of Country Codes .....................................97
In Case of Difficulty .......................................99
If this Message Appears ...............................101
Specifications ................................................103
END USER LICENCE AGREEMENT
(Microsoft) ................................................104
END USER LICENCE AGREEMENT
(NAVTEQ) ................................................106
Installation and
Connections
Warning ................................................ 108
Caution ................................................. 108
Precautions .......................................... 108
Installation ....................................................109
Connections ..................................................112
System Example ........................................... 115
7-EN
Operating Instructions
• Make certain that the volume level of the unit is set to a level
PRECAUTIONS
IMPORTANT INFORMATION, PLEASE READ CAREFULLY BEFORE USING THIS PRODUCT.
This product is intended to safely provide turn-by-turn
instructions to get you to a desired destination. Please read the
following precautions to ensure that you use this navigation
system correctly.
• This product is not a substitute for your personal judgment. Any
route suggestions made by this navigation system should never
supersede any local traffic regulations or your personal
judgment and/or knowledge of safe driving practises. Do not
follow route suggestions if the navigation system instructs you to
perform an unsafe or illegal manoeuvre, places you in an unsafe
situation, or routes you into an area which you consider unsafe.
• Glance at the screen only when necessary and safe to do so. If
prolonged viewing of the screen is necessary, stop in a safe and
legal manner and location.
• Do not input destinations, change settings, or access any
functions requiring a prolonged view of the monitor while you
are driving. Stop in a safe and legal manner and location before
attempting to access the system.
• When using the navigation system to find/route to an emergency
service, please contact the facility to validate and verify
availability, prior to driving to it. Not all locations of emergency
service providers such as police and fire stations, hospitals, and
clinics are contained in the database. Please use your own
judgment and your ability to ask for directions in these
situations.
• The map database contained within the media (SD memory card)
in which it is stored is the most recent map data available at the
time of production. Because of changes in streets and
neighborhoods, there may be situations where the navigation
system may not be able to route you to your desired destination.
In these cases, use your own personal judgment.
• The map database is designed to provide you with route
suggestions, it does not take account of the relative safety of a
suggested route, or of factors which may affect the time required
to reach your destination. The system does not reflect road
closures or construction, road characteristics (i.e. type of road
surface, slope or grade, weight or height restrictions, etc.),
traffic congestion, weather conditions, or any other factors
which may affect the safety or timing of your driving experience.
Use your personal judgment if the navigation system is unable to
provide you with an alternate route.
• There may be situations where the navigation system may
display the vehicle’s location erroneously. Use your own driving
judgment in this situation, taking into account current driving
conditions. Please be aware that in this situation, the navigation
system should correct the vehicle’s position automatically;
however, there may be times where you may have to correct the
position yourself. If this is the case, stop in a safe and legal
manner and location before attempting operation.
which still allows you to hear outside traffic and emergency
vehicles. Driving while unable to hear outside sounds could
cause an accident.
• Please make certain that any other person who intends on using
this navigation system reads these precautions and the following
instructions carefully.
If there is anything in the manual about the operation of
the navigation system which you are uncertain about,
please contact your local Alpine authorised navigation
dealer before using the navigation system.
WARNING
Points to Observe for Safe Usage
• Read this manual carefully before using this disc and the system
components. They contain instructions on how to use this
product in a safe and effective manner. Alpine cannot be
responsible for problems resulting from failure to observe the
instructions in this manual.
• This manual uses various pictorial displays to show you how to
use this product safely and to alert you to potential dangers
resulting from improper connections and operation. Following
are the meanings of these pictorial displays. It is important to
fully understand the meanings of these pictorial displays in order
to use this manual and the system properly.
• Operation of the system while driving is dangerous. Users
should stop vehicle before operating the software.
• Road conditions and regulations take precedence over
information contained on the map display: observe actual
traffic restrictions and circumstances while driving.
• This software is designed for use exclusively in the
X800D-U/INE-W987D. It cannot and may not be used in
conjunction with other hardware.
This symbol means important instructions.
Failure to heed them can result in serious injury
or death.
WARNING
WARNING
8-EN

INSTALL THE PRODUCT CORRECTLY SO THAT THE DRIVER
CANNOT WATCH TV/VIDEO UNLESS THE VEHICLE IS
STOPPED AND THE EMERGENCY BRAKE IS APPLIED.
It is dangerous for the driver to watch TV/Video while driving a
vehicle. Installing this product incorrectly enables the driver to
watch TV/Video while driving. This may cause a distraction,
preventing the driver from looking ahead, thus causing an accident.
The driver or other people could be severely injured.
USE THIS PRODUCT FOR MOBILE 12V APPLICATIONS.
Use for other than its designed application may result in fire,
electric shock or other injury.
DO NOT PLACE HANDS, FINGERS OR FOREIGN OBJECTS IN
INSERTION SLOTS OR GAPS.
Doing so may result in personal injury or damage to the product.
DO NOT WATCH VIDEO WHILE DRIVING.
Watching the video may distract the driver from looking ahead of
the vehicle and cause an accident.
DO NOT OPERATE ANY FUNCTION THAT TAKES YOUR
ATTENTION AWAY FROM SAFELY DRIVING YOUR VEHICLE.
Any function that requires your prolonged attention should only be
performed after coming to a complete stop. Always stop the vehicle
in a safe location before performing these functions. Failure to do
so may result in an accident.
DO NOT FOLLOW ROUTE SUGGESTIONS IF THE
NAVIGATION SYSTEM INSTRUCTS YOU TO PERFORM AN
UNSAFE OR ILLEGAL MANEUVER, OR PLACES YOU IN AN
UNSAFE SITUATION OR AREA.
This product is not a substitute for your personal judgment. Any
route suggestions by this system should never supersede any local
traffic regulations or your personal judgment or knowledge of safe
driving practise.
KEEP THE VOLUME AT A LEVEL WHERE YOU CAN STILL
HEAR OUTSIDE NOISES WHILE DRIVING.
Excessive volume levels that obscure sounds such as emergency
vehicle sirens or road warning signals (train crossings, etc.) can be
dangerous and may result in an accident. LISTENING AT LOUD
VOLUME LEVELS IN A CAR MAY ALSO CAUSE HEARING
DAMAGE.
CAUTION
This symbol means important instructions.
Failure to heed them can result in injury or
material property damage.
HALT USE IMMEDIATELY IF A PROBLEM APPEARS.
Failure to do so may cause personal injury or damage to the
product. Return it to your authorized Alpine dealer or the nearest
Alpine Service Centre for repairing.
KEEP FINGERS AWAY WHILE THE MOTORIZED FRONT
PANEL OR MOVING MONITOR IS IN MOTION.
Failure to do so may result in personal injury or damage to the
product.
MINIMIZE DISPLAY VIEWING WHILE DRIVING.
Viewing the display may distract the driver from looking ahead of
the vehicle and cause an accident.
DO NOT DISASSEMBLE OR ALTER.
Doing so may result in an accident, fire or electric shock.
USE ONLY IN CARS WITH A 12 VOLT NEGATIVE GROUND.
(Check with your dealer if you are not sure.) Failure to do so may
result in fire, etc.
KEEP SMALL OBJECTS SUCH AS SCREWS OUT OF THE
REACH OF CHILDREN.
Swallowing them may result in serious injury. If swallowed,
consult a physician immediately.
USE THE CORRECT AMPERE RATING WHEN REPLACING
FUSES.
Failure to do so may result in fire or electric shock.
DO NOT BLOCK VENTS OR RADIATOR PANELS.
Doing so may cause heat to build up inside and may result in fire.
9-EN
NOTICE
Product Cleaning
Use a soft dry cloth for periodic cleaning of the product. For more
severe stains, please dampen the cloth with water only. Anything
else has the chance of dissolving the paint or damaging the plastic.
Temperature
Be sure the temperature inside the vehicle is between +45°C
(+113°F) and 0°C (+32°F) before turning your unit on.
Moisture Condensation
You may notice the disc playback sound wavering due to
condensation. If this happens, remove the disc from the player and
wait about an hour for the moisture to evaporate.
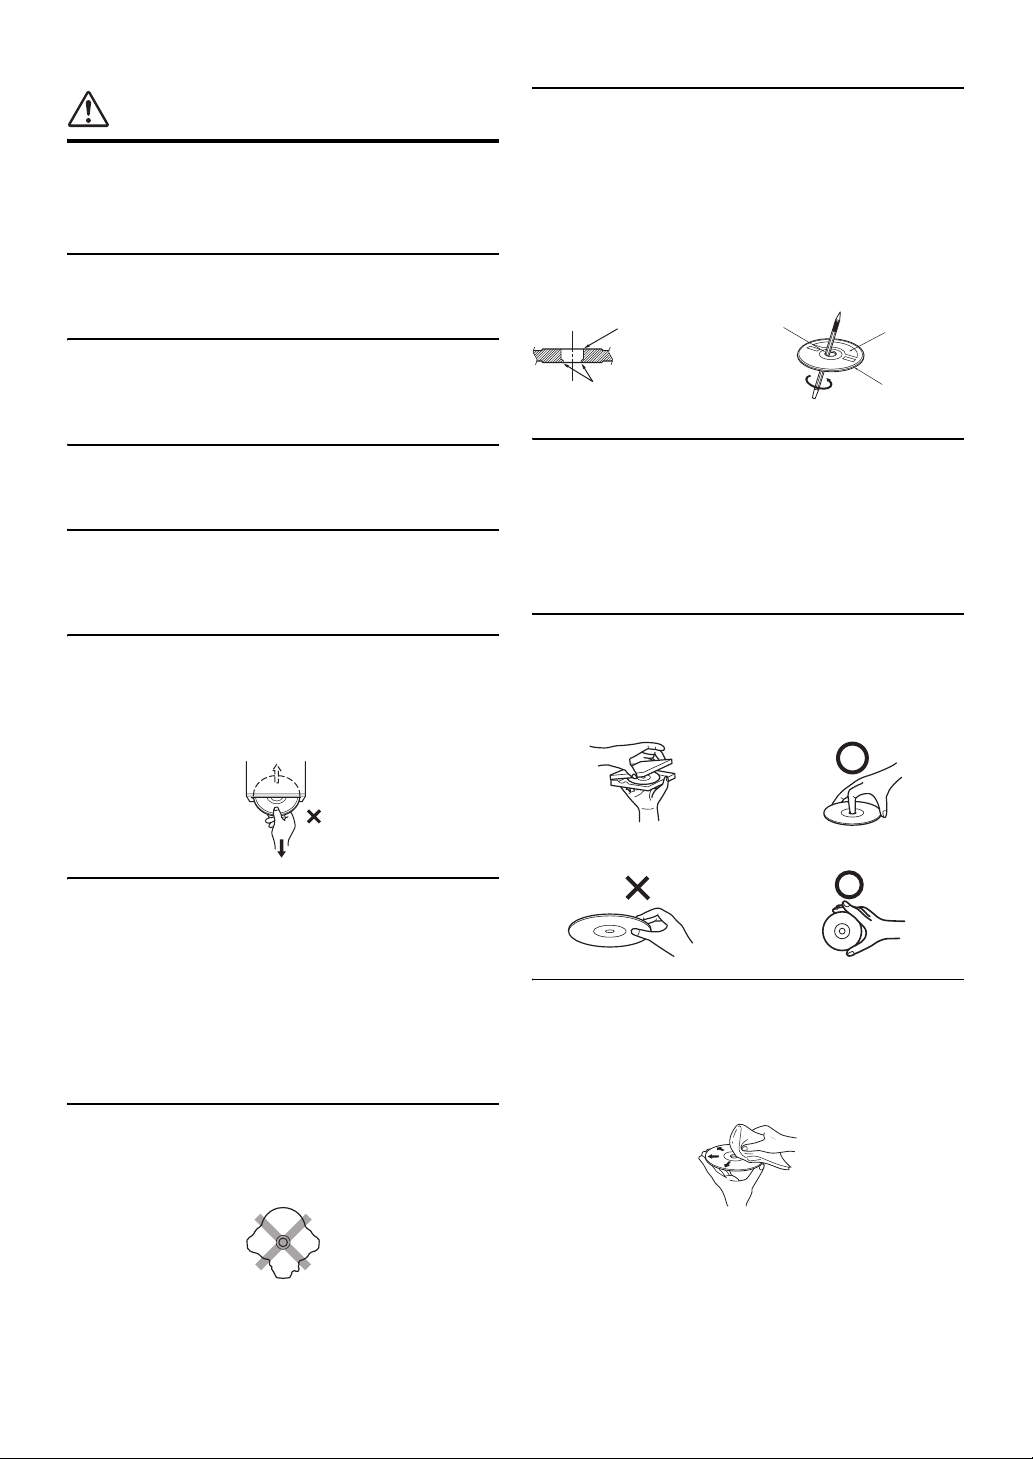
New Discs
To prevent the disc from jamming, “Disc error” is displayed if discs
with irregular surfaces are inserted or if discs are inserted
incorrectly. When a new disc is ejected immediately after initial
loading, use your finger to feel around the inside of the centre hole
and outside edge of the disc. If you feel any small bumps or
irregularities, this could inhibit proper loading of the disc. To
remove the bumps, rub the inside edge of the hole and outside edge
of the disc with a ballpoint pen or other such instrument, then insert
the disc again.
Centre Hole
Bumps
Centre Hole
New Disc
Outside
(Bumps)
Damaged Disc
Do not attempt to play cracked, warped, or damaged discs. Playing
a bad disc could severely damage the playback mechanism.
Maintenance
If you have problems, do not attempt to repair the unit yourself.
Return it to your Alpine dealer or the nearest Alpine Service
Station for servicing.
Never Attempt the Following
Do not grip or pull out the disc while it is being pulled back into the
player by the automatic reloading mechanism.
Do not attempt to insert a disc into the unit when the unit power is
off.
Inserting Discs
Your player accepts only one disc at a time for playback. Do not
attempt to load more than one disc.
Make sure the label side is facing up when you insert the disc.
“Disc error” will be displayed on your player if you insert a disc
incorrectly. If “Disc error” continues to be displayed even though
the disc has been inserted correctly, push the RESET switch with a
pointed object such as a ballpoint pen.
Playing a disc while driving on a very bumpy road may result in
skips, but this will not scratch the disc or damage the player.
Irregular Shaped Discs
Be sure to use round shaped discs only for this unit and never use
any special shaped discs.
Use of special shaped discs may cause damage to the mechanism.
Installation Location
Make sure the X800D-U/INE-W987D will not be installed in a
location subjected to:
• Direct sun and heat
• High humidity and water
• Excessive dust
• Excessive vibrations
Correct Handling
Do not drop the disc while handling. Hold the disc so you will not
leave fingerprints on the surface. Do not affix tape, paper, or
gummed labels to the disc. Do not write on the disc.
CORRECT
INCORRECT CORRECT
Disc Cleaning
Fingerprints, dust, or soil on the surface of the disc could cause the
DVD player to skip. For routine cleaning, wipe the playing surface
with a clean, soft cloth from the centre of the disc to the outer edge.
If the surface is heavily soiled, dampen a clean, soft cloth in a
solution of mild neutral detergent before cleaning the disc.
10-EN

Disc Accessories
There are various accessories available on the market for protecting
the disc surface and improving sound quality. However, most of
them will influence the thickness and/or diametre of the disc. Using
such accessories can cause operational problems. We recommend
not using these accessories on discs played in Alpine DVD players.
Transparent Sheet Disc Stabilizer
Operation of some of the functions of this unit is very complex.
Because of this, it was deemed necessary to place these functions
into a special screen. This will restrict operation of these functions
to times when the vehicle is parked. This ensures the focus of the
driver’s attention will be on the road and not on the X800D-U/
INE-W987D. This has been done for the safety of the driver and
passengers.
Setup operations cannot be made if the car is moving. The car must
be parked and the parking brake must be engaged for the procedure
described in the Owner’s Manual to be valid. The warning “If you
are driving, Please pull over before using this function.” will be
displayed if any attempts are made to perform these operations
while driving.
• The X800D-U/INE-W987D draws minimal current even when its
power switch is turned off. If the switched power (ignition) lead of the
X800D-U/INE-W987D is connected directly to the positive (+) post
of the vehicle’s battery, the battery may be discharged.
An SPST (Single-Pole, Single-Throw) switch (sold separately) can be
added to simplify this procedure. Then, you can simply place it in the
OFF position when you leave the vehicle. Turn the SPST switch back
ON before using the X800D-U/INE-W987D. For connecting the
SPST switch, refer to the “Connection Diagram of SPST Switch (sold
separately)” (page 111). If the power (ignition) lead is unswitched, it
must be disconnected from the battery post should the vehicle be left
unused for an extended period of time.
Discs Playable on This Unit
Playable Discs
The discs listed below can be played on this unit.
Mark (logo) Recorded Content Disc size
DVD Video Audio + Video 12 cm*
Music CD Audio 12 cm
®
DivX
* Two-layer DVD disc compatible
The formatted discs listed below can be played on this unit.
CD Format
MP3 Format (“mp3”)
WMA Format (“wma”)
AAC Format (“aac”, “m4a”)
DVD Video Format
Audio + Video 12 cm
CD-R/
CD-RW
DVD-R/
DVD-RW
DVD+R/
DVD+RW
DivX Format (“avi”, “divx”)
• Discs that are not finalised cannot be played back.
11-EN
Discs that cannot be played
DVD-ROMs, DVD-RAMs, CD-ROMs (excluding MP3/WMA/
AAC files), photo CDs, etc.
DualDisc
This unit is not compatible with DualDisc.
Using a DualDisc may cause unit malfunction, and may cause disc
damage when the disc is inserted/ejected.
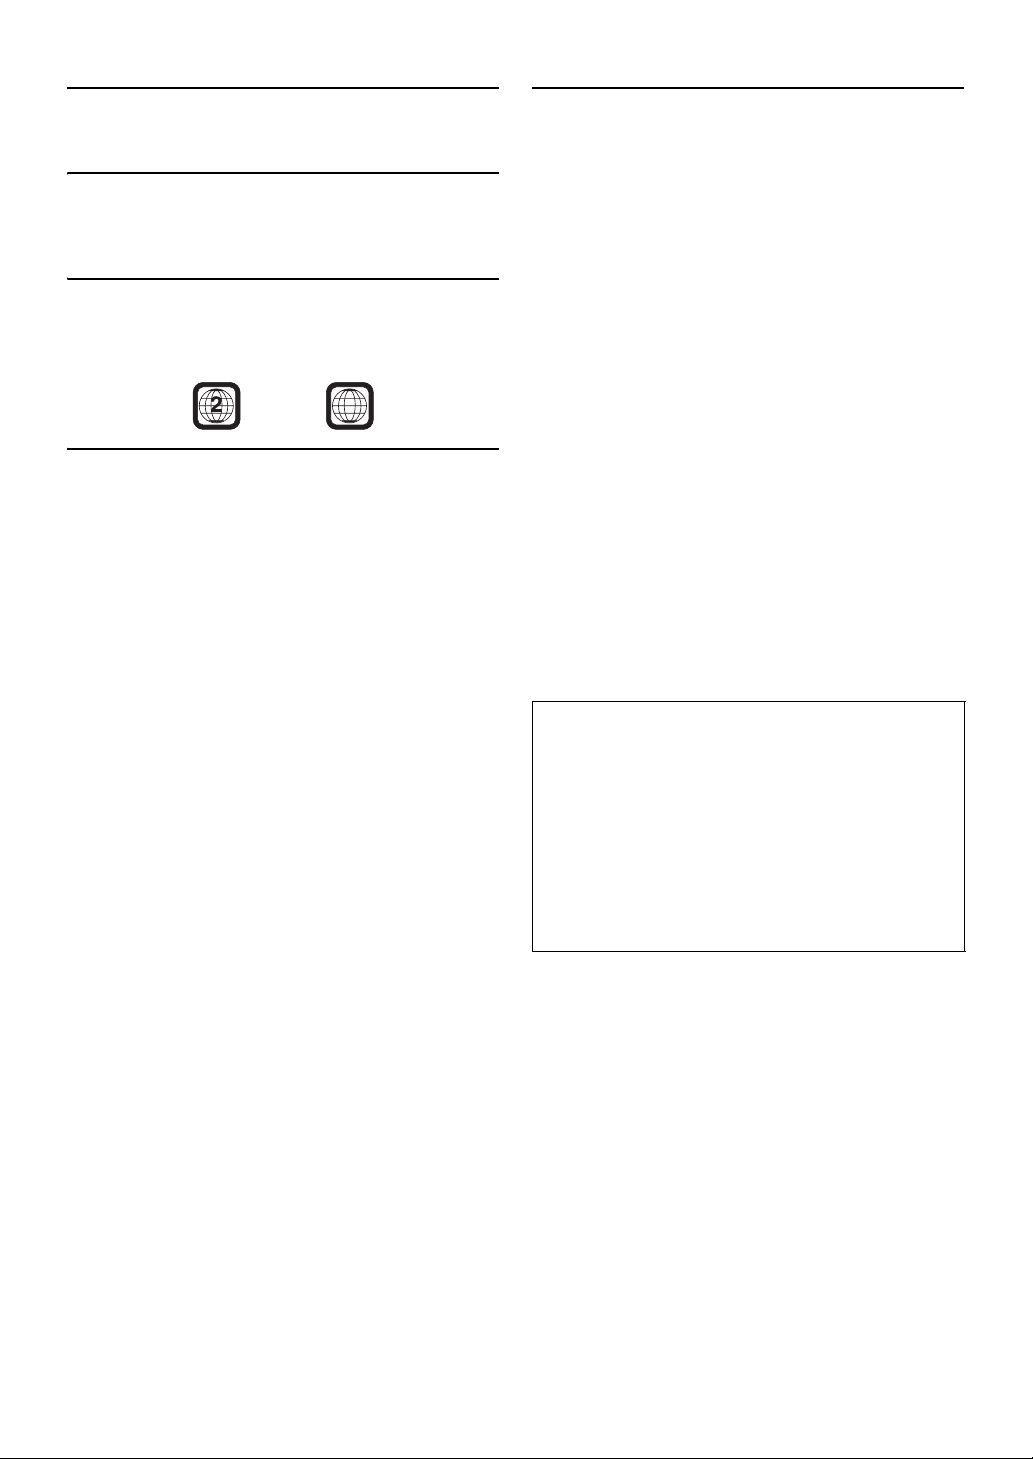
DVD region number (playable region number)
This DVD player will play back any disc whose region number is 2
(or All). DVDs with a region number other than those listed below,
cannot be played on this DVD player.
ALL
Using compact discs (CD/CD-R/CD-RW)
If you use unspecified compact discs, correct performance cannot
be guaranteed.
You can play CD-Rs (CD-Recordables)/CD-RWs (CD
ReWritables) which have been recorded only on audio devices.
You can also play CD-Rs/CD-RWs containing MP3/WMA/AAC
formatted audio files.
• Some of the following discs may not play on this unit:
Flawed discs, discs with fingerprints, discs exposed to extreme
temperatures or sunlight (e.g., left in the car or this unit), discs
recorded under unstable conditions, discs on which a recording
failed or a re-recording was attempted, copy-protected CDs
which do not conform to the audio CD industry standard.
• Use discs with MP3/WMA/AAC files written in a format
compliant with this unit. For details, see pages 39 and 40.
To customers using CD-R/CD-RW
• If a CD-R/CD-RW cannot be played back, make sure the last
recording session was closed (finalised).
• Finalise the CD-R/CD-RW if necessary, and attempt playback
again.
-
Tips for making your own discs
The X800D-U/INE-W987D plays DVD Video, DivX®, Audio CD
and has a built in MP3/WMA/AAC decoder.
The following information is designed to help you create your own
music CDs (either Audio CD or MP3/WMA/AAC encoded CD-R/
RW file s).
What is the difference between an Audio and MP3/WMA/AAC
CD?
An Audio CD is the same format as the commercial CDs you buy
in the store (also known as CD-DA). MP3 (MPEG Audio Layer 3)/
WMA (Windows Media Audio)/AAC (Advanced Audio Coding) is
a data file that uses a compression scheme to reduce the size of the
music file*.
* If the first session on a disc containing both CD-DA data and
MP3/WMA/AAC data is a CD-DA file, only CD-DA files will
be played.
Multisession CD-R/RW:
Once a recording has been stopped, this is considered one session.
If the disc is not closed (finalised), additional data may be added.
Once this additional data has been recorded, this becomes a
“multisession” CD.
Properly formatted MP3/WMA/AAC Discs:
Use ISO9660 formatting to insure proper playback. You may use
standard ISO naming Level 1 (8.3 DOS standard), Level 2
(32 characters) or Joliet (Windows or Macintosh long filenames)
file naming conventions*.
* Please consult the Owner’s manual for additional information.
On handling compact discs (CD/CD-R/CD-RW)
• Do not touch the surface.
• Do not expose the disc to direct sunlight.
• Do not affix stickers or labels.
• Clean the disc when it is dusty.
• Make sure that the disc is smooth and flat.
• Do not use commercially available disc accessories.
Do not leave the disc in the car or the unit for a long time.
Never expose the disc to direct sunlight.
Heat and humidity may damage the disc and you may not be
able to play it again.
12-EN

Using DVD-Rs/DVD-RWs/DVD+Rs/DVD+RWs
• This unit is compatible with discs recorded in the standard
DVD-Video format.
• Note that discs not finalised (processed to enable to play on
playback-only DVD players) cannot be played on this DVD
player.
• Some discs may not play back, depending on the recording
device and disc format.
• Discs or files utilising copy protection, may not be playable.
Some recording systems may not properly format copied files to
enable proper playback.
• In the following cases, the disc may not play on this unit:
discs recorded by certain DVD recorders, certain irregular discs,
flawed discs, dirty discs, when the pickup lens of this DVD
player is dirty, or when moisture condensation has occurred
inside the unit.
• Be sure to follow all cautions included with your DVD-Rs/
DVD-RWs/DVD+Rs/DVD+RWs discs.
• Do not put stickers, seals, or tape on the label side of DVD-Rs/
DVD-RWs/DVD+Rs/DVD+RWs.
• Compared to the regular discs, DVD-Rs/DVD-RWs/DVD+Rs/
DVD+RWs are more affected by heat, moisture, and direct
sunlight. If left in a car, etc., damage may occur and it might not
play on this unit.
• The operable temperature range for disc playback is as follows:
DVD-R/DVD-RW: -25 ~ +70°C
DVD+R/DVD+RW: +5 ~ +55°C
Disc terminology
Title
If titles are programmed for the DVD, these are the largest units of
division of the information recorded on the disc.
Chapter
Each Title may also be divided into smaller divisions, called
chapters. These can be specific scenes or musical selections.
Protecting the USB connector
• Only an iPod/iPhone or USB memory can be connected to the
USB connector on this unit. Correct performance using other
USB products cannot be guaranteed.
• If the USB connector is used, be sure to use only the supplied
connector cable with the unit. A USB hub is not supported.
• Depending on the connected USB memory device, the unit may
not function or some functions may not be performed.
• The audio file format that can be played back on the unit is
MP3/WMA/AAC.
• The video file format that can be played back on the unit is
®
.
DivX
• Artist/song name, etc., can be displayed. Certain, special
characters may not be correctly displayed.
CAUTION
Alpine accepts no responsibility for lost data, etc., even if data, etc.,
is lost while using this product.
On Handling USB Memory
• This unit can control a memory storage device that supports the
USB Mass Storage Class (MSC) protocol. Playable audio file
formats are MP3, WMA and AAC.
• USB memory function is not guaranteed. Use USB memory
according to the terms of agreement. Read the USB memory
Owner’s Manual thoroughly.
• Avoid usage or storage in the following locations:
Anywhere in the car exposed to direct sunlight or high
temperatures.
Anywhere the possibility of high humidity or corrosive
substances are present.
• Fix the USB memory in a location where driver operation will
not be hindered.
• USB memory may not function correctly at high or low
temperature.
• Use only certified USB memory. Note that even certified USB
memory, may not function correctly depending on its type or
state.
• Depending on the settings of the USB memory type, memory
state or encoding software, the unit may not play back or display
properly.
• Files protected by DRM (Digital Rights Management), cannot be
played back on this unit. These include AAC formatted files
purchased from the iTunes Store and WMA or other files with
some form of copyright protection.
• USB memory may take time to start playback. If there is a
particular file other than audio in the USB memory, it may take
considerable time before the file is played back or searched.
• The unit can play back “mp3”, “wma” or “m4a” file extensions.
• Do not add the above extensions to a file other than audio data.
This non-audio data will not be recognised. The resulting
playback may contain noise that can damage speakers and/or
amplifiers.
• It is recommended to back up important data on a personal
computer.
• Do not remove the USB device while playback is in progress.
Change SOURCE to something other than USB, then remove the
USB device to prevent possible damage to its memory.
13-EN

• This item incorporates copy protection technology that is
protected by U.S. patents and other intellectual property rights
of Rovi Corporation. Reverse engineering and disassembly are
prohibited.
• Manufactured under licence from Dolby Laboratories. Dolby
and the double-D symbol are trademarks of Dolby Laboratories.
• Windows Media, and the Windows logo are trademarks, or
registered trademarks of Microsoft Corporation in the United
States and/or other countries.
• iPhone, iPod, iPod classic, iPod nano, iPod touch, and iTunes
are trademarks of Apple Inc., registered in the U.S. and other
countries.
• “Made for iPod,” and “Made for iPhone,” mean that an
electronic accessory has been designed to connect specifically to
iPod, or iPhone, respectively, and has been certified by the
developer to meet Apple performance standards. Apple is not
responsible for the operation of this device or its compliance
with safety and regulatory standards. Please note that the use of
this accessory with iPod, or iPhone may affect wireless
performance.
®
, DivX Certified® and associated logos are trademarks of
• DivX
Rovi Corporation or its subsidiaries and are used under licence.
• The Bluetooth
owned by the Bluetooth SIG, Inc. and any use of such marks by
Alpine Electronics, Inc. is under licence.
• The terms HDMI and HDMI High-Definition Multimedia
Interface, and the HDMI Logo are trademarks or registered
trademarks of HDMI Licensing LLC in the United States and
other countries.
• Android is a trademark of Google Inc.
• MPEG Layer-3 audio coding technology licenced from
Fraunhofer IIS and Thomson. Supply of this product only
conveys a licence for private, non-commercial use and does not
convey a licence nor imply any right to use this product in any
commercial (i.e. revenue-generation) real time broadcasting
(terrestrial, satellite, cable and/or any other media),
broadcasting/streaming via internet, intranets and/or other
networks or in other electronic content distribution systems, such
as pay-audio or audio-on-demand applications. An independent
licence for such use is required. For details, please visit
http://www.mp3licensing.com
©1993-2014 NAVTEQ. All rights reserved.
Portions ©2014, Microsoft Corporation. All Rights Reserved.
®
word mark and logos are registered trademarks
14-EN
Features
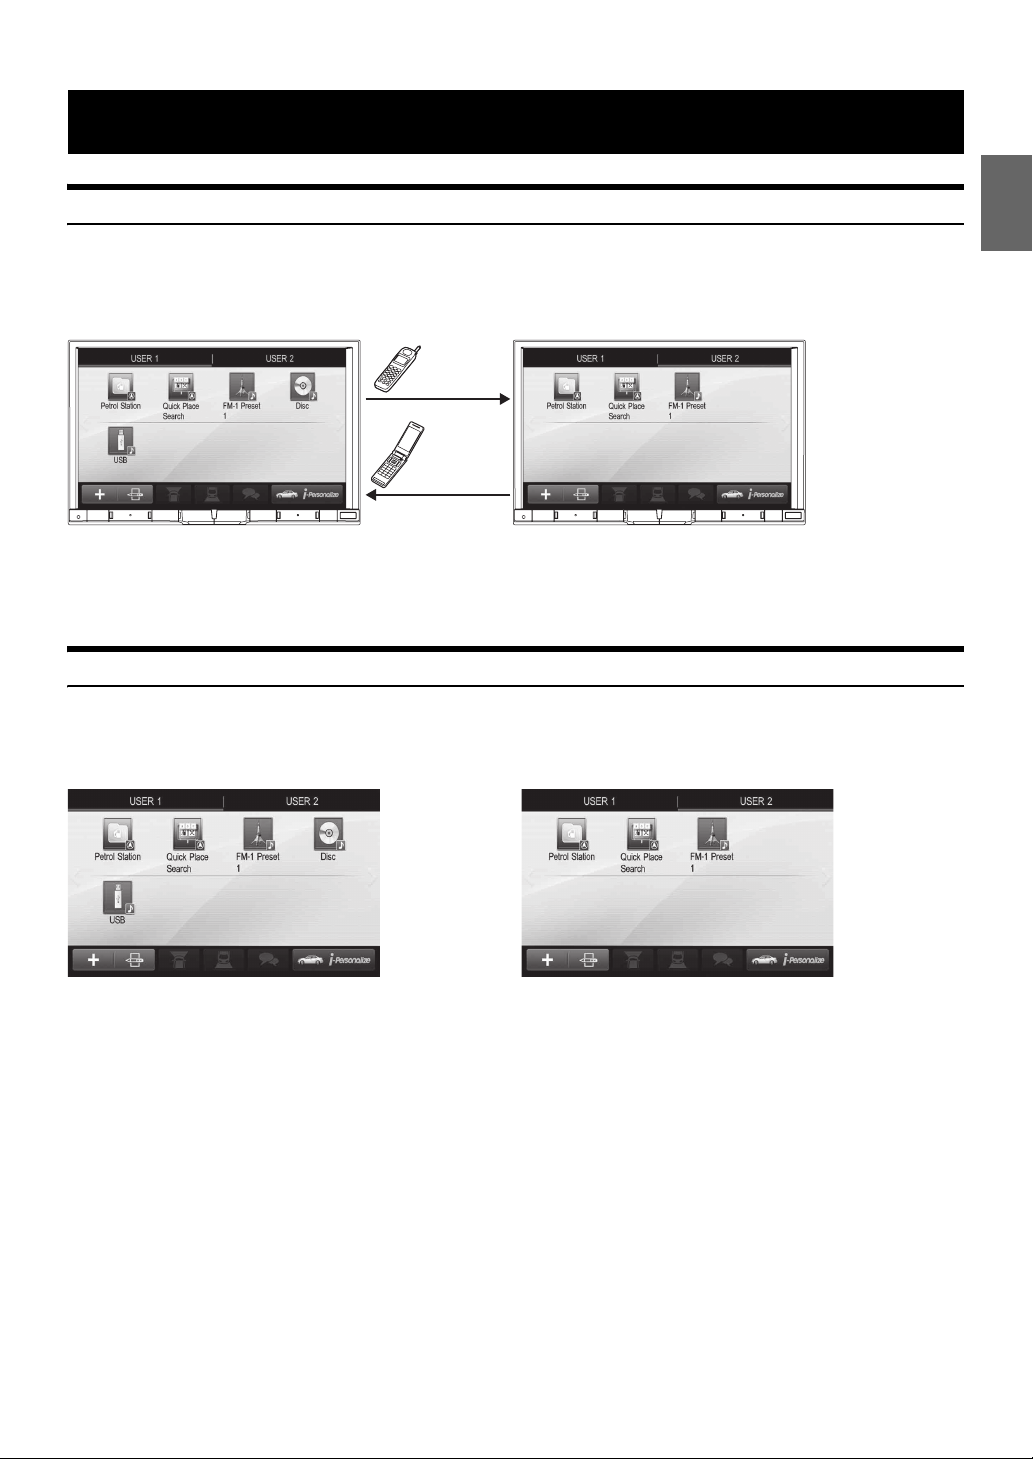
Auto user setting change
With the X800D-U/INE-W987D, you can register up to two users.
Each user can configure their own preferred settings.
By registering their respective BLUETOOTH devices to the unit, each user can be identified automatically.
USER1 USER2
USER2
USER1
• For details of how to register a BLUETOOTH device, refer to “User Registration” (page 22).
• If USER2 is recognised while USER1 is using the system, a confirmation message is displayed.
• If no BLUETOOTH device has been registered or if you want to switch users manually, touch the user tab key on the top of the screen.
• For details of which settings are affected by switching users, refer to “Settings When Switching Users” (page 26).
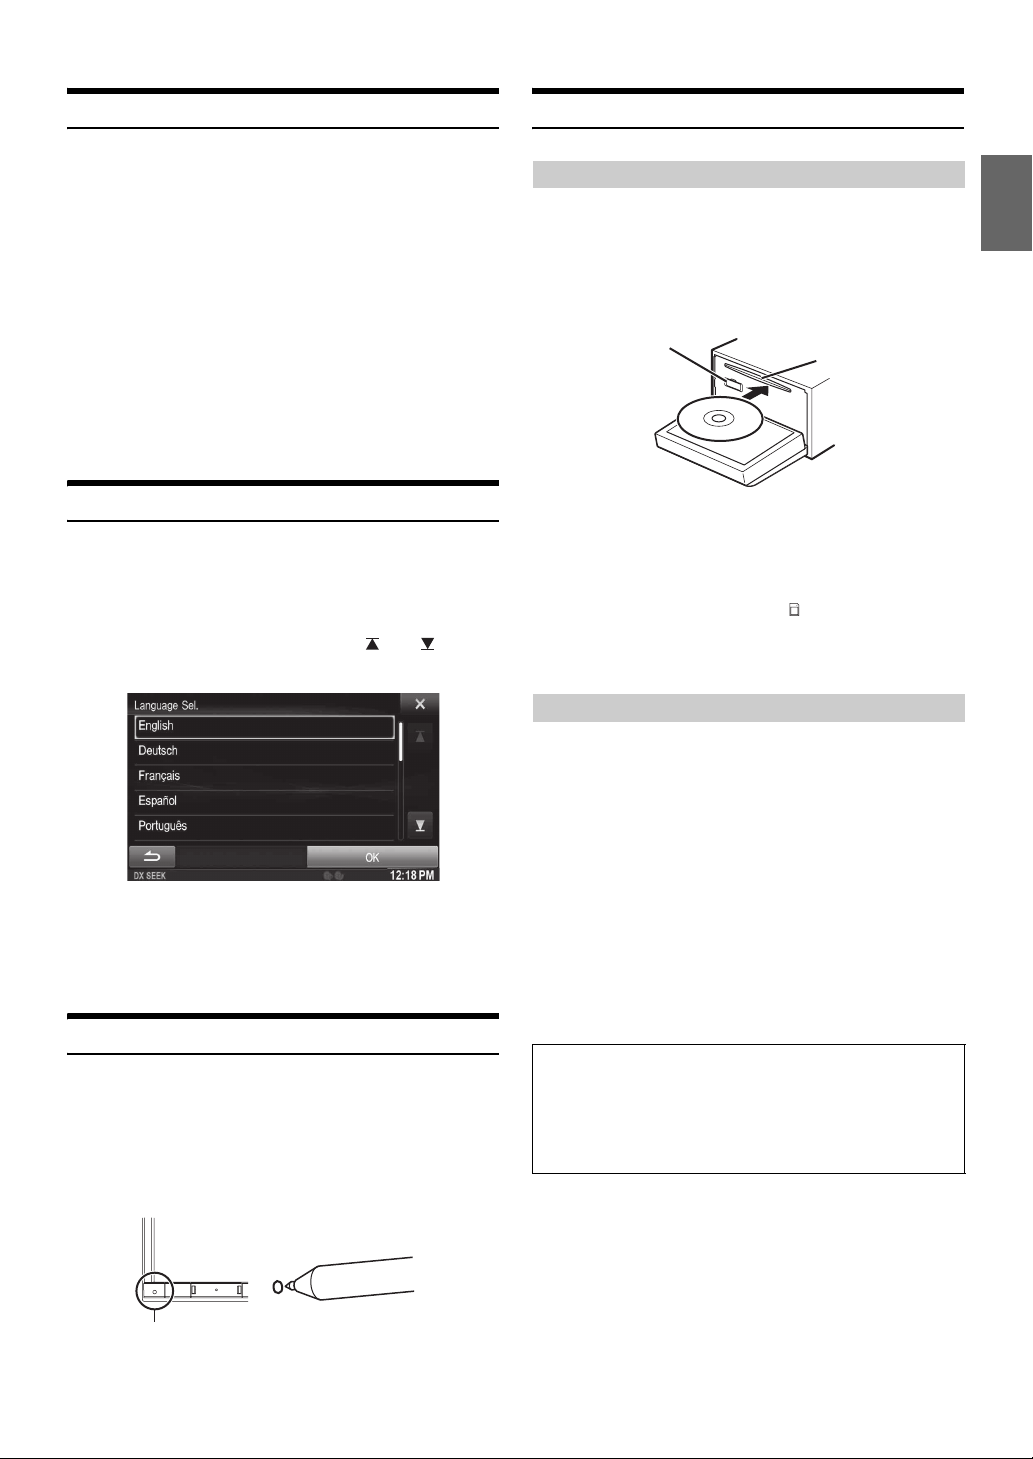
My Favourites
Up to 80 My Favourites can be registered as shortcut keys for each registered user.
Frequently used functions and handy functions can be customised for your convenience.
USER1 USER2
For details of how to register or add My Favourites, how to change the name, etc., refer to “Using My Favourites” (page 21).
15-EN

Easy sound setting by car type (i-Personalize)
This function lets you set the best audio environment for your car.
On the unit, select and set the car category/steering wheel position/speaker type and size/seat material.
For details of how to configure the settings, refer to “Car Specific Sound Setup” (page 24).
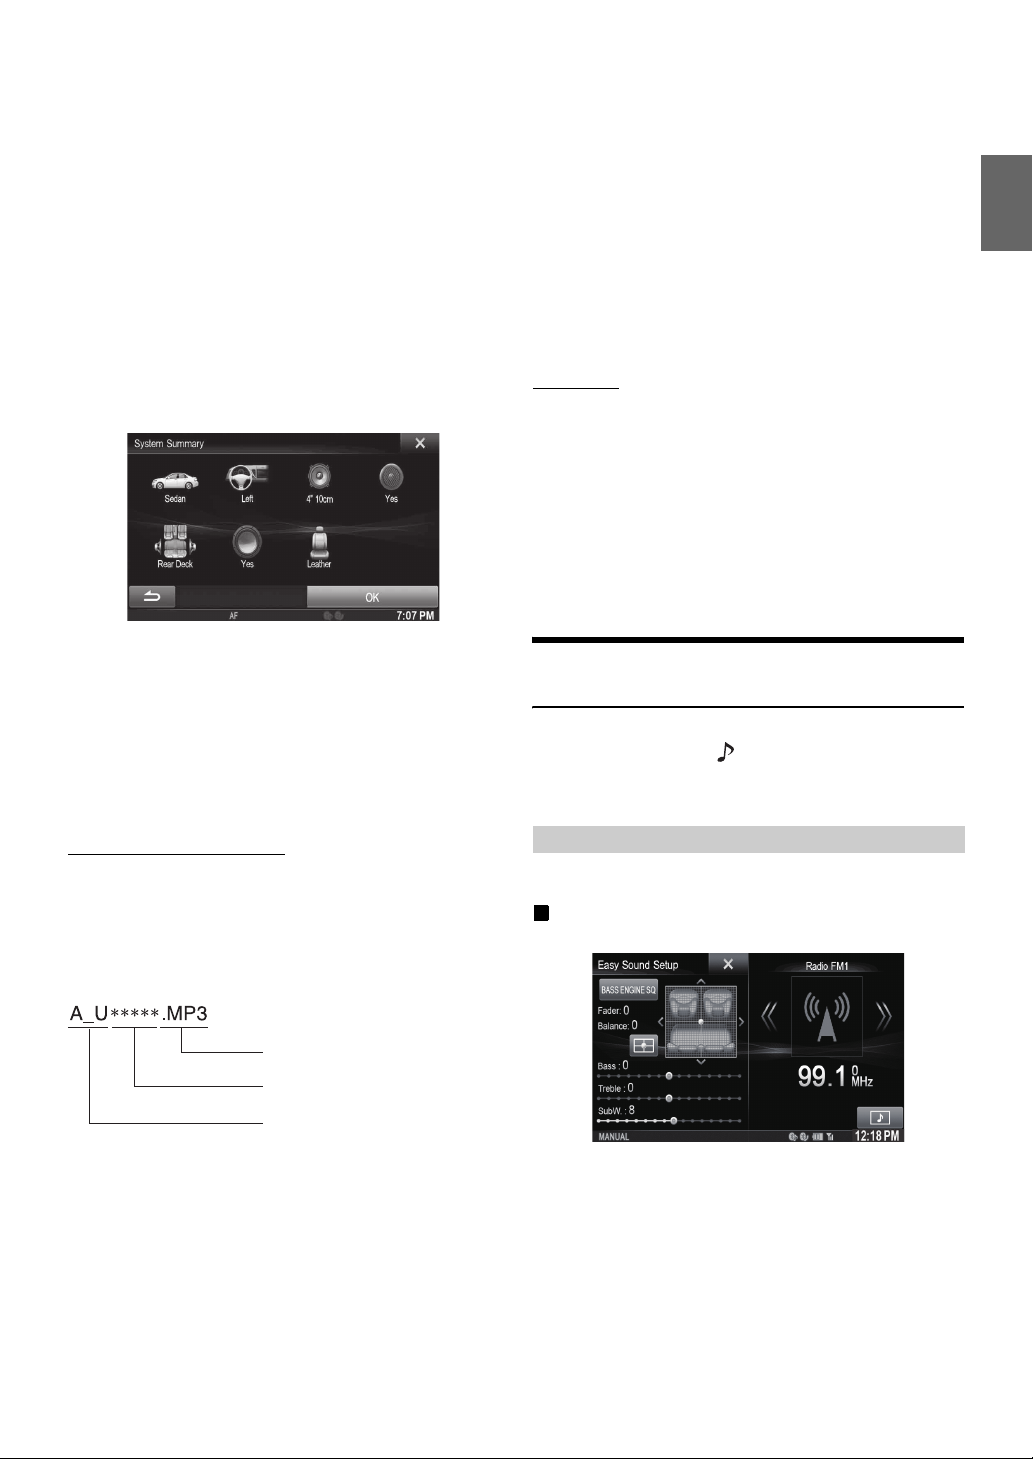
Display example when setting is completed
About Dual Screen
If you want to display the music playback screen while route guidance is displayed, etc., you can display the Navigation and Audio/Visual screens
simultaneously.
Navigation Full screen
Touch the Navigation screen portion.
or
Press the (MAP) button.
Dual Screen
Touch
Audio/Visual Full screen
Touch *
or
Press the button.
* During video playback, [Dual Wide], [Dual Full] and [Full Screen] appear on the screen for selecting the screen size. For details, refer to
“Switching the Dual Screen Display” (page 29).
16-EN

Dual Screen Display Position
You can switch the Audio/Visual and Navigation screens using drag & drop.
To switch the screens, touch the middle of the Audio/Visual screen and drag it to the navigation screen. The screens will switch positions when you
remove your finger.
• Drag and drop the navigation screen will change to navigation full screen.
17-EN

Getting Started
Accessory List
• X800D-U/INE-W987D ..........................................................1
• Power cable .........................................................................1
• Flush head screw (M5×8) (INE-W987D Only) .....................6
• Screw (M5×8) ......................................................................8
• GPS Antenna .......................................................................1
• Antenna mounting plate ......................................................1
• Cable clamp for antenna................................................1set
• AUX/PRE OUT cable ...........................................................1
• CAMERA/W.REMOTE cable ................................................1
• USB extension cable ...........................................................1
• Microphone..........................................................................1
• Mounting sleeve (INE-W987D Only)....................................1
• Face plate (INE-W987D Only) .............................................1
• Bracket key (INE-W987D Only) ...........................................2
• Rubber cap (INE-W987D Only) ...........................................1
• Hex bolt (INE-W987D Only).................................................1
• Carrying bag (INE-W987D Only) .........................................1
• Owner’s Manual ..............................................................1set
• SD memory card..................................................................1
• Cushion (X800D-U Only) .....................................................1
• To install the X800D-U, refer to the manual in the separately
purchased installation kit for each car type.
Location of Controls
For X800D-U
RESET switch
The system of this unit is reset.
(My Favourites)/ button
The My Favourites screen for registered User1 or User2 is
displayed.
Press and hold this button at least 3 seconds to switch to
climate screen. You can check the air condition, etc,. when
this unit is connected to the car’s CAN Interface box.
/ (DOWN/UP) button
Press to adjust the volume.
MUTE/C button
Press to activate/deactivate the mute mode.
Press and hold this button for at least 3 seconds to turn the
power off.
/AUDIO button
Displays the Audio/Visual screen. If the Audio/Visual screen
is already displayed, changes the source.
Press and hold this button for at least 3 seconds to activate
the “Easy Sound Setup” mode (page 25). You can select
this menu to be displayed on the left or right of the screen.
For details, refer to “Setting the Easy Sound Setup Position”
(page 60).
(MAP) button
Recalls the navigation map screen.
Press again to switch to Navigation menu screen.
Press and hold this button for at least 3 seconds to change
to Go Home route screen. If the Home is not set yet, it will
change to Home setting screen.
(PHONE) button
Recalls the Telephone Menu screen.
When a hands-free phone with Voice Recognition is
connected, press and hold for at least 3 seconds to recall
the Voice Recognition mode.
/ button
Press to seek down/up station in radio mode or down/up
track, chapter, etc., in other audio/visual source.
c (Eject) button
Recalls the Open/Tilt screen.
If the disc does not eject after touching [c] of DISC, press
and hold this button for at least 5 seconds.
Remote Sensor
Point the remote control transmitter towards the remote
sensor within a range of 2 metres.
For INE-W987D
18-EN
Optional Remote Control Interface Box
This unit is operable using the vehicle’s secondary radio controls.
An Alpine Remote Control Interface Box (optional) is required. For
details, contact your Alpine dealer.
Controllable with Remote Control
This unit can be controlled with an optional Alpine remote control.
For details, consult your Alpine dealer. Point the optional remote
control transmitter at the remote control sensor.
About the button descriptions used in this Owner’s
Manual
The buttons found on the face of the unit are expressed in
bold (e.g. (My Favourites)). The buttons found on the
touch-screen display are shown in bold within brackets, [ ]
(e.g. []).
Turning Power On or Off
Some of this unit’s functions cannot be performed while the vehicle is in
motion. Be sure to stop your vehicle in a safe location and apply the
parking brake, before attempting these operations.
1
Turn the ignition key to the ACC or ON position.
The system turns on.
• When turned on, the system displays the last mode screen that
was displayed before the ignition key was turned off. For
example, if the unit is in radio mode when ignition is turned off,
it will remain in radio mode when ignition is turned back on.
2
Press and hold the MUTE/C button for at least 3
seconds to turn the power off.
• The unit can be turned on by pressing any button.
• The X800D-U/INE-W987D is a precision device. Careful handling of
the unit should provide you with years of trouble-free operation.
Inserting/Ejecting a Disc
Inserting the Disc
1
Press c (Eject).
The Open/Tilt screen is displayed.
2
Touch [c Disc].
3
Insert the disc with the label side facing up.
SD memory
card slot*
Disc Slot
Turning the System On
With the Alpine system, when the ignition key is turned to ACC or ON,
the opening screen will be automatically displayed.
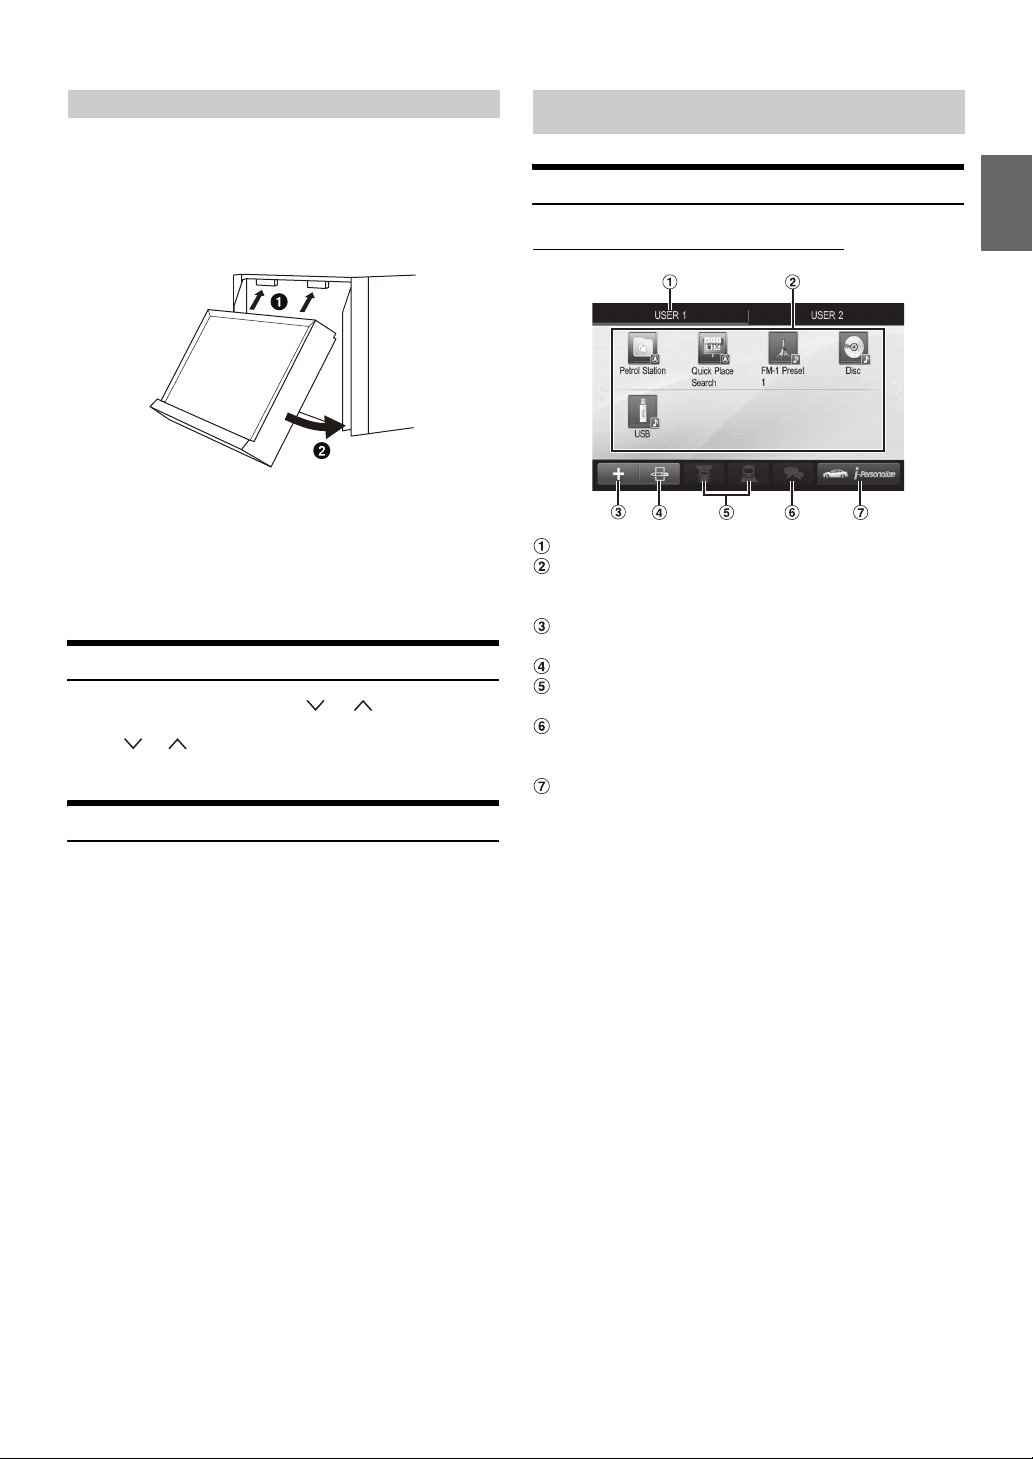
1
When the system is used for the first time, the
language selection menu is displayed. There are 24
languages to choose from. Touch [] or [] to
scroll the list, and then touch the desired language.
• You can also scroll through lists by touching the screen and
sliding your finger up and down.
2
Touch [OK].
The radio screen is displayed.
Initial System Start-Up
Be sure to press the RESET switch when using the unit for the first
time, after changing the car battery, etc.
1
Turn off the unit power.
2
Press RESET switch with a ballpoint pen or similar
pointed object.
Insert the disc until it is automatically pulled into the unit.
The unit starts to play the disc.
* The SD memory card does not support Music/Video playback.
For details on how to use SD memory cards, refer to “Navigation
System OM” on the supplied CD-ROM.
• To remove the SD memory card, touch [ SD].
• Insert the SD memory card into the slot until it is locked.
If the SD memory card is not inserted properly, the monitor cannot be
closed.
Removing the Disc
1
Press c (Eject).
The Open/Tilt screen is displayed.
2
Touch [c Disc].
The monitor will open. Then the disc is ejected.
When the disc has been ejected part way, take it out.
• Even if no disc is inserted, the monitor will open after touching
[c Disc].
3
Touch [Close], or press c (Eject).
• If the disc does not eject after touching [c Disc], press and hold
c (Eject) for at least 5 seconds.
• Do not apply shock to the monitor when it is open as it may result in
malfunction of the unit.
• The monitor will stop at the set tilt angle when closing.
CAUTION
Keep hands (or any other object) away from the monitor while it
is opening or closing to avoid damage or injury. The back of the
monitor tends to become very warm under normal operating
conditions. This is not a malfunction, but care should be taken to
avoid prolonged contact with it.
RESET switch
19-EN

Adjusting the Screen Viewing Angle
Adjust the screen’s angle for better visibility.
1
Press c (Eject).
The Open/Tilt screen is displayed.
2
Touch [Up] or [Down] of “Tilt” to adjust the
desired screen angle.
The screen angle can be adjusted in 5 stages.
3
Touch [] to return to the normal mode.
• The screen colour will vary when viewed at certain angles. Adjust the
screen angle for the best viewing position.
• If the voltage of the vehicle’s battery power is low, the screen may
blink when the screen angle is changed. This is normal and not a
malfunction.
Detaching and Attaching the Screen (INE-W987D Only)
Detaching
It may be difficult to remove the screen panel in some angle, so please
select a proper angle to detach the screen panel easily base on your
vehicle type and the installation location of the main unit. Refer to
“Setting the Remove Screen Angle” on page 48. And please according
to the following operation to remove the screen panel.
1
Press c (Eject).
The Open/Tilt screen is displayed.
4
Press the Release Lever on the bottom of the screen
panel (figure1) within the 30 seconds count down.
The screen panel is unlocked (figure2).
• After the Release Lever is pressed, the front panel will close in
15 seconds, whether the screen panel is detached or not.
figure1
figure2
5
Grasp the screen panel firmly, and force the bottom
of the screen panel outward to make it depart from
the main unit.
2
Touch [ Remove Screen].
A confirmation message is displayed.
3
Touch [OK] to confirm.
Touch [Cancel] will return to normal mode.
The screen turns to the Remove Screen Angle which is set
in “Setting the Remove Screen Angle” (page 48). Then, a
count down for 30 seconds is displayed.
• If you do not want to remove the screen panel, press
button to return to normal mode.
• If the Screen is not detached within 30 seconds, the unit will
return to normal mode.
c (Eject)
figure3
• When the screen panel is detached, please keep your hand away from
the unit, because the front panel will close automatically in 15
seconds after the Release Lever is pressed.
• The screen panel may become hot in normal usage (especially the
connector terminals on the back of the screen panel). This is not a
malfunction.
• To protect the screen panel, place it in the supplied carrying bag.
• When detaching the screen panel, do not apply excessive force as it
may result in malfunction.
• If Auto Open/Close is set to On, the screen will turn to the Remove
Screen Angle automatically when ignition is set to OFF. Refer to
“Opening/Closing Screen Automatically” on page 48.
20-EN
Attaching
1
Insert the upside of the screen panel into the main
unit. Align the groove on the screen panel with
projections on the main unit.
2
Push the downside of the screen panel until it locks
firmly into the main unit.
figure4
Common Operations
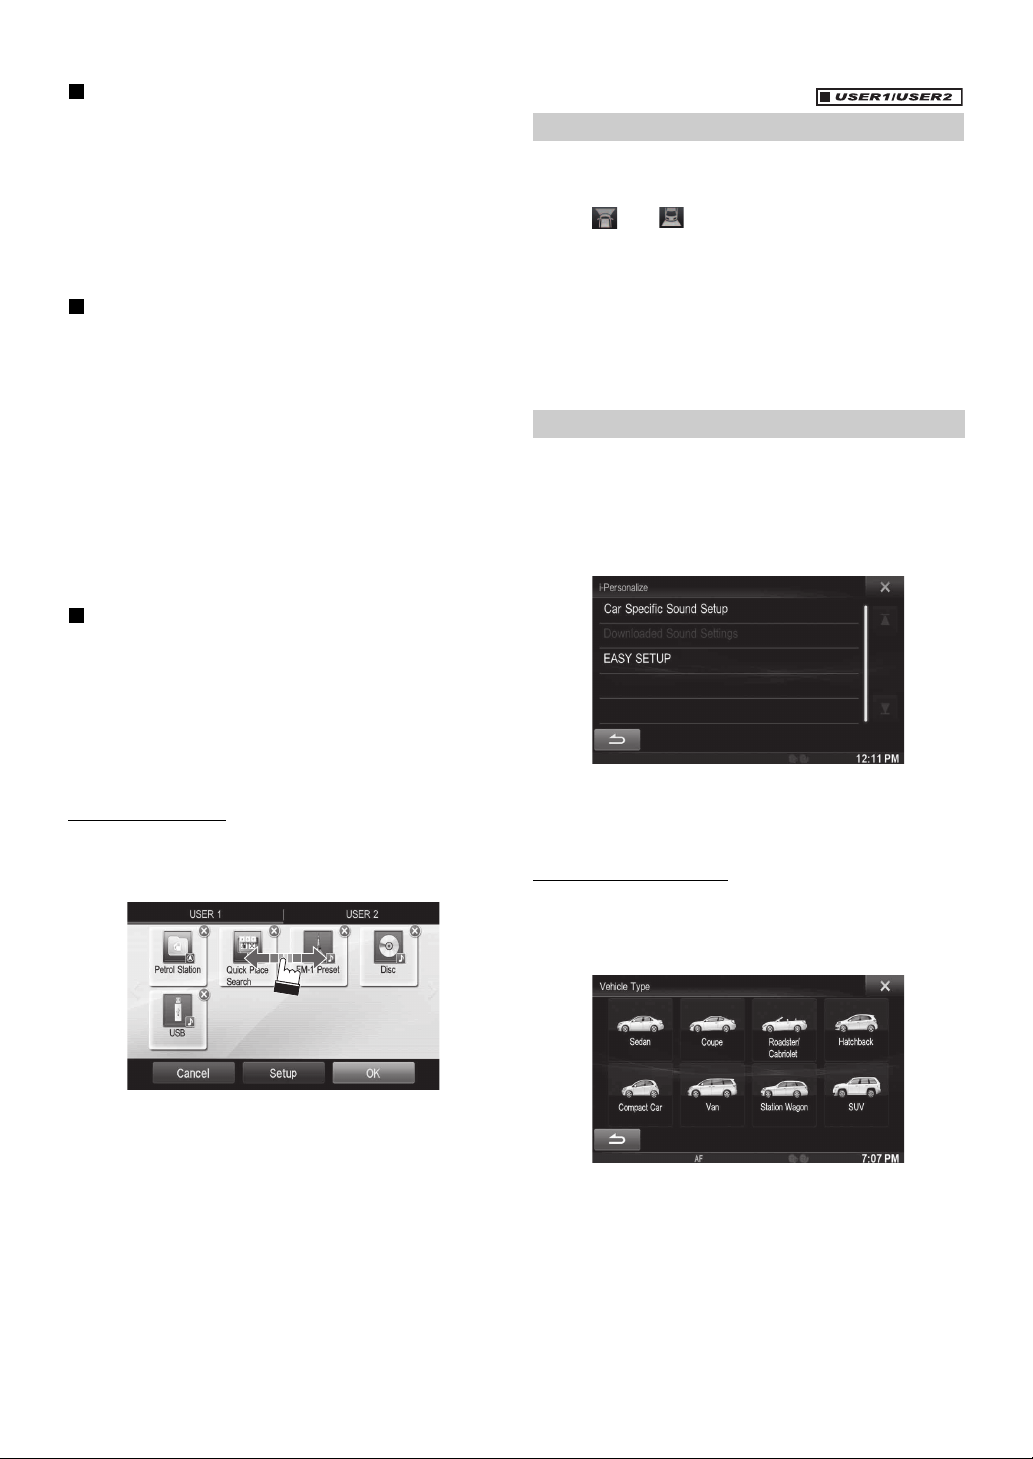
Using My Favourites
Display example of My Favourites screen
• Before attaching the screen panel, make sure that there is no dirt or
dust on the connector terminals and no foreign object between the
screen panel and the main unit.
• Attach the screen panel carefully, holding the sides of the screen
panel to avoid pushing buttons by mistake.
Adjusting the Volume
Adjust the volume by pressing or .
Volume decreases/increases continuously by pressing and
holding or .
Volume: 0 - 35
Lowering Volume Quickly
Activating the Audio Mute function will instantly lower the volume
level by 20 dB.
1
Press MUTE to activate the MUTE mode.
The audio level will decrease by about 20 dB.
2
Pressing MUTE again will bring the audio back to its
previous level.
User name: Displays the name of the user
My Favourites icon: Touching an icon on My Favourites
screen will switch to the screen for the selected
application.
Add button: Use to add (register) My Favourites icons
(page 23)
Edit button: Use to edit My Favourites (page 23)
Camera button: Use to display the camera image
(page 24)
Notification List button: Use to display the Notification
List from Facebook in the connected smartphone via
this unit (page 31)
i-Personalize button: Use to configure the i-Personalize
Setup (page 24)
21-EN

User Registration
You can register up to two users. Configure the User1 and User2
settings for each user.
1
Press the (My Favourites) button.
The My Favourites screen is displayed.
2
Touch [Start].
The user name input screen for the first user is displayed.
• After registering the first user, touch [USER2] to access to
USER2’s registration screen.
• Touching [Skip] registers the user name as “USER1” or
“USER2” and no BLUETOOTH device is registered. In this
case, the users will not be switched automatically.
• Touching [Cancel] or pressing the (My Favourites) button
returns to the original screen without registering a user.
3
Input the user name from the keypad and touch
[OK].
5
Touch [Search].
The system starts searching for BLUETOOTH devices.
When the search is completed, the BLUETOOTH Device
List is displayed.
• Set the BLUETOOTH setting on the preregistered
BLUETOOTH device side to [ON].
6
Touch a registered BLUETOOTH device and touch
[OK].
My Favourites screen for USER1 or USER2 is displayed.
• You can edit My Favourites icons.
For details of how to add, edit, delete or set My Favourites
icons, refer to “Adding My Favourites” (page 23).
The BLUETOOTH Device Setup screen is displayed.
• Touch [ ] to edit the name.
For details of how to input characters from the keypad, refer to
“How to Input Characters and Numbers (Keypad)” (page 27).
4
Touch [Link], then touch [OK].
The BLUETOOTH Device List is displayed.
• The BLUETOOTH devices registered here are used to
automatically identify the user.
Also, a cellular phone can be used as a hands-free phone.
For details, see “BLUETOOTH Setting” (page 66).
• Touching [Do not Link] exits user registration without
registering a BLUETOOTH device.
7
Press the (My Favourites) button.
The My Favourites screen is exited and the display returns
to the original screen.
Setting My Favourites
Configure the My Favourites settings.
Press the (My Favourites) button.
My Favourites screen for USER1 is displayed.
• To configure My Favourites settings for USER2, touch [USER2]. The
My Favourites screen is displayed.
22-EN

Adding My Favourites Editing My Favourites
You can register up to eight My Favourites for each user.
You cannot, however, register the same items (categories).
1
Touch [].
The addition items (categories) are displayed.
2
Touch the desired addition item (category).
Current position : Registers your current position in My Favourites
Current source
Favourites
• During Radio, CD, etc., main screen, you can directly register the
playing source to My Favourites by touching [ ]. The [ ] will
not display when the current source is already registered.
Navigation
search category in My Favourites
[Specific Place] : You can display the places registered in
My Favourites and set your destination.
Search for a place registered in My Favourites by Address/
Find Place/Address Book/History, then touch Add.
[Quick Place search] : Displays the address search keypad
[Help Nearby] : Displays the nearby search screen
[POI category] : Displays the selected POI category list
• For details of navigation operations, refer to “Navigation System
OM” in the CD-ROM.
Phone
My Favourites for shortcut dialling.
Select a name or phone number from the Phonebook list and touch
[Add].
• Touch [
• You can only select PHONE when a mobile phone is connected.
Audio/Visual
[Radio]/[DAB] : You can register presets No. 1-6 in each
band.
Select presets No. 1-6 from your desired band.
[Disc]/[USB/iPod]/[HDMI]/[Car Mode]/[Mirror Mode]/[Aux-1]/
[Aux-2]/[Aux-3]/[BLUETOOTH Audio] : You can switch
directly to any of these audio sources.
: Registers the audio source currently playing in My
: Registers the destination search category or nearby place
: Lets you register phone numbers stored in the phonebook in
b
] or [B] to switch phone numbers.
: Lets you switch directly to an audio source
You can delete names in My Favourites or change the layout.
Touch [].
“ ” appears and the mode switches to the Edit mode.
• Touching [Cancel] returns to the previous screen without executing
any changes.
Changing the name
1
Touch the icon you want to change.
The Edit Text screen (Keypad) is displayed.
2
Enter the name and touch [OK].
The mode returns to the Edit mode.
3
Touch [OK].
The name is changed.
Deleting Icons
1
Touch “ ” by the icon you want to delete.
The confirmation message is displayed.
2
Touch [OK].
The mode returns to the Edit mode.
3
Touch [OK].
My Favourites setup
You can change or delete the current registered user name or change the
registered phone number.
Touch [Setup].
The My Favourites Setup screen is displayed.
23-EN
Changing the User Name
1
Touch the [Name] of the current user you want to
change.
The Input User Name screen (Keypad) is displayed.
2
Input the name and touch [OK].
The user name is changed.
• For details of how to input characters using the keypad, refer to
“How to Input Characters and Numbers (Keypad)” (page 27).
Changing a BLUETOOTH device
You can change the BLUETOOTH devices associated with the user.
1
Touch the [Phone].
The BLUETOOTH Device Setup screen is displayed.
2
Touch [Link], then touch [OK].
The BLUETOOTH Device list is displayed.
• The BLUETOOTH device set by User Registration is
highlighted.
For detailed settings, touch [Search].
3
Select the current device you want to change and
touch [OK].
The device is changed.
Deleting current Registered User
1
Touch [Delete] for the user name you want to
delete.
The confirmation message is displayed.
Displaying the Camera Image
When a separately purchased camera is connected to the system, you
can display the camera image.
Touch [] or [].
The camera image is displayed.
• For details of camera operations, refer to “Camera Operation
(Optional)” (page 81).
• When the front camera (direct camera) and rear camera or side
camera (AUX camera) are connected simultaneously, the screen for
selecting which camera image to display appears.
• Depending on the setting, the camera button may not be displayed.
For details, refer to “Setting the Camera Input” (page 68).
i-Personalize Setup
You can configure the audio settings by car type.
• You cannot access to i-Personalize screen while driving.
Touch [i-Personalize]*.
The i-Personalize Setup screen is displayed.
2
Touch [OK].
• When the registered user is deleted, all the items affected by
switching users are returned to the default settings.
Changing the Layout
You can change the layout of the shortcut keys.
1
Drag and drop the icon to the desired location.
2
Touch [OK].
* This item cannot be adjusted when External AP is set to On or BASS
ENGINE SQ mode is selected, refer to “Setting the External Audio
Processor On/Off” (page 53) / “BASS ENGINE SQ” mode
(page 26).
Car Specific Sound Setup
You can set the best audio environment for your car.
1
Touch [Car Specific Sound Setup].
The vehicle type selection screen is displayed.
2
Touch the relevant Vehicle type.
• The selected Vehicle type is reflected in the “i-Personalize”
symbol on My Favourites screen.
3
Touch the position of the driver’s seat.
24-EN
4
Touch the size of the front speaker.
5
Select whether or not there is a tweeter.
6
Select the installation position of the rear speaker.
If you select “No rear speaker”, you cannot adjust the rear
speaker in Time Correction/X-OVER in sound setup.
7
Select whether or not there is a subwoofer.
If you select “No”, you cannot adjust the subwoofer level/
subwoofer phase in sound setup.
8
Select the material of the car seats.
The settings confirmation screen is displayed.
• If the car seats are made of both leather and fabric, select
[Half leather].
9
Check the settings and touch [OK].
1
Touch [Downloaded Sound Settings].
Setting data files are displayed in a list with a maximum of 5
items.
2
Touch the desired file.
3
Touch [OK].
The downloaded setting values are set as the Time
Correction/X-OVER/Parametric EQ settings, and at the
same time saved as Preset3, respectively.
• When no downloaded file is detected in the connected USB memory,
the “Downloaded Sound Settings” function is not available.
• If Preset3 was already saved for Time Correction/X-OVER/
Parametric EQ, the data will be overwritten.
Easy Setup
This unit provides various vehicle types of the custom settings. You can
select the vehicle type to be easily fit your audio settings.
1
Touch [EASY SETUP].
The EASY SETUP screen is displayed.
2
Touch the desired car type.
• This unit provides only a part of representative vehicle types’ setting
values. If your car doesn’t belong to these types, please complete the
audio settings by “Car Specific Sound Setup” or “Downloaded
Sound Settings” (pages 24 to 25).
• If Preset3 was already saved for Time Correction/X-OVER/
Parametric EQ, the data will be overwritten.
• The Easy sound settings are reflected in the following Sound Setup
items.
Setting the MX (Media Xpander)
- Adjusting the Parametric Equalizer Curve (Parametric EQ)
Adjusting the Time Correction (Time Correction)
Adjusting the Crossover Settings (X-OVER) (only when
Subwoofer is set to [On])
The Equalizer Presets settings are disabled.
Downloaded Sound Settings
Using a USB memory device, the sound settings downloaded from the
ALPINE website can be used to configure Time Correction, X-OVER
and Parametric EQ settings.
Setting item: Downloaded Sound Settings
The file name of download data shall be
“A_U*****.MP3”.
Extender (fixed)
Identifier (alphabet or number
5 letters maximum)
Header (fixed)
• Save the setting data in the root folder.
• For details about procedures of download, see ALPINE’s web site.
Easy Sound Setup mode/BASS ENGINE SQ mode
During normal source play mode, you can activate Easy Sound Setup
mode by pressing and holding /AUDIO for at least 3 seconds. Fader/
Balance/Bass level/Treble level/Subwoofer level and BASS ENGINE
SQ can be adjusted in this mode.
Easy Sound Setup mode
Adjust the Fader/Balance/Bass level/Treble level.
Display example for Easy Sound Setup screen
• You can choose to display this menu on the left or right of the screen.
For details, refer to “Setting the Easy Sound Setup Position” on
page 60.
• Subwoofer level is not adjustable when SubW. is Off. (Page 54)
• The Fader/Balance setting is reflected to “Setting the Balance/
Fader” (page 54).
• In BASS ENGINE SQ mode, touch [BASS ENGINE SQ] to switch to
Easy Sound Setup screen.
25-EN
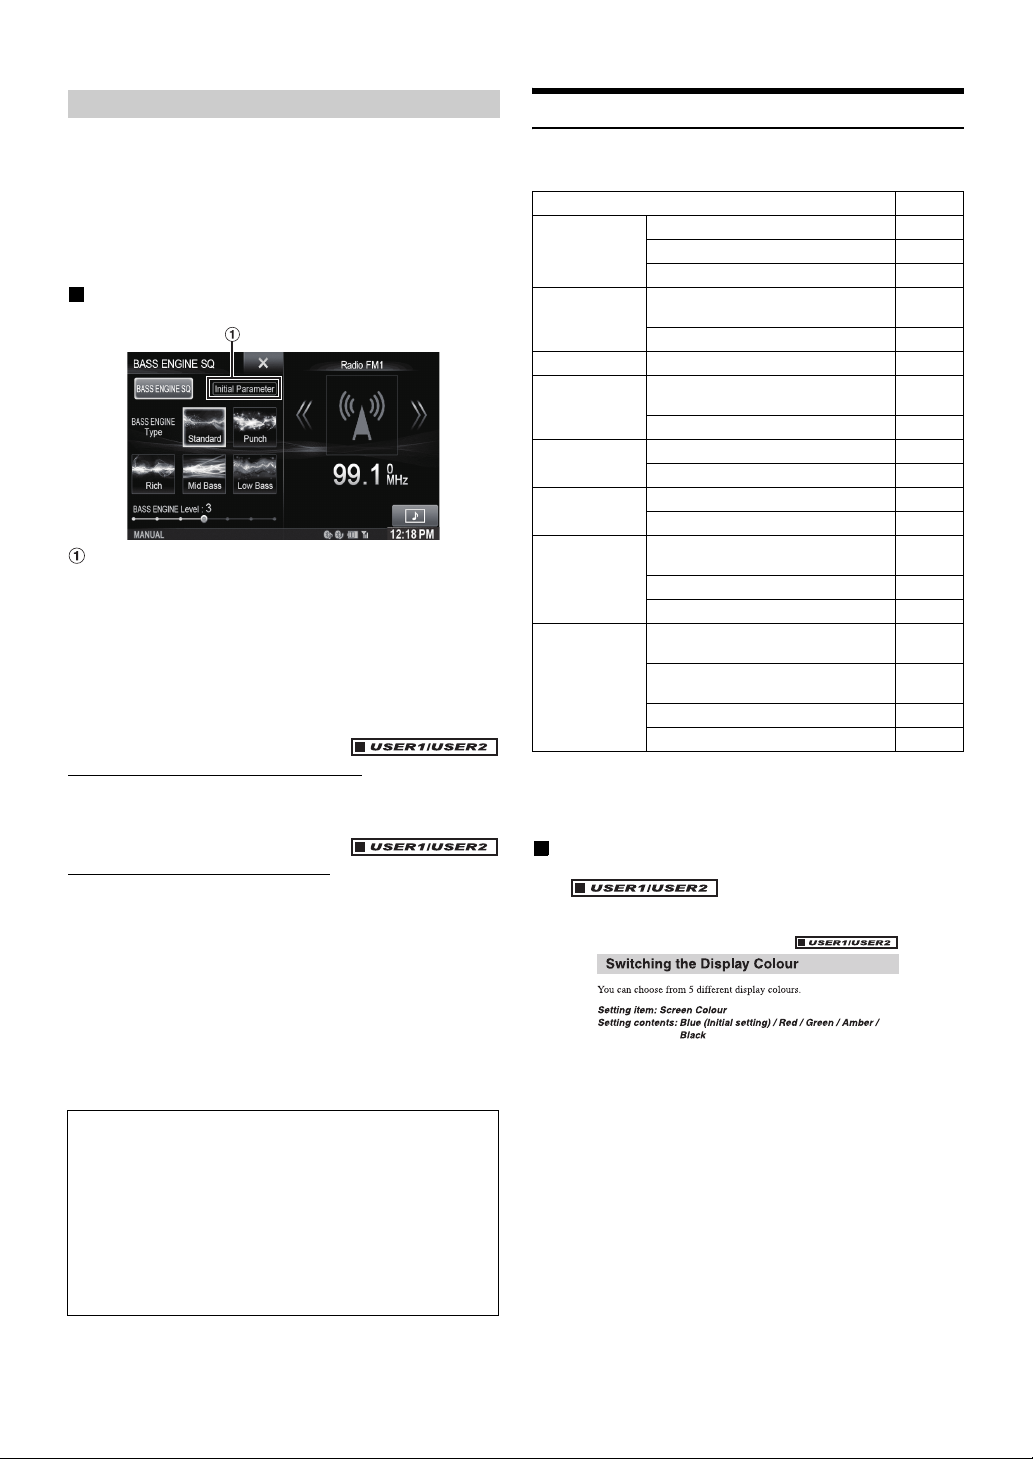
BASS ENGINE SQ mode
With the BASS ENGINE SQ function on this unit, several parameters
affecting Bass performance are adjusted simultaneously. The Bass Level
adjustment varies these parameters uniformly for optimum Bass effect
at different levels.
Touch [BASS ENGINE SQ] to switch to BASS ENGINE
SQ mode.
Display example for BASS ENGINE SQ screen
Display the current BASS ENGINE SQ parameter.
BASS ENGINE SQ:
Adjust the relevant Bass parameters uniformly and
automatically.
Easy Sound Setup:
Adjust each audio effect setting separately and manually.
• You can set this item via TuneIt App on a smartphone. Refer to
“Adjusting the sound via the smartphone” on page 31.
Select the Desired BASS ENGINE Type
You can select your preferable BASS ENGINE type within Standard
(Initial setting)/Punch/Rich/Mid Bass/Low Bass.
Settings When Switching Users
The functions/settings that are affected when switching users are as
shown below.
Item Ref. page
My Favourites User Registration 22
Setting My Favourites*
Displaying the Camera Image*
BASS ENGINE
SQ mode
RDS Displaying Radio Text 35
General Setup Setting Top banner and Bottom banner
Sound Setup Turning Subwoofer ON/OFF 54
Source Setup Setting the Slide Source Change 60
Hands-Free
Phone Control
Camera
Operation
1
*
Except POI category/i-Personalize Setup
2
The display pattern can be set when a camera equipped with a switch
*
Select the Desired BASS ENGINE
Ty pe
Adjusting the BASS ENGINE Level 26
Display
Switching the Display Colour 49
Adjusting the Subwoofer Level 54
Setting the Easy Sound Setup Position 60
Assigning as a Short Cut Dialling
Number
Redial Function 73
Phone Book Function 75
Switching the Image Pattern for the
Rear Camera*
Switching the Image Pattern for the
Fron t Came ra*
Guide Display ON/OFF Setting 81, 84
Adjusting the Caution Display Location 81, 84
function on the Camera screen is connected.
1
2
2
2
22
24
26
49
76
81
84
Adjusting the BASS ENGINE Level
With BASS ENGINE SQ ON, adjusting the Bass Level uniformly
effects various sound parameters for optimum Bass effect.
• Adjustable only when Defeat is Off.
• The Bass parameters affected contain Bass Level, Treble Level, EQ
PRESETS, Parametric EQ, SUBWOOFER (when set this item via
TuneIt App), Subwoofer Level, Media Xpander, X-OVER, Car
Specific Sound Setup and Downloaded Sound Settings. These items
are set automatically in BASS ENGINE SQ mode and cannot be
adjusted separately.
• From Level 0 to Level 6, the effect of BASS ENGINE SQ increases
level by level.
About Setup when the external power amplifier is connected.
In order to optimize the BASS ENGINE SQ, we recommend the
following power amplifier setup.
After setting up, you can adjust the BASS ENGINE SQ Level
according to the music.
1 Set gain of the power amplifier to “MIN”.
2 Set the Crossover Mode Sector switch to “OFF”.
3 Set the BASS ENGINE SQ of this unit to “ON”, and the
BASS ENGINE SQ Level to “+3”.
4 Play a song of the genre you frequently listen to, and
adjust gain of the power amplifier.
26-EN
Items whose settings are affected when switching
registered users, are indicated by
“ ” in this manual.
Example:
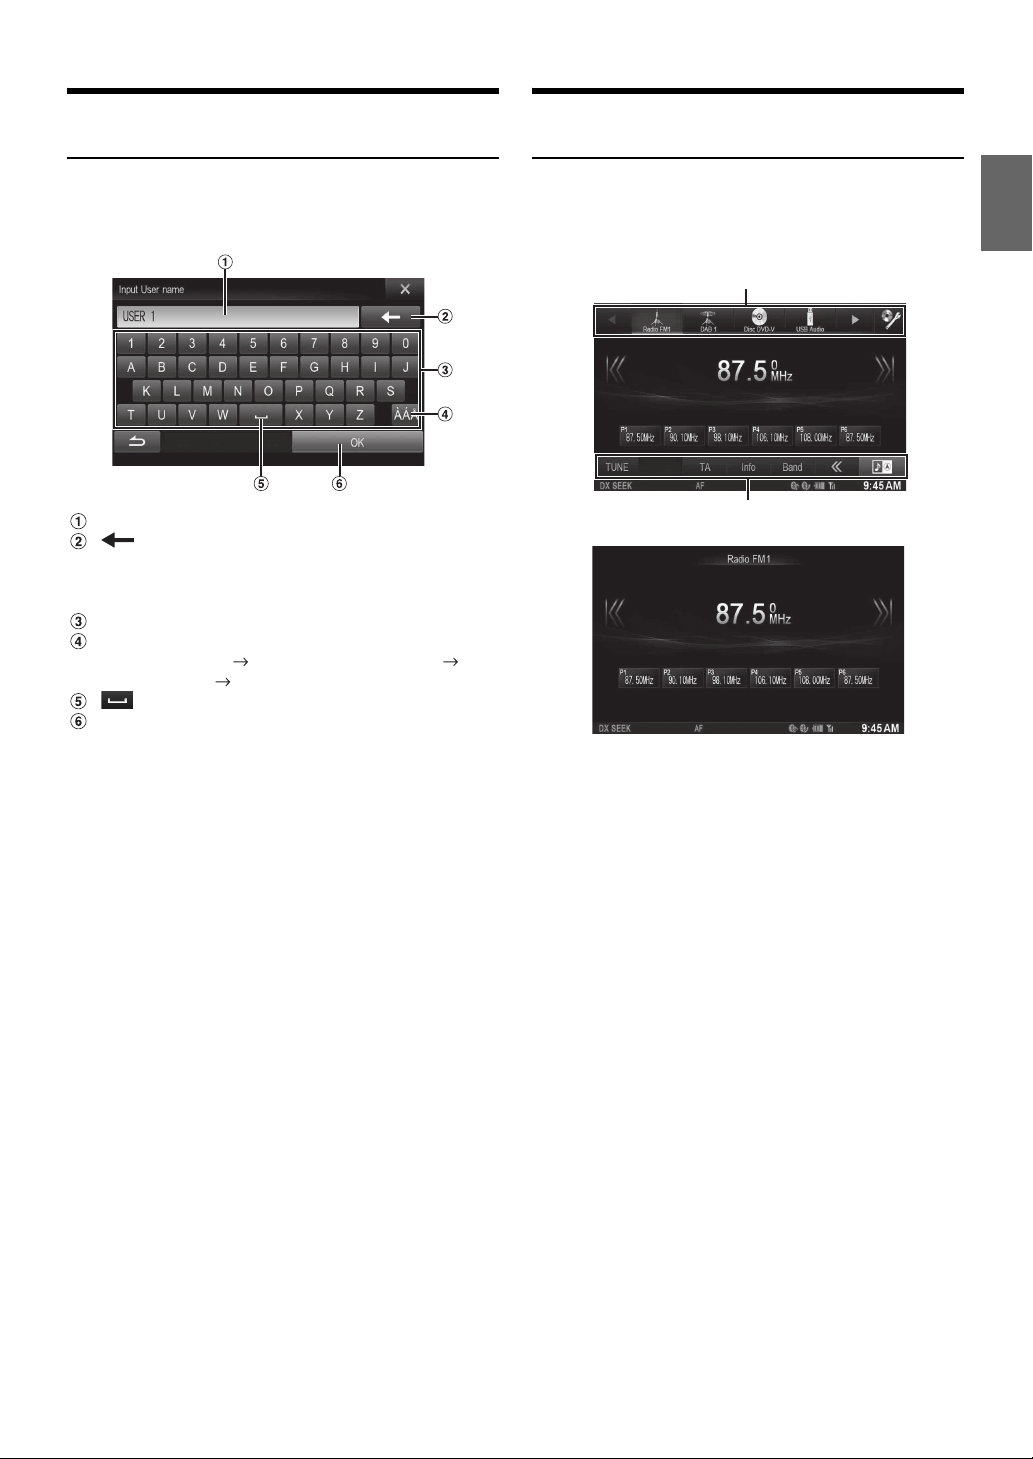
How to Input Characters and Numbers (Keypad)
Top banner and Bottom banner Fade Out Setting
Character input is required for user registration, place searches, etc.
The displayed screens and procedures may vary slightly depending on
the function used, but the basic input method is the same.
Input screen area.
(Delete)
Returns to the previous character and erases it.
Touching here for more than 2 seconds will erase all
input characters.
Character keypad
Special character selector switch
Character keypad Special character keypad
Symbol keypad Character keypad
(Space)
Input number is confirmed.
When “Top/Bottom Banner Fade Out” is set to [ON], the Top banner
and Bottom banner on the Audio/Visual Playback screen fade out after 5
seconds if no operation is performed. To display the keys again, touch
the middle of the screen.
Top banner
Bottom banner
• For details of how to set Top/Bottom Banner Fade Out, refer to
“Setting Top banner and Bottom banner Display” (page 49).
27-EN
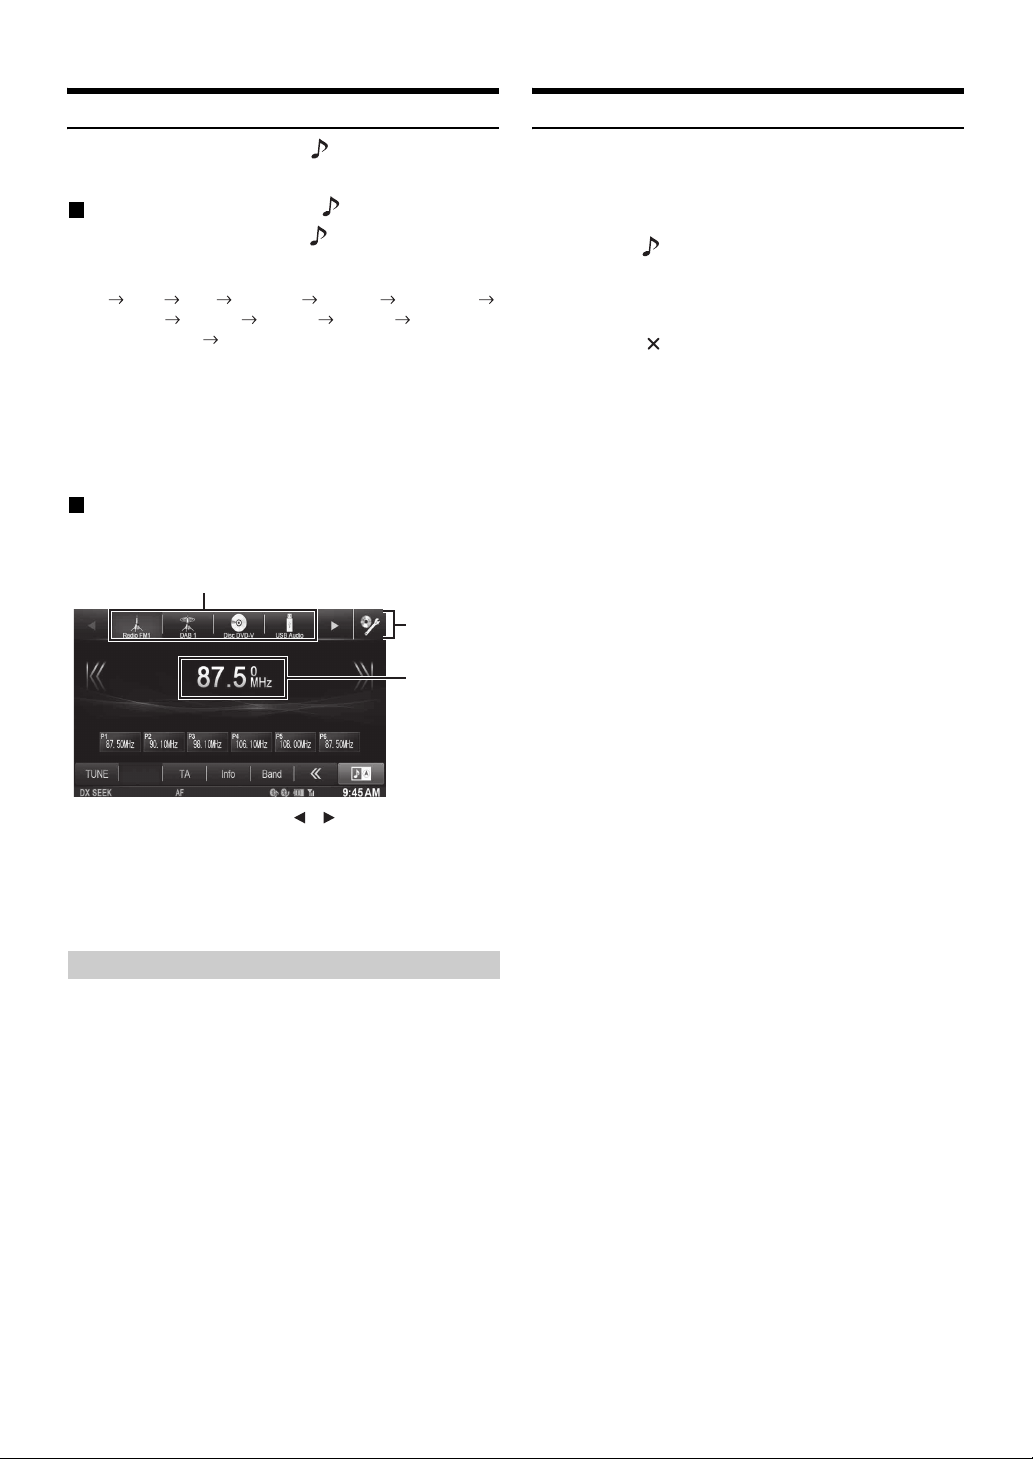
Switching Sources
Rear Entertainment Function
During audio/visual playback, press the button or touch a source
button in the top banner to switch to the desired source.
Switching Sources Using the Button
During audio/visual playback, press the button repeatedly to switch
to the desired source.
1
Radio DAB Disc USB/iPod HDMI*
Mirror Mode*
BLUETOOTH Audio Radio
1
When no HDMI device is connected, this option is not available.
*
2
When no smartphone with applications for MirrorLink is connected,
*
this option is not available.
3
When AUX In is set to “Off”, this option is not available.(Page 63)
*
4
When AUX3 In Sel. is set to “iPod Video”, this option is not
*
available.(Page 64)
2
Aux-1*3 Aux-2*3 Aux-3*4
Car Mode*2
Switching Sources Using the Top banner
Touch the source button for the Top banner at the top of the Audio/
Visual Playback screen and select the desired source.
Source button
Top banner
Swipe here
to switch
source
The rear entertainment function independently routes different sources
to the front and the rear inside a car. For example, while listening to the
radio or other audio source in the front, DVD can be enjoyed in the rear
with the optional rear monitor and headphones.
1
Press the button.
2
Touch [Rear]* of Top banner.
Rear source Select display appears.
* Displayed only when RSE is On. (Page 64)
• Touching [ ] on the Rear selection screen will change to the
main source screen.
3
Touch the desired visual source (such as auxiliary
input, built-in DVD) to select.
• To uc h [OFF] to cancel the rear entertainment function.
• When the “Setting the AUX Mode” (page 63) is set to Off, the
auxiliary source is not displayed.
• Depending on the status, some Rear source items may not be
available in some case. (For example, when there is no DVD disc
inserted on this unit, you cannot set “Disc” as Rear source.)
• Touch [AUTO] to set the rear source the same as the X800D-U/
INE-W987D playing visual source.
• When iPhone Pandora
INE-W987D, you cannot select iPod Video or enjoy iPod Video on
rear monitor.
• Select iPod audio on X800D-U/INE-W987D may impact the iPod
video playing on the rear monitor.
• You cannot make the aux1 and aux2 to play on the main unit and rear
monitor at the same time.
®
source is selected on X800D-U/
If the source button is hidden, touch [] [].
• When “Slide Source Change” (page 60) is set to “On”, you can
switch sources by swiping from the middle of the marked area from
right to left or from left to right.
• The Source display order can be changed. For details, refer to
“Customizing the Source Banner” (page 60).
Screen Off Function
This mode is useful if you feel the unit’s display is too bright at night.
To cancel Screen OFF mode, touch the screen or press any button.
• Screen OFF mode is cancelled when the power or ACC is turned off.
• When the gear lever is shifted to the reverse (R) position while the
rear camera is connected, the rear camera image is displayed.
• When a call is received while a BLUETOOTH device is connected,
the incoming call screen is displayed.
28-EN
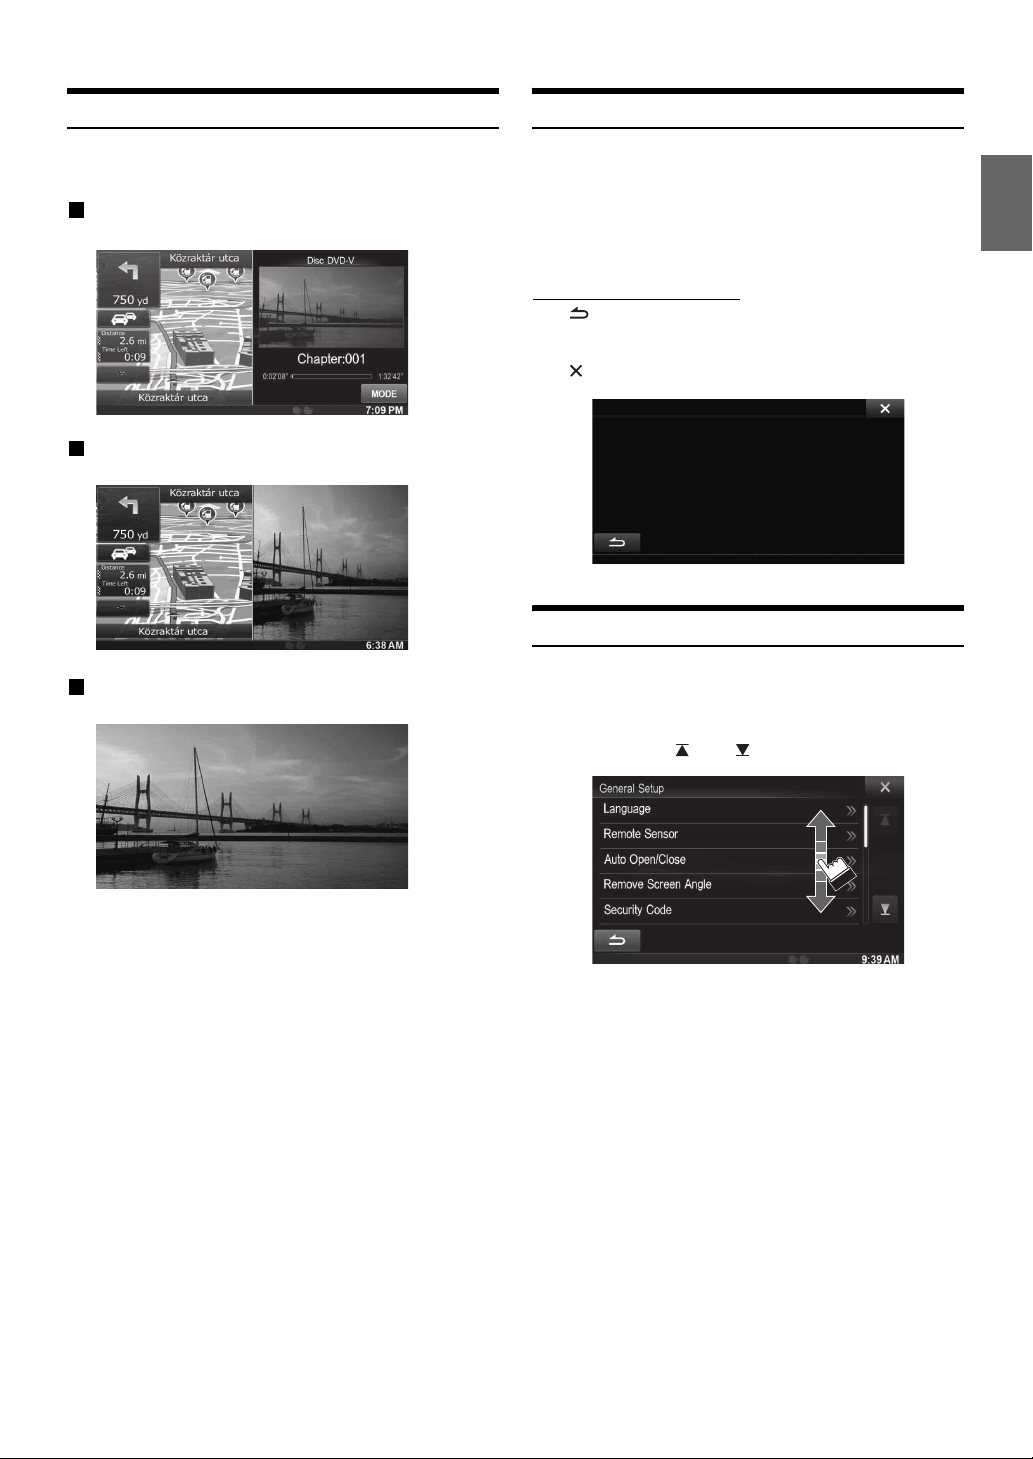
Switching the Dual Screen Display
Touch operation
When you touch [MODE] on the dual screen during video playback, the
screen size selection message is displayed.
Dual Wide (Initial setting)
Dual Full
Full Screen
You can operate the system by using the touch panel on the screen.
• Be sure to touch the onscreen button lightly with the pad of your
finger to protect the display.
• If you touch a button and there is no reaction, remove your finger
from the display once, and try again.
• Onscreen buttons that cannot be operated appear dull in colour.
Common onscreen buttons
[]:Returns to the previous screen. Depending on the
function, this button may cancel the operations
performed on the screen.
[]:Closes the window.
Selecting an Item in a List
To scroll through a list, perform the following operations.
Touch the screen and slide your finger up and down.
The screen will scroll along with your finger movement.
Also, you can touch [] and [].
• After touching the screen, move your finger away from the screen
before dragging and that item will be selected.
29-EN
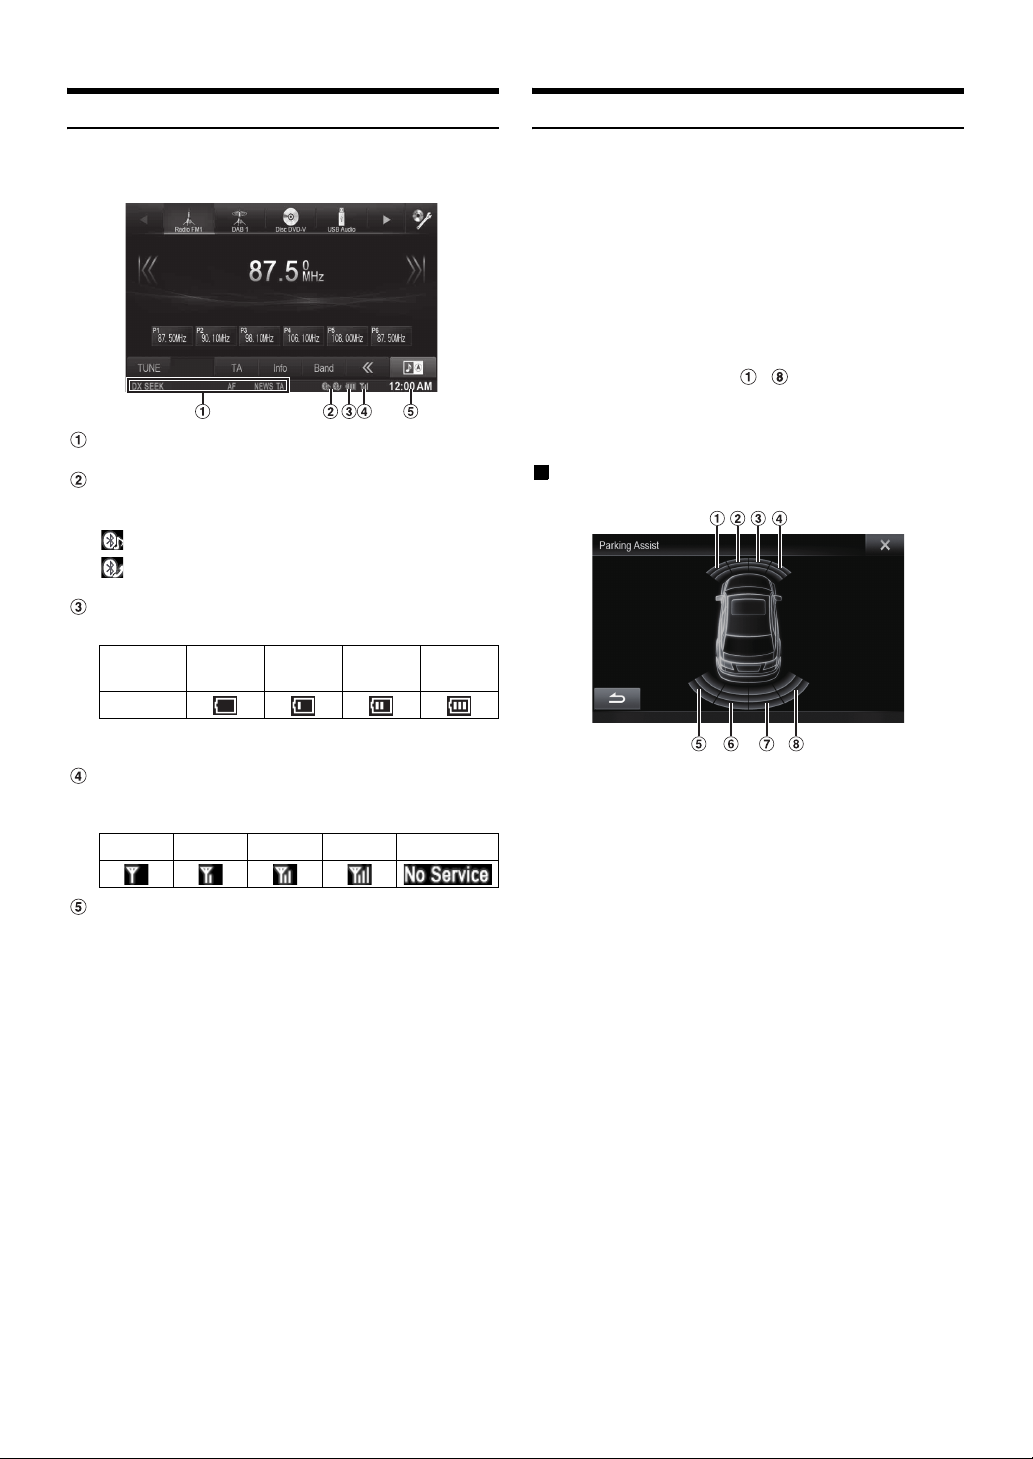
About the Indicator Display
Parking Assist Interrupt Function
The Indicator Bar at the bottom of the screen displays various types of
information, like the current time.
The display will differ depending on the source. For
details, refer to the display example of each source.
Lights up when connected to a BLUETOOTH
compatible device. (
set to OFF.
Blinks while reconnecting.
Indicates the battery level of the connected
BLUETOOTH device.
This may not be displayed depending on the connected
BLUETOOTH device.
Indicates the signal strength level of the connected
BLUETOOTH compatible device.
Displayed when BLUETOOTH setting is ON.
)
: BLUETOOTH connection to audio device
: BLUETOOTH connection to Hands Free Phone
Battery
Level
Icon
0123No Service
Does not display when connection is
No Battery Level 1 Level 2 Level 3
When the unit is connected to the vehicle equipped CAN Interface box.
A Parking Assist screen may be tuned in if the obstacle within a certain
distance is detected by the front or rear sensor of your vehicle.
Please set Parking Assist Interrupt to On before using this function.
(Page 52)
• Depending on your vehicle, this function may not be supported.
• Depending on the vehicle speed, when the speed is greater than a
certain value, the Parking Assist screen may not be displayed.
When the obstacle within a certain distance is detected
by the front or rear sensor, the Parking Assist screen
displays and the indicator ( ~ ) of the corresponding
area lights up.
According to the distance from far to near, the colour of indicator
from yellow to orange to red.
Display example for Parking Assist screen
• If the parking assist interruption occurs during the camera mode, a
small parking assist image will display on the right side of camera
screen. Touch the image can see the full screen of parking assist
mode.
The clock display
You can switch between the 12 hour display and 24 hour
display options.
For details of the clock display settings, refer to “Navigation
System OM” in the CD-ROM.
30-EN
Loading...